


LTQX50 WEU.qxd 12-09-2002 11:07 Pagina 1
Electronic Labelmaker |
UK |
||
|
|||
Instructions for Use |
|
||
|
|||
Etiqueteuse électronique |
F |
||
Mode d’emploi |
|
||
Elektronische Labelmaker |
|
|
|
|
NL |
||
Gebruikershandleiding |
|
|
|
Elektronisches |
|
D |
|
Beschriftungsgerät |
|
|
|
|
|||
Bedienungsanleitung

LTQX50 WEU.qxd 12-09-2002 11:07 Pagina 2
A |
D |
1 |
2 |
|
3 |
4 |
|
5 |
|
B |
E |
|
|
|
1 |
2 |
3 |
4 |
5 |
6 |
7 |
C |
|
A |
|
|
|
|
|
||
|
B |
|
|
|
|
|
|||
|
|
C |
|
|
|||||
|
'CLICK!' |
D |
|
|
|||||
|
|
|
|
|
|
|
|
|
|
|
|
E |
|
|
|
||||
|
|
F |
|
|
|
|
|
||
|
|
G |
|
£ |
$ |
¢ |
¥ |
|
|
|
|
H |
” |
_ |
= |
< |
> |
° |
|
|
|
I |
( |
) |
[ |
] |
# |
|
|
2

LTQX50 WEU.qxd 12-09-2002 11:07 Pagina 3
CAPS |
BF ABC |
123 STYLE ABC |
P
R
|
W |
|
IE |
E |
V |
|
REVIEW
CANCEL
--ll-- |
|
FEED |
|
LENGTH |
|
123 |
COPIES |
|
|
/ |
|
|
SIZE |
|
|
STYLE |
Q |
W |
E |
R |
T |
Y |
U |
I |
O |
P |
|
|
|
|
|
|
||||
|
- |
+ |
' |
& |
@ |
% |
* |
|
|
A |
S |
D |
F |
G |
H |
J |
K |
L |
|
|
|
|
|
|
|
|
|
|
|
LANG |
|
|
\ |
/ |
. |
, |
: |
; |
CLEAR |
caps |
Z |
X |
C |
V |
B |
N |
M |
|
X |
1 |
2 |
3 |
4 |
5 |
6 |
7 |
8 |
9 |
0 |
|
|
|
|
|
|
|
|
del
SYMBOLS
SPACE
QWERTY EU
3

LTQX50 WEU.qxd 12-09-2002 11:07 Pagina 4
4
LTQX50 WEU.qxd 12-09-2002 11:07 Pagina 5
What the DYMO LetraTag QX50 can do for you
With the LetraTag QX50 you can print a wide range of high-quality labels in different sizes and styles. You type using the familiar layout of a traditional keyboard. The QX50 can print on coloured, transparent, metallic and ironon fabric tapes. See the list of Dymo cassettes available for the LetraTag QX50 at the end of this guide.
How to use your DYMO LetraTag QX50
Getting started: your first label in 6 easy steps
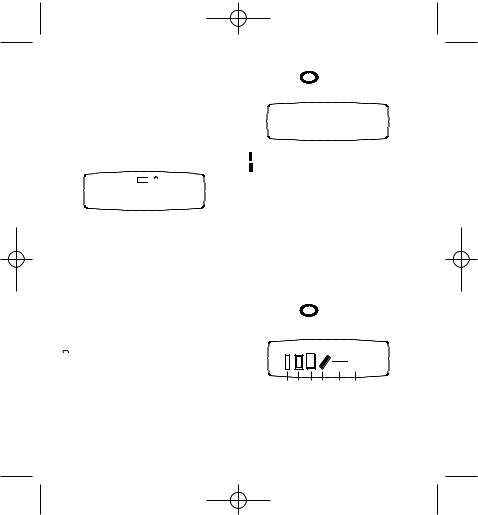
Step One - insert the batteries
-Remove the battery cover (Fig A)
-Insert five size AA alkaline batteries, observing the polarity markings. Start with the single battery in the upper slot, then slide the second and third under bridge. Slot in the fourth and fifth batteries and close the cover.
-Remove the batteries if the Letra Tag is to remain unused for some time.
Step Two - insert the cassette
Press the catch to open the cassette door. Insert cassette (Fig B) and gently press on the centre of the cassette until it clicks into place (Fig C).
UK
Check the cassette is correctly positioned before closing the cassette door.
Step Three - switch on
Press the red button to switch on.
Note: the label maker switches off automatically after 2 minutes if no keys are pressed.
Step Four - type a label
Type a simple label first to try the machine. Learn more about formatting in the following pages.
Step Five - Print your label
Press PRINT to print your label.
Step Six - Cut the label
Use the cutter button on the left-hand side of the LetraTag to cut the label (Fig E).
Congratulations ! You’ve just printed your first label !
5
LTQX50 WEU.qxd 12-09-2002 11:07 Pagina 6
Setting the language
Setting the language will define which extra characters your LetraTag can print, so that you have fast access to the accented characters or currency symbols you need in your language or country. It will also specify the measurement units used (millimetres, or inches in the US version), and the language in which error messages appear on the display. Press LANG (  + caps ). An abbreviation of a language will appear. Use H or P on the navigation key to scroll down through the alphabetical list of language abbreviations until you reach the one you require. Then press
  to select. Note that the starting point for the list of languages depends on the keyboard model:
keyboard model |
starting point |
Qwerty |
OFF |
Qwerty (Scandinavia, Spain and Portugal) |
OFF |
Qwerty (US) |
US |
Qwertz |
D |
Azerty |
F |
Note: whenever you change the batteries, you will have to re-set the language.
Typing labels
The DYMO LetraTag QX 50 looks familiar: it has the same layout as a computer keyboard to make typing labels easy.
Typing normal characters: just like a computer keyboard
If you want to type numbers and characters shown above the keys (1 2 3 & @ % ; , etc),
press |
and the key at the same time. |
||
If you make a mistake, press |
X del |
and the |
|
|
|||
cursor will delete the character on the left of the current cursor position, and will move one place to the left.
The |
caps |
key is a toggle key. Press it to |
start typing in capitals. You will see the SPACE indicator is highlighted on the display. Press it again when you want to drop back to lower case. If you want to type numbers only, press the  123 key under the screen. Note that this will only lock numbers, and not the other shifted characters, such as & @ %.
The SPACE key inserts a blank space within your label.
Extra characters
LetraTag QX50 also stores a large number of extra characters (such as other letters or accented letters). It uses RACE technology, like a mobile phone keyboard. If you tap the same key repeatedly within a short time, you can scroll through a sequence of characters based on that letter. For example, pressing the E key repeatedly in the French-language version will scroll through e - é - è - ê - ë. If you wait for more than one second, the
character will be selected, and the cursor will move on to the next position.
Example:
Type a twice, and the letter à appears.
6
LTQX50 WEU.qxd 12-09-2002 11:07 Pagina 7
If you tap the key again within one second, á will appear. Pause for a second, and the letter á will be selected, and the cursor will move on to the next position.
The currency key e also uses RACE to scroll through a number of currency symbols:
e- £ - $ - ¢ - ¥.
Note that the order these symbols appear depends on the keyboard version and language you have selected.
Graphic symbols
You can also insert a number of graphic symbols. To insert a symbol, press (  +
+
SPACE |
). You can then scroll left |
and right, up and down through the symbol chart, using the navigation key.
Press  to select the symbol you want. If you have a telephone button on your key-
board (only for Qwerty EU, Qwertz and Azerty keyboards), you also have fast access to the symbols on Row E of the symbol chart. Press the key and the telephone symbol appears. Press the same key repeatedly and you will scroll through all the symbols on
Row E of the symbol chart. Press |
to |
select the symbol you want. |
|
Text over two lines
You can add a second line to your label by pressing  . If the display shows Abc 123, your label will print:
Abc 123
The text will be centred on the label.
Note that you cannot print two-line labels in certain formats (big font, vertical). If you try this, the message Error 6 will alert you.
Checking what you’ve typed
The display will show eight characters of the text you have typed, plus the cursor. The PREVIEW function (press  + PRINT ) will automatically scroll through entire text of the label. You can also scroll manually through the label using the R and Q arrows on the navigation button. If you want to edit the label, use the navigation button to move the cursor through the text to the place you want, then type or delete.
Adding a break between two labels
The --ll-- function (  +
+  123 ) is a ‘label break’. You can use this to end one label’s text and start another.
Storing text: the text buffer
You can store up to 70 characters in the text buffer of your LetraTag QX50, in as many as 20 labels. These characters will remain in the buffer, even if you switch off. If you try to type when the 70-character memory is full, the message ERROR 4 will appear. You will then have delete part or all of the text in the buffer in order to make a new label.
You can quickly move to the beginning of the buffer by pressing  + Q.
+ Q.
Go to the end of the buffer by pressing + R To delete the entire contents of the buffer, press CLEAR (  +
+  )
)
7
LTQX50 WEU.qxd 12-09-2002 11:07 Pagina 8
Formatting labels
You can use a wide range of formatting options to change the font style in your printed label, such as font size, bold, italic, boxed, vertical etc. The way you format these characters is shown by a combination of indicators above the text display.
Display indicators
CAPS 
 BF ABC
 123 STYLE ABC
1 2 3 4 5 6 7 8 _
There are 7 display indicators above the text display. When one or more of these indicators is highlighted, it shows the relevant formatting option is active:
CAPS |
Characters are typed as capital letters |
|||
lQ-Rl Fixed length is enabled. |
||||
BF |
The label will be printed in Big Font style. |
|||
|
ABC |
|
The label will be printed in a certain |
|
|
|
|
|
type of box. (Cannot be used with |
|
|
|
|
underlined text). |
STYLE |
The label will be printed in a certain |
|||
|
|
|
|
selected text style. |
|
|
123 |
Numbers are selected instead of the |
|
|
||||
|
||||
|
|
|
|
characters. |
ABC |
The label will be printed underlined. |
|||
Selecting the text size
Pressing the SIZE key will display the size menu, with four options:
BF


 B
B
narrow (condensed)
normal
 wide (extended)
B big font (highly visible labels using the entire print height)
You can use Narrow, Normal and Wide fonts in two-line labels, where they will be reduced to half their normal height.
Move the cursor to the required size with the navigation key, and press  to select.
Selecting the text style
Pressing the STYLE key will display the style menu, with six options:
STYLE
M

 M
M
D D D D |
D |
D |
If you try a combination of formats which the machine cannot produce, an error message will appear. See error message list in Troubleshooting.
You cannot combine these different text styles, or use these styles with the big font setting.
Move the cursor to the required style with the navigation key, and press  to select.
8
LTQX50 WEU.qxd 12-09-2002 11:07 Pagina 9
Underlining or boxing text
Pressing the  key will display the box/underline menu, with eight options:
1. no box |
- |
|
|
|
|
|
|
= |
DYMO |
|
|
|
|
|
|
|
|||||
2. underlined |
- |
|
|
|
|
|
|
|
DYMO |
|
|
|
|
|
|
|
= |
|
|||
|
|
|
|
|
|
|
|
|
||
3. square box |
|
|
|
|
|
|
|
DYMO |
|
|
- |
|
= |
|
|||||||
4. square box with |
|
|
|
|
|
|
|
DYMO |
|
|
|
|
|
|
|
||||||
- |
|
= |
|
|||||||
rounded corners |
|
|
|
|
|
|
|
|
|
|
|
|
|
|
|
|
|
|
|
|
|
|
|
|
|
|
|
|
|
|
|
|
5. shaded box |
- |
|
|
|
= |
DYMO |
|
|||
|
|
|
|
|
|
|
|
DYMO |
|
|
6. pointed box |
- |
|
|
= |
|
|||||
|
|
|
||||||||
|
|
|
|
|
|
|
|
|
|
|
7. zigzag box |
- |
|
|
|
|
= |
DYMO |
|
||
|
|
|
|
|
|
|
|
|
|
|
8. crocodile box |
- |
|
|
|
|
= |
DYMO |
|
||
The unit used depends on the language settings, and will be in mm or inches. You can increase or reduce the length settings in steps of 2mm or 0.1 inches, by using the H or P arrow on the navigation key. The display will show the selected length either as XX mm, or as X.X, if the units are inches.
The maximum length is 300mm or 12inches. The display will flash ERROR 5 if you try to make the label shorter than the text.
To return to the automatic length mode, press LENGTH (  + SIZE ) again, and the machine will return to the automatic length setting.
You cannot combine different underlining or box settings, or use them with the big font setting.
Move the cursor to the required setting with the navigation key, and press  to select.
Setting a fixed length for your labels
The LENGTH function allows you to set a fixed length for the complete label (the leader, the text and the trailer). Text is always centred on a fixed length label.
To set a fixed length, press LENGTH (  + SIZE ). The fixed length indicator
will be highlighted. For fixed-length labels, the text is always centred.
TEXT
FIRST LINE
SECOND LINE
To exit from a menu
Press CANCEL to exit from a menu or cancel an action (except printing).
Clearing formatting and other settings
Use CLEAR (  +
+  )to delete the entire content of the text you have stored in the buffer. This will delete the text, and restore all settings to their default values (except for the language settings you have selected). This means that:
•Style is reset to normal
•Box is reset to no boxes
•Fixed length is disabled and the value is reset to the minimum length
•Number of copies is reset to 1
•Size is reset to normal
•CAPS are on
9

LTQX50 WEU.qxd 12-09-2002 11:07 Pagina 10
Note: if you want to change the language settings, press LANG (  + caps ) and scroll through the language list. Press
  to select your language.
Printing labels
Previewing your label(s)
Before printing, you can preview the text you have typed. Press PREVIEW (  + PRINT ), and the label will scroll over the display once.
Reviewing the text in the buffer
You can also review all the text stored in the LetraTag buffer. Press REVIEW (  + CANCEL ), and the entire text of the buffer will scroll across the display.
Printing a label
Make sure the cursor is inside the text of the label you want to print, and press PRINT . During printing the message Print... will be displayed.
Printing multiple copies of a label
Your LetraTag can print up to nine copies of a label. To print more than one copy of your label, press COPIES (  + STYLE ). The message n=1 will appear on the display. Use H or P on the navigation key to increase or reduce
the number of copies. Press |
while in |
this menu to print the selected number of copies.
When printing multiple copies of a label, a vertical chain mark will be printed between the labels.
Cutting your label
The cutter button is on the left of your machine. To cut a label push the cutter inwards (Fig E). The label backing is split down the middle for easy removal.
Feeding extra tape through
Press FEED (  +
+  ) to feed a short section (12mm, 1/2 inch) of blank tape through the mechanism.
10
LTQX50 WEU.qxd 12-09-2002 11:07 Pagina 11
Troubleshooting
Messages |
Solution |
ERROR 1 |
|
Tape jammed or battery low |
Remove jam (see Troubleshooting below), or |
|
replace batteries |
|
|
ERROR 2 |
|
Big font can not be selected with characters |
Try another format |
in the buffer |
|
|
|
ERROR 3 |
|
Big font can not be selected with |
Try another format |
style/box_underline/2line or lower case |
|
|
|
ERROR 4 |
|
Buffer is full |
Delete some or all of the buffer text |
|
|
ERROR 5 |
|
Text bigger than defined length |
Choose a longer label length |
|
|
ERROR 6 |
|
2 line cannot be selected with the selected |
Try another format |
editing function |
|
|
|
Display blinks |
|
Beyond end of buffer |
Your cursor cannot go any further to the right |
|
|
Display blinks |
|
Beyond start of buffer |
Your cursor cannot go any further to the left |
|
|
Display blinks |
|
Wrong key pressed in editing mode |
|
|
|
Display blinks |
|
Wrong key pressed in menus |
|
11
LTQX50 WEU.qxd 12-09-2002 11:07 Pagina 12
No display
Check the machine is on
Check batteries and replace if necessary
No response to keys
Remove the batteries for a few minutes then refit. The machine will now reset.
No printing or poor text
Check batteries and replace if necessary Check tape cassette is installed correctly and not empty. Clean print head (see “Cleaning).
Print contrast
For use under extreme temperature or humidity conditions.
Press  + SPACE + PRINT
The display will show the five contrast symbols
Use Q or R to select lighter or darker then press  to set
Jammed tape
Lift out the cassette and carefully release jammed tape. Cut off excess tape and refit/replace the cassette.
No success?
Call the customer service telephone - see warranty booklet
Cleaning
Check and clean the print head regularly to ensure optimum print quality, using the cleaning tool supplied (see Fig D).
DYMO label cassettes for the QX50
Label cassettes
Type: |
Paper |
Plastic |
Metallic Iron-on |
|
Length: |
4m |
4m |
4m |
2m |
White |
91200 |
------- |
------- |
------- |
Pearl White |
------- |
91201 |
------- |
------- |
HyperYellow |
------- |
91202 |
------- |
------- |
Cosmic Red |
------- |
91203 |
------- |
------- |
Acid Green |
------- |
91204 |
------- |
------- |
Ultra Blue |
------- |
91205 |
------- |
------- |
Silver |
------- |
------- |
91208 |
------- |
Green |
------- |
------- |
91209 |
------- |
Clear |
------- |
12267 |
------- |
------- |
Iron-on |
------- |
------- |
------- |
18767 |
Assorted Pack 91240: 1 x paper white
1 x plastic yellow
1 x metallic silver
12
LTQX50 WEU.qxd 12-09-2002 11:07 Pagina 13
13

LTQX50 WEU.qxd 12-09-2002 11:07 Pagina 14
CAPS |
BF ABC |
123 STYLE ABC |
|
|
W |
|
|
IE |
|
E |
V |
|
|
|
P |
R |
|
|
|
1 2
A Z
-
Q S
LANG
caps W
REVIEW
CANCEL
|
--ll-- |
|
|
FEED |
|
|
123 |
LENGTH |
COPIES |
/ |
|
|
|
|
|
||
|
|
SIZE |
STYLE |
|
|
|
|
|
|
||
3 |
4 |
5 |
6 |
7 |
8 |
E |
R |
T |
Y |
U |
I |
+ |
' |
& |
@ |
% |
* |
|
|
|
|
|
|
D |
F |
G |
H |
J |
K |
|
\ |
/ |
. |
, |
: |
X |
C |
V |
B |
N |
|
SYMBOLS
SPACE
AZERTY
9 0
O P
L M
;
CLEAR
X
del
14
 Loading...