


A
➊
B
➋
B
➊
C
➊
D
➊
➠
E
➊
D
➋
C
➋
C
➌

Introduction
The Dymo 9000 Electronic Labelmaker enables you to
create a wide variety of high quality self-adhesive
labels. These instructions describe how to use your
Labelmaker in stand-alone mode; for PC-Link operation
consult the relevant sections of the Dymo Label
Software manual.
The Labelmaker uses 6mm (
3
/4") 24mm (1") or 32mm (11/4") wide tape
19mm (
1
/4"), 12mm (1/2"),
cassettes in a number of label colours. Labels can be
tab-cut for easy removal from the backing tape.
Text can be printed horizontally or
verticall
in a variety of sizes and styles and can be left-justified,
right-justified or centred on the label.
Warranty Registration
Please complete the warranty registration card and
return it to your national customer service address
within seven days – see the warranty booklet for
details.
Power Supply
AC ADAPTOR
• Connect the AC adaptor to socket A➊.
Use only the special AC adaptor designed for the
DYMO 9000 Labelmaker.
• An internal battery will retain memory settings for up
to three months. The battery is charged while the
Labelmaker is connected to the AC adaptor.
Changing the cassette
• Ensure that tape and ribbon are taut across mouths
of cassettes (wind the ink ribbon cassette on a little if
necessary before inserting cassette).
• Insert tape cassette
• Insert correct ink ribbon cassette
Note – interlocks C➊ prevent you from inserting a
3
/4") ink ribbon cassette with a 24mm (1") or
19mm (
1
32mm (1
/4") tape cassette.
• Insert cassettes with tape and ribbon positioned as
shown between pinch roller
• Ensure tape and ribbon are positioned correctly.
• Ensure that the lid is closed correctly or printing will
not start.
• A sensor detects if a label is left in the cutter area.
When this occurs further printing will be prevented
until you remove the label. See ‘Troubleshooting’.
• When you change to another cassette size, the
Labelmaker will prompt you to select the correct tape
width installed – see CASSETTE in the SET UP
function menu.
B➊ as shown.
B➋ as shown.
C➋ and print head C➌.
The Display
The display shows:
• A ‘WYSIWYG’ representation of the label you are
creating in edit mode and menus for selecting
functions and features.
• A status bar at the bottom of the display.
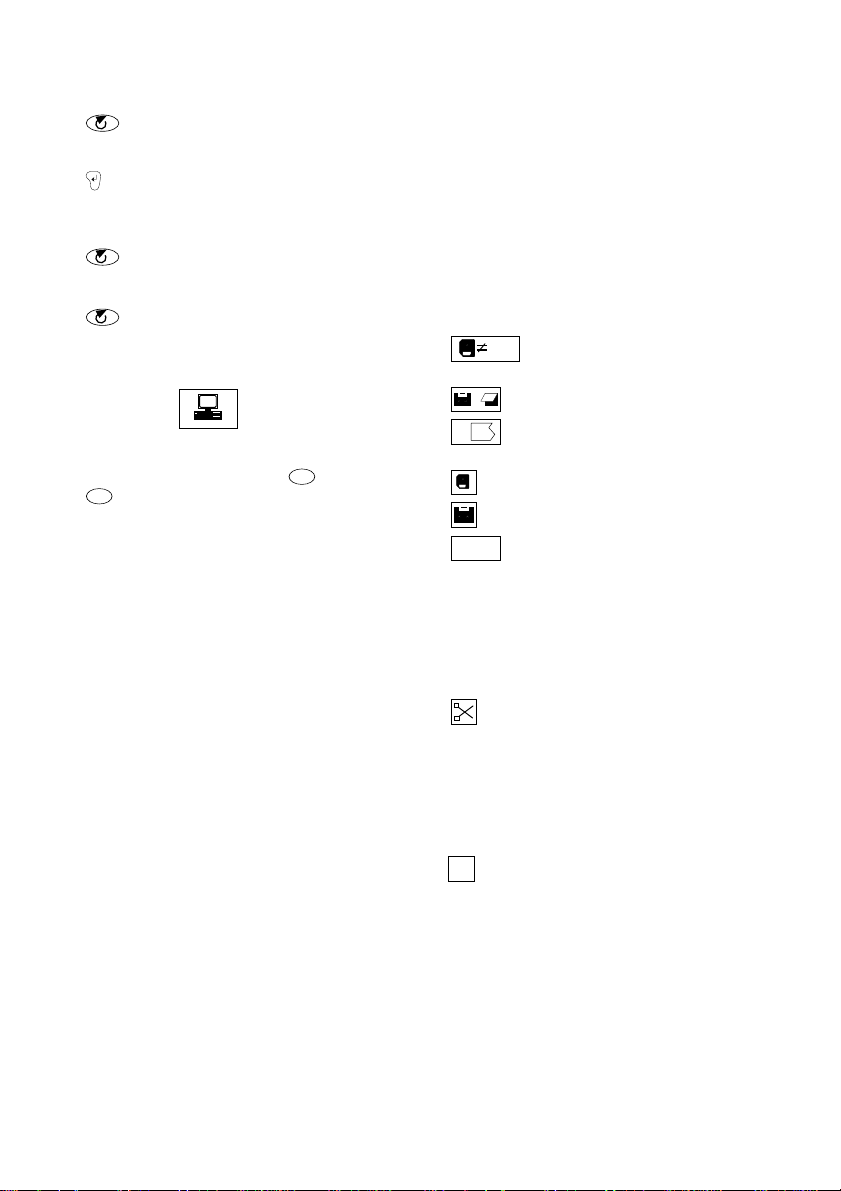
WYSIWYG
DISPLAY
y
STATUS BAR
Function keys
ON/OFF
Switches the power on and off.
• Switches off automatically after ten minutes if no keys
are pressed. The last label created will be retained and
displayed when next turned on. In addition, any stored
settings will be retained.
Note: The internal battery will retain stored settings
for up to three months.
CAPITALS
• Press for all subsequent characters to be in UPPER
CASE (CAPITALS), as confirmed by the
in the status bar.
• Press again to cancel and return to lower case.
SHIFT KEY
• Press and hold down before pressing an
alphabet key to produce an UPPER CASE (CAPS)
character.
• For dual purpose keys, press and hold
produce the legend above the key.
• Pressing
characters.
DELETE
• Press to delete the character to the left of the cursor, or
to exit certain function key operations.
CLEAR TEXT
• Press to clear all the current text but leave the text
size and other settings unchanged. Also use to exit or
clear certain function key operations.
ESCAPE
• Press to exit certain function key operations.
NEW
• Press to clear the workspace and return all settings
back to their default state - eg plain text, auto size, etc.
CURSOR KEYS
• Press or to move the cursor along the text,
one character at a time.
• Press and hold to scan quickly through the text.
3
DEL
ESC
CAPS
+
while
+
NEW
ESC
, , or
CAPS
is set will give lower case
CLEAR
DEL
CAPS
indicator
UK
first to

• Press
SIZE AUTO
WIDTH W
FONT HELV
A
AUTO 1 2 3 4 5 6
+ or to move the cursor to
the beginning or end of the line of text.
• When used in conjunction with certain function keys,
use
or to select options.
• To insert characters into the text, use
or to
position the cursor under the character to the right of
the insertion point, then type in the characters required.
• Press
or to move the cursor to the start of the
previous or next line of a multi-line label.
• Press
+ or to move the cursor to the
beginning or end of the label.
PRINT
PRINT
• Press
• Use the CUTTER option in the
PRINT
to print the label.
SET UP
menu to select
CUT ONLY or CUT TAB – see ‘SET UP’.
SPACE KEY
• Press to insert a space into the text.
FEED
• Press +
+
FEED
FEED
to feed out 25mm (1") of
tape and cut the tape with a tab cut.
PAGE
+
• In edit mode, press + to start a new ‘page’
of the label.
SELECT
• In edit mode, press followed by or to
highlight characters.
• Use a function key to change the format of the
highlighted characters, eg BOLD, then press
make the change and return to edit mode.
• Press
again to remove the highlight.
• Note that global functions, eg BOX, will always apply
to the whole label.
International characters
To add a diacritical (accent) to a character, enter the
character first, followed immediately by the diacritical,
e.g. press
followed by ' to get é.
E
To add a diacritical to an existing character, use
to place the cursor to the right of the character to
be changed, then press the appropriate diacritical key.
Function Menus
Pressing one of the blue function keys changes the
display to show a menu of options for that function.
Most function menus work in a similar way -
• Press
• Press
• Press
For example, pressing
display:
or to select the option and to step
through the choices.
to select your choice and return to edit
mode, or use
or to step through the menu
options again.
ESC
to cancel and return to edit mode
SIZE
will produce the following
to
or
The display shows the current selection of text size,
width and font.
or to step through the menu options SIZE,
Use
WIDTH or FONT. Each option will flash when it is
selected.
The status bar will change to show the choices
available for that function, ie for SIZE, shown above,
the status bar shows a choice of AUTO text size or fixed
sizes 1 to 6. Note that the size options available depend
on the label width selected – see
Press
press
display, or use
to step through the choices, then either
to select your choice and return to the edit
or to step through the menu
SET UP
.
options again.
Note that BOX, INVERSE, MIRROR, VERTICAL and
JUSTIFICATION are global functions affecting the
whole label.
SIZE
SIZE
Menu gives text size, width and font options - see
above.
STYLE
STYLE
NORMAL ✓
BOLD
ITALIC
OUTLINE
SHADOW
UNDERLINE 0
0 1 2 3
A
• Press or to step through the options, then
to select choice, as shown by ✓ in the
use
display. Note that styles can be combined, except
OUTLINE and SHADOW which cannot be used
together.
• UNDERLINE has three choices of line thickness, as
indicated in the status bar.
• In edit mode, icons appear in the status bar to
confirm style selections BOLD (
),
LAYOUT
Shadow (
Shadow
Outline (
LAYOUT
), Italic (I),
B
s
) and Underlined (U).
s
The Layout menu gives the following options:
BOX 1
THICKNESS 1
JUSTIFY L
ORIENT. H
FIX. LENGTH L
ALIGNMENT L
0 1 2 3 4
5 6
ABCD
EF
mm
4

BOX
The display shows the current selection, with six
choices of box available on the status bar.
• THICKNESS option only appears when box selection
made. Offers 3 levels of box line thickness.
JUSTIFY
Choices are Left, Centre or Right alignment of text lines
relative to each other, as shown in the display. Left
justified is default.
ORIENT.
Orientation of the label can be Horizontal (H),
Horizontal Mirrored (HM), Vertical (V) or Vertical
Mirrored (VM), In edit mode, the status bar shows
for mirrored and for vertical text. Horizontal is the
default.
FIX. LENGTH
The label length is normally calculated automatically,
according to the length and size of the text on the label.
)
Choices available are (use
:
FIXED LENGTH TEXT (T) – press then use or
to adjust the length shown in the box, or use the
number keys to enter the length required.
• Press
to select your choice and return to edit
mode.
in the status bar confirms that a fixed text
length is selected.
FIXED LENGTH LABEL (L) – press
then use or
to increase (up to 999mm max.) or decrease the
length in 2mm (0.1") steps, as shown in the box, or use
the number keys to enter the length required. The
Labelmaker will not allow you to make the label shorter
than the text.
• ALIGNMENT option appears when a fixed label length
is selected. Press
to select ALIGNMENT, then use
to choose Left , Centre or Right alignment of
the label image on the label, as shown in the display.
• Press
to fix the length for all subsequent labels
and return to edit mode.
in the status bar
confirms that a fixed label length is selected.
BARCODE
BARCODE
TYPE EAN8
DENSITY IIIIIII
EAN8 EAN13 UPCA UPCE
C39 C128A C128B C128C
Barcodes can be either full height or mixed with text on
one or more lines, depending on the label cassette size
selected.
To create a bar code:
BARCODE
• Press
to display the barcode type previously
selected, see example EAN8 shown above.
• Press
to step through and select from the
barcode options listed in the status bar, as confirmed
in the display.
• Press
to select DENSITY – the currently selected
density is shown in the display.
• Press
to step through and select from the
density options shown in the status bar:
IIIIIII IIII
• Press to return to edit mode and insert the
barcode type selected into the workspace.
• Enter the characters which will become the barcode,
eg: 1234567. The barcode will appear as you type.
BARCODE
• Press
mode.
Note that the barcode symbol
status bar whenever the cursor is positioned over
barcode characters.
MEMORY
Enables you to store your favourite labels in the
memory and to recall them by pressing just a few keys.
To store a label:
• Create your label.
• Press
• Press
confirm.
You can store any number of labels in the memory,
up to a total of approximately 3000 characters. The
status bar displays the amount of memory available
– see example 97% FREE.
To recall a label:
• Press
• Press
flashes.
• Press
• Press
the memory, as shown in the display.
• Press
edit mode (the recalled label will appear in the
workspace) or:
• Press
options; press
and return to edit mode.
To search for a label in the memory:
• Press
• Press
• Press to select SEARCH, then enter up to 6
characters of the item you are searching for.
• Press
search characters will appear in the display. Press
containing the search characters stored in the
memory.
5
again followed by to return to text
IIIII
will appear in the
MEMORY
STORE ✓
RECALL
SEARCH
CLEAR
MEMORY
; STORE will flash.
abc
97% FREE
to store the label; ✓ will appear to
MEMORY
; STORE will flash.
to step through options until RECALL
to select RECALL
or to step through the labels stored in
to select the label required and return to
ESC
to cancel and return to the MEMORY
ESC
again to cancel MEMORY function
MEMORY
; STORE will flash.
until SEARCH flashes.
; the first label found containing the
or to step through the remaining labels

• Press
d
I
PREVIEW
CASSETTE 32 MM
CUTTER CUT TAB
LANGUAGE ENGLISH
UNITS MM
PC LINK
to select the label required and return to
edit mode (the selected label will appear in the
workspace) or:
ESC
• Press
options; press
to cancel and return to the MEMORY
ESC
again to cancel the MEMORY
function and return to edit mode.
To clear a label from the memory:
MEMORY
• Press
• Press
• Press
; STORE will flash.
until CLEAR flashes.
to select CLEAR, then use or to
select the label to be cleared.
• Press
to clear the selected label from the
memory. The display will return to MEMORY
options, with CLEAR flashing.
• Repeat the above for each label to be cleared.
ESC
• Press
SYMBOLS
Press
to return to edit mode.
SYMBOLS
SYMBOLS
to show symbols and special characters,
some of which are not available direct from the
keyboard. The display will show:
PUNCT.
LANG.
TECH.
MISC.
SIGNS
ALL
! ¡ ? ¿ # & @ $
r
£ ¢ ¥ F – ± ( )
: ; ✳ < > \ [ ]
§ { } = – / X —
% - " ’ , .
• Press or to step through the options
available, then press
to select your chosen
option, confirmed by the first symbol in the list
becoming highlighted and a large version of that
symbol appearing in the display.
• Press
symbols available, then press
, , or to step through the
to return to edit
mode and insert the selected symbol in the label
workspace at the cursor position, or:
ESC
• Press
SPECIAL
to cancel and return to the symbols menu.
SPECIAL
COPIES INCR.
CHAIN ✓
COLOUR
INVERSE
PERS. STORE
PERS. RECALL
COPIES
• Press
to select between:
SAME – for several copies of the same label, or
INCR. which increments the right-most number on a
label by 1 - 99, ready for the next print command.
• Press
then use or to increase or decrease
the number shown in the box, or use the number
keys to enter the number required.
CHAIN
• Press
short 6mm (
dots will be printed between each label as a cutting
to select CHAIN printing of labels with a
1
/4") leader and trailer. A row of vertical
guide; the final label in the chain will be cut and tabcut. Only operates if more than one label set to print
(see COPIES), confirmed by ✓ in the display.
COLOUR
• Press
to insert a colour break at the cursor
point, confirmed by ✓ in the display. In edit mode,
the colour break will be shown as a vertical dotted
line in the display; this line is not printed on the
label.
• Printing will stop when the colour break is reached.
➝
will appear to prompt you to change the
➝
ink cassette to an alternative colour.
INVERSE
• Press for the label to be printed
confirmed by ✓ in the display and by
bar in edit mode.
inverse
,
in the status
PERS. STORE
• Press to store your current personalised label
settings in the memory, confirmed by ✓ in the
display. Any settings previously stored will be
replaced by these settings.
PERS. RECALL
• Press
to recall your current personalised label
settings from the memory, confirmed by ✓ in the
display.
ESC
• Press
• Press
to cancel and return to edit mode, or:
to return to edit mode and insert your
personalised label settings in the label workspace at
the cursor position. All subsequent characters
entered will conform to your personalised settings.
NOTE: Global functions, eg INVERSE, will be applied
to the whole label.
SET UP
2
SET UP
PREVIEW
• Press
• Press
• Press
to display a preview of the actual label.
ESC
to return to the options menu.
ESC
again to cancel and return to edit mode.
CASSETTE
• Press
• Press
to display a list of label sizes.
or to select the tape size required.
Note: If the tape size selected is different from the
tape cassette installed, the Labelmaker will give a
warning message if you try to print on a tape
narrower or wider than the tape size selected. Either
change the cassette to the correct size for printing,
or change the label design and tape size to suit the
cassette size. See ‘Troubleshooting’.
CUTTER
• Press
to choose between TAB cut ONLY
(useful when printing several copies of the same
6
label), or CUT and TAB cut for easy removal from the
backing tape.
LANGUAGE
• Press
to step through the operating languages
available on the Labelmaker. The SET UP display will
change accordingly .
• Press
to change to the selected language and
return to edit mode. The Labelmaker will retain the
chosen operating language until you change it again.
UNITS
• Press
to choose between UNITS of measure
INCHES or MM, as shown in the status bar.
PC LINK
• Press to select PC LINK mode when the
Labelmaker is connected to a PC – see the
instructions accompanying the software for details.
• The display will change to show
to confirm PC LINK mode selection. Note that the
Labelmaker will not respond to the keyboard in PC
ESC
LINK mode, with the exception of the
• Press
ESC
to cancel PC LINK mode and return to
key.
normal operation.
Cleaning
• Check and clean the print head and pinch roller
regularly.
Follow the instructions packed with the cleaning tool.
Moisten the cleaning tool with alcohol and clean the
pinch roller and print head as shown
• After cleaning, store the tool in the lid
D➊.
D➋ for future
use.
Troubleshooting
No display
• check machine is on
• check AC adaptor connected, plugged in and
switched on.
No printing or poor text
XX"
•
printed. See CASSETTE option in ‘SET UP’ menu.
•
•
before printing next label
•
•
•
°C/°F
May occur if printing many labels with dense image.
Stops for 3 minutes for head to cool, then resumes
printing automatically.
• check correct tape and ribbon cassettes installed
• check tape cassette installed correctly
• clean the print head.
Poor cutter performance
•
• clean the cutter blade regularly.
Poor tab cuts
• replace tab cutter blade
screw in the top of the cutter block, then pull it
straight up to remove.
WARNING – the blade is extremely sharp!
No response to print key
•
!!!
key to return to normal display. Open the cassette
compartment and free the jam.
No success?
• Call the customer service telephone number in your
country – see the warranty booklet.
In the USA, call 800-645-6051
In Canada, call (905) 670-2222
wrong cassette fitted for label to be
ink cassette missing or lid open
?
➧➧
Lab.
label not removed from cutter area - remove
label tape run out – replace the cassette
ink tape run out – replace the cassette
printhead overheat safety cutout warning.
cutter jammed – clear jam and clean cutter
E➊ – remove the single
in the display indicates a printer jam. Press any
7
 Loading...