Druck DPI 610, DPI 615 IS Specifications

GE
Sensing
DPI 610/615 Series is a Druck
product. Druck has joined other
GE high–technology sensing
businesses under a new
name—GE Sensing.
g
• Ranges -14.7 to 10,000 psi
• Accuracy from 0.025% full scale (FS)
• Integral combined pressure/vacuum pump
• Dual readout: input and output
• 4 to 20 mA loop test: auto step and ramp
• Intrinsically safe (IS) version
• RS232 interface and fully documenting version
• Remote pressure sensors
Features
Druck Portable
Pressure Calibrators
DPI 610/615 Series
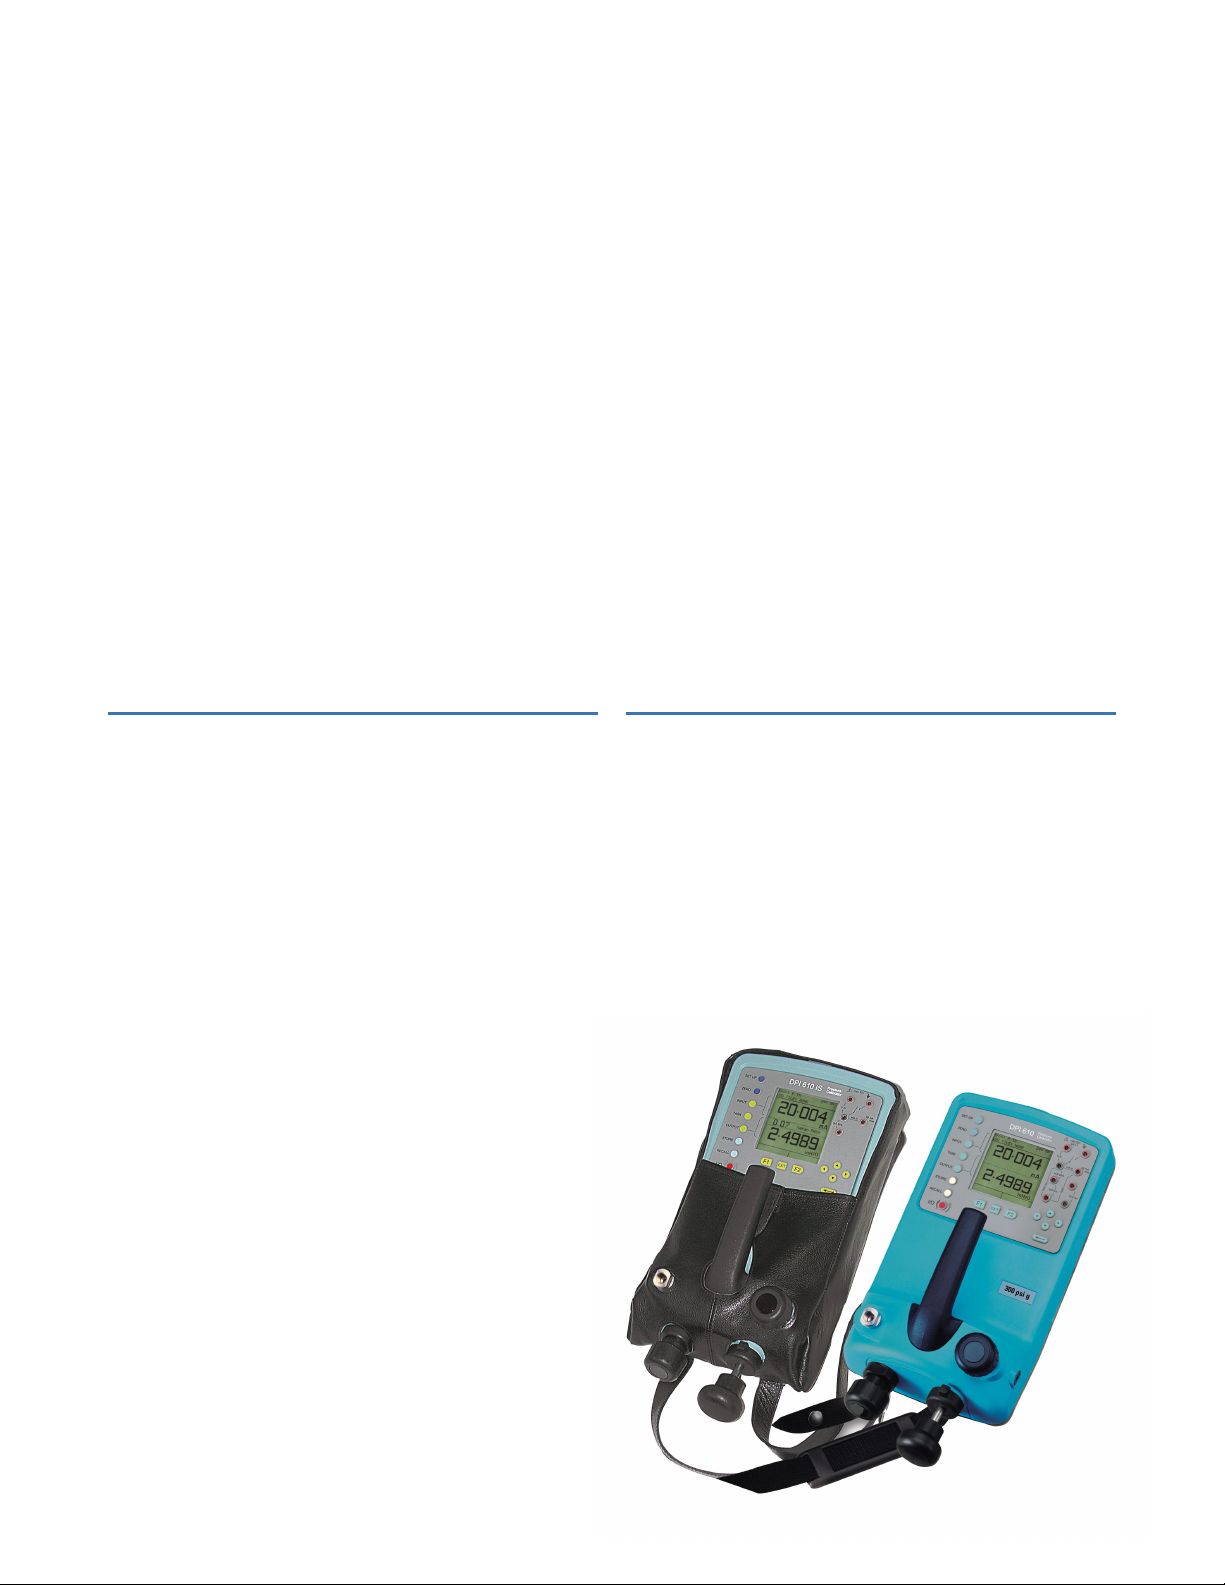
The technically advanced Druck DPI 610 and DPI 615
portable calibrators are the culmination of many years of
field experience with the company’s DPI 600 series.
These self-contained, battery powered packages contain
a pressure generator, fine pressure control, device
energizing (not IS version) and output measurement
capabilities, as well as facilities for 4 to 20 mA loop
testing and data storage. The rugged weatherproof
design is styled such that the pressure pump can be
operated and test leads connected without
compromising the visibility of the large dual parameter
display. The mA step and ramp outputs and a built-in
continuity tester extend the capabilities to include the
commissioning and maintenance of control loops.
Setting the Standard for Portable
Pressure Calibrators

A highly accurate and easy to use calibrator is only part
of the solution for improving overall data quality and
working efficiency. The DPI 610 and DPI 615, with data
storage and RS232 interface, reduce calibration times
and eliminate data recording errors. The DPI 615 also
provides error analysis for field reporting of calibration
errors and pass/fail status. In addition, procedures
downloaded from a PC automatically configure the
DPI 615 to pre-defined calibration and test routines.
Improved performance
The DPI 610/615 Series combine practical design with
state-of-the-art performance, summarized as follows:
Accuracy 0.025% FS for ranges 2.5 to 10,000 psi
Ranges 1 psi to 10,000 psi including gauge, absolute and
differential versions
Integral Pneumatic –22 inHg to 300 psi
Pressure Source
Integral Hydraulic 0 to 6000 psi
Pressure Source
Measure Pressure, mA, V, switch state (open/closed) and
ambient temperature
Output: Pressure, mA step, mA ramp, mA value
Energizing Supplies 10 and 24 VDC (not IS version)
Data Storage 92 Kbytes
Documenting (DPI 615 only) Error analysis with pass/fail status and graphs.
Two-way PC communication for transferring
procedures and results
Remote pressure sensors Up to 10 digitally characterized sensors per
calibrator
Simplified Operation
GE’s knowledge of customer needs, combined with
innovative design, results in high performance,
multi-functional calibrators that are simple to use. The
key to simple operation is the Task Menu. Specific
operating modes such as P-I, switch test and leak test
are configured at the touch of a button by menu
selection.
Featuring highly reliable pneumatic and hydraulic
assemblies and self-test routines, the DPI 610/615 Series
can be relied upon time and time again for field
calibration in the most extreme conditions.
The DPI 610 and DPI 615 have been designed for ease of
use while meeting a wide range of application needs
including calibration, maintenance and commissioning.
The Intrinsically Safe versions, certified to European and
North American standards for use in hazardous areas,
reduce response times to breakdowns and emergencies
by removing the need for ’Hot Permits‘ and gas detection
equipment. This gives peace of mind to all those
responsible for safety within hazardous areas.
The dual parameter display shows the Input and Output
values in large clear digits. A unique built-in handle
provides a secure grip for on-site use in addition to a
shoulder strap which is also designed to allow the
instrument to be suspended for hands-free operation.
Any technician can use these calibrators without formal
training, such as a novice on an emergency call out, or
those familiar with the DPI 601. By selecting basic mode
the calibrator is configured to source pressure and
measure mA or V, with all non-essential keys disabled.
Dedicated Task Menu
The dedicated task key gives direct access to the task
menu. Select the required test, for example P-I for a
pressure transmitter, and with a single key press, the
calibrator is ready.
Use the advanced mode for custom tasks and add to the
user task menu for future use.
Some of the Capabilities
P mA V 10 V* 24 V* Switch °F
Measure
__
Source
_
__
P = Pressure
F = Local ambient temperature
* = Not IS
Pressure Transmitter Calibration
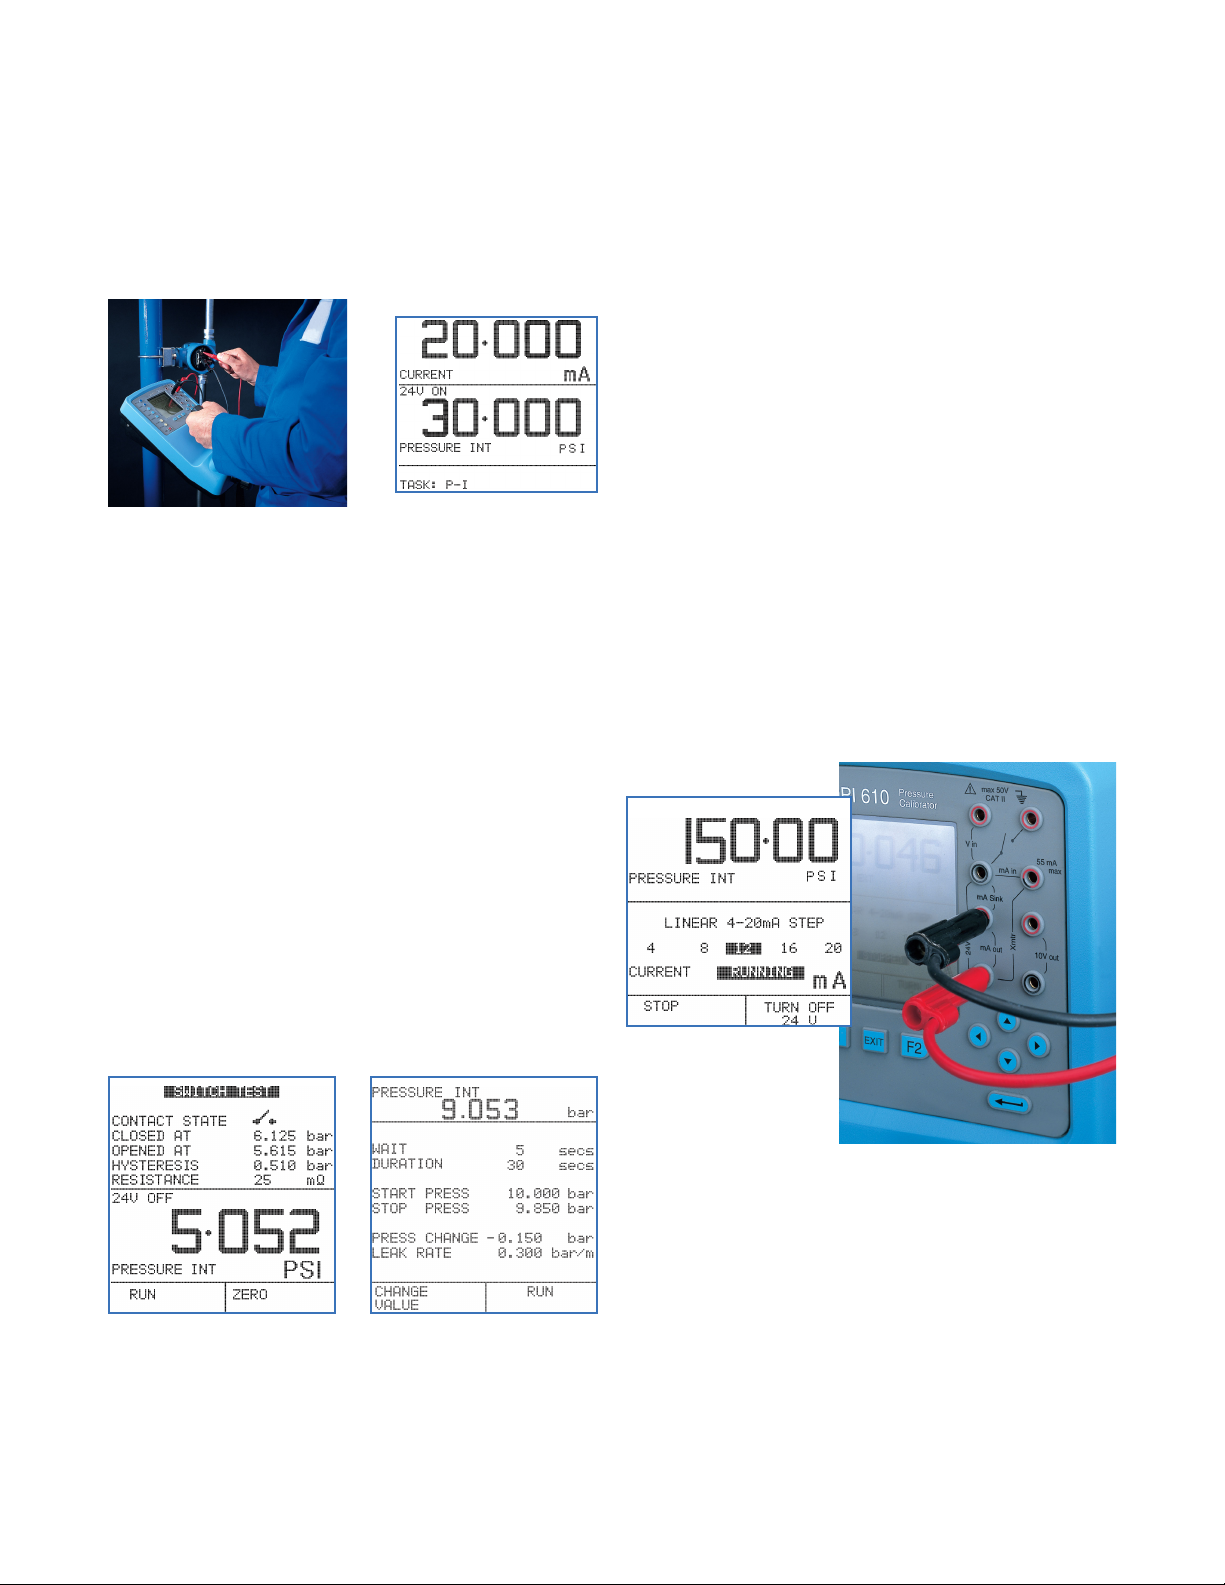
The P-I task configures the DPI 610/615 Series to
simultaneously display the output pressure and the input
current. The pressure unit can be chosen to suit the
transmitter and a 24 V supply is available for
loop-power (not IS version).
For process transmitters reading in percentage, use %
span to scale the pressure accordingly.
The DPI 610/615 Series pneumatic calibrator hand-pump
can generate pressure from -12 to 300 psi. The volume
adjuster gives fine pressure setting and the release valve
also allows gradual venting for falling calibration points.
GE
Sensing

Reduce the burden imposed by quality systems such as
ISO 9000, simply store results in memory and leave both
pen and calibration sheet back at the office.
Pressure Switch Testing and Leak
Testing
For switch set-up and fault finding, the display shows the
output pressure and switch state open or closed.
Continuity is declared by an audible signal.
Verify pressure switch performance using the automatic
procedure. The DPI 610/615 Series displays the switch
points and the contact hysteresis.
Leak test will check for pressure leaks prior to
calibration or during routine maintenance. Define the test
times or use the defaults and wait. The DPI 610/615
Series will report the start and stop pressures, the
pressure change and the leak rate.
Take a ‘snapshot’ of the working display; all details are
stored in a numbered location for later recall.
Loop Testing and Fault Finding
The DPI 610/615 Series can generate a continuous mA
step or mA ramp output, allowing a single technician to
commission control loops.
Feed the loop using mA step or mA ramp and at the
control room, check the instrumentation.
Use mA value for alarm and trip circuit tests. Any mA
output can be set and adjusted from the keypad.
Comprehensive process features aid flow and level
measurement and help with troubleshooting. Select tare,
maximum/minimum, filter, flow or %span and the
function will be applied to the input parameter.
Save time in fault finding, by leaving the DPI 610/615
Series to monitor system parameters. Use periodic data
log or the maximum/minimum process function to
capture intermittent events.
Remote Pressure Sensors
By adding up to 10 external sensors (one at a time) the
working ranges of the DPI 610 and DPI 615 can be
extended. Modules from 1 inH2O to 10,000 psi are
available to suit most applications.
As a leading manufacturer of pressure sensors GE has
applied the latest silicon technology and digital
compensation techniques to develop these sensors.
GE
Sensing
 Loading...