How it Works
Log In / Sign Up
Buy Points
How it Works
FAQ
Contact Us
Questions and Suggestions
Users
Denver
Loading...
M
MP–1022
MP–122
MP–222
MP–522
MPC-4055
7
MPC-4055C
8
MPG-1011 PLL
MPG-1022C
MPG-1024C
MPG-2011 PLL
MPG-2017PLL
MPG-2018CPLL
MPG-2018NRC
MPG-2019CPLL
MPG-2042C
MPG-2044C
MPG-2120PLL
MPG-2122PLL
MPG-4017PLL
MPG-4018CPLL
MPG-4019CPLL
MPG-4054 NR
2
MPG-4064BT
MPG-4084BT
2
MPG-4094NR
MPG-4120PLL
MPM-4034
MPM-4038
MPS-201
MPS-201C
MPS-205C
MPS-409C MK2
MPT-3014
2
MRD165
MRD-51
3
MS-330
MT-1002 BLACK
5
MT-1008
3
MT-1063
5
MT-1080T2H
2
MT-1083NB
2
MT-1084NB
2
MT-1087T2H
2
MT-1150T2H
3
MT-500
5
MT-700
MT-703
4
MT-704
5
MT-705
MT-708
6
MT-712
MT-713
3
MT-720TWIN
8
MT-722TWIN
7
MT-723TWIN
MT-725TWIN
6
MT-726TWIN
8
MT-729TWIN
3
MT-732
MT-732B
3
MT-738
4
MT-739
MT-742TWIN
4
MT-743TWIN
4
MT-748DVBT
4
MT-748DVBT MPEG4
MT-749DVBT
4
MT-750
6
MT-752C
MT-758
7
MT-761
2
MT-761 MK2
6
MT-763DVBT
5
MT-765
4
MT-766
3
MT-768
6
MT-769
MT-770
4
MT-772DVBT
5
MT-773
4
MT-774
5
MT-776 BLACK
5
MT-776 WHITE
4
MT-777 WHITE
MT-778
4
MT-779
7
MT-779DVBT
MT-780
6
MT-782
4
MT-783
10
MT-783 NB
MT-784 NB
2
MT-902
6
MT-902DVBT
MT-908
6
MT-909
3
MT-910
4
MT-979
6
MT-979DVBT
6
MT-980
6
Loading...
Loading...
Nothing found
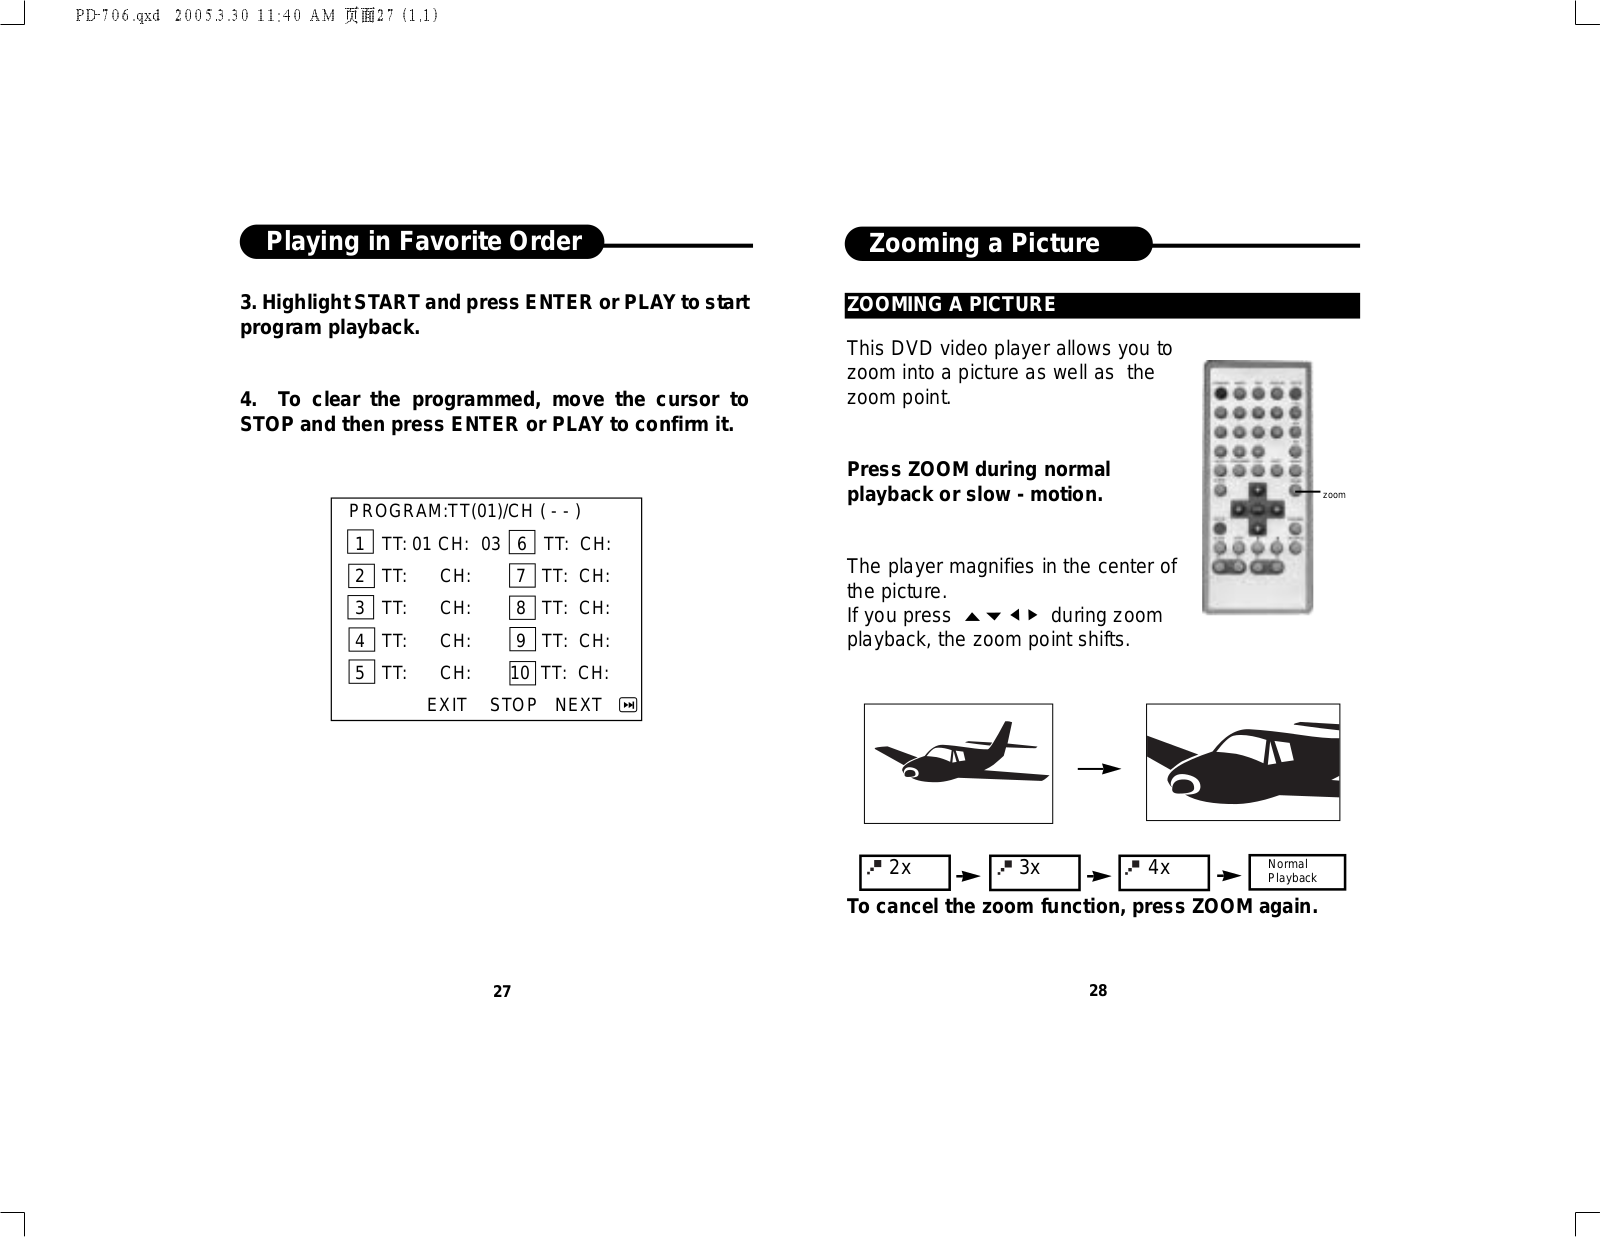
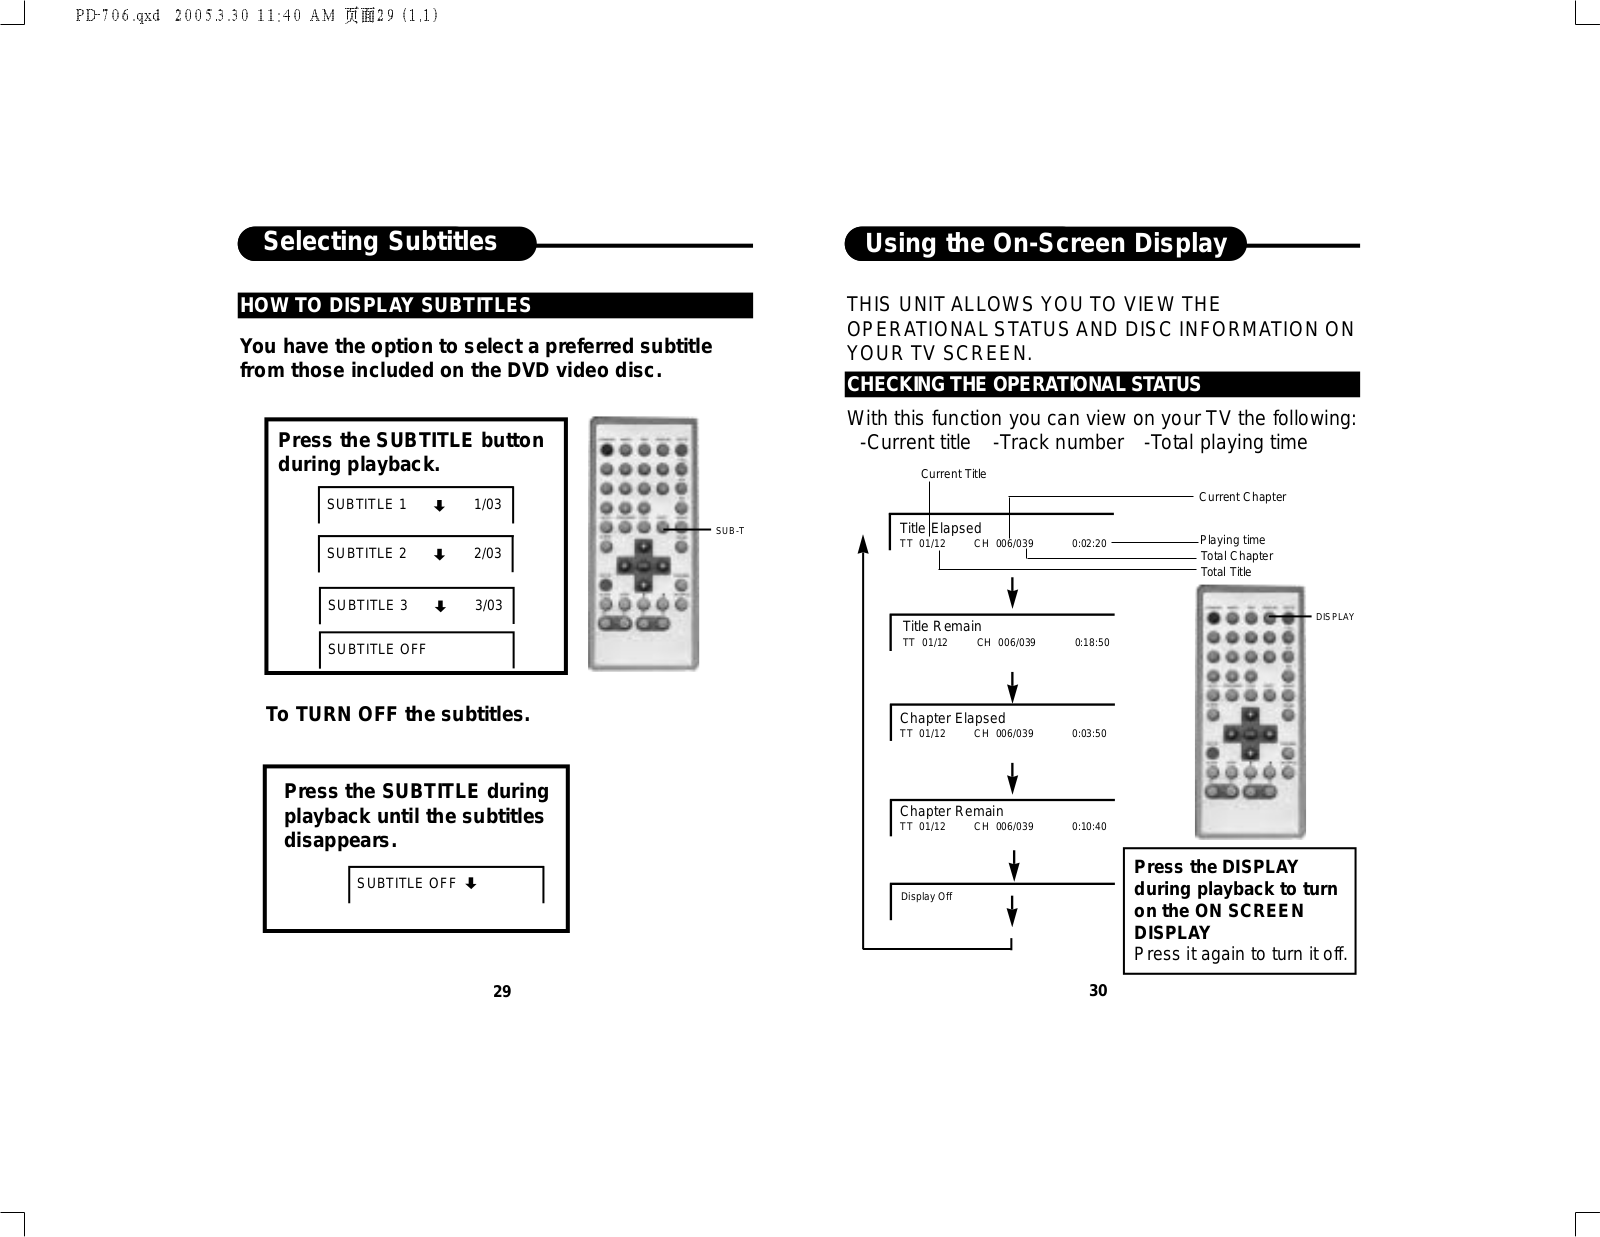
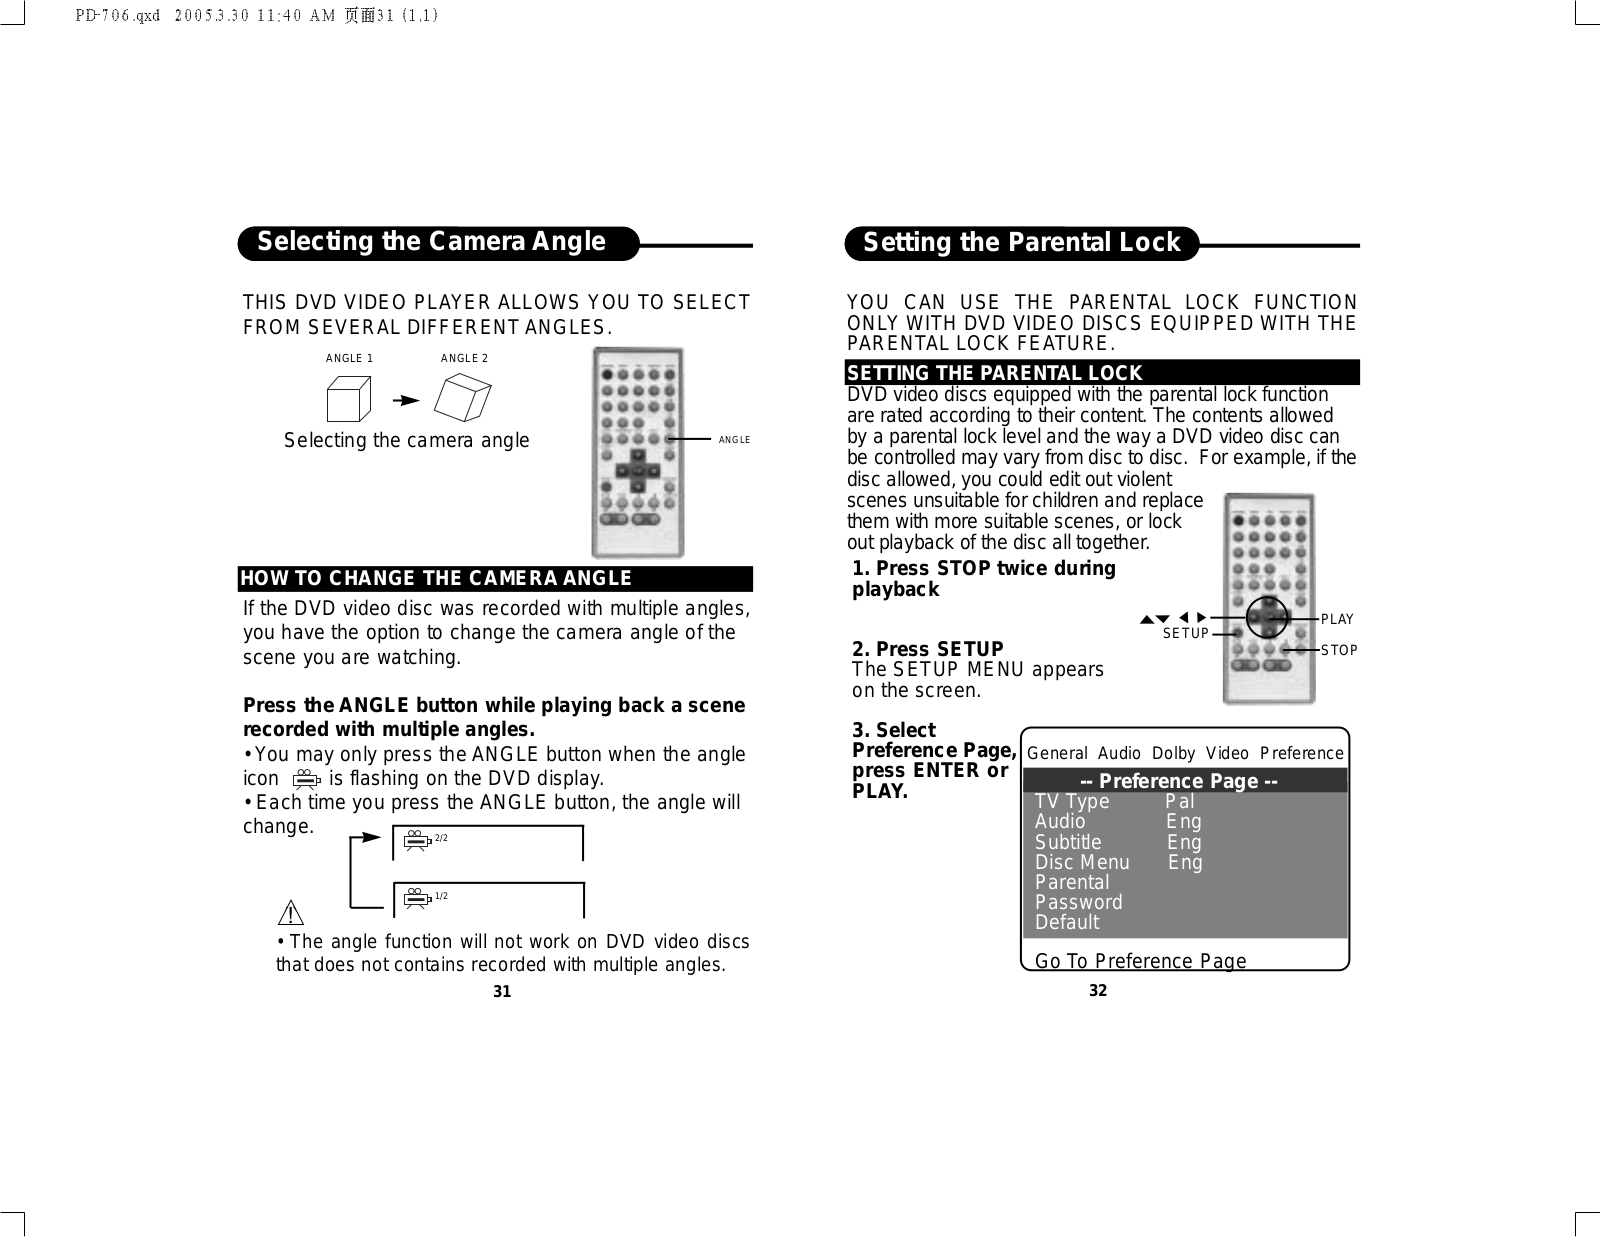
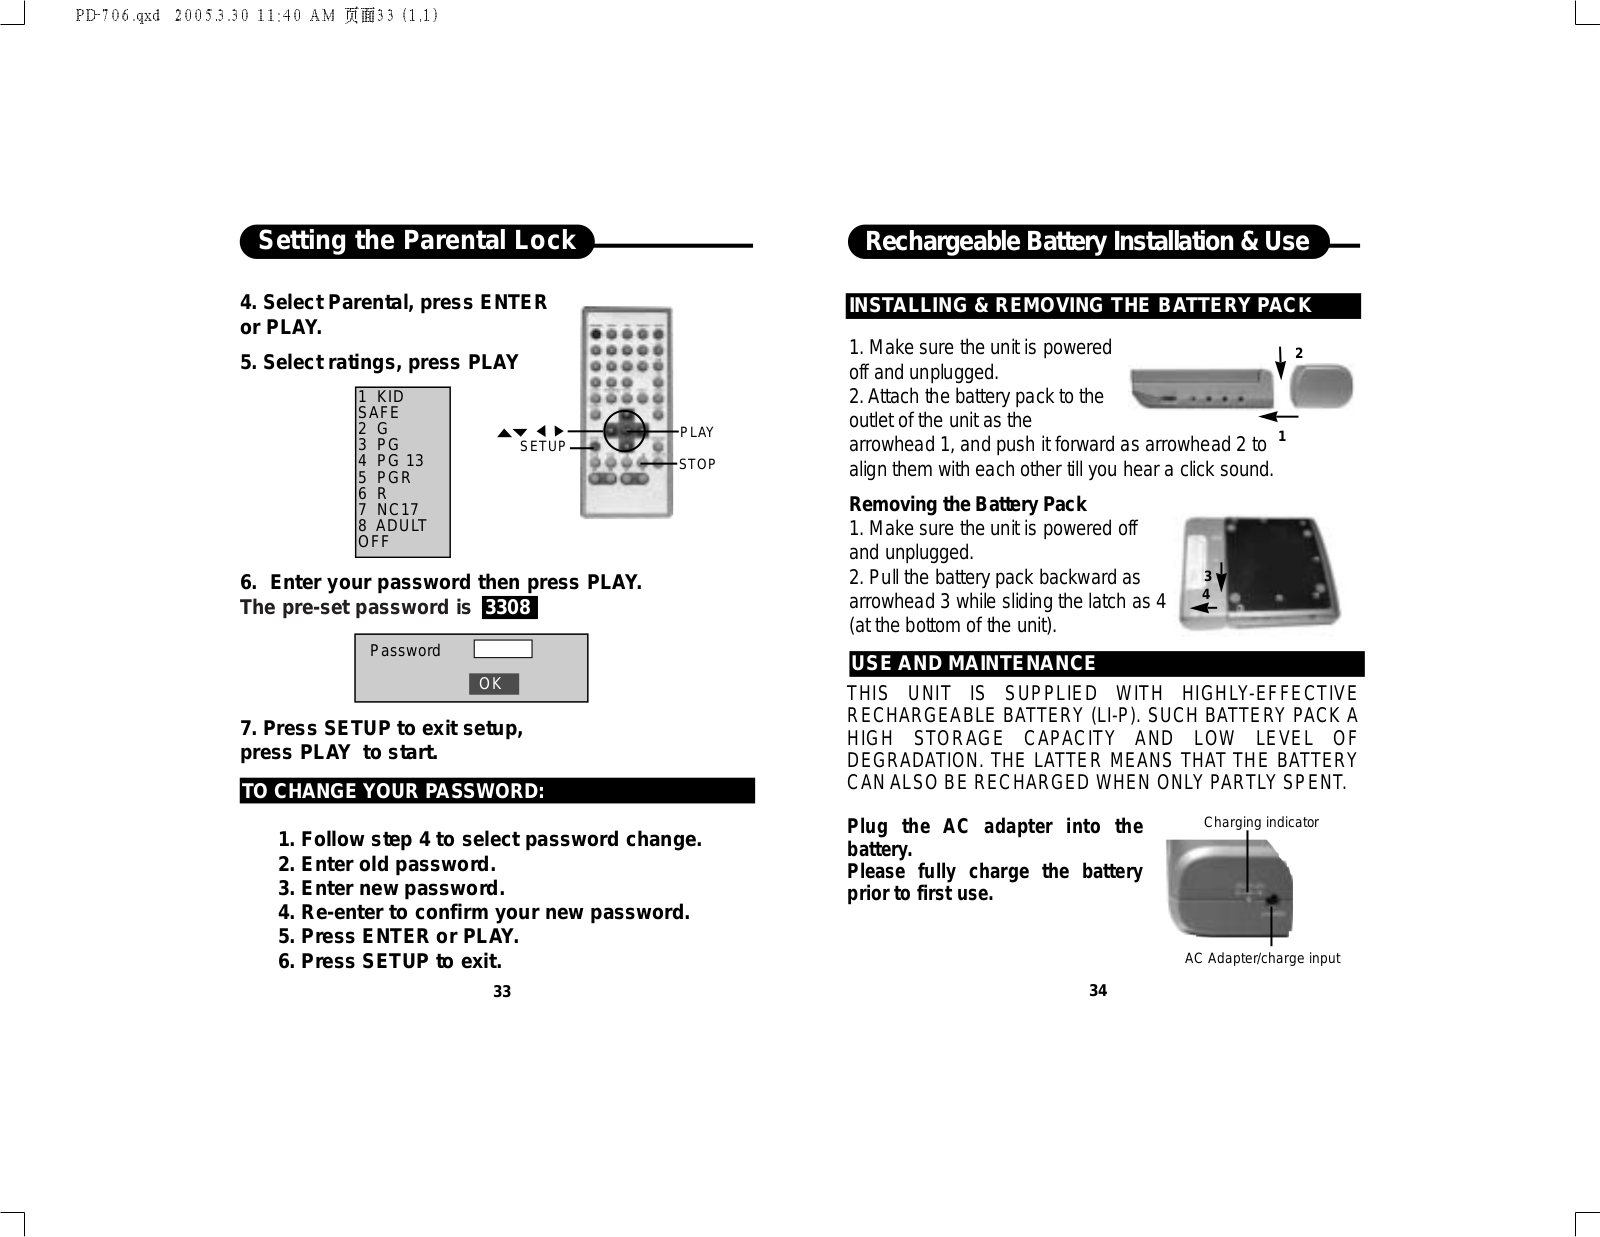
MT-712
Operating Manual
60 pgs
1.09 Mb
0
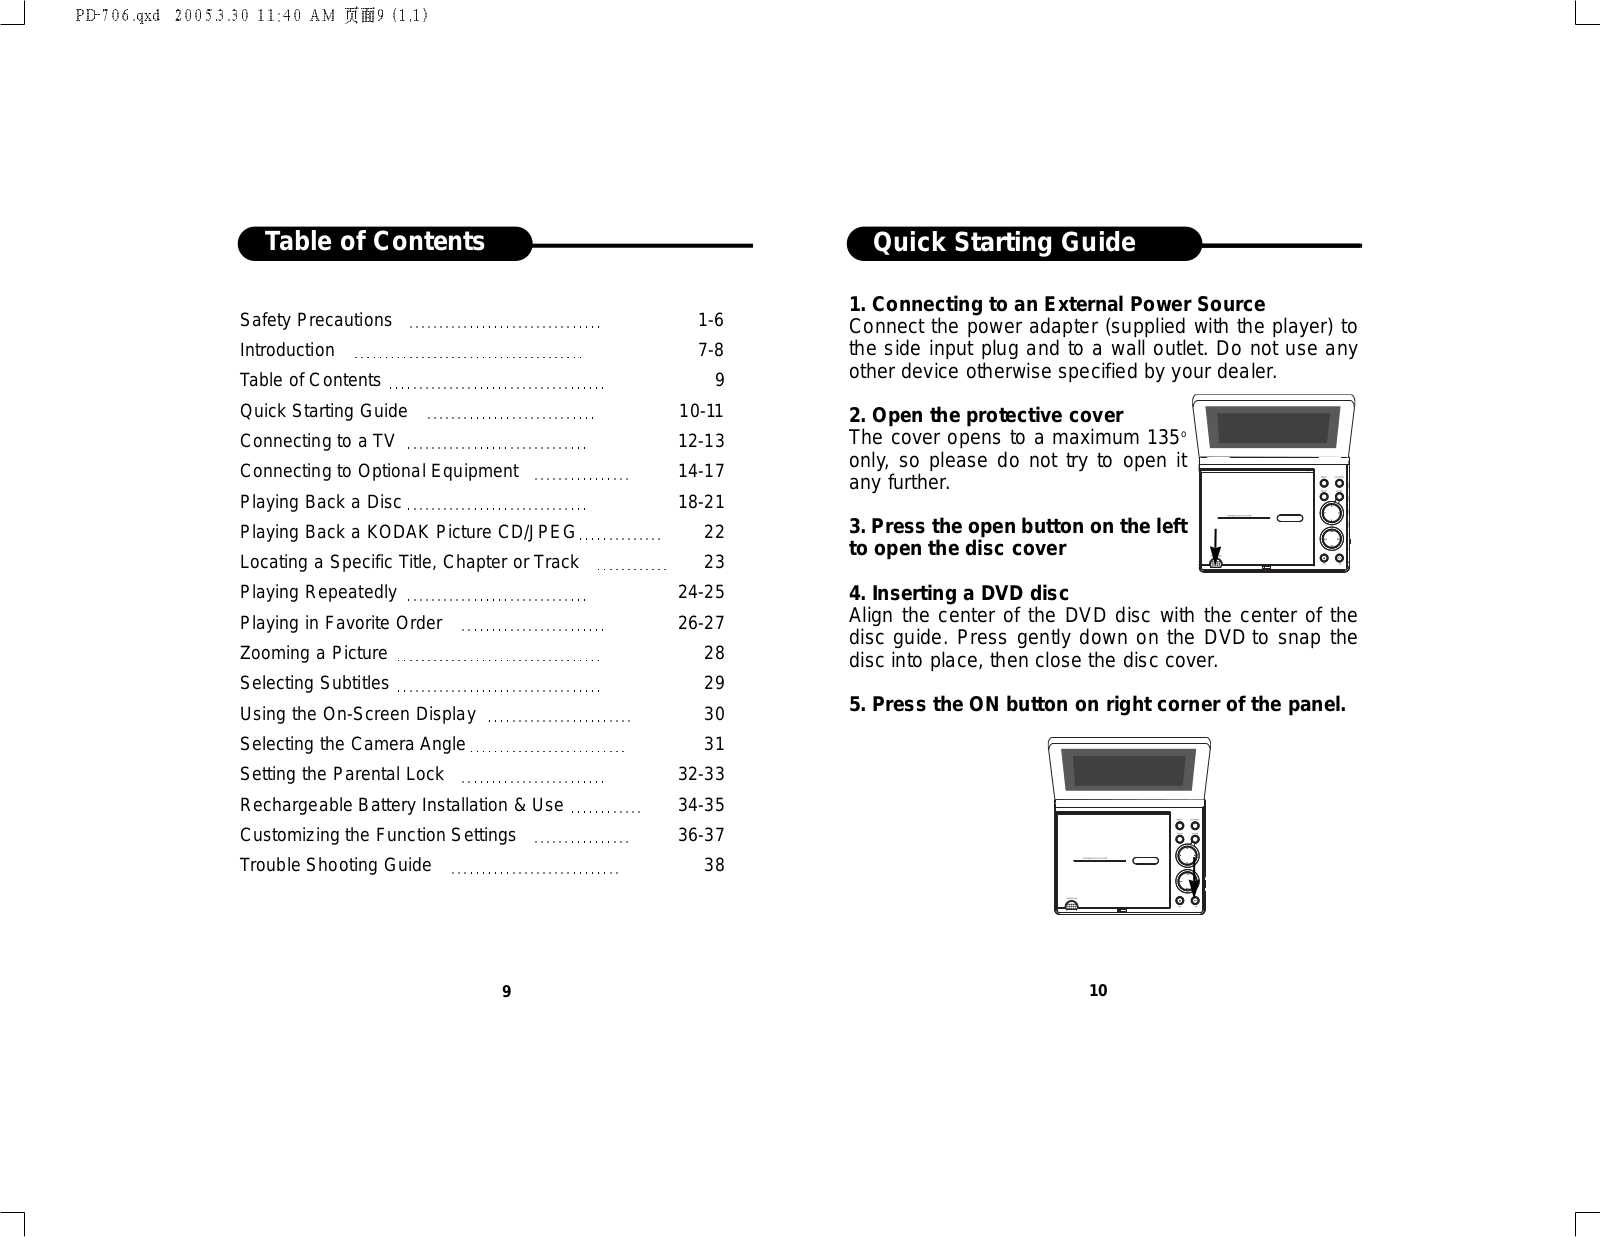
Table of contents
Loading...
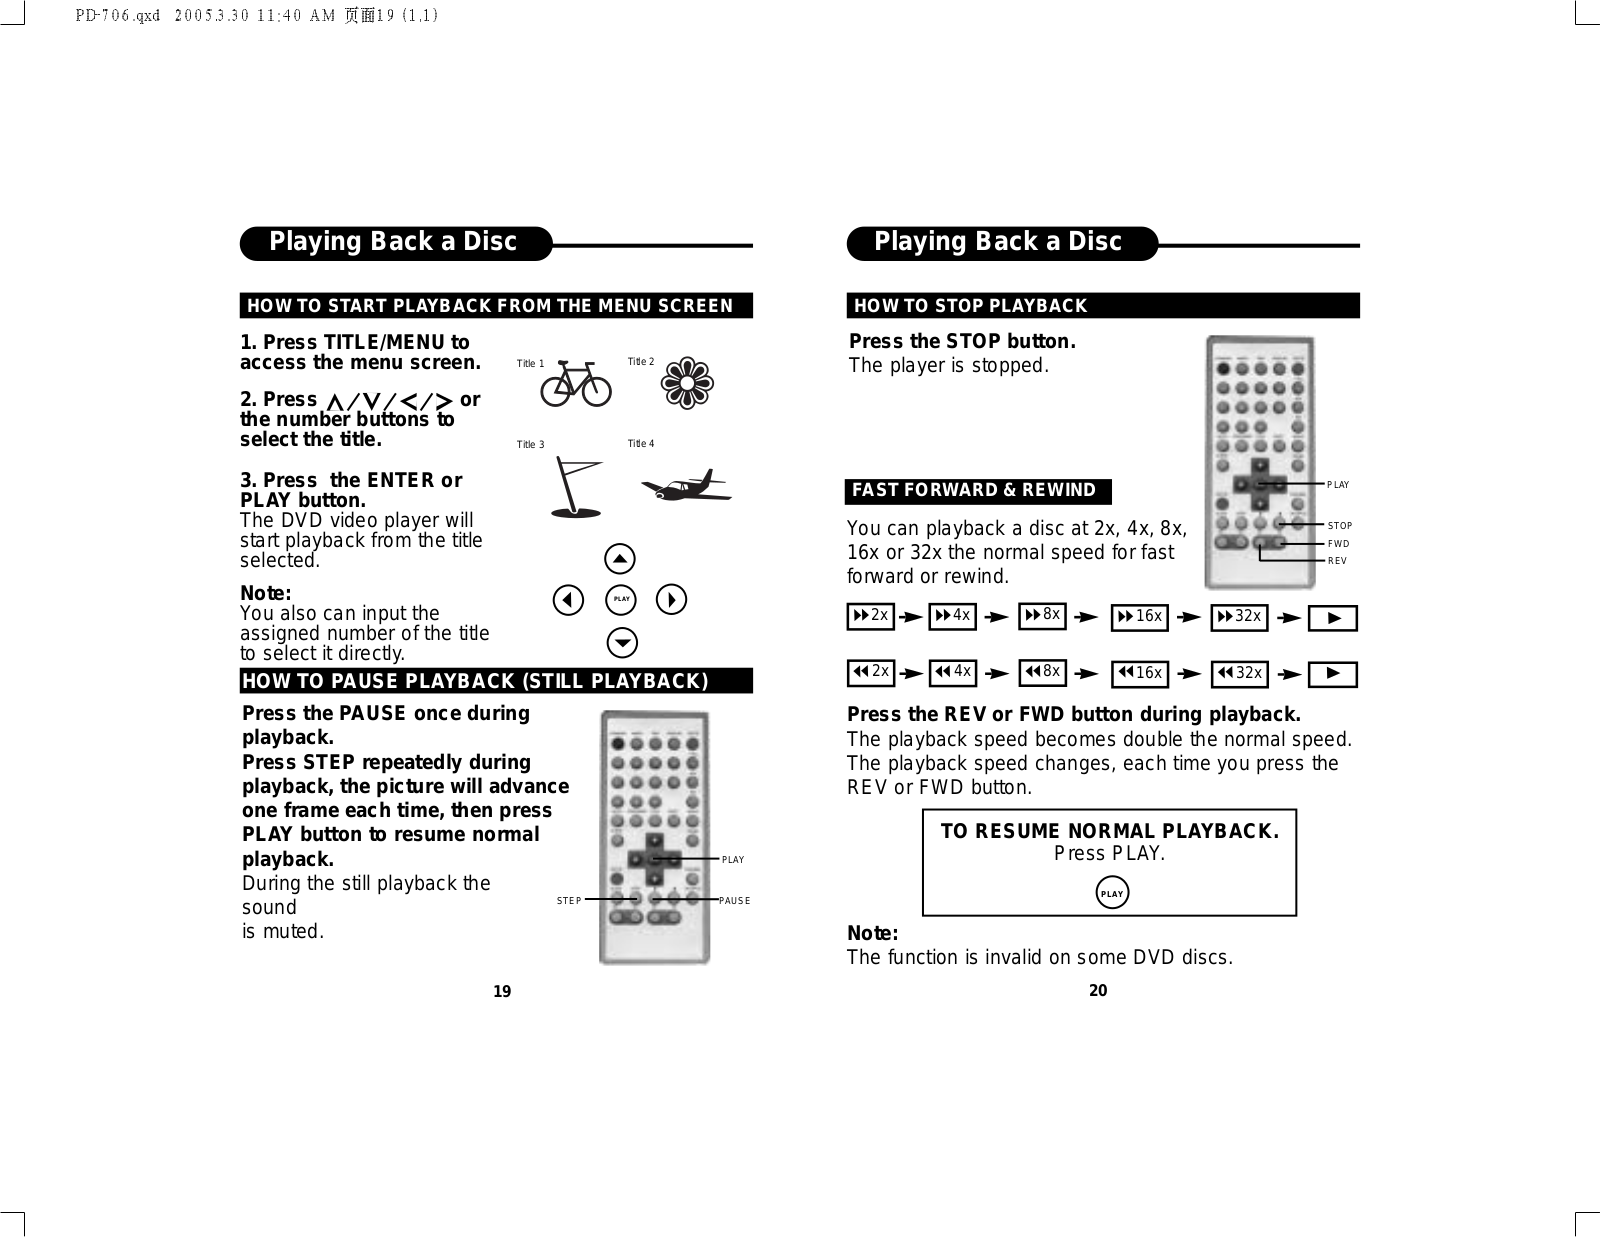
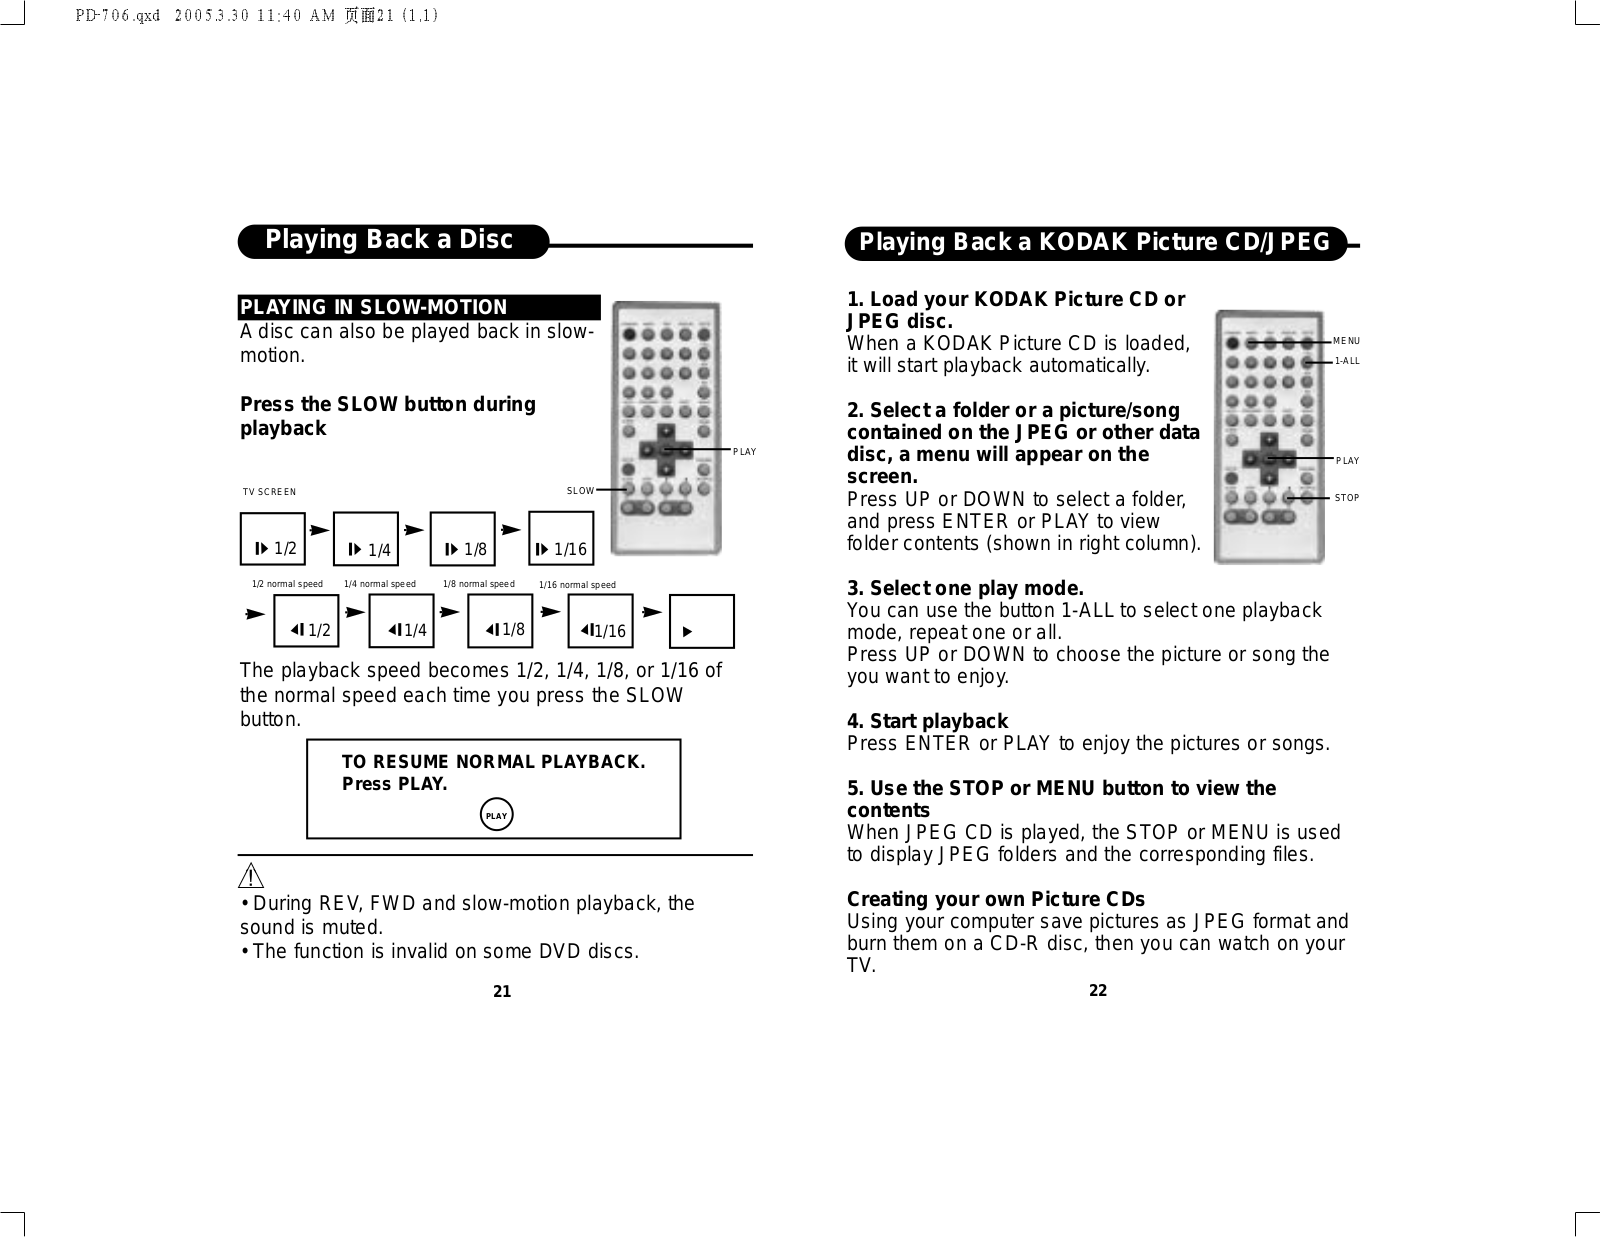
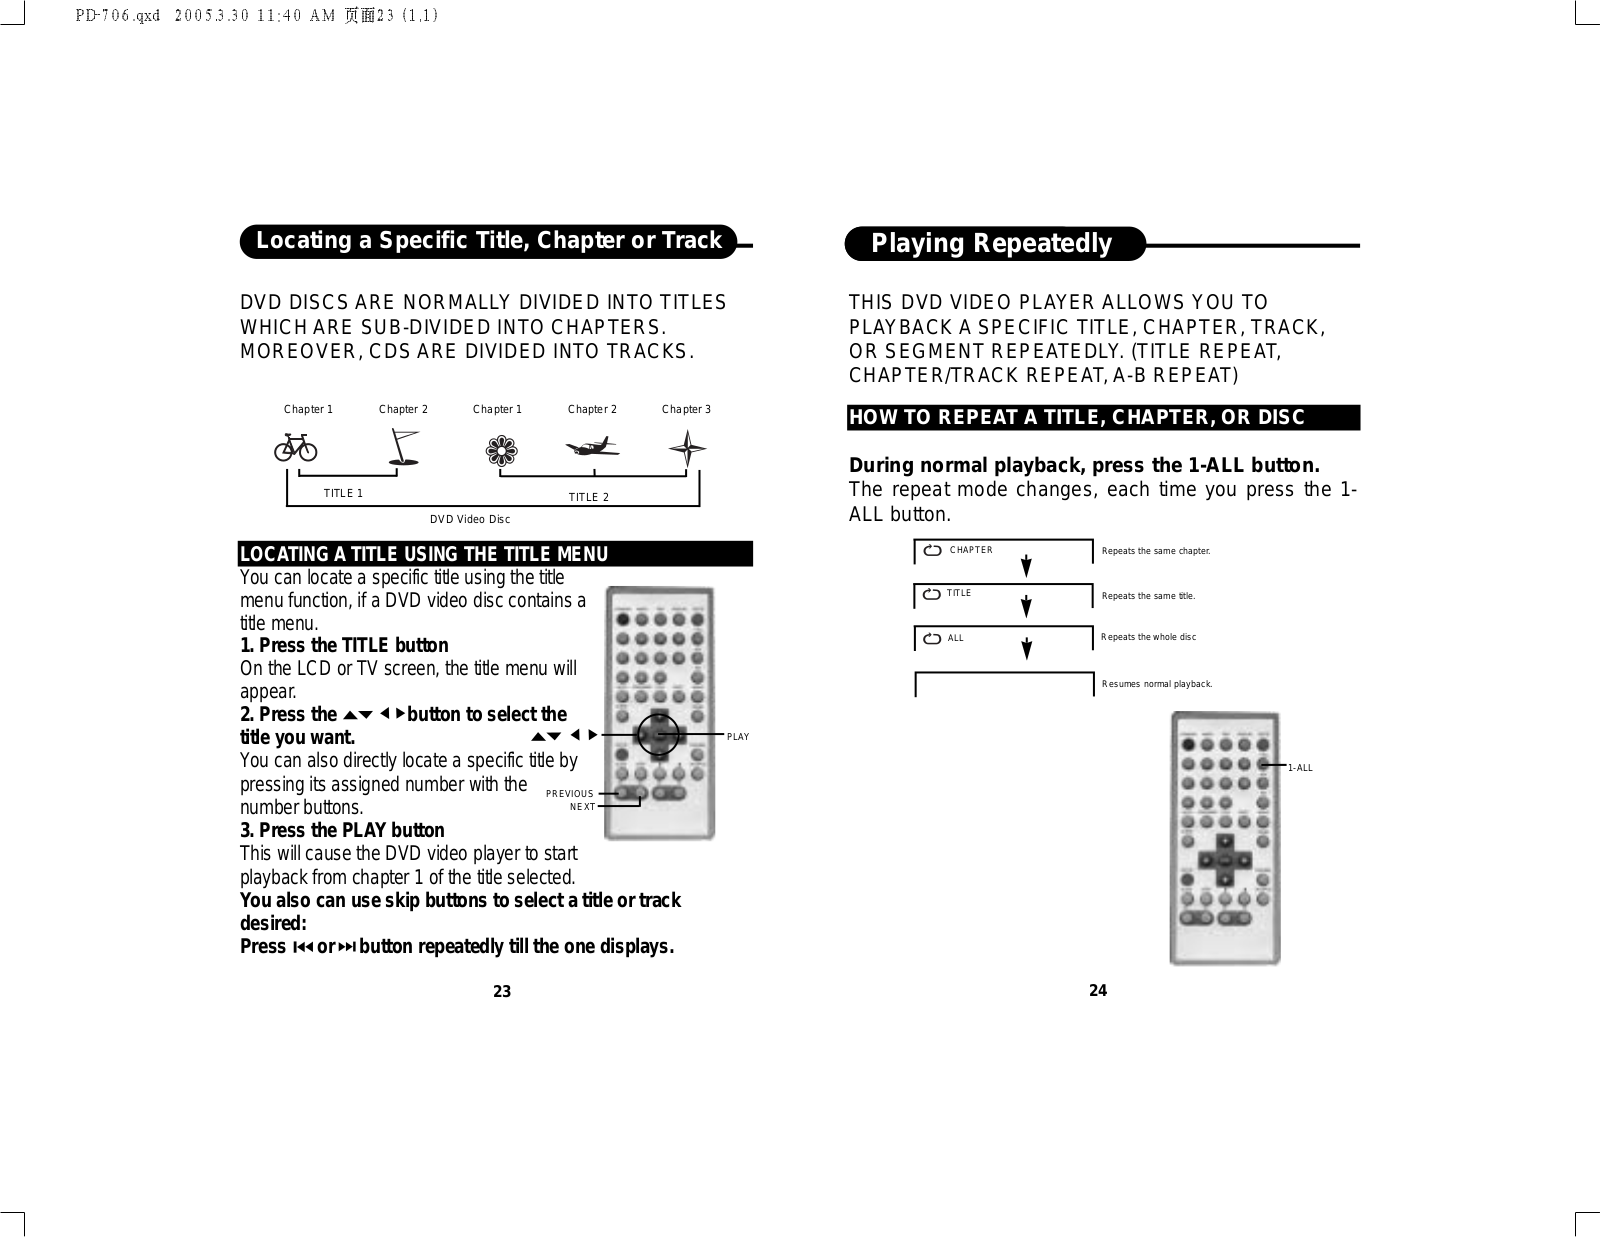
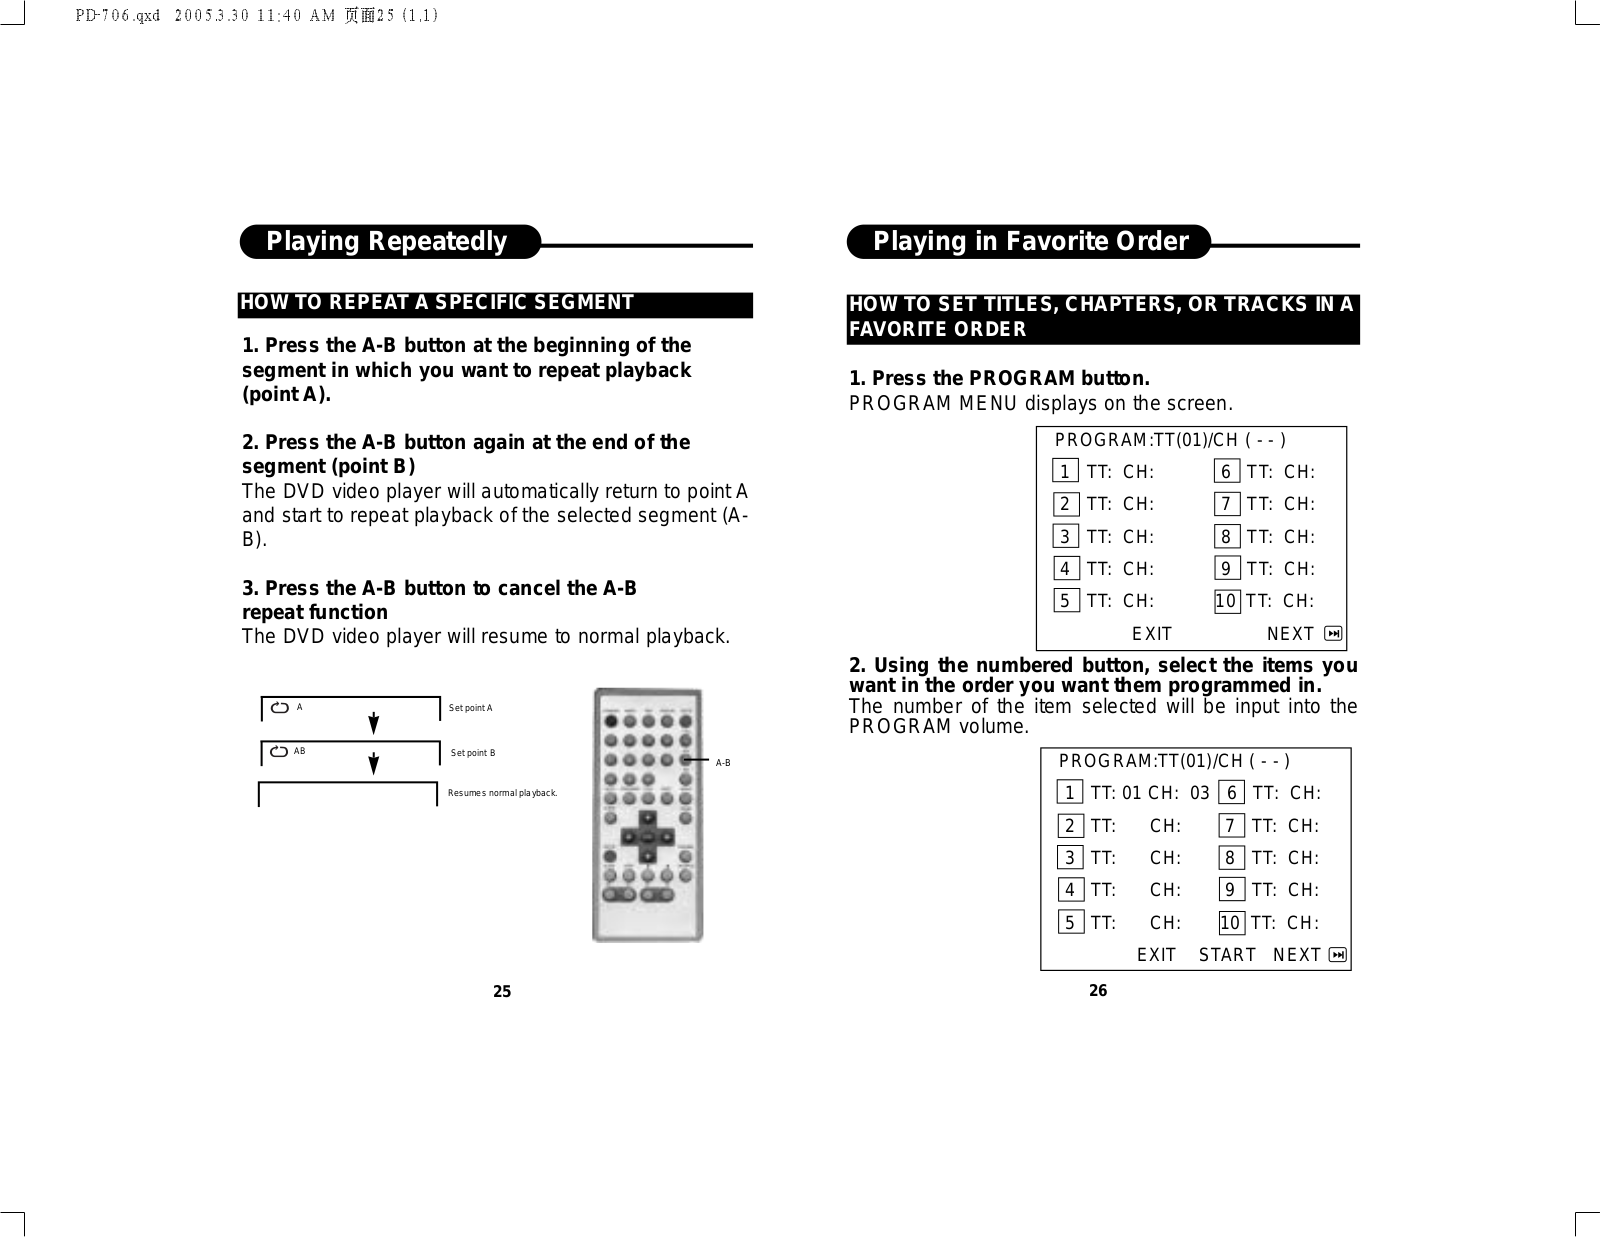
Denver MT-712 Operating Manual
...
Denver Operating Manual
Download
Specifications and Main Features
Frequently Asked Questions
User Manual
Download
Loading...
+
42
hidden pages
Unhide
You need points to download manuals.
1 point = 1 manual.
You can buy points or you can get point for every manual you upload.
Buy points
Upload your manuals
 Loading...