


138.88784
OPERATOR'S MANUAL
MANUEL DEL OPERADOR
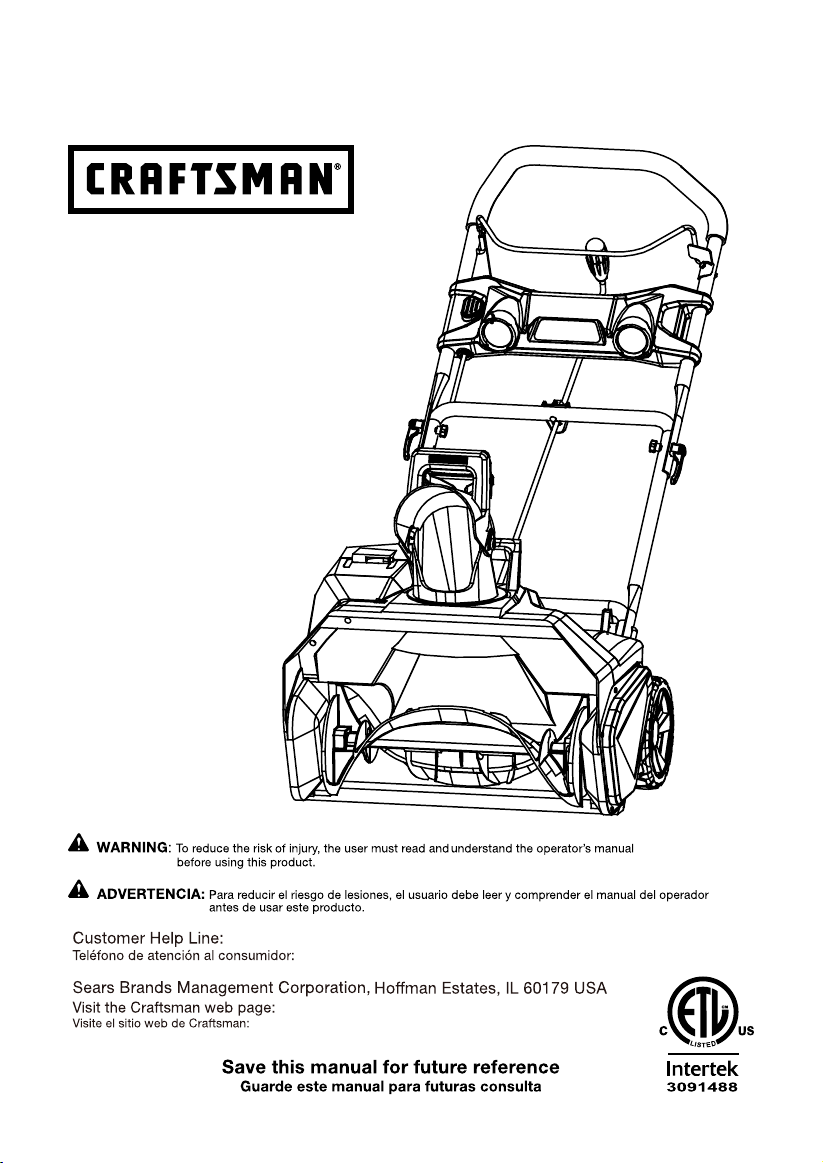
20 in. 40 VOLT
SNOW THROWER
508 mm (20 pulg.) 40 V
MÁQUINA QUITANIEVE
Model No.
138.88784
Número de modelo
138.88784
1-888-266-7096
1-888-266-7096
www.craftsman.com
www.craftsman.com

TABLE OF CONTENTS / ÍNDICE DE CONTENIDO
ENGLISH ESPAÑOL
■ Warranty.................................................................. 2
■ Introduction..............................................................2
■ Important Safety Instructions................................3-5
■ Symbols................................................................6-7
■ Specications..........................................................7
■ Assembly.................................................................8
■ Operation...........................................................9-10
■ Maintenance.....................................................11-12
■ Troubleshooting.....................................................13
■ Illustrated parts list...........................................14-17
■ Illustrations...........................................................i-vi
CRAFTSMAN LIMITED WARRANTY
FOR FOUR YEARS from the date of sale, this power tool is warranted against defects in material or workmanship.
FOR TWO YEARS from the sale date, a supplied battery pack or charger is warranted against material or
workmanship defects.
WITH PROOF OF SALE, a defective product will be replaced free of charge.
For warranty coverage details to obtain free replacement, visit the web page: www.craftsman.com/warranty
This warranty does not cover blades, which are expendable parts that can wear out from normal use within the
warranty period.
This warranty is void if this product is ever used while providing commercial services or if rented to another person.
This warranty gives you specic legal rights, and you may also have other rights which vary from state to state.
Sears Brands Management Corporation, Hoffman Estates, IL 60179
GARANTÍA DE CRAFTSMAN
DURANTE CUATRO AÑOS a partir de la fecha de adquisición, esta herramienta eléctrica cuenta con garantía frente
a defectos de material o mano de obra. Durante dos años y a partir de la fecha de compra, el conjunto de la batería
o el cargador que se proporciona está garantizado ante los defectos materiales o de fábrica.
Adjuntando la prueba de compra, se reemplazará gratuitamente el producto defectuoso.
Para detalles sobre la cobertura de la garantía para el reemplazo gratuito, visite la página web: www.craftsman.com/
warranty
Esta garantía no cubre las hojas, que son piezas consumibles que pueden desgastarse con el uso normal durante el
período de garantía.
Esta garantía se anula si se utiliza este producto durante la prestación de servicios comerciales o si se alquila a otra
persona.
Esta garantía le otorga derechos legales especícos y también puede tener otros derechos que varían de estado a
estado.
Sears Brands Management Corporation, Hoffman Estates, IL 60179
■ Garantía............................Sección de Inglés pág. 2
■ Introducción......................Sección de Inglés pág. 2
■ Instrucciones de seguridad importantes...............3-6
■ Símbolos............................................................. 7-8
■ Especicaciones.....................................................8
■ Armado....................................................................9
■ Funcionamiento...............................................10-11
■ Mantenimiento.................................................12-13
■ Corrección de problemas......................................14
■ Figura numeras (ilustraciones).............................i-vi
* * *
INTRODUCTION / INTRODUCCIÓN
This tool has many features for making its use more pleasant and enjoyable. Safety, performance, and
dependability have been given top priority in the design of this product making it easy to maintain and operate.
Esta herramienta ofrece numerosas características para hacer más agradable y placentero su uso. En el
diseño de este producto se ha conferido prioridad a la seguridad, el desempeño y la abilidad, por lo cual se
facilita su manejo y mantenimiento.
* * *
2 — English

IMPORTANT SAFETY INSTRUCTIONS
WARNING!
READ AND UNDERSTAND ALL
INSTRUCTIONS. Failure to follow all
instructions listed below and on the machine
may result in electric shock, re, and/or serious
personal injury.
FOLLOW THESE RULES WHILE
OPERATING THE SNOW THROWER
• Walk. Do not run.
• Verify that the snow thrower is not in contact
with anything before turning it on.
• Stay away from the discharge opening at all
times. Keep face, hands, and feet away from
concealed, moving, or rotating parts.
• Be attentive when using the snow thrower,
and stay aler t for holes in the terrain and
other hidden hazards or trafc.
• Do not use the snow thrower on a gravel or
crushed rock surface. Use extreme caution
when crossing gravel/crushed rock drives,
walks, or roads.
• Move up and down slopes when clearing
snow. Do not go across a slope. Use caution
when changing direction. Do not use this
snow thrower to clear snow from steep
slopes.
• Do not attempt to use the snow thrower on
a roof or on any steeply inclined slippery
surface.
• Do not operate the snow thrower if the
guards, plates, and other safety protective
devices are not in place.
• Do not operate the snow thrower near glass
enclosures, automobiles, trucks, window
wells, drop -offs, etc. without properly
adjusting the angle of the snow discharge.
Keep children and pets away from the work
area.
• Do not force or overload the snow thrower.
The snow thrower will perform better and
safer when it is used at the rate that it was
designed to work at.
• Do not operate the snow thrower at high
speeds on slippery surfaces. Look behind,
and exercise caution when backing up.
• Do not direct the discharge toward people,
and do not allow anyone to move in front of
the snow thrower while it is in use.
• Wear safety glasses or goggles that meet
ANSI Z87.1 standards, and wear ear/hearing
3 — English
protection when using this snow thrower.
• Use the snow thrower in daylight or in good
articial light.
• Avoid accidental start-ups. Remain in the
starting position when turning the snow
thrower on. The operator and the snow
thrower must be in a stable position during
start-up.
• Use the proper tool. Only use this snow
thrower for the purpose that it was designed
fo r.
• Do not overreach. Always keep proper
footing and balance.
• Hold the snow thrower with both hands while
it is in use. Keep a rm grip on the handles
or the grips.
• Keep hands, face, and feet away from all
moving parts. Do not touch or try to stop the
impeller while it is rotating.
• If the impeller does not rotate freely due to
frozen ice, thaw the snow thrower thoroughly
before attempting to use it.
• Keep the impeller clear of debris.
• Do not attempt to clear the impeller while
the motor is running. Turn the motor off and
remove the battery.
• Keep clothing and body parts away from the
impeller.
• Do not operate the motor at a faster speed
than necessary. Do not run the motor at high
speed while not clearing snow.
• Stop the motor when snow clearing is
delayed or when moving from one location to
another.
• Remove the battery when it is being
transported and when it is not in use.
• After striking a foreign object, turn the snow
thrower off and remove the battery, and then
inspect it for damage. Repair any damage
before restarting and using the snow thrower.
• If the snow thrower starts to vibrate
abnormally, stop the snow thrower
immediately and attempt to determine the
cause. Vibration is generally an indication of
danger.
• Stop the motor and remove the battery
whenever the operator is not in the operating
position, before unclogging the impeller, and
before making any repairs, adjustments, or
inspections.

IMPORTANT SAFETY INSTRUCTIONS
• Do not discharge snow onto public roads or
near moving trafc.
• Allow the snow thrower to run for a few
minutes after clearing snow in order to
prevent moving parts from freezing.
• Use only the manufacturer's original
replacement parts and accessories for this
snow thrower. The use of unauthorized parts
or accessories could lead to serious injury to
the user or damage to the snow thrower, and
will void the warranty.
• Do not use the snow thrower in the hand held
position. Do not pick up the snow thrower
while it is running. The snow thrower is
designed to travel along the ground.
GENERAL SAFETY RULES
• Verify that the snow thrower is secure while
transporting.
• Store the snow thrower in a dry area, locked
up or high enough to prevent unauthorized
use or damage, and out of the reach of
children.
• Do not douse or squirt the unit with water or
any other liquid. Keep handles dr y, clean,
and free of debris. Clean the snow thrower
after each use.
• If the labels on the snow thrower become
defaced or start to lift off, contact the toll-free
helpline, at 1- 888-266-7096.
• Keep these instructions in a safe place for
future reference. Refer to them often, and
use them to instruct other users. Anyone
who uses this snow thrower must read these
instructions carefully.
• Maintain the snow thrower with care. Follow
the instructions for lubricating and changing
accessories.
BATTERY & CHARGER
CAUTION!
Use only Craftsman replacement batteries;
other batteries may cause injury or damage to
the unit.
BATTERY SAFETY RULES
• Battery tools do not have to be plugged into
an electrical outlet; therefore, they are always
in operating condition. Be aware of possible
hazards when not using your battery tool or
4 — English
when changing accessories. Following this
rule will reduce the risk of electric shock, re,
or serious personal injury.
• Do not place battery tools or their batteries
near re or heat. This will reduce the risk of
explosion and possibly injury.
• Do not crush, drop or damage battery pack.
Do not use a battery pack or charger that
has been dropped or received a sharp blow.
A damaged battery is subject to explosion.
Properly dispose of a dropped or damaged
battery immediately.
• Batteries can explode in the presence of a
source of ignition, such as a pilot light. To
reduce the risk of serious personal injury,
never use any cordless product in the
presence of open ame. An exploded battery
can propel debris and chemicals. If exposed,
ush with water immediately.
• Do not charge battery tool in a damp or wet
location. Following this rule will reduce the
risk of electric shock.
• For best results, your batter y tool should be
charged in a location where the temperature
is more than 45°F but less than 104°F. To
reduce the risk of serious personal injury, do
not store outside or in vehicles.
• Under extreme usage or temperature
conditions, batter y leakage may occur. If
liquid comes in contact with your skin, wash
immediately with soap and water. If liquid
gets into your eyes, ush them with clean
water for at least 10 minutes, then seek
immediate medical attention. Following this
rule will reduce the risk of serious personal
injury.
• When battery pack is not in use, keep it away
from other metal objects like: paper clips,
coins, nails, screws, or other small metal
objects that can make a connection from
one terminal to another. Shorting the battery
terminals together may cause sparks, burns,
or a re.
• Always remove battery pack from your tool
when you are assembling par ts, making
adjustments, cleaning, or when not in
use. Removing battery pack will prevent
accidental starting that could cause serious
personal injury.
IMPORTANT SAFETY INSTRUCTIONS
• Always remove battery pack before storing
the device. When battery becomes fully
charged, unplug the charger from the power
supply and remove the batter y pack from the
charger.
• Always wear eye protection with side shields
marked to comply with ANSI Z87.1. Failure
to do so could result in objects being thrown
into your eyes and other possible serious
injuries.
• Keep batter y pack dry, clean, and free from
oil and grease. Always use a clean cloth
when cleaning. Never use brake uids,
gasoline, petroleum-based products, or any
solvents to clean batter y pack.
PROPER CARE FOR BATTERY
Off-season storage
To obtain the longest possible battery life, we
suggest the following:
• Remove the battery pack from the charger
once it is fully charged and ready for use.
For battery pack storage longer than 30
days:
• Store the battery pack where the temperature
is below 80°F and away from moisture.
• Store battery packs in a 30%-50% charged
condition.
• Every six months of storage, charge the pack
as normal.
CHARGER SAFETY RULES
• DO NOT ABUSE THE CHARGE CORD.
Never carry the charger by the cord.
• Do not use a damaged charger. Replace the
charger cords or the charger immediately.
• Keep the charger away from water, heat
sources (radiators, heaters, stoves, etc.),
ames, and chemicals.
• Make sure the battery pack is secured in the
charger before beginning operation.
• The battery pack will become slightly warm
to the touch while charging. This is normal
and does not indicate a problem.
• Do not place the charger and battery pack
in an area of extreme heat or cold. They will
work best at normal room temperature.
• When batteries become fully charged,
unplug the charger from the power supply
and remove the battery pack.
WARNING!
When transporting or servicing unit, always
remove the battery.
PROPOSITION 65
WARNING!
Some dust created by power sanding,
sawing, grinding, drilling, and other
construction activities contains chemicals
known to cause cancer, birth defects or
other reproductive harm. Some examples of
these chemicals are:
• lead from lead-based paints
• crystalline silica from bricks and cement
and other masonry products
• arsenic and chromium from chemically-
treated lumber
Your risk from these exposures varies,
depending on how often you do this type
of work. To reduce your exposure to these
chemicals: work in a well ventilated area,
and work with approved safety equipment,
such as dust masks that are specially
designed to lter out microscopic particles.
5 — English
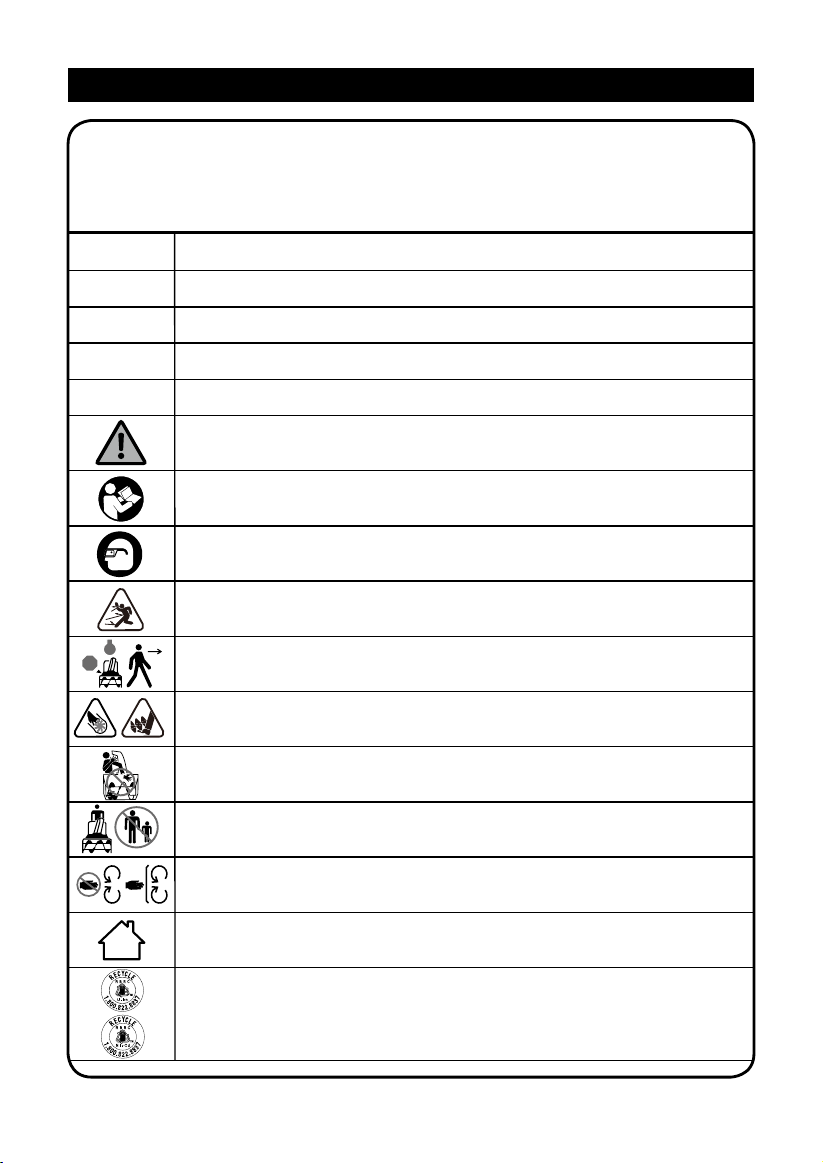
SYMBOLS
Some of the following symbols may be used on this product. Please study them and learn
their meaning. Proper interpretation of these symbols will allow you to operate the product
better and safer.
SYMBOL DESIGNATION/EXPLANATION
V Volts
A Amperes
Hz Hertz
W Watts
Hrs Hours
Precautions that involve your safety.
To reduce the risk of injury, user must read and understand user’s manual before
using this product.
Before beginning power tool operation, always wear safety goggles or safety
glasses with side shields.
Pay attention that bystanders are not injured through foreign objects thrown from
the snow thrower.
STOP
Stop the machine before leaving the machine.
STOP
Danger – Keep hands and feet away from spinning impeller. Spinning impeller
can cause severe injury.
Keep hands, feet away from the discharge area.
Keep bystanders a safe distance from the machine.
Stay away from moving parts, keep all guards and shields in place.
The charger is intended for indoor use only.
This product uses Lithium-ion (Li-ion) batteries. Local, state or federal laws may
prohibit disposal of batteries in ordinary trash. Consult your local waste authority
for information regarding available recycling and/or disposal options.
6 — English
SYMBOLS
The following signal words and meanings are intended to explain the levels of risk associated with this
product.
SYMBOL SIGNAL MEANING
DANGER Indicates an imminently hazardous situation, which, if not
avoided, will result in death or serious injury.
could result in death or serious injury.
may result in minor or moderate injury.
result in property damage.
WARNING
CAUTION
CAUTION
Indicates a potentially hazardous situation, which, if not avoided,
Indicates a potentially hazardous situation, which, if not avoided,
(Without Safety Alert Symbol) Indicates a situation that may
PRODUCT SPECIFICATIONS
Battery .....................................................................................................................40V Lithium-ion
No-load speed ................................................................................................... 1800 r/min. (RPM)
Clearing width .........................................................................................................................20 in.
Clearing depth ................................................................................................................up to 10 in.
Discharge distance .........................................................................................................up to 20 ft.
Impeller size ............................................................................................................................16 in.
Wheel size .................................................................................................................................7 in.
Unit Weight (without batteries) ...............................................................................................33 lbs
7 — English

ASSEMBLY
UNPACKING
This product requires assembly.
■ Carefully remove the product and any
accessories from the box. Make sure that all
items listed in the packing list are included.
■ Inspect the product carefully to make sure no
breakage or damage occurred during shipping.
■ Do not discard the packing material until
you have carefully inspected and satisfactorily
operated the product.
■ If any parts are damaged or missing, please
call 1-888-266-7096 for assistance.
PACKING LIST
■ Snow Thrower
■ Middle Handle
■ Chute Deector
■ 40V Battery
■ 40V Charger
■ (2) Chute Control Rod Pieces
■ (2) Cam Locks
■ (2) Wing Nuts
■ (2) Bolts
■ (2) Handle Knobs
■ (1) Hitch Pin
■ Operator’s Manual
WARNING!
If any parts are damaged or missing do
not operate this product until the parts are
replaced. Failure to heed this warning could
result in serious personal injury.
WARNING!
Do not attempt to modify this product or create
accessories not recommended for use with this
product. Any such alteration or modication
is misuse and could result in a hazardous
condition leading to possible serious personal
injury.
WARNING!
Do not insert battery pack until assembly
is complete. Failure to comply could result
in accidental starting and possible serious
personal injury.
WARNING!
To prevent accidental starting, do not make any
adjustments or installations with the battery
pack inserted.
8 — English
ASSEMBLING THE HANDLE
See Figure 2.
• Align the holes on the middle handle and the
lower handle. Insert the bolts, and use the
handle knobs to tighten them.
• Align the hole on the middle handle and
the upper handle. Insert the cam locks and
tighten them with the wing nuts provided.
ASSEMBLING THE DISCHARGE CHUTE
See Figure 3
Push the chute deector until the latching tabs
on both sides click into the restrict slots and
the position-joints on both sides click into the
keyed holes.
WARNING!
Make sure that the chute deector locks
completely onto the discharge chute. An
opening between the discharge chute and the
chute deector may allow foreign objects to be
picked up by the snow thrower and thrown in
the direction of the operator causing serious
bodily injury.
INSTALLING THE CHUTE CONTROL ROD
See Figure 4-8.
• Position the discharge chute so that it faces
forward.
NOTE: Align the arrow on the discharge chute
with the arrow on the housing.
• Align the holes on the directional chute arm
with the holes on the lower directional chute
arm. Inser t the hitch pin. Insert the end of
the chute control rod through the keyed hole
in the bracket that is attached to the top of
the middle handle.
• Ensure that the handle of the chute control
rod points upward, and insert the rod into the
keyed hole in the back of the housing.
• Firmly push the rod into the keyed hole in the
back of the housing until it snaps into place.
• Move the handle on the chute control rod to
ensure that it moves in the same direction as
the chute.

OPERATION
WARNING!
Do not allow familiarity with products to make
you careless. Remember that a careless
fraction of a second is sufcient to inict
serious injury.
WARNING!
Always wear eye protection with side shields
marked to comply with ANSI Z87.1. Failure to
do so could result in objects being thrown into
your eyes resulting in possible serious injury.
WARNING!
Always inspect snow thrower for missing or
damaged parts and blade for damage, uneven,
or excessive wear prior to use. Use of the
snow thrower with damaged or missing parts
can result in serious personal injury.
This product will accept Craftsman 40V lithiumion battery packs only.
For complete charging instructions, refer to the
Operator’s Manuals for your Craftsman battery
pack and charger models.
BATTERY PROTECTION FEATURES
Craftsman lithium-ion batteries are designed
with features that protect the lithium-ion cells
and maximize battery life.
If the tool stops during use, release the bail
switch to reset and resume operation. If the
tool still does not work, the battery needs to be
recharged.
WARNING!
Always remove battery pack(s) from your
tool when you are assembling parts, making
adjustments, cleaning, or when not in use.
Removing battery pack will prevent any chance
of accidental starting that could cause serious
personal injury.
TO INSTALL BATTERY PACK
See Figure 9.
• Open the battery compartment cover.
• Slide the battery down to lock it into position.
• Close the battery compartment cover.
WARNING!
Make sure the latch on the bottom of the
battery pack snaps in place and the battery
pack is fully seated and secure in the snow
thrower’s battery compartment before
beginning operation. Failure to securely seat
the battery pack could cause the battery pack
to fall out.
TO REMOVE BATTERY PACK
See Figure 9.
• Release your grip on the ON/OFF switch bar
lever to stop the snow thrower.
• Press and hold the batter y latch button at the
bottom of the battery pack.
• Remove batter y pack from the snow thrower.
POWERING ON AND OFF
See Figure 10.
• To power on, rst press the safety switch
button.
• While pressing the safety switch button
with one hand, use your other hand to
simultaneouly pull the ON/OFF switch bar
lever toward you. Once the machine powers
on, release the safety switch button and
proceed with operation. The snow thrower
can only be started by pressing the safety
switch button rst, followed by squeezing the
ON/OFF switch bar lever; reverse sequence
will not start the machine.
• To power off, release your grip on the ON/
OFF switch bar lever.
UTILIZING THE LED LIGHTS
See Figure 11.
• To utilize the LED light for nighttime snow
removal, activate the LED light switch.
NOTE: After you have nished using your
snow thrower, remember to turn off the light
switch.
9 — English

OPERATION
OPERATING TIPS
• Keep the area of operation free of foreign
objects that can become thrown by the
impeller. Perform a thorough inspection of
the area since some objects may be hidden
from view by surrounding snow. lf the snow
thrower hits an obstruction or picks up a
foreign object during use, stop the snow
thrower, remove the battery, remove the
obstruction, and inspect the unit for damage.
Repair or replace any damaged part before
restarting and operating the unit.
• Keep children, pets, and bystanders away
from the area of operation. Be aware that the
normal noise of the machine when turned
on may make it difcult for you to hear
approaching people.
• When moving the snow thrower, use the
wheels on one side as the pivot point.
Slightly tilt the snow thrower on this pivot
point to move it forward or backward.
• Start your clearing path outward, throwing
snow in a back and forth motion. To clear
in the opposite direction, pivot the snow
thrower on its wheels. Make sure to overlap
clearing paths.
• Note the wind direction. If possible, move
in the same direction as the wind so that
the snow is not thrown against the wind and
blown back into your face and onto the just
cleared path.
• Do not push the snow thrower with excessive
force. You should push the machine gently
and evenly in accordance with the unit's
throw rate.
• Some parts of the snow thrower may freeze
under extreme temperature conditions. Do
not attempt to operate the snow thrower
with frozen parts. If the parts freeze while
the snow thrower is in use, stop the snow
thrower, remove the battery, and inspect for
frozen parts. Free all parts before restarting
or operating the snow thrower. Never force
controls that have frozen.
• When working on pebbles, gravel, or
unpaved surfaces, avoid throwing loose
surface material along with the snow by
pushing down on the handle to raise the
scraper at the base of the unit above the
pebbles or gravel.
WARNING!
If the snow thrower hits a foreign object while
it is in use, the object could be thrown in
the direction of the operator or a bystander.
Thrown objects could cause serious personal
injury. Keep the area cleared free of all foreign
objects that may be picked up and thrown by
the impeller.
ADJUSTING THE DISCHARGE CHUTE AND
CHUTE DEFLECTOR
See Figure 12
• To adjust the discharge chute, rotate the
handle on the chute control rod in the
direction that you wish to direct the snow
stream.
• To adjust the chute deector (and therefore
the height of the snow stream), squeeze the
trigger and raise or lower the chute deector.
WARNING!
Never direct the snow discharge chute at
the operator, bystanders, vehicles, or nearby
windows. The discharged snow and foreign
objects accidentally picked up and thrown by
the snow thrower can cause serious damage
and personal injury.
10 — English

MAINTENANCE
WARNING!
Make sure to turn off the switch and remove
the battery before performing any maintenance
task on your snow thrower.
LIFETIME LUBRICATION
Lubrication is not necessary and may damage
the unit. The snow thrower is lubricated for
lifetime use at the factory before shipment.
GENERAL MAINTENANCE TIPS
• Do not attempt to repair the machine unless
you have the proper tools and instructions
for disassembly and repair of the machine.
• Check bolts and screws at frequent intervals
for proper tightness to ensure that equipment
is in safe working condition.
• After each snow removal session, run the
snow thrower for a few minutes to prevent
the collector/impeller from freezing. Shut
off the motor, wait for all revolving parts to
stop completely, and wipe residual ice and
snow off the unit. Rotate the chute deector
several times to remove any excess snow.
REPLACING THE SCRAPER BAR
See Figures 13.
• The scraper bar is located at the base of the
snow thrower beneath the impeller housing.
• Remove the 5 screws that secure the right
side cover to the frame of the snow thrower.
Remove the right side plate.
• Remove the 5 screws that secure the left
side plate to the frame of the snow thrower.
Remove the left side plate.
• Detach the worn scraper bar from the snow
thrower by removing the 3 screws that hold it
in place.
• Install the new scraper bar and fasten it
securely to the snow thrower with 3 screws.
• Reinstall the right side cover and left side
cover.
REPLACING THE DRIVE BELT
See Figures 14.
• Remove the 5 screws that secure the left
side cover to the frame of the snow thrower.
Remove the cover.
• Remove the old belt from the small pulley
and large pulley.
• Loop one end of the new belt over the small
pulley.
• Install the new belt by rotating the impeller
with the lef t hand while positioning the belt
on the large pulley with the right hand.
• Install the left side cover, and secure it using
the 5 screws.
REPLACING THE IMPELLER
See Figures 15.
• Remove the 5 screws that secure the right
side cover to the frame of the snow thrower.
• Remove the axle nut.
• Remove the 5 screws that secure the left
side cover to the frame of the snow thrower.
• Remove the belt.
• Using a 23 mm socket, remove the large
pulley.
• Remove the 5 screws that secure the left
side plate and remove the left side plate.
• Pull the axle and remove the old impeller.
• Install the new impeller.
• Reinstall the left side plate, large pulley, belt
and left side cover.
• Reinstall the nut and right side cover.
11 — English
 Loading...