

Page 1
Page 2

Page 3

Contents
Welcome to Corel VideoStudio Pro X5 . . . . . . . . . . . . . . . . . . . . . . . . . . . . 2
New Features and Enhancements . . . . . . . . . . . . . . . . . . . . . . . . . . . . . . . . 4
Getting to Know the Workspace . . . . . . . . . . . . . . . . . . . . . . . . . . . . . . . . . 7
Create a Video Now . . . . . . . . . . . . . . . . . . . . . . . . . . . . . . . . . . . . . . . . . . 8
Quick Tutorials . . . . . . . . . . . . . . . . . . . . . . . . . . . . . . . . . . . . . . . . . . . . . . 9
Photo Editing for Videographers . . . . . . . . . . . . . . . . . . . . . . . . . . . . . . . . 16
Contents | 1
Page 4
Welcome to Corel VideoStudio Pro X5
Create studio-quality HD movies with the powerful yet
easy-to-use Corel® VideoStudio® Pro X5. The workspace
guides you through a simple three-step workflow while
providing a complete set of video editing tools.
Corel VideoStudio Pro X5 also incorporates the latest
advances in visual computing for faster rendering of HD
content.
• Import video from various devices and in diverse
formats, including BDMV™ and AVCHD™.
• Make use of a wide range of tools for enhancing and
assembling movies. Apply smooth transitions and
awesome filters and effects.
• Export your video to devices such as iPod®, iPhone®
and PlayStation Portable® (PSP) or upload to
Vimeo®, YouTube™, Facebook® or Flickr®. You can
also burn video to DVD and Blu-ray Disc™ or output
AVCHD™ on standard DVD.
• Take advantage of advanced hardware acceleration
support that enhances the speed at which you can
work with resource-intensive HD projects.
2 | Corel VideoStudio Pro X5 Getting Started Guide
Workflow efficiency, advanced editing tools and
processing speed offer both the novice and well-seasoned
professional an immensely enjoyable movie making
experience.
Get started with HD movie making!
Learn the basics, explore a great set of new features and
complete some fun projects right away by using this easyto-follow Getting Started Guide.
Page 5

Installing Corel VideoStudio
Pro X5
To access the Corel Guide
• In the upper-right corner of the application window,
click the Help and product information button.
To install Corel VideoStudio Pro X5
1 Close all applications.
2 Insert the DVD in the drive. If the setup does not start
automatically, navigate to the DVD drive on your
computer, and double-click Setup.exe.
3 Follow the instructions on your screen.
The Corel Guide
Get the most up-to-date information and content. You can
find tips and tricks, download new styles and content for
your projects, explore new ways to share your photos and
videos, and access free, up-to-the-minute updates for your
software.
Get more and learn more by registering your
software
You will be asked to register your software after installation
to get the latest product updates, free downloads,
tutorials, tips and tricks, and special offers!
Join community sites
A quick search on the Internet will connect you with many
Corel communities and user groups. For a start, visit
www.photovideolife.com to meet other users, ask
questions, and share tips, ideas and projects!
Welcome to Corel VideoStudio Pro X5 | 3
Page 6
New Features and Enhancements
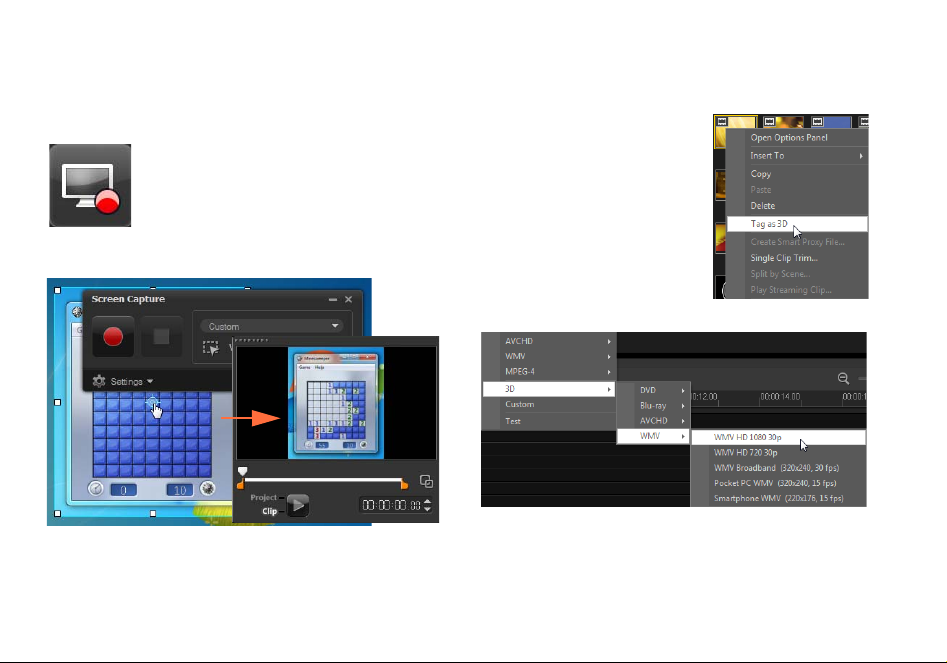
Screen Capture
Prepare software demos and tutorials, save
streaming content, record gameplay and
webcam meetings. The new screen capture
feature lets you record and create smooth
videos of everything you see and hear on
your computer!
Specify the area to capture. You can capture part of the screen
or the entire desktop.
4 | Corel VideoStudio Pro X5 Getting Started Guide
Output 3D Video
Create a 3D title in a few steps
and enjoy your video on any 3D
player! You can now tag native
3D content as 3D and set the
format for displaying the
content.
Cut and trim, and when you are
done, quickly output to a 3D file!
Page 7

PSP Layer Support
Perform layer editing of Corel® PaintShop™ Pro (PSP)
images in Corel VideoStudio Pro X5. When you drag a
multilayered PaintShop Pro image to the timeline, each
layer is added to a separate track. By applying effects and
filters to individual layers or tracks, you can produce
amazing custom effects and enhancements.
HTML5 Authoring
You have the power and versatility of
HTML5 right in your hands...
Select New HTML5 Project from the File
menu to open the application in HTML5
mode. This allows you to apply HTML5
compliant attributes to your video, add
web links, select cue and chapter pointers, and output
your video project as an HTML5 website or Web object.
New Features and Enhancements | 5
Page 8

Instant Project tab in Library
Improved template management allows you to work more
efficiently. The Instant Project tab in the Library organizes
sample templates in process-oriented folder categories:
Beginning, Middle, Ending, Complete and Custom.
Downloaded templates are automatically added to the
Custom folder or to a predefined location.
When exporting a
project as a
template, you can
specify one of the
default Instant
Project categories
as target location.
6 | Corel VideoStudio Pro X5 Getting Started Guide
Choose a track to render
When you output your
project, you can choose
to render only the tracks
you need. Use the Show/
Hide tracks option in the
timeline to render only
visible tracks and hide
tracks that you do not
want to render.
Choose attributes
to paste
After copying clip
attributes, you have the
option to paste a selected
set of attributes. Select
Paste Optional Attributes
from the context menu to
select the attributes to
paste. These attributes
vary depending on the
media type.
Page 9

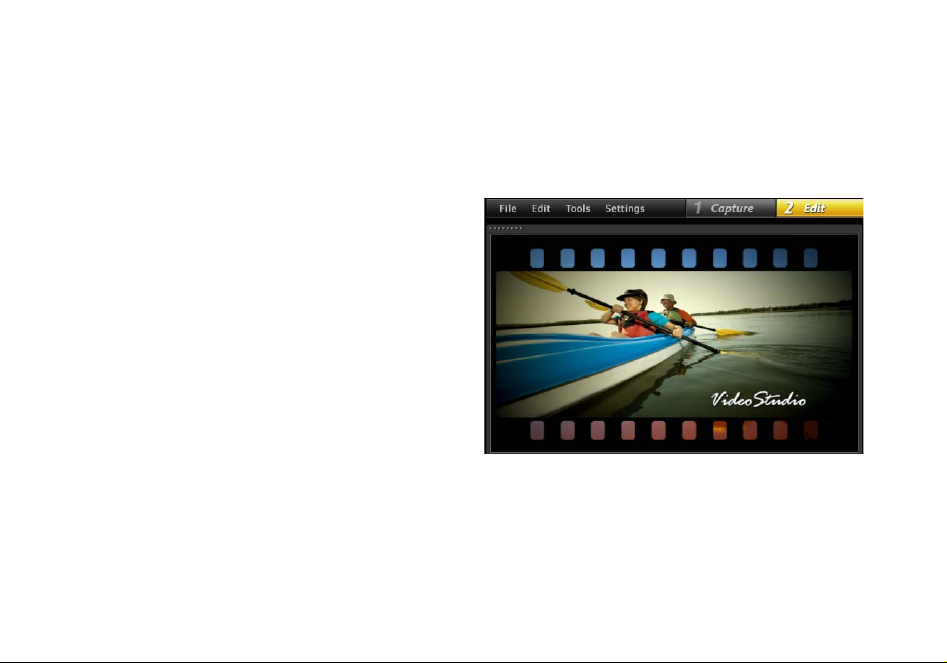
Getting to Know the Workspace
Corel VideoStudio Pro X5 provides unparalleled ease of
use. The three main steps of most video productions —
Capture, Edit and Share — are neatly arranged so that you
can work in a simple and intuitive environment.
Capture
In the Capture step, record from a connected camera, scan
a DV source, or import from digital media, such as AVCHD.
Share
To complete your project, choose an output destination in
the Share step. You can save to a file, transfer to a device,
or upload to social networking sites.
Edit
Most of the excitement and challenges of video
production happen in the Edit step. It is here that you put
together your movie by modifying and arranging clips. You
can add text, effects, transitions, audio and a lot more.
Getting to Know the Workspace | 7
Page 10

Create a Video Now
Let’s quickly create a movie!
Capture video from a camera
Connect your camcorder or
camera to your computer. If you
have a tape-based DV or HDV
camcorder, connect an IEEE1394
(FireWire®) cable and select
Capture Video. If you have an
AVCHD or other camcorder that
records to memory or hard drive, connect with USB, and
select Import from Digital Media.
Arrange video clips, add titles and effects
Drag your video, photo, and
audio clips from the Library
to the timeline. You can also
apply titles, transitions, filters
and effects.
Double click a clip in the
timeline to modify it.
8 | Corel VideoStudio Pro X5 Getting Started Guide
Drag the end of the clip
to adjust the duration if
needed.
In the Options Panel, edit the attributes of clips, as well as
the transitions and filters that are added to the timeline.
Share your video
Choose the output destination in the Share step and select
an output format.
To create a disc by using the disc authoring wizard, click
Create Disc and select a disc format.
To upload your video to the Web, click Upload to Web,
select the target website and the output format.
Page 11

Quick Tutorials
Screen Recording
Use the screen capture feature to create a simple demo on
how to change the size of desktop icons. It is a good idea
to prepare a script and practice your presentation a
number of times before you record. If you are recording
audio, make sure that your microphone is working
properly.
To begin, clear your desktop and launch Corel VideoStudio
Pro X5.
To record a video from your screen
1 Click the Record/Capture Option button .
The Record/Capture Option dialog box opens.
2 Click Screen Capture.
The application is minimized except for the Screen
Capture toolbar.
3 Drag the desktop nodes and crosshairs to define a
smaller capture area near the desktop icons.
Tip: Clicking Settings in the Screen Capture toolbar allows
you to modify capture settings. For this tutorial, we will use
the default settings.
Quick Tutorials | 9
Page 12

4 Click the Start/Resume Recording button to begin
recording.
Tip: You can press F11 to pause and resume recording.
A countdown displays.
5 When recording begins, follow the steps below.
Step 1 - Right-click on the desktop.
Step 2 - From the context menu, choose View.
Step 3 - In the submenu, select Large icons.
The changes are applied.
10 | Corel VideoStudio Pro X5 Getting Started Guide
6 Press F10 or click the Stop button to stop recording.
A message appears to prompt you when the capture
is completed.
7 Click OK.
8 Preview and enhance your demo video by adding
overlay and title clips.
Page 13

Animated Photo Layers
Editing PaintShop Pro image layers in the timeline will
definitely spark your imagination. In this tutorial, you will
learn how to add motion to a photo in a few steps!
To edit photo layers in the timeline:
1 Open a new project and add a background video to
the video track.
2 Drag a multilayered .pspimage file from the Library to
the timeline overlay tracks. Each layer becomes a
separate track.
You can also right-click the photo thumbnail in the
Library and select the target track location.
3 Delete layers that you do not need.
Quick Tutorials | 11
Page 14

4 Rearrange the location of the remaining layers and
adjust their duration.
5 Resize the picture elements and adjust their position
on the screen.
6 Create motion by editing Direction/Style in the
Options Panel.
[
12 | Corel VideoStudio Pro X5 Getting Started Guide
7 Add filters to each element by dragging thumbnails
from the Library to the overlay tracks.
8 Preview your project.
Page 15

HTML5 Web Page
Corel VideoStudio Pro X5 is now a visual editor for HTML5!
You can generate an animated HTML5 Web page without
any programming knowledge. All you need to do is export
your project as an HTML5 folder.
In this tutorial, you will learn how to create a simple
HTML5 Web page.
Step 1: Start a new HTML5 Project
1 Click File and select New HTML 5 Project.
A message box informs you that after your project is
exported to the HTML5 format, all effects and clips in
background tracks will be rendered to one video file.
2 Click OK.
The workspace switches to HTML5 mode.
Note: In HTML5 mode, only the features that are
supported by HTML5 are enabled.
Step 2: Edit your video
1 Drag a background video clip to Background
Track # 1.
You can use the Tra ck Man ag er to add more
background tracks and insert other video clips.
Note: In HTML5 mode, overlay tracks can have only
image, color, and title clips. Video is inserted in the
background tracks.
2 Click Title and add title clips to the title and overlay
tracks. Modify the titles as needed and adjust their
duration.
Quick Tutorials | 13
Page 16

3 In the Preview Window, arrange the layout of your
HTML5 Web page by moving the title and video clips
into place.
4 Add music to the voice track and adjust duration.
You are now ready to add interactivity to your project.
Step 3: Add links
1 Right-click a title clip in the overlay track and select
Add Link.
14 | Corel VideoStudio Pro X5 Getting Started Guide
The Add Link dialog box appears.
2 Select Enter the URL link and type a valid URL link so
that you can accurately preview your HTML5 project.
3 Click OK.
Repeat the same process to add other links. You can add
links based on cue and chapter points by selecting Select
from cue/chapter point in the Add Link dialog box. When
you are done, preview your project.
Page 17

Step 4: Export to HTML5
1 In the Share step, click Create HTML5 File.
The Create HTML5 Files dialog box appears.
2 Provide a folder location and project folder name.
Select HD [16:9] under Project dimensions for now.
Note: Select Flatten audio and background video if
your browser supports only a single video/audio track.
3 Click OK.
After rendering your project, a message box informs
you that your project has been successfully exported
as an HTML5 folder. Click OK.
Step 5: Preview in browser
1 Navigate to the HTML5 folder and open it.
2 Double-click the Index file.
3 Play your video and click the links to check if they are
working properly.
Quick Tutorials | 15
Page 18

Photo Editing for Videographers
Add polish to your video productions with
®
Corel
PaintShop™ Pro
Video hobbyists have long known that the best videos also
make creative use of custom images and graphics.
Corel PaintShop Pro is
an excellent companion
tool for creating:
• custom titles and
title masks
•"lower-third"
graphics for names
and subtitles
•objects, overlays
and frames
Visit www.corel.com for more information.
16 | Corel VideoStudio Pro X5 Getting Started Guide
Copyright © 2012 Corel Corporation. All rights reserved. Corel
and the Corel logo, VideoStudio Pro and PaintShop are
trademarks or registered trademarks of Corel Corporation in
Canada, the U.S. and/or other countries. AVCHD and the
AVCHD logo are trademarks or registered trademarks of
Panasonic Corporation and Sony Corporation. Blu-ray and Bluray Disc are trademarks or registered trademarks of Blu-ray
Disc Association (BDA). Facebook is a registered trademark of
Facebook, Inc. YouTube is a registered trademark of Google
Inc. Flickr is a registered trademark of Yahoo! Inc. Windows
and the Windows logo are trademarks or registered
trademarks of Microsoft Corporation. Other products, font
and company names and logos may be trademarks or
registered trademarks of their respective owners.
 Loading...