

Page 1
Page 2

Corel® PaintShop® Pro X8 User Guide
Page 3

Contents
Welcome . . . . . . . . . . . . . . . . . . . . . . . . . . . . . . . . . . . . . . . 1
What’s new in Corel PaintShop Pro X8 . . . . . . . . . . . . . . . . . . . . . 1
Installing and uninstalling Corel programs . . . . . . . . . . . . . . . . . . . 5
Starting and exiting the program. . . . . . . . . . . . . . . . . . . . . . . . . . 6
Registering Corel products. . . . . . . . . . . . . . . . . . . . . . . . . . . . . . . 7
Updates and messages . . . . . . . . . . . . . . . . . . . . . . . . . . . . . . . . . 8
Corel Support Services. . . . . . . . . . . . . . . . . . . . . . . . . . . . . . . . . . 8
About Corel . . . . . . . . . . . . . . . . . . . . . . . . . . . . . . . . . . . . . . . . . 9
The digital workflow . . . . . . . . . . . . . . . . . . . . . . . . . . . . . 11
Learning how to use Corel PaintShop Pro . . . . . . . . . . . . . 17
Documentation conventions . . . . . . . . . . . . . . . . . . . . . . . . . . . . 17
Using the Help system. . . . . . . . . . . . . . . . . . . . . . . . . . . . . . . . . 19
Corel PaintShop Pro X8 User Guide PDF. . . . . . . . . . . . . . . . . . . . 20
Using the Learning Center palette . . . . . . . . . . . . . . . . . . . . . . . . 20
Learning with video tutorials . . . . . . . . . . . . . . . . . . . . . . . . . . . . 22
Using Web-based resources. . . . . . . . . . . . . . . . . . . . . . . . . . . . . 23
Workspace tour . . . . . . . . . . . . . . . . . . . . . . . . . . . . . . . . . 25
Exploring the workspaces . . . . . . . . . . . . . . . . . . . . . . . . . . . . . . 26
Switching between workspaces . . . . . . . . . . . . . . . . . . . . . . . . . . 31
Choosing a workspace color . . . . . . . . . . . . . . . . . . . . . . . . . . . . 31
Using palettes . . . . . . . . . . . . . . . . . . . . . . . . . . . . . . . . . . . . . . . 32
Using toolbars. . . . . . . . . . . . . . . . . . . . . . . . . . . . . . . . . . . . . . . 34
Using tools . . . . . . . . . . . . . . . . . . . . . . . . . . . . . . . . . . . . . . . . . 36
Customizing toolbars and palettes. . . . . . . . . . . . . . . . . . . . . . . . 42
Using dialog boxes . . . . . . . . . . . . . . . . . . . . . . . . . . . . . . . . . . . 44
Contents i
Page 4

Viewing images . . . . . . . . . . . . . . . . . . . . . . . . . . . . . . . . . . . . . 49
Using shortcut keys. . . . . . . . . . . . . . . . . . . . . . . . . . . . . . . . . . . 53
Using context menus . . . . . . . . . . . . . . . . . . . . . . . . . . . . . . . . . 54
Using rulers, grids, and guides . . . . . . . . . . . . . . . . . . . . . . . . . . 55
Getting started. . . . . . . . . . . . . . . . . . . . . . . . . . . . . . . . . . 61
Getting photos into Corel PaintShop Pro . . . . . . . . . . . . . . . . . . . 62
Connecting with image scanners. . . . . . . . . . . . . . . . . . . . . . . . . 63
Opening and closing images . . . . . . . . . . . . . . . . . . . . . . . . . . . . 64
Saving images. . . . . . . . . . . . . . . . . . . . . . . . . . . . . . . . . . . . . . . 66
Creating images . . . . . . . . . . . . . . . . . . . . . . . . . . . . . . . . . . . . . 71
Viewing images and image information . . . . . . . . . . . . . . . . . . . 78
Capturing images from the computer screen. . . . . . . . . . . . . . . . 81
Zooming and panning . . . . . . . . . . . . . . . . . . . . . . . . . . . . . . . . 83
Cutting, copying, and pasting . . . . . . . . . . . . . . . . . . . . . . . . . . . 86
Copying images into other applications . . . . . . . . . . . . . . . . . . . . 89
Undoing and redoing actions . . . . . . . . . . . . . . . . . . . . . . . . . . . 90
Repeating commands . . . . . . . . . . . . . . . . . . . . . . . . . . . . . . . . . 95
Deleting images . . . . . . . . . . . . . . . . . . . . . . . . . . . . . . . . . . . . . 96
Files supported by Corel PaintShop Pro . . . . . . . . . . . . . . . . . . . . 96
Reviewing, organizing,
and finding photos. . . . . . . . . . . . . . . . . . . . . . . . . . . . . . 101
Setting up the Manage workspace . . . . . . . . . . . . . . . . . . . . . . 101
Browsing folders for photos . . . . . . . . . . . . . . . . . . . . . . . . . . . 105
Finding images on your computer . . . . . . . . . . . . . . . . . . . . . . . 108
Working with saved searches . . . . . . . . . . . . . . . . . . . . . . . . . . 110
Adding keyword tags to images . . . . . . . . . . . . . . . . . . . . . . . . 111
Viewing photos by tags. . . . . . . . . . . . . . . . . . . . . . . . . . . . . . . 113
Using the calendar to find images . . . . . . . . . . . . . . . . . . . . . . . 114
Finding people in your photos. . . . . . . . . . . . . . . . . . . . . . . . . . 115
Adding location information . . . . . . . . . . . . . . . . . . . . . . . . . . . 121
ii Corel PaintShop Pro X8 User Guide
Page 5

Working with thumbnails in the Manage workspace . . . . . . . . . 127
Capturing and applying edits to multiple photos . . . . . . . . . . . . 132
Displaying and editing photo information . . . . . . . . . . . . . . . . . 135
Using Quick Review to review photos . . . . . . . . . . . . . . . . . . . . 138
Working with trays . . . . . . . . . . . . . . . . . . . . . . . . . . . . . . . . . . 139
Using the Adjust workspace . . . . . . . . . . . . . . . . . . . . . . 143
Opening the Adjust workspace . . . . . . . . . . . . . . . . . . . . . . . . . 144
Working in the Adjust workspace . . . . . . . . . . . . . . . . . . . . . . . 144
Tools and features in the Adjust workspace. . . . . . . . . . . . . . . . 145
Working with camera RAW photos . . . . . . . . . . . . . . . . . 149
Supported RAW file formats . . . . . . . . . . . . . . . . . . . . . . . . . . . 149
Using the Camera RAW Lab. . . . . . . . . . . . . . . . . . . . . . . . . . . . 150
Applying edits to multiple RAW photos . . . . . . . . . . . . . . . . . . . 152
Converting RAW photos to another file format . . . . . . . . . . . . . 152
Working with XMP files. . . . . . . . . . . . . . . . . . . . . . . . . . . . . . . 153
Adjusting images. . . . . . . . . . . . . . . . . . . . . . . . . . . . . . . 155
Fixing common problems . . . . . . . . . . . . . . . . . . . . . . . . . . . . . 156
Rotating images . . . . . . . . . . . . . . . . . . . . . . . . . . . . . . . . . . . . 160
Cropping images. . . . . . . . . . . . . . . . . . . . . . . . . . . . . . . . . . . . 162
Straightening images . . . . . . . . . . . . . . . . . . . . . . . . . . . . . . . . 168
Correcting photographic perspective . . . . . . . . . . . . . . . . . . . . . 170
Making basic photo corrections automatically . . . . . . . . . . . . . . 172
Brightening images . . . . . . . . . . . . . . . . . . . . . . . . . . . . . . . . . . 177
Darkening images . . . . . . . . . . . . . . . . . . . . . . . . . . . . . . . . . . . 178
Removing purple fringe. . . . . . . . . . . . . . . . . . . . . . . . . . . . . . . 178
Removing digital noise . . . . . . . . . . . . . . . . . . . . . . . . . . . . . . . 179
Removing chromatic aberrations . . . . . . . . . . . . . . . . . . . . . . . . 183
Using Lens Correction to fix distortion, chromatic aberration, and
vignetting . . . . . . . . . . . . . . . . . . . . . . . . . . . . . . . . . . . . . . . . . 187
Correcting lens distortions. . . . . . . . . . . . . . . . . . . . . . . . . . . . . 190
Contents iii
Page 6

Adjusting white balance . . . . . . . . . . . . . . . . . . . . . . . . . . . . . . 192
Adjusting brightness, contrast, and clarity . . . . . . . . . . . . . . . . . 195
Adjusting hue and saturation . . . . . . . . . . . . . . . . . . . . . . . . . . 208
Adding or removing noise. . . . . . . . . . . . . . . . . . . . . . . . . . . . . 212
Controlling depth of field . . . . . . . . . . . . . . . . . . . . . . . . . . . . . 221
Blurring images. . . . . . . . . . . . . . . . . . . . . . . . . . . . . . . . . . . . . 224
Sharpening images . . . . . . . . . . . . . . . . . . . . . . . . . . . . . . . . . . 227
Softening images . . . . . . . . . . . . . . . . . . . . . . . . . . . . . . . . . . . 230
Resizing images . . . . . . . . . . . . . . . . . . . . . . . . . . . . . . . . . . . . 231
Retouching and restoring images. . . . . . . . . . . . . . . . . . . 239
Removing red-eye . . . . . . . . . . . . . . . . . . . . . . . . . . . . . . . . . . . 240
Applying cosmetic changes . . . . . . . . . . . . . . . . . . . . . . . . . . . . 243
Removing scratches. . . . . . . . . . . . . . . . . . . . . . . . . . . . . . . . . . 248
Removing flaws and objects . . . . . . . . . . . . . . . . . . . . . . . . . . . 250
Using Magic Fill to erase image areas . . . . . . . . . . . . . . . . . . . . 253
Moving selected areas with Magic Move . . . . . . . . . . . . . . . . . . 254
Erasing image areas . . . . . . . . . . . . . . . . . . . . . . . . . . . . . . . . . 256
Cutting out image areas . . . . . . . . . . . . . . . . . . . . . . . . . . . . . . 261
Retouching image areas by using brushes . . . . . . . . . . . . . . . . . 263
Recoloring image areas for a realistic effect . . . . . . . . . . . . . . . . 266
Replacing colors, gradients, or patterns . . . . . . . . . . . . . . . . . . . 269
Filling areas with colors, gradients, or patterns . . . . . . . . . . . . . 271
Flipping and mirroring images. . . . . . . . . . . . . . . . . . . . . . . . . . 274
Adding borders. . . . . . . . . . . . . . . . . . . . . . . . . . . . . . . . . . . . . 275
Scaling photos by using Smart Carver . . . . . . . . . . . . . . . . . . . . 276
Scaling and transforming photos using the Pick tool . . . . . . . . . 279
Resizing the canvas . . . . . . . . . . . . . . . . . . . . . . . . . . . . . . . . . . 283
Merging exposures and content. . . . . . . . . . . . . . . . . . . . 285
Understanding HDR . . . . . . . . . . . . . . . . . . . . . . . . . . . . . . . . . 285
Taking photos for HDR processing. . . . . . . . . . . . . . . . . . . . . . . 287
iv Corel PaintShop Pro X8 User Guide
Page 7

Combining photos by using HDR Exposure Merge . . . . . . . . . . . 288
Using Single RAW Photo to create an HDR effect. . . . . . . . . . . . 295
Merging batches of photos into HDR images. . . . . . . . . . . . . . . 296
Combining photos with Photo Blend. . . . . . . . . . . . . . . . . . . . . 298
Working with selections . . . . . . . . . . . . . . . . . . . . . . . . . 303
Creating selections . . . . . . . . . . . . . . . . . . . . . . . . . . . . . . . . . . 304
Hiding and displaying the selection marquee. . . . . . . . . . . . . . . 315
Moving, clipping, and rotating selections . . . . . . . . . . . . . . . . . 316
Modifying selections . . . . . . . . . . . . . . . . . . . . . . . . . . . . . . . . . 320
Inverting and clearing selections . . . . . . . . . . . . . . . . . . . . . . . . 326
Using feathering with selections . . . . . . . . . . . . . . . . . . . . . . . . 327
Using anti-aliasing with selections . . . . . . . . . . . . . . . . . . . . . . . 329
Modifying the edges of selections . . . . . . . . . . . . . . . . . . . . . . . 330
Creating custom patterns from selections . . . . . . . . . . . . . . . . . 332
Saving and loading selections . . . . . . . . . . . . . . . . . . . . . . . . . . 332
Working with layers. . . . . . . . . . . . . . . . . . . . . . . . . . . . . 339
Understanding layers. . . . . . . . . . . . . . . . . . . . . . . . . . . . . . . . . 340
Using layers with photos . . . . . . . . . . . . . . . . . . . . . . . . . . . . . . 345
Using layers with illustrations . . . . . . . . . . . . . . . . . . . . . . . . . . 347
Using the Layers palette . . . . . . . . . . . . . . . . . . . . . . . . . . . . . . 348
Creating layers . . . . . . . . . . . . . . . . . . . . . . . . . . . . . . . . . . . . . 352
Promoting the background layer . . . . . . . . . . . . . . . . . . . . . . . . 355
Deleting layers and clearing layer contents. . . . . . . . . . . . . . . . . 355
Duplicating and copying layers . . . . . . . . . . . . . . . . . . . . . . . . . 356
Renaming layers . . . . . . . . . . . . . . . . . . . . . . . . . . . . . . . . . . . . 358
Viewing layers. . . . . . . . . . . . . . . . . . . . . . . . . . . . . . . . . . . . . . 358
Finding layers . . . . . . . . . . . . . . . . . . . . . . . . . . . . . . . . . . . . . . 359
Organizing layers by color . . . . . . . . . . . . . . . . . . . . . . . . . . . . . 360
Changing the order of layers in an image . . . . . . . . . . . . . . . . . 360
Moving layers on the canvas . . . . . . . . . . . . . . . . . . . . . . . . . . . 361
Contents v
Page 8

Grouping layers. . . . . . . . . . . . . . . . . . . . . . . . . . . . . . . . . . . . . 362
Linking layers . . . . . . . . . . . . . . . . . . . . . . . . . . . . . . . . . . . . . . 364
Blending layers . . . . . . . . . . . . . . . . . . . . . . . . . . . . . . . . . . . . . 365
Setting layer opacity . . . . . . . . . . . . . . . . . . . . . . . . . . . . . . . . . 370
Protecting transparent areas of raster layers. . . . . . . . . . . . . . . . 371
Merging layers . . . . . . . . . . . . . . . . . . . . . . . . . . . . . . . . . . . . . 372
Using adjustment layers . . . . . . . . . . . . . . . . . . . . . . . . . . . . . . 375
Using layer styles. . . . . . . . . . . . . . . . . . . . . . . . . . . . . . . . . . . . 377
Working with masks. . . . . . . . . . . . . . . . . . . . . . . . . . . . . 387
Understanding masks . . . . . . . . . . . . . . . . . . . . . . . . . . . . . . . . 387
Displaying masks. . . . . . . . . . . . . . . . . . . . . . . . . . . . . . . . . . . . 388
Creating masks . . . . . . . . . . . . . . . . . . . . . . . . . . . . . . . . . . . . . 389
Deleting masks . . . . . . . . . . . . . . . . . . . . . . . . . . . . . . . . . . . . . 395
Editing masks . . . . . . . . . . . . . . . . . . . . . . . . . . . . . . . . . . . . . . 395
Loading masks . . . . . . . . . . . . . . . . . . . . . . . . . . . . . . . . . . . . . 398
Saving masks . . . . . . . . . . . . . . . . . . . . . . . . . . . . . . . . . . . . . . 400
Working with colors and materials. . . . . . . . . . . . . . . . . . 403
Using the Materials palette . . . . . . . . . . . . . . . . . . . . . . . . . . . . 403
Choosing colors in the Material Properties dialog box . . . . . . . . 407
Choosing colors for paletted images . . . . . . . . . . . . . . . . . . . . . 411
Choosing colors from an image or the desktop . . . . . . . . . . . . . 412
Using gradients. . . . . . . . . . . . . . . . . . . . . . . . . . . . . . . . . . . . . 413
Editing gradients. . . . . . . . . . . . . . . . . . . . . . . . . . . . . . . . . . . . 418
Exporting and importing gradients . . . . . . . . . . . . . . . . . . . . . . 421
Using patterns . . . . . . . . . . . . . . . . . . . . . . . . . . . . . . . . . . . . . 422
Using textures. . . . . . . . . . . . . . . . . . . . . . . . . . . . . . . . . . . . . . 425
Working with custom palettes and swatches . . . . . . . . . . . . . . . 427
Applying effects . . . . . . . . . . . . . . . . . . . . . . . . . . . . . . . . 431
Choosing effects . . . . . . . . . . . . . . . . . . . . . . . . . . . . . . . . . . . . 432
Applying 3D effects. . . . . . . . . . . . . . . . . . . . . . . . . . . . . . . . . . 438
vi Corel PaintShop Pro X8 User Guide
Page 9

Applying Art Media effects . . . . . . . . . . . . . . . . . . . . . . . . . . . . 445
Applying Artistic effects. . . . . . . . . . . . . . . . . . . . . . . . . . . . . . . 449
Applying environment maps and bump maps . . . . . . . . . . . . . . 466
Applying Distortion effects . . . . . . . . . . . . . . . . . . . . . . . . . . . . 467
Using the Displacement Map effect. . . . . . . . . . . . . . . . . . . . . . 477
Applying Edge effects . . . . . . . . . . . . . . . . . . . . . . . . . . . . . . . . 479
Applying Geometric effects . . . . . . . . . . . . . . . . . . . . . . . . . . . . 484
Applying Illumination effects . . . . . . . . . . . . . . . . . . . . . . . . . . . 488
Applying Image effects . . . . . . . . . . . . . . . . . . . . . . . . . . . . . . . 491
Applying Photo effects . . . . . . . . . . . . . . . . . . . . . . . . . . . . . . . 494
Using Retro Lab. . . . . . . . . . . . . . . . . . . . . . . . . . . . . . . . . . . . . 502
Applying a gradient with the Graduated Filter effect . . . . . . . . . 504
Creating vintage-style photos with the Time Machine . . . . . . . . 505
Applying film and filter effects to photos. . . . . . . . . . . . . . . . . . 509
Applying Reflection effects . . . . . . . . . . . . . . . . . . . . . . . . . . . . 512
Applying Texture effects . . . . . . . . . . . . . . . . . . . . . . . . . . . . . . 517
Adding picture frames to images. . . . . . . . . . . . . . . . . . . . . . . . 532
Creating your own effects . . . . . . . . . . . . . . . . . . . . . . . . . . . . . 534
Combining images . . . . . . . . . . . . . . . . . . . . . . . . . . . . . . . . . . 535
Using the Picture Tube tool . . . . . . . . . . . . . . . . . . . . . . . . . . . . 537
Warping images . . . . . . . . . . . . . . . . . . . . . . . . . . . . . . . . . . . . 543
Working with deformation maps. . . . . . . . . . . . . . . . . . . . . . . . 546
Working with text . . . . . . . . . . . . . . . . . . . . . . . . . . . . . . 549
Applying text . . . . . . . . . . . . . . . . . . . . . . . . . . . . . . . . . . . . . . 549
Formatting text . . . . . . . . . . . . . . . . . . . . . . . . . . . . . . . . . . . . . 553
Fitting text to a path . . . . . . . . . . . . . . . . . . . . . . . . . . . . . . . . . 558
Wrapping text within a selection or shape . . . . . . . . . . . . . . . . . 562
Moving text . . . . . . . . . . . . . . . . . . . . . . . . . . . . . . . . . . . . . . . 563
Applying effects to text . . . . . . . . . . . . . . . . . . . . . . . . . . . . . . . 564
Converting text to curves. . . . . . . . . . . . . . . . . . . . . . . . . . . . . . 565
Contents vii
Page 10

Creating a text cutout filled with an image . . . . . . . . . . . . . . . . 566
Filling text with image patterns . . . . . . . . . . . . . . . . . . . . . . . . . 567
Sizing and transforming text . . . . . . . . . . . . . . . . . . . . . . . . . . . 569
Displaying captions and info text on images . . . . . . . . . . . . . . . 570
Drawing and editing vector objects . . . . . . . . . . . . . . . . . 573
Understanding raster and vector objects . . . . . . . . . . . . . . . . . . 574
Selecting vector objects. . . . . . . . . . . . . . . . . . . . . . . . . . . . . . . 576
Drawing rectangles and squares . . . . . . . . . . . . . . . . . . . . . . . . 577
Drawing circles and ellipses . . . . . . . . . . . . . . . . . . . . . . . . . . . . 579
Drawing symmetric shapes . . . . . . . . . . . . . . . . . . . . . . . . . . . . 580
Creating preset shapes . . . . . . . . . . . . . . . . . . . . . . . . . . . . . . . 582
Filling cutout shapes with images . . . . . . . . . . . . . . . . . . . . . . . 583
Editing shapes . . . . . . . . . . . . . . . . . . . . . . . . . . . . . . . . . . . . . 585
Saving shapes as presets . . . . . . . . . . . . . . . . . . . . . . . . . . . . . . 586
Working with nodes . . . . . . . . . . . . . . . . . . . . . . . . . . . . . . . . . 586
Sizing, shaping, and rotating vector objects . . . . . . . . . . . . . . . 594
Aligning, distributing, and arranging vector objects. . . . . . . . . . 595
Grouping and ungrouping vector objects . . . . . . . . . . . . . . . . . 599
Converting objects to paths. . . . . . . . . . . . . . . . . . . . . . . . . . . . 600
Adding and closing contours. . . . . . . . . . . . . . . . . . . . . . . . . . . 601
Editing contours and paths . . . . . . . . . . . . . . . . . . . . . . . . . . . . 602
Drawing lines . . . . . . . . . . . . . . . . . . . . . . . . . . . . . . . . . . . . . . 606
Saving custom line styles. . . . . . . . . . . . . . . . . . . . . . . . . . . . . . 608
Drawing curves . . . . . . . . . . . . . . . . . . . . . . . . . . . . . . . . . . . . . 610
Modifying lines and curves . . . . . . . . . . . . . . . . . . . . . . . . . . . . 613
Copying and moving vector objects. . . . . . . . . . . . . . . . . . . . . . 615
Working with brushes . . . . . . . . . . . . . . . . . . . . . . . . . . . 617
Choosing brushes . . . . . . . . . . . . . . . . . . . . . . . . . . . . . . . . . . . 618
Choosing brush options . . . . . . . . . . . . . . . . . . . . . . . . . . . . . . 619
Using brushes . . . . . . . . . . . . . . . . . . . . . . . . . . . . . . . . . . . . . . 622
viii Corel PaintShop Pro X8 User Guide
Page 11

Customizing brush settings . . . . . . . . . . . . . . . . . . . . . . . . . . . . 624
Creating brush tips and presets . . . . . . . . . . . . . . . . . . . . . . . . . 626
Importing and sharing brush tips . . . . . . . . . . . . . . . . . . . . . . . 629
Painting and drawing with the Art Media tools. . . . . . . . 631
Working with Art Media layers . . . . . . . . . . . . . . . . . . . . . . . . . 632
Working with the Mixer palette . . . . . . . . . . . . . . . . . . . . . . . . . 633
Working with Art Media tools . . . . . . . . . . . . . . . . . . . . . . . . . . 638
Using the Oil Brush tool . . . . . . . . . . . . . . . . . . . . . . . . . . . . . . 641
Using the Chalk tool . . . . . . . . . . . . . . . . . . . . . . . . . . . . . . . . . 643
Using the Pastel tool . . . . . . . . . . . . . . . . . . . . . . . . . . . . . . . . . 644
Using the Crayon tool . . . . . . . . . . . . . . . . . . . . . . . . . . . . . . . . 645
Using the Colored Pencil tool . . . . . . . . . . . . . . . . . . . . . . . . . . 646
Using the Marker tool . . . . . . . . . . . . . . . . . . . . . . . . . . . . . . . . 647
Using the Watercolor Brush tool . . . . . . . . . . . . . . . . . . . . . . . . 648
Using the Palette Knife tool . . . . . . . . . . . . . . . . . . . . . . . . . . . . 650
Using the Smear tool . . . . . . . . . . . . . . . . . . . . . . . . . . . . . . . . 651
Using the Art Eraser tool . . . . . . . . . . . . . . . . . . . . . . . . . . . . . . 652
Working with advanced color features . . . . . . . . . . . . . . 653
Understanding color depth . . . . . . . . . . . . . . . . . . . . . . . . . . . . 653
Viewing color depth information. . . . . . . . . . . . . . . . . . . . . . . . 655
Increasing the color depth of an image . . . . . . . . . . . . . . . . . . . 656
Decreasing the color depth of an image . . . . . . . . . . . . . . . . . . 657
Understanding color reduction methods . . . . . . . . . . . . . . . . . . 663
Understanding palette options . . . . . . . . . . . . . . . . . . . . . . . . . 664
Working with image palettes. . . . . . . . . . . . . . . . . . . . . . . . . . . 665
Understanding color and color models . . . . . . . . . . . . . . . . . . . 671
Understanding how monitor colors and print colors differ . . . . . 674
Calibrating your monitor . . . . . . . . . . . . . . . . . . . . . . . . . . . . . . 676
Working with color management . . . . . . . . . . . . . . . . . . . . . . . 677
Using color channels . . . . . . . . . . . . . . . . . . . . . . . . . . . . . . . . . 679
Contents ix
Page 12

Customizing . . . . . . . . . . . . . . . . . . . . . . . . . . . . . . . . . . . 683
Viewing and hiding toolbars . . . . . . . . . . . . . . . . . . . . . . . . . . . 684
Using custom workspaces . . . . . . . . . . . . . . . . . . . . . . . . . . . . . 685
Customizing the menu system. . . . . . . . . . . . . . . . . . . . . . . . . . 688
Customizing toolbars . . . . . . . . . . . . . . . . . . . . . . . . . . . . . . . . 689
Creating custom toolbars . . . . . . . . . . . . . . . . . . . . . . . . . . . . . 690
Customizing keyboard shortcuts . . . . . . . . . . . . . . . . . . . . . . . . 692
Setting Undo preferences . . . . . . . . . . . . . . . . . . . . . . . . . . . . . 694
Setting View preferences. . . . . . . . . . . . . . . . . . . . . . . . . . . . . . 695
Setting Display and Caching preferences . . . . . . . . . . . . . . . . . . 696
Setting Palettes preferences. . . . . . . . . . . . . . . . . . . . . . . . . . . . 699
Setting Units preferences . . . . . . . . . . . . . . . . . . . . . . . . . . . . . 701
Setting Transparency and Shading preferences . . . . . . . . . . . . . 702
Setting Warnings preferences . . . . . . . . . . . . . . . . . . . . . . . . . . 703
Setting Auto Action preferences . . . . . . . . . . . . . . . . . . . . . . . . 703
Setting Miscellaneous preferences . . . . . . . . . . . . . . . . . . . . . . . 704
Setting Manage workspace preferences. . . . . . . . . . . . . . . . . . . 707
Setting Auto-Preserve preferences . . . . . . . . . . . . . . . . . . . . . . . 709
Choosing a default workspace. . . . . . . . . . . . . . . . . . . . . . . . . . 710
Setting file format preferences . . . . . . . . . . . . . . . . . . . . . . . . . 710
Setting file format associations . . . . . . . . . . . . . . . . . . . . . . . . . 716
Setting file locations . . . . . . . . . . . . . . . . . . . . . . . . . . . . . . . . . 717
Managing resources . . . . . . . . . . . . . . . . . . . . . . . . . . . . . . . . . 720
Setting plug-in preferences . . . . . . . . . . . . . . . . . . . . . . . . . . . . 722
Selecting Web browsers . . . . . . . . . . . . . . . . . . . . . . . . . . . . . . 724
Setting Autosave preferences . . . . . . . . . . . . . . . . . . . . . . . . . . 725
Resetting all preferences . . . . . . . . . . . . . . . . . . . . . . . . . . . . . . 726
Switching languages . . . . . . . . . . . . . . . . . . . . . . . . . . . . . . . . . 727
Adjusting general viewing options. . . . . . . . . . . . . . . . . . . . . . . 728
Accessing tools and commands from previous versions of Corel
PaintShop Pro . . . . . . . . . . . . . . . . . . . . . . . . . . . . . . . . . . . . . . 729
x Corel PaintShop Pro X8 User Guide
Page 13

Protecting and restoring the Corel PaintShop Pro database . . . . 729
Automating tasks . . . . . . . . . . . . . . . . . . . . . . . . . . . . . . 731
Scripting basics . . . . . . . . . . . . . . . . . . . . . . . . . . . . . . . . . . . . . 731
Working with scripting tools and features . . . . . . . . . . . . . . . . . 733
Recording and saving a script . . . . . . . . . . . . . . . . . . . . . . . . . . 735
Running saved scripts . . . . . . . . . . . . . . . . . . . . . . . . . . . . . . . . 739
Stopping or undoing a script. . . . . . . . . . . . . . . . . . . . . . . . . . . 742
Editing scripts in Corel PaintShop Pro . . . . . . . . . . . . . . . . . . . . 742
Editing scripts using a text-editing application . . . . . . . . . . . . . . 744
Troubleshooting a script . . . . . . . . . . . . . . . . . . . . . . . . . . . . . . 745
Assigning icons to scripts . . . . . . . . . . . . . . . . . . . . . . . . . . . . . 746
Using and creating presets . . . . . . . . . . . . . . . . . . . . . . . . . . . . 747
Processing files in batches . . . . . . . . . . . . . . . . . . . . . . . . . . . . . 749
Renaming files in batches . . . . . . . . . . . . . . . . . . . . . . . . . . . . . 755
Printing . . . . . . . . . . . . . . . . . . . . . . . . . . . . . . . . . . . . . . 759
Printing images . . . . . . . . . . . . . . . . . . . . . . . . . . . . . . . . . . . . . 759
Creating layouts . . . . . . . . . . . . . . . . . . . . . . . . . . . . . . . . . . . . 765
Editing templates . . . . . . . . . . . . . . . . . . . . . . . . . . . . . . . . . . . 770
Editing and saving layouts. . . . . . . . . . . . . . . . . . . . . . . . . . . . . 772
Printing CMYK color separations . . . . . . . . . . . . . . . . . . . . . . . . 776
Understanding printing. . . . . . . . . . . . . . . . . . . . . . . . . . . . . . . 776
Sharing photos . . . . . . . . . . . . . . . . . . . . . . . . . . . . . . . . 779
E-mailing photos. . . . . . . . . . . . . . . . . . . . . . . . . . . . . . . . . . . . 779
Uploading photos to a sharing site . . . . . . . . . . . . . . . . . . . . . . 781
Creating Share My Trip projects. . . . . . . . . . . . . . . . . . . . . . . . . 784
Creating images for the Web. . . . . . . . . . . . . . . . . . . . . . 787
Saving images for the Web . . . . . . . . . . . . . . . . . . . . . . . . . . . . 787
Working with GIF files . . . . . . . . . . . . . . . . . . . . . . . . . . . . . . . . 789
Working with JPEG files. . . . . . . . . . . . . . . . . . . . . . . . . . . . . . . 796
Contents xi
Page 14

Working with PNG files . . . . . . . . . . . . . . . . . . . . . . . . . . . . . . . 798
Previewing images in Web browsers . . . . . . . . . . . . . . . . . . . . . 801
Slicing images. . . . . . . . . . . . . . . . . . . . . . . . . . . . . . . . . . . . . . 803
Mapping images. . . . . . . . . . . . . . . . . . . . . . . . . . . . . . . . . . . . 808
Creating image rollovers . . . . . . . . . . . . . . . . . . . . . . . . . . . . . . 813
Using digital watermarks. . . . . . . . . . . . . . . . . . . . . . . . . . . . . . 814
Adding visible watermarks . . . . . . . . . . . . . . . . . . . . . . . . . . . . 818
xii Corel PaintShop Pro X8 User Guide
Page 15

Welcome
For people with a passion for photography, Corel® PaintShop® Pro is
an easy-to-use, professionally powered, image-editing software that
helps you achieve stunning photos and creative designs.
This section presents the following topics:
• What’s new in Corel PaintShop Pro X8
• Installing and uninstalling Corel programs
• Starting and exiting the program
• Registering Corel products
• Updates and messages
• Corel Support Services
• About Corel
The availability of features depends on the version of the
software you have.
What’s new in Corel PaintShop Pro X8
Corel PaintShop Pro X8 is defined by new tools, enhanced features,
and performance gains that help you focus on enjoying the creative
journey. As always, working closely with our users was an essential part
of creating this version of the versatile photo-editing tool that many
professional and enthusiast photographers and designers have come
to rely upon.
Welcome 1
Page 16

New! Text wrapping
Corel PaintShop Pro X8 makes it easy to use text as a design element
in your creative projects. New
Text Wra pping lets you wrap text inside
any vector shape or selection. Simply choose your shape or draw your
selection using any of the selection tools, and type your text. The text
automatically wraps within the shape. This is an ideal effect for posters,
scrapbooking, brochures, collages, websites and other projects. For
more information, see
“Wrapping text within a selection or shape” on
page 562.
New! Move people or objects with Magic Move
Accelerate editing with Magic Move, a new content-aware tool that
automatically replaces the background when you move an object or
person. Simply select an area and drag it to a new position. The empty
area left behind is automatically filled to match the surrounding
background. For more information, see
“Moving selected areas with
Magic Move” on page 254.
Enhanced! Batch processing—powerful and easy
Save time by applying common actions to multiple photos with the
new Batch Process wizard. Resize, add watermarks and picture frames,
apply scripts, and control the file names, formats, security-related
information, and more--the wizard makes it easy. For more
information, see “Processing files in batches” on page 749.
New & Enhanced!More precise selections
Fast and accurate selection tools are a must for any photo editor. The
enhanced
Smart Selection Brush now includes a Tol er an ce setting for
more precise selections across areas that are close in tone or hue. New
Selection Style options for the Selection Tool let you define a selection
size by typing height and width values, or you can define a fixed aspect
ratio for the selection. You can also choose from a list of popular aspect
2 Corel PaintShop Pro X8 User Guide
Page 17

ratios and resolutions. For more information, see “Creating selections”
on page 304.
Enhanced! More power and speed than ever before
The new Corel PaintShop Pro includes performance gains that save you
time and make editing tasks more responsive and enjoyable:
• "Faster brushes for a more responsive feel — Enjoy speed gains of
30 - 60% for brushes, including
brushes (
brushes (
Dodge, Burn, Sharpen and others), and art media
Oil Brush, Chalk, Marker and others)
Paint Brush, Air Brush, retouch
• "Larger maximum brush size — Cover more area, more quickly
with an increased maximum brush size of 3,000 pixels
•"Enhanced Smart Edge — See up to 50% faster performance
when using the Smart Edge feature, which works with several
tools help keep your brushstrokes "inside the lines"
• "Faster saving — our native Corel PaintShop Pro image file format
(*.pspimage) saves up to 50% faster, to keep you in your creative
groove
New! High resolution 4K monitor support
Pair Corel PaintShop Pro X8 with a high resolution monitor for the
best-looking PaintShop Pro ever. See each detail, read more clearly and
easily, and appreciate every aspect of your photo or composition in a
beautifully rendered high resolution interface. All-new icons and
enhanced workspaces are compatible with Ultra HD displays (up to
250% zoom with 4K resolution).
New & Enhanced!More creative and flexible layer workflow
Layers are fundamental to advanced photo editing, compositing and
graphic design. The following features make it easier to work with
multi-layer projects:
Welcome 3
Page 18

• Quick Search — find the right layer in seconds when you search
for it by name. This is especially useful for projects with many
layers
• Merge layers — now you can merge selected layers or create a
new layer from selected or visible layers
• Expand or collapse all layer groups — easily expand and view all
layers in your project
For more information, see “Working with layers” on page 339.
New! Lens Correction
Lens Correction helps correct the distortions, vignetting and chromatic
aberrations that are commonly introduced by most camera lenses.
Whether you're in the
apply
Lens Correction tools automatically, taking advantage of the
wide range of lens profiles included in Corel
Edit workspace or the Camera RAW Lab, you can
PaintShop Pro, or take full
control and apply corrections manually. For more information, see
“Using Lens Correction to fix distortion, chromatic aberration, and
vignetting” on page 187.
Enhanced! Camera RAW Lab
Inspired by insights from Corel PaintShop Pro users, the Camera RAW
offers an enhanced layout, including before and after views, and a
Lab
bigger preview to make working with RAW images easier. You can also
add more photos without having to close the RAW Lab, and apply lens
corrections. As always, we continue to add support for latest camera
models. For more information, see
“Using the Camera RAW Lab” on
page 150.
New! Enhancements suggested by our users
We love getting suggestions from Corel PaintShop Pro users. As part of
our ongoing commitment to empower creativity, we have included the
following improvements, suggested by our users:
4 Corel PaintShop Pro X8 User Guide
Page 19

• Show Original button in the Adjust workspace — quickly see what
you have changed versus the original by holding the button. For
more information, see
“To view original image” on page 145.
•New Save behavior and Save As dialog box — see and adjust
compression settings to ensure that your image looks right
• Swatches in the Material Properties window — access all the
swatches you have created more easily
• Cutter Preview for Shape Cutter and Text Cutter — a semitransparent overlay lets you preview the area you are cutting
before you apply your cutout.
• Gradient Preview - now you can view gradient updates on your
image as you make the changes in the Material Properties.
Installing and uninstalling Corel programs
The Installer makes it easy to install Corel® programs and components.
Before installing
• Close all open programs. Note that antivirus software and firewall
applications may affect installation.
• Ensure that you are logged in to your computer as Administrator
or as a user with local administrative rights.
64-bit and 32-bit installation options
The Corel PaintShop Pro installer installs the 32-bit or 64-bit version of
the application by detecting and matching the version to your
operating system. For 64-bit systems, after the initial installation, you
can choose to add the 32-bit version. This will let you use any 32-bit
plug-ins or other 32-bit compatible software with the 32-bit version of
Corel PaintShop Pro, but still work with the 64-bit version of the
Welcome 5
Page 20

application to take advantage of 6 or more GB RAM and other 64-bit
optimized features.
Note: If you install 64-bit and 32-bit versions, the programs are listed
separately and launched separately from the Windows Start menu or
Start screen.
To install Corel PaintShop Pro
1 Close any open applications.
2 Insert the DVD in the DVD drive or double-click the associated .exe
file that you downloaded.
If the DVD setup does not start automatically, navigate to the DVD
drive on your computer, and double-click
3 Follow the instructions on your screen.
Setup.exe.
To uninstall Corel PaintShop Pro
1 Open the Windows Control Panel.
2In the Programs category, click the Uninstall a program link.
3In the Programs and Features window, click
Corel PaintShop Pro X8 in the list of applications.
4 Click Uninstall/Change.
5 Follow the instructions on your screen.
Starting and exiting the program
You c an s tar t Co rel PaintShop Pro from the Windows taskbar or your
desktop icon, and exit the program from the File menu.
To start Corel PaintShop Pro
•From the Start menu, choose All Programs
Corel PaintShop Pro X8 or use the Corel PaintShop Pro X8
6 Corel PaintShop Pro X8 User Guide
Page 21

application icon or tile on your desktop or Start screen.
If you associate specific file formats, such as JP EG an d T IF F, with
PaintShop Pro, you can double-click the associated file to
Corel
start the program. For information about setting file format
associations, see “Setting file format associations” on
page 716.
To exit Corel PaintShop Pro
• Choose File Exit.
Registering Corel products
Registering Corel products is important to ensure that you receive
timely access to the latest product updates, as well as valuable
information about product releases. Registration also gives you access
to free downloads, articles, tips and tricks, and special offers.
You can register the program immediately after you install it, or you
can register at a later date.
You can register the program in one of the following ways:
• online — If you are connected to the Internet when you are
prompted to register, you can launch the online registration. If no
Internet connection is detected, you are presented with a list of
options.
• by phone — You can call the Corel Customer Service Center
nearest you.
For more information about registering a Corel product, visit
www.corel.com/support/register.
Welcome 7
Page 22

Updates and messages
Notification messages provide you with important information about
your program.You can turn automatic program updates and
messaging on or off. You can choose to check for updates and
messages manually.
To turn notification messages on or off
1 Click Help Message Preference.
2 Mark only the check boxes for the updates or messages that you
want to receive.
To update your program
• Choose Help Check for Updates.
To check for messages
• Click Help Messages.
Corel Support Services
Corel® Support Services™ can provide you with prompt and accurate
information about product features, specifications, pricing, availability,
services, and technical support. For the most current information on
available support and professional services for your Corel product,
please visit
www.corel.com/support.
8 Corel PaintShop Pro X8 User Guide
Page 23

About Corel
Corel is one of the world’s top software companies, boasting some of
the industry’s best-known graphics, productivity and digital media
products. We've built a reputation for giving customers more choice,
and delivering solutions that are easy to learn and use. Our mission is
simple: help people achieve new levels of creativity and productivity.
Corel’s product lines include CorelDRAW® Graphics Suite, Corel®
Painter®, Corel® PaintShop® Pro, Corel® VideoStudio®, Corel®
WordPerfect® Office, Pinnacle Studio™, Roxio Creator®, Roxio®
Toast® and WinZip®. For more information on Corel, please visit
www.corel.com.
Welcome 9
Page 24

10 Corel PaintShop Pro X8 User Guide
Page 25
The digital workflow
The digital workflow outlined below can help you understand how to
best use Corel PaintShop Pro. It suggests a sequence for working with
your digital images. Whether you want to organize, retouch, print or
share, you can use the workflow described below as a guide.
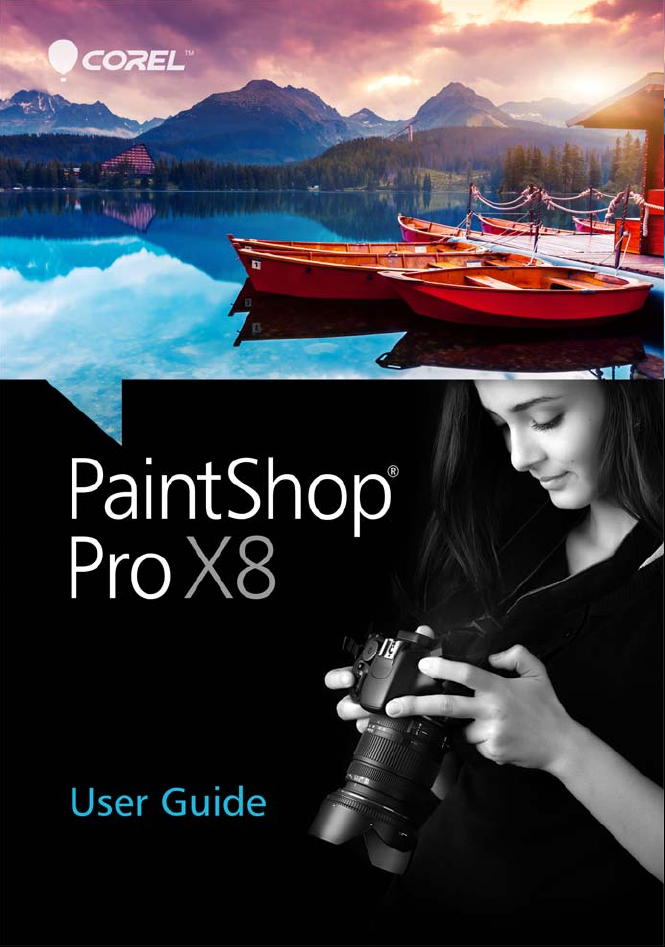
Bring photos into Corel PaintShop Pro
Bringing photos into Corel PaintShop Pro is as simple as opening the
application in the Manage workspace and navigating to your favorite
photo folders on your computer. The application automatically
catalogs the folders that you navigate to, essentially “importing” them
into the application, without duplicating any files.
The digital workflow 11
Page 26
For more information, see “Getting photos into Corel PaintShop Pro”
on page 62.
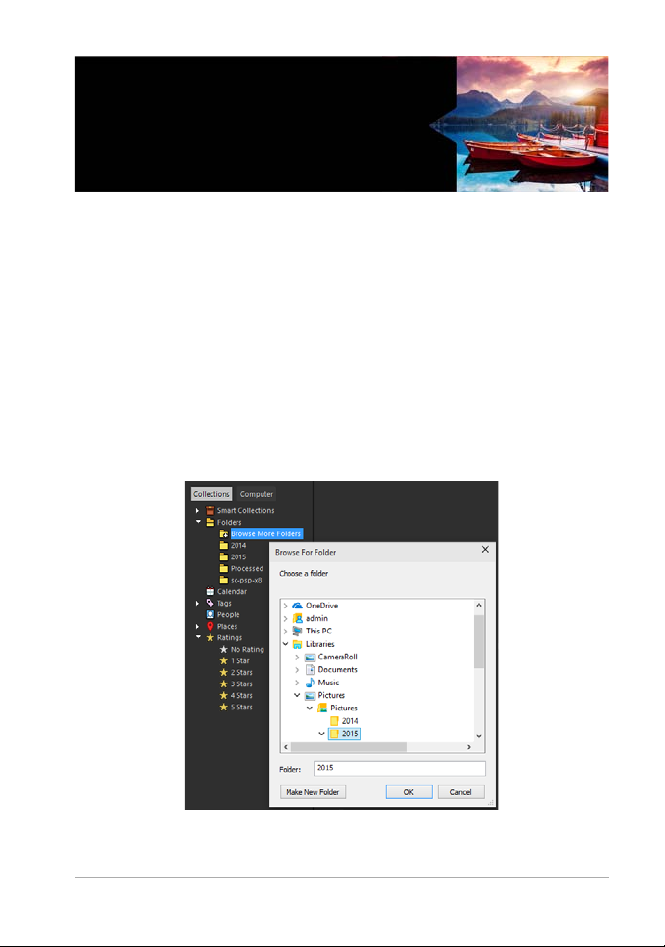
Manage your photos
Digital photography gives you the freedom to experiment. The result is
a large number of digital files, so photographers understand the need
to manage those files by reviewing, culling, and identifying photos as
early in the process as possible.
The Manage workspace lets you access all the tools you need to cull,
rate, tag, and prepare photos for editing or sharing. Double-clicking a
thumbnail opens a full-screen review mode called Quick Review. Search
options and collections make it easy to find and work with the photos
that you currently store on your computer.
Quick Review is a full-screen review mode that opens when
you double-click a thumbnail in the Manage workspace. You
can use arrow keys to zoom and navigate.
12 Corel PaintShop Pro X8 User Guide
Page 27
For more information, see “Reviewing, organizing, and finding
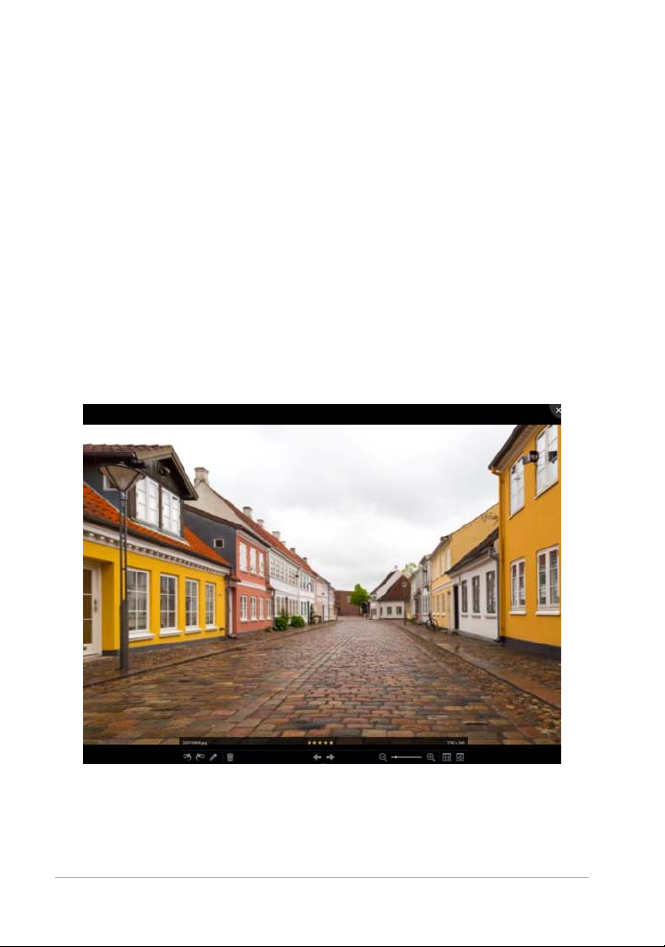
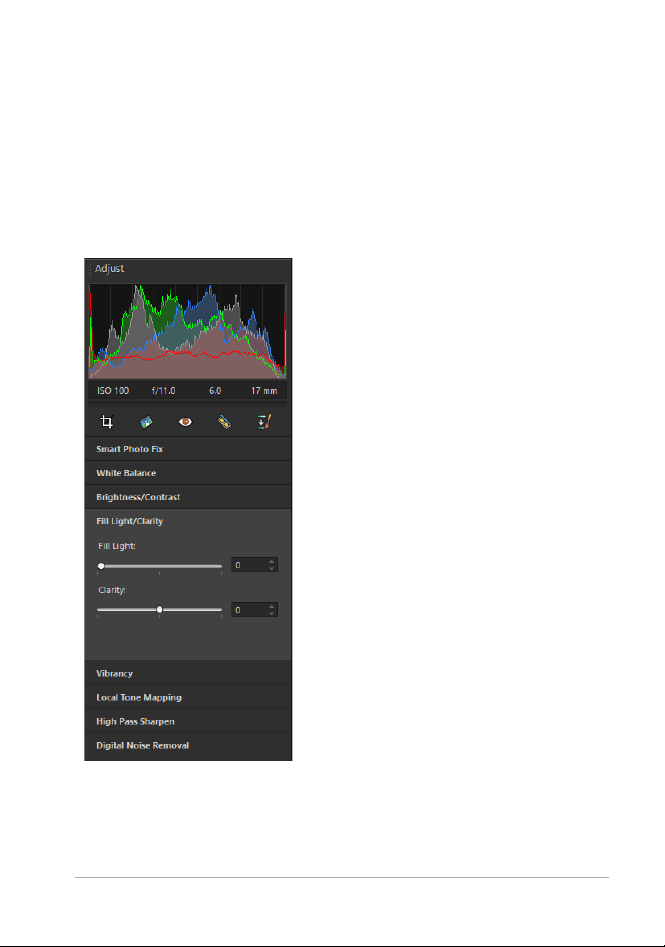
The Adjust pane in the Adjust
workspace gives you quick access
to commonly-used editing options.
photos” on page 101.
Adjust photos quickly
The challenge for many photographers is finding the time to edit
photos, so the Adjust workspace lets you move from photo to photo
quickly and puts commonly-used editing tools at your fingertips. In
some cases, this will be all the editing your photos will need.
The digital workflow 13
Page 28

After you edit photos, you can return to the Manage workspace to take
advantage of multi-photo editing features such as Capture editing and
Apply editing. Capture and Apply editing lets you copy edits made to
a single photo and apply the edits to multiple photos. Images
photographed under similar conditions can be fixed with amazing
speed — no scripting required.
For more information, see the following topics:
• “The Adjust workspace” on page 28
• “Capturing and applying edits to multiple photos” on page 132
Advanced editing and RAW files
Professional-level tools and features are available in the Edit
workspace. For example, you can apply effects, add text, and use
custom painting tools. You can also use layers to create highly editable
composite images, isolate image areas with selections and masks, and
access tone curves, histograms, and other advanced adjustment tools.
If you like the full control of working with RAW files, you can use the
Camera RAW Lab to process your photos.
14 Corel PaintShop Pro X8 User Guide
Page 29
For more information, explore the following topics:
• “Adjusting images” on page 155
• “Retouching and restoring images” on page 239
• “Working with selections” on page 303
• “Working with layers” on page 339
• “Applying effects” on page 431
• “Working with text” on page 549
• “Working with camera RAW photos” on page 149
Share photos
After you adjust and enhance your photos, you’ll want to share them.
Along with printing, layout, and e-mailing options, there are sharing
options that let you post directly to popular sharing sites, such as
Facebook, Flickr, and Google+.
For more information, see the following topics:
• “Printing” on page 759
• “Sharing photos” on page 779
Expanded creative options for DSLR photography
Many DSLR (digital single-lens reflex) camera owners are expanding
their knowledge and looking for creative options. HDR (high dynamic
The digital workflow 15
Page 30

range) features in Corel PaintShop Pro help you take advantage of
bracketing features on your camera. You can also combine multiple
photos with Photo Blend.
For more information, see the following topics:
• “Taking photos for HDR processing” on page 287
• “Combining photos by using HDR Exposure Merge” on page 288
• “Merging batches of photos into HDR images” on page 296
• “Combining photos with Photo Blend” on page 298
16 Corel PaintShop Pro X8 User Guide
Page 31

Learning how to use
Corel
You can learn how to use Corel PaintShop Pro in various ways: by
accessing the Help and videos, by using the Learning Center palette,
or by exploring the Corel Guide and by visiting the Corel website
(www.corel.com), where you can access tips, tutorials, and
information about training.
This section presents the following topics:
• Documentation conventions
• Using the Help system
• Corel PaintShop Pro X8 User Guide PDF
• Using the Learning Center palette
• Learning with video tutorials
• Using Web-based resources
PaintShop Pro
Documentation conventions
The following table describes important conventions used in the Help.
Convention Description Example
Menu
Menu
command
drop-list A list of options that drops
A menu item followed by a
menu command
down when a user clicks a
down arrow button
Choose File
Choose an option from the
Selection Type drop-list on
the Tool Options palette.
Open.
Learning how to use Corel PaintShop Pro 17
Page 32

Convention Description Example
palette A window containing
available commands and
settings relevant to a specific
tool or task
mark and
unmark
Enter The Enter key on your
Terms that refer to enabling or
disabling check boxes by
clicking them
keyboard
A note containing information
that is important to the
preceding steps. It may
describe conditions under
which the procedure can be
performed.
A tip containing suggestions
for performing the preceding
steps. It may present
alternatives to the steps, or
other benefits and uses of the
procedure.
Double-click the name of the
group on the Layers
To preserve the current print
size, mark the Maintain
original print size check box.
To save this gradient as a
swatch that you can access
later, click the Add to
swatches button, type a
name, and press Enter.
Although you can apply the
Texture Preserving Smooth
command to the entire
image, the command works
best when you select the
problem area.
You can also right-click in the
image to set the source point
for the Clone tool.
palette.
18 Corel PaintShop Pro X8 User Guide
Page 33

Using the Help system
The Help that is available from within the program is the most
comprehensive source of information for Corel
Help system provides two ways to find information. You can choose a
topic from the Contents page, or use the Search page to search for
specific words and phrases. You can also print topics from the Help.
Online and local Help
If you are connected to the Internet, the application displays the online
Help. When you are online, you have access to the latest information,
videos, and helpful links. If no Internet connection is available, the
application displays the local Help that is installed on your computer.
To use the Help system
1 Do one of the following:
• Click Help Help topics.
• Press F1.
2 In the Help window, click one of the following tabs:
• Contents — lets you browse through topics in the Help
• Search — lets you search the full text of the Help for a particular
word or phrase (no quotation marks required). For example, if
you are looking for information about a specific tool or
command, you can type the name of the tool or command,
such as
Backlighting, to display a list of relevant topics.
PaintShop Pro. The
You can also
Print a specific Help topic Open a Help topic, and from the
Internet Explorer menu, choose File
Print.
Learning how to use Corel PaintShop Pro 19
Page 34

You can also
View Help for a dialog box Click Help at the bottom of the
dialog box.
Corel PaintShop Pro X8 User Guide PDF
You c an d own loa d th e Co rel PaintShop Pro X8 User Guide PDF to your
computer or tablet, or you can print the pages you want. You can find
the PDF in Help menu (
Help User Guide (PDF)).
Using the Learning Center palette
The Learning Center palette contains helpful information about
Corel
PaintShop Pro tasks, commands, and tools to help first-time
users as well as experienced users get their work done faster. You can
use the Learning Center in one of two ways: from the Home page,
navigate through the task-based workflow, or simply click a tool in the
Tools toolbar and follow the corresponding instructions that appear in
the Learning Center palette.
Each task appearing on the Home page has its own topics with
instructions that describe its related tools or commands. You can click
a given topic to access a related tool or command. In this way, you can
perform a task as you learn about it. You can also access the Help from
the Learning Center palette to obtain additional information about a
task.
20 Corel PaintShop Pro X8 User Guide
Page 35

From the Learning Center Home page, click a task, and then
Back button Home button
click a topic.
To display or hide the Learning Center palette
Edit workspace
• Choose View Palettes Learning Center.
The Learning Center palette is displayed by default. It appears
along the right side of the Edit workspace.
Learning how to use Corel PaintShop Pro 21
Page 36

To use the Learning Center palette
Edit workspace
1 From the Home page, click a task.
The topics related to the task appear.
2 Click a topic.
The procedure related to the topic appears.
• For topics describing a tool, the tool becomes active. The Tool
Options palette and any other relevant palettes appear.
• For topics describing a command associated with a dialog box,
the dialog box appears.
3 Read the procedure for using the tool or command.
Some tasks and commands are not available unless an image is
open.
Learning with video tutorials
The Discovery Center window (English only) lets you find and view a
range of videos that help you learn about the application and
photography.
22 Corel PaintShop Pro X8 User Guide
Page 37

You can also find video links within some topics in the online Help and
by visiting
www.youtube.com/corelpaintshoppro.
To open the Discovery Center window
• Choose Help Video Tutorials.
Using Web-based resources
From the Corel PaintShop Pro Help menu and the Corel website, you
can access a number of Web pages dedicated to customer support and
communities. You can find resources such as downloads, tutorials,
tips, newsletters, newsgroups, and other online resources.
Learning how to use Corel PaintShop Pro 23
Page 38

To access Web-based resources
•From the Help menu, select one of the following website links:
• Corel Support — this link takes you to the Customer Support
Web page
• Check for Updates — checks the Corel Update Service to see if
there are updates to your copy of Corel
PaintShop Pro
To access Corel learning resources
• Use your Internet browser to go to www.paintshoppro.com, and
click the Resources tab.
24 Corel PaintShop Pro X8 User Guide
Page 39

Workspace tour
Corel PaintShop Pro includes three main workspaces that let you
organize and edit your images: Manage, Adjust, and Edit.
The availability of features depends on the version of the
software you have.
This section presents the following topics:
• Exploring the workspaces
• Switching between workspaces
• Choosing a workspace color
• Using palettes
• Using toolbars
• Using tools
• Customizing toolbars and palettes
• Using dialog boxes
• Viewing images
• Using shortcut keys
• Using context menus
• Using rulers, grids, and guides
Workspace tour 25
Page 40

Exploring the workspaces
Corel PaintShop Pro consists of three workspaces:
•Manage
•Adjust
•Edit
Each workspace contains specific tools and controls to help you
accomplish the task at hand quickly and efficiently.
You can save the workspaces, including all open images and their
magnifications and screen positions, as well as positions and
preferences of palettes, toolbars, dialog boxes, and windows. For
information about using custom workspaces, see
workspaces” on page 685.
The Manage workspace
When you open Corel PaintShop Pro, the Manage workspace appears
as your default workspace.
“Using custom
26 Corel PaintShop Pro X8 User Guide
Page 41

The Manage workspace in Preview mode
Info paletteNavigation palette
Organizer palette
Preview area
Organizer toolbar
Thumbnails
The Manage workspace consists of the following components:
• Navigation palette — helps you find and organize photos. You can
use the Search box or click the Collections tab or Computer tab to
display the folders on your computer, or you can sort photos by
collection, tags, or ratings.
• Preview area — lets you choose between two views — a large
single-image view or a multi-thumbnail view (expanded Organizer
palette).
• Info palette — displays information about the selected image. It
consists of a camera-style display of the settings used to take the
photo and a tabbed area that lets you add information, such as
tags and ratings, and access a full list of EXIF or IPTC data.
Workspace tour 27
Page 42

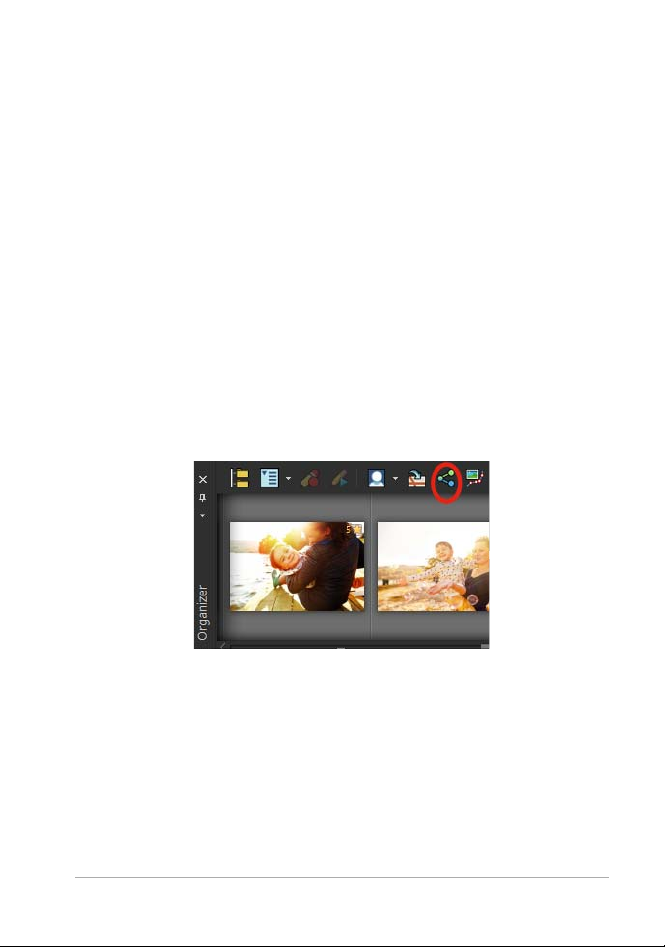
• Organizer palette — available in all three workspaces, this palette
ToolbarAdjust palette
Organizer palette Thumbnails
Set RatingStatus bar
Preview area Instant Effects palette
lets you select photos (as thumbnails) and includes a toolbar with
a range of commands and options for managing photos. You can
hide or show the tools by clicking the
button.
For more information about the Manage workspace, see “Reviewing,
organizing, and finding photos” on page 101.
The Adjust workspace
Adjust is your workspace for quick edits. It lets you fix and enhance
your photos by offering a set of the most commonly-used tools.
A photo displayed in the Adjust workspace
The Adjust workspace includes the following components:
• Adjust palette — displays tools and controls for adjusting photos
• Preview area — displays the photo selected in the Organizer
palette
28 Corel PaintShop Pro X8 User Guide
Page 43

• Toolbar — displays buttons for accessing common saving and
viewing commands
• Instant Effects palette — displays preset effects that you can apply
to your photo
• Status bar — displays information about the selected tool
• Organizer palette — available in all three workspaces, this palette
lets you select photos (as thumbnails) and includes a toolbar with
a range of commands and options for managing photos. You can
hide or show the tools by clicking the
button.
• Set Rating control — lets you assign ratings to each photo, so that
you can quickly find your favorites
For more information about the Adjust workspace, see “Using the
Adjust workspace” on page 143.
The Edit workspace
The Edit workspace lets you access in-depth editing features. It
includes menus, tools, and palettes that you can use to create and edit
images. In addition to photo editing, it lets you perform painting and
drawing tasks.
Workspace tour 29
Page 44

A photo displayed in the Edit workspace
Image windowTool Options paletteStandard toolbarMenu bar
Learning Center palette
Tools toolbar
Status bar
The Edit workspace includes the following components:
• Menu bar — displays commands for performing tasks. For
example, the Effects menu contains commands for applying
effects to images.
• Toolbars — display buttons for common commands. For more
information, see
“Using toolbars” on page 34.
• Palettes — display image information and help you select tools,
modify options, manage layers, select colors, and perform other
editing tasks. For more information, see
“Using palettes” on
page 32.
30 Corel PaintShop Pro X8 User Guide
Page 45

• Image window — displays open files. You can choose from a
tabbed view or a window view. For more information, see
“Viewing images” on page 49.
• Status bar — displays information about the selected tool or
menu command, as well as information about image dimensions,
color depth, and pointer position. The status bar appears at the
bottom of the workspace, and unlike other toolbars, it cannot be
customized or moved. For more information about viewing image
information, see
page 135.
“Displaying and editing photo information” on
Switching between workspaces
Corel PaintShop Pro lets you switch between different workspaces
quickly and easily so that you can accomplish your photo managing
and editing tasks in the most efficient manner.
To switch between workplaces
• At the top of the application window, click one of the following
tabs:
• Manage
• Adjust
• Edit
Choosing a workspace color
You can choose from a variety of workspace colors — from dark to
light. You can also choose a background color for the image window
and preview windows.
To choose a workspace color
1 Click View Workspace Color.
Workspace tour 31
Page 46

2 Choose one of the following colors:
• Dark Gray (default)
• Medium Gray
• Light Gray
To ch a nge the background color
1 Click View Background Color, and choose a color.
Using palettes
Corel PaintShop Pro contains many palettes that organize information
and commands to help you edit your images. Some palettes appear
automatically, others appear when you activate certain tools, and some
palettes appear only when you choose to open them. You can easily
turn a palette on and off by choosing
are available only in specific workspaces.
Palettes display information and may contain both controls and
command buttons. Like toolbars, palettes can be moved from their
default docked position. For more information about customizing
palettes, see
“Customizing toolbars and palettes” on page 42.
Palette Description
Brush Variance Lets you set additional brush options when you use
a paint brush or any other raster painting tool. This
palette is particularly useful when you use a
pressure-sensitive tablet or a four-dimensional
mouse. For example, you can vary the opacity of a
brushstroke by applying pressure with the stylus.
Some options also work well with a mouse.
View Palettes. Some palettes
32 Corel PaintShop Pro X8 User Guide
Page 47

Palette Description
Histogram Displays a graph of the distribution of red, green,
blue, grayscale, hue, saturation, and lightness
values in an image. You can analyze the distribution
of detail in the shadows, midtones, and highlights
to help you decide how to make corrections.
History Lists the actions taken on the active image; lets you
undo and redo adjacent or nonadjacent actions;
and lets you create a Quickscript that can be
instantly applied to other open images
Info palette (Manage workspace) Displays information about
the selected image. It consists of a camera-style
display of the settings used to take the photo and a
tabbed area that lets you edit and view
information, such as tags and ratings, EXIF and IPTC
data, and information about location and people.
Instant Effects Provides quick access to thumbnails of preset
effects that you can apply to your photos.
Layers Lets you view, organize, and adjust settings for
image layers
Learning Center Displays information about workflow, tools, and
commands to help you complete common tasks
quickly and efficiently
Materials Lets you choose colors and materials for painting,
drawing, filling, and retouching
Mixer Lets you place and mix pigments to use with the
Oil Brush tool and the Palette Knife tool, allowing
you to create realistic strokes with oil paints on
Art Media layers
Navigation palette Lets you find and organize photos
Workspace tour 33
Page 48

Palette Description
Organizer Lets you gather and display photos from various
folders so that you can select, edit, e-mail, or print
them. You can add, remove, and rename custom
trays within the palette to match your workflow.
Overview Displays a thumbnail of the active image; lets you
set a zoom level, and displays image information
Script Output Displays a list of your actions and results when you
run scripts
Tool Options Displays settings and controls for the active tool
To display or hide a palette
Edit workspace
• Choose View Palettes, and click the palette name.
Palettes that are currently displayed are denoted with a check
.
mark
You can display or hide a floating palette by pressing F2.
To resize a palette
Edit workspace
• Drag the corner or edge of a palette.
You can also resize a docked palette by clicking the Minimize
palette
or Maximize palette button in the upper-right
corner of the palette’s title bar.
Using toolbars
All three workspaces contain toolbars with buttons that are useful for
performing common tasks. When you position the pointer over a
34 Corel PaintShop Pro X8 User Guide
Page 49

button, its name appears in a tooltip, and the status bar displays
additional information about the command. In addition, in the
Edit
workspace, the Learning Center provides advice on using the tool.
The Edit workspace is the main access point for the following toolbars:
• Effects — displays commands for applying effects to your images
• Photo — displays commands for enhancing photos
• Script — displays commands for creating and running scripts
• Standard — appears by default toward the top of the workspace
and displays the most common file-management commands,
such as saving images, undoing a command, and cutting and
pasting items
• Status — appears by default at the bottom of the workspace and
displays information about the selected tool
• Tools — contains tools for painting, drawing, cropping, typing
text, and performing other image-editing tasks
• Web — displays commands for creating and saving images for the
Web
To display or hide a toolbar
Edit workspace
• Choose View Too lb ar s, and click the toolbar that you want to
display or hide.
A check mark beside the toolbar name in the menu indicates that
the toolbar is displayed.
You can also display a toolbar by right-clicking any toolbar in
the Edit workspace, choosing Too lb ar s, and then choosing the
toolbar name.
To hide a specific toolbar, click the Close button on its title
bar.
Workspace tour 35
Page 50

You can display or hide a floating toolbar by pressing F2.
Flyout arrow
Using tools
You can use the tools to perform a variety of image editing and creative
tasks. When you hold the pointer over a tool, a tooltip displays the tool
name and shortcut key, and the status bar displays hints for using the
tool.
While the Adjust workspace contains a limited number of tools for
quickly touching up your images, the Edit
selection of tools for advanced image creation and editing. In the
workspace, some of these tools, such as the Crop, Move, and Text
Edit
tools, reside in their own space on the Tools toolbar. Most tools,
however, are grouped with other tools that perform similar tasks. A
group of tools is denoted by a small flyout arrow on the right side of
the active tool.
Some tools are grouped together in flyouts. You can access all
tools in a flyout by clicking the flyout arrow beside the active
tool.
workspace contains a wide
For information about moving, hiding, and displaying the Tools toolbar
in the Edit
workspace, see “Using toolbars” on page 34.
Depending on the type of layer you are working on, some tools may
not be available. For example, the Paint Brush and Clone Brush tools
work only on raster layers; the Pen tool works only on vector layers. For
more information about raster and vector layers, see
“Understanding
layers” on page 340.
36 Corel PaintShop Pro X8 User Guide
Page 51

The following table briefly describes each tool on the Tools toolbar of
the Edit
workspace. Some of these tools are also available in the Adjust
workspace.
Tool Description
Pan
Zoom
Pick
Move
Auto Selection
Smart Selection Brush
Selection
Freehand Selection
Magic Wand
Dropper
Crop
Straighten
Lets you control which part of the image is
visible in the image window
Zooms in when you click, or zooms out when
you right-click. You can drag to define an area
for zooming.
Moves, rotates, and reshapes raster layers, and
selects and modifies vector objects
Moves a raster layer or a vector layer on the
canvas
Selects the edges of an area automatically
when you enclose the area in a selection
rectangle.
Selects the edges of an area automatically
when you brush over a sample area.
Creates a geometrically shaped selection, such
as a rectangle, ellipse, or triangle
Creates an irregularly shaped selection
Makes a selection based on pixel values within
a specified tolerance level
Lets you choose the foreground/stroke color
by clicking or the background/fill color by
right-clicking
Trims or eliminates unwanted edges
Rotates a crooked photo to straighten it
Workspace tour 37
Page 52

Tool Description
Perspective Correction
Red Eye
Makeover
Clone
Scratch Remover
Object Remover
Paint Brush
Airbrush
Lighten/Darken
Dodge
Burn
Squares the perspective of buildings or other
objects that appear to be leaning
Quickly corrects the red-eye effect commonly
seen in photos
Provides five modes — Blemish Fixer,
Toothbrush, Eye Drop, Suntan, and Thinify™
— which let you apply cosmetic fixes to
subjects in your photos
Removes flaws and objects by painting over
them with another part of the image
Removes wrinkles, wires, and similar linear
flaws from digital photos, and removes
scratches from scanned photos
Covers unwanted elements of a photo with a
neighboring texture in the same photo
Lets you paint on your image with colors,
textures, or gradients
Simulates painting with an airbrush or spray
can
Lightens areas as you drag, or darkens areas as
you drag with the right mouse button. This
effect is stronger than the effects produced by
the Dodge and Burn tools.
Lets you lighten areas of a photo by clicking or
darken areas by right-clicking
Lets you darken areas of a photo by clicking,
or lighten areas by right-clicking
38 Corel PaintShop Pro X8 User Guide
Page 53

Tool Description
Smudge
Push
Soften
Sharpen
Emboss
Saturation Up/Down
Hue Up/Down
Change to Target
Color Replacer
Eraser
Background Eraser
Smears pixels by picking up new colors as you
drag, or pushes pixels by not picking up new
colors as you drag with the right mouse
button
Pushes pixels by not picking up new colors as
you drag, or smears pixels by picking up new
colors as you drag with the right mouse
button
Softens pixels as you drag, or sharpens pixels
as you drag with the right mouse button
Sharpens pixels as you drag, or softens pixels
as you drag with the right mouse button
Creates an embossed effect by suppressing
color and tracing edges as you drag
Makes colors more vivid as you drag, or less
vivid as you drag with the right mouse button
Shifts pixel hue values up as you drag, or shifts
them down as you drag with the right mouse
button
Recolors pixels while retaining detail
Replaces the background/fill color with the
foreground/stroke color when you click and
drag, or replaces the foreground/stroke color
with the background/fill color when you rightclick and drag
Erases raster layer pixels to transparency
Erases around the edges of the areas you want
to keep in a photo
Workspace tour 39
Page 54

Tool Description
Flood Fill
Color Changer
Picture Tube
Text
Preset Shape
Rectangle
Ellipse
Symmetric Shape
Pen
Warp Brush
Mesh Warp
Oil Brush
Chalk
Pastel
Fills pixels of a similar tolerance level with the
current foreground/stroke material when you
click, or with the current background/fill
material when you right-click
Changes the color of an object while
preserving the shading and luminosity of the
original color
Places picture tubes, theme-based artistic
elements, in your image
Places text on your image
Adds predefined shapes (such as callouts,
arrows, and starbursts) to your image
Creates a rectangle or square
Creates an ellipse or circle
Creates symmetric or star-shaped objects
Creates connected or unconnected lines,
freehand curves, and Bézier curve segments
Shrinks, grows, twists, or distorts pixels
Distorts a photo by dragging points along an
overlay grid
Simulates oil brushstrokes on an Art Media
layer
Simulates drawing with chalk on an Art Media
layer
Simulates drawing with pastels on an Art
Media layer
40 Corel PaintShop Pro X8 User Guide
Page 55

Tool Description
Crayon
Colored Pencil
Marker
Watercolor Brush
Palette Knife
Smear
Art Eraser
Simulates drawing with crayon on an Art
Media layer
Simulates drawing with colored pencil on an
Art Media layer
Simulates drawing with an ink marker on an
Art Media layer
Simulates watercolor brushstrokes on an Art
Media layer
Simulates applying oil paint with a knife
(instead of a brush) on an Art Media layer
Smears whatever pigment you’ve applied to
an Art Media layer
Erases whatever pigment you’ve applied to an
Art Media layer
Workspace tour 41
Page 56

Customizing toolbars and palettes
You can dock, float, resize, and move the toolbars and palettes to
customize your workspace. When docking is enabled, toolbars and
palettes can be automatically integrated into the workspace. When
docking is disabled, toolbars and palettes can float anywhere on the
screen without being integrated into the workspace.
You can keep the open palettes and toolbars fully displayed or roll
them up when you’re not using them.
To set docking preferences
Edit workspace
1 Choose View Docking Options.
The Preferences dialog box appears.
2In the Allow Docking Of group box, mark the palettes that you
want to dock.
Even if a palette is set for docking, you can still place it
anywhere in the workspace without docking it by dragging it
while holding down
To dock a toolbar or palette
Edit workspace
• Drag the toolbar or palette’s title bar to one edge of the
workspace.
The toolbar or palette snaps into place.
Ctrl.
You can also dock a toolbar or palette by double-clicking its title
bar.
42 Corel PaintShop Pro X8 User Guide
Page 57

To float a toolbar or palette
Edit workspace
1 Do one of the following:
• Place the pointer over the toolbar’s handle. The pointer
becomes a four-sided mover icon.
• Place the pointer in the palette’s title bar.
2 Drag the toolbar or palette away from the workspace edge.
The handle size and position vary, depending on the size of the
toolbar and whether it is vertical or horizontal.
You can also double-click the toolbar’s handle.
To move a toolbar or palette
Edit workspace
• Drag its title bar to a new position.
To resize a toolbar or palette
Edit workspace
• Drag a side or a corner of the toolbar or palette.
To display all toolbars and palettes
Edit workspace
• Press Ctrl + Shift + T.
To roll up a toolbar or palette
Edit workspace
• Click the Auto Hide pushpin button on the toolbar or
palette’s title bar.
When the Auto Hide pushpin is pointing down, the toolbar or
palette remains fully displayed.
Workspace tour 43
Page 58

When the Auto Hide pushpin is pointing to the left , the
toolbar or palette rolls up when you move your pointer away.
If you perform an action in which the toolbar or palette remains
in focus, the toolbar or palette remains displayed even after the
pointer moves away. When you click anywhere else or perform
another action, the toolbar or palette rolls up.
When you click away from the palette or toolbar with the Auto
Hide button activated, it rolls up in one of two ways: If it’s
floating, only the title bar is visible; if it’s docked, a tab appears
with the palette or toolbar name.
Clicking the Auto Hide button again prevents the palette from
rolling up.
To display the palette again, position your pointer over the tab.
Using dialog boxes
Dialog boxes are windows that open when you choose certain
PaintShop Pro commands. You can use them to select and
Corel
preview command options. All dialog boxes remember where you last
positioned them on the screen and re-open in the same location.
There are two styles of dialog boxes. The following Adjust and Effect
filters use a larger layout to make it easier to use interactive controls:
Depth of Field, Digital Noise Removal, Graduated Filter, Red Eye
Removal, Retro Lab, Selective Focus, Smart Photo Fix, and Vignette.
44 Corel PaintShop Pro X8 User Guide
Page 59

Some Adjust and Effect dialog boxes use a larger layout.
For an example of the other style of dialog box, see “Choosing effects”
on page 432.
Common features found in many dialog boxes include the following:
• Before and After panes — let you see the effect of the dialog box
settings on your image before the effect is applied
• Zoom and Pan controls — let you zoom in and out on the preview
areas, and change the current viewing area
• Presets — display saved settings, or scripts, that you can use to
make quick changes to images. For more information, see
“Using
and creating presets” on page 747.
• Reset to Default button — lets you reset dialog box settings
to their initial values
• Numeric edit controls — let you select or enter numeric values
• Color boxes — let you select colors for a command setting
Workspace tour 45
Page 60

• Randomize parameters button — lets you preview random
— The Before and After panes are displayed.
— The Before and After panes are hidden.
settings.
Using preview areas
Most dialog boxes that you use to correct images, apply effects, or
modify selections contain Before and After panes that show the image
with changes applied.
In some dialog boxes, you can show or hide the Before and After pan es
by clicking the Show/Hide
Previews button:
When you hide the Before and After panes, you can still see the effects
of the current settings on the image by marking the
Preview on Image
check box in the upper-right corner of the dialog box.
Editing numeric values
To edit values in Corel PaintShop Pro dialog boxes, you can use the
numeric edit control to enter values and change settings.
Using color boxes
In some dialog boxes, a color box displays the currently selected color
for a given control. When you move the pointer over the color box, the
pointer changes to a dropper and displays the RGB values.
Randomizing parameters
Many correction and effect dialog boxes contain a Randomize
Parameters button
that lets you update settings with random
values.
46 Corel PaintShop Pro X8 User Guide
Page 61

To zoom in or out of the image preview
Enter a zoom
setting here
Click these buttons to
increase or decrease
the zoom setting
Click and drag here
to increase or decrease
the zoom setting
• Set the value in the Zoom control.
You can also expand the dialog box to create more room for the
Before and After panes.
To pan the image preview
Edit workspace
1 Move the pointer into the After pane.
The pointer changes to a hand.
2 Drag the image.
You can also hold down the Pan button , and then center
the selection rectangle over the part of the image you want to
display.
To proof changes in the main image window
Edit workspace
•Mark the Preview on Image check box.
Any change to a dialog box setting will be applied to the main
image window.
To edit numeric values
Edit workspace
• Perform a task from the following table.
Workspace tour 47
Page 62

To Do the following
Enter a specific value Click in the control, press Delete or
Backspace, and type a new value.
Increase or decrease the number
by one
Choose an approximate value Click the slider.
Choose from the range of available
settings
Click the up or down arrow.
Move the slider.
If you enter a value that is out of range for the control, it turns
red.
You can also double-click the number to highlight it, and type
a new value.
To choose a color from a dialog box
Edit workspace
• Perform a task from the following table.
To D o th e fo l low ing
Select a color Click the color box, and select a color
from the Color dialog box.
Select from recently used colors Right-click the color box, and select a
color in the Recent Colors dialog
box.
To randomize settings within a dialog box
Edit workspace
• Click the Randomize parameters button .
48 Corel PaintShop Pro X8 User Guide
Page 63

You can try a variety of settings by continuing to click the
Randomize parameters button until you get the effect you
want.
Viewing images
You can view images in a tabbed format, in which a tab appears at the
top of the image window. When you click a tab, the image in that
window becomes the active image. You can also view images in
windows, which you can move, resize, or close. You can open the same
image in multiple tabs or image windows, which lets you see the image
at different magnification levels.
The Tabbed Documents mode (left) lets you maximize your
image viewing space. To view several images at the same time
(right), turn Tabbed Documents mode off.
If you have multiple images open, you can arrange the image windows
to view them side by side or stacked in cascading order. You can also
see a list of all open images.
If the image is larger than the image window, you can pan to view
different parts of the image, or you can fit the window to the image.
You can also see a thumbnail of the entire image in the Overview
palette. For more information, see
“Using palettes” on page 32.
The title bar at the top of the image window shows the filename and
the magnification percentage. An asterisk after the filename indicates
Workspace tour 49
Page 64

that the image has been modified and that those changes have not
been saved.
If the image has an embedded watermark, a copyright symbol is
displayed in front of its name. For more information, see
“Using digital
watermarks” on page 814.
To enable or disable the tabbed image window option
Edit workspace
• Choose Window Tabbed Documents.
To view another image, click its tab. If an image tab is not in the
current view, click the arrows in the upper-right corner of the
image window to scroll left or right.
To close a tabbed-format image, click the Close button .
To move an image window
Edit workspace
• Drag the title bar.
To resize an image window
Edit workspace
• Drag a corner of the image window.
When you resize an image window, you are not changing the
size of the image.
To minimize or maximize an image window
Edit workspace
• Perform a task from the following table.
50 Corel PaintShop Pro X8 User Guide
Page 65

To Do the following
Minimize the image window to
display only the title bar
Maximize the image window to fill
the workspace
Restore the image window to its
previous size
Click the Minimize button .
Click the Maximize button .
Click the Restore Up button .
To close an image window
Edit workspace
• Choose File Close.
If you have made unsaved changes to your image, you are
prompted to save.
You can also click the Close button on the title bar.
To close all windows, choose Window Close All.
To make a copy of the active image
Edit workspace
• Choose Window Duplicate.
A copy of the active image opens. You can edit the copy
independently of the original image.
You can also duplicate the active image by pressing Shift + D.
To open multiple views of the same image
Edit workspace
• Choose Window New Window.
Workspace tour 51
Page 66

A new window opens with another view of the active image.
When you make changes in one window, both windows are
updated.
To arrange multiple windows
Edit workspace
• Perform a task from the following table.
To Do the following
Display cascading windows
Display windows side by side
vertically
Display windows side by side
horizontally
Choose Window
The windows cascade from the
upper left to the lower right of the
workspace.
Choose Window
Windows are resized to fit within the
workspace.
Choose Window
Windows are resized to fit within the
workspace.
Cascade.
Tile Vertically.
Tile Horizontally.
To see a list of all open images
Edit workspace
• Click the Window menu.
The names of all open images appear at the bottom of the
Window menu. The filenames are listed in the order in which they
were opened.
To view another area of the image
Edit workspace
• Perform a task from the following table.
52 Corel PaintShop Pro X8 User Guide
Page 67

To Do the following
Pan the image On the Tools toolbar, choose the Pan
tool , and then drag in the
image. If any other tool is active,
hold down the Spacebar, and then
drag in the image.
Change the view horizontally or
vertically
Change the view by small incrementsPress the arrow keys.
Pan in the Overview palette Press F9 to display the Overview
Drag the horizontal or vertical scroll
bar.
palette, click the Preview tab, place
the pointer inside the panning
rectangle, and drag. You can also set
the zoom level in the Preview tab of
the Overview palette.
To fit the image in the image window
Edit workspace
• Perform a task from the following table.
To Do the following
Fit the window to the image
Fit the image to the window
Fit the image and the window to
the screen
Choose Window
Choose Window
Choose Window
Fit to Image.
Fit to Window.
Fit to Screen.
Using shortcut keys
Corel PaintShop Pro lets you use shortcut keys to execute menu
commands, select tools, display palettes, edit nodes on vector objects,
and execute Organizer commands. All of the menu commands,
Workspace tour 53
Page 68

including those for opening palettes, list their shortcut keys. Shortcut
keys for tools are displayed when you move the pointer over a tool.
You can customize the shortcut keys. For more information, see
“Customizing keyboard shortcuts” on page 692.
To access menu commands by using shortcut keys
•Hold down Alt, and press the underlined letter in the menu item.
For example, press Alt + F to open the File menu.
You can also scroll through the menus by using the arrow keys.
To view all shortcut keys
Edit workspace
Manage workspace
• Choose Help Keyboard Map.
Using context menus
Context menus provide quick access to commands that are specific to
a tool, selection, palette, or other item. You can open a context menu
by right-clicking the item.
To view a complete list of context menus
Edit workspace
1 Choose View Customize.
The Customize dialog box appears.
2 Click the Menu tab.
3 Click the Select context menu drop-list.
All of the context menu names appear in the drop-list. If you want
to open a specific context menu, select it.
54 Corel PaintShop Pro X8 User Guide
Page 69

To use a context menu
1 Right-click an image, an empty area of a palette, a layer on the
Layers palette, a thumbnail in the Organizer, or a toolbar.
2 Choose a command.
Using rulers, grids, and guides
The Edit workspace displays the rulers by default. You can choose a
ruler display in pixels, inches, or centimeters, change the color of the
rulers, or altogether hide them.
What is a grid?
A grid is a series of horizontal and vertical lines overlaying your image.
Grid lines can help you position image elements. You can display or
hide grids and set grid preferences for spacing and appearance. When
you display grids, they appear in all open image windows.
What are guides?
Guides are horizontal or vertical lines you position to overlay your
image. With the rulers displayed, you drag guides onto your image to
help with precision work, such as cropping, moving image elements,
selections, as well as text and brushstroke placement. While grids place
a series of horizontal and vertical lines at certain intervals, you place
guides at the locations you want.
Setting snapping
You can use snapping to align your brushstrokes and image elements
precisely to the nearest grid line or guide. The snap influence controls
the distance, in pixels, that an element must be from a guide or grid
line in order to snap to it. An item’s center point snaps to a guide or
grid if the center point is the closest part of the item to a grid or guide.
Workspace tour 55
Page 70

To display the ruler, grid, or guides
Edit workspace
• Choose the View menu, and select one of the following:
• Rulers
• Grid
• Guides
You must first display rulers before you can drag guidelines
onto your image.
To set ruler properties
Edit workspace
Manage workspace
1 Choose File Preferences General Program Preferences.
The Preferences dialog box appears.
2 Choose Units from the list.
3In the Rulers group box, choose an option from the Display Units
drop-list.
4 Choose the ruler color by selecting one of the following options:
• Black on white — displays black hash marks and numbers on a
white background
• Toolbar colors — displays black hash marks and numbers on a
color background that is used in toolbars and palettes
5 Click OK.
To set default or current grid properties
Edit workspace
1 Choose View Change Grid, Guide & Snap Properties.
The Grid, Guide & Snap Properties dialog box appears.
2 Click the Grid tab.
56 Corel PaintShop Pro X8 User Guide
Page 71

The Default settings group box shows the default settings for the
grid. The
Current image settings group box shows settings for the
grid in the current image.
3 Type or set a value in the Horizontal grids control to set the
distance between horizontal grid lines (starting from the top of
the image).
4 Type or set a value in the Vertical grids control to set the distance
between vertical grid lines (starting from the left side of the
image).
5 Choose a unit of measurement option from the Units drop-list.
6 Click OK.
You can also
Choose a grid color Click the Color box, and choose a color
from the color palette.
Set the snap influence level Type or set a value in the Snap influence
control.
Workspace tour 57
Page 72

To place a horizontal or vertical guide
Edit workspace
1 If the rulers are not displayed, choose View Rulers.
2 Choose View Guides.
3 Do one of the following:
• To place a horizontal guide, click the top ruler, and drag a guide
into position.
• To place a vertical guide, click the left ruler, and drag a guide
into position.
As you drag, the Status bar displays the guide’s position (in pixels).
4 For further placement position, on a ruler, double-click a guide
handle.
The Guide Properties dialog box appears.
5 Type or set a value in the Guide position control.
6 Click OK.
To change the color of a guide
Edit workspace
1 On a ruler, double-click a guide handle.
The Grid, Guide & Snap Properties dialog box appears.
2 On the Guides tab, click the Color box, and choose a color from
the color palette.
3 Click OK.
To set the default properties for guides
Edit workspace
1 Choose View Change Grid, Guide, and Snap Properties.
The Grid, Guide & Snap Properties dialog box appears.
2 Click the Guides tab.
58 Corel PaintShop Pro X8 User Guide
Page 73

The Default Settings group box shows the default settings for
guides. The
Current Image Settings group box shows settings for
the guides in the current image.
3In the Default Settings group box, click the Color box, and choose
a color from the color palette.
If you want to choose a recently-used color, right-click the Color
box, and choose a color from the Recent Colors dialog box.
4 Type or set a value in the Snap influence control to specify the
distance (in pixels) that an item must be from the guide in order
for it to snap.
5 Click OK.
Note: You must choose the Snap to Guide command in the View
menu.
To delete guides from an image
Edit workspace
1 Choose View Change Grid, Guide, & Snap Properties.
2 Click the Guides tab.
3Mark the Delete guides check box.
4 Choose one of the following options:
• From current image only
• From all open images
5 Click OK.
You can also drag a guide’s handle until the guide is off the
image area, or right-click a guide handle and click
Delete in the
Guide Properties dialog box.
Workspace tour 59
Page 74

To snap to the nearest guide or grid line
Edit workspace
•From the View menu, choose one of the following:
• Snap to Guides
• Snap to Grid
60 Corel PaintShop Pro X8 User Guide
Page 75

Getting started
You can bring your images into Corel PaintShop Pro in various ways:
you can import photos that you have transferred to your computer,
scan images directly into the application, capture images from the
computer screen; or you can create an image.
After you bring your images into the application, you can access many
basic commands that help you view images and image information.
You can perform basic actions such as cut, copy, undo, and repeat.
This section presents the following topics:
• Getting photos into Corel PaintShop Pro
• Connecting with image scanners
• Opening and closing images
• Saving images
• Creating images
• Viewing images and image information
• Capturing images from the computer screen
• Zooming and panning
• Cutting, copying, and pasting
• Copying images into other applications
• Undoing and redoing actions
• Repeating commands
• Deleting images
• Files supported by Corel PaintShop Pro
Getting started 61
Page 76

Getting photos into Corel PaintShop Pro
After you transfer your photos to your computer (by using Windows or
the software for your camera), you can import your photos into
Corel
PaintShop Pro. You import photos by browsing to folders. The
photos in the folders are then cataloged automatically in a database.
This makes it easy to find, edit, and update the information for your
photos.
Although you can browse to folders from any workspace, the Manage
workspace is designed to make it easy to review and manage multiple
photos. For more information about importing options, see
folders for photos” on page 105.
To import your photos into Corel PaintShop Pro
Manage workspace
1 In the Navigation palette, click the Collections tab, and click
Browse More Folders.
2 In the Browse For Folder dialog box, navigate to the folder you
want.
3 Click OK.
The folder is added to the folder list and all the images are
cataloged in the application database.
“Browsing
You can open the Navigation palette from any workspace by
clicking the
Show/Hide Navigation button on the Organizer
palette.
62 Corel PaintShop Pro X8 User Guide
Page 77

Connecting with image scanners
Your scanning software may allow you to choose an application for
scanning images. Many TWAIN, WIA, and USB scanners are
compatible with Corel
32-bit and 64-bit scanner compatibility
WIA (Microsoft Windows Image Acquisition) is supported by both the
32-bit and 64-bit versions of Corel
TWAIN is supported by both the 32-bit and 64-bit versions of
PaintShop Pro. However, to work with the 64-bit version of
Corel
PaintShop Pro, your scanner must support 64-bit applications (in
Corel
some cases, scanner drivers install to the 64-bit version of Windows,
but do not support interaction with 64-bit applications). How can you
tell? After you install the 64-bit scanner driver from the manufacturer,
a file appears in the following location: Windows/twain_64. If you do
not see the twain_64 folder and a file within the folder, then the driver
does not support 64-bit applications. For more information, please
refer to the scanner manufacturer’s website.
To get images from a scanner
Edit workspace
1 After installing the software that came with your scanner, connect
your scanner to your computer.
2In Corel PaintShop Pro, choose File Import, and click From
Scanner or Camera
the type of scanner.
3 Use the scanner’s software to perform the scan.
If you have set up your scanner to work with Corel PaintShop Pro,
the image is displayed in the application after it is processed. The
scanner’s software may remain open, so you can either continue
to acquire images or exit the software.
PaintShop Pro.
PaintShop Pro.
(WIA option) or TWAIN Acquire, depending on
Getting started 63
Page 78

After scanning multiple photos at the same time, you can
quickly create individual image files by using the
Image
feature. For more information, see “To create a new
Crop as New
image by cropping” on page 168.
After cropping an image, you might notice that the Width and
Height values on the Tool Options palette are each set at 0.100.
These settings do not reflect the cropped image size. To see the
image size dimensions after cropping, choose
Information
.
Image Image
Opening and closing images
You can open most image formats in Corel PaintShop Pro. You can
open the images by using the menu bar or by using the
Manage
Corel
open in Corel
information about setting file format associations, see
format associations” on page 716.For a list of the file formats that you
can open in Corel PaintShop Pro, see “Files supported by
Corel PaintShop Pro” on page 96. For information on RAW files, see
“Supported RAW file formats” on page 149.
To open an image
Edit workspace
1 Choose File Open.
2In the Look in drop-list, choose the folder where the file is stored.
3 Click the name of the file that you want to open.
4 Click Open.
workspace. You can associate specific file formats with
PaintShop Pro, such as JPEG, TIF, or PNG, so that these files will
PaintShop Pro when you double-click them. For more
“Setting file
If you want to open multiple files, hold down Ctrl, and click the
filenames.
64 Corel PaintShop Pro X8 User Guide
Page 79

You can also
View information about an image In the Open dialog box, click the
filename, and click Details.
View a thumbnail in the preview
area
Run a script on the files as they openIn the Open dialog box, mark the
In the Open dialog box, mark the
Show preview check box.
Enable Pre-processing check box,
and choose a script from the droplist.
To open a recently viewed file
Edit workspace
• Choose File Recent Files, and choose the filename.
By default, the Recent Files menu lists four recently viewed files.
You can choose to list up to 10 files. For more information, see
“To set the number of files that appear in the Recent Files list”
on page 704.
To open an image from the Manage workspace
Manage workspace
• Click a thumbnail to select the file.
To view thumbnails from another folder, click Browse More Folders
on the Navigation palette, and from the Browse For Folder dialog
box that appears, choose the folder you want. The folder appears
in the Folders list.
You can work with the file in the Manage workspace, or click the
Adjust tab or Edit tab to edit the file in another workspace.
To open a RAW photo image
Edit workspace
• Do one of the following:
Getting started 65
Page 80

• Choose File Open.
• Double-click on a RAW image thumbnail.
• Hold down Ctrl, and click the filenames or thumbnails to open
multiple files.
The Camera RAW Lab dialog box opens. This dialog box lets you
adjust the settings that are stored with the RAW photo file.
To close an image
• Choose File Close.
In the Edit workspace, you can also close an image by clicking
the
Close button above the image.
Saving images
Before you save an image, you need to consider the file format in
which you want to save it, and you must ensure that you don’t
overwrite an original image that you may need in the future.
The PspImage file format of Corel PaintShop Pro supports layers, alpha
channels, and other features used in creating images. It is
recommended that you save and edit your images as PspImage files.
You can then save the files to common file formats. You can also use
Save for Office command if you want to optimize your images for
the
placement in another application, such as a page layout, e-mail, or
Web page design application.
The following list provides basic information about common file
formats:
• JPEG — a standard file format for digital photos that is suitable for
e-mail and the Web. It uses lossy compression, which ensures a
small file size but entails a loss of image data each time you save.
66 Corel PaintShop Pro X8 User Guide
Page 81

For this reason, this format is not recommended for editing
photos unless a high quality setting is used. This file format
supports EXIF and IPTC data, which can be used to provide
information about the photo, such as when a photo was taken.
• TIFF — a standard file format for printing and sharing images
between programs. This file format uses non-lossy compression.
Although you do not lose image data when you save the file, the
larger file size is less suitable for e-mail and the Web. TIFF can save
data in the CMYK color mode for printing, and it supports EXIF
and IPTC data.
• PNG — a file format widely used for Web images. It uses non-lossy
compression to reduce the file size without losing image data.
• RAW camera formats — a file format typically used by
professional photographers. RAW camera formats provide
uncompressed, unprocessed image data and gives you the most
control over how an image is processed. You must have a camera
that captures digital image in a RAW format, and you need
software that lets you open and work with the file, such as
PaintShop Pro.
Corel
You can save a PspImage file with or without compression. Both
compression methods that Corel
PaintShop Pro uses are lossless and
reduce the file size without losing any image information.
Uncompressed files require more disk space.
Corel PaintShop Pro uses the following compression methods:
• Run length encoding (RLE) — a fast compression method, which
compresses most multilayer images to about 75 percent of their
original size. This method works well with images that contain
large areas of the same color.
Getting started 67
Page 82

• LZ77 compression — a slower compression method that
compresses most images to smaller sizes than with the RLE
method. This method works well with photorealistic images.
When you save a new image, Corel PaintShop Pro lets you select its
location, name, and file format. When you save an image and then edit
it, the image title bar displays an asterisk, or modifier tag, after the
filename to indicate that the file has been modified. This tag
disappears each time you save your work.
You can also automatically save your files at specific intervals to avoid
losing your work if your computer shuts down unexpectedly. For more
information, see
“Setting Autosave preferences” on page 725.
If you want to save a version of a file, you can save a copy of an image.
This is useful when you want to apply effects to an image but keep the
original file.
Important! The Auto-Preserve Original preference setting can help
you avoid overwriting original images. By default, this feature is on.
For more information on this preference setting, see “Setting AutoPreserve preferences” on page 709.
To sa v e a n ew im age
Edit workspace
1 Choose File Save.
The Save As dialog box appears.
2From the Save in drop-list, choose the folder in which you want to
save the file.
3In the File name field, type a name for the file.
4In the Save as type drop-list, choose a file format. The most
commonly used formats are listed first.
68 Corel PaintShop Pro X8 User Guide
Page 83

If you want to change the default settings for the file format (for
example compression or color profile), click
Options, and choose
the settings you want.
5 Click Save.
You can also save your work by clicking the Save As button
on the Standard toolbar to avoid overwriting your current file.
You can also adjust default settings for JPEG images by
dragging the
Compression slider the first time you save a JPEG
in your editing session.
You can save in the last-used file format by choosing File
Preferences General Program Preferences, and clicking Display
and Caching
group box, mark the
from the list on the left side. In the Presentation
Re-use last type in the file save-as dialog
check box.
To save your work
Edit workspace
• Choose File Save.
If the Auto-Preserve Originals preference setting is enabled, and
this is the first time you’ve attempted to save changes to this
image, you are prompted to save a copy of the original unedited
image. If Auto-Preserve Originals is not enabled, the original
image is overwritten by the modified image.
You can avoid overwriting the current file by using the Save As
command.
You can also save your work by clicking the Save button on
the Standard toolbar.
Getting started 69
Page 84

To save a copy of an image
Edit workspace
1 Choose the File Save Copy As.
The Save Copy As dialog box appears.
2From the Save in drop-list, choose a folder in which to save the
image.
If you want to create a new folder for the image, click the Create
New Folder
button.
3In the File name box, type a name for the file.
If you want to save the file in a different format, select the format
from the
Save as type drop-list. The most commonly used formats
are listed first.
If you want to change the default settings for the file format (for
example compression or color profile), click
Options, and choose
the settings you want.
4 Click Save.
To save images for office applications
Edit workspace
1 Choose File Save for Office.
The Save for Office dialog box appears.
2From the Save in drop-list, choose a folder in which to save the
image.
If you want to create a new folder for the image, click the Create
New Folder button .
3From the Optimize drop-list, choose one of the following:
• Desktop Printing — sets the image resolution to 200 dpi. This
option is ideal for when you are working in a general page
layout application and you want high-quality images but not an
overwhelming file size.
70 Corel PaintShop Pro X8 User Guide
Page 85

• Professional Printing — sets the image resolution to 300 dpi.
This option is ideal for when you need the highest image quality.
• Screen or e-mail — sets the image resolution to 96 dpi. This
option is ideal for when you want a smaller file size that can be
shared or displayed quickly.
4In the File name box, type a name for the file.
5 Choose a file format from the Save as type drop-list.
6 Click Save.
You can also
Define the maximum image size Mark the Advanced Settings check
box, and then adjust the Width and
Height settings. Choose a unit of
measure from the drop-list on the
right.
Adjust the image quality Mark the Advanced Settings check
box, and then choose a resolution
from the Image quality drop-list.
Use the most recent settings from
the Save to Office dialog box
Use the default settings for the
Save to Office dialog box
From the Optimize drop-list, choose
Last Used.
From the Optimize drop-list, choose
Default. The settings are the same as
the default Screen or e-mail settings.
Creating images
The New Image dialog box is like a start screen for your creative
projects. You can choose a preset, such as a standard page, photo size,
or Facebook timeline cover, or you can create a custom image. The
section below describes some of the settings available.
There are two types of computer graphics: raster and vector. With
Corel
PaintShop Pro, you can create both types of images. You can also
Getting started 71
Page 86

create an image with both raster and vector layers. It is important to
understand the differences between these two data types before you
begin working with them.
Raster graphics
Raster images are composed of individual elements, called pixels,
which are arranged in a grid. Each pixel has a specific location and
color. If you magnify raster data, you can see the individual pixels as
squares of colors. Raster images contain a fixed number of pixels, so
when you magnify the image you are magnifying the display size of the
pixels. As a result, raster images may display jagged rather than
smooth edges when magnified on screen or when printed at a large
magnification.
An object in a raster image is defined by its pixels. For example, the
front door in an image of a house is made up of a mosaic of pixels at
certain locations in the image. In bitmap images, you edit pixels rather
than objects or shapes.
Raster images can display subtle changes in tones and colors, so they
are most often used for images like photographs and digital artwork.
Vector graphics
Vector graphics use geometric characteristics — lines, curves, and their
locations — to define objects. For example, a door in a graphic of a
house is made up of a rectangle that has a certain width and height,
is placed at a specific location, and is filled with a certain color. In
vector images, you edit objects or shapes rather than pixels.
Vector graphics do not lose clarity or detail when they are scaled or
printed, regardless of the change in size or resolution. For this reason,
vector graphics are suited to technical illustrations or corporate logos.
72 Corel PaintShop Pro X8 User Guide
Page 87

Choosing to work with raster or vector data
With Corel PaintShop Pro, you create and edit raster and vector data
on separate layers. With some tools you create raster data (like
brushstrokes with the Paint tool), and with other tools (like the Text and
Preset Shapes tools) you can choose whether you want to create raster
or vector data.
In general, it is best to use a vector object if you need to edit it as an
element separate from other parts of the image. For example, if you
add a star to an image, you may want to change its size, color, or
location. You can make these changes more easily if the star is a vector
object. You can create raster data on separate layers, which can be
easily edited or moved.
To apply tools or commands to vector objects that work only on raster
data (such as the painting tools or the Effects commands), you can
create a raster selection of a vector object and then paste the selection
to a new raster layer.
Understanding image size, resolution, and color depth
Before you create a new image, you need to consider how you will use
it. For example, will you display the image on a website, send it as an
e-mail attachment, or print it? How you use the image helps you
determine its size, resolution, and color depth.
Image size is represented by the physical dimensions of the image.
When you create a new image or resize an existing image with
PaintShop Pro, you can define image height and width in pixels,
Corel
inches, millimeters, or centimeters.
The following are guidelines for choosing a unit of measure:
Getting started 73
Page 88

• If you plan to print the images, use inches or centimeters. By
starting with the final image dimensions, you can produce an
image that fits the page.
• If you plan to export the images to another application (such as a
word-processing application), and then resize and print them, you
can use any of the options.
• If you plan to display the images on the screen, use pixels.
You can resize an image after creating it, but doing so may result in
loss of image data. For more information about resizing images, see
“Retouching and restoring images” on page 239.
Image Resolution is measured in pixels per inch (ppi) or pixels per
centimeter. Low resolution can cause pixelation, a problem in which
large pixels produce coarse output. High resolution can increase an
image’s memory requirements without producing a proportional
increase in its quality.
Color Depth is measured according to the number of colors that a pixel
can display. Each pixel’s color information is stored in bits — from 1 to
48 bits. In a 1-bit image, each pixel can display only one of two colors
(black or white). In a 24-bit image, each pixel can display 1 of 16
million colors. Images with a color depth of 16 million colors look
good, but they also require more memory to store and edit. Not all
computer monitors can display 16 million colors, so some file formats
limit the number of supported colors. For example, GIF images, a
popular format for the Web, contain up to 256 colors (8-bit depth).
Many of the commands in Corel PaintShop Pro for applying effects and
correcting images work on 16 million–color images only. Therefore, it’s
best to create most images in 16 million colors. When you have
finished working on the image, you can decrease its color depth and
save it in another format.
74 Corel PaintShop Pro X8 User Guide
Page 89

You can create an image by using the New command in the File menu,
or by copying aspects of an existing image. When you use an existing
image as the source of your new image, you can copy the entire image
or an individual layer. You can also create an image from any graphic
data copied to the Clipboard from Corel PaintShop Pro.
When you create a new image in Corel PaintShop Pro, you can specify
its dimensions, resolution, and type. The options available depend on
the type of graphic you want to create. If you’re uncertain as to what
type of graphic you need for your project, or which settings to choose,
review the information in the following procedure. For more
information about creating Art Media graphics, see
“Painting and
drawing with the Art Media tools” on page 631.
To create an image
Edit workspace
1 Choose File New.
The New Image dialog box appears.
2 To choose a preset, click one of the category buttons on the left,
and choose a preset. To adjust the preset, or to define a custom
image, follow the steps below.
3In the Image Dimensions group box, type or set values for the
following controls:
• Units — specifies the unit of measure
• Width — specifies the width of the new image
• Height — specifies the height of the new image
• Resolution — specifies number of pixels contained in the chosen
unit of measure
If you want to choose preset dimensions, choose an option from
the
Load Preset drop-list.
Getting started 75
Page 90

4In the Image Characteristics group box, choose one of the
following options:
• Raster Background — suitable for most graphics and painting
tasks
• Vector Background — suitable for vector graphics
• Art Media Background — lets you use the Art Media tools
5 Choose an option from the Color depth drop list.
If you chose the Raster Background option, you can choose a
background color for the image by clicking the color box and
choosing a color from the Material Properties palette. To choose a
transparent background (for 8-bit or 16-bit images only), mark
the
Transparent check box.
If you chose the Art Media Background option, you can choose a
canvas texture from the
want to choose a color for the canvas, mark the
Select the canvas texture drop-list. If you
Enable fill color
check box, click the color box, and choose a color from the Color
dialog box.
6 Click OK.
The Memory Required field displays the amount of memory
required for the image. Your computer’s available memory
should be at least two to three times the value displayed in the
Memory Required field. To reduce the memory requirement,
you can reduce the resolution or the dimensions of the image.
For more information on choosing colors or materials, see
“Using the Materials palette” on page 403.
To duplicate an image
Edit workspace
1 Open the image you want to duplicate.
2 Choose Window Duplicate.
76 Corel PaintShop Pro X8 User Guide
Page 91

A new window containing a copy of the image appears in the
workspace.
To create an image from a layer
Edit workspace
1 On the Layers palette, click the layer you want to copy.
2 Choose Edit, and click one of the following:
• Copy
• Cut
The current layer is placed on the Clipboard.
3 Choose Edit Paste As New Image.
A new window containing the layer appears in the workspace.
To create a new image from a layered image
Edit workspace
1 On the Layers palette, click the layer you want to copy.
2 Choose Edit Copy Special Copy Merged.
All layers are copied to the Clipboard.
3 Choose Edit Paste As New Image.
A new image window appears in the workspace. The new image
contains all layers merged into one raster layer.
To create an image from the Clipboard contents
Edit workspace
1 Copy a selection or layer of an image, or an item from another
program.
2 Choose Edit Paste As New Image.
The Clipboard contents are pasted as a new image.
Getting started 77
Page 92

If the Paste As New Image command is grayed out, then the
data you have copied to the Clipboard cannot be pasted as a
PaintShop Pro image.
Corel
A dialog box may appear and request additional information,
such as the width and height of the new image window. You
can change your preferences so that
Corel PaintShop Pro does
not prompt you for size and options when you paste data. For
more information about setting file format preferences, see
“Setting file format preferences” on page 710.
Viewing images and image information
When you open an image in Corel PaintShop Pro, it appears in an
image window. The title bar of the image window displays the image
filename and the level of magnification applied to the image. An
asterisk after the filename indicates that the image has been modified
and that the changes have not been saved.
You can view basic image information, such as the height and width
of an image (in pixels) and its color depth. You can also view detailed
information for the image, such as its resolution, color depth, layers
and alpha channels, and EXIF data. You can also view the number of
unique colors in an image.
You can also view and edit image information in the Info palette that
displays in the
“Displaying and editing photo information” on page 135.
Manage workspace. For more information, see
The EXIF Information tab of the Image Information dialog box lets you
view EXIF data for digital camera photos. When you take a photo with
a digital camera, the camera attaches information to the image, such
as the date and time that it was captured, the exposure, and the flash
78 Corel PaintShop Pro X8 User Guide
Page 93

settings. When you load a photo from a digital camera into
Corel
PaintShop Pro, you can view this extra information.
You can expand the workspace to preview an image without the
menus, toolbars, or palettes visible.
The Status bar, which is located at the bottom of the application
window, displays the cursor position, height and width in pixels, and
color depth for the current image.
To view digital photo information
Edit workspace
1 Open an image.
2 Choose Image Image information.
• Click the Image Information tab to view the filename, file
format, image dimensions, resolution, color depth, modification
status, number of layers and alpha channels, and the amount of
RAM and disk space used for the image. This page also displays
the image’s selections, masks, alpha channels, and Undo
storage.
• Click the Creator Information tab to view or edit the image’s
title, artist’s name, copyright, description, date of creation, and
date of modification.
• Click the Watermark Information tab to view and add
information about Digimarc watermarking.
• Click the EXIF Information tab to view information for images
taken with digital cameras. In the
check boxes for the information you want to display:
Device
, Artist, Date, Image, Shot Conditions, GPS, or
Makernote. Some items are editable (as denoted by an asterisk).
To add customized text for an editable item, click in the
column, and then type your custom information.
Section group box, mark the
Input
Value
Getting started 79
Page 94

You can also add IPTC data to the image information by using
the Advanced Creator Information dialog box. This can be
useful for photojournalists, for example, who may need to
record IPTC data about when and where a photo was shot, and
how urgently the photo needs to be reviewed. To access this
dialog box, click the
Creator Information tab, and then click
Advanced.
EXIF and IPTC data is also available on the Info palette in the
Manage workspace.
To view image color information
Edit workspace
• Choose Image Count Image Colors to display the number of
unique colors in the image.
To view layer color information
Edit workspace
• Choose Layers Count Layer Colors to display the number of
unique colors in the current layer.
To view an image on the full screen
Edit workspace
• Choose View Full Screen Preview.
The workspace disappears, and the image appears at its current
magnification.
To return to the Corel PaintShop Pro workspace, press any key.
80 Corel PaintShop Pro X8 User Guide
Page 95

Capturing images from the computer screen
Corel PaintShop Pro lets you capture images from your computer
screen. Captured screens can then be embedded in documents such as
reports, training guides, presentations, and Web pages.
To initiate the capture process, you must choose settings and then
press a hot key, right-click, or set a delay timer. You can define your
own hot key. You can also specify the delay period, so that you can set
up elements such as menu lists or flyouts before completing the
capture.
You can specify the window elements you want to capture. For
example, you can capture the active window, a menu, an image, or a
part of an image. However, hot keys and right-clicking cannot be used
for capturing user-defined areas.
You can also capture a series of images. Each image is assigned a value
and placed in order in the series. You can open the series of images in
a graphics or word-processing application.
If you frequently capture screens, you may want to create a new,
customized toolbar containing the icons for the screen capture
command. For more information, see
page 689.
“Customizing toolbars” on
To specify a method for capturing screens
Edit workspace
1 Choose File Import Screen Capture Setup.
2In the Activate capture using area, choose one of the following
options:
• Right mouse click — lets you capture screen contents by
right-clicking
Getting started 81
Page 96

• Hot key — lets you use a keyboard shortcut to capture screen
contents. Choose a key or key combination from the drop-list.
• Delay timer — lets you capture screen contents after a specified
delay. Type a number in the seconds box.
To specify capture settings
Edit workspace
1 Choose File Import Screen Capture Setup.
2 In the Capture area, choose one of the following options:
• Area — captures the area of the screen that you select
• Full screen — captures the entire screen
• Client area — captures the contents of the active program
• Window — captures the active window
• Object — captures an object within the program that you select,
such as a menu bar, toolbar, icon, or document window
3 Click OK.
To capture an image or series of images
Edit workspace
1 Choose File Import Screen Capture Setup.
If you want to capture multiple images, mark the Multiple
Captures
If you want to include the pointer in the capture, mark the Include
Cursor
2 Click Capture Now.
3 Set up the image you want to capture.
If you want to capture an area of the screen, marquee select that
area. If you want to capture an object, click the object.
4 Press the hot key or right-click.
check box.
check box in the Options group box.
82 Corel PaintShop Pro X8 User Guide
Page 97

If you marked the Multiple captures check box, you can now
capture another image. Press the hot key, or right-click, for
each capture. When you are finished, click the
Corel PaintShop Pro button on the Windows task bar. The
images appear in the workspace.
Zooming and panning
By default, images that you open in Corel PaintShop Pro appear at a
magnification level that allows the full image to appear in the
workspace. You can zoom in to get a closer look at image detail or
zoom out to view a larger portion of the image. You can also magnify
a specific area of an image.
You can view image areas that fall outside the current image window.
For example, when you are working at a high magnification level, you
can pan or jump to a different image area without having to adjust the
magnification level. When an image is too large to fit within its
window, scroll bars appear on the bottom and right sides of the image.
Getting started 83
Page 98

You can use the Zoom tool to magnify your image (left) or you
can use the Magnifier command to view a specific area
without changing the magnification of the image (right).
To zoom
Edit workspace
1 On the Tools toolbar, choose the Zoom tool .
2 Click to magnify the area, or right-click to reduce the area.
The magnification changes to a preset percentage that appears in
the
Zoom (%) control on the Tool Options palette.
You can also
Magnify the image by a specified
percentage
View the image at 100%
On the Tool Options palette, type a
value in the Zoom (%) control.
Choose View
click the Zoom to 100% button
on the Tool Options palette.
Zoom to 100%, or
By default, when you zoom in or out, the image window
automatically resizes to fit the image.
84 Corel PaintShop Pro X8 User Guide
Page 99

You can also change the magnification when the Zoom tool is
active by using the scroll-wheel if one is included on your
mouse or stylus.
You can also change the magnification of an image by
choosing
View Zoom in and View Zoom out.
To magnify an image area
Edit workspace
1 Choose View Magnifier to place the cursor in magnifier mode.
2 Position the cursor over the image area that you want to magnify.
The area under the cursor is displayed at 500%.
To turn off the magnifier mode, choose View Magnifier again.
To pan around an image
Edit workspace
1 On the Tools toolbar, choose the Pan tool .
2 Drag within the image.
You can also
Pan while using another tool Hold down the Spacebar, and drag
with the other tool.
Pan around an image by using the
Overview palette
Drag the preview rectangle on the
Overview palette to a new position.
To fit the window to the image
Edit workspace
• Choose Window Fit to Image.
Getting started 85
Page 100

You can also fit the window to the image by clicking the Fit
Window to Image
button on the Tool Options palette
when the Pan tool or Zoom tool is active.
Cutting, copying, and pasting
You can sele ct an entire i mage, part of an image, or a n entire laye r, and
cut it or copy it to the Clipboard. You can then paste the Clipboard
content into the same image or another image, or into another
application, such as an e-mail program or word processor. The basic
commands for cutting, copying, and pasting are as follows:
• Cut — removes the selected content to the Clipboard and replaces
it with the image background color or transparency
• Copy — copies the selected content to the Clipboard
• Copy Merged — copies a flattened (merged) version of all the
layers in a selection to the Clipboard
• Copy Special — provides three options for optimizing copied
content for subsequent pasting into another application
• Paste — pastes cut or copied content from the Clipboard into the
same image or another image
• Clear — deletes the selected content
• Empty Clipboard — erases the data from the Clipboard. Placing
data on the Clipboard for cutting and pasting can slow your
computer’s performance. Emptying the Clipboard can restore the
performance speed of your computer. Once applied, this
command cannot be undone.
You can cut or copy a selection, layer, or vector object. You can paste
the selected content as a new image, a new layer, or a selection.
86 Corel PaintShop Pro X8 User Guide
 Loading...