


Copyright 1991 - 2004 Corel Corporation. All rights reserved.
Corel® Painter™ IX User Guide
The contents of this user guide and the associated Corel Painter software are the
property of Corel Corporation and its respective licensors, and are protected by
copyright. For more complete copyright information about Corel Painter, please refer
to the About Corel Painter section in the Help menu of the software.
Corel, the Corel logo, Corel Painter, CorelDRAW, KPT , Gel, Goo, LensFlare,
Lightning, Pyramid Paint, Reaction, ShapeShifter, and Natural-Media are trademarks
or registered trademarks of Corel Corporation and/or its subsidiaries in Canada, the
U.S. and/or other countries.
Adobe, Illustrator, Photoshop, PostScript, and Premiere are registered trademarks of
Adobe Systems Incorporated in the United States and/or other countries. Mac, Mac
OS, and Quick Draw are registered trademarks of Apple Computer, Inc., registered in
the United States and other countries. Canon is a registered trademark of Canon Inc.
Kodak is a registered trademark of Eastman Kodak Company. Hewle tt-Packard and
DeskJet are registered trademarks of Hewlett Packard. Microsoft and Windows are
registered trademarks of Microsoft Corporation in the United States and/or other
countries. Minolta QMS is a trademark of Minolta Co., Ltd. Pantone, Hexachrome,
and PANTONE MATCHING SYSTEM are trademarks or registered trademarks of
Pantone, Inc. in the United States and/or other countries. TARGA is a registered
trademark of Pinnacle Systems, Inc., registered in the U.S. and other countries.
Cinepak is a registered trademark of Radius, Inc. EPSON Stylus is a registered
trademark of Seiko Epson Corporation. Tektronix is a registered trademark of
Tektronix, Inc. Wacom and Intuos are registered trademarks of Wacom Company, Ltd.
Other product, font, and company names and logos may be trademarks or registered
trademarks of their respective companies.
Corel's licensor(s) makes no warranties, express or implied, including without
limitation the implied warranties of merchantability and fitness for a particular
purpose, regarding the software, Corel's licensor(s) does not warrant, guaranty,
or make any representations regarding the use of the results of the use of the
software in terms of its correctness, accuracy, reliability, currentness, or
otherwise. The entire risk as to the results and performance of the software is
assumed by you. The exclusion of the implied warranties is not permitted by
some states. The above exclusion may not apply to you.

In no event will Corel's licensor(s), and their directors, officers, employees, or
agents (collectively "Corel's licensor") be liable to you for any consequential,
incidental, or indirect damages (including damages for loss of business profits,
business interruption, loss of business information, and the like) arising out of
the use of, or inability to use, the software even if Corel's licensor has been
advised of the possibility of such dama ges. Beca use some st ates do not allow the
exclusion or limitation of liability for consequential or incidental damages, the
above limitations may not apply to you.
007094

Featured artists
Ryan Church . . . . . . . . . . . . . . . . . . . . . . . . . . . . . . . . . . . . . . . . . . . . 1
Chet Phillips . . . . . . . . . . . . . . . . . . . . . . . . . . . . . . . . . . . . . . . . . . . 13
Christopher Welch. . . . . . . . . . . . . . . . . . . . . . . . . . . . . . . . . . . . . . . 75
Jeremy Sutton . . . . . . . . . . . . . . . . . . . . . . . . . . . . . . . . . . . . . . . . . 135
Cher Threinen-Pendarvis . . . . . . . . . . . . . . . . . . . . . . . . . . . . . . . . . 195
Don Seegmiller . . . . . . . . . . . . . . . . . . . . . . . . . . . . . . . . . . . . . . . . 271
John Taylor Dismukes . . . . . . . . . . . . . . . . . . . . . . . . . . . . . . . . . . . 325
John Ryan . . . . . . . . . . . . . . . . . . . . . . . . . . . . . . . . . . . . . . . . . . . . 355
Andrew Jones. . . . . . . . . . . . . . . . . . . . . . . . . . . . . . . . . . . . . . . . . . 383


Table of contents
Art by Ryan Church: Concept painting for a movie scene
Welcome to Corel Painter IX. . . . . . . . . . . . . . . . . . . . . . . . . . . . . . . . 3
What’s in This User Guide? . . . . . . . . . . . . . . . . . . . . . . . . . . . . . . . . . . . . . . 3
What’s New in Corel Painter IX?. . . . . . . . . . . . . . . . . . . . . . . . . . . . . . . . . . 3
How to Use the Documentation. . . . . . . . . . . . . . . . . . . . . . . . . . . . . . . . . . . 9
How to Sign Up for Free Training from lynda.com. . . . . . . . . . . . . . . . . . . . 12
How to Access Corel Support Services. . . . . . . . . . . . . . . . . . . . . . . . . . . . . . 12
Art by Chet Phillips: Newspaper illustration
The Basics. . . . . . . . . . . . . . . . . . . . . . . . . . . . . . . . . . . . . . . . . . . . . . 15
Working with Documents . . . . . . . . . . . . . . . . . . . . . . . . . . . . . . . . . . . . . . 15
Setting Preferences . . . . . . . . . . . . . . . . . . . . . . . . . . . . . . . . . . . . . . . . . . . . 32
Layers . . . . . . . . . . . . . . . . . . . . . . . . . . . . . . . . . . . . . . . . . . . . . . . . . 43
Getting Started with Layers . . . . . . . . . . . . . . . . . . . . . . . . . . . . . . . . . . . . . 43
Managing Layers . . . . . . . . . . . . . . . . . . . . . . . . . . . . . . . . . . . . . . . . . . . . . 52
Editing Layers . . . . . . . . . . . . . . . . . . . . . . . . . . . . . . . . . . . . . . . . . . . . . . . 63
Art by Christopher Welch: Concept vehicle design
Color . . . . . . . . . . . . . . . . . . . . . . . . . . . . . . . . . . . . . . . . . . . . . . . . . . 77
Getting Started with Color. . . . . . . . . . . . . . . . . . . . . . . . . . . . . . . . . . . . . . 77
Working with the Mixer Palette. . . . . . . . . . . . . . . . . . . . . . . . . . . . . . . . . . 84
Working with Color Sets . . . . . . . . . . . . . . . . . . . . . . . . . . . . . . . . . . . . . . . 92
Setting Color Variability. . . . . . . . . . . . . . . . . . . . . . . . . . . . . . . . . . . . . . . 100
Viewing Color Information. . . . . . . . . . . . . . . . . . . . . . . . . . . . . . . . . . . . . 102
Setting Color Expression. . . . . . . . . . . . . . . . . . . . . . . . . . . . . . . . . . . . . . . 103
Working with Gradients . . . . . . . . . . . . . . . . . . . . . . . . . . . . . . . . . . . . . . 104
Textures, Patterns, and Weaves. . . . . . . . . . . . . . . . . . . . . . . . . . . . 113
Using Paper Texture. . . . . . . . . . . . . . . . . . . . . . . . . . . . . . . . . . . . . . . . . . 113
Table of contents i

Using Patterns . . . . . . . . . . . . . . . . . . . . . . . . . . . . . . . . . . . . . . . . . . . . . . 120
Using Weaves. . . . . . . . . . . . . . . . . . . . . . . . . . . . . . . . . . . . . . . . . . . . . . . 131
Art by Jeremy Sutton: Digital portrait painting
Painting . . . . . . . . . . . . . . . . . . . . . . . . . . . . . . . . . . . . . . . . . . . . . . 137
Exploring Brushes. . . . . . . . . . . . . . . . . . . . . . . . . . . . . . . . . . . . . . . . . . . . 137
Marking the Canvas . . . . . . . . . . . . . . . . . . . . . . . . . . . . . . . . . . . . . . . . . . 144
Exploring Painting . . . . . . . . . . . . . . . . . . . . . . . . . . . . . . . . . . . . . . . . . . . 148
Working with Fill. . . . . . . . . . . . . . . . . . . . . . . . . . . . . . . . . . . . . . . . . . . . 163
Watercolor . . . . . . . . . . . . . . . . . . . . . . . . . . . . . . . . . . . . . . . . . . . . 169
Getting Started with Watercolor. . . . . . . . . . . . . . . . . . . . . . . . . . . . . . . . . 169
Working with Digital Watercolor. . . . . . . . . . . . . . . . . . . . . . . . . . . . . . . . 172
Liquid Ink. . . . . . . . . . . . . . . . . . . . . . . . . . . . . . . . . . . . . . . . . . . . . 175
Working with the Liquid Ink Layer. . . . . . . . . . . . . . . . . . . . . . . . . . . . . . . 175
Using Liquid Ink Controls. . . . . . . . . . . . . . . . . . . . . . . . . . . . . . . . . . . . . . 176
Impasto. . . . . . . . . . . . . . . . . . . . . . . . . . . . . . . . . . . . . . . . . . . . . . . 179
Getting Started with Impasto . . . . . . . . . . . . . . . . . . . . . . . . . . . . . . . . . . . 179
Adjusting Surface Lighting . . . . . . . . . . . . . . . . . . . . . . . . . . . . . . . . . . . . . 187
Image Hose. . . . . . . . . . . . . . . . . . . . . . . . . . . . . . . . . . . . . . . . . . . . 191
How the Image Hose Works. . . . . . . . . . . . . . . . . . . . . . . . . . . . . . . . . . . . 192
Getting Started with the Image Hose . . . . . . . . . . . . . . . . . . . . . . . . . . . . . 193
Art by Cher Threinen-Pendarvis: Digital landscape painting
Customizing Brushes . . . . . . . . . . . . . . . . . . . . . . . . . . . . . . . . . . . . 197
Getting Started with the Brush Creator. . . . . . . . . . . . . . . . . . . . . . . . . . . . 198
Managing Settings and Controls . . . . . . . . . . . . . . . . . . . . . . . . . . . . . . . . . 204
Managing Custom Brushes . . . . . . . . . . . . . . . . . . . . . . . . . . . . . . . . . . . . . 263
Art by Don Seegmiller: Concept character painting
ii Table of contents

Cloning and Tracing. . . . . . . . . . . . . . . . . . . . . . . . . . . . . . . . . . . . . 273
Cloning Images . . . . . . . . . . . . . . . . . . . . . . . . . . . . . . . . . . . . . . . . . . . . . 273
Using Cloner Brushes . . . . . . . . . . . . . . . . . . . . . . . . . . . . . . . . . . . . . . . . . 278
Turning Other Brushes into Cloners. . . . . . . . . . . . . . . . . . . . . . . . . . . . . . 288
Image Effects . . . . . . . . . . . . . . . . . . . . . . . . . . . . . . . . . . . . . . . . . . 291
Working with Surface Texture . . . . . . . . . . . . . . . . . . . . . . . . . . . . . . . . . . 291
Mosaics . . . . . . . . . . . . . . . . . . . . . . . . . . . . . . . . . . . . . . . . . . . . . . . 307
Getting Started with Mosaics . . . . . . . . . . . . . . . . . . . . . . . . . . . . . . . . . . . 308
Placing and Customizing Tiles. . . . . . . . . . . . . . . . . . . . . . . . . . . . . . . . . . 314
Art by John Taylor Dismukes: 3D Halloween concept design
Using Shapes . . . . . . . . . . . . . . . . . . . . . . . . . . . . . . . . . . . . . . . . . . 327
Getting Started with Shapes. . . . . . . . . . . . . . . . . . . . . . . . . . . . . . . . . . . . 327
Creating Shapes . . . . . . . . . . . . . . . . . . . . . . . . . . . . . . . . . . . . . . . . . . . . . 330
Editing Shapes . . . . . . . . . . . . . . . . . . . . . . . . . . . . . . . . . . . . . . . . . . . . . . 339
Transforming Shapes . . . . . . . . . . . . . . . . . . . . . . . . . . . . . . . . . . . . . . . . . 345
Combining Shapes . . . . . . . . . . . . . . . . . . . . . . . . . . . . . . . . . . . . . . . . . . . 351
Art by John Ryan: Animation storyboard for a radio commercial
Animation and Video . . . . . . . . . . . . . . . . . . . . . . . . . . . . . . . . . . . . 357
Creating Animations and Video . . . . . . . . . . . . . . . . . . . . . . . . . . . . . . . . . 357
Getting Started with Movies. . . . . . . . . . . . . . . . . . . . . . . . . . . . . . . . . . . . 362
Modifying a Movie . . . . . . . . . . . . . . . . . . . . . . . . . . . . . . . . . . . . . . . . . . . 367
Rotoscoping . . . . . . . . . . . . . . . . . . . . . . . . . . . . . . . . . . . . . . . . . . . . . . . . 369
Saving and Exporting Movies . . . . . . . . . . . . . . . . . . . . . . . . . . . . . . . . . . . 378
Art by Andrew Jones: Character design for a video game
Printing. . . . . . . . . . . . . . . . . . . . . . . . . . . . . . . . . . . . . . . . . . . . . . . 385
Understanding Printing . . . . . . . . . . . . . . . . . . . . . . . . . . . . . . . . . . . . . . . 385
Getting Started with Printing. . . . . . . . . . . . . . . . . . . . . . . . . . . . . . . . . . . 386
Table of contents iii

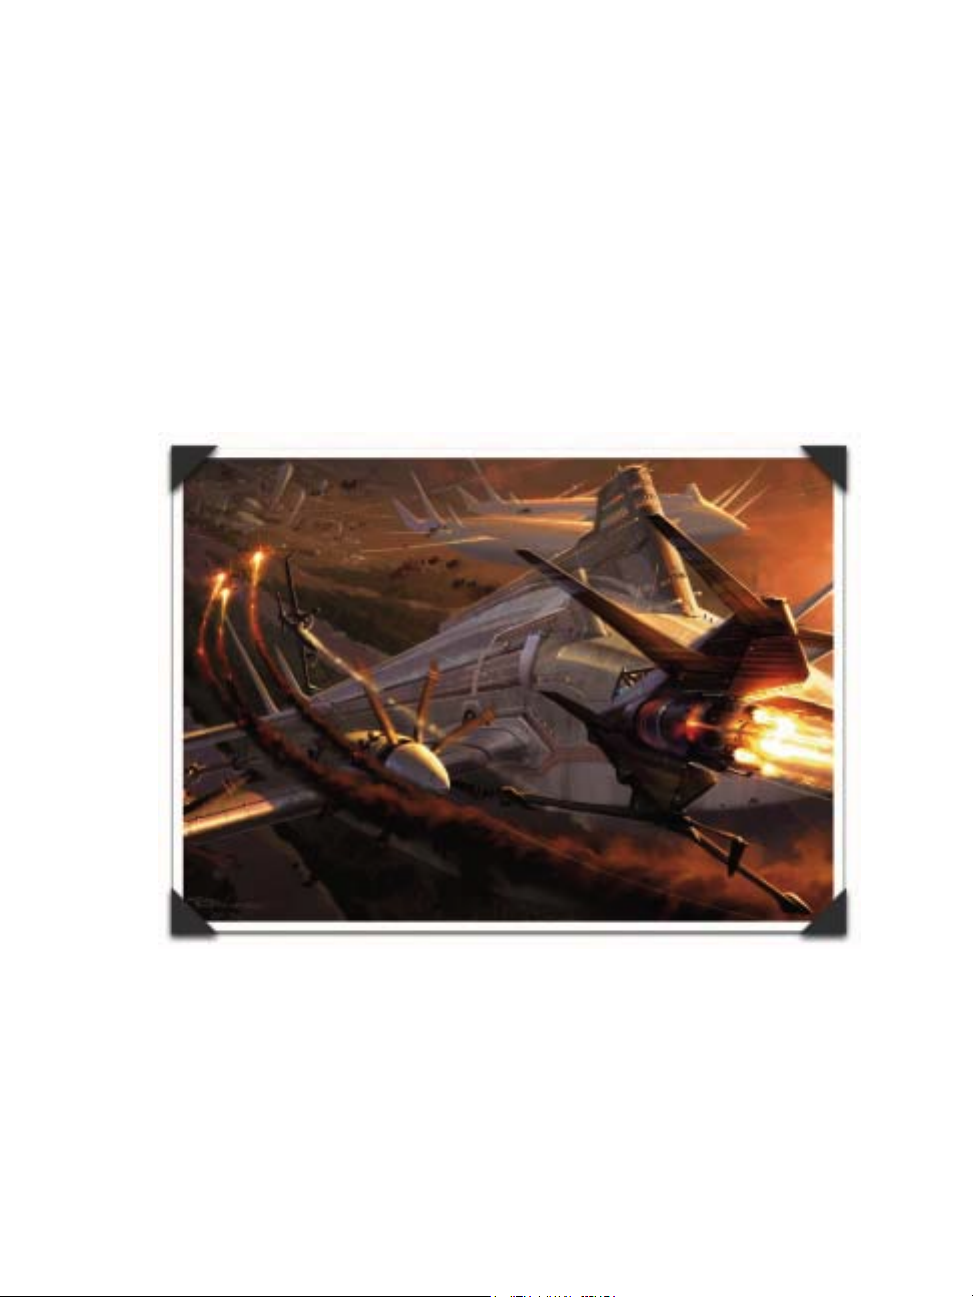
Art by Ryan Church: Concept painting for a movie scene
Ryan Church is one of the leading concept artists working today . He has worked with clients such as
Walt Disney Imagineering, Universal Studios, Industrial Light and Magic, and Lucasfilm. Ryan
is currently a Concept Design Supervisor for Star Wars: Episode III, and a Senior Art Director at
Industrial Light and Magic.


Welcome to Corel Painter IX
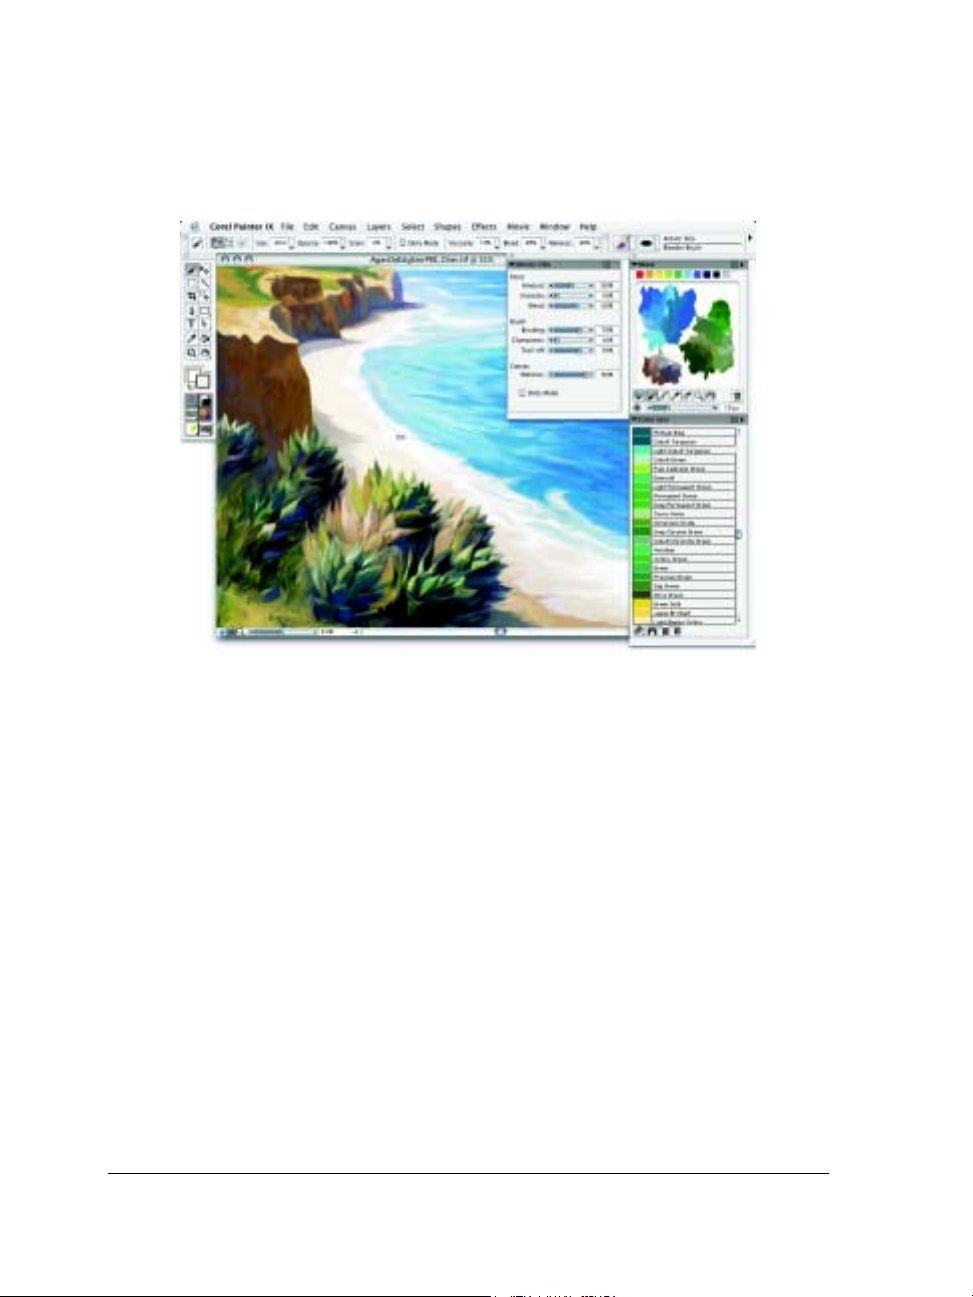
Corel® Painter™ IX is the leading Natural-Media® painting application.
Corel Painter lets you simulate a wide range of art tools — from felt pens, charcoal,
and colored pencils to watercolor and oils.
What’s in This User Guide?
The Corel Painter IX User Guide is divided into nine sections. Each section describes a
collection of tools you can use to create digital artwork and provides step-by-step
instructions. In addition, artwork by a renowned digital artist is featured at the
beginning of each of the nine sections to demonstrate what can be achieved using
Corel Painter IX .
The content provided in this user guide describes the most common tasks performed in
Corel Painter IX . Please note that it is not an exhaustive reference for every tool. If you
require detailed information about topics that are not discussed in this user guide,
please refer to the application’s Help system.
What’s New in Corel Painter IX?
Corel Painter IX adds a range of tools and features that increase performance, fuel
creativity, and further extend compatibility with other industry-standard tools and
applications. With improved Help, tutorials by world-class digital artists, and free
lynda.com videos, getting started with Corel Painter is easier than ever.
Welcome to Corel Painter IX 3

Performance and Productivity
Increasing the overall speed, pe rformance, and stability was a top priority for
Corel Painter IX. Working closely with Apple, Intel, and AMD, Corel engineers
created improvements and efficiencies wherever possible. Corel Painter has never been
a more efficient and powerful application.
Improved Speed
This is the fastest v ersion of Co rel Painter yet, with some brushes up to 10 times faster!
Brushes now perform, on average, twice as fast. In addition, users can now change the
default scratch disk location in the Preference settings.
New Welcome Screen
Getting down to the job at hand has never been easier, thanks to the Corel Painter IX
Welcome screen, which launches on startup. Divided into four sections, the Welcome
screen gives quick access to recently used files, tutorials, brush and color-management
settings, and even artwork from renowned Corel Painter masters.
Brush Control Palettes
New Brush Control palettes provide easy access to all brush settings and controls.
Making on-the-fly changes to brush setti ngs and variables is as simple as dragging a
slider — without any disruption to workflow.
For example, the new Boost slider , found in the General palette of the Brush Controls,
instantly enhances brush speed. Just drag the slider and see brush performance
accelerate.
Frames-per-Second Control
Animators can now test frame rates directly in Corel Painter. With the new Framesper-Second Control, frame rates can be set and previewed in a range of 1 to 40 frames
per second.
Rotate/Flip Canvas
Entire images can now be easily rotated or flipped directly in Corel Painter. Image
composition is easily verified at the touch of a button.
4 Corel Painter User Guide

Customizable Shortcut Keys
Corel Painter now offers creative professionals an unprecedented level of control over
their workflow by enabling complete customization of shortcut keys. A handy
printable template for keeping a quick reference is included.
Multiuser Support
Corel Painter now supports multiple users on both the Mac® and Windows®
platforms. User files are stored in the user file directory, ensuring that users in a
networked environment can retain individual settings and preferences. In addition, all
settings are easily reverted to the default without having to reinstall the application.
Tracker Palette Enhancements
The Tracker palette stores historical information about every brush stroke that is
applied to the canvas. Acting as a "virtual brush diary," the Tracker palette tells the
story of an image created with Corel Painter IX brushes. Brushes used in the last
session can be recalled in the next, and favorite brush variants can be locked so that
they are always readily accessible.
Iterative Save
Iterative Save enables users to quickly save sequentially numbered versions of an image
with a simple menu command. The first time Iterative Save is used, "_001" is
appended to the filename. Each subsequent time the number increments by 1, and a
new sequentially numbered file is created.
Creativity
Corel Painter IX delivers an impressive array of new features that provide
unprecedented power to replicate natural media, and dazzling new effects offer more
options than ever.
Artists' Oils Painting System
The Artists' Oils Painting System is a milestone in the evolution of digital art. This
new painting system enables users to apply paint blends created in the Mixer palette
directly onto images in the document window. Each brush dab loads the brush variant
Welcome to Corel Painter IX 5
with a finite amount of oil. As the oil runs out, the brush stroke becomes fainter. Brush
strokes interact with any paint already on the canvas just as they would with natural
media.
The Artists' Oils Painting System has four components:
• Artists' Oils Brush Category and Variants
• Artists' Colors are based on the color measurements of real-world oil paints.
• Integration of Artists' Oils with the Mixer palette, including a new multicolor
eyedropper
• Artists' Oil Brush Controls provide the ability to control the amount of oil,
viscosity, blend, bristling, clumpiness, brush trails, and dirtiness.
Sna p-to-Path Painting
When users need to create a perfect curve or shape, Snap-to-Path Painting is a great
time-saver. Snap-to-P ath P ainting makes it possible to constrain a brush stroke along a
path or a shape by clicking a button or using a keyboard shortcut. With a simple click,
users can now create a perfect, precise brush stroke that reflects the attributes typically
found in a Corel Painter stroke, such as pressure, tilt, and bearing.
6 Corel Painter User Guide

Digital Watercolor
Digital Watercolor has been significantly enhanced in Corel Painter IX. P aint stays wet
between sessions, enabling users to start one session where the last one ended. The wet
fringe of digital watercolor brush strokes can now be changed dynamically, enabling
experimentation after the brush stroke has been applied.
Quick Clone
Quick Clone is ideal for photographers, enabling them to transform their photos into
paintings. This new feature speeds up the image-cloning workflow and reduces five
steps to one. Quick Clone settings can be defined on the General page of the
Preferences dialog box.
KPT Filters
KPT® filters are renowned, powerful plug-ins that creative professionals rely on to
produce stunning effects quickly and easily. Seven powerful KPT filters have been
included in Corel Painter IX: KPT® Gel™, KPT® Goo™, KPT® LensFlare™,
KPT® Lightning™, KPT® Pyramid Paint™, KPT® Reaction™, and KPT®
ShapeShifter™. These plug-ins are valuable additions to the impressive array of effects
available in Corel Painter.
Compatibility
The ability to use Corel Painter in conjunction with other industry-standard software
and hardware is greater than ever. New color-management enhancements enable
printer colors to be reproduced more accurately on-screen and in print. Extended
support for Adobe® Photoshop® and Wacom® pen tablets streamlines a professional
workflow.
Enhanced Adobe Photoshop Support
Moving between Adobe Photoshop and Corel Painter is simple. Files saved to the
Adobe Photoshop (PSD) file format open in Corel Painter IX, with layer masks, alpha
channels and layer sets (layer groups) maintained.
Layer behavior in Corel Painter is now very similar to Adobe Photoshop. New layers
are now added above the selected layer, layers with different merge modes are
collapsible, and it is now possible to hide or display multiple layers by simply clicking
and dragging.
Welcome to Corel Painter IX 7

In addition, Corel Painter now supports Photoshop plug-ins for Mac OS® X.
Enhanced Wacom Support
Corel Painter IX features support for Wacom's newest pen tablet model — the
Wacom® Intuos®3 — and the entire Wacom tablet product line. The Wacom
Intuos3 has touch strips that can be configured to control brush size, zooming, and
many other functions, eliminating the need for a keyboard while painting. In addition,
tablet keys can be used as modifier keys, such as Command, Option, Shift, or Spacebar
on a Mac; or Ctrl, Alt, Shift, or Spacebar on a PC.
Enhanced Color Management
Corel Painter IX includes an enhanced Color Management System that ensures
accurate color reproduction when images are printed. Supporting industry-standard
ICC4.0 profiles, Corel Painter IX Color Management enables color matching between
on-screen and printed colors. A color-management tutorial helps users configure their
system for optimal color reproduction.
Learning
With improved Help, a revitalized User Guide, tutorials from leading graphics
professionals, training videos from lynda.com, and courseware specifically designed for
educators, getting started with Corel Painter IX has never been easier!
Improved Help
A revised User Guide and Help system provide information and fast solutions. The
Corel Painter IX Handbook, which is included with Corel Painter IX Full and
Upgrade versions, offers a collection of step-by-step tutorials created by well-known
creative professionals.
Free lynda.com Training Videos
Corel Painter IX includes training videos created by lynda. c om, one of the world's
most renowned graphics training companies, to guide users through the Corel Painter
workspace, tools, features, and techniques.
8 Corel Painter User Guide

Free Academic Courseware
Corel Painter academic courseware consists of complete lesson plans and exercises for
10 classes on a variety of subjects.
How to Use the Documentation
You can find answers to many of your questions in the Corel Painter User Guide and
the Help available from within the Corel Painter workspace.
The Corel Painter User Guide contains commonly used procedures and information. A
Portabl e Document F orm at (PDF) version of the Corel Painter User Guide is available
on the Corel Painter IX CD. Full-color versions of the Corel Painter User Guide can be
purchased from www.corel.com/painterix.
The Help gives you access to a full range of topics in a searchable format.
If you have any comments or suggestions about The Handbook, user guide, Help, or
tutorials, please contact us at www.corel.com/painterix/feedback.
Documentation Conventions
The following table describes important conventions used in the
Corel Painter User G uid e a nd in th e Help.
Convention Description Example
Multiple platforms The Corel Painter User Guide is
for both the Mac OS and
Windows platforms. As a
convention, Mac OS commands
precede Windows commands in
the text.
Modifier keys When a modifier key differs
between Mac OS and Windows,
the Mac OS modifier is listed
first, followed by the Windows
modifier.
Welcome to Corel Painter IX 9
Hold down Command (Mac OS)
or Ctrl (Windows).
“Command + I (Mac OS) or Ctrl
+ I (Windows)” means that
Mac OS users would press
Command + I and Windows
users would press Ctrl + I.
Convention Description Example
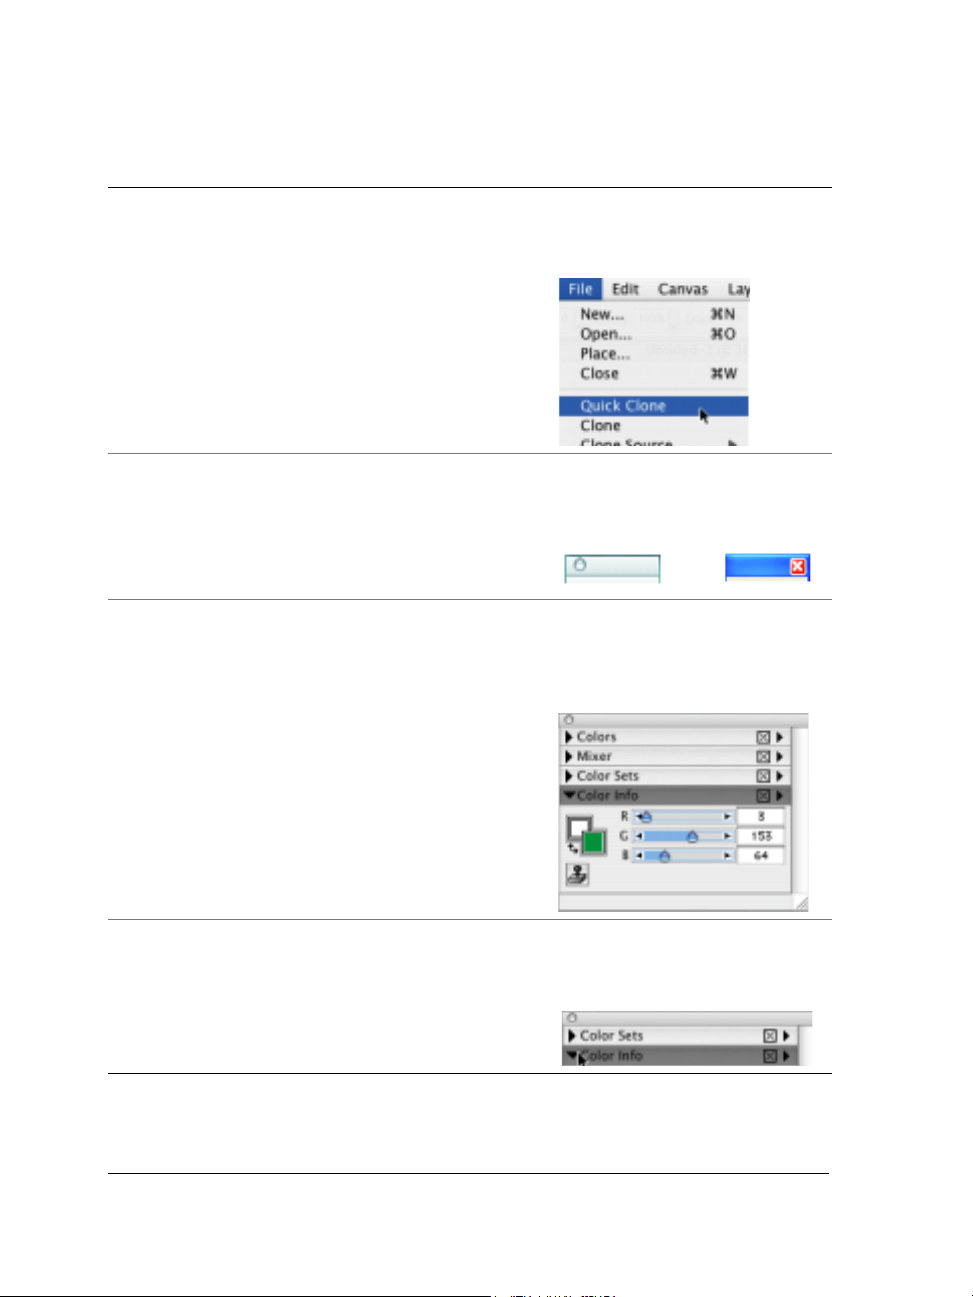
Choose X menu >
menu item
Title bar A title bar is located at the top or
Palette title bar The palette title bar appears at
On the menu bar, click the menu
name, and choose the menu item
from the list.
side of some UI elements, such as
the toolbox, property bar, and
palettes. It may not display title
text.
the top of a palette. When
expanded, the palette’s title bar
changes to dark gray. When a
palette is collapsed, you can still
see the palette’s title bar , which is
now light gray.
“Choose File menu >
Quick Clone” means the
following:
Examples of the toolbox title bar
on the Mac OS (left) and in
Windows (right):
Palette title bars for the Colors,
Mixer, and Color Sets palettes are
collapsed, and the Color Info
palette is expanded.
Palette arrow The palette arrow is used to
expand or collapse a palette.
10 Corel Painter User Guide
The Color Sets palette arrow is
collapsed, and the Color Info
palette arrow is expanded.
Convention Description Example
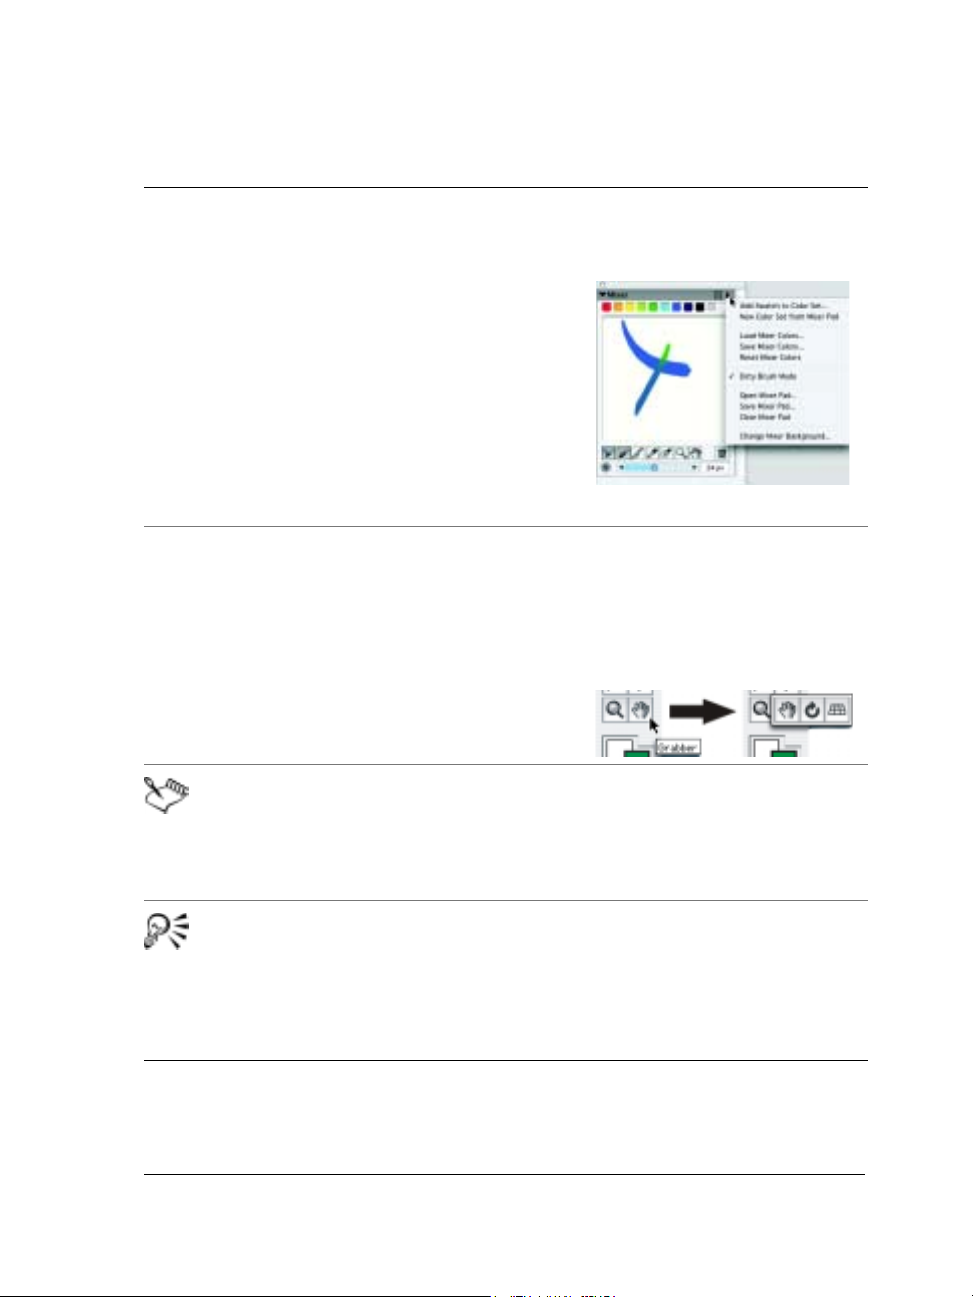
Palette menu arrow
or selector menu
arrow
Flyout Some tools share a space in the
Clicking a palette menu arrow or
a selector menu arrow displays a
pop-up menu with additional
commands.
toolbox. Hold down the tool
button that’s displayed to open
the flyout.
A note contains information that
is important to the steps that
precede it. It can describe
conditions under which the
procedure can be performed.
The palette menu arrow for the
Mixer palette displays the Mixer
palette menu.
In the toolbox, by clicking and
holding the Grabber tool, you
can display a flyout that includes
two other tools: the Rotate Page
tool and the Perspective Grid
tool.
For example: “This command is
available only if you have turned
off a selection.”
A tip contains suggestions for
performing the steps that
precede it. It can present
alternatives to the steps, as well
as other benefits and uses of the
procedure.
Welcome to Corel Painter IX 11
For example: “You can choose a
brush category and variant in the
main application or in the Brush
Creator.”

Using Corel Painter Help
The Help is the documentation that can be accessed from within the Corel Painter
workspace. It is fully searchable and includes all the information in the
Corel Painter User Guide and more.
To use Help
1 Choose Help menu > Help Topics.
2 Click one of the following tabs:
• The Contents tab lets you browse through topics in the Help.
• The Index tab lets you use the index to find a topic.
• The Search tab lets you search the full text of the Help for a particular word. F or
example, if you are looking for information about RGB color mode, you can
type “RGB” to display a list of relevant topics.
How to Sign Up for Free Training from lynda.com
When you register Corel Painter IX, you will receive free access to some of the
lynda.com “Getting Started With Corel Painter IX” training videos. These videos are
designed to allow new users to start working quickly and give experienced users a tour
of the new features.
How to Access Corel Support Services
Corel® Support Services can provide you with prompt and accurate information about
product features, specifications, pricing, availability, services, and technical support.
For the most current information on support services available for your Corel product,
please visit www.corel.com/support.
12 Corel Painter User Guide
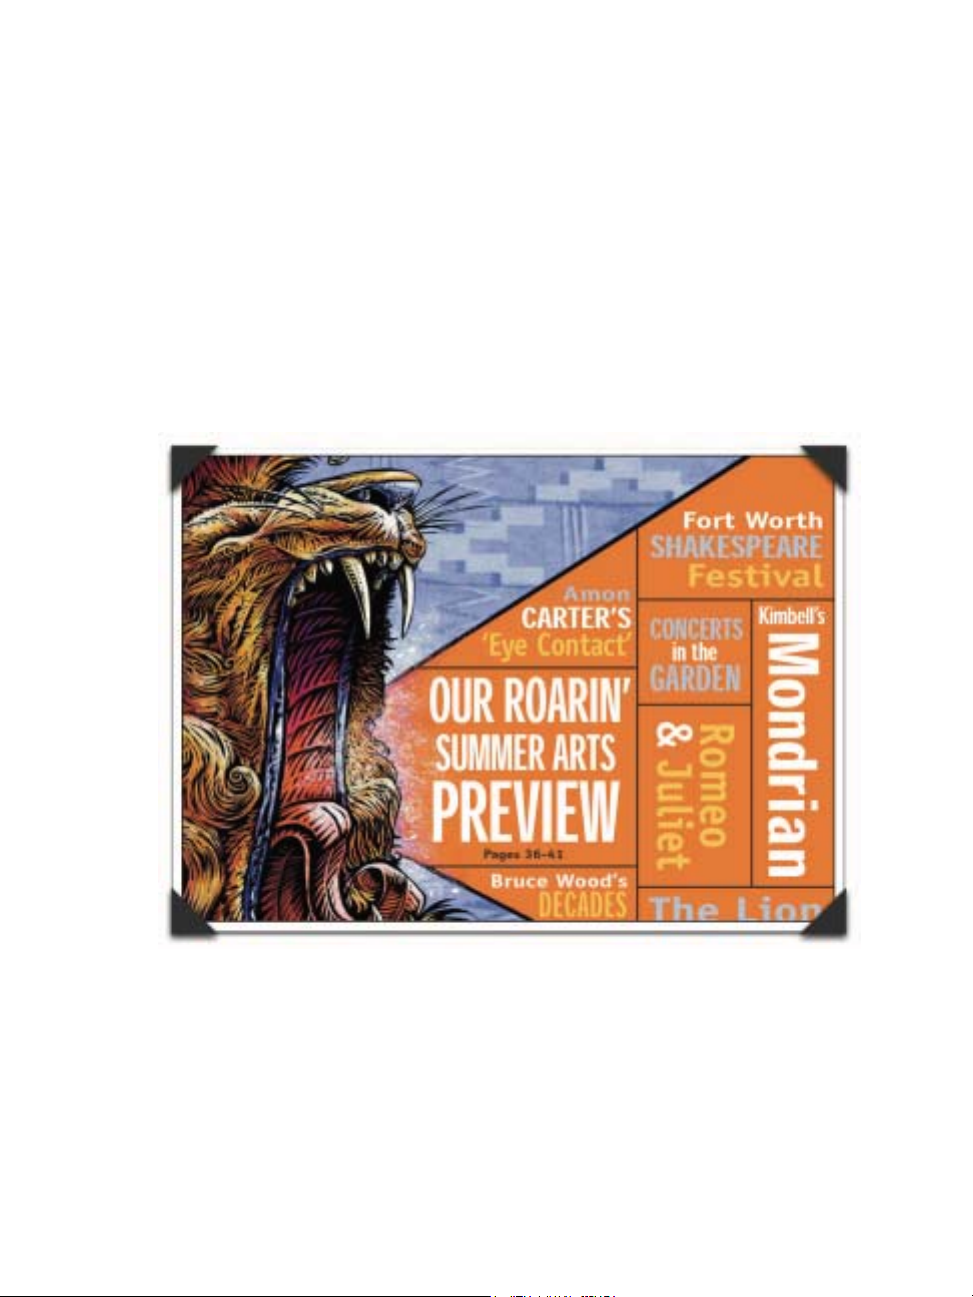
Art by Chet Phillips: Newspaper illustration
Chet Phillips has presented his slightly off-center view of the world under the guise of a freelance
illustrator for more than 20 years. He divides his time between working for corporate, publishing,
advertising and design companies as well as displaying his work in galleries and shows. As usual,
no electrons are harmed in the process.


The Basics
The Corel Painter application provides a digital workspace in which you can create
new images, or alter existing images, using the Corel Painter Natural-Media tools and
effects. Your working image is known as a document and is displayed in a document
window. This document window includes navigation and productivity features to help
you work efficiently.
As you create an image, you can save your document in a number of different file
formats: RIFF (Corel Painter native format), JPEG, TIFF, and Adobe Photoshop
(PSD), to name a few. Corel Painter also lets you open or import images in many file
formats.
Every artist works in a unique way, and every computer system has its own
configuration of memory, disks, printers, and accessories. Corel Painter preferences let
you customize the program for your own work style and for optimum performance on
your particular system. You can also customize the features of your tablet and pens in
Corel Painter.
Working with Documents
The first step in creating an image in Corel Painter is opening a document. You can
open a blank canvas by creating a new document, work with an existing image by
opening a file already created, or acquire an image from a scanner or digital camera.
Once you have created your image, you can place it directly into a document.
Creating and Opening Documents
The File menu > New command creates a blank, untitled document based on the
specifications you set in the New dialog box. Canvas Size shows the RAM requirement
for creating the document at the specified width, height, and resolution. This number
The Basics 15

does not reflect the file size for the saved document. A saved Corel Painter file is
usually 25% to 50% of the size of the working document, depending on the number of
colors it contains.
You can also open documents from other graphics applications and use Corel Painter to
add brush strokes, tints, or pape r textures. Or, you can clone a document to re-create it
in a different medium. Corel Painter lets you open the following file formats:
• RIFF — Corel Painter native format (RIF)
• TIFF (TIF)
•CMYK TIF (TIF)
• Adobe Photoshop formats (PSD) — Corel Painter preserves layers, layer masks,
alpha channels, and composite methods. Layer effects and adjustment layers are not
supported and should be merged or flattened in Adobe Photoshop.
•Windows Bitmap (BMP)
• PC Paintbrush (PCX)
• TARGA® (TGA)
• GIF — Corel Painter does not convert GIF animations to frame stac ks.
•JPEG (JPG)
• Frame stacks (FRM) — Corel Painter animation files
• QuickT i me™ (MOV), Vid e o for Windows (AVI), and numbered files. For more
information, refer to “Opening a Movie” on page 363 or “W orking with Numbered
Files” on page 381.
Corel Painter does not support LZW compressed TIFF file format. Only
uncompressed TIFF files open in Corel Painter.
To create a new document
1 Choose File menu > New.
2 In the New dialog box, enter values for the following:
• Width and Height determine the dimensions of the canvas. You can change the
unit of measurement by using the menu. Choose from pixels (the default),
inches, centimeters (CM), points, picas, and columns (2 inches wide).
16 Corel Painter User Guide
• Resolution is the number of pixels per inch (ppi) or pixels per centimeter that
make up an image. In the New dialog box, setting the document’s pixels per
inch is the same as setting its dots per inch (dpi). Refer to “Understanding
Resolution” on page 19 for detailed information about document, screen, and
print resolutions.
3 Click the Paper Color chip to set the document’s background to a color other than
white.
Choose a color from the Color di alog box that appears.
4 Choose a Picture Type.
Picture Type lets you set up a document to contain a single frame for an image (the
default) or multiple frames for a movie.
5 Click OK.
A new document appears in the workspace.
To open an existing document
1 Choose File menu > Open.
Corel Painter remembers the location of the last file you opened.
2 In the Open (Mac OS) or Select Image (Windows) dialog box, use the controls to
locate the file you want to open.
Corel Painter lists every image’s dimensions (in pixels), file size, and file format. In
addition, files saved in Corel Painter include thumbnails for browsing purposes.
3 Click Open.
The File menu also offers you a shortcut to previously opened documents.
Before choosing Open in the File menu, see if the file you want is in the
recently opened files list at the bottom of the File menu.
To browse for a document (Mac OS)
1 Choose File menu > Open.
2 Click Browse.
The Browse dialog box shows thumbnails for all the RIFF files in a folder.
3 Double-click the file name, or select a file and click Open.
The Basics 17

Acquiring Images
You can acquire images for Corel Painter directly from an external device — such as a
scanner or digital camera — if the device provides a:
• Adobe Photoshop-compatible plug-in module (Mac OS)
• TWAIN driver (Windows)
Before acquiring images
• Install the device plug-in module on your computer.
This plug-in module is provided by the manufacturer of your scanner or digital
camera. Refer to the device documentation for installatio n ins t ructions.
Corel Painter can access plug-ins from any single folder on your computer. This
location can be inside the Corel Painter folder, in a generic plug-ins folder on your
hard drive, or in the Adobe Photoshop Plug-ins folder.
• Make sure your TWAIN driver is properly installed.
Creating and Opening Templates
If you regularly create documents that contain similar dimensions, formatting, and
resolution, you can create document templates so that you don’t have to start each
document from scratch.
To open a document template
1 Choose Help menu > Welcome.
2 Choose a template from the Open a Template pop-up menu.
To save a document as a template
1 Set up a file with all the sizing, formatting, and resolution attributes you want in
the template.
2 Choose File menu > Save As.
3 In the Save Image As dialog box, save the file to the Corel Painter IX\Templates
folder.
If you work in a multiuser environment, only Administrators can add to the
Corel Painter IX\Templates folder.
18 Corel Painter User Guide

Placing Files
Placing a file lets you import an image into an existing Corel Painter document. The
placed image becomes a new reference layer in the document — you can transform
(resize, rotate, slant) it on screen by dragging its handles. A placed file maintains its
link to the source file until you commit it to standard layer format.
For general information about working with reference layers, refer to “Working with
Reference Layers” in the Help.
To place a file
1 Choose File menu > Place.
2 Select an image file, and click Open.
3 In the Place dialog box, set the options:
• In the Scaling area, the Horizontal and Vertical boxes suggest a scale to fit the
image in the current document. To change the size, enter scaling percentages in
the Horizontal and Vertical boxes .
• Constrain Aspect Ratio maintains the proportions of the image. Disable this
check box to distort the image.
• Retain Alpha retains the file’s mask. When the image is placed, the image mask
becomes the layer mask. Disable this check box to discard the mask.
4 Do one of the following:
• To place the image in a particular location, click on that location in the
document.
• To place the image in the center of the document, click OK.
Understanding Resolution
When working with images in a digital workspace, it is helpful to understand the
concept and applications of resolution. Resolu ti o n r efe rs to how Corel Painter
measures, displays, saves, and prints images — either as small squares of color known
as pixels or as mathematical objects known as vectors.
A document’s resolution affects both its appea ra nce on your computer screen and its
print quality. You can specify a document’s resolution when you create a new
document, acquire an image, or save or export a file.
The Basics 19

Resolution and Screen Appearance
Most monitors have a resolution of 72 dpi (dots per inch). Because of this, the
Corel Painter display default is 72 ppi (pixels per inch). This means that each pixel in
the Corel Painter image occupies 1 pixel on your monitor. The display resolution does
not affect the document’s actual pixels per inch — only how the image is displayed on
the monitor.
For example, a 300-ppi document displays at approximately four times its actual size.
This happens because each pixel in the Corel Painter image occupies 1 pixel on your
monitor, and the monitor’s pixels are four times the size of the image’s pixels. Put
another way, at 300 ppi your printed document will be approximately one-quarter of
its on-screen size. In this example, if you wanted to view the image at actual size, you
would set the zoom level to 25%.
Keep in mind that if you leave the dimensions in pixels and then change the pixels per
inch (resolution), the actual printed size will be affected by the change. If you set your
document size in inches, centimeters, points, or picas and change resolution, the
dimensions will not be affected by the change.
Resolution and Print Quality
The resolution of output devices (printers) is measured in dots per inch, and, in the
case of halftones, lines per inch (lpi). Output device resolutions vary, depending on the
type of press and paper you’re printing on. Generally, a photograph will be output at a
crisp 150 lpi if printed on glossy magazine stock and at 85 lpi for newspaper stock.
If you are using a personal laser or inkjet printer, set your document size in inches,
centimeters, points, or picas at the dots-per-inch setting specific to your printer. Most
printers will produce excellent output from images set at 300 ppi. Your file will be
output correctly — in the proper size and at the best resolution for your printer.
Increasing the file’s pixels-per-inch setting does not necessarily improve the output and
may create a large, unwieldy file.
If you are using a commercial printer or a more sophisticated output device, the
dimensions of the image should always be set to the actual size it will appear in the
printed piece. For the resolution, a good rule of thumb is to set your document’s pixels
per inch to twice the desired lines per inch. So, at 150 lpi, the pixels per inch should be
twice that, or 300 ppi; at 85 lpi, the pixels per inch should be 170 ppi. It’s a good idea
to check with your service bureau if you have questions about output device resolution.
20 Corel Painter User Guide

Zooming
By default, Corel Painter opens a document at 100% magnification, but you can
change the level of magnification by zooming. You can zoom in and out using the
Magnifier tool, reset magnification, or zoom to fit the screen. You can even zoom in
and out while working with other tools.
To zoom in
1 Do one of the following:
• In the toolbox, click the Magnifier tool .
• Hold down Command + Spacebar (Mac OS) or Ctrl + Spacebar (Windows).
The Magnifier cursor shows a plus sign (+), indicating that you are increasing
magnification (zooming in).
2 Click or drag in the document window.
When you drag, Corel Painter chooses the magnification level that most closely
conforms to the selected area and centers the screen view on that area.
The document’s magnification level appears in the document window’s title bar.
To zoom out
1 Do one of the following:
• In the toolbox, click the Magnifier tool and hold down Option (Mac OS) or Alt
(Windows).
• Hold down Option + Command + Spacebar (Mac OS) or Alt + Ctrl +
Spacebar (Windows).
The Magnifier cursor shows a minus sign (-), indicating that you are decreasing
magnification (zooming out).
2 Click in the document window.
Each click reduces the magnification to the next level, as defined in the Zoom Level
at the bottom of the image window.
You can also zoom in or out by moving the Scale slider, typing a value in the
Scale box at the bottom of the image window, or choosing an option from the
Zoom Level pop-up menu on the property bar.
The Basics 21

To zoom using the Magnifier tool
1 In the toolbox, click the Magnifier tool.
2 Choose a zoom level from the Zoom Level pop-up menu on the property bar.
To reset magnification to 100%
• Double-click the Magnifier tool.
To zoom to fit the screen
• Do one of the following:
• Choose Window menu > Zoom to Fit.
• In the toolbox, double-click the Grabber tool .
Corel Painter generates a view of the entire document to fit the size of your screen.
To access the Magnifier tool while any other tool is selected
• Press Command + Spacebar (Mac OS) or Ctrl + Spacebar (Windows), and click to
zoom in; press Command + Option + Spacebar (Mac OS) or Ctrl + Alt +
Spacebar (Windows), and click to zoom out.
Repositioning Documents
The Grabber tool allows you to reposition a document in the Corel Painter workspace
and view different areas of an image.
To use the Grabber tool
1 Activate the Grabber tool by doing one of the following:
• In the toolbox, click the Grabber tool .
• Hold down the Spacebar.
The cursor changes to the Grabber tool.
2 Do one of the following:
• Drag in the document window to scroll through your image.
• Click once in the document window to center the image.
22 Corel Painter User Guide

Rotating Documents
The Rotate Page tool lets you rotate an image on the screen to accommodate the way
you draw naturally.
To rotate the page
1 Activate the Rotate Page tool by doing one of the following:
• In the toolbox, click the Rotate Page tool .
• Hold down Option + Spacebar (Mac OS) or Alt + Spacebar (Windows).
The cursor changes to a hand with a pointing finger.
2 Drag in the document window to rotate the image.
Move the cursor clockwise to rotate the image clockwise. Move the cursor
counterclockwise to rotate the image counterclockwise.
The new rotation angle appears on the property bar.
You can also rotate an image by typing a rotation angle in the Rotation Angle
box on the property bar.
To return an image to its original orientation
1 In the toolbox, click the Rotate Page tool .
2 Do one of the following:
• Click once in the document window.
• Double-click the Rotate Page tool.
• On the property bar, click the Reset Tool button.
To constrain rotation to 90° increments
• Hold down the Shift key while rotating.
Cropping Images
You can remove unwanted edges from the image with the Crop tool. You can adjust
the ratio of the cropped image and choose to maintain the aspect ratio.
The Basics 23

To crop an image
1 In the toolbox, click the Crop tool .
2 Drag inside the image to define the rectangular area you want to keep.
You can adjust the rectangle by dragging a corner or any of its edges.
3 When you’re ready to execute the crop, click inside the rectangle.
To constrain the cropping rectangle to a certain aspect ratio, enter values for
the width and height aspect, and enable the Ratio option on the property bar.
To constrain cropping to a square
• Hold down the Shift key while dragging to define the area with the Crop tool.
To adjust the ratio of the cropped image
1 In the toolbox, click the Crop tool.
2 On the property bar, type ratio values in the boxes.
If necessary, enable the Ratio check box to maintain aspect ratio when cropping the
image.
Using Full Screen Mode
Full screen mode allows you to hide your computer’s desktop and view the document
window without scroll bars. When full screen mode is on, the document window is
centered over a solid background. All Corel Painter features — ex cept the buttons on
the document window — work when you use full screen mode.
To toggle the full screen mode on and off
• Press Command + M (Mac OS) or Ctrl + M (Windows), or click W indow menu >
Screen Mode Toggle from the menu bar.
You can position the image window anywhere on the screen by holding down
the Spacebar and dragging.
24 Corel Painter User Guide

Image Size Information
You can use the Info palette to check image size. For more information, see “Using the
Info Palette” in the Help.
Resizing the Canvas
If you want the same image at a different scale, you can resize the canvas. You can also
change the size of the drawing area or crop the canvas.
To resize the canvas
1 Choose Canvas menu > Resize.
The Resize dialog box appears, showing the current and new sizes by width, height,
and resolution.
2 Enter a new value for width, height, or resolution.
For more information on these values, refer to “Creating and Opening Documents”
on page 15.
3 The Constrain File Size check box lets you choose how to deal with dimensions
relative to resolution.
When Constrain File Size is enabled, you can change the height and width of the
image together. The resolution will change accordingly.
When Constrain File Size is disabled, you can change the height and width
independently of the resolution, and vice versa.
If you choose pixels or percent as the unit and enter a value, Corel Painter
automatically disables the Constrain File Size check box.
To resize the drawing area
1 Choose Canvas menu > Canvas Size.
2 In the Canvas Size dialog box, specify the number of pixels you want to add to any
side of the canvas.
Enter negative values to reduce the canvas size.
The Basics 25

Rotating and Flipping the Canvas
Corel Painter lets you rotate and flip the Canvas layer. When you rotate or flip the
Canvas layer, all other layers move along with it. You can rotate the Canvas layer by a
predefined amount, or you can choose the amount of rotation. If your document has
layers of different varieties, you are prompted to commit all of them to default, pixelbased layers. The Canvas layer increases in size when necessary, so rotating or flipping
it does not cause the contents of other layers to be cropped.
To rotate the Canvas layer by a predefined amount
1 Choose Canvas menu > Rotate Canvas.
2 Choose one of the following:
• 180 to rotate 180 degrees
• 90 CW to rotate 90 degrees clockwise
• 90 CCW to rotate 90 degrees counterclockwise
To rotate the Canvas layer by a user-defined amount
1 Choose Canvas menu > Rotate Canvas > Arbitrary.
2 In the Rotate Selection dialog box, type the number of degrees of rotation you want
in the Amount box.
To flip the Canvas
1 Choose Canvas menu > Rotate Canvas.
2 Choose one of the following:
• Flip Canvas Horizontal
• Flip Canvas Vertical
Saving Files
You have several options for saving files. You can save a file in its current format or to a
different format. You can also save iterations of the same file. Whenever you perform
an iterative save, a new version of the file is saved with a number added to the file
name, and for each subsequent save, the number added to the file name increments by
1. In addition, Corel Painter remembers the location of the last file you saved.
26 Corel Painter User Guide

Saving RIF Files
RIF is the Corel Painter native format, which retains special information about your
document. For example, a RIF file maintains layers so that you can return to the file to
re-access them.
It is a good idea to always save files in RIF format first. Think of RIF files as
“work-in-progress” files. When a file is ready for production, then save it to GIF,
JPEG, TIF, or another file format.
Corel Painter lets you compress files and save disk space with a lossless compression
method. When saving in RIF format, leave the Uncompressed option disabled to
minimize the file size on your hard disk.
Saving JPEG Files
Corel Painter supports the JPEG file format. Because of its small file size and high
quality, JPEG is commonly used to transmit files through a modem. Unlike GIF, the
JPEG file format displays a full range of colors.
The JPEG file format allows you to compress your file on a scale of Fair to Excellent,
where quality is directly proportional to file size. These quality settings will let you
achieve compression ratios of less than 10:1 to greater than 100:1. JPEG is a “lossy”
file format, meaning that a decompressed JPEG file will not be identical pixel-for-pixel
to the original. However, because the JPEG algorithm takes into account the
sensitivity of the eye to different colors, the higher-quality settings should achieve
visually satisfying results.
You can assign a URL to layers and placed images and then save the file in GIF or
JPEG format to produce an image map. For more information, refer to “Client-Side
Image Mapping” in the Help.
When you save a file in JPEG format, Corel Painter displays the JPEG Encoding
Quality dialog box, with the following options:
• The Quality options — Excellent, High, Good, and Fair — let you set the degree
of file compression.
The Excellent option compresses the least, but retains the most data. Fair
compresses the most, but loses the most data.
You can also use the Quality slider to adjust file compression.
• The Smoothness slider applies smoothing to the entire image. This is useful when
using the Fair option, to blur the edges of JPEG artifacts. The default is 0. Keep in
mind that using a high smoothness setting can cause blurring.
The Basics 27

• The Progressive JPEG check box creates a progressive JPEG file. Progressive
format is useful for files used on the Web. As the name implies, progressive format
displays an image in stages — as a series of scans — while the file downloads. The
first scan is a low-quality image; the following scans improve in quality. This allows
the user to see the whole image very quickly.
• The HTML Map Options — NCSA Map Fi le, CERN Map File, and Client Side
Map File — let you generate an image map. (NCSA refers to the National Center
for Supercomputing Applications, and CERN refers to the Conseil Europeén pour
la Recherche Nucléaire.) Use the NCSA Map File or CERN Map File option to
generate a server-side image map. Use the Client Side Map File option to generate
a client-side image map.
Refer to “Working with Image Maps” in the Help for more information about image
map types.
It is best not to decompress and recompress a file multiple times. Although JPEG can
compress and discard data not visible or obvious, the degradation of the data can affect
the condition of your file.
When a file has lost a significant amount of data, block patterns may appear in areas of
the image. If you try to use the Apply Surface Texture feature on a JPEG file, you may
find it will accent the block patterns.
Saving GIF Files
Corel Painter allows you to save documents as GIF files. GIF, a file format using 8 or
fewer bits, is commonly used to display graphics on the Web. When you save a GIF
file, you can choose settings from 4 Colors to 256 Colors. You can choose how your
colors will be displayed and what part of your image will be transparent.
You can enable the Color Set option to force all colors in the color table of the GIF file
to match the colors in the current color set. This option can be useful when you are
doing Web work, especially if you want to constrain colors to a specific color set or
control the number of colors in a Web page, thus controlling the image file size.
The Imaging Method setting determines how your 24-bit Corel Painter document will
be converted to the limited number of colors that GIF uses. If you choose Quantize to
Nearest Color, Corel Painter picks the color nearest to that of each pixel. If you choose
Dither Colors, Corel Painter applies a pattern to the colors chosen to generate a more
accurate, less banded result.
Corel Painter can also save a frame stack as a GIF animation file. For more
information, refer to “Creating Animated GIFs” in the Help.
28 Corel Painter User Guide

If you want your image to have transparency, enable the check box for Output
Transparency. Most programs that display GIF files support transparency, but for those
that don’t, you should specify the color of the “transparent” area. If your image will be
displayed on the Web, enable the Background is WWW Gray option. You can also
choose to use the background color of your Web page by enabling the Background is
BG Color option.
For programs that support transparency, your selection will determine which areas are
transparent. The Threshold slider determines which selection (loaded mask) value
becomes transparent. You can see how the Threshold slider is affecting the
transparency of your image in the Preview window in the dialog box. Transparency is
displayed in the Preview window by a rectangular lattice. You can toggle between the
Preview window and your Save As GIF options to get exactly what you want. Enable
the Interlaced check box if your image will be displayed on a Web page.
For information on creating masks, refer to “Selections” in the Help.
Saving RGB TIF and CMYK TIF Files
The TIF format facilitates exchange between applications and computer platforms. It
is a widely supported bitmap image format that lets you save with either CMYK or
RGB color space information. When you save a file in CMYK TIF format,
Corel Painter creates a color separation, which can then be used for four-color process
printing.
Saving Adobe Photoshop (PSD) Files
Corel Painter can save files in Adobe Photoshop (PSD) format. For optimum
compatibility, shapes are rasterized, and masks are placed in channels.
When you save a file in PSD format, you have RGB and CMYK options, as you do
when saving in TIF format.
Saving Encapsulated PostScript (EPS) Files
The encapsulated PostScript® (EPS) files in Corel Painter conform to the Desktop
Color Separation (DCS) 2.0 format (EPS-DCS 5 file format). Although Corel Painter
saves files in EPS-DCS, it can’t read EPS-DCS. If you plan to save an image in
EPS-DCS, it’s a good idea to save it in another format first, so that you’ll have a copy
of it that you can reopen in Corel Painter.
The Basics 29

When you save an image as EPS-DCS with Preview Options turned on, Corel Painter
uses the loaded International Color Consortium (ICC) profile to prepare the separation
files. If you’re using the Hexachrome® ICC profile, Corel Painter prepares six
separation files — Cyan, Magenta, Yellow, Green, Orange, and Black. For more
information on Preview Options and color management, refer to “Printing” on
page 385.
Although you can save your images as CMYK EPS separations, Corel Painter can’t
open or edit CMYK files.
When you save a file in EPS-DCS, Corel Painter opens the EPS Save Options dialog
box, with these options:
• Hex (ASCII) Picture Data provides another way of storing PostScript information.
Some page design programs require that this option be checked. The file sizes will
be approximately twice as large when saved with this option.
• Preview Options — No Preview, Black and White Preview, and Color Preview —
specify whether to save preview data and in what format. The resulting preview file
is a low-resolution (72-ppi) file.
If you have an older laser printer, you have to use the black and white preview to
print these files. Although the preview or display is black and white, the color
information remains intact.
Recovering Lost Work
When you work with computers, sometimes uncontro llable events cause files to
become corrupt. How can you recover work lost in a corrupt image file? No backup?
Do you have to create the whole image again?
Maybe not. Corel Painter records all actions into the Current Script. If Corel Painter is
stopped and restarted within 24 hours, the old current script is still available (saved as
“{date}{time}”), and a new current script is started. By default, the dated scripts are
saved for one day, but you can reset this to a longer time.
The dated scripts can be used to replay actions for recovering lost work or to create
scripts for movies. Also, you can use the Script List to cut and paste portions of the
dated script that are useful. Just open the dated script, and delete the last few
commands; then play the script to re-create the work, and try saving the file again.
For more information, see “Scripting” in the Help.
30 Corel Painter User Guide

To save a file in its current format
• Choose File menu > Save.
To save a file with a different name or format
1 Choose File menu > Save As.
2 In the Save (Mac OS) or Save Image As (Windows) dialog box, use the controls to
specify a location, file name, and format.
To perform an iterative save
• Choose File menu > Iterative Save.
You can also perform an iterative save by pressing Command + Option + S
(Mac OS) or Ctrl + Alt + S (Windows).
Closing Documents and Quitting the Application
You can close documents or quit Corel Painter using menu commands, keyboard
shortcuts, or the Close button of the current window.
To close a document
• Do one of the following:
• Click the current window’s Close button.
• Choose File menu > Close.
• Press Command + W (Mac OS) or Ctrl + W (Windows).
To quit Corel Painter
• Do one of the following:
• (Mac OS) Choose Corel Painter IX menu > Quit Corel Painter IX.
• (Windows) Choose File menu > Exit.
You can also quit Corel Painter by pressing Command + Q (M ac OS) or Ctrl
+ Q (Windows).
The Basics 31

Setting Preferences
Corel Painter has several different pages of the Preferences dialog boxes: General,
Brush Tracking, Customize Keys, Undo, Shapes, Internet, Save, Opera ting System,
and Palettes.
General Preferences
To access General preferences
• Do one of the following:
• (Mac OS) Choose Corel Painter IX menu > Preferences > General.
• (Windows) Choose Edit menu > Preferences > General.
To make changes to other preferences before closing the Preferences dialog
box, choose another preference type from the pop-up menu.
Setting up the Drawing Cursor
You can choose a cursor icon and its orientation. You can also set the drawing cursor to
show the brush size and shape.
To choose a drawing cursor icon
1 On the General page of the Preferences dialog box, enable the Brush option in the
Cursor Type area.
2 Choose one of the following drawing cursor icon options from the pop-up menu to
the right of the Brush option:
•Brush
• Cross
•Torus
•Triangle
• Hollow Triangle
•Gray Triangle
The selected cursor icon appears in the Orientation area.
3 Enable an Orientation option.
32 Corel Painter User Guide

If you want to set the cursor to show the brush size a nd shape, enable the
Brush Ghosting check box. Brush Ghosting gives you immediate visual
feedback on the cursor, showing you the shape and size of the selected brush.
If you want the drawing cursor icon to be a single pixel, enable the Single
Pixel option in the Cursor Type area.
When you use a brush with “Enable Brush Ghosting”
enabled, the cursor shows the shape of the brush.
Setting the Default Libraries
Corel Painter provides standard libraries that contain brushes, paper grains, selections,
layers, images, and color sets. The Libraries section of the General page of the
Preferences dialog box lets you designate which libraries appear by default.
To set default libraries
• Enter library file names in the Brushes, Papers, Selections, Images, and Color Set
boxes.
The default libraries must reside in the Corel Painter folder.
Setting Quick Clone Preferences
You can customize the Quick Clone effect. You can choose whether to delete the image
from the clone or to turn on Tracing Paper. You can also select the last-used Cloner
brush or choose to clone color with any brush variant.
The Basics 33

To set Quick Clone preferences
1 Choose Corel Painter IX menu > Preferences > General (Mac OS), or Edit menu
> Preferences > General (Windows).
2 In the Quick Clone area of the Preferences dialog box, enable or disable the
following check boxes:
• Delete Image From Clone. When enabled, this option automatically deletes the
contents of the clone file.
• Turn on Tracing Paper. When enabled, this option automatically activates the
Tracing Paper feature.
3 Enable one of the following check boxes:
• Switch to Cloner Brushes automatically activates the last Cloner brush variant
used.
• Clone Color uses the current brush variant to clone the underlying color.
By default, the Switch to Cloner Brushes check box is enabled. To enable the
Clone Color check box, you must disable the Switch to Cloner Brushes check box.
Auto-Save Scripts
When you create an image, Corel Painter records all the operations you perform. This
recording is known as a background script and is saved on the Scripts palette. The
Auto-Save Scripts preference governs how long Corel Painter saves background scripts
before deleting them.
To reset the Auto-Save Scripts preference
1 Do one of the following:
• (Mac OS) Choose Corel Painter IX menu > Preferences > General.
• (Windows) Choose Edit menu > Preferences > General.
2 Specify the number of days for which you want Corel Painter to save background
scripts in the Auto-Save Scripts For box.
For more information about creating and using scripts, refer to “Scripting” in the
Help.
Brush Size Increment
The Brush Size Increment preference lets you set the increment value in pixels.
34 Corel Painter User Guide

Magnifier Increment
The Magnifier Increment preference lets you specify the percentage of magnification at
which the magnifier will increase or decrease.
Units
The Units preference lets you choose the unit of measurement used by the
application’s various sliders and other measurement options.
Cloning Preference
When you clone an image, Corel Painter uses the color information from the original
as you fill in your clone. If you would like Corel Painter to display what part of the
original you’re cloning, check the box next to Indicate Clone Source with Crosshairs
While Cloning.
Draw Zoomed-out Views Using Area-Averaging
When you are viewing an image at under 100% magnification, screen draw is faster
when Draw Zoomed-out Views Using Area-Averaging is enabled, and slower — but
more accurate — when this check box is not enabled.
Display Warning When Drawing Outside Selection
Checking this box enables the warning that appears when you draw outside a
selection.
Show Commit Dialog When Converting to a Layer
Enable this check box if you have enabled the Commit and Don’t Ask Again check box
in the Commit dialog box and want to reinstate the dialog box.
Brush Tracking Preferences
When you draw with traditional media, the amount of pressure you use with a tool
determines how dense and how wide your strokes are. Using a pressure-sensitive stylus
with Corel Painter gives you this same kind of control. Each artist has a different
strength or pressure level in a stroke. The Brush Tracking preference lets you adjust
Corel Painter to match your stroke strength. This is particularly useful for artists with
a light touch. If a light stroke leaves no color on the canvas, you should use Brush
Tracking to increase sensitivity.
The Basics 35

You might also change brush tracking between phases of a project. You could use a
light touch when sketching with a pencil brush variant, then set tracking for more
pressure when you switch to an oil paint variant. Corel Painter saves Brush Tracking
between sessions, so whatever tracking sensitivity you set will be the default the next
time you open the application.
To set Brush Tracking
1 Do one of the following:
• (Mac OS) Choose Corel Painter IX menu > Preferences > Brush Tracking.
• (Windows) Choose Edit menu > Preferences > Brush Tracking.
2 Drag in the scratch pad in a “normal” stroke.
Use the pressure and speed you prefer when drawing or painting. For specific
adjustments, you can move the sliders.
Customize Keys Preferences
Corel Painter lets you assign commands to keys on your keyboard. This saves you time
by giving you immediate keyboard access to your favorite commands. Along with
character, numeric, function, and modifier keys, you can also use Tab, Backspace
(Windows), Delete, Insert, Home, End, Page Up, Page Down, Up Arrow, Down
Arrow, Left Arrow, Right Arrow, and Spacebar. You can use keys already used for other
shortcuts.
You can also create a collection of keyboard shortcuts, or key sets, based on changes to
the default key set. For easy reference, you can generate an HTML summary of a key
set.
To assign commands to keys
1 Do one of the following:
• (Mac OS) Choose Corel Painter IX menu > Preferences > Customize Keys.
• (Windows) Choose Edit menu > Preferences > Customize Keys.
2 Choose a key set from the Key Set pop-up menu.
The default key set is named “Default” and is not editable. When you change any
shortcut in the Default key set, another set is created and named “Custom.”
3 Choose one of the following from the Shortcuts menu:
• Application Menus to create or modify menu bar command shortcuts
36 Corel Painter User Guide

• Palette Menus to create or modify palette menu co mmand shortcuts
• Tools to create or modify tools shortcuts
• Other to create or modify non-menu, non-palette menu or non-tool command
shortcuts
4 Choose a command from the Application Commands list, and type the shortcut
keys you want to assign.
If the shortcut you assigned is already in use, a message appears below the
Application Commands list.
5 Do one of the following:
• Click Accept to assign the shortcut to the command.
The conflicting command that previously had the keyboard shortcut now has no
keyboard shortcut assigned to it.
• Click Accept and Go To Conflict to assign the shortcut to the new command,
and to assign another keyboard shortcut to the conflicting.
To revert keyboard shortcuts
To Do the following
Revert the last keyboard shortcut you
created or modified
Revert to all keyboard shortcuts you created
or modified since you opened the Preferences
dialog box
Revert all keyboard shortcuts to their default
settings
Click Undo.
Click Reset. In the warning dialog box, click
Yes.
Click Defaults. In the warning dialog box,
click Yes.
To manage key sets
To Do the following
Open an existing key set Click the Open button . In the Open Key
Set dialog box, select a key set, and click
Open.
The Basics 37

To Do the following
Create a new key set from the existing key
set
Save the active key set Click the Save Active Set button . In the
Create an HTML summary of the active key
set
Delete the active key set Click the Delete button .
Click the New from Existing button . In
the Save New Key Set dialog box, type a
name for the key set in the Filename box,
and click Save.
Save Key Set dialog box, type a name for the
key set in the Filename box, and click Save.
Click the Create HTML Summary button
. In the Save Summary dialog box, type a
name in the Filename box, and click Save.
Key set files created on the Mac OS cannot be imported into Corel Painter on
Window s. Likewise, key set files cr eated on W indows canno t be imported into
Corel Painter on the Mac OS.
Undo Preferences
Multiple Undo allows you to undo and redo up to 32 levels of changes. Corel Painter
sets 32 levels as the default.
The number of Undo levels applies across ope n documents. If you have set the number
of Undo levels to 5, and you have two documents open and have “undone” three
operations on the first document, you can undo only two operations on the second
document.
Multiple Undo can use a significant amount of disk space. If you perform multiple
operations on the entire image, the whole image must be saved for each Undo step.
To set Undo levels
1 Do one of the following:
• (Mac OS) Choose Corel Painter IX menu > Preferences > Undo.
• (Windows) Choose Edit menu > Preferences > Undo.
2 Enter a number between 1 and 32 in the box.
38 Corel Painter User Guide

Shapes Preferences
You can set the default fill and stroke in the Shapes page of the Preferences dialog box.
These settings apply to new shapes you create. If you enable the Big Handles check
box, the Bézier curve control handles will appear larger. (Y ou may find it easier to work
with them in the larger size.) You can also specify colors for the wing color, outline
color, and point color.
To change Shapes preferences
1 Do one of the following:
• (Mac OS) Choose Corel Painter IX menu > Preferences > Shapes.
• (Windows) Choose Edit menu > Preferences > Shapes.
2 Select your preferences from the following options:
• Drawing Options control how Corel Painter displays shapes as you create them
(On Draw) and when a shape path is closed (On Close). The default setting for
On Draw is Stroke In Current Color, and the default setting for On Close is Fill
with Current Color.
• Big Handles controls the size of the anchor points and direction wing handles.
This can make them easier to grab and drag. If you want big points, enable this
option.
• Outline controls the color of the shape outline paths. Double-click the chip to
change the color.
• Selected Point controls the color of selected anchor points (unselected anchor
points appear “hollow”). Double-click the chip to change the color.
• Wing controls the color of the control wings and handles. Double-click the chip
to change the color.
Save Preferences
You can set preferences for the color space prompt automatically, so that you do not
need to choose a color space every time you save.
For Mac OS only, Corel Painter allows you to select file extension preferences.
To set preferences for the color space prompt
1 Do one of the following:
• (Mac OS) Choose Corel Painter IX menu > Preferences > Save.
The Basics 39

• (Windows) Choose Edit menu > Preferences > Save.
2 Choose one of the following options from the TIFF and PSD pop-up menus:
• RGB automatically saves the file as RGB.
• CMYK automatically saves the file as CMYK.
• Prompt on Save prompts you to choose a color space every time you save a file.
To set file exte nsion pr ef ere nces (Ma c OS)
1 Choose Corel Painter IX menu > Preferences > Save.
2 Choose one of the following options from the Append pop-up menu:
• Always — The appropriate file extension is always added when you save a file.
• Never — A file extension is never added when you save a file.
• Ask When Saving — You are prompted to choose whether to add a file
extension when you save a file.
Operating System Preferences (Windows)
Computers running Windows have some additional options.
Printing Option
In the Printing Option area of the Operating System page of the Preferences dialog
box, if you disable the No Print Banding check box, print banding is disabled.
Disabling print banding may help some PostScript printers, but it hurts the
performance of some bitmap printers, such as the Hewlett-Packard® DeskJet®
printers. The operation of most dot matrix printers is faster if you do not enable No
Print Banding. If you experience problems printing in landscape orientation, you may
have to enable the No Print Banding check box.
Display Option
If your video display driver is set to 16-bit colors, you may experience some color
irregularities on your screen when you use Corel Painter. Enabling the No Device
Dependent Bitmaps check box will correct this problem with most 16-bit color video
displays. If you are not using 16-bit color, enabling this check box will have no effect
on your system.
40 Corel Painter User Guide

To access Operating System preferences
• (Windows) Choose Edit menu > Preferences > Operating System.
Palettes and UI Preferences
Corel Painter lets you control how palettes are docked and grouped. You can also set
the window background color.
To change palette behavior
1 Do one of the following:
• (Mac OS) Choose Corel Painter IX menu > Preferences > Palettes and UI.
• (Windows) Choose Edit menu > Preferences > Palettes and UI.
2 Choose your preferences from the following options:
• Autoscroll lets you scroll through a palette with many elements automatically.
• Snapping Behavior determines where palettes are docked in relation to other
elements on the user interface.
• Snapping Tolerance determines the minimum distance, in pixels, between the
palette and other elements on the user interface before docking.
To change the window background color
1 Do one of the following:
• (Mac OS) Choose Corel Painter IX menu > Preferences > Palettes and UI.
• (Windows) Choose Edit menu > Preferences > Palettes and UI.
2 Do one of the following:
• To use the current main colo r, click Use Current Color.
• To choose another color, cl ick Custom Color, sel ect a color in the Color dialog
box, and click OK.
Memory and Scratch Preferences
You can change the percentage of memory usage dedicated to Corel Painter, which is
set to 80% by default. You can dedicate as much as 100% of memory to Corel Painter.
The lowest percentage you can choose is 5%. You can also choose the scratch disk,
which selects the disk volume that Corel Painter uses to store its temporary file and to
access virtual memory.
The Basics 41

To set memory usage
1 Do one of the following:
• (Mac OS) Choose Corel Painter IX menu > Preferences > Memory & Scratch.
• (Windows) Choose Edit menu > Preferences > Memory & Scratch.
2 Type a number in the Memory Usage box.
To choose a scratch disk
1 Do one of the following:
• (Mac OS) Choose Corel Painter IX menu > Preferences > Memory & Scratch.
• (Windows) Choose Edit menu > Preferences > Memory & Scratch.
2 Choose the volume name (Mac OS) or letter (Windows) from the Scratch Disk
pop-up menu.
Using Two Monitors
The Corel Painter user interface can be displayed across two or more monitors. Y ou can
drag any of the Corel Painter palettes, the property bar, and the toolbox to any
monitor; however, each palette must be displayed entirely on one monitor at a time. If
a palette straddles two monitors, it will automatically snap to the nearest vertical edge
of the monitor with the largest portion of the palette. If the palette is displayed equally
on both monitors, it will snap to the vertical edge of the left monitor.
For best performance, make sure that both monitors are set to the same resolution. In
Windows, you must stretch the application window to straddle both monitors, then
redesign your workspace. For information on configuring your system to display across
two or more monitors, refer to your operating system documentation.
42 Corel Painter User Guide

Layers
When you open a new document and create an image, your work appears on a
background layer known as the Canvas layer. You can add additional layers to a
document, which allows you to manipulate the visual elements in the image
independently of the canvas.
Layers provide one of the great advantages of creating images in a digital workspace
— the freedom to experiment with different compositions and effects without risking
an unwanted, permanent edit. The Corel Painter RIF file format preserves layers when
you save a document, so you can easily make changes at a later time. There’s no need
to re-create the entire composition — just modify one or more layers. The result is a
dynamic and flexible design environment.
Think of layers as sheets of clear material, such as acetate. Painting on a layer obscures
the image below it. Areas of a layer that don’t contain images remain transparent.
Getting Started with Layers
Corel Painter features different types of layers; how you work with each layer depends
on the type of data it contains. You can manage layers by using the Layers palette, and
modify layers by using the Layer Adjuster tool. You can also create, name, save, and
delete layers.
Layers 43

Layer Basics
In Corel Painter, layers are objects that contain image data. Because each layer is a
distinct object, you can move it around and edit it without interfering with the image
data on the canvas or other layers. Likewise, you can work on the canvas without
interfering with any of the other layers.
Layers can contain either pixel-based or vector-based images. How you work with a
layer depends on the type of data it contains. When you work with layers, you use the
Layers palette and the Layer Adjuster tool.
Layer Types
Layers can contain two types of images:
• Pixel-based images
• Vector-based images
Corel Painter also features specialized types of layers:
• Floating object layers
• Reference layers
• Dynamic layers
• Watercolor layers
• Liquid Ink layers
Some features in Corel Painter can be applied only to default, pixel-based layers. If you
want to use these features on shapes, Watercolor layers, Liquid Ink layers, dynamic
layers, and so on, you must convert them to default layers.
Pixel-based Layers
You can create pixel-based images on a layer using any brush variant, with the
following exceptions: Watercolor brushes, Liquid Ink brushes, brushes that use the
Wet method. You can also create pixel-bas ed images on a layer by pasting or placing
an image.
Layers play a role in more specialized functions, such as building an image hose nozzle,
embedding a URL in an image, or creating an animation.
44 Corel Painter User Guide

Vector Shape Layers
Shapes are vector-based objects. When you create a shape with one of the shape tools
(Pen, Quick Curve, Rectangular Shape, Oval Shape, or Text), Corel Painter
automatically adds a new layer to the document. Each new shape becomes a separate
layer; you can group multiple shapes together or merge them into a single shape.
Shapes cannot contain pixel information. To perform pixel-based operations — such as
painting in a shape with a brush or filling it with a gradation — you must convert the
shape to a pixel-based layer.
The information in this chapter can help you manage shapes on the Layers palette. For
detailed information about creating and working with shapes, see “Using Shapes” on
page 327.
Floating Object Layers
Floating object layers contain images that can be moved around the layer. For more
information, refer to “Floating Object Layers” on page 45.
Reference Layers
Reference layers are low-resolution representations of other layers. Using reference
layers lets you more easily manipulate standard layers. For more information, refer to
“Working with Reference Layers” on page 69.
Dynamic Layers
Dynamic layers are a class of layers that provide dynamic effects to the underlying
image. Some dynamic layers, such as Glass Distortion and Equalize, interact with the
underlying images in a specific area to produce effects. Other dynamic layers, such as
Liquid Metal, interact with the underlying images as you apply brush strokes.
Dynamic layers are different from other effects because they are distinct objects — you
can access them on the Layers palette and update their controls to modify them at any
time.
This chapter can help you manage dynamic layers on the Layers palette. For detailed
information about creating and working with dynamic layers, see “Dynamic Plug-ins”
in the Help.
Layers 45

Watercolor Layers
The Watercolor layer is a special layer reserved for Watercolor brushes. It enables the
paint applied with these brushes to mix and flow together. You can create multiple
Watercolor layers in a document. These layers are part of the layer hierarchy and
appear on the Layers palette, where they are characterized by a blue ink droplet icon
.
In earlier versions of the application, if you applied watercolor brush strokes, they were
applied to the Canvas layer and, as such, were uneditable. Now, when you apply a
Watercolor brush to the canvas or to an image layer, a new Watercolor layer is
automatically created. You can edit Watercolor layers as you would any other layer,
including erasing and blurring, without affecting other layers.
Refer to “Working with the Watercolor Layer” on page 170 for more information
about working with Watercolor layers.
Liquid Ink Layers
The Liquid Ink layer is a special layer reserved for Liquid Ink brushes. You can create
multiple Liquid Ink layers in a document. These layers are part of the layer hierarchy
and appear on the Layers palette, where they are characterized by a black ink droplet
icon .
When you apply one of the Liquid Ink brushes to the canvas or to an image layer, a
new Liquid Ink layer is automatically created. You can edit Liquid Ink layers without
affecting other layers.
Refer to “Working with the Liquid Ink Layer” on page 175 for more information about
working with Liquid Ink layers.
The Layers Palette
All layers in a document are listed on the Layers palette. The Layers palette manages
the hierarchy of layers and includes controls for selecting, hiding, locking, deleting,
naming, and grouping layers.
You can access many layer functions and commands using the buttons at the bottom of
the palette, and the palette menu (accessed by clicking the palette menu arrow in the
upper-right corner of the palette).
The Layers palette displays icons next to each layer to indicate the layer’s type and
characteristics. The following table lists the icons that appear in the Layers palette:
46 Corel Painter User Guide

Pixel-based layer
Watercolor layer Reference layer Visible layer
Liquid Ink layer Dynamic layer Hidden layer
Floating object Expanded group
Shape layer Grouped layer Locked layer
On the Layers palette, you can set layer opacity and choose a composite method. For
information about layer opacity, refer to “Setting Layer Opacity” on page 71. For
information about composite methods, refer to “Blending Layers by Using Composite
Methods” on page 71.
The Info palette displays information about the dimensions and position of layer
content. For more information, refer to “Using the Info Palette” in the Help.
To display the Layers palette
• Choose Window menu > Show Layers.
If the palette is not expanded, click the palette arrow.
To convert to a default layer
1 On the Layers palette, select the layer that you want to convert.
Types of layers that you may want to convert include shape, W atercolor, Liquid Ink,
and dynamic layers.
2 Click the palette menu arrow, and choose Convert to Default Layer.
The Layer Adjuster Tool
With the Layer Adjuster tool, you can select and work with layers. When you choose
the Layer Adjuster tool from the toolbox, the property bar contains options for
selecting layers automatically and for changing a layer’s position in the hierarchy. For
information about selecting layers automatically, refer to “Selecting Layers” on
page 52. For information about changing the layer hierarchy , refer to “Changing Layer
Hierarchy” on page 58.
You can also cut, copy, paste, and duplicate layers using the Layer Adjuster tool. For
more information, see “Creating Layers” on page 48.
Layers 47

Creating Layers
You can create new pixel-based, Watercolor, or Liquid Ink layers directly from the
Layers palette. You can also duplicate layers and copy layers between documents.
How you create a layer determines its place in the layer hierarchy on the Layers
palette. If you use a button on the Layers palette, a Layers menu command, or a
keyboard shortcut to create a layer, the new layer is placed directly above the selected
layer. If the selected layer belongs to a group, the new layer is added to the group. If a
group of layers is selected, the layer is placed above the group. For more information,
see “Grouping Layers” on page 60.
Another way to create a layer is to base it on a selection. To do this, you can copy or
convert the contents of a selection to a new layer. For information about creating
selections, refer to “Creating Selections” in the Help.
For information about creating dynamic layers, refer to “Creating Dynamic Layers” in
the Help. For information about creating vector shape layers, see “Creating Shapes” on
page 330.
To create a new layer
• Click one of the following buttons at the bottom of the Layers palette:
• New Layer
• New Watercolor Layer
• New Liquid Ink Layer
You can also create a new layer by clicking the palette menu arrow and
choosing New Layer, New Watercolor Layer, or New Liquid Ink Layer.
To duplicate or copy and paste a layer
1 Choose the Layer Adjuster tool from the toolbox.
2 On the property bar, enable the Auto Select Layer check bo x.
3 Perform an action from the following table.
48 Corel Painter User Guide

To Do the following
Duplicate a layer In the document window, hold down Option
(Mac OS) or Alt (Windows), and click the
layer.
Corel Painter duplicates the layer on top of
the original layer. Drag the new layer to
reveal the original layer in the document
window.
Copy a layer between documents In the document window, select a layer , and
do one of the following:
•In the document window, drag the layer to
another document.
•Choose Edit menu > Copy, display the
other document, and then choose Edit
menu > Paste.
For more information about selecting layers, refer to “Selecting Layers” on
page 52.
You can also paste a copied layer from the Clipboard to a new document by
choosing Edit menu > Paste Into New Image.
To create a layer based on a selection
1 Make a selection.
2 Perform an action from the following table.
To Do the following
Convert the selection to a layer Choose Select menu > Float or click the
selection with the Layer Adjuster tool .
Convert, cut, and move the selection to layer Drag the selection with the Layer Adjuster
tool.
Layers 49

To Do the following
Copy the selection to a layer Hold down Option (Mac OS) or Alt
(Windows), and click the selection with the
Layer Adjuster tool.
Copy and move the selection to a layer Hold down Option (Mac OS) or Alt
(Windows), and drag the selection with the
Layer Adjuster tool.
You can also convert a selection to a layer by rotating, scaling, distorting, or
flipping a selection. Refer to “Us ing Orien tation Effects ” in the Help fo r more
information.
You can also create a new layer by copying or cutting a selection and then
pasting it.
Naming Layers
Corel Painter assigns each layer or group a default name when you create it. This name
references the object’s type and creation order. For example, pixel-based layers are
titled Layer 1, Layer 2, and so on. A shape’s title is based on the tool you use to create
it — Rect # for the Rectangular Shape tool, Oval # for the Oval Shape tool, and
Shape # for the Pen and Quick Curve tools.
As you add more layers and groups to a document, it can become difficult to
remember which image data each layer contains. By assigning descriptive names to
layers and groups, you can easily keep track of the separate pieces of an image.
To name a layer or group
1 On the Layers palette, select a layer or group.
2 Click the palette menu arrow, and choose Layer Attributes.
3 In the Layer Attributes dialog box, type a new name in the Name box.
For pixel-based layers and reference layers, double-click the item on the
Layers palette, or select an item and press Return (Mac OS) or Enter
(Windows).
You cannot change the name of the Canvas layer.
50 Corel Painter User Guide

You can add extra infomation to a layer using notes. For more information,
see “Adding Notes to a Layer” on page 72.
Saving Files That Contain Layers
You can save your Corel Painter document in the RIFF format with “live” layers — the
layers continue to function when you reopen the file. RIFF is the only format that
preserves layers in their original state.
If you save a Corel Painter document in PSD (Photoshop) format, all layers convert to
standard Photoshop transparent layers. Photoshop does not preserve groups; each
layer in a group becomes its own Photoshop layer. For information about grouping
layers in Corel Painter, refer to “Grouping Layers” on page 60.
If you save a Corel Painter document to PSD format, keep in mind how layer
composite methods in Corel Painter convert to blend modes in Photoshop:
Corel Painter
Composite
Method
Gel Darken Overlay Overlay
GelCover
Colorize
Reverse-Out
Shadow Map
Magic Combine
Pseudocolor
Normal
Dissolve
Multiply
Screen
Photoshop
Blend Mode
not converted Soft Light Soft Light
Color Hard Light Hard Light
Normal Darken Darken
Multiply Lighten Lighten
Lighten Difference Difference
Normal Hue Hue
Normal Saturation Saturation
Dissolve Color Color
Multiply Luminosity Luminosity
Screen
Corel Painter
Composite
Method
Photoshop
Blend Mode
For more information about composite methods, refer to “Blending Layers by Using
Composite Methods” on page 71.
If you save a file to a file format other than RIFF or PSD, the layers drop (or merge)
into a single background image.
Layers 51

Deleting Layers
You can delete layers from the Layers palette, but you cannot delete the canvas.
To delete a layer
1 On the Layers palette, select the layer.
2 Do one of the following:
• Click the palette menu arrow, and choose Delete Layer.
• Click the Delete button at the bottom of the Layers palette.
You can also delete vector shape layers by pressing Delete (Mac OS) or
Backspace (Windows).
You cannot delete the Canvas layer.
Managing Layers
To manage layers in a document, you can select, lock, view, or hide them, or change
their position in the hierarchy.
Selecting Layers
Selecting a layer lets you make changes to it. If no layers are selected, any changes you
make apply to the canvas. The Auto Select Layer option changes your ability to select
and move layers with the Layer Adjuster tool.
By default, the Auto Select Layer option is disabled. This means that the layer selection
is “locked in” — the Layer Adjuster tool affects only the selected layer or layers. In
other words, you cannot select a layer by clicking it in the document window; you
must select a layer by clicking it on the Layers palette. When the Auto Select Layer
option is enabled, you can select layers automatically with the Layer Adjuster tool by
clicking an area of layer content in the document window.
52 Corel Painter User Guide

To select a layer
To Do the following
Select a single layer Do one of the following:
•Click a layer on the Layers palette.
•Choose the Layer Adjuster tool from
the toolbox. With the Auto Select Layer
check box on the property bar enabled,
click anywhere in a layer’s content.
Select multiple layers Do one of the following:
•On the Layers palette, hold down Shift
and click each layer you want to select.
•Choose the Layer Adjuster tool from the
toolbox. With the Auto Select Layer
check box on the property bar enabled,
drag over the layers you want to select in
the document window.
Select all layers in a document On the Layers palette, click the palette menu
arrow, and choose Select All Layers.
Corel Painter selects all layers except the
canvas.
You can also press the F key to activate the Layer Adjuster tool.
If you are working with a shape, you can switch to the Shape Selec tion tool by
double-clicking a shape with the Layer Adjuster tool.
To deselect layers
• On the Layers palette, click Canvas (the last item in the list).
Deselecting one or more layers automatically selects the Canvas layer.
You can also click the palette menu arrow on the Layers palette, and choose
Deselect.
Layers 53

Moving Layers
When a layer is selected, you can move its content anywhere in the document to create
a new image layout.
Repositioning layer content helps you achieve the optimal image composition quickly and easily.
Think of a layer’s content as being contained by an invisible bounding box. This
bounding box is a rectangle that marks the left, right, top, and bottom edges of the
layer’s content. When you move or align a layer, you work with the dimensions and
position of this bounding box, not with the entire area of the layer. This allows you to
easily position the contents of a layer in relation to the canvas.
This layer contains a brush stroke. The content area is defined by an
invisible bounding box (indicated by a dashed outline in the image).
The layer indicators provide a visual representation of the bounding box. Refer to
“Showing Layer Indicators” on page 60 for more information.
To move or nudge a layer
1 On the Layers palette, select the layer or group you want to move.
2 Perform an action from the following table.
54 Corel Painter User Guide

To Do the following
Move a layer Choose the Layer Adjuster tool from the
toolbox, and drag the selected layer in the
document window.
Move a layer one pixel at a time Press the Arrow keys to move the selected
layer one pixel at a time.
To move a layer to a specific location
1 On the Layers palette, select a layer or group.
2 Click the palette menu arrow, and choose Layer Attributes.
3 In the Layer Attributes dialog box, type values in the following boxes:
• Top defines the distance in pixels from the top edge of the canvas to the top
edge of the layer’s content. Increase to move the layer down, or decrease to
move the layer up.
• Left defines the distance in pixels from the left edge of the canvas to the left
edge of the layer’s content. Increase to move the layer to the right, or decrease
to move the layer to the left.
If you use negative values, or values larger than the canvas dimensions, the
layer is placed partially or wholly outside the canvas.
You can also open the Layer Attributes dialog box for pixel-based and by
double-clicking the item on the Layers palette, or by selecting an item and
pressing Return (Mac OS) or Enter (Windows).
Aligning Layers
You can align layers horizontally or vertically. When you align layers, Corel Painter
calculates the “destination” point for alignment. For example, if you align layers to the
left, the destination is the leftmost point of all selected layers. If you align horizontally
to the center, the destination is the midpoint between the leftmost edge and the
rightmost edge of the selected layers.
Next, Corel Painter aligns the corresponding edge of each selected layer’s bounding
box with the destination point.
Layers 55

For example, if you align layers to the left, Corel Painter moves each layer so that
the left edge of its bounding box lines up with the destination point. If you align
horizontally to the center, Corel Painter moves each layer so that the horizontal
midpoint of its bounding box lines up with the destination point.
The left edge of the square is the leftmost point of all the layers (left). The layers are
aligned horizontally to the left so that all the layers line up with the leftmost point (right).
To align layers
1 Select the layers or groups that you want to align.
2 Choose Effects menu > Objects > Align.
3 In the Align Shapes dialog box, enable any of the following Horizontal options:
• Left aligns the left edges of the layers’ content.
• Center aligns the midpoints of the layers’ content horizontally.
• Right aligns the right edges of the layers’ content.
• None preserves the existing horizontal alignment.
4 Enable any of the following Ve rtic al options:
• Top aligns the top edges of the layers’ content.
• Middle aligns the midpoints of the layers’ content vertically.
• Bottom aligns the bottom edges of the layers’ content.
• None preserves the existing vertical alignment.
Locking Layers
You can lock layers to avoid accidentally changing them. When a layer is locked, you
cannot select it with the Layer Adjuster tool in the document window. You can,
however, move a locked layer or shape by nudging it. For more information, refer to
“Working with Reference Layers” on page 69.
56 Corel Painter User Guide

To lock or unlock a layer
1 Select the layer on the Layers palette.
2 Do one of the following:
• On the Layers palette, click the Lock Layer button .
• Click the palette menu arrow, and choose Lock or Unlock.
The Locked Layer icon appears next to a locked layer on the Layers palette.
Viewing Layers
You can control your view of an image in the document window by changing layer
visibility settings. This is helpful in both compositing an image and applying effects.
You can hide one layer to gain better visibility of the layer below it. Or, you can set up
different states of an image to create rollover effects for use on the Web. For more
information about creating rollovers, refer to “Creating Rollovers from Image Slices” in
the Help.
Use layer visibility settings to create different states of an image. In the example on the left, the
layers containing the background are hidden; in the example on the right, the layers containing
the background are visible.
Layer visibility settings stay active when you print or save documents to certain file
formats. In other words, the content of hidden layers does not print and is not saved.
However, saving a document in RIF or PSD format preserves hidden layers as part of
the document. Refer to “Saving Files That Contain Layers” on page 51 for more
information about how layers are saved in different file formats.
To show or hide a layer or the canvas
• On the Layers palette, click the eye icon next to the layer name or the canvas.
When the eye is shut , the layer is hidden in the document window. When the
eye is open , the layer is visible in the document window .
Layers 57

You can show or hide multiple layers at the same time by dragging over eye
icons in the Layers palette. The state of the first eye icon you drag over
determines what will happen with subsequent la yers. F or e xample, if you firs t
drag over a layer that is hidden, and then drag over some layers that are
visible and some that are hidden, all layers you drag over become visible.
Changing Layer Hierarchy
The hierarchy of layers determines how the layers in a document interact. When you
create a new pixel-based layer, it appears on top of the existing layers (when the canvas
is selected) or on top of the selected layer. New Watercolor, Liquid Ink, and dynamic
layers are always created on top of existing layers. Depending on its transparency,
masking, and compositing characteristics, the layer will obscure or otherwise affect the
underlying layers.
A document’s layer hierarchy is reflected on the Layers palette. The bottom layer is
always the canvas.
Change the hierarchy of layers to create different effects.
To change a layer’s position in the hierarchy
1 Choose the Layer Adjuster tool from the toolbox.
2 On the Layers palette, select the layer you want to reposition in the hierarchy.
3 From the menu bar, choose Layers, and one of the following:
• Move to Bottom
•Move to Top
•Move Down One Layer
• Move Up One Layer
58 Corel Painter User Guide

When you have nonoverlapping layers in a document, the Move Up One
Layer and Move Down One Layer commands may move the selected layer
past multiple layers. This is because nonoverlapping layers are considered to
be at the same level. The Move Up One Layer and Move Down One Layer
commands move the selected layer (or layers) above or below the next level.
To move a layer to a position between nonoverlapping layers, drag it on the
Layers palette.
You can also reposition a layer by dragging it to a new position on the Layers
palette, by clicking the Move to Bottom , Move to Top , Move Down
One Layer , or Move Up One Layer buttons on the property bar.
Viewing Layer Position
The Info palette contains information about the size and position of the selected layer’s
content on the canvas. Think of the area of a layer that contains images as being
marked by a bounding box. The Info palette displays the dimensions and position of
the bounding box, not the entire area of the layer . This makes it easy to determine the
exact size and location of a layer’s content in the document.
The following list describes information displayed in the Info palette:
•
X is the x-coordinate of the pointer on the canvas, measured in pixels.
• Y is the y-coordinate of the pointer on the canvas, measured in pixels.
•
W is the width of the layer’s content, measured in pixels.
•
H is the height of the layer’s content, measured in pixels.
•
T is the position of the top edge of the layer’s bounding box, measured in pixels
from the top edge of the canvas.
•
L is the position of the left edge of the layer’s bounding box, measured in pixels
from the left edge of the canvas.
•
B is the position of the bottom edge of the layer’s bounding box, measured in pixels
from the top edge of the canvas.
•
R is the position of the right edge of the layer’s bounding box, measured in pixels
from the left edge of the canvas.
In the document window, you can also view indicators that mark the corners of the
selected layer’s content. For more information, see “Showing Layer Indicators” on
page 60.
Layers 59

Showing Layer Indicators
You can show the layer indicators to see display handles at the corners of a layer’s
content when it is selected. You can also display information about the size of a layer’s
content and its position on the canvas. For more information, see “Viewing Layer
Position” on page 59.
Show the layer indicators to mark the corners of a selected layer.
To display the Info palette
1 Choose Window menu > Show Info.
If the palette is not expanded, click the palette arrow.
To show layer indicators
1 On the Layers palette, select a non-Canvas layer.
2 Click the palette menu arrow, and choose Show Layer Indicators.
To hide the layer indicators, click the palette menu arrow, and choose Hide
Layer Indicators.
Grouping Layers
Grouping layers enables you to control layers as a unit. A group can contain any
combination of layers: pixel-based layers, Watercolor layers, Liquid Ink layers,
vector-based shapes, and dynamic layers.
60 Corel Painter User Guide

You can move, rename, hide, show, lock, and set options for a group just as you do for
a single layer. However, you cannot paint across layers in a group or change the
composite method for a group; you must collapse the group into a single layer if you
want to paint on it.
To work with individual layers in a group, you must open the group. To regain control
of the group as a unit, you must close the group. Collapsing a group reduces its
contents to a single layer.
If you create a layer with a button on the Layers palette, a Layers menu command, or a
keyboard shortcut when a layer within a group is selected, the new layer is added to
the group. If the group is selected, the layer is placed above the group.
To create a group
1 On the Layers palette, select the layers you want to group.
For more information about selecting multiple layers, refer to “Selecting Layers” on
page 52.
2 Do one of the following:
• Click the Layer Commands button , and choose Group.
• Click the palette menu arrow, and choose Group.
The layers are collected under a group item on the Layers palette.
If you select nonsequential layers (layers not next to each other in the list),
Corel Painter creates the group at the position of the topmost layer. To select
nonsequential layers, on the Layers palette, hold down Shift and click each
layer you want to select.
To open or close a group
• On the Layers palette, click the palette arrow to the left of the group.
When the arrow points down and you can see the group items, the group is
open. When the arrow points to the right and the names of the group members
are hidden, the group is closed.
To add or remove a layer in a group
1 On the Layers palette, open the destination group.
2 Perform an action from the following table.
Layers 61

To Do the following
Add a layer to a group Drag a layer to the group.
Remove a layer from a group Drag the layer out of the group.
You can create a nested group by dragging a closed group to the open
destination group.
To ungroup layers
1 On the Layers palette, select the group.
If the group is open, click the palette arrow to close it.
2 Do one of the following:
• Click the Layer Commands button , and choose Ungroup.
• Click the palette menu arrow, and choose Ungroup.
To collapse a group
1 On the Layers palette, select the group.
2 Do one of the following:
• Click the Layer Commands button , and choose Collapse.
• Click the palette menu arrow, and choose Collapse.
If the group contains shapes, Liquid Ink layers, or dynamic layers, the Commit
dialog box is displayed. Click Commit All to convert the items to pixel-based layers
before collapsing the entire group.
If you want to collapse a group containing a Watercolor layer, you must first
convert the Watercolor layer to a default layer and change its composite
method to Default. For more information about composite methods, refer to
“Blending Layers by Using Composite Methods” on page 71.
Merging Layers with the Canvas
Dropping a layer or group merges its contents with the canvas. Once you drop a layer,
you can no longer access the layer’s content separately from the canvas. You can drop
specific layers or you can drop all layers at once.
62 Corel Painter User Guide

When you drop a layer, you can choose to create a selection based on the layer
contents. If the layer has a layer mask, the mask is used to make the selection. For
more information about layer masks, refer to “Working with Layer Masks” in the
Help. For more information about selections, refer to “Selections” in the Help.
To drop a layer
To Do the following
Drop specific layers On the Layers palette, select the layers (or
groups) that you want to drop, and do one of
the following:
•Click the Layer Commands button ,
and choose Drop.
•Click the palette menu arrow, and choose
Drop.
Drop all layers On the Layers palette, click the palette menu
arrow, and choose Drop All.
Make a selection by dropping a layer On the Layers palette, click the palette menu
arrow, and choose Drop and Select.
Editing Layers
You can paint on layers, and preserve layer transparency to prevent painting on
transparent areas. You can also move layer content to change the overall image layout.
Using selections, you can turn an area of a layer into a floating object so that you can
move it separately. Reference layers, low-resolution representations of an image, let
you quickly manipulate images in ways that might otherwise require more time.
You can edit a layer’s content by applying effects to it, such as drop shadows and
patterns, and by transforming its dimensions. You can also change a layer’s opacity,
and use composite methods to change how a layer blends with other layers. The
Image Portfolio lets you save the contents of a layer for future use.
Painting on Layers
When a layer is selected, you can use the brushes to paint, draw, erase, or clone. When
painting on layers, keep the following points in mind:
Layers 63

• Watercolor brushes can be used only on Watercolor layers; on a Watercolor layer,
you can paint only with Watercolor brushes.
• Liquid Ink brushes can be used only on Liquid Ink layers; on a Liquid Ink layer, you
can paint only with Liquid Ink brushes.
• You can’t paint across grouped layers — you must collapse the group first. For
more information, see “To collapse a group” on page 62.
• Before painting on a shape, you must commit it to a pixel-based layer.
Corel Painter prompts you to commit a shape if you attempt to paint on it. Once
committed, you cannot re-access the shape’s vector controls. For more information,
see “To paint a shape” on page 350.
• You can protect areas of a layer from painting by creating a selection. For more
information, see “Creating Selections” in the Help.
• You can control what parts of a layer are visible and hidden by creating a layer
mask. For more information, refer to “Worki ng with Layer Masks” in the Help.
To paint on a layer
1 On the Layers palette, select a layer.
2 On the Brush Selector bar, choose a brush category and variant.
3 Paint on the layer in the document window.
The Preserve Transparency option on the Layers palette affects what areas of a layer
you can paint on. Refer to “Preserving Layer Transparency” on page 65 for more
information.
Brush Methods and Painting on Layers
The Natural-Media environment allows brush strokes on different layers to interact
with each other. However, mixing brush strokes that use the Cover and Buildup
methods on the same layer can produce unexpected results. This is caused by a conflict
between the brush method and the layer’s composite method.
• Brushes that use the Buildup method — such as those in the Felt Pens or Pencils
category — work best on layers that use the Gel composite method. In fact, when
you use the Buildup method to paint on a blank layer, Corel Pa inter automatically
sets the layer’s composite method to Gel.
• Brushes that use the Cover method work best on layers that are set to the Default
composite method.
64 Corel Painter User Guide

For more information about layer composite methods, refer to “Blending Layers by
Using Composite Methods” on page 71. For more information about brush methods,
refer to “Methods and Subcategories” on page 211.
Preserving Layer Transparency
Areas of a layer that don’t contain images are transparent. You can preserve the
transparent areas of a layer with the Preserve Transparency check box on the Layers
palette. This option affects which areas of a layer you can create images on. It also
affects the results of erasing or deleting images on a layer.
By default, the Preserve Transparency check box is disabled, which lets you paint
anywhere on the layer. When Preserve Transparency is enabled, the transparent areas
are preserved, and you are confined to painting on areas of the layer that already
contain images.
The results of painting on a layer with the Preserve Transparency option
disabled (left) and enabled (right).
If you want to paint on a shape, you must first commit the shape to a pixel-based layer.
For more information, see “To paint a shape” on page 350.
A good way to think about the Preserve Transparency option is in terms of a layer
mask. As described in “Working with Layer Masks” in the Help, a layer mask defines
the visible areas of a layer.
Preserve Transparency provides a powerful selective editing capability to create
interesting effects by altering the strokes you’ve already applied. For example, you can
enable Preserve Transparency to fill a set of hand-drawn letters with a pattern, a color
gradient, or other brush strokes.
Preserve Transparency also affects the results of cutting or erasing on a layer.
Layers 65

• When Preserve Transparency is disabled, erasing or deleting images restores
transparency to the area and reveals the underlying image.
• When Preserve Transparency is enabled, erasing or deleting images reveals the
document’s paper color. In effect, erasing or deleting with Preserve Transparency
enabled is the same as painting or filling with the document’s paper color.
Erasing part of a layer (the top-right wing of the butterfly) with the
Preserve Transparency check box disabled restores transparency (left).
When the option is enabled, erasing reveals the paper color (right).
You can create a layer mask based on the layer’s transparency. A layer mask defines
which areas of a layer are visible in the document window. For more information, see
“Creating Layer Masks” in the Help.
To preserve layer transparency
• On the Layers palette, enable the Preserve Transparency check box.
You can also load a layer’s transparency to a selection. On the Layers palette,
hold down Control and click the layer (Mac OS), or right-click the layer
(Windows), and choose Select Layer Transparency. For more information
about selections, refer to “Se l ections” in the Help.
Working with Floating Objects
You can make a selection on a layer using the Rectangular Selection, Oval Selection,
Lasso, or Magic Wand tool. Selections on layers function in the same way as selections
on the canvas — you can use them to constrain brush strokes, to isolate an area of the
layer for applying an effect, or to choose an area of the layer to cut or copy. For more
information about working with selections, see “Selections” in the Help.
66 Corel Painter User Guide

By default, when you move a selection, only the selection marquee moves, not the
images. To move selected images on a layer, you must “float” the selection. In effect,
this turns the selected area of the layer into a floating object. You can move floating
objects around a layer to create new compositions.
Each layer in a document can have only one floating object at a time. You can drop a
floating object to merge it with the layer. Many operations automatically drop (or
merge) the floating object back to its parent layer.
Floating objects are created by making a selection on a pixel-based layer. Shapes
cannot be floating objects because they are vector-based. However, you can turn a
shape into a pixel-based layer. For instr uctions, see “To convert a shape to a pixel-based
layer” on page 329
When you save a document to RIF format, Corel Painter preserves all floating objects.
However, saving a document in a non-RIF format automatically drops floating objects
onto their parent layers.
To create a floating object
1 Create a selection on a layer using a selection tool.
2 Do one of the following:
• Click the selection with the Layer Adjuster tool .
• Choose Select menu > Float.
The floating object appears as an item below the parent layer on the Layers palette.
To reposition or drop a floating object
1 On the Layers palette, select the floating object.
2 Perform an action from the following table.
To Do the following
Repositon a floating object In the document window, drag the floating
object to the new location with the Layer
Adjuster tool . Then, press the arrow keys
to move the floating object one pixel at a
time.
Drop a floating object Click the Layer Commands button , and
choose Drop.
Layers 67

Adding Drop Shadows
Adding shadows to a layer’s content can enhance the appe arance of an im age. You can
add a drop shadow to a single layer or to a group.
Drop shadows are also helpful for developing Image Hose nozzles. For more
information, refer to “Preparing Images” in the Help.
When you add a drop shadow, Corel Painter creates a new layer for the shadow and
groups it with the original. This enables you to select and modify the drop shadow
layer independently from the original layer.
To add a drop shadow
1 Select a layer or group.
2 Choose Effects menu > Objects > Create Drop Shadow.
3 In the Drop Shadow dialog box, type values in the following boxes:
• X -Offset and Y-Offset specify the distance, in pixels, from the center of the layer
image to the shadow.
• Opacity specifies the degree to which the shadow covers underlying images.
Setting Opacity to 100% obscures underlying images; lower values create a
more transparent shadow.
• Radius specifies the amount of blur at the edge of the shadow. The radius is half
the distance across the blurred region. If you set Radius to zero, you create a
sharp-edged shadow.
• Angle specifies the direction of the blur.
• Thinness specifies the amount of blur applied perpendicular to the Angle. If a
blur shows streaks, increase Thinness to soften it.
If you want to merge the drop shadow layer with the image layer, enable the
Collapse to One Layer check box.
Creating Patterns on Layers
You can use the same techniques to create patterns on layers as you do to create them
on the canvas. However, a pattern’s wrap-around features do not apply to layers. This
is because the canvas has edges, but layers do not — they are unlimited in size. If you
shift a pattern on a layer, the pattern does not wrap around. Refer to “Using Patterns”
on page 120 for more information.
68 Corel Painter User Guide

Working with Reference Layers
Reference layers get their image content from an external source — either a pixelbased layer in the current document or a separate file. They provide a low-resolution
representation of the original image that you can quickly manipulate in ways that
would otherwise require more time. Working with a reference layer allows you to
transform (resize, rotate, or slant) a layer onscreen by dragging its handles. You can
adjust various options. Transformations are immediately displayed in the document
window. When you finish applying transformations, you commit the reference layer
back to a standard layer. Corel Painter examines the source image to restore the
original resolution.
You cannot edit the image data in a reference layer. If you try to paint on or apply
effects to a reference layer, Corel Painter prompts you to commit it back to a
pixel-based layer.
You can create a reference layer by basing it on an existing layer or by placing an
image. For more information about placing images, see to “Placing Files” on page 19.
To create a reference layer
1 Select a layer.
2 Choose Effects menu > Orientation > Free Transform.
The layer’s icon on the Layers palette chan ges to an eight-handled square , and
an eight-handled box marks the boundary of the layer’s contents in the document
window.
To transform a reference layer
• Select a reference layer.
To Do the following
Resize a reference layer in one direction Drag a side handle to resize the layer in one
direction only.
Resize a reference layer in more than
direction
Layers 69
Drag a corner handle to resize the layer in
two directions at once. If you want to
maintain the layer proportions, hold down
Shift as you drag. The pointer changes when
you position it over a corner handle .

To Do the following
Rotate a reference layer Hold down Command (Mac OS) or Ctrl
(Windows), and drag a corner handle. The
pointer changes when you position it over a
corner handle .
Skew a reference layer Hold down Command (Mac OS) or Ctrl
(Windows), and drag a side handle. The
pointer changes when you position it over a
side handle .
To set reference layer options
1 Select a reference layer.
2 Choose Effects menu > Orientation > Set Transform.
3 In the Set Transform dialog box, adjust any of the following settings:
• Retain Alpha works with placed ima ges to retain the fil e’s alpha channel. When
the image is placed, the channel be comes the layer mask. Disable this option to
discard the channel.
• Horizontal and Vertical define the scaling relationship between the reference
layer and the source layer. If the scaling is low, 33% for example, and you
increase it, Corel Painter refers to the source layer to obtain more pixel data.
• Constrain Aspect Ratio maintains the proportions of the image. Disable this
option to distort the image proportions.
• Rotation and Slant rotates or slants the layer based on an original position of 0°.
Enter positive values to rotate or slant the layer counterclockwise; enter
negative values to rotate or slant the layer clockwise.
• Fast sets a high sampling ratio to produce a low-resolution reference layer. A
low-resolution reference layer contains less information, so it can be
transformed quickly.
• Clean sets the sampling ratio at 1 to 1 to produce a reference layer of the
highest possible resolution — up to that of the source. This shows a better
image as you work, but takes much longer to calculate transformations.
The Quality setting (Fas t or Clean) applies only to the quality of the reference
layer . When you convert a refe rence laye r to a pixel-based layer , Corel Painter
resamples the original image to produce the best possible re so lution.
70 Corel Painter User Guide

Reference Image shows the pixel dimensions of the or iginal image. This is
static information — you can’t change the Reference Image value s.
To commit a reference layer
1 Select a reference layer.
2 Choose Effects menu > Orientation > Commit Transform.
The conversion process might take a few seconds, depending on the size and
quality of the layer.
Setting Layer Opacity
You can adjust a layer’s opacity to create different levels of transparency. The Opacity
slider covers a range of 0% (completely transparent) to 100% (compl etely opaque).
To change a layer’s opacity
1 Select the layer you want to change.
2 On the Layers palette, do one of the following:
• Move the Opacity slider.
• Type a percentage in the Opacity box, and press Return (Mac OS) or Enter
(Windows).
The example on the left shows the background layers at 100% opacity. The
example on the right shows them at 50% opacity.
Blending Layers by Using Composite Methods
A layer’s composite method controls how it interacts with the underlying image. You
can change composite methods to create special effects without changing the actual
images that make up a document.
Layers 71

Corel Painter provides two types of composite settings:
• Composite Method sets the standard composite method.
• Composite Depth controls how a layer’s image data interacts with depth
information on the canvas and other layers.
For example, if the canvas contains Impasto brush strokes, the Composite Depth
setting determines what happens when these brush strokes intersect with brush strokes
on the layer. Refer to “Blending Impasto with Other Layers” on page 185 for more
information about Composite Depth options.
You can set a different composite method for every layer in a document. Keep in mind
the role of the underlying image in creating an effect — you might achieve an
unexpected result if the underlying image is solid black or white.
The best way to understand the different composite methods is by seeing them in
action. Quickly cycle through a layer’s composite methods to create new and
interesting versions of your image. For a comparison of Corel Painter composite
methods and Adobe PhotoShop blend modes, see “Saving Files That Contain Layers”
on page 51.
To change a layer’s composite method
1 Select a layer.
2 On the Layers palette, choose a composite method from the Composite Method
pop-up menu.
Adding Notes to a Layer
In the Layer Attributes dialog box, you can attach additional information to a layer by
adding notes to it.
To record notes for a layer
1 Select a layer or group.
2 Do one of the following:
• Choose Layers menu > Layer Attributes.
• Click the palette menu arrow on the Layers palette, and choose Layer
Attributes.
3 Type in the Note box.
72 Corel Painter User Guide

You cannot record notes for a layer if you enable the WWW Map Clickable
Region check box for image mapping.
You can also record notes for pixel-based layers and reference layers, by
double-clicking the item on the Layers palette, or selecting an item and press
Return (Mac OS) or Enter (Windows).
Storing Images with the Image Portfolio
The Image Portfolio is a convenient place to store images you that want to use again.
To display the Image Portfolio palette
1 Choose Window menu > Show Image Portfolio.
If the Image Portfolio palette is not expanded, click the palette arrow.
To add a layer to the Image Portfolio
1 Select a layer.
2 In the toolbox, click the Layer Adjuster tool .
3 Drag the layer from the document window to the Image Portfolio palette.
The layer is cut from the current document.
4 In the Save Image dialog box, type a name in the Save As box.
To copy the layer from the current document, hold down Option (Mac OS) pr
Alt (Windo ws), and drag it to the Image Portfolio palette using the Layer
Adjuster tool .
The Image Portfolio holds only pixel-base d layers. If you want to add a shape,
Watercolor, Liquid Ink, or dynamic layer to the Image Portfolio, you must
first convert it to a default layer. On the Layers palette menu, click Convert to
Default Layer.
To use an image from the Image Portfolio
• Drag an item from the Image Portfolio palette to the document window.
Layers 73

Corel Painter places the Image Portfolio item in a new layer.
Organizing Layers with Image Portfolio Libraries
You can create your own Image Portfolio libraries to organize layers by category. When
you’re creating a library, keep in mind that the smaller the library, the easier it will be
to see its contents at a glance.
The Image Mover command on the Image Portfolio palette menu lets you move items
between Image Portfolio libraries. For more information about moving items between
libraries, refer to “Libraries and Movers” in the Help.
74 Corel Painter User Guide

Art by Christopher Welch: Concept vehicle design
Christopher Welch has worked as a primary designer in the "Advanced" Studio at the automotive
supply company Magna, later renamed Intier Automotive. Recently, he began working at
DaimlerChrysler, creating automotive interiors and exteriors. In addition to automotive design,
Chris does freelance concept design work for the toy and entertainment industry.


Color
Corel Painter offers many ways to apply color to your image. For example, you can
change the paper color, choose colors for your brush strokes, or apply gradients to an
entire image or selection.
Getting Started with Color
You can select colors in several ways. You can use
• the color squares on the Colors palette
• the Dropper tool, which samples color from the image
• the Use Clone Color setting, which pulls color from a source
• the Mixer palette
• the Color Sets palette
The Colors palette is one place where you can select a color to add to your image.
Changing the Paper Color
You can change a document’s paper color — the color of the background canvas — at
any time. This color appears when you delete a filled area or use a brush from the
Erasers category to remove color.
Color 77

An example of changing the paper color.
To display the Colors palette
• Choose Window menu > Color Palettes > Show Colors.
To change the existing paper color
1 Choose a main color from the Colors palette.
2 Choose Canvas menu > Set Paper Color.
3 To expose the new paper color, do one of the following:
• Make a selection, and cut or delete it.
• Use a brush from the Erasers category to erase part of your image.
Do not use a bleach variant to expose the new paper color unless the paper
color is white. Bleach variants erase to white, regardless of the paper color.
Using the Colors Palette
You can configure the Colors palette to display in two ways: standard and small.
78 Corel Painter User Guide

The Color palette configured as standard (left) and small (right).
By default, the Colors palette displays in its standard configuration, which includes the
Hue Ring and the Saturation/Value Triangle.
• Values span the triangle from top to bottom, with the top of the triangle being the
highest value (white) and the bottom being the lowest value (black).
• Saturation levels go from left to right. Dragging or clicking to the right produces
the purest color within the predominant hue. Dragging or clicking to the left
reduces the level of color saturation, producing “muddier” or grayer colors.
In its small configuration, the Colors palette displays a color triangle and indicates
hues on a single bar (the “hue indicator”).
To configure the Colors palette for small display
1 Choose Window menu > Color Palettes > Show Colors to display the Colors
palette.
If the Colors palette is not expanded, click the palette arrow.
2 Click the palette menu arrow, and choose Small.
To choose a hue and color from the Colors palette
1 Choose Window menu > Color Palettes > Show Colors to display the Colors
palette.
If the Colors palette is not expanded, click the palette arrow.
2 Click the palette menu arrow, and choose one of the following:
• Standard Colors to display the Colors palette in its default state.
• Small Colors to display the small configuration of the Colors palette.
3 Do one of the following:
Color 79

• If you use the Standard Colors display, drag the circle on the Hue Ring to select
the predominant hue.
• If you use the Small Colors display, drag the circle on the Hue Ring to select the
predominant hue.
The Saturation/Value Triangle displays all available colors within that selected hue.
4 Select a color on the Saturation/Value Triangle by dragging the circle or by clicking
the color you want.
You can also select a hue by clicking once anywhere on the Hue Ring
(Standard Colors) or on the hue indicator (Small Colors).
Understanding Main and Additional Colors
The color you select appears in one of two overlapping squares displayed on the Colors
palette. The front square represents the selected main color. The back square shows the
selected additional color. By default, blue is the main color, and white is the additional
color. Most of the time, you work with the main color.
Don’t confuse the additional color with what other graphics programs call “the
background color.” In Corel Painter, the “background color” is the paper color.
The additional color is for multicolor brush strokes, two-point gradients, and Image
Hose effects. It’s used when more than one color is applied.
Overlapping squares display the current main and additional colors.
To choose the main color
1 Choose Window menu > Color Palettes > Show Colors to display the Colors
palette.
2 Double-click the front square.
3 Choose a color from the Colors dialog box.
80 Corel Painter User Guide

Click the front square to set the main color.
To choose the additional color
1 On the Colors palette, double-click the back square.
2 Choose a color from the Colors dialog box.
Click the back square to set the additional color.
If you usually work with the main color, you might want to re-click the front
square to reselect it.
To swap main and additional colors
• Click the Color Swap Icon .
Sampling Colors from Images
In addition to choosing colors on the Colors palette, you can use the Dropper tool to
select, or “pick up,” a color from an existing image.
To use the Dropper tool
1 Click the front or back square to select a main or additional color.
2 Click the Dropper tool in the toolbox.
3 Move the cursor to the color you want to pick up, and click it.
The color square updates to display the color you’ve selected.
The Dropper tool picks up visible color only; it cannot be used to select a
hidden color.
Color 81

You can quickly access the Dropper tool by pressing D on the keyboard.
To access the Dropper tool from other tools
• Press Option (Mac OS) or Alt (Windows).
The Dropper tool works with the Brush, Crop, P e n, Re ctangu lar Sha pe, Oval
Shape, Text, Shape Selection, Scissors, Add Point, Remove Point, Convert
Point, and Paint Bucket tools.
Cloning Color
The Clone Color option offers another way to choose color. This feature lets the brush
pick up dabs of color from an original (source) image. Brushes using dab-based dab
types take an average based on samples of color from the clone source, resulting in an
approximation of the original color. Brushes using rendered dab types sample several
colors, loading each into individual bristles of the brush, allowing for startlingly
realistic results. For more information about cloning, refer to “Cloning Images” on
page 273.
To set up a clone source
1 Choose File menu > Open, and choose the file you want to use as a clone source.
2 Choose File menu > Clone.
3 Choose Select menu > All, and press Delete (Mac OS) or Backspace (Windows).
Now you can work in the new file, taking data from the original source file.
You can also use this feature when creating a mosaic. For more information,
see “Mosaics” on page 307.
To use clone colors
1 Set up a clone source.
If you don’t set a file as the source, Corel Painter uses the currently selected
pattern.
2 Choose a brush from the Brush Selector bar.
82 Corel Painter User Guide

3 Choose Window menu > Color P alettes > Show Colors to display the Colors
palette.
4 Do one of the following:
• Click the palette menu arrow, and choose Use Clone Color.
• Click the Clone Color button on the Colors palette.
Enabling the Clone Color option disables the Colors palette. This is a reminder that
your color information is coming from the clone source.
5 When you paint in the clone file, Corel Painter uses colors from the clone source
image.
When you change the brush or variant, Corel Painter turns Use Clone Color
off. Be sure to turn it back on to continue working with the clone color.
Using Two Colors at Once
Usually, you’ll work with only the main color — the front square of the two
overlapping squares on the Colors palette. Using one color produces a solid-color brush
stroke.
By selecting an additional color, you can determine the colors for multicolored brush
strokes. Many brush variants are able to paint with a variable range of colors.
The settings on the Color Expression palette determine when Corel Painter uses one
color or the other. For more information about using color expression, see “Setting
Color Expression” on page 103.
You can use two colors at once in a brush stroke.
Color 83

To set up a two-color brush stroke
1 Choose a brush from the Brush Selector bar.
2 Choose Window menu > Color Palettes > Show Colors
palette.
3 Choose a main and additional color from the Color palette.
Refer to “Understanding Main and Additional Colors” on page 80 for more
information about setting main and additional colors.
to display the Colors
4 Choose Window menu > Brush Controls > Show Color Expression
Color Expression palette.
5 From the Controller pop-up menu, choose Direction.
6 Paint in the document.
The main color is used in one direction, and the additional color is used in the
other.
You can also choose a color from a color set. For more information, see
“Working with Color Sets” on page 92.
You might want to try a different setting from the Controller pop-up menu
on the Color Expression palette. Try setting it to Pressure instead of Direction.
For more information, see “Setting Color Expression” on page 103.
to display the
Working with the Mixer Palette
The Mixer palette mimics the traditional experience of mixing colors on an artist’s
palette. You can apply two or more colors to the Mixer pad, blending them together to
get the color you want.
Colors can be saved, loaded, and reset on the Mixer palette, saved as mixer swatches,
and saved to color sets.
84 Corel Painter User Guide

The Mixer palette.
Viewing the Mixer Palette
You can view the Mixer palette from the Window menu or with a keyboard shortcut.
You can also change the background of the Mixer pad, the surfa ce on which you mix
color.
To display the Mixer palette
• Choose Window menu > Color Palettes > Show Mixer.
You can also display the Mixer palette by pressi ng Command + 2 (Mac OS)
or Ctrl + 2 (Windows).
To change the Mixer Pad background
1 Choose Window menu > Color Palettes > Show Mixer.
2 Click the palette menu arrow, and choose Change Mixer Background.
3 In the Color dialog box, choose a background color.
Understanding the Mixer Palette Tools
The tools on the Mixer palette are used to apply, mix, sample, and clear color on the
Mixer pad.
Color 85

The Mixer palette tools.
The Dirty Brush Mode Tool
When using an Artists’ Oils brush variant, the Dirty Brush Mode tool lets you apply
colors mixed in the Mixer palette to the canvas. The Dirty Brush Mode tool is active by
default.
Apply Color Tool
The Apply Color tool acts as a loaded paint source, applying color to the Mixer pad.
Color loaded on it also blends with colo r already on the Mixer pad.
The Mix Color Tool
The Mix Color tool mixes colors already on the Mixer pad. It does not add new colors
to the Mixer pad.
The Sample Color Tool
The Sample Color tool samples color on the Mixer pad for use on the canvas. The
sampled color becomes the main color on the Colors palette.
The Sample Multiple Colors Tool
The Sample Multiple Colors tool samples multiple colors on the Mixer pad. The size of
the sample area is determined by the Change Brush Size slider. You can then use the
sampled color on the canvas with an Artists’ Oils brush.
86 Corel Painter User Guide

The Zoom Tool
The Zoom tool lets you zoom in and out of areas on the Mixer pad.
The Pan Tool
The Pan tool lets you scroll through the Mixer pad.
The Clear and Reset Canvas Tool
The Clear and Reset Canvas tool erases the contents of the Mixer pad and resets the
zoom level to 100%.
The Brush Size Slider
The Change Brush Size slider lets you increase or decrease the size of the Apply Color
tool and the Mix Color tool. The Change Brush Size slider also lets you set the size of
the sample area on the Mixer pad when sampling with the Sample Multiple Colors
tool. If you adjust the Change Brush Size slider, the new value is retained when you
reopen the application.
Using the Mixer Palette Colors
You can store commonly used colors in mixer swatches at the top of the Mixer palette
and then use these colors on the Mixer pad. A series of colors appears by default;
however, this color series can be changed to suit the individual preferences of the artist.
Mixer colors can be saved, loaded, and reset to the defaul t.
To change Mixer palette colors
1 Choose Window menu > Color Palettes > Show Mixer to display the Mixer
palette.
If the Mixer palette is not expanded, click the palette arrow.
2 Choose Window menu > Color P alettes > Show Colors to display the Colors
palette.
Color 87

3 On the Colors palette, choose a color.
4 On the Mixer palette, choose the mixer swatch you want to change on the Mixer
Color selector.
5 In the color well, press Command + click (Mac OS) or Ctrl + click (Windows).
The new color appears in the mixer swatch.
To save Mixer palette colors
1 Choose Window menu > Color Palettes > Show Mixer to display the Mixer
palette.
2 Click the palette menu arrow, and choose Save Mixer Colors.
3 In the Save Mixer Colors dialog box, type a name for the mixer colors and choose
where you want to save the mixer swatches (MSW) file.
4 Click Save.
To load Mixer palette colors
1 Choose Window menu > Color Palettes > Show Mixer to display the Mixer
palette.
2 Click the palette menu arrow, and choose Load Mixer Colors.
3 In the Load Mixer dialog box, choose the mixer swatches (MSW) file you want to
load.
4 Click Open.
You can also load a color set in the Mixer palette. Click the palette menu
arrow, and choose Load Mixer Colors. In the Load Mixer dialog box, go to the
Corel Painter IX\Color Sets folder, and double-click a color set.
To reset the Mixer palette colors
1 Choose Window menu > Color Palettes > Show Mixer to display the Mixer
palette.
2 Click the palette menu arrow, and choose Reset Mixer Colors.
88 Corel Painter User Guide

Mixing Colors
Using the Mixer pad, the mixer swatches, and the Apply Color, Mix Color, Sample
Color, Sample Multiple Colors, and Dirty Brush Mode tools, you can create new colors
for use in your images.
When you have finished mixing and sampling colors, you can clear the Mixer pad, or
save it as a Mixer pad (MXS) file that you can open and use later.
To mix colors
1 Choose Window menu > Color Palettes > Show Mixer to display the Mixer
palette.
2 Click the Apply Color tool in the Mixer palette.
3 Choose a color from the mixer swatch, and paint on the Mixer pad.
4 Choose a second color from the mixer swatch, and paint on the Mixer pad.
5 Do one of the following:
• Use the Apply Color tool to add to and blend the colors.
• Use the Mix Color tool to blend the colors.
You can toggle between the Apply Color and Mix Color tools by holding down
Command (Mac OS) or Ctrl (Windows).
When working with the Apply Color or Mix Color tool, you can access other
Mixer palette tools as you work. Holding down Spacebar activates the Pan
tool . Holding down Spacebar + Command (Mac OS) or Spacebar + Ctrl
(Windows) activates the Zoom tool in zoom-in mode. Holding down
Spacebar + Command + Option (Mac OS) or Spacebar + Ctrl + Alt
(Wi ndows ) activa tes the Zoom tool in zoom-o ut mode. When you release th e
keys, the Apply Color or Mix Color tool is reactivated.
To sample a color from the Mixer Pad
1 Choose Window menu > Color Palettes > Show Mixer to display the Mixer
palette.
2 Click the Sample Color tool .
3 On the Mixer pad, click the color you want to sample.
The sampled color becomes the main color in the image.
Color 89

When painting with an Artists’ Oils brush, you can sample multiple colors
from the Mixer pad. You can also mix Artists’ Oils paint on the canvas with an
Artists’ Oils palette knife variant. Unlike palette knives in other brush
categories, Artists’ Oil palette knives do not apply color. For more
information, see “To sample multiple colors” on page 91.
To clear the Mixer Pad
1 Choose Window menu > Color Palettes > Show Mixer to display the Mixer
palette.
2 Do one of the following:
• Click the palette menu arrow, and choose Clear Mixer Pad.
• On the Mixer palette, click the Clear and Reset Canvas button .
To save a Mixer Pad
1 Choose Window menu > Color Palettes > Show Mixer to display the Mixer
palette.
2 Click the palette menu arrow, and choose Save Mixer Pad.
3 In the Save Mixer Pad dialog box, type a name for the mixer colors, and choose
where you want to save the Mixer Pads (MXS) file.
4 Click Save.
To load a Mixer Pad
1 Choose Window menu > Color Palettes > Show Mixer to display the Mixer
palette.
2 Click the palette menu arrow, and choose Open Mixer Pad.
3 In the Open Mixer Pad dialog box, choose the Mixer Pads (MXS) file you want to
open.
4 Click Open.
90 Corel Painter User Guide
 Loading...