

Page 1
User Guide
© Justin Buus
Page 2

Copyright 2015 Corel Corporation. All rights reserved.
Corel® Painter® 2016 User Guide
The contents of this user guide and the associated Corel Painter software are the property of Corel Corporation and its respective licensors,
and are protected by copyright. For more complete copyright information about Corel Painter, please refer to the About Corel Painter section
in the Help menu of the software.
Product specifications, pricing, packaging, technical support and information (“specifications”) refer to the retail English version only. The
specifications for all other versions (including other language versions) may vary.
Information is provided by Corel on an “as is” basis, without any other warranties or conditions, express or implied, including, but not
limited to, warranties of merchantable quality, satisfactory quality, merchantability or fitness for a particular purpose, or those arising by law,
statute, usage of trade, course of dealing or otherwise. The entire risk as to the results of the information provided or its use is assumed
by you. Corel shall have no liability to you or any other person or entity for any indirect, incidental, special, or consequential damages
whatsoever, including, but not limited to, loss of revenue or profit, lost or damaged data or other commercial or economic loss, even if Corel
has been advised of the possibility of such damages, or they are foreseeable. Corel is also not liable for any claims made by any third party.
Corel's maximum aggregate liability to you shall not exceed the costs paid by you to purchase the materials. Some states/countries do not
allow exclusions or limitations of liability for consequential or incidental damages, so the above limitations may not apply to you.
Corel, the Corel balloon logo, the Corel logo and balloon logo combination, Painter, Cinco, CorelDRAW, Natural-Media, PaintShop,
RealBristle, VideoStudio and WordPerfect are trademarks or registered trademarks of Corel Corporation and/or its subsidiaries in Canada,
the U.S., and/or other countries. Other product, font, and company names and logos may be trademarks or registered trademarks of their
respective companies. Patents: www.corel.com/patent
Sample artwork is provided by third parties not affiliated with Corel and used by permission.
210085
Page 3

Contents
Welcome to Corel Painter......................................................................................................................................................................1
Using the documentation....................................................................................................................................................................... 1
Adjusting the Help window text size......................................................................................................................................................3
Corel Painter 2016 User Guide eBook.................................................................................................................................................... 4
Hints and tooltips...................................................................................................................................................................................4
Welcome Screen..................................................................................................................................................................................... 5
Additional resources............................................................................................................................................................................... 5
Registration............................................................................................................................................................................................ 5
Feedback.................................................................................................................................................................................................5
About Corel Corporation........................................................................................................................................................................ 5
What’s new in Corel Painter 2016........................................................................................................................................................ 7
What’s new in this version of Corel Painter............................................................................................................................................7
What was new in earlier versions of Corel Painter................................................................................................................................11
Workspace tour................................................................................................................................................................................... 21
Corel Painter terms............................................................................................................................................................................... 21
Exploring the Document window......................................................................................................................................................... 23
Choosing a workspace layout...............................................................................................................................................................25
Exploring the toolbox........................................................................................................................................................................... 27
Displaying the toolbox.......................................................................................................................................................................... 31
Displaying the Media Selector bar........................................................................................................................................................ 32
Displaying the property bar.................................................................................................................................................................. 32
Exploring the Navigator panel.............................................................................................................................................................. 33
Displaying the Brush Selector bar and the Brush library panel.............................................................................................................. 34
Displaying the command bar................................................................................................................................................................35
Exploring panels and palettes...............................................................................................................................................................35
Rearranging panels and palettes...........................................................................................................................................................39
Creating and modifying custom palettes.............................................................................................................................................. 42
Renaming and deleting custom palettes...............................................................................................................................................44
Contents | 1
Page 4

Saving, exporting, and importing custom palettes................................................................................................................................44
Working with libraries.......................................................................................................................................................................... 45
Creating, importing, exporting, and deleting workspaces..................................................................................................................... 46
Restoring the default Corel Painter settings.......................................................................................................................................... 47
A short tour of Corel Painter for users of Adobe Photoshop..............................................................................................................49
Creating, navigating, and manipulating documents........................................................................................................................... 53
Creating documents............................................................................................................................................................................. 53
Understanding resolution..................................................................................................................................................................... 55
Opening and placing files.....................................................................................................................................................................56
Creating and opening templates.......................................................................................................................................................... 58
Switching document views................................................................................................................................................................... 58
Navigating images and viewing image information.............................................................................................................................. 59
Zooming images...................................................................................................................................................................................61
Rotating images and the canvas...........................................................................................................................................................62
Flipping images.................................................................................................................................................................................... 64
Repositioning images............................................................................................................................................................................66
Cropping images.................................................................................................................................................................................. 66
Resizing images and the canvas........................................................................................................................................................... 67
Saving and backing up files................................................................................................................................................................. 68
Choosing a file format......................................................................................................................................................................... 69
Emailing documents............................................................................................................................................................................. 71
Closing documents and quitting the application.................................................................................................................................. 71
Using two monitors..............................................................................................................................................................................72
Support for tablets and other devices.................................................................................................................................................. 72
Multi-touch support............................................................................................................................................................................. 72
Wacom Intuos support......................................................................................................................................................................... 74
Drag-and-drop features........................................................................................................................................................................ 74
Keyboard shortcuts.............................................................................................................................................................................. 77
Customizing keys.................................................................................................................................................................................. 78
Toolbox commands...............................................................................................................................................................................80
2 | Corel Painter 2016 User Guide
Page 5

Panel commands.................................................................................................................................................................................. 82
Corel Painter menu commands.............................................................................................................................................................83
File menu commands........................................................................................................................................................................... 83
Edit menu commands.......................................................................................................................................................................... 84
Canvas menu commands......................................................................................................................................................................84
Layers menu commands....................................................................................................................................................................... 85
Select menu commands....................................................................................................................................................................... 85
Shapes menu commands......................................................................................................................................................................85
Effects menu commands...................................................................................................................................................................... 86
Window menu commands................................................................................................................................................................... 86
Screen navigation................................................................................................................................................................................. 86
Panel navigation................................................................................................................................................................................... 87
Panel menu commands........................................................................................................................................................................ 87
Brush tools........................................................................................................................................................................................... 88
Selection tools...................................................................................................................................................................................... 89
Adjuster tools....................................................................................................................................................................................... 90
Shape tools.......................................................................................................................................................................................... 92
Animation.............................................................................................................................................................................................93
Lighting................................................................................................................................................................................................ 93
Layer selection tools............................................................................................................................................................................. 93
Mosaics................................................................................................................................................................................................ 93
Other commands..................................................................................................................................................................................94
Painting................................................................................................................................................................................................95
Choosing a painting workflow............................................................................................................................................................. 95
Brush tracking and calibration.............................................................................................................................................................. 97
Exploring painting media....................................................................................................................................................................101
Working with the canvas and layers................................................................................................................................................... 101
Displaying reference images............................................................................................................................................................... 102
Clearing the canvas............................................................................................................................................................................ 103
Setting up the drawing cursor........................................................................................................................................................... 103
Contents | 3
Page 6

Using a stylus vs. a mouse................................................................................................................................................................. 104
Applying freehand and straight brushstrokes......................................................................................................................................106
Constraining, fading, and undoing strokes......................................................................................................................................... 107
Erasing image areas........................................................................................................................................................................... 107
Aligning brushstrokes to paths and shapes........................................................................................................................................ 108
Letting media pool............................................................................................................................................................................. 109
Making 360° strokes...........................................................................................................................................................................110
Painting with airbrushes..................................................................................................................................................................... 110
Adjusting spread................................................................................................................................................................................ 111
Recording and playing back brushstrokes........................................................................................................................................... 112
Reference: Troubleshooting.................................................................................................................................................................113
Working with paper texture and grain..............................................................................................................................................115
Applying paper texture....................................................................................................................................................................... 115
Creating and deleting paper textures..................................................................................................................................................116
Opening and managing the Paper Textures library..............................................................................................................................117
Rotating paper texture........................................................................................................................................................................118
Inverting and scaling paper grain.......................................................................................................................................................118
Controlling brightness and contrast of paper grain............................................................................................................................ 119
Adjusting grain direction and behavior...............................................................................................................................................120
Auto-painting photos........................................................................................................................................................................ 123
Creating underpaintings..................................................................................................................................................................... 123
Auto-painting photos......................................................................................................................................................................... 125
Restoring detail to paintings...............................................................................................................................................................127
Image cloning and sampling............................................................................................................................................................. 129
Cloning images...................................................................................................................................................................................129
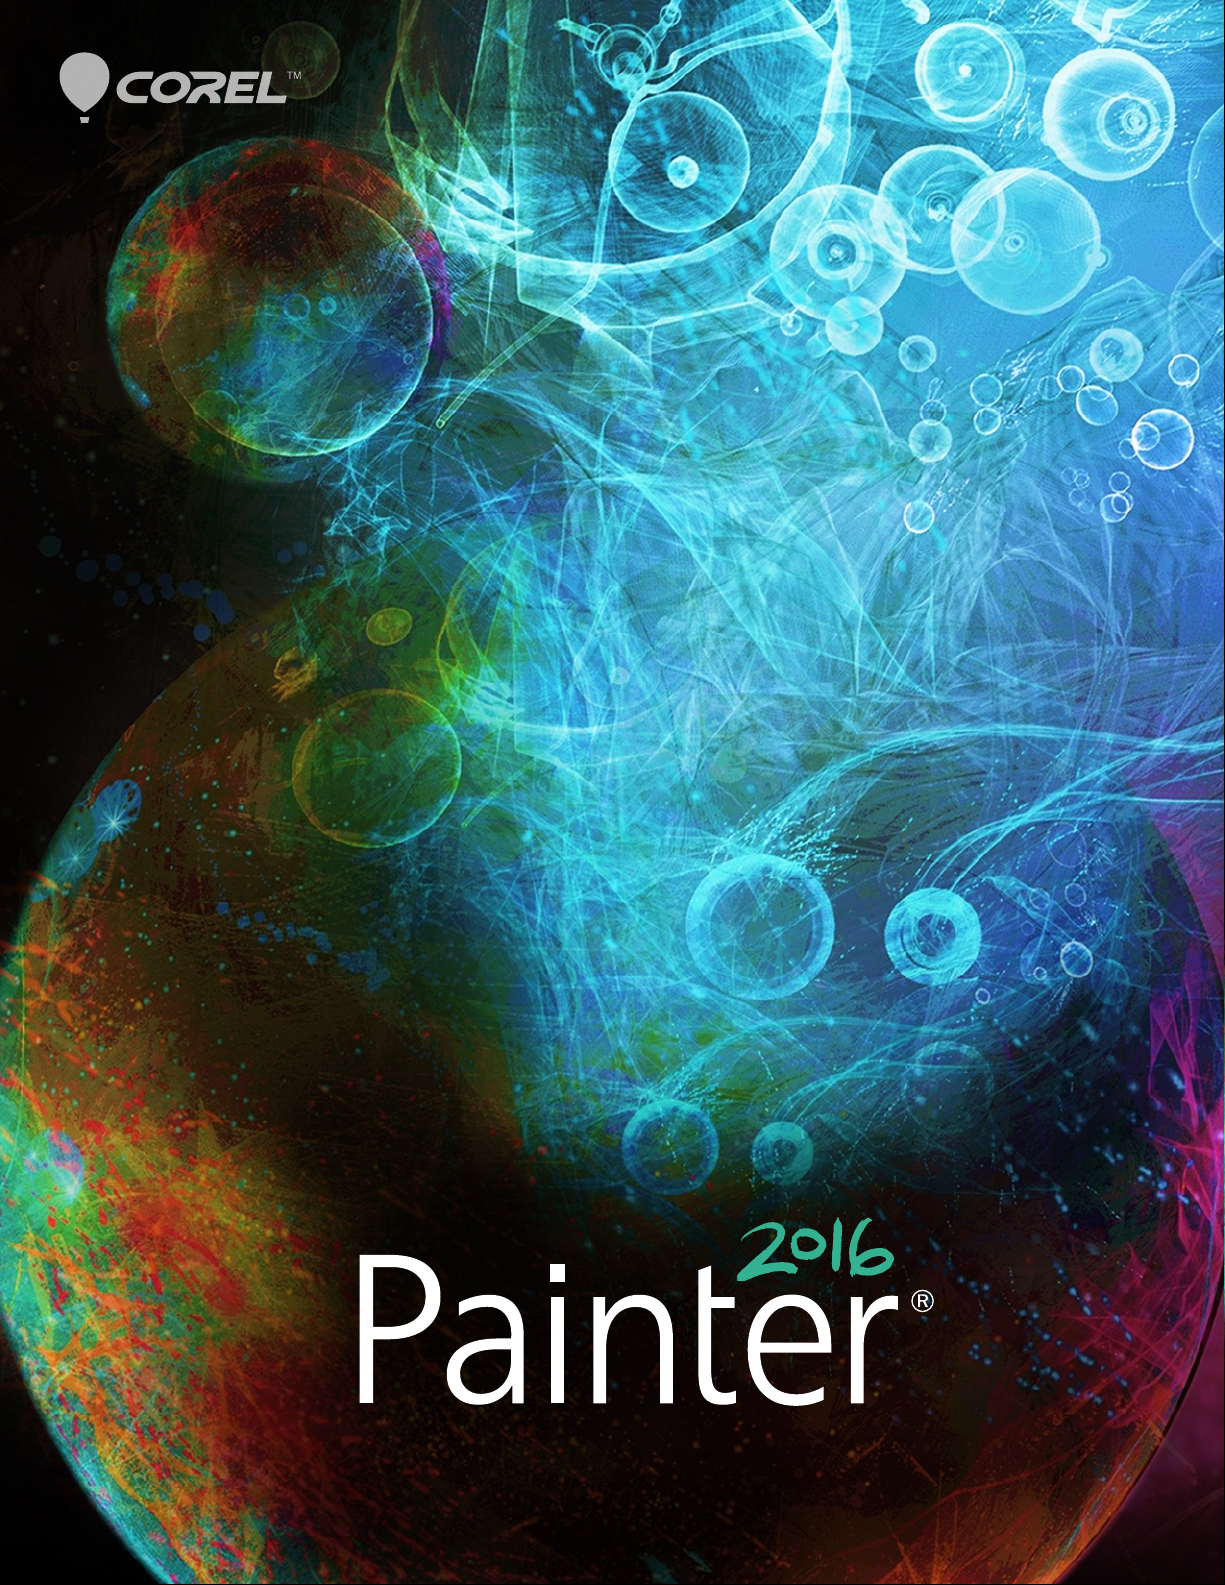
Using Quick Clone.............................................................................................................................................................................. 132
Setting cloning preferences................................................................................................................................................................ 132
Working with multiple clone sources..................................................................................................................................................133
Editing, updating, saving, and exporting clone source images............................................................................................................134
Painting in the clone.......................................................................................................................................................................... 135
4 | Corel Painter 2016 User Guide
Page 7

Using brush loading........................................................................................................................................................................... 137
Performing offset sampling.................................................................................................................................................................138
Applying transformations when sampling...........................................................................................................................................139
Using selections and transformations when sampling.........................................................................................................................146
Filling an area with a sampled image.................................................................................................................................................147
Working with composition tools, symmetry tools, rulers, and guides...............................................................................................149
Using the Layout Grid........................................................................................................................................................................ 149
Using the Mirror Painting mode......................................................................................................................................................... 151
Using the Kaleidoscope Painting mode...............................................................................................................................................153
Using Perspective Guides.................................................................................................................................................................... 154
Using the Divine Proportion tool........................................................................................................................................................ 158
Using rulers........................................................................................................................................................................................ 160
Using guides.......................................................................................................................................................................................161
Using Snap to Guides.........................................................................................................................................................................162
Using the grid.................................................................................................................................................................................... 163
Using Snap to Grid............................................................................................................................................................................ 163
Color.................................................................................................................................................................................................. 165
Choosing colors from the Color panel................................................................................................................................................166
Resizing the Color panel.....................................................................................................................................................................168
Showing or hiding Color panel components...................................................................................................................................... 168
Using the temporal colors palette...................................................................................................................................................... 168
Changing the paper color.................................................................................................................................................................. 169
Sampling colors from images............................................................................................................................................................. 169
Cloning color...................................................................................................................................................................................... 170
Creating two-color brushstrokes......................................................................................................................................................... 170
Exploring the Mixer panel and mixing controls...................................................................................................................................171
Displaying and resizing the Mixer panel............................................................................................................................................. 172
Mixing, sampling, and applying colors from the Mixer pad................................................................................................................ 173
Opening images in the Mixer panel................................................................................................................................................... 175
Contents | 5
Page 8

Changing and saving the Mixer color swatches.................................................................................................................................. 175
Saving Mixer panel colors to a color set.............................................................................................................................................176
Clearing and resetting Mixer panel colors...........................................................................................................................................176
Saving the Mixer pad......................................................................................................................................................................... 177
Loading color swatches and Mixer pad files....................................................................................................................................... 177
Working with color sets..................................................................................................................................................................... 178
Customizing the layouts of color sets.................................................................................................................................................179
Creating and exporting color sets.......................................................................................................................................................179
Editing color sets................................................................................................................................................................................ 180
Setting color variability....................................................................................................................................................................... 181
Setting Color Expression..................................................................................................................................................................... 182
Loading multiple colors...................................................................................................................................................................... 182
Working with color fills...................................................................................................................................................................... 182
Applying a color as a fill.................................................................................................................................................................... 183
Limiting and preventing leakage.........................................................................................................................................................184
Color management............................................................................................................................................................................ 187
Understanding color management..................................................................................................................................................... 187
Specifying the default RGB color profile............................................................................................................................................. 190
Embedding color profiles when saving files........................................................................................................................................ 190
Specifying the default CMYK color profile for converting CMYK images to RGB..................................................................................191
Previewing and soft-proofing color profiles........................................................................................................................................ 191
Assigning or removing color profiles.................................................................................................................................................. 192
Converting color profiles.................................................................................................................................................................... 192
Working with color profile policies..................................................................................................................................................... 193
Working with presets......................................................................................................................................................................... 194
Correcting and adjusting colors........................................................................................................................................................ 195
Correcting colors using curves............................................................................................................................................................ 195
Adjusting brightness and contrast...................................................................................................................................................... 196
Using the curve to correct colors....................................................................................................................................................... 199
Drawing freehand curves to adjust colors...........................................................................................................................................200
6 | Corel Painter 2016 User Guide
Page 9

Specifying the curve values to adjust colors........................................................................................................................................200
Adjusting hue, saturation, and value.................................................................................................................................................. 202
Adjusting selected colors.................................................................................................................................................................... 203
Equalizing images...............................................................................................................................................................................206
Matching color and brightness across images.................................................................................................................................... 207
Inverting colors...................................................................................................................................................................................208
Posterizing an image.......................................................................................................................................................................... 208
Applying video legal colors.................................................................................................................................................................209
Dodging and burning.........................................................................................................................................................................209
Libraries..............................................................................................................................................................................................211
Importing and exporting libraries....................................................................................................................................................... 211
Creating and removing libraries.......................................................................................................................................................... 212
Modifying the display of library panels............................................................................................................................................... 213
Moving, renaming, and deleting library resources.............................................................................................................................. 213
Restoring default libraries................................................................................................................................................................... 214
Selecting, managing, and creating brushes...................................................................................................................................... 215
Understanding brushes.......................................................................................................................................................................215
Exploring brush categories..................................................................................................................................................................216
Searching and selecting brushes......................................................................................................................................................... 227
Setting basic brush attributes............................................................................................................................................................. 229
Displaying advanced brush controls dynamically.................................................................................................................................231
Organizing and displaying brushes in the Brush library panel............................................................................................................. 232
Copying and moving brush variants................................................................................................................................................... 233
Renaming brush categories and variants............................................................................................................................................ 233
Saving and deleting brush variants..................................................................................................................................................... 233
Restoring default brush variants......................................................................................................................................................... 235
Creating and deleting brush categories.............................................................................................................................................. 235
Creating and deleting brush libraries.................................................................................................................................................. 236
Importing and exporting brush libraries, categories, and variants....................................................................................................... 236
Contents | 7
Page 10

Importing Photoshop brush images....................................................................................................................................................239
Saving a brush look............................................................................................................................................................................239
Creating brush dabs........................................................................................................................................................................... 240
Adjusting brushes with brush controls..............................................................................................................................................243
Exploring Brush Controls.................................................................................................................................................................... 244
Expression settings..............................................................................................................................................................................245
Audio Expression................................................................................................................................................................................ 246
Previewing brushstrokes and brush dabs............................................................................................................................................ 247
Calibrating brush variants................................................................................................................................................................... 248
General controls................................................................................................................................................................................. 249
General controls: Dab types............................................................................................................................................................... 249
General controls: Stroke types............................................................................................................................................................ 253
General controls: Methods and subcategories.................................................................................................................................... 255
General controls: Source.....................................................................................................................................................................257
General controls: Multicore................................................................................................................................................................ 257
Opacity controls................................................................................................................................................................................. 258
Grain controls.....................................................................................................................................................................................259
Stroke Attributes controls................................................................................................................................................................... 260
Size controls....................................................................................................................................................................................... 262
Angle controls.................................................................................................................................................................................... 265
Spacing controls................................................................................................................................................................................. 268
Changing dab profiles........................................................................................................................................................................ 269
Real Watercolor controls.....................................................................................................................................................................272
Real Wet Oil controls..........................................................................................................................................................................275
Computed Circular controls................................................................................................................................................................ 279
Hard Media controls...........................................................................................................................................................................280
Bristle controls.................................................................................................................................................................................... 280
RealBristle controls..............................................................................................................................................................................281
Static Bristle controls.......................................................................................................................................................................... 281
Airbrush controls................................................................................................................................................................................ 283
Artists’ Oils controls........................................................................................................................................................................... 285
8 | Corel Painter 2016 User Guide
Page 11

Impasto controls.................................................................................................................................................................................288
Digital Watercolor controls................................................................................................................................................................. 288
Water controls....................................................................................................................................................................................288
Liquid Ink controls.............................................................................................................................................................................. 291
Stroke Jitter controls...........................................................................................................................................................................296
Blending controls................................................................................................................................................................................297
Mouse controls...................................................................................................................................................................................300
Smoothing controls............................................................................................................................................................................ 301
Image Hose controls...........................................................................................................................................................................302
Rake controls...................................................................................................................................................................................... 302
Multi controls..................................................................................................................................................................................... 305
Cloning controls................................................................................................................................................................................. 305
Color Variability controls.....................................................................................................................................................................310
Color Expression controls....................................................................................................................................................................312
Dynamic Speckles............................................................................................................................................................................... 313
Jitter brushes..................................................................................................................................................................................... 317
Choosing a Jitter brush variant...........................................................................................................................................................317
Controlling the behavior of Jitter variants........................................................................................................................................... 319
Watercolor......................................................................................................................................................................................... 321
Working with the Watercolor layer.....................................................................................................................................................322
Watercolor brushes and paper texture interaction.............................................................................................................................. 323
Working with Real Watercolor brushes...............................................................................................................................................323
Working with Watercolor brushes...................................................................................................................................................... 323
Working with Digital Watercolor brushes........................................................................................................................................... 324
Particle brushes..................................................................................................................................................................................327
Gravity Particle brushes.......................................................................................................................................................................328
Flow Particle brushes.......................................................................................................................................................................... 330
Spring Particle brushes....................................................................................................................................................................... 332
Common Particle brush controls.........................................................................................................................................................335
Contents | 9
Page 12

Particles - Thin Lines brush controls....................................................................................................................................................338
Using Dynamic Speckles with Particle brushes.................................................................................................................................... 340
Applying and adjusting flow maps................................................................................................................................................... 343
Getting started with flow maps......................................................................................................................................................... 343
Choosing flow maps and compatible brush variants.......................................................................................................................... 344
Enabling flow maps and controlling flow resistance...........................................................................................................................345
Customizing flow maps...................................................................................................................................................................... 346
Hard Media........................................................................................................................................................................................ 349
Choosing a Hard Media variant..........................................................................................................................................................349
Modifying Hard Media profiles........................................................................................................................................................... 351
Controlling the behavior of Hard Media variants................................................................................................................................ 352
Previewing Hard Media dabs.............................................................................................................................................................. 353
Markers.............................................................................................................................................................................................. 355
Getting started with markers.............................................................................................................................................................. 355
Customizing markers.......................................................................................................................................................................... 356
Image hose........................................................................................................................................................................................ 357
Using the Image hose........................................................................................................................................................................ 357
Adjusting Image hose opacity and grain............................................................................................................................................ 358
Adjusting the size and spacing of image hose elements.....................................................................................................................360
Indexing nozzle files........................................................................................................................................................................... 360
Understanding nozzles, ranks, and indexing.......................................................................................................................................362
Creating a 1-Rank nozzle................................................................................................................................................................... 364
Creating a 2-Rank nozzle................................................................................................................................................................... 366
Creating a 3-Rank nozzle................................................................................................................................................................... 367
Loading and managing nozzle files.................................................................................................................................................... 369
Creating a nozzle from a movie......................................................................................................................................................... 370
RealBristle brushes............................................................................................................................................................................. 373
Getting started with RealBristle brushes............................................................................................................................................. 373
Modifying RealBristle settings............................................................................................................................................................. 374
10 | Corel Painter 2016 User Guide
Page 13

Using RealBristle brushes with Dynamic Speckles................................................................................................................................376
Liquid Ink........................................................................................................................................................................................... 377
Working with Liquid Ink brushes........................................................................................................................................................ 377
Adjusting attributes of the Liquid Ink layer.........................................................................................................................................377
Using Liquid Ink controls....................................................................................................................................................................378
Impasto..............................................................................................................................................................................................381
Applying, displaying, and clearing impasto.........................................................................................................................................381
Adjusting and creating Impasto brushes.............................................................................................................................................382
Adjusting Impasto lighting and depth................................................................................................................................................ 385
Blending impasto with other layers.................................................................................................................................................... 387
Layers................................................................................................................................................................................................. 389
Getting started with layers................................................................................................................................................................. 390
Displaying the Layers panel................................................................................................................................................................ 392
Creating and deleting layers............................................................................................................................................................... 394
Converting selections into layers or floating objects........................................................................................................................... 395
Naming and adding notes to layers................................................................................................................................................... 396
Selecting layers................................................................................................................................................................................... 397
Copying and duplicating layers...........................................................................................................................................................398
Moving layers..................................................................................................................................................................................... 399
Transforming layers.............................................................................................................................................................................401
Aligning layers.................................................................................................................................................................................... 402
Locking layers..................................................................................................................................................................................... 403
Showing or hiding layers....................................................................................................................................................................403
Changing layer order.......................................................................................................................................................................... 404
Viewing layer position........................................................................................................................................................................ 405
Grouping layers.................................................................................................................................................................................. 405
Dropping layers with the canvas........................................................................................................................................................ 407
Painting on layers............................................................................................................................................................................... 408
Preserving layer transparency.............................................................................................................................................................. 409
Contents | 11
Page 14

Adjusting layer opacity....................................................................................................................................................................... 410
Adding drop shadows to layers..........................................................................................................................................................410
Blending layers by using composite methods..................................................................................................................................... 411
Creating and deleting layer masks......................................................................................................................................................417
Applying layer masks.......................................................................................................................................................................... 418
Loading layer masks to selections.......................................................................................................................................................419
Selecting and viewing layer masks......................................................................................................................................................419
Enabling and disabling layers masks................................................................................................................................................... 420
Copying layer masks........................................................................................................................................................................... 420
Inverting layer masks.......................................................................................................................................................................... 420
Editing layer masks............................................................................................................................................................................. 421
Importing and exporting layers...........................................................................................................................................................421
Working with reference layers............................................................................................................................................................ 422
Storing layers as images in the Image Portfolio.................................................................................................................................. 423
Alpha Channels.................................................................................................................................................................................. 425
Creating and copying channels...........................................................................................................................................................425
Generating channels automatically..................................................................................................................................................... 426
Importing and exporting alpha channels............................................................................................................................................ 428
Selecting and viewing channels.......................................................................................................................................................... 428
Setting channel attributes...................................................................................................................................................................430
Deleting and clearing channels........................................................................................................................................................... 431
Editing channels................................................................................................................................................................................. 431
Selections and transformations......................................................................................................................................................... 435
Getting started with selections........................................................................................................................................................... 436
Creating path-based selections........................................................................................................................................................... 437
Creating pixel-based selections........................................................................................................................................................... 440
Creating selections from layers........................................................................................................................................................... 442
Choosing the protected area of a selection........................................................................................................................................ 443
Saving selections as alpha channels....................................................................................................................................................443
Working with the Selection Portfolio.................................................................................................................................................. 446
12 | Corel Painter 2016 User Guide
Page 15

Viewing selections.............................................................................................................................................................................. 446
Inverting selections............................................................................................................................................................................. 447
Softening the edges of selections.......................................................................................................................................................448
Stroking selections..............................................................................................................................................................................448
Modifying the borders of selections................................................................................................................................................... 449
Expanding or contracting selections................................................................................................................................................... 449
Adding to or subtracting from selections........................................................................................................................................... 450
Preparing selections for transformations............................................................................................................................................. 451
Moving selections............................................................................................................................................................................... 452
Transforming a duplicate selection......................................................................................................................................................452
Scaling and rotating path-based selections.........................................................................................................................................453
Skewing and distorting path-based selections.................................................................................................................................... 455
Canceling transformations.................................................................................................................................................................. 456
Common options for effects............................................................................................................................................................. 457
Fading effects..................................................................................................................................................................................... 457
Applying recently used effects............................................................................................................................................................ 458
Changing effects with open panels.................................................................................................................................................... 458
Applying effects using source luminance............................................................................................................................................ 458
Using focus and esoterica effects......................................................................................................................................................459
Applying Smart Blur........................................................................................................................................................................... 459
Applying Camera Motion Blur............................................................................................................................................................ 460
Applying Depth of Field..................................................................................................................................................................... 461
Applying Glass Distortion................................................................................................................................................................... 463
Applying Motion Blur......................................................................................................................................................................... 465
Sharpening focus................................................................................................................................................................................466
Softening focus.................................................................................................................................................................................. 466
Applying Zoom Blur........................................................................................................................................................................... 467
Applying Marbling..............................................................................................................................................................................468
Automatically cloning an image......................................................................................................................................................... 469
Contents | 13
Page 16

Applying the Auto Van Gogh effect................................................................................................................................................... 470
Applying Blobs................................................................................................................................................................................... 471
Creating custom tiles.......................................................................................................................................................................... 472
Applying Grid Paper........................................................................................................................................................................... 475
Applying Growth effects.....................................................................................................................................................................475
Applying Highpass..............................................................................................................................................................................476
Applying the Maze effect................................................................................................................................................................... 477
Placing elements.................................................................................................................................................................................478
Applying the Pop Art Fill effect.......................................................................................................................................................... 479
Using lighting and surface texture effects........................................................................................................................................ 481
Applying preset lighting effects.......................................................................................................................................................... 482
Adding, deleting, and repositioning lights..........................................................................................................................................482
Adjusting light properties................................................................................................................................................................... 483
Using paper to create texture.............................................................................................................................................................484
Using 3D brushstrokes to create texture............................................................................................................................................. 485
Using image luminance to create texture........................................................................................................................................... 486
Using clone source or pattern luminance to create texture.................................................................................................................486
Creating embossed effects..................................................................................................................................................................487
Using channels and layer masks tocreate texture.............................................................................................................................. 488
Creating reflection maps.....................................................................................................................................................................489
Adjusting texture lighting................................................................................................................................................................... 490
Apply Surface Texture controls............................................................................................................................................................491
Applying the Apply Screen effect....................................................................................................................................................... 491
Applying the Color Overlay effect.......................................................................................................................................................492
Applying the Dye Concentration effect............................................................................................................................................... 494
Applying the Express Texture effect.................................................................................................................................................... 496
Applying a warp effect.......................................................................................................................................................................497
Applying the Woodcut effect............................................................................................................................................................. 499
Applying the Distress effect................................................................................................................................................................501
Applying the Serigraphy effect........................................................................................................................................................... 502
Applying the Sketch effect................................................................................................................................................................. 503
14 | Corel Painter 2016 User Guide
Page 17

Dynamic Plug-ins............................................................................................................................................................................... 505
Getting started with dynamic plug-ins............................................................................................................................................... 506
Modifying and deleting dynamic layers.............................................................................................................................................. 506
Committing dynamic layers to default layers...................................................................................................................................... 506
Applying the Brightness and Contrast dynamic plug-in...................................................................................................................... 507
Applying the Burn dynamic plug-in.................................................................................................................................................... 507
Applying the Tear dynamic plug-in..................................................................................................................................................... 509
Applying the Bevel World dynamic plug-in.........................................................................................................................................510
Applying the Equalize dynamic plug-in...............................................................................................................................................511
Applying the Glass Distortion dynamic plug-in................................................................................................................................... 512
Applying the Kaleidoscope dynamic plug-in....................................................................................................................................... 513
Applying the Liquid Lens dynamic plug-in.......................................................................................................................................... 514
Applying the Liquid Metal dynamic plug-in........................................................................................................................................ 518
Applying the Posterize dynamic plug-in..............................................................................................................................................525
Patterns..............................................................................................................................................................................................527
Applying pattern fills.......................................................................................................................................................................... 527
Painting with patterns........................................................................................................................................................................ 529
Creating and editing patterns............................................................................................................................................................. 530
Creating seamless patterns................................................................................................................................................................. 533
Creating fractal patterns..................................................................................................................................................................... 535
Gradients........................................................................................................................................................................................... 539
Applying gradients............................................................................................................................................................................. 539
Replacing image colors with gradient colors...................................................................................................................................... 541
Adjusting gradients............................................................................................................................................................................ 542
Creating and editing gradients........................................................................................................................................................... 543
Saving gradients................................................................................................................................................................................. 546
Mosaics and tessellations.................................................................................................................................................................. 547
Creating a mosaic...............................................................................................................................................................................548
Contents | 15
Page 18

Selecting and removing tiles...............................................................................................................................................................550
Specifying tile and grout color........................................................................................................................................................... 551
Adjusting mosaic tile dimensions and randomness.............................................................................................................................552
Filling an area with tiles..................................................................................................................................................................... 554
Creating 3D tiles.................................................................................................................................................................................555
Re-rendering mosaic tiles....................................................................................................................................................................556
Stroking and filling a selection with mosaic tiles................................................................................................................................ 556
Adding mosaic effects to an image....................................................................................................................................................557
Creating tessellations.......................................................................................................................................................................... 558
Weaves...............................................................................................................................................................................................563
Applying weaves.................................................................................................................................................................................563
Editing and saving weaves................................................................................................................................................................. 564
Creating weave patterns..................................................................................................................................................................... 565
Using the Edit Weave dialog box....................................................................................................................................................... 566
Defining warp and weft expressions................................................................................................................................................... 567
Defining warp and weft color expressions.......................................................................................................................................... 569
Designing the tie-up........................................................................................................................................................................... 570
Reference: Expression operators..........................................................................................................................................................571
Shapes................................................................................................................................................................................................581
Getting started with shapes............................................................................................................................................................... 582
Drawing shapes.................................................................................................................................................................................. 582
Drawing lines and curves................................................................................................................................................................... 583
Setting preferences for drawing shapes.............................................................................................................................................. 586
Selecting a shape............................................................................................................................................................................... 588
Modifying shape outlines and fills......................................................................................................................................................589
Adding, deleting, and moving anchor points..................................................................................................................................... 590
Adjusting curvature............................................................................................................................................................................ 592
Cutting and joining shape segments.................................................................................................................................................. 593
Converting shapes to image layers..................................................................................................................................................... 594
Converting selections to shapes..........................................................................................................................................................595
16 | Corel Painter 2016 User Guide
Page 19

Resizing, rotating, skewing, and flipping shapes................................................................................................................................ 596
Duplicating shapes............................................................................................................................................................................. 597
Combining shapes.............................................................................................................................................................................. 598
Blending shapes................................................................................................................................................................................. 599
Saving a shape outline as a selection................................................................................................................................................. 600
Exporting Adobe Illustrator shapes..................................................................................................................................................... 600
Adding text........................................................................................................................................................................................603
Adding text to images........................................................................................................................................................................603
Formatting text...................................................................................................................................................................................604
Aligning text.......................................................................................................................................................................................604
Adjusting text kerning and leading.....................................................................................................................................................604
Stretching, rotating, and skewing text................................................................................................................................................605
Adding drop shadows to text.............................................................................................................................................................606
Applying effects to text...................................................................................................................................................................... 606
Applying curves to text.......................................................................................................................................................................607
Converting text layers......................................................................................................................................................................... 609
Dropping text..................................................................................................................................................................................... 609
Working with animation and digital videos...................................................................................................................................... 611
Choosing an animation workflow.......................................................................................................................................................611
Creating frame-by-frame animation.................................................................................................................................................... 613
Opening a Corel Painter movie........................................................................................................................................................... 614
Importing QuickTime and AVI files..................................................................................................................................................... 615
Selecting movie frames.......................................................................................................................................................................615
Editing frame content........................................................................................................................................................................ 615
Applying effects to a single frame......................................................................................................................................................616
Previewing animations........................................................................................................................................................................ 616
Using onion skinning..........................................................................................................................................................................617
Animating with layers.........................................................................................................................................................................617
Adding, deleting, and erasing frames.................................................................................................................................................618
Contents | 17
Page 20

Repeating frames................................................................................................................................................................................618
Inserting movies................................................................................................................................................................................. 619
Rotoscoping........................................................................................................................................................................................620
Applying scripts to movies..................................................................................................................................................................620
Exporting movies as QuickTime.......................................................................................................................................................... 621
Exporting movies as AVI.....................................................................................................................................................................622
Importing and exporting numbered files............................................................................................................................................ 623
Exporting animated GIFs.....................................................................................................................................................................624
Using scripts to automate tasks........................................................................................................................................................ 627
Getting started with scripts................................................................................................................................................................ 627
Displaying the Scripts panel................................................................................................................................................................628
Recording and playing scripts............................................................................................................................................................. 628
Enabling and playing background scripts........................................................................................................................................... 629
Creating resolution-independent scripts..............................................................................................................................................630
Editing, renaming, and deleting scripts.............................................................................................................................................. 631
Converting scripts to movies...............................................................................................................................................................632
Importing and exporting scripts......................................................................................................................................................... 632
Importing and exporting script libraries.............................................................................................................................................. 633
Creating and deleting script libraries.................................................................................................................................................. 634
Printing images.................................................................................................................................................................................. 635
Specifying the page layout and image size.........................................................................................................................................635
Printing your work..............................................................................................................................................................................636
Saving files in EPS format for printing................................................................................................................................................637
General notes on printing.................................................................................................................................................................. 637
Notes for users of Adobe Photoshop................................................................................................................................................639
Comparing terminology in Corel Painter and Adobe Photoshop......................................................................................................... 639
Comparing tools in Corel Painter and Adobe Photoshop.................................................................................................................... 640
Frequently asked questions from users of Adobe Photoshop.............................................................................................................. 641
18 | Corel Painter 2016 User Guide
Page 21

Setting preferences............................................................................................................................................................................ 643
General preferences............................................................................................................................................................................ 643
Interface preferences.......................................................................................................................................................................... 645
Performance preferences.....................................................................................................................................................................646
Shapes preferences............................................................................................................................................................................. 647
Cloning preferences............................................................................................................................................................................ 648
Tablet preferences...............................................................................................................................................................................649
Connections preferences..................................................................................................................................................................... 649
Web................................................................................................................................................................................................... 651
Choosing web-safe colors...................................................................................................................................................................651
Posterizing using color sets................................................................................................................................................................ 651
Choosing web-friendly brushes........................................................................................................................................................... 652
Creating transparent GIFs................................................................................................................................................................... 653
Reducing the number of colors in GIF files.........................................................................................................................................654
Creating image maps......................................................................................................................................................................... 655
Creating server-side image maps........................................................................................................................................................ 657
Creating web page backgrounds........................................................................................................................................................ 657
Creating web buttons.........................................................................................................................................................................659
Index.................................................................................................................................................................................................. 661
Contents | 19
Page 22

20 | Corel Painter 2016 User Guide
Page 23

Welcome to Corel Painter
Corel® Painter® 2016 is the ultimate digital art studio. Its inventive drawing tools, realistic brushes, cloning capabilities, and customizable
features let you expand your creative output in exciting new ways. When you use the pressure-sensitive brushes of Corel Painter, they
become fluid extensions of your hand, so the resulting brushstrokes are unrivaled in texture and precision. What’s more, features such as the
ability to build your own Natural-Media® brushes and customize how brushes interact with the canvas give you countless ways to develop
your artistic ideas. Corel Painter takes you far beyond what’s possible in a traditional art environment.
This section contains the following topics:
• “Using the documentation” (page 1)
• “Adjusting the Help window text size” (page 3)
• “Corel Painter 2016 User Guide eBook” (page 4)
• “Hints and tooltips” (page 4)
• “Welcome Screen” (page 5)
• “Additional resources” (page 5)
• “Registration” (page 5)
• “Feedback” (page 5)
• “About Corel Corporation” (page 5)
Using the documentation
The server-based Help gives you access to a full range of up-to-date topics in a searchable format. You need to have an active internet
connection to access the server-based help. However, if you are working offline, you can access the local help file that is installed with Corel
Painter.
The Corel Painter 2016 User Guide provides all Help topics in a print-friendly PDF file, which can be accessed online. The User Guide is also
published as an eBook. For more information, see “Corel Painter 2016 User Guide eBook” on page 4.
The Introduction to Corel Painter 2016 Guide provides an overview of the most common product features and workflows, helping you get
started quickly with the application. This guide also includes information about new features to introduce upgrading users to Corel Painter
2016.
Documentation conventions
The following table describes the conventions used in the Help.
Welcome to Corel Painter | 1
Page 24
Convention Description Example
MacOS and Windows commands Commands for MacOS and Windows
sometimes appear within the same
procedural step, with the operating systems
specified in parentheses.
Modifier keys (Command, Option, Ctrl, Alt) Names of modifier keys for MacOS and
Windows sometimes appear within the
same procedural step, with the operating
systems specified in parentheses.
Menu commands (Choose X menu menu
item)
You choose a menu name by clicking it, and
then you click to choose a menu item from
the list.
Header bar A header bar is located at the top or side of
some workspace components, such as the
toolbox, property bar, and panels.
Hold down Command (MacOS) or Ctrl
(Windows).
Command+I (MacOS) or Ctrl +I
(Windows)
(For the MacOS, press Command+I; for
Windows, press Ctrl+I.)
Choose File QuickClone.
Panel tab The panel tab appears at the top of a panel.
You can click a panel tab to expand that
panel.
Panel options menu Clicking the panel options menu button
displays a pop-up menu with additional
commands.
Flyout Flyouts are containers shared by certain
tools in the toolbox. You can open a flyout
by clicking and holding down the tool on
the flyout that is displayed.
A note contains information that is
important to the steps that precede it.
Often, a note describes conditions under
which the procedure can be performed.
By clicking and holding down the Layer
Adjuster tool in the toolbox, you can
display a flyout that includes the Transform
tool.
This command is available only if you have
turned off a selection.
2 | Corel Painter 2016 User Guide
Page 25

Convention Description Example
A tip contains suggestions related to the
procedure. Some tips present alternative
methods of performing the steps, or
information about other benefits and uses
of the procedure.
You can choose a brush category and
variant in the main application or in the
Brush library panel.
To access the Help
•
Choose Help Corel Painter 2016 Help (Mac OS) or Help Topics (Windows).
To use the Help
1
Choose Help Corel Painter 2016Help (Mac OS) or Help topics (Windows).
2 Perform a task from the following table.
To Do the following
Browse through Help topics Click the Contents tab, and click a topic in the left pane.
Use the index Click the Index tab, and scroll through the entries to find a topic.
Search the full text of the Help (Mac OS) Type a word or phrase in the Search box in the upper-
right corner of the Help window, and press Return.
(Windows) Click the Search tab, type a word or phrase in the
box, and click Go. Note that the search feature does not support
quotation marks. If you enclose the word or expression in
quotation marks, the search will not produce any results.
To access the Corel Painter 2016 User Guide
•
Choose Help User Guide.
To access the Introduction to Corel Painter 2016 Guide
•
Choose Help Introduction to Corel Painter 2016 (PDF).
Adjusting the Help window text size
You can adjust the size of the text that displays in the Help window by adjusting the zoom level in your browser. Adjusting the zoom level
quickly increases the size of all web page elements, including text and images. You can adjust zoom levels in Internet Explorer, Chrome,
Firefox, and Apple Help. Some browsers may offer additional controls for customizing the font size of the display text. For more information,
see the Help for your browser.
To adjust the size of text in Firefox and Chrome
• In the browser, do one of the following:
• To increase the zoom level, press Ctrl and + (Windows), or Command and + (Mac).
• To decrease the zoom level, press Ctrl and - or Command and - (Mac).
Welcome to Corel Painter | 3
Page 26
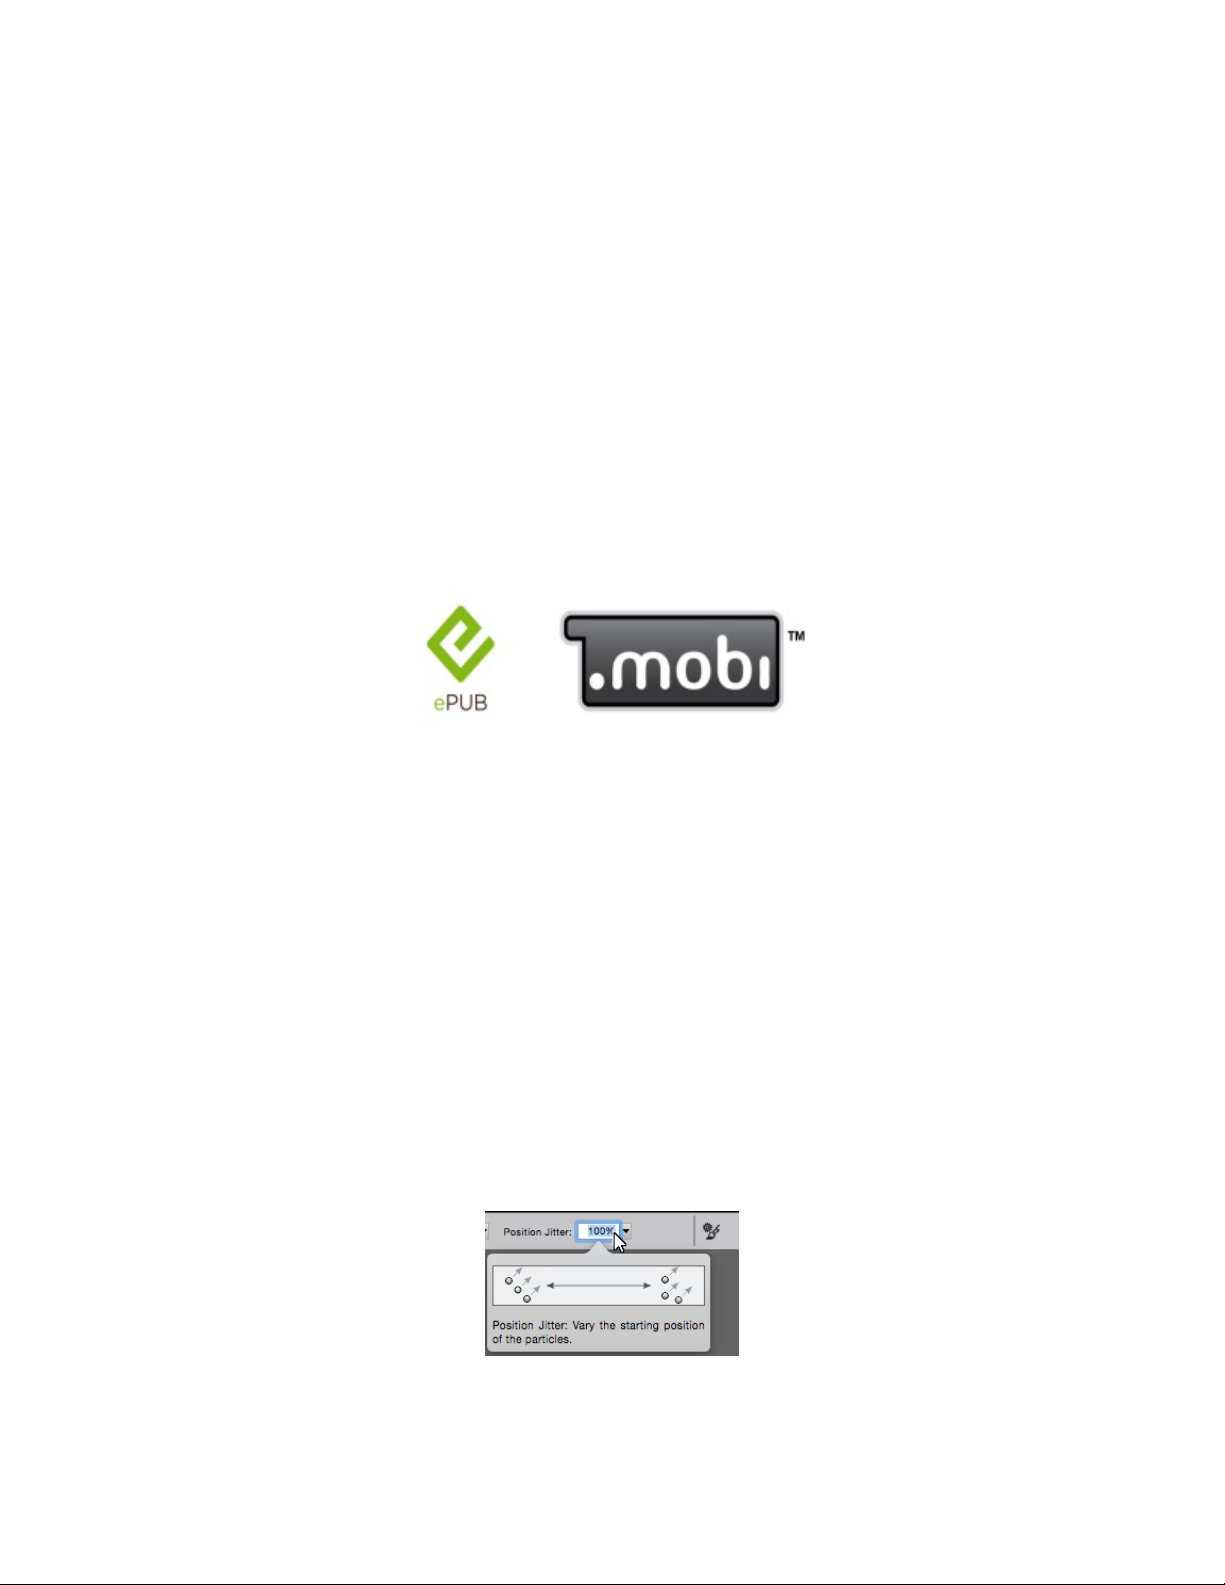
To adjust the size of text in Internet Explorer
• In the Internet Explorer browser, do one of the following:
• To increase the zoom level, press Ctrl and +.
• To decrease the zoom level, press Ctrl and -.
To adjust the size of text in Apple Help
• In the Apple Help viewer, do one of the following:
• To increase the zoom level, press Command and +.
• To decrease the zoom level, press Command and -.
Corel Painter 2016 User Guide eBook
The Corel Painter 2016 User Guide is available as an eBook. Published to the EPUB and MOBI file format, the eBook brings the most
comprehensive information about product features to your eBook reader.
The User Guide is available in two eBook formats: ePUB and MOBI.
To access the Corel Painter 2016 User Guide eBook
• Download one of the following versions:
• MOBI version — for Kindle devices
• ePUB version— for other devices and eBook readers
Hints and tooltips
Hints can help you get started quickly with Painter brushes and tools. Specific hints are displayed if the active brush uses one of the following
brush technologies: Watercolor, Real Watercolor, Liquid Ink, Cloner, Particles, Dynamic Speckles, or Impasto. If the active brush uses
another brush technology, the Hints panel shows tips about finding and modifying brushes. When you click a tool, the Hints panel shows
a description of all tools in the toolbox. All hints include links to relevant Help topics that provide comprehensive information about the
corresponding brush features or tools.
Tooltips provide helpful information about application controls when you position the pointer over icons, buttons, and other user interface
elements. Some tooltips include illustrations that show the effect of using high and low values of specific settings.
To access Hints
•
Choose Help Hints.
4 | Corel Painter 2016 User Guide
Page 27

Welcome Screen
With the Welcome Screen, you can quickly start or open an image, choose a workspace that suits your needs, access online learning videos,
find new brushes and other content online, and get inspired by a gallery of original artwork created with Corel Painter.
The Welcome Screen appears when you start the application. You can also access the Welcome Screen from the Help menu ( Help Welcome
book).
If you don’t want to see the Welcome Screen at startup, disable the Show this at startup check box in the lower left corner of the
Welcome Screen. This check box is not available in trial versions of the product.
Additional resources
You can access additional Corel Painter resources online to learn more about the product and connect with the Corel Painter community.
Resources To access
Corel Painter website http://www.painterartist.com
Corel Painter Tutorials http://www.youtube.com/user/PainterTutorials
Corel Painter on Twitter http://www.twitter.com/corelpainter
Corel Painter on Facebook http://www.facebook.com/corelpainter
Registration
Registering Corel products is important. Registration provides you with timely access to the latest product updates, valuable information
about product releases and access to free downloads.
If you skipped the registration process when installing Corel Painter 2016, you can register at www.corel.com/support/register.
Feedback
We value any feedback that you may have about the product or the Help content. To provide feedback about a specific Help topic, scroll to
the bottom of any Help topic and click the “Was this page helpful?” link.
About Corel Corporation
Corel is one of the world’s top software companies, boasting some of the industry's best-known graphics, productivity and digital media
products. We've built a reputation for giving customers more choice, and delivering solutions that are easy to learn and use. Our mission is
simple: help people achieve new levels of creativity and productivity.
Corel’s product lines include CorelDRAW® Graphics Suite, Corel® Painter®, Corel® PaintShop® Pro, Corel® VideoStudio® and Corel®
WordPerfect® Office. For more information on Corel, please visit www.corel.com.
Welcome to Corel Painter | 5
Page 28

6 | Corel Painter 2016 User Guide
Page 29

What’s new in Corel Painter 2016
Corel Painter takes you far beyond what’s possible in a traditional art environment. This section contains the following topics about what’s
new in Corel Painter 2016:
• “What’s new in this version of Corel Painter” (page 7)
• “What was new in earlier versions of Corel Painter” (page 11)
What’s new in this version of Corel Painter
In this section, you will find information about the new and enhanced features in Corel Painter 2016.
Rotatable media
In Corel Painter 2016, you can change the angle of paper textures and flow maps to get an unprecedented variety in the look of your
brushstrokes. For more information see “Rotating paper texture” on page 118 and “To customize a flow map” on page 347.
Rotatable media can help you vary the look of your brushstrokes.
Default-settings restoration
Corel Painter 2016 makes it easier to preserve custom content when you reset the application to its factory settings. Now when you restore
default settings, you can maintain custom brushes and palettes, paper textures, nozzles, scripts and more. In previous versions, retaining any
customizations required exporting libraries, restoring default settings, and then importing the libraries. For more information, see “Restoring
the default Corel Painter settings” on page 47.
What’s new in Corel Painter 2016 | 7
Page 30
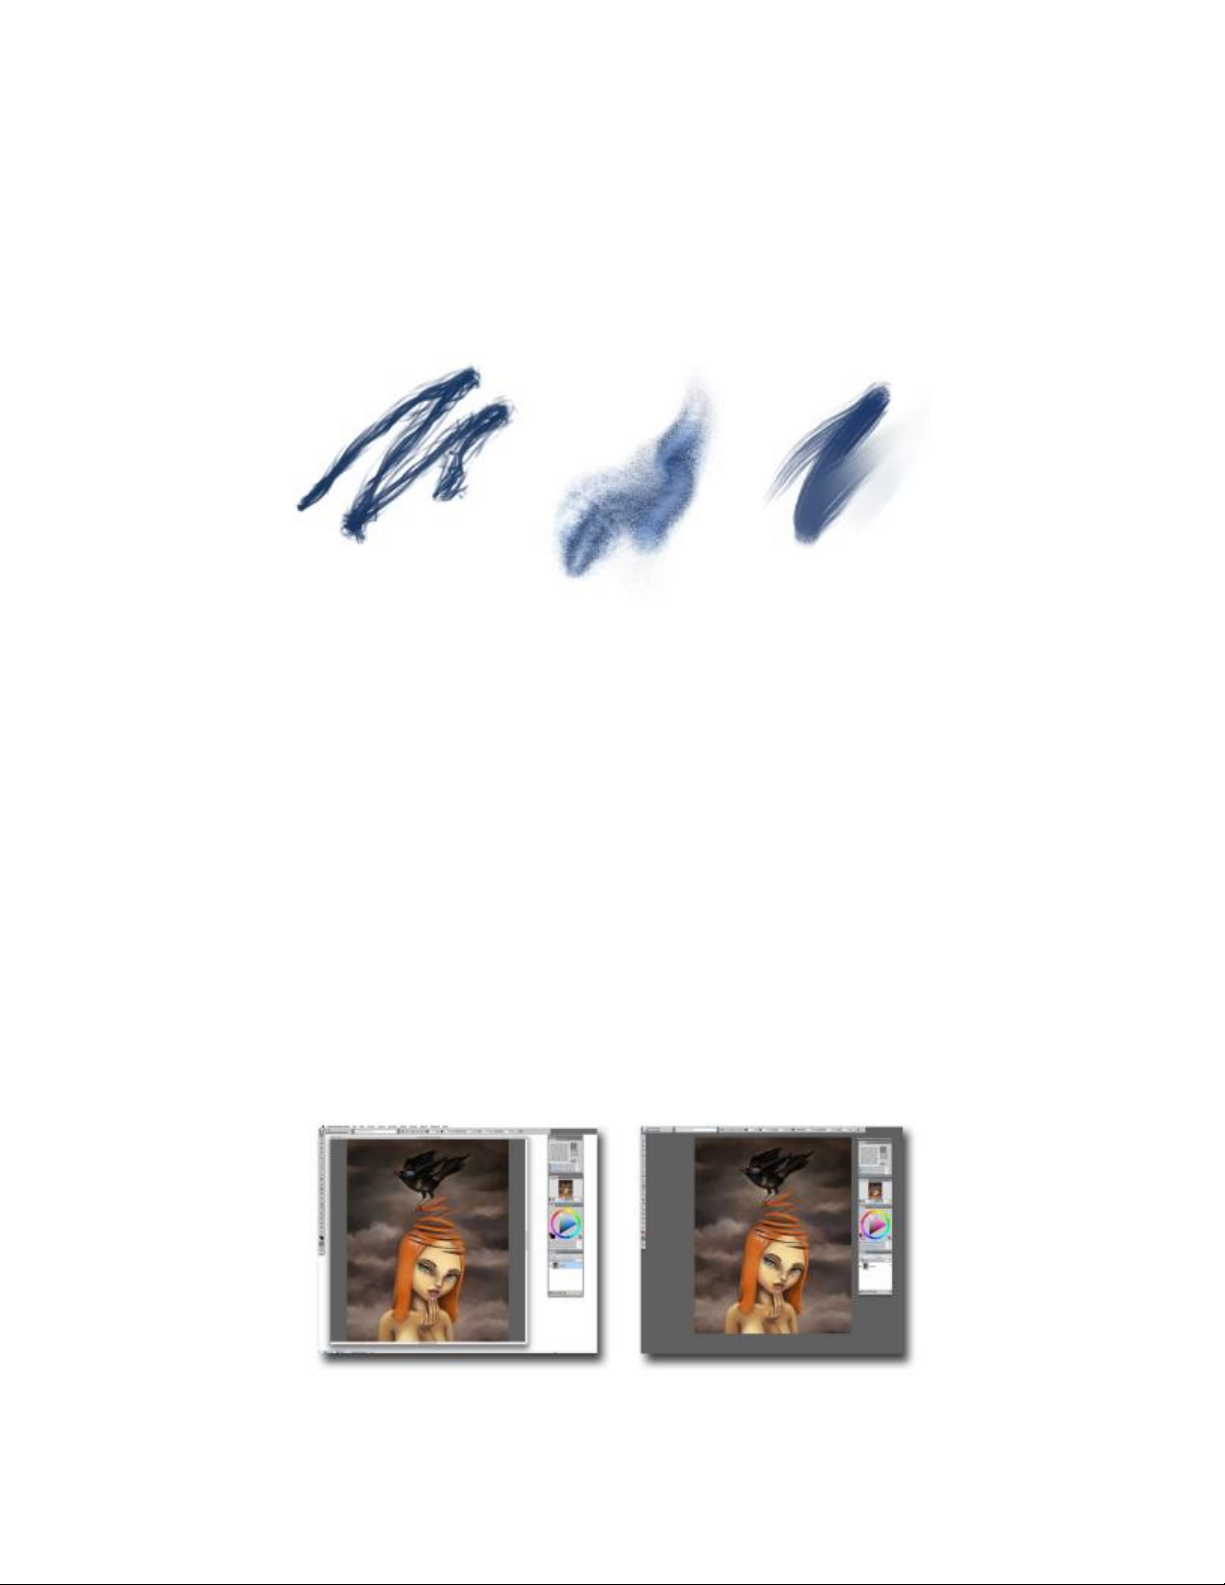
Dynamic Speckles
This feature combines Particle System physics and brush-thickness control linked to your touch, allowing you to create luscious NaturalMedia brushstrokes or progressive-looking Pollock splatters. You can use this feature with select Bristle, RealBristle and Particle brushes, so
you can take full advantage of those revolutionary, Painter-exclusive technologies. For more information, see “Dynamic Speckles” on page
313.
Dynamic Speckles generate a continuous brushstroke from discrete spots of color or speckles.
Audio Expression
Corel Painter 2016 lets you use an audio input device, such as a microphone, or internal audio to modify the look and feel of any brush. For
example, your brushstrokes may change their appearance in synch with streaming music. Audio Expression allows you to link a variety of
brush controls to audio input. In addition, you can adjust the strength of an audio signal, controlling its impact on a brush. For example,
if you link brush size to quiet audio, increasing the strength will result in wider brushstrokes. Conversely, if the audio is loud, decreasing
the strength will result in narrower brushstrokes. In addition, you can set the range of the audio expression to achieve a wider range of
brushstroke variation (for example, minimum to maximum brushstroke width) regardless of whether the audio is consistently strong, low, or
varies. For more information, see “Audio Expression” on page 246.
Document Views
Whether you are working on a project, showing your work, or demonstrating a technique, Corel Painter 2016 makes it even easier to switch
between document views. You can switch document views from the toolbox, the Window menu, and by using keyboard shortcuts. The
Default view shows all the open documents together with commonly used application controls while the Single Document view lets you
focus on the active document. The Presentation Mode hides the menu bar and the taskbar of the operating system, leaving only essential
controls. For more information, see “Switching document views” on page 58.
Single Document View (left); Single Document View in Presentation Mode (right)
8 | Corel Painter 2016 User Guide
Page 31

Brush Hints
Depending on the brush type you are currently working with, context-sensitive brush hints (Help Hints) provide useful tips about brush
technologies. It’s a great way to discover different ways you can take advantage of a variety of unique Corel Painter features, including
Particles, Watercolor brushes, Liquid Ink, Cloner, Impasto, and the new Dynamic Speckles.
Visual tooltips
Some tooltips include illustrations that show the effect of using high and low values of specific settings.
At a glance, you can see the effect of high and low setting values.
Adobe® Photoshop® brush file import
With Corel Painter 2016, you can import the brush stamps of pixel-based Adobe Photoshop brushes stored in Adobe Brush Resource (ABR)
files. These files contain a collection of Adobe Photoshop brushes, including shape, texture, dynamics, and other brush information. All
other brush attributes specified in the ABR files are not imported, but can be fully customized in Corel Painter. For more information, see
“Importing Photoshop brush images” on page 239.
Each imported brush stamp appears as a new brush variant.
Custom content sharing
Corel Painter 2016 simplifies sharing content saved in a custom palette. When you save a custom palette as a Painter Custom Toolbox (BOX)
file, all custom brushes, papers, patterns and flow maps in the palette are saved with the file.
What’s new in Corel Painter 2016 | 9
Page 32

You can share content saved to a custom palette.
Welcome Screen
With the Welcome Screen, you can quickly start or open an image, choose a workspace that suits your needs, access online learning videos,
find new brushes and other content online, and get inspired by a gallery of original artwork created with Corel Painter. The Welcome Screen
appears when you start the application, and you can also access it by clicking Help Welcome.
The Welcome Screen makes it quicker and easier to find information and the tools you need.
Special media brushes
Corel Painter 2016 offers additional dab types, which are methods for applying media to the canvas. The new dab types use both Particles
and Liquid Ink or Watercolor dabs. These combination dab types include: Liquid Ink Gravity Particles, Liquid Ink Flow Particles, Liquid Ink
Spring Particles, Watercolor Gravity Particles, Watercolor Flow Particles, and Watercolor Spring Particles.
10 | Corel Painter 2016 User Guide
Page 33
Layer blending
Whether you are painting with a single color or blending two or more colors on a layer, the Enhanced Layer Blending option can help you
produce brushstrokes without white fringes. For more information, see “Blending controls” on page 297.
Brushstrokes without (left) and with Enhanced Layer Blending (right)
What was new in earlier versions of Corel Painter
This topic describes what was new in earlier versions of Corel Painter.
What was new in Corel Painter 2015?
Corel Painter 2015 introduced the following features and enhancements, which are also available in Corel Painter 2016.
Revolutionary digital brushes
Particle Brushes These new physics-inspired brushes produce rich, chaotic strokes by
emitting particles from a central point that create lines and patterns
as they move across the canvas. This revolutionary brush category
allows a wide variety of artists to push their creative visions further,
whether in photo art, illustration, concept art, traditional art, and
more.
For more information, see “Particle brushes” on page 327.
Jitter Smoothing Corel Painter X3 saw the introduction of Universal Jitter, which
allows you to add randomness to your brushstrokes by integrating
the Jitter expression in a range of brush controls. The addition
of Jitter Smoothing in Corel Painter 2016 helps you give your
brushstrokes an even more natural, organic look.
What’s new in Corel Painter 2016 | 11
Page 34

Enhanced speed and performance
Native 64-bit application for Mac Users on the Mac OS will notice extended processing power right
away, especially during operations that require big data transfers,
such as opening files, switching clone sources, working with
multiple layers, using large documents and more.
Enhanced cross-platform performance With the latest round of CPU performance optimizations, brushes
perform faster, so you can concentrate on your art and forget
about technology.
Enhanced real-time effect preview You can now preview effects in real-time on the canvas so you
instantly get an idea how the whole painting will look.
Enhanced brush tracking Because each artist uses a different strength or pressure level in
a stroke, the enhanced Brush Tracking utility helps calculate the
appropriate settings for pressure and velocity. The new visual
power curve helps you control universal application pressuresensitive memory and instantly apply the settings to the current
brush variant. There are default pressure curves to choose from,
or you can tweak the curve and save it as a preset. You can also
make practice strokes with a variant on the canvas while you’re
calibrating the brush tracking so you can draw from with the
most realistic, accurate brushstroke information possible. For more
information, see “Brush tracking and calibration” on page 97.
A fully responsive experience
Custom user-interface palette arrangements Inspired by Painter artists, this collection of new pre-defined user-
interface arrangements is designed to kick-start a variety of digitalart workflows by displaying only the relevant palettes and tools.
There’s one for illustrating, creating photo art, and getting started
with the revolutionary new Particle brushes. There’s even one that
displays only minimal UI, freeing up space for tablet users. For more
information, see “Choosing a workspace layout” on page 25.
Fresh new content
You can add an extra special touch to your artwork with new,
freshly inspirational papers, nozzles, images, patterns, weaves,
gradients and more. Some of the updates are designed specifically
for different types of digital artists, so whether you're an illustrator
or photo artist, you can be sure to find compelling content to work
with.
Mobile art that moves you
Real-Time Stylus and Windows Tablet PC support You can combine your Tablet PC with Windows Real-Time Stylus
support to capture whatever inspires you on the fly. Support for
the Windows Real-Time Stylus delivers truly responsive pressuresensitivity, and depending on the device, tilt. What’s more, there’s
12 | Corel Painter 2016 User Guide
Page 35

no stylus driver to install, so you can use Corel Painter 2016 right
away. For more information, see “Support for tablets and other
devices” on page 72.
Painter Mobile for Android The Painter Mobile for Android app gives you the ability to paint
anywhere, anytime. When it's time to finalize your work, you can
import it directly into Painter 2015 to add professional finishing
touches.
Particle brushes were used to create the sparks and wisps of smoke in this image. Artwork by Don Seegmiller
Angle Jitter applied to a brushstroke without Jitter Smoothing (top) and with Jitter Smoothing (bottom).
What’s new in Corel Painter 2016 | 13
Page 36

Real-Time Stylus and Windows Tablet PC support let you create art on the go.
What was new in Corel Painter X3?
If you are upgrading to Corel Painter 2016 from Update 2 of Corel Painter 12, you may not be aware of the features and enhancements that
were added in Corel Painter X3. These features and enhancements are also available in Corel Painter 2016.
A platform for inspiration, creativity, and reflection
Brush search Helps you find the perfect brush by performing a search. Simply
type in the name of the brush variant or a combination of brush
properties, such as jitter or bristle, to narrow down the search.
For more information, see “Searching and selecting brushes” on
page 227.
Reference Image panel Lets you display an inspirational image in an easy to use, dockable
panel. You can zoom, pan, and sample colors from the reference
image while maintaining focus on your digital painting.
For more information, see “Displaying reference images” on page
102.
Enhanced stroke preview Offers a more detailed preview of the brushstroke that will appear
on the canvas in real-time. The preview now visually represents
brush parameters such as mixing, erasing, blending, and jitter.
The brush preview displays in the Brush library panel, Brush search
results panel, and the Stroke Preview brush control panel.
For more information, “Previewing brushstrokes and brush dabs”
on page 247.
Inspirational Mixer Pads Lets you choose colors from a collection of original mixer pads that
were created for you by expert Corel Painter artists.
For more information, see “Displaying and resizing the Mixer panel”
on page 172.
The innovator in digital art
14 | Corel Painter 2016 User Guide
Page 37

Jitter brushes Produces more realistic brushstrokes by introducing an increased
amount of randomness. The Jitter brush variants are found under
various brush categories.
For more information, see “Jitter brushes” on page 317.
Universal Jitter Allows you to control the randomness of various brush features,
such as size, angle, and opacity. You can now use Jitter in
conjunction with a different expression.
For more information, see “Controlling the behavior of Jitter
variants” on page 319.
Minimum controls Allows you to introduce a range of variation to a selected
expression. You can apply minimum values for brush controls such
as Size and Opacity.
For more information, “Expression settings” on page 245.
Additional Flow Maps, Patterns, and Papers Includes a greater variety of Flow Maps, Patterns, Papers that you
can use in your paintings.
Easier to learn and use
Smart Brush Settings with added media panel (Advanced Brush
Controls)
Provides you with a more intuitive way of modifying the advanced
brush controls of a selected brush.
For more information, see “Displaying advanced brush controls
dynamically” on page 231.
Perspective Guides Allows you to accurately draw in one, two or three-point
perspective by using preset guides. The Perspective-Guided Strokes
constrain your strokes to direct them towards the vanishing points.
This feature replaces the Perspective Grid feature.
For more information, “Using Perspective Guides” on page 154.
Enhanced Cloning Reintroduces the traditional side-by-side cloning workflow and lets
you view the crosshair cursor on your source image to increase
painting accuracy. In addition, you now have the ability to edit the
source image. For example, you can apply various effects to the
source image.
For more information, see “Cloning images” on page 129. and
“Editing, updating, saving, and exporting clone source images” on
page 134.
Transform across layers Allows you to apply transformations to multiple layers and layer
groups simultaneously.
For more information, “Transforming layers” on page 401.
What’s new in Corel Painter 2016 | 15
Page 38

Set maximum colors for color sets Lets you specify a maximum number of colors when creating new
color sets.
For more information, see “Creating and exporting color sets” on
page 179.
Show Onion Skin layers Allows you to display underlying frames when working with
movies.
For more information, see “Using onion skinning” on page 617.
Performance
Memory Extender Lets you take advantage of more of your Mac systems’s available
RAM by letting you control how much RAM you want to designate
to Painter. This features was introduced in Painter 12.2.1.
For more information, see “Performance preferences” on page
646.
Changes to the brush control panels
In Corel Painter X3, a number of brush controls panels were more logically organized to better reflect the structure of the Corel Painter brush
engine. The following table maps the Corel Painter 12 brush control panels to the Corel Painter X3 brush control panels.
For more information about the brush control panels that include the new Jitter controls, see “Controlling the behavior of Jitter variants” on
page 319.
Corel Painter 12 brush control panels Corel Painter X3 brush control panels
Dab Profile panel
16 | Corel Painter 2016 User Guide
Stroke Preview panel (New)
Dab Preview panel (New)
Dab Profile panel (Modified)
Page 39

Corel Painter 12 brush control panels Corel Painter X3 brush control panels
General panel
General panel (Modified)
Stroke Attributes panel (New)
Opacity panel (New)
Size panel
Grain panel (New)
Size panel (Modified)
Bristles panel (New)
Multi panel (New)
Spacing panel
Spacing panel (Modified)
Smoothing panel (New)
What’s new in Corel Painter 2016 | 17
Page 40

What was new in Corel Painter 12 Updates 1 and 2
If you are upgrading to Corel Painter 2016 from Corel Painter 12, you may not be aware of the features and enhancements that were added
to Corel Painter 12 Updates 1 and 2. These features and enhancements are also available in Corel Painter 2016.
Corel Painter 12 Update 1 Features
Ability to import and export brush libraries, categories, and variants Allows you to import and export brush libraries, categories, and
variants so you can better manage brush resources.
For more information, “Importing and exporting brush libraries,
categories, and variants” on page 236.
Creating and removing brush libraries Allows you to more easily create and delete custom brush libraries.
For more information, “Creating and deleting brush libraries” on
page 236.
Creating and removing brush categories Allows you to store brush variants in custom brush categories. You
can also remove custom brush libraries when you no longer need
them.
For more information, “Creating and deleting brush categories” on
page 235.
Saving brush variants Allows you to quickly save the custom brush variants that you
create.
For more information, “Saving and deleting brush variants” on
page 233.
Moving brush variants Allows you to easily drag variants between categories.
For more information, “Copying and moving brush variants” on
page 233.
Deleting Workspaces Allows you to delete custom Workspaces from within the
application.
For more information, see “Creating, importing, exporting, and
deleting workspaces” on page 46.
Color mixing enhancements Allows you to open images as mixer pads and save mixer pads to
the PNG file format.
For more information, see “Opening images in the Mixer panel” on
page 175 and “Saving the Mixer pad” on page 177.
Panel resizing Lets you vertically resize most panels within a palette.
For more information, see “Rearranging panels and palettes” on
page 39.
18 | Corel Painter 2016 User Guide
Page 41

Navigator panel enhancements Lets you hide the image information area or the controls of the
Navigator panel.
For more information, see “Navigating images and viewing image
information” on page 59.
Corel Painter 12 Update 2 Features
Flow Maps Introduces an additional textured surface for working with Real
Vertical docking of panels Allows you to vertically dock panels in the document window.
Support for Corel Cinco for Painter Allows Corel Painter to connect to Corel Cinco for Painter, which is
Wacom Multi-Touch support Enables enhanced multi-touch support for Wacom Intuos 5 touch
Watercolor and Real Wet Oil brushes that help you direct the flow
of paint.
For more information, see “Applying and adjusting flow maps” on
page 343.
For more information, see “Rearranging panels and palettes” on
page 39.
a companion iPad app that integrates seamlessly into your current
workflow to enhance productivity.
tablets. You can now simultaneously pan, rotate, and zoom the
canvas.
For more information, see “Wacom Intuos support” on page
74.
What’s new in Corel Painter 2016 | 19
Page 42

20 | Corel Painter 2016 User Guide
Page 43

Workspace tour
The Corel Painter workspace has been designed to give you easy access to tools, effects, commands, and features. The workspace is
organized by using a series of menus, selectors, panels, and interactive palettes.
This section contains the following topics:
• “Corel Painter terms” (page 21)
• “Exploring the Document window” (page 23)
• “Choosing a workspace layout” (page 25)
• “Exploring the toolbox” (page 27)
• “Displaying the toolbox” (page 31)
• “Displaying the Media Selector bar” (page 32)
• “Displaying the property bar” (page 32)
• “Exploring the Navigator panel” (page 33)
• “Displaying the Brush Selector bar and the Brush library panel” (page 34)
• “Displaying the command bar” (page 35)
• “Exploring panels and palettes” (page 35)
• “Rearranging panels and palettes” (page 39)
• “Creating and modifying custom palettes” (page 42)
• “Renaming and deleting custom palettes” (page 44)
• “Saving, exporting, and importing custom palettes” (page 44)
• “Working with libraries” (page 45)
• “Creating, importing, exporting, and deleting workspaces” (page 46)
• “Restoring the default Corel Painter settings” (page 47)
Corel Painter terms
Before you get started with Corel Painter, you should be familiar with the following terms.
Term Description
Canvas The canvas is the rectangular work area inside the document
window. In addition, the canvas serves as the background layer of
Workspace tour | 21
Page 44

Term Description
the image. However, unlike other layers, it is always locked. The size
of the canvas also determines the size of the image that you create.
Pixels-per-inch (ppi) The default unit of measurement for resolution in Corel Painter.
Pixels-per-inch (ppi) is equivalent to dots per inch (dpi).
Layer Layers are independent image elements that stack on top of the
canvas. You can manipulate the content of a layer without altering
the canvas. Layers let you experiment with different compositions
and effects without risking an unwanted, permanent edit.
Brush category Brush categories are groups of similar brushes and media.
Brush variant Brush variants are specific brushes and brush settings within a
brush category.
Dab types The dab type controls the way a brush applies color to the painting
surface. In Corel Painter, there are numerous dab types that fall
under two dab type groups: rendered and dab-based, also known
as pixel-based.
Rendered dab type The rendered dab type produces continuous, smooth-edged
strokes. For example, Camel Hair and Airbrush use the rendered
dab type.
Dab-based dab type The dab-based dab types produce brushstrokes that are made up
of tiny dabs of color that are closely spaced together so they appear
smooth.
Panel A panel is a single tabbed container that displays commands,
controls, and settings for a specific feature. Panels reside in a
palette. For example, the Color panel contains controls that allow
you to choose colors.
Palette A palette is a container for one or multiple panels.
Paper Paper allows you to control both the color and texture of the
canvas.
Clone source The clone source determines the image, or image area, that you
want to reproduce through cloning. A document can include
multiple clone sources.
Clone document The clone document is created by copying the original clone source
image which allows you to reproduce a painterly version of the
source image. A copy of the clone source is embedded in the clone
22 | Corel Painter 2016 User Guide
Page 45

Term Description
document. In addition, you can add multiple clone sources to a
clone document.
Image sampling Image sampling lets you copy part of one image and reuse it
elsewhere in the image or in another image. You can sample
an image by using the Rubber Stamp tool, a Cloner brush that
supports offset sampling, or a Cloner brush that supports multipoint sampling. Sampling is similar to cloning, but, unlike cloning,
it does not create a separate document that stores clone sources.
Composite method A composite method, which is similar to blend modes in Adobe
Photoshop, lets you change how a layer blends with an underlying
image.
Exploring the Document window
The document window is the area outside the canvas that is bordered by scroll bars and application controls.
Workspace tour | 23
Page 46

Circled numbers correspond to the numbers in the following table, which describes
the main components of the application window. (Artwork by Karen Bonaker)
Part Description
1. Menu bar Lets you access tools and features using pull-down menu options
2. Brush Selector bar Lets you open the Brush library panel to choose a brush category
and variant. It also allows you to open and manage brush libraries.
3. Property bar Displays commands that relate to the active tool or object. For
example, when the Fill tool is active, the fill property bar displays
commands for filling selected areas.
4. Brush Search bar Lets you quickly search the content of the currently selected brush
library to find brushes that match a specific description.
24 | Corel Painter 2016 User Guide
Page 47

Part Description
5. Navigator panel Lets you navigate in the document window, change the
magnification level, and access various document viewing options,
such as Tracing Paper and Drawing Modes
6. Color panel Lets you choose main and additional colors for painting in Corel
Painter documents.
7. Mixer panel Lets you blend colors together to create new colors. You can also
open inspirational mixer pads designed by expert Corel Painter
artists. (The inspirational mixer pad in the image was created by
artist John Malcolm.)
8. Color Set Libraries panel Displays the colors in the current color set so you can organize
groups of colors.
9. Advanced Brush Controls Lets you quickly access the advanced brush controls for any default
brush variant. It also displays an enhanced stroke preview of the
currently selected brush variant. The image shows the Dynamic
Speckles panel.
10. Layers panel Lets you manage the hierarchy of layers and includes controls for
creating, selecting, hiding, locking, deleting, naming, and grouping
layers
11. A custom palette Custom palettes give you easy access to controls that you use
often. This custom palette includes custom brushes, flow maps,
and paper textures that you can save and share as a Painter Custom
Toolbox (Box) file.
12. Hints Provides useful tips about how to use brushes
13. Toolbox Lets you access tools for creating, filling, and modifying an image
14. Canvas The canvas is the rectangular work area inside the document
window whose size determines the size of the image you create.
The canvas acts as the image background and, unlike a layer, it is
always locked.
Choosing a workspace layout
Corel Painter 2016 offers preset workspace layouts that you can choose from. A workspace layout (also known as “palette arrangement”)
displays, hides, and positions workspace elements such as palettes and panels to suit a specific workflow. The following table describes the
available workspace layouts.
Workspace tour | 25
Page 48

Workspace layout Description
New to Painter Displays the most essential controls together with the Hints panel
to help you get started quickly with Corel Painter
New Brushes Displays the panels of new brush features and technologies such as
Audio Expression and Dynamic Speckles
Simple Displays minimal user interface that includes the toolbox, the menu
bar, and a command bar that contains shortcuts to commonly used
commands. This layout is ideal for small screens.
Photo Art Displays palettes commonly used by photo artists, providing
optimal setup for cloning photos, textures, and paintings
Illustration Displays palettes commonly used for creating illustrations
Default The default workspace layout that works well for most computers.
For more information, see “Exploring the Document window” on
page 23.
The Quick Switch feature lets you choose two workspace layouts that you use most often and quickly switch between them to suit the
current task or the display mode of your device. This feature is especially useful on multi- or dual-mode devices. For example, you can select
Default as Layout 1 and Simple as Layout 2. When you flip the display panel from Notebook to Tablet mode, the Simple workspace layout is
automatically displayed, letting you work in an un-cluttered minimalistic user interface.
To choose a workspace layout
•
Choose Window Arrange Palettes, and choose a layout.
You can also choose a layout from the Welcome screen by clicking the Get Started tab and selecting a layout in the Arrange Your
Workspace area.
To switch between workspace layouts
1
Choose Window Arrange Palettes Quick Switch Layout 1, and choose a layout.
2
Choose Window Arrange Palettes Quick Switch Layout 2, and choose a layout.
3 To switch between Layout 1 and Layout 2, do one of the following:
• Reposition the display panel of your dual- or multi-mode device (for example, from Notebook mode to Tablet mode).
•
Choose Window Arrange Palettes Quick Switch Toggle Layout.
You can switch between factory workspace layouts or custom workspace layouts that you created. For information about creating
and saving custom workspace layouts, see “Rearranging panels and palettes” on page 39.
26 | Corel Painter 2016 User Guide
Page 49

Exploring the toolbox
You can use the tools in the toolbox to paint, draw lines and shapes, fill shapes with color, view and navigate documents, and make
selections. Under the toolbox is a color selector, plus six content selectors that let you choose papers, gradients, patterns, looks, and nozzles.
The following table provides descriptions of the tools in the Corel Painter toolbox.
Tool Description
Color tools
The Brush tool lets you paint and draw on the canvas or a layer.
Brush categories include pencils, pens, chalk, airbrushes, oil paints,
watercolors, and more. When the Brush tool is selected, you can
choose specific brushes from the Brushlibrarypanel. For more
information, see “Selecting, managing, and creating brushes” on
page 215.
The Dropper tool lets you pick up a color from an existing image.
The property bar shows the values of the color. When you select a
color with the Dropper tool, that color becomes the current color
in the Color panel. For more information, see “Sampling colors
from images” on page 169.
Selection tools
The Paint Bucket tool lets you fill an area with media, such as a
color, gradient, pattern, weave, or clone. The property bar shows
options for the areas that you can fill and the media that you can
use. For more information, see “Working with color fills” on page
182.
The Eraser tool lets you remove unwanted areas from an image.
For more information, see “Erasing image areas” on page 107.
The Layer Adjuster tool is used to select, move, and manipulate
layers. For more information, see “Displaying the Layers panel” on
page 392.
The Transform tool lets you modify selected areas of an image by
using different transformation modes. For more information, see
“Preparing selections for transformations” on page 451.
The Rectangular Selection tool lets you create rectangular
selections. For more information, see “Getting started with
selections” on page 436.
Workspace tour | 27
Page 50

Tool Description
The Oval Selection tool lets you create oval selections. For more
information, see “Getting started with selections” on page 436.
The Lasso tool lets you draw a freehand selection. For more
information, see “Getting started with selections” on page 436.
The Polygonal Selection tool lets you select an area by clicking
different points on the image to anchor straight line segments. For
more information, see “Creating path-based selections” on page
437.
The Magic Wand tool lets you select an area of similar color
by clicking or dragging in an image. For more information, see
“Creating pixel-based selections” on page 440.
The Selection Adjuster tool lets you select, move, and manipulate
selections created with the Rectangular, Oval, and Lasso selection
tools and selections converted from shapes. For more information,
see “Preparing selections for transformations” on page 451.
Shape tools
The Crop tool lets you remove unwanted edges from an image. For
more information, see “Cropping images” on page 66.
The Pen tool lets you create straight lines and curves in objects. For
more information, see “Drawing lines and curves” on page 583.
The Quick Curve tool lets you create shape paths by drawing
freehand curves. For more information, see “Adjusting curvature”
on page 592.
The Rectangular Shape tool lets you create rectangles and squares.
For more information, see “Drawing shapes” on page 582.
The Oval Shape tool lets you create circles and ovals. For more
information, see “Drawing shapes” on page 582.
The Text tool creates text shapes. Use the Text panel to set the font,
point size, and tracking. For more information, see “Adding text”
on page 603.
28 | Corel Painter 2016 User Guide
The Shape Selection tool is for editing Bézier curves. You use
the Shape Selection tool to select and move anchor points and
Page 51

Tool Description
adjust their control handles. For more information, see “Selecting a
shape” on page 588.
The Scissors tool lets you cut an open or closed segment. If the
segment is closed, after you click on a line or point, the shape path
becomes open. For more information, see “Cutting and joining
shape segments” on page 593.
The Add Point tool lets you create a new anchor point on a shape
path. For more information, see “Adding, deleting, and moving
anchor points” on page 590.
The Remove Point tool lets you remove an anchor point from
a shape path. For more information, see “Adding, deleting, and
moving anchor points” on page 590.
The Convert Point tool is used to convert between smooth and
corner anchor points. For more information, see “Adjusting
curvature” on page 592.
Photo tools
Symmetry tools
The Cloner tool gives you quick access to the last Cloner brush
variant you used. For more information, see “Painting in the clone”
on page 135.
The Rubber Stamp tool gives you quick access to the Straight
Cloner brush variant, and lets you to sample areas within an image
or between images. For more information, see “Performing offset
sampling” on page 138.
The Dodge tool lets you lighten the highlights, midtones, and
shadows in an image. For more information, see “Dodging and
burning” on page 209.
The Burn tool lets you darken the highlights, midtones, and
shadows in an image. For more information, see “Dodging and
burning” on page 209.
The Mirror Painting mode lets you create a perfectly symmetrical
painting. For more information, see “Using the Mirror Painting
mode” on page 151.
Workspace tour | 29
Page 52

Tool Description
The Kaleidoscope mode lets you transform basic brushstrokes
into colorful and symmetrical kaleidoscope images. For more
information, see “Using the Kaleidoscope Painting mode” on page
153.
Composition tools
The Divine Proportion tool lets you plan compositions by using
guides based on a classical composition method. For more
information, see “Using the Divine Proportion tool” on page 158.
The Layout Grid tool lets you divide your canvas so that you can
plan your composition. For example, you can divide your canvas
into thirds vertically and horizontally to use the compositional rule
of thirds. For more information, see “Using the Layout Grid” on
page 149.
The Perspective Guides tool lets you display guides using one,
two or three-point perspective. For more information, see “Using
Perspective Guides” on page 154.
Navigation tools
Selectors
The Grabber tool lets you scroll through an image quickly. For more
information, see “Repositioning images” on page 66.
The Magnifier tool lets you magnify areas of an image when you
are performing detailed work, or reduce areas to get an overall
view of an image. For more information, see “Zooming images” on
page 61.
The Rotate Page tool lets you rotate an image window to
accommodate the way you naturally draw. For more information,
see “Rotating images and the canvas” on page 62.
The Color selector lets you choose main and additional colors. The
front swatch displays the main color, and the back swatch displays
the additional color. For more information, see “Choosing colors
from the Color panel” on page 166.
The Paper Selector opens the Papers panel. From the Papers
panel, you can choose a paper texture to alter the canvas surface
and achieve more realistic results when applying brushstrokes. For
30 | Corel Painter 2016 User Guide
Page 53

Tool Description
more information, see “Working with paper texture and grain” on
page 115.
The View selector allows you to switch between document
views and viewing modes. For more information, see “Switching
document views” on page 58.
Displaying the toolbox
The toolbox is open by default, but you can close it. In addition, to minimize the space required to display the toolbox, tools of similar
function are grouped together and they are accessible from flyout menus. The button for only one of these tools is displayed at a given time
on the toolbox. A flyout menu is indicated by a triangle in the lower-right corner of the button. You can open a flyout to access all of its
tools.
You can also reposition the toolbox by moving it in the application window. In addition, you can change the toolbox display. For example,
you can arrange the tools in two columns instead of one, or you change the toolbox orientation from vertical to horizontal. If you are
working with a tablet or low-resolution display, or you prefer to work in an uncluttered workspace; you can also display a simpler version of
the toolbox that includes fewer tools.
Top: A simpler version of the toolbox. Bottom: A two-row toolbox.
To open or close the toolbox
•
Choose Window Toolbox.
You can also close the toolbox by clicking the close button on the toolbox header bar.
To access tools grouped in flyouts
1 In the toolbox, click and hold the tool icon whose flyout you want to open.
A flyout menu of the entire group of related tools appears.
2 Click the tool that you want to use.
The tool you’ve chosen appears in the toolbox.
To move the toolbox
• Drag the toolbox header bar to a new location in the application window.
To change the toolbox display
1 Do one of the following:
•
(Mac OS) Choose Corel Painter 2016 Preferences Interface .
Workspace tour | 31
Page 54

•
(Windows) Choose Edit Preferences Interface .
2 Choose an option from the Toolbox Layout list box.
Displaying the Media Selector bar
The Media Selector bar gives you quick access to the libraries for the following Corel Painter media: patterns, gradients, nozzles, weaves, and
looks. The Media Selector bar is open by default, but you can close it at any time.
The Media Selector bar (displayed horizontally). From left to right:
PatternSelector, GradientSelector, NozzleSelector, WeaveSelector, LookSelector.
You can also reposition the Media Selector bar by moving it in the application window. In addition, you can change the Media Selector bar
display. For example, you can change the Media Selector bar orientation or increase the size of the buttons.
To open or close the Media Selector bar
•
Choose Window Media Selector.
You can also close the Media Selector bar by clicking the close button on the header bar.
To move the Media Selector bar
• Drag the Media Selector bar header to a new location in the application window.
To change the Media Selector bar display
1 Do one of the following:
•
(Mac OS) Choose Corel Painter 2016 Preferences Interface .
•
(Windows) Choose Edit Preferences Interface .
2 Choose an option from the Media Layout list box.
Displaying the property bar
In Corel Painter, the property bar displays options for the currently selected tool. By default, the property bar is displayed in the application
window docked below the menu bar, but you can close it. You can also move the property bar or dock it to the application window.
The property bar for the Grabber tool.
From the property bar you can access and change tool options and settings. Tool settings are retained when you switch from one tool to
another. You can also use the property bar to restore the default settings of the selected tool.
To open or close the property bar
•
Choose Window Property Bar.
You can also close the property bar by clicking the close button on the header bar.
32 | Corel Painter 2016 User Guide
Page 55

To move or dock the property bar
• Perform a task from the following table.
To Do the following
Move the property bar Drag the property bar’s header bar to a new location.
Dock the property bar Drag the header area of the property bar, and place it under the
menu bar. The property bar snaps into place.
To reset the default tool settings
• Click the Reset Tool button on the property bar.
The Reset Tool button on the property bar has the same icon as the selected tool in the toolbox.
Various Reset Tool buttons for the Grabber property bar.
Exploring the Navigator panel
The Navigator panel is a convenient tool for managing many aspects of a document.
You can use the Navigator panel to better orient yourself in the document window and modify the document window display. For example,
when you’re working at a high zoom level, or with a large image, you can use the Navigator panel’s small canvas preview to display the
entire image without having to zoom out. You can also move to a different image area without having to adjust the zoom level. In addition,
you can change the zoom level or rotate the canvas from the Navigator panel.
The Navigator’s canvas preview allows you to view the entire image even when you’re zoomed in.
The Navigator lets you enable various tools such as the drawing modes, Impasto information, tracing paper, grids, and color management.
Workspace tour | 33
Page 56

The Navigator panel also displays document information such as the X and Y coordinates and the cursor position to help you navigate
the image. You can also view document width, height, and resolution. For more information, see “Navigating images and viewing image
information” on page 59.
Displaying the Brush Selector bar and the Brush library panel
The Brush library panel lets you choose a brush from the currently selected brush library. It also allows you to organize and display brushes
in various ways. For example, you can create a new brush library, open a previously stored brush library, and view the most recently used
brushes. The Brush library panel displays the content of only one brush library at a time.
You can access the Brush library panel by clicking the Brush Selector on the Brush Selector bar.
In the Brush library panel, brushes are organized into categories, which contain brush variants. Brush categories are groups of similar
brushes and media. Brush variants are specific brushes and brush settings within a brush category. For example, in the Pastels category,
there are pencil, chalk, soft, and hard pastel brush variants. You can change the display of the categories and variants. For more information,
see “Organizing and displaying brushes in the Brush library panel” on page 232.
The Brush library panel allows you to browse all of the brush categories and variants for the currently open brush library.
34 | Corel Painter 2016 User Guide
Page 57

To hide or show the Brush Selector bar
•
Choose Window Brush Selector.
You can also close the Brush Selector bar by clicking the close button on the header bar.
To move the Brush Selector bar
• Perform a task from the following table.
To Do the following
Move the Brush Selector bar Drag the Brush Selector header bar to a new location in the
application window.
Dock the Brush Selector bar Drag the Brush Selector header bar to the edge of the application
window or a panel. The bar snaps into place.
Displaying the command bar
The command bar gives you quick access to commonly used commands such as starting and saving documents, undoing and redoing
actions, cutting and pasting, and accessing brush tracking options. Displaying the command bar is especially useful for tablets and other
small-screen devices.
The command bar.
You can change the orientation of the command bar.
To display the command bar
•
Choose Window Command Bar.
To change the orientation of the command bar
1 Do one of the following:
•
(Mac OS) Choose Corel Painter 2016 Preferences Interface .
•
(Windows) Choose Edit Preferences Interface .
2 From the Command Bar Layout list box, choose an option.
Exploring panels and palettes
The interactive panels in Corel Painter are single tabbed containers that let you access content libraries, commands, controls, and settings.
Panels are stored in palettes. You can store one or multiple panels in a palette. For example, you can reconfigure the panels that you most
often use in one palette. You can also arrange panels and palettes in the application window to quickly access the tools and controls that
you use most often or to maximize screen space. For example, you can display all color-specific panels in one color palette, or display panels
individually.
Workspace tour | 35
Page 58

This palette includes three color-related panels: Color, Mixer, and Color
Set Libraries. You can access a panel’s content by clicking its tabs.
Corel Painter also includes the Brush controls palette, which is a preset palette that groups all panels that contain brush-related settings. You
can copy an individual brush control panel to the workspace, but you can’t remove any of the brush control panels from the palette.
Exploring panels
Corel Painter includes several panels that you can group together to create a custom palette.
Panel Description
Brush Control panels
The brush control panels are included in the Brush Controls palette.
They include the following panels: General, Stroke Attributes,
Allows you to customize brush variants. For more information, see
“Adjusting brushes with brush controls” on page 243.
Opacity, Grain, Dab Profile, Size, Bristles , Spacing , Smoothing ,
Angle, Static Bristle, Computed Circular, Blending, Rake ,
Multi, Mouse, Cloning, Impasto, Image Hose , Airbrush , Water ,
Liquid Ink, Digital Watercolor, Artists’ Oils, Real Watercolor,
Real Wet Oil, Stroke Jitter , RealBristle ™, Hard Media, Color
Variability, Color Expression , Brush Calibration , Dab Preview ,
Stroke Preview, Particles (General, Flow, Gravity, Spring), Audio
Expression, and Dynamic Speckles.
Advanced Brush Controls panel Generates a grouping of brush control panels that are relevant to
the currently selected brush. For more information, see “Displaying
advanced brush controls dynamically” on page 231.
Color panels
Color Lets you choose main and additional colors for painting in Corel
Painter documents. For more information, see “Choosing colors
from the Color panel” on page 166.
Mixer Lets you mix and blend colors as you would on an artist’s palette.
For more information, see “Exploring the Mixer panel and mixing
controls” on page 171.
36 | Corel Painter 2016 User Guide
Page 59

Panel Description
Color Set Libraries Displays the colors in the current color set so you can organize
groups of colors. For more information, refer to “Working with
color sets” on page 178.
Paper panels
Papers Lets you apply and edit paper textures
Paper Libraries Lets you open and manage paper libraries. You can also choose a
paper texture.
Media library panels
Patterns, Gradients , Nozzles, Looks, and Weaves library panels Let you open and manage media libraries. You can also choose
media.
Image Portfolio and Selection Portfolio Contain all images or selections in the current library. You can view
the items as thumbnails or in a list as well as preview the current
item. For more information, see “Storing layers as images in the
Image Portfolio” on page 423 and “Working with the Selection
Portfolio” on page 446.
Media control panels
Patterns, Gradients , and Weaves control panels Lets you apply and edit patterns, gradients, and weaves
Flow Map panels
Flow Map panel Lets you apply and manipulate flow maps. For more information,
see “Applying and adjusting flow maps” on page 343.
Flow Map Libraries panel Lets you open, manage, and navigate flow map libraries. For more
information, see “Choosing flow maps and compatible brush
variants” on page 344.
Navigator, Clone Source, and Reference Image panels
Navigator panel Lets you navigate the document window. You can also view
document information, such as width and height; X and Y
coordinates and the cursor position; context-sensitive information
based on a selected tool; and unit information, such as pixels,
inches, and resolution. For more information, see “Exploring the
Navigator panel” on page 33.
Workspace tour | 37
Page 60

Panel Description
Clone Source panel Lets you open and manage clone sources. For more information,
see “Cloning images” on page 129.
Reference Image panel Lets you display an inspirational image in the document window
while maintaining focus on the canvas. For more information, see
“Displaying reference images” on page 102.
Layers and Channels panels
Layers Lets you preview and arrange all layers in a Corel Painter document.
You can use Dynamic Plug-ins, add new layers (including
Watercolor and Liquid Ink layers), create layer masks, and delete
layers. In addition, you can set the composite method and
depth, adjust the opacity, and lock and unlock layers. For more
information, see “Layers” on page 389.
Channels Lets you preview thumbnails of all the channels in a Corel Painter
document, including RGB composite channels, layer masks, and
alpha channels. From the panel, you can also load, save, and invert
existing channels, and create new channels. For more information,
see “Alpha Channels” on page 425.
Auto-Painting panels
Underpainting Lets you adjust tone, color, and detail in a photo in preparation
for auto-painting. This panel is used in the first step of the
photo-painting process. For more information, see “Creating
underpaintings” on page 123.
Auto-Painting Lets you specify a range of settings that control how brushstrokes
are applied. This panel is used in the second step of the photopainting process. For more information, see “Auto-painting photos”
on page 125.
Restoration Lets you fine-tune a painting by providing brushes that help you
restore detail. This panel is used in the third step of the photopainting process. For more information, see “Restoring detail to
paintings” on page 127.
Composition panels
Divine Proportion Lets you customize the Divine Proportion guide — a tool that helps
you plan a layout according to a classic composition method. For
more information, see “Using the Divine Proportion tool” on page
158.
38 | Corel Painter 2016 User Guide
Page 61

Panel Description
Layout Grid Lets you customize the Layout Grid — a tool that helps you divide
your canvas so that you can plan your composition. For more
information, see “Using the Layout Grid” on page 149.
Text and Scripts panels
Text Lets you perform all text-related tasks, such as choosing fonts,
Scripts Lets you access all commands and settings related to scripts. For
adjusting opacity, and applying drop shadows. For more
information, refer to “Adding text” on page 603.
example, you can open, close, play, and record scripts from the
Scripts panel. For more information, see “Using scripts to automate
tasks” on page 627.
Rearranging panels and palettes
You can rearrange the display of panels to better match your workflow. For example, you can group task-related panels together in one
palette. At any time, you can further customize these palettes by adding or removing a panel, repositioning a panel, or moving a panel to
another palette.
You can easily display a panel when you need it, and you can quickly close a panel when you’re done. If you want to save screen space, but
keep the panels and palettes displayed (in the application window), you can collapse or resize them.
Palettes and panels float in the workspace. Docking attaches the panel or palette to the vertical edge of the application window. Undocking
detaches them from other parts of the workspace, so you can move them. To perform docking, you need to grab a panel’s tab or a palette’s
header bar.
Most panels in Corel Painter contain option menus from which you can access a series of related commands. For example, you can use the
options menu in the Paper controls panel to capture, make, and invert paper textures.
A typical palette features a header bar (1), panel tabs (2), and a Paneloptions button (3).
Workspace tour | 39
Page 62

By default, the Color panel is open and is grouped in a palette with the Mixer and Color Set Libraries panels.
You can save the arrangement of palettes as a custom workspace layout for later use, and you can delete this custom workspace layout
when you no longer need it.
To group panels into palettes
• Perform a task from the following table.
To Do the following
Group panels into a palette Drag a panel by its tab to another open panel to create a group.
Add a panel to a palette Drag the panel tab to the palette.
Remove a panel from a palette Drag the panel tab out of the palette.
Reposition a panel in a palette Drag the panel tab to a new location in the palette.
To hide or show a panel or palette
• Perform an action from the following table.
To Do the following
Hide or show a panel from a menu
Hide an open panel
Hide an open palette
When you choose Window Show Panels, only the panels that were open when you chose Hide Panels are displayed.
40 | Corel Painter 2016 User Guide
Choose Window [Panel name].
Click the Close button on the panel tab.
Click the Close button on the header bar.
Page 63

You can restore a previously hidden palette by choosing Window, and choosing the name of a panel that is contained in the
palette.
To expand or collapse a panel
• Double-click the panel tab.
To resize a panel or palette
• Perform a task from the following table.
To Do the following
Resize a panel or palette proportionally Point to the lower-right corner of the panel or palette. When the
cursor changes to a double-sided arrow, drag the panel or palette
to resize it.
Resize a panel or palette vertically Point to the lower edge of the panel or palette. When the cursor
changes to a double-sided arrow, drag the edge of the panel or
palette to resize it.
Resize a panel or palette horizontally Point to the right edge of a panel or palette header. When the
cursor changes to a double-sided arrow, drag the edge of the panel
or palette to resize it.
To dock or undock a palette
• Perform a task from the following table.
To Do the following
Dock a palette Drag the palette header bar, or the blank space to the right of the
tabs, to the vertical edge of the application window. The palette
snaps into place when it lines up with the edge.
Undock a palette Drag the blank area to the right of the panel tabs away from the
edge of the application window.
Dock a panel Drag the panel tab to the vertical edge of the application window.
The panel snaps into place when it lines up with the edge.
Undock a panel Drag the panel tab away from the application window.
If there’s not enough space along the vertical edge of the application window (for example, if you have a lot of expanded palettes),
you may not be able to dock a panel or a palette. Collapse one or multiple panels to create sufficient space for docking.
You cannot dock panels or palettes with toolbars.
Workspace tour | 41
Page 64

To access additional panel options
•
In the panel, click the Panel options button , and choose an option.
To save an arrangement of palettes as a workspace layout
1
Choose Window Arrange Palettes Save Layout.
2 In the Palette Layout Name dialog box, type a name in the New Layout list box.
The workspace layout appears as a menu item under Window Arrange Palettes.
You can display a saved arrangement of palettes by choosing Window Arrange Palettes [Name of Layout].
You can restore the default palette arrangement at any time by choosing Window Arrange Palettes Default.
To delete a workspace layout
1
Choose Window Arrange Palettes Delete Layout.
2 In the DeletePalette Layout dialog box, choose a layout from the Palette Layout list box.
Creating and modifying custom palettes
Corel Painter lets you create custom palettes that contain only the features that you want so you can quickly access them. For example, you
can place items from the Brush library panel or any of the Media library panels in a custom palette. You can also add commands from the
main menus or panel options to custom palettes.
Items that appear on a custom palette are references (aliases or shortcuts) to the original. This means that if you change the original — for
example, by modifying and saving a brush variant — the custom panel button loads the newest version. However, if you delete the original,
Corel Painter won’t be able to find the item again to load in the custom palette.
You can change how items on a custom palette are displayed. For example, you can display them as text, icons, or wide icons.
Custom palettes behave like the standard panels. For more information about working with panels, see “Rearranging panels and palettes”
on page 39.
To create a custom palette
1
Choose Window Custom Palette Add Command.
2 Choose New from the Custom Palette list box.
3 With the Create Palette/Add Command dialog box open, do one of the following:
• Choose a menu item from a default Corel Painter menu.
• Choose a menu item from the Other menu to add additional controls to a custom palette.
• Choose a menu item from the Panel Menus menu to add a panel, or any of the items included in a panel’s options flyout menu, to a
custom palette.
• Choose a menu item from the Tools menu to add a toolbox tool to a custom palette.
• Choose an item from an open palette.
4 In the Create Palette/Add Command dialog box, click Add, and then click OK.
42 | Corel Painter 2016 User Guide
Page 65

If the item that you want is represented on a panel with an icon, you can create a custom palette by holding down Shift and
dragging the icon out of a panel to the application window. This method works for brush variants, paper textures, media, such as
gradients and patterns, and nozzles, looks, and scripts.
You can add brush variants that are stored in different brush libraries to the same custom palette. When you choose a brush variant
from the custom palette, the brush library in which the brush variant is stored is automatically loaded in the Brush library panel.
This allows you to quickly switch between brush libraries.
To open or close a custom palette
• Perform a task from the following table.
To Do the following
Open a custom palette
Choose Window Custom Palette [Custom Panel Name].
Close a custom palette On the custom panel header bar, click the Close button.
To add items to a custom panel
• Perform a task from the following table.
To Do the following
Add a button from a panel Hold down Shift and drag a button from one panel to the custom
panel.
Add a menu item
Add a tool
Choose Window Custom Palette Add Command. Choose the
custom panel from the SelectCustom Palette list box, and with the
Create Palette/Add Command dialog box open, choose a menu
item, and click OK.
Choose Window Custom Palette Add Command. Choose the
custom panel from the Select Custom Palette list box, and with
the Create Palette/Add Command dialog box open, choose a
menu item from the Tools menu.
To change the appearance of items on a custom palette
1 Do one of the following:
• (Mac OS) Holding down Control, click an item.
• (Windows) Right-click an item.
2 Perform a task from the following table.
To Do the following
Use a custom icon Choose Set Custom Icon, and locate the image you want.
Workspace tour | 43
Page 66

To Do the following
Display a text label for each item Choose Text View .
Display an icon for each item Choose Icon View or Wide Icon View.
To change the size of the icons, click the Options button in the custom palette, and choose Small Icons or Large Icons.
Renaming and deleting custom palettes
You can manage your custom palettes in the Custom Palette Organizer. Corel Painter names custom palettes “Custom 1”, “Custom 2,” and
so on. For ease of use, you can rename them.
Corel Painter keeps your custom palettes from one session to the next. You can also save a custom palette to a file. For more information, see
“Saving, exporting, and importing custom palettes” on page 44.
You can delete obsolete custom palettes or those you don’t use very often.
To rename a custom palette
1
Choose Window Custom Palette Organizer.
2 Choose a palette from the Custom Palette list.
3 Click Rename.
4 In the Palette Name dialog box, type a name in the New Palette text box.
To delete a custom palette
1
Choose Window Custom Palette Organizer.
2 Choose a palette from the Custom Palette list.
3 Click Delete.
Saving, exporting, and importing custom palettes
You can save a custom palette as a Painter Custom Toolbox (BOX) file so that its custom content such as custom brushes, papers, patterns,
and flow maps are saved with the file. You can share the saved custom toolbox (palette) with others or store it for later use.
You can also export a custom palette to the Painter Palette File (PAL) format to make it compatible with earlier versions of Corel Painter.
However, any custom content included in the palette is not saved with the file.
To save a custom palette as a custom toolbox
1
Choose Window Custom Palette Organizer.
2 Choose a palette from the Custom Palette list.
3 Click Save As BOX.
4 In the New Palette File dialog box, type a name in the File Name text box.
5 Choose the drive and folder where you want to save the file.
It’s a good idea to store all saved palettes in the same folder.
44 | Corel Painter 2016 User Guide
Page 67

Custom nozzles, scripts, gradients, looks, and weaves are not supported. Buttons for such custom content will not function when
the custom toolbox is imported.
Any non-custom items that are already in the application appear as duplicates.
To export a custom palette
1
Choose Window Custom Palette Organizer.
2 Choose a palette from the Custom Palette list.
3 Click Export As PAL.
4 In the New Palette File dialog box, type a name in the File Name text box.
5 Choose the drive and folder where you want to save the file.
It’s a good idea to store all exported palettes in the same folder.
Custom content is not saved with the file.
To import a custom palette
1
Choose Window Custom Palette Organizer.
2 In the Custom Palette Organizer, choose a palette from the Custom Palette list.
3 Click Import.
4 In the Open Palette File dialog box, choose the file where the custom palette is saved.
5 Click Open.
Only custom palette files created with version 8.1 or later are supported by Corel Painter. Custom palettes created with version 7 or
earlier cannot be loaded.
Working with libraries
A library is a storage place that helps you organize and manage a collection of similar items, such as brushes or paper textures. For example,
the default paper textures are contained in the Paper Textures library, which is loaded by default when you open Corel Painter. As you
customize paper textures and other resources, you can save them to your own libraries. Libraries are available for brushes, gradients, layers,
lighting, looks, nozzles, paper textures, patterns, selections, scripts, and weaves. For more information, see “Libraries” on page 211 and
“Importing and exporting brush libraries, categories, and variants” on page 236.
Workspace tour | 45
Page 68

The Paper Libraries panel lets you choose, organize, and apply paper textures.
Creating, importing, exporting, and deleting workspaces
Corel Painter lets you completely customize your workspace to suit your workflow needs. You can customize Brush libraries , Paper libraries,
and Portfolios and save these changes to use later. In addition, you can easily create multiple workspaces, each with different libraries and
portfolios. You can even share these customized workspaces with others by importing or exporting them. However, if you are importing a
workspace that was created in an older version of Corel Painter, only libraries and custom palettes are preserved in Corel Painter 2016.
You can also delete any obsolete workspaces.
To create a new workspace
1
Choose Window Workspace New Workspace.
2 Type a name in the Workspace Name text box.
3 From the Based On list box, choose the workspace on which you want to base the new workspace.
4 Click Save.
The application switches to the new workspace.
To switch to a different workspace
•
Choose Window Workspace [Workspace Name].
To import a workspace
1
Choose Window Workspace Import Workspace.
2 Choose the workspace file that you want to import.
3 Click Open.
To export a workspace
1
Choose Window Workspace Export Workspace.
2 Choose the workspace that you want to export.
3 Click Save.
To revert to the default workspace
•
Choose Window Workspace Default.
46 | Corel Painter 2016 User Guide
Page 69

Corel Painter lets you modify the default workspace, so this workspace may eventually differ from the factory default workspace.
If you restore the factory default workspace, you will lose all customizations unless you save the workspace. For more information,
see “Restoring the default Corel Painter settings” on page 47.
To delete a workspace
1
Choose Window Workspace Delete Workspace.
2 From the Workspace list box, choose the workspace that you want to delete.
3 Click Delete.
If you are trying to remove the active workspace, you may be prompted to choose a new active workspace.
Restoring the default Corel Painter settings
When restoring the Corel Painter workspace to its default factory settings, you can keep some customizations, or you can remove all
modifications that you made to the application.
The following customizations can be kept:
• All custom brushes
• All other libraries (papers, scripts, nozzles, etc.). This option lets you save all papers, flow maps, patterns, gradients, nozzles, looks,
weaves, images, selections, and scripts.
• Custom palettes. Note that palette location and icon settings will be lost.
The following customizations are lost after Corel Painter is restored to its default settings:
• Palette Layout(s)
• Color Sets
• All preferences (Preferences dialog box)
• Customized keyboard shortcuts
• Brush tracking and calibration settings
• Recent brushes
• Color Management presets
• Perspective Guides, Layout, and Divine Proportion presets
You can reset all workspaces — the current one and any workspaces you created or imported, or you can reset only the current workspace.
To restore CorelPainter to its default factory settings
1 Hold down Shift, and start Corel Painter.
2 Choose one of the following options:
• Keep some customizations — lets you keep custom brushes, other customized libraries as well as custom palettes
• Restore all settings to factory defaults — removes all customizations that you made to the application including custom brushes and
palettes
3 Click one of the following buttons:
• Reset All Workspaces — resets the current workspace and any other workspaces you created or imported
• Reset Current Workspace — resets only the current workspace
When you choose to restore all workspaces, all custom workspaces are deleted. Only the default workspace is preserved and
restored to the factory settings.
Workspace tour | 47
Page 70

48 | Corel Painter 2016 User Guide
Page 71

A short tour of Corel Painter for users of Adobe Photoshop
by Cher Threinen-Pendarvis
Corel Painter is known for its responsive, realistic brushes, multitude of rich textures, and fabulous special effects, which cannot be found in
any other program. The biggest difference that you will notice between Adobe Photoshop and Corel Painter is the warmth and texture of the
Natural-Media brushes and paper textures of Corel Painter. You’ll find brushes with realistic bristles that lay down oily paint and dry-media
brushes, such as variants in the Chalk and Pastels categories, that are sensitive to textures on the canvas. Now, let’s get started!
Before we begin the tour, you need to make sure that you are displaying the default panels and palettes. To display the default settings,
choose the Window menu, and choose Arrange Palettes Default.
Property bar
At the very top of the screen, you’ll see the property bar, which is similar to the Options bar in Photoshop. The property bar changes
contextually, depending on the tool that you choose from the toolbox.
The property bar with the Grabber tool selected from the toolbox.
Brush Selector bar
On the far left of the property bar is the Brush Selector bar, which lets you open the Brush library panel. The Brush library panel contains the
amazing brush categories and brush variants of Corel Painter, such as the Real Watercolor Brushes category and its variants.
A short tour of Corel Painter for users of Adobe Photoshop | 49
Page 72

The Brush Selector bar (left) lets you choose a brush category and a brush variant (right).
Color panel
On the upper right corner of your screen you’ll see the large, beautiful Color panel, which lets you choose colors. You can choose colors by
using the Hue Ring and the Saturation/Value Triangle. However, if you prefer to mix color by using numbers, you can adjust the three sliders
that are located under the Hue Ring. By clicking the panel options button on the right side of the Color panel, you can set the sliders to
display either Red, Green, and Blue, or Hue, Saturation, and Value.
Also located on the Color panel is the Clone Color button, a useful control that lets you paint with color from a source image. On the left
of the Color panel are the Main Color swatch or Additional Color swatch . The color swatches in Corel Painter operate differently
than the Foreground and Background Color squares in Photoshop. To change the color, you can double-click either the Main Color swatch
or the Additional Color swatch and then choose a new color on the Hue Ring. Or you can click in the Saturation/Value Triangle to choose
a new tint or shade. You can use the additional color to create gradients or to use brushes that paint more than one color. Unlike the
Background Color in Photoshop, the additional color does not affect the canvas.
Before moving on with the tour, click the Main Color swatch to select it.
50 | Corel Painter 2016 User Guide
Color panel
Page 73

In Corel Painter, you can resize the Color panel by dragging the handle in the lower-right corner of the panel to resize it. Resizing the Color
panel lets you select colors more accurately.
Textures
A basic paper texture is automatically loaded when you start Corel Painter. You can access additional rich paper textures by clicking the Paper
Selector from the toolbox, or from the Paper Libraries panel ( Window menu Paper Panels Paper Libraries).
Layers and mask channels
In Corel Painter, you can open Photoshop files that contain pixel-based layers and layer masks. You can access and edit the layers and layer
masks by using the Layers panel, much like in Photoshop. The files you open in Corel Painter have multiple channels intact.
Layers panel
Photoshop Layer Styles
If you are using native Photoshop layer styles, such as the Drop Shadow layer style, make sure that you preserve the original Photoshop file in
your archive before you convert the layer style information. That is, save the file with the live layer styles in the Photoshop (PSD) file format,
and then save a new copy of this file. In the new file, convert the layer style information into pixel-based layers before importing the file into
Corel Painter.
To convert a layer that has a Drop Shadow layer style, select the layer, and then choose Layers Layers Style Create Layer. A word of
caution: Some aspects of the effects cannot be reproduced with standard layers.
File formats
Corel Painter gives you the flexibility of opening Photoshop (PSD) files that are saved in RGB, CMYK, and grayscale modes while preserving
pixel-based layers and mask channels (also referred to as alpha channels). You can also open TIFF files in Corel Painter, but only one mask
channel is preserved. Layered TIFF (TIF) files that you create in Photoshop are flattened when you open them in Corel Painter. When you work
exclusively with RIFF (RIF), which is the native file format for Corel Painter, you retain Corel Painter specific elements when saving files. For
instance, special paint media layers, such as Watercolor layers, require the RIFF format to retain the live “wet” capabilities. However, if you
open a Photoshop file in Corel Painter but plan on reopening the file in Photoshop, you should continue to save the file to the Photoshop
format.
Now roll up your sleeves, grab your stylus, and continue to explore Corel Painter.
About the author
An award-winning artist and author, Cher Threinen-Pendarvis is a pioneer in digital art. She has been widely recognized for her mastery
of Corel Painter, Adobe Photoshop, and the Wacom pressure-sensitive tablet and has used these electronic tools since they were first
released. Her artwork has been exhibited worldwide, her articles and art have been published in many books and periodicals, and she
is a member of the San Diego Museum of Art Artist Guild. She has taught Corel Painter and Adobe Photoshop workshops around the
world and is the principal of the consulting firm Cher Threinen Design. Cher is the author of The Photoshop and Painter Artist Tablet Book,
A short tour of Corel Painter for users of Adobe Photoshop | 51
Page 74

Creative Techniques in Digital Painting, Beyond Digital Photography, and all nine editions of The Painter Wow! book. Visit Cher's web site at:
www.pendarvis-studios.com.
52 | Corel Painter 2016 User Guide
Page 75

Creating, navigating, and manipulating documents
The Corel Painter application provides a digital workspace in which you can create new images, or alter existing images, by using the
Natural-Media tools and effects. Your working image, known as a document, is displayed in a document window. This document window
includes navigation and productivity features to help you work efficiently.
As you create an image, you can save your document in various file formats, such as RIFF (the native Corel Painter format), JPEG, TIFF, and
PSD (Adobe Photoshop). Corel Painter also lets you open or import images saved in many other file formats.
This section contains the following topics:
• “Creating documents” (page 53)
• “Understanding resolution” (page 55)
• “Opening and placing files” (page 56)
• “Creating and opening templates” (page 58)
• “Switching document views” (page 58)
• “Navigating images and viewing image information” (page 59)
• “Zooming images” (page 61)
• “Rotating images and the canvas” (page 62)
• “Flipping images” (page 64)
• “Repositioning images” (page 66)
• “Cropping images” (page 66)
• “Resizing images and the canvas” (page 67)
• “Saving and backing up files” (page 68)
• “Choosing a file format” (page 69)
• “Emailing documents” (page 71)
• “Closing documents and quitting the application” (page 71)
• “Using two monitors” (page 72)
• “Support for tablets and other devices” (page 72)
• “Multi-touch support” (page 72)
• “Wacom Intuos support” (page 74)
• “Drag-and-drop features” (page 74)
Creating documents
To start an image from a blank canvas, you must create a new document. This allows you to specify the canvas settings, such as width,
height, and resolution. You can also specify the canvas color and texture. The size of the canvas determines the size of the image when it is
Creating, navigating, and manipulating documents | 53
Page 76

printed. To quickly get started, you can choose from a list of preset canvas settings. However, you can also specify custom settings, which
you can save as a preset for future use.
You can resize the canvas (left) to prepare an image for printing (right).
Canvas size and resolution
When setting the canvas size and resolution, you can choose options that correspond to the image’s destination, however, you may want
to choose a larger image size to preserve more image details. For example, you can set the resolution of a new image at 300 pixels-perinch (ppi), the width to 16 inches, and the height to 20 inches. This large size makes it easier to maintain image quality when you need to
produce a smaller version of the image. For more information, see “Understanding resolution” on page 55 and “Resizing images and the
canvas” on page 67.
Pixels-per-inch (ppi) is equivalent to dots per inch (dpi).
The maximum canvas size is 16 382 x 16 382 pixels. To prevent performance issues, start with a canvas that is smaller than 16 382
x 16 382 because layers expand when paint and effects are applied close to their edges.
To create a new document
1
Choose File New.
2 Type a filename in the Image Name text box.
3 From the Canvas Preset list box, choose a preset to automatically determine the size, resolution, color of the canvas, and the paper
texture.
You can also
Change the unit of measurement for the document Choose a unit of measurement from the list box located to the
Change the document size Type values in the Width and Height boxes.
Change the number of pixels-per-inch (ppi) or pixels per centimeter
that make up an image
right of the Width and Height boxes.
Type a value in the Resolution box.
Change the resolution type Choose a resolution type from the list box located to the right of
the Resolution box.
54 | Corel Painter 2016 User Guide
Page 77

You can also
Change the color of the canvas Click the Color chip, and choose a paper color from the Color
Change the texture of the canvas Click the Paper chip, and choose a paper texture from the Paper
In the New Image dialog box, setting the document’s pixels-per-inch is equivalent to setting its dots per inch (dpi). For more
information, see “Understanding resolution” on page 55.
dialog box.
Textures panel.
To create a custom canvas preset
1
Choose File New.
2 Choose the settings that you want to save as a canvas preset.
3
Click the Add button .
4 In the Add Preset dialog box, type a name in the Preset Name text box.
A custom canvas preset is not a template. Unlike a template, it does not allow you to store any content. A custom canvas preset
allows you to store only canvas dimensions, resolution, color, and texture.
You can delete a canvas preset by choosing the preset name from the Canvas Preset list box and clicking the Delete button .
Understanding resolution
When you work with images in a digital workspace, it is helpful to understand the concept and applications of resolution. Resolution refers
to how Corel Painter measures, displays, saves, and prints images — whether as small squares of color called “pixels” or as mathematical
objects called “vectors.”
A document’s resolution affects both its appearance on your computer screen and its print quality. You can specify a document’s resolution
when you create a new document, save, or export a file.
Resolution and screen appearance
Most monitors have a resolution of 72 pixels-per-inch (ppi). The Corel Painter display default is 72 ppi, which means that each pixel in the
Corel Painter image occupies one pixel on your monitor. The display resolution does not affect the document’s actual number of pixels-perinch — it affects only how the image is displayed on the monitor.
For example, a 300-ppi image is displayed on-screen at approximately four times its actual size. Because each pixel in the Corel Painter image
occupies one pixel on your monitor, and the monitor’s pixels are approximately four times the size of the image’s pixels (72 ppi versus 330
ppi), the image must appear four times larger on-screen in order to display all of the pixels. In other words, your 300-ppi document will be
printed at approximately one-quarter of its on-screen size. To view the image at its actual size, you can set the zoom level to 25%.
If you set the dimensions in pixels and then change the number of pixels-per-inch (resolution), this change will affect the size of the printed
image. If you set your document size in inches, centimeters, points, or picas and then change the resolution, the dimensions of the printed
image will not be affected.
Creating, navigating, and manipulating documents | 55
Page 78
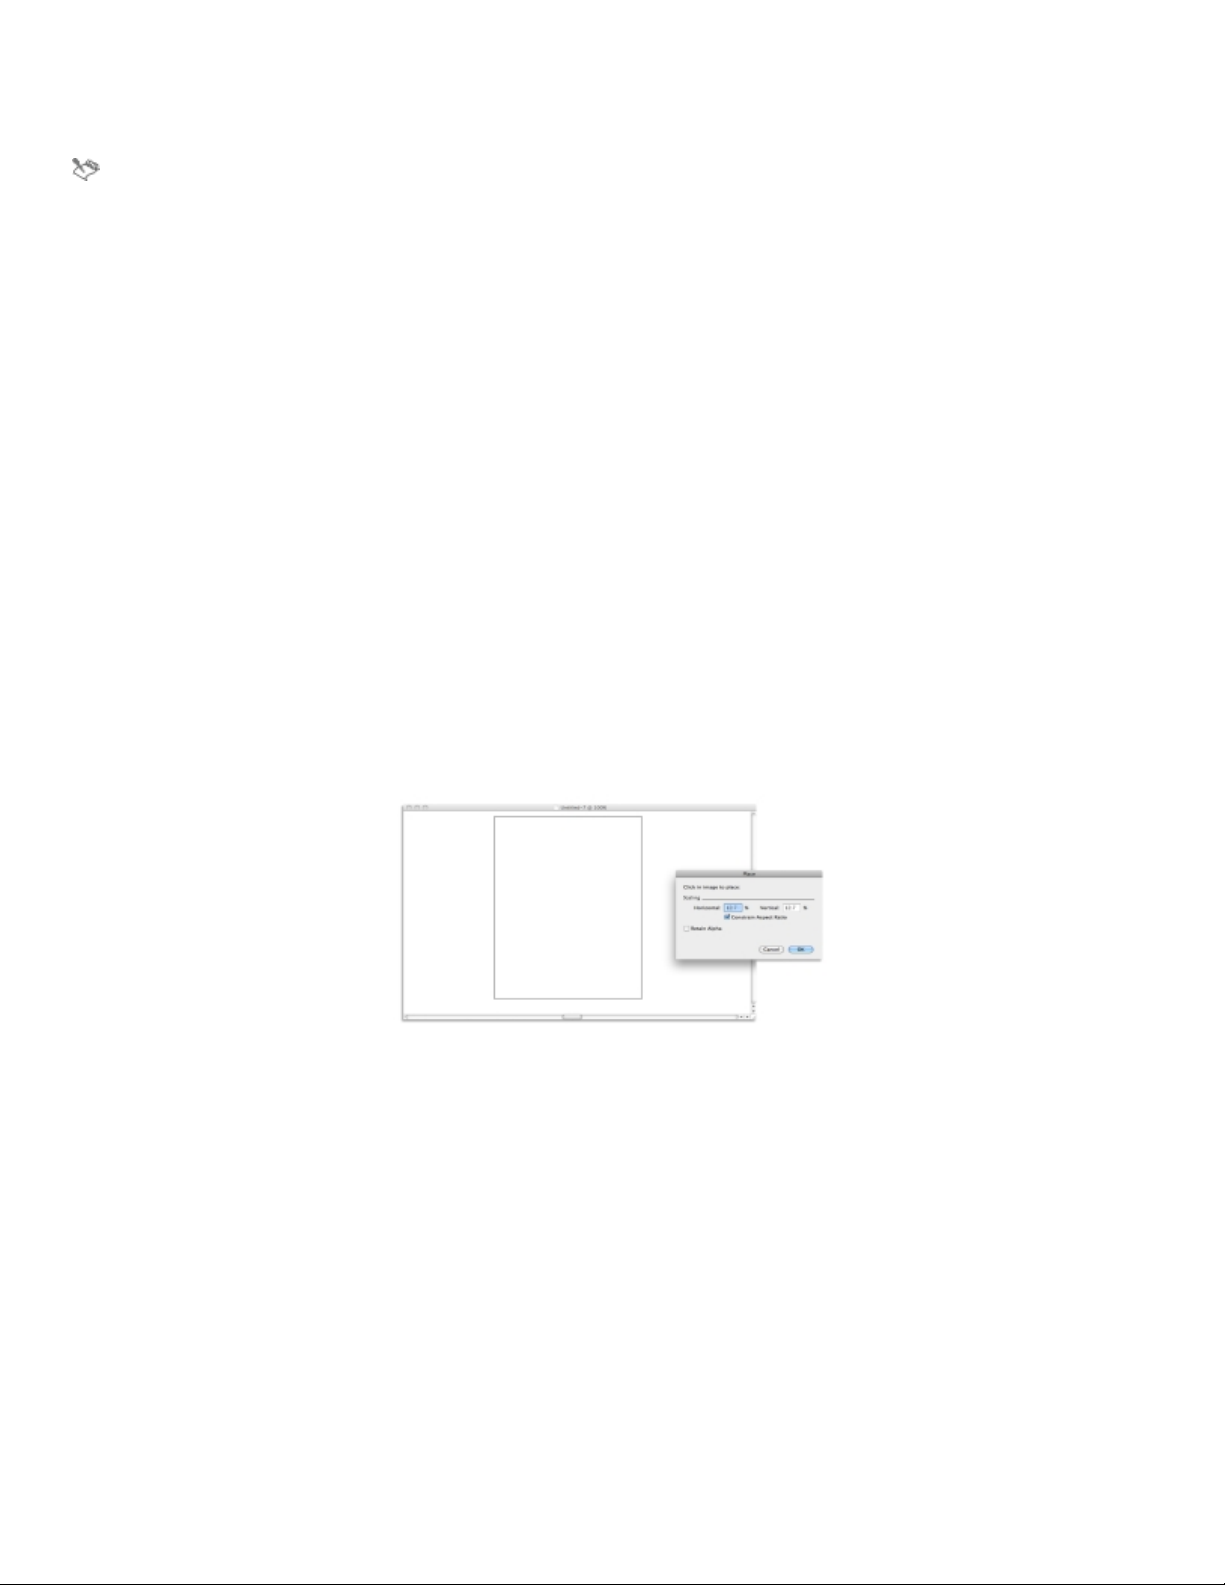
Pixels-per-inch (ppi) is equivalent to dots per inch (dpi).
Resolution and print quality
The resolution of output devices (printers) is measured in dots per inch, and in the case of halftones, lines per inch (lpi). Output device
resolutions vary, depending on the type of press and paper used. In general, a photograph is output at a crisp 150 lpi if printed on glossy
magazine stock, and at 85lpi if printed on newspaper stock.
If you are using a personal laser or inkjet printer, set your document size in inches, centimeters, points, or picas at the dots-per-inch setting
specific to your printer. Most printers produce excellent output from images set at 300 ppi. Increasing the file’s pixels-per-inch setting does
not necessarily improve the output and may create a large, unwieldy file.
If you are using a commercial printer or a more sophisticated output device, the dimensions of the image should always be set to the
actual size that you want the image to appear in the printed piece. A good rule of thumb is to set the number of pixels-per-inch to twice
the desired lines per inch. So, at 150lpi, the setting should be twice that, or 300 ppi; at 85lpi, the setting should be 170 ppi. If you have
questions about the resolution of specific output devices, it’s a good idea to check with the print service provider.
Opening and placing files
You can open files that were created in Corel Painter or in other applications. For example, you can open a file from another graphics
application and use Corel Painter to add brushstrokes, tints, or paper textures.
You can also place a file in an existing Corel Painter document. The placed image becomes a new reference layer in the document — you can
transform (resize, rotate, or slant) it on-screen by dragging its handles. A placed file maintains its link to the source file until you commit it to
the standard layer format.
You can scale a file before placing it in a document.
For more information, see “Working with reference layers” on page 422.
Supported file formats
Corel Painter lets you open the following file formats:
• RIFF (RIF) — native Corel Painter format
• TIFF (TIF)
• PNG
• CMYK TIF (TIF) — Because Corel Painter works with RGB colors, the CMYK TIF files that you open or import in the application are
converted to an RGB color profile.
• Adobe Photoshop formats (PSD) — Corel Painter preserves layers, layer masks, alpha channels, and composite methods. Layer effects and
adjustment layers are not supported and should be merged or flattened in Adobe Photoshop.
• Windows Bitmap (BMP)
• PC Paintbrush (PCX)
• TARGA (TGA)
56 | Corel Painter 2016 User Guide
Page 79

• GIF — Corel Painter does not convert GIF animations to frame stacks.
• JPEG (JPG)
Windows only
• Frame stacks (FRM) — Corel Painter animation files
• QuickTime (MOV), Video for Windows (AVI), and numbered files. For more information, see “Opening a Corel Painter movie” on page
614 or “Importing and exporting numbered files” on page 623.
Corel Painter does not support LZW compressed TIFF file format. Only uncompressed TIFF files can be opened in Corel Painter.
To open a document
1
Choose File Open.
Corel Painter displays the folder of the last file you opened.
2 In the Open dialog box, locate the file that you want to open.
For each image, Corel Painter lists the dimensions (in pixels), file size, and file format. Files saved in Corel Painter include thumbnails for
browsing.
3 Click Open.
The File menu also offers you a shortcut to previously opened documents. You can find your file in the recently opened files list by
choosing File Recent, and clicking the filename to open the file.
To browse for a document (Mac OS)
1
Choose File Open.
2 Click Browse.
The Browse dialog box shows thumbnails for all the RIFF files in a folder.
3 Double-click the filename, or select a file, and click Open.
To place a file
1
Choose File Place.
2 Select an image file, and click Open.
The Place dialog box appears.
3 Perform a task from the following table.
To Do the following
Place the image in a specific location in the document window Click the area in the document window where you want to place
the image.
Place the image in the center of the document window Click Ok.
Scale the image before placing In the Scaling area, type a value in both the Horizontal and
Vertical boxes.
Maintain the image proportions when scaling In the Scaling area, enable the Constrain Aspect Ratio check box.
Creating, navigating, and manipulating documents | 57
Page 80

To Do the following
Retain the image mask Enable the Retain Alpha check box. The image mask becomes a
layer mask.
If the placed image contains a mask and you do not enable the Retain Alpha check box when placing, the image mask is
discarded.
Creating and opening templates
If you regularly work with documents that contain similar dimensions, formatting, and resolution, you can create document templates so
that you don’t have to start each document from scratch. When creating a template, you can add content to the canvas and save it as part
of the template.
To save a document as a template
1 Create a file with the sizing, formatting, and resolution attributes you want.
2
Choose File Save As.
3 In the Save (Mac OS) or Save Image As (Windows) dialog box, save the file to one of the following folders in your user folder:
• (Mac OS) Corel Painter 2016\Support Files\Templates
• (Windows) AppData\Roaming\Corel\Painter 2016\Default\Templates
If you want the template to display under File Open Template, you need to close and then reopen Corel Painter.
In a multiuser environment, only users with Administrator status can add files to the Templates folder.
In Windows, you need to ensure that all hidden files are displayed in order to access the AppData folder.
To open a document template
•
Choose File Open Template {template name}.
You can also open a template by choosing Help Welcome, and then choosing a template from the Open an Image Template list
box.
Switching document views
You can switch between document views and viewing modes to suit your needs. The Default View displays all open documents. The
Single DocumentView displays only the active document, hiding the other open documents. Both views display all standard tools in the
workspace. For example, the menu bar, property bar, Brush selector bar, toolbox, and a few additional panels are readily accessible.
You can enable Presentation Mode, which hides your computer’s desktop and taskbar and centers the document window over a solid
background. All Corel Painter features work when you use Presentation Mode . On the Mac OS, Presentation Mode lets you display only
one document at a time (Single Document View). On Windows, Presentation Mode lets you display one document or multiple documents
(Default View).
You can switch document views and viewing modes by using the Window menu, the toolbox, and keyboard shortcuts.
58 | Corel Painter 2016 User Guide
Page 81

Single Document View (left); Single Document View in Presentation Mode (right)
You can also change the default document view mode for the application. For more information, see “Interface preferences” on page 645.
To switch views
• Choose Window, and choose any of the following commands:
• Single Document View — to switch between Default and Single Document View
• Presentation Mode — to enable or disable Presentation Mode
You can switch views by clicking the Single Document View button and the Presentation Mode button in the toolbox.
You can also switch between Default View and Single Document View by pressing Command+M(MacOS) or
Ctrl+M(Windows).
On Windows, you can enable and disable Presentation Mode by pressing F11.
Navigating images and viewing image information
You can use the Navigator panel to better orient yourself in the document window. For example, when you’re working at a high zoom level
or with a large image, you can use the Navigator panel’s small canvas preview to display the entire image without having to zoom out. You
can also move to a different image area without adjusting the zoom level. In addition, you can highlight which area is currently displayed in
the document window.
Creating, navigating, and manipulating documents | 59
Page 82

The Navigator’s canvas preview allows you to view the entire image even when you’re zoomed in.
The Navigator also lets you view the X and Y coordinates and cursor position to help you navigate the image. In addition, you can view
document information, such as width and height; and unit information, such as pixels, inches, and resolution.
You can customize the appearance of the Navigator panel by hiding the image information area or the controls.
To display the Navigator panel
1
Choose Window Navigator.
2 Perform a task from the following table.
To Do the following
Move to a different area of the image without adjusting the zoom
In the Navigator panel, click a different area of the canvas preview.
level
Zoom to a specific magnification level in the document window Open the Zoom Canvas list box, and adjust the zoom level slider.
Rotate the image in the document window Open the Rotate Canvas list box, and adjust the rotation slider.
From the Navigator panel, you can also enable various tools by clicking the Open Navigator Settings button , and choosing
an option. The available tools include the drawing modes, Impasto, tracing paper, grids, and color management.
To hide or show the information area or controls of the Navigator panel
•
In the Navigator panel, click the Navigator options button , and disable one of the following options:
• Navigator Frame — In the Navigator canvas preview window, hides the frame that shows the area that is currently displayed in the
document window
60 | Corel Painter 2016 User Guide
Page 83

• View Controls — Hides the Navigator controls, such as canvas preview so that you can view the entire image without having to zoom
out. You can also move to a different image area without adjusting the zoom level.
• Info — Hides the X and Y coordinates, cursor position, and document information, such as width and height, and unit information,
such as pixels, inches, and resolution
Zooming images
You can change the level of magnification by zooming. You can zoom in and out by using the Magnifier tool, resetting magnification, or
zooming to fit the screen. You can even zoom in and out while working with other tools.
The Magnifier tool lets you zoom in and out by clicking in the document window.
To zoom in
1
In the toolbox, click the Magnifier tool .
The Magnifier cursor shows a plus sign (+), which indicates that you are increasing the magnification (zooming in).
2 Click or drag in the document window.
Each click increases the magnification to the next level, as defined in the Scale box at the bottom of the image window.
When you drag, Corel Painter chooses the magnification level that most closely conforms to the selected area and centers the screen
view on that area.
You can also zoom in using the following keyboard shortcuts:
• (Mac OS) Hold down Command, and press + (plus sign).
• (Windows) Hold down Ctrl, and press + (plus sign).
To zoom out
1
In the toolbox, click the Magnifier tool , and hold down Option (Mac OS) or Alt (Windows).
A minus sign (–) appears on the Magnifier cursor, which indicates that you are decreasing the magnification (zooming out).
2 Click in the document window.
Each click reduces the magnification to the next level, as defined in the Scale box at the bottom of the image window.
You can also zoom out using the following keyboard shortcuts:
• (Mac OS) Hold down Command, and press – (minus sign).
Creating, navigating, and manipulating documents | 61
Page 84

• (Windows) Hold down Ctrl, and press – (minus sign).
To zoom to a specific magnification level
•
Choose Window Navigator, and type a value in the Zoom canvas box.
If you prefer, open the Zoom Canvas slider, and adjust the zoom level.
To reset magnification to 100%
•
Double-click the Magnifier tool in the toolbox.
You can also reset magnification to 100% by clicking the Reset tool on the property bar or the Reset Zoom to 100% button
in the Navigator panel.
To zoom to fit the screen
•
Choose Window Zoom to Fit.
Corel Painter generates a view of the entire document to fit your document window.
You can also zoom to fit the screen by clicking the Fit Screen button on the property bar.
To set zooming performance preferences
1
Click the Magnifier tool in the toolbox.
2 Click one of the following buttons on the property bar:
• High Quality Display — smooths objects when zooming
• Area-averaging — increases screen drawing speed when zoomed out
You can also specify zooming preferences by clicking Edit Preferences Performance, and enabling options in the View Options
area.
Rotating images and the canvas
You can rotate an image on the screen to accommodate the way you draw naturally. You can also rotate the canvas to change the image
orientation.
62 | Corel Painter 2016 User Guide
Page 85

Rotate an image to accommodate the way you naturally draw.
Rotating an image onscreen is meant for drawing purposes only; whereas rotating the canvas modifies the appearance of the image. For
example, if you print an image that you rotated onscreen, the rotation is not reflected in the printed image. However, if you rotate the
canvas of the image, the rotation is reflected in the printed image.
You can rotate an image or the canvas by a predefined amount, or you can choose the amount of rotation. You can also reset the original
orientation of an image.
To rotate an image
1
From the toolbox, click the Rotate Page tool .
If you prefer using a keyboard shortcut, hold down Option + Spacebar (Mac OS) or Spacebar + Alt (Windows).
The cursor changes to a hand with a pointing finger .
2 Drag in the document window to rotate the image.
The new rotation angle appears on the property bar.
You can also
Constrain rotation to 90° increments Hold down Shift while rotating.
Rotate an image by specifying a rotation angle Type a rotation angle in the Rotation Angle box on the property
bar or in the Navigator panel.
You can also rotate an image from the Navigator panel by typing a value in the Rotate canvas box or by opening the Rotate
Canvas slider and adjusting the rotation.
To reset the original orientation of an image
1
In the toolbox, click the Rotate Page tool .
2 Do one of the following:
• Click once in the document window.
•
Double-click the Rotate Page tool .
•
On the property bar, click the Reset Tool button .
Creating, navigating, and manipulating documents | 63
Page 86

You can also reset image rotation from the Navigator panel by clicking the Reset Rotation button .
To rotate the canvas
1
Choose Canvas Rotate Canvas.
2 Perform a task from the following table.
You can also
Rotate the Canvas layer 180 degrees
Rotate the Canvas layer 90 degrees clockwise
Rotate the Canvas layer 90 degrees counterclockwise
Rotate the Canvas layer by a user-defined amount
Choose Canvas Rotate Canvas 180 .
Choose Canvas Rotate Canvas 90 CW .
Choose Canvas Rotate Canvas 90 CCW .
Choose Canvas Rotate Canvas Arbitrary , and type a value in the
Angle box.
If your document has layers of different types, you are prompted to commit all of them to default, pixel-based layers.
Flipping images
You can flip the canvas and all of its associated layers together, or you can flip a layer, selection, or the canvas individually. You can flip all or
parts of an image horizontally (from left to right) or vertically (from top to bottom).
64 | Corel Painter 2016 User Guide
Original image.
Page 87

Image flipped horizontally.
Image flipped vertically.
To flip the canvas and layers together
1
Choose Canvas Rotate Canvas.
2 Choose one of the following:
• Flip Canvas Horizontal
• Flip Canvas Vertical
If your document has layers of different types, you are prompted to commit all of them to a default, pixel-based layer.
To flip the canvas, a layer, or a selection individually
1 Perform a task from the following table.
To flip Do the following
The canvas Click the Canvas in the Layers panel.
A layer Click one or multiple layers in the Layers panel.
A selection Click a selection tool from the toolbox, and drag in the document
window to select an area.
2 Choose Edit, and choose one of the following:
• Flip Horizontal
• Flip Vertical
Creating, navigating, and manipulating documents | 65
Page 88

Repositioning images
You can reposition an image in the Corel Painter workspace in order to view, or work on, a different area of an image. You can also view a
different area of an image when you’re zoomed in.
To reposition a document
1
In the toolbox, click the Grabber tool .
The cursor changes to the Grabber tool.
2 Perform a task from the following table.
To Do the following
Scroll through the image Drag in the document window.
Center the image Click once in the document window.
You can also activate the Grabber tool by holding down the spacebar.
To reposition a document while zoomed in
1
Choose Window Navigator.
2 In the Navigator panel, click a different area of the preview area.
If the Navigator frame is displayed, you can drag the frame to a different area of the canvas preview.
Cropping images
You can remove unwanted edges from the image with the Crop tool . You can adjust the aspect ratio of the cropped image and choose
to maintain the aspect ratio. You can also remove unwanted areas of an image by resizing the canvas area. For more information, see
“Resizing images and the canvas” on page 67.
To crop an image
1
In the toolbox, click the Crop tool .
2 Drag inside the image to define the rectangular area that you want to keep.
You can adjust the rectangle by dragging a corner or any of its edges.
3
When you’re ready to execute the crop, click the Commit Crop button on the property bar.
To cancel the crop, click the Cancel Crop button on the property bar.
You can also execute the crop by double-clicking inside the rectangle.
66 | Corel Painter 2016 User Guide
Page 89

To constrain cropping to a square
1
In the toolbox, click the Crop tool .
2 Hold down Shift, and drag to define the area for cropping.
3 Double-click inside the square.
To adjust the aspect ratio of the cropped image
1
In the toolbox, click the Crop tool .
2 On the property bar, type values in the Crop Ratio Width and Crop Ratio Height boxes.
Resizing images and the canvas
You can change the physical dimensions of an image by resizing the canvas and the image together, or by resizing the canvas area only. It is
important to understand the distinction between the two resizing techniques.
When you resize the canvas and image together, the image dimensions and resolution change, but the image appearance doesn’t change.
For example, if you resize a 300 ppi image to 150 ppi, the image size is smaller, but it looks the same.
The image was resized by modifying the resolution.
Alternatively, when you resize only the canvas area, both the image dimensions and appearance change. For example, if you increase the size
of the canvas, a border appears around the image. If you decrease the size of the canvas, the edge of the canvas is trimmed. In addition, the
image resolution is affected.
Creating, navigating, and manipulating documents | 67
Page 90

The canvas area is resized in order to apply an empty border around the edge of an image.
It is also important to note that the size of the onscreen image is affected by the pixel height and width of the image, the zoom level, and
the monitor settings. As a result, an image may be displayed as a different size onscreen than when it is printed. For more information, see
“Understanding resolution” on page 55 and “Creating documents” on page 53.
To resize the canvas and image content together
1
Choose Canvas Resize.
To keep the file size of the image in megabytes (MB) the same, enable the Constrain File Size check box.
2 In the New Size area, type values in the Width and Height boxes.
If you enable the Constrain File Size check box, you need to type a value only in one of the boxes; the other values are adjusted
automatically.
If you choose pixels or percent as the unit and enter a value, the Constrain File Size check box is automatically disabled.
Increasing the image dimensions significantly may cause the image to appear stretched and pixelated.
To resize the canvas area
1
Choose Canvas Canvas Size.
2 In the Canvas Size dialog box, specify the number of pixels you want to add to any side of the canvas.
To reduce, or trim, the canvas size, specify negative values.
Saving and backing up files
You can save a file in its current format or in a different format. You can also track the changes that you make to a file by saving multiple
versions of the file, also known as iterations. In addition, you have the option of creating backup files every time you save a document.
When you save an iteration of a file, an updated version of the file is saved with a version number added to the filename. For example,
if you saved the original file as Image. RIF and then save an iteration of the file, the latest version of the file is saved as Image_001.RIF.
For each subsequent iterative save that you perform, the number added to the filename increases by1, for example, Image_002.RIF and
Image_003.RIF. Iterative saving is useful if you need to revert to an older version of a file, or simply to track your progress over time.
68 | Corel Painter 2016 User Guide
Page 91

To save a file in its current format
•
Choose File Save.
To save a file with a different name or in a different format
1
Choose File Save As.
2 In the Save (Mac OS) or Save Image As (Windows) dialog box, use the controls to specify a location, file name, and format.
To perform an iterative save
•
Choose File Iterative Save.
The location of the last file saved is stored and used for iterative saves unless you specify a new location.
You can also perform an iterative save by pressing Command+Option+S (Mac OS) or Ctrl+Alt+S (Windows).
To create a backup file when saving
1 Do one of the following:
•
(Mac OS) Choose Corel Painter 2016 menu Preferences.
•
(Windows) Choose Edit Preferences .
2 In the Preferences list of categories, click General.
3 Enable the Create backup on Save check box.
Choosing a file format
When you save a file, you must choose a file format. The following section contains information about some of the supported file formats.
Saving RIFF files
RIFF is the Corel Painter file format, which retains special information about your document. For example, a RIFF file maintains all layers.
RIFF files are best used as “work-in-progress” files. It is recommended that you always save files in RIFF format, and then save to GIF, JPEG,
TIF, or another file format when a file is ready for production.
Corel Painter lets you compress files and save disk space with a lossless compression method. When saving in RIFF format, you can minimize
the file size on your hard disk by ensuring that the Uncompressed option is disabled by default.
Saving JPEG files
Corel Painter supports the JPEG file format. Unlike GIF, the JPEG file format displays a full range of colors.
The JPEG file format lets you compress your file on a scale of Fair to Excellent, where quality is directly proportional to file size. These quality
settings will let you achieve compression ratios ranging from less than 10:1 to greater than 100:1. JPEG is a “lossy” file format, meaning
that a compressed JPEG file will not be identical, pixel-for-pixel, to the original. However, because the JPEG algorithm takes into account the
sensitivity of the eye to different colors, the higher-quality settings should achieve visually satisfying results.
You can assign a URL to layers and placed images and then save the file in GIF or JPEG format to produce an image map. For more
information, see “Creating image maps” on page 655.
When you save a file in JPEG format, Corel Painter displays the JPEG Encoding Quality dialog box, with the following options:
• The Quality options — Excellent, High, Good, and Fair — let you set the degree of file compression.
The Excellent option compresses the least, but retains the most data. Fair compresses the most, but loses the most data.
Creating, navigating, and manipulating documents | 69
Page 92

You can also use the Quality slider to adjust file compression.
• The Smoothness slider applies smoothing to the entire image. This is useful when using the Fair option to blur the edges of JPEG
artifacts. The default is 0. Keep in mind that using a high smoothness setting can cause blurring.
• The Progressive JPEG check box creates a progressive JPEG file. The progressive format is useful for files designed for the Web. As the
name implies, the progressive format displays an image in stages — as a series of scans — while the file downloads. The first scan is a
low-quality image; the following scans improve in quality. This allows the user to see the whole image quickly.
• The HTML Map Options — NCSA Map File, CERN Map File , and Client Side Map File — let you generate an image map. (NCSA refers
to the National Center for Supercomputing Applications, and CERN refers to the Conseil Europeén pour la Recherche Nucléaire.) Use the
NCSA Map File or CERN Map File option to generate a server-side image map. Use the Client Side Map File option to generate a clientside image map.
For more information, see “Creating image maps” on page 655.
It is best not to decompress and recompress a file multiple times. Although JPEG can compress and discard data that is not visible or
obvious, the degradation of the data can affect the condition of your file.
When a file has lost a significant amount of data, block patterns may appear in areas of the image. If you try to use the Apply Surface
Texture feature on a JPEG file, you may find that the block patterns become more prominent.
Saving GIF files
Corel Painter lets you save documents as GIF files. GIF, a file format using 8 or fewer bits, is commonly used to display graphics on the Web.
When you save a GIF file, you can choose settings from 4 Colors to 256 Colors. You can choose how your colors will be displayed and what
part of your image will be transparent.
You can enable the Color Set option to force all colors in the color table of the GIF file to match the colors in the current color set. This
option can be useful when you are doing Web work, especially if you want to constrain colors to a specific color set or control the number
of colors on a Web page, thus controlling the image file size.
The Imaging Method setting determines how a 24-bit Corel Painter document will be converted to the limited number of colors that GIF
uses. If you choose Quantize to Nearest Color, Corel Painter may replace some colors with colors that are located next to each pixel. If you
choose Dither Colors, Corel Painter applies a pattern to the chosen colors to generate a more accurate, less banded result.
Corel Painter can also save a frame stack as a GIF animation file. For more information, see “Exporting animated GIFs” on page 624.
If you want your image to have transparency, enable the Output Transparency check box. Most programs that display GIF files support
transparency, but for those that don’t, you should specify the color of the “transparent” area. If your image will be displayed on the
Web, enable the Background is WWW Gray option. You can also choose to use the background color of your Web page by enabling the
Background is BG Color option.
For programs that support transparency, your selection will determine which areas are transparent. The Threshold slider determines which
selection (loaded mask) value becomes transparent. You can see how the Threshold slider affects the transparency of your image in the
Preview window of the dialog box. Transparency is displayed in the Preview window by a rectangular lattice. You can toggle between the
Preview window and your Save As GIF options to the results you want. Enable the Interlaced check box if your image will be displayed on a
Web page.
For more information, see “Selections and transformations” on page 435.
Saving RGB TIF files
The TIF format facilitates exchange between applications and computer platforms. It is a widely supported bitmap image format that lets
you save RGB color profile information.
Saving Adobe Photoshop (PSD) files
Corel Painter can save files in Adobe Photoshop (PSD) format. For optimum compatibility, shapes and text are rasterized, and masks are
placed in channels.
When you save a file in PSD format, you can embed the RGB color profile, as you do when saving in TIF format.
70 | Corel Painter 2016 User Guide
Page 93

Saving Encapsulated PostScript (EPS) files
The encapsulated PostScript (EPS) files in Corel Painter conform to the Desktop Color Separation (DCS) 2.0 format (EPS-DCS 5 file format).
Although Corel Painter saves files in EPS-DCS, it can’t read EPS-DCS. If you plan to save an image in EPS-DCS, it’s a good idea to save it in
another format first, so that you’ll have a copy of it that you can reopen in Corel Painter.
When you save an image as an EPS-DCS file with Preview Options turned on, Corel Painter uses the loaded International Color Consortium
(ICC) profile to prepare the separation files. For more information, see “Printing images” on page 635.
Although you can save your images as CMYK EPS separations, Corel Painter can’t open or edit CMYK files.
When you save a file in EPS-DCS, Corel Painter opens the EPS Save Options dialog box, with these options:
• Hex (ASCII) Picture Data provides another way of storing PostScript information. Some page design programs require that this option be
checked. The file sizes will be approximately twice as large when saved with this option.
• Preview options — No Preview, Black and White Preview, and Color Preview — specify whether to save preview data and in what
format. The resulting preview file is a low-resolution (72-ppi) file.
If you have an older laser printer, you must use the black and white preview to print these files. Although the preview or display is black
and white, the color information remains intact.
Emailing documents
Corel Painter lets you email documents by using the default email application installed on your computer.
To email a document
1
Choose File Email Image.
2 Type the image name in the Image Name text box.
3 In the Select Image Format area, enable one of the following options:
• JPEG
• PNG
• TIFF
Closing documents and quitting the application
You can close documents or quit Corel Painter by using menu commands, keyboard shortcuts, or the Close button of the current window.
To close a document
•
Choose File Close.
You can also
Close the current window Click the Close button.
Close the current document by using a keyboard shortcut Press Command + W (Mac OS) or Ctrl + W (Windows).
To quit Corel Painter
• Do one of the following:
Creating, navigating, and manipulating documents | 71
Page 94

•
(Mac OS) Choose Corel Painter 2016 menu Quit Corel Painter 2016.
•
(Windows) Choose File Exit .
You can also quit Corel Painter by pressing Command + Q (Mac OS) or Ctrl + Q (Windows).
Using two monitors
The Corel Painter user interface can be displayed across two or more monitors. You can drag any of the Corel Painter panels, palettes, the
property bar, and the toolbox to any monitor; however, each panel or palette must be displayed entirely on one monitor at a time. If a panel
or palette straddles two monitors, it automatically snaps to the nearest vertical edge of the monitor displaying the large portion of the panel
or palette. If the panel or palette is displayed equally on both monitors, it snaps to the vertical edge of the left monitor.
For best performance, make sure that both monitors are set to the same resolution. In Windows, you must stretch the application window
to straddle both monitors, then redesign your workspace. For information about configuring your system so that Corel Painter is displayed
across two or more monitors, refer to the documentation of your operating system.
Support for tablets and other devices
Corel Painter supports Wacom-compatible tablets and devices as well as devices that support the Real-Time Stylus (RTS) feature of the
Windows operating system. Both groups have multi-touch capabilities.
Wacom-compatible devices are supported on both Mac OS and Windows. For more information, see “Wacom Intuos support” on page
74. RTS-compatible devices include tablet PCs and graphics tablets and are supported only on Windows.
By default, Corel Painter uses tablet options that are suitable for Wacom-compatible devices. To take full advantage of your RTS-compatible
graphics tablet or other device with Corel Painter, you must configure it first. Otherwise, you cannot use stylus information such as pressure
and tilt to adjust and control brushstrokes.
To configure your RTS-compatible device (Windows)
1
Choose Edit Preferences Tablet.
2 In the Tablet Options area, enable the RTS-compatible devices (Real-Time Stylus) option.
3 Restart Corel Painter.
Multi-touch support
Corel Painter supports two ways of working with gestures: with multi-touch mode enabled (default) or disabled. In addition, two multitouch options are available: Corel Painter multi-touch and Windows multi-touch .
Corel Painter multi-touch
This option, available both on Mac OS and Windows, provides enhanced support for Wacom Intuos 5 tablets and other Wacom-compatible
devices. You can simultaneously pan, rotate, and zoom the canvas. This provides a seamless and responsive way of positioning and
navigating the canvas. For example, you can rotate and move the canvas at the same time by moving two fingers in a circular motion
while simultaneously swiping them across the tablet. You can also rotate and zoom by moving two fingers in a circular motion while
simultaneously pinching the fingers together, or pulling them apart. In addition, you can quickly restore the canvas position, rotation, and
zoom level.
72 | Corel Painter 2016 User Guide
Page 95

You can simultaneously perform panning (1), zooming (2), and rotating (3).
You can also change the reference point, around which rotating and zooming takes place. If you’re not using a multi-touch tablet, by
default the reference point is located at the center of the image. However, when using a multi-touch tablet, the reference point changes
depending on the finger positions. Corel Painter sets the reference point at the center of the space that’s between your two fingers.
Changing the finger positions from the center of the image (1) allows you to move the reference point (2).
Windows multi-touch
With this option, your gestures on the tablet or device behave the same way in Corel Painter as in other applications. However, you cannot
use the advanced features of your Wacom-compatible device.
Multi-touch disabled
When the multi-touch mode is disabled, you cannot simultaneously pan, rotate, and zoom the canvas. Disabling multi-touch is useful if you
find that the canvas moves unexpectedly or that brushstrokes do not apply paint as expected.
To restore the canvas position, rotation, and zoom level
• Double-tap two fingers simultaneously on the tablet.
To enable or disable multi-touch support (Mac OS)
1
Choose Corel Painter 2016 Preferences Tablet.
2 Enable or disable the Corel Painter Multi-touch option.
Creating, navigating, and manipulating documents | 73
Page 96

To enable or disable multi-touch support (Windows)
1
Choose Edit Preferences Tablet.
2 In the Multi-touch options area, enable or disable the Enable multi-touch check box.
If multi-touch support is enabled, choose one of the following options:
• Corel Painter Multi-touch
• Windows Multi-touch
Wacom Intuos support
Corel Painter supports the use of Wacom® Intuos® tablet, pen, and airbrush technology.
Painting with an Intuos tablet and pen
The Intuos tablet provides increased pressure sensitivity to help you create smooth curves, gradual transitions, and precise brushstrokes.
When using an Intuos tablet with Corel Painter, you can take advantage of tilt and bearing input in exciting ways.
Customizing brush tracking
Every artist uses different pressure when drawing on an Intuos tablet. The Corel Painter brush tracking preferences help you customize your
Intuos tablet to meet your pressure sensitivity needs. For more information, see “Brush tracking and calibration” on page 97.
Linking stylus features to Expression settings
The settings that you adjust Expression in the brush control panels let you tie brush features like Opacity, Grain, Angle, Size, Jitter,
Resaturation, Bleed, Flow, and Depth to stylus data, such as Velocity, Direction, Pressure, Wheel (for airbrushes), Tilt, and Bearing. For more
information, see “Expression settings” on page 245.
Using the Min Size setting
In Corel Painter, the Min Size setting lets you take full advantage of stylus input data. When Size is set in the Expression panel of the Brush
Controls palette to respond to stylus pressure, and the Min Size setting is set to a small percentage of the brush size, the strokes you make
with the stylus create amazingly realistic results.
Using the Intuos airbrush wheel
The Intuos Airbrush — the first true computer airbrush — provides fingertip media flow control. Corel Painter airbrushes respond to angle
(tilt), bearing (direction), and flow (wheel setting) data from the Intuos stylus, allowing for a truly realistic brushstroke. For example, as you
tilt your stylus, specks of media land on the paper in a way that reflects that tilt. Corel Painter airbrushes create conic sections that mirror
your stylus movements.
Corel Painter airbrushes take advantage of the Intuos Airbrush stylus wheel control. Like the needle control on a real airbrush, the Intuos
wheel control adjusts airbrush flow, or how much medium is applied. For more information, see “Painting with airbrushes” on page 110.
Using multiple Intuos pens
All Intuos pens — both standard and airbrush — feature Tool ID, which lets you configure and work with multiple pens during a Corel
Painter session. For example, let’s assume you have two Intuos pens: Pen 1 and Pen 2. Pen 1 is set to an Oil brush variant; Pen 2 is set to an
Artists variant.
Every time you bring Pen 1 into the tablet’s proximity, Corel Painter automatically changes the active brush to the Oil brush. Every time you
bring Pen 2 into the tablet’s proximity, Corel Painter switches to the Artists brush. If you’ve adjusted the tool assigned to a pen’s size or other
settings, Corel Painter remembers those changes for the next time you use that pen.
Drag-and-drop features
Corel Painter supports drag-and-drop copying of documents and layers from one window to another.
74 | Corel Painter 2016 User Guide
Page 97

Dragging layers between documents
You can copy layers between Corel Painter documents by dragging from one window to the other. When you drag a layer to a new
document, the layer keeps its original properties. For more information, see “Moving layers” on page 399.
Dragging between programs
Corel Painter supports drag-and-drop functionality between applications. This can be a quick, convenient way to acquire images. For
example, you can drag files from Adobe Photoshop directly into Corel Painter.
Creating, navigating, and manipulating documents | 75
Page 98

76 | Corel Painter 2016 User Guide
Page 99

Keyboard shortcuts
Many features in Corel Painter have keyboard shortcuts which allow you to access a variety of tools quickly and easily using the keyboard,
rather than selecting them from a menu or panel.
The four modifier keys on a Mac-compatible keyboard are Command, Option, Shift, and the Spacebar.
The four modifier keys on the Windows keyboard are Ctrl, Alt, Shift, and the Spacebar.
The keyboard shortcuts rely on four modifier keys on Mac-compatible and Windows keyboards: Command, Option, Shift, and the Spacebar
on the Mac OS; and Ctrl, Alt, Shift, and the Spacebar on Windows.
Keyboard shortcuts | 77
Page 100

Some of the same key combinations are reused to provide different actions depending on which tool is currently selected. For example,
holding down the Shift key while using the Rectangle shape tool constrains the shape to a square; whereas holding down the Shift key while
using a Cloning brush sets the clone destination.
This section contains the following topics:
• “Customizing keys” (page 78)
• “Toolbox commands” (page 80)
• “Panel commands” (page 82)
• “Corel Painter menu commands” (page 83)
• “File menu commands” (page 83)
• “Edit menu commands” (page 84)
• “Canvas menu commands” (page 84)
• “Layers menu commands” (page 85)
• “Select menu commands” (page 85)
• “Shapes menu commands” (page 85)
• “Effects menu commands” (page 86)
• “Window menu commands” (page 86)
• “Screen navigation” (page 86)
• “Panel navigation” (page 87)
• “Panel menu commands” (page 87)
• “Brush tools” (page 88)
• “Selection tools” (page 89)
• “Adjuster tools” (page 90)
• “Shape tools” (page 92)
• “Animation” (page 93)
• “Lighting” (page 93)
• “Layer selection tools” (page 93)
• “Mosaics” (page 93)
• “Other commands” (page 94)
Customizing keys
Corel Painter lets you assign commands to keys on your keyboard. This saves you time by giving you immediate keyboard access to your
favorite commands. Along with character, numeric, function, and modifier keys, you can also use Tab, Backspace (Windows), Delete, Insert,
Home, End, Page Up, Page Down, Up Arrow, Down Arrow, Left Arrow, Right Arrow, and Spacebar. You can use keys already used for other
shortcuts.
You can also create a collection of keyboard shortcuts, or key sets, based on changes to the default key set. For easy reference, you can
generate an HTML summary of a key set.
To assign commands to keys
1 Do one of the following:
•
(Mac OS) Choose Corel Painter 2016 menu Preferences Customize Keys.
•
(Windows) Choose Edit Preferences Customize Keys .
If you want to modify keyboard shortcuts that you previously stored in a key set, choose the key set from the Key Set list box.
2 Choose one of the following options from the Shortcuts list box:
• Application Menus — lets you create or modify menu bar command shortcuts
• Panel Menus — lets you create or modify panel menu command shortcuts
• Tools — lets you create or modify tools shortcuts
• Other — lets you create or modify command shortcuts for items that are not menus, panels, or tools
78 | Corel Painter 2016 User Guide
 Loading...