

Page 1
Page 2

Copyright 2014 Corel Corporation. All rights reserved.
Corel® Painter® 2015 Getting Started Guide
The contents of this user guide and the associated Corel Painter software are the property of Corel
Corporation and its respective licensors, and are protected by copyright. For more complete copyright
information about Corel Painter, please refer to the About Corel Painter section in the Help menu of the
software.
Product specifications, pricing, packaging, technical support and information (“specifications”) refer to the
retail English version only. The specifications for all other versions (including other language versions) may
vary.
Information is provided by Corel on an “as is” basis, without any other warranties or conditions, express
or implied, including, but not limited to, warranties of merchantable quality, satisfactory quality,
merchantability or fitness for a particular purpose, or those arising by law, statute, usage of trade, course
of dealing or otherwise. The entire risk as to the results of the information provided or its use is assumed
by you. Corel shall have no liability to you or any other person or entity for any indirect, incidental, special,
or consequential damages whatsoever, including, but not limited to, loss of revenue or profit, lost or
damaged data or other commercial or economic loss, even if Corel has been advised of the possibility of
such damages, or they are foreseeable. Corel is also not liable for any claims made by any third party. Corel's
maximum aggregate liability to you shall not exceed the costs paid by you to purchase the materials. Some
states/countries do not allow exclusions or limitations of liability for consequential or incidental damages, so
the above limitations may not apply to you.
Corel, the Corel balloon logo, the Corel logo and balloon logo combination, Painter, Cinco, CorelDRAW,
Natural-Media, PaintShop, RealBristle, VideoStudio and WordPerfect are trademarks or registered
trademarks of Corel Corporation and/or its subsidiaries in Canada, the U.S., and/or other countries.
Other product, font, and company names and logos may be trademarks or registered trademarks of their
respective companies. Patents: www.corel.com/patent
Sample artwork is provided by third parties not affiliated with Corel and used by permission.
110064
Page 3

Contents
Welcome to Corel Painter..................................................................................................................... 1
What’s in this user guide?................................................................................................................... 1
Additional resources............................................................................................................................. 2
Registration.......................................................................................................................................... 2
Corel Cinco for Painter......................................................................................................................... 2
About Corel Corporation...................................................................................................................... 4
What’s new in Corel Painter 2015........................................................................................................5
Revolutionary digital brushes................................................................................................................ 5
Enhanced speed and performance....................................................................................................... 7
A fully responsive experience................................................................................................................ 8
Mobile art that moves you................................................................................................................... 9
Workspace tour...................................................................................................................................11
Corel Painter terms.............................................................................................................................11
Exploring the Document window....................................................................................................... 14
Choosing a workspace layout.............................................................................................................17
Exploring the toolbox......................................................................................................................... 18
Displaying the toolbox........................................................................................................................23
Displaying the Media Selector bar...................................................................................................... 24
Displaying the property bar................................................................................................................ 24
Exploring the Navigator panel............................................................................................................ 25
Displaying the Brush Selector bar and the Brush library panel.............................................................26
Contents | 1
Page 4

Displaying the command bar............................................................................................................. 27
Exploring panels and palettes.............................................................................................................27
Working with libraries........................................................................................................................ 32
Restoring the default Corel Painter settings........................................................................................ 32
A short tour of Corel Painter for users of Adobe Photoshop..............................................................35
Creating, navigating, and manipulating documents...........................................................................41
Creating documents........................................................................................................................... 41
Understanding resolution................................................................................................................... 43
Opening files...................................................................................................................................... 44
Navigating images and viewing image information............................................................................ 45
Resizing images and the canvas......................................................................................................... 46
Saving files......................................................................................................................................... 49
Support for tablets and other devices................................................................................................ 49
Multi-touch support........................................................................................................................... 49
Painting............................................................................................................................................... 51
Choosing a painting workflow........................................................................................................... 51
Brush tracking and calibration............................................................................................................54
Exploring painting media....................................................................................................................58
Working with the canvas and layers................................................................................................... 59
Displaying reference images............................................................................................................... 59
Clearing the canvas............................................................................................................................ 61
Applying freehand and straight brushstrokes......................................................................................61
2 | Corel Painter 2015 Getting Started Guide
Page 5

Color................................................................................................................................................... 65
Choosing colors from the Color panel................................................................................................ 65
Using the temporal colors palette...................................................................................................... 68
Exploring the Mixer panel and mixing controls...................................................................................69
Mixing, sampling, and applying colors from the Mixer pad................................................................ 71
Opening images in the Mixer panel................................................................................................... 73
Working with color sets..................................................................................................................... 74
Selecting, managing, and creating brushes........................................................................................ 77
Understanding brushes.......................................................................................................................77
Exploring brush categories................................................................................................................. 78
Searching and selecting brushes.........................................................................................................93
Setting basic brush attributes............................................................................................................. 95
Displaying advanced brush controls dynamically.................................................................................99
Importing and exporting brush libraries, categories, and variants....................................................... 99
Cloning images................................................................................................................................. 103
Cloning images................................................................................................................................ 103
Using Quick Clone............................................................................................................................107
Editing, updating, saving, and exporting clone source images.......................................................... 108
Painting in the clone........................................................................................................................ 110
Particle brushes................................................................................................................................. 113
The New Brushes workspace layout..................................................................................................114
Contents | 3
Page 6

Gravity Particle brushes.....................................................................................................................114
Flow Particle brushes........................................................................................................................ 117
Spring Particle brushes..................................................................................................................... 119
General Particle brush controls......................................................................................................... 124
Info palettes..................................................................................................................................... 130
Jitter brushes.....................................................................................................................................131
Choosing a Jitter brush variant.........................................................................................................131
Controlling the behavior of Jitter variants......................................................................................... 134
Working with perspective guides......................................................................................................135
Using Perspective Guides.................................................................................................................. 135
Index................................................................................................................................................. 141
4 | Corel Painter 2015 Getting Started Guide
Page 7

Welcome to Corel Painter
Corel® Painter® 2015 is the ultimate digital art studio. Its inventive drawing tools, realistic brushes, cloning
capabilities, and customizable features let you expand your creative output in exciting new ways. When
you use the pressure-sensitive brushes of Corel Painter, they become fluid extensions of your hand, so the
resulting brushstrokes are unrivaled in texture and precision. What’s more, features such as the ability
to build your own Natural-Media® brushes and customize how brushes interact with the canvas give
you countless ways to develop your artistic ideas. Corel Painter takes you far beyond what’s possible in a
traditional art environment.
This section contains the following topics:
• “What’s in this user guide?” (page 1)
• “Additional resources” (page 2)
• “Registration” (page 2)
• “Corel Cinco for Painter” (page 2)
• “About Corel Corporation” (page 4)
What’s in this user guide?
This user guide provides step-by-step instructions to help you get started with Corel Painter 2015. The
content describes the most common tasks performed with Corel Painter 2015. Please note that this guide
is not an exhaustive reference for every tool. If you require additional information, refer to the application’s
Help system.
Welcome to Corel Painter | 1
Page 8

Additional resources
You can access additional Corel Painter resources online to learn more about the product and connect with
the Corel Painter community.
Resources To access
Corel Painter website http://www.painterartist.com
Corel Painter Tutorials http://www.youtube.com/user/PainterTutorials
Corel Painter on Twitter http://www.twitter.com/corelpainter
Corel Painter on Facebook http://www.facebook.com/corelpainter
Registration
Registering Corel products is important. Registration provides you with timely access to the latest product
updates, valuable information about product releases and access to free downloads.
If you skipped the registration process when installing Corel Painter 2015, you can register at
www.corel.com/support/register.
Corel Cinco for Painter
Corel® Cinco™ for Painter® is a companion app that lets you control Painter remotely from your iPad by
opening and using any custom palettes that you created in Corel Painter. You can download Corel Cinco for
Painter from the Apple App Store.
Corel Cinco for Painter lets you display only one custom palette at a time, but you can quickly switch
between palettes. Corel Cinco for Painter displays five palette controls per screen. If your custom palette
includes more than five controls, you can swipe the screen to display the additional controls.
2 | Corel Painter 2015 Getting Started Guide
Page 9

The icons of the controls are conveniently positioned to match the
shape of your hand so that each finger can quickly tap a control.
Working with Corel Cinco for Painter allows you to extend your workspace and reduce onscreen clutter. It
can also replace traditional shortcut keys.
To allow Corel Cinco for Painter to connect with Corel Painter, you need to enable the option in the Painter
Preferences dialog box.
To allow Corel Cinco for Painter to connect with Corel Painter
1 Do one of the following:
•
(Mac OS) Choose Corel Painter 2015 menu Preferences Connections.
•
(Windows) Choose Edit Preferences Connections .
2 Enable the Allow companion application to connect to Painter check box.
3 Type a name in the Service Name box to give your copy of Corel Painter a unique name.
We recommended that you do not enable the Allow companion applications to connect to
Painter check box before the companion application is available.
To use Corel Cinco for Painter with Corel Painter, you must have iTunes or Bonjour (Windows only)
installed.
Welcome to Corel Painter | 3
Page 10

You can also specify an Authentication Code to ensure that only a legitimate user can access your
copy of Corel Painter from a remote application.
About Corel Corporation
Corel is one of the world’s top software companies, boasting some of the industry's best-known graphics,
productivity and digital media products. We've built a reputation for giving customers more choice, and
delivering solutions that are easy to learn and use. Our mission is simple: help people achieve new levels of
creativity and productivity.
Corel’s product lines include CorelDRAW® Graphics Suite, Corel® Painter®, Corel® PaintShop® Pro,
Corel® VideoStudio® and Corel® WordPerfect® Office. For more information on Corel, please visit
www.corel.com.
4 | Corel Painter 2015 Getting Started Guide
Page 11

What’s new in Corel Painter 2015
Corel Painter takes you far beyond what’s possible in a traditional art environment. This section contains the
following topics about what’s new in Corel Painter 2015:
• “Revolutionary digital brushes” (page 5)
• “Enhanced speed and performance” (page 7)
• “A fully responsive experience” (page 8)
• “Mobile art that moves you” (page 9)
Revolutionary digital brushes
With the addition of Particle brushes and Jitter Smoothing, Corel Painter 2015 continues to push the
envelope of digital art.
Particle Brushes
These new physics-inspired brushes produce rich, chaotic strokes by emitting particles from a central point
that create lines and patterns as they move across the canvas. This revolutionary brush category allows a
wide variety of artists to push their creative visions further, whether in photo art, illustration, concept art,
traditional art, and more.
There are three types of Particle brushes — Gravity, Flow and Springs — and each have their own set of
behaviors. You can control a Particle brush variant by linking its behavior to a variety of real-time input
factors, such as pressure, bearing, tilt or velocity. Or you can let them run free, with beautiful, unpredictable
results.
What’s new in Corel Painter 2015 | 5
Page 12
You can quickly get to work with Particle brushes by choosing the New Brushes user interface arrangement,
which displays all palettes and controls related to the Particle brushes.
For more information, see “Particle brushes” on page 113.
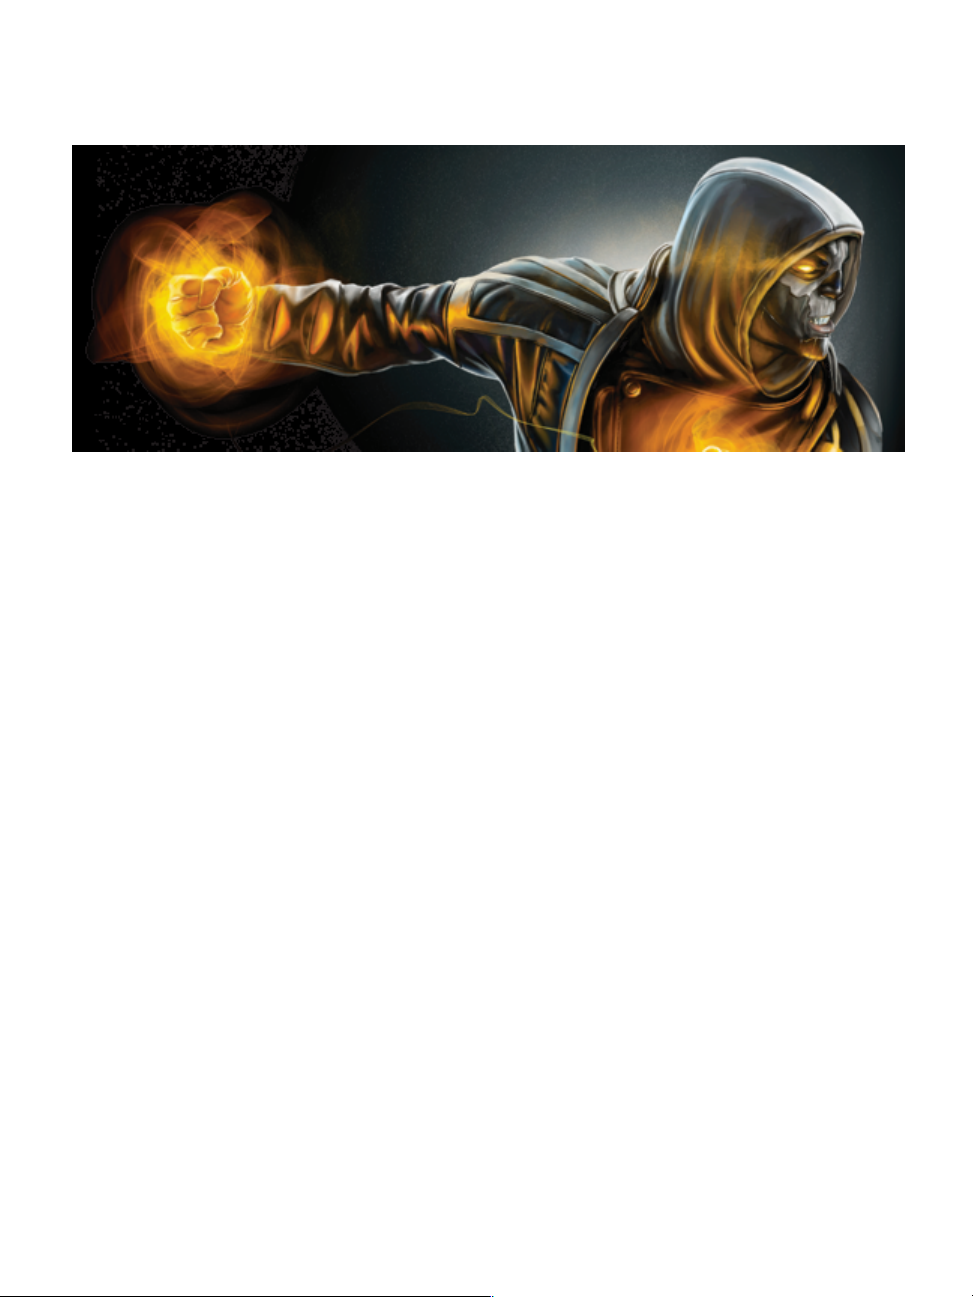
Particle brushes were used to create the sparks and wisps of smoke in this image.
Artwork by Don Seegmiller
Jitter Smoothing
Corel Painter X3 saw the introduction of Universal Jitter, which allows you to add randomness to your
brushstrokes by integrating the Jitter expression in a range of brush controls. The addition of Jitter
Smoothing in Corel Painter 2015 helps you give your brushstrokes an even more natural, organic look.
6 | Corel Painter 2015 Getting Started Guide
Page 13

Angle Jitter applied to a brushstroke without Jitter
Smoothing (top) and with Jitter Smoothing (bottom).
Opacity Jitter applied to a brushstroke without Jitter Smoothing (top) and with Jitter Smoothing
(bottom)
Enhanced speed and performance
Speed and performance enhancements let you focus on your art and forget about technology.
Native 64-bit application for Mac
Users on the Mac OS will notice extended processing power right away, especially during operations that
require big data transfers, such as opening files, switching clone sources, working with multiple layers,
using large documents and more.
Enhanced cross-platform performance
Whether you're working on a Mac or a PC, you'll notice increased speed in Painter 2015. With the latest
round of CPU performance optimizations, brushes perform faster, so you can concentrate on your art and
forget about technology.
Enhanced real-time effect preview
Corel Painter 2015 takes the guesswork out of applying effects. You can now preview effects in real-time on
the canvas so you instantly get an idea how the whole painting will look.
What’s new in Corel Painter 2015 | 7
Page 14
Enhanced brush tracking
Because each artist uses a different strength or pressure level in a stroke, the enhanced Brush Tracking
utility helps calculate the appropriate settings for pressure and velocity. The new visual power curve helps
you control universal application pressure-sensitive memory and instantly apply the settings to the current
brush variant. There are default pressure curves to choose from, or you can tweak the curve and save it as
a preset. You can also make practice strokes with a variant on the canvas while you’re calibrating the brush
tracking so you can draw from with the most realistic, accurate brushstroke information possible. For more
information, see “Brush tracking and calibration” on page 54.
A fully responsive experience
Based on user feedback, Corel Painter 2015 offers you new streamlined ways to work as well as updated
content.
Custom user-interface palette arrangements
Inspired by Painter artists, this collection of new pre-defined user-interface arrangements is designed to
kick-start a variety of digital-art workflows by displaying only the relevant palettes and tools. There’s one for
illustrating, creating photo art, and getting started with the revolutionary new Particle brushes. There’s even
one that displays only minimal UI, freeing up space for tablet users. For more information, see “Choosing a
workspace layout” on page 17.
The New Brushes arrangement displays everything you need to use the Particle Brushes.
8 | Corel Painter 2015 Getting Started Guide
Artwork by Mike Thompson
Page 15
Fresh new content
You can add an extra special touch to your artwork with new, freshly inspirational papers, nozzles, images,
patterns, weaves, gradients and more. Some of the updates are designed specifically for different types of
digital artists, so whether you're an illustrator or photo artist, you can be sure to find compelling content to
work with.
Mobile art that moves you
Corel Painter 2015 lets you paint on the go, so you can create anytime, anywhere.
Real-Time Stylus and Windows Tablet PC support
You can combine your Tablet PC with Windows Real-Time Stylus support to capture whatever inspires you
on the fly. Support for the Windows Real-Time Stylus delivers truly responsive pressure-sensitivity, and
depending on the device, tilt. What’s more, there’s no stylus driver to install, so you can use Corel Painter
2015 right away. For more information, see “Support for tablets and other devices” on page 49.
Real-Time Stylus and Windows Tablet PC support let you create art on the go.
Painter Mobile for Android
The Painter Mobile for Android app gives you the ability to paint anywhere, anytime. When it's time to
finalize your work, you can import it directly into Painter 2015 to add professional finishing touches.
What’s new in Corel Painter 2015 | 9
Page 16

10 | Corel Painter 2015 Getting Started Guide
Page 17
Workspace tour
The Corel Painter workspace has been designed to give you easy access to tools, effects, commands, and
features. The workspace is organized by using a series of menus, selectors, panels, and interactive palettes.
This section contains the following topics:
• “Corel Painter terms” (page 11)
• “Exploring the Document window” (page 14)
• “Choosing a workspace layout” (page 17)
• “Exploring the toolbox” (page 18)
• “Displaying the toolbox” (page 23)
• “Displaying the Media Selector bar” (page 24)
• “Displaying the property bar” (page 24)
• “Exploring the Navigator panel” (page 25)
• “Displaying the Brush Selector bar and the Brush library panel” (page 26)
• “Displaying the command bar” (page 27)
• “Exploring panels and palettes” (page 27)
• “Working with libraries” (page 32)
• “Restoring the default Corel Painter settings” (page 32)
Corel Painter terms
Before you get started with Corel Painter, you should be familiar with the following terms.
Workspace tour | 11
Page 18

Term Description
Canvas The canvas is the rectangular work area inside the
document window. In addition, the canvas serves
as the background layer of the image. However,
unlike other layers, it is always locked. The size of
the canvas also determines the size of the image
that you create.
Pixels-per-inch (ppi) The default unit of measurement for resolution in
Corel Painter. Pixels-per-inch (ppi) is equivalent to
dots per inch (dpi).
Layer Layers are independent image elements that
stack on top of the canvas. You can manipulate
the content of a layer without altering the
canvas. Layers let you experiment with different
compositions and effects without risking an
unwanted, permanent edit.
Brush category Brush categories are groups of similar brushes and
media.
Brush variant Brush variants are specific brushes and brush
settings within a brush category.
Dab types The dab type controls the way a brush applies
color to the painting surface. In Corel Painter, there
are numerous dab types that fall under two dab
type groups: rendered and dab-based, also known
as pixel-based.
Rendered dab type The rendered dab type produces continuous,
smooth-edged strokes. For example, Camel Hair
and Airbrush use the rendered dab type.
12 | Corel Painter 2015 Getting Started Guide
Page 19

Term Description
Dab-based dab type The dab-based dab types produce brushstrokes
that are made up of tiny dabs of color that are
closely spaced together so they appear smooth.
Panel A panel is a single tabbed container that displays
commands, controls, and settings for a specific
feature. Panels reside in a palette. For example, the
Color panel contains controls that allow you to
choose colors.
Palette A palette is a container for one or multiple panels.
Paper Paper allows you to control both the color and
texture of the canvas.
Clone source The clone source determines the image, or image
area, that you want to reproduce through cloning.
A document can include multiple clone sources.
Clone document The clone document is created by copying the
original clone source image which allows you to
reproduce a painterly version of the source image.
A copy of the clone source is embedded in the
clone document. In addition, you can add multiple
clone sources to a clone document.
Image sampling Image sampling lets you copy part of one image
and reuse it elsewhere in the image or in another
image. You can sample an image by using the
Rubber Stamp tool, a Cloner brush that supports
offset sampling, or a Cloner brush that supports
multi-point sampling. Sampling is similar to
cloning, but, unlike cloning, it does not create a
separate document that stores clone sources.
Workspace tour | 13
Page 20

Term Description
Composite method A composite method, which is similar to blend
modes in Adobe Photoshop, lets you change how
a layer blends with an underlying image.
Exploring the Document window
The document window is the area outside the canvas that is bordered by scroll bars and application
controls.
14 | Corel Painter 2015 Getting Started Guide
Page 21
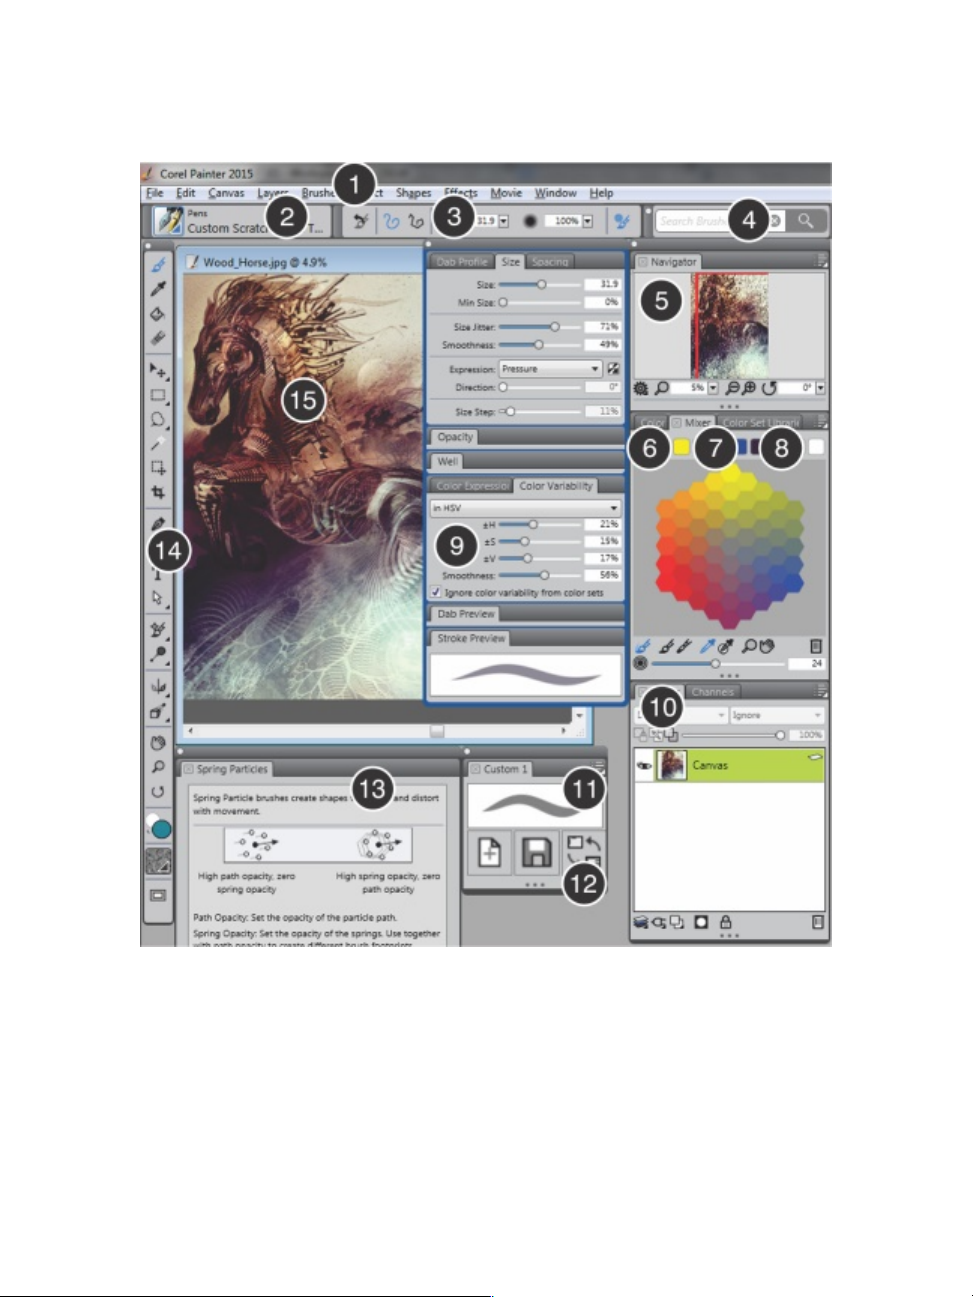
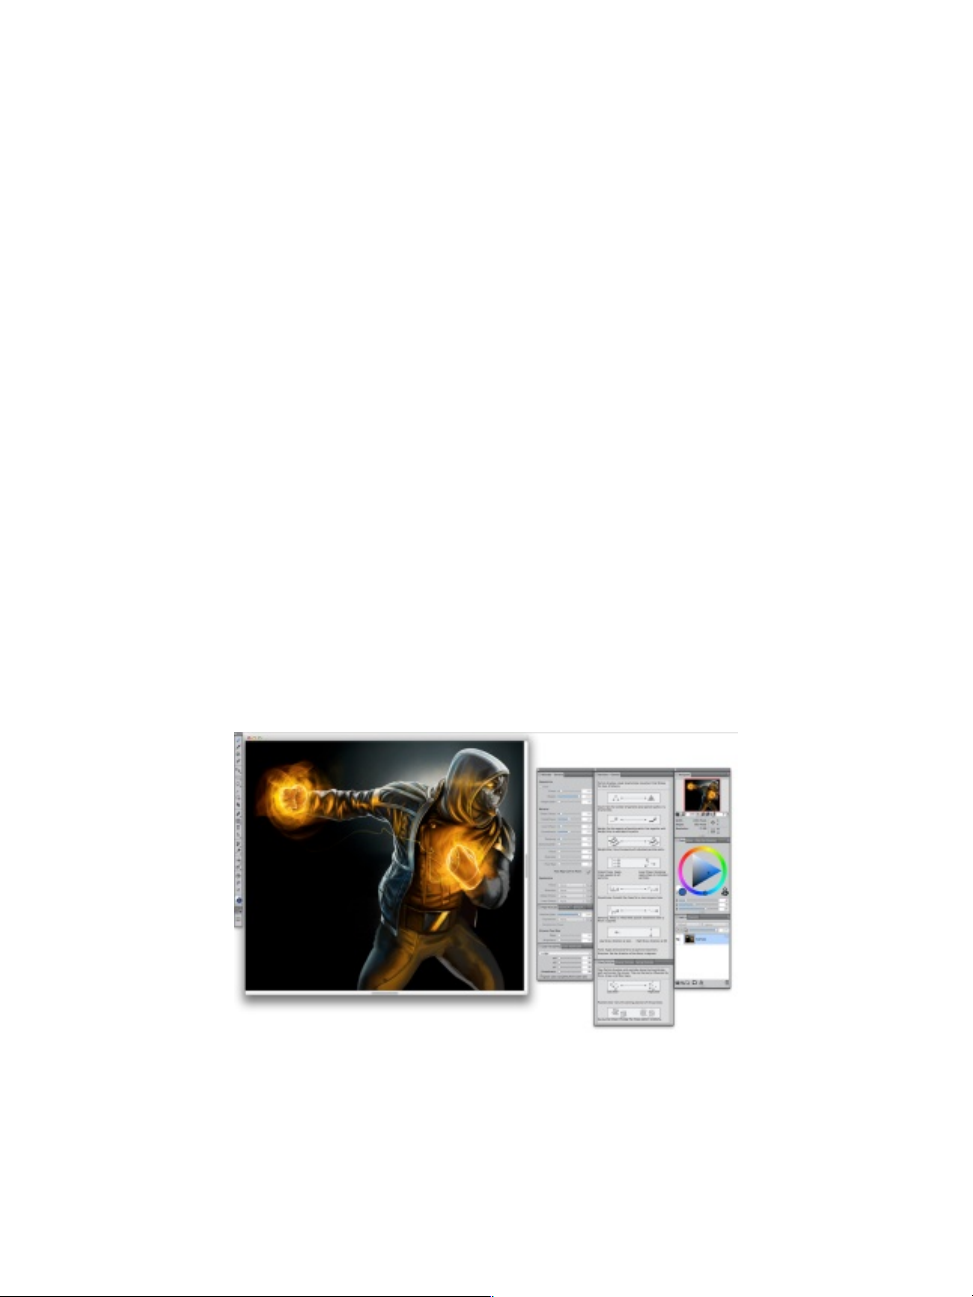
Circled numbers correspond to the numbers in the following table, which describes
the main components of the application window. (Artwork by Android Jones)
Part Description
1. Menu bar Lets you access tools and features using pull-down
menu options
Workspace tour | 15
Page 22

Part Description
2. Brush Selector bar Lets you open the Brush library panel to choose a
brush category and variant. It also allows you to
open and manage brush libraries.
3. Property bar Displays commands that relate to the active tool
or object. For example, when the Fill tool is active,
the fill property bar displays commands for filling
selected areas.
4. Brush Search bar Lets you quickly search the content of the currently
selected brush library to find brushes that match a
specific description.
5. Navigator panel Lets you navigate in the document window,
change the magnification level, and access various
document viewing options, such as Tracing Paper
and Drawing Modes
6. Color panel Lets you choose main and additional colors for
painting in Corel Painter documents.
7. Mixer panel Lets you blend colors together to create new
colors. You can also open inspirational mixer
pads designed by expert Corel Painter artists. (The
inspirational mixer pad in the image was created
by artist John Malcolm.)
8. Color Set Libraries panel Displays the colors in the current color set so you
can organize groups of colors.
9. Advanced Brush Controls Lets you quickly access the advanced brush
controls for any default brush variant. It also
displays an enhanced stroke preview of the
currently selected brush variant. The image shows
the Color Variability panel, which includes the
new Jitter Smoothness control.
16 | Corel Painter 2015 Getting Started Guide
Page 23

Part Description
10. Layers panel Lets you manage the hierarchy of layers and
includes controls for creating, selecting, hiding,
locking, deleting, naming, and grouping layers
11. A custom brush button This custom brush button shows the brush as a
stroke instead of a brush category, helping you
recognize the brush variant.
12. A custom palette Custom palettes give you easy access to controls
that you use often. This custom palette includes
a control (Quick Switch) that lets you switch
between your favorite workspace layouts.
13. Info palette Explains key features of the new Particle brushes.
14. Toolbox Lets you access tools for creating, filling, and
modifying an image
15. Canvas The canvas is the rectangular work area inside the
document window whose size determines the size
of the image you create. The canvas acts as the
image background and, unlike a layer, it is always
locked.
Choosing a workspace layout
Corel Painter 2015 offers preset workspace layouts that you can choose from. A workspace layout (also
known as “palette arrangement”) displays, hides, and positions workspace elements such as palettes and
panels to suit a specific workflow. The following table describes the available workspace layouts.
Workspace layout Description
New Brushes Displays the palettes of the new Particle brushes for
quick and easy access
Workspace tour | 17
Page 24

Workspace layout Description
Simple Displays minimal user interface that includes the
toolbox, the menu bar, and a command bar that
contains shortcuts to commonly used commands.
This layout is ideal for small screens.
Photo Art Displays palettes commonly used by photo artists,
providing optimal setup for cloning photos,
textures, and paintings
Illustration Displays palettes commonly used for creating
illustrations
Default The default workspace layout that works well
for most computers. For more information, see
“Exploring the Document window” on page
14.
To choose a workspace layout
•
Choose Window Arrange Palettes, and choose a layout.
You can also choose a layout from the Welcome screen by clicking the Create tab and selecting a
layout in the Arrange Your Workspace area.
Exploring the toolbox
You can use the tools in the toolbox to paint, draw lines and shapes, fill shapes with color, view and
navigate documents, and make selections. Under the toolbox is a color selector, plus six content selectors
that let you choose papers, gradients, patterns, looks, and nozzles.
The following table provides descriptions of the tools in the Corel Painter toolbox.
Tool Description
Color tools
18 | Corel Painter 2015 Getting Started Guide
Page 25
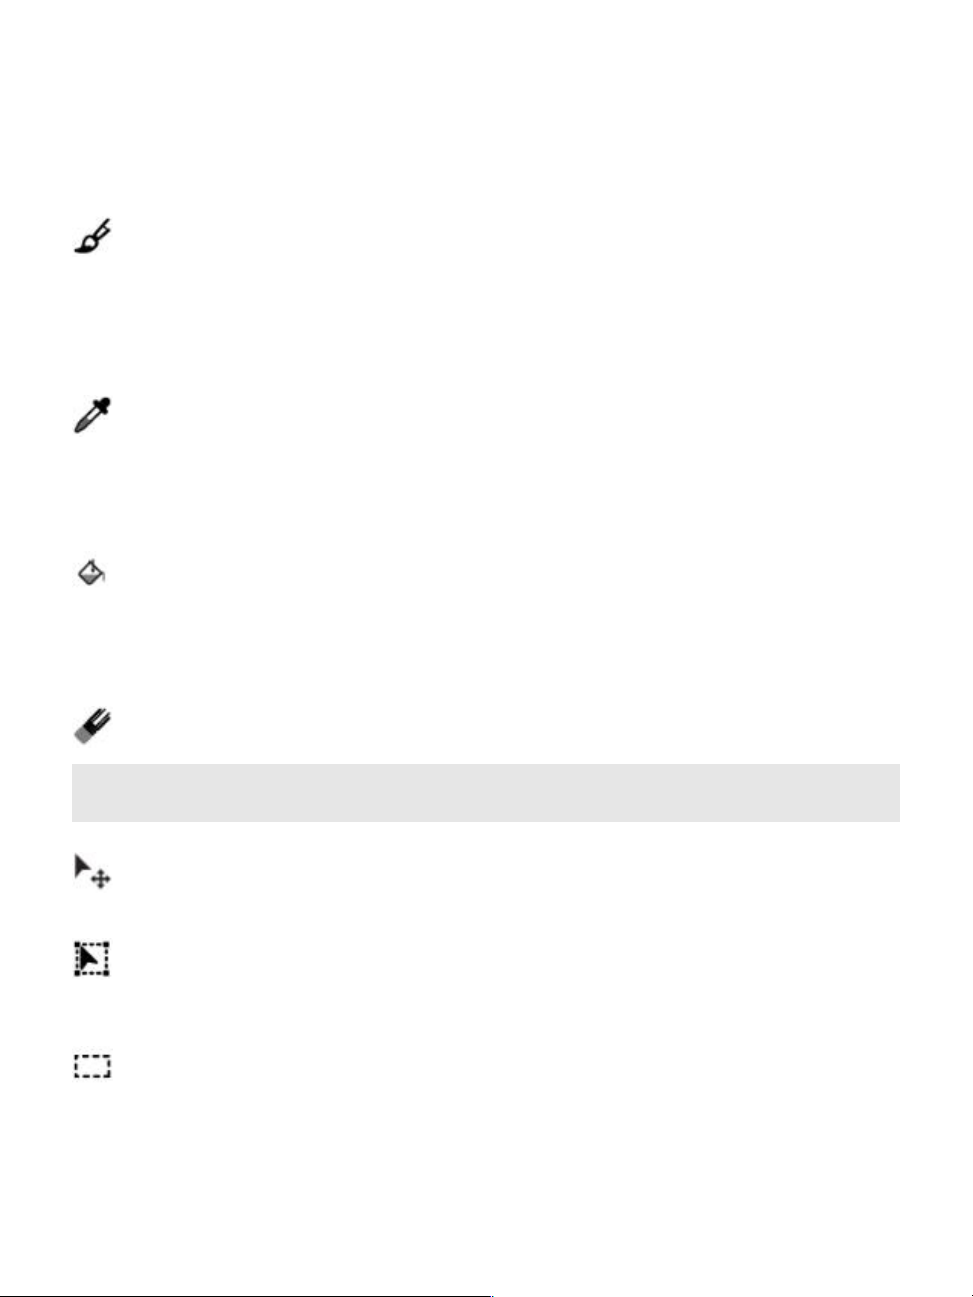
Tool Description
The Brush tool lets you paint and draw on
the canvas or a layer. Brush categories include
pencils, pens, chalk, airbrushes, oil paints,
watercolors, and more. When the Brush tool is
selected, you can choose specific brushes from the
Brushlibrarypanel.
The Dropper tool lets you pick up a color from
an existing image. The property bar shows the
values of the color. When you select a color with
the Dropper tool, that color becomes the current
color in the Color panel.
The Paint Bucket tool lets you fill an area with
media, such as a color, gradient, pattern, weave,
or clone. The property bar shows options for the
areas that you can fill and the media that you can
use.
The Eraser tool lets you remove unwanted areas
from an image.
Selection tools
The Layer Adjuster tool is used to select, move,
and manipulate layers.
The Transform tool lets you modify selected areas
of an image by using different transformation
modes.
The Rectangular Selection tool lets you create
rectangular selections.
Workspace tour | 19
Page 26
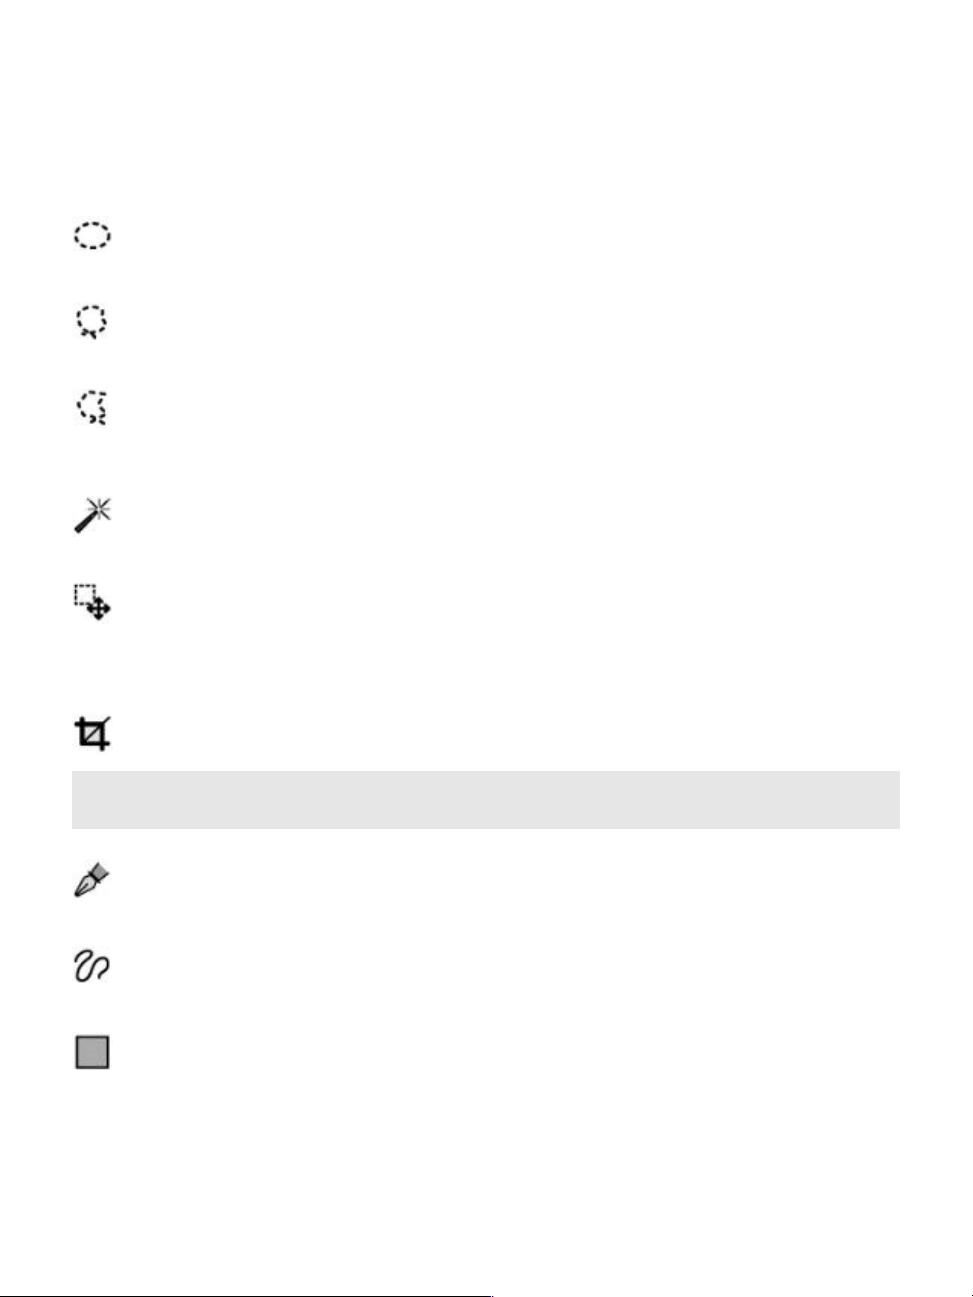
Tool Description
The Oval Selection tool lets you create oval
selections.
The Lasso tool lets you draw a freehand selection.
The Polygonal Selection tool lets you select an
area by clicking different points on the image to
anchor straight line segments.
The Magic Wand tool lets you select an area of
similar color by clicking or dragging in an image.
The Selection Adjuster tool lets you select,
move, and manipulate selections created with the
Rectangular, Oval, and Lasso selection tools and
selections converted from shapes.
The Crop tool lets you remove unwanted edges
from an image.
Shape tools
20 | Corel Painter 2015 Getting Started Guide
The Pen tool lets you create straight lines and
curves in objects.
The Quick Curve tool lets you create shape paths
by drawing freehand curves.
The Rectangular Shape tool lets you create
rectangles and squares.
Page 27
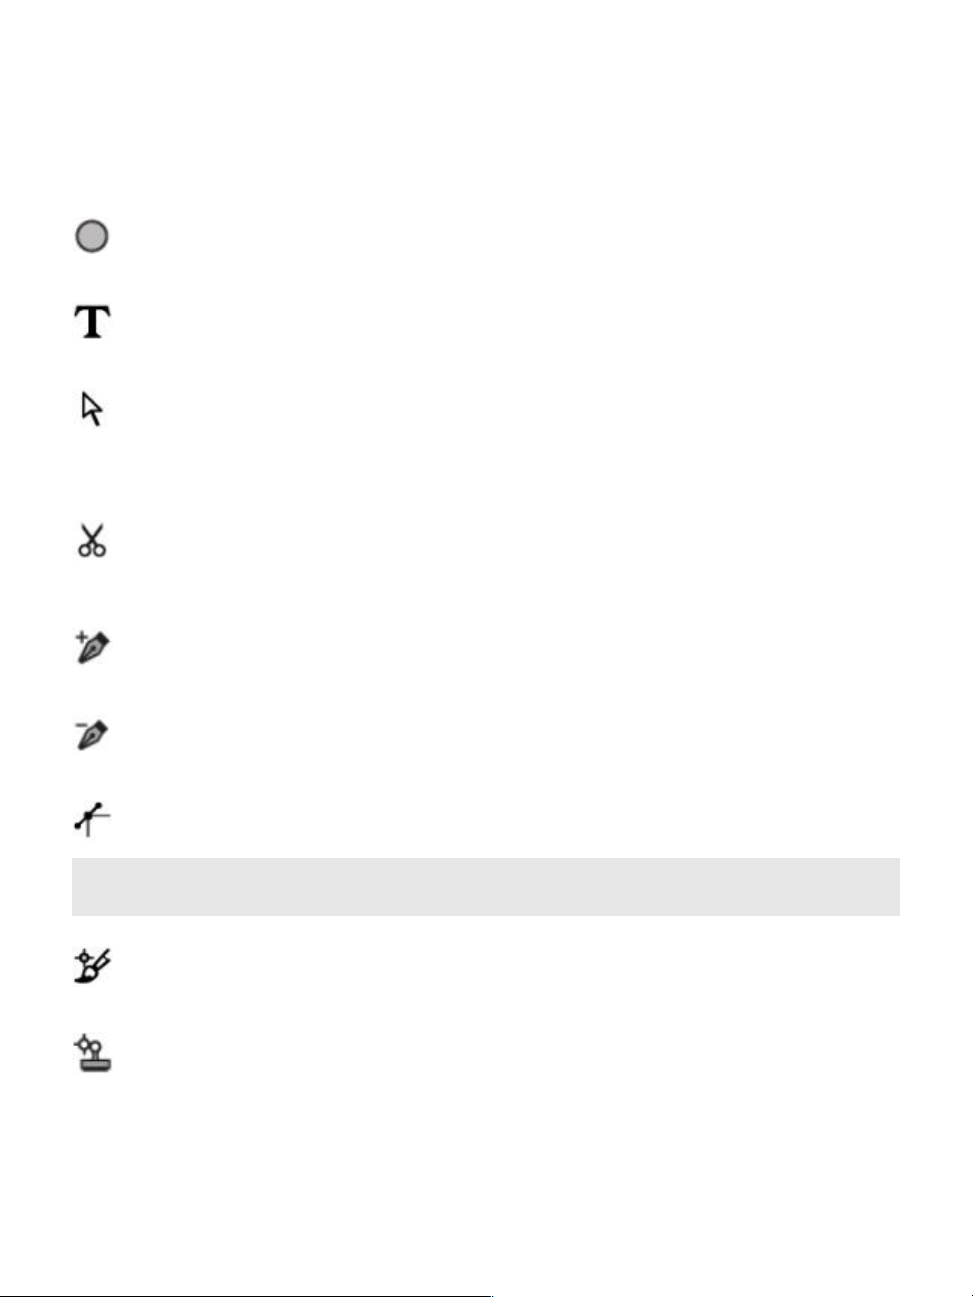
Tool Description
The Oval Shape tool lets you create circles and
ovals.
The Text tool creates text shapes. Use the Text
panel to set the font, point size, and tracking.
The Shape Selection tool is for editing Bézier
curves. You use the Shape Selection tool to select
and move anchor points and adjust their control
handles.
The Scissors tool lets you cut an open or closed
segment. If the segment is closed, after you click
on a line or point, the shape path becomes open.
The Add Point tool lets you create a new anchor
point on a shape path.
The Remove Point tool lets you remove an anchor
point from a shape path.
Photo tools
The Convert Point tool is used to convert between
smooth and corner anchor points.
The Cloner tool gives you quick access to the last
Cloner brush variant you used.
The Rubber Stamp tool gives you quick access to
the Straight Cloner brush variant, and lets you to
sample areas within an image or between images.
Workspace tour | 21
Page 28
Tool Description
The Dodge tool lets you lighten the highlights,
midtones, and shadows in an image.
The Burn tool lets you darken the highlights,
midtones, and shadows in an image.
Symmetry tools
The Mirror Painting mode lets you create a
perfectly symmetrical painting.
The Kaleidoscope mode lets you transform
basic brushstrokes into colorful and symmetrical
kaleidoscope images.
Composition tools
The Divine Proportion tool lets you plan
compositions by using guides based on a classical
composition method.
Navigation tools
22 | Corel Painter 2015 Getting Started Guide
The Layout Grid tool lets you divide your canvas so
that you can plan your composition. For example,
you can divide your canvas into thirds vertically and
horizontally to use the compositional rule of thirds.
The Perspective Guides tool lets you display
guides using one, two or three-point perspective.
For more information, see “Using Perspective
Guides” on page 135.
Page 29
Tool Description
The Grabber tool lets you scroll through an image
quickly.
The Magnifier tool lets you magnify areas of an
image when you are performing detailed work, or
reduce areas to get an overall view of an image.
The Rotate Page tool lets you rotate an image
window to accommodate the way you naturally
draw.
Selectors
The Color selector lets you choose main and
additional colors. The front swatch displays the
main color, and the back swatch displays the
additional color.
The Paper Selector opens the Papers panel. From
the Papers panel, you can choose a paper texture
to alter the canvas surface and achieve more
realistic results when applying brushstrokes.
The View Mode selector allows you to switch
between Full Screen and Windowed .
Displaying the toolbox
The toolbox is open by default, but you can close it. In addition, to minimize the space required to display
the toolbox, tools of similar function are grouped together and they are accessible from flyout menus. The
button for only one of these tools is displayed at a given time on the toolbox. A flyout menu is indicated by
a triangle in the lower-right corner of the button. You can open a flyout to access all of its tools.
Workspace tour | 23
Page 30
To open or close the toolbox
•
Choose Window Toolbox.
You can also close the toolbox by clicking the close button on the toolbox header bar.
To access tools grouped in flyouts
1 In the toolbox, click and hold the tool icon whose flyout you want to open.
A flyout menu of the entire group of related tools appears.
2 Click the tool that you want to use.
The tool you’ve chosen appears in the toolbox.
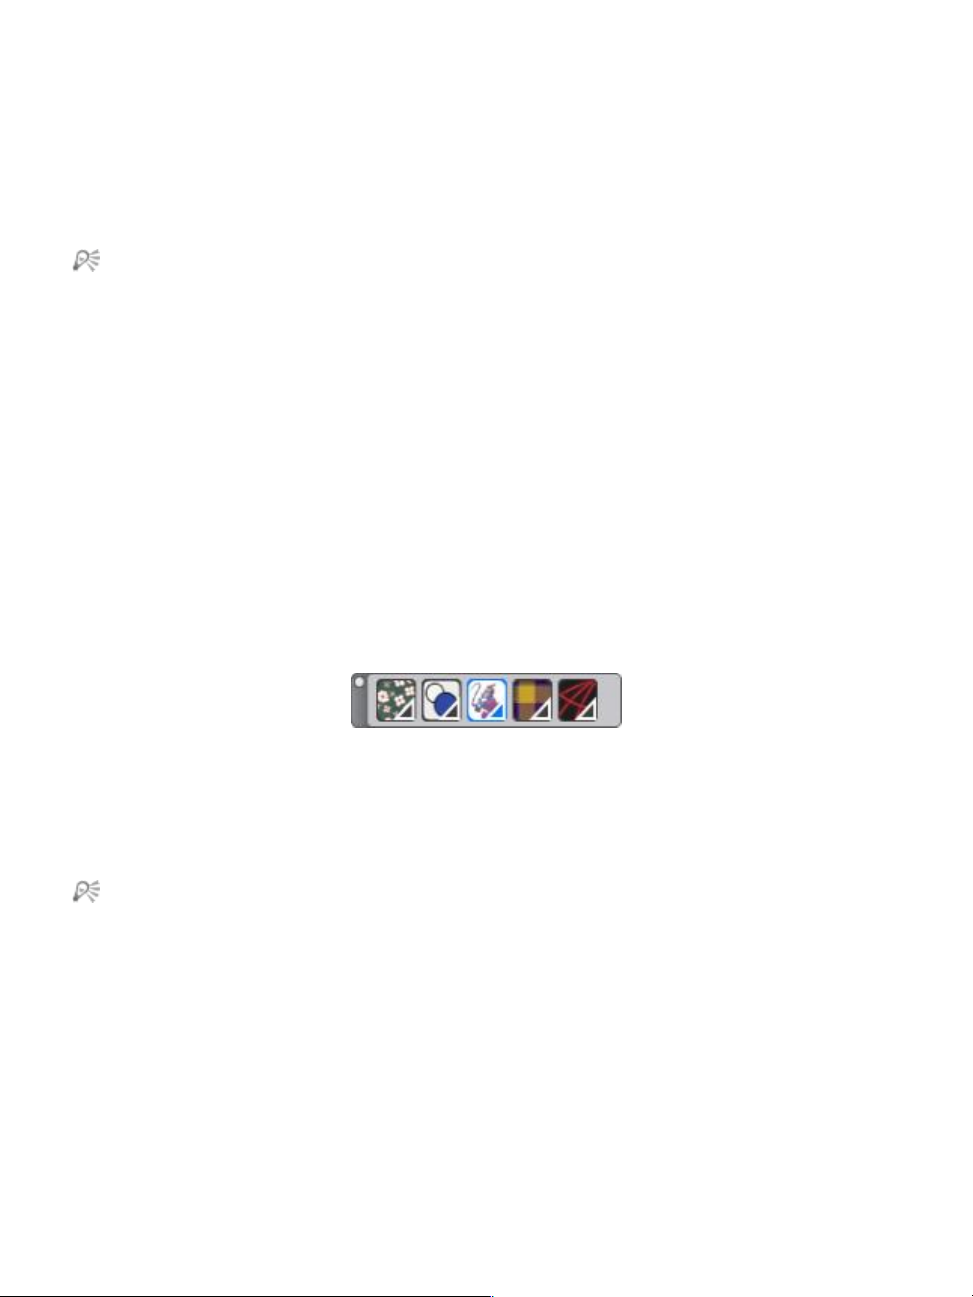
Displaying the Media Selector bar
The Media Selector bar gives you quick access to the libraries for the following Corel Painter media:
patterns, gradients, nozzles, weaves, and looks. The Media Selector bar is open by default, but you can
close it at any time.
The Media Selector bar (displayed horizontally). From left to right:
PatternSelector, GradientSelector, NozzleSelector, WeaveSelector, LookSelector.
To open or close the Media Selector bar
•
Choose Window Media Selector.
You can also close the Media Selector bar by clicking the close button on the header bar.
Displaying the property bar
In Corel Painter, the property bar displays options for the currently selected tool. By default, the property bar
displays in the application window docked below the menu bar, but you can close it.
24 | Corel Painter 2015 Getting Started Guide
Page 31

The property bar for the Grabber tool.
To open or close the property bar
•
Choose Window Property Bar.
You can also close the property bar by clicking the close button on the header bar.
Exploring the Navigator panel
The Navigator panel is a convenient tool for managing many aspects of a document.
You can use the Navigator panel to better orient yourself in the document window and modify the
document window display. For example, when you’re working at a high zoom level, or with a large image,
you can use the Navigator panel’s small canvas preview to display the entire image without having to zoom
out. You can also move to a different image area without having to adjust the zoom level. In addition, you
can change the zoom level or rotate the canvas from the Navigator panel.
The Navigator’s canvas preview allows you to view
the entire image even when you’re zoomed in.
Workspace tour | 25
Page 32

The Navigator lets you enable various tools such as the drawing modes, Impasto information, tracing
paper, grids, and color management.
The Navigator panel also displays document information such as the X and Y coordinates and the cursor
position to help you navigate the image. You can also view document width, height, and resolution.
Displaying the Brush Selector bar and the Brush library panel
The Brush library panel lets you choose a brush from the currently selected brush library. It also allows you
to organize and display brushes in various ways. For example, you can create a new brush library, open a
previously stored brush library, and view the most recently used brushes. The Brush library panel displays the
content of only one brush library at a time.
You can access the Brush library panel by clicking
the Brush Selector on the Brush Selector bar.
In the Brush library panel, brushes are organized into categories, which contain brush variants. Brush
categories are groups of similar brushes and media. Brush variants are specific brushes and brush settings
within a brush category. For example, in the Pastels category, there are pencil, chalk, soft, and hard pastel
brush variants. You can change the display of the categories and variants.
The Brush library panel allows you to browse all of the brush
categories and variants for the currently open brush library.
26 | Corel Painter 2015 Getting Started Guide
Page 33

To hide or show the Brush Selector bar
•
Choose Window Brush Selector.
You can also close the Brush Selector bar by clicking the close button on the header bar.
Displaying the command bar
The command bar gives you quick access to commonly used commands such as starting and saving
documents, undoing and redoing actions, cutting and pasting, and accessing brush tracking options.
Displaying the command bar is especially useful for tablets and other small-screen devices.
The command bar.
To display the command bar
•
Choose Window Command Bar.
Exploring panels and palettes
The interactive panels in Corel Painter are single tabbed containers that let you access content libraries,
commands, controls, and settings. Panels are stored in palettes. You can store one or multiple panels in a
palette. For example, you can reconfigure the panels that you most often use in one palette. You can also
arrange panels and palettes in the application window to quickly access the tools and controls that you use
most often or to maximize screen space. For example, you can display all color-specific panels in one color
palette, or display panels individually.
Workspace tour | 27
Page 34
This palette includes three color-related panels: Color, Mixer, and Color
Set Libraries. You can access a panel’s content by clicking its tabs.
Corel Painter also includes the Brush controls palette, which is a preset palette that groups all panels that
contain brush-related settings. You can copy an individual brush control panel to the workspace, but you
can’t remove any of the brush control panels from the palette.
Exploring panels
Corel Painter includes several panels that you can group together to create a custom palette.
Panel Description
Brush Control panels
The brush control panels are included in the Brush
Controls palette. They include the following panels:
General, Stroke Attributes, Opacity, Grain,
Dab Profile, Size, Bristles, Spacing, Smoothing,
Angle, Static Bristle, Computed Circular, Well,
Rake, Multi, Mouse, Cloning, Impasto, Image
Hose, Airbrush, Water, Liquid Ink , Digital
Watercolor, Artists’ Oils , Real Watercolor ,
Real Wet Oil, Stroke Jitter , RealBristle ™ Hard
Media, Color Variability, Color Expression , Brush
Calibration, Dab Preview, and Stroke Preview.
28 | Corel Painter 2015 Getting Started Guide
Allows you to customize brush variants.
Page 35

Panel Description
Advanced Brush Controls panel Generates a grouping of brush control panels that
are relevant to the currently selected brush. For
more information, see “Displaying advanced brush
controls dynamically” on page 99.
Color panels
Color Lets you choose main and additional colors for
painting in Corel Painter documents.
Mixer Lets you mix and blend colors as you would on an
artist’s palette.
Color Set Libraries Displays the colors in the current color set so you
can organize groups of colors.
Paper panels
Papers Lets you apply and edit paper textures
Paper Libraries Lets you open and manage paper libraries. You can
also choose a paper texture.
Media library panels
Patterns, Gradients , Nozzles , Looks , and Weaves
library panels
Let you open and manage media libraries. You can
also choose media.
Image Portfolio and Selection Portfolio Contain all images or selections in the current
library. You can view the items as thumbnails or in
a list as well as preview the current item.
Media control panels
Workspace tour | 29
Page 36

Panel Description
Patterns, Gradients , and Weaves control panels Lets you apply and edit patterns, gradients, and
weaves
Flow Map panels
Flow Map panel Lets you apply and manipulate flow maps.
Flow Map Libraries panel Lets you open, manage, and navigate flow map
libraries.
Navigator, Clone Source, and Reference Image
panels
Navigator panel Lets you navigate the document window. You can
also view document information, such as width
and height; X and Y coordinates and the cursor
position; context-sensitive information based on a
selected tool; and unit information, such as pixels,
inches, and resolution.
Clone Source panel Lets you open and manage clone sources.
Reference Image panel Lets you display an inspirational image in the
document window while maintaining focus on the
canvas.
Layers and Channels panels
Layers Lets you preview and arrange all layers in a Corel
Painter document. You can use Dynamic Plug-ins,
add new layers (including Watercolor and Liquid
Ink layers), create layer masks, and delete layers.
In addition, you can set the composite method
and depth, adjust the opacity, and lock and unlock
layers.
30 | Corel Painter 2015 Getting Started Guide
Page 37

Panel Description
Channels Lets you preview thumbnails of all the channels
in a Corel Painter document, including RGB
composite channels, layer masks, and alpha
channels. From the panel, you can also load,
save, and invert existing channels, and create new
channels.
Auto-Painting panels
Underpainting Lets you adjust tone, color, and detail in a photo in
preparation for auto-painting. This panel is used in
the first step of the photo-painting process.
Auto-Painting Lets you specify a range of settings that control
how brushstrokes are applied. This panel is used in
the second step of the photo-painting process.
Restoration Lets you fine-tune a painting by providing brushes
that help you restore detail. This panel is used in
the third step of the photo-painting process.
Composition panels
Divine Proportion Lets you customize the Divine Proportion guide —
a tool that helps you plan a layout according to a
classic composition method.
Layout Grid Lets you customize the Layout Grid — a tool that
helps you divide your canvas so that you can plan
your composition.
Text and Scripts panels
Workspace tour | 31
Page 38

Panel Description
Text Lets you perform all text-related tasks, such as
choosing fonts, adjusting opacity, and applying
drop shadows.
Scripts Lets you access all commands and settings related
to scripts. For example, you can open, close, play,
and record scripts from the Scripts panel.
Working with libraries
A library is a storage place that helps you organize and manage a collection of similar items, such as
brushes or paper textures. For example, the default paper textures are contained in the Paper Textures
library, which is loaded by default when you open Corel Painter. As you customize paper textures and other
resources, you can save them to your own libraries. Libraries are available for brushes, gradients, layers,
lighting, looks, nozzles, paper textures, patterns, selections, scripts, and weaves.
The Paper Libraries panel lets you choose, organize, and apply paper textures.
Restoring the default Corel Painter settings
You can restore the Corel Painter workspace to its default factory settings. The restoring process removes all
modifications and customizations that you made to the application — including the following:
• All libraries (Brushes, Papers, Scripts, Nozzles, etc)
• Custom palettes
• Palette Layout(s)
32 | Corel Painter 2015 Getting Started Guide
Page 39

• Color Sets
• All preferences (Preferences dialog box)
• Customized keyboard shortcuts
• Brush tracking and calibration settings
• Recent brushes
• Color Management presets
• Perspective Guides, Layout, and Divine Proportion presets
Before restoring the Corel Painter default workspace, we recommend that you export any libraries that you
want to preserve. For example, if you created custom brushes, you can export the brush library. For more
information, see Importing and exporting libraries
To restore CorelPainter to its default factory settings
1 Hold down Shift and start Corel Painter.
A warning appears, asking you to confirm that you want to erase all of the modifications that you have
made to Corel Painter. Restoring the default factory settings copies the original workspace settings from
the installation to the user folder.
2 Choose whether you want to restore the current workspace or all workspaces.
When you choose to restore all workspaces, all custom workspaces are deleted. Only the default
workspace is preserved and restored to the factory settings.
Workspace tour | 33
Page 40

34 | Corel Painter 2015 Getting Started Guide
Page 41

A short tour of Corel Painter for users of Adobe Photoshop
by Cher Threinen-Pendarvis
Corel Painter is known for its responsive, realistic brushes, multitude of rich textures, and fabulous special
effects, which cannot be found in any other program. The biggest difference that you will notice between
Adobe Photoshop and Corel Painter is the warmth and texture of the Natural-Media brushes and paper
textures of Corel Painter. You’ll find brushes with realistic bristles that lay down oily paint and dry-media
brushes, such as variants in the Chalk and Pastels categories, that are sensitive to textures on the canvas.
Now, let’s get started!
Before we begin the tour, you need to make sure that you are displaying the default panels and palettes. To
display the default settings, choose the Window menu, and choose Arrange Palettes Default.
Property bar
At the very top of the screen, you’ll see the property bar, which is similar to the Options bar in Photoshop.
The property bar changes contextually, depending on the tool that you choose from the toolbox.
The property bar with the Grabber tool selected from the toolbox.
A short tour of Corel Painter for users of Adobe Photoshop | 35
Page 42

Brush Selector bar
On the far left of the property bar is the Brush Selector bar, which lets you open the Brush library panel. The
Brush library panel contains the amazing brush categories and brush variants of Corel Painter, such as the
Real Watercolor Brushes category and its variants.
The Brush Selector bar (left) lets you choose a brush category and a brush variant (right).
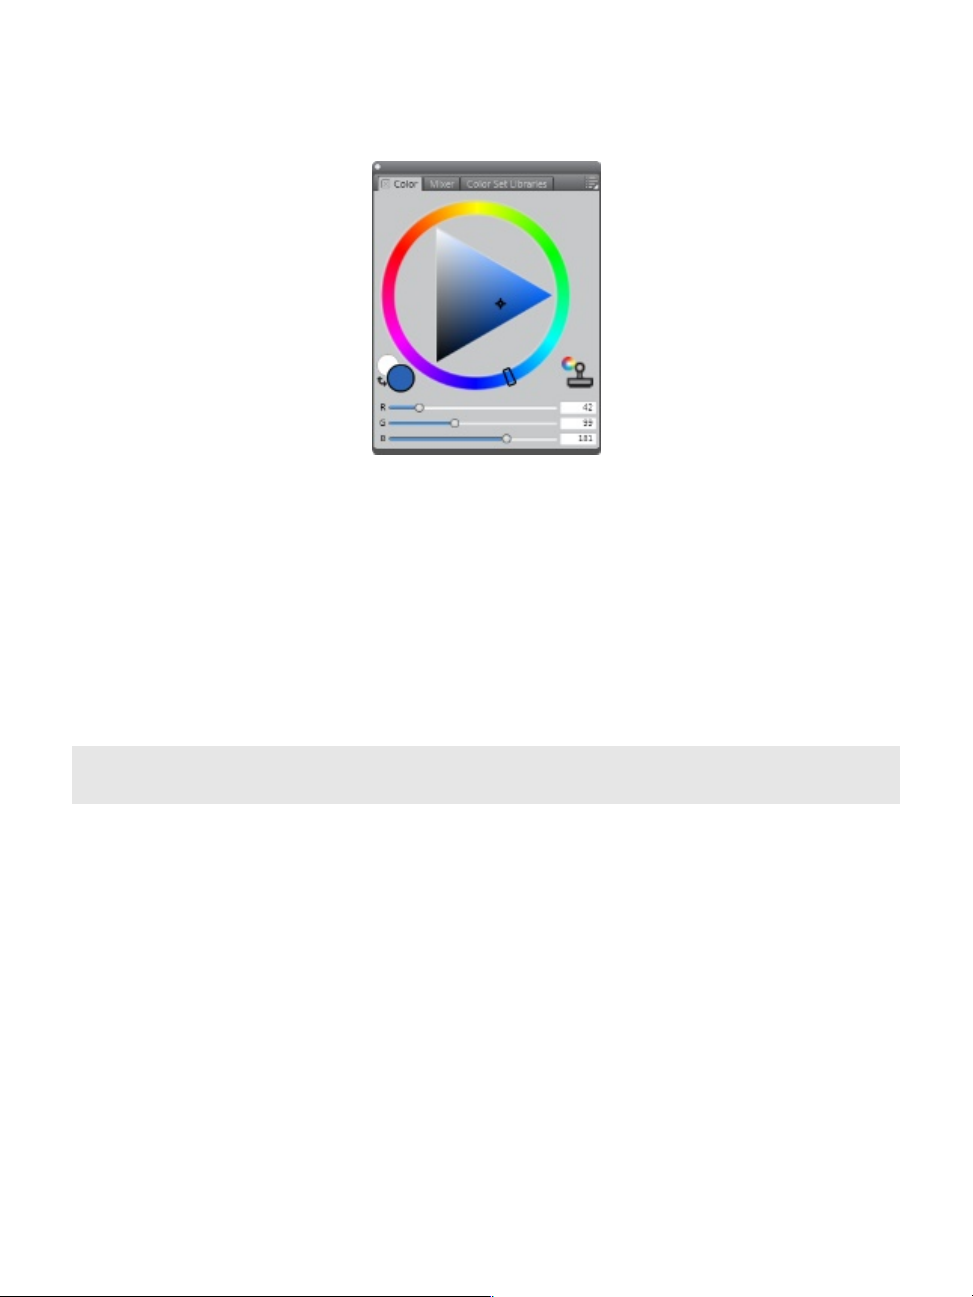
Color panel
On the upper right corner of your screen you’ll see the large, beautiful Color panel, which lets you choose
colors. You can choose colors by using the Hue Ring and the Saturation/Value Triangle. However, if you
prefer to mix color by using numbers, you can adjust the three sliders that are located under the Hue Ring.
By clicking the panel options button on the right side of the Color panel, you can set the sliders to display
either Red, Green, and Blue, or Hue, Saturation, and Value.
Also located on the Color panel is the Clone Color button, a useful control that lets you paint with color
from a source image. On the left of the Color panel are the Main Color swatch or Additional Color
swatch . The color swatches in Corel Painter operate differently than the Foreground and Background
Color squares in Photoshop. To change the color, you can double-click either the Main Color swatch or the
Additional Color swatch and then choose a new color on the Hue Ring. Or you can click in the Saturation/
Value Triangle to choose a new tint or shade. You can use the additional color to create gradients or to use
brushes that paint more than one color. Unlike the Background Color in Photoshop, the additional color
does not affect the canvas.
Before moving on with the tour, click the Main Color swatch to select it.
36 | Corel Painter 2015 Getting Started Guide
Page 43

Color panel
In Corel Painter, you can resize the Color panel by dragging the handle in the lower-right corner of the
panel to resize it. Resizing the Color panel lets you select colors more accurately.
Textures
A basic paper texture is automatically loaded when you start Corel Painter. You can access additional rich
paper textures by clicking the Paper Selector from the toolbox, or from the Paper Libraries panel (Window
menu Paper Panels Paper Libraries).
Layers and mask channels
In Corel Painter, you can open Photoshop files that contain pixel-based layers and layer masks. You can
access and edit the layers and layer masks by using the Layers panel, much like in Photoshop. The files you
open in Corel Painter have multiple channels intact.
A short tour of Corel Painter for users of Adobe Photoshop | 37
Page 44
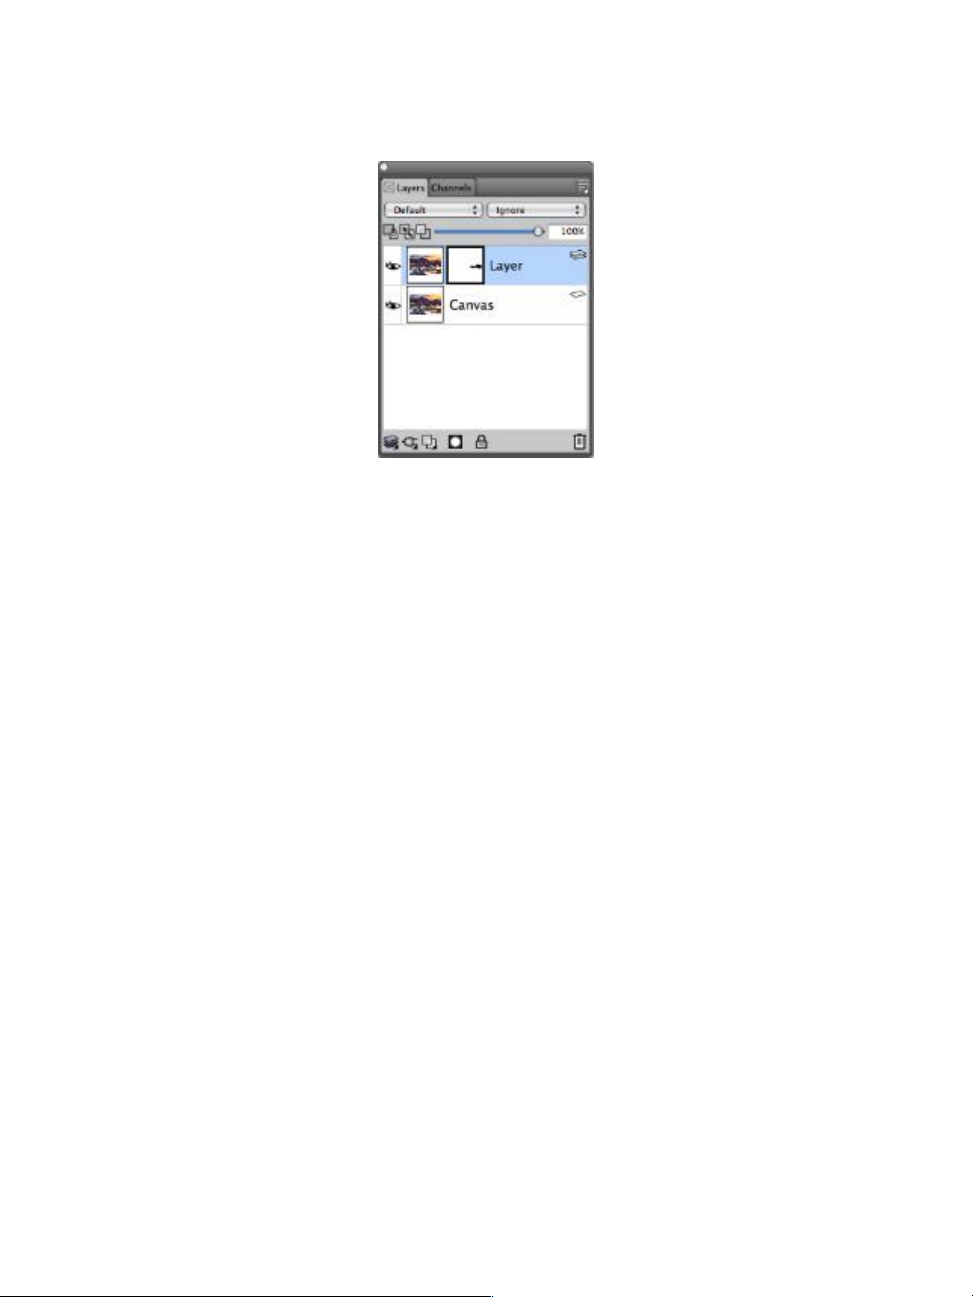
Layers panel
Photoshop Layer Styles
If you are using native Photoshop layer styles, such as the Drop Shadow layer style, make sure that you
preserve the original Photoshop file in your archive before you convert the layer style information. That is,
save the file with the live layer styles in the Photoshop (PSD) file format, and then save a new copy of this
file. In the new file, convert the layer style information into pixel-based layers before importing the file into
Corel Painter.
To convert a layer that has a Drop Shadow layer style, select the layer, and then choose Layers Layers
Style Create Layer. A word of caution: Some aspects of the effects cannot be reproduced with standard
layers.
File formats
Corel Painter gives you the flexibility of opening Photoshop (PSD) files that are saved in RGB, CMYK, and
grayscale modes while preserving pixel-based layers and mask channels (also referred to as alpha channels).
You can also open TIFF files in Corel Painter, but only one mask channel is preserved. Layered TIFF (TIF) files
that you create in Photoshop are flattened when you open them in Corel Painter. When you work exclusively
with RIFF (RIF), which is the native file format for Corel Painter, you retain Corel Painter specific elements
when saving files. For instance, special paint media layers, such as Watercolor layers, require the RIFF format
to retain the live “wet” capabilities. However, if you open a Photoshop file in Corel Painter but plan on
reopening the file in Photoshop, you should continue to save the file to the Photoshop format.
Now roll up your sleeves, grab your stylus, and continue to explore Corel Painter.
About the author
An award-winning artist and author, Cher Threinen-Pendarvis is a pioneer in digital art. She has been
widely recognized for her mastery of Corel Painter, Adobe Photoshop, and the Wacom pressure-sensitive
38 | Corel Painter 2015 Getting Started Guide
Page 45

tablet and has used these electronic tools since they were first released. Her artwork has been exhibited
worldwide, her articles and art have been published in many books and periodicals, and she is a member of
the San Diego Museum of Art Artist Guild. She has taught Corel Painter and Adobe Photoshop workshops
around the world and is the principal of the consulting firm Cher Threinen Design. Cher is the author
of The Photoshop and Painter Artist Tablet Book, Creative Techniques in Digital Painting, Beyond Digital
Photography, and all nine editions of The Painter Wow! book. Visit Cher's web site at: www.pendarvis-
studios.com.
A short tour of Corel Painter for users of Adobe Photoshop | 39
Page 46

40 | Corel Painter 2015 Getting Started Guide
Page 47

Creating, navigating, and manipulating documents
The Corel Painter application provides a digital workspace in which you can create new images, or alter
existing images, by using the Natural-Media tools and effects. Your working image, known as a document,
is displayed in a document window. This document window includes navigation and productivity features
to help you work efficiently.
As you create an image, you can save your document in various file formats, such as RIFF (the native Corel
Painter format), JPEG, TIFF, and PSD (Adobe Photoshop). Corel Painter also lets you open or import images
saved in many other file formats.
This section contains the following topics:
• “Creating documents” (page 41)
• “Understanding resolution” (page 43)
• “Opening files” (page 44)
• “Navigating images and viewing image information” (page 45)
• “Resizing images and the canvas” (page 46)
• “Support for tablets and other devices” (page 49)
• “Multi-touch support” (page 49)
Creating documents
To start an image from a blank canvas, you must create a new document. This allows you to specify the
canvas settings, such as width, height, and resolution. You can also specify the canvas color and texture.
Creating, navigating, and manipulating documents | 41
Page 48
The size of the canvas determines the size of the image when it is printed. To quickly get started, you can
choose from a list of preset canvas settings.
You can resize the canvas (left) to prepare an image for printing (right).
Canvas size and resolution
When setting the canvas size and resolution, you can choose options that correspond to the image’s
destination, however, you may want to choose a larger image size to preserve more image details. For
example, you can set the resolution of a new image at 300 pixels-per-inch (ppi), the width to 16 inches, and
the height to 20 inches. This large size makes it easier to maintain image quality when you need to produce
a smaller version of the image. For more information, see “Understanding resolution” on page 43 and
“Resizing images and the canvas” on page 46.
Pixels-per-inch (ppi) is equivalent to dots per inch (dpi).
To create a new document
1
Choose File New.
2 Type a filename in the Image Name text box.
3 From the Canvas Preset list box, choose a preset to automatically determine the size, resolution, color
of the canvas, and the paper texture.
You can also
Change the unit of measurement for the document Choose a unit of measurement from the list box
42 | Corel Painter 2015 Getting Started Guide
located to the right of the Width and Height
boxes.
Page 49

You can also
Change the document size Type values in the Width and Height boxes.
Change the number of pixels-per-inch (ppi) or
pixels per centimeter that make up an image
Change the resolution type Choose a resolution type from the list box located
Change the color of the canvas Click the Color chip, and choose a paper color
Change the texture of the canvas Click the Paper chip, and choose a paper texture
In the New Image dialog box, setting the document’s pixels-per-inch is equivalent to setting its
dots per inch (dpi). For more information, see “Understanding resolution” on page 43.
Type a value in the Resolution box.
to the right of the Resolution box.
from the Color dialog box.
from the Paper Textures panel.
Understanding resolution
When you work with images in a digital workspace, it is helpful to understand the concept and applications
of resolution. Resolution refers to how Corel Painter measures, displays, saves, and prints images —
whether as small squares of color called “pixels” or as mathematical objects called “vectors.”
A document’s resolution affects both its appearance on your computer screen and its print quality. You can
specify a document’s resolution when you create a new document, save, or export a file.
Resolution and screen appearance
Most monitors have a resolution of 72 pixels-per-inch (ppi). The Corel Painter display default is 72 ppi,
which means that each pixel in the Corel Painter image occupies one pixel on your monitor. The display
resolution does not affect the document’s actual number of pixels-per-inch — it affects only how the image
is displayed on the monitor.
For example, a 300-ppi image is displayed on-screen at approximately four times its actual size. Because
each pixel in the Corel Painter image occupies one pixel on your monitor, and the monitor’s pixels are
approximately four times the size of the image’s pixels (72 ppi versus 330 ppi), the image must appear four
Creating, navigating, and manipulating documents | 43
Page 50

times larger on-screen in order to display all of the pixels. In other words, your 300-ppi document will be
printed at approximately one-quarter of its on-screen size. To view the image at its actual size, you can set
the zoom level to 25%.
If you set the dimensions in pixels and then change the number of pixels-per-inch (resolution), this change
will affect the size of the printed image. If you set your document size in inches, centimeters, points, or
picas and then change the resolution, the dimensions of the printed image will not be affected.
Pixels-per-inch (ppi) is equivalent to dots per inch (dpi).
Resolution and print quality
The resolution of output devices (printers) is measured in dots per inch, and in the case of halftones, lines
per inch (lpi). Output device resolutions vary, depending on the type of press and paper used. In general,
a photograph is output at a crisp 150 lpi if printed on glossy magazine stock, and at 85lpi if printed on
newspaper stock.
If you are using a personal laser or inkjet printer, set your document size in inches, centimeters, points,
or picas at the dots-per-inch setting specific to your printer. Most printers produce excellent output from
images set at 300 ppi. Increasing the file’s pixels-per-inch setting does not necessarily improve the output
and may create a large, unwieldy file.
If you are using a commercial printer or a more sophisticated output device, the dimensions of the image
should always be set to the actual size that you want the image to appear in the printed piece. A good
rule of thumb is to set the number of pixels-per-inch to twice the desired lines per inch. So, at 150lpi, the
setting should be twice that, or 300 ppi; at 85lpi, the setting should be 170 ppi. If you have questions
about the resolution of specific output devices, it’s a good idea to check with the print service provider.
Opening files
You can open files that were created in Corel Painter or in other applications. For example, you can open a
file from another graphics application and use Corel Painter to add brushstrokes, tints, or paper textures.
•
To open a document
1
Choose File Open.
Corel Painter displays the folder of the last file you opened.
2 In the Open dialog box, locate the file that you want to open.
44 | Corel Painter 2015 Getting Started Guide
Page 51

For each image, Corel Painter lists the dimensions (in pixels), file size, and file format. Files saved in Corel
Painter include thumbnails for browsing.
3 Click Open.
To browse for a document (Mac OS)
1
Choose File Open.
2 Click Browse.
The Browse dialog box shows thumbnails for all the RIFF files in a folder.
3 Double-click the filename, or select a file, and click Open.
Navigating images and viewing image information
You can use the Navigator panel to better orient yourself in the document window. For example, when
you’re working at a high zoom level or with a large image, you can use the Navigator panel’s small canvas
preview to display the entire image without having to zoom out. You can also move to a different image
area without adjusting the zoom level. In addition, you can highlight which area is currently displayed in
the document window.
The Navigator’s canvas preview allows you to view
the entire image even when you’re zoomed in.
Creating, navigating, and manipulating documents | 45
Page 52

The Navigator also lets you view the X and Y coordinates and cursor position to help you navigate the
image. In addition, you can view document information, such as width and height; and unit information,
such as pixels, inches, and resolution.
To display the Navigator panel
1
Choose Window Navigator.
2 Perform a task from the following table.
To Do the following
Move to a different area of the image without
adjusting the zoom level
Zoom to a specific magnification level in the
document window
In the Navigator panel, click a different area of the
canvas preview.
Open the Zoom Canvas list box, and adjust the
zoom level slider.
Rotate the image in the document window Open the Rotate Canvas list box, and adjust the
rotation slider.
From the Navigator panel, you can also enable various tools by clicking the Open Navigator
Settings button , and choosing an option. The available tools include the drawing modes,
Impasto, tracing paper, grids, and color management.
Resizing images and the canvas
You can change the physical dimensions of an image by resizing the canvas and the image together, or
by resizing the canvas area only. It is important to understand the distinction between the two resizing
techniques.
When you resize the canvas and image together, the image dimensions and resolution change, but the
image appearance doesn’t change. For example, if you resize a 300 ppi image to 150 ppi, the image size is
smaller, but it looks the same.
46 | Corel Painter 2015 Getting Started Guide
Page 53

The image was resized by modifying the resolution.
Alternatively, when you resize only the canvas area, both the image dimensions and appearance change. For
example, if you increase the size of the canvas, a border appears around the image. If you decrease the size
of the canvas, the edge of the canvas is trimmed. In addition, the image resolution is affected.
Creating, navigating, and manipulating documents | 47
Page 54
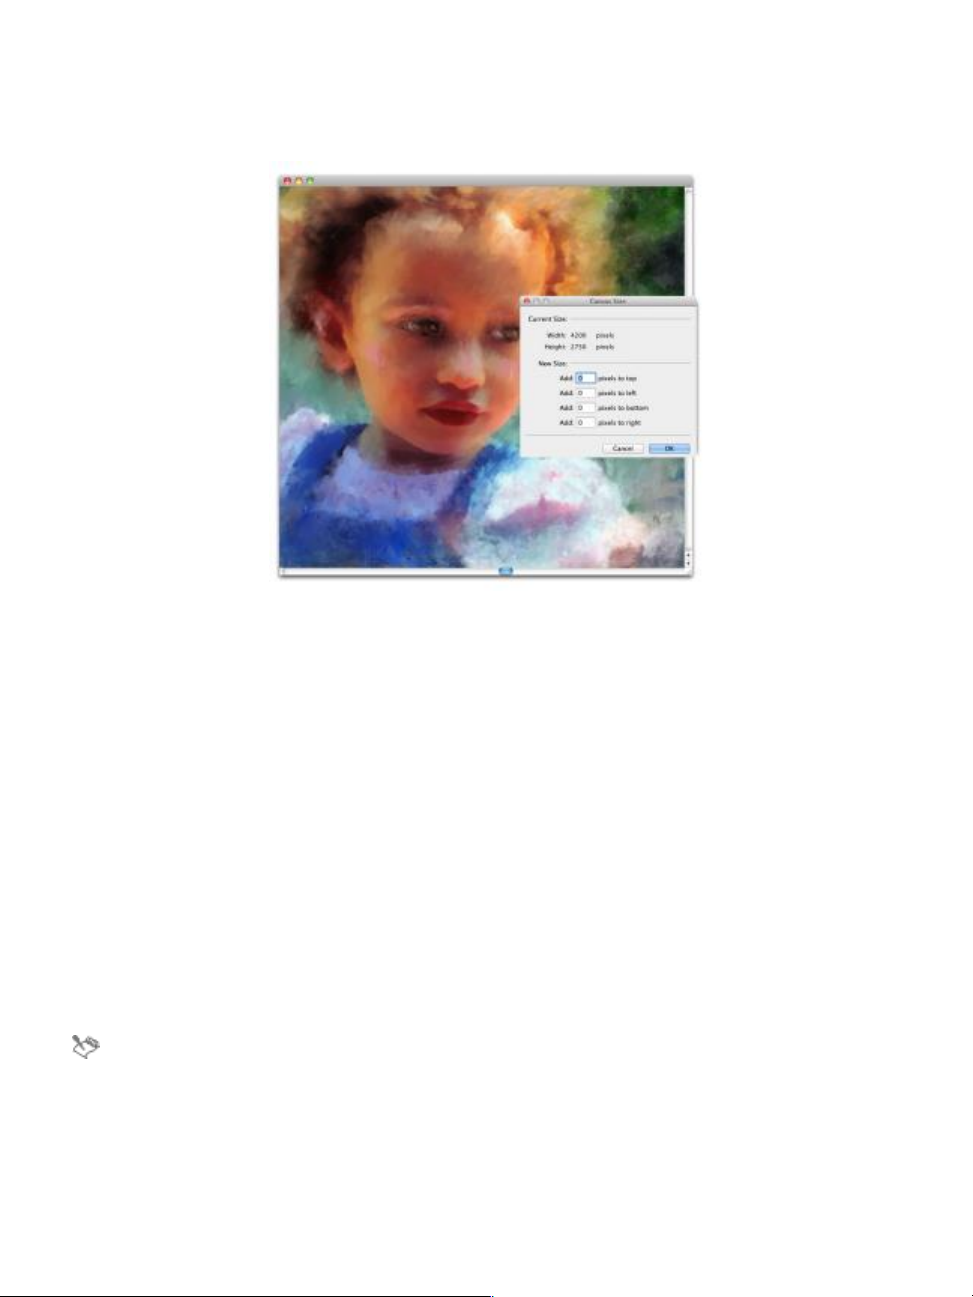
The canvas area is resized in order to apply an empty border around the edge of an image.
It is also important to note that the size of the onscreen image is affected by the pixel height and width of
the image, the zoom level, and the monitor settings. As a result, an image may be displayed as a different
size onscreen than when it is printed. For more information, see “Understanding resolution” on page 43
and “Creating documents” on page 41.
To resize the canvas and image content together
1
Choose Canvas Resize.
To keep the file size of the image in megabytes (MB) the same, enable the Constrain File Size check
box.
2 In the New Size area, type values in the Width and Height boxes.
If you enable the Constrain File Size check box, you need to type a value only in one of the boxes; the
other values are adjusted automatically.
If you choose pixels or percent as the unit and enter a value, the Constrain File Size check box is
automatically disabled.
Increasing the image dimensions significantly may cause the image to appear stretched and
pixelated.
48 | Corel Painter 2015 Getting Started Guide
Page 55

To resize the canvas area
1
Choose Canvas Canvas Size.
2 In the Canvas Size dialog box, specify the number of pixels you want to add to any side of the canvas.
To reduce, or trim, the canvas size, specify negative values.
Saving files
You can save a file in its current format or in a different format.
To save a file in its current format
•
Choose File Save.
Support for tablets and other devices
Corel Painter supports Wacom-compatible tablets and devices as well as devices that support the Real-Time
Stylus (RTS) feature of the Windows operating system. Both groups have multi-touch capabilities.
Wacom-compatible devices are supported on both Mac OS and Windows. RTS-compatible devices include
tablet PCs and graphics tablets and are supported only on Windows.
By default, Corel Painter uses tablet options that are suitable for Wacom-compatible devices. To take full
advantage of your RTS-compatible graphics tablet or other device with Corel Painter, you must configure
it first. Otherwise, you cannot use stylus information such as pressure and tilt to adjust and control
brushstrokes.
To configure your RTS-compatible device (Windows)
1
Choose Edit Preferences Tablet.
2 In the Tablet Options area, enable the RTS-compatible devices (Real-Time Stylus) option .
3 Restart Corel Painter.
Multi-touch support
Corel Painter supports two ways of working with gestures: with multi-touch mode enabled (default) or
disabled. In addition, two multi-touch options are available: Corel Painter multi-touch and Windows
multi-touch.
Creating, navigating, and manipulating documents | 49
Page 56

Corel Painter multi-touch
This option, available both on Mac OS and Windows, provides enhanced support for Wacom Intuos 5
tablets and other Wacom-compatible devices.
Windows multi-touch
With this option, your gestures on the tablet or device behave the same way in Corel Painter as in other
applications. However, you cannot use the advanced features of your Wacom-compatible device.
Multi-touch disabled
When the multi-touch mode is disabled, you cannot simultaneously pan, rotate, and zoom the canvas.
Disabling multi-touch is useful if you find that the canvas moves unexpectedly or that brushstrokes do not
apply paint as expected.
To enable or disable multi-touch support (Mac OS)
1
Choose Corel Painter 2015 Preferences Tablet.
2 Enable or disable the Corel Painter Multi-touch option.
To enable or disable multi-touch support (Windows)
1
Choose Edit Preferences Tablet.
2 In the Multi-touch options area, enable or disable the Enable multi-touch check box.
If multi-touch support is enabled, choose one of the following options:
• Corel Painter Multi-touch
• Windows Multi-touch
50 | Corel Painter 2015 Getting Started Guide
Page 57

Painting
The Corel Painter application lets you draw and paint as you might with real artists’ tools and media. In
your studio, you use brushes, pens, pencils, chalk, airbrushes, and palette knives to make marks on a canvas
or piece of paper. With Corel Painter, an infinite variety of marks are possible.
This section contains the following topics:
• “Choosing a painting workflow” (page 51)
• “Brush tracking and calibration” (page 54)
• “Exploring painting media” (page 58)
• “Working with the canvas and layers” (page 59)
• “Displaying reference images” (page 59)
• “Clearing the canvas” (page 61)
• “Applying freehand and straight brushstrokes” (page 61)
Choosing a painting workflow
Corel Painter includes a wide array of tools and features that allow you to create original artwork. The
purpose of this topic is to introduce you to the two most-common Corel Painter workflows and refer you to
Help topics that provide more information about each of these workflows.
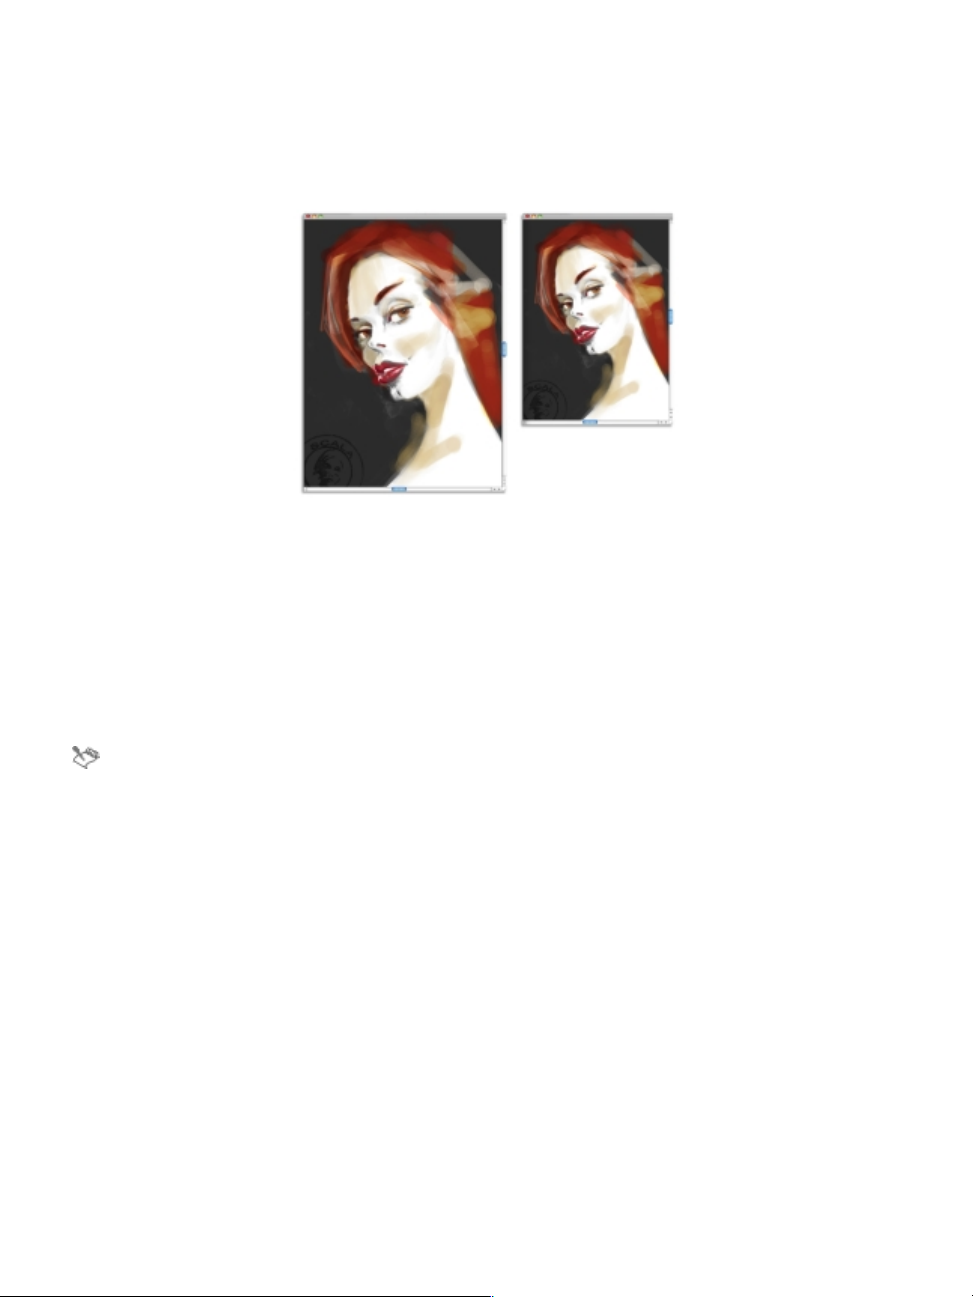
Workflow 1: Start with a photo
Using Corel Painter’s powerful cloning tools, you can quickly transform a digital photo into a painting.
Painting | 51
Page 58

The photo (left) was cloned (right) to begin the painting process.
Workflow step Help topic
1. Open a photo for painting ““Opening files” on page 39” on page 44
2. Prepare a photo for cloning “Using Quick Clone” in the Help
3. Paint the clone “Painting in the clone” in the Help
4. Save the photo painting ““Saving files” on page 43” on page 49
Workflow 2: Start with a sketch
In Corel Painter, you can quickly create a sketch of a photo so you can use it as a guide for applying color.
To maintain the integrity of the sketch, you should apply color to layers, and not directly to the sketch. In
addition, depending on the desired effect, using layers gives you the option of incorporating the sketch
markings in the final image. If you don’t want the sketch to be visible in the final image, you can delete the
sketch by clearing the canvas. When you’re done, you can drop the layers to the canvas.
52 | Corel Painter 2015 Getting Started Guide
Page 59

The photo (left) was transformed into a sketch (right) to begin the painting process.
Workflow Help topic
1. Choose a photo ““Opening files” on page 39” on page 44
2. Convert a photo into a sketch “Applying a Sketch Effect” in the Help
3. Create a layer “Creating and deleting layers” in the Help
4. Apply a brushstroke to the layer “Painting on layers” in the Help
5. Clear the canvas “Clearing the canvas” in the Help
6. Drop layers to the canvas “Dropping layers with the canvas” in the Help
Workflow 3: Start with a blank canvas
You can also start a project from scratch by choosing a paper texture and a brush, and applying color to the
canvas.
Painting | 53
Page 60
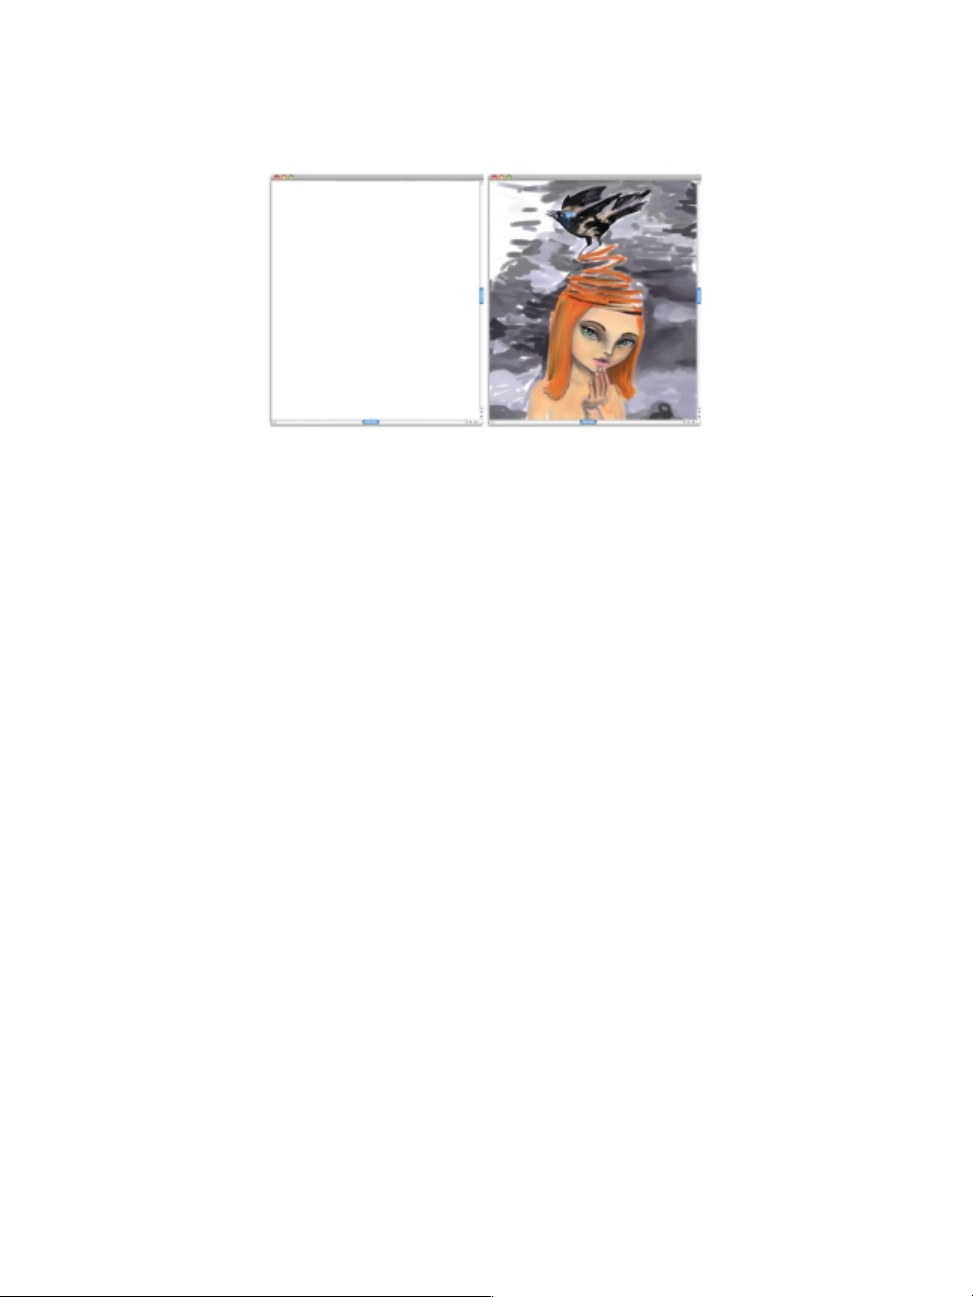
You can start with a blank canvas (left) and use your
imagination, and the Corel Painter tools, to create a work of art.
Workflow Help topic
1. Choose a paper texture “Applying paper texture” in the Help
2. Choose a brush “Selecting, managing, and creating brushes” on
page 77
3. Choose a color “Choosing colors from the Color panel” in the Help
4. Apply a brushstroke to the canvas “Applying freehand and straight brushstrokes” on
page 61
Brush tracking and calibration
When you draw with traditional media, the amount of pressure that you use with a tool determines the
density and width of your strokes. Using a pressure-sensitive stylus with Corel Painter gives you the same
kind of control. Because each artist uses a different strength or pressure level in a stroke, you can adjust
Corel Painter to match your stroke strength for all brushes by using the Brush Tracking preferences, or for a
specific brush, by using the Brush Calibration controls.
Brush Tracking for all brush variants
Brush Tracking is particularly useful for artists with a light touch. If a light stroke leaves no color on the
canvas, you can use Brush Tracking to increase sensitivity for all brushes. Corel Painter saves Brush Tracking
54 | Corel Painter 2015 Getting Started Guide
Page 61

between sessions, so whatever tracking sensitivity you set will be the default the next time you open the
application.
Abrupt changes in the width or density of your strokes shows that you need to adjust your Brush Tracking
preferences.
Top: A brushstroke with abrupt changes in width. Bottom:
A similar brushstroke with adjusted brush tracking.
The most common way of adjusting brush tracking is to apply a typical brushstroke, such as a wavy stroke,
to the scratch pad. Corel Painter then uses your stroke to calculate the appropriate pressure and velocity
settings for all brush variants. However, you can also specify pressure and velocity values.
Use the scratch pad in the Brush Tracking dialog box to customize
how Corel Painter responds to your stroke pressure and speed.
In addition, Corel Painter includes the following brush tracking presets that you can choose from: Default ,
Legacy, and Linear.
Painting | 55
Page 62

By default, brush tracking settings apply to all brush variants, but you can also limit them to only the
current brush variant.
Brush Calibration for individual brush variants
The Brush Calibration controls are very useful for adjusting individual brush variants. You can modify the
pressure of your stroke on the scratch pad to achieve different results. For example, you could use a light
touch when sketching with a pencil brush variant, but set more pressure when using an oil paint brush
variant. Corel Painter saves Brush Calibration control settings with the brush variant, so whatever sensitivity
you set will be the default the next time you choose the brush variant. If you set Brush Calibration for a
specific brush in addition to general Brush Tracking preferences, the Brush Calibration settings override
the Brush Tracking preferences.
Manually adjusting pressure and velocity
When you use the scratch pad to set brush tracking and calibration, Corel Painter calculates the pressure
and velocity settings for you. However, you can manually adjust these settings. For example, you can adjust
the stroke pressure to achieve a full pressure range with a softer or harder touch by using the Scale and
Power sliders for pressure. You can also adjust the stroke velocity to achieve a full velocity range with a
slower or faster stroke by using the Scale and Power sliders for velocity.
To ensure that a brush control is using the pressure or velocity settings, you need to set the brush control
Expression setting to Pressure or Velocity.
To set brush tracking
1 Do one of the following:
•
(Mac OS) Choose Corel Painter 2015 menu Preferences Brush Tracking.
•
(Windows) Choose Edit Preferences Brush Tracking.
2 Drag in the scratch pad by using a “normal” stroke.
Use the pressure and speed you prefer when drawing or painting. This allows the Brush Tracker to
calculate the appropriate speed and pressure settings for the brush.
If you are using a Wacom-compatible tablet, you can also apply brushstrokes in the document to
preview the results and make adjustments as needed.
To adjust the settings manually, perform a task from the following table:
To Do the following
Achieve a full pressure range with a softer or
harder touch
56 | Corel Painter 2015 Getting Started Guide
In the Pressure area, move the Scale and Power
sliders.
Page 63

To Do the following
Achieve a full velocity range with a slower or faster
motion
In the Velocity area, move the Scale and Power
sliders.
Limit brush tracking to the current brush variant Enable the Apply to current brush variant check
box.
To choose a brush tracking preset
1 Do one of the following:
•
(Mac OS) Choose Corel Painter 2015 Preferences Brush Tracking.
•
(Windows) Choose Edit Preferences Brush Tracking.
2 Choose one of the following presets from the Preset list box:
• Default — suitable for most artists. The preset also provides a good starting point for brush tracking
adjustments.
• Legacy — default brush tracking in Corel Painter X3 and earlier versions
• Linear — pressure changes impact the brushstroke in a linear fashion. Each small variation in pen
pressure changes the brushstroke.
You can also
Save brush tracking settings as a custom preset Adjust any settings you want in the Brush Tracking
dialog box. Click the Add button . In the Add
Preset dialog box, type a name in the Preset Name
text box.
Delete a custom brush tracking preset Choose the preset from the Preset list box, and
click the Deletebutton .
To set brush calibration
1
In the toolbox, click the Brush tool .
2 Click the Brush Selector on the Brush Selector bar.
3 In the Brush library panel, click a brush category, and click a brush variant.
Painting | 57
Page 64

4
Choose Window Brush Control Panels Brush Calibration.
5 Enable the Enable Brush Calibration check box.
6
Click the Set brush calibration settings button .
7 Drag in the scratch pad by using a “normal” stroke.
Use the pressure and speed you prefer when drawing or painting. This allows the Brush Tracker to
calculate the appropriate speed and pressure settings for the brush.
To adjust the settings manually, perform a task from the following table:
To Do the following
Achieve a full pressure range with a softer or
harder touch
Achieve a full velocity range with a slower or faster
motion
Adjust the PressureScale and Pressure Power
sliders.
Adjust the Velocity Scale and Velocity Power
sliders.
Exploring painting media
Corel Painter lets you apply a wide variety of media to the canvas. For example, you can use a brush to
apply colors directly from a color panel or apply a color that you mixed on the Mixer Pad. You can also paint
by using a gradient, pattern, or clone.
The following table lists the media that you can apply to the canvas or layer and references to the related
topic in the Help.
Media For information
Color “Choosing colors from the Color panel” in the Help
Mixer pad “Exploring the Mixer panel and mixing colors” in
the Help
Two-color “Creating two-color brushstrokes” in the Help
Gradients “Applying gradients” in the Help
58 | Corel Painter 2015 Getting Started Guide
Page 65

Media For information
Patterns “Painting with patterns” in the Help
Cloners “Painting in the clone” in the Help
Working with the canvas and layers
In Corel Painter, you have the option of painting directly on the canvas by applying brushstrokes or by
creating a layer and applying brushstrokes on it. Working with layers allows you to protect the canvas from
any unwanted changes. When you select a layer in the Layers panel, that layer becomes the target for your
brushstrokes.
The result of any brushstroke you make depends on the following:
• The brush category (or drawing tool) you choose
• The brush variant you select within the brush category
• The brush controls you set, such as brush size, opacity, and the amount of color penetrating paper
texture
• The paper texture
• The color, gradient, or pattern you use as media
• The brush method
If you are using a Watercolor brush, you can paint only on a Watercolor layer. If you are using a Liquid Ink
brush, you can paint only on a Liquid Ink layer.
If you try to paint on a shape, dynamic layer, or reference layer, you must commit it to a standard layer so
that your brushstrokes are accepted.
You can also select a channel or a layer mask as the target for your brushstrokes.
When you have an active selection, painting is confined to the selection by default.
When you use complex brush variants, you see a dotted line on the canvas before the mark appears. For
example, the Gloopy variant of the Impasto brush is complex, and it delays the appearance of the stroke
onscreen. When you experience a delay, you can continue applying strokes, without losing any stroke data,
while waiting for the stroke to appear on the screen.
Displaying reference images
In Corel Painter, you can open an inspirational photo or image that you want to reference in a painting by
using the Reference Image panel.
Painting | 59
Page 66
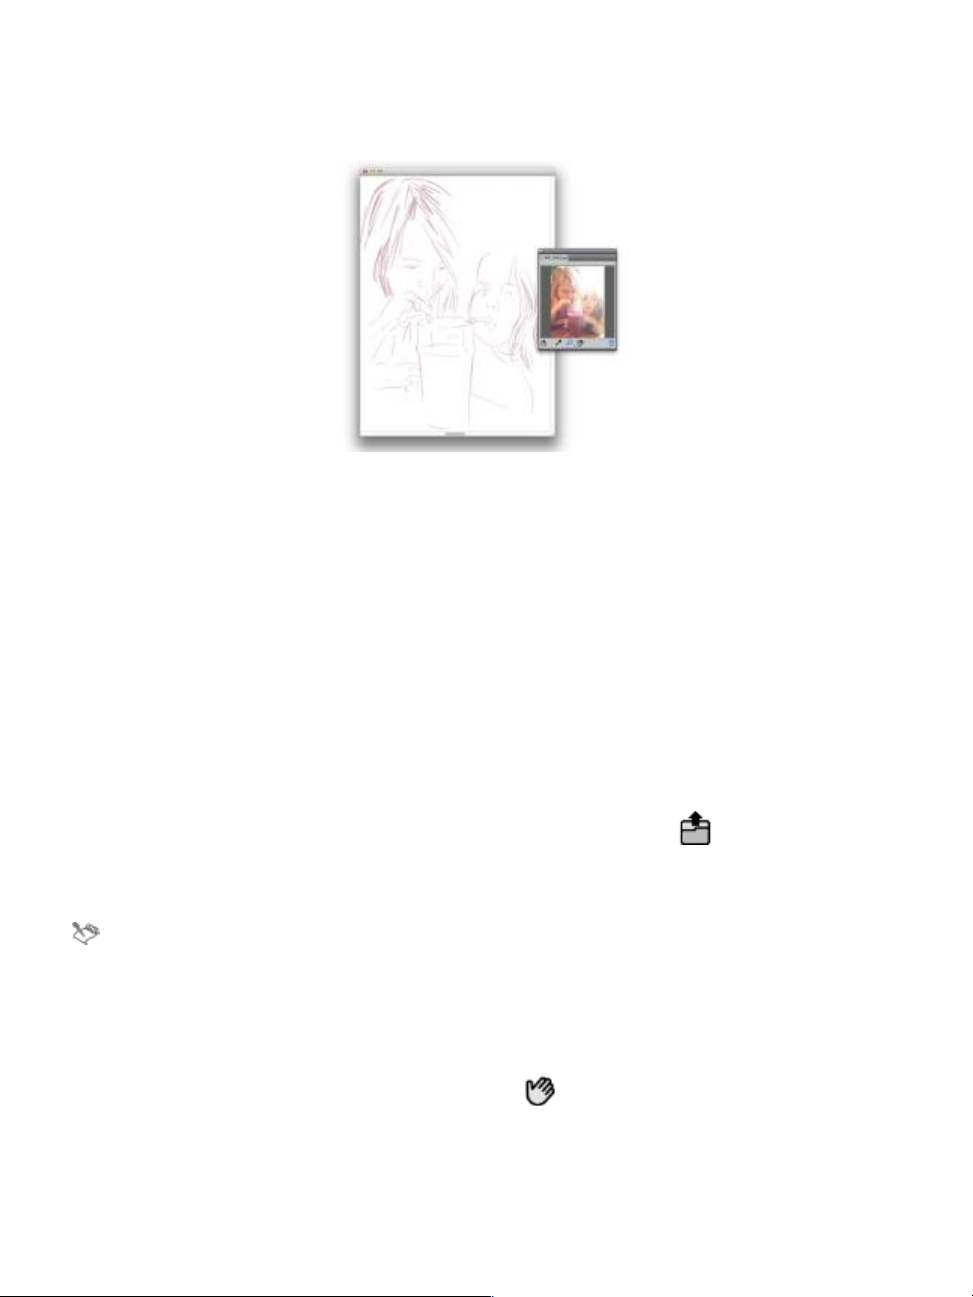
An example of displaying an image in the Reference
Image panel and using it as an inspiration for a painting
You can reposition or magnify the reference image while maintaining focus on your painting. In addition,
you can sample a color directly from the reference image and apply it to your painting. If you plan on using
reference images strictly for color sampling, you may prefer opening images directly in the Mixer panel
instead. This technique allows you to sample and mix the image colors. For more information, see “Opening
images in the Mixer panel” on page 73.
We recommend using reference images that are a maximum of 1600 X 1600 pixels. You can open reference
images that are saved as the following file formats: JPG, PNG, RIFF, and PSD.
To display a reference image
1
Choose Window Reference Image.
2
In the Reference Image panel, click the Open a Reference Image button .
3 In the Open Reference Image dialog box, locate the file that you want to open.
4 Click Open.
When you open RIFF, TIFF, and PSD files that contains layers in the Reference Image panel, all
layers are flattened.
To move a reference image
1
In the Reference Image panel, click the Grabber tool .
2 Drag the image to a new position in the Reference Image window.
60 | Corel Painter 2015 Getting Started Guide
Page 67

To zoom in and out of a reference image
1
In the Reference Image panel, click the Magnifier tool .
2 Do one of the following:
• To zoom in, click in the Reference Image window.
• To zoom out, hold down Command (Mac) or Ctrl (Windows), and click in the Reference Image
window.
To sample a color in a reference image
1
In the Reference Image panel, click the Dropper tool .
2 Move the cursor to the color that you want to sample, and click it.
The color swatch is updated to display the color you’ve selected.
Clearing the canvas
You can erase the canvas by clearing its contents. Clearing the canvas does not delete the canvas, it only
removes its content. In Corel Painter, you cannot delete the canvas.
To clear the canvas
1
Choose Window Layers.
2 In the Layers panel, click the Canvas to select it.
3
Choose Select All.
4
Choose Edit Clear.
Applying freehand and straight brushstrokes
You can draw unconstrained lines by using the freehand drawing style, or you can draw straight lines.
When you draw a freehand stroke, you can drag with any motion or in any direction. The stroke follows
your path.
Painting | 61
Page 68

Dragging to create freehand strokes.
When you draw a straight line stroke, Corel Painter connects points with a straight line.
To create a straight line stroke, you click to add the
first point and then click or drag to create the stroke.
To draw freehand lines
1
On the Brush property bar, click the Freehand Strokes button .
2 Drag on the canvas.
You can use shortcut keys to toggle between the freehand and straight line drawing styles. Press B
to choose the freehand style, or V to choose the straight-line style.
To draw straight lines
1
On the Brush property bar, click the Straight line strokes button .
2 Click a point on the canvas where you want to start your line.
3 Do one of the following:
• Click the point where you want to end the line.
• Drag to place the end point exactly where you want it.
Corel Painter connects the first and second points with a straight line.
4 To continue drawing from the second point, click or drag to create additional points on the canvas.
Corel Painter connects each point with a straight line.
5 To end a line, do one of the following:
62 | Corel Painter 2015 Getting Started Guide
Page 69

• Press Return (Mac OS) or Enter (Windows) to close the polygon. The final point is connected to the
origin with a straight line.
•
Click the Freehand Strokes button to return to the freehand drawing style without closing the
polygon.
6 Press V to end the current polygon without closing it, so that you can begin a new one.
7 Drag on the canvas.
You can also paint in a straight line by holding down Shift as you drag on the canvas.
Painting | 63
Page 70

64 | Corel Painter 2015 Getting Started Guide
Page 71

Color
Corel Painter offers many ways to select color and apply it to your image. For example, you can change the
paper color, choose colors for your brushstrokes, or apply a color fill to an entire image or selection.
This section contains the following topics:
• “Choosing colors from the Color panel” (page 65)
• “Using the temporal colors palette” (page 68)
• “Exploring the Mixer panel and mixing controls” (page 69)
• “Mixing, sampling, and applying colors from the Mixer pad” (page 71)
• “Opening images in the Mixer panel” (page 73)
• “Working with color sets” (page 74)
Choosing colors from the Color panel
You can use the Color panel to select a color and view information about the selected color.
Color | 65
Page 72

Color panel
In the Color panel, you can choose a color from the Hue Ring and adjust the color from the Saturation/
Value Triangle. The following information can help you adjust colors by using the Saturation/Value Triangle.
• Color values span the Saturation/Value Triangle from top to bottom. The top of the triangle represents
the highest value (white), and the bottom of the triangle represents the lowest value (black).
• Saturation levels increase from left to right. Dragging to the right, or clicking on the right, produces
purer colors within the predominant hue. Dragging to the left, or clicking on the left, reduces the color
saturation and produces “muddier” or grayer colors.
You can also enable the Clone Color option from the Color panel.
The Main and Additional Color swatches display in the Color panel, temporal color panel, and the toolbox.
They include two overlapping swatches: the front swatch displays the selected Main Color and the back
swatch displays the selected Additional Color.
The Additional Color is used when applying more than one color, as in two-color brushstrokes, two-point
gradients, and Image Hose effects. It is not what other graphics applications refer to as the “background
color.” In Corel Painter, the background color is the paper color.
The Main Color and Additional Color overlapping swatches.
To display the Color panel
•
Choose Window Color Panels Color.
66 | Corel Painter 2015 Getting Started Guide
Page 73

To choose a hue and color from the Color panel
1
Choose Window Color Panels Color.
2 Drag the handle on the Hue Ring to select the predominant hue.
The Saturation/Value Triangle displays all available colors within that selected hue.
3 Select a color on the Saturation/Value Triangle by dragging the circle or by clicking the color you want.
Drag in the Hue Ring to select a hue. Drag in the
Saturation/Value Triangle to pick the saturation.
You can also select a hue by clicking anywhere on the Hue Ring (in the Standard Colors view) or
on the hue indicator (in the Small Colors view).
To choose the Main Color
1
Choose Window Color Panels Color.
2 Double-click the front swatch in the Color Selector.
3 Choose a color from the Color dialog box.
Click the front swatch to set the Main Color.
To choose the Additional Color
1 In the Color panel, double-click the back swatch.
2 Choose a color from the Color dialog box.
Color | 67
Page 74

Click the back swatch to set the Additional Color.
To work with the Main Color, click the front swatch to reselect it.
To swap the Main and Additional Colors
•
Click the Color Swap icon in the lower-left corner of the Color Selector.
You can also swap the Main Color with the Additional Color by pressing Shift + S or Shift + X.
Using the temporal colors palette
The temporal colors palette is a floating color palette that displays in the document window that allows you
to view and choose colors within the context of the image. The temporal colors palette, which is similar to
the Color panel, consists of two components that help you choose a color and its intensity: the Hue Ring
and the Saturation/Value Triangle.
Hue Ring
The Hue Ring lets you choose a color.
Saturation/Value Triangle
The Saturation/Value Triangle lets you choose the intensity of the color as well as, black, white, or shades of
gray.
Saturation levels can be set from left to right. Dragging or clicking to the right increases the saturation and
produces purer colors within the predominant hue. Dragging or clicking to the left reduces the level of color
saturation, producing “muddier” or grayer colors.
Values can be set from top to bottom. The top of the triangle is the highest value (white), and the bottom
is the lowest value (black).
The current color is displayed in a round swatch to the left of the Saturation/Value Triangle.
To display the temporal colors palette
• Press Command + Option + 1 (Mac OS) or Ctrl + Alt +1 (Windows).
68 | Corel Painter 2015 Getting Started Guide
Page 75
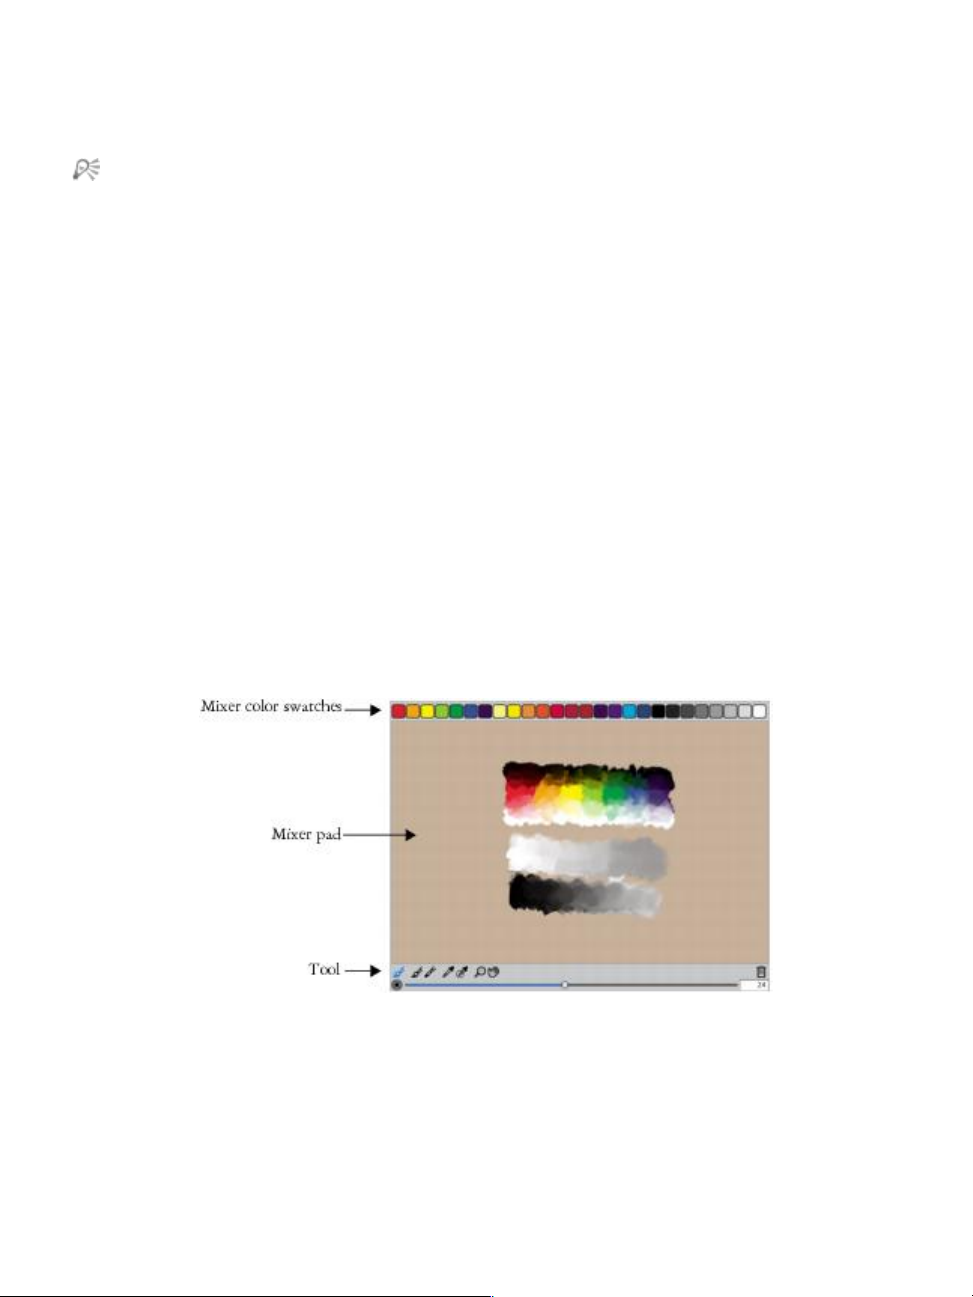
You can also customize the temporal color palette keyboard shortcut by choosing Corel Painter
2015 menu Preferences (Mac OS) or Edit Preferences (Windows), and choosing Customize
Keys. In the Customize Keys dialog box, choose Other from the Shortcuts list box, and click
Toggle Temporal Color Palette from the Application Commands list. You can then type a new
shortcut key in the Shortcut column and click OK.
If you are using a Wacom tablet, you can also assign a shortcut to the stylus button.
To choose a color on the temporal colors palette
1 In the Color panel, click a color on the Hue Ring.
2 Inside the Hue Ring, click the Saturation/Value Triangle to set the exact shade that you want.
The color is displayed as the current color.
Exploring the Mixer panel and mixing controls
The Mixer panel lets you mimic the experience of mixing colors on a traditional artist’s palette. In the Mixer
panel, you can access color swatches and various tools that let you mix colors. You can then apply two
or more colors to the Mixer pad, the mixing area at the center of the Mixer panel, and then blend them
together to create a new color.
You can save, load, and reset colors in the Mixer panel. In addition, you can save colors as Mixer swatches
and save colors to color sets.
Understanding the Mixer panel controls
The controls in the Mixer panel are used to apply, mix, sample, and clear color on the Mixer pad.
Color | 69
Page 76

Mixer panel tools
The following table describes all of the Mixer panel tools.
Mixer panel tool Description
Dirty Brush Mode tool Lets you apply colors that were mixed in the
Mixer panel to the canvas. The Dirty Brush Mode
tool is active by default and can be used with
brush variants that support mixing. For more
information, see “Mixing, sampling, and applying
colors from the Mixer pad” on page 71.
Apply Color tool Acts as a loaded paint source; applies color to the
Mixer pad. Color loaded on the Apply Color tool
blends with color already in the Mixer pad.
Mix Color tool Mixes colors already in the Mixer pad; does not
add new colors to the Mixer pad.
Sample Color tool Samples color in the Mixer pad for use on the
canvas. The sampled color becomes the Main
Color in the Color panel.
Sample Multiple Colors tool Samples multiple colors in the Mixer pad. The size
of the sample area is determined by the Change
Brush Size slider. You can use the sampled color
on the canvas.
Zoom tool Lets you zoom in and out of areas in the Mixer
pad.
70 | Corel Painter 2015 Getting Started Guide
Page 77
Mixer panel tool Description
Pan tool Lets you scroll through the Mixer pad.
Using the Clear and Reset Canvas button
The Clear and Reset Canvas button erases the contents of the Mixer pad and resets the zoom level to
100%. It does not, however, reset the brush size.
Using the Change Brush Size slider
The Change Brush Size slider lets you increase or decrease the size of the Apply Color tool and the
Mix Color tool. The Change Brush Size slider also lets you set the size of the sample area in the Mixer pad
when sampling with the Sample Multiple Colors tool. If you adjust the Change Brush Size slider, the new
value is retained when you reopen the application.
Mixing, sampling, and applying colors from the Mixer pad
You can create a color in the Mixer panel and then sample it to apply it to the canvas.
In addition, some brush variants that support mixing allow you to mix colors in the Mixer panel and apply
them directly to the canvas without sampling, which mimics the traditional experience of mixing color on
an artist’s palette. The brush variants that support mixing use the following dab types: Camel Hair, Flat,
Bristle Spray, Watercolor Camel Hair, Watercolor Flat , and Watercolor Bristle Spray. The dab type for a
brush variant appears in the General panel of the Brush Controls palette. These brush variants also allow
you to sample multiple colors simultaneously to produce multi-colored brushstrokes.
Color | 71
Page 78

You can sample multiple colors in the Mixer panel and paint directly on the canvas.
When you have finished mixing and sampling colors, you can clear the mixer pad, or save it as a mixer pad
(MXS) file that you can open and use later.
To mix colors
1
Choose Window Color Panels Mixer.
2
Click the Apply Color tool in the Mixer panel.
3 Choose a color from a Mixer swatch, and paint on the Mixer pad.
4 Choose a second color from the Mixer swatch, and paint on the Mixer pad.
5 Do one of the following:
• Use the Apply Color tool to add to and blend the colors.
•
Use the Mix Color tool to blend the colors.
To sample a color from the Mixer pad
1
Choose Window Color Panels Mixer.
2
Click the Sample Color tool .
3 On the Mixer pad, click the color you want to sample.
The sampled color becomes the Main Color in the image.
To paint from the Mixer panel
1 Mix the color you want in the Mixer panel.
72 | Corel Painter 2015 Getting Started Guide
Page 79

The Dirty Brush Mode tool is active by default. If it is not active, click the Dirty Brush Mode tool.
2 Click the Brush Selector on the Brush Selector bar.
3 In the Brush library panel, choose a brush category and variant that supports mixing.
4 Paint in the document window.
The last color on the Apply Color tool or Mix Color tool is used in the brushstroke.
You can verify if a brush variant supports mixing by clicking Window Brush Control
Panels General, and ensuring that one of the following dab types is selected: Camel Hair, Flat,
Bristle Spray, Watercolor Camel Hair, Watercolor Flat , and Watercolor Bristle Spray.
To sample multiple colors
1 In the Brush library panel, choose a brush category and variant that supports mixing.
2 Mix the color you want in the Mixer panel.
3
Move the Change Brush Size slider to set the size of the sample area.
The size of the sample area is displayed to the right of the slider and is measured in pixels.
4
Click the Sample Multiple Color tool , and click the area of the Mixer pad that you want to
sample.
You can verify if a brush variant supports mixing by clicking Window Brush Control
Panels General, and ensuring that one of the following dab types is selected: Camel Hair, Flat,
Bristle Spray, Watercolor Camel Hair, Watercolor Flat , and Watercolor Bristle Spray.
Opening images in the Mixer panel
You can now load an external image file in the Mixer panel so that you can sample and mix the image
colors. For example, you can open a photo and then blend its colors directly in the Mixer pad to create new
colors. You can open PNG, RIFF, TIFF, JPEG, and PSD files in the Mixer panel.
Color | 73
Page 80
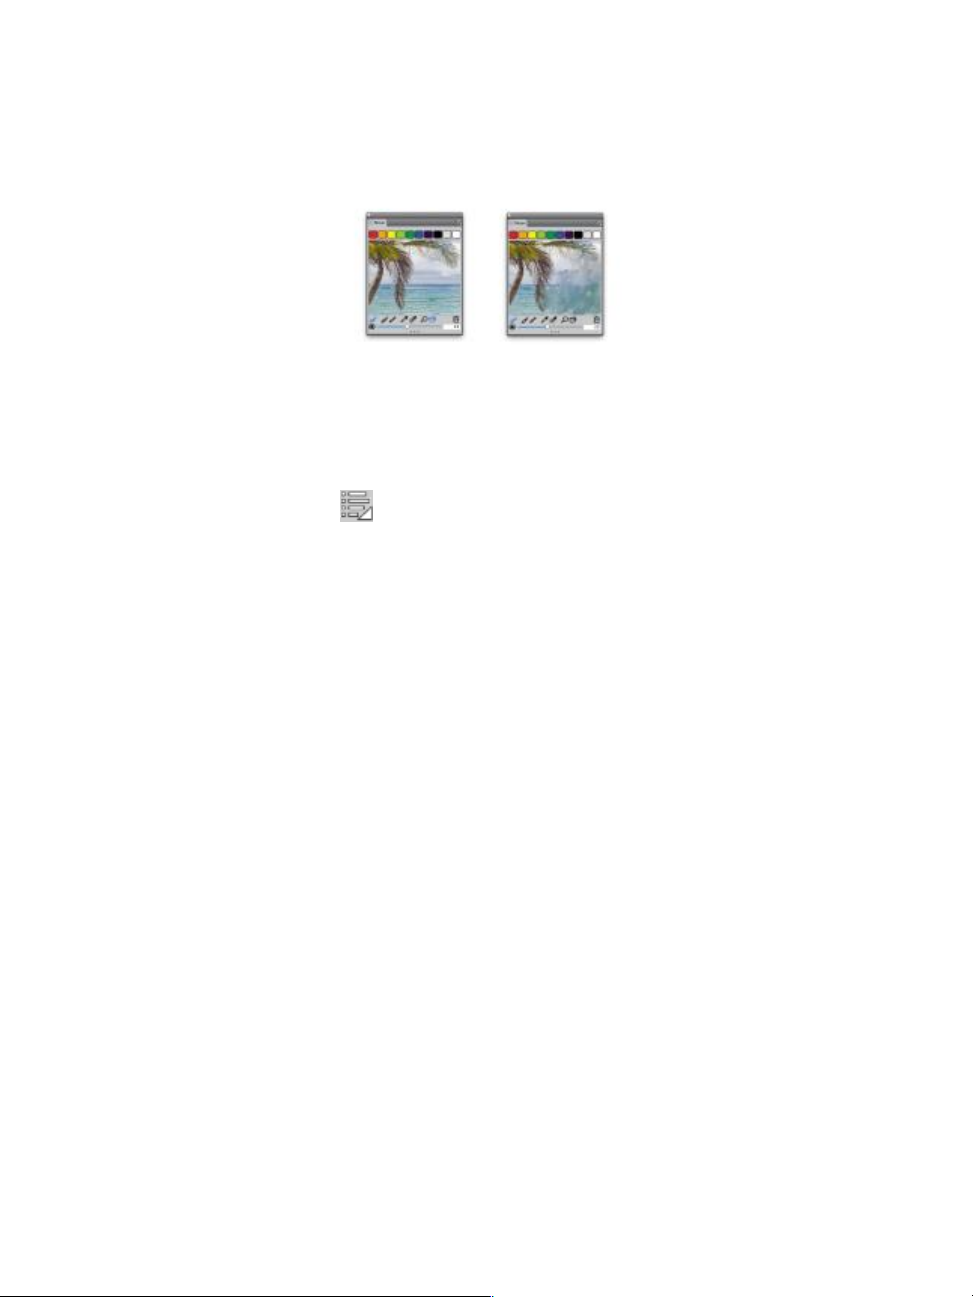
An example of importing a photo in the Mixer
panel (left) to transform the photo into a Mixer Pad
To open an image in the Mixer panel
1
Click the Mixer options button , and choose Open Mixer Pad.
2 In the Open Mixer Pad dialog box, choose the image file format from the list box.
3 Browse to the folder where the image file is stored.
4 Choose the image, and click Open.
Working with color sets
Corel Painter uses color sets to organize groups of colors. Some color sets are organized by both name and
color relationship. Corel Painter provides several color sets — Painter Colors, Mac OS and Windows system
palettes, and the PANTONE MATCHING SYSTEM are a few. You can open any of the available color sets,
choose a color from the color set, and then apply it to a brushstroke. You can open multiple color sets at a
time.
74 | Corel Painter 2015 Getting Started Guide
Page 81
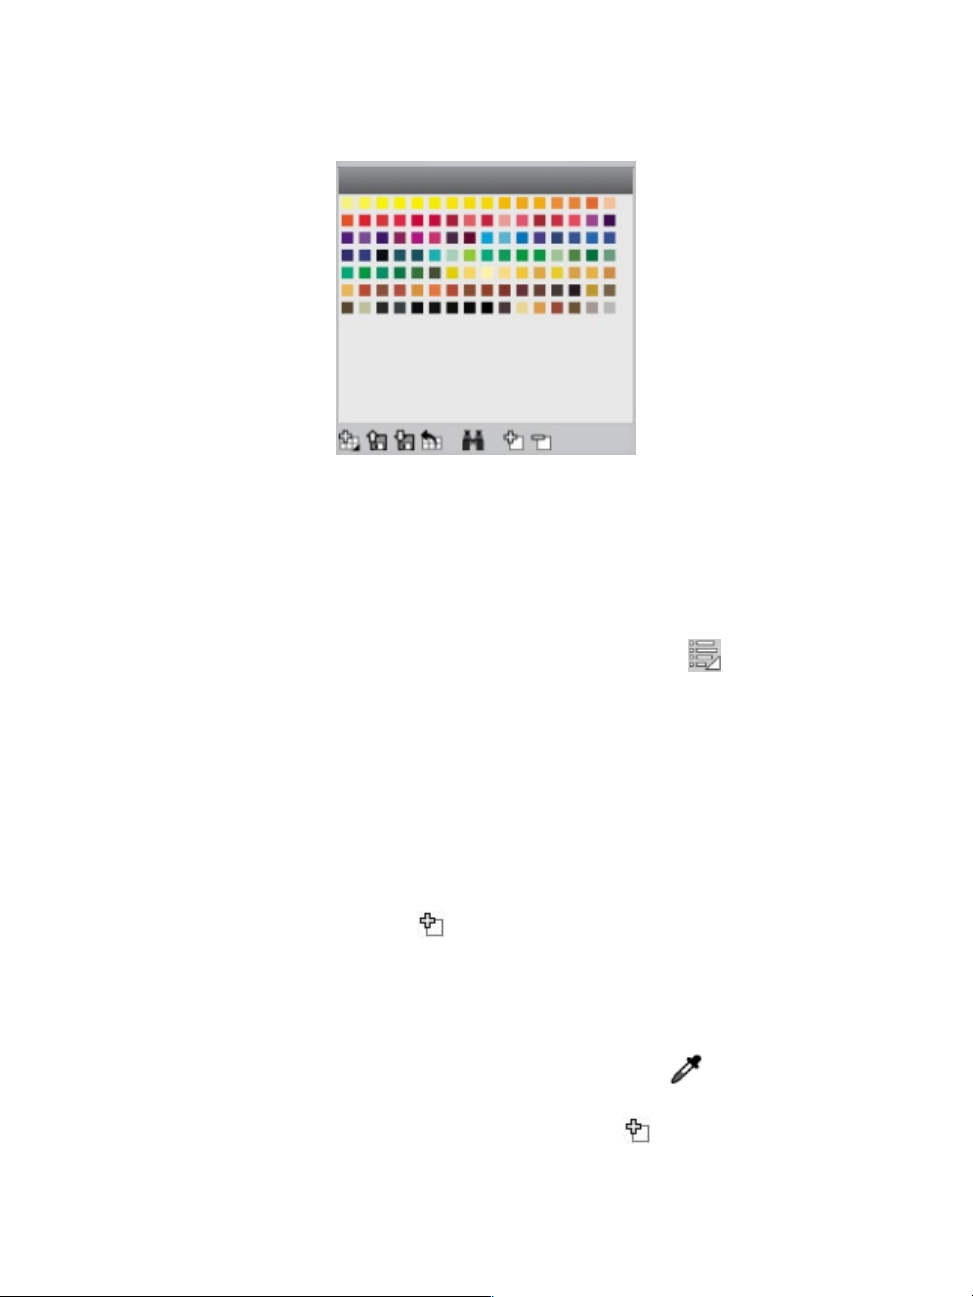
Color Sets panel
To display the Color Sets panel
•
Choose Window Color Panels Color Sets.
To open a color set
•
In the Color Set Libraries panel, click the Color Set Libraries options button , and choose Color Set
Libraries, and choose a color set from the list.
To choose a color from a color set
• In the Color Set Libraries panel, click a color.
To add a color to a color set
1 In the Color panel, choose a color.
2 In the Color Set Libraries panel, choose the color set where you want to add the selected color.
3
Click the Add Color to Color Set button .
You can also
Add a sampled color to a color set
Click the Dropper tool in the toolbox, click
a color in the image, then click the Add Color to
Color Set button .
Color | 75
Page 82

You can also
Add a color from another color set Drag a color swatch from one color set to another.
76 | Corel Painter 2015 Getting Started Guide
Page 83

Selecting, managing, and creating brushes
Corel Painter offers an impressive array of realistic and responsive brushes that you can use to apply media
to the canvas. For example, you can choose a brush with realistic bristles that apply oil, watercolor, or acrylic
paint. You can also choose a dry media brush, such as chalk or charcoal.
This section contains the following topics:
• “Understanding brushes” (page 77)
• “Exploring brush categories” (page 78)
• “Searching and selecting brushes” (page 93)
• “Setting basic brush attributes” (page 95)
• “Displaying advanced brush controls dynamically” (page 99)
• “Importing and exporting brush libraries, categories, and variants” (page 99)
Understanding brushes
Corel Painter offers users a wide range of preset brushes that are designed with the real media in mind, so
you can predict how a brush will behave.
In an art store, if the brushes in one aisle don’t produce the results you want, you can try a different aisle.
Similarly, with Corel Painter, individual brushes, known as brush variants, are stored in the Brush library
panel in different brush categories. You can use the brush variants as they are, or you can adjust them to
suit your purposes. Many artists use brush variants with only minor adjustments — to size, opacity, or grain
(how brushstrokes interact with paper texture).
Selecting, managing, and creating brushes | 77
Page 84

To modify a brush variant extensively, or to create a new brush variant, you can adjust the brush controls.
Most Corel Painter brushes apply media, such as a color, gradient, or pattern, to an image. However, some
brushes make changes to media already in the image. For example, the Just Add Water brush variant (in
the Blenders brush category) smudges and dilutes existing colors in the image with smooth, anti-aliased
brushstrokes. Using one of these brushes on a blank area of the canvas has no effect.
Corel Painter includes a batch of Natural-Media brushes that use a media application method called
“rendered dab types” to produce wonderfully realistic, continuous, smooth-edged brushstrokes. They are
fast and more consistent because the brushstrokes appear as you draw, and are not created by applying
dabs of color. In fact, you can’t draw fast enough to leave dabs or dots of color in a brushstroke. These
brushes allow for rich features that are not possible with the application of dab-based media. You can take
better advantage of tilt and angle, and you can paint with patterns or gradients.
Exploring brush categories
In the following section, descriptions of the brush categories are presented in alphabetical order. The
section includes a description of each category and highlights some of the brush variants that you can find
in Corel Painter.
Acrylics
The Acrylic brush variants, much like their real-world counterparts, are versatile brushes that let you apply
quick-drying paints to the canvas. Most of the brushes allow you to cover underlying brushstrokes and
many are capable of multicolored brushstrokes. In addition, a few Acrylic brush variants interact with
underlying pixels to create realistic effects.
Captured Bristle Thick Acrylic Flat Wet Acrylic
Airbrushes
Airbrushes apply fine sprays of color, which carefully mirror the feel of a real airbrush in action. However,
some variants have a different way of building up color. Most airbrushes support color buildup on a single
brushstroke. However, some of the digital airbrushes do not. To achieve color buildup with the digital
airbrushes, you need to overlay multiple brushstrokes.
78 | Corel Painter 2015 Getting Started Guide
Page 85

Digital soft flow
airbrush
Digital hard edge
airbrush
Digital soft flat
airbrush
The Wacom airbrush styluses are fully compatible with the variants in the Airbrushes category.
Coarse Spray Fine Spray Digital Airbrush
Artists
The Artist brush variants help you paint in the styles of master artists. For example, you can paint in the
style of Vincent Van Gogh, with multishaded brushstrokes, or in the style of Georges Seurat, with multiple
dots combining to form an image.
When you use any of the Artist brush variants, dragging quickly produces wider brushstrokes. You can use
the Color Variability settings to adjust how the Artist brushstrokes are colored.
Impressionist Sargent Brush Seurat
Selecting, managing, and creating brushes | 79
Page 86
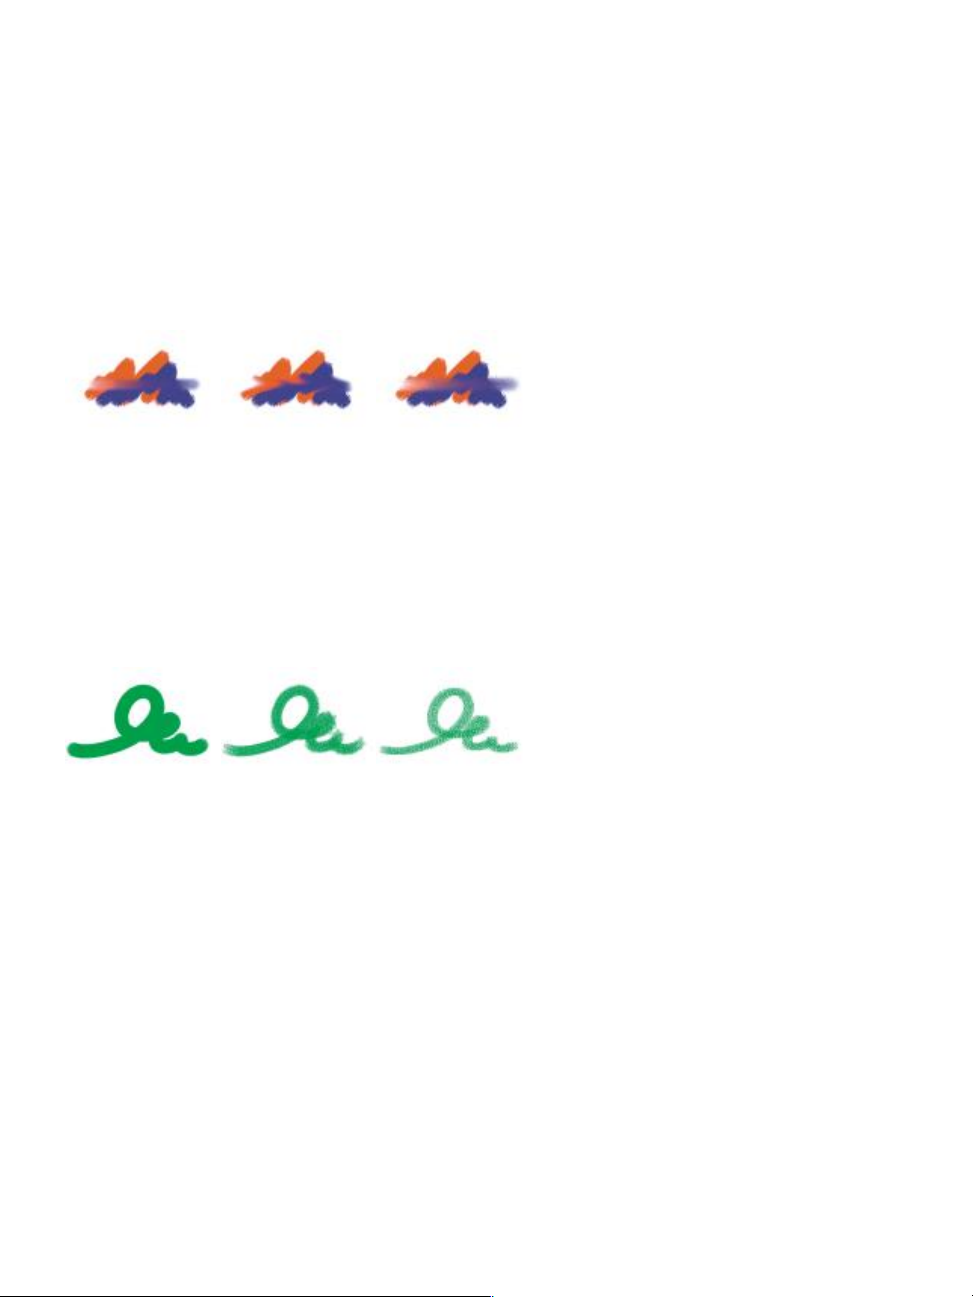
Blenders
Blenders brushes affect underlying pixels by moving and mixing them. The variants can reproduce the
effects of blending paint by applying water or oil. You can also smooth drawing lines and create shading
just as you would on a pencil sketch or charcoal drawing.
Just Add Water Smear Smudge
Chalk & Crayons
Chalk brush variants produce the thick, rich texture of natural chalk sticks, and have strokes that interact
with the paper grain. The opacity is linked to stylus pressure.
Blunt Chalk Square Chalk Variable Chalk
Crayons offer a range of styles. From soft and dull, to waxy and grainy, they produce textured strokes
that interact with the paper grain. As with other dry media brush variants, the opacity is linked to stylus
pressure.
80 | Corel Painter 2015 Getting Started Guide
Page 87
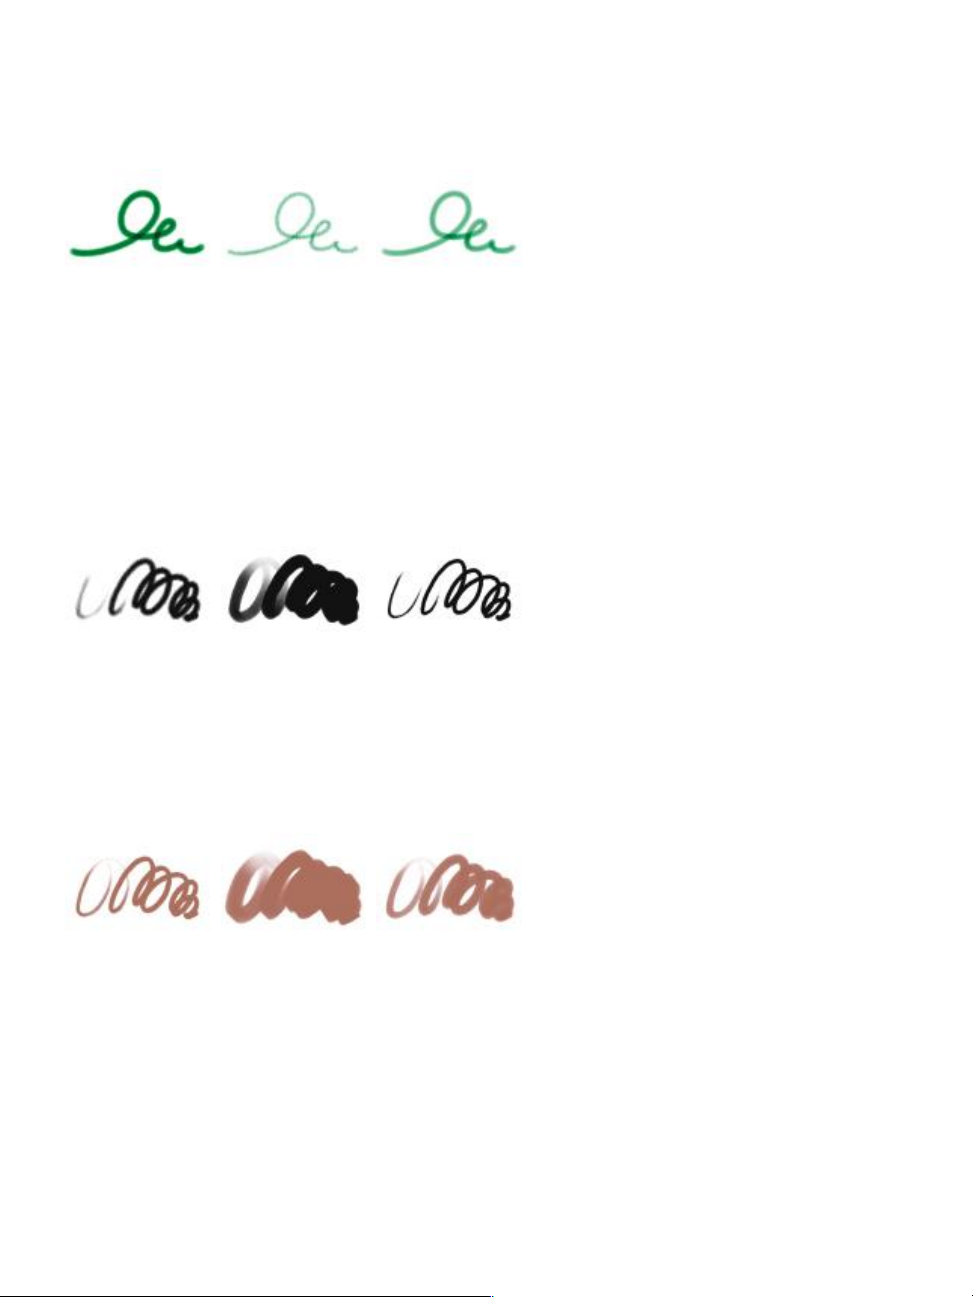
Basic Crayon Grainy Hard Crayon Waxy Crayon
Charcoal & Conte
Charcoal brush variants range from pencils to hard or soft charcoal sticks. As with other dry media brush
variants, the opacity is linked to stylus pressure. Blender brush variants can be used to soften and blend the
charcoal strokes. For a smooth workflow, keep your favorite Charcoal and Blender brush variants together
in a custom palette.
Charcoal Soft Vine Charcoal Hard Charcoal Pencil
Similar to Chalk, Conte brush variants produce textured strokes that interact with the paper grain. As with
other dry media brush variants, the opacity is linked to stylus pressure.
Dull Conte Square Conte Tapered Conte
Cloners
The Cloner brush variants behave like other brush variants, except that they take color from a cloned or
sampled source. These variants recreate the source imagery while effectively filtering it, reproducing the
image in an artistic style, such as pastel chalk or watercolor.
Selecting, managing, and creating brushes | 81
Page 88
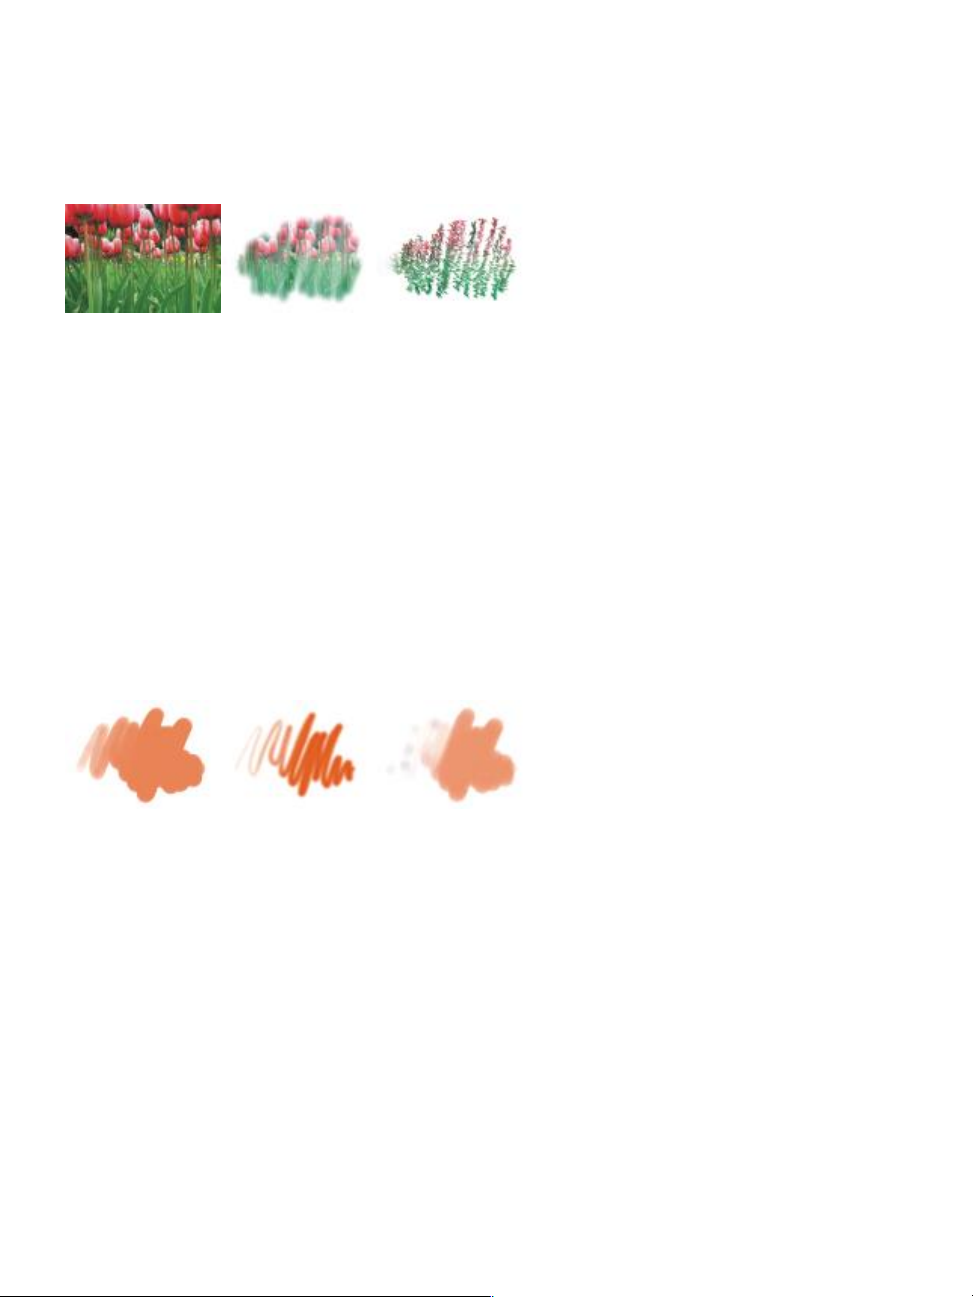
Original photo Soft Cloner Impressionist Cloner
Digital Watercolor
Digital Watercolor brush variants produce watercolor effects that react with the canvas texture. Unlike
Watercolor brush variants, which work with the Watercolor Layer , Digital Watercolor brushstrokes can
be applied directly to any standard pixel-based layers, including the canvas. For example, if you’re applying
watercolor effects to a photo, Digital Watercolor brushstrokes can be applied directly to the image. If
you’re creating a realistic watercolor from scratch, the Real Watercolor or Watercolor brush variants allow
colors to flow, mix, and absorb more realistically.
The width of Digital Watercolor brushstrokes is affected by stylus pressure, with the exception of the Wet
Eraser brush variant.
Simple Water Diffuse Water Dry Brush
Erasers
There are three types of Eraser brush variants: Eraser, Bleach, and Darkener. Eraser brush variants erase
down to the paper color. Bleach brush variants erase to white, gradually lightening by removing color.
Darkener brush variants are the inverse of Bleach variants. Darkener brush variants gradually increase color
density, building colors toward black. With all Eraser brush variants, pressure determines how much you
erase.
82 | Corel Painter 2015 Getting Started Guide
Page 89
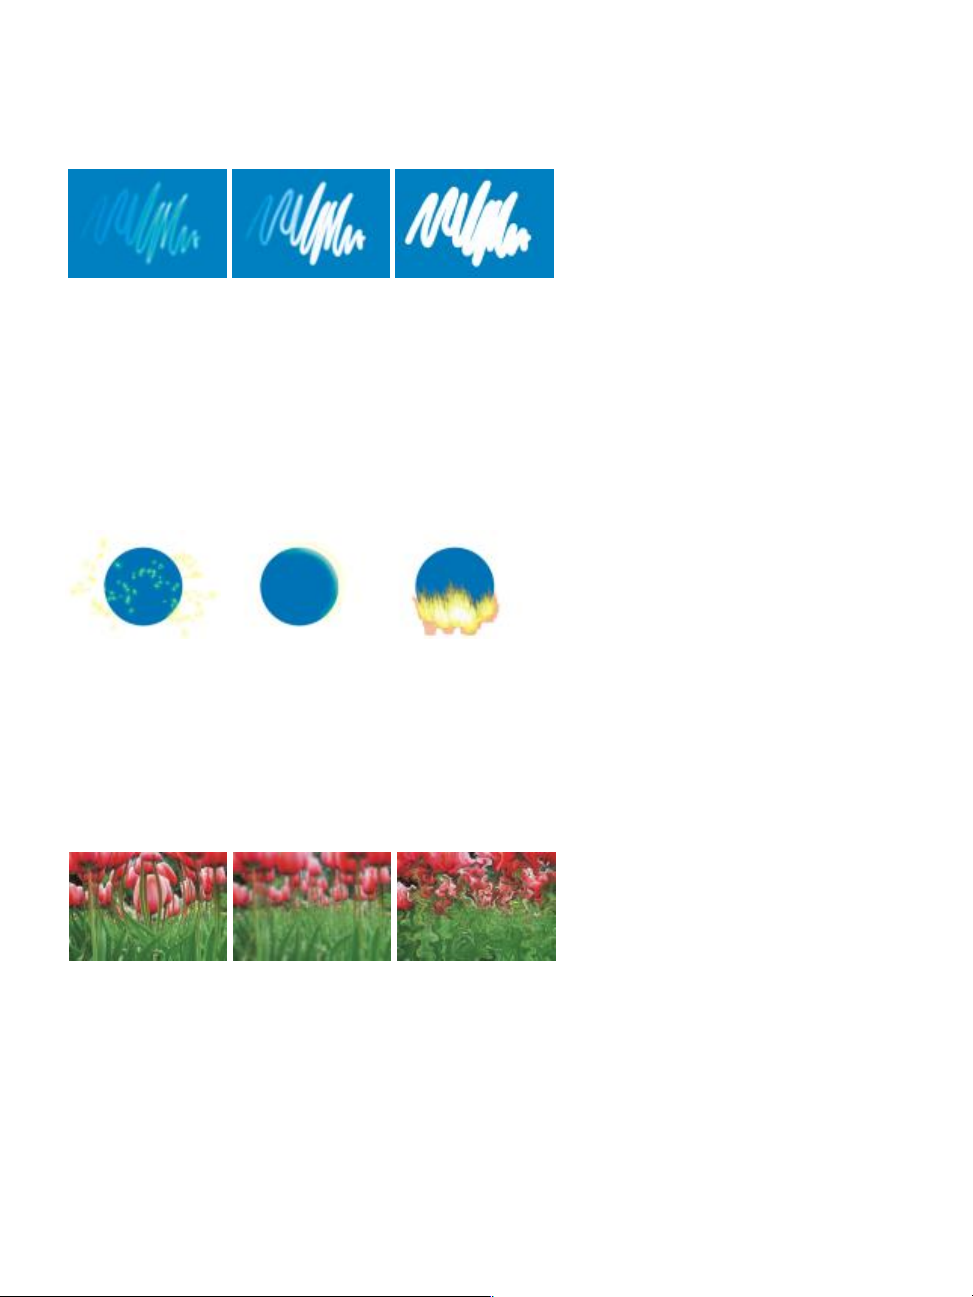
Bleach Eraser Flat Eraser
F/X
F/X brush variants can give you an array of creative results. Some add color; others affect underlying pixels.
The best way to appreciate the F/X brush variants is to experiment with them on an image and a blank
canvas.
Fairy Dust Glow The Fire brush
(works with
underlying colors)
Some variants, such as Grainy Distorto or Grainy Mover, produce blending effects. Other variants, such as
Hurricane, Turbulence, and Water Bubble, produce more dramatic effects.
Bulge Confusion Hurricane
Gel
Gel brushes allow you to tint an image’s underlying colors with the brushstroke color. For example, a yellow
brushstroke gives the underlying color a yellow cast. The Gel brushes use the Merge Modes brush control
Selecting, managing, and creating brushes | 83
Page 90

to produce the effect. The Gel effect is similar to blending layers by using the Gel composite method;
however, you do not require any layers to achieve the same results.
Gel coarse Gel broad Gel captured
Gouache
Gouache brush variants let you paint with the fluidity of watercolors and the opacity of acrylics. These
variants range from fine, detail brushes, to flat or thick brushes. Brushstrokes created with Gouache brush
variants cover underlying brushstrokes.
Detail Opaque Thick Gouache Flat Wet Gouache Round
Image Hose
The Image Hose is a special brush that applies images instead of color. The images it “paints” with come
from special image files called nozzles. Each nozzle file contains multiple images that are organized by
characteristics such as size, color, and angle. Each characteristic (parameter) can be linked to a stylus
attribute (animator), such as Velocity, Pressure , and Direction .
The name of each Image Hose variant tells you which parameter and animator are in effect. For example,
the Linear-Size-P Angle-R brush variant links size to stylus pressure (P) and sets the angle randomly (R).
84 | Corel Painter 2015 Getting Started Guide
Page 91

Linear-Angle-B
(Bearing)
Linear-Size-P
(Pressure)
Spray-Size-P
(Pressure) controls
size and spread
Impasto
Impasto brush variants use the classic technique of applying thick paint on a canvas to create depth.
The depth information for the brushstroke is stored with the layer, but you need to display the Impasto
information to view it.
Some variants, such as Acid Etch, Clear Varnish, Depth Rake , and Texturizer-Clear, apply depth effects to
underlying pixels. Other variants apply three-dimensional brushstrokes with the current paint color.
Opaque Flat Smeary Round Loaded Palette Knife
Liquid Ink
Liquid Ink brush variants combine ink and paint to create a thick, liquid paint effect. There are three main
types of Liquid Ink brush variants: ones that apply ink, ones that remove ink to create a resist effect, and
ones that soften edges. A new layer is created automatically when you first apply a brushstroke. You can
also create 3D effects with Liquid Ink.
Selecting, managing, and creating brushes | 85
Page 92

Clumpy Ink Coarse Bristle Smooth Flat
Markers
The brush variants in the Marker category replicate conventional, real-world markers. The brush variants
range from fine point to blunt and have a variety of nib shapes and opacity levels.
The strokes that you make with some of the Marker variants closely reflect those of traditional, high-quality
markers, mainly because of the way the Marker variants interact with the canvas. For example, the Flat
Rendering Marker allows color buildup and pooling.
Round Tip Marker Leaky Marker Flat Rendering
Art Marker Dirty Marker Felt Marker
Marker
Oils
Oils brush variants let you create effects you’d expect from oil paints. Some variants are semitransparent
and can be used to produce a glazed effect. Other variants are opaque and cover underlying brushstrokes.
86 | Corel Painter 2015 Getting Started Guide
Page 93

Fine Camel Opaque Flat Smeary Round
Some Oil brush variants let you mix media as though you were working with traditional oil paints. You can
use colors mixed on the Mixer pad and apply them directly to the canvas. The colors can then be blended
with the oils already on the canvas. In addition, you can load multiple colors from the Mixer pad. Some Oil
brush variants load the brush with a finite amount of oil, which is then transferred to the image. As you
apply a brushstroke to the canvas, the brush loses oil, and the brushstroke becomes fainter. Because layers
don’t have the oily properties of the canvas, brushstrokes applied to a layer don’t fade as rapidly.
Some Oil brush variants are palette knives that let you mix paint directly on the canvas. There are six brush
tip profiles designed specifically for Oil brushes.
Palette Knives
You can use Palette Knives brush variants to scrape, push, or pick up and drag colors in your image. Only
one Palette Knives brush variant, the Loaded Palette Knife, applies the current paint color. The Palette
Knives dabs are always parallel to the shaft of the stylus.
Loaded Palette Knife Palette Knife Smeary Palette Knife
Particle brushes
Particle brushes are physics-inspired brushes that give a unique look and feel to your artwork. They emit
particles from a central point, and in turn the particles draw a pattern of lines (paths) as they move across
the canvas. For more information, see “Particle brushes” on page 113.
Selecting, managing, and creating brushes | 87
Page 94
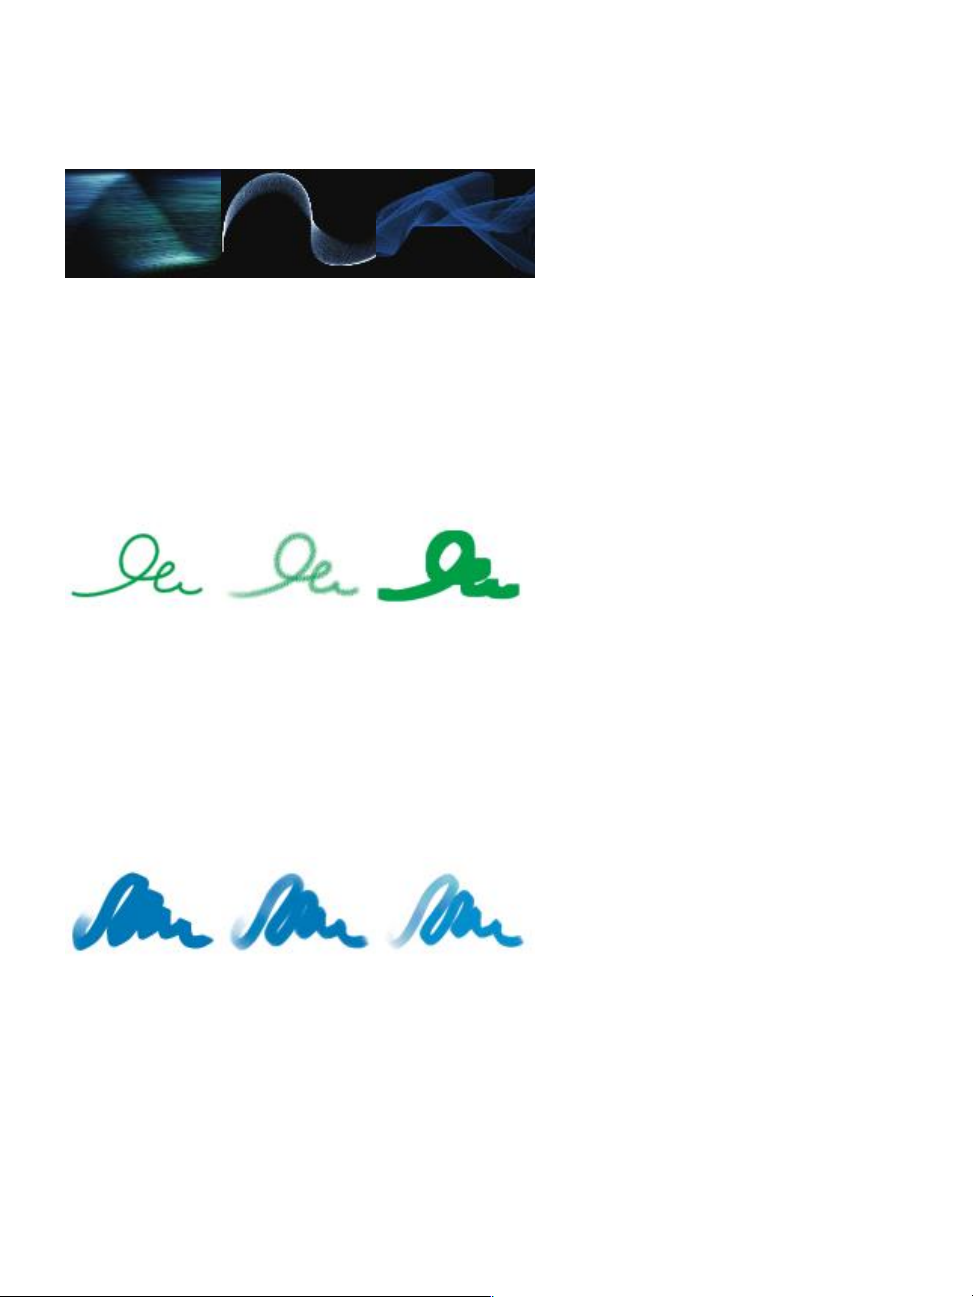
Flow Aurora Gravity Deco
Streamline
Spring Concept
Creature
Pastels
Pastels, which include oil pastels, range from hard pastel styles that reveal the paper grain to extra soft
pastels that glide on to completely cover existing strokes. Opacity is linked to stylus pressure.
Artist Pastel Chalk Soft Pastel Square Soft Pastel
The oil pastel brush variants produce the thick, rich texture of natural pastel sticks. Most oil pastel brush
variants cover existing strokes with the current paint color. However, the Variable Oil Pastel brush variant
blends the underlying color into the stroke. As with other dry media brush variants, opacity is linked to
stylus pressure.
Oil Pastel Chunky Oil Pastel Variable Oil Pastel
Pattern Pens
Pattern Pens brush variants let you use a brush to apply a pattern to an image. You can vary features such
as the size of the pattern and the transparency. For example, Pattern Pen Micro decreases the size of the
pattern, and Pattern Pen Transparent applies a semitransparent version of the pattern.
88 | Corel Painter 2015 Getting Started Guide
Page 95

Pattern Pen Pattern Pen Masked Pattern Pen Marker
(based on the
current color)
Pencils
Pencil brush variants are great for any artwork that would traditionally require pencils, from rough sketches
to fine-line drawings. Like their natural counterparts, Pencil brush variants interact with canvas texture. All
variants build to black and link opacity to stylus pressure. The width of Pencil strokes varies according to the
speed of the stroke, so dragging quickly produces a thinner line and dragging slowly leaves a thicker line.
2B Pencil Cover Pencil Greasy Pencil
Colored Pencil Hard Colored Pencil Oily Colored Pencil
Pens
Pens brush variants, like the Scratchboard Rake and Bamboo Pen , create realistic effects without the
drawbacks of traditional pens, which can clog, spatter, or run dry.
Selecting, managing, and creating brushes | 89
Page 96
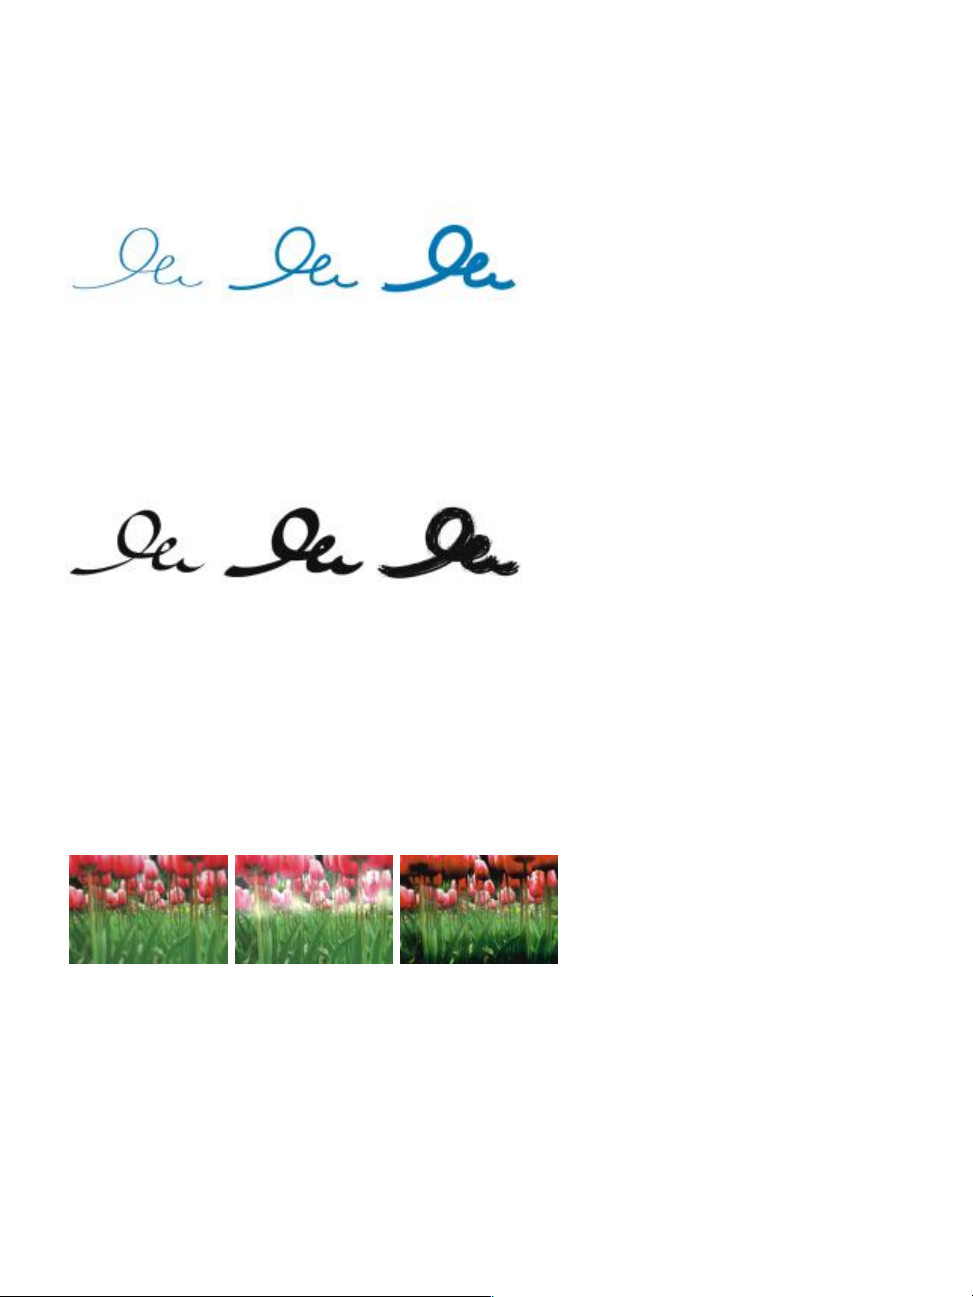
Croquil Pen Scratchboard Tool Thick and Thin Pen
Whether you want to reproduce the look of calligraphy pen strokes on a grainy texture, or the smooth
strokes of a calligraphy brush, the Calligraphy brush variants offer you a range of creative options.
Calligraphy Calligraphy Brush Dry Ink
Photo
Photo brush variants let you modify digital images or existing artwork. For example, you can clean up
photos by adjusting color or removing scratches, add a blur effect, or sharpen an image. You can also add
color to a grayscale image.
Blur Dodge Burn
Real Watercolor
The brushstrokes of the Real Watercolor brush variants flow and apply pigments in a very natural way,
helping you create realistic watercolor paintings. In addition, the brushstrokes interact with the paper
90 | Corel Painter 2015 Getting Started Guide
Page 97

texture and grain to produce results you would expect from real-world watercolors. You can modify the
Real Watercolor brush controls to achieve different effects.
Light fringe Wet on wet paper Dry on dry paper
Real Wet Oil
The Real Wet Oil brush variants help you achieve realistic oil brushstrokes. The Real Wet Oil brush variants
let you control paint viscosity and color concentration, similar to mixing oil paint and a medium. You can
also modify the Real Wet Oil brush controls to achieve different effects.
Turp grainy Liquid oil Wet oil
Smart Strokes
Smart Strokes brush variants are based on popular brush variants from other brush categories, but they are
optimized to work with the Photo Painting System. For more information about the Photo Painting System,
see Auto-painting photos
Sponges
Sponges let you create a variety of textures by applying the current paint color to cover or blend existing
colors. Some Sponge brush variants apply dabs of paint at random angles with each click of a stylus. Wet
sponge brush variants, such as Grainy Wet Sponge, apply sponge dabs as you drag across the canvas. The
Smeary Wet Sponge variant lets you blend the current paint color with existing colors as you drag across
the canvas.
Selecting, managing, and creating brushes | 91
Page 98
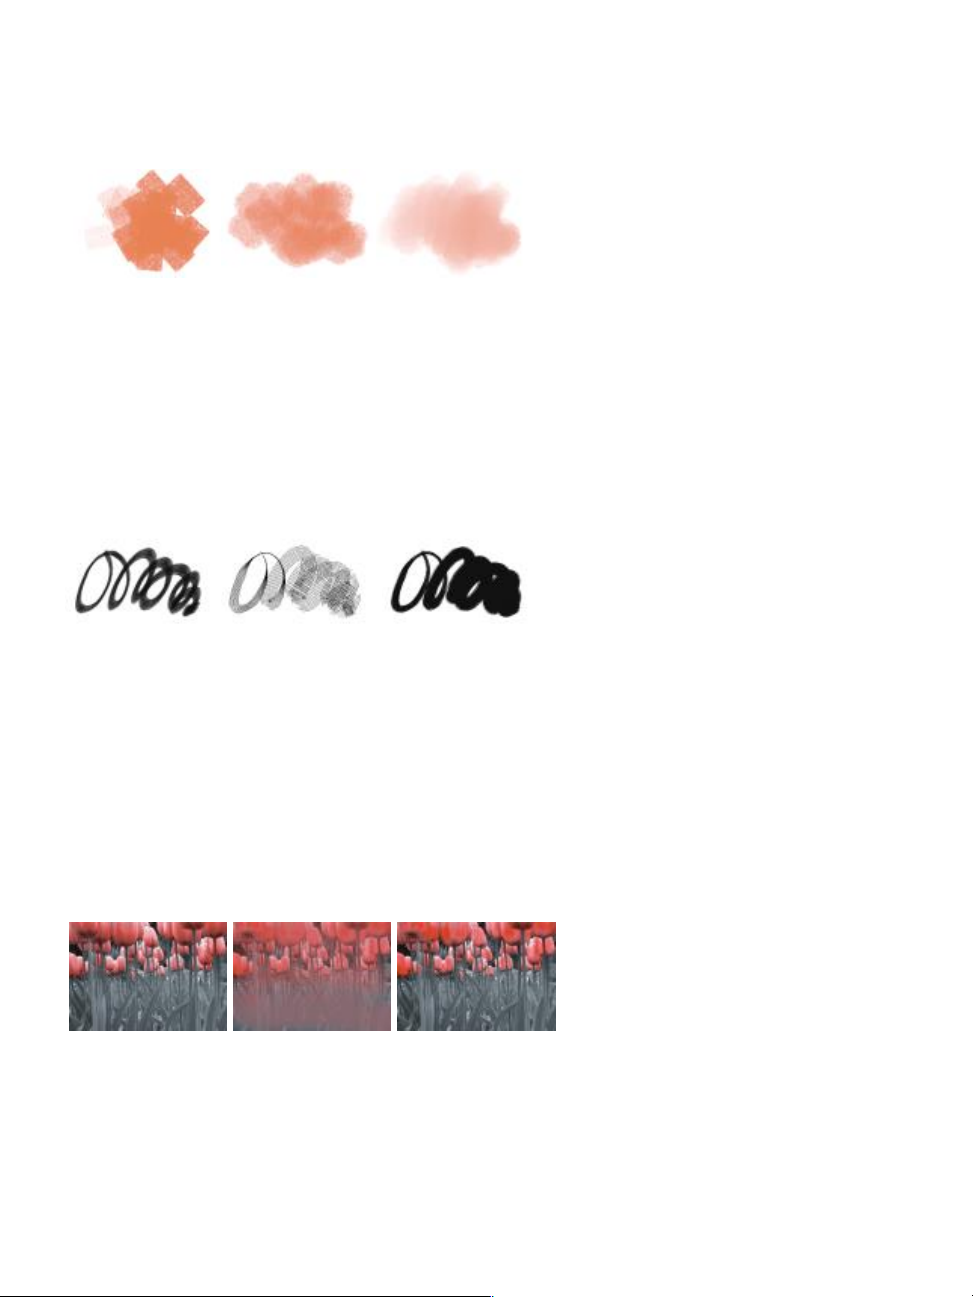
Dense Sponge Grainy Wet Sponge Smeary Wet Sponge
Sumi-e
Sumi-e brush variants let you create flowing sumi-e-style brushstrokes. In addition, various brush sizes and
shapes are available to help you recreate traditional sumi-e brushstrokes.
Sumi-e Brush Detail Sumi-e Coarse Bristle Sumi-e
Tinting
Tinting brush variants let you apply effects to photos or existing artwork. For example, you can apply
translucent color to areas of a black-and-white photo by using the Basic Round brush variant. Applying
each color to a separate Gel or Colorize layer lets you adjust the opacity of each color layer independently
for a more subtle or dramatic effect. Some of the Tinting brushes are based on the Merge Modes brush
control.
Basic Round Blender Soft Grainy Round
92 | Corel Painter 2015 Getting Started Guide
Page 99

Watercolor
Watercolor brush variants paint onto a watercolor layer, which enables the colors to flow, mix, and absorb
into the paper. The watercolor layer is created automatically when you first apply a brushstroke with a
Watercolor brush variant. The layer lets you control the wetness and evaporation rate of the paper to
effectively simulate conventional watercolor media. Most Watercolor brush variants interact with the
canvas texture. You can use Watercolor brush variants to apply a watercolor effect to a photo by lifting the
canvas to the watercolor layer.
For more information about additional watercolor brush variants, see “Real Watercolor” on page 90.
To paint directly on the canvas, use a Digital Watercolor brush variant.
Diffuse Flat Splatter Water Wet Camel
Searching and selecting brushes
In Corel Painter, you can find brush variants by searching or browsing the currently selected brush library.
You can quickly search the content of the currently selected brush library to find brushes that match
a specific description. You can perform a search by entering one attribute, or a combination of brush
attributes. For example, typing the search terms “pencil real” generates a list of all “Real Pencil” brush
variants.
You can also look for brush variants by browsing the brush categories in the Brush library panel. If you
hover over a brush variant’s name, you can preview the variant’s brush dab and brush stroke at the bottom
of the panel. The Brush library panel also displays the most recently used brushes at the top of the panel so
you can quickly access the last brushes that you used.
Selecting, managing, and creating brushes | 93
Page 100

The Brush library panel lets you choose a brush category (left) and a brush variant (right).
The default Corel Painter brush variants are displayed in the Brush library panel until you open or import a
different brush library. In addition, the Brush library panel displays only one brush library at a time. For more
information, see “Importing and exporting brush libraries, categories, and variants” on page 99.
If you’re looking for a brush from a previous version of Corel Painter, you can reload the old version’s brush
library. For more information, see “Importing and exporting brush libraries, categories, and variants” on
page 99.
To select a brush category and variant
1
In the toolbox, click the Brush tool .
2 Click the Brush Selector on the Brush Selector bar.
3 In the Brush library panel, click a brush category, and click a brush variant.
To search for brush variants
1 In the Search bar, type one attribute or a combination of brush attributes in the Search text box.
The Search bar is located to the right of the property bar, in the upper-right corner of the document
window.
2 Hover over a brush variant in the list to display a preview of the brushstroke.
3 Choose a brush variant from the list.
You can search for brushes that are new in Corel Painter 2015 by typing 2015, X4, or 14 in the
Search text box.
If you previously hid the Search bar, you can show it by clicking Window Search .
94 | Corel Painter 2015 Getting Started Guide
 Loading...