Page 1
Page 2

Page 3

Contents
Welcome to Corel Painter 11
What’s New in Corel Painter? . . . . . . . . . . . . . . . . . . . . . . . . . . . . . . . . . . . . . . 1
Learning to Use Corel Painter . . . . . . . . . . . . . . . . . . . . . . . . . . . . . . . . . . . . . . 4
Workspace Tour
The Menu Bar . . . . . . . . . . . . . . . . . . . . . . . . . . . . . . . . . . . . . . . . . . . . . . . . . . 5
The Document Window . . . . . . . . . . . . . . . . . . . . . . . . . . . . . . . . . . . . . . . . . . . 6
The Toolbox . . . . . . . . . . . . . . . . . . . . . . . . . . . . . . . . . . . . . . . . . . . . . . . . . . . . 8
The Property Bar . . . . . . . . . . . . . . . . . . . . . . . . . . . . . . . . . . . . . . . . . . . . . . . 17
The Brush Selector Bar . . . . . . . . . . . . . . . . . . . . . . . . . . . . . . . . . . . . . . . . . . . 18
The Palettes . . . . . . . . . . . . . . . . . . . . . . . . . . . . . . . . . . . . . . . . . . . . . . . . . . . 20
Basics
Understanding Resolution . . . . . . . . . . . . . . . . . . . . . . . . . . . . . . . . . . . . . . . . 31
Setting Preferences . . . . . . . . . . . . . . . . . . . . . . . . . . . . . . . . . . . . . . . . . . . . . 35
Painting
Exploring Brushes . . . . . . . . . . . . . . . . . . . . . . . . . . . . . . . . . . . . . . . . . . . . . . 41
Understanding Brush Categories . . . . . . . . . . . . . . . . . . . . . . . . . . . . . . . . . . . 44
Choosing Brush Settings . . . . . . . . . . . . . . . . . . . . . . . . . . . . . . . . . . . . . . . . . 64
Exploring Painting . . . . . . . . . . . . . . . . . . . . . . . . . . . . . . . . . . . . . . . . . . . . . . 65
iContents
Page 4

Textures
Using Paper Texture . . . . . . . . . . . . . . . . . . . . . . . . . . . . . . . . . . . . . . . . . . . . . 73
A Short Tour of Corel Painter for Users of Adobe Photoshop
Getting Started . . . . . . . . . . . . . . . . . . . . . . . . . . . . . . . . . . . . . . . . . . . . . . . . 79
Index . . . . . . . . . . . . . . . . . . . . . . . . . . . . . . . . . . . . . . . . . . . . . . . . . . 87
ii Contents
Page 5

Welcome to Corel Painter 11
Corel® Painter™ 11 is the ultimate digital art studio. Its inventive drawing tools, realistic
brushes, and customizable features let you expand your creative output in exciting new
ways. When you use the pressure-sensitive brushes of Corel Painter, they become fluid
extensions of your hand, so the resulting brushstrokes are unrivaled in texture and
precision. What's more, features such as the ability to build your own Natural-Media®
brushes and customize how brushes interact with the canvas give you countless ways to
develop your artistic ideas. Corel Painter takes you far beyond what's possible in a
traditional art environment.
This section contains the following topics:
• What’s New in Corel Painter?
• Learning to Use Corel Painter
What’s New in Corel Painter?
In this section, you will find information about the new and enhanced features of
Corel Painter 11.
1Welcome to Corel Painter 11
Page 6

New Features
Color management includes individual color profiles per document and improved color
recognition for imported files, which result in better color matches. Having fewer color
corrections to make streamlines your workflow. In addition, the fresh, simplified interface
for color-management operations makes it easier to control color profiles when you create
or open files.
Hard Media variants include pencils, chalk, markers, and pens that mimic the behavior of
their traditional counterparts more accurately than the tools of any other software!
• Pencils and Chalks — You can control shading by changing the angle of your pen on
the drawing tablet. As with conventional pencils and chalk, you can use the tip for
drawing and the side of the nib for shading.
• Markers — You can intensify color with each marker stroke. This feature lets you use
one continuous shade or a buildup of color.
• Pens — You can create fine pen strokes, or thick strokes and ink deposits, by changing
the stroke velocity. The faster you go, the thinner the line; the slower you go, the
thicker the line.
Transformation capabilities are combined in a centralized tool, improving the ease and
efficiency of transforming images. The new Transform tool offers convenient property bar
buttons that let users quickly switch between the Move, Scale, Rotate, Skew, Distort, and
Perspective Distortion modes.
Corel Painter 11 Getting Started Guide2
Page 7

Enhanced Features
Brushes perform as much as 30% faster than the previous version, creating a more
true-to-life painting speed.
Brush controls let you change the width of your strokes by adjusting the angle of your pen
when you work with a drawing tablet. Now, shading by hand feels more natural than
ever.
Selection tools include a new Polygonal mode for the Lasso tool, plus overall
improvements to marquee tools and the Magic Wand, which lets you make more nimble
selections on your first try.
The Colors palette lets you adjust colors manually with sliders and enlarge the palette up
to 800 pixels for a clearer view of colors. You can now also fine-tune the Hue Ring with
the keyboard arrow keys, so it takes less time to find the perfect color.
The Mixer palette and swatches give you more color options. Extra mixer swatches appear
when you enlarge the newly resizable Mixer palette. You can enlarge the palette to make
colors more accessible and provide a clearer view of your chosen color. When you no
longer need to mix colors, you can reduce the size of the palette so that it uses less screen
space.
Welcome to Corel Painter 11 3
Page 8

Learning to Use Corel Painter
This guide provides general overviews about Corel Painter 11 features and presents the
most commonly used procedures. For more comprehensive assistance, you can refer to
the Help, which is available from within the Corel Painter workspace. The Help gives you
access to a full range of topics in a searchable format. You can access the Help by
choosing Help menu
You can also access a PDF version of the Help, which is included when you install the
application.
You can learn about Corel Painter by accessing online resources for the Corel Painter
community, including Tips and Tricks and tutorials.
Corel Painter 11 Getting Started Guide4
Corel Painter 11 Help (Mac OS®) or Help Topics (Windows®).
Page 9

Workspace Tour
The Corel Painter workspace has been designed to give you easy access to tools, effects,
commands, and features. The workspace is organized across a series of menus, selectors,
and interactive palettes. Some features are also available in the frame of the document
window.
This section contains the following topics:
• The Menu Bar
• The Document Window
• The Toolbox
•The Property Bar
• The Brush Selector Bar
• The Palettes
• Customizing the Workspace
The Menu Bar
Using the commands on the Corel Painter menu bar, you can
• work with files and editing commands
• apply and adjust effects
• perform selection operations, work with shapes, and create animations
• control the document window or the Corel Painter workspace
5Workspace Tour
Page 10
The Document Window
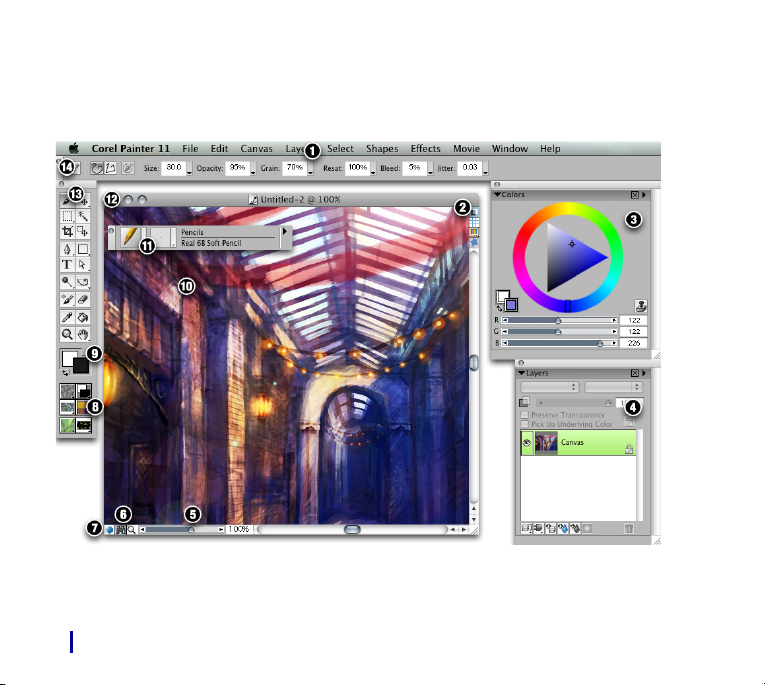
The document window is the area outside the canvas that is bordered by scroll bars and
application controls.
Please refer to the legend on the following page.
Corel Painter 11 Getting Started Guide6
Page 11
1. Menu bar 8. Selectors
2. Tracing Paper icon 9. Color Selection box
3. Colors palette 10. Canvas
4. Layers palette 11. Brush Selector bar
5. Scale slider 12. Document title bar
6. Navigation icon 13. Toolbox
7. Drawing Mode icon 14. Property bar
The document window lets you access the following features with the click of a button:
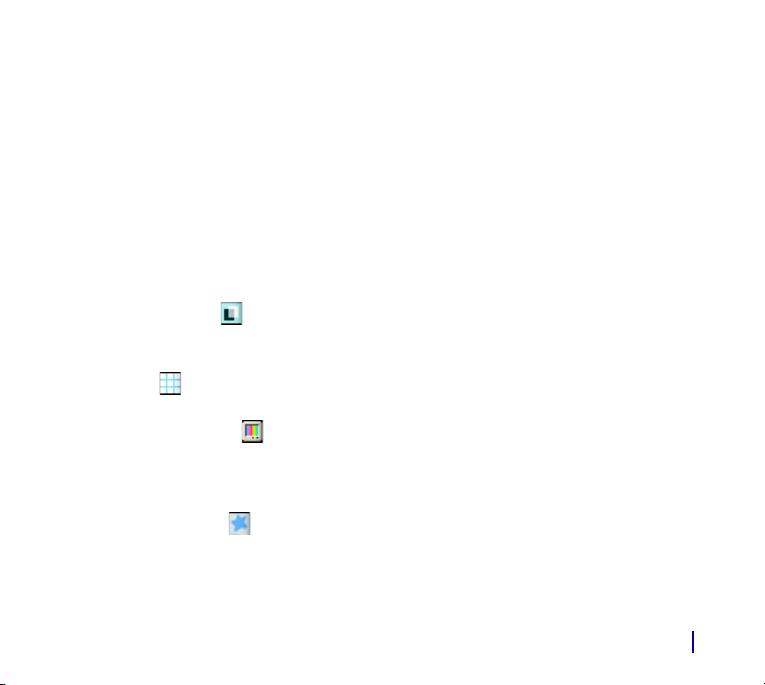
• Tracing Paper — Lets you trace a clone source. When Tracing Paper is in use, you
see a faded-out version of the clone source, as if it were displayed under real tracing
paper on top of a light box.
• Grid — Helps you position brushstrokes and shapes. You can set the types, size,
line thickness, and color of the grid.
• Color Correction — Lets you apply the current color management style to an
image. When the icon shows colors, the color management style is applied to the
image; when the icon shows black, the color management style is not applied to the
image.
• Impasto Effect — Lets you view the depth effect of the Impasto layer.
Workspace Tour 7
Page 12

• Drawing Mode — Lets you choose where you can apply brushstrokes to your
image when you have an active selection. Position the pointer over the icon, and hold
down the stylus button to choose between drawing anywhere, drawing outside the
selection only, or drawing inside the selection only.
• Navigation — Lets you view a pop-up window of the entire image and choose
which area is displayed in the document window. For example, when you are working
at a high zoom level or with a large image, you can find a different image area
without having to adjust the zoom level.
The Toolbox
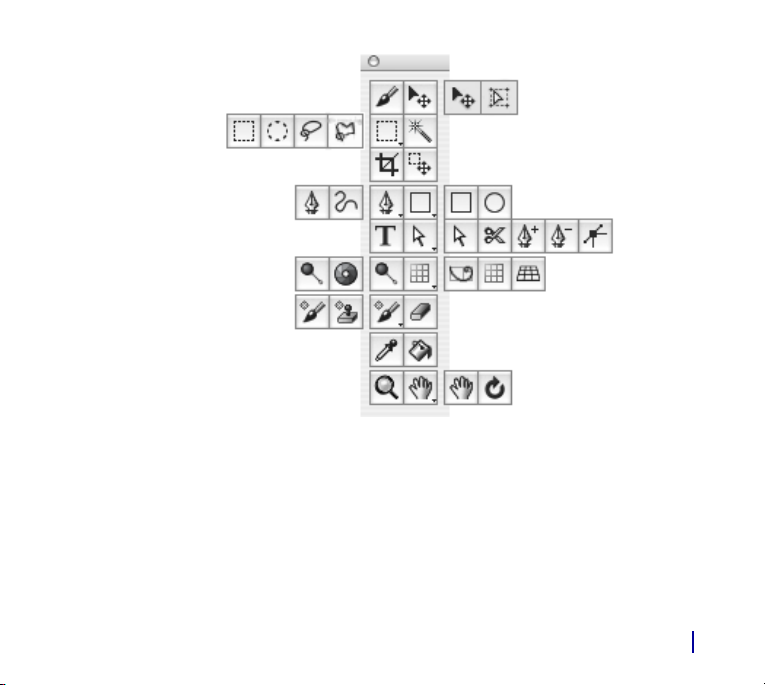
You can use the tools in the toolbox to paint, draw lines and shapes, fill shapes with color,
view and navigate documents, and make selections. Under the toolbox is a color selector,
plus six content selectors that let you choose papers, gradients, patterns, weaves, looks,
and nozzles.
Corel Painter 11 Getting Started Guide8
Page 13
Workspace Tour 9
Page 14
Exploring the Toolbox
Tool Description
Navigation and Utility Tools
Magnifier tool The Magnifier tool lets you magnify areas of
Grabber tool The Grabber tool gives you a quick way to
Rotate Page tool The Rotate Page tool lets you rotate an
Crop tool The Crop tool lets you remove unwanted
Corel Painter 11 Getting Started Guide10
an image when you are performing detailed
work, or reduce areas to get an overall view
of an image.
scroll an image.
image window to accommodate the way
you naturally draw. For more information,
see “Rotating and Flipping the Canvas” on
page 34.
edges from the image.
Page 15
Tool Description
Perspective Grid tool The Perspective Grid tool lets you select and
move the location of the perspective grid
lines, the vanishing point, the horizon line,
the ground line, and the picture plane. For
more information, see “Using the
Perspective Grid” in the Help.
Divine Proportion tool The Divine Proportion tool lets you plan
compositions by using guides based on a
classical composition method.
Layout Grid tool The Layout Grid tool lets you divide your
canvas so that you can plan your
composition. For example, you can divide
your canvas into thirds vertically and
horizontally to use the compositional rule of
thirds.
Workspace Tour 11
Page 16
Tool Description
Tools that Apply Color or Adjust Tone
Brush tool The Brush tool lets you paint and draw on
the canvas or a layer. Brush categories
include pencils, pens, chalk, an airbrush, oil
paints, watercolors, and more.
When the Brush tool is selected, you can
choose specific brushes from the
Brush Selector bar.
Paint Bucket tool The Paint Bucket tool lets you fill an area.
The property bar shows choices for what
area to fill and what to fill it with.
Dropper tool The Dropper tool lets you pick up a color
from an existing image. The property bar
shows you values for the color. When you
select a color with the Dropper tool, that
color becomes the current color on the
Colors palette.
Dodge tool The Dodge tool lets you lighten the
highlights, midtones, and shadows in an
image.
Corel Painter 11 Getting Started Guide12
Page 17
Tool Description
Burn tool The Burn tool lets you darken the highlights,
midtones, and shadows in an image.
Cloner tool The Cloner tool gives you quick access to the
last Cloner brush variant you used.
Rubber Stamp tool The Rubber Stamp tool gives you quick
access to the Straight Cloner brush variant,
allowing you to clone point to point in an
image or between images.
Eraser tool The Eraser tool lets you remove unwanted
areas from the image.
Selection Tools
Rectangular Selection tool The Rectangular Selection tool lets you
create rectangular selections.
Oval Selection tool The Oval Selection tool lets you create oval
selections.
Workspace Tour 13
Page 18
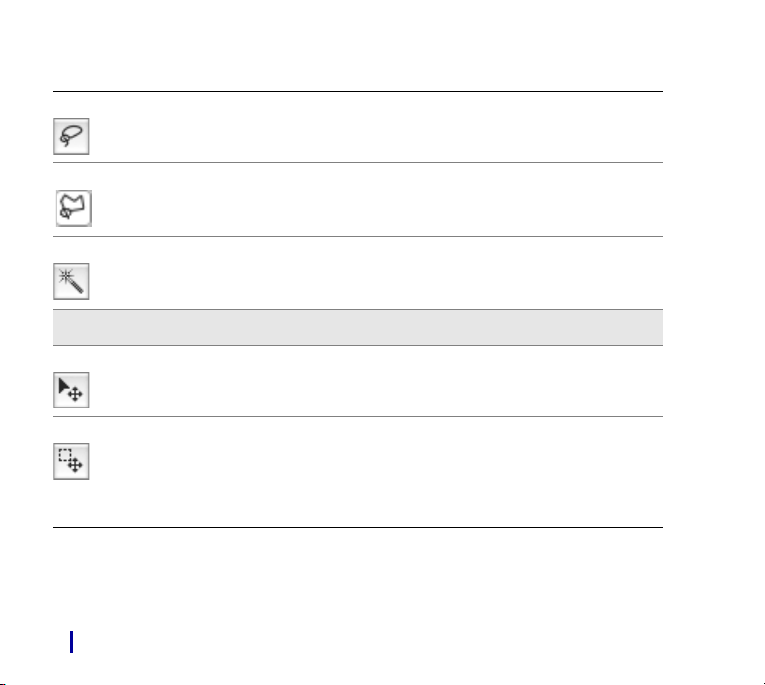
Tool Description
Lasso tool The Lasso tool lets you draw a freehand
selection.
Polygonal Selection tool The Polygonal Selection tool lets you select
an area by clicking at different points on the
image to anchor straight line segments.
Magic Wand tool The Magic Wand tool lets you click or drag
in the image to select an area of similar
color.
Adjuster Tools
Layer Adjuster tool The Layer Adjuster tool is used to select,
move, and manipulate layers.
Selection Adjuster tool The Selection Adjuster tool lets you select,
move, and manipulate selections created
with the Rectangular, Oval, and Lasso
selection tools and those converted from
Shapes.
Corel Painter 11 Getting Started Guide14
Page 19
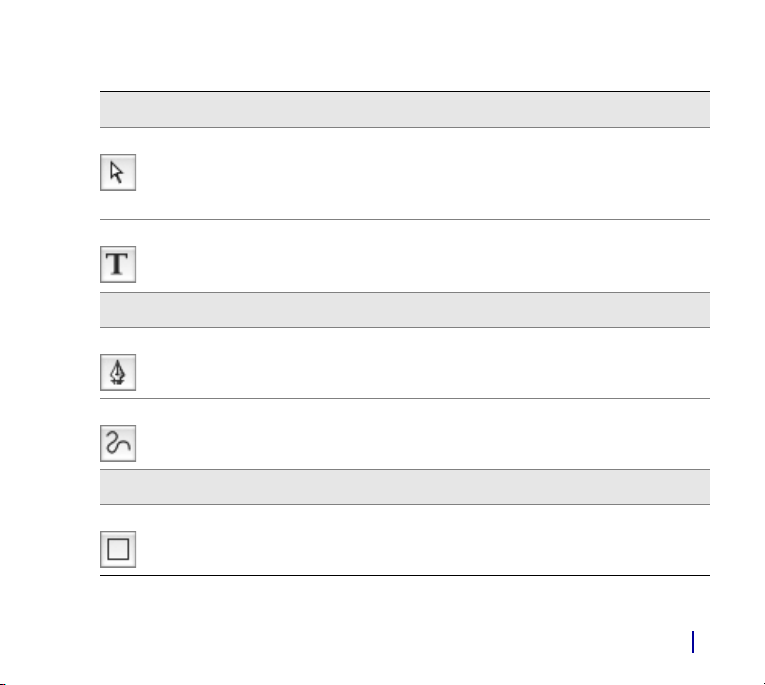
Tool Description
Shape Tools
Shape Selection tool The Shape Selection tool is for editing Bézier
curves (shape paths). You use the Shape
Selection tool to select and move anchor
points and to adjust their control handles.
Text tool The Text tool creates text shapes. Use the
Text palette to set the font, point size, and
tracking.
Shape Design Tools
Pen tool The Pen tool lets you create straight lines
and curves in shape objects.
Quick Curve tool The Quick Curve tool lets you create shape
paths by drawing freehand curves.
Shape Objects Tools
Rectangular Shape tool The Rectangular Shape tool lets you create
rectangular shape objects.
Workspace Tour 15
Page 20
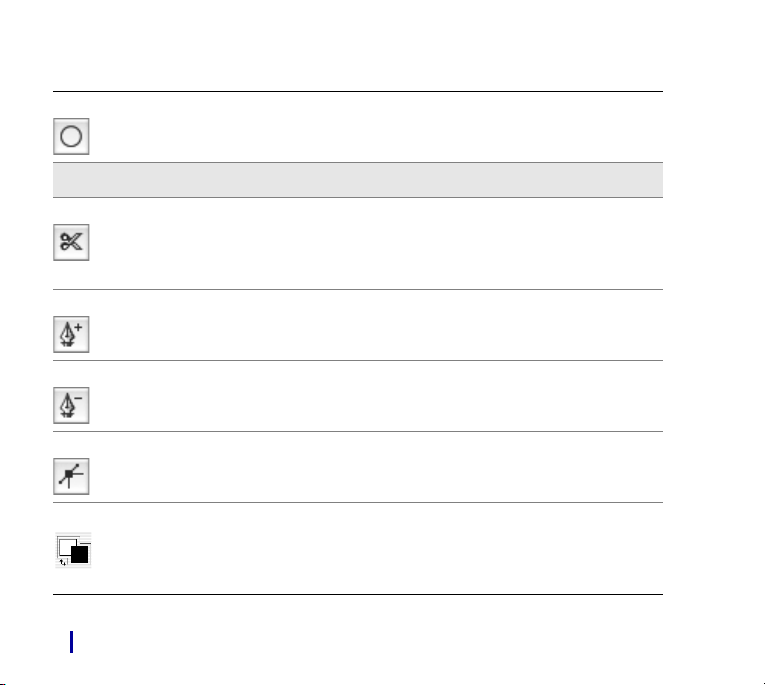
Tool Description
Oval Shape tool The Oval Shape tool lets you create oval
shape objects.
Shape Edit Tools
Scissors tool The Scissors tool let you cut an open or
closed segment. If the segment is closed,
after you click on a line or point to cut the
shape path, the shape path becomes open.
Add Point tool The Add Point tool lets you create a new
anchor point on a shape path.
Remove Point tool The Remove Point tool lets you remove an
anchor point from a shape path.
Convert Point tool The Convert Point tool is used to convert
between smooth and corner anchor points.
Color Selector The Color Selector lets you choose main and
additional colors. The front square displays
the main color, and the back square displays
the additional color.
Corel Painter 11 Getting Started Guide16
Page 21
Tool Description
Transformation Tool
Transform tool The Transform tool lets m od ify s elec ted a reas
of an images by using different
transformation modes.
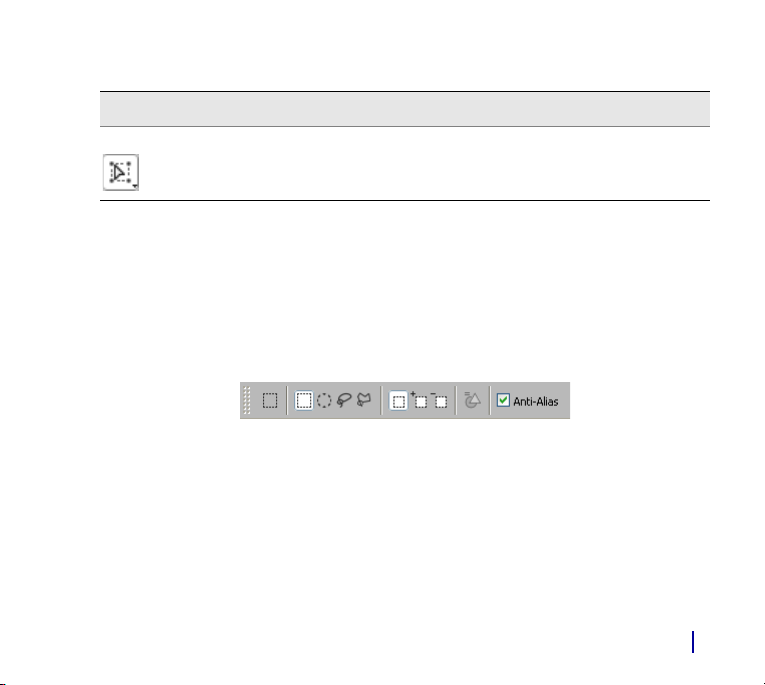
The Property Bar
In Corel Painter, the property bar displays options for the tool that is currently selected in
the toolbox. Here, you can access and change tool options and settings. Tool settings are
retained when you switch from one tool to another. You can also use the property bar to
restore the default settings of the selected tool.
The property bar for the Rectangular Selection tool. You can restore the default
settings for the current tool by clicking the Reset Tool button at the left end of the
property bar.
Workspace Tour 17
Page 22
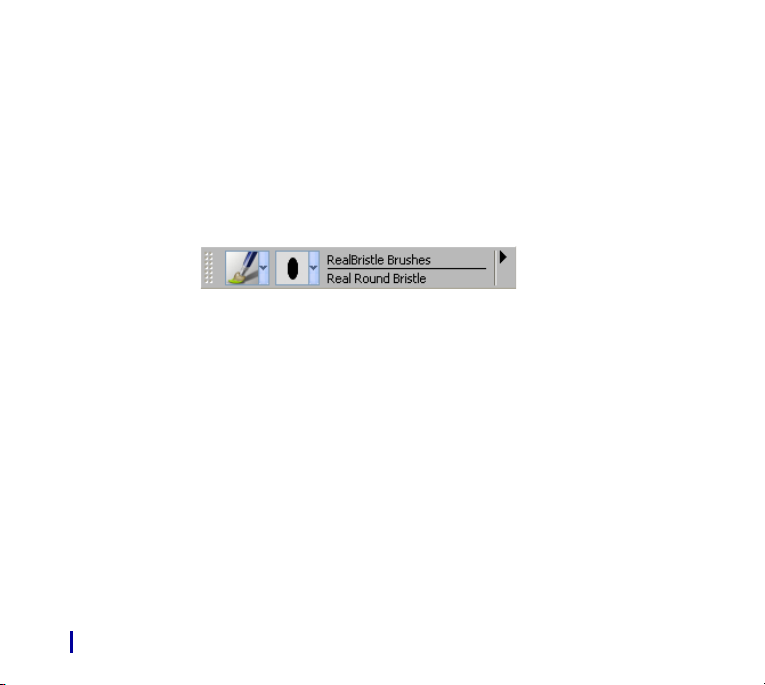
The Brush Selector Bar
The Brush Selector bar lets you choose from a variety of brush categories and variants.
Brush categories are groups of similar brushes and media. Brush variants are specific
brushes and brush settings within a brush category. For example, in the Pastels category,
there are pencil, chalk, soft, and hard pastel variants.
The name of the selected brush category appears at the top of the Brush Selector bar. The
name of the selected brush variant appears under the brush category name.
The Brush Selector bar
You can preview brush categories and variants as thumbnails or in list format. Brush
variants can also be previewed as brushstrokes. The Stroke view shows you both the dab
type and brushstroke of the selected brush variant.
Corel Painter 11 Getting Started Guide18
Page 23
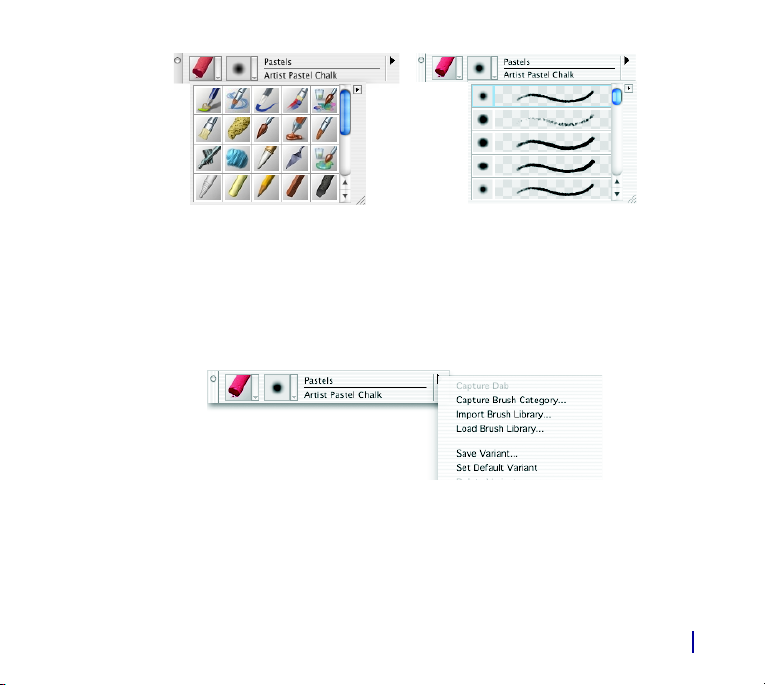
Brush categories can be displayed as thumbnails (left); brush variants can be displayed
as strokes (right).
The Brush Selector bar menu commands, accessed by clicking the menu arrow on the
right side of the Brush Selector bar, are used for creating and loading brushes, working
with brush variants, and manipulating brushstrokes. For more information, see
“Customizing Brushes” in the Help.
Workspace Tour 19
Page 24

The Palettes
The interactive palettes in Corel Painter let you access commands, controls, and settings.
By default, palettes are organized into task-related groups. For example, Brush Controls is
the name given to the group of palettes that contain all the brush-related settings.
You can set up the palette layout in Corel Painter to best suit your working style. Palettes
can be arranged in the application window to give you easy access to the tools and
controls you use most often, and to maximize screen space.
Exploring the Palette Groups
As you work with Corel Painter, you’ll use the following groups of palettes.
Palette Description
Brush Controls
The Brush Controls include the following
palettes for adjusting brushes: General, Size,
Spacing, Angle, Bristle, Well, Rake, Random,
Mouse, Cloning, Impasto, Image Hose,
Airbrush, Water, Liquid Ink, Digital
Watercolor, Artists’ Oils, and RealBristle.
Corel Painter 11 Getting Started Guide20
The Brush Controls are a group of palettes
that let you customize brush variants. The
palettes match the categories on the Stroke
Designer page of the Brush Creator. The
Brush Controls are ideal for making small
adjustments to a brush variant while you
work. For more information about specific
settings, see “Managing Settings and
Controls” in the Help.
Page 25

Palette Description
Color Variability The Color Variability palette contains sliders
to adjust color variability within
brushstrokes. For more information, see
“The Color Variability Palette” in the Help.
Color Expression The Color Expression palette lets you
determine how a stylus applies the Main
Color and Additional Color in Corel Painter
documents. For more information, refer to
“The Color Expression Palette” in the Help.
Color Palettes
Colors The Colors palette lets you choose main and
additional colors for painting in Corel Painter
documents. You can also use the Clone
Color option on the Colors palette. For more
information, see “Using the Colors Palette”
in the Help.
Mixer The Mixer palette lets you mix and blend
colors as you would on an artist’s palette. It
contains its own set of tools. For more
information, see “Working with the Mixer
Palette” in the Help.
Workspace Tour 21
Page 26

Palette Description
Color Sets The Color Sets palette displays the colors in
the current color set. You can use color sets
to organize groups of colors. Some color
sets are organized by both name and color
relationship. For more information, refer to
“Working with Color Sets” in the Help.
Library Palettes
Papers, Gradients, Patterns, and Weaves The Library palettes let you choose and edit
resources. You can view resources as
thumbnails or in a list, and preview the
selected resource. For more information, see
“Using Paper Texture,” “Using Gradients,”
“Using Patterns,” and “Using Weaves” in the
Help.
Corel Painter 11 Getting Started Guide22
Page 27

Palette Description
Layers and Channels Palettes
Layers The Layers palette contains thumbnail
previews of all the layers in a Corel Painter
document. You can use the buttons on the
Layers palette to arrange layers, use Dynamic
Plug-ins, add new layers (including
Watercolor and Liquid Ink layers), create
layer masks, and delete layers. You can also
set the composite method and depth, adjust
the opacity, and lock and unlock layers. For
more information, see “Layers” in the Help.
Channels The Channels palette contains thumbnail
previews of all the channels in a
Corel Painter document, including RGB
composite channels, layer masks, and alpha
channels. The buttons on the palette can be
used to load, save, and invert existing
channels, and to create new channels. For
more information, see “Alpha Channels” in
the Help.
Workspace Tour 23
Page 28

Palette Description
Text and Scripts Palettes
Text The Text palette lets you perform all tasks
relating to text in a Corel Painter document,
such as choosing fonts, adjusting opacity,
and applying drop shadows. For more
information, refer to “Working with Text” in
the Help.
Scripts The Scripts palette gives you access to all
commands and settings related to scripts.
For example, you can open, close, play, and
record scripts from the Scripts palette. For
more information, see “Scripting” in the
Help.
Info and Tracker Palettes
Info The Info palette provides you with an image
preview; document information, such as
width and height; X and Y coordinates and
the cursor position; context-sensitive
information based on the selected tool; and
unit information, such as pixels, inches, and
resolution. The palette menu lets you choose
the preview style and how RGB values are
displayed.
Corel Painter 11 Getting Started Guide24
Page 29

Palette Description
Tracker The Tracker palette temporarily stores brush
categories, variants, and dab types when
you apply brushstrokes to the canvas. Each
time you use a new brush, the variant is
saved on the Tracker palette.
Image Portfolio and Selection Portfolio
Palettes
Image Portfolio and Selection Portfolio These palettes contain all of the images or
selections in the current library. You can view
the items as thumbnails or in a list, as well as
preview the current item. For more
information, see “Storing Images with the
Image Portfolio” and “Using the Selection
Portfolio” in the Help.
Photo Painting Palettes
Underpainting The Underpainting palette lets you adjust
tone, color, and detail in a photo in
preparation for auto-painting. This palette is
used in the first step of the photo-painting
process.
Workspace Tour 25
Page 30

Palette Description
Auto-Painting The Auto-Painting palette lets you specify a
range of settings that control how
brushstrokes are applied. This palette is used
in the second step of the photo-painting
process.
Restoration The Restoration palette lets you fine-tune a
painting by providing brushes that help you
restore detail. This palette is used in the third
step of the photo-painting process.
Composition Palettes
Divine Proportion The Divine Proportion palette lets you
customize the Divine Proportion guide — a
tool that helps you plan a layout according
to a classic composition method.
Layout Grid The Layout Grid palette lets you customize
the Layout Grid — a tool that helps you
divide your canvas so that you can plan your
composition.
Corel Painter 11 Getting Started Guide26
Page 31

Customizing the Workspace
Corel Painter lets you completely customize your workspace to suit your workflow needs.
You can customize Brush Libraries, Paper Libraries, and Portfolios and save these changes
to use again whenever you like. In addition, you can easily create multiple workspaces,
each with different libraries and portfolios. You can even share these customized
workspaces with others by importing or exporting them.
To create a new workspace
1 From the Window menu, choose Workspace New Workspace.
2 In the New Workspace dialog box, type the name of the new workspace.
3 From the Based On pop-up menu, choose the workspace on which you want to base
the new workspace.
4 Click Save.
The current workspace switches to the new workspace you just created.
To customize a workspace
1 From the Window menu, choose Workspace Customize Workspace.
2 From the Workspace pop-up menu, choose the workspace you want to customize.
3 In the Media list, expand the folders for any of the media categories you want to
customize by clicking on the folder name or the + icon.
4 Click on the eye icon that appears next to the name of each media variant you want to
show or hide.
Workspace Tour 27
Page 32

A closed eye indicates that the media variant is not visible in the specified workspace.
An open eye indicates that the media variant is visible in the specified workspace.
Note that you cannot hide every media variant within a media category. At least one
media variant appears for each media category.
• To rename a media variant, click on the variant, and type its new name in the
Preview text box.
• To reorder media variants, drag each media variant to a new location in the list.
5 Click Done.
To switch to a different workspace
• From the Window menu, choose Workspace [Workspace Name].
To import a workspace
1 To import a workspace, do one of the following:
• From the Window menu, choose Workspace
• From the Window menu, choose Workspace
Import Workspace.
2 Choose the workspace file you want to import, and click Open.
If you are working in the Customize Workspace dialog box, the name of the
imported workspace appears in the Workspace pop-up menu. If you chose
Import Workspace from the Window menu, the workspace you just imported
becomes the current workspace.
Import Workspace.
Customize Workspace and click
Corel Painter 11 Getting Started Guide28
Page 33

To export a workspace
1 To export a workspace, do one of the following:
• From the Window menu, choose Workspace
• From the Window menu, choose Workspace
Export Workspace.
2 Choose the workspace you want to export, and click Open.
3 Choose a destination for the workspace, and click Save.
Export Workspace.
Customize Workspace and click
Workspace Tour 29
Page 34

Artwork by Andrew Jones
Page 35

Basics
The Corel Painter application provides a digital workspace in which you can create new
images, or alter existing images, by using the Natural-Media tools and effects. Your
working image is known as a document and is displayed in a document window. This
document window includes navigation and productivity features to help you work
efficiently.
Every artist works in a unique way, and every computer system has its own configuration
of memory, disks, printers, and accessories. Corel Painter preferences let you customize
the program for your own work style and for optimum performance on your particular
system. You can also customize the features of your tablet and pens in Corel Painter.
This section contains the following topics:
• Understanding Resolution
• Setting Preferences
Understanding Resolution
When you work with images in a digital workspace, it is helpful to understand the
concept and applications of resolution. Resolution refers to how Corel Painter measures,
displays, saves, and prints images — either as small squares of color called “pixels” or as
mathematical objects called “vectors.”
31Basics
Page 36

A document’s resolution affects both its appearance on your computer screen and its
print quality. You can specify a document’s resolution when you create a new document,
acquire an image, or save or export a file.
Resolution and Screen Appearance
Most monitors have a resolution of 72 pixels per inch (ppi). The Corel Painter display
default is 72 ppi, which means that each pixel in the Corel Painter image occupies 1 pixel
on your monitor. The display resolution does not affect the document’s actual number of
pixels per inch — it affects only how the image is displayed on the monitor.
For example, a 300-ppi image is displayed on-screen at approximately four times its actual
size. Because each pixel in the Corel Painter image occupies 1 pixel on your monitor, and
the monitor’s pixels are approximately four times the size of the image’s pixels (72 ppi
versus 330 ppi), the image must appear four times larger on-screen in order to display all
of the pixels. In other words, your 330-ppi document will print at approximately
one-quarter of its on-screen size. To view the image at its actual size, you can set the
zoom level to 25%.
If you set the dimensions in pixels and then change the number of pixels per inch
(resolution), this change will affect the size of the printed image. If you set your document
size in inches, centimeters, points, or picas and then change the resolution, the
dimensions of the printed image will not be affected.
Corel Painter 11 Getting Started Guide32
Page 37

Resolution and Print Quality
The resolution of output devices (printers) is measured in dots per inch, and in the case of
halftones, lines per inch (lpi). Output device resolutions vary, depending on the type of
press and paper used. In general, a photograph is output at a crisp 150 lpi if printed on
glossy magazine stock, and at 85 lpi if printed on newspaper stock.
If you are using a personal laser or inkjet printer, set your document size in inches,
centimeters, points, or picas at the dots-per-inch setting specific to your printer. Most
printers produce excellent output from images set at 300 ppi. Increasing the file’s
pixels-per-inch setting does not necessarily improve the output and may create a large,
unwieldy file.
If you are using a commercial printer or a more sophisticated output device, the
dimensions of the image should always be set to the actual size that you want the image
to appear in the printed piece. A good rule of thumb is to set the number of pixels per
inch to twice the desired lines per inch. So, at 150 lpi, the setting should be twice that, or
300 ppi; at 85 lpi, the setting should be 170 ppi. It’s a good idea to check with your
service bureau if you have questions about output device resolution.
Basics 33
Page 38

Rotating and Flipping the Canvas
Corel Painter lets you rotate and flip the Canvas layer. When you rotate or flip the Canvas
layer, all other layers move along with it. You can rotate the Canvas layer by a predefined
amount, or you can choose the amount of rotation. If your document has layers of
different types, you are prompted to commit all of them to default, pixel-based layers. The
Canvas layer increases in size when necessary, so rotating or flipping it does not cause the
contents of the other layers to be cropped.
To rotate the Canvas layer
1 Choose Canvas menu Rotate Canvas.
2 Perform a task from the following table.
To Do the following
Rotate the Canvas layer 180 degrees Choose 180.
Rotate the Canvas layer 90 degrees
clockwise
Rotate the Canvas layer 90 degrees
counterclockwise
Rotate the Canvas layer by a user-defined
amount
Corel Painter 11 Getting Started Guide34
Choose 90 CW.
Choose 90 CCW.
Choose Arbitrary; in the Rotate Selection
dialog box, type a number in the Angle box
to specify degrees of rotation.
Page 39

To f l i p t h e C an v a s
1 Choose Canvas menu Rotate Canvas.
2 Choose one of the following:
• Flip Canvas Horizontal
• Flip Canvas Vertical
Setting Preferences
Corel Painter has several different pages of the Preferences dialog boxes: General, Brush
Tracking, Customize Keys, Undo, Shapes, Operating System (Windows), Palettes and UI,
and Memory and Scratch. For detailed information about preferences, refer to “Setting
Preferences” in the Help.
Setting up the Drawing Cursor
You can choose a cursor icon and its orientation. You can also set the drawing cursor to
show a brush ghost — a representation of the brush variant you choose from the Brush
Selector bar.
Basics 35
Page 40

The brush ghost (left) gives you information about the size of your brush variant. The
Enhanced brush ghost (right) gives you information about the tilt, bearing, and
rotation of your pen.
To choose a drawing cursor icon
1 On the General page of the Preferences dialog box, enable the Brush option in the
Cursor Type area.
2 Choose one of the following icon options from the pop-up menu to the right of the
Brush option:
•Brush
• Cross
• Torus
•Triangle
• Hollow Triangle
• Gray Triangle
The selected cursor icon appears in the Orientation area.
3 Enable an Orientation option.
Corel Painter 11 Getting Started Guide36
Page 41

If you want the drawing cursor icon to be a single pixel, enable the Single Pixel
option in the Cursor Type area.
To set brush ghost options
• On the General page of the Preferences dialog box, choose one of the following
options:
• Enable Brush Ghosting — gives you immediate visual feedback on the cursor,
showing you the shape and size of the selected brush
• Enhanced Brush Ghost — gives you visual feedback about the brush size as well as
the tilt, bearing, and rotation of the pen. The outer ring indicates the brush size,
and the line indicates the tilt and bearing of the pen. If you have a flat-tip pen that
supports 360-degree rotation, a dot appears along the outer ring to indicate the
pen rotation.
The Enhanced brush ghost gives you more visual feedback about your pen in relation
to the tablet.
Basics 37
Page 42

Brush Tracking Preferences
When you draw with traditional media, the amount of pressure you use with a tool
determines the density and width of your strokes. Using a pressure-sensitive stylus with
Corel Painter gives you this same kind of control. Each artist has a different strength or
pressure level in a stroke. The Brush Tracking preference lets you adjust Corel Painter to
match your stroke strength. This is particularly useful for artists with a light touch. If a
light stroke leaves no color on the canvas, you should use Brush Tracking to increase
sensitivity.
You might also change brush tracking between phases of a project. You could use a light
touch when sketching with a pencil brush variant, then set tracking for more pressure
when you switch to an oil paint variant. Corel Painter saves Brush Tracking between
sessions, so whatever tracking sensitivity you set will be the default the next time you
open the application.
To set brush tracking
1 Do one of the following:
• (Mac OS) Choose Corel Painter 11 menu
• (Windows) Choose Edit menu
2 Drag in the scratch pad in a “normal” stroke.
Use the pressure and speed you prefer when drawing or painting. For specific
adjustments, you can move the sliders.
Corel Painter 11 Getting Started Guide38
Preferences Brush Tracking.
Preferences Brush Tracking.
Page 43

Use the Brush Tracking dialog box to customize how Corel Painter responds to your
stroke pressure and speed.
Basics 39
Page 44

Artwork by Heather Michelle Bjoershol
Page 45

Painting
The Corel Painter application lets you draw and paint as you might with real artists’ tools
and media. In your studio, you use brushes, pens, pencils, chalk, airbrushes, and palette
knives to make marks on a canvas or piece of paper. With Corel Painter, an infinite variety
of marks are possible. Like a fully stocked art store, Corel Painter supplies you with many
different brushes and drawing tools, each with modifiable characteristics.
This section contains the following topics:
• Exploring Brushes
• Understanding Brush Categories
• Choosing Brush Settings
• Exploring Painting
Exploring Brushes
The Corel Painter Brush tool offers users a wide range of preset painting and drawing
tools called brush variants. Brush variants are organized into categories, such as
Airbrushes, Artists’ Oils, Calligraphy, Pencils, and Watercolor. They are designed with real
media in mind, so you can select a tool with an expectation of how it will behave. For
example, you’ll find a 2B Pencil brush variant in the Pencils category, and a Fine Camel
brush variant in the Watercolor category. The Brush Selector bar lets you choose a
category and brush variant quickly and easily.
41Painting
Page 46

The Brush Selector bar lets you choose a brush category (left) and a brush variant
(right) quickly and easily.
You can use the Corel Painter brush variants as they are, or you can adjust them to suit
your purposes. Many artists use Corel Painter brush variants with only minor
adjustments — to size, opacity, or grain (how much color penetrates paper texture).
If you want to make more extensive modifications to a brush or create a totally new brush
variant, you can do just that by using brush controls.
Most Corel Painter brushes apply media (a color, gradient, or pattern) to an image. Some
brushes, however, do not apply media. Instead, they make changes to media already in
the image. For example, the Just Add Water brush variant (in the Blenders brush category)
smudges and dilutes existing colors in the image with smooth, anti-aliased strokes. Using
one of these brushes on a blank area of the canvas has no effect.
Corel Painter includes a batch of Natural-Media brushes that use a media application
method called “rendered dab types” to produce “computed” brushstrokes. These brushes
create wonderfully realistic, continuous, smooth-edged strokes. They are fast and more
consistent because the strokes are computed as you draw, not created by applying dabs
of color. In fact, you can’t draw fast enough to leave dabs or dots of color in a stroke.
These brushes allow for rich features that are not possible with the application of
Corel Painter 11 Getting Started Guide42
Page 47

dab-based media. You can take better advantage of tilt and angle, and you can paint with
patterns or gradients. For information about using rendered dab types when customizing
brushes, refer to “Dab Types” in the Help.
If you’re looking for a brush from a previous version of Corel Painter, you can reload the
old version’s brush library.
Selecting a Brush
On the Brush Selector bar, you can choose from brush variants that are arranged in
recognizable categories. The categories are named according to traditional categories of
art media, which lets you select a tool with a reasonable expectation of how it will
behave. In an art store, if the tools in one aisle don’t produce the results you want, you
can try a different aisle. Similarly, with Corel Painter, you can try different brush categories
to find the tool you want.
To show the Brush Selector bar
• In the toolbox, click the Brush tool .
You can also show the Brush Selector bar by choosing Window menu
Selector Bar.
Brush
To choose a brush
1 On the Brush Selector bar, choose a brush category from the Brush Category selector.
2 Choose a variant from the Brush Variant selector.
Painting 43
Page 48

Understanding Brush Categories
In the following section, descriptions of the brush categories are presented in alphabetical
order.
Acrylics
All Acrylic brush variants cover underlying brushstrokes. Many are capable of multicolored
strokes, and others interact with underlying pixels to create realistic effects.
Captured Bristle Thick Acrylic Flat Wet Acrylic
Airbrushes
Airbrushes apply fine sprays of color. Computed airbrushes carefully mirror the feel of a
real airbrush in action. The Wacom® airbrush styluses are fully compatible with the
variants in the Airbrushes category.
Coarse Spray Fine Spray Digital Airbrush
Corel Painter 11 Getting Started Guide44
Page 49

Art Pens
Art Pens are based on brush variants from other brush categories, but they are optimized
to work with flat-tipped pens that support 360-degree barrel rotation.
Artists’ Oils
Brush variants from the Artists’ Oils category let you mix media as though you were
working with traditional oil paints. You can use colors mixed on the Mixer palette and
apply them directly to the canvas. The colors can then be blended with the oils already on
the canvas. Multiple colors from the Mixer palette can be loaded on an Artists’ Oils brush
variant at the same time. Each stroke created with an Artists’ Oils brush variant loads the
brush with a finite amount of oil, which is then transferred to the image. As you apply a
stroke to the canvas, the Artists’ Oil brush loses oil, and the brushstroke becomes fainter.
Because layers don’t have the oily properties of the canvas, brushstrokes applied to a layer
don’t fade as rapidly. Some Artists’ Oil brush variants are palette knives, allowing you to
mix paint directly on the canvas. There are six brush tip profiles designed specifically for
Artists’ Oil brushes. For more information, see “Artists’ Oils Brush Tip Profiles” in the Help.
Bristle Brush Soft Grainy Brush Thick Wet Impasto
Painting 45
Page 50

Artists
Artist brush variants help you paint in the styles of master artists. For example, you can
paint in the style of Vincent Van Gogh, where brushstrokes are multishaded, or in the style
of Georges Seurat, where multiple dots combine to form an image.
When you use any of the Artist brush variants, dragging quickly produces wider strokes.
You can use the Color Variability settings to adjust how the Artist brushstrokes are
colored.
Impressionist Sargent Brush Seurat
Blenders
Blenders affect underlying pixels by moving and mixing them. The variants can reproduce
the effects of blending paint by applying water or oil. You can also smooth drawing lines
and create shading just as you would on a pencil sketch or charcoal drawing.
Just Add Water Smear Smudge
Corel Painter 11 Getting Started Guide46
Page 51

Calligraphy
Whether you want to reproduce the look of calligraphy pen strokes on a grainy texture, or
the smooth strokes of a calligraphy brush, the Calligraphy brush variants offer you a range
of creative options.
Calligraphy Calligraphy Brush Dry Ink
Chalk
Chalk brush variants produce the thick, rich texture of natural chalk sticks, and have
strokes that interact with the paper grain. The opacity is linked to stylus pressure.
Blunt Chalk Square Chalk Variable Chalk
Painting 47
Page 52

Charcoal
Charcoal brush variants range from pencils to hard or soft charcoal sticks. As with other
dry media brush variants, the opacity is linked to stylus pressure. Blender brush variants
can be used to soften and blend the charcoal strokes. For a smooth workflow, keep your
favorite Charcoal and Blender brush variants together in a custom palette.
Charcoal Hard Charcoal Pencil Soft Vine Charcoal
Cloners
The Cloner brush variants behave like other brush variants, except that they take color
from a cloned source. These variants recreate the source imagery while effectively filtering
it, reproducing the image in an artistic style, such as pastel chalk or watercolor.
Original photo used as
Clone Source
Corel Painter 11 Getting Started Guide48
Soft Cloner Impressionist Cloner
Page 53

Colored Pencils
Colored Pencils interact with the canvas texture and unlike other dry media brush variants,
apply strokes with even opacity, regardless of pressure. However, these brush variants do
react to speed. For example, dragging quickly produces a thinner line; dragging slowly
produces a thicker line. As with all pencil-style brush variants, Colored Pencil brush
variants build to black as you draw over the same area of the image.
Colored Pencil Hard Colored Pencil Oily Colored Pencil
Conte
Similar to Chalk, Conte brush variants produce textured strokes that interact with the
paper grain. As with other dry media brush variants, the opacity is linked to stylus
pressure.
Dull Conte Square Conte Tapered Conte
Painting 49
Page 54

Crayons
Crayons offer a range of styles. From soft and dull, to waxy and grainy, they produce
textured strokes that interact with the paper grain. As with other dry media brush
variants, the opacity is linked to stylus pressure.
Basic Crayon Grainy Hard Crayon Waxy Crayon
Digital Watercolor
Digital Watercolor brush variants produce watercolor effects that react with the canvas
texture. Unlike Watercolor brush variants, which work with the Watercolor Layer, Digital
Watercolor strokes can be applied directly to any standard pixel-based layers, including
the canvas. For example, if you’re applying watercolor effects to a photo, Digital
Watercolor brushstrokes can be applied directly to the image. If you’re creating a realistic
watercolor from scratch, the Watercolor brush variants allow colors to flow, mix, and
absorb more realistically.
Digital Watercolor brushstrokes affect each other as you apply one brushstroke on
another, and they react dynamically to the Wet Fringe setting. When you achieve the
results you want, you can keep the brushstrokes from changing by choosing Layers menu
Dry Digital Watercolor.
Corel Painter 11 Getting Started Guide50
Page 55

The width of Digital Watercolor brushstrokes is affected by stylus pressure, with the
exception of the Wet Eraser brush variant.
Simple Water Diffuse Water Dry Brush
Distortion
Distortion brush variants apply special effects that distort an image. Some variants, such
as Grainy Distorto, or Grainy Mover, produce blending effects. Other variants, such as
Hurricane, Turbulence, and Water Bubble, produce more dramatic effects.
Bulge Confusion Hurricane
Painting 51
Page 56

Erasers
There are three types of Eraser brush variants: Eraser, Bleach, and Darkener. Eraser brush
variants erase down to the paper color. Bleach brush variants erase to white, gradually
lightening by removing color. Darkener brush variants are the inverse of Bleach variants.
Darkener brush variants gradually increase color density, building colors toward black.
With all Eraser brush variants, pressure determines how much you erase.
Bleach Eraser Flat Eraser
F/X
F/X brush variants give you wildly creative results. Some add color; others affect
underlying pixels. The best way to appreciate the F/X brush variants is to experiment with
them on an image and a blank canvas.
Fairy Dust The Fire brush works
Corel Painter 11 Getting Started Guide52
with underlying colors
Glow
Page 57

Felt Pens
Felt pen variants let you create marker-style drawings. The brush variants range from fine
point to blunt and have a variety of nib shapes and opacity levels. Felt Pen brush variants
build to black as you draw over the same area of the image.
Art Marker Dirty Marker Felt Marker
Gouache
Gouache brush variants let you paint with the fluidity of watercolors and the opacity of
acrylics. These variants range from fine, detail brushes, to flat or thick brushes.
Brushstrokes created with Gouache brush variants cover underlying brushstrokes.
Detail Opaque Thick Gouache Flat Wet Gouache Round
Painting 53
Page 58

Image Hose
The Image Hose is a special brush that applies images instead of color. The images it
“paints” with come from special image files called nozzles. Each nozzle file contains
multiple images that are organized by characteristics such as size, color, and angle. Each
characteristic (parameter) can be linked to a stylus attribute (animator), such as Velocity,
Pressure, and Direction.
The name of each Image Hose variant tells you which parameter and animator are in
effect. For example, the Linear-Size-P Angle-R brush variant links size to stylus pressure (P)
and sets the angle randomly (R).
Linear-Angle-B (Bearing) Linear-Size-P (Pressure) Spray-Size-P (Pressure)
controls size and spread
Impasto
Impasto brush variants let you create the classic technique of applying thick paint on a
canvas to create depth. The depth information for the brushstroke is stored on the
Impasto Layer.
Corel Painter 11 Getting Started Guide54
Page 59

Some variants apply depth effects to underlying pixels, such as Acid Etch, Clear Varnish,
Depth Rake, and Texturizer-Clear. Other variants apply three-dimensional brushstrokes
with the current paint color.
Opaque Flat Smeary Round Loaded Palette Knife
Liquid Ink
Liquid Ink brush variants combine ink and paint to create a thick, liquid paint effect. There
are three main types of Liquid Ink brush variants: ones that apply ink, ones that remove
ink to create a resist effect, and ones that soften edges. Like Watercolor brush variants, a
new layer is created automatically when you first apply a brushstroke. You can also create
3D effects by double-clicking a Liquid Ink layer and adjusting the Threshold and Amount
sliders.
Clumpy Ink Coarse Bristle Smooth Flat
Painting 55
Page 60

Markers
The brush variants in the Marker category replicate conventional, real-world markers.
The strokes that you make with the Marker variants closely reflect those of traditional,
high-quality markers, mainly because of the way the Marker variants interact with the
canvas. For example, the Flat Rendering Marker in Corel Painter allow color buildup and
pooling.
Flat Rendering Marker Leaky Marker Round Tip Marker
Oil Pastels
Oil Pastel brush variants produce the thick, rich texture of natural pastel sticks. Most Oil
Pastel brush variants cover existing brushstrokes with the current paint color. However, the
Variable Oil Pastel brush variants blend the underlying color into the brushstroke. As with
other dry media brush variants, opacity is linked to stylus pressure.
Oil Pastel Chunky Oil Pastel Variable Oil Pastel
Corel Painter 11 Getting Started Guide56
Page 61

Oils
Oil brush variants let you create effects you’d expect from oil paints. Some variants are
semitransparent and can be used to produce a glazed effect. Other variants are opaque
and cover underlying brushstrokes. For realistic interaction with the Mixer palette, and to
apply multiple colors in a single brushstroke, try using Artists’ Oil brush variants.
Fine Camel Opaque Flat Smeary Round
Palette Knives
You can use Palette Knife brush variants to scrape, push, or pick up and drag colors in
your image. Only one Palette Knife brush variant, the Loaded Palette Knife, applies the
current paint color. Palette Knife dabs are always parallel to the shaft of the stylus.
Loaded Palette Knife Palette Knife applied to
a brushstroke
Smeary Palette Knife
Painting 57
Page 62

Pastels
Pastels range from hard pastel styles that reveal the paper grain to extra soft pastels that
glide on to completely cover existing brushstrokes. Opacity is linked to stylus pressure.
Artist Pastel Chalk Soft Pastel Square Soft Pastel
Pattern Pens
Pattern Pen brush variants let you use a brush to apply a pattern to an image. You
can vary features such as the size of the pattern and the transparency. For example,
Pattern Pen Micro decreases the size of the pattern, and Pattern Pen Transparent applies a
semitransparent version of the pattern.
Pattern Pen Pattern Pen Masked Pattern Pen Marker is
Corel Painter 11 Getting Started Guide58
based on the current
color.
Page 63

Pencils
Pencil brush variants are great for any artwork that would traditionally require pencils;
from rough sketches to fine line drawings. Like their natural counterparts, Pencil brush
variants interact with canvas texture. All of the variants build to black and link opacity to
stylus pressure. The width of Pencil strokes varies according to the speed of the stroke, so
dragging quickly produces a thinner line and dragging slowly leaves a thicker line.
2B Pencil Cover Pencil Greasy Pencil
Pens
Pen brush variants, like the Scratchboard Rake and Bamboo Pen, create realistic effects
without the drawbacks of traditional pens, which can clog, spatter, or run dry.
Croquil Pen Scratchboard Tool Thick and Thin Pen
Painting 59
Page 64

Photo
Photo brush variants let you modify digital images or existing artwork. For example, you
can clean up photos by adjusting color or removing scratches, add a blur effect, or
sharpen an image.
Blur Dodge Burn
RealBristle
RealBristle brush variants bring a new level of realism to the digital painting experience by
simulating the natural movement of an artist’s brush. The RealBristle brushes are based on
individual brushes from other categories, but their Natural-Media capabilities are
enhanced so you can better control how the bristles interact with the canvas and the
paint.
Real Fan Short Real Round Bristle Real Tapered Round
Corel Painter 11 Getting Started Guide60
Page 65

Smart Stroke
Smart Stroke brush variants are based on popular brush variants from other brush
categories, but they are optimized to work with the Photo Painting System.
Sponges
Sponges let you create a variety of textures by applying the current paint color to cover or
blend existing colors. Some Sponge brush variants apply dabs of paint at random angles
with each click of a stylus. Wet sponge brush variants, such as Grainy Wet Sponge, apply
sponge dabs as you drag across the canvas. Smeary Wet Sponge variants let you blend the
current paint color with existing colors as you drag across the canvas.
Dense Sponge Grainy Wet Sponge Smeary Wet Sponge
Painting 61
Page 66

Sumi-e
Sumi-e brush variants let you create flowing sumi-e-style brushstrokes. There are a variety
of brush sizes and shapes to help you recreate traditional sumi-e brushstrokes.
Coarse Bristle Sumi-e Detail Sumi-e Sumi-e Brush
Tinting
Tinting brush variants let you apply effects to photos or existing artwork. For example, you
can apply translucent color to areas of a black and white photo by using the Basic Round
brush variant. Applying each color to a separate Gel or Colorize layer lets you adjust the
opacity of each color layer independently for a more subtle or dramatic effect.
Basic Round Blender Soft Grainy Round
Corel Painter 11 Getting Started Guide62
Page 67

Watercolor
Watercolor brush variants paint onto a watercolor layer, which enables the colors to flow,
mix, and absorb into the paper. The watercolor layer is created automatically when you
first apply a brushstroke with a Watercolor brush variant. The layer lets you control the
wetness and evaporation rate of the paper to effectively simulate conventional watercolor
media. Most Watercolor brush variants interact with the canvas texture. You can use
Watercolor brush variants to apply a watercolor effect to a photo by lifting the canvas to
the watercolor layer. To paint directly on the canvas, use a Digital Watercolor brush
variant.
Diffuse Flat Splatter Water Wet Camel
Painting 63
Page 68

Choosing Brush Settings
Basic brush controls for size, opacity, and grain are located on the property bar. The
property bar may also contain additional controls for the selected brush category, such as
resaturation, bleed, and jitter.
When a brush is selected and positioned over the canvas, the cursor changes, by default,
into a “ghost” of the brush — mirroring size and shape — so you can see the area that
you’re about to paint. This ghost brush provides a handy way to see if a change in size is
required.
The Brush Creator contains additional controls depending on the variant you have
selected. For example, the Brush Creator offers more sophisticated controls for resizing
and shaping brushes, including a minimum (Min) size setting. When a brush takes
advantage of the Min size setting, you’ll see strokes taper and widen as stylus pressure or
direction is varied. For complete information about using the Brush Creator, refer to
“Customizing Brushes” in the Help. For more information on saving customized brushes
as custom variants, refer to “Saving Brush Variants” in the Help.
Corel Painter 11 Getting Started Guide64
Page 69

Setting Brush Size
The Size slider on the property bar determines the size of a single brush dab. The text field
next to this slider lets you enter a specific size (in pixels).
To s e t b r u s h si ze
1 Choose the Brush tool from the toolbox.
2 Choose a brush from the Brush Selector bar.
3 On the property bar, type a value in the Size box, or adjust the pop-up slider.
Corel Painter may need to rebuild the brush after you resize it. Automatic rebuilding of
modified brushes is the default in Corel Painter. Expect a short delay while
Corel Painter is rebuilding the brush.
Exploring Painting
Many Corel Painter brush variants are digital equivalents of real-life brushes you might
already use. Others let you create images that aren’t possible with real-life tools.
Corel Painter features “computed” brushes that create smooth, continuous strokes. You
can use these brushes to apply color, brush on gradients, or paint with patterns.
Corel Painter brushes can be changed in many ways to create the look you desire. For
example, you can start with a pencil and then change the settings until the tool works like
an airbrush. You can also modify an oil pastel to create a pastel brush, or make a leaky
Painting 65
Page 70

pen act like a camel hair brush. Suddenly, the art store has unlimited aisles and floors,
giving you the freedom to create whatever you imagine. For more information about
using controls to customize brushes, refer to “Customizing Brushes” in the Help.
The result of any single mark or stroke you make with a Corel Painter drawing tool
depends on the following:
• The brush category (or drawing tool) you choose. Refer to “Understanding Brush
Categories” on page 44 for more information.
• The brush variant you select within the brush category. Refer to “Selecting a Brush” on
page 43 for more information about selecting a specific brush variant.
• Controls such as brush size, opacity, and the amount of color penetrating paper
texture. Refer to “Choosing Brush Settings” on page 64 for more information.
• The current paper texture. Refer to “Choosing Paper Textures” on page 74 for more
information about selecting paper.
• The color, gradient, or pattern you use as media. Refer to “Painting with Color” on
page 67 and “Painting with Gradients and Patterns” in the Help for more information
about choosing media.
• The brush method. For more information, see “Methods and Subcategories” in the
Help.
Corel Painter 11 Getting Started Guide66
Page 71

Painting with Color
Palette menu arrow
Hue Ring
Saturation/
Value Triangle
Before actually painting, you must choose which media to apply. Most often, you may
choose to apply a color, but selecting a color is just the beginning. Corel Painter offers a
powerful range of color features, including random color variability and color sets.
To paint with color
1 Select a brush that applies media to a document.
2 On the Colors palette, click the palette menu arrow, and choose Standard Colors.
Use the Colors palette to choose a color for painting.
3 Drag or click in the Hue Ring to select a hue.
Painting 67
Page 72

4 Drag or click in the Saturation/Value Triangle to pick the saturation.
The color you select becomes the main color and is displayed in the front square
below the Hue Ring. The back square shows the additional color. The additional color
is not the canvas color; it is used to create two-color brushstrokes and two-point
gradients.
5 Paint in the document window.
To paint with a color already in the image
1 Select a brush that applies media to a document.
2 Hold down Option (Mac OS) or Alt (Windows), and click a color in the image.
The Brush tool switches to the Dropper tool . The color is “picked up” by the
Dropper tool and becomes the main color.
3 Paint in the document window.
Creating Two-Color Brushstrokes
Usually, you work only with the main color — the front square of the two overlapping
squares on the Colors palette. Using one color produces a solid, one-color brushstroke. By
selecting an additional color, you can create a two-color brushstroke.
To set up a two-color brushstroke
1 On the Brush Selector bar, choose a brush category.
Not all brushes can create two-color brushstrokes. Among those that can are Acrylics,
Calligraphy, and Chalk.
Corel Painter 11 Getting Started Guide68
Page 73

2 From the Brush Variant selector, choose a variant with a noncomputed dab type — for
example, the Circular dab type.
A noncomputed dab type is dab-based, as opposed to rendered. For more
information, see “Dab Types” in the Help.
3 On the Colors palette, click the palette menu arrow, and choose Standard Colors.
If the Colors palette is not displayed, choose Window menu
4 Click the Main Color (front) square .
5 Choose a color on the Colors palette or the Color Sets palette.
Color Palettes Colors.
The front square changes according to your selection.
6 Click the Additional Color (back) square .
7 Choose a color on the Colors palette or the Color Sets palette.
The back square changes according to your selection.
8 Click the Main Color (front) square.
This step reactivates the main color for the next time you pick a color.
9 Choose Window menu Brush Controls Color Expression to display the Color
Expression palette.
If the palette is not expanded, click the palette arrow.
10 On the Color Expression palette, choose Direction from the Controller pop-up menu.
11 Paint a “T” in your document. Draw some loops and circles to see how the transition
between colors depends on brushstroke direction.
For information about using the Color Sets palette to choose a color, refer to
“Working with Color Sets” in the Help.
Painting 69
Page 74

For different results, try different Controller settings. For example, choose
Pressure to create color transitions based on the pressure you apply with your
stylus.
Loading Multiple Colors
Imagine the ability to load color at a bristle level, picking up different colors with each
“hair” of a brush — as though filling tiny ink wells. Imagine also the ability to move
multiple colors along with a palette knife, dragging them across your canvas or paper. The
Brush Loading feature affects how paint comes off a brush and what happens to the
pixels underneath.
When Brush Loading is not active, brushes interact with previously applied colors by
sampling underlying pixels and then loading the brush with one new color — the average
of those that were sampled. With Brush Loading active, brushes can literally “pick up”
existing colors, hair by hair. This capability offers truer color interaction, astounding color
variations, and better cloning results.
To paint with multiple colors
1 Choose a brush.
2 On the Stroke Designer page of the Brush Creator, click General.
3 Choose Static Bristle from the Dab Type pop-up menu.
4 Choose Multi from the Stroke Type pop-up menu.
5 On the Stroke Designer page, click Well, and enable the Brush Loading check box.
Corel Painter 11 Getting Started Guide70
Page 75

This step activates the brush’s ability to pick up underlying colors.
6 Adjust the Resaturation and Bleed sliders.
The Bleed setting determines how much underlying paint is affected by the
brushstroke. A higher Bleed setting, combined with a low Resaturation setting, can
enhance the Brush Loading feature. A resaturation value of 0, combined with different
levels of bleed, will cause your brush to smear image color, rather than deposit it. In
this case, the lower the bleed, the longer the smear.
7 On the Stroke Designer page, click Spacing, and adjust the Spacing and Min Spacing
sliders to create fewer “echo” artifacts in your smeared stroke.
8 Drag a brushstroke through existing paint to see how the paint is “picked up” from
the underlying pixels and moved across the canvas.
It is easier to see the Brush Loading feature if the canvas is not white. To fill the
canvas with another color, see “Filling an Area with Media” in the Help.
You can tie brush controls like Bleed to the Controller setting on the
Color Expression palette. For example, if you choose Pressure, each stroke bleeds
more or less, depending on how hard you press the stylus. For more information,
refer to “Expression Settings” in the Help.
Painting 71
Page 76

Artwork by Daniel Cox
Page 77

Te xt u r e s
With Corel Painter, you can apply paper textures to your image.
Using Paper Texture
With traditional art media, the results from using a marking tool depend on the texture of
the surface to which it is applied. Corel Painter allows you to control the texture of the
canvas to achieve the results you’d expect from using traditional media on a given
surface — pencil on watercolor paper, felt pens on cotton paper, chalk on the sidewalk,
and so on.
Some brushes, like those in the Airbrushes category, don’t reveal paper texture in their
strokes. This behavior corresponds with that of a traditional airbrush.
Most brushes interact with the current paper texture.
73Textures
Page 78

You can use paper textures in many ways. Brushes interact with paper “grain,” just as
traditional tools react with the texture of the surfaces beneath them. Working with paper
grains is useful when you use the Apply Surface Texture command or other effects, such
as Glass Distortion. You can select different paper textures, modify them, organize them in
libraries, and even create your own custom textures.
In Corel Painter, brushes that react with paper texture have a “grainy” method.
The terms “paper grain” and “paper texture” are used synonymously.
Choosing Paper Textures
The Papers palette is where all paper textures are stored. In addition to using it to select
papers, you can use this palette to invert, resize, or randomize paper grain; control
brightness and contrast; or open other paper libraries.
The Paper Selector on the Papers palette.
Corel Painter 11 Getting Started Guide74
Page 79

To choose a paper texture
1 Choose Window menu Library Palettes Papers.
The Papers palette appears. If the palette is not expanded, click the palette arrow.
2 On the Papers palette, click the Paper Selector to display the available paper textures.
3 Choose a paper texture from the Paper Selector.
The Papers palette shows the dimensions, in pixels, of the selected paper. Corel Painter
tiles the paper to cover as much canvas as needed.
You can also choose a paper texture from the Paper Selector in the toolbox.
Corel Painter uses the currently selected texture. You can make a few strokes, and
then change the paper and make a few more strokes to get different results.
Creating Paper Textures
The Make Paper command lets you make your own paper textures. The Capture Paper
command lets you turn a section of an image into a paper texture. When you save
textures, they become available on the Papers palette.
To create a paper texture
1 Choose Window menu Library Palettes Papers.
2 On the Papers palette, click the palette menu arrow, and choose Make Paper.
3 In the Make Paper dialog box, choose a pattern from the Pattern pop-up menu to use
as the basis of your paper texture.
Textures 75
Page 80

4 Adjust the Spacing slider.
Moving the Spacing slider to the right opens up space between rows and columns in
the selected pattern.
5 Adjust the Angle slider.
Moving the Angle slider changes the direction in which the pattern’s rows are lined
up.
6 When you like the look of the texture, enter a name, and click OK.
Your new texture appears as the last item in the Paper Selector.
You can also use the Paper Selector in the toolbox to create paper. Click the Paper
Selector, click the selector menu arrow, and choose Make Paper.
The Make Paper dialog box allows you to create your own textures based on patterns
in the Pattern pop-up menu.
Corel Painter 11 Getting Started Guide76
Page 81

To capture paper texture
1 Open or create an image.
2 Select all or a piece of your source image.
3 On the Papers palette, click the palette menu arrow, and choose Capture Paper.
If you want to blend the distinction between tile borders, move the Crossfade slider in
the Save Paper dialog box to the right.
4 Type the name of your new texture, and click OK.
Your texture now appears in the Paper Selector and is added to the current library.
You can also use the Paper Selector in the toolbox to capture paper texture. Click
the Paper Selector, click the selector menu arrow, and choose Capture Paper.
The Make Fractal Pattern feature creates excellent textures. Some weaves also
produce good textures. For more information, see “Creating Fractal Patterns” in
the Help.
Textures 77
Page 82

Artwork by Cliff Cramp
Page 83

A Short Tour of Corel Painter for Users of Adobe Photoshop
by Cher Threinen-Pendarvis
Getting Started
Corel Painter is known for its responsive, realistic brushes, multitude of rich textures, and
fabulous special effects, which cannot be found in any other program. The biggest
difference that you will notice between Adobe® Photoshop® and Corel Painter is the
warmth and texture of the Natural-Media brushes and paper textures of Corel Painter.
You’ll find brushes with realistic bristles that lay down oily paint, and dry-media brushes,
such as variants in the Chalk and Pastels categories, that are sensitive to textures on the
canvas. Now, let’s get started!
Before we begin the tour, you need to make sure that you are displaying the Default
palettes. To display the Default palettes, choose the Window menu, and choose
Arrange Palettes > Default.
Property Bar
At the very top of the screen, you’ll see the property bar, which is similar to the Options
bar in Photoshop. The property bar changes contextually, depending on the tool that you
choose from the toolbox.
79A Short Tour of Corel Painter for Users of Adobe Photoshop
Page 84

The property bar with the Brush tool selected from the toolbox.
2
1
Brush Selector Bar
On the far right of the property bar is the Brush Selector bar, which contains the amazing
brush categories and brush variants of Corel Painter, such as the RealBristle Brushes
category and its variants.
The Brush Selector bar lets you choose a brush category (1) and a brush variant (2).
Colors palette
Directly below the Brush Selector bar you’ll see the large, beautiful Colors palette, which
lets you choose colors. You can choose colors by using the Hue Ring and the
Saturation/Value Triangle. However, if you prefer to mix color by using numbers, you can
Corel Painter 11 Getting Started Guide80
Page 85

adjust the three sliders that are located under the Hue Ring. By clicking the palette menu
arrow on the right side of the Colors palette, you can set the sliders to display either Red,
Green, and Blue, or Hue, Saturation, and Value.
Also located on the Colors palette is the Clone Color button, a useful control that lets you
paint with color from a source image. On the left of the Colors palette are the Main Color
square or Additional Color squares. The color squares in Corel Painter operate differently
than the Foreground and Background Color squares in Photoshop. To change the color,
you can double-click either the Main Color square or the Additional Color square and then
choose a new color on the Hue Ring. Or you can click in the Saturation/Value Triangle to
choose a new tint or shade. You can use the additional color to create gradients or to use
brushes that paint more than one color. Unlike the Background Color in Photoshop, the
additional color does not affect the canvas.
Before moving on with the tour, click the Main Color square to select it.
A Short Tour of Corel Painter for Users of Adobe Photoshop 81
Page 86

Colors palette.
Hue Ring
Saturation/Value Triangle
Resize handle
In Corel Painter 11, you can resize the Colors palette, which lets you select colors more
accurately. First, undock the Colors palette from the other palettes (if applicable), and
then drag the handle in the lower-right corner of the palette to resize it.
Te xt u re s
A basic paper texture is automatically loaded when you start Corel Painter. You can access
additional rich paper textures from the Paper Selector near the bottom of the toolbox, or
from the Papers palette (Window menu > Papers).
Corel Painter 11 Getting Started Guide82
Page 87

Layers and Mask Channels
In Corel Painter, you can open Photoshop files that contain pixel-based layers and layer
masks. You can access and edit the layers and layer masks by using the Layers palette,
much like in Photoshop. The files you open in Corel Painter have multiple channels intact.
Layers palette.
Photoshop Layer Styles
If you are using native Photoshop layer styles, such as the Drop Shadow layer style, make
sure that you preserve the original Photoshop file in your archive before you convert the
layer style information. That is, save the file with the live layer styles in the Photoshop
(PSD) file format, and then save a new copy of this file. In the new file, convert the layer
style information into pixel-based layers before importing the file into Corel Painter.
A Short Tour of Corel Painter for Users of Adobe Photoshop 83
Page 88

To convert a layer that has a Drop Shadow layer style, select the layer, and then choose
Layers > Layers Style > Convert to Layer. A word of caution: Some aspects of the effects
cannot be reproduced with standard layers.
File Formats
Corel Painter gives you the flexibility of opening Photoshop (PSD) files that are saved in
RGB, CMYK, and grayscale modes while preserving pixel-based layers and mask channels
(also referred to as alpha channels). You can also open TIFF files in Corel Painter, but only
one mask channel is preserved. Layered TIFF (TIF) files that you create in Photoshop are
flattened when you open them in Corel Painter. When you work exclusively with RIFF (RIF),
which is the native file format for Corel Painter, you retain Corel Painter specific elements
when saving files. For instance, special paint media layers, such as Watercolor layers,
require the RIFF format to retain the live “wet” capabilities. However, if you open a
Photoshop file in Corel Painter but plan on reopening the file in Photoshop, you should
continue to save the file to the Photoshop format.
Now roll up your sleeves, grab your stylus, and continue to explore Corel Painter.
Corel Painter 11 Getting Started Guide84
Page 89

About the Author
An award-winning artist and author, Cher Threinen-Pendarvis is a pioneer in digital art.
She has been widely recognized for her mastery of Corel Painter, Adobe Photoshop, and
the Wacom pressure-sensitive tablet and has used these electronic tools since they were
first released. Her artwork has been exhibited worldwide, her articles and art have been
published in many books and periodicals, and she is a member of the San Diego Museum
of Art Artist Guild. She has taught Corel Painter and Adobe Photoshop workshops around
the world and is the principal of the consulting firm Cher Threinen Design. Cher is the
author of The Photoshop and Painter Artist Tablet Book, Creative Techniques in Digital
Painting, and all eight editions of The Painter Wow! Book.
A Short Tour of Corel Painter for Users of Adobe Photoshop 85
Page 90

Artwork by Cher Threinen-Pendarvis
Page 91

A
Acrylics 44
Add Point tool 16
Airbrushes 44
Art Pens 45
Artists brush category 46
Artists’ Oils
brush category 45
Auto-Painting palette 26
Brush tool 12
Brush Tracking preferences 38
Brushes 41
Art Pens 45
choosing settings 64
selecting 43
sizing 65
Smart Stroke 61
Brushstrokes
two-color 68
Burn tool 13
B
Bleed
controlling with stylus 71
Blenders 46
Brush Control palettes 20
Brush ghost, setting options 37
Brush Loading option
painting with multiple colors 70
Brush Selector bar 18
choosing brush from 43
showing 43
C
Calligraphy 47
Canvas
flipping 34
rotating 34
Chalk 47
Channels palette 23
Charcoal 48
Cloner tool 13
Cloners 48
Index 87
Page 92

Color
choosing with Dropper tool 68
loading 70
painting with 67
Color Selector 16
Color Sets palette 22
Colored Pencils 49
Conte 49
Convert Point tool 16
Crayons 50
Document window 7
Drawing cursor, choosing 35
Dropper tool 12
E
Eraser tool 13
Erasers 52
Exporting
workspaces 27
D
Digital Watercolor
brushes 50
Displaying
Brush Selector bar 43
Distortion brushes 51
Divine Proportion
palette 26
tool 11
Docking
Property bar 17
Corel Painter 11 Getting Started Guide88
F
F/X 52
Felt Pens 53
Flipping
canvas 34
G
Gallery 1
Gouache 53
Grabber tool 10
Page 93

I
Image Hose
brush category 54
Image Portfolio 25
Images
sampling color from 68
Impasto brushes 54
Importing
workspaces 27
Info palette 24
L
Layers palette 23
Layout Grid
tool 11
Library Palettes 22
Liquid Ink brushes 55
M
Magnifier tool 10
Menu Bar 5
N
New features 1
O
Oil Pastels 56
Oils 57
Oval Selection tool 13
P
Painting 41
creating two-color brush strokes 68
exploring 65
with color 67
with multiple colors 70
Palette Knives 57
Palettes 20
groups 20
Paper texture 73
capturing 77
choosing 74
creating 75
Pastels 58
Index 89
Page 94

Pattern Pens 58
Pencils 59
Pens 59
Perspective Grid tool 11
Photo brushes 60
Polygonal Selection tool 14
Preferences, setting 35
Printing
quality 33
resolution 33
Property bar 17
closing 17
docking 17
Q
Quick Curve tool 15
R
Rectangular Selection tool 13
Rectangular Shape tool 15
Remove Point tool 16
Resolution 31
print quality 33
screen appearance 32
Restoration palette
definition 26
Rotate Page tool 10
Rotating, canvas 34
Rubber Stamp tool 13
S
Sampling, colors 68
Scissors tool 16
Screen resolution 32
Scripts palette, definition 24
Selecting, brushes 43
Selection Adjuster tool 14
Selection Portfolio 25
Shape Selection tool 15
Sizing, brushes 65
Smart Stroke 61
Sponges 61
Corel Painter 11 Getting Started Guide90
Page 95

Stylus
controlling bleed 71
Sumi-e 62
T
Text palette 24
Text,tool 15
Tinting 62
Toolbox 8
Transform tool 17
Two-color brush strokes 68
U
Underpainting palette 25
W
Wacom stylus
using airbrush with 44
Watercolor
brush variants 63
Workspaces 5
customizing 27
exporting 27
importing 27
switching 27
Index 91
Page 96

Page 97

Copyright 2009 Corel Corporation. All rights reserved.
Corel® Painter™ 11 Getting Started Guide
The contents of this user guide and the associated Corel Painter software are the property
of Corel Corporation and its respective licensors, and are protected by copyright. For more
complete copyright information about Corel Painter, please refer to the About Corel
Painter section in the Help menu of the software.
Protected by U.S. Patents 5,347,620; 5,767,860; Patents Pending.
Product specifications, pricing, packaging, technical support and information
(“specifications”) refer to the retail English version only. The specifications for all other
versions (including other language versions) may vary.
Information is provided by Corel on an “as is” basis, without any other warranties or
conditions, express or implied, including, but not limited to, warranties of merchantable
quality, satisfactory quality, merchantability or fitness for a particular purpose, or those
arising by law, statute, usage of trade, course of dealing or otherwise. The entire risk as to
the results of the information provided or its use is assumed by you. Corel shall have no
liability to you or any other person or entity for any indirect, incidental, special, or
consequential damages whatsoever, including, but not limited to, loss of revenue or
profit, lost or damaged data or other commercial or economic loss, even if Corel has been
advised of the possibility of such damages, or they are foreseeable. Corel is also not liable
for any claims made by any third party. Corel's maximum aggregate liability to you shall
not exceed the costs paid by you to purchase the materials. Some states/countries do not
allow exclusions or limitations of liability for consequential or incidental damages, so the
above limitations may not apply to you.
Page 98

Corel, the Corel logo, Painter, and Natural-Media are trademarks or registered trademarks
of Corel Corporation and/or its subsidiaries in Canada, the U.S., and/or other countries.
Adobe and Photoshop are either registered trademarks or trademarks of Adobe Systems
Incorporated in the United States and/or other countries. Mac OS is a trademark of Apple
Inc., registered in the U.S. and other countries. Wacom is a registered trademark of
WACOM Company, Ltd. in the United States and/or other countries. Windows is either a
registered trademark or trademark of Microsoft Corporation in the United States and/or
other countries. Other product, font, and company names and logos may be trademarks
or registered trademarks of their respective companies.
002029
 Loading...