


 Loading...
imageCLASS
LBP664Cx / LBP623Cdw / LBP621Cw
User's Guide
USRMA-3625-01 2019-12 en |
Copyright CANON INC. 2019 |
Contents |
|
Important Safety Instructions ........................................................................................................... |
2 |
Installation ............................................................................................................................................................... |
3 |
Power Supply ............................................................................................................................................................ |
5 |
Handling ................................................................................................................................................................... |
6 |
Maintenance and Inspections .................................................................................................................................... |
9 |
Consumables .......................................................................................................................................................... |
10 |
Setting Up .......................................................................................................................................................... |
14 |
Main Functions ....................................................................................................................................................... |
15 |
Preparations Required Before Use ........................................................................................................................... |
16 |
Preventing Unauthorized Access .............................................................................................................................. |
17 |
Setting Up Using the Setup Guide ............................................................................................................................ |
19 |
Setting the Date/Time ............................................................................................................................................. |
21 |
Setting Up the Network Environment ...................................................................................................................... |
23 |
Selecting Wired LAN or Wireless LAN ..................................................................................................................... |
25 |
Connecting to a Wired LAN .................................................................................................................................. |
26 |
Connecting to a Wireless LAN ............................................................................................................................... |
27 |
Setting Up Connection Using WPS Push Button Mode ....................................................................................... |
29 |
Setting Up Connection Using WPS PIN Code Mode ........................................................................................... |
31 |
Setting Up Connection by Selecting a Wireless Router ....................................................................................... |
33 |
Setting Up Connection by Specifying Detailed Settings ...................................................................................... |
36 |
Checking the SSID and Network Key ............................................................................................................... |
39 |
Setting IP Addresses ........................................................................................................................................... |
40 |
Setting IPv4 Address ..................................................................................................................................... |
41 |
Setting IPv6 Addresses .................................................................................................................................. |
44 |
Viewing Network Settings .................................................................................................................................... |
47 |
Configuring Settings for Communication with a Computer ...................................................................................... |
50 |
Configuring Printing Protocols and WSD Functions ........................................................................................... |
51 |
Configuring Printer Ports ............................................................................................................................... |
54 |
Setting Up Print Server .................................................................................................................................. |
57 |
Configuring the Machine for Your Network Environment ......................................................................................... |
60 |
Configuring Ethernet Settings ........................................................................................................................ |
61 |
Changing the Maximum Transmission Unit ...................................................................................................... |
63 |
Setting a Wait Time for Connecting to a Network .............................................................................................. |
64 |
Configuring DNS .......................................................................................................................................... |
65 |
Configuring SMB .......................................................................................................................................... |
69 |
Configuring WINS ......................................................................................................................................... |
71 |
Monitoring and Controlling the Machine with SNMP ......................................................................................... |
73 |
Other Network Settings ................................................................................................................................. |
77 |
Installing Drivers .................................................................................................................................................... |
81 |
Basic Operations .......................................................................................................................................... |
84 |
Parts and Their Functions ........................................................................................................................................ |
87 |
I |
|
Front Side .......................................................................................................................................................... |
88 |
Back Side ........................................................................................................................................................... |
90 |
Interior .............................................................................................................................................................. |
91 |
Multi-Purpose Tray .............................................................................................................................................. |
92 |
Paper Drawer ..................................................................................................................................................... |
93 |
Operation Panel ................................................................................................................................................. |
95 |
Turning ON the Machine ......................................................................................................................................... |
99 |
Turning OFF the Machine ................................................................................................................................... |
100 |
Turning OFF the Machine by Remote Operation ............................................................................................. |
101 |
Powering OFF at a Fixed Time ...................................................................................................................... |
102 |
Restarting the Machine ..................................................................................................................................... |
104 |
Using the Operation Panel .................................................................................................................................... |
106 |
Basic Screens ................................................................................................................................................... |
107 |
Home Screen ............................................................................................................................................. |
108 |
<Status Monitor> Screen ............................................................................................................................. |
111 |
Message Display ......................................................................................................................................... |
115 |
Basic Operation ................................................................................................................................................ |
116 |
Entering Text ................................................................................................................................................... |
121 |
Logging in to the Machine ..................................................................................................................................... |
125 |
Loading Paper ....................................................................................................................................................... |
126 |
Loading Paper in the Paper Drawer .................................................................................................................... |
128 |
Loading Paper in the Multi-Purpose Tray ............................................................................................................. |
134 |
Loading Envelopes ............................................................................................................................................ |
139 |
Loading Preprinted Paper .................................................................................................................................. |
142 |
Specifying Paper Size and Type .......................................................................................................................... |
144 |
Specifying Paper Size and Type in the Paper Drawer ....................................................................................... |
145 |
Specifying Paper Size and Type in the Multi-Purpose Tray ................................................................................ |
147 |
Registering Default Paper Settings for the Multi-Purpose Tray ......................................................................... |
150 |
Registering a Custom Paper Size .................................................................................................................. |
153 |
Limiting the Paper Sizes Displayed ................................................................................................................ |
155 |
Automatically Selecting an Appropriate Paper Source for Each Function ............................................................ |
156 |
Customizing the Display ........................................................................................................................................ |
158 |
Customizing the Home Screen ........................................................................................................................... |
159 |
Changing the Default Settings for Functions .......................................................................................................... |
161 |
Setting Sounds ...................................................................................................................................................... |
162 |
Entering Sleep Mode ............................................................................................................................................. |
163 |
Using a USB Memory Device .................................................................................................................................. |
165 |
Printing .............................................................................................................................................................. |
168 |
Printing from a Computer ..................................................................................................................................... |
169 |
Canceling Prints ............................................................................................................................................... |
171 |
Checking the Printing Status and Log .................................................................................................................. |
174 |
Various Printing Methods ...................................................................................................................................... |
176 |
Printing a Document Secured by a PIN (Secure Print) ............................................................................................ |
177 |
Printing via Secure Print .............................................................................................................................. |
178 |
II
Printing from a USB Memory Device (Memory Media Print) .................................................................................... |
182 |
Receiving I-Faxes for Printing ............................................................................................................................. |
196 |
Linking with Mobile Devices ............................................................................................................ |
200 |
Connecting with Mobile Devices ............................................................................................................................ |
201 |
Connecting via a Wireless LAN Router (LAN Connection) ........................................................................................ |
202 |
Connecting Directly (Access Point Mode) ............................................................................................................. |
204 |
Utilizing the Machine through Applications ........................................................................................................... |
209 |
Using AirPrint ....................................................................................................................................................... |
210 |
Printing with AirPrint ........................................................................................................................................ |
215 |
If AirPrint Cannot Be Used ................................................................................................................................. |
218 |
Using Google Cloud Print ....................................................................................................................................... |
219 |
Managing the Machine by the Remote Control ....................................................................................................... |
221 |
Managing the Machine ........................................................................................................................ |
223 |
Setting Access Privileges ....................................................................................................................................... |
225 |
Setting the System Manager ID and PIN .............................................................................................................. |
226 |
Setting the Department ID Management ............................................................................................................. |
228 |
Setting a Remote UI PIN .................................................................................................................................... |
234 |
onfigur ng the Network Security Settings ............................................................................................................ |
236 |
Restricting Communication by Using Firewalls ..................................................................................................... |
238 |
Specifying IP Addresses for Firewall Settings .................................................................................................. |
239 |
Specifying MAC Addresses for Firewall Settings .............................................................................................. |
242 |
Changing Port Numbers .................................................................................................................................... |
245 |
Setting a Proxy ................................................................................................................................................. |
246 |
Configuring the Key and Certificate for TLS .......................................................................................................... |
248 |
Generating the Key and Certificate for Network Communication ...................................................................... |
251 |
Generating a Key and Certificate Signing Request (CSR) ................................................................................... |
254 |
Registering the Key and Certificate for Network Communication ...................................................................... |
257 |
Configuring IPSec Settings ................................................................................................................................. |
259 |
Configuring IEEE 802.1X Authentication Settings .................................................................................................. |
266 |
Restricting the Machine's Functions ...................................................................................................................... |
270 |
Restricting Printing from a Computer .................................................................................................................. |
272 |
Restricting USB Functions .................................................................................................................................. |
273 |
Disabling HTTP Communication ......................................................................................................................... |
275 |
Disabling Remote UI ......................................................................................................................................... |
276 |
Restricting Use of the Operation Panel ................................................................................................................ |
277 |
Managing the Machine from a Computer (Remote UI) ............................................................................................ |
278 |
Starting Remote UI ........................................................................................................................................... |
279 |
Checking the Status and Logs ............................................................................................................................ |
282 |
Setting Up Menu Options from Remote UI ........................................................................................................... |
288 |
Security Policy .................................................................................................................................................. |
291 |
Importing/Exporting the Setting Data ................................................................................................................. |
296 |
Updating the Firmware ......................................................................................................................................... |
299 |
III
Initializing Settings ............................................................................................................................................... |
302 |
Setting Menu List ...................................................................................................................................... |
305 |
<Preferences> ....................................................................................................................................................... |
306 |
<Display Settings> ............................................................................................................................................ |
307 |
<English Keyboard Layout> ................................................................................................................................ |
312 |
<Timer/Energy Settings> ................................................................................................................................... |
313 |
<Network> ....................................................................................................................................................... |
318 |
<External Interface> .......................................................................................................................................... |
339 |
<Accessibility> .................................................................................................................................................. |
340 |
<Volume Settings> ............................................................................................................................................ |
343 |
<Adjustment/Maintenance> .................................................................................................................................. |
345 |
<Adjust Image Quality> ..................................................................................................................................... |
346 |
<Maintenance> ................................................................................................................................................ |
360 |
<Function Settings> .............................................................................................................................................. |
362 |
<Common> ...................................................................................................................................................... |
363 |
<Printer> ......................................................................................................................................................... |
367 |
<Receive> ........................................................................................................................................................ |
414 |
<Access Files> .................................................................................................................................................. |
416 |
<Secure Print> .................................................................................................................................................. |
426 |
<Management Settings> ....................................................................................................................................... |
427 |
<User Management> ........................................................................................................................................ |
428 |
<Device Management> ...................................................................................................................................... |
430 |
<License/Other>/<Remote UI Settings/Update Firmware> ..................................................................................... |
434 |
<Data Management> ........................................................................................................................................ |
436 |
<Security Settings> ........................................................................................................................................... |
438 |
Maintenance ................................................................................................................................................. |
441 |
Regular Cleaning .................................................................................................................................................. |
443 |
Cleaning the Exterior ........................................................................................................................................ |
444 |
Cleaning the Fixing Assembly ............................................................................................................................. |
445 |
Cleaning the Transfer Belt (ITB) .......................................................................................................................... |
448 |
Replacing the Toner Cartridge ............................................................................................................................... |
449 |
Checking the Remaining Amount of Consumables .................................................................................................. |
455 |
Relocating the Machine ......................................................................................................................................... |
456 |
Adjusting Image Quality ....................................................................................................................................... |
458 |
Adjusting Gradation .......................................................................................................................................... |
459 |
Correcting "Print Color Mismatch" ...................................................................................................................... |
461 |
Adjusting Print Position ..................................................................................................................................... |
462 |
Viewing the Counter Value .................................................................................................................................... |
464 |
Printing Reports and Lists ..................................................................................................................................... |
466 |
Consumables ........................................................................................................................................................ |
470 |
IV
Troubleshooting (FAQ) .......................................................................................................................... |
474 |
Appendix ........................................................................................................................................................... |
476 |
Third Party Software ............................................................................................................................................. |
478 |
Feature Highlights ................................................................................................................................................ |
479 |
Going Green and Saving Money ......................................................................................................................... |
480 |
Improving E ciency ......................................................................................................................................... |
481 |
So Much More .................................................................................................................................................. |
482 |
pec fic t ons ....................................................................................................................................................... |
484 |
Main Unit ........................................................................................................................................................ |
485 |
Available Paper ................................................................................................................................................ |
488 |
Cassette Feeding Module-AF .............................................................................................................................. |
492 |
Printer Functions .............................................................................................................................................. |
493 |
Management Functions ..................................................................................................................................... |
496 |
System Environment ......................................................................................................................................... |
498 |
Network Environment ....................................................................................................................................... |
499 |
Options ................................................................................................................................................................ |
500 |
Optional Equipment .......................................................................................................................................... |
501 |
System Options ................................................................................................................................................ |
502 |
Manuals and Their Contents .................................................................................................................................. |
504 |
Using User's Guide ................................................................................................................................................ |
505 |
Screen Layout of User's Guide ............................................................................................................................ |
506 |
Viewing User's Guide ........................................................................................................................................ |
509 |
Basic Windows Operations .................................................................................................................................... |
511 |
Notice .................................................................................................................................................................. |
518 |
V
Important Safety Instructions
Important Safety Instructions |
|
Important Safety Instructions ................................................................................................................... |
2 |
Installation ............................................................................................................................................................ |
3 |
Power Supply ......................................................................................................................................................... |
5 |
Handling ................................................................................................................................................................. |
6 |
Maintenance and Inspections .............................................................................................................................. |
9 |
Consumables ....................................................................................................................................................... |
10 |
1

Important Safety Instructions
Important Safety Instructions
3S2X-000
The content described in this chapter is for the prevention of damage to property and injury to users of the machine and others. Before using this machine, read this chapter and follow the instructions to properly use this machine. Do not perform any operations not described in this manual. Canon will not be responsible for any damages resulting from use not described in this manual, improper use, or repair/changes not performed by Canon or a third party authorized by Canon.
 Installation(P. 3)
 Power Supply(P. 5)
 Handling(P. 6)
 Maintenance and Inspections(P. 9)
 Consumables(P. 10)
2

Important Safety Instructions
Installation
3S2X-001
To use this machine safely and comfortably, carefully read the following precautions and install the machine in an appropriate location.
Do not install in a location that may result in a fire or electrical shock
●A location where the ventilation slots are blocked
(too close to walls, beds, sofas, rugs, or similar objects)
●A damp or dusty location
●A location exposed to direct sunlight or outdoors
●A location subject to high temperatures
●A location exposed to open flames
●Near alcohol, paint thinners or other flammable substances
Other warnings
●Do not connect unapproved cables to this machine. Doing so may result in a fire or electrical shock.
●Do not place necklaces and other metal objects or containers filled with liquid on the machine. If foreign substances come in contact with electrical parts inside the machine, it may result in a fire or electrical shock.
●Do not use near medical equipment. Radio waves emitted from this machine may interfere with medical equipment, which may result in malfunctions and accidents.
●When installing and removing the optional accessories, be sure to turn OFF the power, unplug the power plug, and then disconnect all the interface cables and power cord from the machine. Otherwise, the power cord or interface cables may be damaged, resulting in a fire or electrical shock.
●If any foreign substance falls into this machine, unplug the power plug from the AC power outlet and contact your local authorized Canon dealer.
Do not install in the following locations
●The machine may drop or fall, resulting in injury.
-An unstable location
-A location exposed to vibrations
Other cautions
●When carrying this machine, follow the instructions in this manual. If carried improperly, it may fall, resulting in injury.
●When installing this machine, be careful not to get your hands caught between the machine and the floor or walls. Doing so may result in injury.
3

Important Safety Instructions
Avoid poorly ventilated locations
●This machine generates a slight amount of ozone and other emissions during normal use. These emissions are not harmful to health. However, they may be noticeable during extended use or long production runs in poorly ventilated rooms. To maintain a comfortable working environment, it is recommended that the room where the machine operates be appropriately ventilated. Also avoid locations where people would be exposed to emissions from the machine.
Do not install in the following locations that may result in damage
●A location subject to dramatic changes in temperature or humidity
●A location near equipment that generates magnetic or electromagnetic waves
●A laboratory or location where chemical reactions occur
●A location exposed to corrosive or toxic gases
●A location that may warp from the weight of the machine or where the machine is liable to sink (a carpet, etc.)
Do not install in a location where condensation occurs
●Water droplets (condensation) may form inside the machine when the room where the machine is installed is heated rapidly, and when the machine is moved from a cool or dry location to a hot or humid location. Using the machine under these conditions may result in paper jams, poor print quality, or damage to the machine. Let the machine adjust to the ambient temperature and humidity for at least 2 hours before use.
In altitudes of above sea level 3,000 m or higher
●Machines with a hard disk may not operate properly when used at high altitudes of about 3,000 meters above sea level, or higher.
4
Important Safety Instructions
Power Supply
3S2X-002
●Use only a power supply that meets the specified voltage requirements. Failure to do so may result in a fire or electrical shock.
●The machine must be connected to a socket-outlet with grounding connection by the provided power cord.
●Do not use power cords other than the one provided, as this may result in a fire or electrical shock.
●The provided power cord is intended for use with this machine. Do not connect the power cord to other devices.
●Do not modify, pull, forcibly bend, or perform any other act that may damage the power cord. Do not place heavy objects on the power cord. Damaging the power cord may result in a fire or electrical shock.
●Do not plug in or unplug the power plug with wet hands, as this may result in an electrical shock.
●Do not use extension cords or multi-plug power strips with the machine. Doing so may result in a fire or electrical shock.
●Do not wrap the power cord or tie it in a knot, as this may result in a fire or electrical shock.
●Insert the power plug completely into the AC power outlet. Failure to do so may result in a fire or electrical shock.
●Remove the power plug completely from the AC power outlet during a thunder storm. Failure to do so may result in a fire, electrical shock, or damage to the machine.
● Install this machine near the power outlet and leave su cient space around the power plug so that it can be unplugged easily in an emergency.
When connecting power
●Do not connect the power cord to an uninterruptible power source. Doing so may result in malfunction of or damage to the machine at power failure.
●If you plug this machine into an AC power outlet with multiple sockets, do not use the remaining sockets to connect other devices.
●Do not connect the power cord to the auxiliary AC power outlet on a computer.
Other precautions
● Electrical noise may cause this machine to malfunction or lose data.
5

Important Safety Instructions
Handling
3S2X-003
●Immediately unplug the power plug from the AC power outlet and contact an authorized Canon dealer if the machine makes an unusual noise, emits an unusual smell, or emits smoke or excessive heat. Continued use may result in a fire or electrical shock.
●Do not disassemble or modify this machine. There are highvoltage and high-temperature components inside the machine which may result in a fire or electrical shock.
●Place the machine where children will not come in contact with the power cord and other cables or internal and electrical parts. Failure to do so may result in unexpected accidents.
●Do not use flammable sprays near this machine. If flammable substances come into contact with electrical parts inside this machine, it may result in a fire or electrical shock.
●When moving this machine, be sure to turn OFF the power of this machine and your computer, and then unplug the power plug and interface cables. Failure to do so may damage the power cord or interface cables, resulting in a fire or electrical shock.
●When plugging or unplugging a USB cable when the power plug is plugged into an AC power outlet, do not touch the metal part of the connector, as this may result in an electrical shock.
If you are using a cardiac pacemaker
●This machine generates a low level magnetic flux and ultrasonic waves. If you use a cardiac pacemaker and feel abnormalities, please move away from this machine and consult your physician immediately.
●Do not place heavy objects on this machine as they may fall, resulting in injury.
●For your safety, please unplug the power cord if the machine will not be used for a long period of time.
●Use caution when opening and closing covers to avoid injury to your hands.
●Keep hands and clothing away from the rollers in the output area. If the rollers catch your hands or clothing, this may result in personal injury.
●The inside of the machine and the output slot are very hot during and immediately after use. Avoid contact with these areas to prevent burns. Also, printed paper may be hot immediately after being output, so use caution when handling it. Failure to do so may result in burns.
LBP664Cx |
LBP623Cdw |
LBP621Cw |
6

Important Safety Instructions
●Do not carry the machine with any of the paper drawer or optional cassette feeding module installed. Otherwise, they may fall, resulting in injury.
Laser beam
● If the laser beam should escape and enter your eyes, exposure may cause damage to your eyes.
When transporting the machine
●To prevent damage to the machine during transport, perform the following.
-Remove the toner cartridges.
-Securely pack the machine in the original box with packing materials.
If the operating noise concerns you
● Depending on the use environment and operating mode, if the operating noise is of concern, it is recommended that the machine be installed in a place other than the o ce.
Other precautions
●Follow the caution instructions on labels and the like found on this machine.
●Avoid shaking or applying shock to this machine.
●Do not forcibly open and close doors, covers, and other parts. Doing so may result in damage to the machine.
●Do not touch the contacts (  ) inside the machine. Doing so may result in damage to the machine.
7

Important Safety Instructions
●To prevent a paper jam, do not turn OFF the power, open/close the covers, and load/unload the paper when printing.
8
Important Safety Instructions
Maintenance and Inspections
3S2X-004
Clean this machine periodically. If dust accumulates, the machine may not operate properly. When cleaning, be sure to observe the following. If a problem occurs during operation, see Troubleshooting.
●Before cleaning, turn OFF the power and unplug the power plug from the AC power outlet. Failure to do so may result in a fire or electrical shock.
●Unplug the power plug periodically and clean with a dry cloth to remove dust and grime. Accumulated dust may absorb humidity in the air and may result in a fire if it comes into contact with electricity.
●Use a damp, well wrung-out cloth to clean the machine. Dampen cleaning cloths with water only. Do not use alcohol, benzine, paint thinner, or other flammable substances. Do not use tissue paper or paper towels. If these substances come into contact with electrical parts inside the machine, they may generate static electricity or result in a fire or electrical shock.
●Check the power cord and plug periodically for damage. Check the machine for rust, dents, scratches, cracks, or excessive heat generation. Use of poorly-maintained equipment may result in a fire or electrical shock.
●The inside of the machine has high-temperature and high-voltage components. Touching these components may result in burns. Do not touch any part of the machine that is not indicated in the manual.
●When loading paper or removing jammed paper, be careful not to cut your hands with the edges of the paper.
●When removing jammed paper or replacing toner cartridges or the like, be careful not to get any toner on your hands or clothing. If toner gets on your hands or clothing, wash them immediately with cold water.
9

Important Safety Instructions
Consumables
3S2X-005
●Do not dispose of used toner cartridges or the like in open flames. Also, do not store toner cartridges or paper in a location exposed to open flames. This may cause the toner to ignite, and result in burns or fire.
●If you accidentally spill or scatter toner, carefully gather the toner particles together or wipe them up with a soft, damp cloth in a way that prevents inhalation. Never use a vacuum cleaner that does not have safeguards against dust explosions to clean up spilled toner. Doing so may cause a malfunction in the vacuum cleaner, or result in a dust explosion due to static discharge.
●Use caution not to inhale any toner. If you should inhale toner, consult a physician immediately.
●Use caution so that toner does not get into your eyes or mouth. If toner should get into your eyes or mouth, immediately wash with cold water and consult a physician.
●Use caution so that toner does not come into contact with your skin. If it should, wash with soap and cold water. If there is any irritation on your skin, consult a physician immediately.
●Keep the toner cartridges and other consumables out of the reach of small children. If toner is ingested, consult a physician or poison control center immediately.
●Do not disassemble or modify the toner cartridge or the like. Doing so may cause the toner to scatter.
●When removing the sealing tape from the toner cartridge, pull it out completely but without using excessive force. Doing otherwise may cause the toner to scatter.
Handling the toner cartridge
● Be sure to hold the toner cartridge using the handle.
●To avoid scratching the surface (  ) of the drum inside the machine or exposing it to light. Do not touch the electrical contacts (
  ) or the toner cartridge memory (
  ).
).
10

Important Safety Instructions
●Except when necessary, do not take out the toner cartridge from the packing material or from this machine.
●The toner cartridge is a magnetic product. Do not move it close to products susceptible to magnetism including floppy disks and disk drives. Doing so may result in data corruption.
Storing the toner cartridge
●Store in the following environment to ensure safe and satisfactory use. Storage temperature range: 0 °C to 35 °C
Storage humidity range: 35 % to 85 % RH (relative humidity/no condensation)*
●Store without opening until the toner cartridge is to be used.
●When removing the toner cartridge from this machine for storage, place the removed toner cartridge in the original packing material.
●When storing the toner cartridge, do not store it upright or upside down. The toner will solidify and may not return to its original condition even if it is shaken.
*Even within the storable humidity range, water droplets (condensation) may develop inside the toner cartridge if there is a difference of temperature inside and outside the toner cartridge. Condensation will adversely affect the print quality of toner cartridges.
Do not store the toner cartridge in the following locations
●Locations exposed to open flames
●Locations exposed to direct sunlight or bright light for five minutes or more
●Locations exposed to excessive salty air
●Locations where there are corrosive gases (i.e. aerosol sprays and ammonia)
●Locations subject to high temperature and high humidity
●Locations subject to dramatic changes in temperature and humidity where condensation may easily occur
●Locations with a large amount of dust
●Locations within the reach of children
Be careful of counterfeit toner cartridges
●Please be aware that there are counterfeit Canon toner cartridges in the marketplace. Use of counterfeit toner cartridge may result in poor print quality or machine performance. Canon is not responsible for any malfunction, accident or damage caused by the use of counterfeit toner cartridge.
For more information, see global.canon/ctc.
Availability period of repairing parts and toner cartridges and the like
●The repairing parts and toner cartridges and the like for the machine will be available for at least seven (7) years after production of this machine model has been discontinued.
Toner cartridge packing materials
● Save the packing materials for the toner cartridge. They are required when transporting this machine.
11

Important Safety Instructions
●The packing materials may be changed in form or placement, or may be added or removed without notice.
●After you pull out the sealing tape from the toner cartridge, dispose of it in accordance with the applicable local regulations.
When disposing of a used toner cartridge or the like
●When discarding a toner cartridge or the like, place it in the original packing material to prevent toner from scattering from inside, and dispose of it in accordance with the applicable local regulations.
12
Setting Up
Setting Up |
|
Setting Up ............................................................................................................................................................. |
14 |
Main Functions .................................................................................................................................................... |
15 |
Preparations Required Before Use ..................................................................................................................... |
16 |
Preventing Unauthorized Access ........................................................................................................................ |
17 |
Setting Up Using the Setup Guide ...................................................................................................................... |
19 |
Setting the Date/Time ......................................................................................................................................... |
21 |
Setting Up the Network Environment ............................................................................................................... |
23 |
Selecting Wired LAN or Wireless LAN .............................................................................................................. |
25 |
Connecting to a Wired LAN ............................................................................................................................. |
26 |
Connecting to a Wireless LAN ......................................................................................................................... |
27 |
Setting Up Connection Using WPS Push Button Mode ............................................................................. |
29 |
Setting Up Connection Using WPS PIN Code Mode .................................................................................. |
31 |
Setting Up Connection by Selecting a Wireless Router ............................................................................. |
33 |
Setting Up Connection by Specifying Detailed Settings ............................................................................ |
36 |
Checking the SSID and Network Key ........................................................................................................ |
39 |
Setting IP Addresses ....................................................................................................................................... |
40 |
Setting IPv4 Address ................................................................................................................................ |
41 |
Setting IPv6 Addresses ............................................................................................................................ |
44 |
Viewing Network Settings ............................................................................................................................... |
47 |
Configuring Settings for Communication with a Computer ............................................................................ |
50 |
Configuring Printing Protocols and WSD Functions ................................................................................. |
51 |
Configuring Printer Ports ......................................................................................................................... |
54 |
Setting Up Print Server ............................................................................................................................ |
57 |
Configuring the Machine for Your Network Environment ............................................................................... |
60 |
Configuring Ethernet Settings ................................................................................................................. |
61 |
Changing the Maximum Transmission Unit ............................................................................................. |
63 |
Setting a Wait Time for Connecting to a Network .................................................................................... |
64 |
Configuring DNS ...................................................................................................................................... |
65 |
Configuring SMB ...................................................................................................................................... |
69 |
Configuring WINS .................................................................................................................................... |
71 |
Monitoring and Controlling the Machine with SNMP ............................................................................... |
73 |
Other Network Settings ........................................................................................................................... |
77 |
Installing Drivers ................................................................................................................................................. |
81 |
13

Setting Up
Setting Up
3S2X-006
Before using the functions of the machine, the environmental conditions must be set in advance. To begin with, check the sequences of flow required to complete the setup, and then perform the actual settings.  Preparations Required
Before Use(P. 16)
●The functions installed on the machine vary depending on the model you purchased. Before using the machine, see  Main Functions(P. 15) and check the available functions.
onfigur ng Initial Settings of the Machine (Setup Guide)
●You can easily configure the initial settings required to use the machine, such as date, time, and network settings, by following the on-screen guidance.  Setting Up Using the Setup Guide(P. 19)
14
Setting Up
Main Functions
3S2X-007
This manual covers all the functions of the model series you purchased. Before getting started, check which functions are available on the model you purchased.
: With function |
: Without function |
|
|
||
|
|
|
|
|
|
Function |
|
LBP664Cx |
|
LBP623Cdw |
LBP621Cw |
|
|
|
|
|
|
Display |
|
Touch panel |
Black and white LCD |
Black and white LCD |
|
|
|
|
|
|
|
2-sided printing |
|
|
|
|
|
|
|
|
|
|
|
Wireless LAN |
|
|
|
|
|
|
|
|
|
|
|
NFC |
|
|
|
|
|
|
|
|
|
|
|
Default System Manager ID |
7654321 |
|
Not specified |
Not specified |
|
|
|
|
|
|
|
Default System Manager PIN |
7654321 |
|
Not specified |
Not specified |
|
|
|
|
|
|
|
Application Library |
|
|
|
|
|
|
|
|
|
|
|
Cassette Feeding Module-AF * |
|
|
|
|
|
|
|
|
|
|
|
Barcode Printing Kit * |
|
|
|
|
|
|
|
|
|
|
|
*This is an optional item. |
|
|
|
|
|
●For the available driver types, see the User Software CD-ROM/DVD-ROM supplied with the machine, or see the Canon website (https://global.canon).
●In the User's Guide, when operations differ depending on screens, distinctions are highlighted with the different descriptions: "touch panel model" and "black and white LCD model."
●When operations are the same for both models, the screens from the touch panel display will be used for explanation in most cases. The black and white LCD model has screens different from those of the touch panel model. In either case, follow the on-screen terms to perform operations.
LINKS
 Viewing User's Guide(P. 509)
15

Setting Up
Preparations Required Before Use
3S2X-008
Set up the machine following steps 1 to 3 in order. For more information about a particular step, click on the link to go to the corresponding section. In addition, to use the machine safely, also check  Preventing Unauthorized Access(P. 17) .
Step 1 |
Setting Up Using the Setup Guide(P. 19) |
|
|
Step 2 |
Setting Up the Network Environment(P. 23) |
|
|
●Configure the network settings that are not covered in the Setup Guide. If you do not need to use the Setup Guide, configure the network settings from here.
Step 3 |
Installing Drivers(P. 81) |
|
|
Setting from the Remote UI
● When the network environment settings are complete, you can e ciently set the machine from a computer using Remote UI.  Starting Remote UI(P. 279)
Importing data from another machine to save time
●As long as the model is the same, you can save setting data registered on another Canon printer/ multifunction machine to a computer (export) and load the setting data to this machine (import). 
Importing/Exporting the Setting Data(P. 296)
16

Setting Up
Preventing Unauthorized Access
3S2X-009
This section describes the security measures on how to prevent unauthorized access from the external network. This is a must-read for all users and administrators before using this machine, other printers, and multifunction machines connected to the network. In recent years, a printer/multifunction machine connected to the network can offer you a variety of useful functions, such as printing from a computer, operating from a computer using the remote function, and sending scanned documents via the Internet. On the other hand, it is essential to take security measures to reduce the security risk for information leakage, as a printer/multifunction machine has become more exposed to threats, such as unauthorized access and theft, when it is connected to the network. This section explains necessary settings you need to specify to prevent unauthorized access before using a printer/multifunction machine connected to the network.
Security Measures to Prevent Unauthorized Access from the External Network
 Assigning a Private IP Address(P. 17)
 Using Firewall to Restrict Transmission(P. 18)
 Specifying the TLS Encrypted Communication (P. 18)
 Setting PIN to Manage Information Stored in the Multifunction Machine(P. 18)
Assigning a Private IP Address
An IP address is a numerical label assigned to each device participating in a computer network. A "global IP address" is used for the communication connecting to the Internet, and a "private IP address" is used for the communication within a local area network, such as a LAN in the company. If a global IP address is assigned, your printer/ multifunction machine is open to the public and can be accessed via the Internet. Thus, the risk of information leakage due to unauthorized access from external network increases. On the other hand, if a private IP address is assigned, your printer/multifunction machine is closed to a local area network and can be accessed by only users on your local area network, such as a LAN in the company.
Global IP Address |
Private IP Address |
Can be accessed from the external network |
Can be accessed from the users within a local area network |
Basically, assign a private IP address to your printer/multifunction machine. Make sure to confirm the IP address, assigned to the printer/multifunction machine you are using, is a private IP address or not. A private IP address is found in one of the following ranges.
 Ranges for Private IP addresses
●From 10.0.0.0 to 10.255.255.255
●From 172.16.0.0 to 172.31.255.255
●From 192.168.0.0 to 192.168.255.255
For information on how to confirm the IP address, see  Setting IPv4 Address(P. 41) .
●If a global IP address is assigned to a printer/multifunction machine, you can create a network environment to reduce the risk of unauthorized access by installing security software, such as a firewall that prevents
17

Setting Up
access from the external networks. If you want to assign a global IP address to and use a printer/ multifunction machine, contact your network administrator.
Using Firewall to Restrict Transmission
A firewall is a system that prevents unauthorized access from the external networks and protects against attacks/ intrusions to a local area network. You can use a firewall on your network environment to block access from the external network that appears to be dangerous, by restricting communication from specified IP address of the external network. The function installed to a Canon printer/multifunction machine enables you to set up the IP address filter. For information on how to set up an IP address filter, see  Specifying IP Addresses for Firewall Settings(P. 239) .
Specifying the TLS Encrypted Communication
For information on the TLS Encrypted Communication, see  onfigur ng the Network Security Settings(P. 236) , and on the procedures to specify, see
  onfigur ng the Key and ert fic te for TLS(P. 248) .
Setting PIN to Manage Information Stored in the Multifunction Machine
If a malicious third party attempts to gain unauthorized access to a printer/multifunction machine, setting PIN to information stored in the machine will reduce the risk of information leakage. Canon printers/multifunction machines enable you to protect various type of information by setting PIN.
 Setting PIN to Each Function
●Setting PIN for Using Remote UI
For more information, see  Setting a Remote UI PIN(P. 234) .
●Setting PIN for the System Manager Settings
For more information, see  Setting the System Manager ID and PIN(P. 226) .
Listed above are some examples of security measures for preventing unauthorized access. For more information on the other security measures, see  Managing the Machine(P. 223) and take necessary security measures for preventing unauthorized access to suit your environment.
18

Setting Up
Setting Up Using the Setup Guide
3S2X-00A
When the machine is turned on (  Turning ON the Machine(P. 99) ) for the first time, the Setup Guide starts up to assist you to configure the initial settings of the machine by following the on-screen guidance. In the Setup Guide, the setting screens are displayed in the following order.
Step 1 |
Setting the Display Language and the Country or Region |
|
|
|
Set the language to be displayed on the operation panel screen or in reports, as well as the |
|
country or region where the machine will be used. |
1
2
3
Select a language.
For a Touch panel model, select <Yes>.
Select a country or region.
Step 2 |
Setting the Date and Time |
|
|
|
Adjust the machine's date/time. |
1
2
Select a time zone.
What is UTC?
●Coordinated Universal Time (UTC) is the primary time standard by which the world regulates clocks and time. The correct UTC time zone setting is required for Internet communications.
Enter the date and time, and press <Apply> (  ).
).
 Touch panel model
● Tap the entry field, and enter the date and time.
 Black and white LCD model
●Use  or
or  to move the cursor, and enter the date and time using the numeric keys.
Step 3 Setting the Access Security Measures
Set a PIN to access the Remote UI. Because the Remote UI can be used to change the machine settings from a computer, setting of a PIN is recommended.
1
2
3
Select <Yes>.
●If you select <No>, PIN is not set, and the Setup Guide proceeds to step 4.
●You can also set the access security measure of the Remote UI later.  Setting a Remote UI PIN(P. 234)
Enter a PIN, and then press <Apply> (  ).
).
Enter the same PIN, and then press <Apply> (  ).
).
Step 4 |
onfigur ng Automatic Cleaning of the Fixing Assembly |
|
|
19

Setting Up
If the model of your machine is LBP664Cx, configure to automatically clean the fixing assembly. If you are using LBP623Cdw / LBP621Cw, the Setup Guide proceeds to step 5.
1Check the message displayed on the screen, and select ( 
 ) <Yes>.
●If you select <No>, automatic cleaning is not set, and the Setup Guide proceeds to step 5.
●You can set automatic cleaning of the fixing assembly later.  <Auto Clean
Fixing Assembly>(P. 353)
2Select <On>.
●If you select <Off>, automatic cleaning is not set, and the Setup Guide proceeds to step 5.
3Set available paper sources to <On>.
●When cleaning is performed, paper is fed from the paper source for which you set <On>.
●You can use the following paper for cleaning.
-Paper sizes: A4/Letter
-Paper types: Plain 1 to 3/Recycled 1 or 2
4Select <Apply>.
Step 5 Setting the Wireless LAN
Configure the settings to connect to the network using the wireless LAN.
1Select <Yes>.
●If you select <No>, wireless LAN is not set, and the Setup Guide proceeds to step 6.
2Select <OK>.
3Select the setting method.
●For more information about the wireless LAN settings, see  Connecting to a Wireless LAN(P. 27) .
Step 6 |
Viewing Application Library |
|
|
|
The one-touch button referred to as "Application Library" is provided in the Home screen. You |
|
can read the description of each function. |
|
1 To finish the Setup Guide, select <End>. |
|
When the Setup Guide is complete, the Home screen appears. |
20
Setting Up
Setting the Date/Time
3S2X-00C
Set the date and time for the machine. The date and time are used as the reference for the functions specifying the time, therefore, they need to be set accurately.
 Setting the Time Zone(P. 21)
 Setting the Current Date and Time(P. 21)
 Setting the Daylight Saving Time(P. 22)
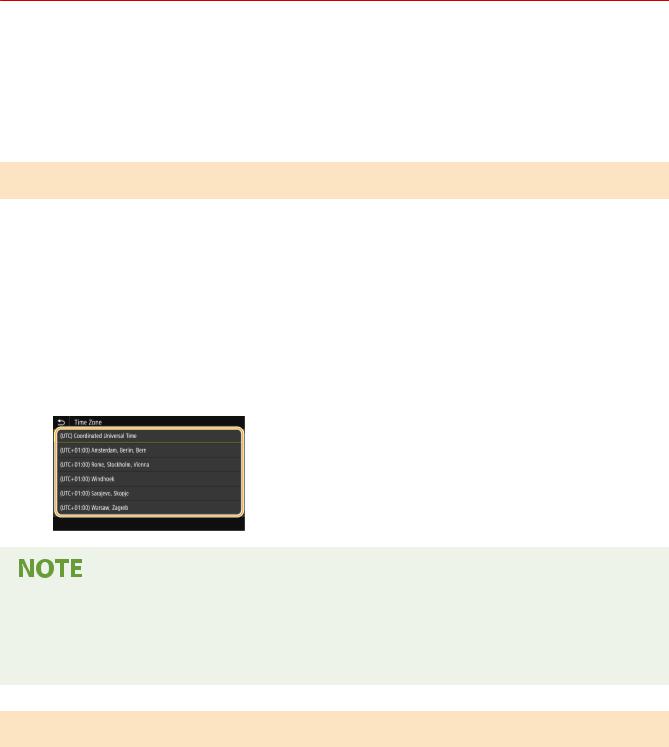
Setting the Time Zone
If the time zone setting is changed, the values set in <Current Date/Time Settings> are also changed accordingly.
1 Select <Menu> in the Home screen.  Home Screen(P. 108)
2Select <Preferences>  <Timer/Energy Settings>
  <Date/Time Settings>
  <Time Zone>.
3 Select the time zone.
What is UTC?
●Coordinated Universal Time (UTC) is the primary time standard by which the world regulates clocks and time. Time differences exist depending on the country or area where the machine is used. The correct UTC time zone setting is required for Internet communications.
Setting the Current Date and Time
1
2
3
Select <Menu> in the Home screen.  Home Screen(P. 108)
Select <Preferences>  <Timer/Energy Settings>
  <Current Date/Time Settings>.
Enter the date and time.
21

Setting Up
 Touch panel model
● Tap the entry field, and enter the date and time.
 Black and white LCD model
● Use  or
or  to move the cursor, and enter the date and time using the numeric keys.
4Press <Apply> ( ).
).
●Set <Time Zone> before setting the current date and time. If the <Time Zone> setting is changed later, the current date and time are also changed accordingly.
●The display format of the date and time can be changed, respectively.
 <Date Format>(P. 314)
 <Time Format>(P. 314)
Setting the Daylight Saving Time
If daylight saving time is enabled, specify the dates from which and to which daylight saving time is in effect.
1 Select <Menu> in the Home screen.  Home Screen(P. 108)
2Select <Preferences>  <Timer/Energy Settings>
  <Date/Time Settings>
  <Daylight Saving Time Settings>.
3Select <Off> or <On> in <Daylight Saving Time>.
●When you select <On>, select <Start Date> and <End Date>, and set the month and day for each item. To set the day, specify "what day of which week."
4 Select <Apply>.
22

Setting Up
Setting Up the Network Environment
3S2X-00E
When connecting the machine to a wired or wireless local area network (LAN), you need to set an IP address unique to the selected network. Select "wired" or "wireless" depending on your communication environment and networking devices. For specific IP address settings, contact your Internet service provider or Network Administrator.
●If the machine is connected to an unsecured network, your personal information might be leaked to a third party.
●The machine cannot connect to both wired and wireless LANs at the same time.
●The machine does not come with a LAN cable or router. Have them ready as necessary.
●For more information about your networking devices, see the instruction manuals for the devices or contact your manufacturer.
Before You Start
Follow these steps to connect the machine to a network.
Check your computer settings.
●Make sure that the computer is correctly connected to the network. For more information, see the instruction manuals for the devices you are using, or contact the device manufacturers.
●Make sure that the network settings have been completed on the computer. If the network has not been set up properly, you will not be able to use the machine on the network, even if you perform the rest of the procedure below.
●Depending on the network, you may need to change settings for the communication method or the Ethernet type (  onfigur ng Ethernet Settings(P. 61) ). For more information, contact your Internet service provider or Network Administrator.
●To check the MAC address of the machine.
 Viewing the MAC Address for Wired LAN(P. 47)
 Viewing the MAC Address and Information for Wireless LAN(P. 48)
23

Setting Up
●To connect to an IEEE 802.1X network, see  onfigur ng IEEE 802.1X Authentication Settings(P. 266) .
Select wired or wireless LAN.
 Selecting Wired LAN or Wireless LAN(P. 25)
Connect to a wired or wireless LAN.
●Proceed to the section that corresponds to the setting you selected in step 2.
 Connecting to a Wired LAN(P. 26)
 Connecting to a Wireless LAN(P. 27)
Set the IP address as necessary.
●At the time of purchase, the machine is set to automatically acquire an IP address. Change this setting if you want to use a specific IP address.  Setting IP
Addresses(P. 40)
LINKS
onfigur ng Settings for Communication with a Computer(P. 50) onfigur ng the Machine for Your Network Environment(P. 60)
24
Loading...