


CanoScan FB630U

ScanGear CS-U 5.3
for CanoScan FB630U/FB636U Color Image Scanner
User’s Guide

Top Page
Glossary
Contents
Index
Copyright Notice
©1999 Canon Inc.
This manual is copyrighted with all rights reserved. Under the copyright
laws, this manual may not be copied, in whole or in part, without
written consent of Canon Inc. Under the law, copying includes
translating into another language or format.
Microsoft and Windows are registered trademarks of the Microsoft
Corporation in the United States and other countries.
Canon, and CanoScan are registered trademarks of Canon, Inc.
ColorGear and ImageTrust are registered trademarks of Canon Inc.
All other names are trademarks of their respective companies.
2

Top Page
Glossary
Contents
Index
Chapter 1 Before You Begin
Welcome to ScanGear CS-U 5.3 ....................................... 6
Getting Help in ScanGear CS ........................................... 8
Chapter 2 Scanning an Original
Preparing the Scanner ................................................... 10
Specifying Preview
Opening Setting ......................................................... 11
Selecting the TWAIN Source.......................................... 13
Previewing and
Scanning an Original ................................................. 14
Selecting the Scanning Area ......................................... 18
Chapter 3 Settings in the Windows
Control Panel
Preferences Settings ...................................................... 21
Displaying the Preferences Sheet .................................. 21
Windowless Mode Settings ............................................ 23
Color Matching Settings ................................................. 23
Preview Opening Settings .............................................. 24
ScanGear Quit Setting .................................................... 24
Events Setting ................................................................ 25
Selecting an Application for Starting Up with the Start
Button ......................................................................... 25
Chapter 4 The ScanGear CS Settings
Overview of the Main Window..................................... 29
Summary of the ScanGear CS
Settings ....................................................................... 32
General Scanning Settings ............................................. 32
Image Manipulation Settings......................................... 34
Image Enhancement Settings ........................................ 35
3

Top Page
Glossary
Contents
Index
Chapter 5 What is on the ScanGear CS
Main Window?
The Toolbar ..................................................................... 38
The Main Sheet .............................................................. 41
The Main Sheet ............................................................... 41
Custom Resolution Dialog Box....................................... 45
The Tone Sheet ............................................................... 47
Auto Tone Sheet ............................................................. 48
Contrast/Brightness Sheet .............................................. 49
Gamma Sheet .................................................................. 50
Histogram Sheet ............................................................. 52
Special Tone Curves Sheet .............................................. 54
Editing a Special Tone Curve Directly ............................ 56
The Scanner Sheet ......................................................... 58
Chapter 6 Troubleshooting
Pre-Scan Checklist .......................................................... 61
How to Avoid Problems................................................. 62
Troubleshooting ............................................................. 64
Glossary
Index
4

chapter
Top Page
Glossary
Contents
Index
1
Before You Begin
Welcome to ScanGear CS-U 5.3
Getting Help in ScanGear CS
1-5

chapter 1
Before You Begin
Top Page
Glossary
Contents
Index
Welcome to ScanGear CS-U 5.3
Welcome to Canon ScanGear CS-U 5.3 software for Windows 98.
ScanGear CS-U 5.3 (hereafter referred to ScanGear CS) will provide
flexible, efficient image enhancement tools for scanning with your
CanoScan FB630U/FB636U Scanner by providing an interface with
a wide variety of TWAIN-compliant software applications.
ScanGear CS has a number of powerful features that help you
achieve peak performance with your scanner. Using ScanGear CS,
you can preview and adjust an image before the image is scanned
and acquired by the target software application.
Here is a quick summary of the important features of ScanGear CS:
• Flexible, fully automatic image acquisition, and pre-scan
image manipulation prior to passing data to the image
application
• Sophisticated, Windows 98 user interface
• TWAIN 1.6 compliant
• High Definition Color
• Text Enhanced mode for OCR applications
• Canon ColorGear (Color Matching software technology)
• Automatic preview or preview image cache
6

chapter 1
Before You Begin
Top Page
Glossary
Contents
Index
• ScanGear CS can run with or without its main window,
depending on the acquiring application.
Normally when you start a scanning job, you will see the ScanGear
CS main window with its toolbar, Preview Area, and tabs.
However, some software applications may not open the ScanGear
CS main window. When this occurs you cannot use the settings
described in this user’s guide because the parent software
application will provide the settings so you can change the image
after it is acquired. When a software application uses ScanGear CS
without opening the ScanGear CS main window, this is called the
windowless mode.
7
chapter 1
Before You Begin
Top Page
Glossary
Contents
Index
Getting Help in ScanGear CS
For information on using ScanGear CS, open the on-line Help by
clicking the Help button on the toolbar or on the dialog
boxes.
For general questions about scanning, check the Table of Contents
or Index to see if the topic you are looking for is covered
elsewhere in this user’s guide.
8

chapter
Top Page
Glossary
Contents
Index
2
Scanning an Original
Preparing the Scanner
Specifying Preview Opening Setting
Selecting the TWAIN Source
Previewing and Scanning an Original
Selecting the Scanning Area
1-9

chapter 2
Scanning
an Original
Top Page
Glossary
Contents
Index
This is a quick overview of executing a scanning job. For more
information about detailed ScanGear CS settings, see Chapter 4
and Chapter 5.
Preparing the Scanner
Follow these simple guidelines to prepare for a scanning job:
• Before you start scanning, make sure the scanner is
connected correctly.
• Always position the original on the scanner platen with the
image side down.
• ScanGear CS lets you correct many undesirable features in
scanned images, but you will save time and effort by starting
with the best possible original. If you are scanning a
photograph, for example, make sure the original is in the
sharpest possible focus.
• If you are scanning text, make sure the printed text is sharp
and clean.
10

chapter 2
Scanning
an Original
Top Page
Glossary
Contents
Index
Specifying Preview
Opening Setting
The preview opening setting determines what you see in the
Preview Area of the ScanGear CS main window when you launch
ScanGear CS from the parent software application. What you will
see every time you start ScanGear CS depends on how the preview
opening setting has been adjusted in the Preferences sheet.
1. On the Windows desktop click the Start button, point
to Settings, and click Control Panel.
2. In the Control Panel window double-click the Scanners
and Cameras icon.
3. In the Scanners and Cameras Properties window, click
CanoScan FB630U/FB636U and click the Properties
button.
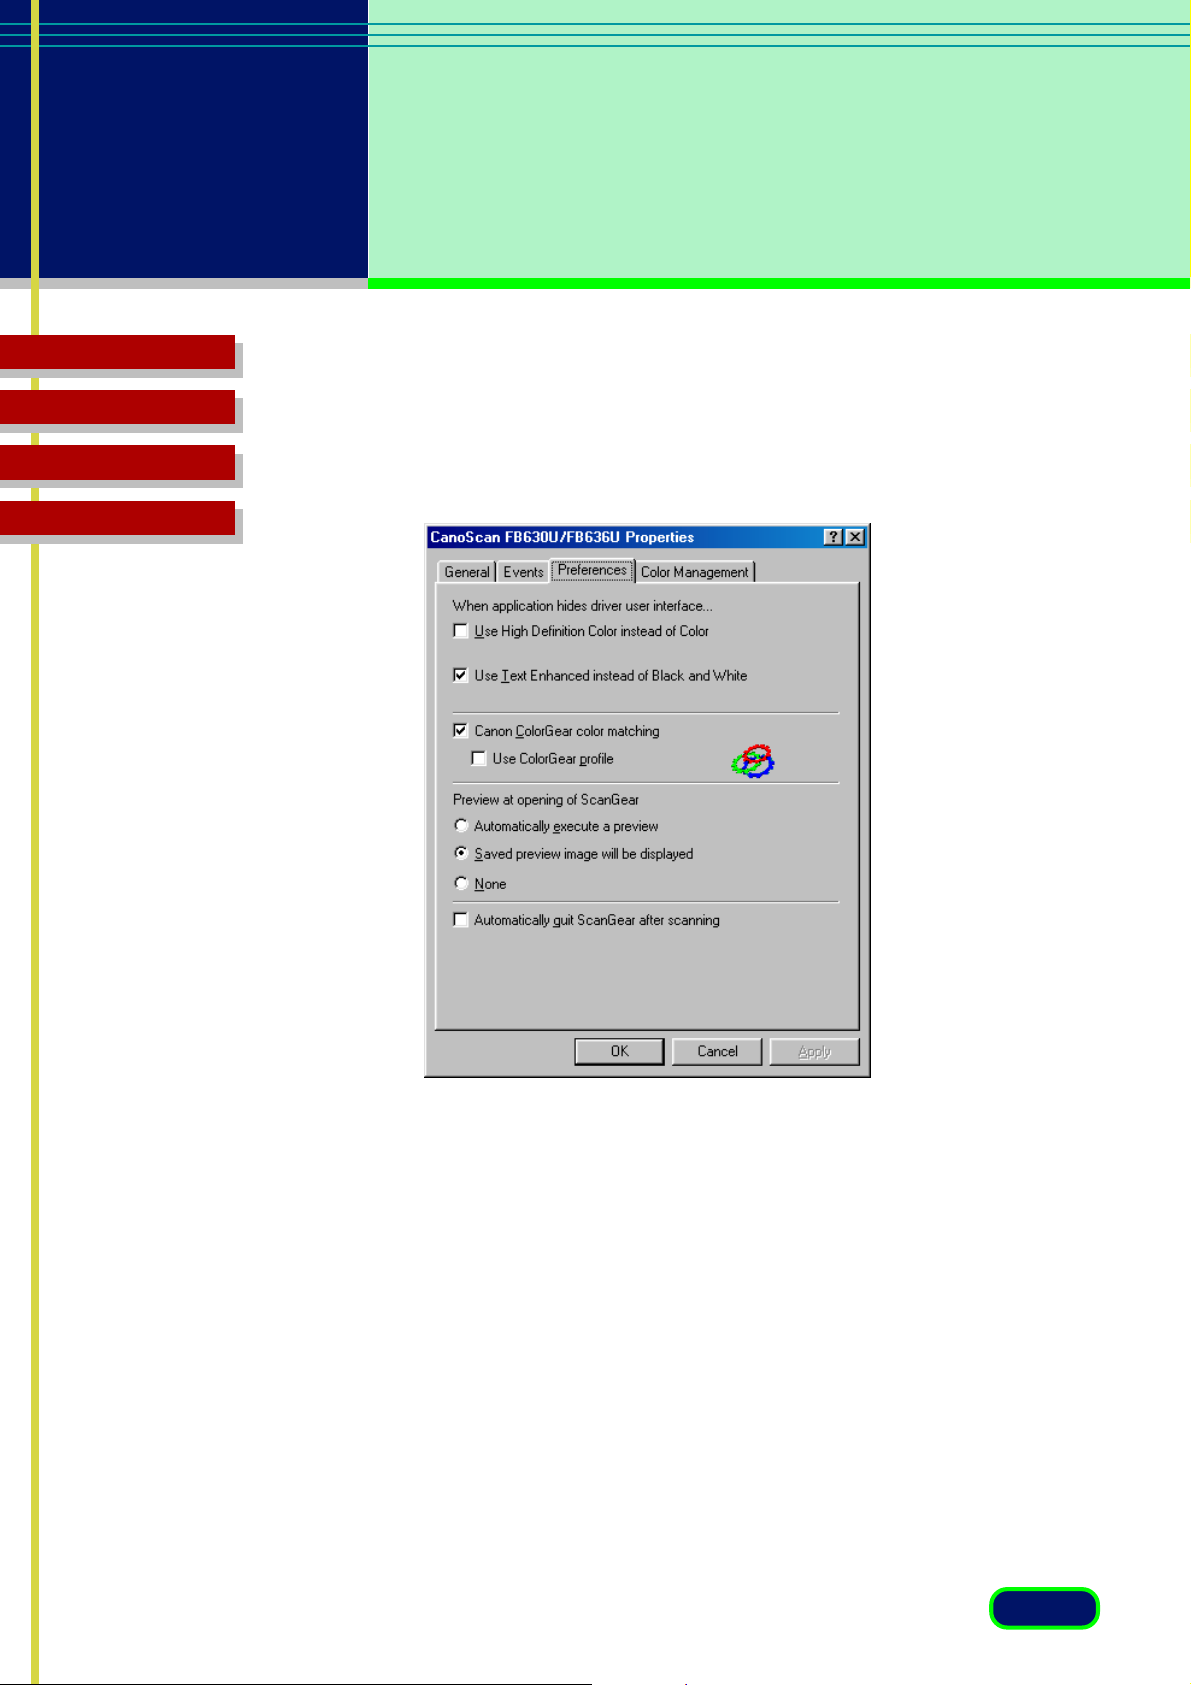
4. In the Properties window, click the Preferences tab to
open the Preferences sheet.
5. Select the Preview at opening of ScanGear setting.
11

chapter 2
Scanning
an Original
Top Page
Glossary
Contents
Index
If you want to preview the original on the scanner platen
automatically when ScanGear CS is launched from the parent
software application, click the button for “Automatically
execute a preview”.
-orIf you want to display the image displayed in the Preview
Area when ScanGear CS was closed at the end of the previous
session, click the button for “Saved preview image will be
displayed”.
-orIf you want to switch off automatic preview and preview
image cache, click the button for None.
12
chapter 2
Scanning
an Original
Top Page
Glossary
Contents
Index
Selecting the TWAIN Source
Follow this simple procedure to select the CanoScan FB630U/
FB636U as the scanner source.
This is a very general description of this procedure. The
procedure for your software application may be slightly
Note
1. Start the software application you are going to use for
scanning.
2. Pull down the File menu and select the Select Scanner
command or its equivalent.
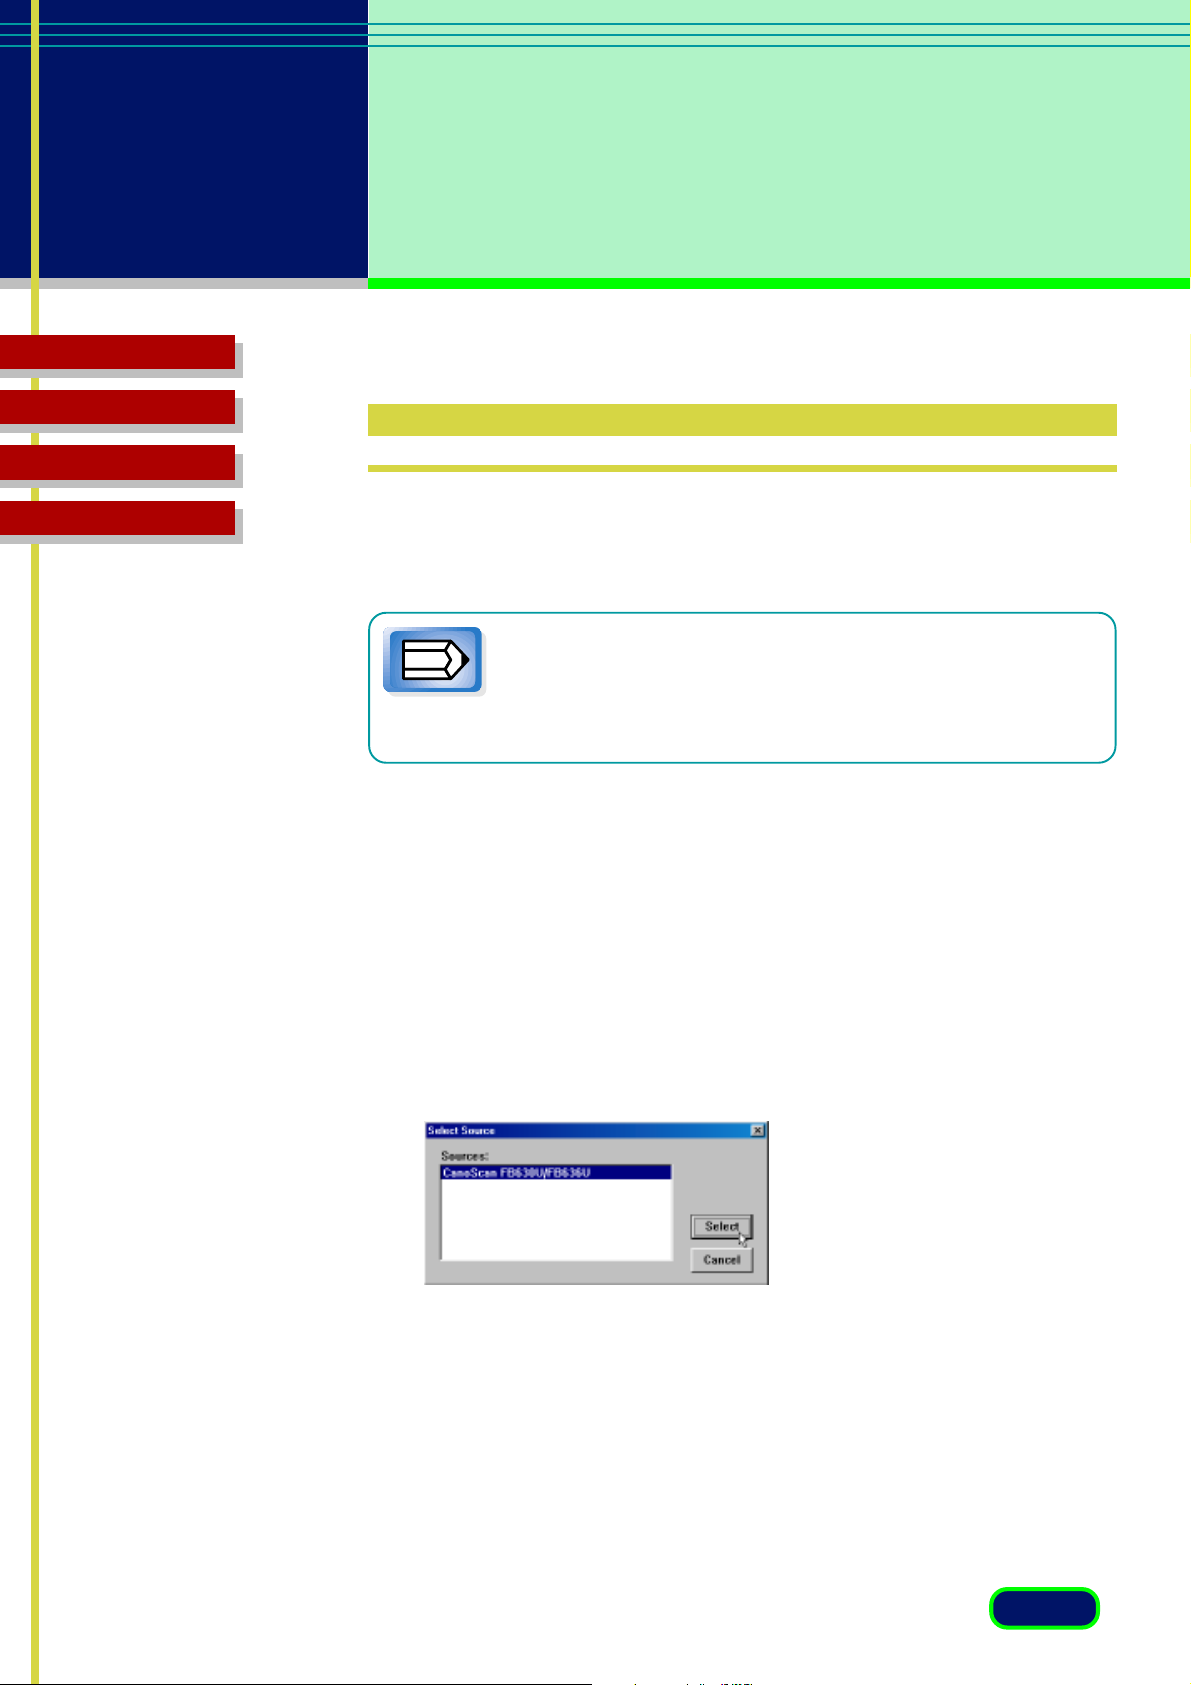
3. In the Select Scanner dialog box select the name of the
scanner (CanoScan FB630U/FB636U) from the list and
click the OK button.
different. For details, refer to your software application
manual.
You are now ready to start scanning.
13
chapter 2
Scanning
an Original
Top Page
Glossary
Contents
Index
Previewing and
Scanning an Original
1. Place the original on the scanner platen.
For details about positioning the original on the
scanner platen, see Quick Start Guide.
Note
2. Start the software application you are going to use to
start the scanning job.
3. Confirm that your scanner is selected in the Select
Source (or its equivalent) dialog box, if needed. For
details, see the previous section.
4. Start the scanning job. Refer to your software
application manual for details about acquiring an
image with a scanner.
For example, pull down the File menu and select the
command to start the scanning job (File|Acquire|Image or
File|Scan New). The ScanGear CS main window opens.
14
chapter 2
Scanning
an Original
Top Page
Glossary
Contents
Index
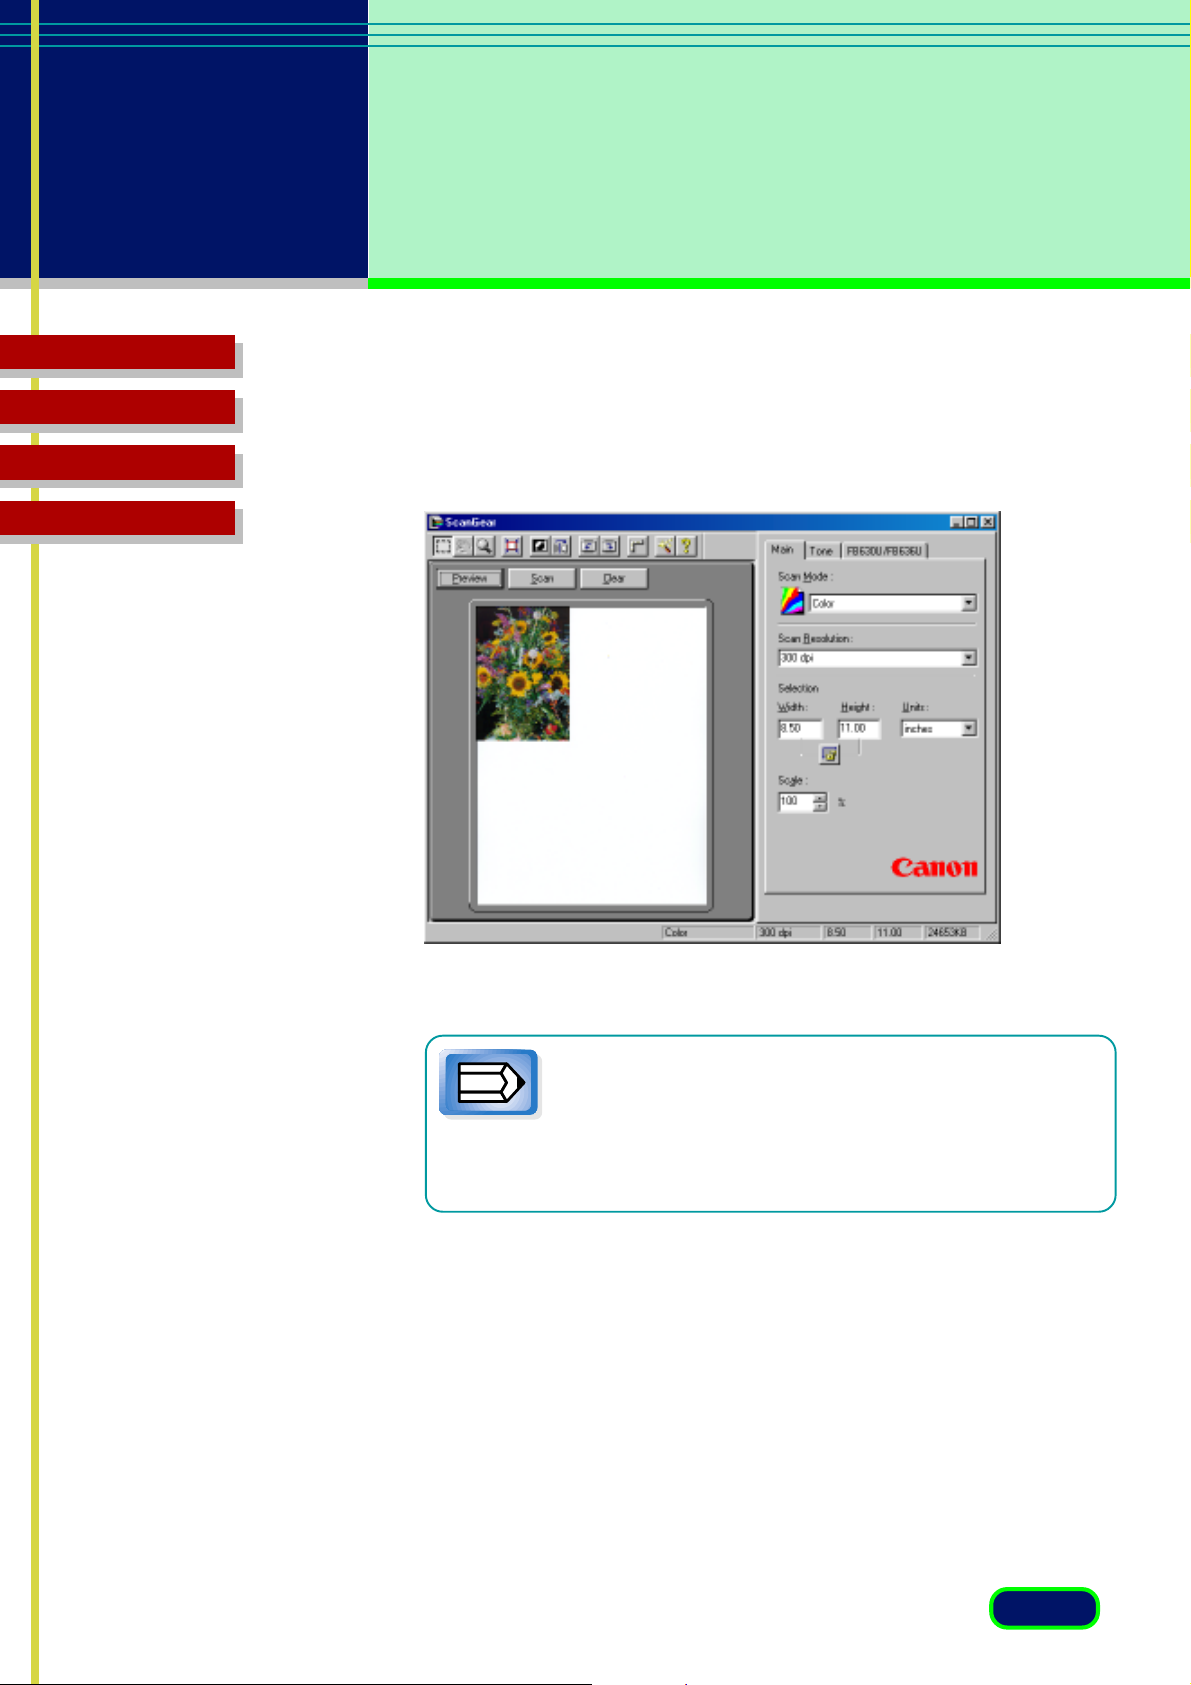
If you see an image in the Preview Area, this
means one of the preview settings has been
Note
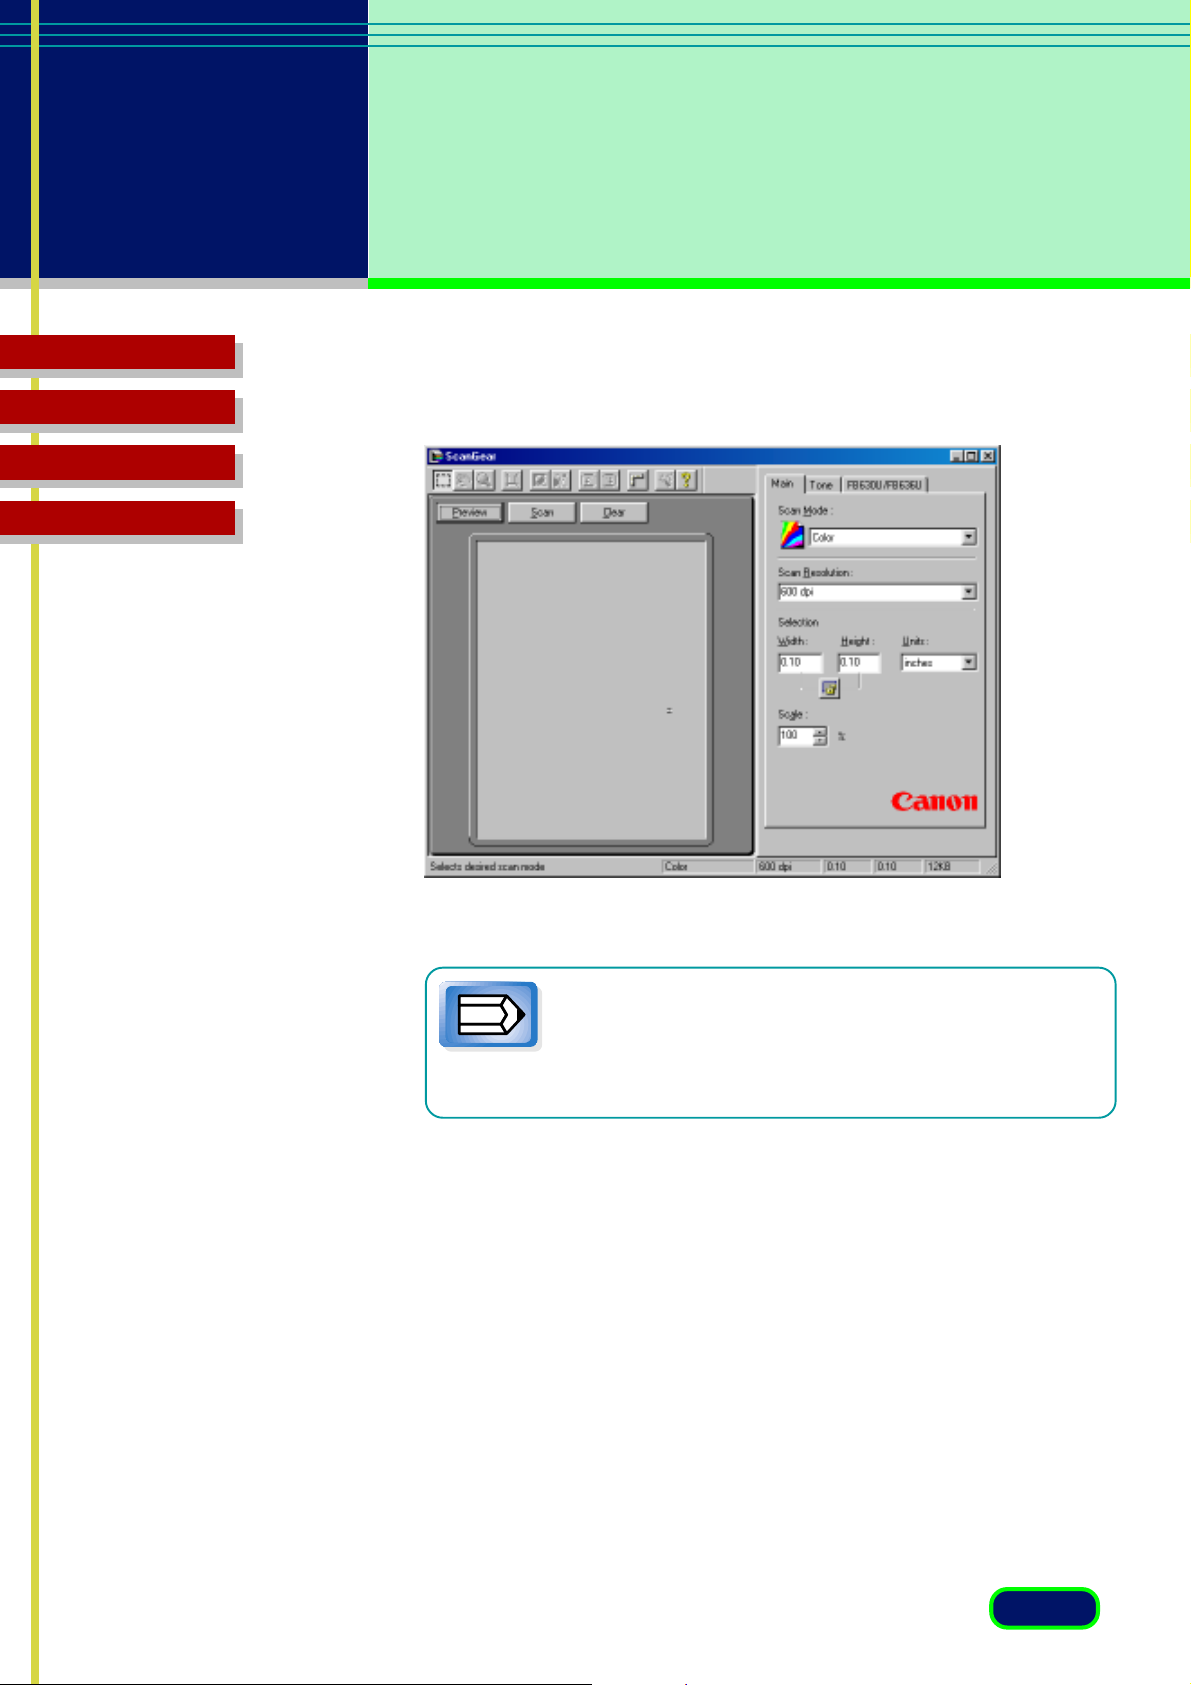
5. On the Main sheet, adjust the settings for the Scan
Mode, Scan Resolution, and size (Selection).
switched on with the Preferences sheet.
Otherwise, the Preview Area is empty. (F30)
15
chapter 2
Scanning
an Original
Top Page
Glossary
Contents
Index
6. Click the Preview button to pre-scan the image and
display it in the Preview Area.
With the image in the Preview Area, you can use
the ScanGear CS toolbar and the sheets to
Note
7. In the Preview Area, adjust the image, or select the
area to scan with the Crop button or the Auto Crop
button.
manipulate or enhance the image before you
actually scan it and send it to the parent software
application.
16
chapter 2
Scanning
an Original
Top Page
Glossary
Contents
Index
8. Adjust the image quality with the tools and options
provided on the sheets:
• Tone sheet. Allows you to adjust the quality of the
image.
• FB630U/FB636U Scanner sheet. Allows you to set the
Threshold and Descreen settings.
9. When you are satisfied with the settings, click the Scan
button to scan the image. The image is acquired in the
software application.
If ScanGear CS does not close automatically after
scanning the original, click the close button in the
Note
upper right corner of the main window.
17
chapter 2
Scanning
an Original
Top Page
Glossary
Contents
Index
Selecting the Scanning Area
Follow this procedure to use the Crop and/or Auto Crop buttons to
select an area of the image in the Preview Area for scanning.
1. In the ScanGear CS main window, click the Preview
button to display the image on the platen in the
Preview Area.
2. With an image in the Preview Area click on the Crop
button.
3. Point to one corner of the area of the image that you
want to scan.
4. Click the left mouse button and, while holding the
mouse button down, drag the mouse pointer to the
opposite corner of the area you want to scan.
5. Release the mouse button. The area will be boxed in
by a rectangle.
• You can drag the selected area to another
location or use the handles on the borders to
Note
6. Click the Auto Crop button if necessary. The rectangle
will adjust its size automatically to fit perfectly around
the object enclosed in the rectangle.
enlarge or reduce the enclosed area.
• Just point and click any portion outside of the
selected area to cancel the selection.
18
chapter 2
Scanning
an Original
Top Page
Glossary
Contents
Index
7. Click the Scan button to scan the image and send it to
the parent software application.
• You can also use the Selection features on the
Main sheet to set the scanning area precisely
Note
by entering the dimensions in the entry boxes.
• You can set the scanning area with the Crop
button or the Selection settings on the Main
sheet with or without an image in the Preview
Area.
19
chapter
Top Page
Glossary
Contents
Index
3
Settings in the Windows
Control Panel
Preferences Settings
Events Setting
1-20

chapter 3
Settings in the
Windows Control
Panel
Top Page
Glossary
Contents
Index
Preferences Settings
Displaying the Preferences Sheet
The Preferences sheet contains settings for important features
that you can switch on and off. The Preferences sheet must be
opened from the Control Panel; it cannot be opened from within
the parent software application.
To open the Preferences sheet
1. On the Windows desktop click the Start button, point
to Settings, and click Control Panel.
2. In the Control Panel window double-click the Scanners
and Cameras icon.
3. In the Scanners and Cameras Properties window, click
CanoScan FB630U/FB636U and click the Properties
button.
21
chapter 3
Settings in the
Windows Control
Panel
Top Page
Glossary
Contents
Index
4. In the Properties window, click the Preferences tab to
open the Preferences sheet.
For a detailed description of Preferences sheet settings, see
the following sections.
22
chapter 3
Settings in the
Windows Control
Panel
Top Page
Glossary
Contents
Index
Windowless Mode Settings
Setting scanning for high-definition color
Click the checkbox for “Use High Definition Color instead of
Color” to scan in high-definition color mode with a parent
software application that will not open the ScanGear CS main
window.
Converting grayscale to black and white for OCR
Click the checkbox for “Use Text Enhanced instead of Black and
White” to convert grayscale to black and white using Canon
ImageTrust technology for an OCR program that will not open the
ScanGear CS main window.
Color Matching Settings
Switching on ColorGear Matching for color matching
Click the checkbox for "Canon ColorGear color matching" to
enable your monitor to display colors that best match the colors
scanned based on the type of monitor identified in the Windows
Control Panel.
Switching on the ColorGear Profile for best color matching
Click the checkbox for "Use ColorGear profile" to use the Canon
ColorGear profile for the best color matching between monitor
display and printed output. The Windows 98 profile is used until
you turn on this setting on.
23
chapter 3
Settings in the
Windows Control
Panel
Top Page
Glossary
Contents
Index
Preview Opening Settings
Switching automatic preview on for ScanGear CS launching
Click the button for “Automatically execute a preview” to preview
the original on the scanner platen automatically when ScanGear
CS is launched from the parent software application.
Switching preview image cache on for ScanGear CS launching
Click the button for “Saved preview image will be displayed” to
display the previous saved image in the Preview Area when
ScanGear is launched from the parent software application.
Turning off automatic preview and preview image cache
Click the button for None to switch off the automatic preview and
image cache feature to display no image in the Preview Area.
ScanGear Quit Setting
Click the button for “Automatically quit ScanGear after scanning”
to close ScanGear CS every time scanning an image is completed.
24

chapter 3
Settings in the
Windows Control
Panel
Top Page
Glossary
Contents
Index
Events Setting
Selecting an Application for Starting Up with the
Start Button
The events setting on the Events sheet determines which parent
application starts automatically when the Start Button on the
scanner is pressed.
1. On the Windows desktop click the Start button, point
to Settings, and click Control Panel.
2. In the Control Panel window, double-click the Scanners
and Cameras icon.
3. In the Scanners and Cameras Properties window, click
CanoScan FB630U/FB636U and click the Properties
button.
25
chapter 3
Settings in the
Windows Control
Panel
Top Page
Glossary
Contents
Index
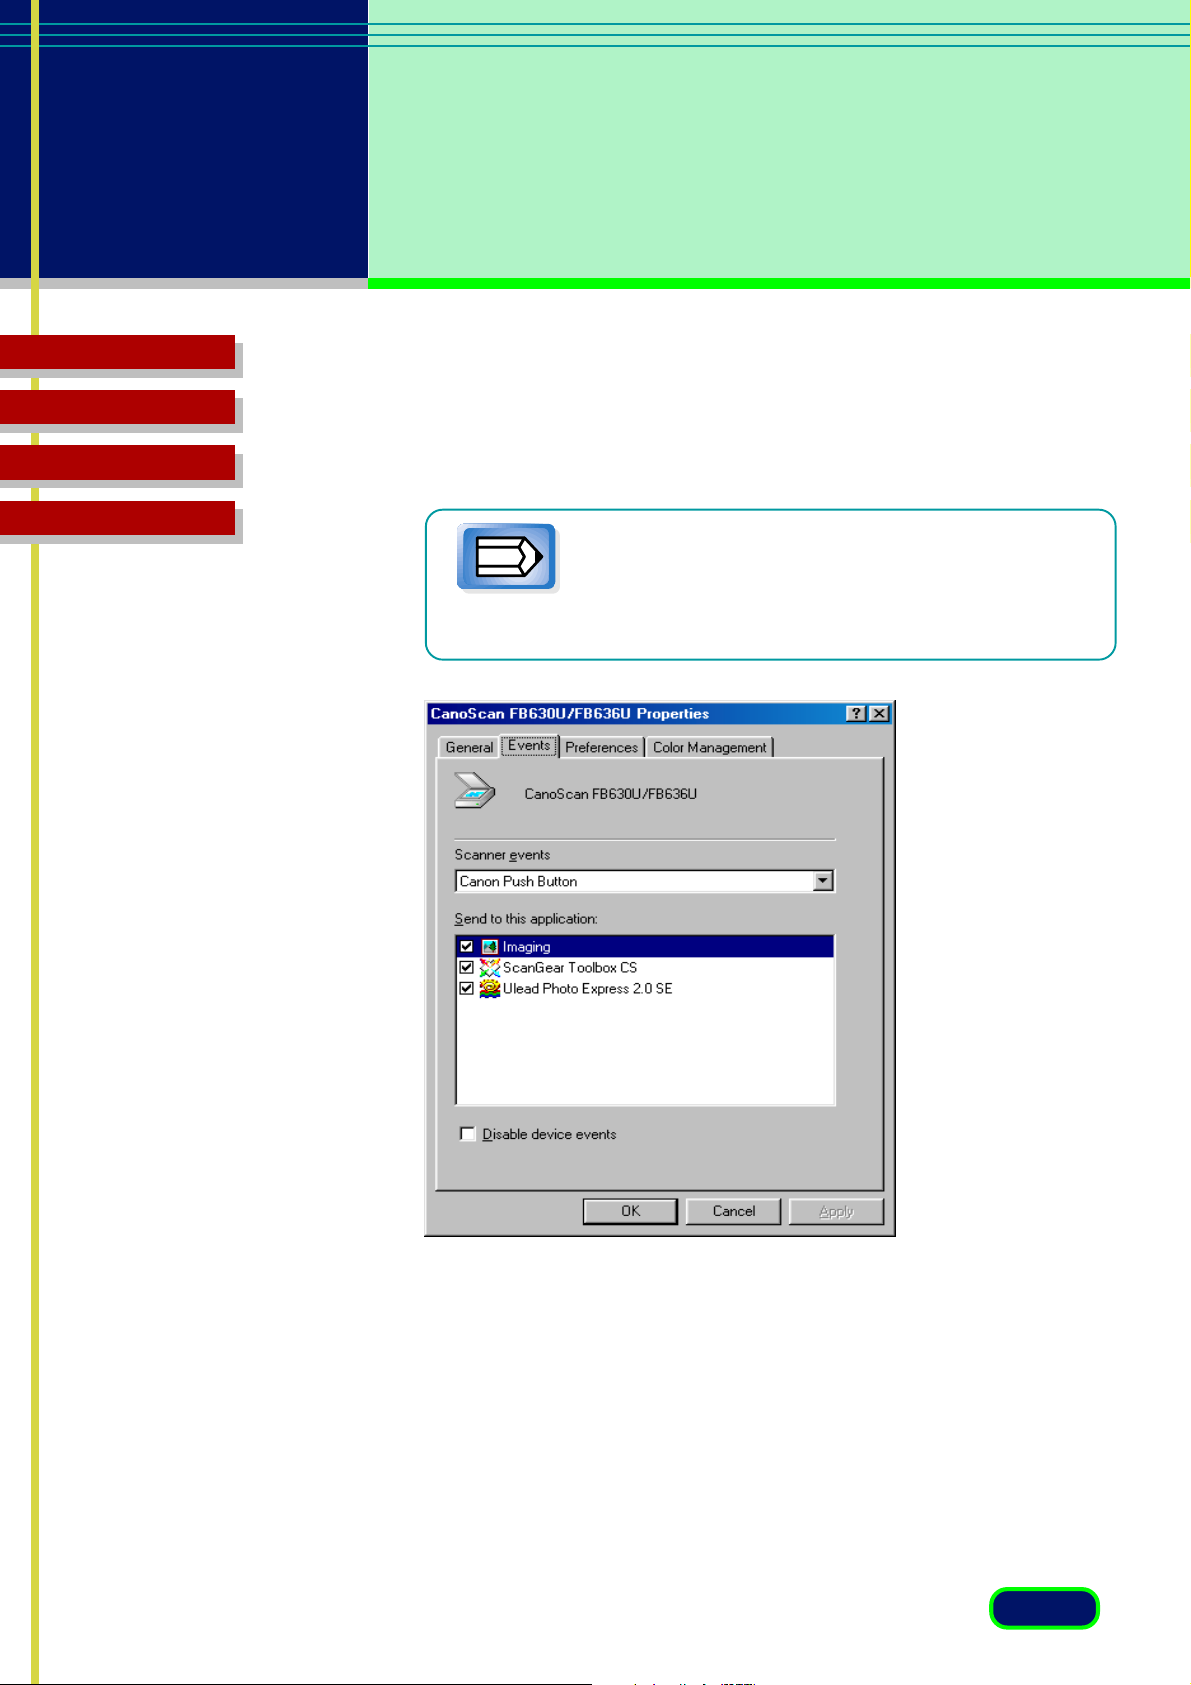
4. In the Properties window, click the Events tab to open
the Events sheet.
The list of all push-enabled applications
(applications designed for scanners with the
Note
push button) registered in your system will
appear in the Events window.
26

chapter 3
Settings in the
Windows Control
Panel
Top Page
Glossary
Contents
Index
5. In the list, click the name of the application that you
want start automatically every time you press the Push
Button on the scanner. If other applications are
selected, click their checkboxes to de-select them.
If several applications are selected on the Events
sheet, every time you press the Push Button on the
Note
scanner, you must select the parent application
that you want to start.
27
 Loading...