


BR8376 BBL600 Book AMEND DEC_06.qxp 22/12/06 10:53 AM Page 1
Ikon™ 600
Blender
Instructions
Includes Recipes
BBL600
|
FILENAME: BBL600 Book AMENDS DEC_06.qxp |
Ver. 02 |
|
|
|
|
|
ARTWORK SCALE 100% |
|
Breville > BR8376 > DO / GW |
22/12/06 |
|
|
|
|
PMS 300 |
PRINTED HERE AT 100% |
|
A5 Instruction Booklet PMS300 and BLACK |
09:45AM |
|
|
BLACK |
|
|
|
|
|
|
|
|
|
|
|
|

BR8376 BBL600 Book AMEND DEC_06.qxp 22/12/06 10:53 AM Page 2
Contents
|
Page |
Breville recommends safety first |
4 |
Important safeguards for your Breville Ikon™ Blender |
4 |
Important safeguards for all electrical appliances |
5 |
Know your Breville Ikon™ Blender |
6 |
Operating your Breville Ikon™ Blender |
7 |
Disassembling your blender for cleaning, care and storage |
11 |
Tips on how to use your Breville Ikon™ Blender |
14 |
Suggested uses for your Breville Ikon™ Blender |
15 |
Trouble shooting chart |
16 |
Recipes |
R1 |
Congratulations
on the purchase of your new Breville Ikon™ Blender
2

BR8376 BBL600 Book AMEND DEC_06.qxp 22/12/06 10:53 AM Page 4
Breville recommends safety first
We at Breville are very safety conscious. We design and manufacture consumer products with the safety of you, our valued customer, foremost in mind. In addition, we ask that you exercise a degree of care when using any electrical appliance and adhere to the following precautions:
Important safeguards for your Breville Ikon Blender
•Carefully read all instructions before operation and save for future reference.
•Remove any packaging material and promotional stickers before using the Breville Ikon Blender for the first time.
•Do not place the Breville Ikon Blender near the edge of a bench or table during operation. Ensure that the surface is level, clean and free of water, flour, etc. Vibration during operation may cause the appliance to move.
•Do not place the Breville Ikon Blender on or near a hot gas or electric burner, or where it could touch a heated oven.
•Always ensure the Breville Ikon Blender is properly assembled before use. Refer to assembly and operation (Page 9).
•Use only the blender jug and lid supplied with the Breville Ikon Blender.
•Always ensure the blender lid is firmly positioned on the blender jug before operating.
•Always ensure the Breville Ikon Blender is turned off by pressing the ‘Power’ button on the control panel. Then switch the appliance off at the power outlet and unplug the cord. Make sure the motor and blades have completely stopped before attempting to move the appliance, or when the Breville Ikon Blender is not in use and before disassembling, cleaning and storing.
•Do not operate the appliance continuously with heavy loads for more than 30 seconds. Allow the motor to rest for 1 minute between each use. None of the recipes in this instruction book are considered a heavy load.
•Do not leave the Breville Ikon Blender unattended when in use.
•If food becomes lodged around the blending blade, turn the Breville Ikon Blender off by pressing the “Power” button on the control panel. Then switch the appliance off at the power outlet and unplug the cord. Make sure the motor and blades have completely stopped before removing the jug from the motor base. Use a spatula to dislodge or stir the food before continuing. Do not use fingers as the blades are sharp.
•Keep hands, fingers, hair, clothing, as well as spatulas and other utensils away from the blender jug during operation. Never place your fingers, hands or utensils inside the blender jug without unplugging the appliance from the power outlet.
•Be careful when handling the blending blade assembly as the blades are very sharp. Mishandling of the blades may cause injury.
•Do not remove the blender jug from the motor base whilst in operation.
•Do not use the Breville Ikon Blender for anything other than food and/or beverage preparation.
•Do not operate the Breville Ikon Blender without food or liquid in the blender jug.
•Do not process hot or boiling liquids. Allow to cool before placing into the blender jug.
•Do not subject the blender jug to extremes of hot or cold, for example placing a cold jug in hot water or vice versa.
•Keep the appliance clean. Refer to care and cleaning (Page 15).
Important safeguards for all electrical appliances
•Fully unwind the cord before use.
•To protect against electric shock, do not immerse the cord, plug or motor base in water or any other liquid.
•Do not allow the cord to hang over the edge of a table or counter, touch hot surfaces or become knotted.
•This appliance is not intended for use by young children or infirm persons unless they have been adequately supervised by a responsible person to ensure they can use the appliance safely.
•Young children should be supervised to ensure that they do not play with the appliance.
•It is recommended to regularly inspect the appliance. Do not use the appliance if the power supply cord, plug or appliance becomes damaged in any way. Return the entire appliance to the nearest authorised Breville Service Centre for examination and/or repair.
•Any maintenance other than cleaning should be performed at an authorised Breville Service Centre.
•This appliance is for household use only. Do not use this appliance for anything other than its intended use. Do not use in moving vehicles or boats. Do not use outdoors.
•The installation of a residual current device (safety switch) is recommended to provide additional safety protection when using electrical appliances. It is advisable that a safety switch with a rated residual operating current not exceeding 30mA
be installed in the electrical circuit supplying the appliance. See your electrician for professional advice.
DO NOT OPERATE THE BLENDER CONTINUOUSLY ON HEAVY LOADS FOR MORE THAN 30 SECONDS.
4 |
5 |

BR8376 BBL600 Book AMEND DEC_06.qxp 22/12/06 10:53 AM Page 6
Know your Breville Ikon Blender
Inner measuring lid
for adding ingredients whilst blending.
Large 1.5 litre glass jug
unique dual ribs continually pass ingredients onto the blades for perfectly blended results.
Heavy duty, commercial grade components for durability
Die-cast metal base
for long lasting, professional performance.
Illuminated buttons
for clarity and ease of reading.
Electronic 5 speed control plus pulse
electronic controls ensure that the RPM speed is maintained for consistent results every time.
Breville Assist™ Lid
unique ring pull design ensures the lid is easy to remove yet sealed tight during operation.
Stainless steel ice-crushing blades
Extra wide stainless steel blades are contoured to the base of the jug so there are no food traps.
Kinetix™ Blade
and Bowl System
revolutionary blade technology for 100% perfect blending and food processing results.
One piece, one twist
and the blades are easily removed for fast and easy cleaning.
Pre-programmed ‘Ice Crush’
and ‘Smoothie’ settings
automatically alter speeds to optimise blending results, then switch off automatically.
LCD display
counts up on speed settings and down for pre-programmed settings for complete control when blending.
Operating your Breville Ikon™ Blender
Before first use
Before using your Breville Ikon™ Blender for the first time, remove any packaging material and promotional labels. Ensure the appliance is switched off at the power outlet and the power cord is unplugged.
Wash the lid, inner lid, blender jug and blade assembly (refer to Disassembling the blender jug on Page 13) in warm, soapy water with a soft cloth. Rinse and dry thoroughly. Do not place parts in the dishwasher (with the exception of the blender jug). The blender jug may be washed in the dishwasher. Ensure the lid and blade assembly have been removed from the blender jug before placing into the dishwasher. The motor base can be wiped with a damp cloth. Dry thoroughly.
•When using your Breville Ikon™ Blender for the first time, you may notice an odour coming from the motor. This is normal and will dissipate with use.
•The blending blades are extremely sharp. Avoid any contact with fingers and hands.
Note
Assembling and attaching the blender
Step 1.
Place the motor base on a flat, dry surface such as a bench top. Ensure that the motor base is switched off at the power outlet and the power cord is unplugged.
Step 2.
To reassemble the blender jug, replace the silicon seal onto the blade assembly (see Page 14 - Fig 1). Upturn the blender jug and insert the blade assembly into the jug base (see Page 14 - Fig 2). Twist the 1/4 turn Blade Removal System anticlockwise until firmly locked into position.
Step 3.
Turn the blender jug upright and insert on to the motor base. The handle of the blender jug can be positioned to the left or right hand side of the appliance.
Step 4.
Add food or liquid into the blender jug ensuring not to exceed the ‘MAX’ mark. Place the blender lid firmly into position on the top of the blender jug. Insert the clear inner lid into the blender lid and
turn clockwise to lock into position. (see Fig 1)
Fig 1
When adding oil or other liquids during operation, turn the lid to the unlocked position and pour through the small holes on either side of the inner lid (see indents for finger placement Fig. 1.) The inner lid can be removed to add ingredients or check the texture of ingredients.
Note
6 |
7 |
BR8376 BBL600 Book AMEND DEC_06.qxp 22/12/06 10:53 AM Page 8
Operating your Breville Ikon™ Blender continued
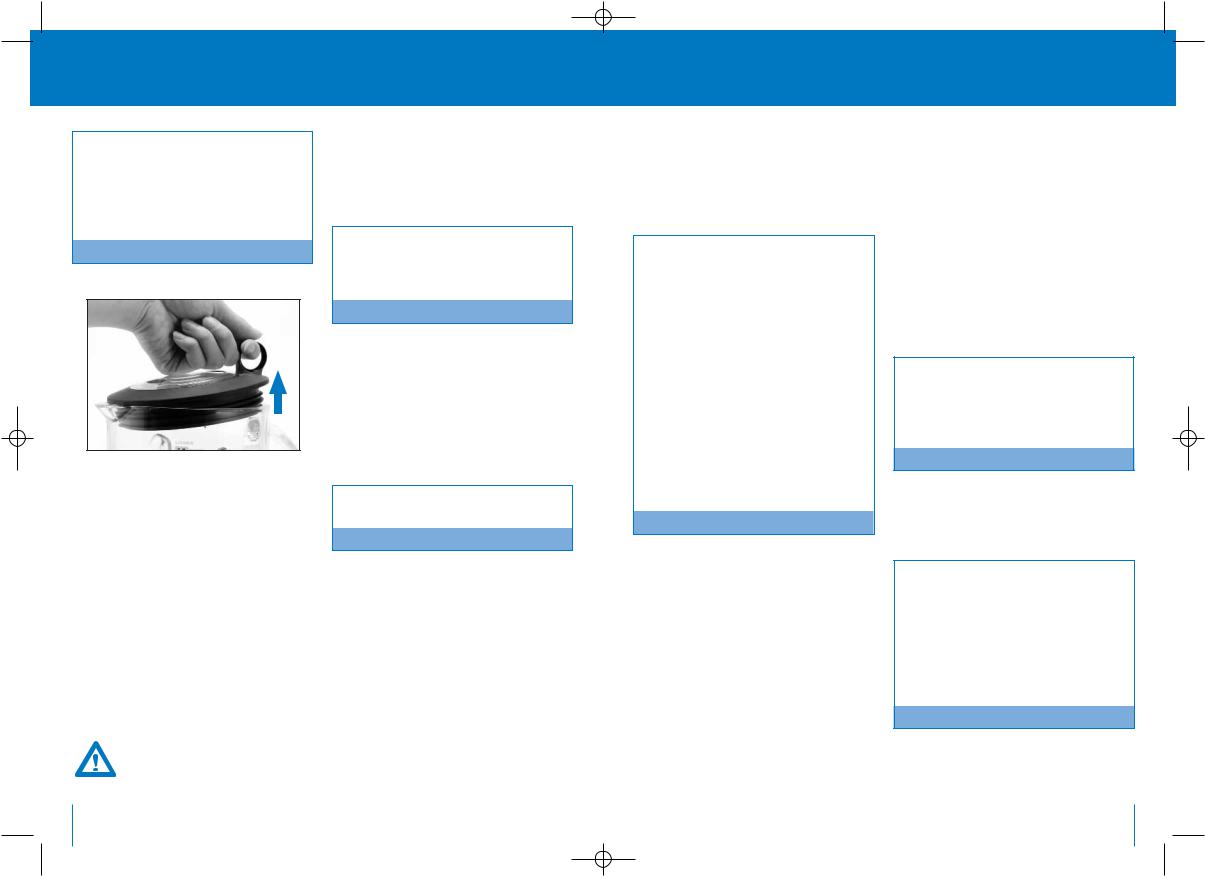
The Breville Ikon™ Blender features a Breville Assist™ Lid. This allows the lid to fit tightly onto the blender jug, avoiding displacement during operation. The ring pull design allows the user to easily remove the lid with a simple leverage action. (See Fig 1)
Note
Fig 1
Step 5.
Plug the power cord into a 230/240V power outlet and switch on.
Step 6.
Press the ‘Power’ button on the far left of the control panel to turn the blender on. The ‘Power’ button will illuminate and flash. The LCD timer screen will illuminate with ‘00’ displayed.
Do not fill the blender jug above the ‘MAX’ line. When the blender jug is filled at or near the ‘MAX’ line place one hand on the blender lid to avoid displacement of the lid during operation.
Note
Step 7.
Select the required speed (1 to 5) by pressing the corresponding speed button. The blender will start to operate and the selected speed button will illuminate. The ‘Power’ button will illuminate and cease to flash. The ‘Stop’ button will illuminate and flash. The LCD timer screen will start counting upwards in one second increments until 120 seconds is reached.
Operate the blender only for the appropriate amount of time required – do not over blend.
Note
NEVER PLACE ANYTHING OTHER THAN FOOD AND LIQUIDS IN THE IKON™ BLENDER WHILST THE MOTOR IS RUNNING.
Step 8.
When 120 seconds is reached, the blender will automatically cease to operate and the selected speed button and ‘Stop’ button illumination will go out. The ‘Power’ button will illuminate and flash. After a few seconds the LCD timer screen will revert to ‘00’.
•The Ikon™ Blender will automatically stop blending after 120 seconds (2 minutes). This is a safety feature and restricts wear on the motor.
•To stop blending at any time, press the ‘Stop’ button or the selected speed button. The ‘Power’ button can also be pressed, but this will also turn the appliance off and all illuminations will go out.
•The speed can be changed at any time during the blending process. Each time a new speed is selected its button will illuminate and the previous speed button illumination will go out. The number of seconds on the LCD timer screen will continue to count upwards to 120 seconds unless interrupted.
Note
Step 9.
The Breville Ikon™ Blender features two additional functions, ‘ICE CRUSH’ and ‘SMOOTHIE’. These are pre-programmed cycles which automatically adjust the blending time and speeds to optimise blending results. Select the required function by pressing the corresponding function button.
The blender will start to operate and the selected function button will illuminate. The ‘Power’ button will illuminate and cease to flash. The ‘Stop’ button will illuminate and flash. The LCD timer screen will start counting downwards in one second increments until ‘00’ is displayed.
The smoothie function has a unique processing technique that blends the denser ingredients at a lower speed, then increases as ingredients thicken. This may happen several times while blending smoothies.
Note
When ‘00’ seconds is reached, the blender will automatically cease to operate and the function button and ‘Stop’ button illumination will go out. The ‘Power’ button will illuminate and flash.
•To stop blending at any time, press the ‘Stop’ button or the selected function button.
The ‘Power’ button can also be pressed, but this will also turn the appliance off and all illuminations will go out.
•The maximum amount of ice cubes the blender can blend at any one time is 1 standard ice tray or 250g.
Note
8 |
9 |
BR8376 BBL600 Book AMEND DEC_06.qxp 22/12/06 10:53 AM Page 10
Operating your Breville Ikon™ Blender continued
Step 10.
For ingredients that require short bursts of power, select the ‘PULSE’ function. The ‘PULSE’ button will illuminate and remain illuminated while the button is depressed. When this function is selected, the LCD timer screen will illuminate and count upwards in one second increments during pulsing. Press the ‘PULSE’ button in short bursts until blending is complete.
Use the ‘PULSE’ button when the food that is being processed is too thick or coarse to circulate within the blender jug.
Note
Step 11.
At the end of use, always ensure the blender is turned off by pressing the ‘Power’ button on the control panel. Then switch the appliance off at the power outlet and unplug the cord. Ensure the motor and blades have completely stopped before attempting to move the appliance, or when the Breville Ikon™ Blender is not in use and before disassembling, cleaning and storing.
•During the blending process, ingredients may stick to the sides of the blender jug. To push the food back onto the blades, press the ‘Power’ button on the control panel and switch off at the power outlet and remove the power cord. Remove the lid and use a plastic spatula to scrape down the sides of the jug. Replace the lid before recommencing blending.
•If any moisture or liquid appears on top of the motor base during blending, press the ‘Power’ button on the control panel, switch off at the power outlet and remove the power plug. Remove the blender jug. Wipe the motor base immediately with a dry cloth or paper towelling to absorb the liquid. Check the blender jug is correctly assembled.
•Never place anything other than food and liquids in the Ikon™ blender whilst the motor is running.
Note
Disassembling your blender for cleaning, care and storage
Step 1. |
Fig 1 |
Always ensure the Breville Ikon™ Blender is off
by pressing the ‘Power’ button on the control panel. Then switch off at the power outlet and unplug
the power cord.
Step 2.
Remove the blender jug from the motor base by grasping the handle and lifting the jug in an upward direction.
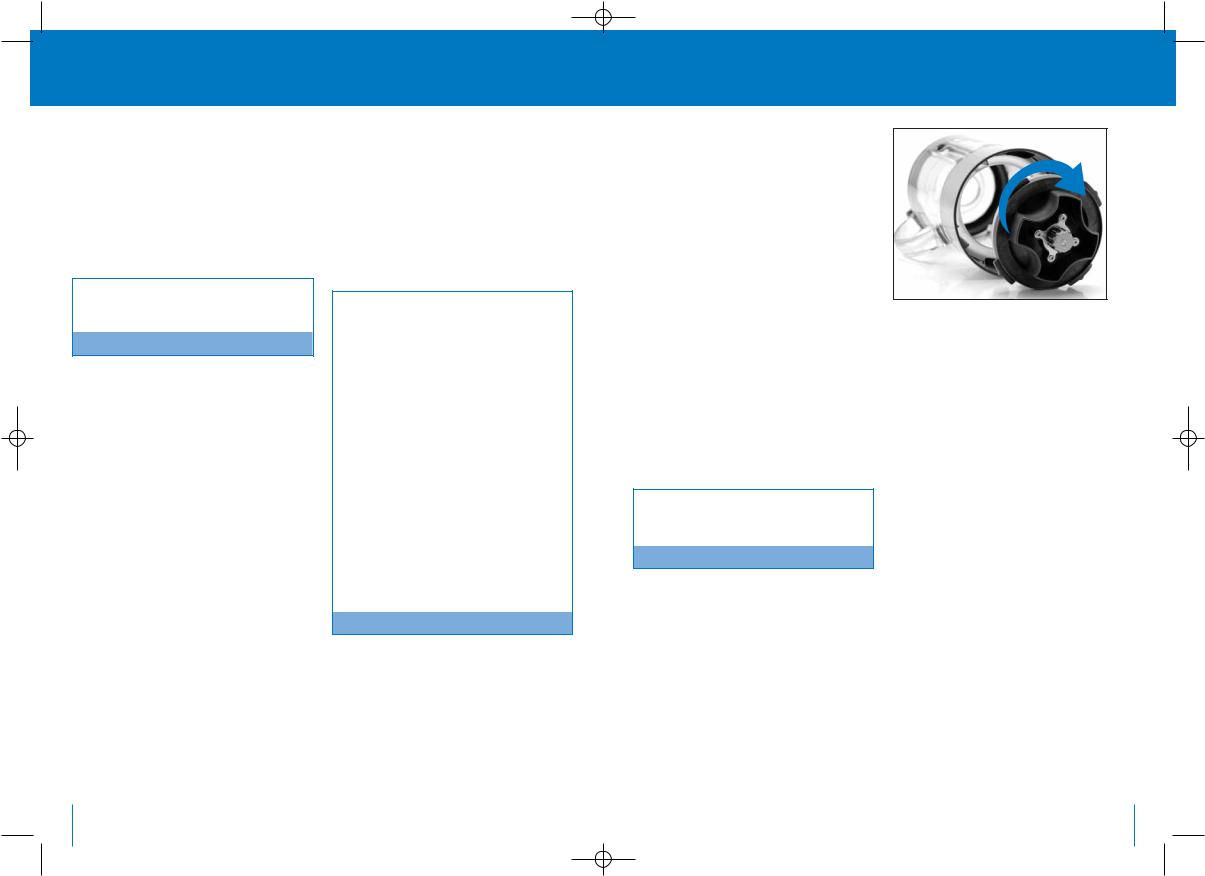
Step 3.
Remove the blade assembly by upturning the blender jug and twisting the 1/4 turn Blade Removal System clockwise for 1/4 of a turn to unlock (see Fig 1), then lift upwards and away from the base of the blender jug. The circular plastic surround attached to the base of the blender jug is not removable.
Step 4.
Remove the silicon seal from the blade assembly.
The Breville Ikon™ Blender features a 1/4 turn Blade Removal System for the easy removal of the blade for cleaning.
Note
10 |
11 |
 Loading...