


Wizz® Planetary Mixer
Instruction Booklet suits all versions of BEM800 Mixers
BEM800

2
INTRODUCING THE BREVILLE PROFESSIONAL 800 COLLECTION™
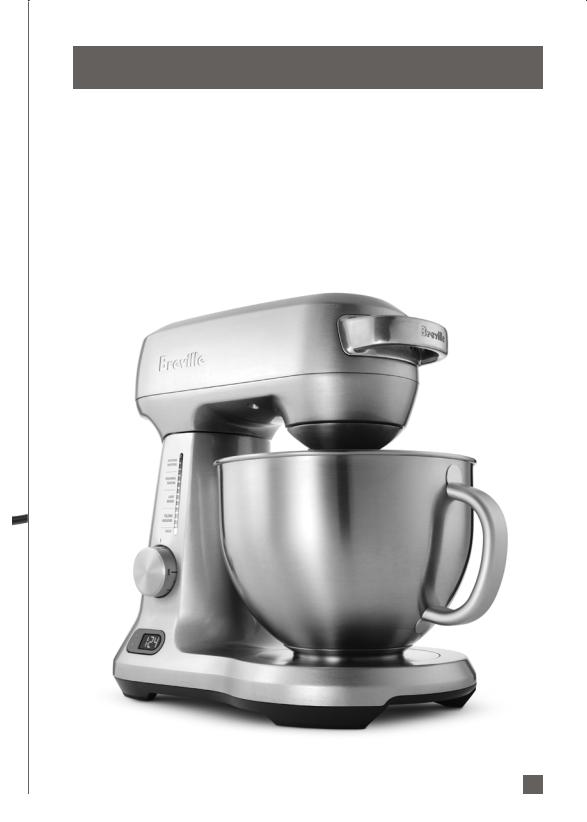
Wizz® Planetary Mixer
Planetary Mixing Action
Patisserie Quality Results
Replicating a similar mixing motion used by commercial mixers, Breville’s planetary mixing action produces patisserie and bakery quality results for evenly mixed batter, creamy icing and pliable dough.
3

Contents
Congratulations on the purchase of your new Breville Professional 800 Collection™
Wizz® Planetary Mixer
5 Breville Recommends Safety First
8 Know Your Breville Wizz® Planetary Mixer
11Before first use
- Assembly and Operation of Your Wizz® Planetary Mixer
19 Care, Cleaning and Storage
21 Measuring and Weighing
25 Hints and Tips
29 The Vital Ingredients
35 Trouble Shooting Guide
37 Recipes
71 Notes
4

BREVILLE RECOMMENDS SAFETY FIRST
At Breville we are very safety conscious. We design and manufacture consumer products with the safety of you, our valued customer, foremost in mind. In addition we ask that you exercise a degree of care when using any electrical appliance and adhere to the following precautions.
IMPORTANT SAFEGUARDS FOR YOUR BREVILLE Wizz® Planetary Mixer
•Carefully read all instructions
before operating the Wizz® Planetary Mixer for the first time and save for future reference.
•Remove and safely discard any packaging material and promotional labels before using the bench mixer for the first time.
•To eliminate a choking hazard for young children, remove and safely discard the protective cover fitted to the power plug of this appliance.
•Do not place the bench mixer near the edge of a bench or table during operation. Ensure the surface is level, clean and free of water and other substances. Vibration during operation may cause the appliance to move.
•Do not use the bench mixer on a sink drain board.
•Do not place the bench mixer on or near a hot gas or electric burner, or where it could touch a heated oven.
•Always ensure the bench mixer is completely assembled before operating. Follow the instructions provided in this book.
•Ensure the Speed Control Dial is in the ‘Off’ position and the bench mixer is switched off at the power
outlet and the power cord is unplugged before attaching the beater, whisk or dough hook.
•Do not use attachments other than those provided with the bench mixer. Use only the beater whisk and dough hook supplied with the mixer.
•Do not operate the appliance continuously on heavy loads for more than 3 minutes. None of the recipes in this book are considered a heavy load.
•Handle the bench mixer and attachments with care. Never place your fingers inside the mixing bowl or near the beater, whisk or dough hook during operation.
•Keep hands, hair, clothing, as well as, spatulas and other utensils away from moving beater, whisk or dough hook/ during operation.
•Should an object such as a spoon or spatula fall into the bowl while mixing, immediately ensure the Speed Control Dial is in the ‘Off’ position, turn the bench mixer off, unplug at the power outlet and remove the object.
•Do not place hands in the mixing bowl unless the bench mixer is disconnected from the power outlet. Ensure the Speed Control Dial is in the ‘Off ’ position, the bench mixer is switched off and unplugged from the
power outlet before removing the beater, whisk or dough hook.
•Ensure the motor and beater, whisk or dough hook have completely stopped before disassembling.
•Always remove the beater, whisk or dough hook from the bench mixer before cleaning.
•Care should be taken when removing the food from the mixer bowl by ensuring the motor and the beater, whisk, or dough hook have completely stopped before disassembling. Ensure
5

BREVILLE RECOMMENDS SAFETY FIRST continued
the Speed Control Dial is in the ‘Off” position, the appliance is switched off at the power outlet and unplugged before unlocking the mixer motor head and moving into the upright position. The beater, whisk or dough hook should
be released from the mixer motor head before removing the processed food from the mixer bowl and the beater, whisk or dough hook.
•Ensure the mixer motor head is locked into the horizontal (closed) position when not in use and before storing.
•Always ensure the Speed Control Dial is in the ‘Off’ position, the power is switched off at the power outlet and the power cord is unplugged from the power outlet before attempting to move the bench mixer, before assembling or disassembling, when not in use and before cleaning or storing.
•Do not move the bench mixer whilst in operation.
•Do not leave the bench mixer unattended when in use.
•Do not place any part of the bench mixer in the dishwasher other than the bowl, splash guard, beater, dough hook and whisk.
•Do not place any part of the bench mixer in the microwave oven.
•Keep the bench mixer clean. Follow the cleaning instructions provided in this book.
6

BREVILLE RECOMMENDS SAFETY FIRST continued
IMPORTANT SAFEGUARDS FOR ALL ELECTRICAL APPLIANCES
•Fully unwind the power cord before use.
•Do not let the power cord hang over the edge of a bench or table, touch hot surfaces or become knotted.
•To protect against electric shock do not immerse the power cord, power plug or mixer in water or any other liquid.
•The appliance is not intended for use by persons (including children) with reduced physical, sensory or mental capabilities, or lack of experience and knowledge, unless they have been given supervision or instruction concerning use of the appliance by a person responsible for their safety.
•Children should be supervised to ensure that they do not play with the appliance.
•It is recommended to regularly inspect the appliance. To avoid a hazard do not use the appliance if power cord, power plug or appliance becomes damaged in any way. Return the entire appliance to the nearest authorised Breville Service Centre for examination and/or repair.
•Any maintenance other than cleaning should be performed at an authorised Breville Service Centre.
•This appliance is for household use only. Do not use this appliance for anything other than its intended use. Do not use in moving vehicles or boats. Do not use outdoors. Misuse may cause injury.
•The installation of a residual current device (safety switch) is recommended to provide additional safety protection when using electrical appliances. It
is advisable that a safety switch with a rated residual operating current not exceeding 30mA be installed in the electrical circuit supplying the appliance. See your electrician for professional advice.
WARNING: ENSURE THE SPEED DIAL CONTROL IS IN THE ‘OFF’ POSITION THE BENCH MIXER IS SWITCHED OFF AT THE POWER OUTLET AND UNPLUGGED FROM THE POWER OUTLET BEFORE ATTACHING THE BEATER, WHISK OR DOUGH HOOK.
7
Know Your Breville Wizz® Planetary Mixer
H
A
D
|
|
K |
|
C |
|
|
|
B |
|
G |
H |
|
|
|
J |
F |
E |
|
A.Motor head: Powerful motor for thorough mixing results
B.4.7L stainless steel mixing bowl with handle
C.Illuminated LED speed indicator band: displays selected mixing task
D.Tilt back and lock down hinge button: the motor head tilts back and locks into position to allow easy removal of the mixing bowl and attachments
E.Bowl locking recess: the bowl locking recess allows the bowl to be securely locked into place for safety and stability when the mixer is in operation
F.LCD screen with count up & down timer: mixer can be set to count down according to a specified time on a recipe or set to count up to asses mixing time
G.Pause function: rotate dial to “pause” to temporarily stop mixing and pause the timer
H.Breville Assist™ handles: handles on base and on motor head allow for easy and comfortable lifting of the mixer
I.Load Sensing Technology: internal sensors detect when heavy batters are being mixed and automatically adjust to maintain the selected speed (not shown)
J.Internal Cord Storage: located in the rear of the mixer. Cord pushes into the mixer base for convenient and tidy storage
K.Splash guard: prevents ingredients from splattering out of the bowl
8
Know Your Breville Wizz® Planetary Mixer continued
L M
N O
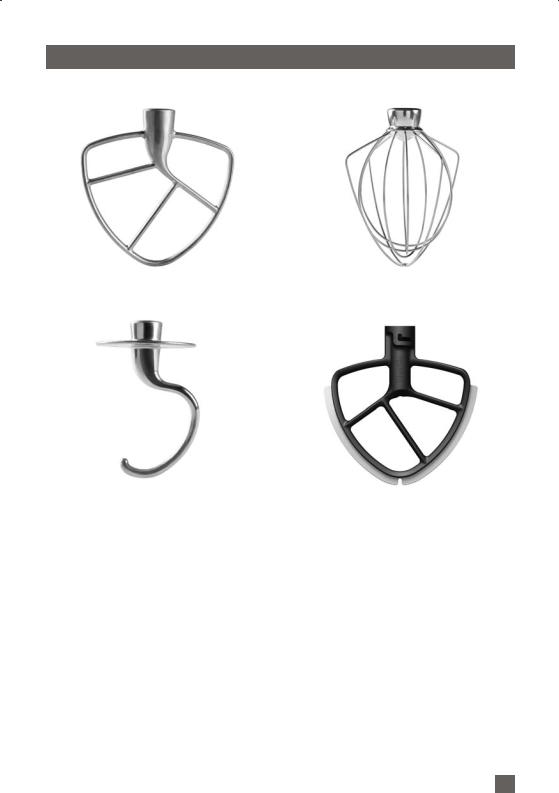
L.Flat beater: thoroughly mixes a variety of mixtures such as cake and biscuit batter, pastries, and mashed potatoes
M.Wire whisk: consistently mixes and aerates for egg whites, cream and thin batters
N.Dough hook: effectively kneads heavy dough for bread and pizza
O.Scraper beater: Scrapes the sides and bottom of the bowl for exceptionally thorough mixing, of cake and biscuit batter, pastry and frosting.
P.Spatula: (not shown)
About your scraper beater
The Breville Scraper Beater folds ingredients and continuously scrapes down the sides and bottom of the bowl for exceptionally thorough mixing. It virtually eliminates the need to scrape the bowl by hand with a spatula and cuts mixing time up to 60%.
Under-mixed batters produce poorly baked results, resulting in collapsing, unevenness of crumb, holes, low rising, streaking and course textures. the Scraper Beater will help to ensure a thoroughly mixed batter for your favourite cakes, biscuits, frosting and more.
Many of the recipes provided in your instruction booklet specify the use of the Flat Beater, however, for exceptionally thorough mixing and to save time, you can use your Scraper Beater instead.
9

Before first use
Assembly and Operation of Your Wizz® Planetary Mixer
Assembling the mixer
Before using your Breville Wizz® Planetary Mixer for the first time, remove any packaging material and promotional labels. Ensure the speed control dial is in the
‘Off’ position, the mixer is switched off at the power outlet and the power cord is unplugged.
Remove the mixing bowl, beater, whisk and dough hook and wash in warm soapy water with a soft cloth. Rinse and dry thoroughly. The bowl and the attachments may be washed in the dishwasher.
NOTE: When first using your Breville Wizz® Planetary Mixer, you may notice an odour coming from the motor. This is normal and will dissipate with use.
Attaching the bowl
1.Place the mixer base on a level, dry surface such as a bench top. The mixer motor head should be in the horizontal (closed) position. Raise the mixer motor head by depressing the tilt back hinge button.
2.Lift the mixer motor head up until it tilts back and locks into the open position.
3.Insert the mixing bowl into the bowl locking recess of the mixer stand and turn clockwise until the bowl locks securely into place.
NOTE: To remove or insert the mixing bowl, the mixer motor head must be raised and locked into the open position.
Attaching the scraper beater to the mixer motor head
1.Ensure the mixer motor head is in the raised/open position. Align the
groove in the top of the Scraper Beater with the locking pin on the spindle extending down from the mixer
motor head.
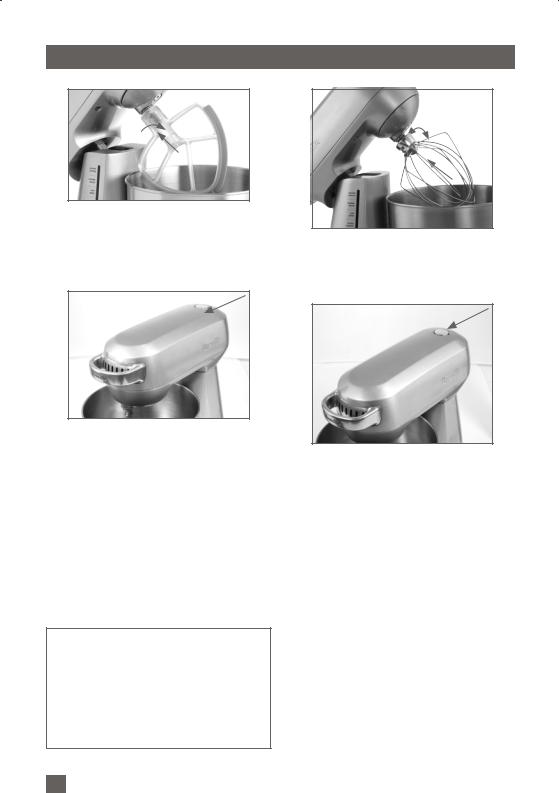
2.Push the scraper beater upwards and turn clockwise until it locks securely onto the locking pin on the spindle (see Fig. 1).
11
Assembly and Operation of Your Wizz® Planetary Mixer continued
Fig. 1
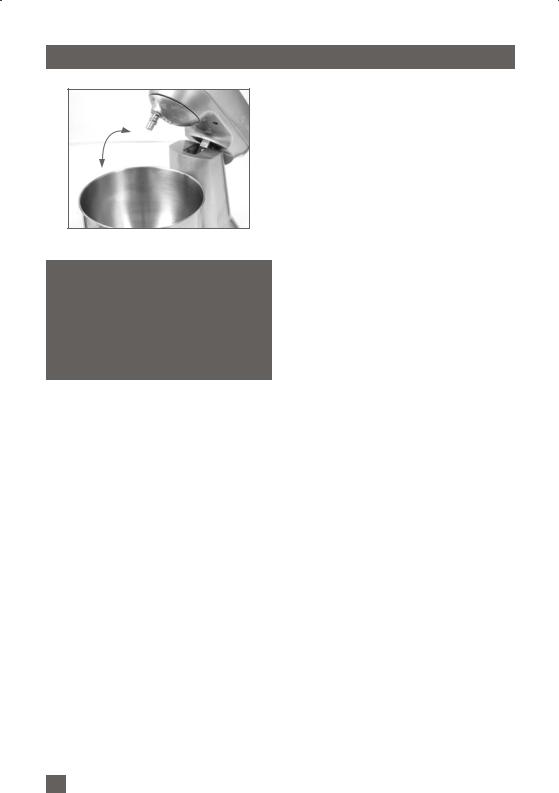
3.Lower the mixer motor head by depressing the tilt back button and gently pushing the mixer motor head down until it locks into the horizontal (closed) position (see Fig. 2).
Fig. 2
4.The splash guard can now be assembled if required. Slide the main ring into position on top of bowl, then assemble the pour spout.
Attaching the beater, dough hook or whisk
1.Ensure the mixer motor head is in the raised open position. Align the groove in the top of the beater, dough hook or whisk with the locking pin on the spindle extending down from the mixer motor head.
Note: When ingredients are in the mixing bowl, the scraper beater may make a slight noise as it scrapes the sides and bottom of the bowl. This is normal and should not cause concern.
Do not turn the mixer on with the scraper beater in place if the mixing bowl is empty. This will cause the scraper beater to make a loud noise as it scrapes the bowl.
2.Press the beater, dough hook or whisk upwards and turn clockwise until it locks securely onto the locking pin on the spindle.
3.Lower the mixer motor head by depressing the tilt back hinge button and pushing the mixer motor head down until it locks into the horizontal (closed) position.
4.Splash guard can now be assembled if required. Slide main ring into position on top of bowl, then assemble pour spout.
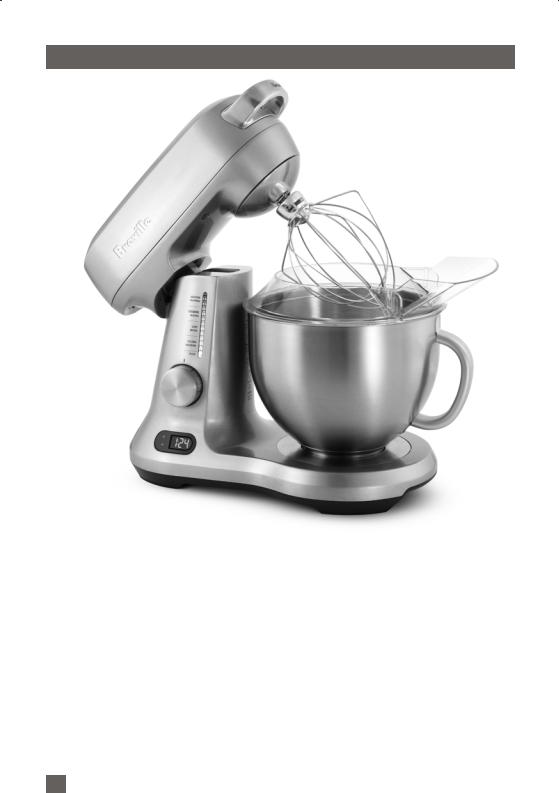
Operating the mixer Planetary Mixing Action
By replicating a similar mixing action used by commercial mixers in bakeries and patisseries, The Breville Wizz® Planetary Mixer head rotates around the bowl whilst rotating the beater in the opposite direction. This ensures a superior and thorough mixing result without the need for a rotating bowl.
12

Assembly and Operation of Your Wizz® Planetary Mixer continued
1.Ensure the speed control dial is set to the ‘Off’ position, plug the cord into a 220-240v power outlet and switch the power ‘ON’ at the power outlet. The illuminated LED speed indicator band will flash and the Count Up/Down timer will display “0:00.” The mixer is now ready to be used.
NOTE: If the mixer has not been used for 3 minutes it will automatically go to a power saving “stand by mode.” The mixer can be left in stand by until the ingredients in the bowl are ready to be mixed. To exit stand by and begin mixing, turn the dial to the selected speed or press one of the ‘Count Up/ Down timer buttons.
2.Add ingredients to the mixing bowl as indicated in the recipe.
Always begin mixing by selecting a low speed setting on the speed control dial. This will prevent ingredients splattering. Increase the speed as suited to the mixing task. The speed setting can be adjusted during operation by moving the dial clockwise for the main mixing settings. Use the mixing guide in this booklet as a reference.
If necessary, stop the mixer during operation and scrape any food mixture down the sides of the mixing bowl with a spatula.
NOTE: Always turn the Breville Wizz® Planetary Mixer off if you need to scrape the bowl during use, and then switch back on and continue mixing.
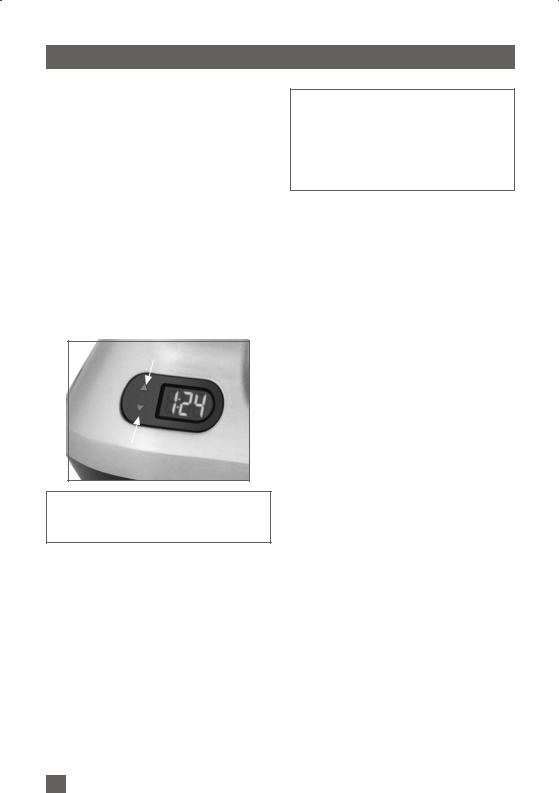
The count-up timer
The count-up timer is especially useful to gauge mixing time or when recipe does not specify the mixing time. You can monitor the time it takes to thoroughly mix the ingredients, so that the next time you mix the same ingredients you can set the count-down timer for the specific time.
The count-up timer will automatically begin counting up as soon as the dial is rotated from ‘Off’ to one of the speeds. When the dial is turned to "Pause" the total time will be displayed on the LCD and will flash. When the dial is turned to "OFF", the LCD display will reset back to "0:00".
13
Assembly and Operation of Your Wizz® Planetary Mixer continued
The count-down timer
The count-down timer is especially useful for any recipe that specifies the length
of time ingredients should be mixed. For example, if a recipe reads, “beat for 3 minutes,” you can set the count-down timer to 3 minutes by pressing the up/down arrows. After 3 minutes of mixing, an alarm will sound and the motor will automatically turn off. The count-down timer will flash “OFF”. The control dial must to be rotated to the “Off” position to reset the timer and to continue mixing.
To set the count down timer, press the up or down arrows until the desired mixing time is displayed on the LCD screen.
NOTE: Press and hold the arrows down to scroll through the timer setting more quickly.
Rotate the dial clockwise to select the desired speed and to begin mixing. When the timer has finished counting down, “0:00” will flash on the LCD screen and a beep will sound to notify you that the time has expired. The mixer will automatically turn the motor off. The control dial must be rotated to the 'OFF' position to reset the timer and to continue mixing.
NOTE: The maximum time displayed on the timer is 9:59 (nine minutes, fifty-nine seconds). The mixer will automatically switch Off at 9 minutes 59 seconds. The control dial needs to be rotated to the “Off” position to reset the timer and to continue mixing.
Pause Mode
While mixing, at any stage, you can rotate the control dial to the “pause” setting. This will turn the motor off and “pause” the timer. This enables you to assess
the mixing progress or add additional ingredients without effecting the timer.
For example, if you are mixing using the ‘count-up timer’ mode, you can rotate the control dial from one of the mixing speeds to “pause”. The mixer motor will stop and the timer will “pause”. Once ready, you can rotate the dial back to one of the mixing speeds, the timer will continue to countup from the exact time it was paused. Alternatively, if you have turned the mixer to “pause” you can then reset the timer to 0:00 by rotating the dial to “Off” position.
If using the “pause” function in ‘countdown timer’ mode, you can suspend the timer at any stage during the count-down process by rotating the control dial to the “pause” setting. To continue mixing in the ‘count-down timer’ mode, simply rotate the dial back into one of the mixing speeds or alternatively to the “Off” position to reset the timer to 0:00.
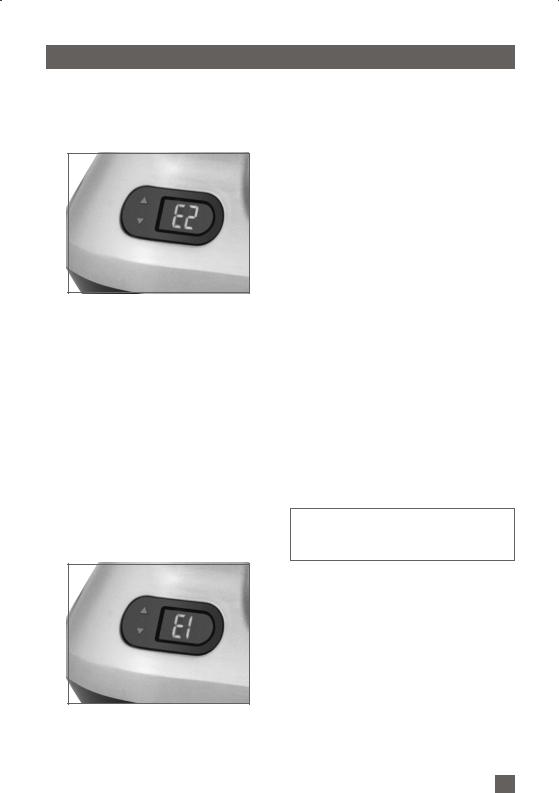
Thermo cut-off – Temperature Overload
The mixer is equipped with a self-resetting safety device which safeguards against overheating the motor with excessive loads. If overheating occurs, the mixer will automatically activate the overheating
protection device and the motor will switch
14
Assembly and Operation of Your Wizz® Planetary Mixer continued
itself off. Should the mixer go into this mode, the LED indicator band will flash and the error message “E2” will flash on the LCD screen and the buzzer will “beep” 3 times.
If this error occurs, turn the speed control dial to the ‘Off’ position, switch the appliance off at the power outlet and unplug the cord. Wait at least 15 minutes before restarting the mixer.
Electronic Protection Cutoff – Current Overload
The mixer is equipped with an electric protection cutoff and will automatically stop operating if the motor is stalled or overloaded. This is normally a result of excessive ingredients being processed at one time. Should the mixer go into this
mode, the LED indicator band will flash and the error message “E1” will flash on the LCD screen and the buzzer will “beep” 3 times.
If this error occurs, turn the speed control dial to the ‘Off” position, switch
the appliance off at the power outlet and unplug the cord. Remove some of the ingredients in the mixing bowl and then restart the mixer.
Disassembling the mixer
1.When mixing is complete, turn the speed control dial to the ‘Off/Stand by’ position, switch the appliance off at the power outlet and unplug the cord.
2.Remove splash guard if assembled. Separate pour spout then slide main ring out of position.
3.Raise the mixer motor head by depressing the tilt back button and lift the mixer motor head up until it tilts back and locks into the open position.
4.Remove the beater/dough hook/whisk attachment by holding the mixer motor head and pressing the attachment upwards on the spindle. Turn the attachment anticlockwise to release it from the pin on the spindle.
5.Use a soft plastic spatula to remove mixture from the beater, dough hook or whisk attachment.
NOTE: When lowering or lifting the mixer, always support the motor head with your other hand to prevent from free-falling.
6.Remove the mixing bowl from the indented bowl locking recess of the mixer Base and turn anti-clockwise until the bowl releases. Use a soft plastic spatula to remove mixture from the mixing bowl.
7.Lower the mixer motor head by depressing the tilt back hinge button and pushing the mixer motor head down until it locks into the horizontal (closed) position.
15
Assembly and Operation of Your Wizz® Planetary Mixer continued
WARNING: AVOID CONTACT WITH
BEATER/DOUGH HOOK/WHISK
DURING OPERATION. KEEP HANDS,
HAIR, CLOTHING, SPATULAS AND
OTHER UTENSILS AWAY FROM
BEATER/DOUGH HOOK/WHISK TO
PREVENT PERSONAL INJURY OR
DAMAGE TO THE MIXER.
16

17

Care, Cleaning
and Storage
 Loading...