


 Loading...
en-us Use and Care Manual, Installation Instructions
Washer
WAT28401UC
Welcome to Your New Washer!
Congratulations on your selection of a new Bosch washer for your laundry needs. We are confident you will enjoy the superior performance and reliability.
Please do not hesitate to contact our Customer Service department if you have any questions or comments about your new washer.
Thank you for choosing Bosch.
Visit our web site at www.bosch-home.com/us for more information and to view a selection of our products.
2

Table of contents |
|
Important information ................................................... |
4 |
Purchase information ........................................................... |
4 |
Customer service ................................................................. |
4 |
Your washing machine is intended for ........................ |
5 |
Importance and meaning of symbols .......................... |
5 |
IMPORTANT SAFETY INSTRUCTIONS ........................ |
6 |
Introduction to your new washer ................................. |
7 |
Standard features and helpful information ...................... |
7 |
Special features .................................................................... |
7 |
Environmentally friendly use of your washer ................... |
8 |
Dimensions and clearances required .......................... |
8 |
Appliance dimensions ......................................................... |
8 |
Length of power cord and water supply hoses .............. |
8 |
Installation types ................................................................... |
9 |
Installation instructions .............................................. |
10 |
Introduction ......................................................................... |
10 |
Tools needed ..................................................................... |
11 |
Waste disposal .................................................................. |
11 |
Parts provided with your washer .................................... |
11 |
Set up on a pedestal with drawer .................................. |
12 |
Installation checklist .......................................................... |
12 |
Importance of installing on a solid, level floor ............. |
12 |
Remove the transport bolts ............................................. |
12 |
Water connections ............................................................ |
13 |
Leveling the washer .......................................................... |
15 |
Electrical connection ........................................................ |
16 |
Transporting the washer .................................................. |
17 |
Getting to know your appliance ................................. |
18 |
Control panel ...................................................................... |
18 |
Operating Instructions ................................................ |
19 |
Before doing any laundry |
|
with your washing machine ............................................. |
19 |
Before loading your first load of laundry ...................... |
19 |
Using the cycle selector to choose a wash cycle ...... |
19 |
Changing default cycle settings ..................................... |
19 |
Selecting additional cycle settings ................................. |
19 |
Loading the laundry .......................................................... |
19 |
Filling the detergent and additives compartments |
..... 20 |
Starting the cycle ............................................................... |
21 |
Child lock ............................................................................ |
21 |
Selecting a different cycle ............................................... |
21 |
Pausing/Adding a garment to the cycle ....................... |
21 |
Cancel cycle ....................................................................... |
21 |
Cycle end ............................................................................ |
21 |
Removing laundry/switching the appliance off ........... |
22 |
Signal ............................................................................ |
22 |
Laundry ........................................................................ |
23 |
Preparing the laundry ....................................................... |
23 |
Sorting the Laundry .......................................................... |
23 |
Identifying and treating stains ......................................... |
23 |
Laundry detergents and additives ............................. |
24 |
Adding the correct amount of HE detergent ............... |
24 |
Program selection table ............................................. |
25 |
Starching ............................................................................. |
26 |
Dyeing/bleaching .............................................................. |
26 |
Soaking ............................................................................... |
26 |
Default Program and Option settings ....................... |
27 |
Changing the temperature range ................................... |
27 |
Changing the spin speed range .................................... |
27 |
Finish in ............................................................................... |
27 |
Additional Program Option settings .......................... |
27 |
Extra Rinse +1, +2 ................................................................. |
27 |
Prewash PW ......................................................................... |
27 |
SpeedPerfect G ............................................................. |
27 |
Cleaning and maintenance ......................................... |
28 |
Cleaning the housing and control panel ...................... |
28 |
Cleaning the drum ............................................................ |
28 |
Descaling the washer ....................................................... |
28 |
Cleaning the detergent dispenser tray ......................... |
28 |
Cleaning the water inlet strainers .................................. |
28 |
Cleaning the drain pump ................................................. |
29 |
Troubleshooting .......................................................... |
31 |
Emergency door lock release ........................................ |
31 |
General Troubleshooting ................................................. |
31 |
Error messages ................................................................. |
34 |
Customer service ........................................................ |
34 |
STATEMENT OF LIMITED PRODUCT WARRANTY ... |
35 |
What this Warranty Covers & Who it Applies to ......... |
35 |
Additional information on products, accessories, |
|
replacement parts and services can be found at |
|
www.bosch-home.com and in the online shop |
|
www.bosch-eshop.com |
|
4XHVWLRQV"
ZZZ ERVFK KRPH FRP
0DLQ 6WUHHW 6XLWH ,UYLQH &$
:H ORRN IRUZDUG WR KHDULQJ IURP \RX
3
Important information
Purchase information
Please take a moment to record the following basic information about your new Bosch washer.
This information will be helpful in the event you need to contact Customer Service or would like to order accessories or replacement parts.
( 1U |
)' |
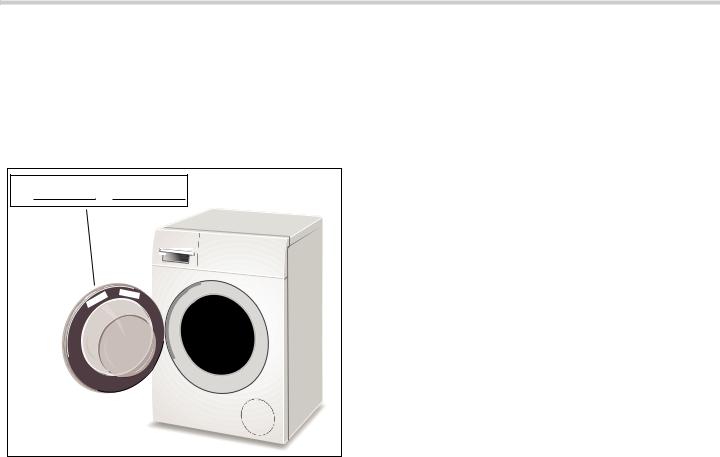
The E-Nr. (model number) and the FD (serial) number are found on the rating plate label.
see illustration
The model number includes the slash and a two digit number (eg: "/27"). Please be sure to include the final 2 digit number when filling in your model number. This helps make sure any parts you may need are correctly matched to your specific machine.
Date of Purchase:___/___/_____
Where Purchased:___________________________
E-Nr. :_________/____ (ex: WFVC5330US/27) FD :_______-_______ (ex: FD 9005| 90001)
Customer service
Your washer does not require any special care other than the maintenance and care mentioned in this manual. If you have a problem with your washer, please consult
~ Troubleshooting; Page 31
This may save you money. If a technician comes out to advise you of information that is in the Troubleshooting table you may be charged, even if your washer is still under warranty.
If problems persist and service becomes necessary, contact your dealer, installer or an authorized service center. Do not attempt to repair the appliance yourself. Any work performed by unauthorized personnel may void the warranty.
If you are having a problem with your washing machine and are not pleased with the service you have received, please follow these steps:
1.Contact your installer or the Authorized Service Provider in your area and explain to them why you are not satisfied. This will usually correct the problem.
2.If after working with your installer or service technician the problem still has not been resolved to your satisfaction, please let us know either by writing to us at:
BSH Home Appliances 1901 Main Street, Suite 600 Irvine, CA 92614
or calling us at: 1-800-944-2904
When writing or calling please have the following information available:
E-Nr. (model number, example: WTVC3300UC/27)
FD (serial) number
Date of Original Purchase (receipt required)
Date Problem Occurred
Explanation of Problem
If writing, please also include a daytime telephone number and a copy of the sales invoice.
When calling Customer Service, please be ready to provide the model number E-Nr. and FD (serial) number. This information will help provide the best support for your washer.
Additional information is available at our website.
www.bosch-home.com/us
4

Your washing machine is intended for
Only household use and in a non-commercial environment.
Household use only washing machine-washable textiles.
Washing with common cold and hot (maximum
140 °F/60 °C) tap water and commercially available detergents and cleaning products suitable for use in washing machines.
We recommend HE (High Efficiency) detergents because they are designed to deliver optimum performance from your front-loading washer. Not using HE detergent could cause problems such as oversudsing, extended cycle periods, or a decrease in wash performance.
NOTICE: Do not use chlorine bleach!~ Operating Instructions; Page 19
When measuring all detergents/stain removers/ laundry care products be sure to follow the manufacturer's instructions.
Children must not do any laundry without supervision.
Keep pets away from the washer.
Set-up conditions:
Ambient temperature: 32-104 °F/0-40 °C Relative humidity: under 95%
Installation by qualified installers.
Installation in accordance with all regulatory requirements; if in doubt have the appliance installed by a specialist familiar with these requirements.
Read the use and set-up instructions and all other information included with the washer and act accordingly.
Keep documents for future use.
Importance and meaning of symbols
Important safety information is contained in this manual and on the warning labels located on your washer.
Standard symbols and headings are used to identify areas where you should take precautions to avoid injury or damage. Please take a moment to become familiar with each of these symbols and what they mean before proceeding.
9WARNING
ELECTRICAL SHOCK HAZARD
This indicates that death or serious injuries may occur as a result of non-observance of this warning.
9CAUTION
This indicates that minor or moderate injuries may occur as a result of non-observance of this warning.
NOTICE: This indicates that damage to the appliance or property may occur as a result of non-observance of this warning.
Tip: This symbol is used to draw the user's attention to important matters.
5

9 IMPORTANT SAFETY INSTRUCTIONS
READ AND SAVE THESE INSTRUCTIONS
WARNING
When properly cared for, your new appliance has been designed to be safe and reliable. Read all instructions carefully before use. These precautions will reduce the risk of burns, electric shock, fire, and injury to persons. When using appliances, basic safety precautions must be followed, including those in the following pages.
Examine the appliance after unpacking it. In the event of transport damage, do not plug it in.
WARNING
TO REDUCE THE RISK OF FIRE, ELECTRIC SHOCK, SERIOUS INJURY OR DEATH WHEN USING YOUR WASHING MACHINE, FOLLOW BASIC PRECAUTIONS INCLUDING THE FOLLOWING
Bosch washers are provided with an Operating, Care and Installation Instruction manual. Read and understand all instructions before using the washing machine.
Do not wash articles that have been previously cleaned, washed, soaked, or spotted with gasoline, dry cleaning solvents, other flammable or explosive substances as they give off vapors that could ignite or explode.
Do not add gasoline, dry cleaning solvents, or other flammable or explosive substances to the wash water. These substances give off vapors that could ignite or explode.
Under certain conditions hydrogen gas may be produced in a hot water system that has not been used for 2 weeks or more. HYDROGEN GAS IS EXPLOSIVE. If the hot water system has not been used for this length of time, turn on all hot water faucets and let the water flow out of each faucet for several minutes before using the washing machine. This will release any accumulated hydrogen gas. As the gas is flammable, do not smoke or use an open flame while carrying out this procedure.
Before the appliance is removed from service or discarded, remove the door to prevent children from playing or hiding inside. Also remove the power cord/ plug.
Do not allow anyone to climb, lean or hang on any part of the washer including any protruding components such as the appliance door or a pullout shelf.
Use caution when draining hot water from the washer drum such as during pump maintenance or when using the emergency door open procedure.
Do not reach into the appliance if the wash drum is moving.
Do not tamper with the controls.
Do not repair or replace any part of the appliance or attempt any service unless specifically recommended in the user manual or in published user repair instructions that you understand and have the skills to carry out.
Always unplug the washing machine from the power supply before attempting any service. Disconnect the power cord by grasping the plug, not the cord.
Do not machine wash fiberglass materials (such as curtains and window coverings that use fiberglass materials). Small particles may remain in the washing machine and stick to fabrics in subsequent wash loads causing skin irritation.
Do not install or store the washer where it will be exposed to the weather. Hoses and internal parts may be damaged if exposed to freezing temperatures.
Do not use the washing machine if it has a worn power cord or loose plug.
The washing machine must only be used for its intended purpose.
Always follow the fabric care instructions recommended by the clothing manufacturer.
Make sure all water connections to the washing machine have shut-off valves that are readily accessible during normal operation of the washer. Turn off both valves during periods in which the washer is not in use and before leaving for extended periods such as vacations to reduce the risk of water damage in the event of a leak. Turn the valves back on prior to resuming use of the washer.
Do not operate the washing machine if parts are missing or broken.
Do not operate the washing machine until you are sure that:
the washing machine has been installed according to the Installation Instructions.
all water, drain, power and grounding connections are in compliance with all local regulations and/or other applicable regulations and requirements.
See the installation instructions in this manual for grounding requirements.
~ Electrical connection; Page 16
6

9 IMPORTANT SAFETY INSTRUCTIONS
READ AND SAVE THESE INSTRUCTIONS
WARNING
WARNINGS FOR CHILDREN
Do not allow children to play on or in the appliance. Close supervision of children is necessary when the appliance is used near children.
Make sure to utilize all child lock/safety features of your appliance, and be sure to turn the appliance Off when not in use.
Appliances are not intended for use by children, however when children become old enough to operate the appliance, it is the responsibility of the parents or legal guardians to ensure they are instructed in safe practices by qualified persons.
Keep all laundry aids (including detergents, bleach, fabric softener, etc.) out of the reach of children.
WARNING
STATE OF CALIFORNIA PROPOSITION 65 WARNINGS
This product contains chemicals known to the State of California to cause cancer, birth defects or other reproductive harm.
SAVE THESE INSTRUCTIONS!
Keep These Instructions for Future Reference.
In case of change of ownership, manual should be conveyed with the washer.
Introduction to your new washer
9WARNING
RISK OF FIRE, ELECTRIC SHOCK OR INJURY
To reduce the risk of fire, electric shock or injury to persons, read the IMPORTANT SAFETY INSTRUCTIONS of this manual before installing or operating this appliance.
~ IMPORTANT SAFETY INSTRUCTIONS; Page 6
Standard features and helpful information
Thank you for choosing Bosch for your laundry appliance needs.
Please read and follow the use & care, important safety instructions and troubleshooting information contained in this manual. Please retain this manual for future reference.
Standard features
17.7 lb (8 kg) large drum capacity (for regular cotton loads).
Low washing and spinning noise levels.
Large door opening featuring magnetic lock, 180º opening angle.
Quality tested
Every Bosch washer is thoroughly tested before leaving the factory. As a result, a small amount of residual water may remain in the washer drum. We recommend running the Drum Clean cycle to remove this water prior to washing your first load of laundry.
~ Before loading your first load of laundry; Page 19
Web Site
Visit our web site at www.bosch-home.com/us for more information and to view a selection of our products.
About this manual
These operating and installation instructions may apply to more than one model of washer. Illustrations used may show details that differ from your particular model.
Read your user manual. It contains valuable information about safety, installation and operation of your new appliance.
This can save you time, make it easier to correctly install and use your washer, and improve your overall satisfaction with your new appliance.
Special features
Load adjust matches the water and power consumption to each program according to the amount of laundry sensed in the drum and the type of fabric.
The load adjust function runs automatically to keep energy and water consumption as low as possible.
The water level sensor ensures the water level is correct for the laundry and the program selected.
The automatic unbalanced load detection system spins the laundry several times to ensure even distribution.
If the laundry is not evenly distributed, the spin speed is reduced, or the laundry may not be spun for reasons of safety.
In the Wool program, the spin cycle is attempted only twice in order to prevent felting.
7
Environmentally friendly use of your washer
Your new Bosch washing machine is designed to use water, energy and detergent in a highly efficient way to help reduce operating costs, conserve resources and protect the environment.
Utilize the maximum amount of laundry for the appropriate program.
Avoid using too much detergent.
Wash normally soiled laundry without a prewash.
Save energy and detergent when washing lightly and normally soiled laundry.
Energy-saving mode: The display panel lighting goes out after a few minutes and Start/Pause flashes. To activate the display, touch any button.
Energy-saving mode is not activated if a program is running.
If the laundry will be dried in a dryer afterwards, select spin speed according to the dryer manufacturer’s instruction.
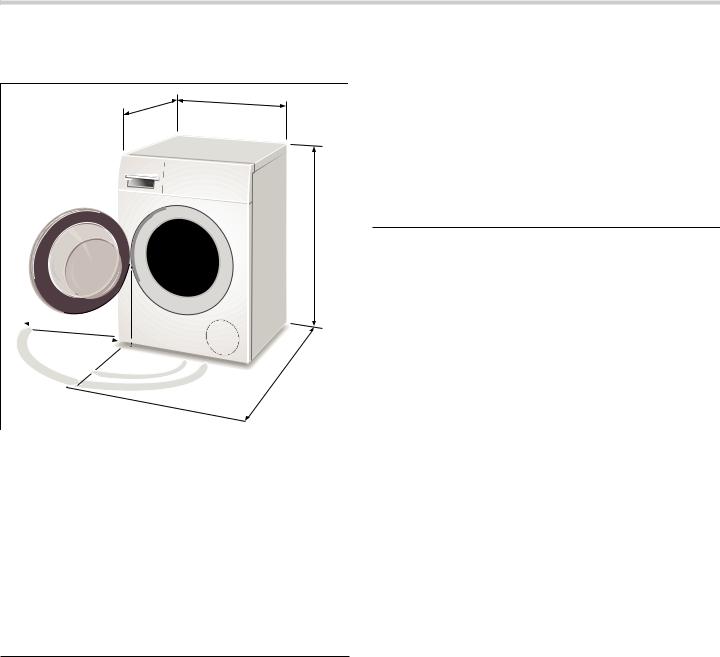
Dimensions and clearances required
Appliance dimensions
|
E |
D |
|
|
|
|
|
F |
|
G |
|
|
|
H |
|
||
|
|
Label |
Dimension |
U.S. |
Metric |
|
|
|
|
a |
width |
23.6 in. |
60 cm |
|
|
|
|
b |
depth |
25 in. |
64 cm |
|
(to front of door) |
|
|
|
|
|
|
c |
height (minimum*) |
33.2 in. |
85 cm |
|
height (maximum*) |
33.8 in. |
86 cm |
|
|
|
|
d |
side clearance |
15.8 in. |
40 cm |
|
(door open 180°) |
|
|
|
|
|
|
e |
depth |
42.5 in. |
108 cm |
|
(door open 90°) |
|
|
|
|
|
|
Weight |
approximate gross |
164 lbs. |
77.2 kg |
* height of appliance depends on the extension of the height adjustable appliance feet.
Length of power cord and water supply hoses
|
To left of washer* |
To right of washer* |
||
|
U.S. |
Metric |
U.S. |
Metric |
|
|
|
|
|
Electric power |
25 in. |
64 cm |
43 in. |
109 cm |
cord |
|
|
|
|
|
|
|
|
|
Water supply |
43 in. |
109 cm |
28 in. |
71 cm |
hoses |
|
|
|
|
Drain Hose |
27 in. |
69 cm |
46 in. |
117 cm |
* All distances are measured from indicated side when facing front of washer.
8
Installation types
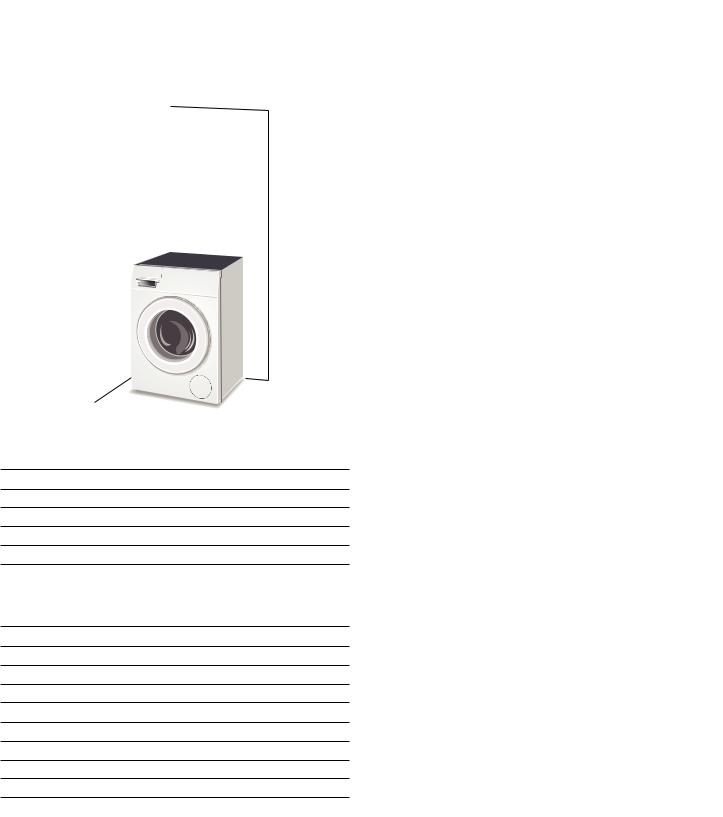
Stacked washer and dryer
A Bosch dryer of the same dimensions can be placed on top of the washer to save space.
Use the special washer-dryer stacking kits (noted in Bosch Dryer User Manuals) which can be purchased from customer service or your local dealer.

 %
%
(
+
)
*
 &
&
$
'
Clearance requirements (Minimum)
A Both |
Sides |
0.6 in. |
1.5 cm |
B |
Top |
6.3 in. |
16 cm |
C |
Rear* |
2.5 in. |
6.4 cm |
D |
Front |
2.4 in. |
6.1 cm |
* Rear clearance as close to wall as venting or water connection will allow. If the washer is installed with a dryer, the greater rear clearance for the dryer venting is required for the laundry pair.
Ventilation area (Minimum) |
|
||
E |
Top |
63 sq. in. |
404 sq. cm |
F |
Bottom |
63 sq. in. |
404 sq. cm |
Vent spacing (actual not minimum dimensions)
G |
37 in. |
94 cm |
H |
26 in. |
66 cm |
J |
3 in. |
7.6 cm |
K |
29 in. |
73 cm |
Stand alone (shown) or Side-by-Side
(
.
)
 &
&
-
$
'
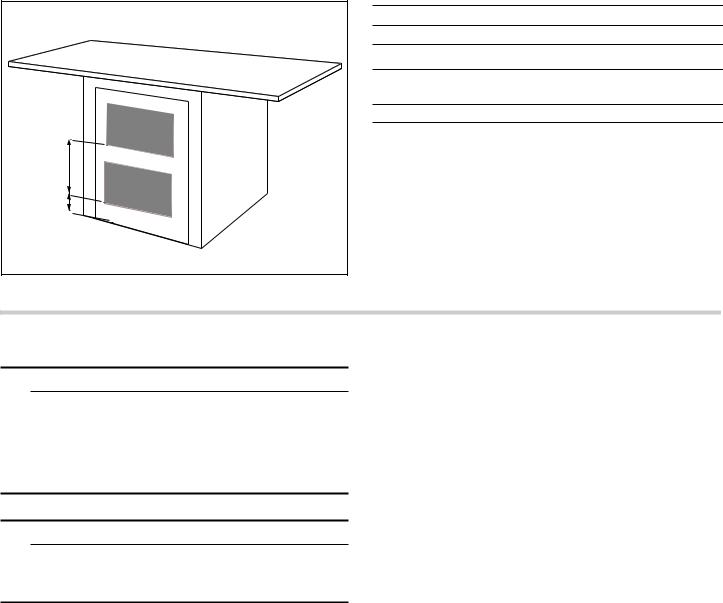
Under counter (Preferred)
$ |
& |
|
|
% |
|
Front of the appliance fully open.
No doors or coverings.
Minimum opening dimensions |
|
|
A |
28 in. |
71.1 cm |
B |
23.8 in. |
60.5 cm |
C |
35.5 in. |
90.2 cm |
9
Under counter (Less Desirable)
( |
+ |
) |
* |
If front of the appliance is covered ventilation openings must be installed.
E & F are minimum area sizes |
|
|
E |
63 sq.in. |
404 sq.cm |
F |
63 sq.in. |
404 sq.cm |
G & H actual spacing dimensions for min. open area sizes
G |
3 in. |
7.6 cm |
H |
14 in. |
35.6 cm |
Installation instructions
9WARNING
RISK OF FIRE, ELECTIRICAL SHOCK OR INJURY TO PERSONS
To reduce the risk of fire, electric shock or injury to persons, read the Important Safety Instructions at the front of this manual before installing or operating this appliance.
9CAUTION
WASHING MACHINE IS HEAVY
Use additional help and care when lifting and positioning.
Introduction
Read these installation instructions completely and carefully before starting to install your new washing machine. The information contained can save you time and effort and will help to ensure optimum performance of your new washer. Be sure to observe all warnings and cautions.
NOTICES
Frozen hoses can tear or burst. Do not install the washing machine outdoors or in an area exposed to freezing condtions.
If the washing machine is located in a room which will be exposed to temperatures below freezing, or if it is located in a cabin that is being shut down for the winter, any residual water in the pump or water inlet hose(s) must be drained.
Take care not to damage the washing machine. Do not hold on to protruding parts (e.g. door) when lifting. Do not push against the appliance door glass due to risk of damage.
In addition to the safety information listed here, the local water and electric authorities may have special requirements that must be followed.
If in doubt, have the appliance installed by an authorized technican.
Hidden surfaces may have sharp edges. During service use caution when reaching inside the washer housing.
These installation instructions are intended for use by qualified installers. In addition to these instructions, the installation must comply with:
-for the United States - National Electrical Code, ANSI/ NFPA70 - and latest editions of the State and municipal and/or local regulations.
-for Canada - Canadian Electrical Code C22.1 - and the latest editions of the Provincial, Municipal and/or local regulations.
10
Tools needed
The following tools may be helpful during installation of your washer.
13mm socket for removing the transport bolts.
17mm wrench for adjusting the appliance feet.
Bubble level for leveling the appliance.
Waste disposal
Disposal of Packaging Materials
After unpacking your new appliance dispose of the protective packaging materials in an environmentally friendly way. Ask your dealer or inquire with your local authority regarding currently acceptable means of disposal.
9WARNING
WARNINGS FOR CHILDREN
Do not let children play with packaging and associated parts to avoid risk of choking or suffocation.
Disposal of Your Old Appliance
Your old appliance can be recycled if it is no longer to be used. Prior to disposing of your old appliance observe the following precautions to reduce safety risks.
9WARNING
TO AVOID RISK OF INJURY OR DEATH, DO THE FOLLOWING
-after unplugging the old appliance, remove the electric power cord and dispose of properly.
-remove the door or permanently disable the door lock to prevent children from being locked inside.
Parts provided with your washer
Back side of the washing mashine
|
|
# |
|
( Power cord with plug
0Literature pack; contents:
User manual
Warranty
Covers with hose holders
8Drain hose
@ Elbow to form the hose to fit the drain pipe
11
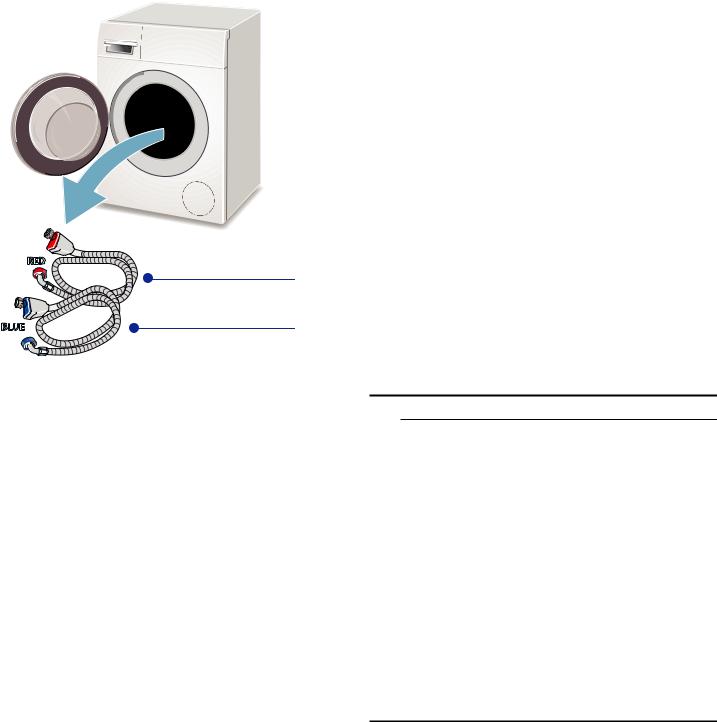
Washer drum contents
Two AquaShield ® water supply hoses are shipped in the washer drum. Be sure to remove each of these items from the drum before using the washer.
è Installation Step |
Page |
|
|
Before washing laundry, run |
~ Before loading |
the Drum Clean program |
your first load of |
|
laundry; Page 19 |
Importance of installing on a solid, level floor
Your new Bosch washing machine utilizes high spin speeds to achieve superior water removal from your laundry resulting in reduced drying time. It is important to install your washing machine on a floor that will provide firm support. This prevents the washer from experiencing excess vibration during spinning that could cause the washer to move or be noisy.
The installation surface must be solid and level in both directions. Avoid installing your washer on soft surfaces such as floors with carpet or foam backed covering material.
If installing the washer on a wooden floor, observe the following:
+ |
install the washer in a corner for better support if |
|
possible. |
if necessary, reinforce the floor by screwing a water 3 resistant wooden board to the floor (minimum of
1.18 in./30 mm thick).
H Hot water AquaShield ® hose P Cold water AquaShield ® hose
NOTICE: If any parts are missing please notify your dealer immediately.
Set up on a pedestal with drawer
Pedestal item number: WMZ 20490
Mount washer on the pedestal according to the instructions in the installation kit.
Installation checklist
Review the following list and check off each step as it is completed during installation.
è Installation Step |
Page |
|
|
If installing to a pedestal |
~ Remove the trans- |
(base), complete the base |
port bolts; Page 12 |
installation before removing |
|
the transportation bolts |
|
|
|
Completely remove all four |
~ Remove the trans- |
shipping bolts keeping the |
port bolts; Page 12 |
bolt and bushing assem- |
|
blies intact |
|
Remove the transport bolts
9CAUTION
DAMAGE TO THE APPLIANCE OR INJURY POSSIBLE
The machine is secured for transport with transport bolts.
Transport bolts that are not removed can damage the drum during operation of the machine, the washer will vibrate, and it will be much noisier during spin cycles if the transport bolts are not removed before use.
Be sure to remove all 4 transport bolts completely before first use. Keep the transport bolts.
If a pedestal was purchased with the washer, it must be installed first, prior to removing the transport bolts. Please consult the pedestal installation instructions.
In order to prevent transport damage during later transport, be sure to re-install the bolts before transport.
Connect the water supply |
~ Water |
hose and drain hose |
connections; Page 13 |
|
|
Connect the electrical |
~ Electrical |
power |
connection; Page 16 |
Slide the washing machine |
|
into its final location |
|
|
|
Level the washing machine |
~ Leveling the |
(as low as possible) |
washer; Page 15 |
12
Loading...