


Bosch PIA611T16E Operating/installations instructions
PIA6..T.6., PIM6..T1..
Hob
[en] Instructions for installation and use
|
|
|
|
|
|
|
|
|
|
|
ÚTable of contentsudanoltirse]Icf[ |
|
|
INSTALLATION INSTRUCTIONS............................................... |
3 |
Assembly ............................................................................... |
3 |
Important notes .............................................................................. |
5 |
Installing and connecting the hob - Figure 1/2/3/4/5 ........... |
5 |
Connection drawing - Figure 5.................................................... |
5 |
Changing the connection current |
|
13 / 16 / 20 Amps - Figure 6 ..................................................... |
5 |
Removing the hob ......................................................................... |
5 |
INSTRUCTION MANUAL............................................................ |
6 |
Safety precautions ................................................................ |
6 |
Elements that may damage the appliance ............................... |
8 |
Protecting the environment.................................................. |
8 |
Environmentally-friendly disposal of waste products .............. |
8 |
Energy-saving advice .................................................................... |
8 |
Induction cooking ................................................................. |
9 |
Advantages of induction cooking ............................................... |
9 |
Suitable pans .................................................................................. |
9 |
Familiarise yourself with the appliance............................. |
10 |
The control panel ........................................................................ |
10 |
The hotplates ............................................................................... |
10 |
Residual heat indicator .............................................................. |
10 |
Programming the hob ......................................................... |
11 |
Switching the hob on and off ................................................... |
11 |
Set the hotplate ........................................................................... |
11 |
Cooking guidelines table........................................................... |
11 |
Childproof lock .................................................................... |
12 |
Activating and deactivating the childproof lock. ................... |
12 |
Activating and deactivating the childproof lock .................... |
12 |
Powerboost function........................................................... |
13 |
To activate ................................................................................... |
13 |
To turn off .................................................................................... |
13 |
Time programming function............................................... |
13 |
To switch a cooking zone off automatically........................... |
13 |
Automatic timer ........................................................................... |
13 |
The timer....................................................................................... |
13 |
Automatic time limitation ................................................... |
14 |
Basic settings ...................................................................... |
14 |
Accessing the default settings ................................................. |
15 |
Care and cleaning ................................................................ |
15 |
Hob ................................................................................................ |
15 |
Hob frame .................................................................................... |
15 |
Fixing malfunctions ............................................................. |
16 |
Normal noise while the appliance is working ....................... |
16 |
After-sales service ............................................................... |
17 |
2 |
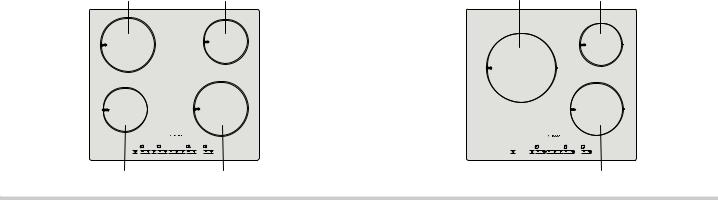
Ø = cm |
INSTALLATION INSTRUCTIONS
Assembly |
|
|
3

|
|
4

Important notes
Safety in use is only guaranteed if the technical installation of the hob has been carried out correctly and in accordance with the installation instructions. The installation technician shall be liable for any damage caused as a result of incorrect installation.
Only an authorised technician is able to connect the appliance. The guidelines set out by the local electricity provider must be observed.
This is a class I appliance and should only be used with an earthed connection.
Using this appliance without an earth connection or after it has been incorrectly installed may, under very rare circumstances, cause serious harm.
The manufacturer accepts no responsibility for any malfunction or damage caused by incorrect electrical installation.
If the appliance is not fitted with an accessible plug, means for disconnecting it must be incorporated in the fixed installation, in accordance with the installation regulations.
The inlet hose must be positioned so that it does not touch any of the hot parts of the hob or oven.
Any change to the appliance's interior, including changing the power cable, must be performed by the Technical Assistance Service.
Induction hobs may only be installed over drawers, ovens with the same brand of forced-air ventilation, or dishwashers of the same brand. Refrigerators, unventilated ovens, and washing machines may not be installed beneath the hob.
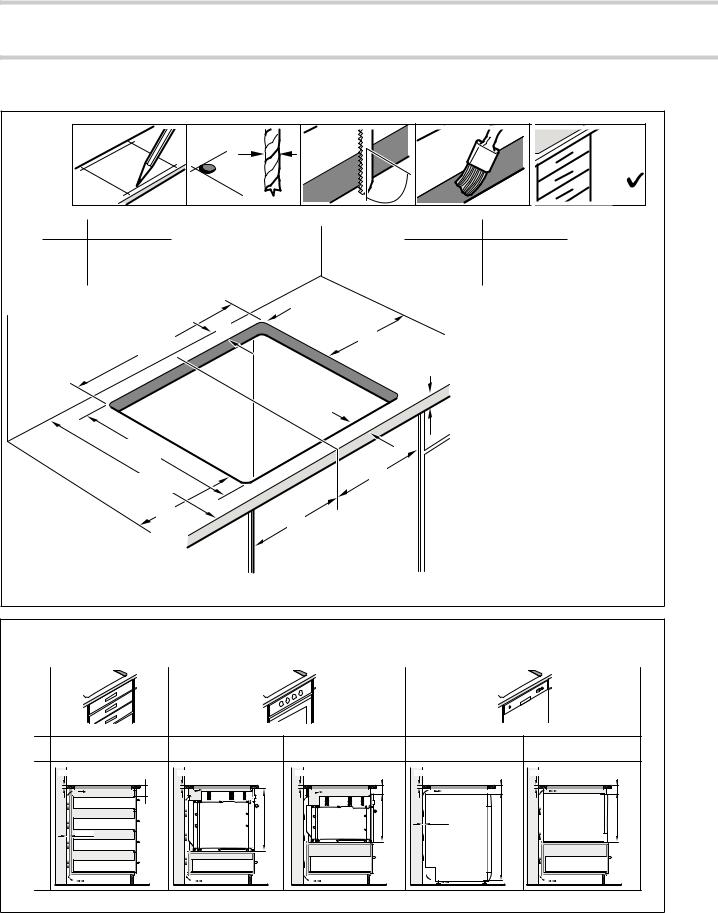
Assembly over drawer (figure 2a)
If the hob is installed above a drawer, metal objects stored inside could become very hot due to the air recirculating from the hob ventilation system. If this occurs, an intermediate support is recommended.
A wooden panel can be used as an intermediate support (figure 3), or you may order a suitable accessory from our Technical Assistance Service.
The reference code for this accessory is 686002.
The worktop where the hob is installed should be at least 20 mm thick.
The distance between the top of the working surface and the top of the drawer must be 65 mm.
Assembly over oven (figure 2b)
The working surface upon which the hob is installed must be at least:
■20 mm thick if installed over a compact oven.
■30 mm thick if installed over a full-size oven.
If the hob is installed over a compact oven, there must be
60 mm distance between the top of the oven and the top of the working surface.
Assembly over dishwasher (figure 2c)
If the hob is installed over a dishwasher, an intermediate accessory must be installed. The accessory may be ordered from our Technical Assistance Service.
The reference code for this accessory is 686002.
The working surface upon which the hob is installed must be a minimum of 20 mm and a maximum of 40 mm thick.
The space between the top of the working surface and the top of the dishwasher must be:
■60 mm if installed over a compact dishwasher.
■65 mm if installed over a full-size dishwasher.
Installing and connecting the hob - Figure 1/2/ 3/4/5
Voltage, see specifications plate.
Connect using the connection drawing only.
Connection drawing - Figure 5
1.Brown
2.Blue
3.Yellow and green
Changing the connection current 13 / 16 / 20 Amps - Figure 6
Before using the hob for the first time, it must be tested for the correct current.
Follow the steps below to change the current of the hob:
1.Turn on the hob with the main switch. Do not place any pans on the hotplates
2.Within the following 60 seconds, adjust all hotplates to the desired power level according to the required connection current (see table).
Power level |
Connection current in amperes |
‚ |
20 A |
ƒ |
16 A |
„ |
13 A |
3.Turn off all the hotplates in sequence, starting from the lower right and continuing counter-clockwise.
4.The selected connection current is indicated in the display of the right-hand lateral hotplates.
5.Turn off the hob with the main switch.
The selected connection current will have been properly saved.
Removing the hob
Disconnect the appliance from the mains.
Remove the hob by pushing it from below.
5

INSTRUCTION MANUAL
Produktinfo
Additional information on products, accessories, replacement parts and services can be found at www.bosch-home.com and in the online shop www.bosch-eshop.com
ã=Safety precautions
Please read this manual carefully. Please keep the instruction and installation manual as well as the appliance certificate in a safe place for later use or for subsequent owners.
Check the appliance after removing it from the packaging. If it has suffered any damage in transport, do not connect the appliance, contact the Technical Assistance Service and provide written notification of the damage caused, otherwise you will lose your right to any type of compensation.
This appliance must be installed according to the installation instructions included.
This appliance is intended for domestic use only. The appliance must only be used for the preparation of food and drink. The appliance must be supervised during operation. Only use this appliance indoors.
This appliance is not intended for operation with an external clock timer or a remote control.
This appliance may be used by children over the age of 8 years old and by persons with reduced physical, sensory or mental capacity or by persons with a lack of experience or knowledge if they are supervised or are instructed by
a person responsible for their safety how to use the appliance safely and have understood the associated hazards.
Children must not play with the appliance. Children must not clean the appliance or carry out general maintenance unless they are at least 8 years old and are being supervised.
Keep children below the age of
8 years old at a safe distance from the appliance and power cable.
Risk of fire!
■Hot oil and fat can ignite very quickly. Never leave hot fat or oil unattended. Never use water to put out burning oil or fat. Switch off the hotplate. Extinguish flames carefully using a lid, fire blanket or
something similar.
Risk of fire!
■ The hotplates become very hot. Never place combustible items on the hob. Never place objects on the hob.
Risk of fire!
■ The appliance gets hot. Do not keep combustible objects or aerosol cans in drawers directly underneath the hob.
Risk of fire!
6
 Loading...