


Installation and User’s
Guide
RIM 857 Wireless
Handheld
TM

Installation and User’s Guide
Last revised 07/10/00
Part Number: MAT-03077-001 Rev. 001
At the time of printing, documentation complies with versions:
Operating System 2.0, Ap pl i cations 2.0, and Desktop 2.0.
© 1999-2000 Research In Motion Limited. All rights reserved. RIM, the
RIM logo, Research In Motion, RIM 857 Wireless Handheld, and
‘Always On, Always Connected’ are trademarks of Research In Motion
Limited. RIM, Research In Motion - Registered U.S. Patent and
Trademark Office. © Puma Technology, Inc. Puma Technology, the
Puma Technology logo, DSX Technology, the DSX Technology logo,
Intellisync, the Intellisync logo and Intellisync Ready logo are
trademarks of Puma Technology, Inc. that may be registered in some
jurisdictions. DataTAC is a trademark of Motorola Inc., that may be
registered in some jurisdictions. Windows 95/98/2000, Exchange an d
Outlook are either trademarks or registered trademarks of Microsoft
Corporation. All other brands, product names, company names,
trademarks and service marks used herein are the property of their
respective owners.
Warning: This document is for the use of licensed users only. Any
unauthorized copying, distribution or disclosure of information is a
violation of copyright laws.
While every effort has been made to ensure technical accuracy,
information in this document is subject to change without notice and
does not represent a commitment on the part of Research In Motion
Limited.
For more information on BlackBerry, call 1-877-BLK-BERRY.
Research In Motion Limited
295 Phillip Street,
Waterloo, Ontario, Canada N2L 3W8
Tel. (519) 888-7465 Fax (519) 888-6906
www.rim.net
Printe d In Canada KMOct2000/857.book

FCC compliance statement (USA)
FCC Class B Part 15
This device complies with Part 15 of the FCC Rules. Operation is
subject to the following two conditions:
• This device may not cause harmful interference, and
• This device must accept any interference received, including
interference that may cause undesired operation.
WARNING
This equipment has been t est ed a nd found to comply with the limits
for a Class B di gital device, pur suant to Part 15 of t he FCC Rules.
These limits are designed to provide reasonable protection against
harmful interference in a residential installation. This equipment
generates, uses and can radiate radio frequency energy and, if not
installed and used in accordance with the manufacturer’s
instructions, may cause interference harmful to radio
communications.
There is no guarantee, however, that interference will not occur in a
particular installation. If this equipment does cause harmful
interference to radio or television reception, which can be
determined by turning the equipment off and on, the user is
encouraged to try to correct the interference by one or more of the
following measures:
• Reorient or relocate the receiving antenna.
• Increase the separation between the equipment and receiver.
• Connect the equipment into an outlet on a circuit different from
that to which the receiver is connected.
Changes or modifications to this unit not expressly
approved by the party responsible for compliance could
void the user’s authority to operate this equipment.

• Consult the dealer or an experienced radio/TV technician for
help.
Industry Canada Certification
This device complies with Industry Canada RSS 119, under
certificatio n number 2503 195 677A.
IC Class B compliance
This device complies with the Class B limits for radio noise emissions as set out in the inte rfer ence-causi ng equipment standard entitled “Digital Apparatus,” ICES-003 of Industry Canada.

Contents
FCC compliance statement (USA)..........................................3
Industry Canada Certification ................................................4
IMPORTANT SAFETY INFORMATION........ ... .... .... ................9
IMPORTANT UL SAFETY INSTRUCTIONS.....................11
Welcome to your wireless solution ............................................13
New for version 2.0.................................................................14
Upgrading to version 2.0.... ...................... .... ..................... ....14
Contents of your package......................................................15
System Requirements.............................................................15
About this guide......................................................................16
About Research In Motion.....................................................16
Customer support........................ ... .... ...................... ... .... .......17
Get to know your handheld.........................................................19
Handheld components...........................................................19
Turning on your handheld....................................................22
Turning off the handheld.......................................................23
Description of keys....... .... ... .... ...................... ... .... .... ..............23
Setting the date and time.......................................................37
Setting message notification..................................................37
Using password protection ...................................................38
Summary and tips...................................................................44
Start sending email........................................................................45
Turning the radio on and off.................................................45
Registering with the network................................................46
Installing the Desktop Software............................................48
Connect the handheld to your PC........................................48
Sending a message..................................................................50
Reading a message..................................................................52
Summary..................................................................................54
Using the Desktop Software....................... .... ...................... ... ....55

Installation and setup.............................................................55
Loading handheld applicatio ns....................... .... ... ..............56
Backing up files from handheld to the PC..........................57
Synchronizing PIM..................................... ...................... ... ...59
Summary..................................................................................60
Composing and sending messages.............................................61
Setting message options.........................................................61
Setting level of importance....................................................62
Choosing a send method.......................................................63
Sending one-time messages...................................................64
Sending messages to many contacts....................................65
Attaching Address Book entrie s...........................................66
Using AutoText.......................................................................67
Automatic formatting.................. .... .... ..................... .... .... ......73
Inserting symbols....................................................................75
Summary and tips...................................................................76
Receiving and reading messages................................................79
Received message options.................................................. ...79
Receiving long messages .......................................................81
Sending file attachments........................................................82
Managing Address Book attachments.................................83
Adding contacts to Address Book ........................................85
Summary and tips...................................................................86
Managing messages.......................................................................89
Saving messages......................................................................89
Searching messages................................................................93
Deleting messages................. .... ... ...................... .... ... ..............99
Editing messages......................................... ... .... ...................102
Resending a message........................... ..................... .... .... ....103
Marking a message as unread............................................ .104
Marking all messages read..................................................105
Summary and tips.................................................................106
Using the Address Book............................... .... ...................... ... .109
Setting Address Book options.............................................109

Adding addresses........................... .... ... ...................... .... ... ..110
Viewing addresses................................................................114
Editing addresses....................................... ...................... ... ..115
Deleting addresses..................................... ...........................116
Searching addresses..............................................................116
Summary and tips.................................................................117
Managing Tasks and Appointments........................................119
Using the Tasks function .....................................................119
Using the Calendar function...............................................124
Summary and tips.................................................................137
Using the MemoPad and Calculator...... ... ...................... .... ... ..139
Using the MemoPad function .............................................139
Using the Calculator function.............................................142
Summary and tips.................................................................146
Customizing your handheld’s options....................................149
Setting the alarm ...................................................................149
Customizing handheld optio ns..........................................151
Handheld options.................................................................152
Summary................................................................................160
Frequently asked questions.......................................................161
Alarm......................................................................................161
Battery.....................................................................................161
Storage....................................................................................162
Home screen..........................................................................163
LCD screen....................................... .... ... ...............................163
Messages.................................................................................164
Punctuation............................................................................166
Desktop Software..................................................................166
Resetting the handheld ........................................................166
Specifications................................................................................169
Research In Motion Limited Software License Agreement.171
Terms and Conditions..........................................................171
Limited Warranty.........................................................................175

Index...............................................................................................179

IMPORTANT SAFETY INFORMATION
Please read these safety instructions and the operation instructions
provided in this manual before operating the RIM 857 Wireless
Handheld or its charging cradle. Retain these instructions for future
use.
Remember to follow any special regulations governing the use of
the RIM 857 Wireless Handheld and always switch it off in areas
where radio devices are forbidden, or when it may cause
interference or danger. Any safety laws and regulations pertaining
to the use of cell phones and two-way radios will likely apply to
your use of the handheld. We encourage you to follow such laws
and regulations at all times. In particular, please observe all
restrictions on the use of radio equipment in fuel depots (fuel
storage and distribution areas), chemical plants, where blasting
operations are in progress or in any other area in which restrictions
on radio transmissions are imposed. In addition, the RIM 857
Wireless Handheld should not be used in locations that may be
hazardous including, without limitation, locations in which
hazardous or combustible gases may be present.
The RIM 857 Wire le ss Ha nd he ld is n ot an FA A-ap pr ov ed elec t ron ic
device for use on aircraft. Switch off the handheld when in an
aircraft. The effect of the use of the handheld in an aircraft is
unknown. Such use may affect aircraft instrumentation,
communication and performance, may disrupt the network, and
may be illegal.
Operation of any radio transmitting equipment, including the
handheld, may interfere with the functionality of inadequately
protected medical devices, including pacemakers. Consult a
physician or the manufacturer of th e med ical de vice if y ou hav e an y

questions. Additionally, while most modern equipment is
adequately shielded from radio signals such that your handheld
will not interfere with the operation of such equipment, certain
electronic equipment, including automotive systems, may not be
shielded against the radio signals from your handheld. You should
check with the manufacturer of your motor vehicle or the
manufacturer’s representative to determine whether the use of the
handheld will present any safety issues.
Avoid using the handheld in any environment requiring your full
attention, such as when driving a vehicle. If you need to use your
handheld while driving, have a passenger in the vehicle use the
handheld for you, or find a safe location to halt your vehicle prior to
using the handheld . Do not use the charging cradl e as a means of
storing your handheld while in a vehicle.
WARNING
Do not use any cradle, charging unit, or any other
accessory or attachment that is not manufactured or
supplied by RIM or an authorized RIM accessories supplier.
Use of any accessory or attachment that is not supplied or
approved for use by RIM in conjunction with the handheld is
not permitted as it may cause hazards.
Do not place th e RIM 8 57 Wirele ss Ha ndheld o r its cha rging cradle
on any unstable surface, such as a cart, stand, tripod, bracket, or
table. It may fall, causing serious injury to a child or adult, and
serious damage to the handheld .
Discard the handheld properly. As the unit contains a lithium
battery, neither the handheld nor the lithium battery should be
disposed of in fire. Dispose of the handheld containing the lithium
battery in accordance with the laws and regulations in your area
governing disposal of such cell types. Contact RIM if you have any
questions concerning disposal of the handheld or the lithium cell.
The handheld should be operated only from the type of power
source indicated on the marking label. Refer to the operating

instructions starting on page 21 for more information on the battery
and power supply. Do not overload wall outlets, extension cords, or
integral convenienc e rec ept ac les a s th is may resu lt in a r isk of fir e or
electric shock.
Never push objects of any kind into th e RIM 857 Wir e less Ha ndh eld
through openings as th ey m a y s hort -ou t par ts an d t his m ay res u lt in
a fire or electric shock. Never spill liquid of any kind on the
handheld or its chargin g cradle. Unplug the charging cradle from
the wall before cleaning. Do not use liquid or aerosol cleaners.
IMPORTANT UL SAFETY INSTRUCTIONS
Read these instructions. Keep these instructions. Heed all warnings.
Follow all instructions.
Do not use this apparatus near water. Clean only with a dr y cloth.
Do not install near any heat sources, such as radiators, heat
registers, stoves, or other apparatus (including amplifiers) that
produce heat.
Do not defeat the safety purpose of the polar ized or grounding-type
plug. A polarized plug has two blades with one wider than the
other. A grounding-type plu g ha s t wo b lad es an d a t hir d gr ou ndin g
prong. The wide blade or the third prong are provided for your
safety. If the prov ided plug do es not fi t into your o utlet, co nsult an
electrician for replacement of the obsolete outlet.
Protect the power cord from being walked on or pinched
particularly at plugs, convenience receptacles, and the point where
they exit from the apparatus.
Only use attachments/accessories specified by the manufacturer.

Unplug this apparatus during li ghtning storms or w hen used for
long periods of time.
Refer all servicing to qualified service personnel. Servicing is
required when the apparatu s ha s b een d amaged in any way, such as
when the power-supply cord or plug has been damaged, liquid has
been spilled or objects have fallen into the apparatus, it has been
exposed to rain or moisture, does not operate normally, or has been
dropped.
WARNING
To reduce the risk of fire or electric shock, do not expose
this apparatus to rain or moisture.
Adjust only those controls that are covered in this manual. An
improper adjustment of other controls may re sult in d amag e and
will often require extensive work by a qualified technician to
restore the handheld or charging cradle to its normal operation.
Failure to observe all safety instructions contained in this
manual will void the Limited Warranty, and may lead to
suspension or denial of services to the offender, or legal action,
or both.

Welcome to your wireless solution
The RIM 857 Wireless Handheld is a powerful computer with a fullfeatured Address Book, Appointment Calendar, MemoPad, and
Task List. Unlike other PIM products, the RIM 857 Wireless
Handheld includes an integrated wireless modem. Your package
will also include the RIM 857 Wireless Handheld Charging Cradle
and the Desktop Software, which allows you to synchronize with
popular desktop personal information management (PIM) software.
Get ready to experience the power of messaging with your
handheld us ing functions such as:
essages: Receive, read, reply to, compose, forward, save, file,
• M
and delete messages.
ompose: Create and send messages to Internet email
• C
addresses.
• Saved Messages: Store messages for future viewing.
• Search Messages: Locate messages in seconds with the
powerful search tool.
• Address Book: Store your personal directory of contact
information, such as multiple phone and fax numbers, and
email addresses. Enter notes for individual contacts and search
the database to find specific contacts.
• Cal
endar: Keep track of appointments using one of the four
calendar views: Day, Week, Month, or Agenda.
• Tasks: Add, edit, and delete tasks and mark tasks as complete.
• Alarm: Set the alarm on the handheld to so und daily.
• MemoP
ad: Compose, edit, and delete notes, memos and lists.

14
Welcome to your wireless solution — New for version 2.0
• Calculator: Perform basic mathematical operations and
conversions.
ptions: Customize th e way th e handh eld noti fies you o f new
• O
messages; set the password; add, edit, and delete AutoText
entries; set the current date; program the automatic on/off
feature.
• Lock: Lock the handheld with a password security screen so
that only you can use it. (This function is only visible in the
Home screen after you have set a passwo r d.)
• Turn Wireless Off / Turn Wireless On: Turn th e handheld’s
radio off when it may interfere with other radio
communications, such as during a flight. Turn on the radio
again to send and receive messages.
• Power Off: Turn off the handheld at night or on weekends.
New for version 2.0
The handheld (pre-installed with version 2.0 software) has an
updated Search Messages function, which lets you create and save
pre-defined searches on the handhe ld. You can use these searches in
the Messages, S a ve d Me s sa ge s, or Se arch Messages screens to find
messages sent to a particular address or containing specific text.
(See page 93 for more information.) The expanded Calendar
function now supports recurring calendar appointments and offers
you one of four views: Day, Week, Month, or Agenda.
For a complete list of new features for version 2.0 of the software,
refer to the README.txt file, found on your installation CD-ROM.
Upgrading to version 2.0
If you are currently using a previous version of the Desktop
Software, you should upgrade to version 2.0. Before installing the
new software on your desktop and your handheld, you should
Installation and User’s Guide

Welcome to your wireless solution — Contents of your package
perform a backup to store the contents of your handheld (such as
Address Book entries, messages, and calendar items) on your PC.
See Chapter 3 or th e B acku p and Restore online he lp for in st ru ction s
on performing a backup.
Once you have backed up your handheld information to your PC,
follow the instructions on page 48 to install.
Contents of your package
Your package should contain the following:
• Handheld
• Charging Cradle
• Holster
• This Installation and User’s Guide
• Handheld Getting Started Card
• Installation CD-ROM
If something from this package is missing or not working properly,
contact the point of purch ase.
System Requirements
15
The following components are required to install the Desktop
Software:
• Intel-compatible 486 or higher desktop with an available serial
port
• Windows 95/98/2000 with 8 Mb of RAM
Installation and User’s Guide

16
Welcome to your wireless solution — About this guide
About this guide
This guide provides information for operating the handheld and for
installing the Desktop Software.
Note
Tip
A summary, including a list of relevant tips, is included at the end
of each chapter.
The ‘Frequently asked questions’ chapter will help you further with
your handheld. As well, the Desktop Software offers online help to
guide you and answer your questions. To open the online help,
select Help from any active window.
Notes will appear in this format and will contain additional
information to help you perform the task being described.
Tips provide information about performing tasks and offer
different options to perform tasks.
About Research In Motion
RIM is a world leader in the mobile communications market. Our
current product portfolio includes mobile email solutions, wireless
handhelds , and wirele ss modems.
RIM has a history of developing breakthrough wireless data
solutions. Our products are based on industry-leading technologies,
providing superior radio coverage, small size, high performance
and long battery life. They offer the freedom of mobility and the
ability to stay in touch with people and information. And as people
discover new uses for wireless data technology, RIM will continue
to address their needs and help them discover new frontiers in
wireless data.
Installation and User’s Guide

Welcome to your wireless solution — Customer support
Customer support
For customer support, contact your service provider.
17
Installation and User’s Guide


1
Get to know your handheld
This chapter will help you get acquainted with your handheld
before you start sending and receiving email.
Handheld components
Figure 1: Front view of handhe ld
Here are some details on the handheld’s main components:
LCD screen
The LCD screen is your interface with functions such as composing
and reading messages, set ting t ask s a nd a ppoint ment s, viewing and
editing contact information, customizing device options, and

20
Get to know your handheld — Handheld components
performing basic mathematical calculations. The Home screen
displays the current signal strength and battery level of the
handheld.
In low light conditions, you can increase the readability of the LCD
by using the backlighting feature. To activate backlighting, press the
silver key once. The backlight will shut off automatically if you do
not press any keys or use the trackwheel for more than 20 seconds.
(You can manually turn off the backlighting by pressing the silver
key again.)
Keyboard and trackwheel
The 33-key QWERTY keyboard provides access to all of the regular
alphabetic characters; numeric characters, a symbols library,
punctuation, and special characters can be generated using the
ALT key in combination with the other keys. For easy typing,
orange
hold the device in both hands and use your thumbs. Roll and click
the trackwheel for navigation and selection.
A trackwheel that clicks!
The trackwheel on the handheld has a unique feature for greater
usability and performance: it clicks! Pressing down on the
trackwheel with yo ur thumb is compa rable to the cl icking fun ction
of your PC mouse. Click to open menus and to select fu nctions and
menu options.
Holster (belt clip)
A holster, equipped with a belt clip, accompanies the handheld.
While in the holster, the handheld is protected and wearable. You
can choose different forms of message notifica tion base d on whether
the handheld is in or out of the holster.
When you receive a new message and remove the handheld from
the holster within five seconds, notification (based on how you’ve
set it) stops and the most recently received message will be open. If
Installation and User’s Guide

Get to know your handheld — Handheld components
you pull the handheld out of the holster and quickly replace it,
notification stops but the message will remain marked unread. See
“Setting message notification” on page 37 for information on
notification options.
Serial port
The serial port on the bottom of the handheld fits into the prongs of
the docking cradle. You must connect the docking cradle to your PC
to use the Desktop Software (provided on the CD with your
package).
The Desktop Software supports standard USB-to-serial port
converters. See Chapter 3, “Using the Desktop Software”, for more
information on instal lat ion procedures and seria l co n nect ion det ail s.
Docking cradle
The docking cradle provides a link between the handheld and your
PC, so that you may use the Desktop Software provided with your
package. See Chapter 3, “Using the Desktop Software” for more
information on the cradle and the capabilities of the Desktop
Software.
Charger
The handheld is designed to operate for one week or more on a full
charge; exact battery life, however, will depend on factors such as
usage and quality of coverage. The handheld contains an internal
lithium cell. The docking cradle (see description above) is also used
to recharge this cell.
21
To charge the handheld, connect the AC adapter to the cradle's
serial port connector, plug into a wall outlet, and insert the
handheld into the cradle. The Desktop Software does not need to be
running for charging to occur, nor does the cradle need to be
connected to your PC. When the handheld is charging, the battery
Installation and User’s Guide

22
Get to know your handheld — Turning on your handheld
icon will change to a charging icon. Once the handheld is fully
charged, the battery icon will replace the charging icon. See page 33
for a list of handheld status icons.
The handheld can be kept at a full charge by “topping up” the
battery every day for 10-15 minutes. From an empty battery, a full
charge can be achieved in approximately 3 hours. It is not necessary
to drain the battery co mpletely before recharging.
If the battery level becomes too low, the signal strength bars (located
in the top right corner of the Home screen, next to the battery icon)
will be replaced by “BAT”. This is an indication that it is time to
recharge the handheld. In this state, all radio functions, such as
sending and receiving email, will be disabled until the battery is
recharged.
Turning on your handheld
When you receive your handheld, you must first i nsert it into the
charging cradle and allow it to charge to full battery power. (You
can view the strength of the battery in the top right corner of the
Home screen.) See page 48 for more information on connecting your
handheld to y our PC.
1. Press the silver key to turn on the handheld. From the Home
screen you can select any of the handheld’s main functions.
2. Using the trackwheel, scroll through the icons to view the
functions. The name of each function appears at the bottom of
the screen.
Installation and User’s Guide

Get to know your handheld — Turning off the handheld
3. To select a function, scroll to the appropriate icon and click the
trackwheel to open that function’s screen.
23
Tip
You can also select a function by pressing the underlined
character in the function’s name. For example, press M for
M
essages.
Turning off the handheld
There are two methods of turning off the handheld:
• Press and hold the silver key until the handheld turns off.
• In the Home screen, scroll to the POWER OFF icon and click.
Description of keys
The following chart describes special keyboard and trackwheel
combinations that will help you navigate, compose messages, and
configure options on the handheld.
Key Function
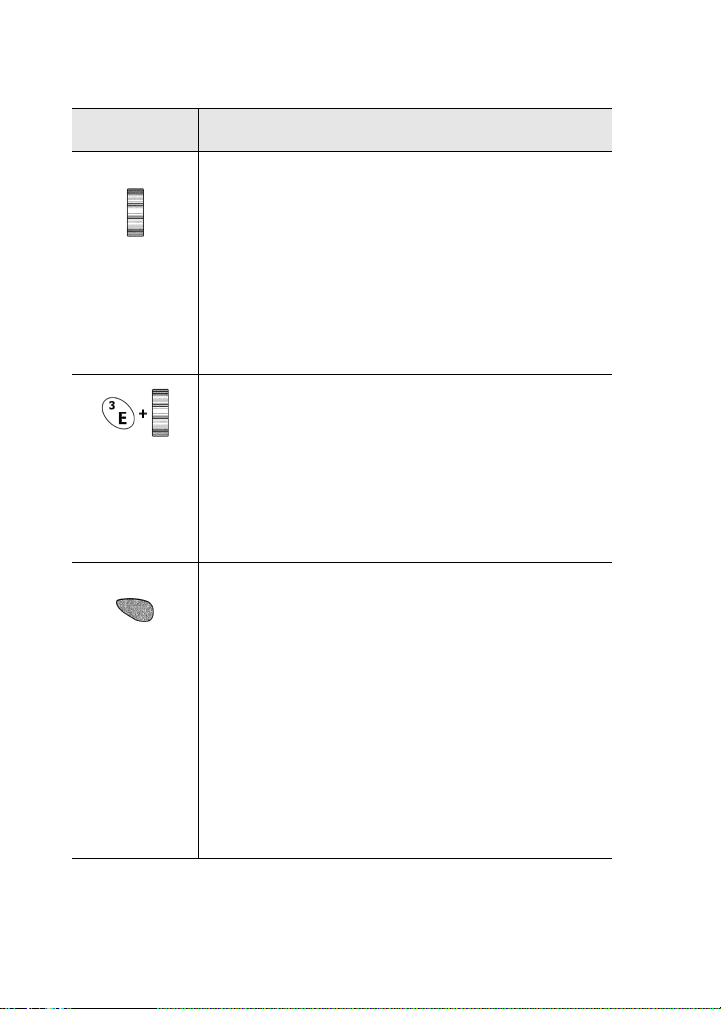
Power On/Off, Backlight
SILVER KEY
• Press the silver key once to turn on the
handheld.
• When the handheld is on, press the silver
key once to activate backlighting. Press
again to turn off backlighting. (Backlighting
will turn off automatically if you do not
press any keys for 20 seconds.)
• Press and ho ld the silve r key to turn off the
handheld.
Installation and User’s Guide
24
Get to know your handheld — Description of keys
Key Function
Scrolling and selecting
• Roll the trackwheel with your thumb to
scroll up and down through screen lines,
TRACKWHEEL
fields, and menu items.
• Click (press down) the trackwheel with your
thumb to open menus and select options,
similar to the click function of a mouse used
with your PC.
Scroll through accented characters
• When composing a messag e or en ter ing te xt,
press and hold a letter key while rolling the
trackwheel to scroll through international
characters/characters with accents. When
the desired character appears, release the
letter key.
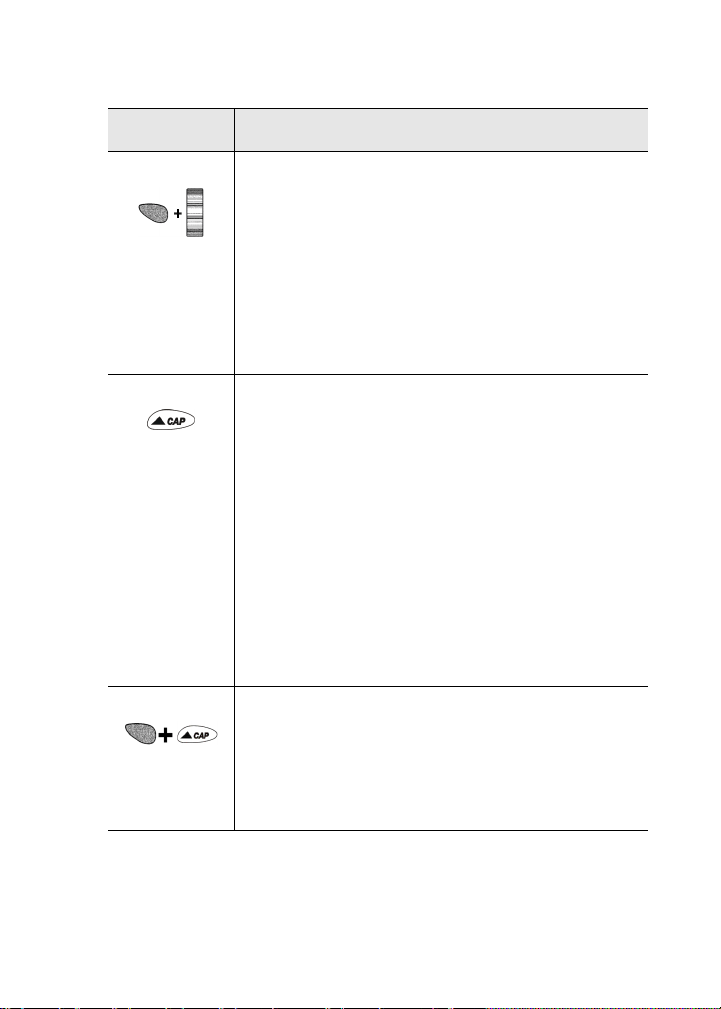
ALT characters
ALT key
symbol characters, printed in orange above the
alphabetic ke ys.
• Press the
• Press and hold the ALT key while yo u ty pe to
An ‘A’ icon appears in the top right corner of
your screen when the
Installation and User’s Guide
The orange
ALT key activates the numeric and
ALT key once to affect the next
character you type.
affect all characters.
ALT key is active.
Get to know your handheld — Description of keys
Key Function
Horizontal scroll and changing options
25
SHIFT key
• Hold the
ALT key while you roll the
trackwheel to move the cursor horizontally
across screen lines (except in the Home
screen where
ALT + ROLL will move the
cursor vertically).
• Hold the
ALT key while you roll the
trackwheel to scroll through field options.
Capitalize alpha characters
• Press the SHIFT key once to capitalize the
next character that you type.
• Press and hold the
SHIFT key while you type
so that all letters are capitalized.
• Press and hold the letter to capitalize it. This
feature only works wh en Key Rate is set to
Slow or Fast in the Screen/Keyboard screen.
An ‘up arrow’ icon appears in the top right
corner of your screen when the
SHIFT key is
activated.
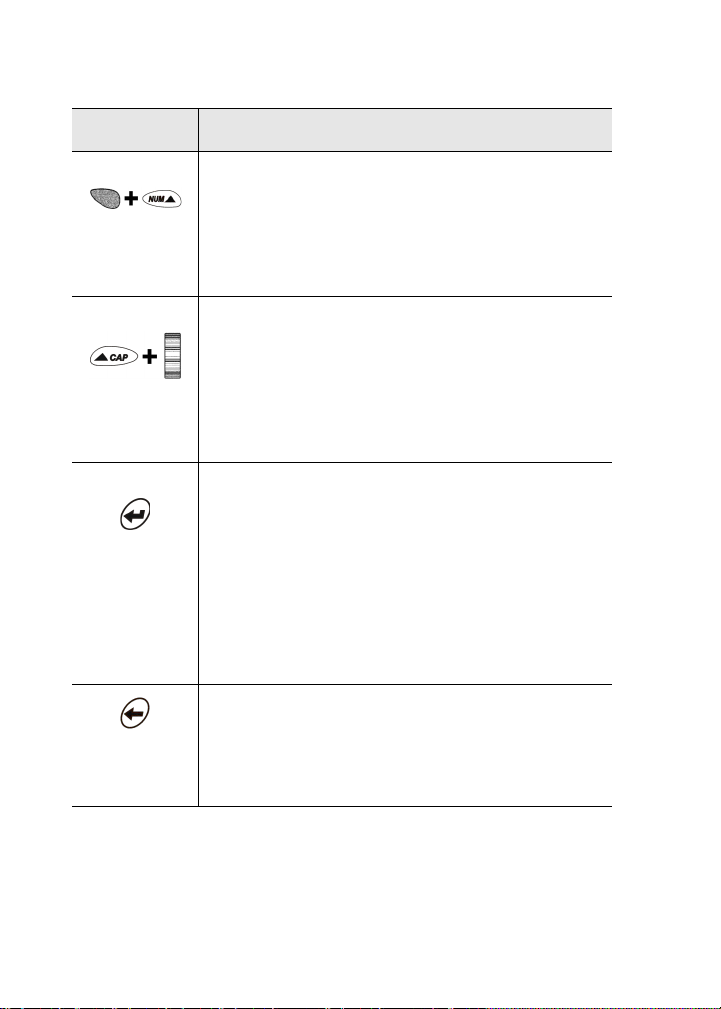
CAPs lock
• Press
ALT + CAP (RIGHT SHIFT) to activate caps
lock mode. Any key that you press will be
typed in upper case. Press SHIFT again to
return to lower case mode.
Installation and User’s Guide
26
Get to know your handheld — Description of keys
Key Function
NUM lock
ENTER key
BACKSPACE
key
• Press
ALT + NUM (LEFT SHIFT) to activate num
lock mode. Any key that you press in the
upper row will be typed in its numer ic fo rm.
SHIFT again to return to regular mode.
Press
Select multiple messages
• Hold the
SHIFT key while rolling the
trackwheel in the Messages screen to select
more than one message. You can file, delete,
or save these messages, or mark them read
or unread.
Carriage returns, select highlighted items
• Press the ENTER key to insert a regular
carriage return, moving your cursor to a
new line.
• Press the
ENTER key to select the highlighted
item. Instead of clicking the trackwheel to
select the item, you can press the ENTER key
to perform your task.
Delete previous characters
• Press the
BACKSPACE key to move the cursor
backwards and delete characters to the left
of the cursor position.
Installation and User’s Guide

Get to know your handheld — Description of keys
Key Function
Delete characters ahead of cursor, delete
messages
27
Escape key
(under
trackwheel)
SPACE key
• Press the
DEL key to er ase characters to th e
right of the cursor position.
• Press the
DEL key while composing a
message to delete the selected character
only.
• Press the
DEL key in the Messages screen to
delete the selected message. If you scrol l to a
date in the Messages screen and press DEL, a
message appears asking if you wish to
delete all messages prior to that date.
Esc from screens/menus
• Press the
ESC key to hide (close) a menu.
• Press the ESC key repeatedly to ret u rn to th e
screen.
Home
• Press the
ESC key to cancel an action.
Insert a space, scroll through field options
• Press the SPACE key to insert a space
between characte rs while you type.
• Press the SPACE key to insert the ‘@’ and ‘.’
characters in Email fields.
• Press the
options.
SPACE key to toggle through fiel d
Installation and User’s Guide
28
Get to know your handheld — Description of keys
Key Function
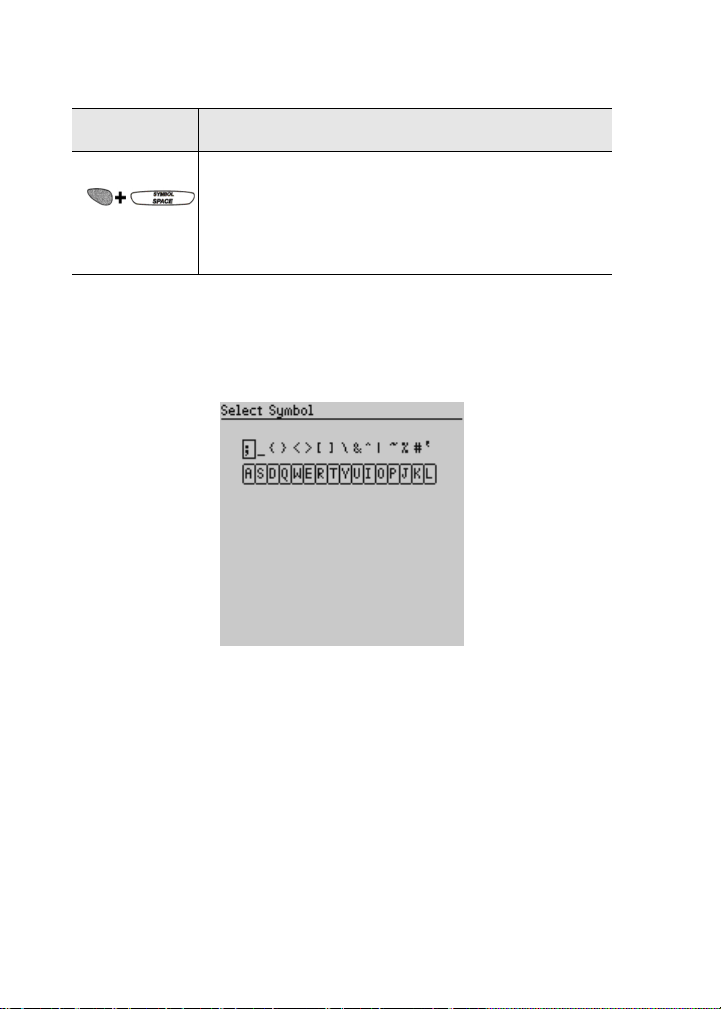
Open symbols library for extra characters
• Press
ALT+SPACE to open the Select Symbol
screen, from which you can insert the
symbol you need.
Symbols screen
As described in the chart above, you can press ALT+SPACE to open
the Select Symbol screen. The following characters are available for
you to insert into your message:
To select a symbol, either scroll to a symbol and click, or press the
associated alph a key under the desire d symbol. You will ret urn to
your message with the symbol inserted.
LCD interface
The handheld’s LCD screen is composed of the Home screen,
function screens that are launched from the Home screen, and
menus within each function. Icons are used throughout for mess age
status, handheld status, and navigational aid. The following
Installation and User’s Guide

Get to know your handheld — Description of keys
sections provide details on the handheld’s screens, menus, and
icons.
Backlighting
• When the handheld is on, press the silver key to activate
backlighting.
• Backlighting is disabled after 20 seconds if you do not press a
key or move the trackwheel. You can manually turn off the
backlighting by pressing the silver key again.
Function screens
The functions list appears on the Home screen in rows of icons. To
open a function’s screen, scroll to an icon and click the trackwheel
(or, press the underlined character in the function name).
29
Home screen
Installation and User’s Guide
30
Get to know your handheld — Description of keys
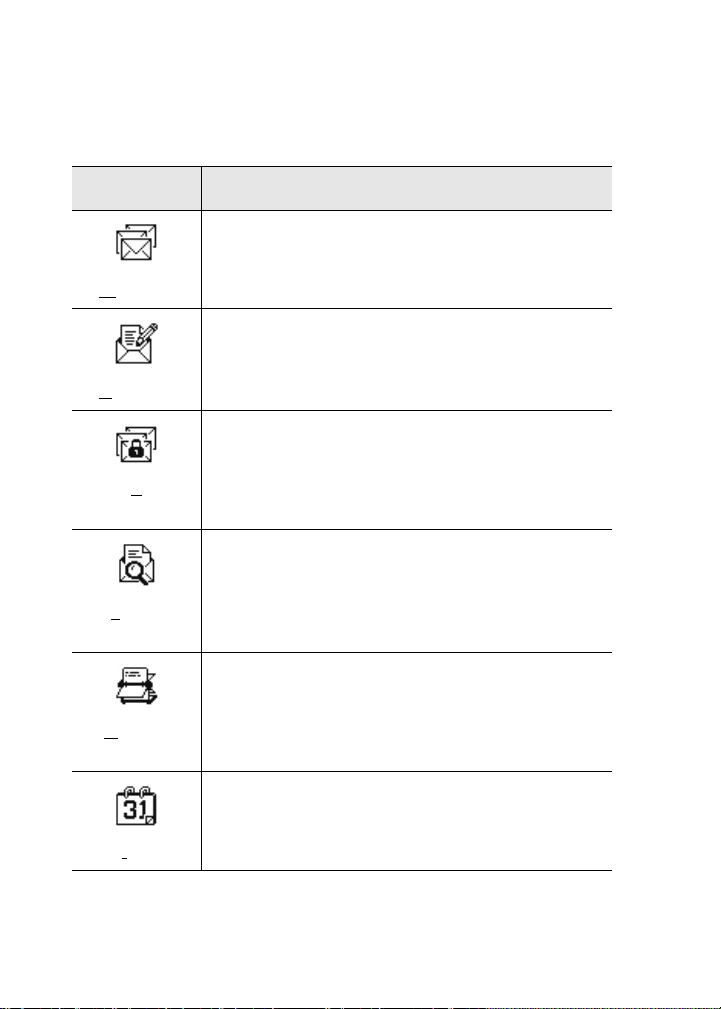
The following chart shows each function icon and describes the
corresponding function:
Icon Description
Receive, read, reply to, compose, forward, save,
file, and delete messages.
Messages
Type and send messages to Internet email
addresses.
ompose
C
Store important messages for future reference.
Saved
Messages
Locate messages in seconds with the powerful
search tool.
S
earch
Messages
Store your personal directory of contact
information, such as multiple phone, fax
A
ddress
Book
numbers, and email addresses. Use the search
function to locate a specific contact.
Keep track of appointments using one of the
four calendar views: Day, Week, Month, or
Agenda.
endar
Cal
Installation and User’s Guide

Get to know your handheld — Description of keys
Icon Description
Add, edit, and delete tasks and mark tasks as
complete.
Tasks
Set the alarm on the handheld to sound daily.
m
Alar
Compose, edit, and delete important notes and
memos.
MemoPad
Perform basic mathematical operations and
conversions.
Calculator
Customize the way the handheld notifies you of
messages; set the password; custom ize A utot ext ;
set the date/time; pro gram the automatic on /off
O
ptions
feature.
31
Lock
Lock the handheld with a password security
screen so that only you can gain access to it. This
icon will only appear on the Home screen after
you have set a password.
Installation and User’s Guide

32
Get to know your handheld — Description of keys
Icon Description
Turn the handheld’s radio off when it may
/
Turn
Wireless
interfere with other radio communications, such
as during fl ight. You will not be ab le to send or
receive messages until you turn the radio on
again.
On/Turn
Wireless Off
Turn off the handheld whenever you prefer not
to receive email messages or when you wish to
conserve battery power. All queued messages
Power Off
will be delivered to your handheld once you
turn it back on.
Function menus
Menus provide a list of options for the current function. You can
open a function screen’s menu by clicking the trackwheel; the menu
appears on top and covers approximately half of the screen’s width.
Installation and User’s Guide
Address Book function menu

Get to know your handheld — Description of keys
Icons and graphical tools
Home screen components
The Home screen appears when you turn on the handheld. It is your
starting point for using the handheld’s functions.
Home screen display
In any of the function screens, press the ESC key to return to this
Home screen. For a description of each function, see page 29.
Handheld status icons
These icons appear on the handheld’s LCD screen to indicate
battery power, coverage levels, and keyboard modes.
33
Icon Description
Battery power indicator
Coverage strength indicator
Installation and User’s Guide

34
Get to know your handheld — Description of keys
Icon Description
Charging indicator
Data is being sent
Data is being received
ALT key mode is activated
SHIFT key mode is activated
NUM lock mode is activated
Unread messages waiting
Message status icons
These icons appear on the handheld’s LCD screen to in dicate the
status of pending, sent, and received messages.
Icon Description
Message is being sent
Message has been sent out to the network
Message pending (will be sent later)
Installation and User’s Guide

Get to know your handheld — Description of keys
Icon Description
Composed message has been saved (not sent yet)
Unread message transmission error
Message returned, message transmission error
New, unread message has been received
Message has been read.
Status of message is high
Scrolling through options
The handheld provides alternate methods of performing the same
function (e.g. using hotkeys instead of the trackw heel). In particular ,
there are four ways to change the configurable options on your
handheld. These alternatives apply to all screens where you can
change options, such as in the Date/Time, the New Appointment,
or the Daily Alarm screens.
35
• Use the menu. While in an option field, click to view the menu.
Scroll to Change Options a nd click . A dial og box appea rs whe re
you can scroll through your options. Once you reach the option
you prefer, click the trackwheel. After setting all of the options
in the screen, click to view the me nu. Scro ll to Save Opti ons an d
click.
Installation and User’s Guide

36
Get to know your handheld — Description of keys
• Use ALT + roll. Hold the ALT key while rolling the trackwheel to
scroll through the o ptions. Release the
ALT key onc e you reach
your desired setting.
• Use the keyboard. You can press the letter or number which
represents your choice. For example, if you are in a time field,
press the first number of the hour you want to specify.
• Use the
your options. Release the
SPACE key. You can use the SPACE key to scroll thro ugh
SPACE key once you have se t the fie ld
to your preference. This method is used throughout the guide.
Navigational icons
These icons appear on the handheld’s LCD screen to indicate
positions within fields, lists, menus, and screens.
Icon Description
Indicates the curs or position
You are at the bottom of a menu or screen; scroll
the trackwheel up to view more items.
You are at the top of a menu or screen; scroll the
trackwheel down to view more items.
You can scroll the trackwheel up or down to view
more screen or menu items.
You can scroll the trackwheel left or right to
continue viewing icons on the functions list.
Installation and User’s Guide

Get to know your handheld — Setting the date and time
Setting the date and time
1. In the Home screen, scroll to the OPTIONS icon and click.
2. In th e Device Options screen, scroll to Date/Time and click.
The Date/Time screen appears. Scroll to the field you would
like to set, then press the SPACE key to scroll through your
options.
37
3. Click the trackwheel to view the
and click.
You return to the Device Options screen.
me nu. Scroll to Save Options
Setting message notification
You can customize the way the handheld notifies you when you
receive a message.
1. In the Home screen, scroll to the OPTIONS icon and click.
Installation and User’s Guide

38
Get to know your handheld — Using password protection
2. In th e Device Options screen, scroll to Notify and click. The
Notify screen appears. Scroll to the field you would like to set,
then press the
3. Click the trackwheel to view the menu. Scroll to Save Options
and click.
You return to the Device Options screen. See page 154 for more
information on the notification options.
SPACE key to scroll th rough your options.
Using password protection
By setting a password for your handheld, you ensure greater
security against others using the handheld.
You can specify the length of time that the handheld is idle before
the password security screen appears. Once the handheld is left idle
for that amount of time, you will need to type your password to use
the handheld.
You can also manually activate the password security screen by
selecting the Lock function from the Home screen. You should lock
your handheld if you leave it unattended.
Installation and User’s Guide

Get to know your handheld — Using password protection
If you do not want the password security screen to appear, you
must disable your password in the Security screen.
Password security screen
Note
If you have entered information in the Owner screen of the
Options function, it will appear on the password security
screen. We recommend that you include your own (or your
company’s) contact information in case the handheld is lost.
If an incorrect password is entered 10 times, all information
could be erased from the handheld for security reasons.
The handheld’s radio is turned off and the radio icon is
removed from the Home screen. You will need to reload t he
applications before you can use your handheld again. You
should regularly backup any information from your
handheld that might not have originated on your PC. See
Chapter 3 or the Backup and Restore online help for more
information.
39
To enable password protection
You should set a password so that no one can use your handheld
without knowing the password.
1. In the Home screen, scroll to the O
PTIONS icon and click.
Installation and User’s Guide

40
Get to know your handheld — Using password protection
2. In th e Device Options screen, scroll to Security and click. The
Security screen appears. While in the Password field, press the
SPACE key to enable the password. A dialog box appears,
prompting you to enter a minimum 4 character password. Press
ENTER when you are finished. You will have to enter your
password again to verify it.
3. In the Security Timeout field, set how much idle time should
pass before the password security screen will appear. Press the
SPACE key to scroll through your options. Release the SPACE
key once you have set the field to your preference.
4. Click the trackwheel to view the menu. Scroll to Save Options
and click.
You return to the Device Options screen.
If the password is enabled, you will need to enter it when
connecting the handheld to your PC for use with the Desktop
Installation and User’s Guide

Get to know your handheld — Using password protection
Manager. With the handheld in the cradle, you must type your
password before you can gain access to the Desktop Manager tools.
41
Note
The password security screen will show your contact
information (if you have entered it in the Owner screen) or it
will prompt you to “Press any key”. Type the first letter of
your password to gain access to the Enter Pa ssword dialog
box. Type the remaining letters of your password to resume
using the handheld.
Once you have set a password, you need to enter it to use
the Security screen again. In addition, if you turn off the
handheld with the password security screen enabled, you
will need to enter the password once you turn on the
handheld again.
To lock the handheld
Once you have enabled your password in the Security screen, you
can lock the handheld whenever you like. A lock icon will appear
on the Home screen.
1. In the Home screen, scroll to the LOCK
2. The password security screen appears and you will need to
enter your password to use the handheld.
Note
The information you entered in the Owner screen of the
handheld options will appear on the password security
screen. If you did not enter any information, default
information appears. See page 156 for more information on
the Owner screen.
icon and click.
To change your password
1. In the Home screen, scroll to the OPTIONS icon and click.
Installation and User’s Guide

42
Get to know your handheld — Using password protection
2. In the Device Options screen, scroll to Security and click. A
dialog box appears, asking you to type your password. Once
you do so, press
ENTER to open the Security screen.
3. Click to view the menu. Scroll to Change Password and click.
4. A dialog box appears, prompting you to enter a new password
(minimum 4 characters). Press ENTER when you are finished.
You will have to ente r your new password again to verify it.
5. Click the trackwheel to view the menu. Scroll to Save Options
and click.
You return to the Device Options screen with your password
changed.
To disable password protection
Once you disable your password, the password security screen will
no longer ap pear.
1. In the Home screen, scroll to the OPTIONS icon and click.
Installation and User’s Guide

Get to know your handheld — Using password protection
2. In the Device Options screen, scroll to Security and click. A
dialog box appears, asking you to type your password. Once
you do so, press
ENTER to open the Security screen.
3. While in the Password field of the Security screen, press the
SPACE key to change the Password option to Disabled.
4. Click the trackwheel to view the menu. Scroll to Save Options
and click.
43
You return to the Device Options screen.
Installation and User’s Guide

44
Get to know your handheld — Summary and tips
Summary and tips
In this chapter, you learned about the various components and
features of the handheld. You’ve also performed a basic setup
including setting the date and time, setting message notification,
and enabling password protection. You’re now ready to start
sending email.
Getting to know your handheld - Tips
• Press the first letter of an item in an options list, menu, or choice list to
jump directly to the item.
• Press Y to select Yes in a pop-up dialog box.
• Press N to select No in a pop-up dialog box.
• Press C or ESC to select Cancel in a pop-up dialog box.
• Press
ALT and click the trackwheel to select an icon. Roll the
trackwheel to move the icon to another position, and click the
trackwheel to “drop” it into the new position.
Installation and User’s Guide

2
Start sending email
Now that you’re more familiar with the handheld, you can start
sending and receiving email! The following steps will help you get
started:
1. Turn on the radio.
2. Register with the wireless network (if necessary).
3. In stall the Deskto p Software on your P C .
4. Connect the handheld to your PC using the cradle .
5. Send a test message.
6. Read the test message.
Turning the radio on and off
When you receive your handheld, you must first i nsert it into the
charging cradle and allow it to recharge to full battery power. The
wireless radio will be turned off, and the handheld cannot
communicate over the network. You must turn on t he radio before
you can send and receive messages .
In the Home screen, scroll to the TURN WIRELESS ON icon
and click.

46
Start sending email — Registering with the network
You will notice that the TURN WIRELESS ON icon was an
antenna, but w he n yo u select the icon, th e fun c tion name changes to
TURN WIRELESS OFF and the icon changes to an airplane. The
airplane icon is a reminder to turn off your handheld’s radio when
on an airplane, in a hospital, or any place where it may interfere
with other radio transmissions and frequencies. The icon will
change depending on whether the wireless radio is on or off.
Note
You should turn off your handheld’s radio if you are going to
be out of coverage for an extended period of time. Turning
off the radio will greatly improve battery life. See page 161
for more information on saving battery life.
There should be two messages in the Messages screen when you
first receive your handheld to introduce you to your handheld and
some of its basic features.
Registering with the network
After you turn on the wireless radio, a Registration message should
arrive. In the rare case th at t he Reg istra ti on mes sag e do es n ot a rr ive,
check the Home screen to ensure you are in coverage. (You are in
coverage if you have one or more bars beside the coverage indicator
Installation and User’s Guide

Start sending email — Registering with the network
in the top right cor ner o f th e Home screen.) Register your handheld
using this procedure.
47
1. In the Home screen, scroll to the O
PTIONS icon and click.
2. In th e Device Options screen, scroll to Network Settings and
click.
3. In th e Network Settings screen, ensure that the Roaming field
is set to your country (U.S. or Canada) and that the Radio field
is set to On. Verify that the Status field is set to Active.
4. Click to view the menu. Scroll to Register Now and click.
If you are in coverage, the Registration message should arrive
within a few seconds.
Note
If the Status field in the Network Settings screen is not set
to Active, contact customer support.
You may also need to re-register your handheld each time
you load new applications using the Desktop Software’s
Application Loader tool. See Chapter 3 or the Application
Loader online help for more information.
Installation and User’s Guide

48
Start sending email — Installing the Desktop Software
Installing the Desktop Software
You must install the Desktop Software in order to synchronize your
Personal Information Management data, and use the other Desktop
Software tools.
1. Insert the CD-ROM into the appropriate drive. The Setup
program starts automatically. Follow the instructions on your
screen, using the default paths and names recommended for
the Desktop Software.
2. When Setup is complete, you may choose to open the README
file and run the Desktop Software right away.
Connect the handheld to your PC
Note
1. Ensure that you have properly installed the Desktop Software.
If it is not already open, launch the Desktop Manager by
selecting it from the Start>Prog ra ms menu .
When connecting the handheld to the PC, use only the
charging cradle provided by Research In Motion Limited.
When you first receive your handheld, you must insert it into
the cradle (with the AC connector plugged into a power
outlet) and allow the handheld to fully charge to activate it.
2. Insert the end of the cradle cable into a COM port on the back of
your PC. Conne ct the AC adapte r to th e cradle cable as shown
below. Plug the AC adapter into an available power outlet.
Installation and User’s Guide

Start sending email — Connect the handheld to your PC
3. Secure the handheld in the cradle by inserting the connector
port on the bottom edge of the handheld into the connector
prongs of the cradle and press firmly in place.
49
Note
If the password is enabled, you must enter it before you can
connect to the desktop. See page 38 for more information
on the password.
4. In the Desktop Manager, ensure that your PC recognizes a
connection with the handheld. Select Options>Serial Settings to
open the Settings window. Click Detect.
Note
The message “Handheld not found” will appear if the PC
cannot detect the handheld on a serial port.
If the handheld and charging cradle cable both appear to be
connected securely, ensure that no other devices are
sharing the serial port, such as a PCMCIA card or IrDA unit.
Ensure that there is no other connectivity software running
on your PC, and that you are not using the same port as
your mouse.
5. After connection is successful, click OK to exit the Settings
window. The Desktop Manager will show the handheld’s PIN
and Current Status in the status bar.
Installation and User’s Guide

50
Start sending email — Sending a message
Sending a message
You can send a message to an existing contact or add a new contact
while composing your message.
Note
1. In the Home screen, scroll to the C
You can also compose a message while in the Messages,
Address Book, or Saved Messages screens. Click the
trackwheel to view the menu. Scroll to Compose Message
and click. Follow steps 2-6 below to compose and send
your message.
OMPOSE icon and click.
2. In th e To: screen, click the trackwheel to view the menu; scroll
to New Address and click. (Once you have entries in your
Address Book, you can scroll to a name. See page 110 for more
information on adding Address Book entries.)
3. In the New Address screen, enter your own email address
informatio n and press
ENTER after each field.
4. Click the trackwheel to view the menu. Select Save Address by
clicking again. You return to the To: screen with your new
contact selected. Click the trackwheel to view the menu where
you select Email as your send method.
Installation and User’s Guide

Start sending email — Sending a message
5. Type a subject line and press ENTER to begin typing your
message. When you are finished composing your message,
click the trackwheel to view the menu; select Send Message by
clicking again.
51
The Messages screen shows a list of message headers for each
message you’ve sent or received; the header includes the time sent
or received, the recipient or sender, and the sub ject line. You will see
Installation and User’s Guide

52
Start sending email — Reading a message
one of the following icons to the left of the message header to
indicate the message’s status.
Message is being sent
Message has been sent out to the network
Message is pending (will be sent later). This icon
will appear if you are out of a coverage area or the
network is b usy.
See Chapter 4 for more information on composing and sending
messages.
Reading a message
When you receive your test message, follow these steps to read it.
1. In the Home screen, scroll to the M
2. In the Messages screen, scroll to the new message (the message
header with an unread messa ge icon beside it) and cli ck to view
the menu. Select Open Message by clicking again.
Tip
3. The new message appears on your screen. Scroll down to read
the entire message. Scroll up past the subject line of the
message to view the current folder, the message status, the
recipient(s), the sender, and the date.
Installation and User’s Guide
Open messages quickly by double-clicking the trackwheel.
ESSAGES icon and click.

Start sending email — Reading a message
4. Press ESC to return to the Messages screen or click the
trackwheel to view the menu, then scroll to select your next
option. See Chapter 5 for more information on receiving and
reading messages.
53
Note
If you slide the handheld out of the holster within five
seconds of notification, the notification stops and the most
recently-received message will be open. If you pull the
handheld out of the holster and quickly replace it,
notification stops but the message will remain closed and
marked unread. See page 37 for more information on
setting message notification options.
Installation and User’s Guide

54
Start sending email — Summary
Summary
You’ve just sent and received a wireless email message. In this
chapter, you learned the st eps that are require d for emai l redirec tion
to occur. You can turn on the radio, register with the network,
install the Desktop Software on your PC, connect the handheld to
your PC, and enable email redirection. Read on to learn more about
the Desktop Software.
Installation and User’s Guide

3
Using the Desktop Software
The Desktop Software can synchronize your messages, contacts,
appointments, memos , and tasks between your PC and handh eld.
You can also backup any important information from the handheld
to your PC, edit the Address Book and AutoText files, restore data
back to the handheld, and loa d new applications onto the han dhel d,
all using the Desktop Software’s convenient Windows interface.
Note
You will find basic instructions in this chapter for using the
Desktop Software and its tools; you can find more detailed
information in the online help. From any window, select
Help to view procedures.
Installation and setup
The previous chapter, “Start sending email” described installing the
Desktop Software and connecting your handheld to the PC for
using the Desktop So ftware tools. This chapt er shows you how to
use the Desktop Software to get the most from your handheld.

56
Using the Desktop Software — Loading handheld applications
Loading handheld applications
If necessary, use the Application Loader tool to update the software
on the handheld and add any new applications that might be
available.
Note
Before updating your handheld with new software using the
Application Loader, use the Backup and Restore tool to
save any important information from the handheld to your
PC. See page 58 for more information.
1. Place your handheld in the cradle and connect it to your PC. In
the Desktop Manager, double-click Application Loader. The
Welcome to Application Loader window appears. The
handheld must be conne cted be fore you ca n load new softwar e.
See page 48 for more information on connecting to the PC.
2. Click Next> to start the process of loading new software onto
your handhel d. An Initialization Progress dialog box appears
on your PC to indicate that the Application Loader is
connecting to your handheld and is reading your handheld’s
configuration. At the same time, your handheld’s LCD will
read “Loader activity...”. Wait until initialization is complete
and the dialog box disappears. The Optional Application
Selection window appears, displaying the applications that
you can choose to download to your handheld.
3. Select the check boxes next to the names of the applications you
want to load and click Next>.
Any applications that do not have a check mark beside them
will be erased from the handheld (even if you have them
currently loaded).
4. The Existing Data Preservation window appears. In the
Application Data section, select the check box if you want to
Installation and User’s Guide

Using the Desktop Software — Backing up files from handheld to the PC
delete the information on your handheld (including your
messages and address book entries). If you select this check
box, ensure that any important information is backed up first.
In the Applications section, select the check box if you wish to
erase the applications from your handheld before loading
updated ones. You should select this option if you are loading
applications after a failed load operation. Click Next> to
continue.
5. The Summary window appears, displaying the application
versions that will be downloaded to your handheld. Verify that
the information is correct and click Finish.
6. The Load Progress dialog box appears and the new files are
added to your handheld.
7. When loading is complete, the Loader dialog box will indicate
whether loading was successful. If loading was not successful,
make sure that your handheld is in the cradle and the cradle is
connected to your PC properly. Then, repeat these steps. Click
OK to return to the Desktop Manager.
57
Note
After the loading process is complete, you will need to turn
on your handheld’s radio to send and receive messages. In
the Home screen, scroll to the TURN WIRELESS ON icon
and click.
Backing up files from handheld to the PC
Use the Backup and Restore tool to save any handheld files to your
PC or restore previously-saved files back to your handheld.
Additionally, you can use it to customize the Address Book and
Installation and User’s Guide

58
Using the Desktop Software — Backing up files from handheld to the PC
AutoText files: create new entries, edit existing entries, and delete
the entries on your PC.
Note
Before updating your handheld with new software using the
Application Loader, use the Backup and Restore tool to
save any important information from the handheld to your
PC.
See the online help topic “Advanced backup and restore”
for more information on editing AutoTe xt and Address Book
entries.
To backup files from handheld to PC
1. Place your handheld in the cradle and connect it to your PC. In
the Desktop Manager, double-click Backup and Restore. The
Backup and Restore window appears.
2. To backup everything on your handheld, click the Backup
button. The Select file for Full Backup window appears. The
default file name will be “Backup-today’s date.ipd”. Select the
location and name of the file as desired and click Save.
3. A dialog box will chart the progress of the data transfer from
the handheld to your PC. Once the information has been saved
to your PC, you return to the Backup and Resto re window.
Note
You can backup specific databases to your PC by
performing an Advanced backup. See the online help topic
“Performing an Advanced backup” for more information.
To restore files back to the handheld
1. Place your handheld in the cradle and connect it to your PC. In
the Desktop Manager, double-click Backup and Restore. The
Backup and Restore window appears.
Installation and User’s Guide

Using the Desktop Software — Synchronizing PIM
2. To restore everything that was saved previously from your
handheld, click the Restore button. The Select file for Full
Restore window appears. Select the file name that contains the
information you want to restore and click Open.
3. A dialog box will chart the progress of the data transfer from
the PC to your handheld. Once the informat ion is retrie ved and
organized, another dialog box appears, warning you that you
are replacing the information currently stored in the listed
databases of the handheld.
4. Click Yes to continue. Once the information has been restored
to your handheld, you return to the Backup and Restore
window.
59
Note
You can restore only specific databases to your handheld
by performing an Advanced restore. See the online help
topic “Performing an Advanced restore” for more
information.
Synchronizing PIM
Using the Intellisync tool, you can synchronize your PIM
applications.
Note
To configure PIM synchronization
1. Place your handheld in the cradle and connect it to your PC. In
the Desktop Manager, double-click Intellisync. The Intellisync
window appears.
Y ou can also update the handheld’s date and time using the
Intellisync tool. See the online help for more information.
In the Intellisync window, click the Auto start button to
specify settings for automatic synchronization.
Installation and User’s Guide

60
Using the Desktop Software — Summary
2. In the Intellisync window, click Configure PIM... to customize
your PIM synchronization settings. The Handheld
Configuration window appears. Select a PIM application
(Address Book, Calendar, MemoPad, or Tasks) and click
Choose.
3. In the Choose Translator window, select the PC program
(called the “translator”) that you use and click OK.
4. You can configure other opti ons in these windows such a s field
mapping, synchronization filters, and conflict resolution
settings, depending on the translator that you have selected.
See the online help for more information.
5. Once you have configured all the PIM applications, ensure the
the check box next to Synchronize PIM is selected in the
Intellisync window. Click Synchronize now to perform the
operation.
Summary
In this chapter, you learned how to use the Desktop Software. You
can update your handheld’s applications, backup and restore
information, synchronize PIM. In the next chapter, you’ll discover
more about composing and sending email.
Installation and User’s Guide

4
Composing and sending messages
In the previous chapters of this guide, you learned about your
handheld’s main components, the general procedures required for
sending and reading messages, and the Desktop Software’s tools.
This chapter explains the different features that the handheld offers
for advanced composing and sending capabilities.
Setting message options
You can change the message options for all message types received, saved, and sent. You can choose:
• Display Time: shows the time the message was sent or
received.
• Display Name: shows the name of the sender or the
recipient.
• Confirm Delete: confirms deletion of messa ges.
To set message options
1. In the Home screen, scroll to the MESSAGES icon and click.
2. In t he Messages screen, click the trackwheel to view the menu.
Scroll to Options and click.

62
Composing and sending messages — Setting level of importance
3. The Message List Options screen appears. Scroll to the field
you would like to set, then press the
through your opti on s. Re le ase th e
SPACE key once you have set
SPACE key to scroll
the option to your preference.
4. When you have made the required changes to the fields, click to
view the menu. Scroll to Save Options and click.
You return to the Messages screen.
Note
You can also change the message options from the Saved
Messages screen.
Setting level of importance
You can change the level of importance of a message that you are
composing.
1. In the Home screen, scroll to the COMPOSE icon and click.
2. In t he To: screen while composing a message, click to view the
menu. Scroll to Options and click.
Installation and User’s Guide

Composing and sending messages — Choosing a send method
3. The Current Message Options screen appears. In the
Importance field, press the
SPACE key to change the importance
level of the message you are composing from Normal to High.
4. Clic k to view the menu. Scroll to Save Opti ons and click. You
return to the message you are composing. When you have
finished composing the message, click to view the menu. Scroll
to Send Message an d click.
63
Note
An exclamation mark appears beside the sent message in
the Messages screen , to indicate that the message was of
high importance. You can also view the importance level of
a message by opening it and scrolling to the top.
Messages that you receive with High importance status will
appear in the Messages screen in bold text.
Choosing a send method
When sending messages, choose from the following send methods:
• Use Email: select the contact’s email address.
• Use Fax #: select the contact’s fax number.
Installation and User’s Guide

64
Composing and sending messages — Sending one-time messages
To choose a send method
1. In the Home screen, scroll to the COMPOSE icon and click.
2. The To: screen appear s. Scrol l to a co ntact’s name and click. A
menu appears, listing the send methods available for that
contact.
3. Scroll to either Use Email or Use Fax # and click.
Sending one-time messages
This send option is a short-c ut method and the recipient’s address
will NOT be saved in your Address Book.
1. In the Home screen, scroll to the C
2. The To: screen appears. Scroll to [Use Once] and click to view
the menu. Select a send method - either Email or Fax # . (For this
exercise, select Use Email.)
3. The One Time Email screen appears and you can type your
contact’s email address. Click the trackwheel to view the menu
and select Continue by clicking again.
Installation and User’s Guide
OMPOSE icon and click.

Composing and sending messages — Sending messages to many contacts
4. Type a subject and press ENTER to begin composing your
message. When you are ready to send the message, click the
trackwheel to view the menu. Scroll to Send Message and click.
From the Messages screen you can view the sent message’s status.
Sending messages to many contacts
You can send a message to more than one recipient and choose
whether recipients are addressed directly (To), carbon copied (CC),
or blind carbon copied (BCC). See the Address Book chapter for
information on adding contacts to your Address Book.
65
1. In the Home screen, scroll to the C
2. In th e To: screen (after selecting a main recipient and a send
method), click the trackwheel to view the menu. Click either
Add To, Add Cc, or Add Bcc. (For this exercise, select Add Cc.)
3. The Cc: screen appears, listing all of your contacts’ names.
Scroll to a name. (Alt ernati vely, you can type the first le tters o f
your contact’s name to start a search and then scroll to the
OMPOSE icon and click.
Installation and User’s Guide

66
Composing and sending messages — Attaching Address Book entries
name.) Click the trackwheel to view the menu, then scroll to
Continue and click.
4. You return to the To: screen where the additional recipient
appears in the list. Type your subject in the Subject field and
ENTER to begin composing your message.
press
5. When you have finished composing your message, click to
view the menu. Scroll to Send Message and click.
Note
When you add a recipient to your message, the same send
method (Email or Fax) must be used f or all. By default, the
send method selected for the main recipient will be used for
all.
Attaching Address Book entries
You can send an Address Book entry as an attachment.
Note
1. In the Home screen, scroll to the C
Installation and User’s Guide
Please contact your service provider to determine if this
functionality is supported.
OMPOSE icon and click.

Composing and sending messages — Using AutoText
2. While you are composing your message, cli ck th e trackwheel to
view the menu. Scroll to Attach Address and click.
3. The Attach: screen appears, listing all of your contacts’ names.
Scroll to a contact and click to view the menu. Scroll to Use
Address and click.
4. You return to the To: screen and you can see that your message
now contains an Address Book attachment. Click the
trackwheel to view the menu. Scro ll to Send Message an d click.
See page 110 for information on how to add a new Address Book
entry.
67
Using AutoText
The handheld’s AutoText function automatically replaces certain
text that you type with pre-programmed tex t. You can increase how
quickly you compose messages by using AutoText. By configuring
the default AutoText entries and adding new ones to meet your
specific needs, you can use AutoText to:
• Automatically correct commonly misspelled words.
Installation and User’s Guide

68
Composing and sending messages — Using AutoText
• Automatically replace abbreviations and acronyms with
complete words.
• Automatically enter commonly-used strings of words into a
message by typing only one keyword.
• Automatically insert punctuation and symbols into your
message without using the
ALT key or symbols library.
Note
There are several shortcuts built into the AutoText function
for inserting macros into messages. These shortcuts
include inserting the time, date, etc. See page 70 for more
information on creating AutoText entries using macros.
How AutoText works
1. In the Home screen, scroll to the COMPOSE icon and click.
2. While composing your message in the To: screen, type the text
‘hte’. The text ‘hte’ is a default AutoText entry that tells the
handheld to automatically replace the text with the correctly
spelled word ‘the’.
3. As soon as you press the
replaces the error.
SPACE key, the correct spelling
Installation and User’s Guide

Composing and sending messages — Using AutoText
To add a new AutoText entry
You may want to customize your AutoText database by adding
specific AutoText entries.
1. In the Home screen, scroll to the OPTIONS icon and click.
2. The Device Options screen appears. Scroll to AutoText and
click. The AutoText screen appears with a list of default
AutoText entries. Click to view the menu. Scroll to New Item
and click. You will be prompted with two fields: When I type
(for the keyword) and Replace it with (for what should appear
instead).
69
3. Type the keyword and replacement text in each field, then click
the trackwheel to view the menu. Select Save Item by clicking
again.
Installation and User’s Guide

70
Composing and sending messages — Using AutoText
You can test your new entry by typing the keyword while you
compose your message.
To add a new AutoText entry using a macro
You can use AutoText macros to quickly enter standard items such
as dates, times, and owner informat ion.
1. In th e Home screen, scroll to the O
PTIONS icon and click. The
Device Options screen appears. Scroll to AutoText and click.
The AutoText screen appears with a list of default AutoText
entries. Click to view the menu. Scroll to New Item and click.
You will be prompted with two fields: When I type (for the
keyword) and Replace it wit h (for w ha t should appea r i nst ea d).
2. For this example, enter a short form for the date in the When I
type field. Scroll to the Replace it with field and click to view
the menu.
3. Scroll to Insert Macro and click. In the Insert Macro screen,
scroll to a macro and click. The list of macros includes: Short
date, Long date, Short time, Long time, Owner name, Owner
info, Backspace, Delete, and %.
Installation and User’s Guide

Composing and sending messages — Using AutoText
4. Once the appropriate macro is in the Replace it with field, click
the trackwheel to view the menu. Scroll to Save Item and click.
The new AutoText entry will appear in the AutoText entries list in
alphabetical order. When you use this AutoText entry in a message
and press the
SPACE key, the corresponding macro is inserted into
your message.
To edit an AutoText entry
You may wish to change a pre-programmed AutoText entr y to suit
your needs.
71
1. In the Home screen, scroll to the OPTIONS icon and click.
2. The Device Options screen appears. Scroll to AutoText and
click. In the AutoText screen, scroll to the entry you would like
to edit. Click the trackwheel to view the menu. Scroll to Edit
Item and click.
3. The Edit AutoText screen appears. Press
ALT while you roll the
trackwheel to scroll horizontally while you make your edits.
Make your changes to the current entry .
Installation and User’s Guide

72
Composing and sending messages — Using AutoText
4. Click the trackwheel to view the menu. Scroll to Save Item and
click.
You will return to the AutoText screen where you can view your
changes.
Note
Y ou can also edit AutoText entries while you’re composing a
message. In the To: screen, click to view the menu. Scroll
to Edit AutoText and click.
You can also edit AutoText entries in the Backup and
Restore tool in the Desktop Manager. See the Backup and
Restore online help for more information.
To delete an AutoText entry
If you do not wish to keep an AutoText entry (either a default entry
or one that you added), you can delete it.
1. In the Home screen, scroll to the OPTIONS icon and click.
2. The Device Options screen appears. Scroll to AutoText and
click. In the AutoText screen, scroll to the entry you would like
to delete. Click the trackwheel to view the menu. Scroll to
Delete Item and click.
3. A dialog box appears asking if you want to delete the entry.
Scroll to Yes and click.
You return to th e AutoText screen and you ca n see th at th e entr y is
no longer listed.
To perform an AutoText search
Rather than scrolling through your list of AutoText entries, you can
perform a search to find an entry quickly.
1. In the Home screen, scroll to the OPTIONS icon and click.
Installation and User’s Guide

Composing and sending messages — Automatic formatting
2. The Device Options screen appears. Scroll to AutoText and
click. In the AutoText screen, type the first letter or first few
letters of the entry you would like to find. For this example,
type the letter ‘t’. (The screen header will display the word
Find, followed by the letter ‘t’.) The AutoText list will isolate all
entries beginning with the letter ‘t’. Scroll to the desired entry
or type additional letters to furt her isolate entr ies.
3. Scroll to the correct entry, then click the trackwheel to choose to
edit or delete the entry.
Automatic formatting
The handheld’s built-in formatting capabilities extend beyond the
AutoText function to reduce your typing time.
Auto capitalization
As you compose a message, you do not have to worry about
pressing the
methods of performing capitalization for you.
• Begin typing; you will see that the first letter you type is
capitalized automatically and that every first letter following a
period becomes capitalized too. The handh eld recognizes the
beginning of a new sentence and does the work for you.
SHIFT key to capitalize words — the handheld has two
73
• If you want any othe r characters to be capitalized, pre ss and
hold the character key until it becomes capitalized. You must
have the Key Rate (Options>Screen/Keyboard) option set to
either Slow or Fast for this feature to work. See page 156 for
details on the Screen/Keyboard options.
Installation and User’s Guide

74
Composing and sending messages — Automatic formatting
Auto punctuation
You can insert a period automatically at t he end of a sentence or
word by pressing the
be capitalized.
Email fields
You can type an email address in an Email field of the Address
Entry screen without pressing the
address; instead of pressing
press the
SPACE key to do so. When you press the SPACE key again , a
‘.’ character will be inserted.
To insert a blank space into the Email field, press BACKSPACE and
then press
SPACE again. A blank space appears in the field. The next
time you press the
Number fields
You can type numbers in the PIN, Work, Home, Mobile, Pager, and
Fax fields withou t p res s i ng the
To type a number in one of these fields, simply press the associated
character key. For example, to display the number ‘4’, press the ‘R’
key. These fields support all numeric characters and the ‘-‘, ‘+’, ‘x’
and ‘.’ characters without pressing the ALT key.
SPACE key twice. The next letter you type will
ALT key! Begin typing an email
ALT + L to i nsert the ‘@’ sign, simply
SPACE key, the ‘@’ sign appears.
ALT key.
Note
To enter hexadecimal characters, you must pres s the ALT
key when pressing the associated letter. For example, to
enter an ‘e’ in the PIN field, press and hold the ALT key
while pressing the E key.
Number lock
You can activate number lock (num lock) mode to type numbers
without holding down the
lock mode is activated and you can enter numbers in any screen.
SHIFT or ALT again to turn off num lock mode
Press
Installation and User’s Guide
ALT key. Press ALT + CAP (left SHIFT). Num

Composing and sending messages — Inserting symbols
Inserting symbols
You can enhance your messages by inserting symbols from the
handheld’s symbols library.
75
Note
1. In the Home screen, scroll to the C
You can insert symbols into screens other than To (such as
the New Address, E dit Address, Search Messages, and
AutoText screens) by following steps 3-4.
OMPOSE icon and click.
2. The To: screen appears. Begin composing a message by
following the standard email message procedure (as shown on
page 50).
3. Press ALT+SPACE to view the Select Symbol screen.
4. Use the trackwheel to scroll to the symbol that you would like
to insert into your message, then click to insert the symbol.
(You can also press the associated alpha key under the desired
symbol.)
Installation and User’s Guide

76
Composing and sending messages — Summary and tips
5. You retur n to your message in the To: screen and the symbol
has been inserted.
Tip
You can also insert international characters and characters
with accents into your messages. When composing a
message or entering text, press and hold a letter key while
rolling the trackwheel to scroll through international
characters and characters with accents. When the desired
character appears, release the letter key.
Summary and tips
In this chapter, you learned more about composing and sending
email. Not only have you learned about sending methods, but you
have also been introduced to the time-saving features such as
automatic formatting and AutoText. In the next chapter you’ll learn
more about receiving and reading messages.
Composing and sending messages - Tips
• Press C to create a new message while in the Messages screen.
• Press
• Press
• Press
• Type the first letters of the name or the initials separated by a space to
• Press
• Press
• Press and hold a letter to capitalize it (only works with Key Rate
ALT and roll the trackwheel to scroll horizontally in any field
where you can enter or view text.
SPACE to insert the “@” and “.” characters in an Email field.
SPACE twice to insert a period while composing a mess age ( the
letter following the period will automatically be capitalized.)
find a specific contact in the To field.
ALT + CAP (RIGHT SHIFT) to turn on caps lock mode (press
SHIFT again to turn it off).
ALT + NUM (LEFT SHIFT) to turn on num lock mode (press SHIFT
again to turn it off).
enabled).
Installation and User’s Guide

Composing and sending messages — Summary and tips
Composing and sending messages - Tips
AutoText
• While composing a message, press br + SPACE to enter an open angle
bracket.
• While composing a message, press ld +
date.
• While composing a message, press lt +
time.
• While composing a message, press rb +
bracket.
SPACE to enter the current
SPACE to enter the current
SPACE to enter a closed
77
Installation and User’s Guide


5
Receiving and reading messages
In this chapter, you will learn about your options for received
messages, how to receive more of a long message, and how to open
file and Address Book attachments.
When you receive a new message, the handheld will display visual
notification on the Home screen, and may provide other
notification, depending on how you have set your notification
options.
Received message options
Once you have read a new message, click the trackwheel to view
your options:
Mark Unread — Marks the current message as unread.
Save Message — Saves the open message. A copy of the message
will be placed in the Saved Messages screen. See page 89 for more
information on saving messages.
Reply to Message — Sends a reply to the sender of the open
message, withou t including the ori ginal text. (See Reply with Text
below.) Reply to Message is the default menu option.
Reply to All — Sends a reply to all recipients of the message,
without including the origin al tex t.

80
Receiving and reading messages — Received message options
Forward Message — Forwards (sends) the open message to another
contact. If an attachment is included with the message, it will be
forwarded with the message.
Reply with Text — Sends a reply to the send er of the open message.
The text of the original messag e appears below you r reply. All of t he
original message is sent, even if it was truncated on your handheld.
Reply to All with Text — Sends a reply to all recipients and include
the text of the original message as part of the reply.
Delete Message — Deletes the open message.
Show Qualified Address — Sh ows the SMTP address (full address)
of the recipient or sender. This option is only available when you
have your cursor in the From or To field of the open message.
Show Friendly Name — Shows the first and last name of the sender
or the recipient. This option is only available when you have your
cursor in the From or To field of the open message with the
Qualified Address showing.
Add to Address Book — Ad ds the sender of the message to your
Address Book. This option is only available when you have your
cursor in the From field of the open message. It will not appear if the
sender’s address is already in your Address Book. See page 85 for
more information on adding contacts to your Address Book from
messages.
Next Unread — Closes the current message and opens the next
unread message if unread messages exist.
Previous Message — Closes the current message and opens the
previous message.
Next Message — Closes the current message and opens the next
message.
Installation and User’s Guide

Receiving and reading messages — Receiving long messages
Receiving long messages
Occasionally, the message you receive may be longer than what the
network can transmit. In this case, the maximum amount of data
allowed is sent to your handheld and the remainder is stored in
your email Inbox. You can receive the rest of your message by
following this procedure:
81
Note
1. In the Home screen, scroll to the M
2. Open a message. If the message is too large to view at one time,
you will see the message “More available” at the end. The
remaining number of bytes in the message is also listed. Click
to view the menu. Scroll to More and click.
3. Once you have selected More, the remaining part of the
message will be sent to you. It will appear at the end of the
Please contact your service provider to determine if this
functionality is supported.
ESSAGES icon and click.
Installation and User’s Guide

82
Receiving and reading messages — Sending file attachments
existing part of the message. Press G to resume reading the
message where you last left off.
Note
Y ou can also return to the Messages screen and you will be
notified when the handheld receives the remaining part of
the message. When more of the message is received, it will
be marked unread again. In the Messages screen, scroll to
the unread message and open it by pressing the ENTER
key. Press G to resume reading the message where you
last left off.
Sending file attachments
If you have received a message on your handheld that has a file
attached, you can forward the message to someone else. The
original message (with the attached file) is forwarded through your
email Inbox.
Note
1. In the Home screen, scroll to the M
2. Open a received message that has a file attachment. (If there are
attachments to the message, the number of attachments is
displayed at the top of the message.) The name of the
attachment and the size of the file will appear at the end of the
message.
Please contact your service provider to determine if this
functionality is supported.
ESSAGES icon and click.
Installation and User’s Guide

Receiving and reading messages — Managing Address Book attachments
3. Click the trackwheel to view the menu. Scroll to Forward
Message and cli c k. Select a recipient and a send method.
4. You can type a message before you click to view t he menu and
select Send Message. The sent message will include the file
attachment.
You return to the Messages screen where you can view the sent
message’s status.
Managing Address Book
83
attachment s
The handheld supports attachments in th e form of Address Book
entries. If you have received a messag e wit h this t ype of a tta chment ,
follow this procedure to open the attachment and add it to your
handheld’s contact database:
Note
1. In the Home screen, scroll to the M
Please contact your service provider to determine if this
functionality is supported.
ESSAGES icon and click.
Installation and User’s Guide

84
Receiving and reading messages — Managing Address Book attachments
2. Ope n a received mess age and read i t. (If there are attachments
to the message, the number of attachments is displayed at the
top of the message.) Scroll to the end of the message; if there is
an Address Book attachment for you to open, you will see its
name and size.
3. With your cursor in the name of the Address Book attachment,
click the trackwheel to view the menu. Click Open Attachment.
The Address Attachment screen opens and you can view the
information.
4. Click the trackwheel to view the menu. Scroll to Save Address
and click.
The attachment is added to your Address Book and you return to
the open message.
Installation and User’s Guide

Receiving and reading messages — Adding contacts to Address Book
Adding contacts to Address Book
When you receive a new message from someone who is not
currently in your handheld’s Address Book, you can add the
address from the open message.
85
Note
1. In the Home screen, scroll to the M
2. Open a received message and read it. Scroll to the top of the
message. Place your cursor in the From field and click to view
the menu.
3. Scroll to Add to Address Book and click. The new contact’s
information will be shown in th e Edit Addre ss screen. Add any
information you would like to include for this contact.
Please contact your service provider to determine if this
functionality is supported.
ESSAGES icon and click.
Installation and User’s Guide

86
Receiving and reading messages — Summary and tips
4. Click to view the menu and select Save Address by clicking
again.
The contact is added to your Address Book and you return to the
open message.
Summary and tips
In this chapter, you learned about reading and receiving messages.
You can set received message options, retrieve long messages,
manage file attachments, open address book attachments, and add
attachments to your Address Book. Now that you know the basics
of reading an d receiving email, you ar e ready to le arn more about
managing messages.
Receiving and reading messages - Tips
• Press ALT and roll the trackwheel to page up and down in the
Messages screen.
• Press M to go to the Messages screen while in the Home screen or
Saved Messages screen.
• Press V to go to the Saved Messages screen while in the Home
screen or Messages screen.
Installation and User’s Guide

Receiving and reading messages — Summary and tips
Receiving and reading messages - Tips
• Press T to go to the top of a list or open message.
• Press B to go to the bottom of a list or open message.
• Press
• Press
• Press
• Press G to return to the last cursor position if you choose to close a
• Press N to go to the next message when viewing or next day when in
• Press P to go to the previous message when viewing or pr evious day
• Press U to go to the next unread message in the list.
• Press R when in a message to reply without text to the sender only.
• Press F when in a message to forward the message.
ALT and roll the trackwheel to scroll horizontally in any field
where you can enter or view text.
ALT + ENTER to page up in an open message.
ENTER to page down in an open message.
message before you’ve finished reading.
the Messages screen.
when in the Messages screen.
87
Installation and User’s Guide


6
Managing m essages
Chapters 4 and 5 discuss the features and functions that the
handheld provides for sending and receiving messages. Now, find
out how you can organize, customize, and search your list of
messages more efficiently.
Saving messages
Save important messages by copying them to a separate list. It is
important to save any messages you want to keep for future
reference. If the handheld needs to delete old messages to free
memory space, saved messages are not deleted.
To save a received or sent message
You may wish to save a received or sent message to retain it for
future use.
Note
1. In the Home screen, scroll to the M
2. In the Messages screen, scroll to a received o r s ent m e ss age and
click to view the menu. Scroll to Open Message and click.
3. Clic k the t rackwheel to vie w the men u. Scrol l to Sa ve Messag e
and click. The message “Copying to saved folder...” flashes on
An icon in front of the message header indicates message
status (sent, received, etc.). See page 34 for an explanation
of each icon.
ESSAGES icon and click.

90
Managing messages — Saving messages
the screen and the message is copied to the Saved Messages
screen but also remains in the Messages screen.
4. Retur n to the Messages screen by clicking to view the menu,
scrolling to and clicking Close. Exit to the Home screen. In the
Home screen, scroll to the SAV
ED MESSAGES icon and click.
5. The Saved Messages screen appears and you can see that the
message has been copied into this folder.
Installation and User’s Guide

Managing messages — Saving messages
Now that the message has been saved, you can delete the message
from the Messages screen. See page 99 for more information on
deleting messages.
To remove messages from the Saved Messages screen
You can remove sent and received messages from the Saved
Messages screen by deleting them.
1. In the Home screen, scroll to the SAVED MESSAGES icon and
click.
2. In th e Saved Message s screen, scroll to a saved message and
click to view the menu.
3. Scroll to Delete Message and click. A dialog box appears,
asking if you want to delete the message. Click Yes.
91
Note
If you have deleted the message from the Messages
screen and then delete it from the Saved Messages
screen, the message will no longer be on your handheld.
To save a message while composing
You may wish to save a message that you have not finished
composing, so that you may complete it and send it at a later time.
1. In the Home screen, scroll to the C
2. While composing a message in the To: screen, click the
trackwheel to view the menu. Scroll to Save Message and click.
OMPOSE icon and click.
Installation and User’s Guide

92
Managing messages — Saving messages
3. The Messages screen appears. An icon beside the message
indicates that the message is saved but has not been sent. The
message you save while composing is saved in the Messages
screen, not in the Saved Messages screen.
4. To resume composing, scroll to the saved message and click to
view the menu. Scroll to Open Message and click. The saved
message opens and you can resume composing.
5. When you’ve finished composing, click the trackwheel to view
the menu. Choose to save again or to send the message.
Installation and User’s Guide

Managing messages — Searching messages
Searching messages
Use the handheld’s search function to locate specific messages. You
can specify and save the terms of several searches and use them at
any time. You can also perform a one-time search. Two default
searches (Inbox and Outbox) are saved on the handheld.
93
Note
You can also search for messages while in the Messages
and Saved Messages screens.
You do not need to complete all the fields in the Search
Messages screen. The more fields you complete, the more
narrow the search will be.
To perform a search
1. In t he Home screen, scroll to the SEARCH MESSAGES icon
and click.
2. The Sea rch Messages screen appears. In the Name, Subject, or
Message fields, type the keywords for which you want to
search.
Note
3. In the In field, press the
search for the name that you have entered. Choose from From
field, Any Address Field, To field, Cc field, or Bcc field.
If you forget an exact spelling, you can search for a name
stored in your Address Book while still in the Search
Messages function. With your cursor in the Name field,
click the trackwheel to view the menu. Scroll to Select
Name and click. In the Address Book screen, select the
name for which you would like to search. Click the
trackwheel to view the menu. Scroll to Use Address
click. You return to the
selected name in the Name field.
Search Messages screen with your
SPACE key to select where you want to
and
Installation and User’s Guide

94
Managing messages — Searching messages
.
4. Sel ect the types of messages that you want the results of the
search to show. In the Show field, press the
SPACE key to select
the type of messages to show. The default is to show all sent
and received messages. You can view only the sent messages,
only the received messages, or only the saved messages which
match your search terms.
5. After you have set the terms of your search, click the
trackwheel to view the menu.
6. To perform a one-time search without saving any of t he terms
that you have specified, scroll to Search and click.
To save the terms of your search, scroll to Save Search and click.
The Save Search screen appears. Type a name for your search
in the Title field. You may indicate a shortcut key to be
associated wi th that search. Click t o view the menu. Scroll to
Save and click.
Installation and User’s Guide

Managing messages — Searching messages
The results of your search are displayed in the Search screen.
95
Note
Once you have saved a search and specified a hotkey, you
can use
Messages or Saved Messages screens.
When you enter text in the Subject or Messag e field, the
Search Messages function will search for phrases
containing these characters in the subject line and the body
of your messages.
You can clear a field by clicking to view the menu, scrolling
to Clear and clicking. If you want to clear all the fields in
your search and restate your search terms, click to view the
menu, scroll to New Search and click. The fields in the
Search Messages screen are reset to the default values.
ALT + the hotkey to carry out the search in the
To edit a search
1. In t he Home screen, scroll to the SEARCH MESSAGES icon
and click.
2. The Searc h Messages screen appears. Click the trackwheel to
view the menu. Scroll to Recall Search and click.
Installation and User’s Guide

96
Managing messages — Searching messages
3. Yo ur saved sear ches are lis ted. Selec t the search th at you want
to edit then click to view the menu. Scroll to Edit Search and
click.
4. The Save Search screen appears. In this window, you can
change any of the information in the fields. Once you have
made your changes, click to view the menu. Scroll to Save and
click.
The results are displayed in the Search screen.
Installation and User’s Guide

Managing messages — Searching messages
To edit a search once
1. In t he Home screen, scroll to the SEARCH MESSAGES icon
and click.
2. The Searc h Messages screen appears. Click the trackwheel to
view the menu. Scroll to Recall Search and click.
3. Yo ur saved sear ches are lis ted. Selec t the search th at you want
to edit then click to view the menu. Scroll to Select Search and
click.
97
4. The details of the search you have selected are displayed and
you can edit any of the fields. Once you have made your
changes, click to view the menu. Scroll to Search and click.
The results are displayed in the Search screen.
Note
The changes you make to the search are not saved. If you
want to save your changes, select Save Search from the
menu. The Save Search screen appears. Click to view the
menu, scroll to Save and click.
Installation and User’s Guide

98
Managing messages — Searching messages
To delete a search
1. In t he Home screen, scroll to the SEARCH MESSAGES icon
and click.
2. The Searc h Messages screen appears. Click the trackwheel to
view the menu. Scroll to Recall Search and click.
3. Yo ur saved sear ches are lis ted. Selec t the search th at you want
to delete then click to view the menu. Scroll to Delete Search
and click.
4. A dialog box appears asking if you are sure you want to delete
the selected searches. Click Yes to delete the search.
You return to t he Search Messages screen and you can see that the
search is no longer listed.
To search for the sender
When you have a received message selected in the Messages screen,
you can search for all messages received from that contact. This
feature is helpful if you want to search for all messages relating to a
new message that you have received.
Installation and User’s Guide

Managing messages — Deleting messages
1. In the Home screen, scroll to the MESSAGES icon and click.
2. Select a recei ved messag e from the contact for which you wa nt
to search then click to view the menu. Scroll to Search Sender
and click.
All messages from that sender are shown in the Search screen.
Deleting messages
Although the handheld has ample memory for storing messages,
you should delete unnecessary messages in order to manage the list
more efficiently.
99
Note
If the handheld’s memory is full and you receive new
messages, the handheld will delete the oldest messages in
the Messages screen to accommo date new ones. Saved
messages will not be deleted.
T o dele te a message from the Messages s creen
If you are in the Messages screen, you can delete a messa ge wi th ou t
opening it. This procedure also applies for deleting messages from
the Saved Messages screen.
Installation and User’s Guide

100
Managing messages — Deleting messages
1. In the Home screen, scroll to the MESSAGES icon and click.
2. In t he Messages screen, s croll to the mes sage that yo u want to
delete and click to view the menu. Scroll to Delete Message and
click.
3. A dialog box appears, asking if you want to delete the mes sag e.
Click Yes. (This dialog box appears only if Confirm Message
Delete is enabled in the Message List Options screen.)
You return to the Messages screen and you can see that t he message
is no longer listed.
Note
If you request more of a message, you should not delete
the message until you have received all the information.
See page 81 for more information on receiving long
messages.
To delete an open message
You can delete a message while it is open without returning to the
Messages screen.
1. In the Home screen, scroll to the M
Installation and User’s Guide
ESSAGES icon and click.
 Loading...