


LX1200H/LX210
V-AMPIRE
User’s manual
Version 1.1 December 2005
V-AMPIRE LX1200H/LX210
IMPORTANT SAFETY INSTRUCTIONS
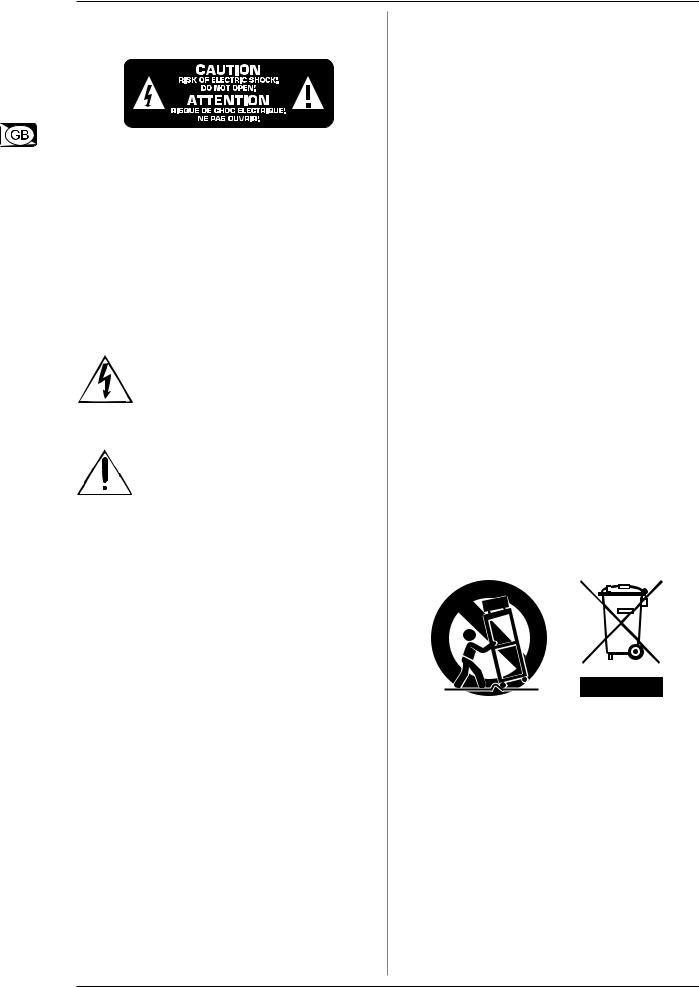
CAUTION: To reduce the risk of electric shock, do not remove the top cover (or the rear section). No user serviceable parts inside; refer servicing to qualified personnel.
WARNING: To reduce the risk of fire or electric shock, do not expose this appliance to rain and moisture. The apparatus shall not be exposed to dripping or splashing and no objects filled with liquids, such as vases, shall be placed on the apparatus.
This symbol, wherever it appears, alerts you to the presence of uninsulated dangerous voltage inside the enclosure—voltage that may be sufficient to constitute a risk of shock.
This symbol, wherever it appears, alerts you to important operating and maintenance instructions in the accompanying literature. Please read the manual.
DETAILED SAFETY INSTRUCTIONS:
1)Read these instructions.
2)Keep these instructions.
3)Heed all warnings.
4)Follow all instructions.
5)Do not use this apparatus near water.
6)Clean only with dry cloth.
7)Do not block any ventilation openings. Install in accordance with the manufacturer’s instructions.
8)Do not install near any heat sources such as radiators, heat registers, stoves, or other apparatus (including amplifiers) that produce heat.
9)Do not defeat the safety purpose of the polarized or grounding-type plug. A polarized plug has two blades with one wider than the other. A grounding type plug has two blades and a third grounding prong. The wide blade or the third prong are provided for your safety. If the provided plug does not fit into your outlet, consult an electrician for replacement of the obsolete outlet.
10)Protect the power cord from being walked on or pinched particularly at plugs, convenience receptacles, and the point where they exit from the apparatus.
11)Only use attachments/accessories specified by the manufacturer.
12)Use only with the cart, stand, tripod, bracket, or table specified by the manufacturer, or sold with the apparatus. When a cart is used, use caution when moving the cart/apparatus combination to avoid injury from tip-over.
13)Unplug this apparatus during lightning storms or when unused for long periods of time.
14)Refer all servicing to qualified service personnel. Servicing is required when the apparatus has been damaged in any way, such as power supply cord or plug is damaged, liquid has been spilled or objects have fallen into the apparatus, the apparatus has been exposed to rain or moisture, does not operate normally, or has been dropped.
15)CAUTION - These service instructions are for use by qualified service personnel only. To reduce the risk of electric shock do not perform any servicing other than that contained in the operation instructions unless you are qualified to do so.
2
V-AMPIRE LX1200H/LX210
FOREWORD
Dear Customer,
welcome to the team of BEHRINGER users, and thank you very much for expressing your confidence in us by purchasing the V-AMPIRE.
Writing this foreword for you gives me great pleasure, because it represents the culmination of many months of hard work delivered by our engineering team to achieve a very ambitious goal: to create two outstanding guitar amplifier, whose excellent sound and remarkable functions offer a maxi-
mum on flexibility and performance. The task of designing our new V-AMPIRE amps certainly meant a great deal of responsibility, which we assumed by focusing on you, the discerning user and musician. Meeting your expectations also meant a lot of work and night shifts. But it was fun, too. Developing a product usually brings a lot of people together, and what a great feeling it is when all who participated in such a project can be proud of what they’ve achieved.
It is our philosophy to share our enjoyment with you, because you are the most important member of the BEHRINGER team. With your highly competent suggestions for new products you’ve made a significant contribution to shaping our company and making it successful. In return, we guarantee you uncompromising quality as well as excellent technical and audio properties at an extremely reasonable price. All of this will enable you to give free rein to your creativity without being hampered by budget constraints.
We are often asked how we manage to produce such highquality equipment at such unbelievably low prices. The answer is quite simple: it’s you, our customers! Many satisfied customers mean large sales volumes enabling us to get better purchasing terms for components, etc. Isn’t it only fair to pass this benefit on to you? Because we know that your success is our success too!
I would like to thank all of you who have made the V-AMPIRE LX210 and LX1200H possible. You have all made your own personal contributions, from the developers to the many other employees at this company, and to you, the BEHRINGER user.
My friends, it’s been worth the effort!
Thank you very much,
Uli Behringer
|
TABLE OF CONTENTS |
|
1. INTRODUCTION ......................................................... |
4 |
|
1.1 |
... before you get started ............................................... |
4 |
|
1.1.1 Online registration ............................................... |
4 |
1.2 The manual ...................................................................... |
4 |
|
2. CONTROL ELEMENTS ............................................... |
5 |
|
2.1 |
Front panel ...................................................................... |
5 |
2.2 |
Rear panel ....................................................................... |
7 |
3. Operating Modes and applications ......................... |
8 |
|
3.1 Selecting an operating mode in CONFIGURATION mode 8 |
||
3.2 |
Live on stage or in a rehearsal room ............................. |
8 |
|
3.2.1 LX1200H .............................................................. |
8 |
|
3.2.2 LX210 ................................................................... |
9 |
3.3 |
Rehearsal or recording at home |
|
(LX1200H und LX210) .......................................................... |
9 |
|
3.4 |
Studio recording/recording |
|
(LX1200H und LX210) ........................................................ |
10 |
|
4. PRESETS ................................................................. |
10 |
|
4.1 Calling up presets ......................................................... |
10 |
|
4.2 |
Editing presets .............................................................. |
10 |
4.3 |
Storing presets .............................................................. |
11 |
4.4 |
Discarding an edited preset/restoring a single factory |
|
preset .................................................................................. |
11 |
|
4.5 |
Restoring all factory presets ........................................ |
11 |
5.AMP/SPEAKER-SIMULATION .................................. |
11 |
|
5.1 |
Amp descriptions .......................................................... |
11 |
5.2 |
Speaker descriptions .................................................... |
13 |
6. EFFECTS PROCESSOR ............................................ |
14 |
|
6.1 Wah Wah ...................................................................... |
14 |
|
6.2 |
Effect descriptions ....................................................... |
14 |
|
6.2.1 Reverb and delay algorithms ............................ |
14 |
|
6.2.2 Modulation effects ............................................. |
14 |
|
6.2.3 Combinations of effect algorithms |
|
|
(multi-effects programs) ............................................ |
15 |
|
6.2.4 Special effects ................................................... |
15 |
6.3 |
The separate reverb effect .......................................... |
15 |
7. TUNER ...................................................................... |
15 |
|
7.1 |
Tuning your guitar ......................................................... |
15 |
7.2 |
Setting reference pitch “A” .......................................... |
15 |
8. INSTALLATION ......................................................... |
16 |
|
8.1 Mains voltage ................................................................ |
16 |
|
8.2 Audio connections ........................................................ |
16 |
|
8.3 MIDI connections ........................................................... |
17 |
|
|
8.3.1 Sending/receiving MIDI Sysex data .................. |
17 |
9. SPECIFICATIONS ..................................................... |
17 |
|
10. APPENDIX .............................................................. |
18 |
|
|
WARNING! |
|
Please note that high volume levels may cause |
||
permanent damage to your hearing and/or your |
||
headphones. Turn all LEVEL controls to the left |
||
before you switch on the unit. Be sure to keep the |
||
volume at an appropriate level. |
|
|
3

V-AMPIRE LX1200H/LX210
1. INTRODUCTION
Congratulations! With the V-AMPIRE, you have the newest generation of modeling guitar amps. It offers an extremely broad range of options and possibilities, the only limit being your own imagination.
LX1200H
The V-AMPIRE LX1200H is is so versitile and has so many features that you will hardly need any other equipment. Use it with a guitar speaker cabinet like our BG412V to deliver either 120 Watts mono or 2 x 60 Watts stereo.
LX210
With the V-AMPIRE LX210 you own the new combo version of our famous V-AMP 2. It’s an allrounder with so many features that you hardly need any other equipment. Use it as a guitar combo to deliver 2 x 60 Watts stereo with internal or external loudspeakers.
However you use your V-AMPIRE, you will always profit from its enormous flexibility.
So enough talk: Nothing will convince you more than what you actually hear and feel when you play your V-AMPIRE.
But ...
1.1 ... before you get started
Your V-AMPIRE was carefully packed at the assembly plant to assure secure transport. Should the condition of the cardboard box suggest that damage may have taken place, please inspect the unit immediately and look for physical indications of damage.
Damaged equipment should NEVER be sent directly to us. Please inform the dealer from whom you acquired the unit immediately as well as the transportation company from which you took delivery. Otherwise, all claims for replacement/ repair may be rendered invalid.
Please always use the original packaging to avoid damage due to storage or shipping.
Never let unsupervised children play with the V-AMPIRE or with its packaging.
Please dispose of all packaging materials in an environmentally friendly fashion.
Please make sure the unit is provided with sufficient ventilation, and never place the V-AMPIRE in the vicinity of heaters to avoid the risk of overheating.
Before you connect the unit to the mains, please make sure that the voltage setting on the unit matches the local voltage! Please refer to the important information on this topic given in chapter 8: “INSTALLATION”.
Please make sure that all units have a proper ground connection. For your own safety, never remove or disable the ground conductor from the unit or of the AC power cord. The unit shall always be connected to the mains socket outlet with a protective earthing connection.
The MIDI connections (IN, OUT/THRU) are for standard DIN connectors. Data is transferred via ground-free opto-couplers. Further information can be found in chapter 8 “INSTALLATION.”
1.1.1 Online registration
Please do remember to register your new BEHRINGER equipment right after your purchase by visiting www.behringer.com (alternatively www.behringer.de) and kindly read the terms and conditions of our warranty carefully.
Should your BEHRINGER product malfunction, our goal is to have it repaired as quickly as possible. To arrange for warranty service, please contact the retailer from whom the equipment was purchased. Should your BEHRINGER dealer not be located in your vicinity, you may directly contact one of our subsidiaries. Corresponding contact information is included in the original equipment packaging (Global Contact Information/European Contact Information). Should your country not be listed, please contact the distributor nearest you. A list of distributors can be found in the support area of our website (www.behringer.com/ support).
Registering your purchase and equipment with us helps us process your repair claims quicker and more efficiently.
Thank you for your cooperation!
1.2 The manual
This manual has been designed so that you can get a clear overview of all control elements and at the same time find detailed information on how to use them. To let you quickly get an overview of different topics, we have grouped various control elements according to their function. If you need more information on specific topics, please visit our web site at www.behringer.com. For example, there you can find complete information about MIDI implementation.
4 |
1. INTRODUCTION |
V-AMPIRE LX1200H/LX210
2. CONTROL ELEMENTS
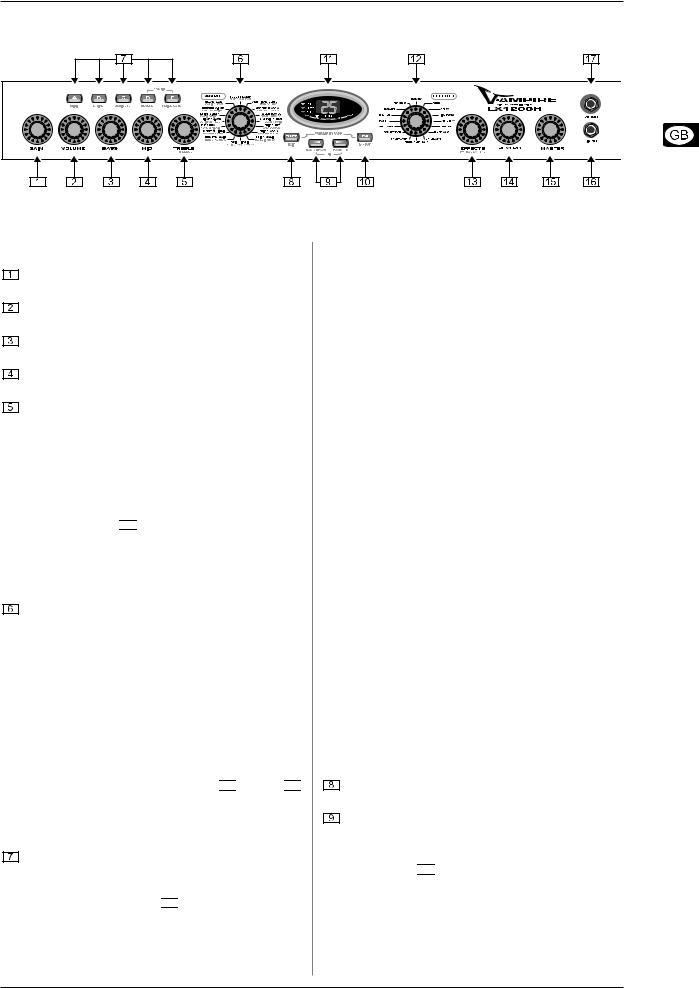
Fig. 2.1: V-AMPIRE’s control elements (front panel LX1200H)
2.1 Front panel
The GAIN control determines the distortion level and the saturation of an amp simulation.
The VOLUME control determines the volume of the selected preset.
The BASS control in the EQ section is for boosting or cutting the low-frequency range.
The MID control is for boosting or cutting the mid-range frequencies.
TREBLE controls the high-frequency range of the selected preset.
The LED rings around the VOLUME, BASS, MID, TREBLE, GAIN, EFFECTS and REVERB controls each have nine LEDs. On each ring either one LED or two neighboring LEDs (in between position) will light up at a time, indicating a total of 17 different positions.
If the TAP button 


 is pressed, the TREBLE control functions as a PRESENCE control. This enables you to boost/cut a high-frequency filter tuned to whatever amp model is active, thus simulating the frequency-dependent negative feedback of tube amps.
The AMPS control is for selecting one of 32 different amplifier simulation models. The control is surrounded by a ring of 16 LEDs. Each LED corresponds to two types of amplifiers. The first 16 simulations can be selected by turning the AMPS control.
To select the simulation models 17 - 32, press down the TAP button while making your selection by turning the AMPS control.
The LED “17 - 32” in the bottom left-hand corner of the DISPLAY indicates that one of the simulation models 17 - 32 has been selected.
In addition, you can activate a PREAMP BYPASS by pressing the button combination TUNER 

 and TAP


 for using the V-AMPIRE as effects unit. If PREAMP BYPASS has been selected, none of the LEDs on the AMPS control lights up. To disable PREAMP BYPASS, simply select a different amp model or press both buttons again.
These five buttons are for selecting a preset (A - E) within one bank.
In EDIT mode (activated by simultaneously pressing the arrow buttons described in 

 ), the buttons perform the function printed directly below them:
A: Accesses the MIDI functions. Use the arrow buttons to set the MIDI channels (1 through 16) for transmitting and receiving MIDI data.
If you use button A in EDIT mode to select the MIDI function and then press the TAP button, the MIDI OUT connector is set to act as a MIDI THRU. In this setting (the TAP LED is lit) no MIDI data is sent, but the device passes on the signal received at the MIDI IN connection.
B: Selects the DRIVE function. This noticeably raises distortion and volume. Use the arrow buttons to switch DRIVE on and off. The DRIVE function is wired pre GAIN control.
While editing the DRIVE function, you can also activate and adjust the Wah-Wah effect by turning the EFFECTS control. The LEDs surrounding the EFFECTS control indicate the position of the pedal. If none of the LEDs light up, the Wah-Wah is not activated.
C: This button activates the CABINETS mode. Use the arrow buttons to select the type of speaker or combination of speakers you want. You can also switch off the speaker simulation completely (“-”). For further details, please refer to chapter 5.2.
D: Use this button to select the REVERB function. The arrow buttons can be used to select one of nine different types of reverb in addition to the multi-effects processor. For further details see chapter 6.3.
E: Here you can activate the NOISE GATE function. Use the arrow buttons to adjust the noise reduction threshold.
After preset editing, please press TUNER/EXIT to quit (the EDIT MODE LED dies out).
CONFIGURATION: If you press the D and E buttons simultaneously, you can select the general operating mode of your V-AMPIRE, allowing adjustments to different studio and live situations (see chapter 3). To do that, first exit the EDIT mode by pressing TUNER (“Exit”).
The TUNER button is for switching on the tuner. In addition, this button can be used to quit EDIT mode (“Exit”).
Use the two arrow buttons to select a different bank (BANK DOWN and BANK UP). You can skip banks by holding each of the buttons down. To activate the EDIT mode, press both buttons simultaneously. If you press one of the buttons A - E ( 

 ) in that mode, the arrow buttons can be used for setting parameters.
2. CONTROL ELEMENTS |
5 |
V-AMPIRE LX1200H/LX210
The TAP button has seven functions:
“Tap”: Tap the rhythm of a piece of music on the TAP button and the selected effect automatically adapts to the tempo of the music.
“Presence”: While holding down the TAP button, you can use the TREBLE control to change the PRESENCE setting of the amp model you’ve selected.
“2nd parameter”: You also can access the second effects parameter set by using the EFFECT control while holding down the TAP button.
“Amp Models 17 - 32”: Keep the TAP button pressed down and select an amp model using the AMPS control.
“MIDI Thru”: The MIDI OUT connector can be set to act as MIDI THRU (see 

 “A”).
“A”).
“Drive”: Using the TAP button and the EFFECT control changes the sound of the Wah-Wah effect.
“Input Gain”: By pressing the TAP button in the configuration menu (see 

 ) you change the value (please refer to chapter 3.1 for further information).
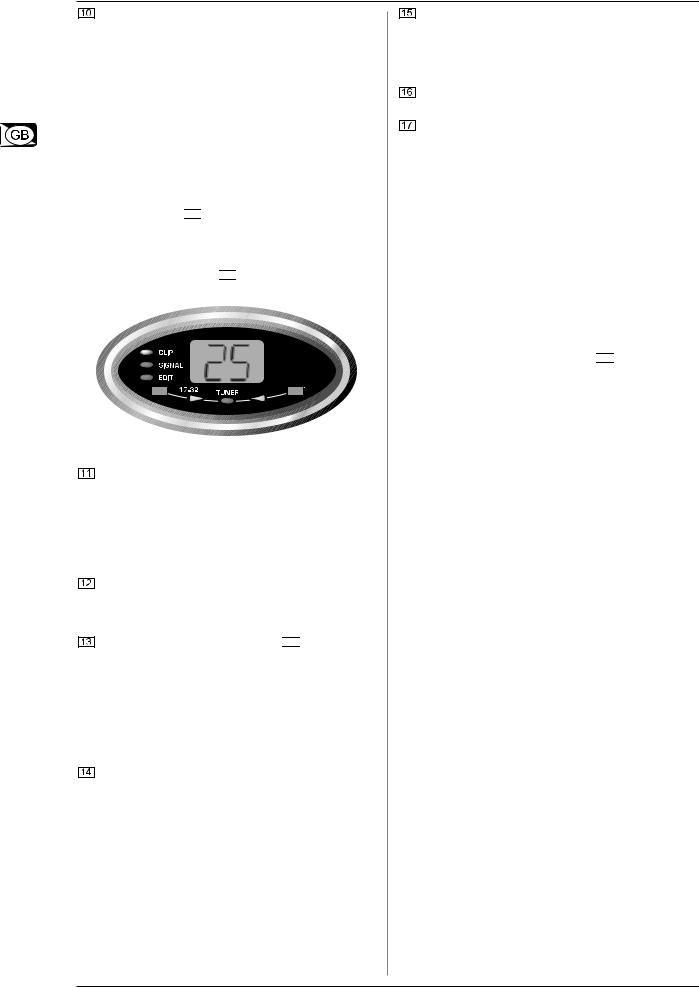
Fig. 2.2: V-AMPIRE display
The DISPLAY shows you which preset bank you have selected and gives you information on parameter changes when you are editing. In TUNER mode the DISPLAY shows the pitch of the instrument connected to the unit. If one of the amplifier simulations 17 - 32 has been selected, the LED in the bottom left-hand corner of the DISPLAY lights up. Applied signals are indicated by the green SIGNAL LED, overload signals by the red CLIP LED.
This control is for selecting an effect or a combination of effects. This encoder-type rotary control is also surrounded by a ring of 16 LEDs. Each LED corresponds to one specific effects preset.
If an effect has been selected via 


 , its part of the overall sound can be set using this EFFECTS control. If you select the “Compressor” effect, you can use the EFFECTS control to adjust the compression intensity. Turning the control to the left until all the LEDs are off disables the effect. This is known as an effects bypass.
By pressing the TAP button, you can set a second effects parameter using the EFFECTS control (see table 6.1).
Using the REVERB control, you can gradually add reverb to your overall sound. By turning it to the left until all the LEDs are off, you deactivate the reverb. To fade out the original signal, turn the control to the right until only the last LED lights up.
The MASTER control determines the overall volume of your device.
This is the only “conventional” non-programmable control. All other controls are encoder-type rotary controls whose settings can be stored as a preset.
The INPUT socket is the 1/4" connector for your guitar. Please use a standard 1/4" TS connector.
The stereo PHONES connector allows you to monitor the audio signal with standard headphone (e.g. BEHRINGER HP series).
Your V-AMPIRE automatically activates studio mode 1 (S1) when connecting headphones. In this mode the digital speaker simulations are activated. With the headphones plugged in, you are able to select any other configuration, e.g. for monitoring purposes (see also chapter 3).
If you did not choose a speaker simulation with the current setting and connect headphones, the device will automatically switch to a speaker simulation. This will increase the listener’s sound impression. Please refer to table 5.2 for detailed information on the various speaker/amp combinations. However, you can intentionally change or deactivate the simulation when using headphones by selecting “-” in the CABINETS mode (see 

 C).
C).
WARNING!
Please note that high volume levels may cause permanent damage to your hearing and/or your headphones. Turn all LEVEL controls to the left before you switch on the unit. Be sure to keep the volume at an appropriate level.
6 |
2. CONTROL ELEMENTS |
 Loading...