

Page 1

Outlook®
WinDock™
Operation
Manual
Outlook“
Window
Operation
WinDock
Version
Rx
of
Manual
Only
Docking
This
manual
any
electronic
951031
Rev
may
not,
in
whole
or
machine-readable
(10/04)
D
or
in
form
part,
without
be
copied,
photocopied,
prior
written
reproduced,
consent
of
translated,
B.
Braun.
IVI
or
converted
to
Page 2

Outlook®
WinDock™
Operation
Manual
951031
Rev
(10/04)
D
CEE
Page 3
Outlook®
WinDock™
Operation
Manual
Tables
Introduction
Chapter 1 —
Computer
WinDock®M
Connect
Configure
Chapter 2 —
Accessing
,
How
Chapter 3 —
How
How
Chapter 4 -
How
Index
the
For
Outlook®
For
Horizon®
Biomed
to
Enter
Configure
Default
DoseScan™
Audible
Review
Set
Monitor
Set
Setting
Setting
Setting
Setting
Setting
Setting
Occlusion
Time
Up
Drug
Factory
to
Capture a Pump
Up
Up
to
Send a Pump
Up
Up
to
Receive a Log
Up
Up
of
Contents
Installation...
System
Installation
Windock™
Communication
Manual
the
Security
Menus
Signal
Docking..
Working
the
the
the
the
Operation
the
the
Requirements...
Process.........
Biomed
Pump
and
Horizon®
Port
Configuration
Pump’s
Configuration
Options.........
Lists
Defaults...
Biomed
Code
pe。
...............
Limit
Options.....
and
Date.
...
with
Configuration
Configuration
PUMP.........-.........
Outlook®
Pump...........................
WinDock
Pump.........
Outlook®
WinDock™
Configuration........................
Program
and
Alarm
File
WinDock
o..
Box
to
NXT
Pumps..
....................
of a Pump.
Menu.....
Information
..
Logs....
Program
see
the
Pump
Manually
Files
.....
Program
on
pump
951031
Rev D (10/04)
i
om
Page 4

Outlook®
WinDock™
Operation
Manual
Table
Figure
Figure
Figure
Figure
Figure
Figure
Figure
Figure
Figure
Figure
Figure
Figure
Figure
Figure
Figure
Figure
Figure
Figure
Figure19:
Figure
Figure
Figure
1:
2:
3:
4:
5:
6:
7:
8:
9:
10:
11:
12:
13:
14:
15:
16:
17:
18:
20:
21:
22:
of
Figures
Welcome
User
Choose
Select
Start
SetupScreen.................
Setup
Main
Select
Serial
Setting
Pump
Choose
Warning
Capturing
Pump
Choose
Sending
MainMenu....................................
Choose
Operation
No
Screen
Information
Destination
Program
Copying
Complete
Menu...
Communication
Port
Configuration
Configuration
Activity
Folder Screen
Files
Screen.
Conflict
up
Pump
Configuration
Pop-up
Configuration
Configuration
Configuration
File
to
Hold
and
Alarm
Alert
Screen
Location
Screen...
Pop-up
for
these
Page...........................
Box
Page.........
Captured
Pop-Up
Port
File
Page
File
File
Logs
Screen..
Screen
Box
......
Options
to
Capture
..
to
Send
Page..
Log
Page...
Page.
Dialog
Dialog
Dialog
Box...
Box.
E
Box
951031
Rev D (10/04)
ii
опа
Page 5
introduction
Outlook
WinDock™
Operation
Manual
Outlook®
pump
that
communication
serial
a
Outlook®
from
logs
derived
Use
from
the
following
Step
Step
Step
Step
Step
Step
WinDock™
allows
WinDock
the
Note:
revisions
1.
2.
3.
4.
5.
6.
the
Biomedical
also
Outlook®
serial
the
Configuration
may
easy
Install
Connect
Installation)
Configure
Installation)
Configure a pump
Pump),
Capture
Transmit
Outlook®
Pump
Configuration,
Chapter
is
a
Windows-based
Professional
infrared
an
or
allows
and
number
not
steps
the
the
configuration
the
3)
the
Biomedical
Horizon
the
of
files
from
be
compatible.
to
configure
WinDock™
WinDock
Communication
manually
Chapter
"Configuration
link,
pumps.
device.
different
pumps:
Biomed
from
"golden"
interface
to
receive
Professional
logs
These
B.Braun
ona
computer
Box
to
Port,
if
(See
Chapter 2 —
(standard)
3)
File"
(See
between
the
necessary
How
a
or
transmit
to
placed
are
pumps
(See
pump.
Manual
to
Send a Pump
PC
and
configuration
retrieve
a
in
and
software
Chapter 1 —
(See
Chapter 1 —
(See
Chapter 1 —
Configuration
pump
(See
a
supported
operation
file
How
and
whose
Installation),
to
Capture
Configuration,
B.Braun
data
via
alarm
name
of
a
is
a
951031
Read
become
Refer
For
technical
Rev D (10/04)
this
Manual
familiar
to
the
before
with
the
appropriate
assistance,
1601
using
the
Outlook®
proper
pump
call
use
of
the
Operation
B.Braun
(800)-627-PUMP
pumps@bbmus.com
Distributed
B.Braun
Wallace
Carrollton,
Medical
Drive,
TX
1
WinDock™
software
Manual
by:
Inc.
Suite
75006
:
and
for
complete
150
software.
the
supported
directions
ATTI
The
pump’s
user
for
should
operation.
pump
use.
Page 6
Outlook®
WinD
ock™
Operation
Manual
Chapter
Computer
1 — Installation
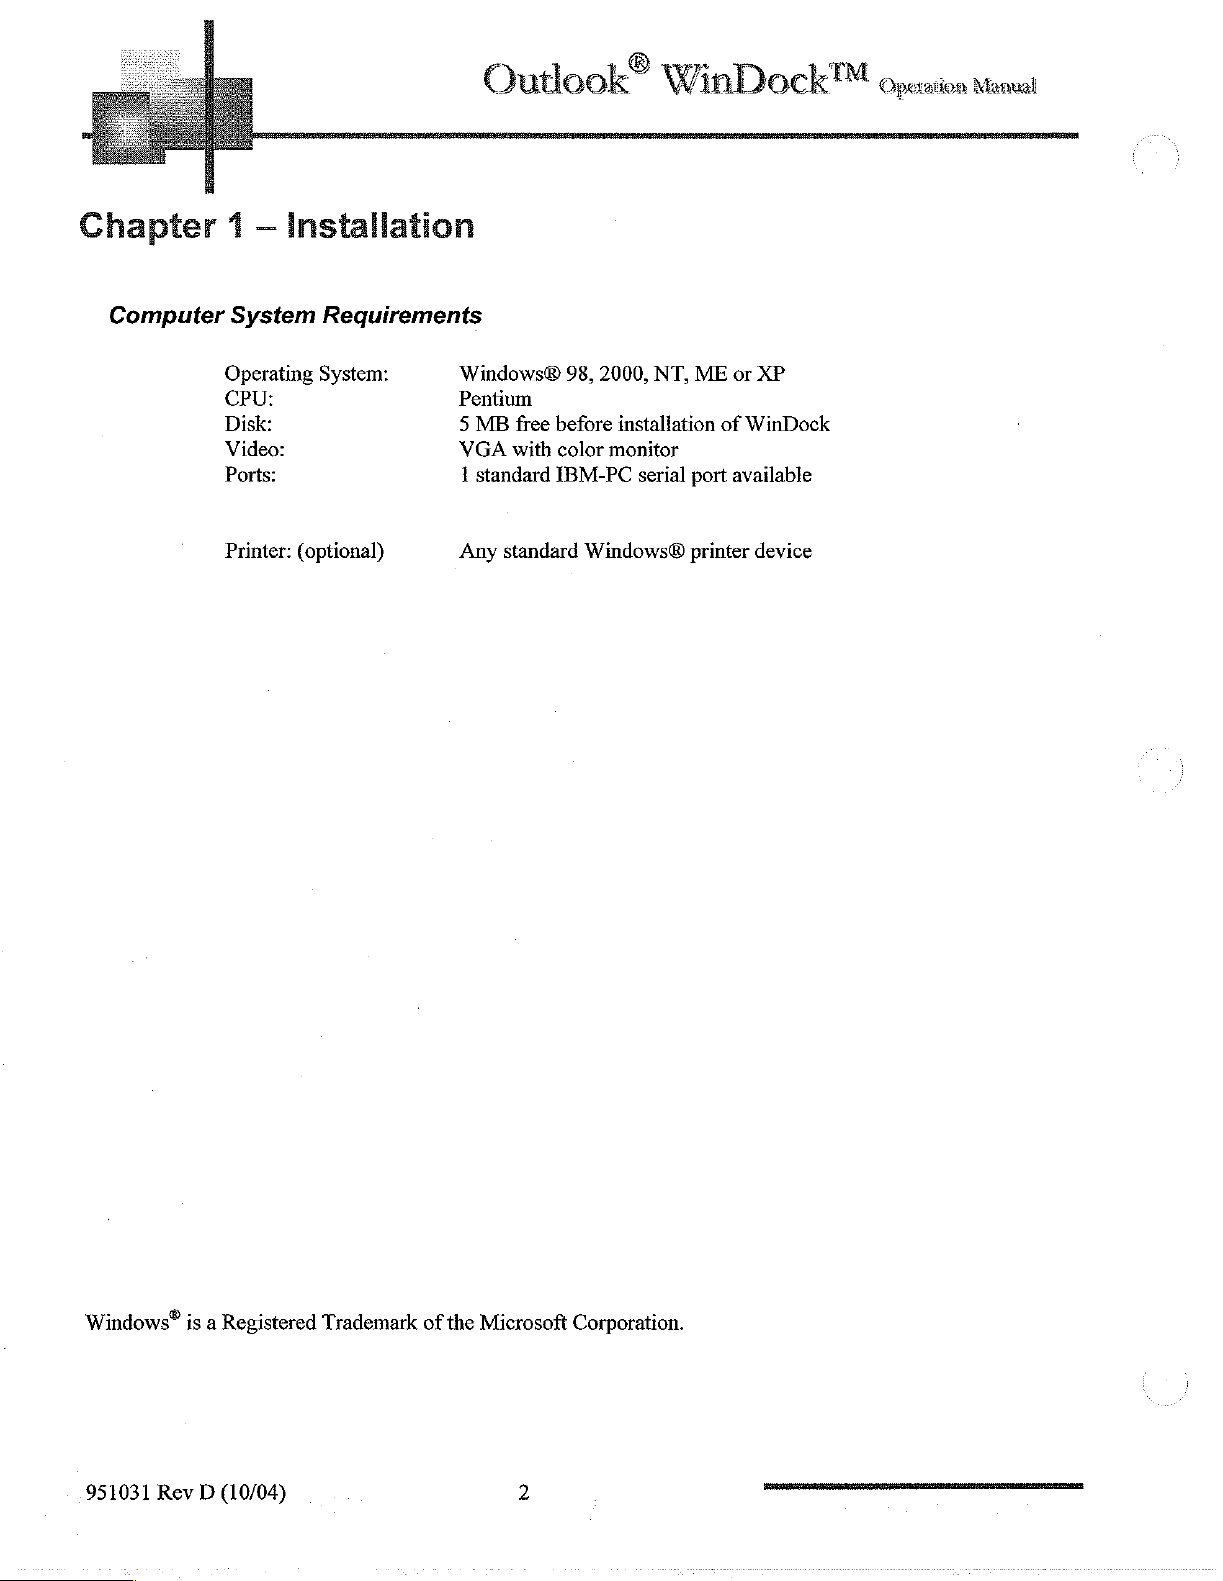
System
Operating
CPU:
Disk:
Video:
Ports:
Printer:
Requirements
System:
(optional)
Windows&
Pentium
5
MB
VGA
1
standard
Any
98,
free
before
with
color
IBM-PC
standard
2000,
NT,
installation
monitor
serial
Windows®
ME
or
of
WinDock
port
available
printer
XP
device
Windows®
951031
Rev D (10/04)
is a Registered
Trademark
of
the
Microsoft
Corporation.
Page 7
Outlook®
WinDock™
Operation
Manual
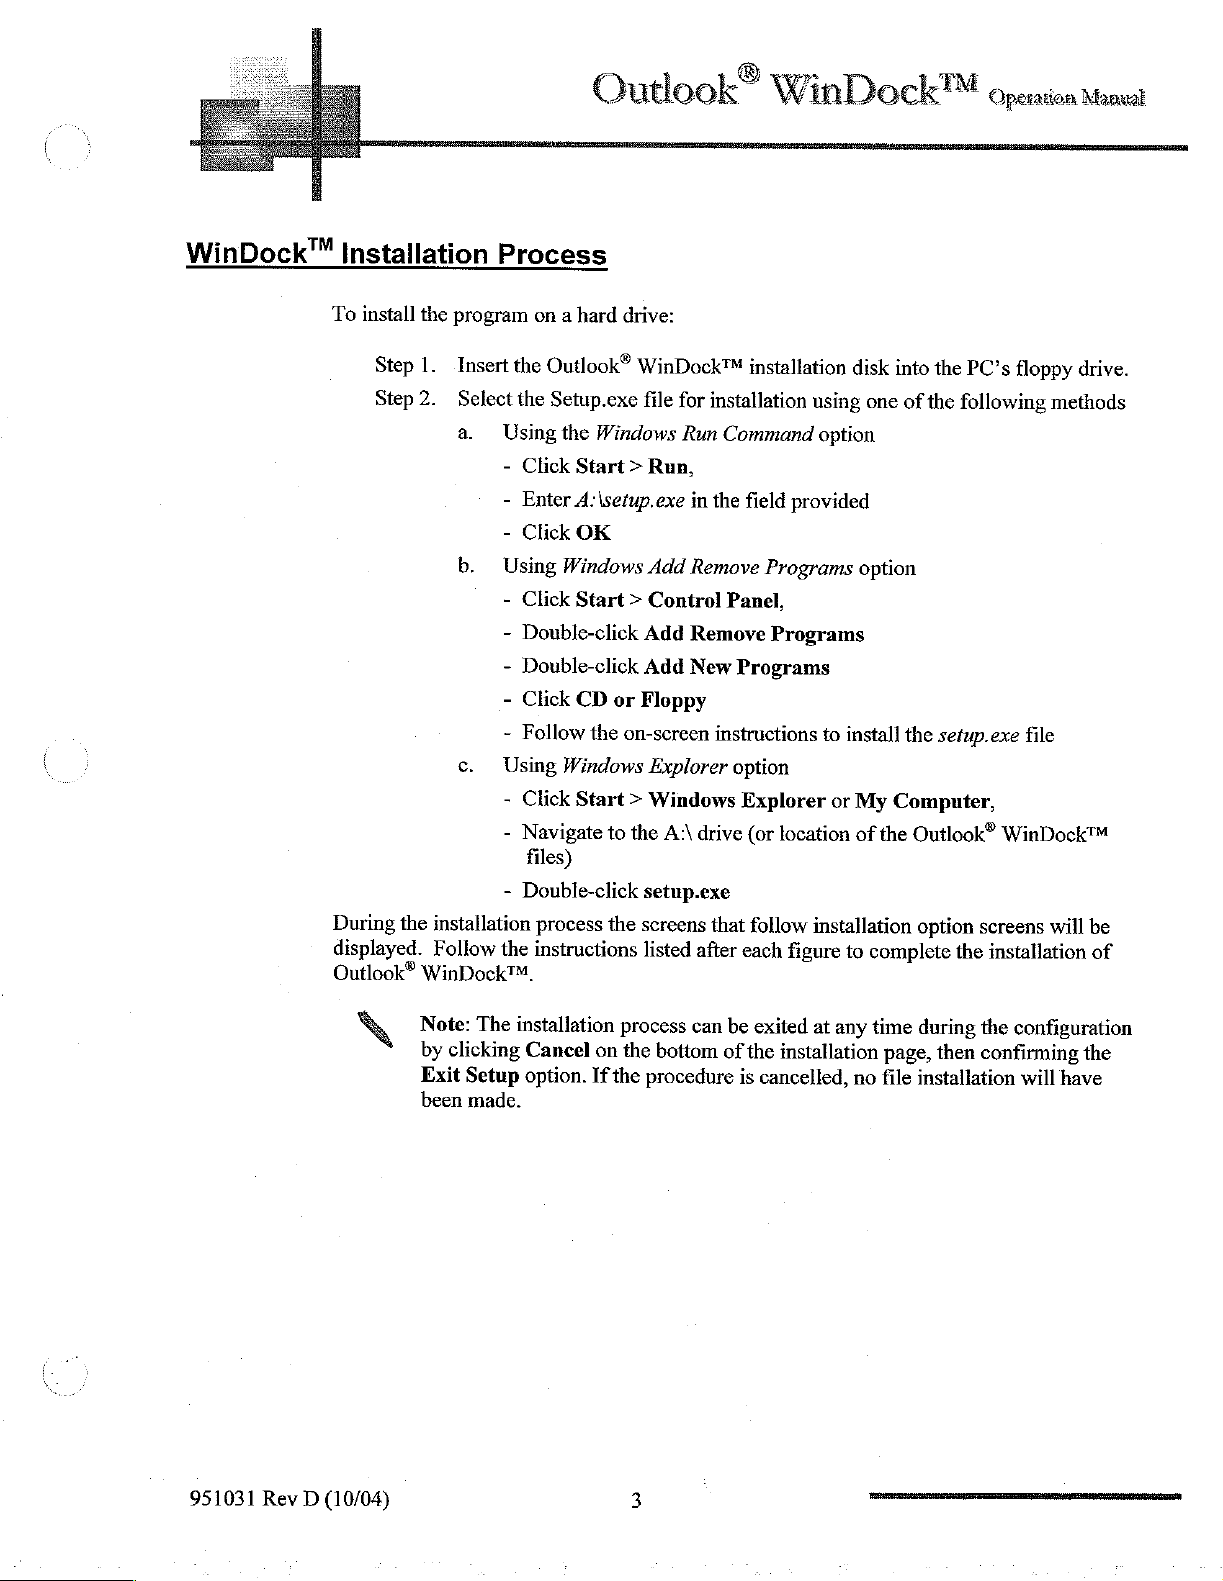
WinDock™
Installation
To
install
the
program
Step
1.
Insert
Step
2.
Select
a.
b.
c.
During
displayed.
Outlook®
the
installation
Follow
WinDock™.
Process
on a hard
the
Outlook®
the
Setup.exe
Using
the
Windows
-
Click
Start > Run,
-
Enter
-
Using
-
Using
-
-
-
the
A:\setup.exe
Click
OK
Windows
Click
Start > Control
Double-click
Double-click
Click
CD
Follow
Click
Navigate
files)
Double-click
the
Windows
Start > Windows
process
instructions
drive:
WinDock™
file
Add
Add
Add
or
Floppy
on-screen
Explorer
to
the
A:
setup.exe
the
screens
listed
installation
for
installation
Run
Command
in
the
field
Remove
Panel,
Remove
New
Programs
instructions
option
Explorer
drive
(or
that
follow
after
each
using
option
provided
Programs
Programs
to
or
location
installation
figure
disk
into
one
of
option
install
the
My
Computer,
of
the
to
complete
the
PC’s
the
following
setup.exe
Outlook®
option
screens
the
floppy
WinDock™
installation
methods
file
will
drive.
be
of
951031
Rev D (10/04)
N
Note:
by
clicking
Exit
been
The
installation
Cancel
Setup
option.
made.
process
on
the
If
the
can
be
bottom
procedure
of
exited
at
the
installation
is
cancelled,
any
no
time
during
page,
then
file
installation
the
configuration
confirming
will
have
the
Page 8
Outlook®
W
=.=
jad
then
ALLE
em
inDock™
i
dose
ar
ne
See
eS
Operation
progra
pradtam
y
το
Manual
Figure
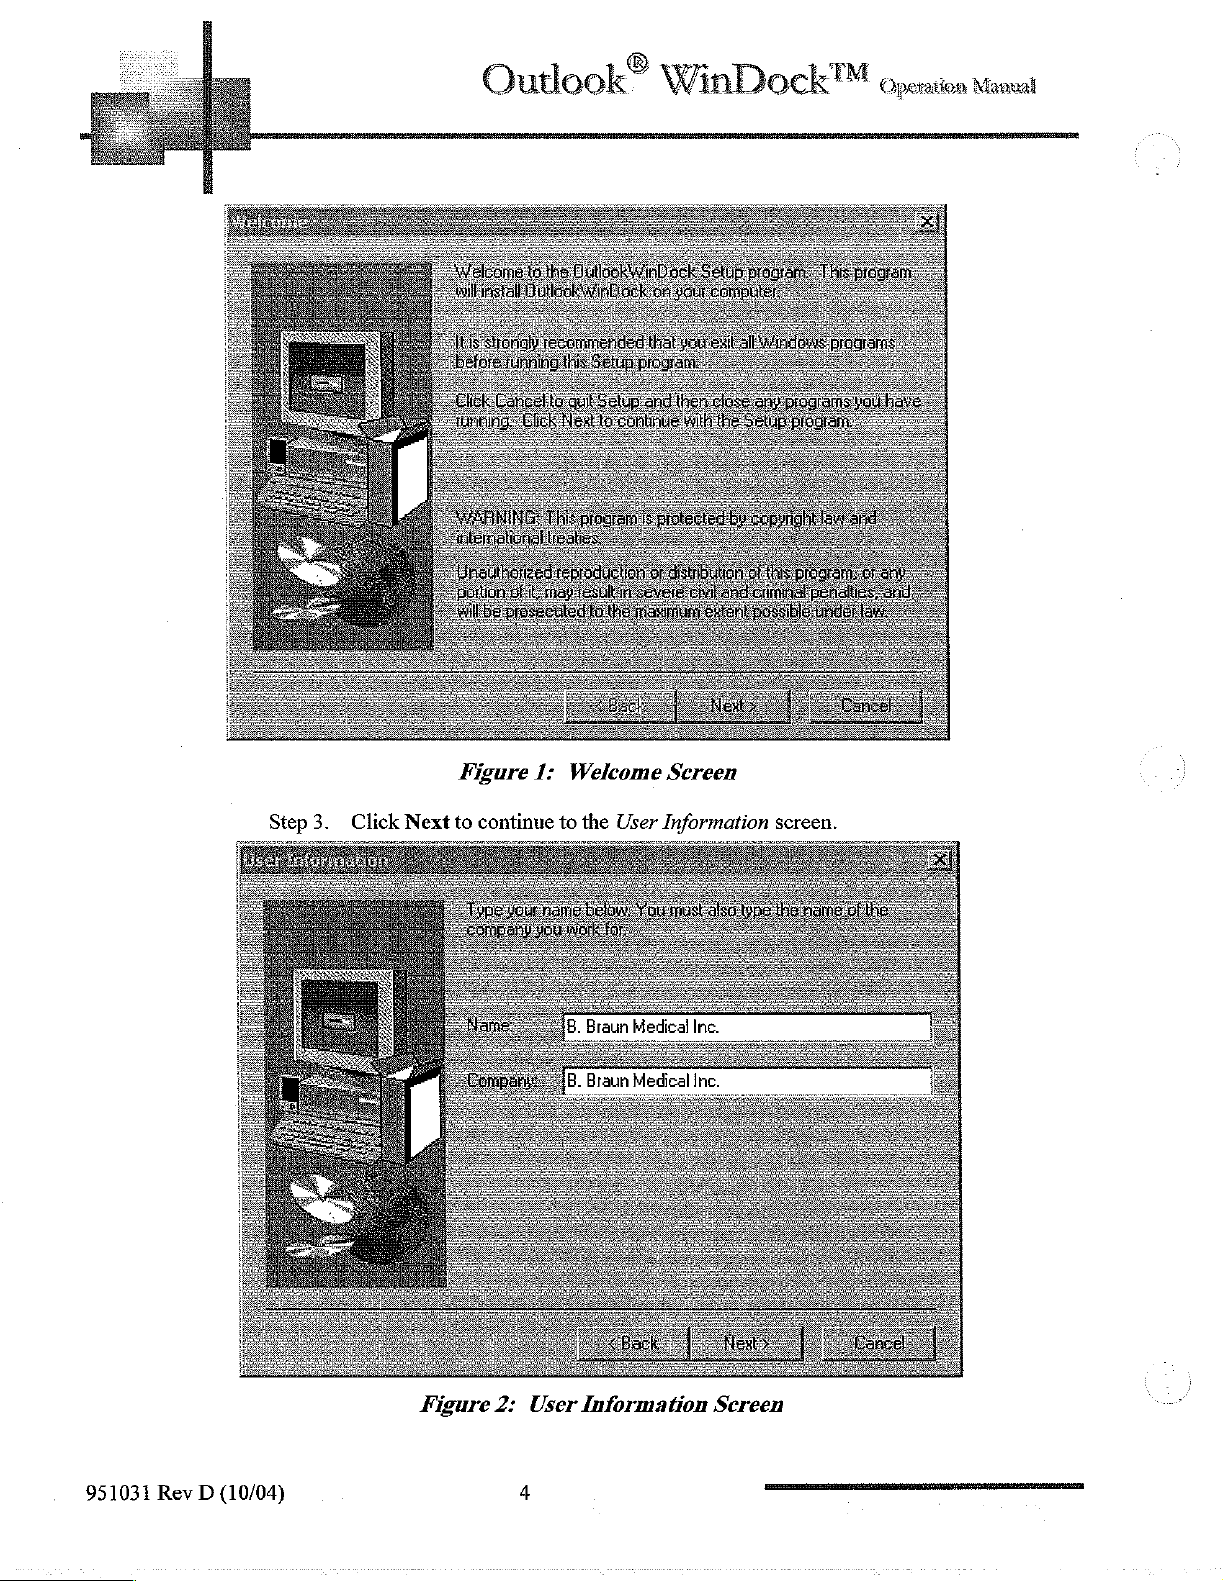
Step3.
Click
Nextto
1:
continue
Welcome
to
the
User
Screen
Information
screen.
951031
Rev
(10/04)
D
Figure
2:
User
4
Information
Screen
A
Page 9
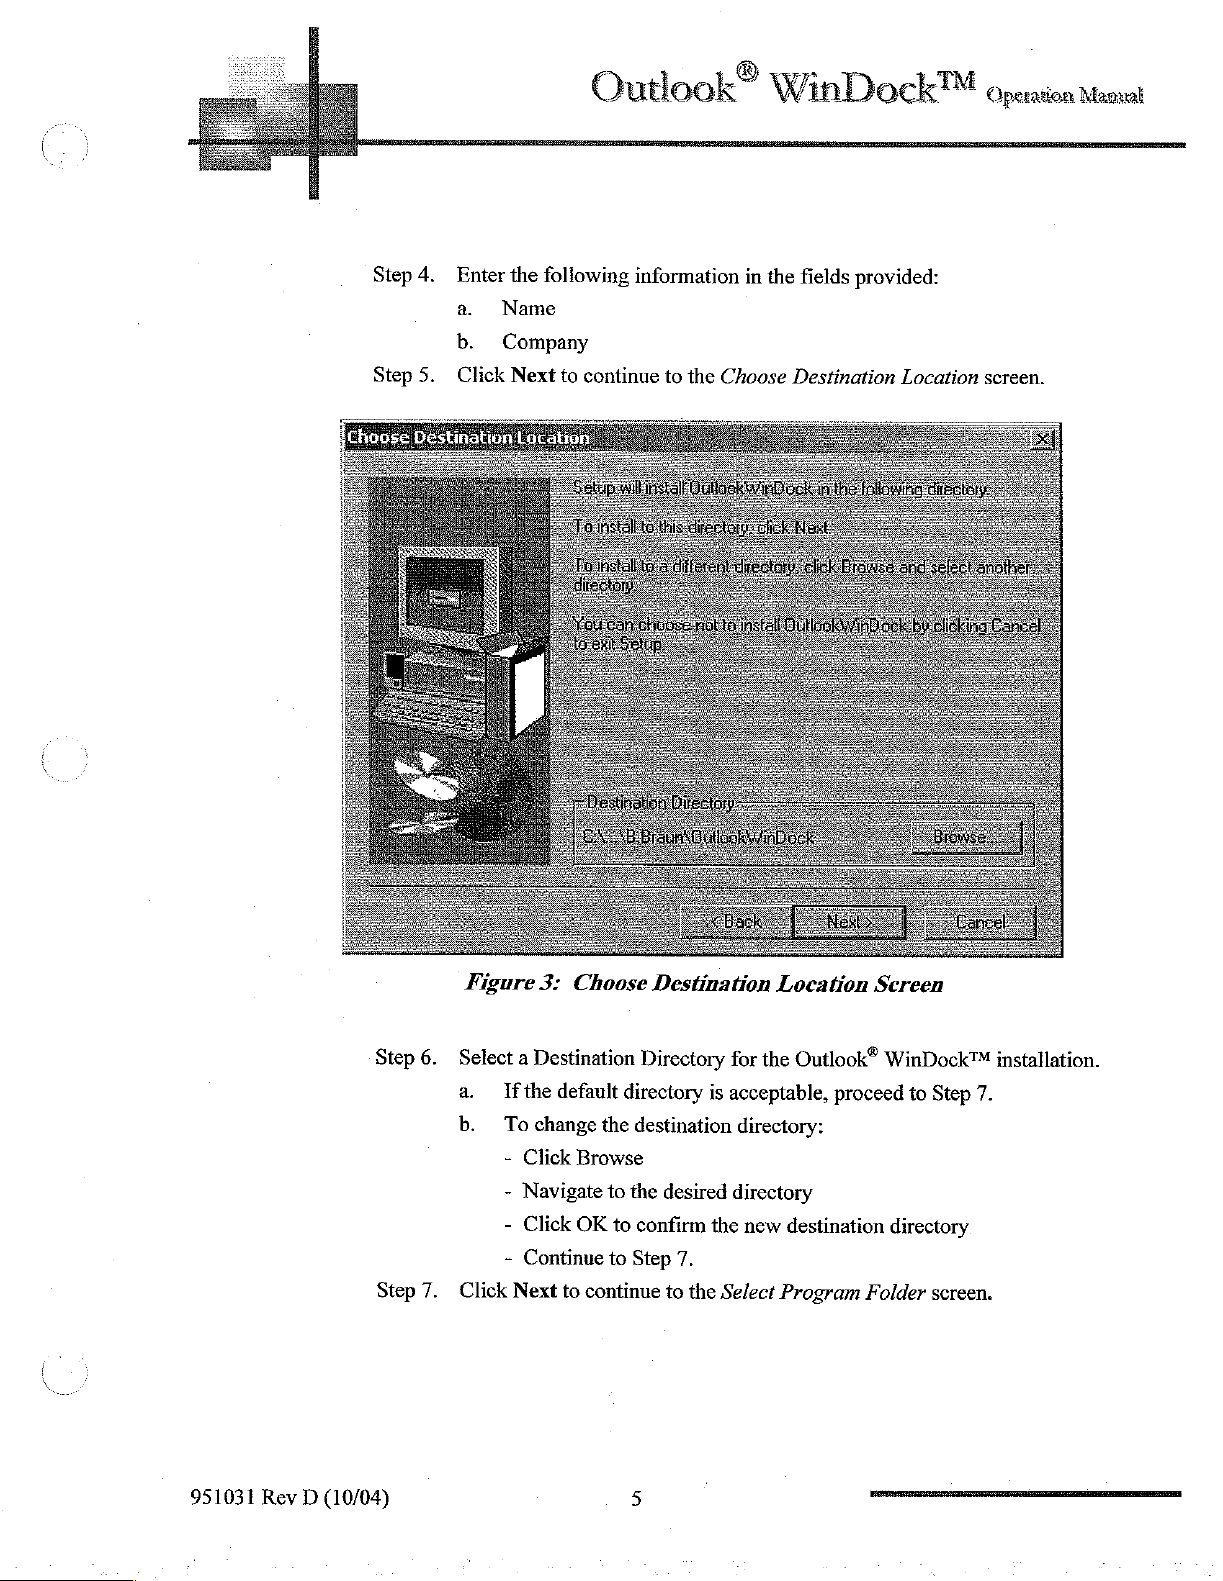
Step
Step
4.
5.
Enter
a.
b.
Click
the
following
Name
Company
Next
to
Outlook”
information
continue
to
the
WinDock™
in
the
Choose
fields
provided:
Destination
Location
Operation
screen.
Manual
B
=
ЕН
Figure
3:
Choose
Destination
Location
Screen
951031
Step
Step
Rev D (10/04)
6.
Select a Destination
a.
If
the
default
b.
To
change
Click
Navigate
Click
Continue
7.
Click
Next
the
Browse
to
OK
to
to
continue
Directory
directory
destination
the
desired
to
confirm
Step
7.
to
the
5
for
the
is
acceptable,
directory:
directory
the
new
destination
Select
Program
Outlook®
proceed
Folder
WinDock™
to
Step
directory
screen.
installation.
7.
Page 10

Outl
Adobe
ahead
America
Ac
roderbund
Nero
Online
ook®
WinD
ock!M
Operation
Manual
Step
Step
Figure
8.
Select a Program
a.
Ifthe
To
b.
-
Use
-
Create a new
-
Continue
9.
Click
Next
4:
default
change
the
to
continue
Select
Folder
Program
the
Program
scroll
Program
to
Step
Program
for
bar
to
9.
to
the
the
Outlook®
Folder
Folder:
select
Folder
Start
Folder
WinDock™
is
acceptable,
from
existing
name
Copying
Screen
proceed
Program
in
the
space
Files
application.
to
Folder,
provided
screen.
Step
9.
or
951031
Rev D (10/04)
6
——
Page 11

Figure
Step
10.
Step
The
installation
A
*
Verify
a.
11.
Click
Status
the
If
desired,
installation
Next
process
updates
bar
5:
Current
to
to
begin
will
now
indicate
to
Start
Settings
change
option
the
install
Copying
information
a
setting
screen
Setup
the
Outlook®
percent
Files
is
click
WinDockTM
complete
Screen
correct
Back
to
return
to
the
application:
applicable
951031
Rev
D
(10/04)
7
VIII
Page 12

Outlook®
WinDock™
Operation
Manual
Figure
6:
Setup
Screen
951031
Rev D (10/04)
8
|
_———___________é
Page 13

Figure
When
all
files
have
been
Step
12.
Optional,
WinDock™
Step
13.
Click
Finish.
Connect
For
Outlook®
Horizon®
For
the
Windoc
Pump
Step
Step
Step
Step
and
Step
Step
ΚΤΜ
Biomed
1.
Ifrequired,
of
the
pump.
2.
Remove
the
service
3.
Connect
4.
Connect
(configured
Horizon®
1.
Clamp
2.
Connect
(configured
NXT
the
AC
the
the
the
7:
Setup
copied,
click
power-down
outlet.
the
Yes,
when
Finish
Box
power
Biomed
RS-232
in
Configure
Setup
Launch
is
to
the
from
the
box
to
cable
to
Communication
Pumps
IR-communication
RS-232
in
cable
Configure
to
Communication
Complete
Complete
the
program
selected.
the
Pump
pump
by
pump
by
the
Db-9
the
serial
box
to
the
serial
Screen
screen
pressing
disconnecting
connector
communications
the
communications
file,
Port)
back
Port).
is
displayed:
to
the
POWER
of
the
of
the
launch
the
AC
pump.
port
pump.
port
Outlook®
key
on
power
of
the
of
the
the
cord
PC
PC
front
from
951031
Rev
D (10/04)
9
Page 14

Outlook®
Ÿ
inDock™
Operation
Manual
Configure
The
Outlook®
communication
configured.
communications
B
BRAUN
WinDock™
This
Welcome
Pump
Communication
application
port.
Prior
to
using
section
port.
This
operation
pump
previously
Operation
will
identify
!
program
Configuration
log,
family.
saved
and
allows
and
You
file.
Alarm
may
the
you
alarm
also
Logs
Port
communicates
application,
the
process
to
capture
fog
and
from
any
update a pump's
with
the
pump
the
communication
to
configure a default
save
the
member
configuration
of
the
Outlook®
configuration
Select
Communications
via a serial
port
serial
data,
infusion
from
a
must
Port
be
From
the
Step
Main
1.
End
this
Menu:
Click
The
Select
Program
Select
Communications
Communications
Figure
8:
Main
Port
Port page
Menu
is
displayed.
Feedback
Page 15

Outlook®
WinDock™
OS
operation
Manual
Select
Choose
Most
Note:
may
Communications
the
computers
Any
ports
not
be
modem, a mouse,
Back
N
Note:
desired
communications
contain
which
selected.
Figure
Non-available
These
or
other
9:
could
at
least
not
either
external
Select
ports
will
Port
port
by
ports
"COM1"
be
opened
do
peripheral.
Communication
be
grayed-out
not
are
exist
clicking
and
on a button
"COM2".
colored
or
are
Port
Screen
and
unavailable
in
gray
use
for
below.
and
by
a
selection.
N
Step
Step
2.
Click
(A
3.
Click
Note:
If
device,
the
black
Back
the
selected
the
following
Figure
Radio
dot
appears
to
Button
confirm
communication
pop-up
10:
for
next
the
message
Serial
the
desired
to
the
port
selection
port
will
Port
Conflict
COM
selected
and
return
is a serial
be
displayed
Pop-up
port
to
be
to
Main
device
active)
Menu
configured
when Back
Box
as a serial
is
selected.
951031
Rev D (10/04)
11
om
Page 16

Outlook®
WinDock™
Operation
Manual
Chapter 2 —
The
Outlook“
each
hospital.
user
interface. A variety
Accessing
Biomed
the
Many
Biomed
To
access
Step
Step
Step
Step
Step
Step
Step
Security
Manual
and
Each
Pump’s
of
the
pump’s
Menu.
the
Biomed
1.
Ifrequired,
2.
Press
3.
Press
4.
Press
5.
Press
6.
Press
7.
Enter
Code
Configuration
Horizon®
pump’s
Biomed
configurable
Menu,
MENU
the
ENTER
the
ENTER
the
family
Biomedical
of
options
perform
press
CURSOR
Cursor
Biomed
of
may
Menu
options
HOLD
keys
keys
to
Security
pumps
the
to
highlight
can
Menu
contains
be
activated
are
enabled
following
place
to
highlight
Code.
of a Pump
be
customized
the
configuration
in
either
from
or
steps
on
the
the
pump
in
the
the
Alternate
Biomed
See
Options
Biomed
Security
to
fit
the
the
Main
or
configured
pump:
Hold
State.
Menu
option
Code
specific
options
within
for
Alternate
the
on
pg.
needs
the
Menu.
12.
of
The
security
proper
Press
Each
Examples:
The
Press
The
Press
sequence.
the + keys
key
N
correct
the + key
e
One
e
Ten
e
Thousand
*
Hundred
correct
the + key
e
Tens
e
Thousand
e
One
e
Hundred
code
is
pressed
Note:
before
sequence
sequence
works
The
under
only
The
user
the
pump
under
1“
ord
3'İ
4%
under
1
2%
3rd
4%
by
pressing
security
the
‘Volume
one
time.
is
allowed
is
returned
for
"3421"
the
Volume
for
"2413"
the
Volume
the
number
to
Do
three
is:
to
be
is:
to
Primary
is
created
be
Delivered’
not use
(3)
to
the
Delivered
be
Delivered
Volume
randomly
the
tenth
attempts
menu
state.
in
in
to
each
numeric
key.
to
enter
the
following
the
following
be
Delivered
time
display
the
correct
sequence
sequence
the
screen
to
display
keys
in
the
is
"1111."
security
shown.
code
951031
Rev D (10/04)
12
azman
E
TS
Page 17

Outlook®
WinDock™
Operation
Manuel
How
to
Configure
Default
Enter
Enter
(pg.
Menus
From
Occlusion
From
Configuration
the
Biomed
Menu
12).
the
Step
Step
Step
Step
Step
Step
the
Step
Step
Step
Step
Step
Biomed
1.
2.
3.
4.
5.
6.
Limit
Biomed
1.
2.
3.
4.
5.
Menu:
Press
the
Press
Enter
Press
Enter
A
list
of
Press
the
Alternate
Press
up
Enter
Press
Menu:
Press
Cursor
Press
Enter
A
list
of
Select
from
Use
the
Press
the + or - keys
Information
by
following
Cursor
items
right
Menu,
and
items
Cursor
again
appears
and
Main
down
return
to
keys
appears
the
following
Up
keys
to
the
to
highlight
left
Cursor
Menu
Cursor
Biomed
to
highlight
options
key
to
to
change
Manually
steps
in
"Accessing
Configure
keys
or
Disabled
keys
to
scroll
Menu
Default
highlight
fixed
to
select
for
through
Occlusion
Retain
value
on
pump
the
Menus
the
appropriate
each
item
the
Limit
Last
Setting
Pump’s
list
of
or
Biomed
choice
items
Menu"
of
951031
κ
Step
Rev D (10/04)
Note:
6.
Press
The
Factory
Enter
Default
to
return
B
value
to
Biomed
is
set
Menu
to
300mmHg.
eR
A
Page 18

Outlook®
WinDock™
Operation
Manual
DoseScan™
From
Audible
Signal
Options
N
Note:
the
Biomed
Step
1.
Step
2.
Step
3.
Step
4.
Step
5.
Options
This
parameter
Menu:
Press
Cursor
Press
Enter
A
list
of
items
Press
the
up
-
Authorized
-
Patient
-
DoseGuard
Press
highlighted
-
-
Press
the
YES
NO
Enter
ID
right
(ON)
(OFF)
is
keys
to
appears
and
down
User
ID
scan,
and
Matching
and
option:
or
to
return
not
supported
highlight
Cursor
scan,
option
left
Cursor
to
Biomed
on
all
DoseScan
keys
to
toggle
keys
to
Menu
pumps.
Options
toggle
between
the
desired
the
setting
for
the
Review
From
the
Step
Step
Step
Step
Step
Time and
From
the
Step
Step
Step
Step
Step
Biomed
1.
2.
3.
4.
5.
Menu:
Press
Cursor
Press
Enter
A
list
of
Press
the
-
-
Nino)
Press up
Press
Enter
Date
Biomed
I.
2.
3.
4.
5.
Menu:
Press
Cursor
Press
Enter
Use
up and
Use + and - keys
Press
Enter
items
right
(yes)
and
keys
appears
and
or
down
to
return
keys
to
select
down
to
return
to
select
left
Cursor
to
to
highlight
the
Cursor
below
to
Audible
Cursor
keys
Biomed
option
keys
numeric
Biomed
Signal
keys
to
to
move
Menu
Review
to
highlight
display
Menu
Options
toggle
the
desired
through
Time & Date
on
the
appropriate
LEDs
to
setting
list
of
fields
enter
items
correct
data
951031
Rev D (10/04)
14
DO
E O E E 44m
Page 19

Set
Up
Drug
From
Lists
the
Step
Step
Biomed
1.
Press
2.
Press
Menu:
Cursor
Enter
Outlook®
keys
to
highlight
Set
Up
р
finDock™
Drug
Lists
Operation
Manual
Step
Step
Step
Step
Under
etc.
completed
3.
Press
centrations
4.
Press
An
5.
Press
6.
Use
a.
b.
c.
d.
each
of
the 6 separate
the
drugs
and
by
the
the
Cursor
will
be
Enter
alphabetical
the
Cursor
right
Press
-
IfN
Enter
-
Use
Example:
25,000
20,000
Use
the
-
Press
Press
listing
and
left
Enter
(no),
the
appropriate
the
Cursor
Heparin
units
units
Cursor
the
Enter
drug
concentrations
hospital
keys
to
assigned
of
keys
to
highlight
Cursor
the
system
keys
in
500
ml
in
500
ml
keys
Data
Keys
to
return
Drug
List
headings
will
highlight a Drug
drugs
appears
the
drug
keys
to
select Y (yes)
will
advance
default
to
to
concentration
to
move
move
to
to
enter
the
list
through
the
MIN
ie.
be
configured
List
to
which
to
be
placed
to
the
next
values.
the
fields
DoseGuard™
and
MAX
ICU/CCU,
drugs/con-
in
drug
on
fields.
values
MedSurg,
from a worksheet
the
Drug
on
the
the
screen.
List.
list
951031
Rev D (10/04)
Step
Step
Step
7.
8.
9.
Repeat
After
all
Press
Enter
Steps 3 through 6 for
headings
are
complete,
15
all
Drug
use
List
headings
Cursor
keys
as
required
to
highlight
Exit
a
Page 20

Outlook
WinDock™
Operation
Manual
Monitor
Set
Factory
Docking
N
N
From
the
Step
Step
Step
Step
Defaults
From
the
Step
Step
Step
Step
Step
Note:
Note:
Biomed
1.
Press
2.
Press
3.
Use
4.
Press
Note:
order
Biomed
5.
Press
6.
Press
7.
Press
8.
Press
9.
Press
This
option
Monitor
Menu:
Cursor
Enter
up and
Enter
It is
important
to
avoid
Menu:
Cursor
Enter
Cursor
Enter
POWER
is
not
Docking
keys
down
to
corrupt
data.
keys
keys
to
available
must
be
to
select
Cursor
Load
to
to
turn
keys
Factory
select
highlight
the
on
the
disabled.
Monitor
to
highlight
Defaults
Load
Factory
Yes
pump
off
Outlook®
Docking
Disable
before
Defaults
and
then
family
on
of
pumps.
configuring a pump
again
in
951031
Rev D (10/04)
16
TITTI
Page 21

Outlook®
WinDock™
Operation
Manual
Chapter 3 —
Outlook®
from a previously
additional
How
to
Capture
Setting
Up
the
Step
Step
Step
Working
WinDock™
configured
pumps
Note:
additional
Nxt.
a
Pump
Note:
(Hospital
Pump
1.
2.
3.
thus
Only
The
Access
pg.
12)
Press
Press
The
Status
with
allows
allowing
configuration
pumps;
Configuration
the
Biomedical
"golden"
simple
files
i.e.
Outlook®
Configuration
data
files
used
to
Configuration
the
Biomed
Cursor
Enter
on
keys
pump
File).
Menu.
to
select
LCD
Professional
pump
and
and
quick
from
compatible
200
to
configure
(See
"Accessing
Set
Options
graphic
to
send
that
same
configuration
pumps
Outlook®
pumps
display
200,
have a file
the
via
PC
should
Files
capture a configuration
configuration
of
multiple
can
Horizon
extension
Pump’s
be
IDLE
be
used
Nxt
Biomed
pumps.
to
to
of
file
file
to
configure
Horizon
.hcf
Menu"
on
N
Note:
the
Setting
from
Step
Step
An
overview
up
the
Main
1.
Clicking
2.
Clicking
Configuration
Pump
Menu
Pump
Setting
of
the
steps
for
these
by:
Configuration
Up
Menu
required
Operations
Pump
for
to
access
screen.
from
these
the
Biomed
This
Main
Menu
Operations
Menu
screen
from
can
Pump
are
provided
be
accessed
on
951031
Rev
(10/04)
D
7
:
nn
Page 22

НИ
Setting
TEE
Press
Move
Enter
Move
The
Outlook®
Note:
up
Pump
MENU
cursor to
the
cursor
Horizon®
key,
Biomed
to
move
item
security
item
Pump
Classic
Outlook
for
these
cursor
“Biomed
code,
"Set
Options
is
now
pumps
Operations...
to
item
"Alternate
Options",
press
ready
do
Via
to
not
press
ENTER.
PC",
send
support
WinDock™
Menu",
ENTER.
press
or
ENTER.
receive
the
configuration
Operation
press
configurations.
ENTER.
feature.
Manual
Pump
Em 0 o
ae
Setting
Up
From
the
Pump
You
may
of
the
Capture
+
Send
screen
<
E
should
Figure
Outlook®
the
Main
Menu:
Step
1.
Click
The
Configuration
use
this
program
pump
Configuration
as
desired,
Configuration
show:
11:
Setting
WinDock™
Pump
Configuration
Pump
Configuration
to
capture,
frora
Pump
to
Pump
up
Pump
Program
screen
save,
for
is
and
these
Options
displayed
restore
Page
settings
©
à
Back
951031
Rev D (10/04)
Note:
The
any
configuration
date
and
files.
time
in
Date
Figure
your
is
Aug
12:
Pump
PC
will
be
15
2004,
Setting
Configuration
18
sent
up
to
Time
Pump
the
pump
is
12:57:38
for
these
Page
along
with
PM
Operations...
Page 23

.
Outlook
A
WinDock™
rey
PA
Operation
Manual
Step2.
Figure
Step
3.
Click
Capture
À dialog
specified.
Enter a name
13:
box
Choose
Configuration
will
be
displayed
Configuration
for
the
configuration
from
to
Pump
allow
File
file
the
to
file
name
Capture
and
location
Dialog
Box
to
be
に
Step
Note:
The
(Hospital
4.
Click
Note: The
serial
port
Near
Figure
data
files
used
Configuration
Save
following
selection
pop-up
is
incorrect,
cee
14:
Warning
to
configure
File).
box
pumps
will
appear
or
if
the
Pop-up
have a file
if
pump
Box
cable
is
not
extension
connection
in
“Set
Options
of
.hef
is
incorrect,
via
PC”.
951031
Rev
(10/04)
D
19
`
CSSS
Page 24

To
clear
Step
Step
the
5.
6.
message
Click
Correct
O
and correct
OK
the
problem
utlook“
the
error
by:
WinD
condition:
ock™
Operation
Manval
Green
lights
percent
A
The
transferred
of
completion.
confirmation
version
and
configuring
checking
checking
pump
blink
during
screen
number, a unique
End
Record
cable
serial
is
not a Horizon®
the
The
status
appears
are
pump
to
Set
connections
port
selection
classic
configuration
on
the
pump
when
configuration
check
sum
for
displayed.
Options
capture
LCD
that
file
Via
PC
and
the
status
changes
capture
configuration,
from
is
complete.
bar
IDLE
the
updates
to
SENDING.
Click
number
to
indicate
OK.
of
records
the
How
951031
to
Send
Rev D (10/04)
a
Sending a configuration
configuration
Pump
Figure
Configuration
file
to
15:
to a pump,
be
downloaded
Capturing
also
called
to
the
20
Configuration
"docking
pump.
the
Page
pump,"
DS
allows
the
selected
Page 25

Outlook®
WinDock™
Operation
Manual
Setting
Setting
Up
Up
the
N
the
From
Pump
Note:
file
Step
1.
Step
2.
Step
3.
Step
4.
Step
5.
Step
6.
Step
7.
Step
8.
Step
9.
WinDock
the
Main
Step
1.
It
is
in
order
Access
on
pg. 12)
Press
Press
Press
Press
Press
Access
Press
Press
Status
Program
Menu:
Click
The
Pump
important
to
avoid
the
Biomed
Cursor
Enter
Cursor
Enter
Power
the
Enter
on
Pump
keys
key
to
the
Biomed
Cursor
Pump
Configuration
Configuration
to
Load
data
corruption..
Menu.
to
highlight
to
move
turn
the
Menu
keys
to
LCD
graphic
Factory
(See
"Accessing
Load
highlight
pump
off
highlight
display
screen
Defaults
Factory
to
“Yes”
and
then
Set
Options
should
is
displayed
prior
the
Defaults
on
again
be
to
sending a configuration
Pump’s
via
IDLE
PC
Biomed
Menu"
951031
Pump
You
of
Capture
Send
Note:
any
Back
Rev D (10/04)
Configuration
may
use
this
the
pump
Configuration
The
configuration
as
desired.
Configuration
date
program
to
and
time
files.
Figure
from
Pump
in
Date
to
capture,
Pump
your
PC
is
Aug
16:
Pump
21
save,
will
be
15
2004,
Setting
up
Configuration
and
sent
Time
Pump
restore
to
the
pump
is
12:57:38
for
these
Page
settings
along
PM
Operations...
with
Page 26

Step
2.
Click
A
specified.
Send
dialog
.
Outlook
Configuration
box
will
be
to
Pump
displayed
©
É
WinDock™
to
allow
ver
the
file
name
,
Operation
and
location
Manual
to
be
Figure
Step
3.
Select
Step
4.
Click
Green
The
increments
apturing
17:
Choose
correct
Open.
lights
number
of
up
configuration
Configuration
file
to
be
blink
and
records
during
file
the
sending
downloaded
status
bar
indicates
1661
the
as
2.hef
File
to
Send
updates
expected
to
indicate
total
Dialog
percent
and
the
Box
completed.
current
record
951031
Rev D (10/04)
Figure
18:
Sending
22
Configuration
File
Page
Page 27

N
Step
Step
Note:
number
5.
6.
The
status
RECEIVING.
The
version
of
records
С
Click
Open..
Outlook®
on
the
pump
LCD
number, a unique
transferred,
and
End
WinDock™
graphic
check
sum
Record
display
for
that
are
displayed.
changes
file
configuration,
Operation
from
IDLE
Manual
to
the
951031
Rev D (10/04)
23
ох
Page 28

Outlook®
WinDock™
Operation,
Manual
Chapter 4 -
Operation
unique
and
date
file
size
estimated
one
month's
depends
Once
be
appended
tremendous
logs,
the
See
the
If
you
for
future
a
file
approximately
compression
85%,
certain
be
responsible
Operation
Logs
can
be a useful
feature
the log
appropriate
download
compression
from
amount
of
the
log
stamped.
on
the
that
upon
amount
logs
reference, a tremendous
10
The
PC
will
under
worth
of
how
frequently
is
filled
to
the
end
will
become
Horizon
the
utility.
200
operation
can
reduce
Megabytes
of
risk
or
liable
operation
be
normal
information.
the
of
of
information
logs
is
for
and
is
that
approximately
oldest
the
an
on a regular
Without
the
down
involved
the
Alarm
tool
for
each
log
use,
the
Operation
The
the
controls
event
list,
in a First
exists
invaluable
Service
logs
amount
Manual
amount
compression
per
of
to
1.5
when
loss
or
Logs
troubleshooting
time
an
event
will
hold
255
55
kilobytes once
Log
length
of
time
of
the
pump
will
be
discarded
In
First
in
the
logs.
diagnostic
for
explanation
basis
and
wish
of
disk
you
10
Megabytes
disk
space
required
Megabytes.
you
alter
the
corruption
of
pump
is
stored
in
entries
will
Out
and
space
Please
(32
downloaded.
store
it
takes
are
manipulated.
and
the
(FIFO)
Once
familiar
troubleshooting
of
to
save
this
can
be
will
only
of
disk
space.
by
keep
files
and
data.
events.
the
bytes
approximately
to
new
symbols.
saved
be
approximately
in
B.Braun
The
log
it
is
each).
It
fill
the
log
event
will
fashion.
information
able
mind
with
if
to
File
that
will
A
the
tool.
you
store
time
The
is
a
use
not
"The
Alarm
difference
therefore
is
useful
through
will
for
all
log
is
similar
being
that
it
hold
approximately
giving a quick
of
the
user
to
the
Operation
stores
the
last
3-4
look
at
operations.
255
the
log
alarms
months
alarm
in
many
instead
of
alarm
history
ways,
of
history.
versus
the
primary
operations
The
Alarm
having
to
wade
and
log
951031
Rev D (10/04)
24
 Loading...