


 Loading...
BeoCom 5

Before you start … |
|
3 |
|
This Guide contains instructions in how to set up and use the handset with a BeoLine 2 base.
You can also use the handset with other bases, such as a BeoLine base or a BeoLine PSTN base. However, note that some functions work differently or are unavailable when you use the handset with one of these bases.
How to use this Guide
The following examples show what a key or status display looks like in an instruction sequence.
Examples of keys on the handset
|
|
The wheel |
|
|
OK |
The key in the middle of the wheel |
|
|
|
The hook key, which starts and ends a call |
|
|
0 – 9 |
The digit keys |
|
The handset display |
|
|
|
|
555 123 4567 |
If you have chosen to use two phone lines, the |
|
|
Store number |
display indicates the line currently in use with |
|
|
|
the watermarks 1 or 2. |
|
|
|
An arrow indicates that more options are |
|
|
Call |
|
|
|
|
||
|
Edit |
available if you turn the wheel clockwise. |
|
|
Primary |
|
|
|
|
|
|
|
|
|
|

4
Technical specifications, features and the use thereof are subject to change without notice!
Contents |
|
5 |
|
Get started, 7
Find out how to connect and set up the handset, use the handset keys and the display. You can also find information about maintenance.
Daily use, 21
Find out how to make and answer calls, adjust the handset volume, make calls from the Phonebook, Calls list, store a number in the Phonebook after a call, silence the handset ringer and lock the keypad.
2-line use, 35
Find out how to handle simultaneous calls on the same line, handle simultaneous calls on both lines, make a 2-line conference call and make a three-party call on one line.
Advanced operations, 41
Find out how to enter, edit and delete names and numbers in the Phonebook, store numbers from the Calls list, delete the content of the Calls list*1, call and store extension numbers, and adjust the volume level of some Bang & Olufsen audio or video products. This chapter also provides an overview of the Settings menu. Find out, for example, how to register a handset to a base, set the time and date, and select settings for the ringer.
System use with several handsets, 59
Find out how to make a handset personal or common, call another handset, forward external calls and make an internal conference call.
Menu overview, 64
Handset and base compatibility, 65
Important information about the handset, 66
Index, 67
*1 This is only possible if you use the handset with a BeoLine 2 or a BeoLine base.

6
Get started |
|
7 |
|
|
|
Quick Start |
||
The battery, 8 |
||||
When getting started, follow this |
||||
• Charge the handset battery |
procedure: |
|||
• |
Battery status |
1 |
Connect the charger or the |
|
|
|
|
Speaker Phone to the power |
|
The handset, 10 |
|
outlet as described in the |
||
• |
The handset display |
|
charger’s or Speaker Phone’s |
|
• |
Handset keys |
|
Guides; |
|
• Display and keypad backlight |
2 |
Charge the handset battery; |
||
|
|
3 |
Connect the BeoLine 2 base as |
|
Registration of the handset to a base, 14 |
|
described in the BeoLine 2 base |
||
• First-time registration of the handset to a base |
|
Guide; |
||
• Choose a colour for the handset |
4 |
Register the handset to the base. |
||
• |
Name the handset |
|
Refer to page 14. |
|
• Set the time and date |
|
|
||
• Set the handset for use with one or two lines |
This chapter describes the first-time |
|||
|
|
setup procedure in detail. |
||
Placement, surroundings, and cleaning, 20 |
|
|
||
8 |
>> Get started |
Charge the handset battery
The handset controls the battery charging, so you can always place the handset in the charger or Speaker Phone after use, even if the battery does not need recharging. Leaving the handset in the charger or Speaker Phone does not reduce the lifetime of the battery.
If the handset requires charging, this occurs automatically when the handset is placed in the charger or in the Speaker Phone. For safety reasons, the battery is not charged prior to shipping. We recommend that you charge the handset for at least one hour before proceeding further with first-time registration of the handset.
About charging …
–The charger or Speaker Phone must be connected to the power outlet.
–It takes approximately four hours to fully charge the battery.
–The maximum talk-time is up to 12 hours.
–The maximum standby-time is up to 100 hours.

9
Battery status
The battery indicator in the display shows the charge level of the handset battery. If the battery require charging, you are alerted by a message in the display and a sound signal.
To display the battery status …
OK |
Press while the handset is in standby |
|
Turn the wheel until Battery status is highlighted |
|
and press OK. The current charge level appears |
Battery status |
|
OK |
in the display |
Battery status |
The battery symbol indicates a battery status of 0, 10, 25, 50, 75 or 100% depending on how much of the symbol that is filled out.

10
3 new calls
If you do not wish to view new call information, press  .
.
>> Get started
The handset display
Switch on the display …
>Lift up the handset.
>Press OK while the handset is in idle mode.
>Turn the wheel to view options in the display.
>Press OK to select an option.
98765432 |
10:17 |
Wed 2 Jan |
3 calls |
Example of information about a new call.
*1 ’Delete Calls list’ and number types are only available if you use the handset with a BeoLine 2 or a BeoLine base.
*2 If you have selected a primary phone line, only new calls from this line will be shown.
Options in the main menu
–Lock keypad… Lock the handset keypad. Refer to page 23.
–Silence… Mute the handset ringer and battery alarm. Refer to page 24.
–Battery status … See the charge level of the battery. Refer to page 9.
–Delete Calls list … Delete the content of the Calls list. Refer to page 45*.
–Settings … Activate, adjust, or deactivate functions. Refer to page 54.
Display of new, unanswered calls
While the handset is activated but not operated, the display informs you of any unanswered calls you have received. The menu disappears when you have seen the calls, and the call information is moved to the Calls list.
‘3 new calls’ appears in the display …
>Press OK to see the number, time and date of the latest call. If the name is stored in the Phonebook, this name and the number type*1 are shown instead of the number. If you have two phone lines, you can also see which phone line, the call was received on, as a watermark in the background.*2
>Turn the wheel to see the other calls.
>When you have seen the new calls, press  to leave the menu, or …
>… press  to call the highlighted number.

11
Troubleshooting via the display
If conditions exist which impede or otherwise affect the optimal use of your phone, an alert appears in the display while the handset is in standby and remains as long as the conditions apply.
An alert appears in the display*3 …
>Turn the wheel to highlight other conditions if they apply.
>Press OK to be able to adjust relevant settings, if available.
>Turn the wheel to adjust settings, and press OK to store them.
Messages in idle mode:
The handset is not registered to a base. Press OK to start the first-time setup procedure.
There is no contact between the base and the handset.
There is no connection between the base and the phone line. This alert is only available if you use the handset with a BeoLine 2 or a BeoLine base.
The battery needs to be recharged.
The clock has not been set in the system. Press
OK to bring up the Time and date menu.
*3 If you do not wish to view the alert, .
When this symbol appears in idle mode the line is busy.

12
L1 |
HOLD |
L2 |
|
1 |
2 |
3 |
|
|
ABC |
DEF |
|
4 |
5 |
6 |
|
GHI |
JKL |
MNO |
|
7 |
8 |
9 |
|
PQRS |
WXYZ |
||
TUV |
|||
|
0 |
|
|
AV |
R |
INT |
FLASH
>> Get started
Handset keys
OK/MENU (centre of the wheel)
–Accept and store entries or choices in the display
–Depending on the state of the handset, pressing OK gives you access to additional functions or options, which you can view by turning the wheel
–Press and hold to switch the handset off, and press once to switch it on again
 Calls list
Access the Calls list.
C
Delete the last digit or letter entered or the current item in a list, when editing names, browsing the Phonebook or lists. In idle mode, press and hold to enter silent mode.
 Hook key
Press to make and end a call.
 Back key
Press to go back one level. Press and hold to exit a function.
Turn the wheel to enter the Phonebook and search in Phonebook, Calls list and the phone’s menu system. During a call, turn the wheel to adjust the volume.
[L1], [L2]
Press [L1] or [L2] to select phone line before or during calls. If you have only one phone line, store a favourite number on each button
HOLD
Place a call on hold, if you have two phone lines or switch the microphone on and off, if you have one phone line.
0 – 9 (A-Z)
Digit keys for entering phone numbers.
Used in phone numbers, for Call Forwarding and other automated services.
The handset has a ´reversed´design, where the microphone and the speaker are placed on the opposite side of the display.

13
AV
Press to be able to adjust the volume of Bang & Olufsen audio and video systems.
R (FLASH)
Used in conjunction with Call Forwarding, Call Waiting and other automated services.
For more information about the R (FLASH) services available and how to use them, contact your local service provider.
INT
Press to be able to call an internal handset. You can then look through the list of handsets with the wheel, or select a handset by pressing that handset’s number (1–8).*1
*1 If you use a BeoLine PSTN base, you can only register six handsets.
Display and keypad backlight
Backlight on the handset
–When the handset is in sleep mode, all backlight is off.
–During operation all backlight is fully on.
–During normal calls all backlight is dimmed.
–During hands-free calls, when the handset is placed in the
Speaker Phone and charging, all backlight is reduced.
–When the handset is placed in the charger, the display backlight is reduced and the keypad backlights is off.
Moreover, the backlight is switched on when you press a key, lift up the handset and when it is ringing.
You can switch off the handset indication of unanswered calls. Refer to ‘Preference settings’ on page 54 for more information.

14 |
>> Get started |
First-time registration of the handset to a base
Indicator light
The BeoLine 2 base.
You cannot use a BeoLine 2 US model in markets for Standard models, and you cannot use a BeoLine 2 Standard model in markets for US models.
*1 If you use a BeoLine PSTN base, you can only register six handsets.
For the base and the handset to be able to communicate, the handset must be registered to a base. Up to eight handsets can be registered to the same base.*1 You cannot register a handset to more than one base.
If you want to register more handsets to a base, and one or more of these handsets are BeoCom 6000 or BeoCom 2, the oldest handset model should be registered first. The functional operations will then be limited to match the operations of the oldest handset registered.
>Disconnect the base from the mains for at least two seconds and then reconnect it. The indicator light flashes, and the base is open for registration for five minutes.
When your base is open for registration, follow the procedure on the following page.

15
To register the handset to a base … |
For more information about how |
|
OK |
Press to switch on the handset. The Language |
to handle, place and connect a |
|
menu appears. Turn the wheel to select the |
BeoLine 2 base, refer to the Guide |
OK |
desired menu language and press OK |
enclosed with the base. |
Register handset
to base?
OK
Base found
36.000077123456
Base found
36.000077234567
Register handset to base? is shown in the display
Press OK. The handset searches for an open base
When a base is located, the PARK number*2 for the base is shown. Check the number against the number on the base
If the numbers do not match, turn the wheel to move through the available bases, if more than one is available. If your base is not shown, open the base for registration once more and repeat the procedure
To open the BeoLine 2 or the BeoLine base for registration of additional handsets at a later time, refer to page 57.
*2 Depending on which base you have, the PARK number can be found on a label behind the socket cover, on the socket cover, or on the bottom of the base.
OK |
If the numbers match, press to register the |
|
handset to the base |
0 – 9 |
If the base prompts you for a pincode, enter the |
OK |
pincode and press OK. The display tells you |
|
when registration is complete. You can now give |
|
the handset a colour, as described on page 16 |

16 |
>> Get started |
Choose a colour for the handset
With this handset, you can assign a colour theme to the handset display, for example, so you can recognise in which room it is placed, or which person uses it most frequently.
The functions described on these pages are also accessible via the ‘Settings’ menu. Refer to ‘Preference settings’ on page 54 for more information.
When registration is complete, the display prompts you to assign a colour theme to the handset display. This is practical if you have more than one handset. You can enter this setting at any time.
|
The Colour menu appears in the display. Turn the |
|
wheel to highlight a colour |
Colour |
|
Yellow |
|
OK |
Press OK to store the setting |
OK |
Press OK to continue first-time setup and name |
|
the handset |
17
Name the handset
When the handset display has been assigned a colour theme, the display prompts you to name the handset. This is practical if you have more than one handset. You can enter this setting at a later date, if you wish.
You can name the handset, for example, after the room in which it is placed, or after the person who uses it most frequently.
Enter handset
name?
OK
Kitchen
ABCDEFGHIJ
OK
store
ABCDEFGHIJ
OK
Kitchen
Stored
The display prompts you to enter a name. Press OK to be able to do so, or press  if you wish to skip this step
Turn the wheel to select the letters for the name. Both upper and lower case letters are available*1
Press OK to store the selected letter
When the name is complete, turn the wheel to move the cursor to the  symbol. store appears in the display
Press OK to store the name. You can now set the time and date
If you register a previously named handset to the base, this name appears in the display when registration is complete. To use the same name, move the cursor to the  symbol and press OK.
*1 Pressing OK when  in the spelling line is highlighted, switches between upper and lower case letters, if you use a BeoLine 2 or a BeoLine base.

18 |
>> Get started |
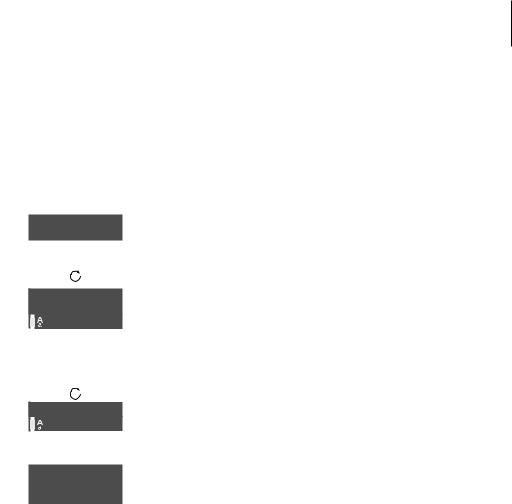
Set the time and date
When the handset is in idle mode and there are no new calls, the clock is shown in the display. The clock can be displayed in two ways, either with digits or with circles. The small circle shows the hours and the large circle shows the minutes. In the illustration above the time is 17:45, 5:45AM or 5:45PM. For further information, refer to page 55.
After you have registered the first handset, assigned a colour theme to it and named it, the display prompts you to set the time and date. The time is shown when the handset is not in use and when there is no new information in the display. Time and date are also shown with Caller ID and Redial information.
Set time and date? |
Set time and date? is shown |
OK |
Press OK to be able to set the time and date, or |
|
press if you wish to skip this step |
|
Turn the wheel to select a time format and press |
OK |
OK |
|
Set the hour and minute by turning the wheel |
OK |
and pressing OK |
|
Set the day, month and year by turning the |
OK |
wheel and pressing OK. You can now select the |
|
number of phone lines you wish to use |

19
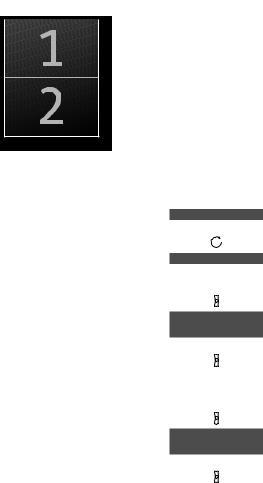
Set the handset for use with one or two lines
After you have set the time and date, the handset prompts you to select the number of phone lines you have access to.
Phone lines Phone lines appears in the display*1
1
2
|
Turn the wheel to select the number of lines and |
OK |
press OK to store |
*1 This menu step is only available if you use the handset with a BeoLine 2. If you use other bases proceed to the next step.
*2 You can register additional hand sets in this way only if you use the handset with a BeoLine 2 or a BeoLine base.
Register more |
When you have set the number of phone lines, |
handsets? |
the handset prompts you to register more |
|
handsets*2 |
OK |
Press OK if you have more handsets to register. |
|
The base is automatically opened for registration. |
Base is open |
|
for registration |
If you do not have more handsets, press . The |
|
registration is now complete and the base is |
|
closed for registration |

20
Placement and surroundings
The phone must not be placed in damp, dusty or polluted surroundings and should not be exposed to direct sunlight or liquids. Avoid the handset charging contacts touching metal or greasy parts.
Clean the handset
Clean your handset with a soft, damp cloth with a few drops of mild detergent added. To clean the charging contacts of charger, Speaker Phone and handset – and only these parts – use a cotton swab and isopropyl alcohol. Do not use isopropyl alcohol to clean any other part of the charger, Speaker Phone or handset!
Daily use |
|
21 |
|
|
|
This chapter instructs you in the |
|
Make and answer calls, 22 |
|||
daily use of the handset, such as |
|||
• |
Make a call |
making and answering calls, |
|
• |
Answer a call |
storing a number in the Phonebook |
|
• Mute a handset’s ringing |
after a call, and using the Calls list. |
||
Lock the handset keypad, 23
Silence the handset ringer and battery alert, 24
Volume and the microphone, 25
Use the optional BeoCom 5 Speaker Phone, 26
Store a number after a call, 27
Search the Phonebook and make a call, 29
Use the Calls list, 30
Store and call a favourite number, 32
22 |
>> Daily use |
Make and answer calls
If you have two phone lines and select a primary line for outgoing calls, as described on page 40, this line is accessed when you press  . If you have not selected a primary line, the line last used for an outgoing call is accessed.
If you end a call to or from a number not previously stored in the Phonebook, the display prompts you to do so. Refer to ‘Store a number after a call’ on page 27 for more information.
To get a dial tone before entering the number, press  .
.
The  key on the handset is used to start and end a call. During the call, the handset displays the duration of the call, the number or name of the person called, and if you have two phone lines, also the active line. If you do not wish to answer a call, you can mute the ringing signal with the C key.
To make a call …
L 1 or L 2
0 – 9
98765432|
98765|432
C
98765432
0:19
If you have two phone lines, the current line for outgoing calls is indicated in the display as seen in the illustration on this page. If you wish to use another line, press the appropriate line key
Enter the phone number
To correct a digit, turn the wheel to move the cursor to the digit and press C to delete it
Press to make the call. The call time is shown, and if the name is stored in the Phonebook, this is shown as well
Press to end the call. Alternatively, place the handset in the charger
To answer a call …
Press to answer the call
23456789
0:02
Press to end a call. Alternatively, place the handset in the charger
To mute a handset’s ringing …
CPress to mute the ringing signal for the incoming call.

23
Keypad locked |
You can also lock the handset key pad by pressing and holding  when the handset is in idle mode.
You can set the handset to lock auto matically when not in use. You activate and deactivate this function via the Settings menu. Refer to page 56 for more information.
Loading...