


 Loading...
I N T R O D U C I N G B E O C E N T E R A V 5 |
1 |
|
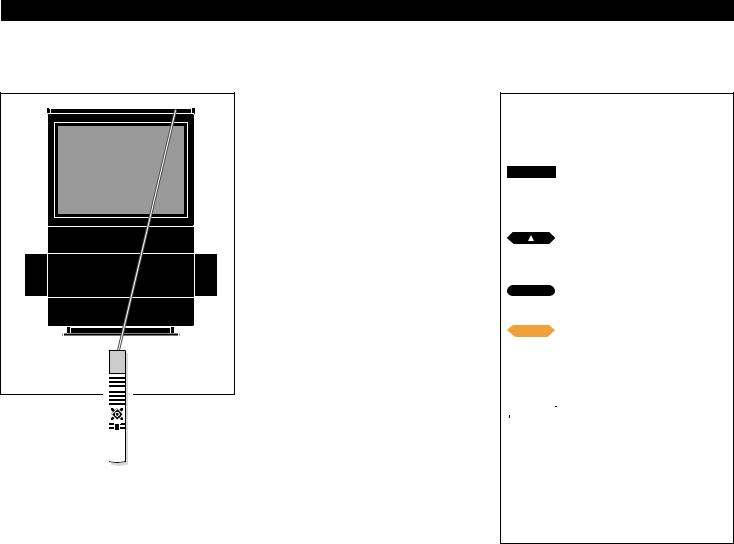
BeoCenter AV5 is an audio/video system with a built-in CD player and a
FM Radio.
The BeoCenter AV5 delivers excellent sound and picture quality. As the speakers unfold, you will be surprised and amazed over their construction and not least their sound.
With BeoCenter AV5, you have the ability to distribute sound and pictures throughout your home.
BeoCenter AV5’s simple operation will further amaze you. From a distance, you can operate all the sources available with ease with the Beo4 remote control.
This guide explains how!
User’s guide

2 |
U S I N G T H I S G U I D E |
|
Before you start…
Two guides are enclosed with the BeoCenter AV5; a User’s guide and a Setting-up guide.
We recommend that you (or your Bang & Olufsen dealer) follow the instructions in the Setting-up guide when you set up your BeoCenter AV5. If you connect auxiliary equipment to your system, you must also refer to the Setting-up guide for instruction.
Apart from explaining how to set up and make the system ready for use, the Setting-up guide also includes maintenance instructions and information which you may need from time to time.
The User’s guide then explains how to tune and preset your BeoCenter AV5 as well as operate the various sources and functions offered by BeoCenter AV5, using the Beo4 remote control.
A U T O T U N I N G
Lorem ipsum dolor sit amet.
Consec-tetuer adipiscing elit, sed diam.
Nonummy nibh euismod tincidunt
ut laoreet ...
Ut wisi enim ad dignissum qui.
Blandit praesent luptatum zril de
lenit augue duis dolore te ...
Nulla facillisi. Lorem ipsum dolor sit amet.
Consec-tetuer adipiscing elit, sed
diam feu-gait nulla facilisi...
Nam liber tempor cum soluta te nobis eleifend option.
Congue nihil imper-diet doming.
Wid sit quod mazim place-rat facer possim facilisi. Consectetuer adipiscing elit, sed diam nonummy nibh euismod tincidunt...
Duis dolore te feugait nulla facillisi. Lorem ipsum dolor sit amet, consectetuer adipiscing.
Let AV5 tune in your TV stations
SETUP |
TV |
TV SETUP
AUTO TUNING
PROGRAM LIST
TV AUTO TUNING
FREQUENCY 210
Lorem ipsum dolor sit amet, consectetuer adipiscing elit, sed diam nonummy nibh euismod tincidunt ut laoreet dolore magna aliquam erat volupat.
Ut wisi enim ad dignissum qui blandit praesent luptatum zril de lenit augue duis dolore te feugait nulla facillisi.
Lorem ipsum dolor sit amet, consectetuer adipiscing elit, sed diam feugait nulla facilisi.
Nam liber tempor cum soluta te nobis eleifend option congue nihil imperdiet doming id sit quod mazim placerat facer possim facilisi.
Consectetuer adipiscing elit, sed diam nonummy nibh euismod tincidunt.
Duis dolore te feugait nulla facillisi. Lorem ipsum dolor sit amet, consectetuer adipiscing elit, sed diam feugait nulla facilisi. Nonummy nibh euismod tincidunt or sit amet, consectetuer adipiscing elit, sed diam feugait nulla fa.
Duis dolore te feugait nulla facillisi. Lorem ipsum dolor sit amet, consectetuer adipiscing elit, sed diam feugait nulla facilisi. Nonummy nibh euismod tincidunt or sit amet, consectetuer adipiscing elit, sed diam feugait nulla fa.
Let AV5 tune in your Satellite stations
Lorem ipsum dolor sit amet, consectetuer adipiscing elit, sed diam nonummy nibh euismod tincidunt ut laoreet dolore magna aliquam erat volupat.
Ut wisi enim ad dignissum qui blandit praesent luptatum zril de lenit augue duis dolore te feugait nulla facillisi.
Lorem ipsum dolor sit amet, consectetuer adipiscing elit, sed diam feugait nulla facilisi.
Nam liber tempor cum soluta te nobis eleifend option congue nihil imperdiet doming id sit quod mazim placerat facer possim facilisi.
Consectetuer adipiscing elit, sed diam nonummy nibh euismod tincidunt.
Duis dolore te feugait nulla facillisi. Lorem ipsum dolor sit amet, consectetuer adipiscing elit, sed diam feugait nulla facilisi. Nonummy nibh euismod tincidunt or sit amet, consectetuer adipiscing elit, sed diam feugait nulla fa.
SETUP |
SAT |
SAT SETUP
AUTO TUNING
PROGRAM LIST
SAT AUTO TUNING
FREQUENCY 11.374
Duis dolore te feugait nulla facillisi. Lorem ipsum dolor sit amet, consectetuer adipiscing elit, sed diam feugait nulla facilisi. Nonummy nibh euismod tincidunt or sit amet, consectetuer adipiscing elit, sed diam feugait nulla fa.
Lorem ipsum dolor sit amet.
Consec-tetuer adipiscing elit, sed diam.
Nonummy nibh euismod tincidunt
ut laoreet ...
Ut wisi enim ad dignissum qui.
Blandit praesent luptatum zril de
lenit augue duis dolore te ...
Nulla facillisi. Lorem ipsum dolor sit amet.
Consec-tetuer adipiscing elit, sed
diam feu-gait nulla facilisi...
Nam liber tempor cum soluta te nobis eleifend option.
Congue nihil imper-diet doming.
Wid sit quod mazim place-rat facer possim facilisi. Consectetuer adipiscing elit, sed diam nonummy nibh euismod tincidunt...
Duis dolore te feugait nulla facillisi. Lorem ipsum dolor sit amet, consectetuer adipiscing.
a |
b |
b |
a |
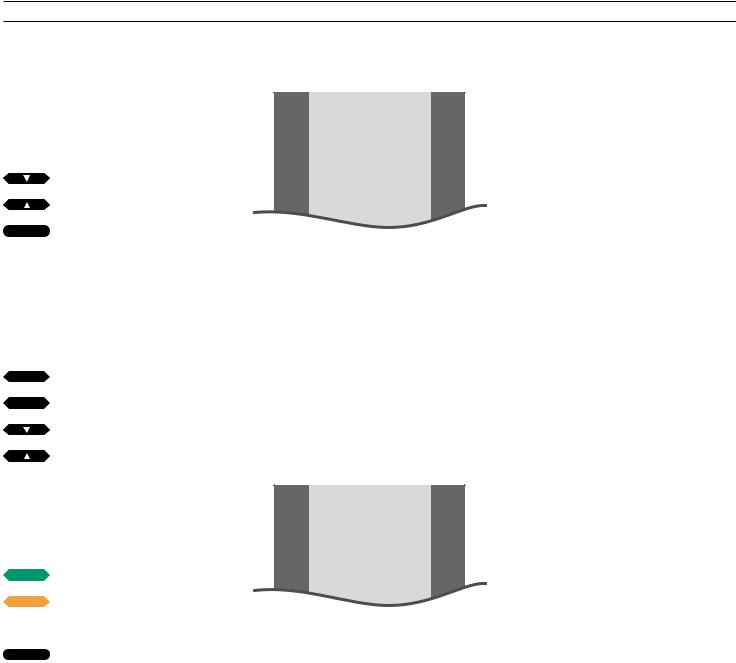
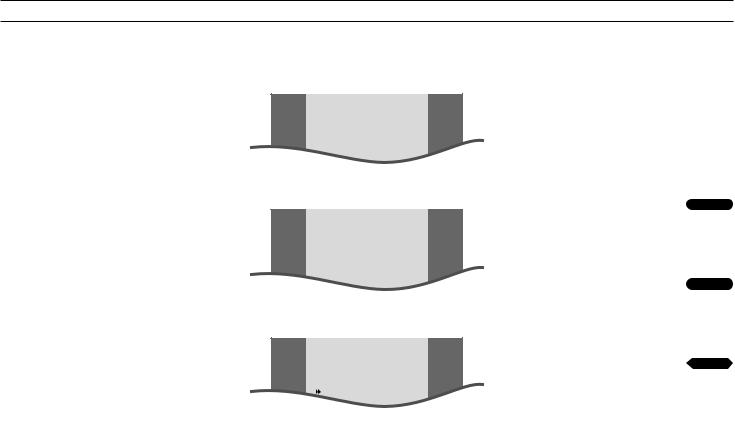
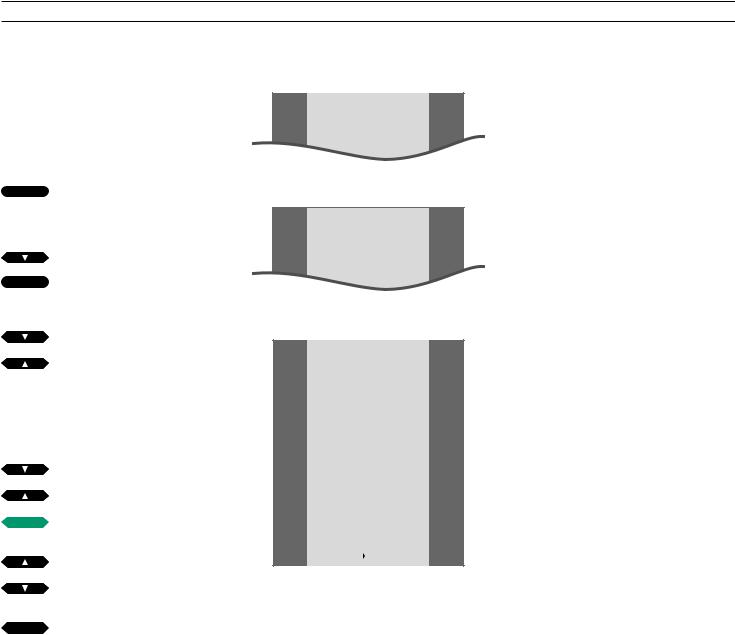
This illustration exemplifies the different types of information, presented in this guide…
The section, marked a, gives you a step-by-step instruction of the operation in question.
Section a includes:
•The buttons you must press to complete the operation. The buttons displayed correspond to the buttons on the Beo4 remote control.
•The captions which give you important information. The captions must be read in order to complete the operation successfully.
The section, marked b, supports the button sequence.
Section b includes:
• The relevant on-screen menus which you call up when you follow the step-by-step button instruction.
• A text which gives you an additional introduction to the operation in question, and provides you with examples of how you could benefit from using the function in question.
C O N T E N T S |
3 |
|
|
|
|
4 Principles of remote operation |
52 BeoCenter AV5 close-up operation |
Operating BeoCenter AV5 with Beo4, 4 Beo4 operating principles, 5
Using on-screen menus, 6
Buttons on the close-up operation panel,
52
Displayed information, 53 Direct access sockets, 54
7 Quick guide to daily operations
55 Quick guide to on-screen menus
9Tuning and presetting
Auto tuning, 9
Using the program lists, 14 Manual tuning, 16
Update the tuning of your stations, 22 Presetting stand positions, 23
Setting the clock, 24
27TV, Satellite and Teletext
Daily operations, 28 Teletext, 29
Making video recordings via Teletext, 35
37CD
CD Audio, 38
Other CD formats, 40
42Radio
Daily operations, 42
43Sound and Picture
46Timer function
Using the Timer function for play or standby, 46
48 Videotape recording
50 BeoCenter AV5 and BeoLink
4 |
P R I N C I P L E S O F R E M O T E O P E R A T I O N |
|
Your Beo4 remote control commands are registered by a small receiver in the display bar, placed on top of BeoCenter AV5 to the right
Operating BeoCenter AV5 with Beo4
Before you start operating BeoCenter AV5, it may be a good idea to familiarise yourself with the Beo4 operating principles.
Your BeoCenter AV5 is designed for remote operation using the Beo4 remote control.
Most operations are carried out via the Beo4 remote control. The somewhat more advanced functions in the BeoCenter AV5 are guided by menus which you call up on the screen (see pages 6-7).
Beo4, furthermore, integrates remote operation of your BeoCenter AV5 and the daily functions in other recent Bang & Olufsen systems.
Note: A few functions are operated directly on the small operation panel on the back of the BeoCenter display bar. Please refer to BeoCenter AV5 close-up operation, pages 52-54 for further information.
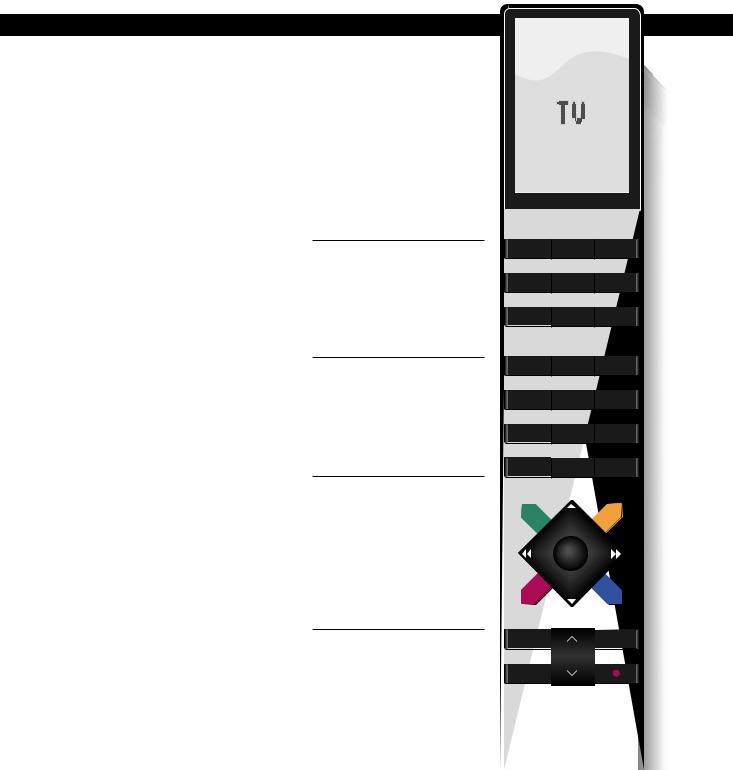
Nice to know about Beo4 buttons...
In the step-by-step operating sequences shown in this guide, the buttons on the Beo4 and cues in the Beo4 display will be illustrated like this:
TV Rectangular buttons for source control, numbers and dedicated functions, such as Teletext and menu operation
Buttons within the star-shaped button for stepping, selecting or winding
GO The circular GO button is for accepting and storing instructions
:The coloured buttons within the star-shaped button are used for special functions, it will be explained when and how to use them
|
LIST |
The double-button LIST means |
|
|
‘press repeatedly’ to reveal more |
|
|
|
|
|
cues or functions in the Beo4 LIST |
|
|
of functions |
STAND |
The cues or functions in the Beo4 |
|
|
|
display indicate either the current |
|
|
source or operation you are |
|
|
addressing or an extra function |
|
|
which you call up by pressing LIST |
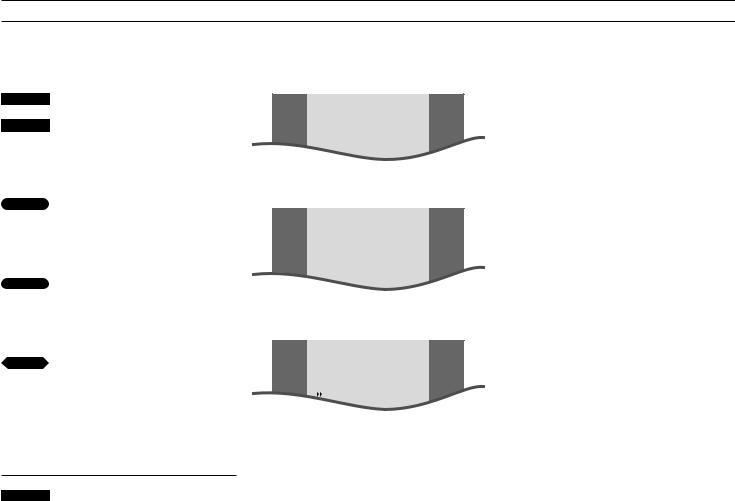
Beo4 operating principles
The Beo4 remote control is divided into 5 areas. Each area has its own dedicated functions.
The buttons are arranged so that your operation of the various functions in BeoCenter AV5 is made as simple and clear as possible.
The Beo4 display reads out which source or function you are controlling, but if you press the LIST button, the cue on the display changes and reveal more functions or buttons available for the operation of BeoCenter AV5*.
*Note: If some operations require a function or button which is not already available when you press the LIST button, you can add the function to your Beo4 and rearrange the order in which all the extra functions on Beo4 appear, please refer to Beo4’s own User’s guide and the chapter Customising your Beo4 for further instruction.
The Beo4 display tells you which source or function you are using
– It also displays extra functions.
Source buttons for switching on; buttons for Audio/Video operation and recording.
Number buttons; Teletext and menu control buttons.
The control buttons within the star-shaped button are for winding or selecting, for stepping and for accepting and storing information. The coloured buttons have special functions, it will be specified in this guide when they are needed
5
TV |
LIGHT |
RADIO |
SAT |
DVD |
CD |
V TAPE |
RECORD |
A TAPE |
7 |
8 |
9 |
4 |
5 |
6 |
1 |
2 |
3 |
TEXT |
0 |
MENU |
GO
Volume button; LIST button for |
LIST |
EXIT |
displaying extra functions; |
|
|
and “stop” buttons. |
STOP |
|
|
|
Note: Please refer to the special Beo4 User’s guide for further information about the remote control.
6 |
O N - S C R E E N M E N U S |
|
TV |
Press to switch on to TV |
then |
|
|
Press to call up the main setup menu |
MENU |
|
|
The main SETUP menu for TV |
|
appears… |
|
Press to select the item or menu you |
or |
want |
then |
Press to call up the menu you have |
GO |
|
|
chosen |
|
The menu appears… |
|
You may have to select another |
|
item on a second menu to get to |
|
the menu where you fill in |
|
information… |
In a fill-in menu… |
|
tt |
Press to reveal options for an item |
or |
or activate a function, such as |
ss |
tuning |
|
Press to move from item to item in |
or |
the menu |
Using on-screen menus
SETUP
TV
TIMER
PICTURE
SOUND
STAND
CLOCK
Main setup menu for TV
TV… gives access to tuning of stations and the program list which lists the tuned stations.
TIMER… for programming your BeoCenter AV5 to switch on or switch to standby automatically.
PICTURE… for adjusting the picture SOUND… for adjusting the sound
STAND… for turning your BeoCenter AV5 and presetting stand positions.
CLOCK… for setting the BeoCenter AV5 inbuilt clock.
AV SOCKET… for registering any extra equipment connected to your BeoCenter AV5.
|
If it is required… |
|
use the number keys to fill in |
0 |
|
through |
information for an item |
|
|
|
|
menus, e.g. the menu listing your tuned must…
·Press the Green or Yellow button to
or |
carry out a function |
:
Once you have entered the required information…
GO Press GO to store the information you entered
CLOCK
TIME |
20:00 |
DATE |
FRI 10 |
MONTH |
SEPTEMBER |
YEAR |
1996 |
TEXT TIME |
DR |
Example of a fill-in menu – the menu for setting the clock
Your BeoCenter AV5 on-screen menu system will assist you when you have to carry out the more advanced functions for BeoCenter AV5 such as tuning or presetting values for the system.
To get access to the on-screen menus, you must call up the main setup menu. Each source, TV, Satellite, CD and Radio, has its own main setup menu. Each item in a main menu then gives access to a menu for a particular function.
In some menus, you must fill in information, e.g. key in numbers or browse through available options for a particular item. The content of some of these menus change when you select specific items. This is intended to further assist you in your operation of these particular functions.

TV LIGHT RADIO
SAT |
DVD |
CD |
V TAPE |
RECORD |
A TAPE |
7 |
8 |
9 |
4 |
5 |
6 |
1 |
2 |
3 |
TEXT |
0 |
MENU |
GO
LIST |
EXIT |
STOP |
|
Q U I C K
Daily operations
Your BeoCenter AV5 supplies you with both audio and video sources. You can watch TV or Satellite* stations, choose to play CDs or listen to the Radio.
You switch on the different sources by pressing the appropriate source buttons on Beo4.
While you are watching or listening to a source, you can select the different program numbers or tracks directly, or step through all the program numbers or tracks.
Likewise, you can raise or lower the volume, and mute the speakers at any time.
*Note: In order to receive Satellite, your BeoCenter AV5 must be specially equipped for Satellite reception. Please contact your Bang & Olufsen dealer for further information about an built-in Satellite receiver.
G U I D E |
7 |
|
Switching on… |
|
Press to switch on TV |
|
TV |
|
Press to switch on Satellite |
|
SAT |
|
Press to switch on Radio |
|
RADIO |
|
CD operation… |
|
Open the CD compartment by pressing |
|
the LOAD button on the BeoCenter |
|
AV5 close-up operation panel and load |
|
Press to switch on your CD |
|
|
|
Press to search forward or |
|
backward on a CD |
|
Press to pause CD playback or |
|
|
|
searching |
|
Press to stop searching and resume |
GO |
playback |
|
Selecting program numbers or tracks… |
|
Use the number keys to select |
|
0 |
|
specific program number or select |
through |
specific tracks on a CD |
|
9 |
|
or |
|
Press to step through stored |
|
program numbers or tracks |
or |
Adjusting volume… |
|
Press to raise the volume |
|
Press to lower the volume |
|
Pressing the Volume button right |
|
on the middle silences the speakers, |
|
press again to recall the sound |
|
|
|
Press to switch to the system to |
|
• |
|
standby |
|

8
T U N I N G A N D P R E S E T T I N G |
9 |
|
10Auto tuning
Let AV5 tune in your TV stations
Let AV5 tune in your Satellite stations
Let AV5 tune in your Radio
stations
14Program lists
Using the program lists Naming a station
Moving or clearing a station
16Manual tuning Tuning in TV stations
Tuning in Satellite stations
Tuning in Radio stations
22Update tuning
Update the tuning of your stations
23Stand
Setting your favourite stand positions
24Clock
Setting the clock
10 |
A U T O T U N I N G |
|
TV Press to tune in TV stations
then
MENU Press to call up the main setup menu
The main SETUP menu for TV appears, TV is lit up…
then
Press to call up the menu for TV setup
The TV SETUP menu appears, AUTO
TUNING is lit up…
GO Press to call up the menu for auto tuning
The TV AUTO TUNING menu appears…
ttPress to start auto tuning TV stations
(Pressing STOP stops auto tuning)
When auto tuning is completed, the program list with the tuned stations appears automatically…
EXIT Press to remove the menus from the screen
Let AV5 tune in your TV stations
SETUP
TV
Main setup menu for TV
TV SETUP
AUTO TUNING
PROGRAM LIST
UPDATE TUNING
Special setup menu for TV
TV AUTO TUNING
FREQUENCY 210
Menu for auto tuning TV stations
The BeoCenter AV5 auto tuning function tunes in all your TV stations automatically. Before you call up the menu for auto tuning, you must choose TV as your source.
You can tune in up to 79 TV stations. As the tuning progresses, the registered stations appear on the menu. For most stations, a name is registered automatically.
If a station appears without a name, you can name the station in the program list which appears when the auto tuning of stations is completed.
See page 14 for instructions of how to use the program list.
Note: If a station requires a decoder, it will be selected automatically during tuning, provided the decoder has been connected to the dedicated decoder socket on the back of BeoCenter AV5.
Note: If the auto tuning function fails to tune in a particular TV station, you may have to use the manual tuning function, see pages 16 -17 for further instruction.
Let AV5 tune in your Satellite stations
Please note…
If your Satellite arrangement includes a motorised dish, please refer to the following page for further information before you start your auto tuning…
The BeoCenter AV5 auto tuning function tunes in all your Satellite stations* automatically. Before you call up the menu for auto tuning, choose Satellite as your source.
You can tune in up to 119 Satellite stations. As the tuning progresses, the registered stations appear on the menu. For most stations, a name is registered automatically.
See page 14 for instructions of how to use the program list and name a station if necessary.
*Note: In order to receive Satellite, your BeoCenter AV5 must be especially equipped for Satellite reception. If a Satellite station requires a decoder, it will be selected automatically during tuning, provided the decoder is connected to the dedicated decoder socket on the back of BeoCenter AV5.
Due to special circumstances, the auto tuning function may fail to tune in particular Satellite stations. If this is the case, use the manual tuning function to tune in stations, see pages 18 -19 for further instructions.
SETUP
SAT
TIMER
Main setup menu for Satellite
SAT SETUP
AUTO TUNING
PROGRAM LIST
UPDATE TUNING
Special setup menu for Satellite
SAT AUTO TUNING
FREQUENCY 11.374
Menu for auto tuning Satellite stations
11
Press to start tuning in Satellite |
SAT |
stations |
|
|
then |
Press to call up the main setup |
|
MENU |
|
menu |
|
The main SETUP menu for Satellite |
|
appears, SAT is lit up… |
|
Press to call up the menu for |
then |
GO |
|
Satellite setup |
|
The SAT SETUP menu appears, AUTO |
|
TUNING is lit up… |
|
Press to call up the menu for auto |
GO |
tuning |
|
The SAT AUTO TUNING menu appears… |
|
Press to start auto tuning Satellite |
tt |
stations |
|
(Pressing STOP stops auto tuning) |
|
When tuning is completed, |
|
the program list with the tuned |
|
stations appears automatically… |
|
|
|
Press to remove the menus from the |
|
EXIT |
|
screen |
|

12 > Auto tuning – Satellite
Auto tuning of Satellite equipped with motorised dish…
If your Outdoor Unit arrangement for Satellite reception includes a motorised dish and an external positioner, you must direct the position of the dish to the Satellites you want to auto tune stations from.
Once the external positioner is connected to your BeoCenter AV5, start the tuning process using the Beo4:
•Press SAT, then MENU, and now press GO to call up the SAT SETUP menu
•Press ▼ until MANUAL TUNING is lit up, then press GO to call up the menu
•Then tune in to a frequency of an appropriate station transmitted by the Satellite you are trying to tune in from
•Press ▼ until POSITION is lit up and adjust with ss or tt as required.
•Now press STOP to leave the SAT MANUAL TUNING menu
•Then press ▲ until AUTO TUNING is lit up and press GO to call up the SAT AUTO TUNING menu and press tt to start auto tuning stations
Repeat the procedure for the stations which are tuned in from other Satellites and adjust the position of the dish as appropriate.
However, in order to keep the stations you have tuned in already, and just auto tune the new Satellite stations, you must call up the item UPDATE TUNING instead of AUTO TUNING, see page 22 for further information about the update tuning function.
Let AV5 tune in your Radio stations
The BeoCenter AV5 auto tuning function tunes in all your Radio stations automatically. Before you call up the menu for auto tuning, you must choose Radio as your source.
You can tune in up to 59 Radio stations. As the tuning progresses, the registered stations appear on the menu with a program number and a name, if any such is registered*.
If a station’s frequency appears on the menu, you can name the station in the program list which appears on the screen as soon as the auto tuning is completed.
See page 14 for instructions of how to use the program list.
*Note: Names for Radio stations are only registered automatically if RDS is broadcast with the station. RDS is a facility which enables Radio broadcasters to transmit information such as a station name along with the station itself. If RDS is not broadcast, the station’s frequency will appear on the menu.
SETUP
RADIO
TIMER
Main setup menu for Radio
RADIO SETUP
AUTO TUNING
PROGRAM LIST
UPDATE TUNING
Special setup menu for Radio
RADIO AUTO TUNING
FREQUENCY 92.8
Menu for auto tuning Radio stations
13
Press to start tuning in Radio |
RADIO |
stations |
|
|
then |
Press to call up the main setup menu |
|
MENU |
|
The main SETUP menu for Radio |
|
appears, RADIO is lit up already… |
|
Press to call up the menu for Radio |
then |
GO |
|
setup |
|
The RADIO SETUP menu appears, |
|
AUTO TUNING is lit up… |
|
Press to call up the menu for auto |
GO |
tuning |
|
The RADIO AUTO TUNING menu |
|
appears… |
|
Press to start auto tuning Radio |
tt |
stations |
|
(Pressing STOP stops auto tuning) |
|
When tuning is completed, |
|
the program list with the tuned |
|
stations appears automatically… |
|
|
|
Press to remove the menus from |
|
EXIT |
|
the screen |
|
Note: If the auto tuning function fails to tune in a particular Radio station, you may have to use the manual tuning function, see pages 20 -21 for further instructions.
14 |
P R O G R A M L I S T S |
|
TV |
Press to select a source, e.g. TV, |
then |
|
|
Press to call up the main setup |
MENU |
|
|
menu |
|
The main SETUP menu for TV |
|
appears… |
then |
Press to call up the menu for TV |
GO |
|
|
setup |
|
The TV SETUP menu appears… |
then |
|
|
Press until PROGRAM LIST is lit up |
then |
|
GO |
Press to call up the program list for |
|
TV |
|
The TV PROGRAM LIST appears… |
|
Press to move down the list |
or |
|
|
Press to move up the list |
or |
|
|
Use the number keys to select a |
0 |
|
through |
station |
|
|
9 |
|
|
|
To name or rename a station in the list… |
|
|
Press to select the station you want |
or |
to name |
then
·Press the Green button to name a station
then |
|
|
Press to display the first character |
or |
in a name |
then
ttPress to move to the next space and accept the first character
See the button sequence on the following page for further instruction…
Using the program lists
SETUP
TV
Main setup menu for TV
TV SETUP
AUTO TUNING
PROGRAM LIST
UPDATE TUNING
Special setup menu for TV
TV PROGRAM LIST
1DR
2TV2
3ZDF
4EURO
5. . . . . . . .
6ARD
7TCC
8CMT
9TV3
10CNN
11. . . . . . . .
12INFO
13SAT1
14FILMNET
15TV5
16. . . . . . . .
17MTV
18RTL
19SUPER
•NAME  MOVE/CLEAR
Menu listing the TV stations you have tuned in – the TV program list
If you have just auto tuned your TV, Satellite or Radio stations, a program list for the appropriate source will appear on the screen.
You can use the program lists to call up, name, move or clear a tuned station.
Naming a station…
For most stations, names will be available in the program list already. Names for TV and Satellite stations appear automatically during auto tuning. For Radio stations, a name may appear both during auto and manual tuning.
If you wish, you name a station which has not been named already.*
Moving or clearing a station…
Via the program list, you can clear or move a station to a different program number. If the new program number, you choose, is already occupied, the ‘new’ station and the ‘old’ station will change places. Now move the ‘old’ station to another program number.
15
*Naming a station…
If you choose to name a station yourself, the station or program number you select will be emphasised to make the actual naming easier, as illustrated on the program list for TV stations to the right.
To write a name character by character, you press ▲ or ▼ until you find the first character you want in your name. For TV or Satellite, this character may appear as a part of a preset name which has been entered to make the naming process easier and faster. In order to match up the station with an appropriate preset name, move to the next space and press ▲ or ▼ to find the second character in a name.
If a preset name is available for the station in question, it may appear automatically, and all you have to do is accept this preset name. If an appropriate name does not appear, you simply move to the next space and repeat the procedure
– 8 character spaces are available for a name.
With respect to Radio stations, the station’s own name may be broadcast via the RDS facility and appear during auto tuning or manual tuning. If no name is broadcast, the Radio frequency will appear on the list. If you choose to name a Radio station which has already been given a name via the RDS facility, the information received via RDS will be cancelled for this particular station. If you store the station again, however, the RDS facility will of course apply again.
TV PROGRAM LIST
1DR
2TV2
4EURO


The program list for TV stations – with the naming function activated
TV PROGRAM LIST
1DR
2TV2
3ZDF
4EURO
5. . . . . . . .
6ARD
7TCC
8CMT
9TV3
10CNN
11. . . . . . . .
12INFO
13SAT1
14FILMNET
15TV5
16. . . . . . . .
17MTV
18RTL
19SUPER
 MOVE/SWAP •CLEAR
The program list for TV stations – the station you wish to move to another program number or clear has been moved outside the list
Press ▲ or ▼ repeatedly to reveal the second character for this space or find the appropriate preset name…
If no preset name is available – continue |
|
to move to different character spaces |
|
and ‘write’ the name… |
|
Press GO |
then |
GO |
|
|
|
To move or clear a station in the list |
|
Select the station you want to move |
|
or clear |
or |
Press to move the station out next |
then |
tt |
|
to the list |
then |
To move the station… |
|
Press to move it down or up the |
|
list to its new program number |
or |
|
then |
Press to move the station back into |
ss |
the list |
|
If two stations change places, now |
|
the ‘old’ station to another program |
|
Or, clear the station… |
|
Press the Yellow button twice to |
: |
clear the station |
: |
Press to remove the menus from |
EXIT |
the screen |
|
16 |
M A N U A L T U N I N G |
|
TV |
Press to select TV |
then |
|
|
Press to call up the main setup |
MENU |
|
|
menu |
|
The main SETUP menu for TV |
|
appears… |
then |
Press to select TV and call up the |
GO |
|
|
menu |
|
The TV SETUP menu appears… |
then |
|
|
Press until MANUAL TUNING is lit |
then |
up |
GO |
Press to call up the menu |
|
The TV MANUAL TUNING menu |
|
appears… |
tt |
Press to start tuning |
or |
|
ss |
|
|
Alternatively, key in the exact |
|
frequency, using the number keys |
|
(Pressing STOP stops tuning) |
Once a station is found, then press ▼ to move to the other items in the menu…
1 Key in a program number e.g. 12
2
Now, press GO to store your station…
Or, continue to follow the instructions on the following page…
Tuning in TV stations
SETUP
TV
Main setup menu for TV
TV SETUP
AUTO TUNING
PROGRAM LIST
UPDATE TUNING
Special setup menu for TV
TV MANUAL TUNING
FREQUENCY 210
PROGRAM 10
Menu for manual tuning of TV stations
TV MANUAL TUNING
FINE |
0 |
DECODER OFF
The second menu for the manual tuning of TV stations
Before you start…
On a multi-standard BeoCenter AV5, several broadcast systems may be available for stations, so check that the correct broadcast system is displayed before you start tuning, otherwise some stations may not appear during tuning. To do so, call up the second menu for manual tuning of TV stations, then select the correct system.
You can tune in your stations yourself. Assign them with a program number, as well as a name, and, if it proves necessary, determine whether a decoder should be cut in.
You can furthermore choose a type of sound or language you wish to store for your station.

17
What’s on the TV MANUAL TUNING menu…
FREQUENCY
Indicates the TV frequency.
PROGRAM
Program number – 79 program numbers are available.
ID (Name)
Naming stations – ‘write’ a name by revealing the individual characters for each character space – 8 characters spaces are available. When you reveal the first characters, an appropriate preset name may appear. If no preset name is available – then continue to ‘write’ the name character by character.
What’s on the second TV MANUAL TUNING menu…
FINE
Fine tuning – usually the TV tunes to the best possible picture, however, neighbouring channels may blur the picture slightly. Fine tune within a range of +8 – -8.
DECODER
A decoder can be connected to the reception of coded TV stations. If DECODER is set to one of the ON options, the decoder will be cut in automatically when the relevant program number is selected.
The following options are available for DECODER: ON/AV… (decoder on) where both audio and
video signals are coded
ON/V… (decoder on) where only video signals are coded
OFF… (decoder off) for no decoder
Select ON/AV for most coded stations, in order to get both sound and pictures. If only the video signal is coded, select ON/V. If you select ON/AV where only the video signal is coded, the sound may be lost when the signal is decoded.
Note: If an extra decoder is connected to the AV socket and DECODER-2 is registered in the AV socket menu (see the Setting-up guide for further information), select 1/V or 1/AV for Decoder number 1; 2/V, 2/AV for Decoder number 2; or OFF for no decoder.
SOUND (mono/stereo/language)
The following types of sound may be available: MONO… FM/NICAM mono sound STEREO… NICAM/ A2 stereo sound MONO1… Mono language 1
MONO2… Mono language 2
MONO3… Mono language 3
STEREO2… Stereo language 2
Note: MONO3 and STEREO2 are only available, if a NICAM stereo system decoder is built into your BeoCenter AV5.
Even though you store your preferred type of sound/language in this way, you may still switch between the various types of sound while you are watching this TV station. See page 44, Switching sound, for further instruction.
To name a station… |
|
Press to move to ID |
|
|
or |
Press the Green button to start |
· |
naming |
|
Press to reveal the first character |
|
in a name |
or |
Press to move to the next character |
tt |
spaces |
|
Press ▲ or ▼ to reveal the second character preset name – if no name is available,
next character space, and reveal the characters…
Press to store your station and, |
GO |
if you wish, continue tuning |
|
To fine tune, make decoder or sound selections for your station…
Press repeatedly to call up to the second manual tuning menu
The second TV MANUAL TUNING menu appears…
Use ▼ or ▲ to move to the other items, and press ss or tt to reveal options for an item…
Press to store and return to the first |
GO |
tuning menu |
|
Press to store your station |
then |
|
|
Continue to tune in stations… |
|
Or |
|
Press to remove the menus from |
|
EXIT |
|
screen |
|
Loading...