


ROG Phone ZS661KS
Table of contents
 Loading...
ZS661KSZS661KS
User Guide
E16902
July 2020
First Edition
Notify the customer of a change of premises
We, ASUS Computer International, will move to a new location on August 1st, 2018.
New address and telephone number are shown as follows:
New Address: 48720 Kato Rd., Fremont, CA 94538
Telephone Number: (510) 739-3777
Kindly forward your contacts to the above address after the date.
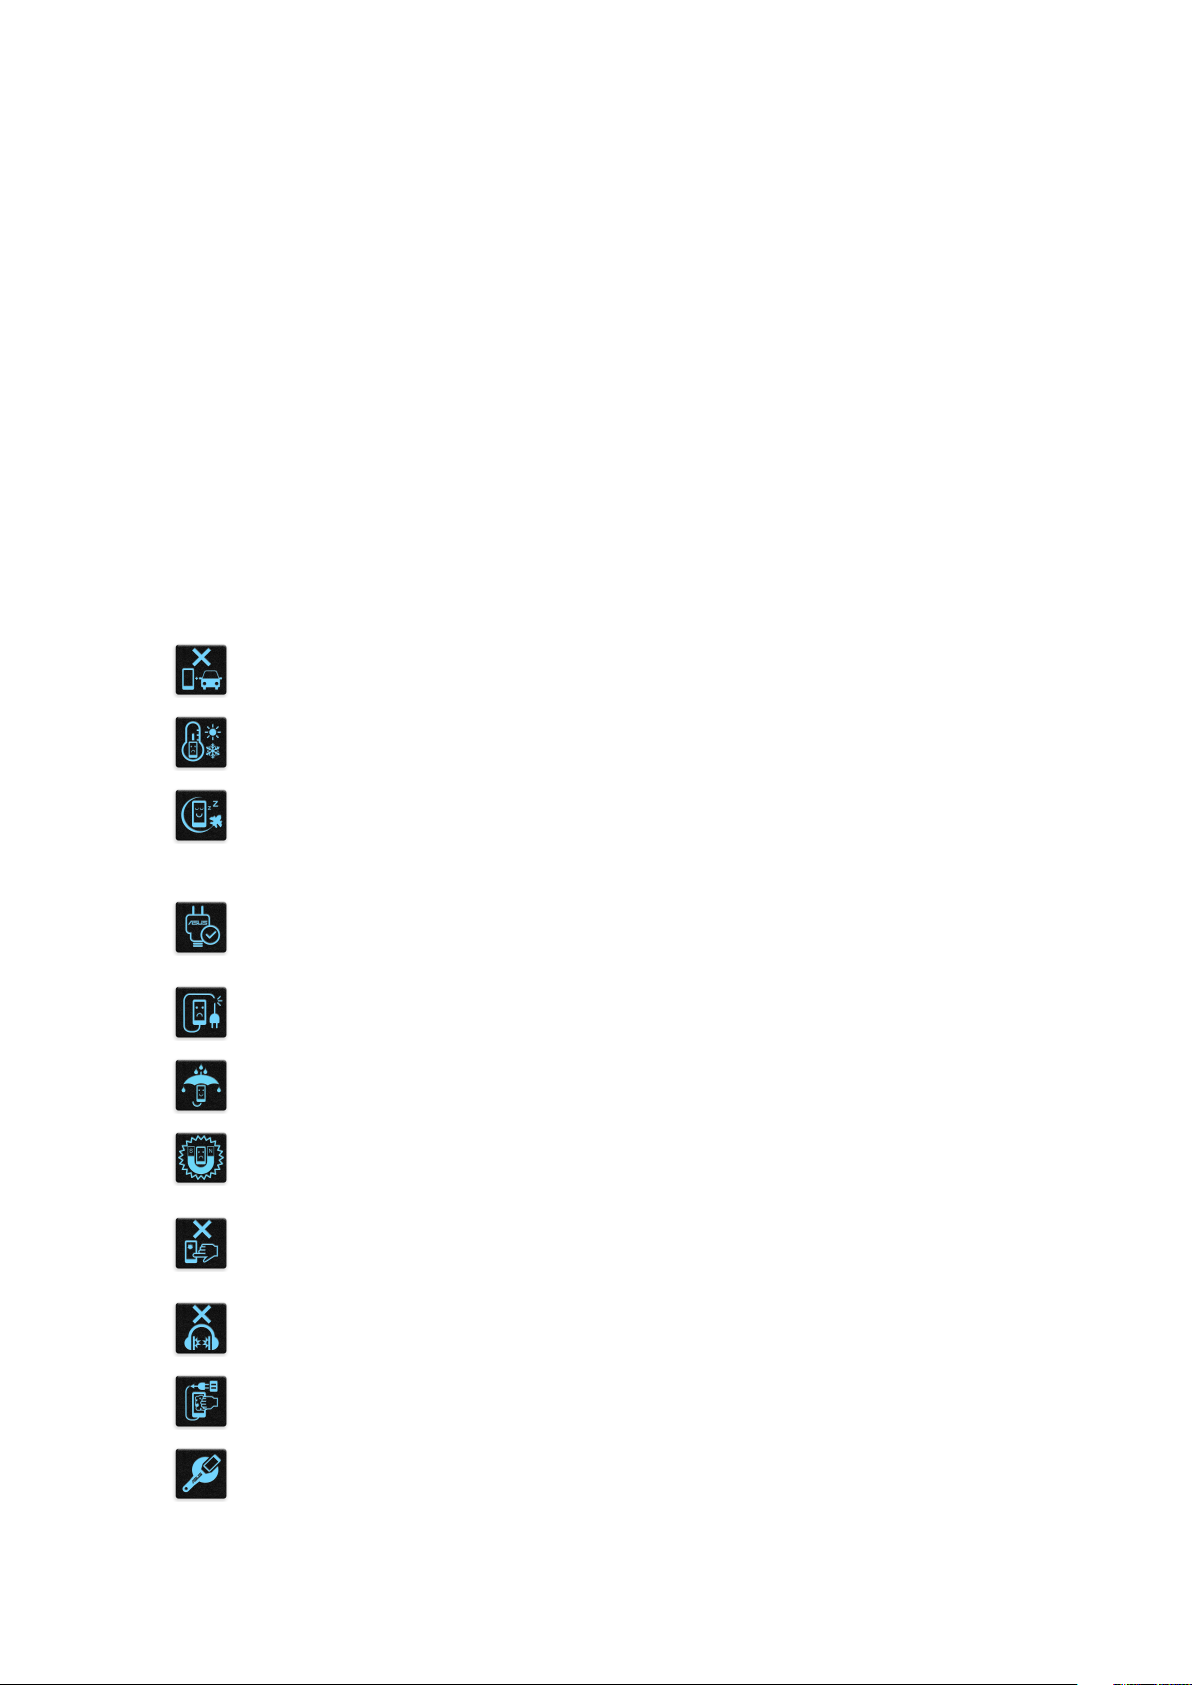
Care and safety
Guidelines
Road safety comes rst. We strongly recommend not to use your device when
driving or operating any type of vehicle.
This device should only be used in environments with ambient temperatures
between 0°C (32°F) and 35°C (95°F).
Turn o your device in restricted areas where the use of mobile devices is prohibited.
Always obey rules and regulations when in restricted areas, such as, in aircraft, movie
theater, in hospitals or near medical equipment, near gas or fuel, construction sites,
blasting sites and other areas.
Use only AC adapters and cables approved by ASUS for use with this device. Refer to
the rating label on the bottom of your device and ensure that your power adapter
complies with this rating.
Do not use damaged power cables, accessories, and other peripherals with your
device.
Keep your device dry. Do not use or expose your device near liquids, rain, or
moisture.
You can put your device through x-ray machines (such as those used in conveyor
belts for airport security), but do not expose the device to magnetic detectors and
wands.
The device screen is made of glass. If the glass gets broken, stop using the device
and do not touch the broken glass parts. Immediately send device for repair to
ASUS-qualied service personnel.
Do not listen at high volume levels for long periods to prevent possible hearing
damage.
Disconnect the AC power before cleaning your device. Use only a clean cellulose
sponge or chamois cloth when cleaning your device screen.
Send device for repair to ASUS-qualied service personnel only.
2
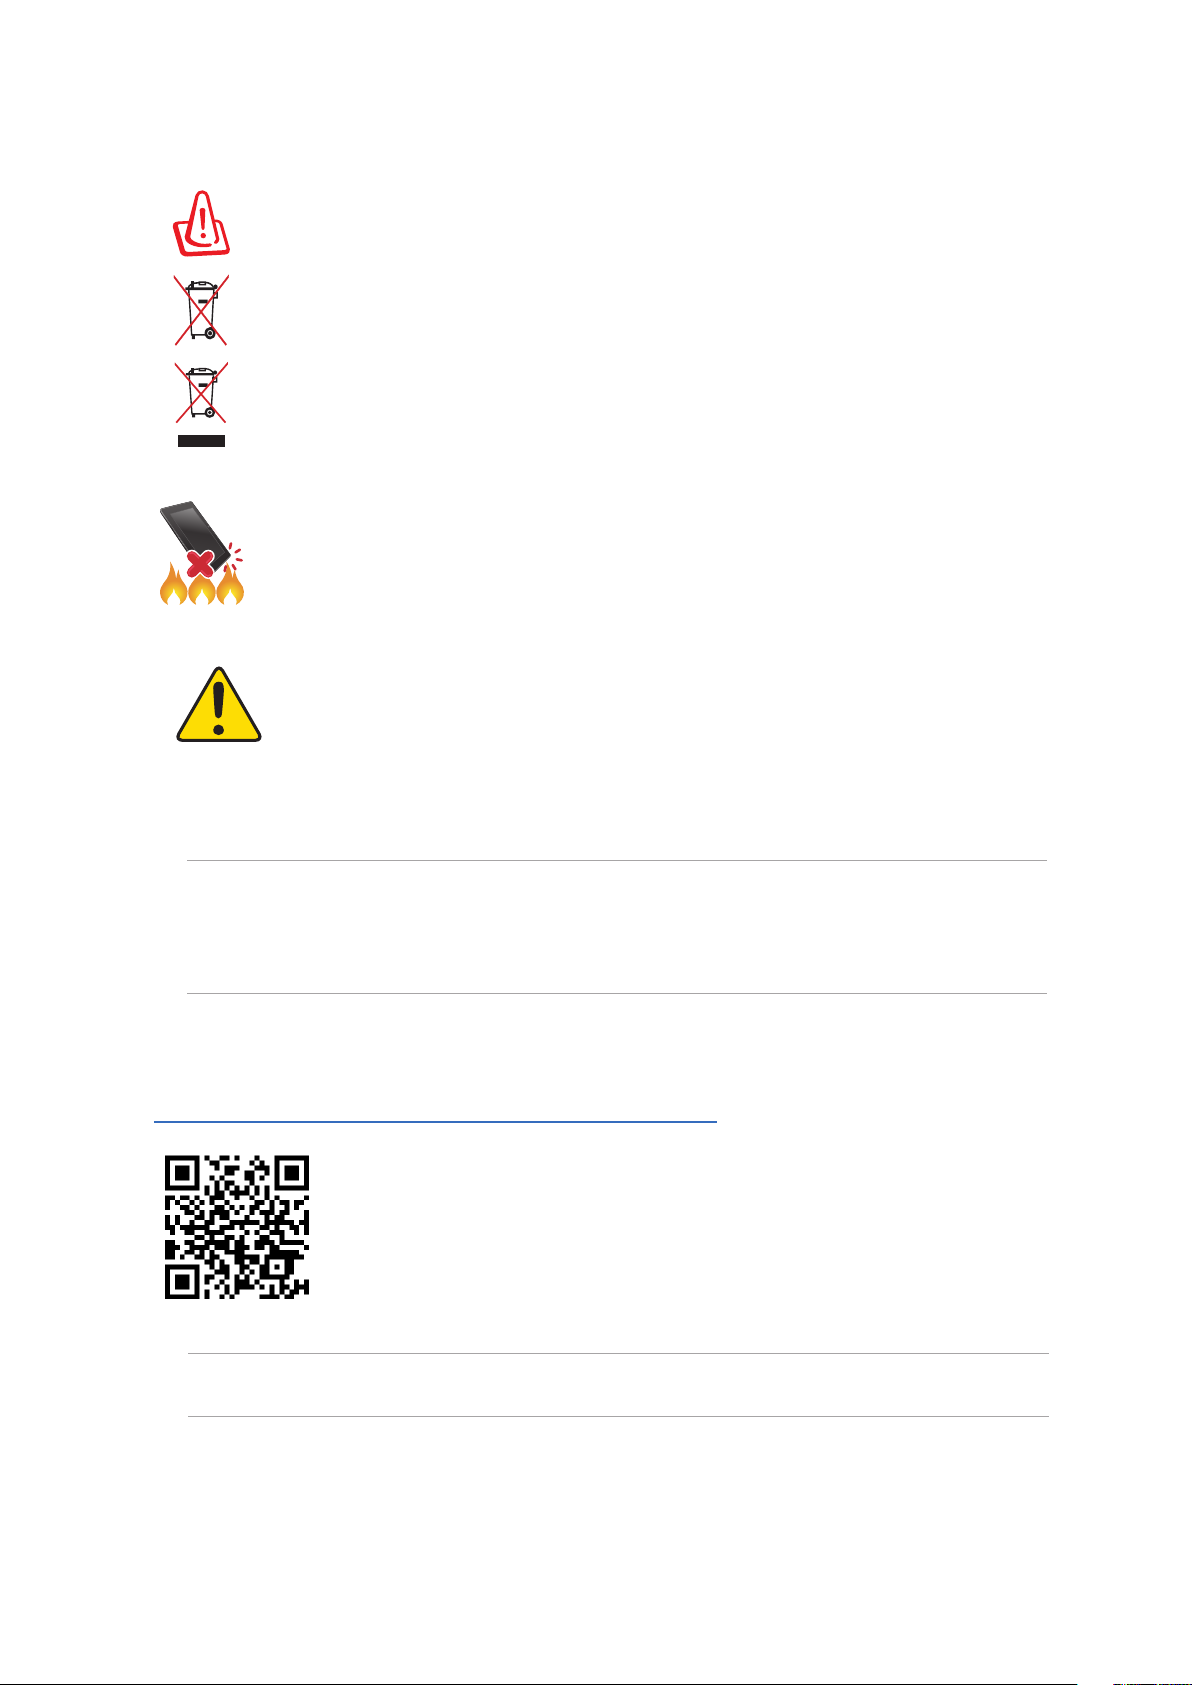
Proper disposal
Risk of explosion if battery is replaced by an incorrect type. Dispose of used batteries
according to the instructions.
DO NOT throw the battery in municipal waste. The symbol of the crossed out
wheeled bin indicates that the battery should not be placed in municipal waste.
DO NOT throw this product in municipal waste. This product has been designed to
enable proper reuse of parts and recycling. The symbol of the crossed out wheeled
bin indicates that the product (electrical, electronic equipment and mercurycontaining button cell battery) should not be placed in municipal waste. Check local
regulations for disposal of electronic products.
DO NOT throw this product in re. DO NOT short circuit the contacts. DO NOT
disassemble this product.
WARNING
Cancer and Reproductive Harm-
www.P65Warnings.ca.gov
NOTES:
• For more legal information, check on your device from
information.
• For more e-labelling information, check on your device from
Settings > System > About phone > Legal
ZenTalk Fans Forum
(http://www.asus.com/zentalk/global_forward.php)
Settings > System > Regulatory labels.
NOTE: The app descriptions shown in this manual are for reference purposes only, and may not
exactly match what you see on your device.
3

Contents
1 Basics
Welcome! .................................................................................................................................................. 7
Get your ROG Phone ready! ...............................................................................................................8
AeroActive Cooler (optional) feature ...........................................................................................10
Starting for the rst time ..................................................................................................................18
Using the touchscreen.......................................................................................................................19
2 There’s no place like Home
Zen Home features .....................................................................................................22
Home screen .........................................................................................................................................22
Quick settings .......................................................................................................................................23
Notications ..........................................................................................................................................24
Personalizing your Home screen ...............................................................................25
Widgets ..................................................................................................................................................25
Wallpapers .............................................................................................................................................26
Setting up the date and time ..........................................................................................................27
Setting up your ringtone and alert sounds................................................................................27
Lock Screen .................................................................................................................28
Customizing your lock screen .........................................................................................................28
Fingerprint ID sensor ..................................................................................................29
Starting your ROG Phone for the rst time ................................................................................29
Setting up ngerprint ID from Settings ......................................................................................30
Face Unlock .................................................................................................................31
Setting up face unlock from Settings ...........................................................................................31
3 Work hard, play harder
Chrome ........................................................................................................................34
Launching Chrome .............................................................................................................................34
Sharing pages .......................................................................................................................................35
Bookmarking pages ...........................................................................................................................35
Clearing the browsing data .............................................................................................................35
Gmail ............................................................................................................................ 36
Google Calendar ......................................................................................................... 37
Creating events ....................................................................................................................................37
Editing or removing events .............................................................................................................37
Creating reminders .............................................................................................................................38
Editing or removing reminders ......................................................................................................38
File Manager................................................................................................................39
Armoury Crate .............................................................................................................40
4 Keeping in touch
Call in style ..................................................................................................................41
Dual SIM feature...................................................................................................................................41
Making calls ........................................................................................................................................... 43
Receiving calls ......................................................................................................................................45
4

Other call options ................................................................................................................................ 46
Answering another call .....................................................................................................................47
Recording calls .....................................................................................................................................47
Managing contacts ..................................................................................................... 48
Contacts Settings ................................................................................................................................48
Setting up your prole ......................................................................................................................48
Adding contacts ...................................................................................................................................49
Marking your favorite contacts ......................................................................................................50
Social networking with your contacts .........................................................................................51
Send messages and more ..........................................................................................52
Messages ................................................................................................................................................52
5 Fun and entertainment
Using a headset ........................................................................................................... 53
Connecting the audio jack ...............................................................................................................53
YT Music .......................................................................................................................54
6 Your precious moments
Capture moments .......................................................................................................55
Launching the Camera app .............................................................................................................55
Using the Gallery ........................................................................................................57
Sharing les from the Gallery ..........................................................................................................57
Deleting les from the Gallery ........................................................................................................ 57
Editing images ......................................................................................................................................57
7 Staying connected
Mobile network ........................................................................................................... 58
Enabling the mobile network .........................................................................................................58
Wi-Fi .............................................................................................................................58
Enabling Wi-Fi .......................................................................................................................................58
Connecting to a Wi-Fi network .......................................................................................................59
Disabling Wi-Fi ......................................................................................................................................59
Bluetooth® ................................................................................................................... 59
Enabling Bluetooth® ...........................................................................................................................59
Pairing your ROG Phone to a Bluetooth® device ......................................................................60
Unpairing your ROG Phone from the Bluetooth® device ......................................................60
Tethering .....................................................................................................................61
Wi-Fi
Hotspot .........................................................................................................................................61
Bluetooth Tethering ............................................................................................................................62
8 Travel and Maps
Weather .......................................................................................................................63
Launching the Weather app ............................................................................................................63
Weather home screen ........................................................................................................................64
Clock ............................................................................................................................65
World Clock ............................................................................................................................................65
Alarm clock ............................................................................................................................................66
Stopwatch .............................................................................................................................................. 66
5

Timer ........................................................................................................................................................67
9 Zen Everywhere
Special Zen Tools .........................................................................................................68
Sound Recorder ...................................................................................................................................68
AirTriggers .............................................................................................................................................. 70
10 Maintain your Zen
Keeping your device up-to-date ................................................................................ 73
Updating your system .......................................................................................................................73
Storage ....................................................................................................................................................73
Backup .....................................................................................................................................................73
Reset .........................................................................................................................................................73
Securing your ROG Phone ................................................................................................................74
Appendix
Safety information ......................................................................................................77
Notices ......................................................................................................................... 79
Index
6
1 Basics
Basics
1
Welcome!
Explore the intuitive simplicity of ASUS ZenUI!
ASUS ZenUI is a charming and intuitive interface exclusively for ROG Phones. It provides you with
special apps, which are integrated in or with other apps, to t your unique individual needs and
make your life easier while letting you have fun with your ROG Phone.
Camera
With PixelMaster technology, capture those precious moments in vivid and high-quality
photos and videos.
Armoury Crate
Armoury Crate displays the gaming-related information including CPU, GPU, memory,
and storage and allows you to control your gaming needs on your ROG phone.
File Manager
File Manager allows you to easily locate and manage your data on the internal storage
of your ROG Phone.
NOTE: Availability of ASUS ZenUI apps vary per region and ROG Phone model. Swipe up on your Home
screen to check the apps available on your ROG Phone.
Chapter 1: Basics
7
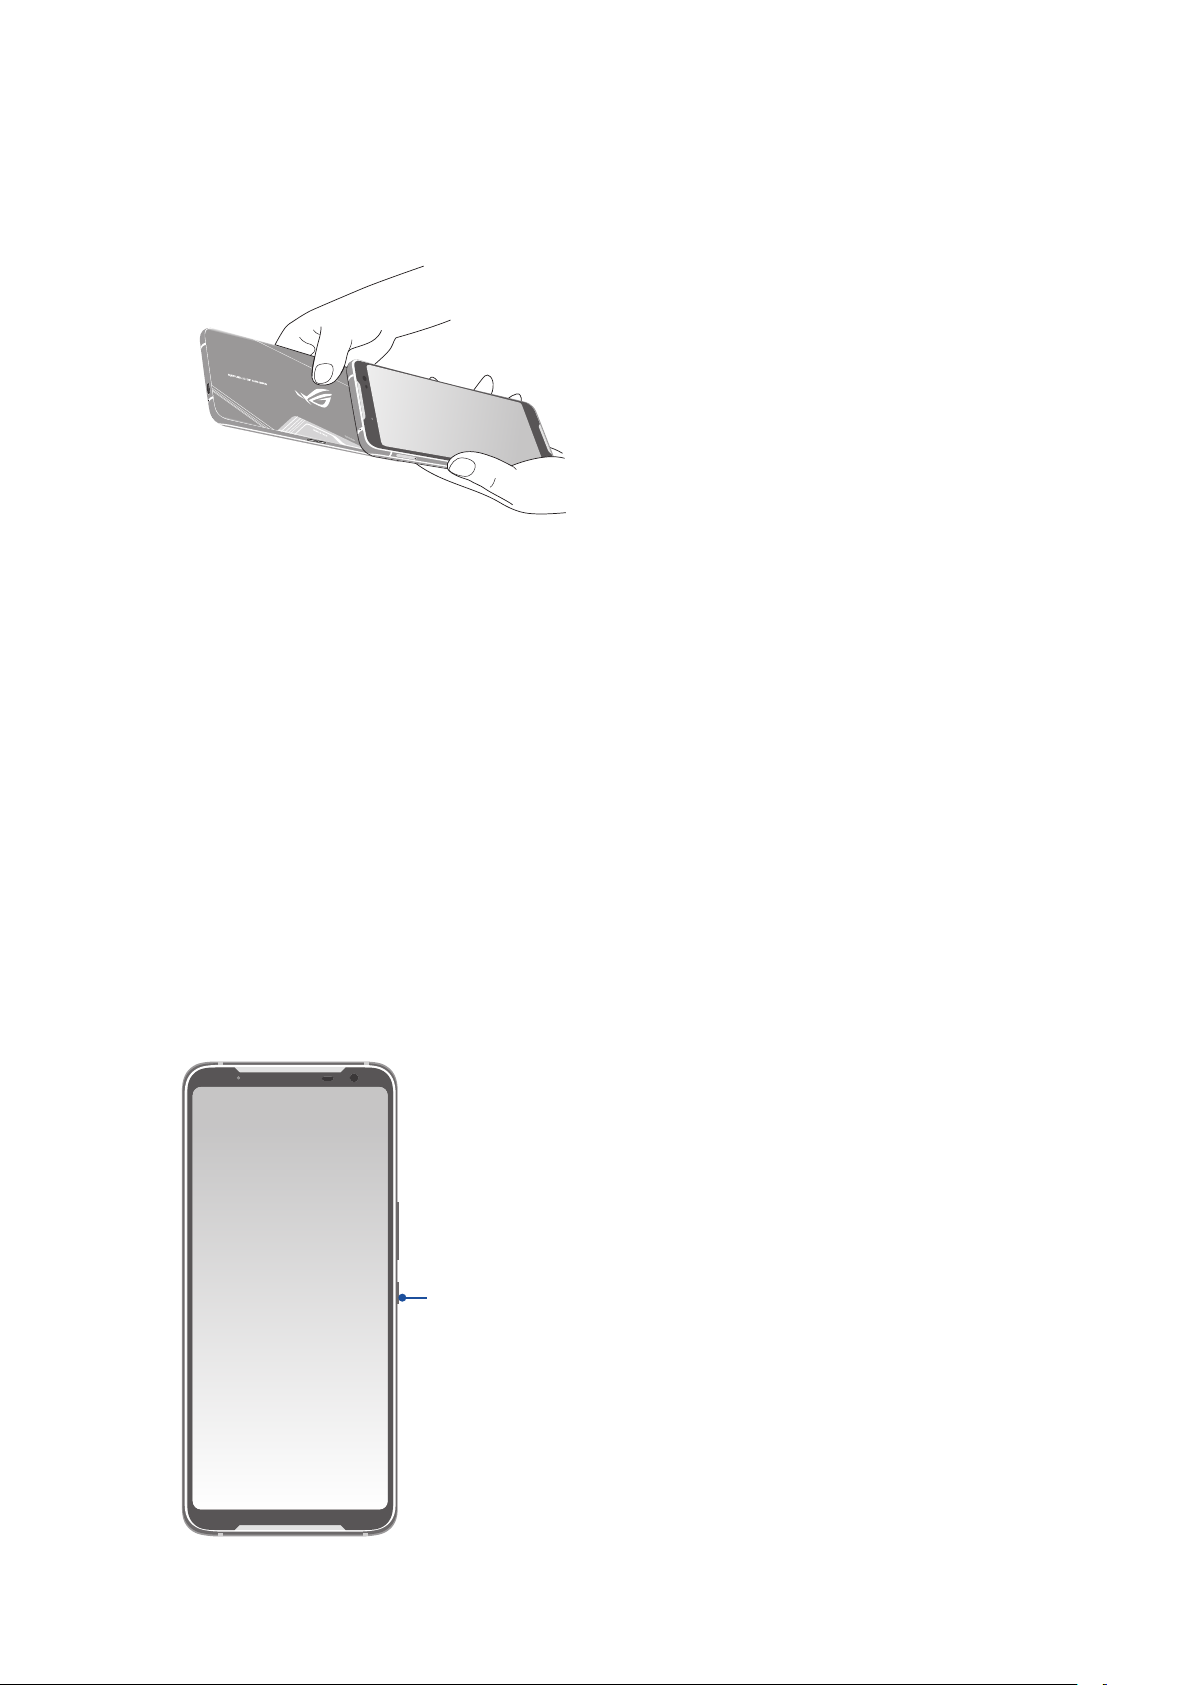
Get your ROG Phone ready!
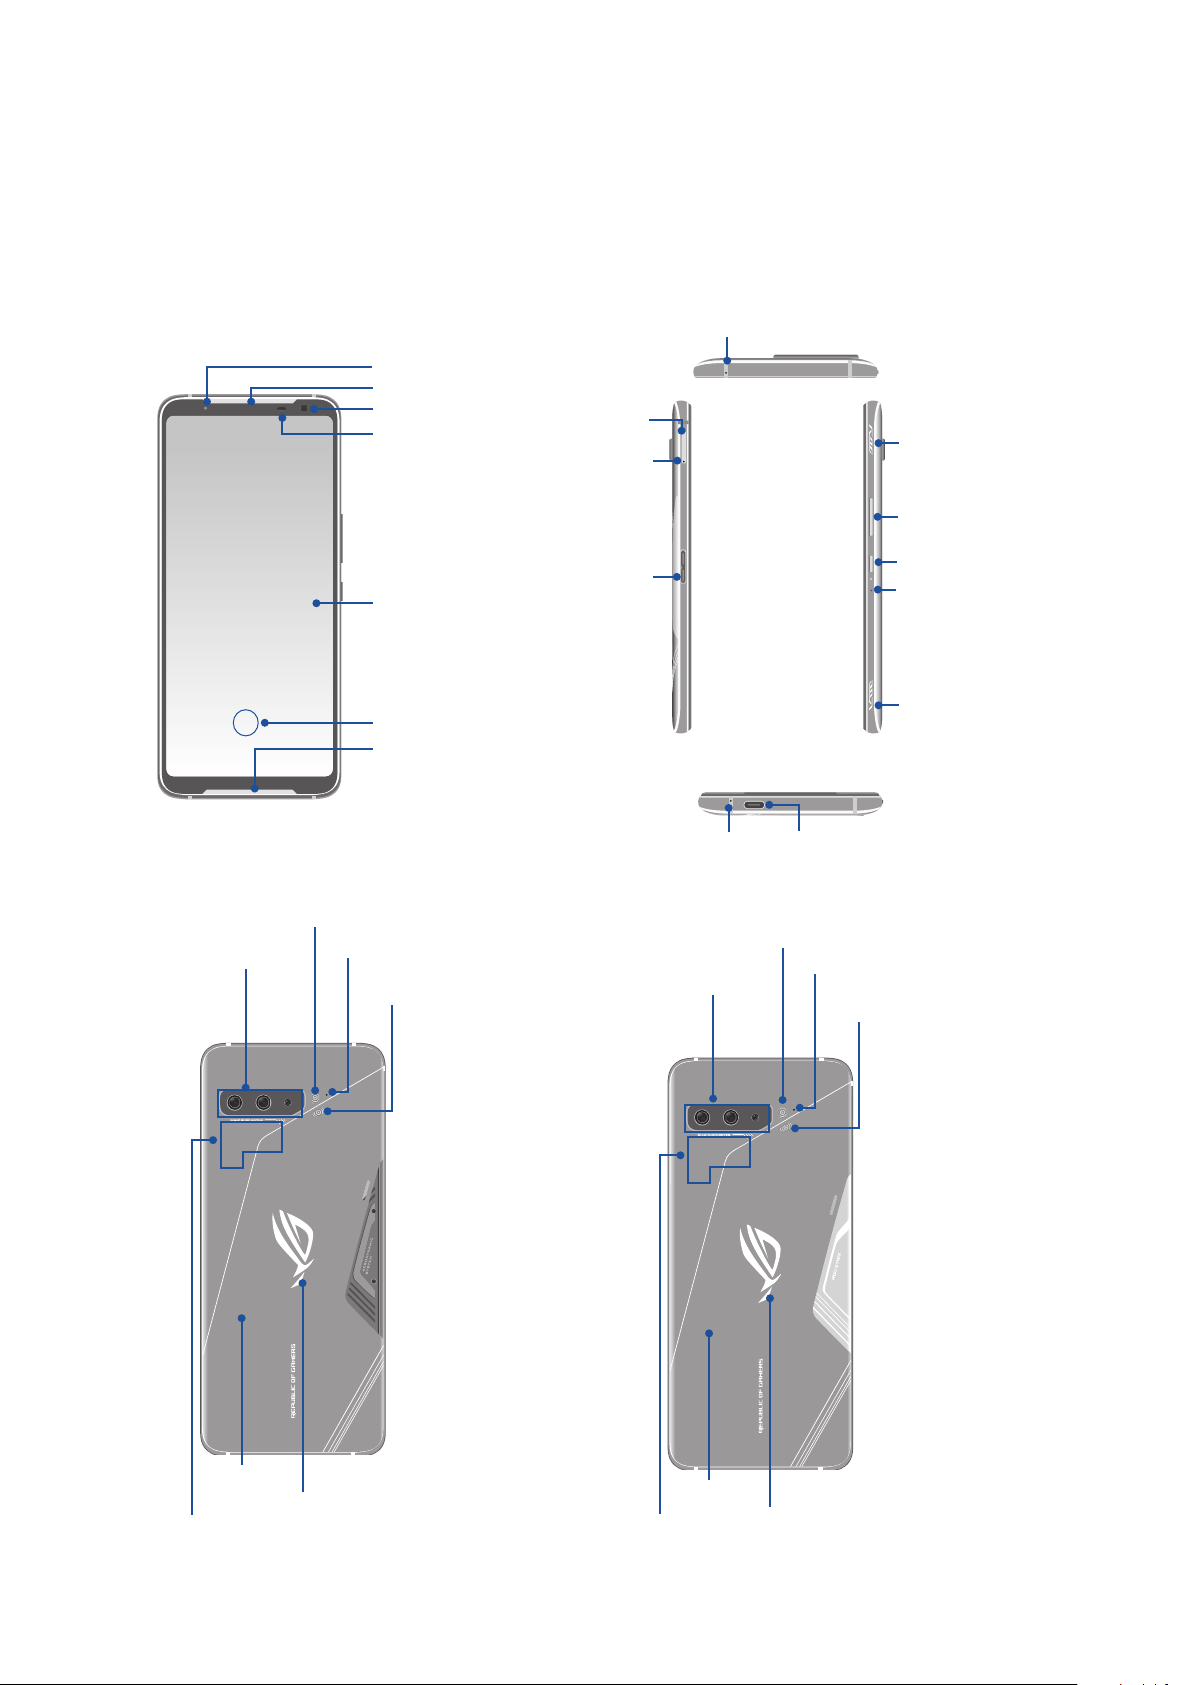
Parts and features
Take a hold of your device and have it running in a jiy.
LED indicator
Receiver & Speaker
Front camera
Proximity sensor
and light sensor
Nano SIM
card slot
Nano SIM card
tray eject hole
Microphone
Air Trigger
touch sensor
Volume key
Rear cameras
Camera ash
Microphone
Touch screen
display
Fingerprint sensor
Speaker
Bumper RGB LED
Side Mount
connector
Rear cameras
Microphone
Camera ash
Power key
Microphone
Air Trigger
touch sensor
USB Type-C port
Microphone
Bumper RGB LED
Rear cover
NFC detection area
8
Chapter 1: Basics
Aura light
Rear cover
NFC detection area
Aura light

WARNING!
• To avoid network connection and battery issues:
• DO NOT place a metallic sticker on the antenna area.
• DO NOT use a metallic protective frame/case on your ROG Phone.
• DO NOT cover the antenna area with your hands or other objects while using some functions such
as making calls or using the mobile data connection.
• We recommend that you use ASUS-compatible screen protectors. Using non-ASUS-compatible
screen protectors may cause your ROG Phone's sensor to malfunction.
NOTES:
• The USB Type-C port supports USB 2.0 transfer rate. The Side Mount connector Type-C port supports
USB 3.1 Gen1 transfer rate.
• Go to Settings > Advanced > AirTriggers to set AirTriggers.
IMPORTANT!
• We do not recommend using a screen protector as it can interfere with the proximity sensor. If you
want to use a screen protector, ensure that it does not block the proximity sensor.
• Keep the device, particularly the touch screen, dry all the time. Water or other liquids can cause the
touch screen to malfunction.
Chapter 1: Basics
9

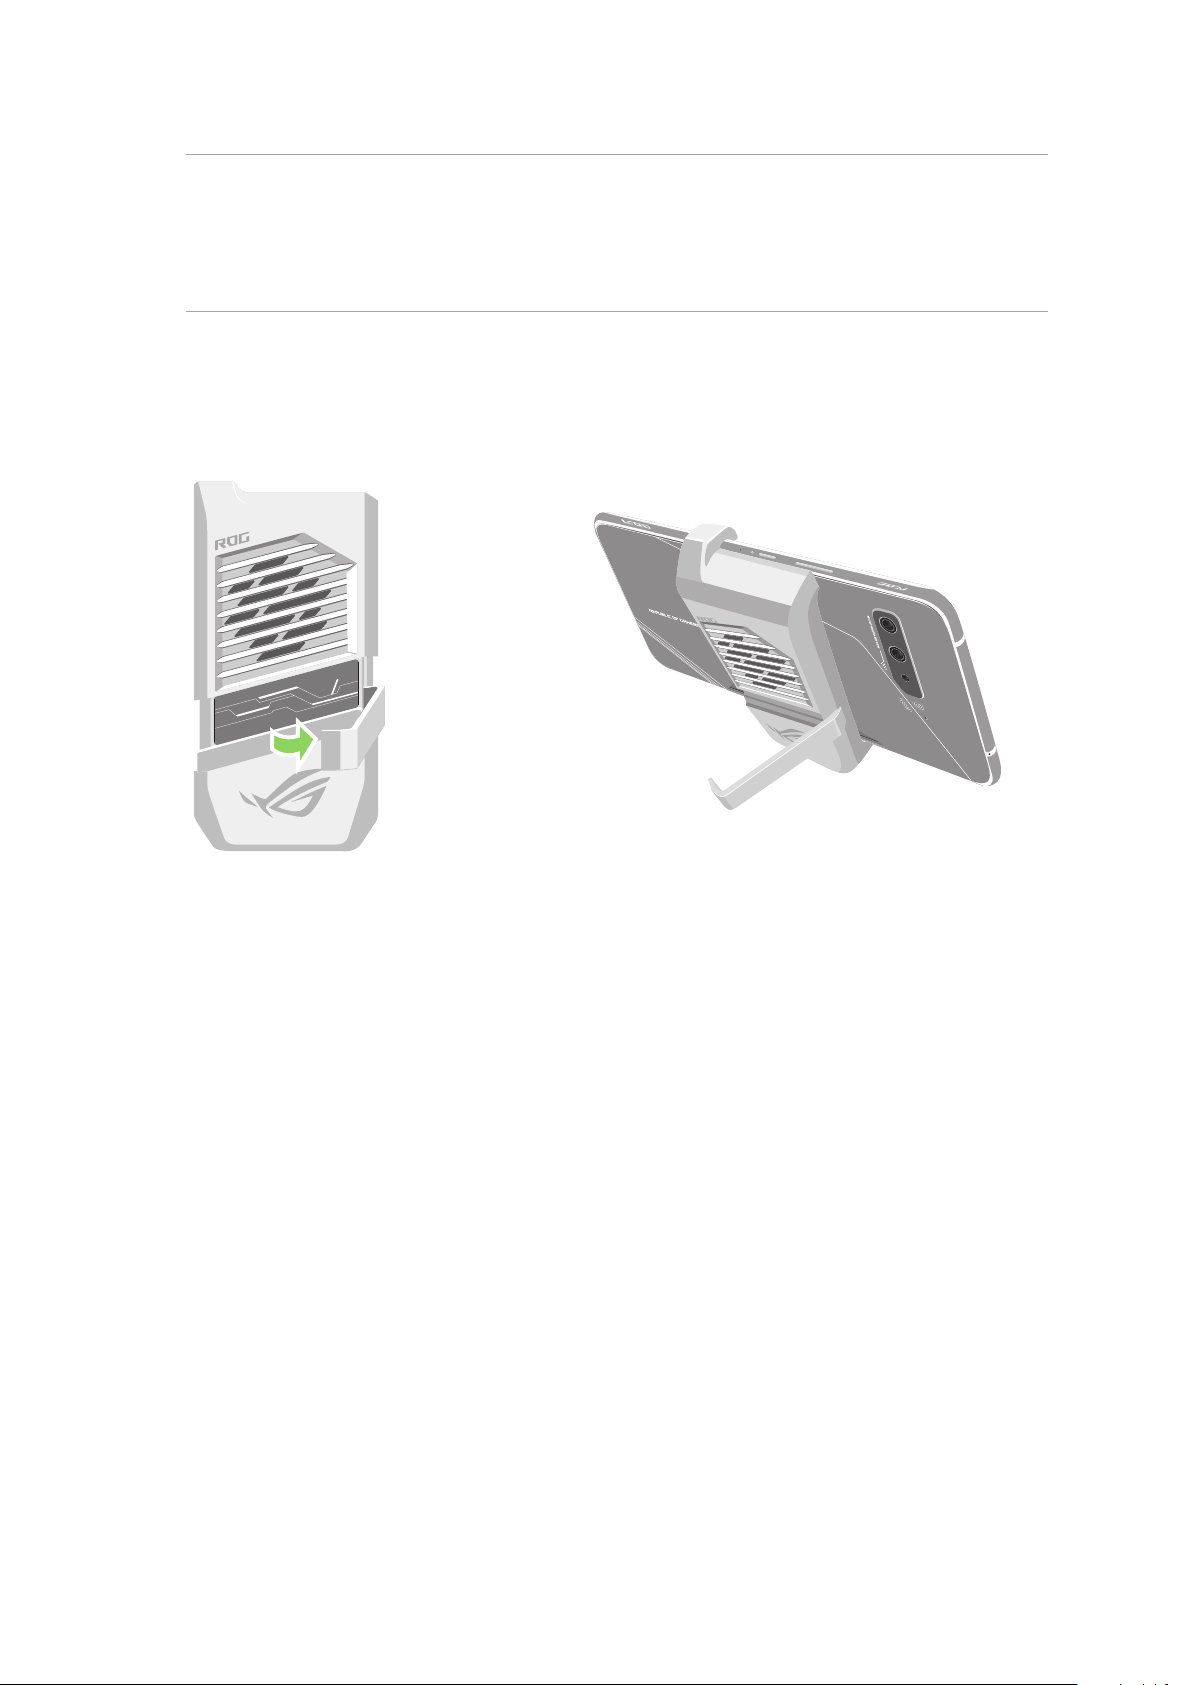
AeroActive Cooler (optional) feature
Use the optional AeroActive Cooler to keep your ROG Phone working at a high frequency during
heavy workloads by providing a better thermal solution, and oering the ultimate user experience.
Fan
Audio jack
Side mount
connector cover
Aura light
NOTES:
• Connect your AeroActive Cooler to the Side Mount connector of your ROG Phone.
• We recommend that you put your side mount connector cover into the side mount connector cover
storage to avoid missing while connecting the side mount connector.
• You can use your AeroActive Cooler while using the bundled ROG Phone 3 Case.
storage
USB Type-C port
To install the AeroActive Cooler:
1. Place your smartphone in a horizontal position.
2. Place the AeroActive Cooler on the back side of your phone with the ROG logo facing outwards.
3. Insert the USB plug of the AeroActive Cooler into the Side Mount connector of your Phone.
4. Push the top part of the AeroActive Cooler and snap the clip on the top side.
10
Chapter 1: Basics
NOTES:
• It is not recommended that you connect other devices to your ROG Phone when you install the
phone on the AeroActive Cooler.
• Docking your ROG Phone on an accessory with fan(s) will impact the audio quality when making
phone calls and recording.
To use the kickstand of AeroActive Cooler:
Open the kickstand on the back of the AeroActive Cooler to get optimal viewing experience.
Chapter 1: Basics
11
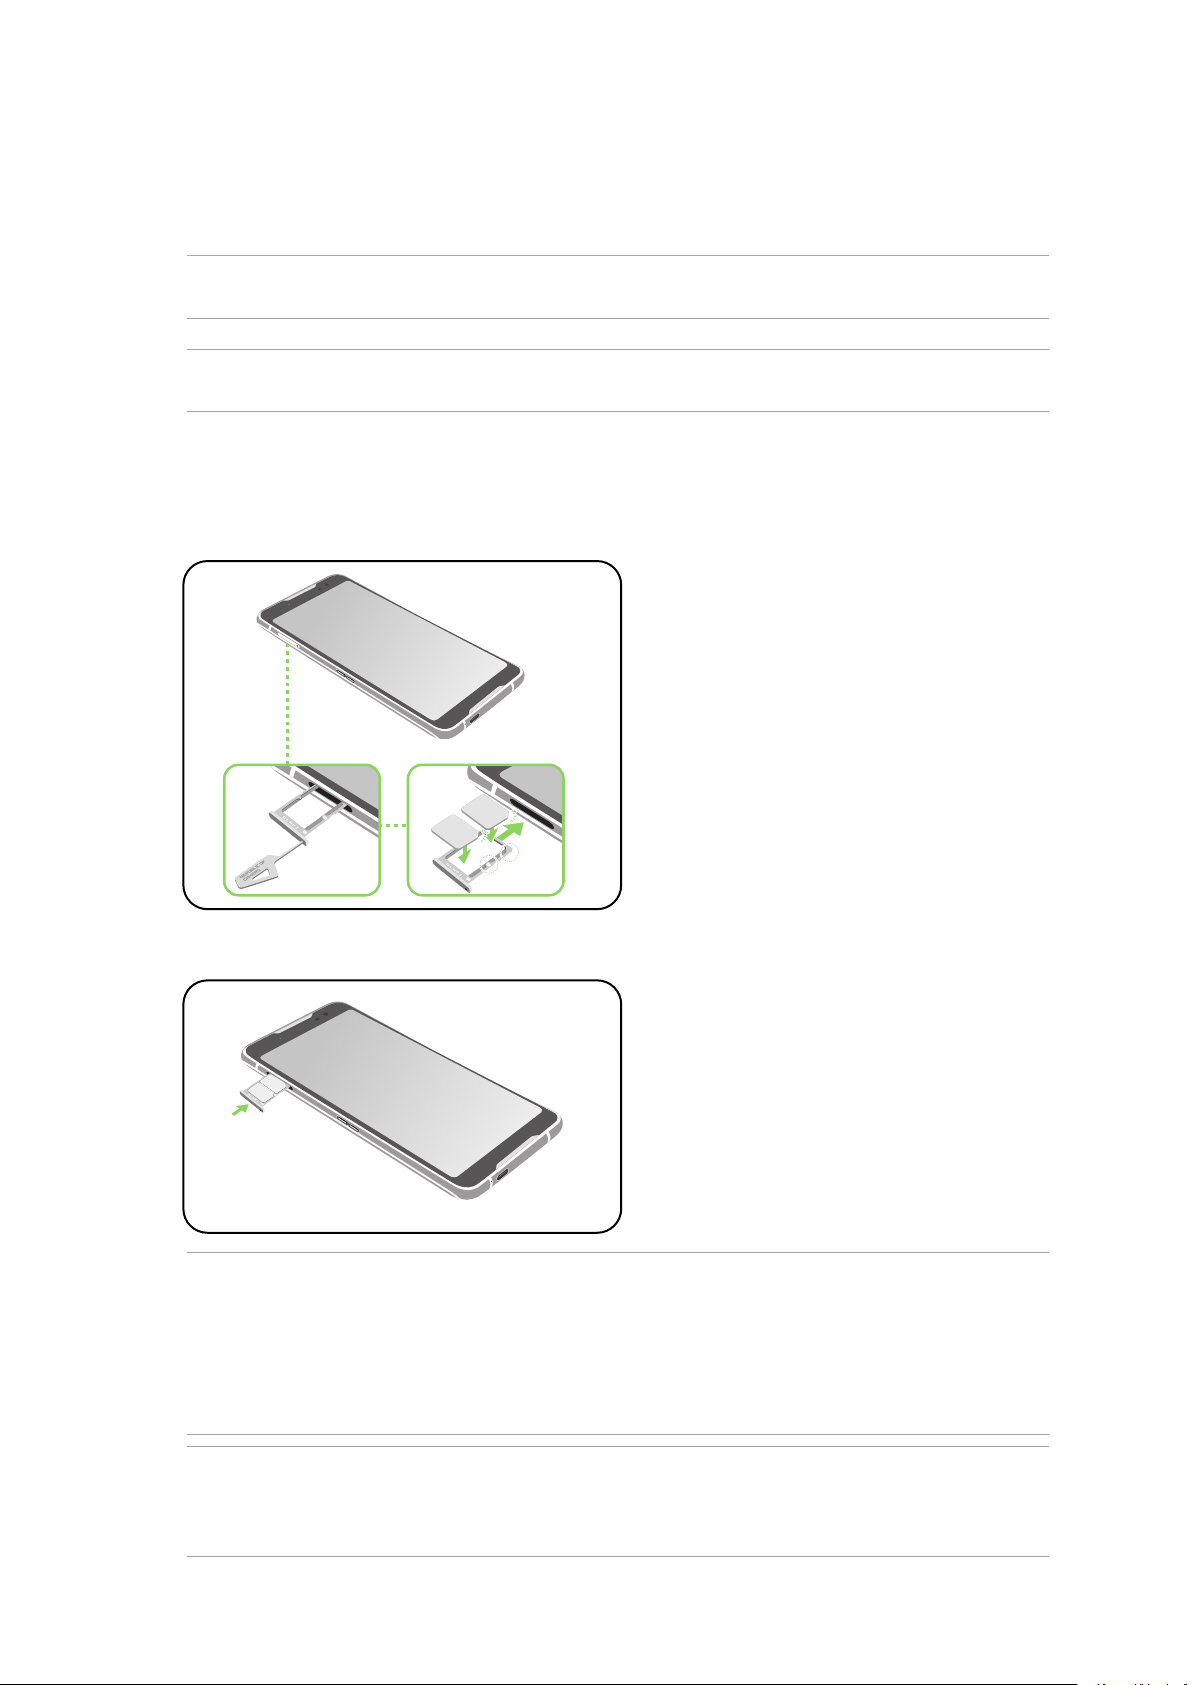
Nano-SIM1
Nano-SIM2
Installing a nano SIM card
Your nano SIM card slots support GSM/GPRS/EDGE, WCDMA/HSPA+/DC-HSPA+, FDD-LTE, TD-LTE,
and 5G NR Sub-6 network bands.
NOTE: To prevent connector damage, ensure to use a standard nano SIM card without a SIM adapter or
the use of a cutter.
CAUTION! Be extra careful when handling a
damage incurred to your
nano SIM cards
.
nano SIM card
. ASUS is not responsible for any data loss or
To install a Nano SIM card:
1. Push a pin into the hole on the Nano SIM card tray to eject it. Insert the Nano SIM card(s) into the
card slot(s).
2. Push the tray to close it.
NOTES:
• Both Nano SIM card slots support GSM/GPRS/EDGE, WCDMA/HSPA+/DC-HSPA+, FDD-LTE, TD-LTE, and 5G NR
Sub-6 network bands. Both Nano SIM cards can connect to VoLTE 4G calling service, but only one can connect
to 5G NR Sub-6 data service at a time.
• Actual network and frequency band usage depends on network deployment in your area. Contact
your telecom carrier if 5G NR Sub-6 support and VoLTE 4G calling service are available in your area.
CAUTION!
•
Do not use sharp tools or solvent on your device to avoid scratches on it
• Use only a standard Nano SIM card on your ROG Phone.
12
Chapter 1: Basics
.
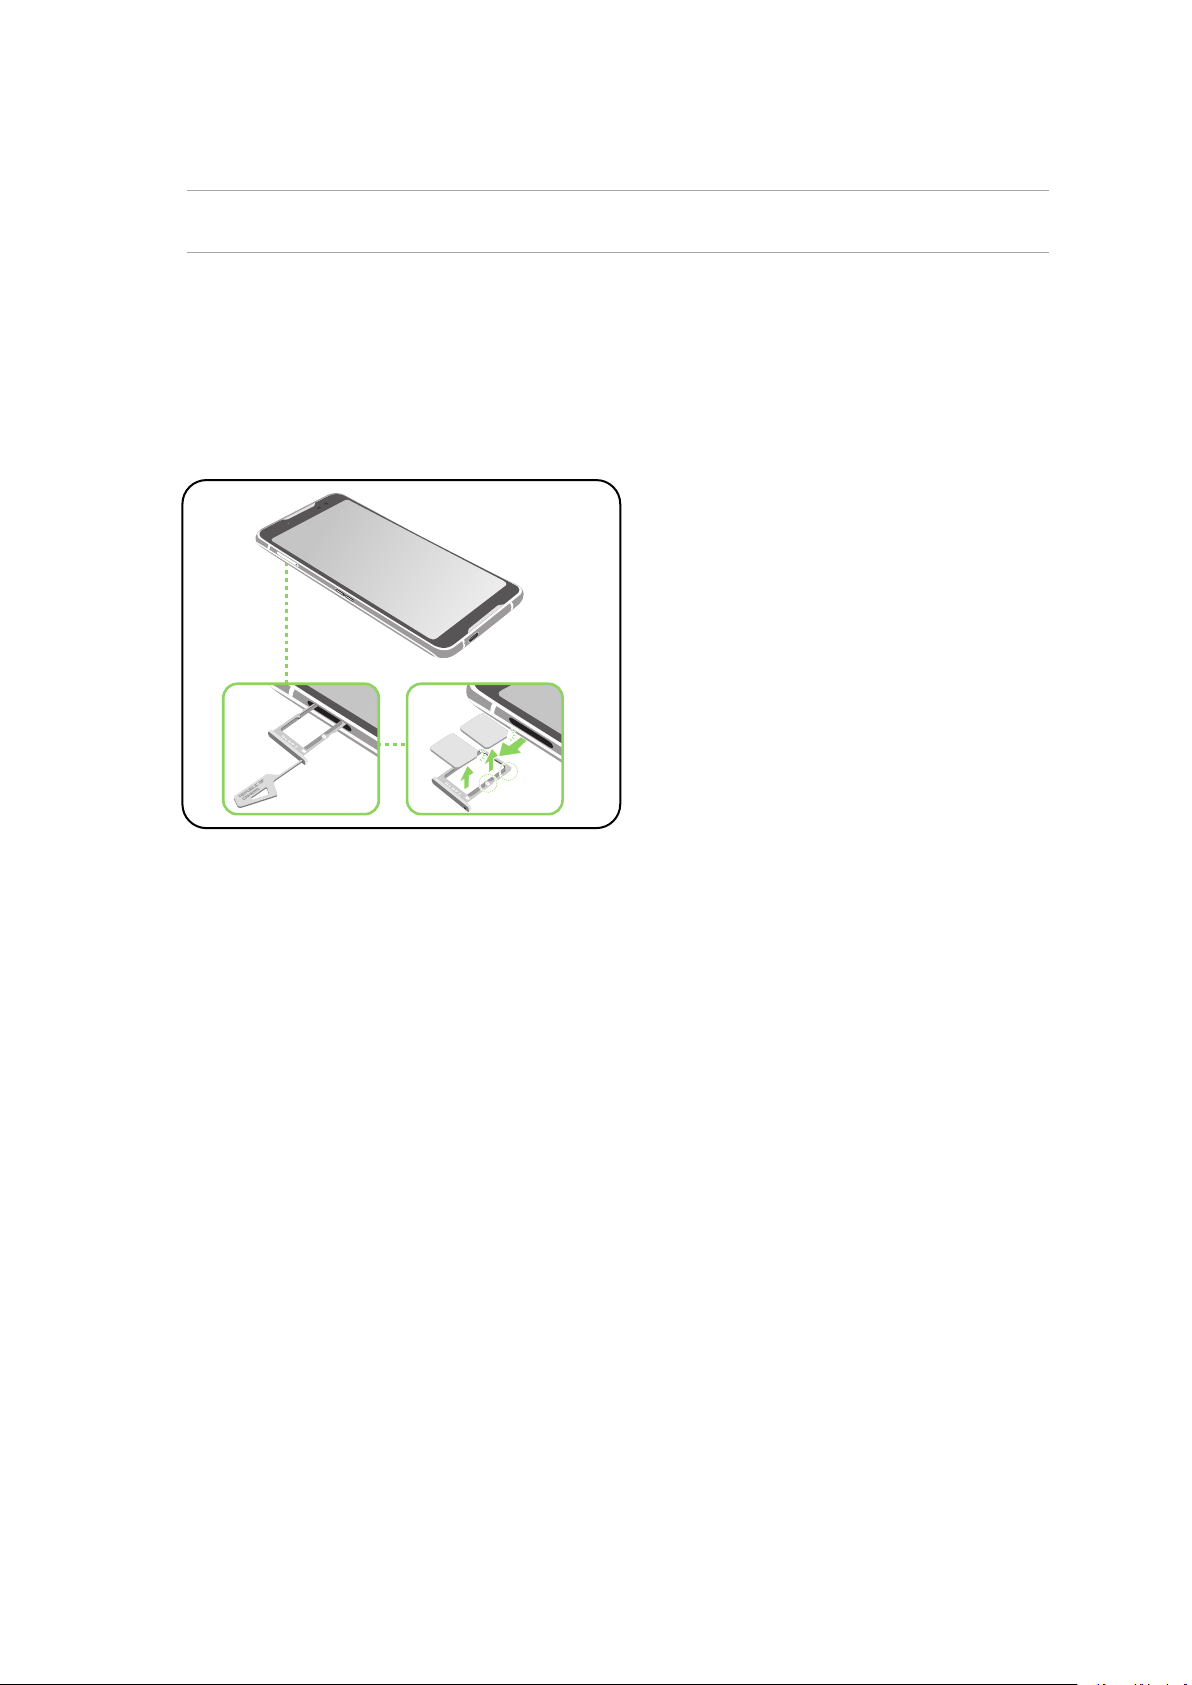
Removing a nano SIM card
Nano-SIM1
Nano-SIM2
CAUTION! Be extra careful when handling a nano SIM card. ASUS is not responsible for any data loss or
damage incurred to your nano SIM cards.
To remove a nano SIM card:
1. Push a pin into the hole on the Nano SIM card tray to eject it. Remove the Nano SIM card(s) from
the card slot(s).
2. Push the tray to close it.
Chapter 1: Basics
13

Charging your ROG Phone
Your ROG Phone comes partially charged but you must charge it fully before using it for the rst
time. Read the following important notices and cautions before charging your device.
IMPORTANT!
• Peel o the protective lm on the AC power adapter and USB Type-C cable before using them with
your device.
• Ensure to plug the AC power adapter to a compatible power outlet. You can plug the AC power
adapter to any compatible 100~240 V outlet.
• The output voltage of the AC power adapter for this device is +5V-10V 3A, 30W.
• When using your ROG Phone while plugged-in to a power outlet, the power outlet must be near
your device and easily accessible.
• To conserve electricity, unplug the AC power adapter from the power outlet when not in use.
• Do not place heavy objects on top of your ROG Phone.
CAUTION!
• While charging, your ROG Phone can become warm. This is normal, however, if your device
becomes unusually hot, disconnect the USB Type-C cable from your device and send the device,
including the AC power adapter and cable to an ASUS-qualied service personnel.
• To prevent any damage to your ROG Phone, AC adapter, or USB Type-C cable, ensure that the USB
Type-C cable, AC adapter, and your device are connected properly before charging.
To charge your ROG Phone:
1. Connect the USB Type-C cable to the power adapter.
2. Connect the USB Type-C cable to your ROG Phone.
3. Plug the AC power adapter to a grounded power outlet.
3
2
1
OR
USB Type-C port
14
Chapter 1: Basics
3
2
* DO NOT insert a USB
Type-C cable to this port.
1

OR
3
1
2
3
1
2
NOTES:
• We recommend that you charge your ROG phone through one USB Type-C port at a time.
• Only the Side Mount connector has Display Port functionality.
• If you connect USB Type-C OTG or charging devices to both of the USB Type-C ports on your ROG
phone, the Side Mount connector will become the master and the charging current or OTG device
on the bottom port will be limited.
IMPORTANT!
• When using your ROG Phone while it is plugged to a power outlet, the grounded power outlet must
be near to the unit and easily accessible.
• When charging your ROG Phone through your computer, ensure that you plug the USB Type-C
cable to your computer’s USB port.
• Avoid charging your ROG Phone in an environment with ambient temperature of above 35oC (95oF).
• DO NOT charge your ROG phone underwater or when the USB connector is wet.
• Charge your ROG Phone for eight (8) hours before using it in battery mode for the rst time.
• The status of battery charge is indicated by the following icons:
Low Not Charging Charging Full
NOTES:
• For safety purposes, use ONLY the bundled power adapter and cable to avoid damaging your
device and prevent the risk of injury.
• For safety purposes, use ONLY the bundled power adapter and cable to charge your ROG Phone.
• The input voltage range between the wall outlet and this adapter is AC 100V - 240V. The output
voltage of the device is +5V-10V 3A, 30W.
Chapter 1: Basics
15
4. When fully-charged, disconnect the USB cable from your ROG Phone rst before unplugging the
AC power adapter from the power outlet.
NOTES:
• You can use your device while charging but it may take longer to fully charge the device.
• Charging your device via USB port of a computer may take longer to fully charge the device.
• If your computer does not provide enough power for charging via USB port, charge your ROG Phone
using the AC power adapter plugged to a power outlet instead.
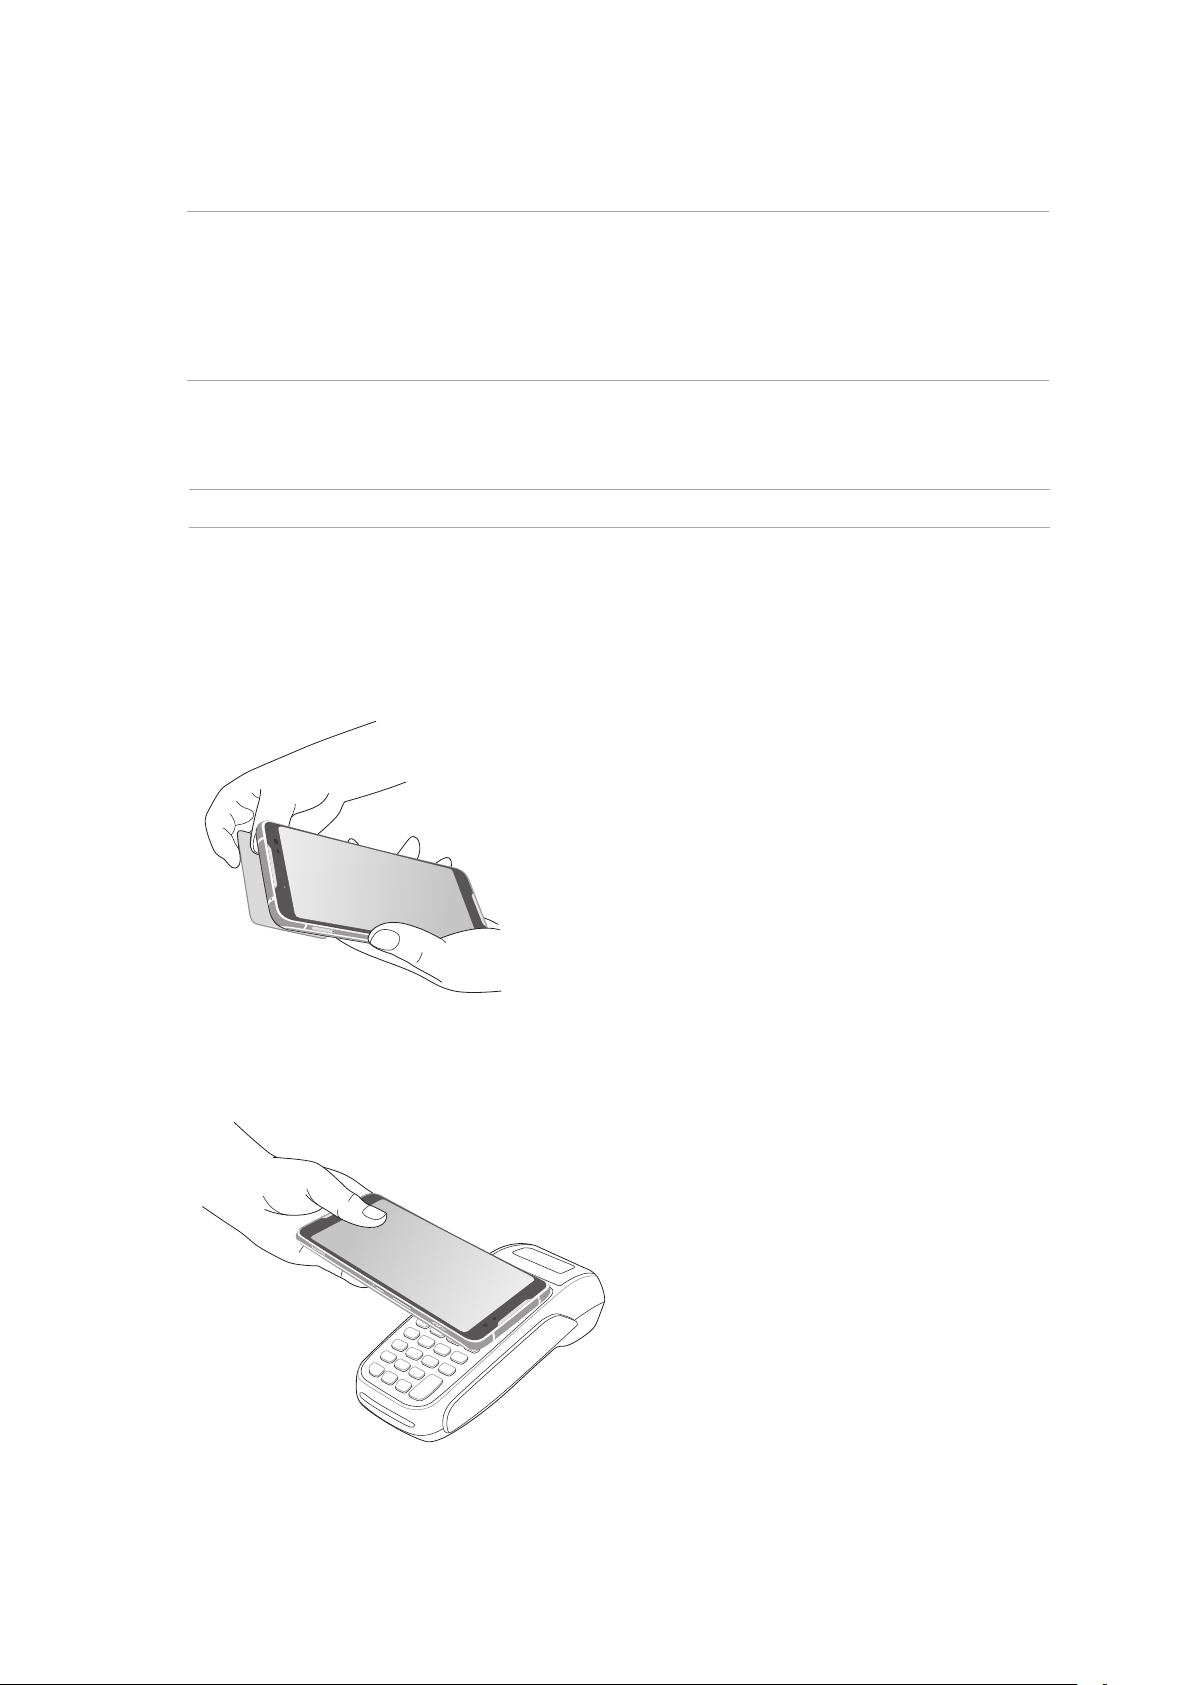
Using NFC
NOTE: NFC is only available in selected regions/countries.
You can use NFC in the following three scenarios:
Reader mode: Your phone reads information from a contactless card, NFC tag, or other NFC
devices.
Place the NFC area of your phone on the contactless card, NFC tag, or NFC device.
Card Emulation mode: Your phone can be used like a contactless card.
Place the NFC area of your phone on the NFC area of the NFC reader.
16
Chapter 1: Basics
Peer-to-Peer mode: Transfers photos, contacts, or other data between your phone and an NFCenabled smartphone.
Bring the NFC areas of both smartphones together, without any space between them.
Turning your ROG Phone on or o
Turning your device on
To turn your device on, press and hold the power button until your device vibrates and starts up.
Turning your device o
To turn your device o:
1. If your screen is turned o, press the power button to turn it on. If your screen is locked, unlock
the device screen.
2. Press and hold the power button, then when prompted, tap Power o then tap OK.
Sleep mode
To put your device in sleep mode, press the power button once until the screen turns o.
Power key
Chapter 1: Basics
17

Starting for the rst time
When you turn your ROG Phone on for the rst time, Setup Wizard will guide you through the setup
process. Follow the onscreen instructions to select your language, set up your mobile network, WiFi and security features, and sync accounts.
Use your Google or ASUS account to set up your device, if you do not have a Google or ASUS
account yet, go ahead and create one.
Google Account
Using a Google Account allows you to fully utilize these Android OS features:
• Organize and see all your information from anywhere.
• Automatically backup all your data.
• Leverage Google services conveniently from anywhere.
ASUS Account
Having an ASUS Account gets you to enjoy the following perks:
• Personalized ASUS support service and warranty extension for registered products.
• Receive the latest device and rmware updates.
Battery power conservation tips
The battery charge is the lifeline of your ROG Phone. Here are some battery power conservation
tips that helps preserve the power of your ROG Phone battery.
– Close all running apps that are not in use.
– When not in use, press the power button to put the device in sleep mode.
– Decrease brightness of display.
– Keep the speaker volume to a low level.
– Disable Wi-Fi feature.
– Disable Bluetooth feature.
– Disable the screen auto-rotate feature.
– Disable all auto-sync features in your device.
18
Chapter 1: Basics
Using the touchscreen
Use these gestures on the touchscreen to launch apps, access some settings, and navigate your
ROG Phone.
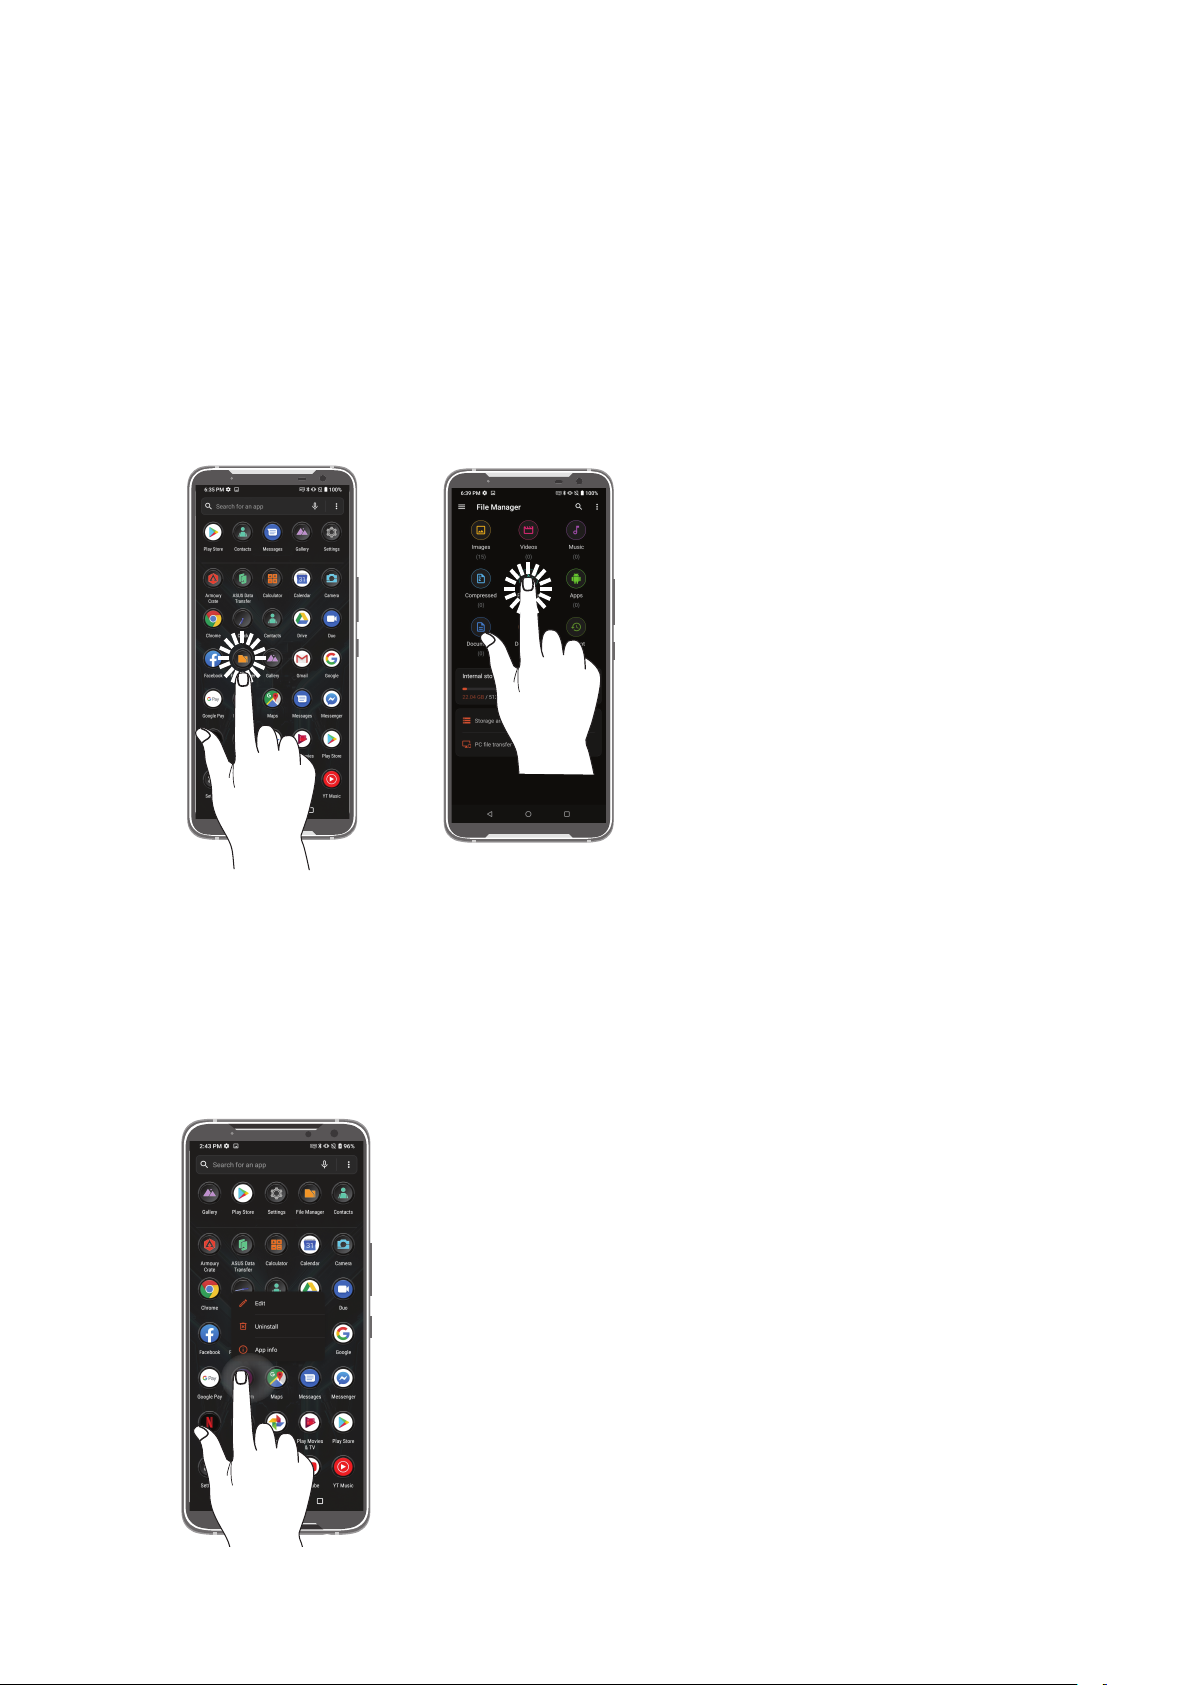
Launching apps or selecting items
Do any of the following:
• To launch an app, simply tap on it.
• To select an item such as in File Manager app, simply tap on it.
Moving or deleting items
Do any of the following:
• To move an app or widget, tap and hold then drag it to the location where you want it to be.
• To delete an app or widget , tap and hold it then tap Uninstall.
Chapter 1: Basics
19
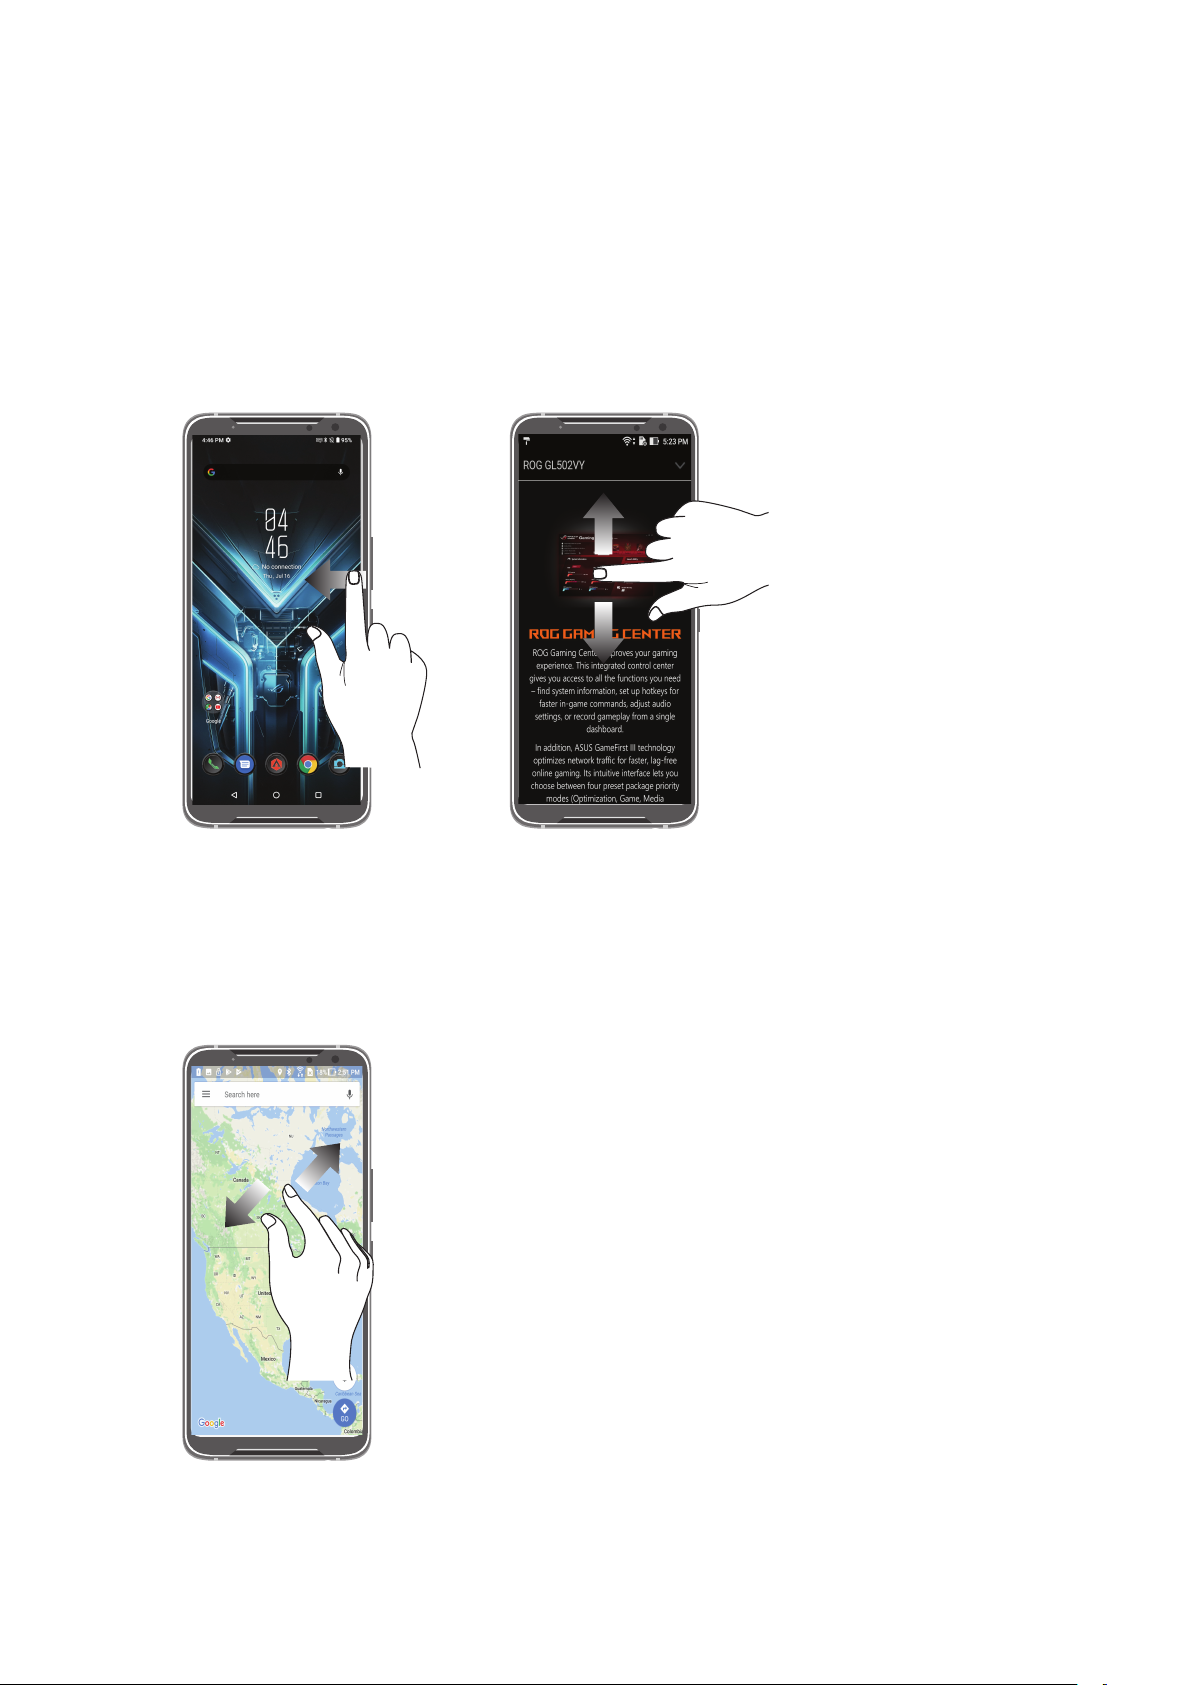
Moving through pages or screens
Do any of the following:
• Swipe your nger to the left or to the right to switch between screens or to open Google Search
page.
• Scroll your nger up or down to go through web pages or list of items.
Zooming in
Spread apart your two ngers on the touch panel to zoom in an image in Gallery or Maps, or zoom
in a web page.
20
Chapter 1: Basics
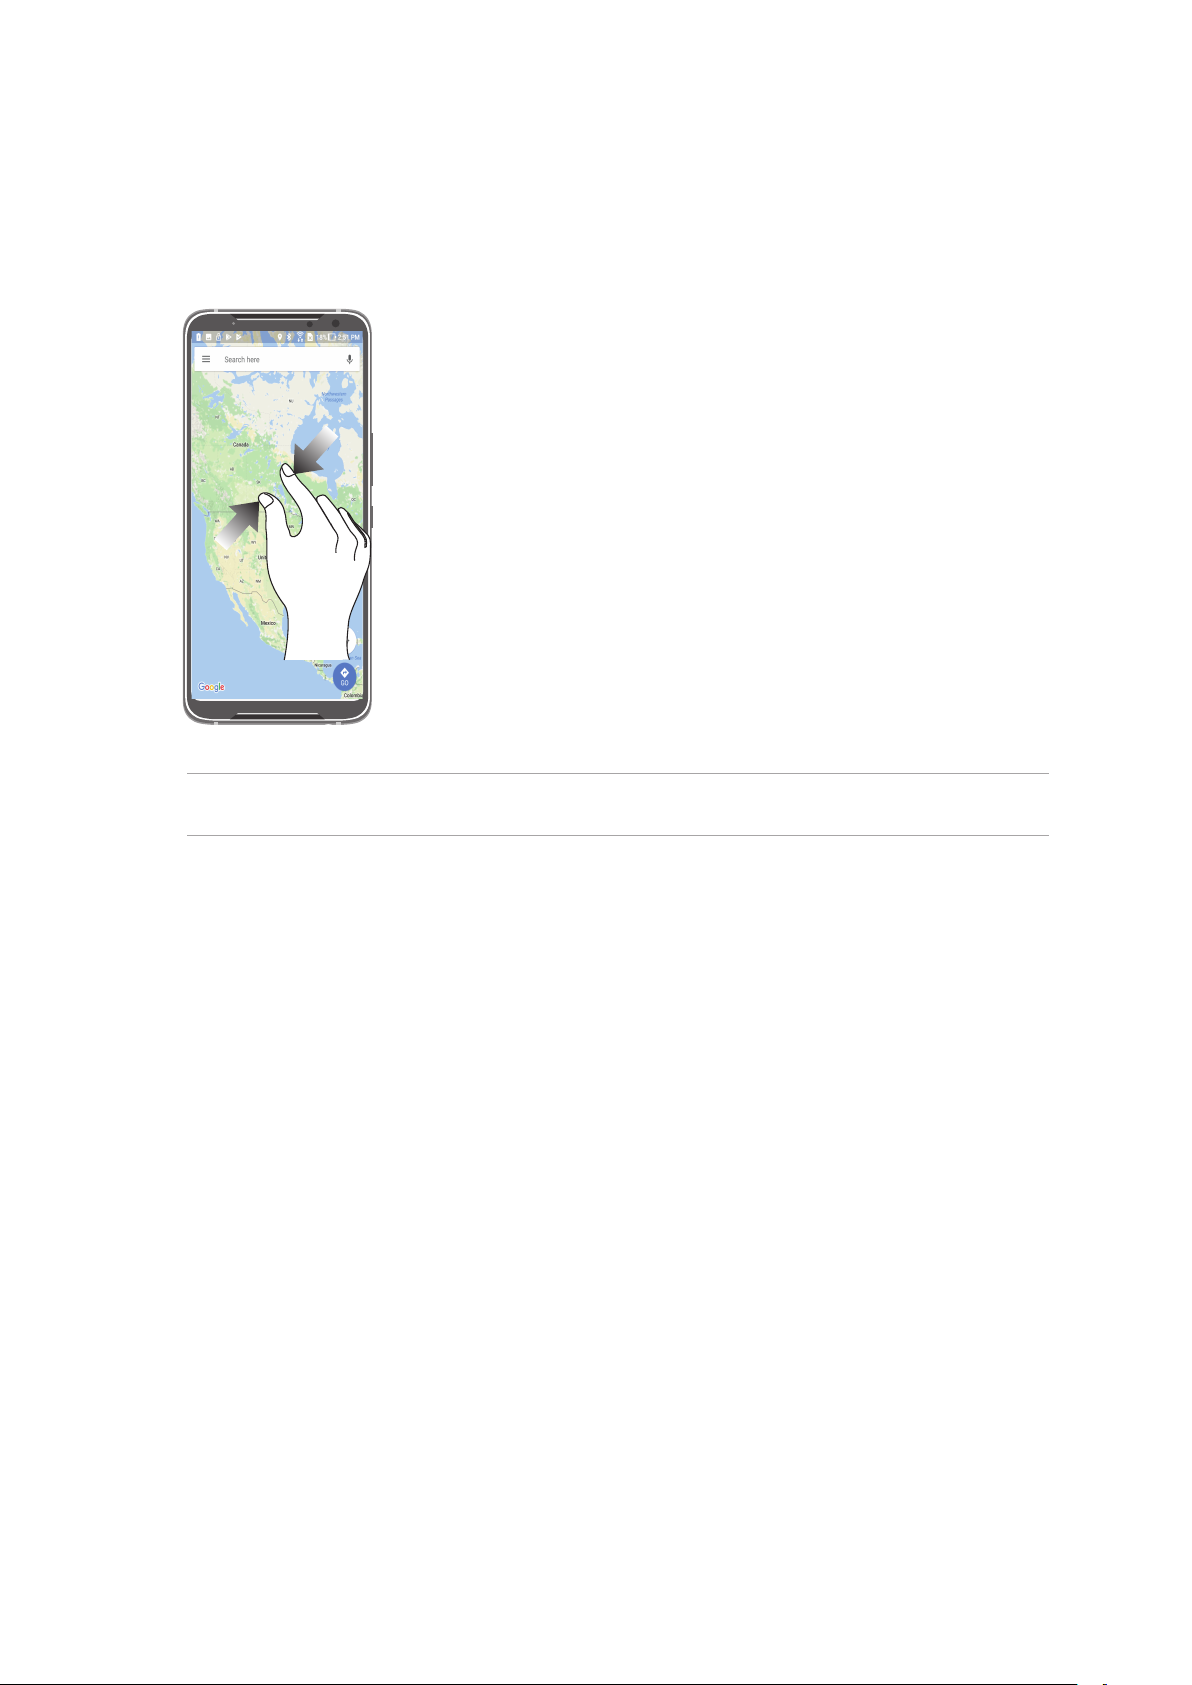
Zooming out
Bring together your two ngers on the touch panel to zoom out an image in Gallery or Maps, or
zoom out of a web page.
NOTE: You may not be able to zoom in/out of some web pages as these pages may have been
designed specically to t your mobile screen.
Chapter 1: Basics
21
2 There’s no place like Home
There’s no place like Home
2
Zen Home features
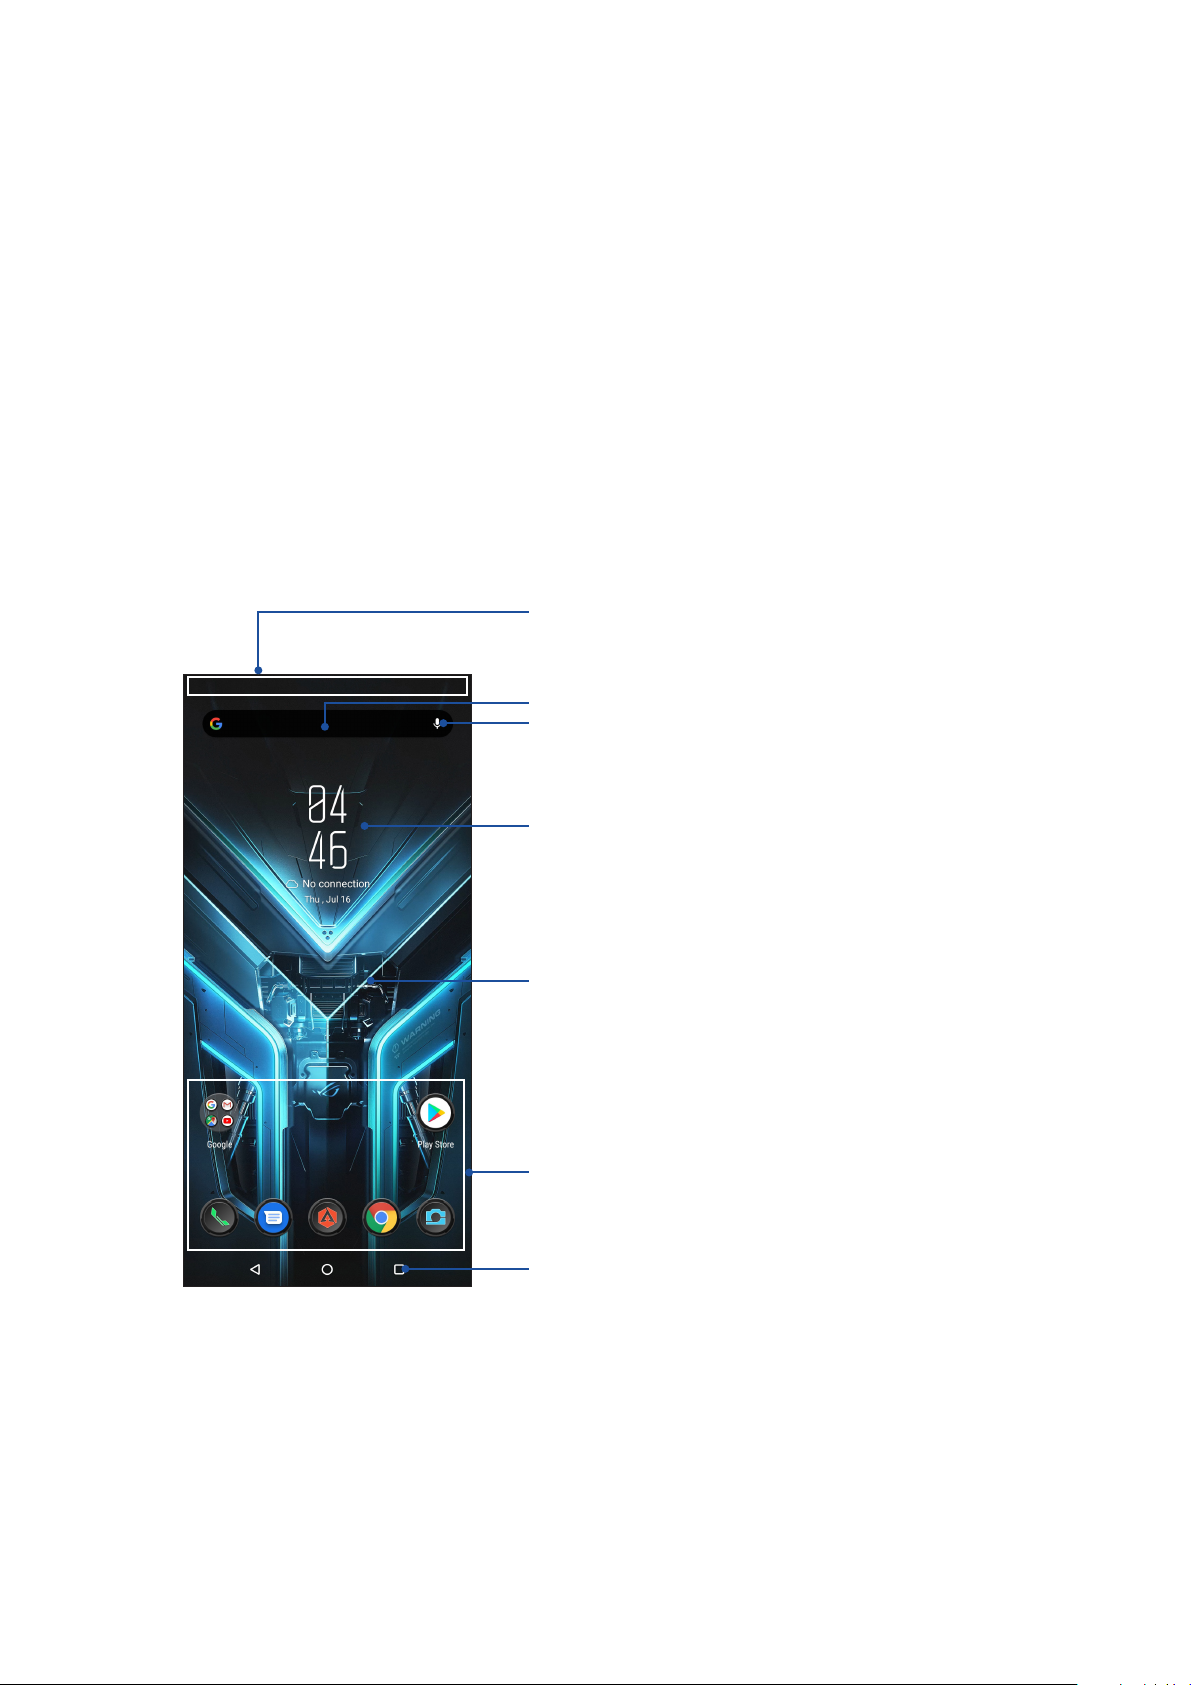
Home screen
Get reminders of important events, app and system updates, weather forecasts, and text messages
from people who really matter to you, right from your Home screen.
Swipe down this area once to display System notications
Swipe down this area twice to display Quick settings
Tap to open Google Search page
Tap to open Voice Search
Tap to display Time and Weather settings
Swipe up to open the All apps screen
Tap to open an app
Touch keys
22
Chapter 2: There’s no place like Home
Quick settings
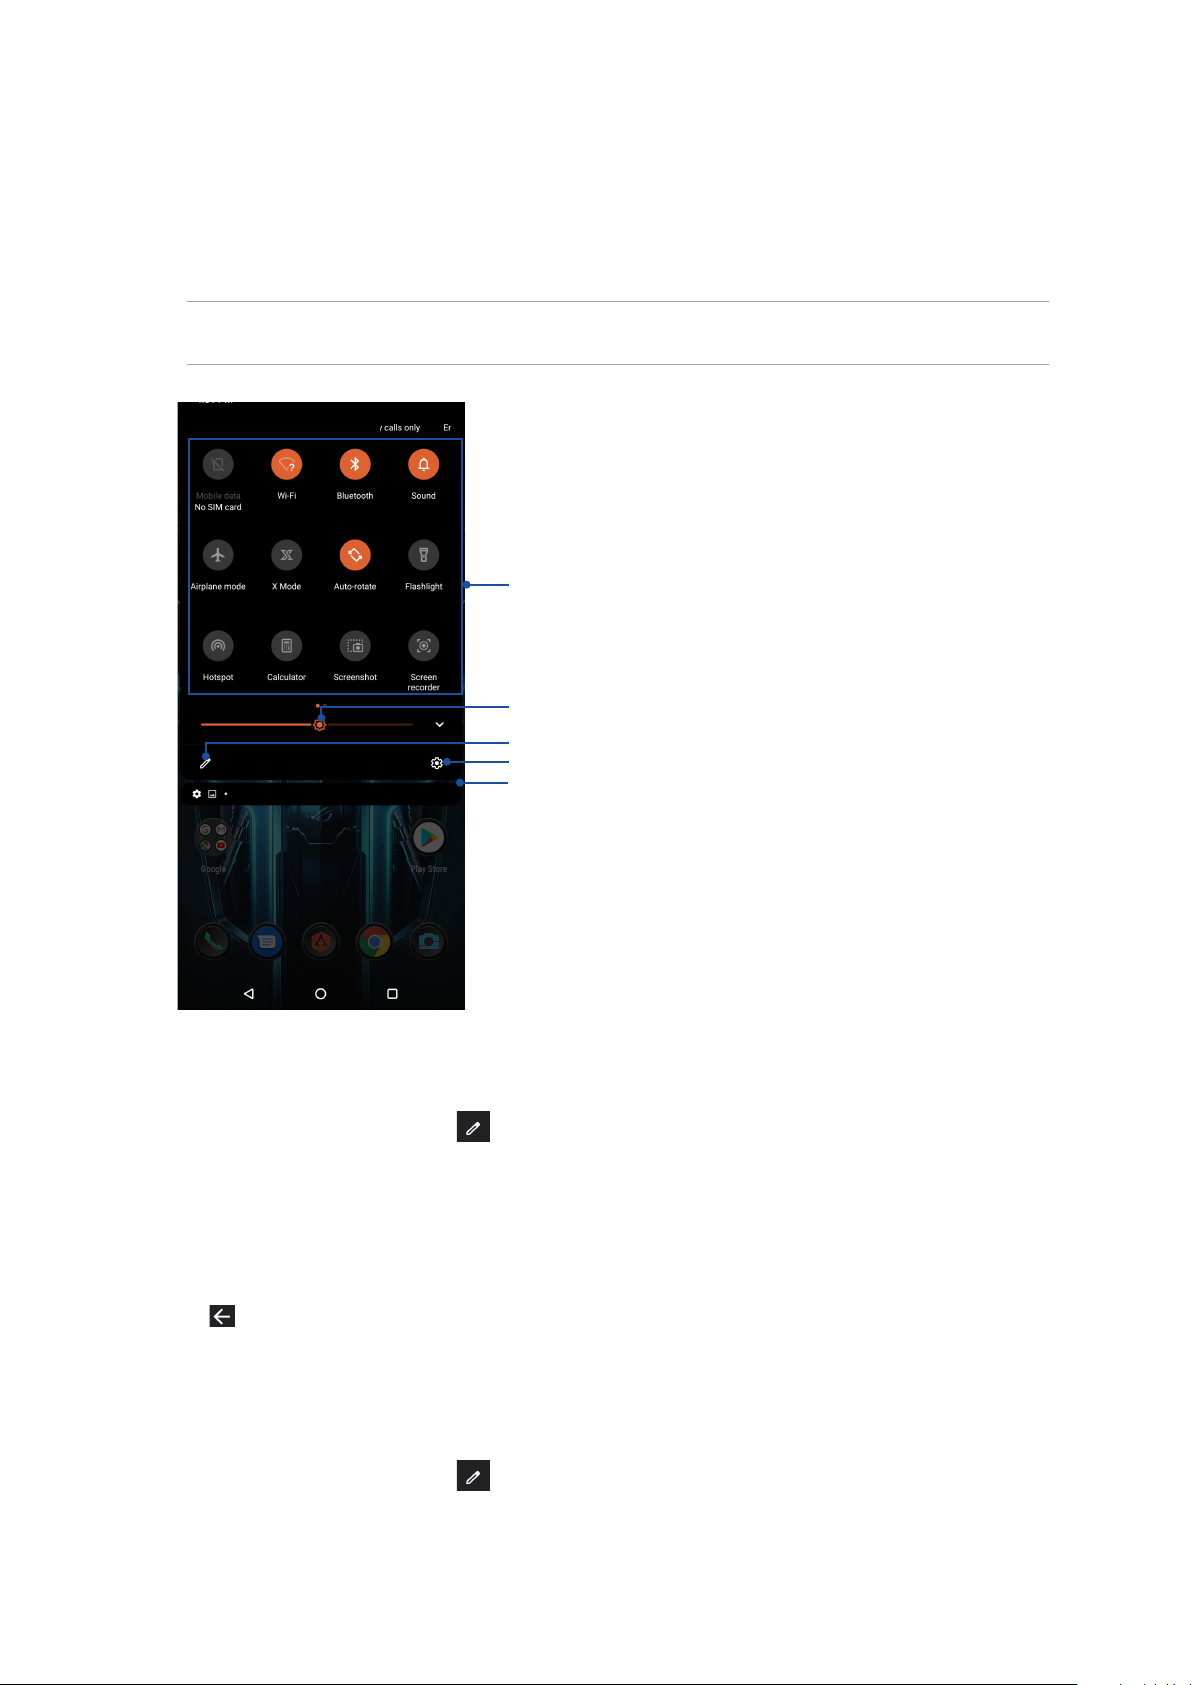
The Quick settings panel provides a one-tap access to some of the wireless features and settings of
your ROG Phone. Each of these features are represented by an icon.
To launch the Quick settings panel, swipe down twice from the top of your screen.
NOTE: An orange icon indicates that the feature is currently enabled while a gray icon indicates a
disabled feature.
Tap these buttons to enable or disable their functions
Slide left or right to adjust the screen’s brightness
Tap to select/deselect items to display in Quick settings
Tap to open Settings
Swipe up to switch to System notications panel
Adding features
To add features from the Quick Settings panel:
1. Launch Quick settings then tap .
2. Swipe up HOLD AND DRAG TO ADD TILES.
3. Under HOLD AND DRAG TO ADD TILES, tap and drag an icon up to add it to the Quick Settings
panel.
4. Tap to go back and view the current Quick Settings panel.
Removing features
To remove existing features from the Quick Settings panel:
1. Launch Quick settings then tap .
2. Tap and drag an icon below HOLD AND DRAG TO REARRANGE TILES to remove it from the
Quick Settings panel.
Chapter 2: There’s no place like Home
23
Notications
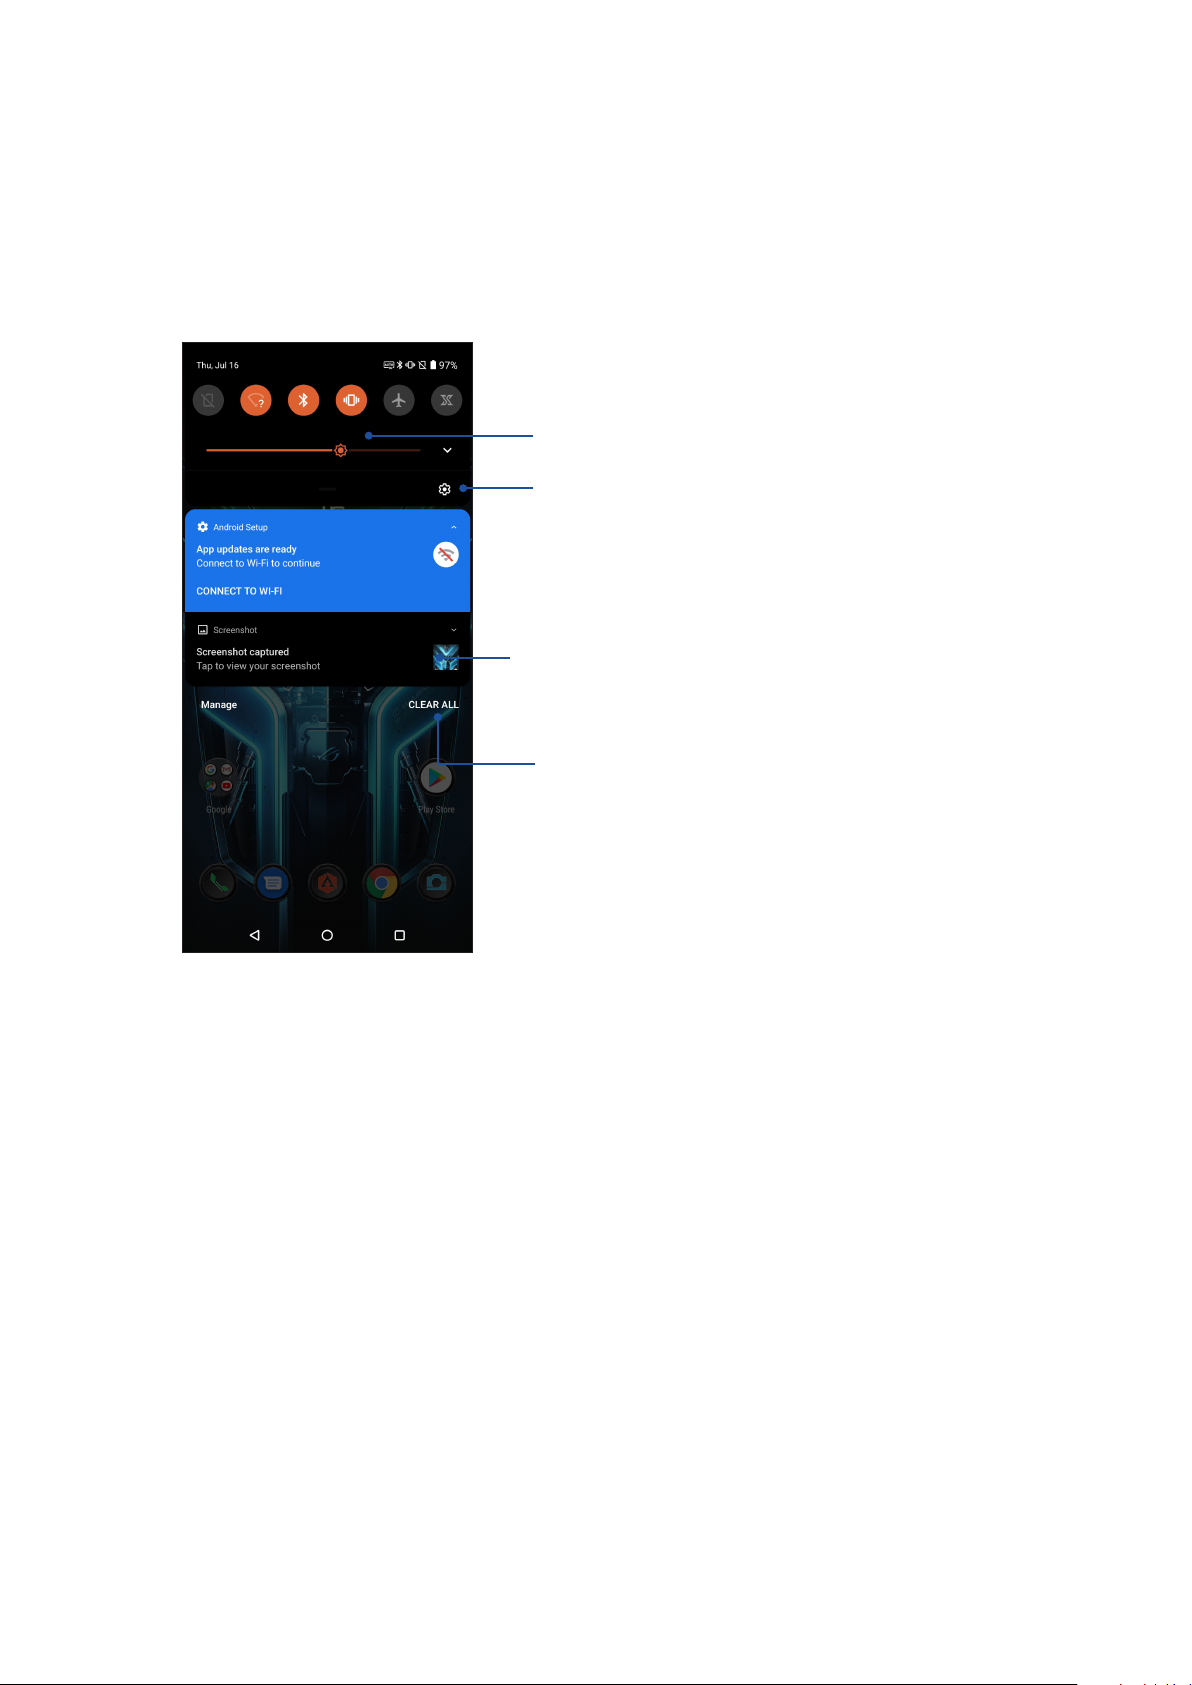
From the notications panel, you can see the latest updates done and system changes made on
your ROG Phone. Most of these changes are data and system-related.
To launch the notications panel, swipe down from the top of your screen.
Swipe down to switch to the Quick Settings panel
Tap to open Settings
• Swipe the notication to the left or right to
remove it from the list
• Tap on the notication to view its details
Tap this to delete all of the listed notications
24
Chapter 2: There’s no place like Home
Personalizing your Home screen
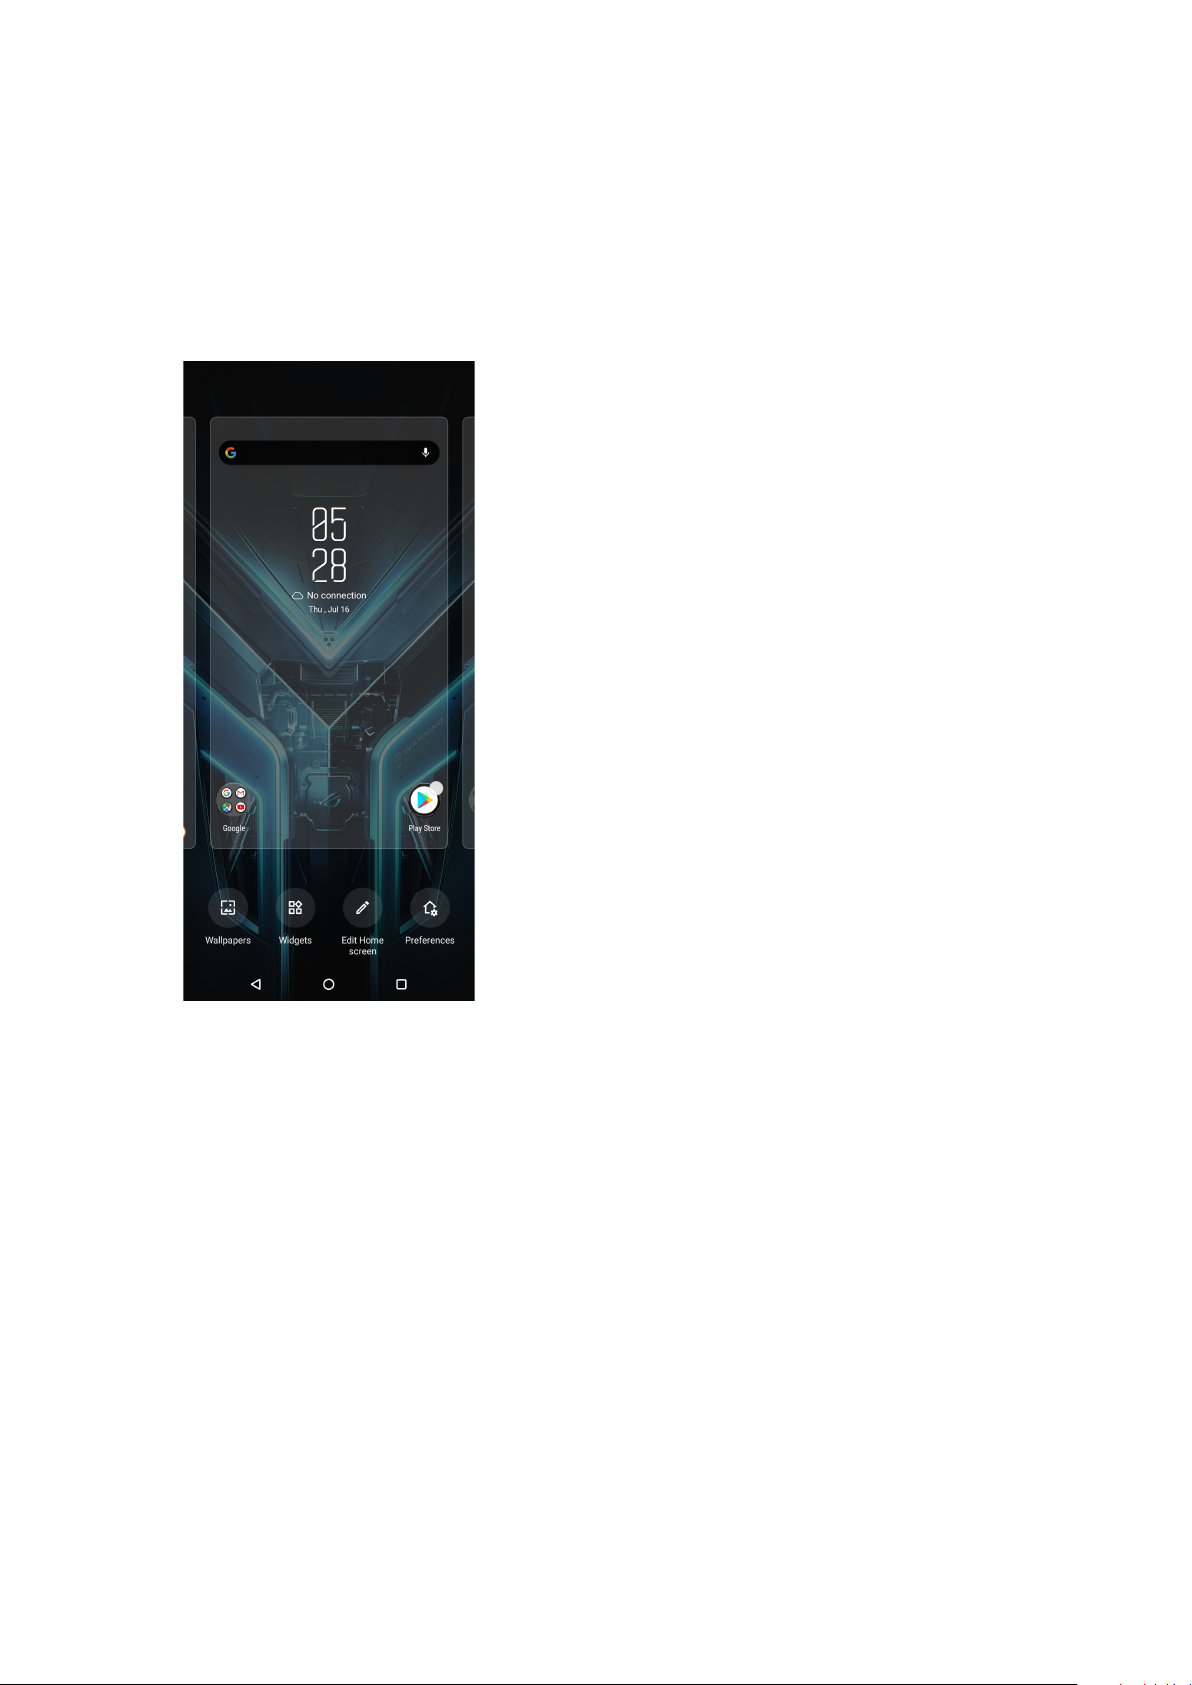
Stamp your own personality on your Home screen. Select an attractive design as your wallpaper,
and add widgets for a quick review of important info. You can also add more pages so you can add
and quickly access or view more apps or widgets on your Home screen.
To launch the Manage Home screen, tap and hold an empty area on your Home screen.
Widgets
You can put widgets, which are small dynamic apps, on your Home screen. Widgets provide you
with quick-views of the weather forecast, calendar events information, battery status, and more.
Adding widgets
To add a widget:
1. Tap and hold an empty area on your Home screen and select Widgets.
2. From the Widgets screen, tap and hold a widget, then drag it to an empty area on your Home
screen.
Removing widgets
From your Home screen, tap and hold a widget, then drag it to Remove on top of your screen.
Chapter 2: There’s no place like Home
25
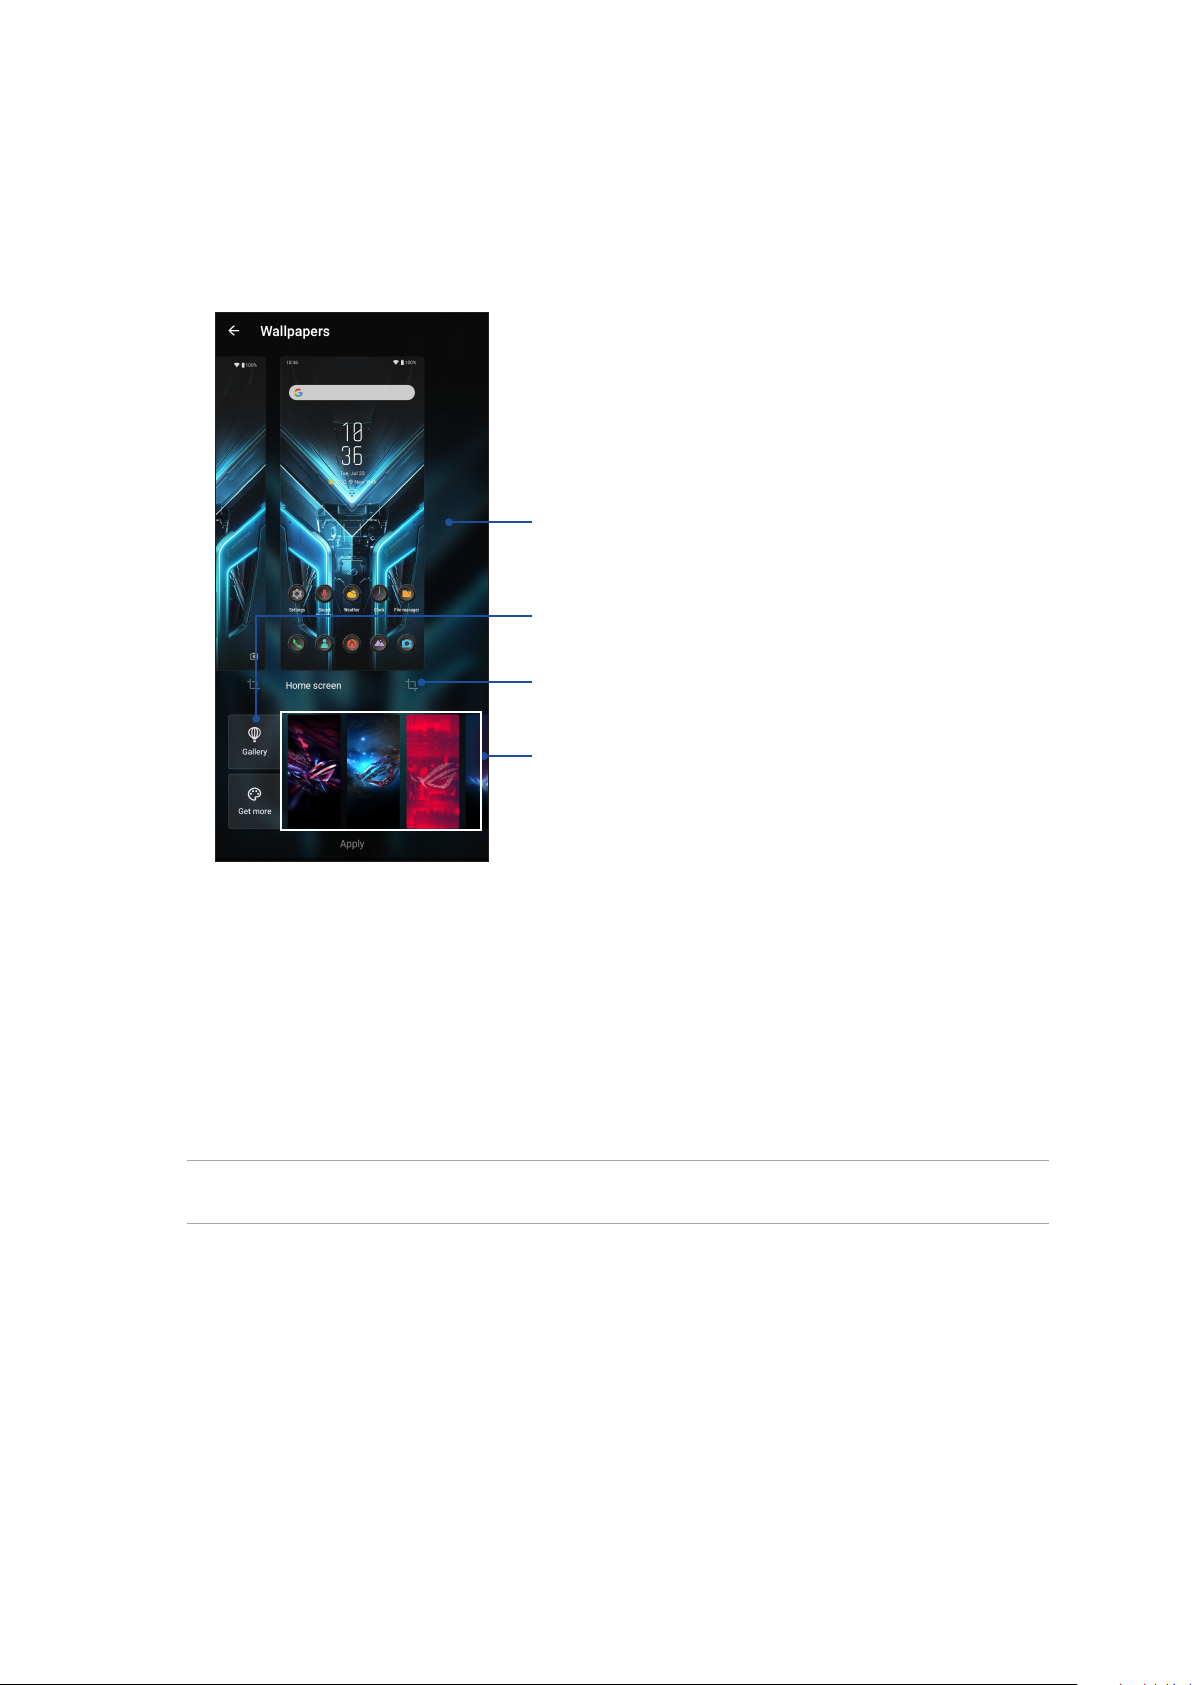
Wallpapers
Let your apps, icons, and other Zen elements sit on an attractively designed wallpaper. You may
add a translucent background tint to your wallpaper for readability and clarity. You can also select
an animated wallpaper to make your screen come alive.
Swipe right or left to select where you want to apply the wallpaper
Tap to select an image from Gallery
Tap to crop the wallpaper
Swipe right or left to select a wallpaper
Applying wallpaper
To apply wallpaper:
1. Tap and hold an empty area on your Home screen and select Wallpapers.
2. Select to set wallpaper to Lock screen or Home screen.
3. Select a wallpaper, then tap Apply.
NOTE: You can also set up your wallpaper settings from Settings > Themes & wallpapers >
Wallpapers.
26
Chapter 2: There’s no place like Home
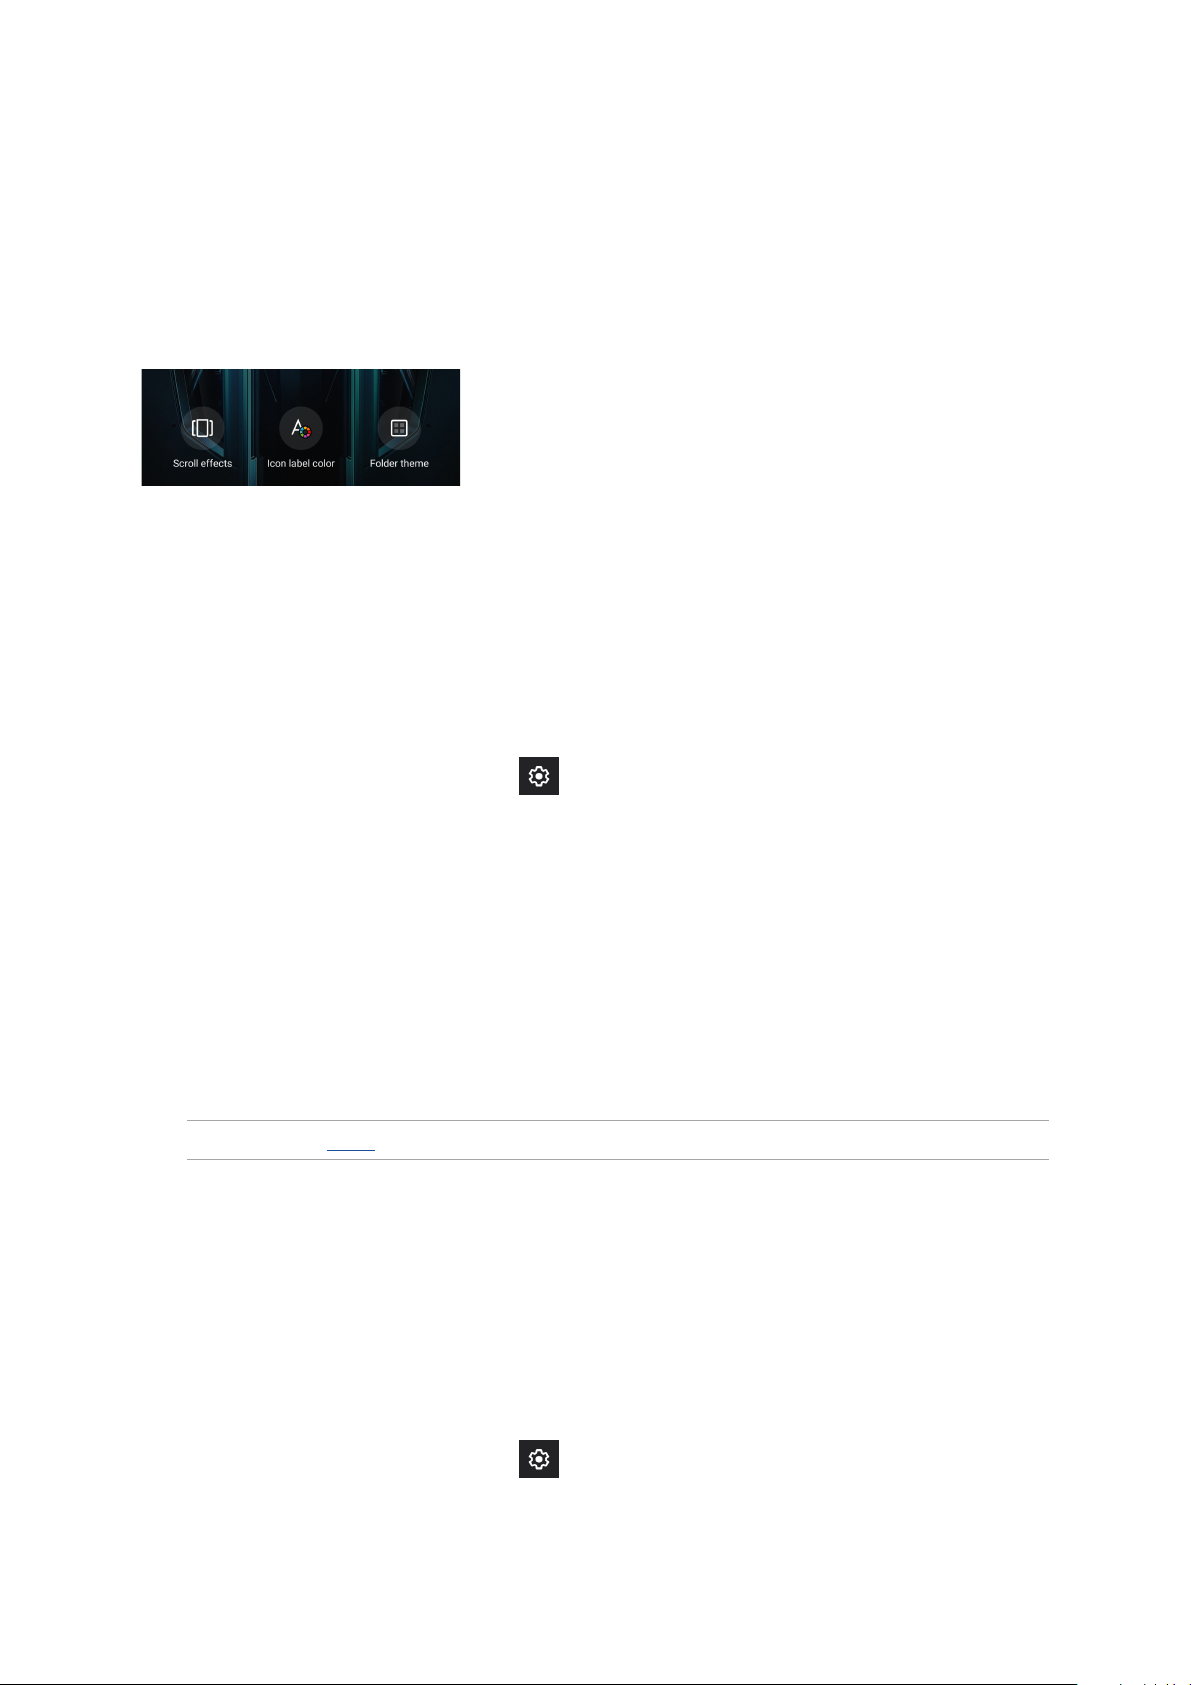
Editing your Home screen
You can extend your Home screen, select a scroll eect, change the icon and font, adjust the size
and color of the icon and font, and align the icons to the top or bottom of your screen.
1. Tap and hold an empty area on your Home screen and select Edit Home screen.
2. Tap a feature to edit your Home screen.
Setting up the date and time
By default, the date and time displayed on your Home screen automatically syncs with your mobile
provider’s settings.
To change the date and time settings:
1. Launch the Settings screen by doing any of the following:
• Launch Quick Settings then tap .
• Swipe up on your Home screen then tap Settings.
2. Scroll down the Settings screen and select System > Date & time.
3. Slide Use network-provided time and Use network-provided time zone to o.
4. Tap Date and Time to adjust the date and time.
5. Tap Time Zone to select the time zone.
6. You can opt to use the 24-hour format, if you prefer.
NOTE: See also Clock.
Setting up your ringtone and alert sounds
Set up the sound for your phone ringtone, notications such as text messages, emails, and event
alerts. You can also choose to enable or disable the dial pad touch tones, touch sounds, screen lock
sound, or you can choose to have your ROG Phone vibrate when you tap on it.
To set up the sound settings:
1. Launch the Settings screen by doing any of the following:
• Launch Quick Settings then tap .
• Swipe up on your Home screen then tap Settings.
2. Select Sound & vibration and set up your preferred sound settings.
Chapter 2: There’s no place like Home
27
Loading...