


ASUS HYPER
M.2 X16 Card V2
Quick Start Guide
E14501
July 2018
First Edition 15060-0GR10000
Parts and features
|
4 |
M |
3 |
LED 2. |
2 |
|
1 |
 LED4_M.2
 M.2_LED3

 M.2_LED2
M.2_LED1 |
M.2(SOCKET3)_1
M.2(SOCKET3)_2
M.2(SOCKET3)_3
M.2(SOCKET3)_4
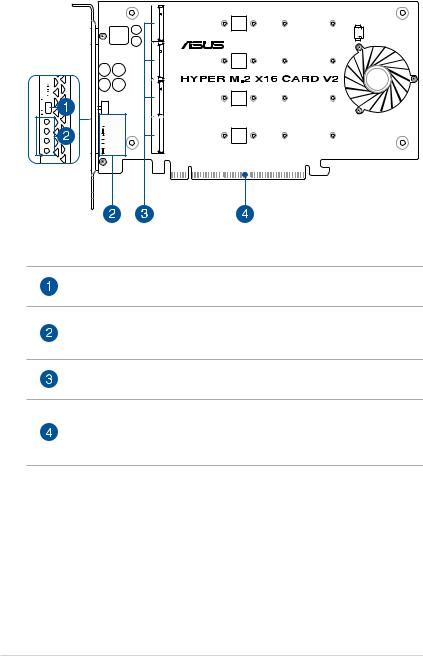
FAN Power Switch
This switch allows you to turn the fan on or off.
M.2 Access LEDs
These LEDs will blink to indicate that data are being read/written from/into the M.2 storage devices.
PCIE M.2 storage device connectors
These connectors allow you to install PCIE M.2 storage devices.
PCI Express interface
This is the interface for the ASUS HYPER M.2 X16 CARD V2 to be installed in your motherboard’s PCI Express slot. Ensure to install the ASUS HYPER M.2 X16 CARD V2 into a PCI Express 3.0 slot for optimum results.
2
Specifications summary
Interface |
PCI Express 3.0 x16 interface, compatible with PCI Express x8 and x16 |
|
slots, supports data transfer rates of up to 128 Gbps. |
||
|
||
|
|
|
|
4 x M.2 Socket 3 with M Key design, type 2242/2260/2280/22110 |
|
External Connectors |
storage devices support* |
|
|
* Supports PCIE M.2 storage devices only. |
|
|
|
|
LED and Switch |
1 x M.2 FAN Power Switch |
|
4 x M.2 Access LEDs |
||
|
||
|
|
|
|
Intel® VROC Ready for X299 / Z370 Series Motherboards* |
|
RAID support |
Supports AMD X399 / X470 / X370 / B450 / B350 Series Motherboards |
|
|
* Supports Intel® SSD modules only. |
|
Dimension |
20.2 x 9.6 x 1.3 cm |
|
|
|
|
Compatible Models |
Visit to www.asus.com for the latest compatible model lists. |
|
|
|
• Specifications are subject to change without notice. Please refer to the ASUS website for the latest specifications.
•M.2 storage devices are not included in the package.
Getting started
To install M.2 storage devices onto your ASUS HYPER M.2 X16 CARD V2:
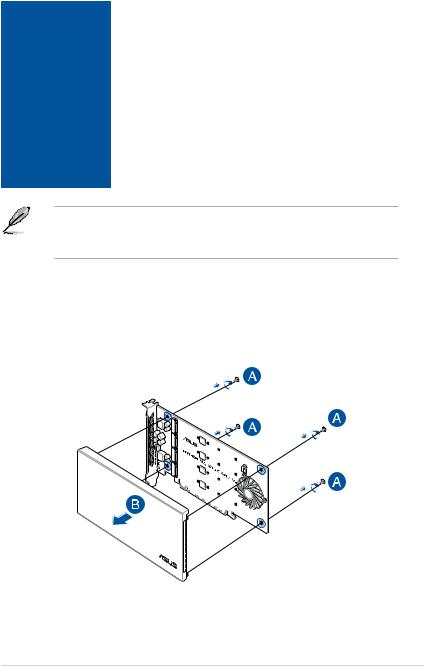
1.Remove the four cover screws that secure the cover to the ASUS HYPER M.2 X16 CARD V2, then remove the cover and set it aside.
M .2(SOCKET3)_1
M .2(SOCKET3)
3

2. Secure the stand screws onto the ASUS HYPER M.2 X16 CARD V2.
M .2(SOCKET3)_1
M .2(SOCKET3)_2
M .2(SOCKET3)_3
M .2(SOCKET3)_4
3.Insert the M.2 storage devices into the PCIE M.2 storage device connectors, then secure the M.2 storage devices with the bundled screws.
4.Peel the plastic films off the thermal pads, secure the cover to the ASUS HYPER M.2
X16 CARD V2 with the cover screws that you removed earlier, then install the ASUS HYPER M.2 X16 CARD V2 into a PCI Express 3.0 slot.
4
 Loading...