

Page 1
iMac G5
Power Supply, 17-inch
Replacement Instructions
Follow the instructions in this sheet carefully. Failure to follow these instructions could
damage your equipment and void its warranty.
Note:
Online instructions are available at http://www.apple.com/support/doityourself/.
Tools Required
• Use the screwdriver provided, or a Phillips #2 screwdriver, preferably with a
magnetized tip
• Flat-blade screwdriver
• Screw tray or equivalent to hold the screws
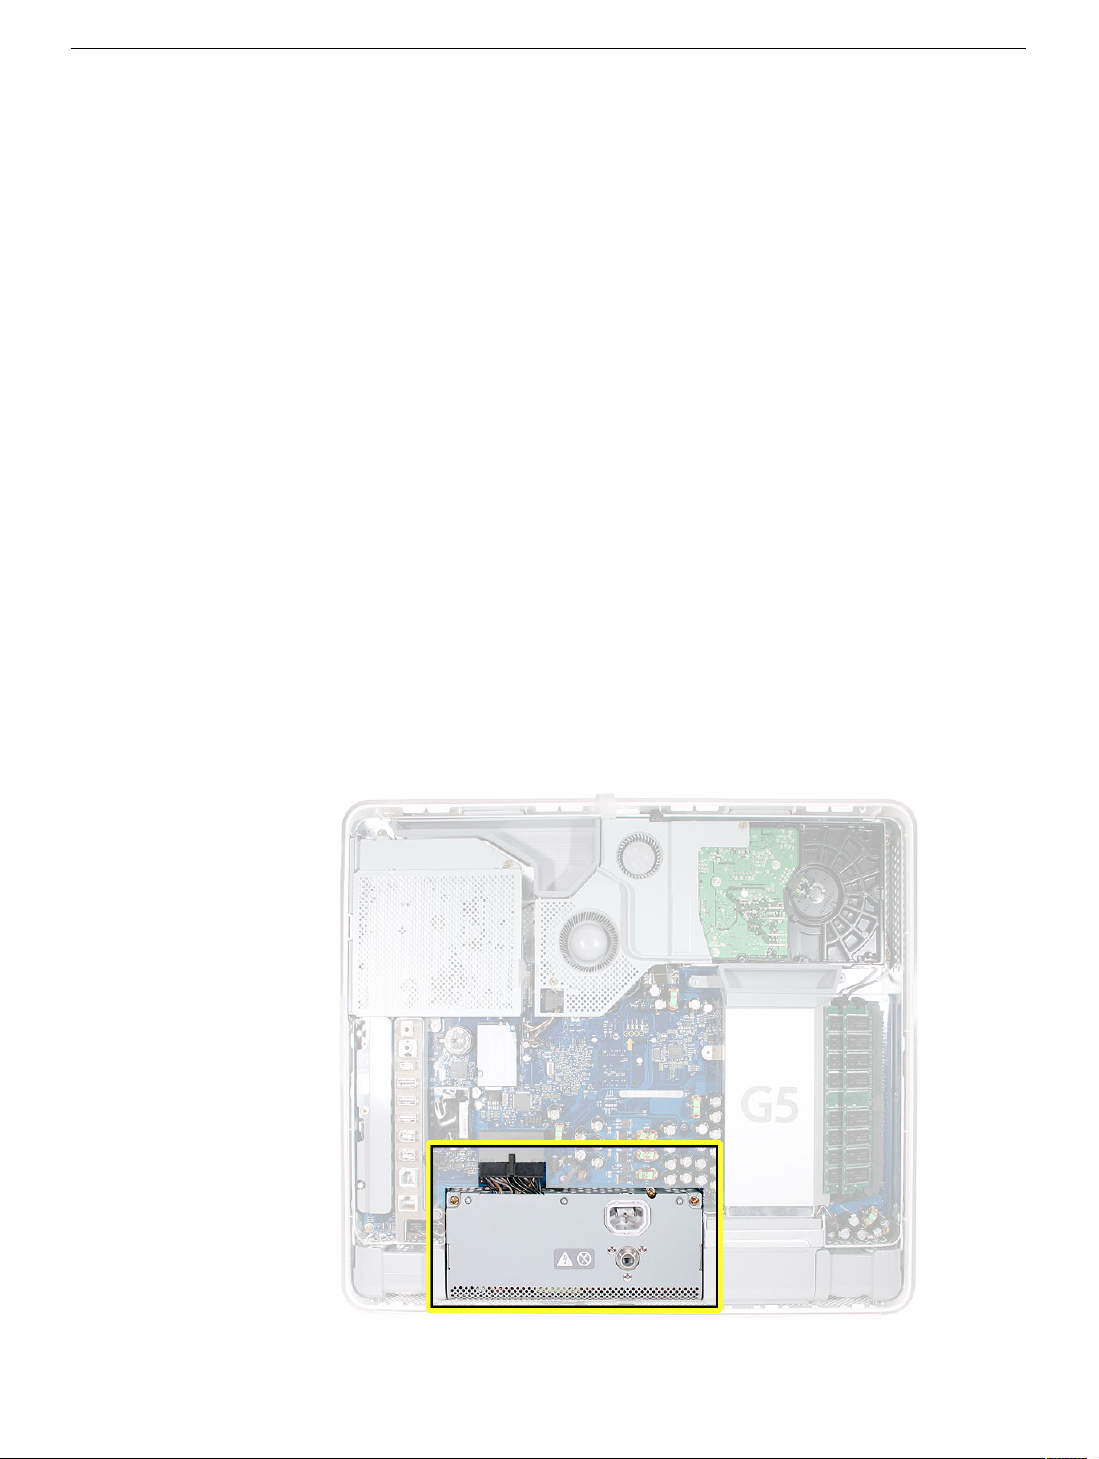
Part Location
033-2498 Rev. C
Page 2
Important Things to Know
Note: These instructions cover the iMac G5 (17-inch) models. The models may look
slightly different from one shown in the illustration; however, the following
procedure applies to both models.
1. The replacement power supply has an ambient light sensor attached with two plastic
rivets. If your computer doesn’t have an ambient light sensor (see next step), remove
the ambient light sensor from the replacement power supply.
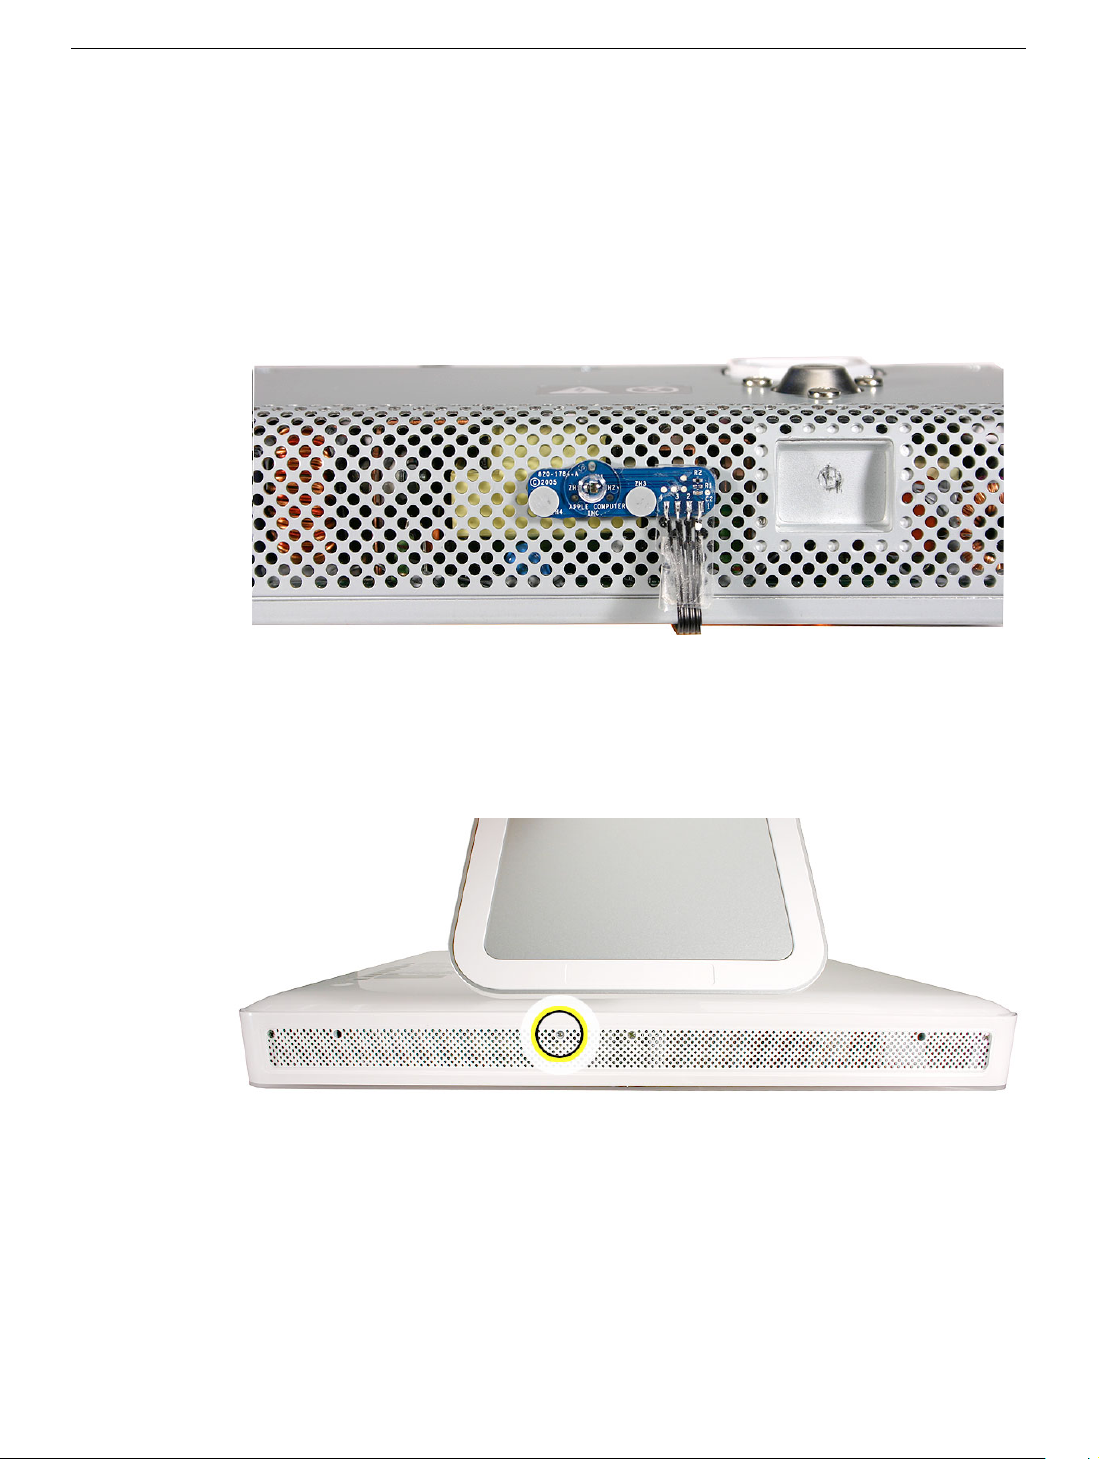
2. How do you tell if you have an iMac G5 with the ambient light sensor? Look at the
picture below. Along the bottom of the display bezel, next to the middle case screw is
a small bump protruding from the case. This is the ambient light sensor.
.
3. All customer removable screws are brass colored
they are brass colored, or you will void your warranty.
4. Ground yourself when working on the computer. The procedure will show you how to
ground yourself.
5. Do not pull on individual wires when disconnecting a part; pull on the connector.
Do not remove screws unless
6. A magnetized “L”-shaped Phillips screwdriver is included with the replacement part.
2 -
iMac G5 Power Supply, 17-inch
Page 3
Opening the Computer
1. Turn your computer off by choosing Shut down from the Apple (K) menu.
2. Disconnect all cables, and unplug the power cord from your computer.
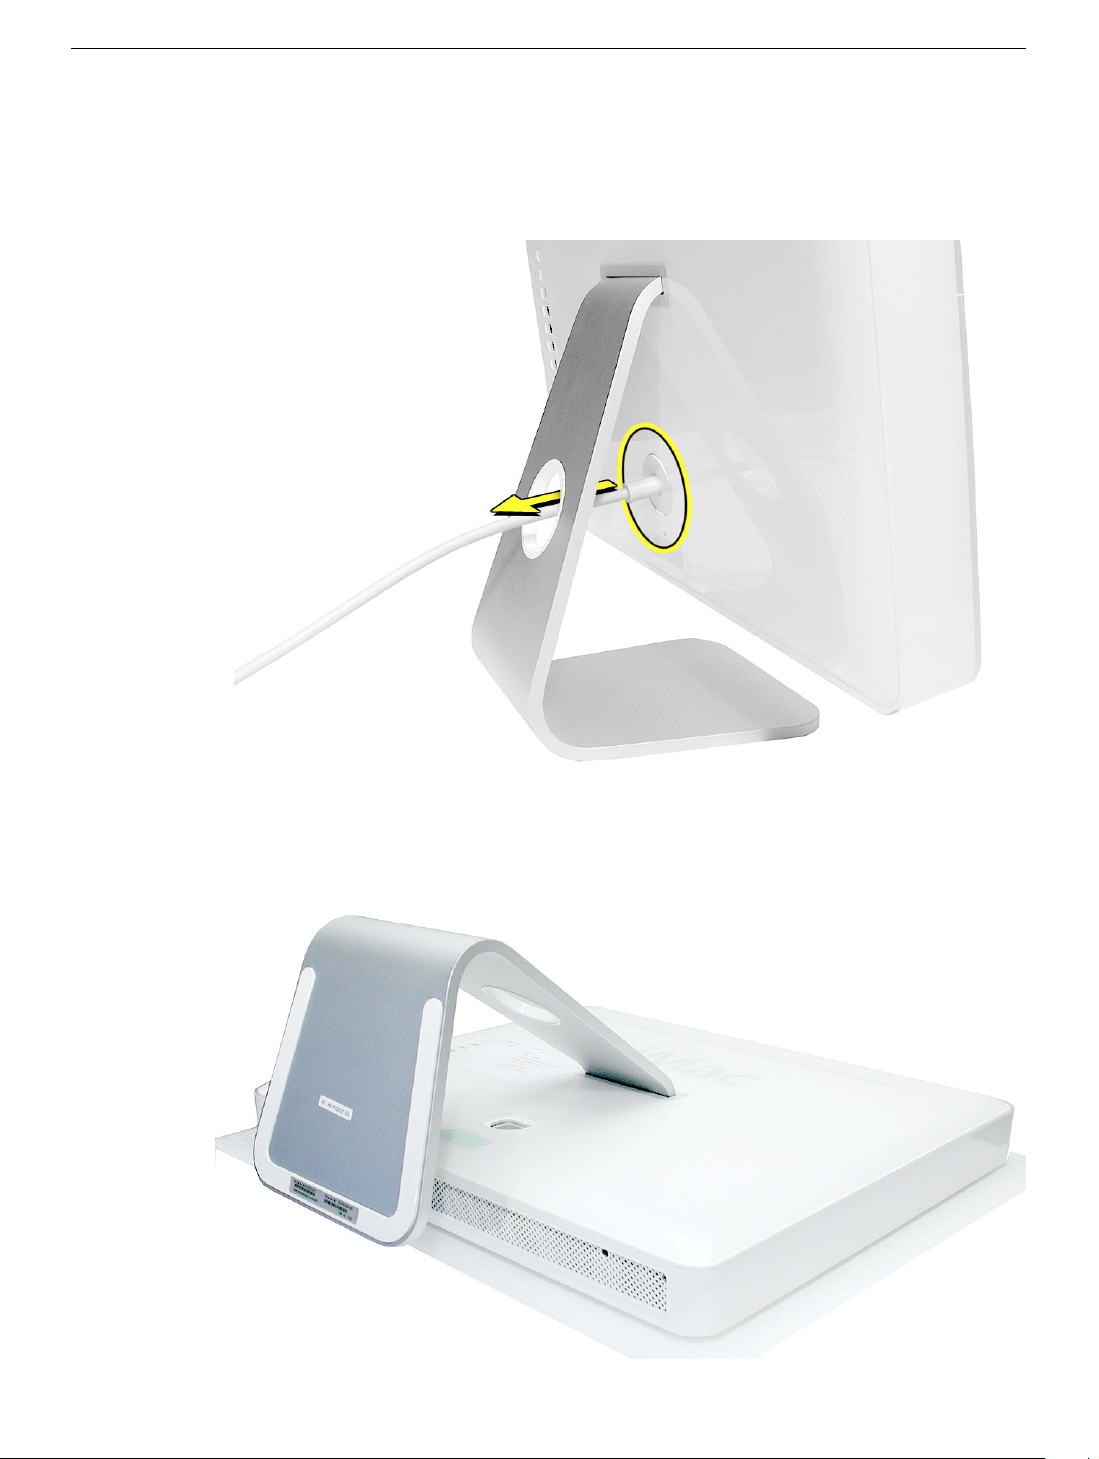
3. Place a soft, clean towel or cloth on the desk or surface. Hold the sides of the
computer and slowly lay the computer face down as shown.
iMac G5 Power Supply, 17-inch -
3
Page 4
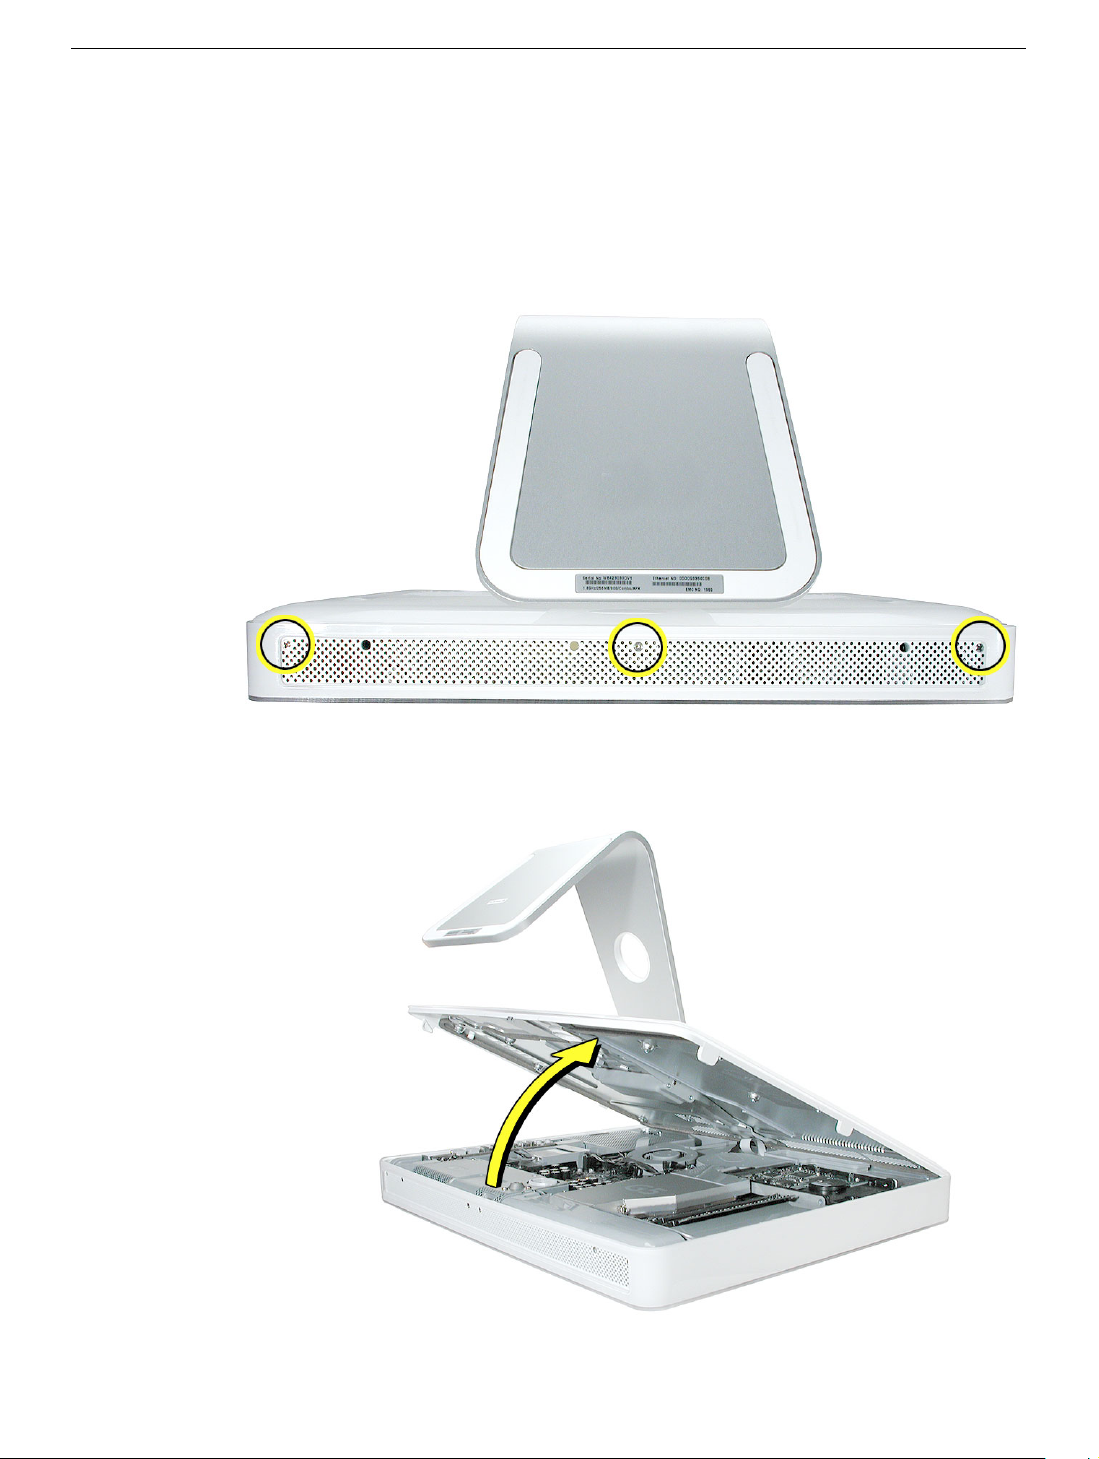
4. Locate the three case screws circled below. Lift the metal foot to locate the middle
case screw.
assembly and cannot be removed.
Using the tool provided, or a Phillips #2 screwdriver, loosen the three captive screws.
Turn the screws to the left until they stop turning.
stop turning
Note:
These screws are captive; they are part of the display/bezel
Don’t force the screws once they
.
5. Holding the foot, tilt the back cover up and lift it off the computer.
4 -
iMac G5 Power Supply, 17-inch
Page 5

Removing the Power Supply
1. Ground yourself. Touch the metal surface (as shown below) on the inside of the
computer to discharge any static electricity.
Warning: Always discharge static electricity before you touch any parts or
install any components inside the computer. To avoid generating static
electricity, do not walk around the room until you have finished installing the
part and closed the computer
.
iMac G5 Power Supply, 17-inch -
5
Page 6
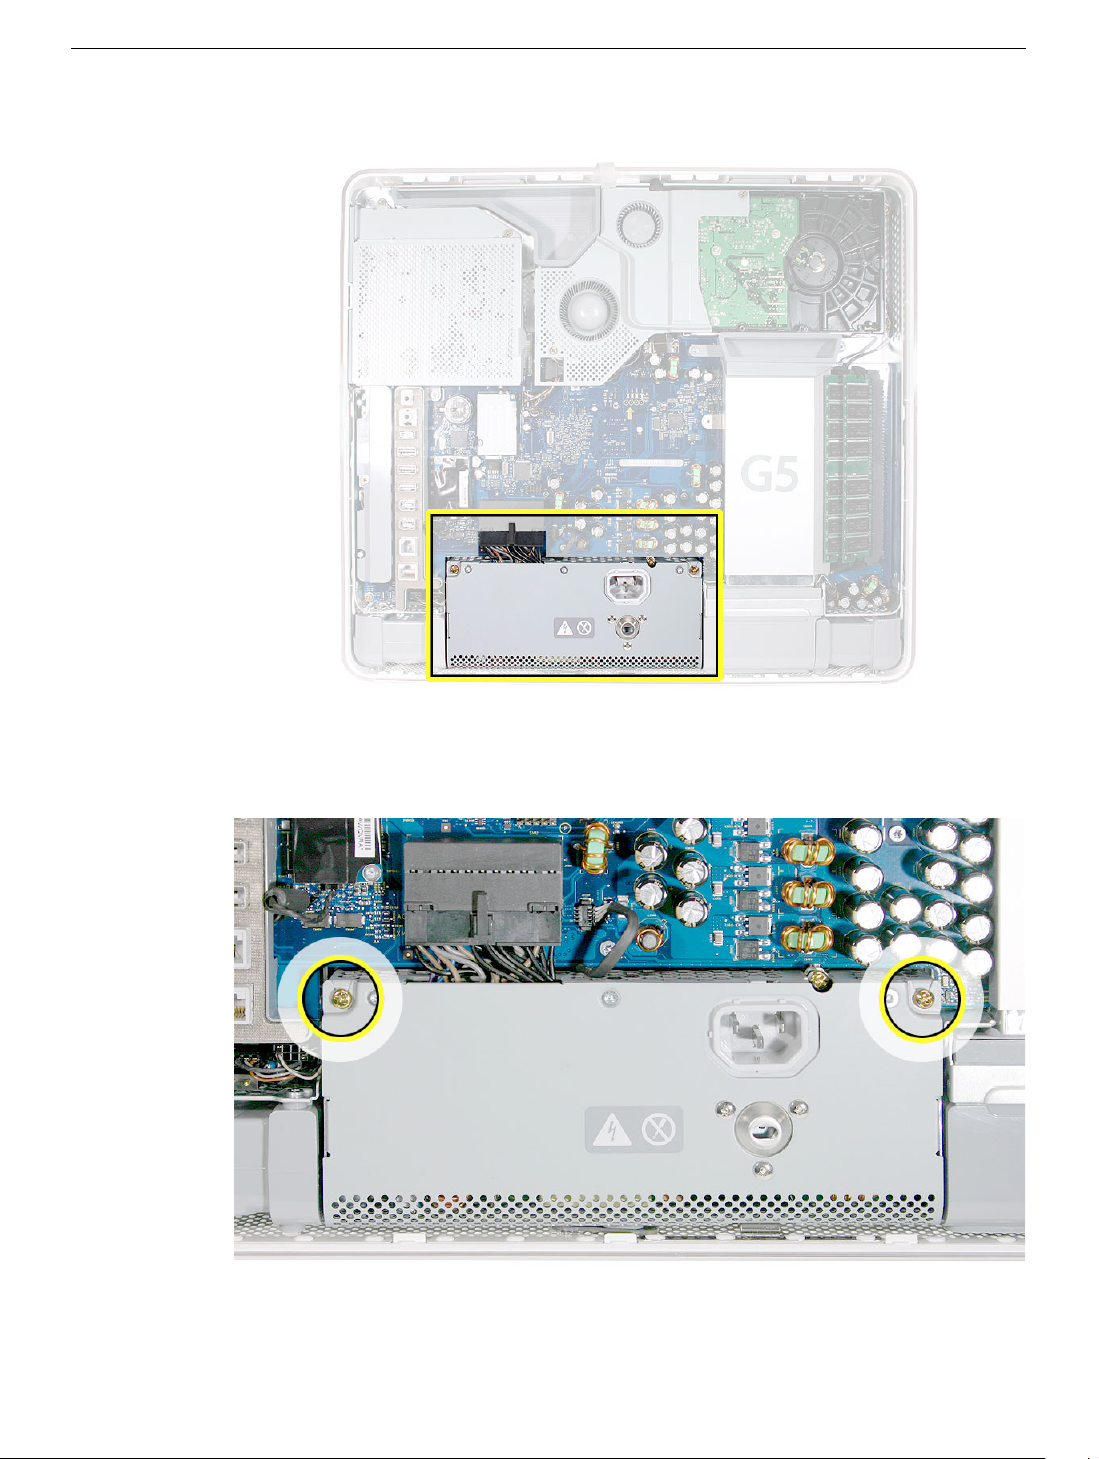
2. Locate the power supply in the picture below.
3. Loosen the two outer power supply screws by turning them to the left.
screws are captive; they cannot be removed.
Note:
These
6 -
iMac G5 Power Supply, 17-inch
Page 7

4. Loosen the middle power supply screw (also a captive screw) by turning it to the left
until it is flush with the top of the power supply. This screw attaches the power supply
to the display bezel below; make sure to loosen the screw all the way.
5. Proceed to the next step if you don’t have and ambient light sensor. For more
information, refer to “Important Things to Know”, step 1 and 2 at the beginning of this
procedure.
If you do have an iMac G5, with the ambient light sensor, disconnect the ambient
light sensor cable (circled) from the logic board.
iMac G5 Power Supply, 17-inch -
7
Page 8

6. Turn the middle case screw clockwise about five revolutions. This releases the back
cover clamp screw.
7. Disconnect the power supply connector with a flat-blade screwdriver. Loosen the
connector enough so that you can remove it with your fingers.
8 -
iMac G5 Power Supply, 17-inch
Page 9

8. Pull the power supply cable out of the connector by rocking it back and forth with your
fingers and pulling it toward the power supply.
9. Tilt up the power supply until it clears the edge of the main circuit board. Wiggle it out
of the computer and set it aside.
iMac G5 Power Supply, 17-inch -
9
Page 10

10. Return the power supply and ambient light sensor to Apple in the packaging provided.
10 -
iMac G5 Power Supply, 17-inch
Page 11

Installing the Replacement Power Supply
1. Remove the replacement power supply from its packaging.
2.
Replacement Note:
the sensor that is riveted to the front of the power supply. Use your fingers or a flatblade screwdriver to remove the rivets.
If your computer does not use an ambient light sensor, remove
3. Push the center screw up with a flat-blade screwdriver. It will be easier to install the
power supply with the screw pushed up and out of the way.
iMac G5 Power Supply, 17-inch -
11
Page 12

4. Tilt the power supply and lower it into the display bezel.
the ambient light sensor, line it up with the opening on the display bezel.
Note:
If your computer has
5. Lower the power supply into place.
12 -
iMac G5 Power Supply, 17-inch
Page 13

6.
Note:
If your computer uses an ambient light sensor cable, check that the ambient
light sensor cable is positioned in the notched-out area on the board.
7. Connect the black power supply cable and the ambient light sensor (if you have one).
iMac G5 Power Supply, 17-inch -
13
Page 14

8. Tighten the two outer captive screws, turning them to the right
9. Tighten the captive screw in the middle. This screw attaches the power supply to the
display/bezel.
14 -
iMac G5 Power Supply, 17-inch
Page 15

10. Turn the middle case screw to the left about five revolutions. This step prepares the
back cover for installation.
iMac G5 Power Supply, 17-inch -
15
Page 16

Closing the Computer
1. Replace the cover so that the slots on the top edge of the cover mate with the tabs on
the display housing.
2. Tilt the back cover slightly and align the top edge with the tabs on the housing. Push
the two together as you lower the back cover.
16 -
iMac G5 Power Supply, 17-inch
Page 17

3. Tighten the three captive case screws by turning them to the right. Don’t overtighten
the screws
4. Position the computer in the upright position. Reconnect the power cord and
remaining cables. Turn on the computer.
iMac G5 Power Supply, 17-inch -
17
Page 18

Apple Computer, Inc.
© 2005 Apple Computer, Inc. All rights reserved.
This document is protected under U.S. Copyright Law and International Treaties, and no
part of this document may be reproduced in any form without written permission from
Apple.
Apple is not responsible for typographical, printing, or inadvertent errors.
Apple Computer, Inc.
1 Infinite Loop
Cupertino, CA 95014-2084
USA
+ 1 408 996 1010
http://www.apple.com
Apple, the Apple logo, Mac, Macintosh, and the Mac logo are trademarks of Apple
Computer, Inc., registered in the U.S. and other countries.
18 -
iMac G5 Power Supply, 17-inch
 Loading...