

Alesis PROACTIVE51 User Manual
Setup
Alesis
®
Installation
Instalación
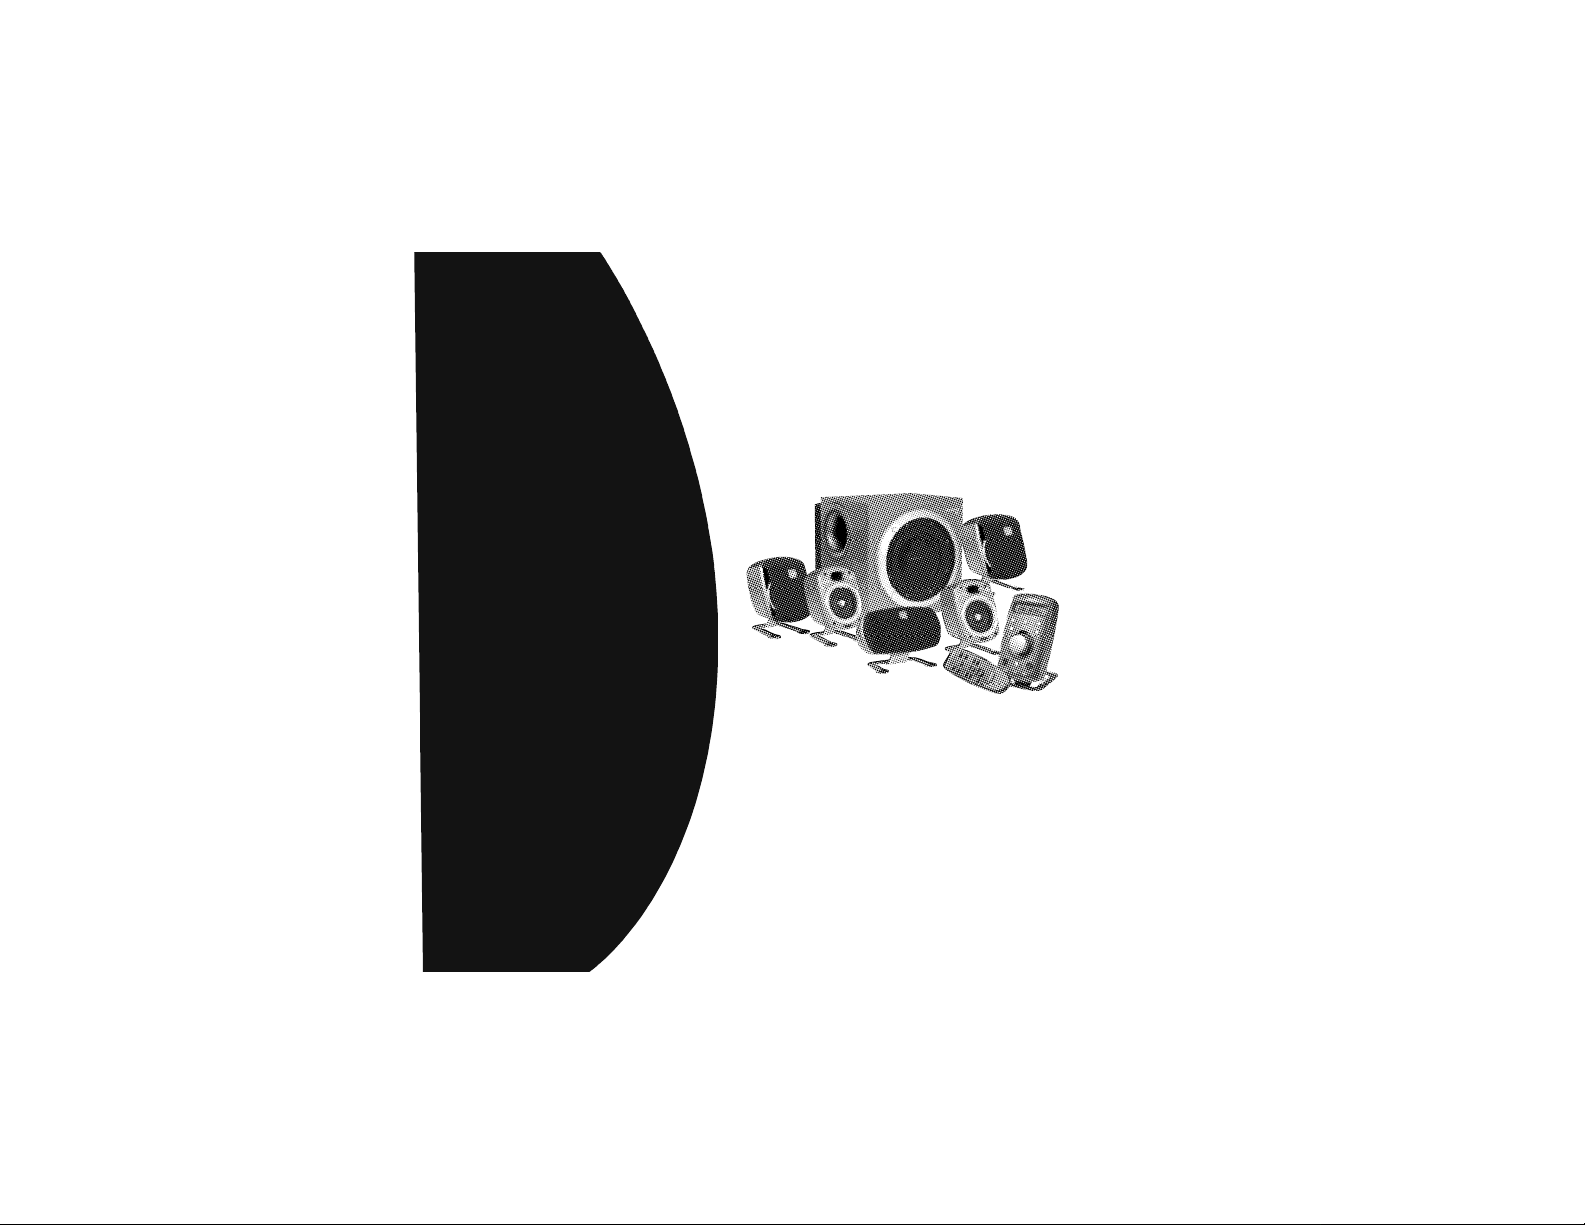
ProActive 5.1

IMPORTANT SAFETY INFORMATION
• Read these instructions.
• Keep these instructions.
• Heed all warnings.
• Follow all instructions.
• Unplug the speakers from the computer and
from the electrical outlet before cleaning them
with a dry cloth.
• Install in accordance with the manufacturer’s
instructions.
• Place the speakers in a stable location so
they will not fall causing damage to the
speakers or bodily harm.
• Do not use the speakers near water, and do
not immerse them in any liquid or pour any
liquid on them.
• Do not block the openings in the speaker
cabinets, never push objects into speaker
vents or slots because of fire or electric shock
hazards, and provide sufficient space around
the speakers for proper ventilation.
• Do not install near any heat sources such as
radiators, heat registers, stoves, or other
apparatus (including amplifiers) that produce
heat.
• Do not defeat the safety purpose of the
polarized plug. A polarized plug has two
blades with one wider than the other. The
wide blade is provided for your safety. If the
provided plug does not fit into your outlet,
consult an electrician for replacement of the
obsolete outlet.
• Operate the speakers only from the low level
1
English
ELECTRIC SHOCK HAZARD
CAUTION
audio line out jack of the computer or of an
audio device.
• Protect the power cord from being walked on
or pinched particularly at plugs, convenience
receptacles, and the point where they exit
from the apparatus.
• Only use attachments/accessories specified
by the manufacturer.
• For added protection during lightning storms,
unplug the speakers from the electrical outlet
and turn off the computer.
• Unplug this apparatus when unused for long
periods of time.
• Servicing is required when the apparatus has
been damaged in any way, such as when the
power-supply cord or plug has been
damaged, liquid has been spilled or objects
have fallen into the apparatus, the apparatus
has been exposed to rain or moisture, does
not operate normally, or has been dropped.
• Refer all servicing to qualified service
personnel.
• The speakers should be disconnected from
the mains by placing the subwoofer Master
Power switch in the off position and
unplugging the power cord of the speakers
from the AC mains receptacle.
TO REDUCE THE RISK OF ELECTRIC
SHOCK, DO NOT EXPOSE THIS APPARA-
TUS TO RAIN OR MOISTURE.
WARNING:
Thank you for purchasing Alesis’’s ProActive 5.1 multimedia speaker system. We’ve worked hard to
meet the rigid standards of THX®and have included the latest Dolby®Digital and DTS®technologies in
order to give you a superior digital audio experience for your PC, gaming, or home theater needs.
Dolby®Digital is the universal
standard for 5.1 digital sound.
DVDs, PlayStation®2, Xbox™,
digital cable, satellite TV, and
HDTV all use Dolby®Digital.
The ProActive 5.1 includes a
hardware Dolby®Digital
decoder for full, rich 5.1 digital
sound.
THX®certification is the “seal of
approval” for speaker quality. It
is an absolute assurance that
these speakers accurately
recreate the full sonic
experience of a movie theater.
The ProActive 5.1 is one of a
select few speaker systems
that meets the rigid standards
for unparalleled THX®quality
DTS®Digital Surround delivers
5.1 digital sound that rivals
master soundtracks. DTS
®
soundtracks are included in
many DVD videos, DVD Audio
discs and PlayStation®2
games. The ProActive 5.1
includes a hardware DTS
®
decoder for master-quality
sound.
sound.
English
2

Please take a few minutes to read this manual before setting up your ProActive 5.1 system. It will
help you optimize your listening experience.
For your safety, set up the entire system before plug-
Important:
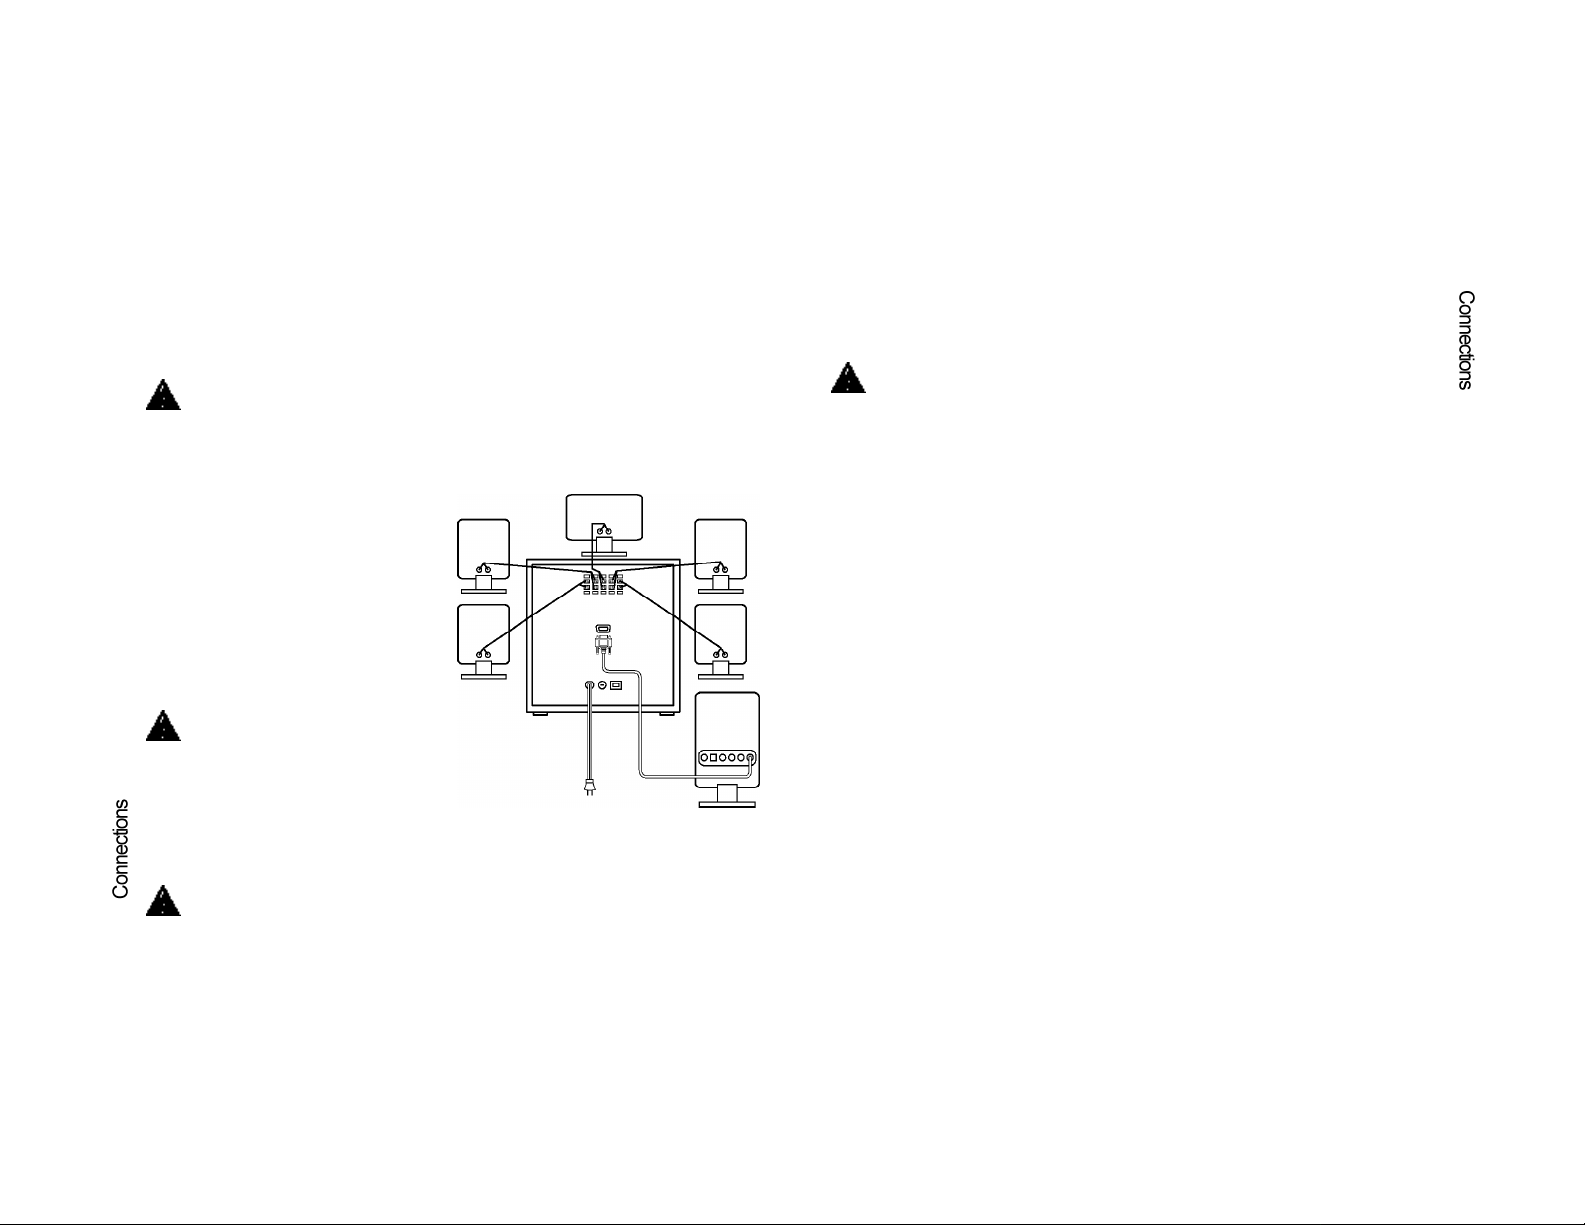
1. Subwoofer
2. Satellite speakers
3. Center channel speaker
4. Digital SoundTouch™ Control Center
5. Wireless remote control
6. 6-channel direct cable
3
3
English
4
6
ging it into a power source.
1
2
Setting up your ProActive 5.1system:
Satellite speakers
Before attaching the cables, position two satellite
speakers on either side of your computer monitor
or television about the same distance from each
other as from you. Angle them to face you.
Place the rear speakers behind you and about the
same distance apart as the front speakers. You
may want to mount these speakers on the wall. If
so, simply loosen the screws on the stands and
rotate the stands 180°. Mount the speakers using
appropriate wall anchors through the holes in the
stands.
For a pro-audio look, remove the cloth grilles by
pulling them straight off. Removing the grilles will
not affect sound quality.
Center channel
Depending on your configuration, place your
center channel speaker on your desk (angled up), on top of your monitor or television (angled
down), or wall-mounted (angled down). To angle the speaker down for placement on top of your
monitor or television, remove the screw, rotate the stand 180 degrees, and reinsert the screw. To
wall mount the speaker, remove the screw and mount the stand through the other hole on the
bottom of the speaker.
Subwoofer
Because bass frequencies are non-directional, the subwoofer can be placed anywhere in relation to
the other speakers. To ensure optimum sound quality do not block the driver or the bass port. To
achieve the strongest bass, place the subwoofer near a wall, corner or under a desk.
Note: Please ensure adequate ventilation around the subwoofer. Keep the cooling fins on the back of
the subwoofer at least 3 inches away from any object. For your safety, the ProActive 5.1 system is
5
protected by a thermal overload switch, which will cause the system to shut down if it becomes too hot.
In rare circumstances where the ambient room temperature is high, the unit can shut down. If this
occurs, turn off the system and allow it to cool. Increase the ventilation around the system before
turning the power back on.
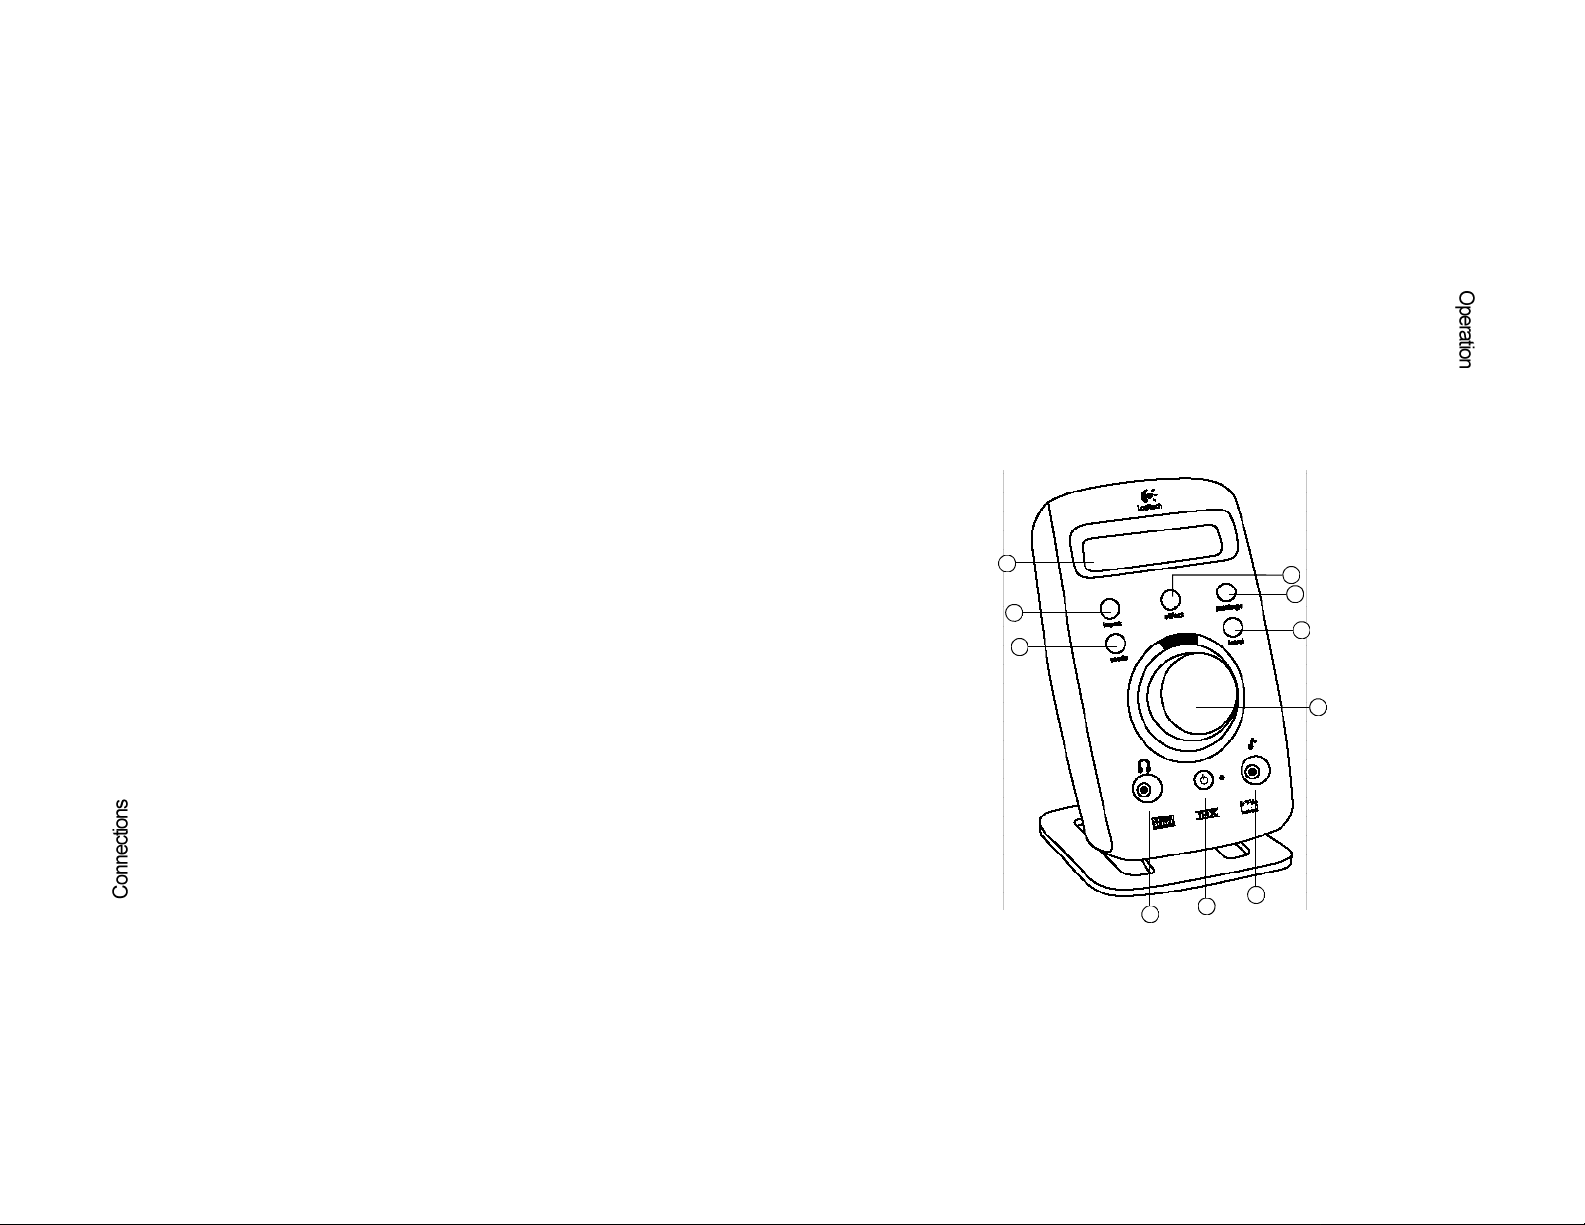
Digital SoundTouch™Control Center
English
4
Position the Digital SoundTouch™Control Center where it is easy to reach.
Connecting the speakers:
Once you have positioned the speakers, connect them to the subwoofer. Two 6’ lengths and
three 15’ lengths of speaker cable are included. If you want to position your speakers further
away, you can use commercially available speaker cable.
Important: Do not plug the subwoofer into AC power until all connections have been
made. Improperly connected or shorted speaker wires will damage the system.
On the back of each speaker, unscrew the terminal
connectors until you see the holes through the
center posts. Insert the cable into the holes, and
tighten the connectors.
Connect the speaker end of each wire before
connecting the subwoofer end.
On the back of the subwoofer, press the lever on
the terminal and insert the cable. Release the lever
and the cable will be locked into position. To avoid
wiring confusion, connect the speakers to the
subwoofer one at a time. Be sure to connect the
cables from the red and black terminals on the
speakers to the corresponding red and black
terminals on the subwoofer. The cable has a white
stripe to aid in maintaining proper polarity.
Important: To avoid shorting out the sys-
tem, make sure that no exposed wires
touch each other and that no stray wires touch
other terminals.
When properly connected, the speakers will operate “in phase” and your sound quality will be
optimized. If not connected properly, the system will operate “out of phase.” While this won’t
damage the system, the sound will be less clear and the bass sounds will be diminished.
English
Important: Only use the ProActive 5.1 satellites with the ProActive 5.1subwoofer. The system
is not designed to be used with any other speakers.
Connecting the Digital SoundTouch™Control Center:
Attach the D-sub cable from the Digital SoundTouch™Control Center to the subwoofer and tighten the
thumbscrews on each side of the connector. To extend the cable to the control center, use only
a Alesis approved extension cable. Contact Alesis for more information and availability.
Important: Do not use an extension cable designed for computer monitors. Computer monitor
cables may damage your ProActive 5.1 system.
Connecting your Audio Sources:
The ProActive 5.1 speaker system can connect to as many as 4 different audio sources
simultaneously. These sources can be connected in a variety of different configurations, depending
on the type of equipment you have.
NOTE: To use the optical or coax jacks, you will need to purchase an optical or coax cable
separately. These are readily available at most consumer electronics retailers.
Instructions are provided below for each type of equipment.
A common configuration might be:
• PC Audio Sound card to 6-channel direct using multiple RCA phono connectors
• Mixer console using 1/4” TR jack outouts
• Multi-channel Recorder with AES/EBU output (optical or coax)
• Analog audio into standard mini-jack
NOTE: These represent only some of the possible configurations
PCs
Digital Connection
If your sound card has a digital output jack, you can use it to connect to the Digital SoundTouch
Control Center. The control center supports either an optical or a coaxial connection. Check your
source device documentation for instructions on how to enable it’s digital output.
Analog Connection
Use the 6-channel direct input cables to connect the Digital SoundTouch™Control Center to the
analog jacks on your sound card, mixer, recorder, etc. There are 3 types of analog inputs to the
system: mono 1/4” TR jack, mono RCA phono and 3.5mm 2-channel mini-jack. For optimal
sound, connect only those cables necessary for your sound card and leave the other cables
unattached at both ends:
™
English
65
• 6-channel pro-audio sound card: These cards usually have an umbilical with female RCA
phono outputs that will connect directly to the ProActive 5.1 RCA phono via the 3.5mm
input adapters that plug into the rear of the Digital SoundTouch™Control Center.
• 6-channel sound card: Connect the orange, black, and green plugs to the Digital
SoundTouch™Control Center and to the color-coded jacks on the sound card.
• 4-channel sound card: Connect the green and black plugs to the Digital SoundTouch
Control Center. Connect the green plug to the sound card’s front jack and the black plug to
the sound card’s rear jack. Leave the orange plug unattached at both ends.
• 2-channel sound card: Connect the green plug to the Digital SoundTouch™Control Center
and to the “line out” jack on your sound card. Leave the orange and black plugs
unattached at both ends.
Mixer, recorder(s), etc.
Testing Your Speakers:
Plug the power cord into a wall outlet and turn on the master power switch on the back of the
subwoofer.
™
Access the speaker test feature by pressing the Test button on the wireless remote control. A test
tone will cycle through each speaker. While in your normal listening position, use the Sub, Center,
or Surround +/- buttons to adjust the speakers to your satisfaction. For optimal sound, each
speaker should play the test tone at the same volume level.
• Mixer output: 6 channels of a mixer output can be connected to the analog inputs via
single channel RCA phono connectors or 1/4” TR adapters connected to the RCA phono
connectors. The mixer outputs should be unbalanced or there will be a 6db loss of signal
going into the speakers which could result in a higher noise level.
• Multi-channel devices such as tape decks connect connect in the same manner as the
the mixer.
Audio/video player
Digital DVD or CD
Connect your DVD or CD player to the Digital SoundTouch™Control Center using a digital
connection appropriate for your player.
Analog audio source
To use an analog audio player with RCA jacks (such as an Alesis Masterlink, CD player or
Analog tape deck ) with the ProActive 5.1 system, plug each channel into the RCA phono to
auxiliary input jack adapter.
Analog 2 channel source
To use a simple 2 channel source such as a personal CD player or MP3 player, connect the
output of the player to the front input connector of the Digital SoundTouch™ Control Center
with a 3.5mm jack.
1
2
5
9
8
3
4
6
7
10
87
EnglishEnglish

Utilizing Your Alesis ProActive 5.1 Speaker System:
The Digital SoundTouch™Control Center gives you easy access to the numerous features of the
ProActive 5.1 system. You can also access these features from the wireless remote control.
1
LCD display
The LCD display allows you to configure your listening environment. When idle, the LCD shows
the input and effect you are listening to.
2
Input
Use the Input button to select the audio source. Pressing the button will cycle through each of the
three source inputs: optical, coax and (6-channel) direct.
3
Effect
The effect button allows you to select music effects to enhance your listening enjoyment. The
ProActive 5.1 system supports the following effects:
• Dolby®Digital
®
• DTS
• MPEG
• Dolby®Pro Logic II Movie
• Dolby®Pro Logic II Music
• 6 Channel Direct
• Stereo x2
• Stereo
For some types of input sources, including 6-channel digital audio sources such as Dolby
Digital, DTS®and MPEG multi-channel, the effect is automatically selected and cannot be
changed. However, for most 2-channel sources, you can choose a desired effect. Use the Effect
button to cycle through the different choices, including: Dolby®Pro Logic II Movie, Dolby®Pro Logic
II Music, 6 Channel Direct, Stereo x2, and Stereo. Note that the list of available effects can be limited depending on the input source.
4
Settings
Use this button to change the settings for certain effects, listed below. Press the settings button to
cycle through the available settings. Rotate the system volume knob to change the displayed setting. If you press this button and the active effect does not have changeable settings, the LCD will
display “No settings for this effect.”
5
Mute
To mute the system volume, press this button. The LCD display will show “Mute on.”
9
Surround Delay—The surround delay setting allows you to adjust the delay of the rear speakers
to accommodate your rear speaker placement.
Dimension (Dolby®Pro Logic II Music only)—Use this setting to adjust the signal toward either the
front or rear speakers to achieve a better sound.
Center Width (Dolby®Pro Logic II Music only)—This setting allows improved blending of the center and main speakers by allowing the adjustment of the signal so that it is heard only from the
center speaker, only from the left and right speakers as a phantom center image, or from combinations of the three front speakers.
Panorama (Dolby®Pro Logic II Music only)—Use this setting to extend the front signal to the surround speakers for a “wraparound effect.”
6
Level
This feature allows you to adjust the following levels: subwoofer, surround, center, and system
volume. Press the Level button to scroll through the options and use the system volume knob to
adjust the levels to your satisfaction.
7
System volume
While idle, this knob is used to adjust the system volume. This knob is also used to adjust other
functions, such as settings and levels.
8
Headphone jack
To use headphones with your Z-680 system, plug them into this jack. The speakers will mute
automatically for private listening. Control the headphone volume with the system volume knob.
®
9
Power/Standby
Use this button to turn power on or to place the system in standby mode. The adjacent LED is
blue when the power is on and red when the system is in standby mode. While in standby mode,
the system will still consume a small amount of power. To completely disconnect the system from
the
10
Auxiliary jack
To use your portable audio player with the Z-680 system, plug it into this jack. Note: The Digital
power source, disconnect the power cord from the wall receptacle.
SoundTouch™Control Center mixes the auxiliary input with the current input.
11
EnglishEnglish
 Loading...