

Page 1

ADOBE® INDESIGN® CS3
USER GUIDE
Page 2

Copyright
© 2007 Adobe Systems Incorporated. All rights reserved.
Adobe® InDesign® CS3 User Guide for Windows® and Mac OS
If this guide is distributed with software that includes an end user agreement, this guide, as well as the software described in it, is furnished under license and may be used or
copied only in accordance with the terms of such license. Except as permitted by any such license, no part of this guide may be reproduced, stored in a retrieval system, or transmitted, in any form or by any means, electronic, mechanical, recording, or other wise, without the prior written permission of Adobe Systems Incorporated.Pleasenotethatthe
content in this guide is protected under copyright law even if it is not distributed with software that includes an end user license agreement.
Thecontentofthisguideisfurnishedforinformationaluseonly,issubjecttochangewithoutnotice,andshouldnotbeconstruedasacommitmentbyAdobe Systems Incorporated. Adobe Systems Incorporated assumes no responsibility or liability for any errors or inaccuracies that may appear in the informational content contained in this guide.
Please remember that existing artwork or images that you may want to include in your project may be protected under copyright law. The unauthorized incorporation of such
material into your new work could be a violation of the rights of the copyright owner. Please be sure to obtain any permission required from the copyright owner.
Any references to company names in sample templates are for demonstration purposes only and are not intended to refer to any actual organization.
Adobe, the Adobe logo, Acrobat, Adobe Bridge, Adobe Caslon, After Effects, Creative Suite, Dreamweaver, Flash, GoLive, Illustrator, InCopy, InDesign, the OpenType logo,
PageMaker, Photoshop, PostScript, PostScript 3, Reader, and Version Cue are either registered trademarks or trademarks of Adobe Systems Incorporated in the United States
and/or other countries.
Mac OS and QuickTime are trademarks of Apple Inc., registered in the United States and other countries. OpenType, Vista, and Windows are trademarks of Microsoft Corporation registered in the U.S and/or other countries. Java is a trademark or registered trademark of Sun Microsystems, Inc. in the United States and other countries. Pantone, Inc.
is the copyright owner of color data and/or software which are licensed to Adobe Systems Incorporated to distribute for use only in combination with Adobe InDesign. PANTONE
Color Data and/or Software shall not be copied onto another disk or into memory unless as part of the execution of Adobe InDesign. All other trademarks are the property of
their respective owners.
Certain Spelling portionsof this product arebased on Proximity LinguisticTechnology. ©Copyright 1990 Merriam-Webster Inc.©Copyright 1990 Allrights reserved. Proximity
Technology A Division of Franklin Electronic Publishers, Inc. Burlington, New Jersey USA. ©Copyright 2003 Franklin Electronic Publishers Inc.©Copyright 2003 All rights
reserved. Proximity Technology A Division of Franklin Electronic Publishers, Inc. Burlington, New Jersey USA. Legal Supplement ©Copyright 1990/1994 Merriam-Webster
Inc./Franklin Electronic Publishers Inc. ©Copyright 1994 All rights reserved. Proximity Technology A Division of Franklin Electronic Publishers, Inc. Burlington, New Jersey
USA. ©Copyright 1990/1994 Merriam-Webster Inc./Franklin Electronic Publishers Inc. ©Copyright 1997All rights reserved. Proximity Technology A Division of Franklin
Electronic Publishers, Inc. Burlington, New Jersey USA ©Copyright 1990 Merriam-Webster Inc. ©Copyright 1993 All rights reserved. Proximity Technology A Division of
Franklin Electronic Publishers, Inc. Burlington, New Jersey USA. ©Copyright 2004 Franklin Electronic Publishers Inc. ©Copyright 2004 All rights reserved. Proximity
Technology A Division ofFranklin ElectronicPublishers, Inc. Burlington,New Jersey USA.©Copyright 1991Dr.Lluis de Yzaguirre I Maura ©Copyright1991 All rights reserved.
Proximity Technology A Division of Franklin Electronic Publishers, Inc. Burlington, New Jersey USA. ©Copyright 1990 Munksgaard International Publishers Ltd. ©Copyright
1990 All rights reserved. Proximity Technology A Division of Franklin Electronic Publishers, Inc. Burlington, New Jersey USA. ©Copyright 1990 Van Dale Lexicografie bv
©Copyright 1990 All rights reserved. Proximity Technology A Division of Franklin Electronic Publishers, Inc. Burlington, New Jersey USA. ©Copyright 1995 Van Dale
Lexicografie bv ©Copyright 1996 All rights reserved. Proximity Technology A Division of Franklin Electronic Publishers, Inc. Burlington, New Jersey USA. ©Copyright 1990
IDE a.s. ©Copyright 1990 All rights reserved. Proximity Technology A Division of Franklin Electronic Publishers, Inc. Burlington, New Jersey USA. ©Copyright 1992
Hachette/Franklin Electronic Publishers Inc. ©Copyright 2004 All rights reserved. Proximity Technology A Division of Franklin Electronic Publishers, Inc. Burlington, New
Jersey USA. ©Copyright 1991 Text & Satz Datentechnik ©Copyright 1991 All rights reserved. Proximity Technology A Division of Franklin Electronic Publishers, Inc.
Burlington, New Jersey USA. ©Copyright 2004 Bertelsmann Lexikon Verlag ©Copyright 2004 All rights reserved. Proximity Technology A Division of Franklin Electronic
Publishers, Inc.Burlington, New Jersey USA. ©Copyright2004 MorphoLogic Inc. ©Copyright 2004All rights reserved. Proximity Technology A Division of Franklin Electronic
Publishers, Inc. Burlington, New Jersey USA. ©Copyright 1990 William Collins Sons & Co. Ltd. ©Copyright 1990 All rights reserved. Proximity Technology A Division of
Franklin Electronic Publishers, Inc. Burlington, New Jersey USA. ©Copyright 1993-95 Russicon Company Ltd. ©Copyright 1995 All rights reserved. Proximity Technology A
Division of Franklin Electronic Publishers, Inc. Burlington, New Jersey USA. ©Copyright 2004 IDE a.s. ©Copyright 2004 All rights reserved. Proximity Technology A Division
of Franklin Electronic Publishers, Inc. Burlington, New Jersey USA. The Hyphenation portion of this product is based on Proximity Linguistic Technology. ©Copyright 2003
Franklin Electronic Publishers Inc.©Copyright 2003 All rights reserved. Proximity Technology A Division of Franklin Electronic Publishers, Inc. Burlington, New Jersey USA.
©Copyright 1984William CollinsSons & Co. Ltd.©Copyright 1988All rights reserved.Proximity Technology A Divisionof Franklin Electronic Publishers, Inc.Burlington, New
Jersey USA. ©Copyright 1990 Munksgaard International Publishers Ltd. ©Copyright 1990 All rights reserved. Proximity Technology A Division of Franklin Electronic
Publishers, Inc. Burlington, New Jersey USA. ©Copyright 1997 Van Dale Lexicografie bv ©Copyright 1997 All rights reserved. Proximity Technology A Division of Franklin
Electronic Publishers, Inc. Burlington, New Jersey USA. ©Copyright 1984 Editions Fernand Nathan ©Copyright 1989 All rights reserved. Proximity Technology A Division of
Franklin Electronic Publishers, Inc. Burlington, New Jersey USA. ©Copyright 1983 S Fischer Verlag ©Copyright 1997 All rights reserved. Proximity Technology A Division of
Franklin ElectronicPublishers, Inc. Burlington,New Jersey USA. ©Copyright 1989Zanichelli ©Copyright1989 All rightsreserved. Proximity Technology A Divisionof Franklin
Electronic Publishers,Inc. Burlington,New JerseyUSA. ©Copyright 1989IDE a.s. ©Copyright1989 All rightsreserved. ProximityTechnology A Divisionof FranklinElectronic
Publishers, Inc. Burlington, New Jersey USA. ©Copyright 1990 Espasa-Calpe ©Copyright 1990 All rights reserved. Proximity Technology A Division of Franklin Electronic
Publishers, Inc. Burlington, NewJersey USA. ©Copyright1989 C.A.Stromberg AB. ©Copyright1989 All rights reserved. ProximityTechnology ADivision of Franklin Electronic
Publishers, Inc. Burlington, New Jersey USA.
The Spelling portion ofthis product is based on Proximity Linguistic Technology. Color-database derived from Sample Books © Dainippon Inkand Chemicals, Inc., licensed to
Adobe Systems Incorporated. Portions © The Focoltone Colour Systems, and used under license.
This product includes software developed by the Apache Software Foundation (
www.apache.org).
Portions © 1984-1998 Faircom Corporation. All rights reserved. Portions copyrighted by Trumatch, Inc. and used under license.
PANTONE® Colors displayed inthe software application orin the userdocumentation maynot matchPANTONE-identified standards.Consult current PANTONE Color Publications for accurate color. PANTONE® and other Pantone, Inc. trademarks are the property of Pantone, Inc. © Pantone, Inc., 2006
This product contains either BISAFE and/or TIPEM software by RSA Data Security, Inc. Copyright (c) 1994 Hewlett-Packard Company. Permission to use, copy, modify,
distributeandsellthissoftwareanditsdocumentationforanypurposeisherebygrantedwithoutfee,providedthattheabovecopyrightnoticeappearinallcopiesandthatboth
that copyrightnotice and this permission notice appearin supporting documentation. Hewlett-Packard Companymakes no representations about the suitability of thissoftware
for any purpose. It is provided “as is” without express or implied warranty.
Copyright (c) 1996, 1997 Silicon Graphics Computer Systems, Inc. Permission to use, copy, modify, distribute and sell this software and its documentation for any purpose is
hereby granted without fee, provided that the above copyright notice appear in all copies and that both that copyright notice and this permission notice appear in supporting
documentation. Silicon Graphics makes no representations about the suitability of this software for any purpose. It is provided “as is” without express or implied warranty.
Notice to U.S. Government End Users: The Software and Documentation are “Commercial Items,” as that term is defined at 48 C.F.R. §2.101, consisting of “Commercial
Computer Software” and “Commercial Computer Software Documentation,” as such terms are used in 48 C.F.R. §12.212 or 48 C.F.R. §227.7202, as applicable. Consistent with
48 C.F.R. §12.212 or 48 C.F.R. §§227.7202-1 through 227.7202-4, as applicable, the Commercial Computer Software and Commercial Computer Software Documentation are
being licensed to U.S. Government end users (a) onlyas Commercial Itemsand (b)with onlythose rights asare granted toall otherend users pursuant tothe terms and conditions
herein. Unpublished-rights reserved under the copyright laws of the United States. Adobe agrees to comply with all applicable equal opportunity laws including, if appropriate,
the provisions of Executive Order 11246, as amended, Section 402 of the Vietnam Era Veterans Readjustment Assistance Act of 1974 (38 USC 4212), and Section 503 of the
Rehabilitation Act of 1973, as amended, and the regulations at 41 CFR Parts 60-1 through 60-60, 60-250,and 60-741. The affirmative action clause and regulations contained in
the preceding sentence shall be incorporated by reference.
Adobe Systems Incorporated, 345 Park Avenue, San Jose, California 95110, USA.
Page 3

Contents
Chapter 1: Getting started
Installation . . . . . . . . . . . . . . . . . . . . . . . . . . . . . . . . . . . . . . . . . . . . . . . . . . . . . . . . . . . . . . . . . . . . . . . . . . . . . . . 1
Adobe Help . . . . . . . . . . . . . . . . . . . . . . . . . . . . . . . . . . . . . . . . . . . . . . . . . . . . . . . . . . . . . . . . . . . . . . . . . . . . . . . 2
Resources . . . . . . . . . . . . . . . . . . . . . . . . . . . . . . . . . . . . . . . . . . . . . . . . . . . . . . . . . . . . . . . . . . . . . . . . . . . . . . . . 5
What’s new . . . . . . . . . . . . . . . . . . . . . . . . . . . . . . . . . . . . . . . . . . . . . . . . . . . . . . . . . . . . . . . . . . . . . . . . . . . . . . 11
Chapter 2: Workspace
Workspace basics . . . . . . . . . . . . . . . . . . . . . . . . . . . . . . . . . . . . . . . . . . . . . . . . . . . . . . . . . . . . . . . . . . . . . . . . 15
Customize menus and keyboard shortcuts . . . . . . . . . . . . . . . . . . . . . . . . . . . . . . . . . . . . . . . . . . . . . . . . 24
Toolbox . . . . . . . . . . . . . . . . . . . . . . . . . . . . . . . . . . . . . . . . . . . . . . . . . . . . . . . . . . . . . . . . . . . . . . . . . . . . . . . . . 26
Viewing the workspace . . . . . . . . . . . . . . . . . . . . . . . . . . . . . . . . . . . . . . . . . . . . . . . . . . . . . . . . . . . . . . . . . . 31
Setting preferences . . . . . . . . . . . . . . . . . . . . . . . . . . . . . . . . . . . . . . . . . . . . . . . . . . . . . . . . . . . . . . . . . . . . . . 36
Recovery and undo . . . . . . . . . . . . . . . . . . . . . . . . . . . . . . . . . . . . . . . . . . . . . . . . . . . . . . . . . . . . . . . . . . . . . . 38
Chapter 3: Layout
Creating documents . . . . . . . . . . . . . . . . . . . . . . . . . . . . . . . . . . . . . . . . . . . . . . . . . . . . . . . . . . . . . . . . . . . . . 40
Creating custom page sizes . . . . . . . . . . . . . . . . . . . . . . . . . . . . . . . . . . . . . . . . . . . . . . . . . . . . . . . . . . . . . . 44
Rulers and measurement units . . . . . . . . . . . . . . . . . . . . . . . . . . . . . . . . . . . . . . . . . . . . . . . . . . . . . . . . . . . 45
Grids . . . . . . . . . . . . . . . . . . . . . . . . . . . . . . . . . . . . . . . . . . . . . . . . . . . . . . . . . . . . . . . . . . . . . . . . . . . . . . . . . . . . 50
Ruler guides . . . . . . . . . . . . . . . . . . . . . . . . . . . . . . . . . . . . . . . . . . . . . . . . . . . . . . . . . . . . . . . . . . . . . . . . . . . . . 52
Pages and spreads . . . . . . . . . . . . . . . . . . . . . . . . . . . . . . . . . . . . . . . . . . . . . . . . . . . . . . . . . . . . . . . . . . . . . . . 57
Masters . . . . . . . . . . . . . . . . . . . . . . . . . . . . . . . . . . . . . . . . . . . . . . . . . . . . . . . . . . . . . . . . . . . . . . . . . . . . . . . . . . 62
Layers . . . . . . . . . . . . . . . . . . . . . . . . . . . . . . . . . . . . . . . . . . . . . . . . . . . . . . . . . . . . . . . . . . . . . . . . . . . . . . . . . . . 69
Laying out frames and pages . . . . . . . . . . . . . . . . . . . . . . . . . . . . . . . . . . . . . . . . . . . . . . . . . . . . . . . . . . . . . 75
Numbering pages, chapters, and sections . . . . . . . . . . . . . . . . . . . . . . . . . . . . . . . . . . . . . . . . . . . . . . . . 79
Text variables . . . . . . . . . . . . . . . . . . . . . . . . . . . . . . . . . . . . . . . . . . . . . . . . . . . . . . . . . . . . . . . . . . . . . . . . . . . . 85
iii
Chapter 4: Working with documents
Working with files and templates . . . . . . . . . . . . . . . . . . . . . . . . . . . . . . . . . . . . . . . . . . . . . . . . . . . . . . . . . 90
Saving documents . . . . . . . . . . . . . . . . . . . . . . . . . . . . . . . . . . . . . . . . . . . . . . . . . . . . . . . . . . . . . . . . . . . . . . . 95
Converting QuarkXPress and PageMaker documents . . . . . . . . . . . . . . . . . . . . . . . . . . . . . . . . . . . . . . 98
Exporting . . . . . . . . . . . . . . . . . . . . . . . . . . . . . . . . . . . . . . . . . . . . . . . . . . . . . . . . . . . . . . . . . . . . . . . . . . . . . . . 102
Chapter 5: Text
Creating text and text frames . . . . . . . . . . . . . . . . . . . . . . . . . . . . . . . . . . . . . . . . . . . . . . . . . . . . . . . . . . . . 111
Adding text to frames . . . . . . . . . . . . . . . . . . . . . . . . . . . . . . . . . . . . . . . . . . . . . . . . . . . . . . . . . . . . . . . . . . . 114
Importing text . . . . . . . . . . . . . . . . . . . . . . . . . . . . . . . . . . . . . . . . . . . . . . . . . . . . . . . . . . . . . . . . . . . . . . . . . . 117
Threading text . . . . . . . . . . . . . . . . . . . . . . . . . . . . . . . . . . . . . . . . . . . . . . . . . . . . . . . . . . . . . . . . . . . . . . . . . . 122
Text frame properties . . . . . . . . . . . . . . . . . . . . . . . . . . . . . . . . . . . . . . . . . . . . . . . . . . . . . . . . . . . . . . . . . . . 126
Editing text . . . . . . . . . . . . . . . . . . . . . . . . . . . . . . . . . . . . . . . . . . . . . . . . . . . . . . . . . . . . . . . . . . . . . . . . . . . . 128
Find/Change . . . . . . . . . . . . . . . . . . . . . . . . . . . . . . . . . . . . . . . . . . . . . . . . . . . . . . . . . . . . . . . . . . . . . . . . . . . . 132
Glyphs and special characters . . . . . . . . . . . . . . . . . . . . . . . . . . . . . . . . . . . . . . . . . . . . . . . . . . . . . . . . . . . 147
Page 4

Spell-checking and language dictionaries . . . . . . . . . . . . . . . . . . . . . . . . . . . . . . . . . . . . . . . . . . . . . . . 153
Footnotes . . . . . . . . . . . . . . . . . . . . . . . . . . . . . . . . . . . . . . . . . . . . . . . . . . . . . . . . . . . . . . . . . . . . . . . . . . . . . .161
Chapter 6: Styles
Paragraph and character styles . . . . . . . . . . . . . . . . . . . . . . . . . . . . . . . . . . . . . . . . . . . . . . . . . . . . . . . . . .165
Drop caps and nested styles . . . . . . . . . . . . . . . . . . . . . . . . . . . . . . . . . . . . . . . . . . . . . . . . . . . . . . . . . . . . . 173
Object styles . . . . . . . . . . . . . . . . . . . . . . . . . . . . . . . . . . . . . . . . . . . . . . . . . . . . . . . . . . . . . . . . . . . . . . . . . . . . 177
Working with styles . . . . . . . . . . . . . . . . . . . . . . . . . . . . . . . . . . . . . . . . . . . . . . . . . . . . . . . . . . . . . . . . . . . . . 183
Chapter 7: Combining text and objects
Anchored objects . . . . . . . . . . . . . . . . . . . . . . . . . . . . . . . . . . . . . . . . . . . . . . . . . . . . . . . . . . . . . . . . . . . . . . . 186
Wrapping text around objects . . . . . . . . . . . . . . . . . . . . . . . . . . . . . . . . . . . . . . . . . . . . . . . . . . . . . . . . . . . 195
Creating type on a path . . . . . . . . . . . . . . . . . . . . . . . . . . . . . . . . . . . . . . . . . . . . . . . . . . . . . . . . . . . . . . . . . 199
Chapter 8: Typography
Formatting text . . . . . . . . . . . . . . . . . . . . . . . . . . . . . . . . . . . . . . . . . . . . . . . . . . . . . . . . . . . . . . . . . . . . . . . . . 204
Using fonts . . . . . . . . . . . . . . . . . . . . . . . . . . . . . . . . . . . . . . . . . . . . . . . . . . . . . . . . . . . . . . . . . . . . . . . . . . . . . 206
Leading . . . . . . . . . . . . . . . . . . . . . . . . . . . . . . . . . . . . . . . . . . . . . . . . . . . . . . . . . . . . . . . . . . . . . . . . . . . . . . . . 211
Kerning and tracking . . . . . . . . . . . . . . . . . . . . . . . . . . . . . . . . . . . . . . . . . . . . . . . . . . . . . . . . . . . . . . . . . . . . 212
Formatting characters . . . . . . . . . . . . . . . . . . . . . . . . . . . . . . . . . . . . . . . . . . . . . . . . . . . . . . . . . . . . . . . . . . .215
Formatting paragraphs . . . . . . . . . . . . . . . . . . . . . . . . . . . . . . . . . . . . . . . . . . . . . . . . . . . . . . . . . . . . . . . . . . 222
Aligning text . . . . . . . . . . . . . . . . . . . . . . . . . . . . . . . . . . . . . . . . . . . . . . . . . . . . . . . . . . . . . . . . . . . . . . . . . . . . 227
Indents . . . . . . . . . . . . . . . . . . . . . . . . . . . . . . . . . . . . . . . . . . . . . . . . . . . . . . . . . . . . . . . . . . . . . . . . . . . . . . . . . 230
Tabs . . . . . . . . . . . . . . . . . . . . . . . . . . . . . . . . . . . . . . . . . . . . . . . . . . . . . . . . . . . . . . . . . . . . . . . . . . . . . . . . . . . .233
Bullets and numbering . . . . . . . . . . . . . . . . . . . . . . . . . . . . . . . . . . . . . . . . . . . . . . . . . . . . . . . . . . . . . . . . . . 237
Composing text . . . . . . . . . . . . . . . . . . . . . . . . . . . . . . . . . . . . . . . . . . . . . . . . . . . . . . . . . . . . . . . . . . . . . . . . . 246
iv
Chapter 9: Tables
Creating tables . . . . . . . . . . . . . . . . . . . . . . . . . . . . . . . . . . . . . . . . . . . . . . . . . . . . . . . . . . . . . . . . . . . . . . . . . 252
Selecting and editing tables . . . . . . . . . . . . . . . . . . . . . . . . . . . . . . . . . . . . . . . . . . . . . . . . . . . . . . . . . . . . .257
Formatting tables . . . . . . . . . . . . . . . . . . . . . . . . . . . . . . . . . . . . . . . . . . . . . . . . . . . . . . . . . . . . . . . . . . . . . . . 260
Table strokes and fills . . . . . . . . . . . . . . . . . . . . . . . . . . . . . . . . . . . . . . . . . . . . . . . . . . . . . . . . . . . . . . . . . . . 264
Table and cell styles . . . . . . . . . . . . . . . . . . . . . . . . . . . . . . . . . . . . . . . . . . . . . . . . . . . . . . . . . . . . . . . . . . . . . 268
Chapter 10: Long document features
Creating book files . . . . . . . . . . . . . . . . . . . . . . . . . . . . . . . . . . . . . . . . . . . . . . . . . . . . . . . . . . . . . . . . . . . . . . 274
Creating a table of contents . . . . . . . . . . . . . . . . . . . . . . . . . . . . . . . . . . . . . . . . . . . . . . . . . . . . . . . . . . . . . 279
Creating an index . . . . . . . . . . . . . . . . . . . . . . . . . . . . . . . . . . . . . . . . . . . . . . . . . . . . . . . . . . . . . . . . . . . . . . . 285
Working with markers . . . . . . . . . . . . . . . . . . . . . . . . . . . . . . . . . . . . . . . . . . . . . . . . . . . . . . . . . . . . . . . . . . . 297
Chapter 11: Drawing
Understanding paths and shapes . . . . . . . . . . . . . . . . . . . . . . . . . . . . . . . . . . . . . . . . . . . . . . . . . . . . . . . . 298
Drawing with the line or shape tools . . . . . . . . . . . . . . . . . . . . . . . . . . . . . . . . . . . . . . . . . . . . . . . . . . . . . 301
Drawing with the Pencil tool . . . . . . . . . . . . . . . . . . . . . . . . . . . . . . . . . . . . . . . . . . . . . . . . . . . . . . . . . . . . 302
Drawing with the Pen tool . . . . . . . . . . . . . . . . . . . . . . . . . . . . . . . . . . . . . . . . . . . . . . . . . . . . . . . . . . . . . . . 304
Editing paths . . . . . . . . . . . . . . . . . . . . . . . . . . . . . . . . . . . . . . . . . . . . . . . . . . . . . . . . . . . . . . . . . . . . . . . . . . .309
Page 5

Applying line (stroke) settings . . . . . . . . . . . . . . . . . . . . . . . . . . . . . . . . . . . . . . . . . . . . . . . . . . . . . . . . . . . 316
Compound paths and shapes . . . . . . . . . . . . . . . . . . . . . . . . . . . . . . . . . . . . . . . . . . . . . . . . . . . . . . . . . . . 321
Chapter 12: Graphics
Understanding graphics formats . . . . . . . . . . . . . . . . . . . . . . . . . . . . . . . . . . . . . . . . . . . . . . . . . . . . . . . . 327
Importing files from Adobe applications . . . . . . . . . . . . . . . . . . . . . . . . . . . . . . . . . . . . . . . . . . . . . . . . . 329
Importing other graphics formats . . . . . . . . . . . . . . . . . . . . . . . . . . . . . . . . . . . . . . . . . . . . . . . . . . . . . . . 334
Placing graphics . . . . . . . . . . . . . . . . . . . . . . . . . . . . . . . . . . . . . . . . . . . . . . . . . . . . . . . . . . . . . . . . . . . . . . . . 337
Managing graphics links . . . . . . . . . . . . . . . . . . . . . . . . . . . . . . . . . . . . . . . . . . . . . . . . . . . . . . . . . . . . . . . .349
Object libraries . . . . . . . . . . . . . . . . . . . . . . . . . . . . . . . . . . . . . . . . . . . . . . . . . . . . . . . . . . . . . . . . . . . . . . . . . 354
Chapter 13: Frames and objects
Selecting objects . . . . . . . . . . . . . . . . . . . . . . . . . . . . . . . . . . . . . . . . . . . . . . . . . . . . . . . . . . . . . . . . . . . . . . . 358
Transforming objects . . . . . . . . . . . . . . . . . . . . . . . . . . . . . . . . . . . . . . . . . . . . . . . . . . . . . . . . . . . . . . . . . . .364
Aligning and distributing objects . . . . . . . . . . . . . . . . . . . . . . . . . . . . . . . . . . . . . . . . . . . . . . . . . . . . . . . . 378
Grouping, locking, and duplicating objects . . . . . . . . . . . . . . . . . . . . . . . . . . . . . . . . . . . . . . . . . . . . . . 381
Working with frames and objects . . . . . . . . . . . . . . . . . . . . . . . . . . . . . . . . . . . . . . . . . . . . . . . . . . . . . . . . 383
Clipping paths . . . . . . . . . . . . . . . . . . . . . . . . . . . . . . . . . . . . . . . . . . . . . . . . . . . . . . . . . . . . . . . . . . . . . . . . . . 388
Chapter 14: Transparency effects
Adding transparency effects . . . . . . . . . . . . . . . . . . . . . . . . . . . . . . . . . . . . . . . . . . . . . . . . . . . . . . . . . . . . 392
Blending colors . . . . . . . . . . . . . . . . . . . . . . . . . . . . . . . . . . . . . . . . . . . . . . . . . . . . . . . . . . . . . . . . . . . . . . . . . 401
Flattening transparent artwork . . . . . . . . . . . . . . . . . . . . . . . . . . . . . . . . . . . . . . . . . . . . . . . . . . . . . . . . . . 404
v
Chapter 15: Color
Understanding spot and process colors . . . . . . . . . . . . . . . . . . . . . . . . . . . . . . . . . . . . . . . . . . . . . . . . . . 413
Applying color . . . . . . . . . . . . . . . . . . . . . . . . . . . . . . . . . . . . . . . . . . . . . . . . . . . . . . . . . . . . . . . . . . . . . . . . . . 415
Working with swatches . . . . . . . . . . . . . . . . . . . . . . . . . . . . . . . . . . . . . . . . . . . . . . . . . . . . . . . . . . . . . . . . . 419
Importing swatches . . . . . . . . . . . . . . . . . . . . . . . . . . . . . . . . . . . . . . . . . . . . . . . . . . . . . . . . . . . . . . . . . . . . . 424
Tints . . . . . . . . . . . . . . . . . . . . . . . . . . . . . . . . . . . . . . . . . . . . . . . . . . . . . . . . . . . . . . . . . . . . . . . . . . . . . . . . . . . . 426
Gradients . . . . . . . . . . . . . . . . . . . . . . . . . . . . . . . . . . . . . . . . . . . . . . . . . . . . . . . . . . . . . . . . . . . . . . . . . . . . . . . 428
Mixing inks . . . . . . . . . . . . . . . . . . . . . . . . . . . . . . . . . . . . . . . . . . . . . . . . . . . . . . . . . . . . . . . . . . . . . . . . . . . . . 433
Using colors from imported graphics . . . . . . . . . . . . . . . . . . . . . . . . . . . . . . . . . . . . . . . . . . . . . . . . . . . . 435
Chapter 16: Color management
Understanding color management . . . . . . . . . . . . . . . . . . . . . . . . . . . . . . . . . . . . . . . . . . . . . . . . . . . . . . 437
Keeping colors consistent . . . . . . . . . . . . . . . . . . . . . . . . . . . . . . . . . . . . . . . . . . . . . . . . . . . . . . . . . . . . . . . 439
Color-managing imported images . . . . . . . . . . . . . . . . . . . . . . . . . . . . . . . . . . . . . . . . . . . . . . . . . . . . . . . 443
Color-managing documents for online viewing . . . . . . . . . . . . . . . . . . . . . . . . . . . . . . . . . . . . . . . . . . 445
Proofing colors . . . . . . . . . . . . . . . . . . . . . . . . . . . . . . . . . . . . . . . . . . . . . . . . . . . . . . . . . . . . . . . . . . . . . . . . . 446
Color-managing documents when printing . . . . . . . . . . . . . . . . . . . . . . . . . . . . . . . . . . . . . . . . . . . . . . 448
Working with color profiles . . . . . . . . . . . . . . . . . . . . . . . . . . . . . . . . . . . . . . . . . . . . . . . . . . . . . . . . . . . . . . 450
Color settings . . . . . . . . . . . . . . . . . . . . . . . . . . . . . . . . . . . . . . . . . . . . . . . . . . . . . . . . . . . . . . . . . . . . . . . . . . . 455
Page 6

Chapter 17: Trapping color
Trapping documents and books . . . . . . . . . . . . . . . . . . . . . . . . . . . . . . . . . . . . . . . . . . . . . . . . . . . . . . . . . 460
Trap presets . . . . . . . . . . . . . . . . . . . . . . . . . . . . . . . . . . . . . . . . . . . . . . . . . . . . . . . . . . . . . . . . . . . . . . . . . . . . 464
Adjusting ink options for trapping . . . . . . . . . . . . . . . . . . . . . . . . . . . . . . . . . . . . . . . . . . . . . . . . . . . . . . . 470
Chapter 18: Creating Adobe PDF files
Exporting to Adobe PDF . . . . . . . . . . . . . . . . . . . . . . . . . . . . . . . . . . . . . . . . . . . . . . . . . . . . . . . . . . . . . . . . 472
Adobe PDF options . . . . . . . . . . . . . . . . . . . . . . . . . . . . . . . . . . . . . . . . . . . . . . . . . . . . . . . . . . . . . . . . . . . . . 478
Preparing PDFs for service providers . . . . . . . . . . . . . . . . . . . . . . . . . . . . . . . . . . . . . . . . . . . . . . . . . . . . . 487
Structuring PDFs . . . . . . . . . . . . . . . . . . . . . . . . . . . . . . . . . . . . . . . . . . . . . . . . . . . . . . . . . . . . . . . . . . . . . . . . 489
Adding hyperlinks for PDFs . . . . . . . . . . . . . . . . . . . . . . . . . . . . . . . . . . . . . . . . . . . . . . . . . . . . . . . . . . . . . . 494
Including bookmarks in PDFs . . . . . . . . . . . . . . . . . . . . . . . . . . . . . . . . . . . . . . . . . . . . . . . . . . . . . . . . . . . . 498
Using movies and sounds in PDFs . . . . . . . . . . . . . . . . . . . . . . . . . . . . . . . . . . . . . . . . . . . . . . . . . . . . . . . 499
Creating buttons for PDFs . . . . . . . . . . . . . . . . . . . . . . . . . . . . . . . . . . . . . . . . . . . . . . . . . . . . . . . . . . . . . . . 503
Chapter 19: XML
Working with XML . . . . . . . . . . . . . . . . . . . . . . . . . . . . . . . . . . . . . . . . . . . . . . . . . . . . . . . . . . . . . . . . . . . . . . 510
Importing XML . . . . . . . . . . . . . . . . . . . . . . . . . . . . . . . . . . . . . . . . . . . . . . . . . . . . . . . . . . . . . . . . . . . . . . . . . 513
Tagging content for XML . . . . . . . . . . . . . . . . . . . . . . . . . . . . . . . . . . . . . . . . . . . . . . . . . . . . . . . . . . . . . . . . 524
Structuring documents for XML . . . . . . . . . . . . . . . . . . . . . . . . . . . . . . . . . . . . . . . . . . . . . . . . . . . . . . . . . 530
Exporting XML . . . . . . . . . . . . . . . . . . . . . . . . . . . . . . . . . . . . . . . . . . . . . . . . . . . . . . . . . . . . . . . . . . . . . . . . . .538
vi
Chapter 20: Printing
Printing documents . . . . . . . . . . . . . . . . . . . . . . . . . . . . . . . . . . . . . . . . . . . . . . . . . . . . . . . . . . . . . . . . . . . . . 541
Setting up a printer . . . . . . . . . . . . . . . . . . . . . . . . . . . . . . . . . . . . . . . . . . . . . . . . . . . . . . . . . . . . . . . . . . . . . 549
Printer’s marks and bleeds . . . . . . . . . . . . . . . . . . . . . . . . . . . . . . . . . . . . . . . . . . . . . . . . . . . . . . . . . . . . . . . 550
Printing thumbnails and oversized documents . . . . . . . . . . . . . . . . . . . . . . . . . . . . . . . . . . . . . . . . . . . 552
Printing in color . . . . . . . . . . . . . . . . . . . . . . . . . . . . . . . . . . . . . . . . . . . . . . . . . . . . . . . . . . . . . . . . . . . . . . . . . 554
Printing graphics and fonts . . . . . . . . . . . . . . . . . . . . . . . . . . . . . . . . . . . . . . . . . . . . . . . . . . . . . . . . . . . . . . 555
Managing color . . . . . . . . . . . . . . . . . . . . . . . . . . . . . . . . . . . . . . . . . . . . . . . . . . . . . . . . . . . . . . . . . . . . . . . . .557
Printing gradients and color blends . . . . . . . . . . . . . . . . . . . . . . . . . . . . . . . . . . . . . . . . . . . . . . . . . . . . . . 559
Print presets . . . . . . . . . . . . . . . . . . . . . . . . . . . . . . . . . . . . . . . . . . . . . . . . . . . . . . . . . . . . . . . . . . . . . . . . . . . . 560
Handing off files . . . . . . . . . . . . . . . . . . . . . . . . . . . . . . . . . . . . . . . . . . . . . . . . . . . . . . . . . . . . . . . . . . . . . . . . 562
Creating PostScript and EPS files . . . . . . . . . . . . . . . . . . . . . . . . . . . . . . . . . . . . . . . . . . . . . . . . . . . . . . . . . 564
Printing booklets . . . . . . . . . . . . . . . . . . . . . . . . . . . . . . . . . . . . . . . . . . . . . . . . . . . . . . . . . . . . . . . . . . . . . . . 569
Chapter 21: Color separations
Preparing to print separations . . . . . . . . . . . . . . . . . . . . . . . . . . . . . . . . . . . . . . . . . . . . . . . . . . . . . . . . . . . 574
Overprinting . . . . . . . . . . . . . . . . . . . . . . . . . . . . . . . . . . . . . . . . . . . . . . . . . . . . . . . . . . . . . . . . . . . . . . . . . . . . 577
Previewing color separations . . . . . . . . . . . . . . . . . . . . . . . . . . . . . . . . . . . . . . . . . . . . . . . . . . . . . . . . . . . . 581
Inks, separations, and screen frequency . . . . . . . . . . . . . . . . . . . . . . . . . . . . . . . . . . . . . . . . . . . . . . . . . . 583
Chapter 22: Automation
Scripting . . . . . . . . . . . . . . . . . . . . . . . . . . . . . . . . . . . . . . . . . . . . . . . . . . . . . . . . . . . . . . . . . . . . . . . . . . . . . . . 590
Plug-ins . . . . . . . . . . . . . . . . . . . . . . . . . . . . . . . . . . . . . . . . . . . . . . . . . . . . . . . . . . . . . . . . . . . . . . . . . . . . . . . . 591
Data merge . . . . . . . . . . . . . . . . . . . . . . . . . . . . . . . . . . . . . . . . . . . . . . . . . . . . . . . . . . . . . . . . . . . . . . . . . . . . . 592
Merging records . . . . . . . . . . . . . . . . . . . . . . . . . . . . . . . . . . . . . . . . . . . . . . . . . . . . . . . . . . . . . . . . . . . . . . . . 599
Page 7

Chapter 23: Sharing content between InCopy and InDesign
Understanding a basic managed-file workflow . . . . . . . . . . . . . . . . . . . . . . . . . . . . . . . . . . . . . . . . . . . 602
Sharing content . . . . . . . . . . . . . . . . . . . . . . . . . . . . . . . . . . . . . . . . . . . . . . . . . . . . . . . . . . . . . . . . . . . . . . . . . 609
Assignment packages . . . . . . . . . . . . . . . . . . . . . . . . . . . . . . . . . . . . . . . . . . . . . . . . . . . . . . . . . . . . . . . . . . . 615
Working with managed files . . . . . . . . . . . . . . . . . . . . . . . . . . . . . . . . . . . . . . . . . . . . . . . . . . . . . . . . . . . . . 617
Adjusting your workflow . . . . . . . . . . . . . . . . . . . . . . . . . . . . . . . . . . . . . . . . . . . . . . . . . . . . . . . . . . . . . . . . 623
Chapter 24: Comparison of PageMaker and InDesign menus
PageMaker menu commands . . . . . . . . . . . . . . . . . . . . . . . . . . . . . . . . . . . . . . . . . . . . . . . . . . . . . . . . . . . 627
Chapter 25: Keyboard shortcuts
Default keyboard shortcuts . . . . . . . . . . . . . . . . . . . . . . . . . . . . . . . . . . . . . . . . . . . . . . . . . . . . . . . . . . . . . 634
Index . . . . . . . . . . . . . . . . . . . . . . . . . . . . . . . . . . . . . . . . . . . . . . . . . . . . . . . . . . . . . . . . . . . . . . . . . . . . . . . . . . 649
vii
Page 8

Chapter 1: Getting started
If you haven’t installed your new software, begin by reading some information on installation and other preliminaries. Before you begin working with your software, take a few moments to read an overview of Adobe® Help and
of the many resources available to users. You have access to instructional videos, plug-ins, templates, user communities, seminars, tutorials, RSS feeds, and much more.
Installation
Requirements
❖ To review complete system requirements and recommendations for your Adobe® software, see the Read Me file
on the installation disc.
Install the software
1 Close any other Adobe applications open on your computer.
2 Insert the installation disc into the disc drive, and follow the on-screen instructions.
1
Note: For more information, see the Read Me file on the installation disc.
Activate the software
Ifyouhaveasingle-userretaillicenseforyourAdobesoftware,youwillbeaskedtoactivateyoursoftware;thisisa
simple, anonymous process that you must complete within 30 days of starting the software.
For more informationon product activation, see the Read Me file onyour installation disc, or visitthe Adobe website
at www.adobe.com/go/activation.
1 If the Activation dialog box isn’t already open, choose Help > Activate.
2 Follow the on-screen instructions.
Note: If you want to install the software on a different computer, you must first deactivate it on your computer. Choose
Help > Deactivate.
Register
Register your product to receive complimentary installation support, notifications of updates, and other services.
❖ To register, follow the on-screen instructions in the Registration dialog box, which appears after you install and
activate the software.
If you postpone registration, you can register at any time by choosing Help > Registration.
Page 9
INDESIGN CS3
User Guide
Read Me
The installation disc contains the Read Me file for your software. (This file is also copied to the application folder
during product installation.) Open the file to read important information about the following topics:
• System requirements
• Installation (including uninstalling the software)
• Activation and registration
• Font installation
• Troubleshooting
• Customer support
• Legal notices
Adobe Help
Adobe Help resources
Documentation for your Adobe software is available in a variety of formats.
2
In-product and LiveDocs Help
In-product Help provides access to all documentation and instructional content available at the time the software
ships. It is available through the Help menu in your Adobe software.
LiveDocs Help includes all the content from in-product Help, plus updates and links to additional instructional
content available on the web. For some products, you can also add comments to the topics in LiveDocs Help. Find
LiveDocs Help for your product in the Adobe Help Resource Center, at www.adobe.com/go/documentation.
Page 10

INDESIGN CS3
User Guide
Most versions of in-product and LiveDocs Help let you search across the Help systems of multiple products. Topics
may also contain links to relevant content on the web or to topics in the Help of another product.
Think of Help, both in the product and on the web, as a hub for accessing additional content and communities of
users. The most complete and up-to-date version of Help is always on the web.
Adobe PDF documentation
The in-product Help is also available as a PDF that is optimized for printing. Other documents, such as installation
guides and white papers, may also be provided as PDFs.
All PDF documentation is available through the Adobe Help Resource Center, at www.adobe.com/go/documen-
tation.Tosee the PDF documentation includedwith yoursoftware, look in the Documents folder onthe installation
or content DVD.
Printed documentation
Printed editions of the in-product Help are available for purchase in the Adobe Store, at www.adobe.com/go/store.
You can also find books published by Adobe publishing partners in the Adobe Store.
A printed workflow guide is included with all Adobe Creative Suite® 3 products, and stand-alone Adobe products
may include a printed getting started guide.
3
Using Help in the product
In-productHelpisavailablethroughtheHelpmenu.AfteryoustarttheAdobeHelpViewer,clickBrowsetoseeHelp
for additional Adobe products installed on your computer.
These Help features facilitate cross-product learning:
• Topics may contain links to the Help systems of other Adobe products or to additional content on the web.
• Some topics are shared across two or more products. For instance, if you see a Help topic with an Adobe
Photoshop® CS3 icon and an Adobe AfterEffects® CS3 icon, you know that the topic either describes functionality
that is similar in the two products or describes cross-product workflows.
• You can search across the Help systems of multiple products.
If you search for a phrase, such as “shape tool,” enclose it in quotation marks to see only those topics that include all
the words in the phrase.
Page 11
INDESIGN CS3
User Guide
A
C
D
B
4
Adobe Help
A. Back/Forwardbuttons (previously visited links) B. Expandable subtopics C. Icons indicating shared topic D. Previous/Next buttons (topics
in sequential order)
Accessibility features
Adobe Help content is accessible to people with disabilities—such as mobility impairments, blindness, and low
vision. In-product Help supports these standard accessibility features:
• The user can change text size with standard context menu commands.
• Links are underlined for easy recognition.
• If link text doesn’t match the title of the destination, the title is referenced in the Title attribute of the Anchor tag.
For example, the Previous and Next links include the titles of the previous and next topics.
• Content supports high-contrast mode.
• Graphics without captions include alternate text.
• Each frame has a title to indicate its purpose.
• Standard HTML tags define content structure for screen reading or text-to-speech tools.
• Style sheets control formatting, so there are no embedded fonts.
Keyboard shortcuts for Help toolbar controls (Windows)
Back button Alt+Left Arrow
Forward button Alt+Right Arrow
Print Ctrl+P
About button Ctrl+I
Browse menu Alt+Down Arrow or Alt+Up Arrow to view Help for another application
Search box Ctrl+S to place the insertion point in the Search box
Page 12
INDESIGN CS3
User Guide
Keyboard shortcuts for Help navigation (Windows)
• To move between panes, press Ctrl+Tab (forward) and Shift+Ctrl+Tab (backward).
• To move through and outline links in a pane, press Tab (forward) or Shift+Tab (backward).
• To activate an outlined link, press Enter.
• To make text bigger, press Ctrl+equal sign.
• To make text smaller, press Ctrl+hyphen.
Resources
Adobe Video Workshop
The Adobe Creative Suite 3 Video Workshop offers over 200 training videos covering a wide range of subjects for
print, web, and video professionals.
YoucanusetheAdobeVideoWorkshoptolearnaboutanyCreativeSuite3product.Manyvideosshowyouhowto
use Adobe applications together.
5
Page 13
INDESIGN CS3
User Guide
When you start the Adobe Video Workshop, you choose the products you want to learn and the subjects you want
to view. You can see details about each video to focus and direct your learning.
6
Community of presenters
With this release, Adobe Systems invited the community of its users to share their expertise and insights. Adobe and
lynda.com present tutorials, tips, and tricks from leading designers and developers such as Joseph Lowery, Katrin
Eismann, and Chris Georgenes. You can see and hear Adobe experts such as Lynn Grillo, Greg Rewis, and Russell
Brown. In all, over 30 product experts share their knowledge.
Tutorials and source files
The Adobe Video Workshop includes training for novices and experienced users. You’ll also find videos on new
features and key techniques. Each video covers a single subject and typically runs about 3-5 minutes. Most videos
come with an illustrated tutorial and source files, so you can print detailed steps and try the tutorial on your own.
Using Adobe Video Workshop
YoucanaccessAdobeVideoWorkshopusingtheDVDincludedwithyourCreativeSuite3product.It’salsoavailable
online at www.adobe.com/go/learn_videotutorials. Adobe will regularly add new videos to the online Video
Workshop, so check in to see what’s new.
InDesign CS3 videos
Adobe Video Workshop covers a wide range of subjects for Adobe InDesign® CS3, including these:
• Setting up a document
• Using the Control panel
• Importing content into InDesign
• Working with text
Page 14

INDESIGN CS3
User Guide
• Creating and formatting tables
Videos also show you how to use InDesign CS3 with other Adobe products:
• Using shared elements in Photoshop®, Illustrator®, InDesign, and Flash®
• Using Smart Objects and Live Color
• Designing a website with InDesign and Dreamweaver®
• Creating interactive PDF files
To access Adobe Creative Suite 3 video tutorials, visit Adobe Video Workshop at
www.adobe.com/go/learn_videotutorials.
Extras
You have access to a wide variety of resources that will help you make the most of your Adobe software. Some of
these resources are installed on your computer during the setup process; additional helpful samples and documents
are included on the installation or content disc. Unique extras are also offered online by the Adobe Exchange
community, at www.adobe.com/go/exchange.
Installed resources
During software installation, anumber ofresources are placed inyour applicationfolder.To viewthose files, navigate
to the application folder on your computer.
7
• Windows®: [startup drive]\Program Files\Adobe\[Adobe application]
• Mac OS®: [startup drive]/Applications/[Adobe application]
The application folder may contain the following resources:
Plug-ins Plug-in modules are small software programs that extend or add features to your software. Once installed,
plug-in modules appear as options in the Import or Export menu; as file formats in the Open, Save As, and Export
Original dialog boxes; or as filters in the Filter submenus. For example, a number of special effects plug-ins are
automatically installed in the Plug-ins folder inside the Photoshop CS3 folder.
Presets Presets include a wide variety of useful tools, preferences, effects, and images. Product presets include
brushes, swatches, color groups, symbols, custom shapes, graphic and layer styles, patterns, textures, actions,
workspaces, and more. Preset content can be found throughout the user interface. Some presets (for example,
Photoshop Brush libraries) become available only whenyou select the corresponding tool. If you don’t want to create
an effect or image from scratch, go to the preset libraries for inspiration.
Templates Template files can be opened and viewed from Adobe Bridge CS3, opened from the Welcome Screen, or
opened directly from the File menu. Depending on the product, template files range from letterheads, newsletters,
Page 15

INDESIGN CS3
E
T
V
E
R
O
E
O
S
E
T
A
C
C
U
S
A
M
E
T
J
U
S
T
O
D
U
O
D
O
L
O
R
E
S
E
T
E
A
R
E
B
U
M
.
S
T
E
T
C
L
I
T
A
K
A
S
D
.
ET
C
O
S
E
T
E
T
U
R
S
A
D
I
P
S
C
I
N
G
01
Pelletir
Inc
.
C
O
R
E
I
N
V
E
S
T
M
E
N
T
S
P
E
C
T
R
U
M
Vel
i
ll
u
m
d
o
lore
e
u
fe
u
giat
n
u
ll
a
fac
ilis
is
at
vero
e
ros
e
t
a
cc
u
m
s
a
n
e
t
iu
s
to
o
d
io
d
i
gn
is
s
im
q
u
i.
R
E
T
I
R
E
M
E
N
T
S
A
V
I
N
G
P
L
A
N
Ve
l
ill
u
m
d
o
lore e
u
fe
u
giat
n
u
ll
a
fac
ilis
i
s
a
t vero
e
ro
s
e
t a
ccu
m
s
a
n
e
t
iu
s
to
o
d
io
d
i
gn
iss
im
q
u
i.
Y
o
u
r In
v
e
s
tm
e
n
t
G
u
id
e
A
r
e
y
o
u
l
e
a
v
in
g
m
o
n
e
y
o
n
t
h
e
t
a
b
l
e
?
0
1
Ty
p
i
n
o
n
h
a
b
e
nt c
la
ritate
m
in
s
it
a
m
;
e
s
t
u
s
u
s
l
e
g
ent
is
in ii
s
q
u
i fa
c
it
e
o
r
u
m
c
l
a
ritate
m
.
Inve
s
t
ig
ati
o
n
e
s
d
e
m
o
n
s
trave
r
u
nt l
e
ctore
s
le
g
e
re
m
e
l
i
u
s
q
u
o
d
ii
le
g
u
nt s
a
e
p
i
us. C
la
ritas
e
s
t
e
t
ia
m
p
roce
s
s
u
s.
Ty
p
i
n
o
n
h
a
b
ent
c
la
ritate
m
i
n
s
itam
;
e
s
t
u
s
u
s
l
e
g
ent
is
in
iis
q
u
i fa
c
i
t
e
o
r
u
m
c
la
ritate
m
.
Inve
s
t
ig
at
io
n
e
s
d
e
m
o
n
s
trave
r
u
nt
l
e
ctore
s
le
g
e
re
m
e
li
u
s
q
u
o
d
ii
le
g
u
nt
s
a
e
p
i
us. C
la
rit
a
s
e
s
t
e
t
ia
m
proce
s
s
u
s.
SU
R
V
I
C
E
M
E
N
U
N
U
L
C
H
E
vero
d
i
o
eu
m
n
ul
c
he
agiam
e
t ad
lorpe
ri
t
sum a
$
45
a
giam
e
t ad
atin
u
t
et
v
ero dio
e
u
m
n
u
l
che
su
m
a
ag
aim
et
ad
eu
m
n
ullam
$25
lo
r
p
e
r
it
sum
a
agiam
e
t ad
lo
rp
eri
t
vero dio
eum n
u
l
lam
$
35
SU
CCIVERO
S
sucicver
o
dio
ve
r
o dio
eu
m
n
ul
che
s
u
m
a
$15
eum
n
u
l
lam
vero dio
eum
n
u
l
c
he
su
m
a
agaim
e
t
a
d e
u
m
nu
l
lam
$3
5
N
eum n
ul
lam
$
35
S
UCC
I
VERO
S
su
cicver
o d
io
vero dio
eu
m
n
ul
c
he
su
m
a
$
1
5
e
um
nullam
ve
r
o d
io
eu
m
n
u
l
ch
e su
m
a
agaim
et
ad
e
um
nu
llam
$35
CC
a
s
i
o
p
i
a
S
p
A
User Guide
and websites to DVD menus and video buttons. Each template file is professionally constructed and represents a
best-use example of product features. Templates can be a valuable resource when you need to jump-start a project.
8
Travel Earth
Best 100 places to see on the planet
in your lifetime
Vel: Ad : Vulputate:
volute
ipsummy
, commy
re eugiarud tem
eraes-
exer
n ullutet
Samples Sample files include more complicated designs and area great way to see new features in action. These files
demonstrate the range of creative possibilities available to you.
Fonts Several OpenType® fonts and font families are included with your Creative Suite product. Fonts are copied to
your computer during installation:
• Windows: [startup drive]\Windows\Fonts
• Mac OS X: [startup drive]/Library/Fonts
For information about installing fonts, see the Read Me file on the installation DVD.
DVD content
The installation or content DVD included with your product contains additional resources for use with your
software. The Goodies folder contains product-specific files suchas templates,images, presets,actions, plug-ins,and
effects, along with subfolders for Fonts and Stock Photography. The Documentation folder contains a PDF version
of the Help, technical information, and other documents such as specimen sheets, reference guides, and specialized
feature information.
Adobe Exchange
For more free content, visit www.adobe.com/go/exchange, an online community where users download and share
thousands of free actions, extensions, plug-ins, and other content for use with Adobe products.
Bridge Home
Bridge Home, a new destination in Adobe Bridge CS3, provides up-to-date information on all your Adobe Creative
Suite 3 software in one convenient location. Start Adobe Bridge, then click the Bridge Home icon at the top of the
Favorites panel to access the latest tips, news, and resources for your Creative Suite tools.
Page 16
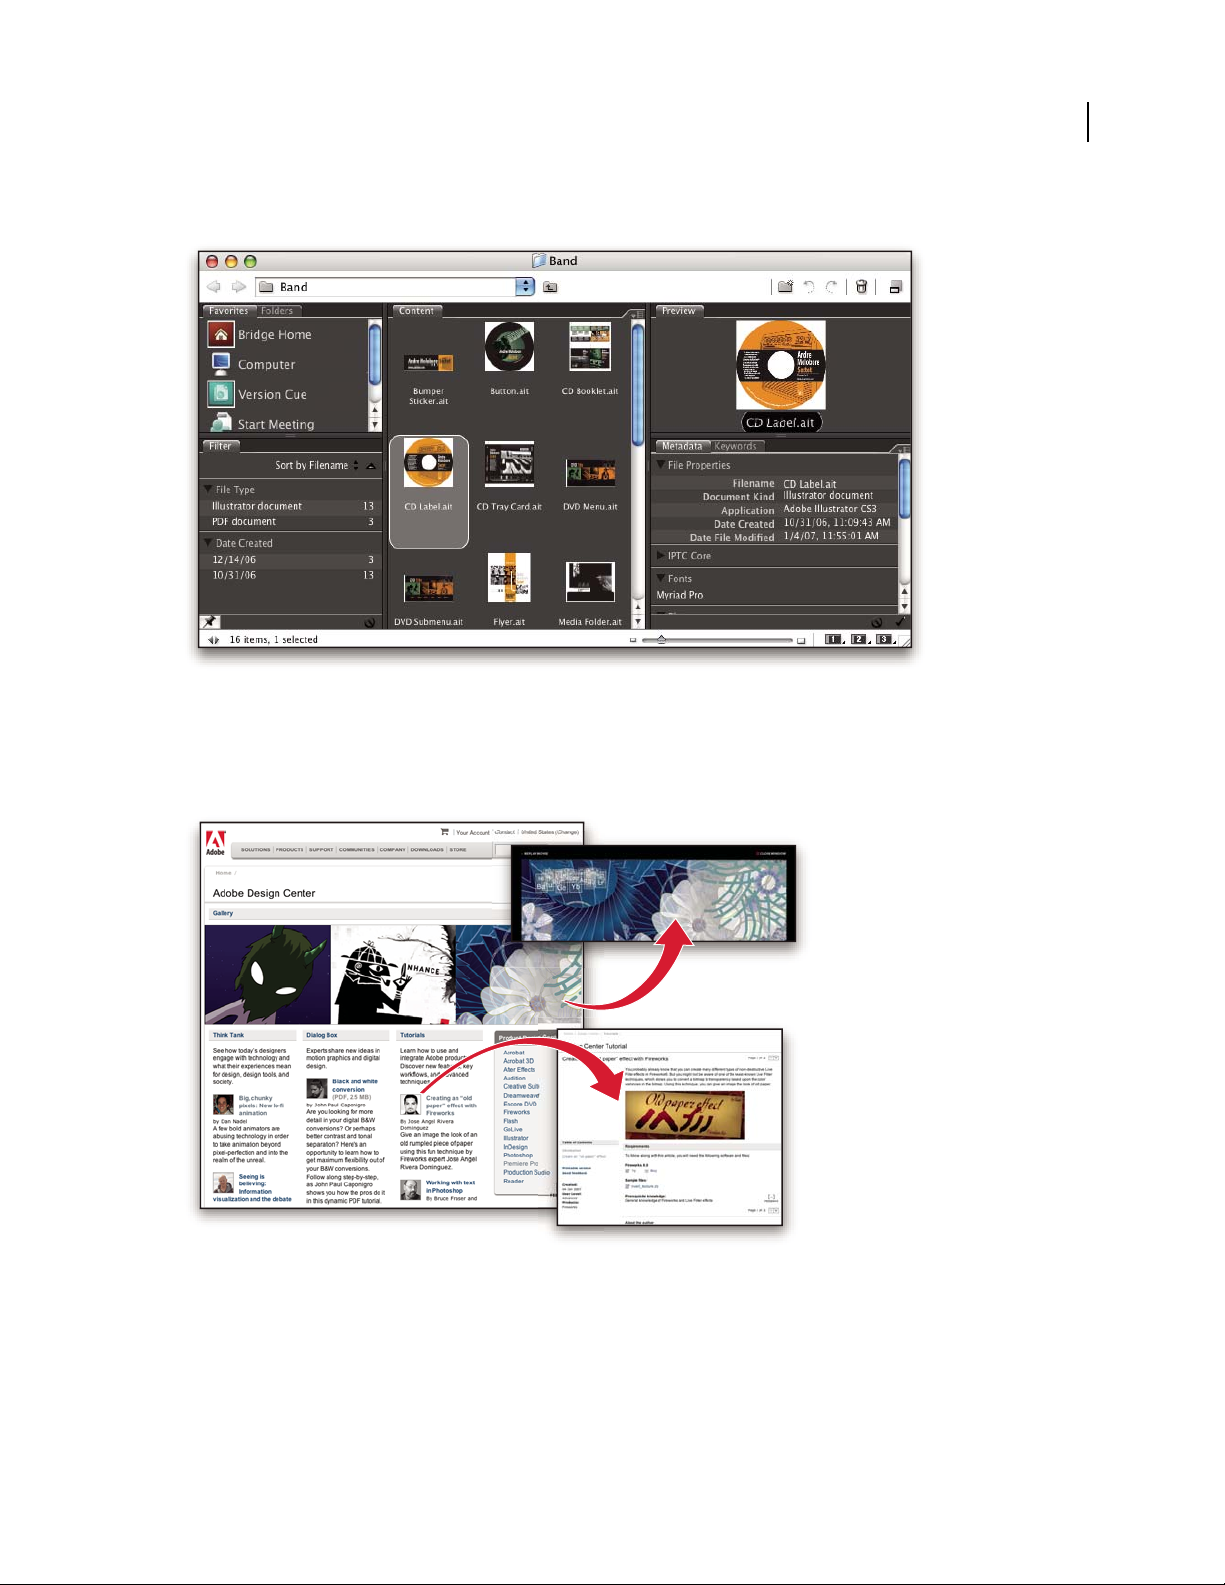
Note: Bridge Home may not be available in all languages.
INDESIGN CS3
User Guide
9
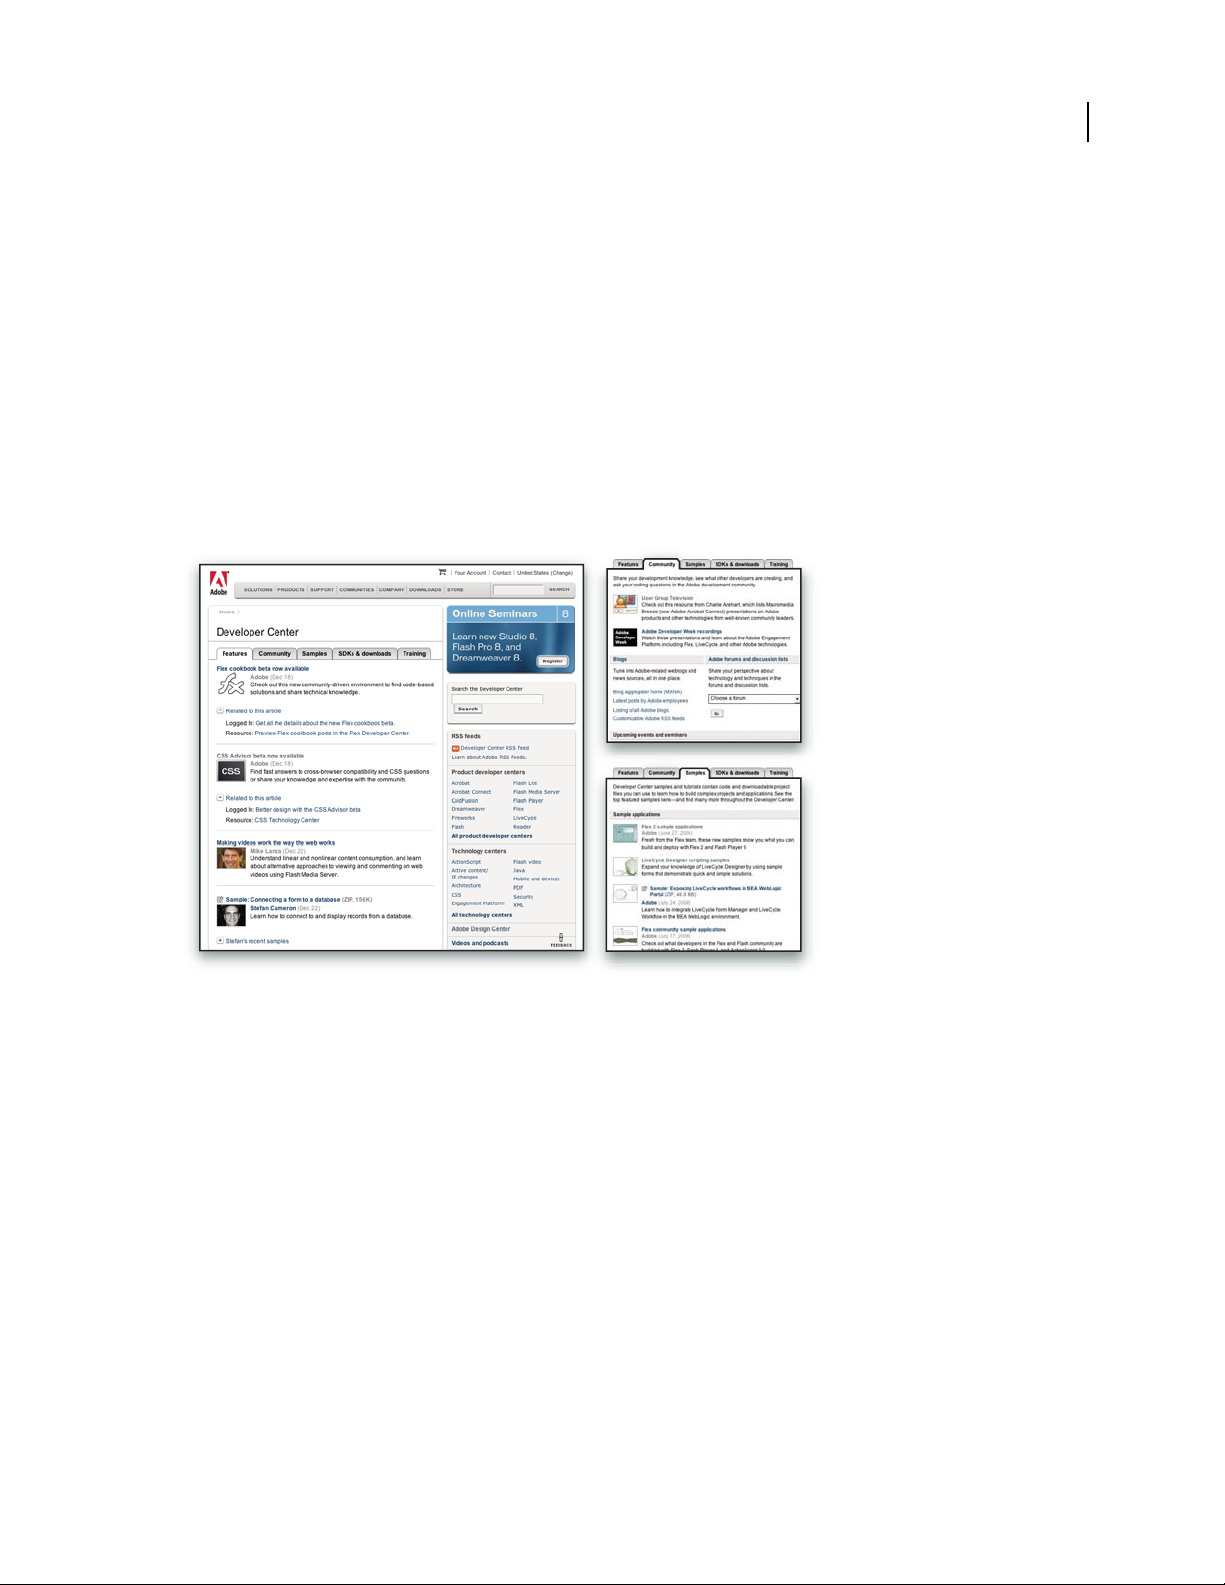
Adobe Design Center
Adobe Design Center offers articles, inspiration, and instruction from industry experts, top designers and Adobe
publishing partners. New content is added monthly.
You can find hundreds of tutorials for design products and learn tips and techniques through videos, HTML
tutorials, and sample book chapters.
Page 17
INDESIGN CS3
User Guide
New ideas are the heart of Think Tank, Dialog Box, and Gallery:
• ThinkTankarticlesconsiderhowtoday’sdesignersengagewithtechnologyandwhattheirexperiencesmeanfor
design, design tools, and society.
• In Dialog Box, experts share new ideas in motion graphics and digital design.
• The Gallery showcases how artists communicate design in motion.
Visit Adobe Design Center at www.adobe.com/designcenter.
Adobe Developer Center
Adobe Developer Center provides samples, tutorials, articles, and community resources for developers who build
rich Internet applications,websites, mobilecontent, and other projects usingAdobe products.The Developer Center
also contains resources for developers who develop plug-ins for Adobe products.
10
In addition to sample code and tutorials, you'll find RSS feeds, online seminars, SDKs, scripting guides, and other
technical resources.
Visit Adobe Developer Center at www.adobe.com/go/developer.
Customer support
VisittheAdobeSupportwebsite,atwww.adobe.com/support, to find troubleshooting information for your product
and tolearn about freeand paid technicalsupport options.Follow the Training link foraccess to Adobe Press books,
a variety of training resources, Adobe software certification programs, and more.
Downloads
Visit www.adobe.com/go/downloads to find free updates, tryouts,and other useful software. In addition, the Adobe
Store (at www.adobe.com/go/store) provides access to thousands of plug-ins from third-party developers, helping
you to automate tasks, customize workflows, create specialized professional effects, and more.
Page 18

INDESIGN CS3
User Guide
Adobe Labs
Adobe Labs gives youthe opportunity toexperience andevaluate new and emerging technologies and products from
Adobe.
At Adobe Labs, you have access to resources such as these:
• Prerelease software and technologies
• Code samples and best practices to accelerate your learning
• Early versions of product and technical documentation
• Forums, wiki-based content, and other collaborative resources to help you interact with like-minded developers
Adobe Labs fosters a collaborative software development process. In this environment, customers quickly become
productive with new products and technologies. Adobe Labs is also a forum for early feedback, which the Adobe
development teams use to create software that meets the needs and expectations of the community.
Visit Adobe Labs at www.adobe.com/go/labs.
User communities
User communities feature forums, blogs, and other avenues for users to share technologies, tools, and information.
Users can ask questions and find out how others are getting the most out of their software. User-to-user forums are
available in English, French, German, and Japanese; blogs are posted in a wide range of languages.
11
To participate in forums or blogs, visit www.adobe.com/communities.
What’s new
Creativity enhancements
Creative effects
Experiment with designs right on the page layout with Adobe Photoshop®-like effects. You can experiment with
blending modes, opacity, and other effects without permanently altering your objects. And you can save effects as
part of an object style for easy reuse and sharing.
Take advantage of these new creative effects:
Gradient feather effect Fade an object into the background by way of an adjustable linear or radial gradient.
Directional feather effect Enhance feathering by customizing the feather angle and the amount of feathering on
each side.
Bevel and Emboss effect Add inner highlights and shadows that create a relief effect.
Satin effect Apply interior shading that creates a satin-like finish.
Inner Shadow effect Add a shadow that falls just inside the edges of the object’s content, giving the object a recessed
appearance.
Inner Glow and Outer Glow effects Add glows that emanate from the inside and outside edges of an object.
See “Transparency effects” on page 395.
Page 19

INDESIGN CS3
User Guide
Finer transparency controls
Create complex visual effects by applying multiple transparency settings to a single object. You can apply transparency settings independently to an object’s fill, stroke, and content. See “Effects panel overview” on page 392.
Improved text wrap
Easily flow text around objects. Wrap to a side or according to a clipping path or alpha channel. See “Change the
shape of a text wrap” on page 197.
Convenient Glyphs panel
Use the Glyphs panel to locate recently used glyphs, filter and sort glyphs, and save glyph sets for sharing and reuse.
See “Glyphs panel overview” on page 147.
Choose Window > Workspace > New and Improved in CS3 to highlight menu commands of new and enhanced
features.
Productivity enhancements
Multi-file placing
Import several different files in one step. You can see thumbnail views of the different files and cycle through them
until you find the one you want to place. See “Place multiple graphics” on page 339.
12
Placed InDesign documents
Shorten the layout process and collaborate more effectively by reusing Adobe InDesign® CS3 documents. When
InDesign files are placed in the document, the Links panel provides notification of updates, eliminating the need to
save and manage interim files. See “Importing InDesign (.indd) pages” on page 333.
Expanded Quick Apply
Type a few letters into the Quick Apply panel and be able to access commands, text variables, scripts, and styles
instantly without having to rummage around in different panels. You can also customize Quick Apply searches. See
“Use Quick Apply” on page 183.
Fast frame-fitting
Set the default fit behavior of frames and assign fit options to object styles so that, as soon as you place a graphic or
other content in a frame, it fits perfectly. See “Set frame fitting options” on page 385.
Visual Pages panel
Quickly navigate a documentand arrange its pages usingthumbnail previews in the Pages panel. See “Add new pages
to a document” on page 59.
Nested style looping
Automatically apply a sequence of character styles within a paragraph with one click instead of manually formatting
eachstylechange.Withnestedstylelooping,youcanrepeatasequenceofnestedstylesuntiltheendofaparagraph.
See “Define paragraph and character styles” on page 166.
Page 20

INDESIGN CS3
User Guide
Table and cell styles
As well as applying styles to characters and paragraphs, apply styles to a table or to table cells. With table styles and
cell styles, you no longer have to manually format tables or individual table cells. See “About table and cell styles” on
page 268.
E-mail-based assignments for InCopy workflow
Use new e-mail-based assignments to send stories and graphics as a single assignment package to any contributor in
your small workgroup via e-mail. The e-mail package contains all of the information needed to update the layout
with the added or edited content, so it’s easy toassign tasks and integrate contributions without the need for a shared
server. See “Assignment packages” on page 615.
Export to XHTML
Quickly repurpose InDesign content for the web by exporting to XHTML. Styles can be mapped to an external CSS
to instantly format your content. See “Export content to XHTML / Dreamweaver” on page 105.
Automatically generated layouts from XML
Automate the creation and formatting of documents by integrating InDesign content into XML workflows by way
of XML rules. The conditionalrules automatically adapt formatting andlayout dependingon content. See “XML rule
sets” on page 512.
13
Support for XSLT and CALS tables with XML
Apply XSLT style sheets when importing or exporting XML content to make flowing XML into InDesign pages
easier. See “Import and merge XML” on page 522.
Agate measurement units
Take advantage of agate measurement units for newspaper publishing. See “Change measurement units and rulers”
on page 46.
Support for long documents
Text variables
Automate the use of repeating elements such as headers, footers, product names, and date stamps. Running headers
and footers can be generated from the text and dynamically updated as text flows from page to page. See “Text
variables” on page 85.
Advanced bulleted and numbered lists
Create sophisticated lists with hierarchical, outline-style number sequences. Set styles, modes, alignment, indents,
and other advanced options for different levels of bulleted and numbered lists. You can interrupt lists and spread
them across different pages and stories. See “Bullets and numbering” on page 237.
More powerful Find/Change capabilities
Search and replace more efficiently with new find/change features. You can save searches, search across many
documents, enlarge the scope of a search, and use GREP expressions in searches. See “Find/Change overview” on
page 132.
Page 21

INDESIGN CS3
User Guide
Customizable user interface
Customized workspaces
Save your panel andmenu changes asa workspace and be able to callup your personalized workspaces any time. You
can create different workspaces for different projects and tasks. See “Save workspaces” on page 21.
Customized menus
Get direct access to commonly used commands or simplify training on new workflows by color-coding or hiding
individual menu items. Save customized menus as part of a workspace. See “Customize menus” on page 24.
Enhanced Control panel
Rely on the context-sensitive Control panel to show you the most useful settings based on the objects you selected
and the type of work you are doing. You can also customize the Control panel to show only your most frequently
used options. See “Control panel overview” on page 22.
Flexible compact panels
Make more room for viewing your document while preserving instant access to your favorite features. View docked
panels as icons to keep them accessible and easily recognizable. See “Workspace basics” on page 15.
14
Page 22

Chapter 2: Workspace
The Adobe® InDesign® CS3 workspace is arranged to help you focus on designing and producing pages efficiently.
When you first start InDesign, you see the default workspace, which you can customize to suit your needs.
Workspace basics
Workspace overview
You create and manipulate your documents and files using various elements such as panels, bars, and windows. Any
arrangement of these elements is called a workspace.WhenyoufirststartanAdobeCreativeSuitecomponent,you
see the default workspace, whichyou can customize for the tasks you perform there. For instance, you cancreate one
workspace for editing and another for viewing, save them, and switch between them as you work.
You can restore the default workspace at any time by choosing the default option on the Window > Workspace menu.
15
Although default workspaces vary across Flash, Illustrator, InCopy, InDesign, and Photoshop, you manipulate the
elements much the same way in all of them. The Photoshop default workspace is typical:
• The menu bar across the top organizes commands under menus.
• The Tools panel (called the Tools palette in Photoshop) contains tools for creating and editing images, artwork,
page elements, and so on. Related tools are grouped together.
• The Control panel (called the options bar in Photoshop) displays options for the currently selected tool. (Flash has
no Control panel.)
• The Document window (called the Stage in Flash) displays the file you’re working on.
• Panels (called palettes in Photoshop) help you monitor and modify your work. Examples include the Timeline in
Flash and the Layers palette in Photoshop. Certain panels are displayed by default, but you can add any panel by
selecting it from the Window menu.Many panels have menus with panel-specific options. Panels can be grouped,
stacked, or docked.
Page 23
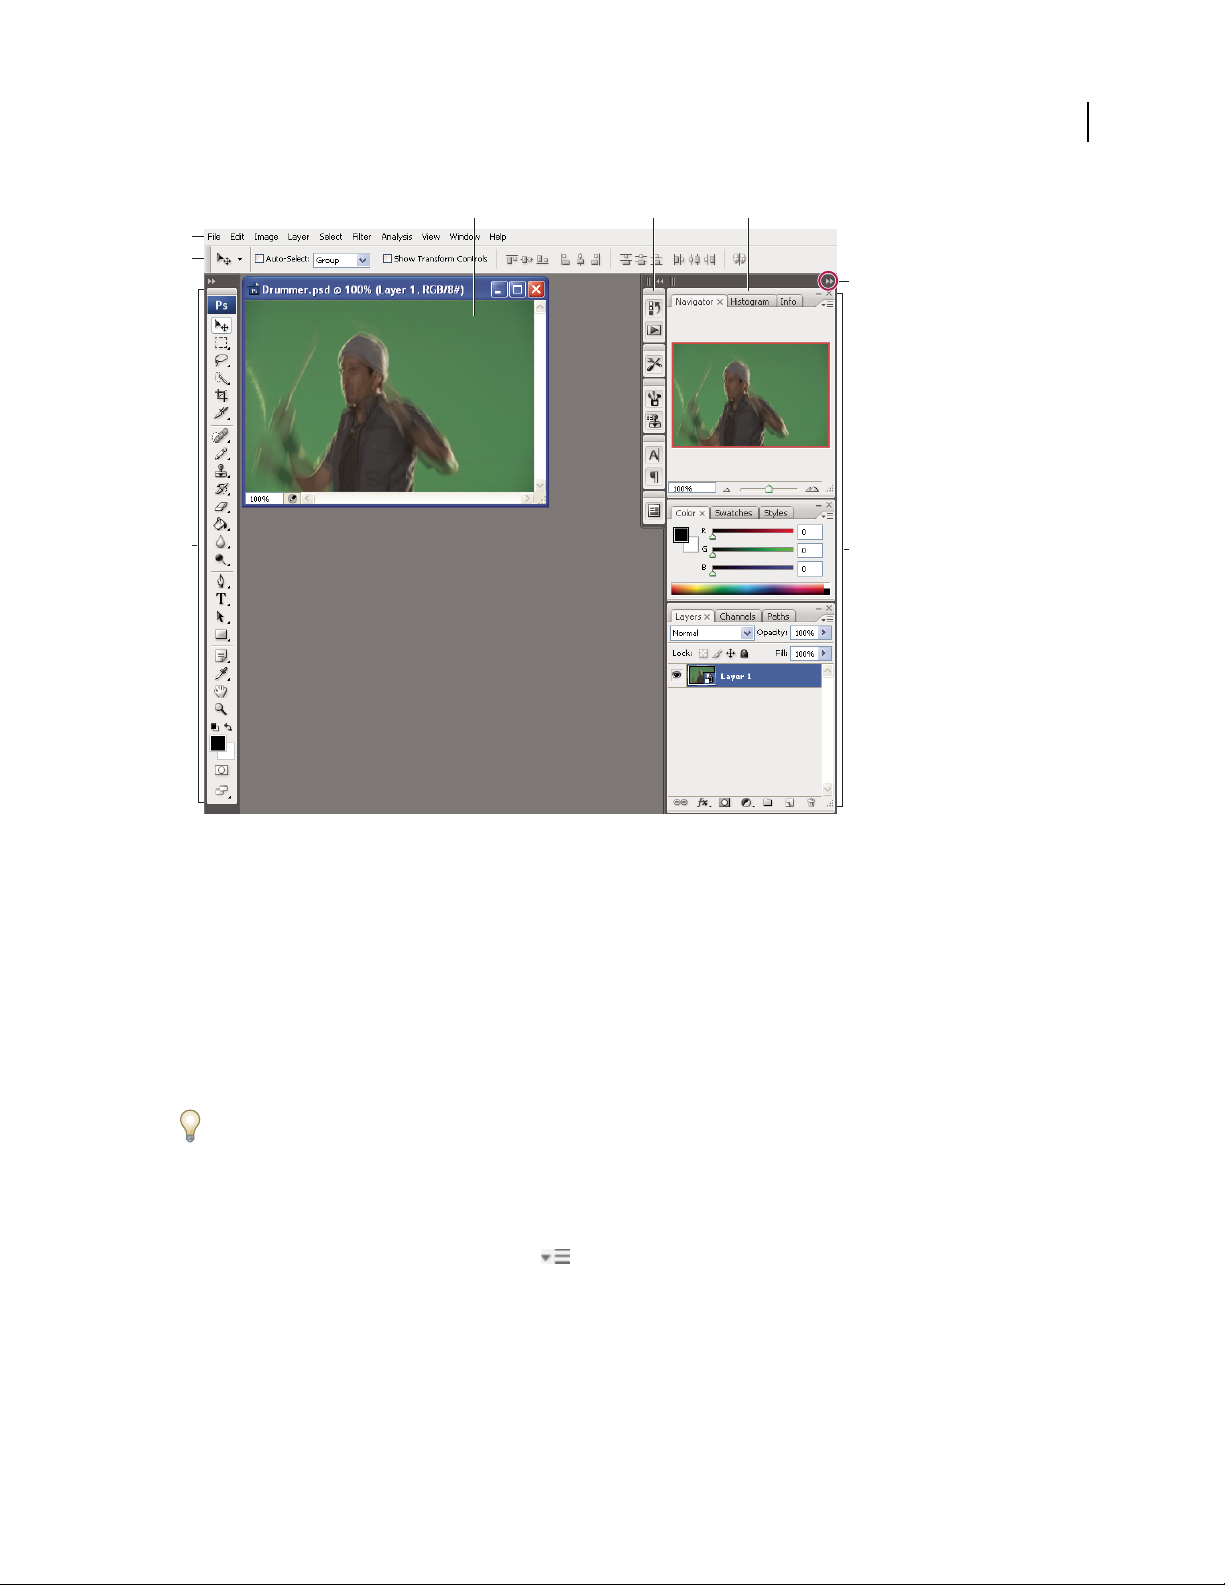
INDESIGN CS3
User Guide
A B C
D
E
G
16
F
Default Photoshop workspace
A. Document window B. Dock of panels collapsed to icons C. Panel title bar D. Menu bar E. Options bar F. Tools palette G. Collapse To
Icons button H. Three palette (panel) groups in vertical dock
H
For a video on understanding the workspace, see www.adobe.com/go/vid0187.
Hide or show all panels
• (Illustrator, InCopy, InDesign, Photoshop) To hide or show all panels, including the Tools panel and options bar
or Control panel, press Tab.
• (Illustrator, InCopy, InDesign, Photoshop) To hide or show all panels except the Tools panel and options bar or
Control panel, press Shift+Tab.
You can temporarily display panels hidden by these techniques by moving the pointer to the edge of the application
window (Windows) or to the edge of the monitor (Mac OS) and hovering over the strip that appears.
• (Flash) To hide or show all panels, press F4.
Display panel menu options
❖ Position the pointer on the panel menu icon in the upper-right corner of the panel, and press the mouse
button.
(Illustrator) Adjust panel brightness
❖ In User Interface preferences, move the Brightness slider. This control affects all panels, including the Control
panel.
Page 24
INDESIGN CS3
User Guide
Reconfigure the Tools panel
You can display the tools in the Tools panel in a single column, or side by side in two columns.
In InDesign, you also can switch from single-column to double-column display by setting an option in Interface
preferences.
❖ Click the double arrow at the top of the Tools panel.
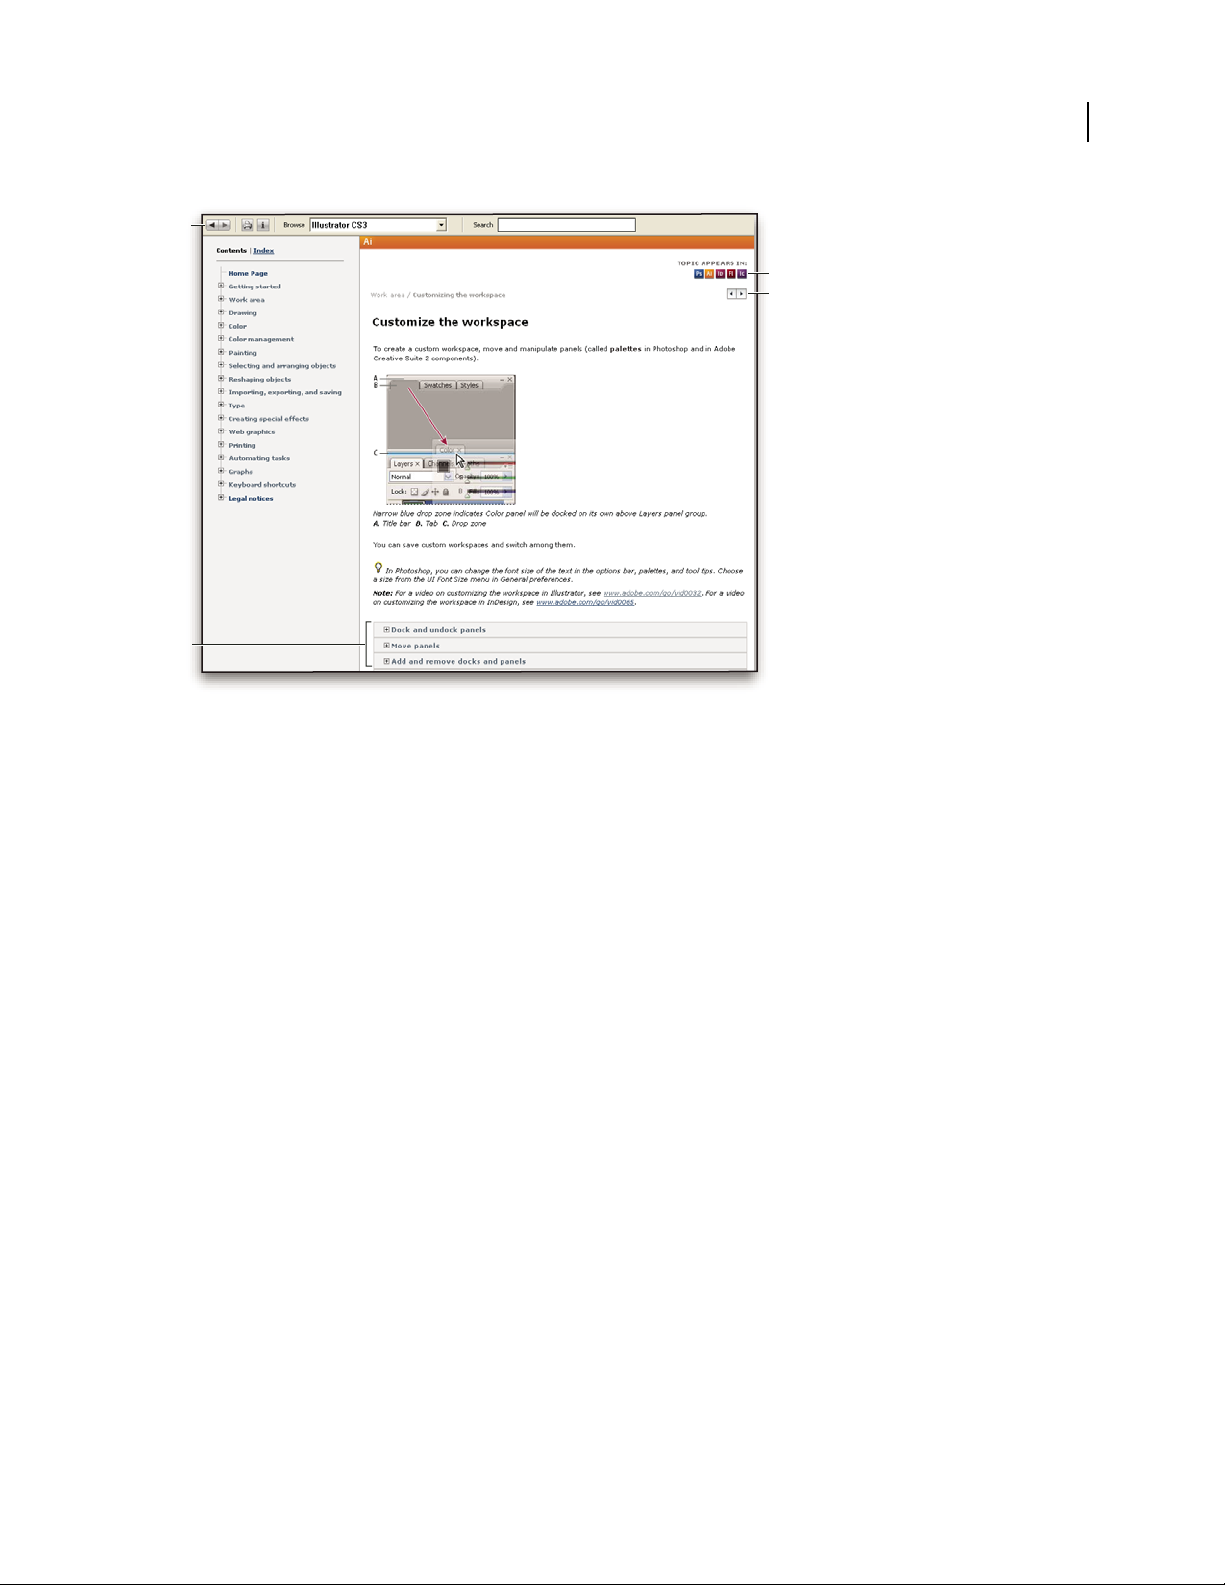
Customize the workspace
To create a custom workspace, move and manipulate panels (called palettes in Photoshop and in Adobe Creative
Suite 2 components).
A
B
C
17
Narrow blue drop zone indicates Color panel will be docked on its own above Layers panel group.
A. Title bar B. Ta b C. Drop zone
You can save custom workspaces and switch among them.
In Photoshop, you can change the font size of the text in the options bar, palettes, and tool tips. Choose a size from
the UI Font Size menu in General preferences.
Note: For a video on customizing the workspace in Illustrator, see www.adobe.com/go/vid0032. For a video on custom-
izing the workspace in InDesign, see www.adobe.com/go/vid0065.
Dock and undock panels
A dock is a collection of panels or panel groups displayed together, generally in a vertical orientation. You dock and
undock panels by moving them into and out of a dock.
Note: Docking is not the same as stacking. A stack is a collection of free-floating panels or panel groups, joined top to
bottom.
• To dock a panel, drag it by its tab into the dock, at the top, bottom, or in between other panels.
• To dock a panel group, drag it by its title bar (the solid empty bar above the tabs) into the dock.
• To remove a panel or panel group, drag it out of the dock by its tab or title bar. You can drag it into another dock
or make it free-floating.
Page 25
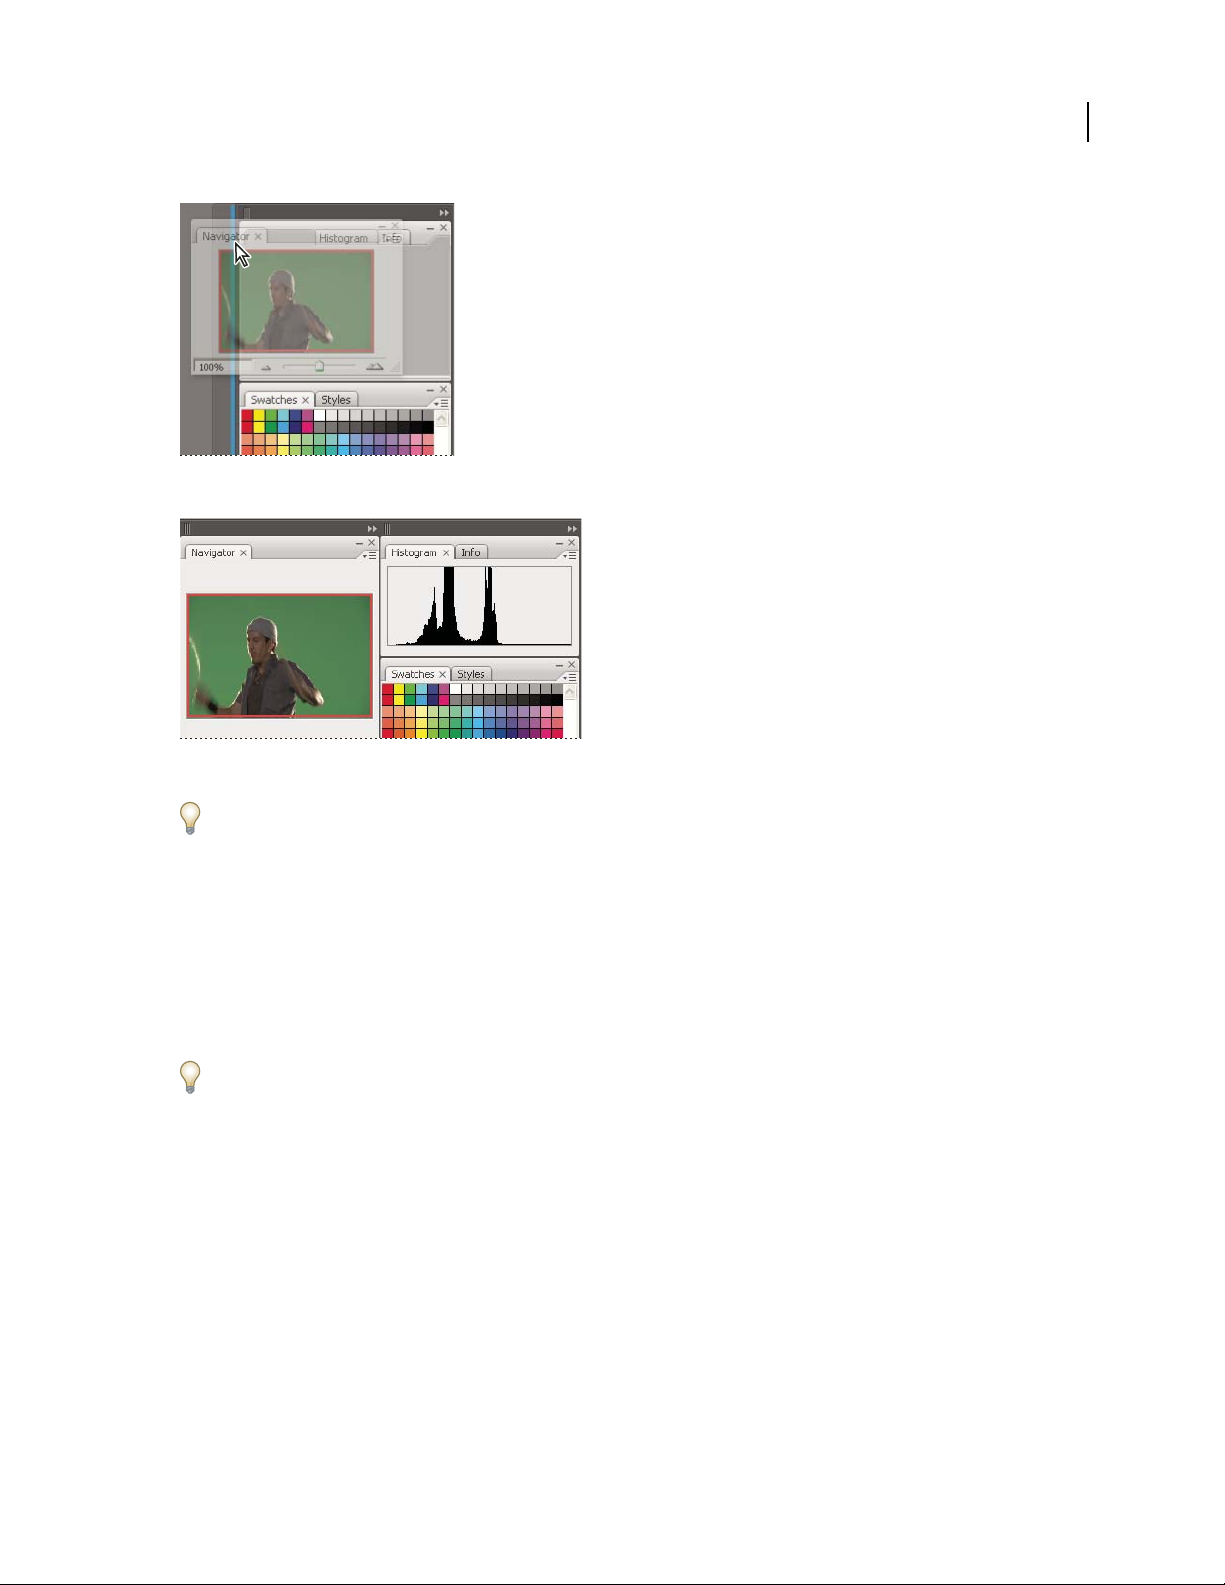
Navigator panel being dragged out to new dock, indicated by blue vertical highlight
INDESIGN CS3
User Guide
18
Navigator panel now in its own dock
To prevent panels from filling all space in a dock, drag the bottom edge of the dock up so it no longer meets the edge
of the workspace.
Move panels
As you move panels, you see blue highlighted drop zones,areaswhereyoucanmovethepanel.Forexample,youcan
moveapanelupordowninadockbydraggingittothenarrowbluedropzoneaboveorbelowanotherpanel.Ifyou
drag to an area that is not a drop zone, the panel floats freely in the workspace.
• To move a panel, drag it by its tab.
• To move a panel group or a stack of free-floating panels, drag the title bar.
Press Ctrl (Windows) or Control (Mac OS) while moving a panel to prevent it from docking.
Add and remove docks and panels
If you remove all panels from a dock, the dock disappears.You cancreate new docks by moving panels to drop zones
next to existing docks or at the edges of the workspace.
• To remove apanel, click its close icon (the X at the upper-right cornerof the tab),or deselect itfrom the Window menu.
• To add a panel, select it from the Window menu and dock it wherever you wish.
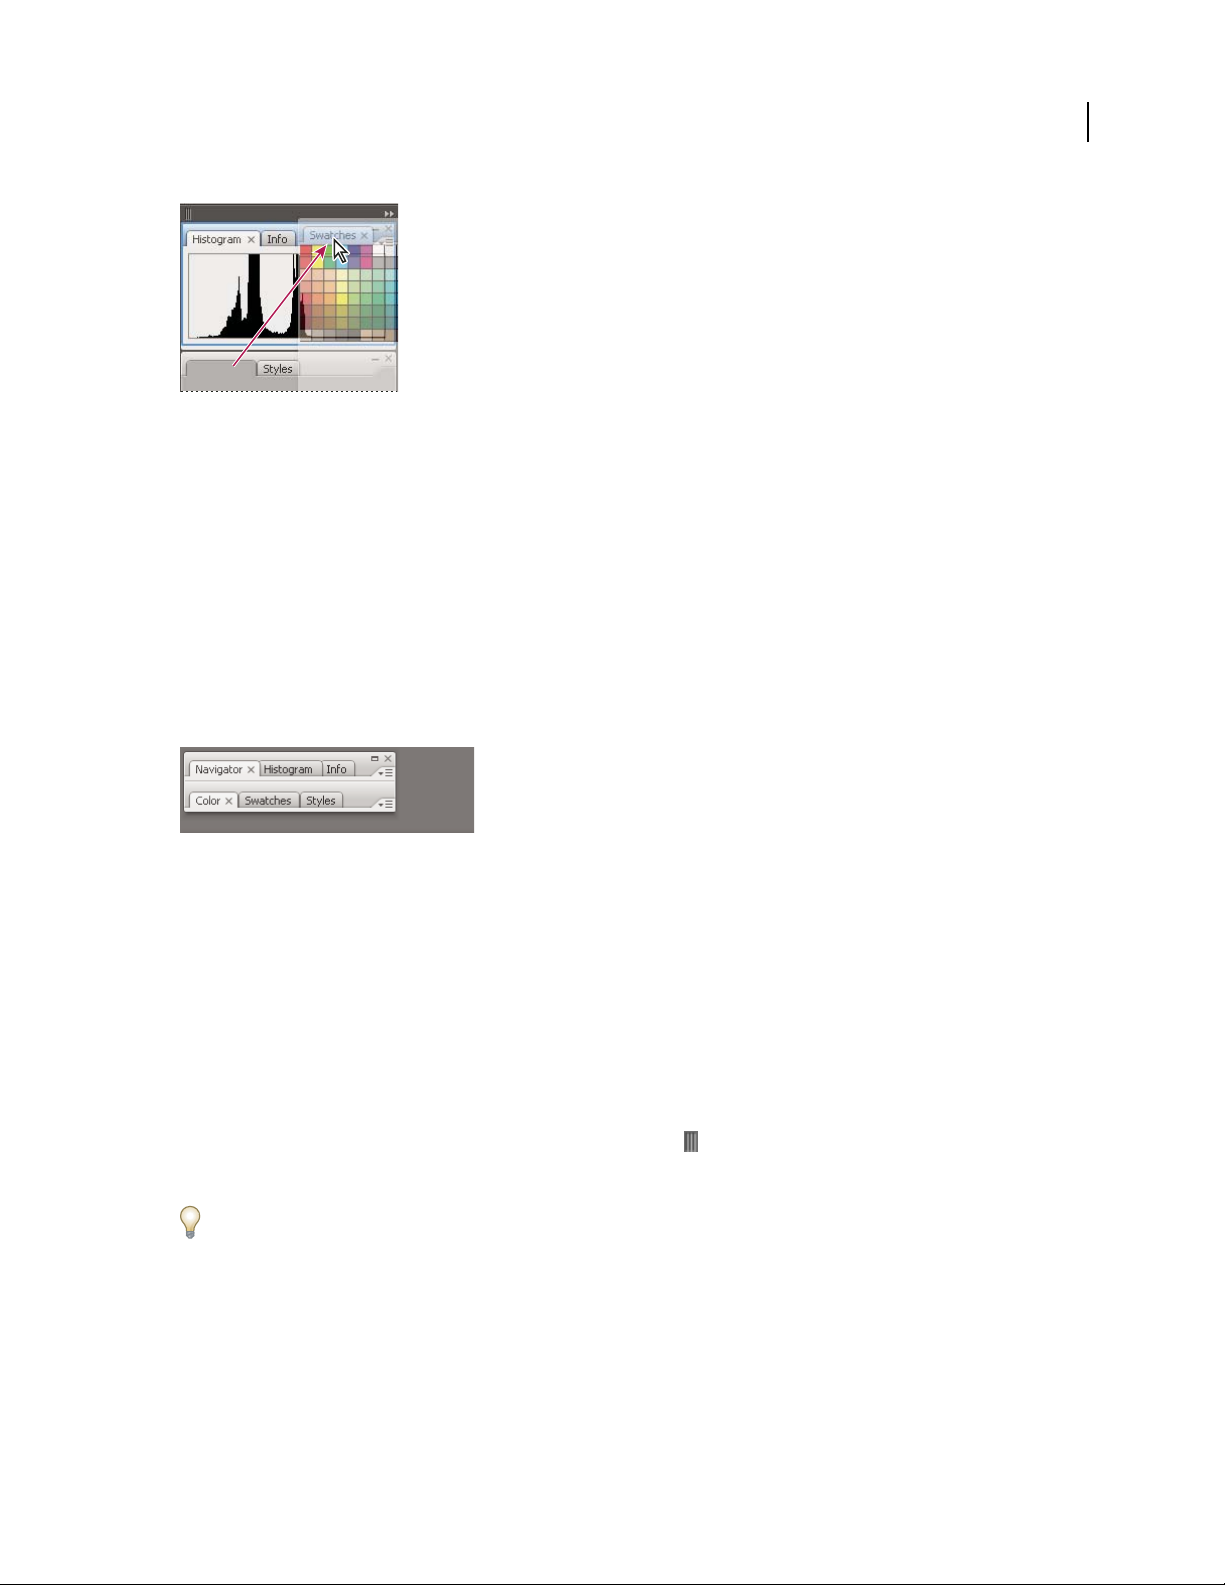
Manipulate panel groups
• To move a panel into a group, drag the panel’s tab to the highlighted drop zone at the top of the group.
Page 26
INDESIGN CS3
User Guide
Adding a panel to a panel group
• To rearrange panels in a group, drag a panel’s tab to a new location in the group.
• To remove a panel from a group so that it floats freely, drag the panel by its tab outside the group.
• To make a panel appear at the front of its group, click its tab.
• To move grouped panels together, drag their title bar (above the tabs).
Stack free-floating panels
When you drag a panel out of its dock but not into a drop zone, the panel floats freely, allowing you to position it
anywhere in the workspace. Panels may also float in the workspace when first selected from the Window menu. You
can stack free-floating panels or panel groups together so that they move as a unit when you drag the topmost title
bar. (Panels that are part of a dock cannot be stacked or moved as a unit in this way.)
19
Free-floating stacked panels
• To stack free-floating panels, drag a panel by its tab to the drop zone at the bottom of another panel.
• To change the stacking order, drag a panel up or down by its tab.
Note: Be sure to release the tab over the narrow drop zone between panels, rather than the broad drop zone in a title bar.
• To remove a panel or panel group from the stack, so that it floats by itself, drag it out by its tab or title bar.
Resize or minimize panels
• To resize a panel, drag any side of the panel or drag the size box at its lower-right corner. Some panels, such as the
Color panel in Photoshop, cannot be resized by dragging.
• To change the width of all the panels in a dock, drag the gripper at the top left of the dock.
• To minimize a panel, panel group, or stack of panels, click the Minimize button in its title bar.
You can open a panel menu even when the panel is minimized.
Page 27
INDESIGN CS3
User Guide
Minimize button
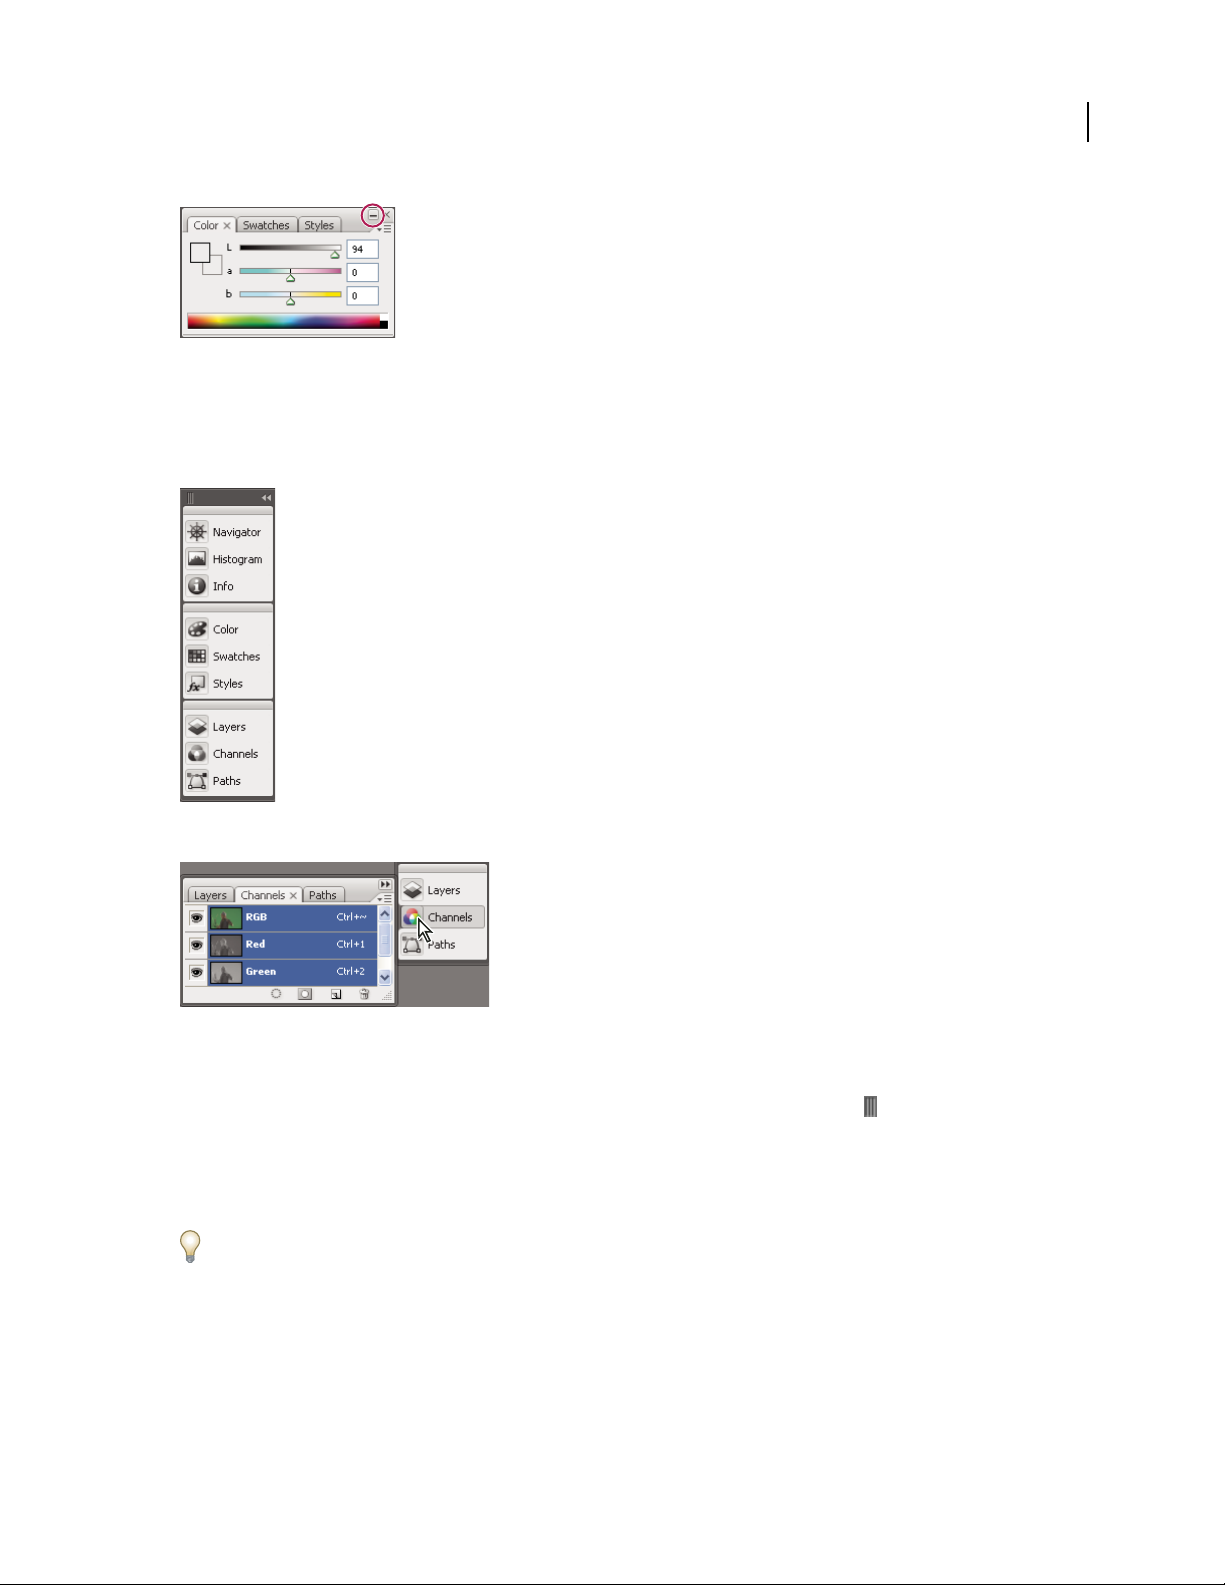
Manipulate panels collapsed to icons
Collapse panels to icons to reduce clutter on the workspace. (In some cases, panels are collapsed to icons in the
default workspace.) Click a panel icon to expand the panel. You can expand only one panel or panel group at a time.
20
Panels collapsed to icons
Panels expanded from icons
• To collapse or expand all panels in a dock, click the double arrow at the top of the dock.
• To resize panel icons so that you see only the icons (and not the labels), drag the gripper at the top of the dock
toward the icons until the text disappears. (To display the icon text again, drag the gripper away from the panels.)
• To expand a single panel icon, click it.
• To collapse an expanded panel back to its icon, click its tab, its icon, or the double arrow in the panel’s title bar.
If you select Auto-Collapse Icon Panels from the Interface or User Interface Options preferences, an expanded panel
icon will collapse automatically when you click away from it.
• To add a panel or panel group to an icon dock, drag it in by its tab or title bar. (Panels are automatically collapsed
to icons when added to an icon dock.)
• To move a panel icon (or panel icon group), drag the bar that appears above the icon. You can drag panel icons up
and down in the dock, into other docks (where they appear in the panel style of that dock), or outside the dock
(where they appear as free-floating, expanded panels).
Page 28

INDESIGN CS3
User Guide
Save workspaces
Youcansavethecurrentsizesandpositionsofpanelsandanymenuchangesasacustomworkspace.Thenamesof
workspaces appear in a Workspace submenu of the Window menu. You can edit the list of names by adding or
deleting a workspace.
❖ Do one of the following:
• To save the current workspace, choose Window > Workspace > Save Workspace. Type a name for the new
workspace, indicate whether you want to include panel locations and customized menus as part of the saved
workspace, and click OK.
• To display a custom workspace, choose it from the Window > Workspace submenu.
• To delete a custom workspace, choose Window > Workspace > Delete Workspace. Select a workspace to delete
and click Delete.
For a video on customizing the workspace, see www.adobe.com/go/vid0065.
See also
“Customize menus” on page 24
21
About view modes
You can change the visibility of the document window using the Mode buttons at the bottom of the toolbox or by
choosing commands from the View > Screen Mode menu. When the toolbox is displayed in a single column, you
can select view modes by clicking the current mode button and selecting a different mode from the menu that
appears.
Normal Mode Displays artwork in a standard window with all visible grids and guides showing, non-printing
objects showing, and a white pasteboard.
Preview Mode Displays artwork as if it were output, with all non-printing elements suppressed (grids, guides,
non-printing objects), and the pasteboard set to the preview background color defined in Preferences.
Bleed Mode Displays artwork as if it were output, with all non-printing elements suppressed (grids, guides, non-
printing objects), the pasteboard set to the preview background color defined in Preferences, and any printing
elements within the document's bleed area (defined in Document Setup) showing.
Slug Mode Displays artwork as if it were output, with all non-printing elements suppressed (grids, guides, non-
printing objects), the pasteboard set to the preview background color defined in Preferences, and any printing
elements within the document's slug area (defined in Document Setup) showing.
Using the status bar
The status bar (at the lower left of a document window) shows information about the status of a file and lets you
change the document zoom percentage or turn to a different page. Click the status bar menu to do any of the
following:
• Access Adobe Version Cue® commands.
• Show the current file in the file system by choosingReveal In Explorer (Windows®) or Reveal In Finder (Mac OS®).
• Show the current file in Adobe® Bridge® by choosing Reveal in Bridge.
Page 29
INDESIGN CS3
User Guide
See also
“About Adobe Bridge” on page 93
“Adobe Version Cue” on page 94
Control panel overview
The Control panel (Window > Control) offers quick access to options, commands, and other panels related to the
currentpageitemorobjectsyouselect.Bydefault,theControlpanelisdockedtothetopofthedocumentwindow;
however, you can dock it to the bottom of the window, convert it to a floating panel, or hide it altogether.
Options displayed in the Control panel vary depending on the type of object you select:
• When you select a frame, the Control panel displays options for resizing, repositioning, skewing, and rotating the
frame, or applying an object style.
• When you select text inside a frame, the Control panel displays either character or paragraph options. Click the
icons on the left side of the Control panel to determine whether paragraph or character options are displayed. If
your monitor size and resolution allows, the Control panel displays additional options. For example, if Character
FormattingControls is selected,all thecharacteroptions are displayed,and some paragraph options appear onthe
right of the Control panel. If you click Paragraph Formatting Controls, all paragraph options are displayed, and
some character options appear on the right.
• When you select a table cell, the Control panel displays options for adjusting row and column dimensions,
merging cells, aligning text, and adding strokes.
22
As the options in the Control panel change, you can get more information about each option by using tool tips—
pop-up descriptions that appear when you hover over an icon or option label with the pointer.
Control panel with tool tip displayed
Control panel menu
To open dialog boxes associated with Control panel icons, Alt-click (Windows) or Option-click (Mac OS) as you
click a Control panel icon. For example, when a frame is selected, hold down Alt or Option and click the Rotation
Angle icon to open the Rotate dialog box.
For a video on using the Control panel, see www.adobe.com/go/vid0064.
Page 30
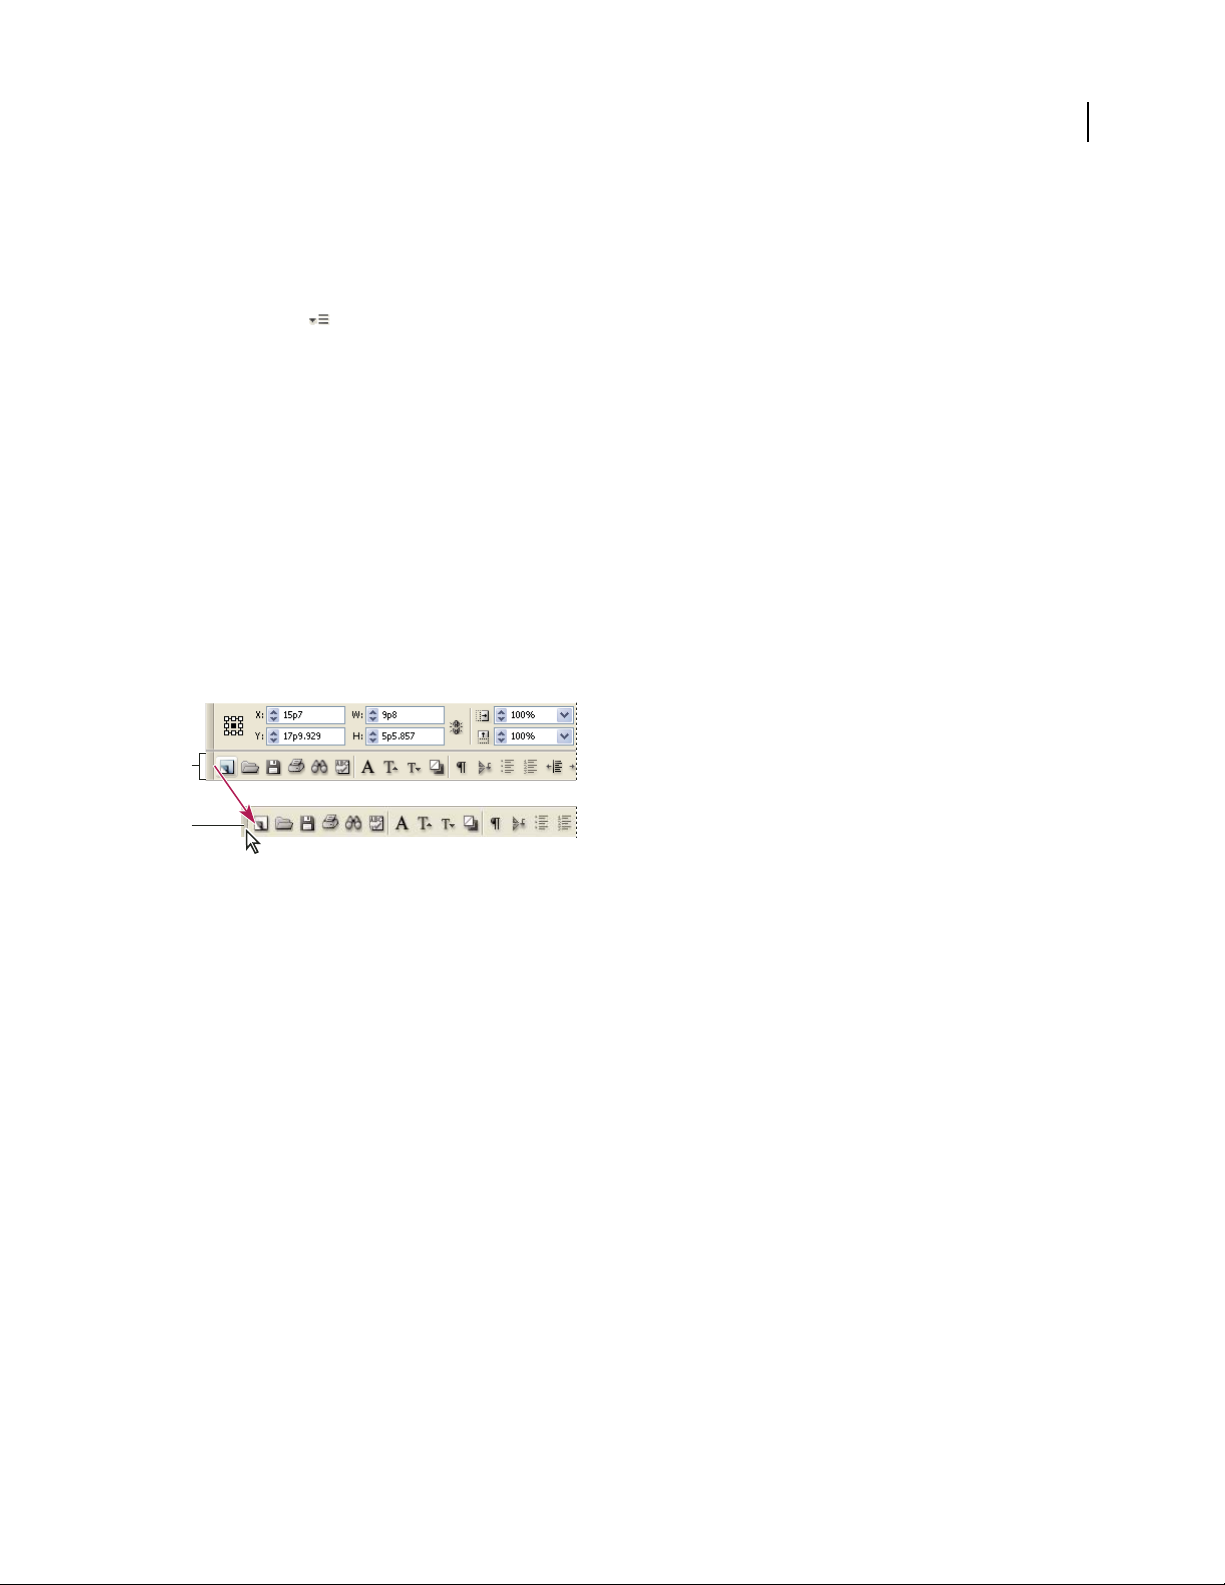
INDESIGN CS3
User Guide
See also
“Keys for the Control panel” on page 643
Display the panel menu
❖ Click the icon to the right of the Control panel.
Dock or float the Control panel
❖ Do one of the following:
• Drag the vertical bar on the left side of the Control panel until the toolbar is docked to the top or bottom of the
application window (Windows) or screen (Mac OS).
• Choose Dock At Top, Dock At Bottom, or Float from the Control panel menu.
Use the Command bar
The Command bar (previously called the PageMaker toolbar) provides quick access to a set of frequently used
features.Youcanshoworhidethetoolbar,andyoucandockittothetop,bottom,orsideofthedocumentwindow.
Note: In InDesign, Command bar buttons are disabled if the feature isn’t available. For example, if a document has only
one page, the Remove Pages button is dimmed.
23
A
B
Command bar
A. Docked toolbar B. Floating toolbar
❖ Do one of the following:
• To display or hide the Command bar, choose Window > Object & Layout> Command Bar.
• To dock the Command bar, drag the vertical bar on the left of the Control bar until the bar is docked beneath the
Control panel, or to the bottom of the document window.
• To undock (float) the Command bar, drag the vertical bar on the left of Command bar away from the area where
it’s docked.
Use context menus
Unlike the menus that appear at the top of your screen, context-sensitive menus display commands related to the
active tool or selection. You can use context menus as a quick way to choose commonly used commands.
1 Position the pointer over the document, object, or panel.
2 Click the right mouse button.
Note: (Mac OS) If you don’t have a two-button mouse, you can display a context menu by pressing the Control key as
you click with the mouse.
Page 31

INDESIGN CS3
User Guide
Customize menus and keyboard shortcuts
Customize menus
Hiding and colorizing menu commands is a way to remove menu clutter and emphasize commands you frequently
use. Note that hiding menu commands simply removes the menu from view; it doesn’t disable any features. At any
time, you can view hidden commands byselecting the Show All MenuItems commandat the bottomof a menu. You
can include customized menus in workspaces you save.
You can customize the main menu, context menus, and panel menus. Context menus appear when you right-click
(Windows) or Control-click (Mac OS) an area. Panel menus appear when you click the triangle icon in the upper
right of a panel.
See also
“Save workspaces” on page 21
Create a custom menu set
1
Choose Edit > Menus.
You cannot edit the default menu set.
24
2 Click Save As, type the name of the menu set, and click OK.
3 From the Category menu, choose Application Menus or Context & Panel Menus to determine which menus are
customized.
4 Click the arrows to the left of the menu categories to display subcategories or menu commands. For each
command you want to customize,click the eyeicon under Visibility to show or hide the command; clickNone under
Color to select a a color from the menu.
5 Click Save, and then click OK.
Select a custom menu set
1
Choose Edit > Menus.
2 Choose the menu set from the Set menu, and then click OK.
Edit or delete a custom menu set
1
Choose Edit > Menus.
2 Choose the menu set from the Set menu, and then do one of the following:
• To edit a menu set, change the visibility or color of menu commands, click Save, and then click OK.
• To delete a menu set, click Delete and then click Yes. If you’ve modified the menu set without saving it, you’re
prompted to save the current menu set. Click Yes to save the menu set, or click No to discard changes.
Show hidden menu items
❖ Choose Show All Menu Items at the bottom of the menu that includes hidden commands.
Holding down Ctrl (Windows) or Command (Mac OS) and clicking a menu name temporarily displays any menu
commands you’ve hidden by customizing menus.
Page 32

INDESIGN CS3
User Guide
Use keyboard shortcut sets
Tooltipsprovideaninstantaneousreferenceforshortcuts.InDesignalsoprovidesashortcuteditorinwhichyoucan
view and generate a list of all shortcuts, and edit or create your own shortcuts. The shortcut editor includes all the
commands that accept shortcuts, but some of these commands are undefined in the Default shortcut set.
You can also associate keyboard shortcuts with paragraph or character styles (“Define paragraph and character
styles” on page 166) or scripts (see “Scripting in InDesign” on page 590).
For a video on using keyboard shortcuts, see www.adobe.com/go/vid0066.
See also
“Default keyboard shortcuts” on page 634
Change the active shortcut set
1
Choose Edit > Keyboard Shortcuts.
2 Select a shortcut set in the Set menu. For example, select Shortcuts for QuarkXPress® 4.0.
3 Click OK.
View shortcuts
1
Choose Edit > Keyboard Shortcuts.
2 For Set, select a shortcut set.
3 For Product Area, select the area containing the commands you want to view.
4 From Commands, select a command. The shortcut is displayed in the Current Shortcut section.
25
Generate a list of shortcuts for printing
1
Choose Edit > Keyboard Shortcuts.
2 For Set, select a shortcut set.
3 Click Show Set.
A text file opens with all current and undefined shortcuts for that set.
Create a new shortcut set
1
Choose Edit > Keyboard Shortcuts.
2 Click New Set.
3 Type a name for the new set, select a shortcut set in the Based On Set menu, and click OK.
Create or redefine a shortcut
1
Choose Edit > Keyboard Shortcuts.
2 For Set, select a shortcut set or click New Set to create a new shortcut set.
Note: Do not edit the Default or the QuarkXPress shortcut sets. Instead, create a new set based on one of these sets, and
then edit the new set.
3 For Product Area, select the area containing the command you want to define or redefine.
4 In the Commands list, select the command that you want to define or redefine.
Page 33

INDESIGN CS3
User Guide
5 In the New Shortcut box, press the keys for your new keyboard shortcut. If the key sequence is currently being
used for another command, InDesign displays that command under Current Shortcuts. You can choose to change
the original shortcut also, or try another shortcut.
Note: Do not assign single-key shortcuts to menu commands, because they interfere with the typing of text. If an
insertion point is active when you type a single-key shortcut, InDesign actives the keyboard shortcut instead of inserting
the character in the text.
6 In the Context list, select the context in which you want the keyboard shortcut to function. The context ensures
that the shortcut performs the way you intended. For example, you can assign Ctrl+G to merge table cells (Table
context) and Ctrl+G to insert special characters (Text context).
Note: Assign shortcuts in the Default context when you want them to function regardless of the current state of the
document. Shortcuts you assign in other contexts, such as Table or Text, override shortcuts assigned in the Default
context.
7 Do one of the following:
• Click Assign to create a new shortcut where none currently exists.
• Click Assign to add another shortcut to a command. Menu commands can have multiple keyboard shortcuts.
8 Click OK to close the dialog box, or click Save to keep the dialog box open while you enter more shortcuts.
26
Toolbox
Toolbox overview
Some tools in the toolbox are for selecting, editing, and creating page elements. Other tools are for choosing type,
shapes, lines, and gradients. You can change the overall layout of the toolbox to fit your preferred window and panel
layout. By default, the toolbox appears as two vertical columns of tools. You can also set it up as a single vertical
column or as one horizontal row. However, you can’t rearrange the positions of individual tools in the toolbox. To
move the toolbox, drag the toolbox by its title bar.
Select a tool from the default toolbox by clicking it. The toolbox also contains several hidden tools related to the
visible tools. Hidden tools are indicated by arrows to the right of the tool icons. Select a hidden tool by clicking and
holding the current tool in the toolbox and then selecting the tool that you want.
Page 34

INDESIGN CS3
User Guide
The name of the tool and its keyboard shortcut appear when you hold the pointer over the tool—this text is called
the tool tip. You can turn off tool tips by choosing None from the Tool Tips menu in General preferences.
Tool b ox overview
27
A
Selection tools
Selection (V)
Direct Selection (A)
A
B
Drawing and Type
Positions (Shift+A)
tools
B
C
D
Pen (P)
Add Anchor Point
Delete Anchor
Point
Convert Anchor
Point
Type (T)
Type On a Path
(Shift+T)
Pencil (N)
Smooth
Erase
Line (\)
Rectangle Frame (F)
Ellipse Frame
Polygon Frame
Rectangle (M)
Ellipse (L)
Polygon
Button (B)
Scissors (C)
C
Transformation tools
Rotate (R)
Scale (S)
Shear (O)
Free Transform (E)
Gradient (G)
Gradient Feather
(Shift+G)
D
Modication and
Navigation tools
Note
Eyedropper (I)
Measure (K)
Hand (H)
Zoom (Z)
Indicates default tool * Keyboard shortcuts appear in parenthesis
See also
“Gallery of selection tools” on page 29
“Gallery of drawing and type tools” on page 29
“Gallery of transformation tools” on page 30
“Gallery of modification and navigation tools” on page 31
Display the toolbox
❖ Choose Window > Tools.
Page 35

Display tool options
❖ Double-click a tool in the toolbox.
This procedure works only for some tools, such as the Eyedropper, Pencil, and Polygon tools.
Display and select hidden tools
1
In the toolbox, position the pointer over a tool that has hidden tools and hold down the mouse button.
2 When the hidden tools appear, select a tool.
Hidden tools menu
Change the toolbox layout
1
Choose Edit > Preferences > Interface (Windows) or InDesign > Preferences > Interface (Mac OS).
2 Choose a layout option from the Floating Tools Panel menu and click OK.
INDESIGN CS3
User Guide
28
Tools overview
Type tools Create and format type in standard or customized blocks or paths.(See “About text frames”on page 111.)
Drawing and painting tools Draw and style simple and complex objects, including rectangles, ellipses, polygons,
freeform shapes. (See “Draw basic lines and shapes” on page 301, “Draw with the Pencil tool” on page 302, and
“Drawing with the Pen tool” on page 304.)
Selection tools Select (activate) objects, points, or lines. (See “Select objects” on page 358.)
Transform tools Reshape, reorient, and resize objects. (See “Transform objects” on page 368.)
Navigation, zoom, and measuring tools Move around in, control the view of, and measure distances in a document.
(See “Zoom in and out” on page 31 and “Rulers and measurement units” on page 45.)
The Scissors tool Splits paths and frames. (See “Split a path using the Scissors tool” on page 313.)
The Button tool Creates buttons to serve as triggers for various actions in interactive documents. (See “Create
buttons” on page 503.)
Page 36

Gallery of selection tools
INDESIGN CS3
User Guide
29
Selection tool lets you select entire
objects.
Direct Selection tool lets you select
pointsonapathorcontentswithina
frame.
See also
“Toolbox overview” on page 26
“Select objects” on page 358
“Overview of selection methods” on page 358
Gallery of drawing and type tools
Pen tool lets you draw
straight and curved paths.
Add Anchor Point tool lets
you add anchorpoints toa
path.
Position tool lets you crop and move
images in a frame.
Delete Anchor Point tool
lets you remove anchor
points from a path.
Convert Direction Point
tool lets you convert
corner points and smooth
points.
Type tool lets you create
text frames and select text.
Type on a Path tool lets
you create and edit type
on paths.
Pencil tool lets you draw a
freeform path.
Smooth tool lets you
remove excess angles from
a path.
Page 37
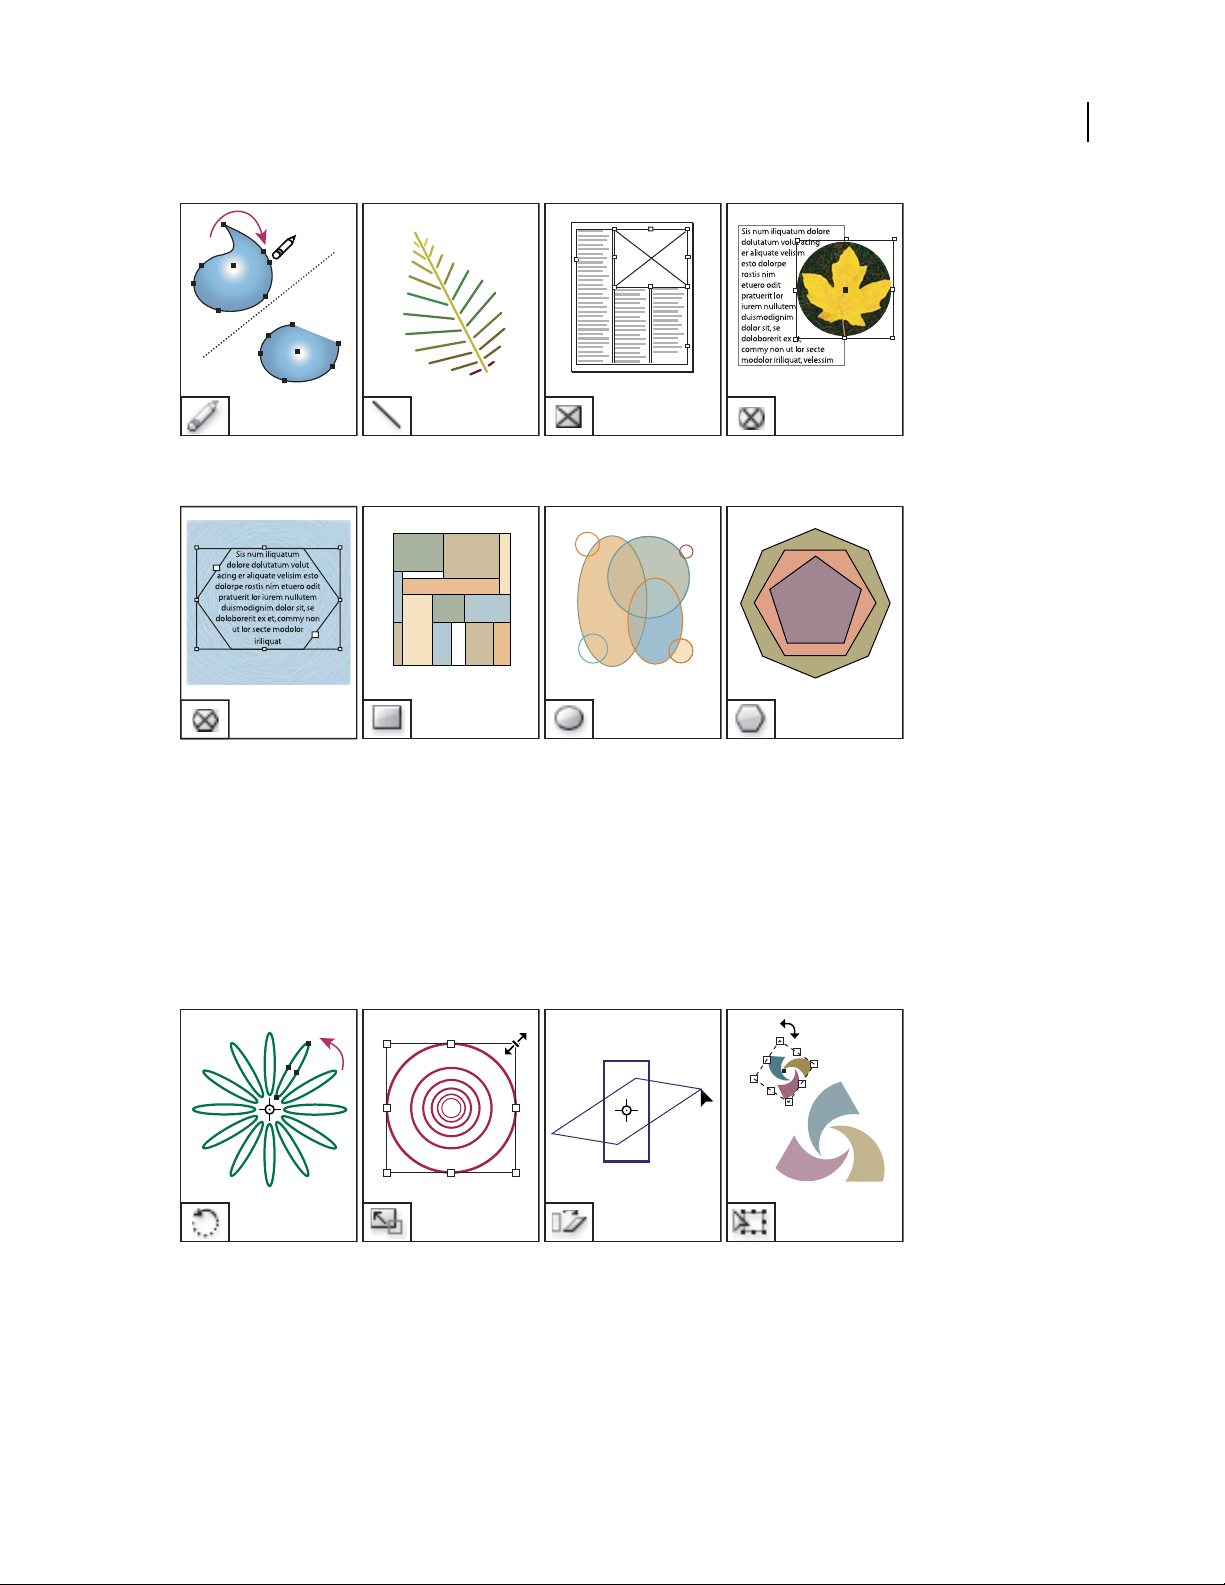
INDESIGN CS3
User Guide
30
Erasetoolletsyoudeleted
points on a path.
Polygon Frame tool lets
you create a multi-sided
shape placeholder.
Line tool lets you draw a
line segment.
Rectangle tool lets you
create a square or
rectangle.
See also
“Toolbox overview” on page 26
“Types of paths and shapes” on page 298
Gallery of transformation tools
Rectangle Frame tool lets
you create a square or
rectangle placeholder.
Ellipse tool lets you create
a circle or oval.
Ellipse Frame tool lets you
create a circle or oval
placeholder.
Polygon tool lets you
create multi-sided shape.
Rotate tool lets you rotate
objects around a fixed
point.
Scale tool lets you resize
objects around a fixed
point.
Shear tool lets you skew
objects around a fixed
point.
Free Transform tool lets
you rotate, scale, or shear
an object.
Page 38

See also
“Toolbox overview” on page 26
“Transform objects” on page 368
Gallery of modification and navigation tools
INDESIGN CS3
User Guide
31
Eyedropper tool lets you
sample color or type
attributes from objects
and apply them to other
objects.
Scissors tool cuts paths at
specified points.
Measure tool measures the
distance between two
points.
Hand tool moves the page
view withinthe document
window.
See also
“Toolbox overview” on page 26
Viewing the workspace
Gradient Swatch tool lets
you adjust the beginning
and ending points and
angle of gradients within
objects.
Zoom tool increases and
decreases the view magnification in the document
window.
Gradient Feather tool lets
you fade an object into the
background.
order
Button tool lets you create
abuttonthatperformsan
action when thedocument
is exported to Adobe PDF.
Zoom in and out
Use the Zoom tool or the Zoom commands to magnify the size of documents.
See also
“Keys for tools” on page 634
Page 39

INDESIGN CS3
User Guide
Zoom in or out
• To zoom in, select the Zoom tool and click the area you want to magnify. Each click magnifies the view to the
next preset percentage, centering the display around the point you click. At maximum magnification, the center
of the Zoom tool appears blank. To zoom out, hold down Alt (Windows) or Option (Mac OS) and click the area
you want to reduce. Each click reduces the view.
• To magnify to the next preset percentage, activate the window you want to view and choose View > Zoom In. To
reduce the view to the previous preset percentage, choose View > Zoom Out.
• To set a specific magnification level, type or choose a level in the Zoom text box at the lower left of the document
window.
• To zoom in or out, press Alt (Windows) or Option (Mac OS) while using the mouse scroll wheel or sensor.
• To magnify by dragging, select the Zoom tool and drag around the area you want to magnify.
Zoom to 100%
• Double-click the Zoom tool.
• Choose View > Actual Size.
• Type or choose a magnification level of 100 in the Zoom text box at the lower left of the document window.
32
Fit the page, spread, or pasteboard within the active window
• Choose View > Fit Page In Window.
• Choose View > Fit Spread In Window.
• Choose View > Entire Pasteboard.
See also
“Keys for viewing documents and document workspaces” on page 641
Use the Navigator panel
The Navigator panel (Window > Object & Layout > Navigator) contains a thumbnail of the selected spread, so that
you can quickly change the view of a document.
A
B
C
E F G
D
Navigator panel
A. Thumbnail B. View box C. Spread number D. Zoom edit box E. Zoom Out button F. Zoom slider G. Zoom In button
Alternate between viewing one or all open spreads
❖ Choose View Active Spread/All Spreads from the Navigator panel menu. Use the scroll bar to view spreads before
or after the current spread.
Page 40

INDESIGN CS3
User Guide
Ifyoudecidetoviewallspreads,viewingmaybeeasierifyouresizetheNavigatorpaneltomakeittallandnarrow.
Magnify or reduce the view using the Navigator panel
❖ Do any of the following:
• Click the Zoom In or Zoom Out buttons at the bottom of the Navigator panel.
• Drag the Zoom slider at the bottom of the panel.
• In the Zoom text box, type the magnification or reduction percentage and press Enter (Windows) or Return
(Mac OS).
Change the color of the Navigator panel view box
1
Choose Panel Options from the Navigator panel menu.
2 Choose a color:
• To use a preset color, select one from the pop-up menu.
• To specify a different color, choose Custom from the pop-up menu, and specify a color in the color picker.
Scroll the view
You can easily adjust the degree to which pages or objects are centered in the document window. These techniques
are also useful for navigating between pages.
33
❖ Do any of the following:
• Select the Hand tool from the Tools panel, and then click and drag in the document window. Holding down
Alt (Windows) or Option (Mac OS) and pressing the spacebar temporarily activates the Hand tool.
• In the Navigator panel, click the thumbnail or drag the view box that represents the visible area of the current
spread.
• Click the horizontal or vertical scroll bars or drag the scroll box.
• Press Page Up or Page Down.
• Use the mouse scroll wheel or sensor to scroll up and down. To pan left or right, press Ctrl (Windows) or
Command (Mac OS) as you use the mouse scroll wheel or sensor.
See also
“Keys for viewing documents and document workspaces” on page 641
Turn pages
InDesign makes it easy to jump from page to page in a document. For example, just as most web browsers provide
Back and Forward buttons to navigate through pages you’ve visited, InDesign keeps track of the order in which
you’ve viewed pages in a document.
❖ Do any of the following:
• To move through pages in the order in which you viewed them during the current session, choose Layout > Go
Back or Go Forward.
• To go to the next or previous page, click the Next Page button or Previous Page button at the bottom of
the document window, or choose Layout > Next Page or Previous Page.
Page 41

INDESIGN CS3
User Guide
• To go to the first or last page, click the First Spread button or Last Spread button at the lower left of
the document window, or choose Layout > First Page or Last Page.
• To go to a specific page, choose Layout > Go To Page, specify the page number, and click OK. Or, click the
downward-facing arrow at the right of the page box, and then choose a page.
Choose page from page box to go to specific page
• To go to a master page, click in the page box at the lower left of the document window. Type the first few letters
of the master page name, and press Enter (Windows) or Return (Mac OS). Or, in the Pages panel, double-click a
master page icon or double-click the page numbers below the icons.
34
Work with additional windows
You can open additional windows for the same document or for other InDesign documents. With additional
windows, you can compare different spreads simultaneously, especially spreads that aren’t adjacent. You can also
display different magnifications of the same page, so that you can work closely on details while watching how the
changes affect the overall layout. In addition, you can display a master page in one window, and pages based on it in
other windows, to see how editing the master page affects various parts of the document.
When you reopen the document, only the last-used window appears.
• To create a new window for the same document, choose Window > Arrange > New Window.
• To cascade or tile windows, choose Window > Arrange > Cascade to arrange all windows into a stack, with each
window offset slightly. Or, choose Window > Arrange > TileHorizontally or TileVertically to display all windows
equally without overlapping.
• To activate a window, click the window title bar. Or, choose the name of the view in the Window menu. Multiple
windows for a document are numbered in the order they were created.
• To close all windows for the active document, press Shift+Ctrl+W (Windows) or Shift+Command+W (Mac OS).
• To close all windows for all open documents, press Shift+Ctrl+Alt+W (Windows) or
Shift+Command+Option+W (Mac OS).
Use anti-aliasing for smoothing edges
Anti-aliasing smooths the jagged edges of type and bitmap images by softening the color transition between edge
pixels and background pixels. Since only the edge pixels change, no detail is lost.
1 Choose Edit > Preferences > Display Performance (Windows) or InDesign > Preferences > Display Performance
(Mac OS).
2 From the Adjust View Settings menu, choose the view setting for which you want to turn on anti-aliasing.
Page 42

INDESIGN CS3
User Guide
You can enable or disable anti-aliasing for each of the view settings. For example, you can enable anti-aliasing for
High Quality view and disable it for Fast view.
3 Select Enable Anti-aliasing.
Greek type
When display capabilities are insufficient to show text at a small size, InDesign displays the text as a dimmed bar.
This behavior is called greeking type. Any type at or below the specified type size is replaced on-screen with nonletterforms that act as placeholders.
1 Choose Edit > Preferences > Display Performance (Windows) or InDesign > Preferences > Display Performance
(Mac OS).
2 From the Adjust View Settings menu, choose the view setting for which you want to change the Greek Type
setting.
You can specify different Greek Type values for each of the view settings.
3 For Greek Type Below, type a value.
4 To control whether to greek text and images when you scrolla document, drag the HandTool slider to the desired
level of performance versus quality, and then click OK.
35
Calculate values in panels and dialog boxes
You can perform simple math in any numerical edit box. For example, if you want to move a selected object 3 units
to the right using the current measurement units, you don’t have to work out the new horizontal position—simply
type +3 after the current value in the Transform panel.
Panels use the measurement system selected in the Preferences dialog box; however, you can specify values in
another measurement instead.
1 In a text box that accepts numerical values, do one of the following:
• To replace the entire current value with a mathematical expression, select the entire current value.
• To use the current value as part of a mathematical expression, click before or after the current value.
2 Type a simple mathematical expression using a single mathematical operator, such as + (plus), - (minus),
x (multiplication), / (division), or % (percent).
For example, 0p0+3 or 5mm + 4.
3 Press Enter or Return to apply the calculation.
In the Control panel and the Transform panel, you can duplicate the selected object and apply the calculation to the
duplicate (instead of the original). Enter the calculation and press Alt+Enter (Windows) or Option+Return
(Mac OS).
Page 43

INDESIGN CS3
User Guide
Enter values in panels and dialog boxes
Panels and dialog boxes use the measurement units and increments defined in the Edit > Preferences > Units &
Increments (Windows) or InDesign > Preferences > Units & Increments (Mac OS) dialog box. However, you can
specify values using any of the supported measurement units at any time by temporarily overriding the current
preference settings.
❖ Do any of the following:
• Type a value in the box, and then press Enter or Return.
• Drag the slider.
• Drag the dial.
• Click the arrow buttons in the panel to change the value.
• Click in the box and then use the up or down arrow keys on the keyboard to change the value.
• Select a value from the menu associated with the box.
Note: When you make a change using the arrow buttons, arrow keys, or pop-up menus, InDesign applies the change
immediately.
See also
“Rulers and measurement units” on page 45
36
Setting preferences
About preferences and defaults
Preferences include settings such as panel positions, measurement options, and display options for graphics and
typography. Preference settings specify how InDesign documents and objects behave initially.
Default settings are used for every new document or object you create. For example, you can specify the default font
and other type specifications for all new documents or text frames.
Numerous program preferences and default settings are stored in the Adobe InDesign preferences files, called
InDesign Defaults and InDesign SavedData. Both of these defaults files are saved each time you exit from InDesign.
Note: InDesign preference settings are fully scriptable. To share a consistent set of preferences across user groups, develop
a script to set the preferences, and then have all users in the group run the script ontheir computers. Don’t copy and paste
one user’s preferences files onto another computer, as doing so might cause application instability. For more information
about scripting, see the Scripting Guide on the InDesign CS3 DVD.
Set general preferences
1 Choose Edit > Preferences > General (Windows) or InDesign > Preferences > General (Mac OS), and then
choose the type of preferences you want to specify.
2 In the Page Numbering section, choose a page numbering method from the View menu.
3 In the Font Downloading and Embedding section, specify a threshold to trigger font subsetting based on the
number of glyphsa font contains. This setting affects font downloading options in thePrint and Export dialog boxes.
Page 44

INDESIGN CS3
User Guide
4 In the Scripting section, select Enable Attached Scripts to allow JavaScript actions to be attached to features in
InDesign. You may want to turn off this option if you’re opening an InDesign document from an unknown source.
5 Click Reset All Warning Dialogs to display all warnings, even the ones you’ve already checked not to display. (As
warnings appear, you can select a check box to prevent the warning from appearing again.)
See also
“Scale type” on page 220
Set defaults
If you change settings when no documents areopen, your changes set thedefaults fornew documents. Ifa document
is open when you change settings, the changes affect only that document.
Similarly, if you change settings when no objects are selected, your changes set the defaults for new objects.
Specify default settings for new documents
1
Close all InDesign documents.
2 Change any menu items or panel or dialog box settings.
If you use the same page size and language for most of your documents, you can change these defaults with no
document open. For example, to change the default page size, close all documents, choose File > Document Setup,
and select a desired page size. To set a default dictionary, close all documents, choose Edit > Preferences > Dictionary
(Windows) or InDesign > Preferences > Dictionary (Mac OS), and select an option from the Language menu.
37
Specify default settings for new objects in a document
1
With an InDesign document open, choose Edit > Deselect All.
2 Change any menu items or panel or dialog box settings.
Restore all preferences and default settings
❖ Do one of the following:
• (Windows) Start InDesign, and then press Shift+Ctrl+Alt. Click Yes when asked if you want to delete preference
files.
• (Mac OS) While pressing Shift+Option+Command+Control, start InDesign. Click Yes when asked ifyou want to
delete preference files.
About InDesign styles and presets
You can store settings for reuse, including settings for the following items:
• Creating paragraph and character styles. (See “Define paragraph and character styles” on page 166.)
• Creating object styles. (See “Define object styles” on page 178.)
• Creating table and cell styles. (See “Define table and cell styles” on page 270.)
• Creating PDF export presets. (See “Customize Adobe PDF presets” on page 476.)
• Creating print presets. All the attributes in the Print dialog box are included in the style. (See “Print a document
or book” on page 542.)
• Creating trap presets. (See “Create or modify a trap preset” on page 464.)
Page 45

INDESIGN CS3
User Guide
• Creating transparency flattener presets. (See “Flattening transparent artwork” on page 404.)
• Creating table of contents styles. (See “Create or import TOC styles” on page 281.)
• Saving the workspace configuration.
• Creating document presets. (See “Define document presets” on page 44.)
• Creating stroke styles. (See “Define custom stroke styles” on page 318.)
In general, change the feature settings in the dialog box, and then save the settings. Styles and presets are stored in
the document in which they are created. You can use the settings from another document by importing or loading
the styles and presets from that document. In addition, most presets can be exported or saved to a separate file and
distributed to other computers.
You can also share styles and presets across all documents in a book file. For more information, see “Synchronize
book documents” on page 275.
Recovery and undo
Recover documents
InDesign guards your data against unexpected power or system failures using an automatic recovery feature.
Automatically recovered data exists in a temporary file that is separate from the original document file on disk.
Under normal circumstances you don’t need to think about automatically recovered data, because any document
updates stored in the automatic recovery file are automatically added to the original document file when you choose
the Save or Save As command or exit from InDesign normally. Automatically recovered data is important only if
you’re unable to save successfully before an unexpected power or system failure.
38
Even though these features exist, you shouldsave your files oftenand create backup files in case of unexpected power
or system failures.
See also
“Adobe Version Cue” on page 94
Find recovered documents
1
Restart your computer.
2 Start InDesign.
If automatically recovered data exists, InDesign automatically displays the recovered document. The word
[Recovered] appears after the filename in the title bar of the document window to indicate that the document
contains unsaved changes that were automatically recovered.
Note: If InDesign fails after attempting to open a document using automatically recovered changes, the automatically
recovered data may be corrupted.
3 Do one of the following:
• To save the recovered data, choose File > Save As, specify a location and a new filename, and click Save. The Save
As command keeps the recovered version that includes the automatically recovered data; the word [Recovered]
disappears from the title bar.
Page 46

INDESIGN CS3
User Guide
• To discard automatically recovered changes and use the most recent version of the document that was explicitly
saved to disk before the failure occurred, close the file without saving it and open the file on disk, or choose File >
Revert.
Change the location of recovered documents
1
Choose Edit > Preferences > File Handling (Windows) or InDesign > Preferences > File Handling (Mac OS).
2 Under Document Recovery Data, click Browse (Windows) or Choose (Mac OS).
3 Specify the new location for the recovered document, click OK, and then click OK again.
Undo mistakes
If necessary, you can cancel a lengthy operation before it’s completed, undo recent changes, or revert to a previously
savedversion.Youcanundoorredouptoseveralhundredofthemostrecentactions(theamountislimitedbythe
amount of RAM available and the kinds of actions you performed). The series of actions is discarded when you
choose the Save As command, close a document, or when you exit from the program.
If you have access to a Version Cue Workspace, you can create and locate different file versions using Version Cue
features in InDesign or InCopy. The Version Cue Workspace is available only as part of Adobe Creative Suite® 3.
❖ Do one of the following:
• To undo the most recent change, choose Edit > Undo [action]. (You cannot undo certain actions, such as
scrolling.)
• To redo an action, choose Edit > Redo [action].
• To undo all changes made since the last time you saved the project, choose File > Revert.
• To close a dialog box without applying changes, click Cancel.
39
See also
“Adobe Version Cue” on page 94
Page 47

Chapter 3: Layout
The decisions you make when you first set up a document affect how efficiently you can design and produce pages.
Proper planning helps you and your vendors save money and time.
Creating documents
Create new documents
Page design begins with the basics: starting a new document, settingup pages, and positioning margins andcolumns
or changing grid settings.
You can also create tables of contents and indexes by managing a document in a book file with InDesign.
For a video on setting up new documents, see www.adobe.com/go/vid0068.
See also
“Recommended workflow for InDesign documents” on page 90
40
“Use document templates” on page 94
“Add documents to a book file” on page 274
“Define document presets” on page 44
Create a new document
1
Choose File > New > Document.
The New Document dialog box combines the Document Setup and the Margins And Columns dialog boxes, so that
youcansetupthepagesize,margins,andpagecolumnsallinoneplace.Youcanchangethesesettingsatanytime.
2 Choose a Page Size or specify a custom Width and Height for your document.
3 Click the orientation for the page, either Portrait (tall) or Landscape (wide).
4 Specify options in the Margins and Columns sections, if necessary.
5 To specify the dimensions of the bleed and slug areas, click More Options. The bleed and slug areas extend out
from the edges of the defined Page Size. To make the bleed or slug areas extend evenly on all sides, click the Make
All Settings The Same icon . (See “New Document options” on page 40.)
6 Click OK to open a new document with the settings you specified.
To set default layout settings for all new documents, choose File > Document Setup or Layout > Margins And
Columns, and set options when no documents are open.
New Document options
Facing Pages Select this option to make left and right pages face each other in a double-page spread. Deselect this
option to let each page stand alone, such as when you plan to print on both sides of a sheet of paper or want objects
to bleed in the binding.
Page 48

INDESIGN CS3
User Guide
After you’ve created a document, you can use the Pages panel to create spreads with more than two pages or force
the first two pages to open as a spread.
Master Text Frame Select this option to create a text frame the size of the area within the margin guides, matching
the columnsettings you specified. The master text frameis added tothe A-Master. (See “Using text frameson master
pages” on page 113.)
The Master Text Frame option is available only when you’ve chosen File > New > Document.
Page Size Choose a page size from the menu, or type values for Width and Height. Page size represents the final size
you want after bleeds or other marks outside the page are trimmed.
Orientation Click Portrait (tall) or Landscape (wide). These icons interact dynamically with the dimensions
youenterinPageSize.WhenHeightisthelargervalue,theportraiticonisselected.WhenWidthisthelargervalue,
the landscape icon is selected. Clicking the deselected icon switches the Height and Width values.
To specify the dimensions of the bleed and slug areas, click More Options in the New Document dialog box. To make
the bleed or slug areas extend evenly on all sides, click the Make All Settings The Same icon .
Bleed The Bleed area allows you to print objects that are arranged at the outer edge of the defined page size. For a
page of the required dimensions, if an object is positioned at its edge, some white may appear at the edge of the
printed area due to slight misalignment during printing. For this reason, you should position an object that is at the
edge of the page of the required dimensions a little beyond the edge, and trim after printing. Bleed area is shown by
a red line on the document. You can set bleed area settings from Bleed in the Print dialog box.
41
Slug The slug area is discarded when the document is trimmed to its final page size. The slug area holds printing
information, customized color bar information, or displays other instructions and descriptions for other information in the document. Objects (including text frames) positioned in the slug area are printed but will disappear
when the document is trimmed to its final page size.
Objects outside the bleed or slug area (whichever extends farther) do not print.
Note: You can also click Save Preset to save document settings for future use.
Document window overview
Each page or spread in your document has its own pasteboard and guides, which are visible in Normal View mode.
(To switch to Normal View, choose View > Screen Mode > Normal.) The pasteboard is replaced with a gray
backgroundwhenthedocumentisviewedusingoneofthePreviewmodes.Youcanchangethecolorofthispreview
background and guides in Guides & Pasteboard preferences.
A
B
C
Document and guides in Normal View Mode
A. Spread (black lines) B. Page (black lines) C. Margin guides (magenta lines) D. Column guides (violet lines) E. Bleed area (red lines)
F. Slug area (blue lines)
D
E
F
Page 49

INDESIGN CS3
User Guide
Document window notes:
• Lines of other colors are ruler guides which, when present, appear in the layer color when selected.
• Column guides appear in front of margin guides. When a column guide is exactly in front of a margin guide, it
hides the margin guide.
See also
“Preview documents” on page 548
“Assign a layer color” on page 71
Customize the pasteboard and guides
You can control the colors used to display guides for page margins and columns, as well as the guides for the bleed
and slug areas on the pasteboard. To make it easier to distinguish between the Normal and Preview modes, you can
change the color of the preview background.
InDesignalsoletsyoucontrolhowcloseanobjectneedstobetosnaptoaguide,whetherguidesshouldbedisplayed
in front of or behind objects, as well as the size of the pasteboard.
1 Choose Edit > Preferences > Guides & Pasteboard (Windows) or InDesign > Preferences > Guides & Pasteboard
(Mac OS).
2 UnderColor,choosethedesiredcolorsfromeachofthefollowingmenus,orchooseCustomtospecifyacustom
color using the color picker.
Margins Sets the color of the page margins.
42
Columns Sets the color of the column guides for the page.
Bleed Sets the color of the bleed area (which is set in the Document Setup dialog box).
Slug Sets the color of the slug area (which is set in the Document Setup dialog box).
Preview Background Sets the color of the pasteboard when in the Preview mode.
3 To set how close an object must be to snap to a guide or grid, specify a value in pixels for Snap to Zone.
4 To display guides behind objects, select Guides in Back.
5 To specify howfar the pasteboard extends out from the page or spread (or thebleed orslug area,if specified), enter
a value for Minimum Vertical Offset.
6 Click OK to close the Preferences dialog box.
You can change the on-screen color of your paper. With no text or objects selected, double-click the Paper color in the
Swatches panel (choose Window > Swatches). The Paper color appears on-screen only and does not affect output; it
is intended only to simulate designing for nonwhite paper.
Change document setup
ChangingoptionsintheDocumentSetupdialogboxaffectseverypageinthedocument.Ifyouchangepagesizeor
orientation after objects have been added to pages, you can use the Layout Adjustment feature to minimize the
amount of time needed for arranging existing objects.
1 Choose File > Document Setup.
2 Specify the document options, and then click OK. (See “New Document options” on page 40.)
Page 50

INDESIGN CS3
User Guide
See also
“About automatic layout adjustment” on page 77
Change page margin and column settings
You can change column and margin settings for pages and spreads. When you change the column and margin
settings on a master page, you change the setting for all pages to which the master is applied. Changing the columns
and margins of regular pages affects only those pages selected in the Pages panel.
Note: The Margins And Columns dialog box doesn’t alter columns inside text frames. Text frame columns exist only
within individual text frames, not on the page itself. You can set up columns within individual text frames by using the
Text Frame Options dialog box. Text frame columns can also be affected by the Layout Adjustment feature.
1 Do one of the following:
• To change margin and column settings for one spread or page, go to the spread you want to change, or select one
spread or page in the Pages panel.
• To change margin and column settings for multiple pages, select those pages in the Pages panel, or select a master
that controls the pages you want to change.
2 Choose Layout > Margins And Columns, specify the following options, and then click OK.
Margins Type values to specify the distance between margin guides and each edge of the page. If Facing Pages is
selected in the New Document or Document Setup dialog box, the Left and Right margin option names change to
Inside and Outside, so that you can specify additional inside margin space to accommodate binding.
43
Columns For Number, type the number of columns to be created within the margin guides. For Gutter, type a value
for the width of the space between columns.
See also
“About automatic layout adjustment” on page 77
“Change text frame properties” on page 126
Create unequal column widths
When you have more than one column on a page, the column guides in the middle appear in pairs. When you drag
one column guide, the pair moves. The space between the column guides is the gutter value you specified; the pair
moves together to maintain that value.
Note: You cannot create unequal column widths for columns in a text frame. Instead, created threaded, side-by-side text
frames with different column widths.
1 Go to the master or spread you want to change.
2 If column guides are locked, choose View > Grids & Guides > Lock Column Guides to deselect it.
3 Using the Selection tool , drag a column guide. You can’t drag it past an adjacent column guide or beyond the
edge of the page.
Page 51
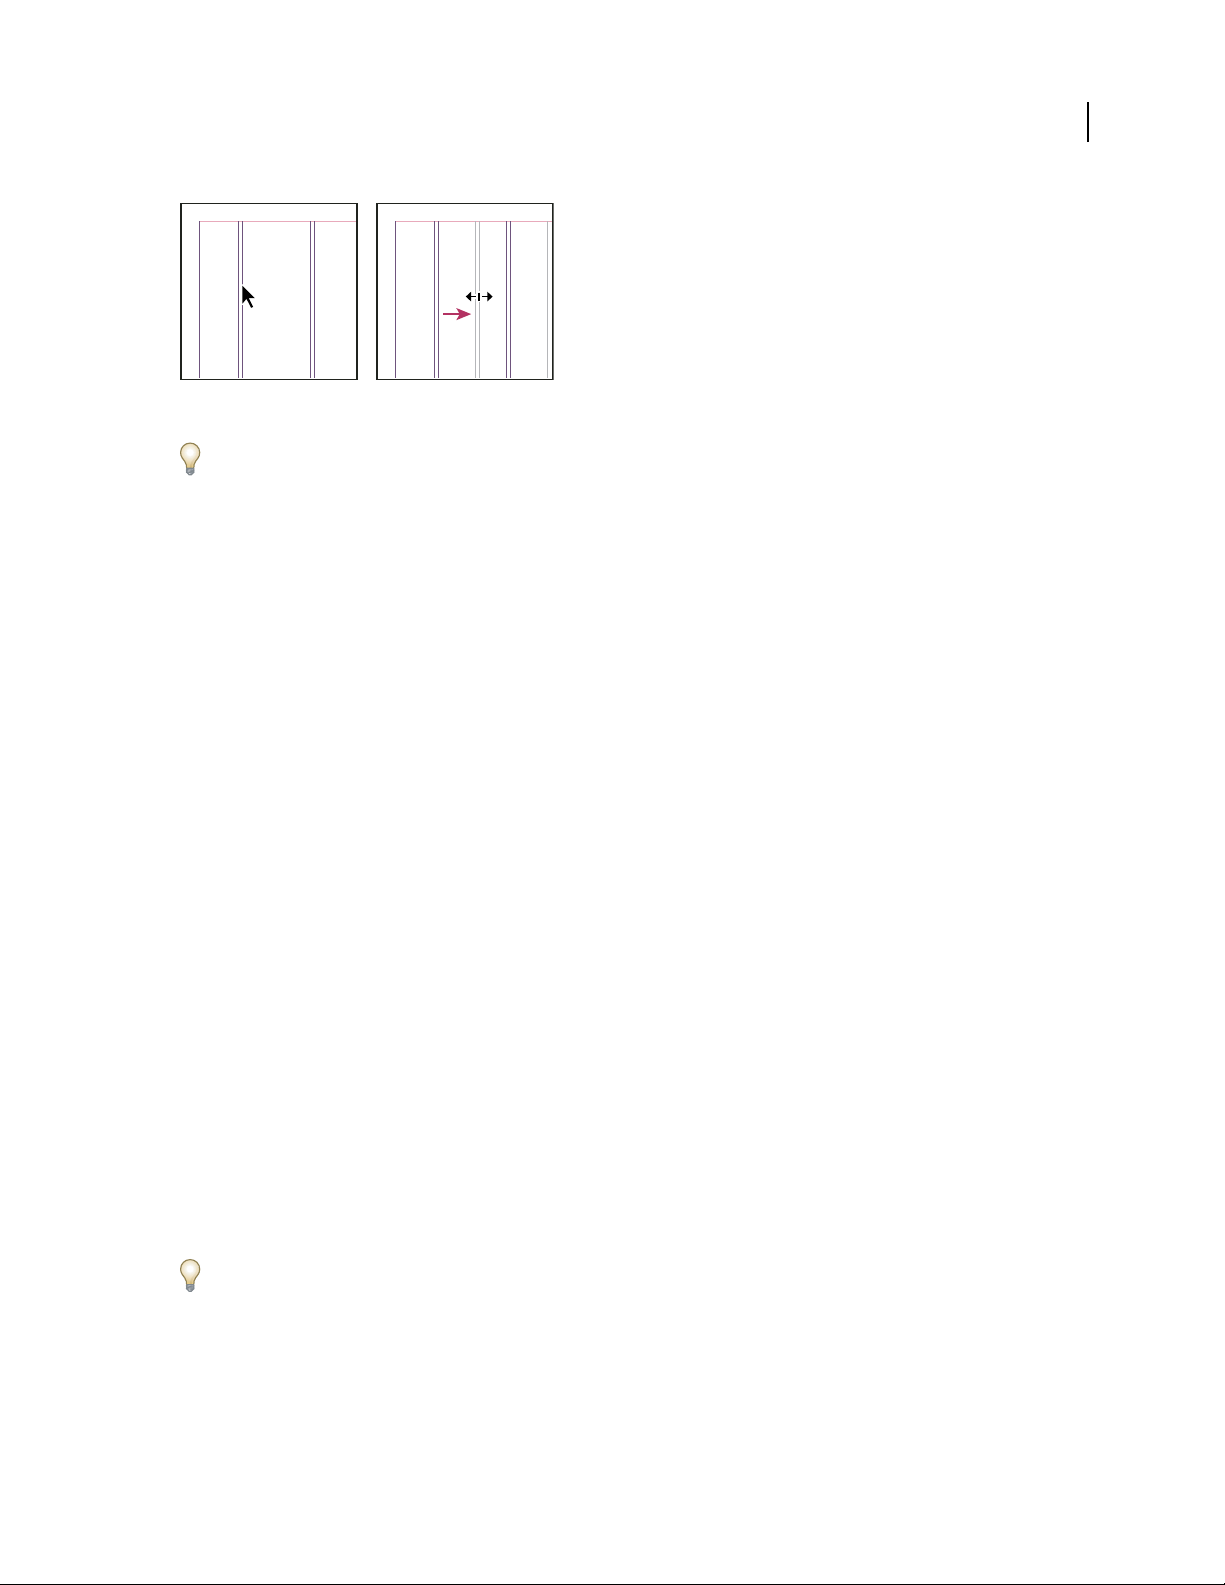
INDESIGN CS3
User Guide
Dragging a column guide to create unequal column widths
To create columns with unequal gutters, create evenly spaced ruler guides and then drag individual guides to the
desired location. (See “Create ruler guides” on page 52.)
Creating custom page sizes
Creating custom page sizes
If you routinely specify a custom page size, you can add it to the Page Size menu in the New Document dialog. You
add custom page sizes to the Page Size menu by editing the New Doc Sizes text file in the Presets folder (in the
InDesign application folder). This text file is self-documenting; to define custom page sizes, open the file in a text
editor and follow the instructions in the file itself.
44
Page sizes defined in the New DocSizes file willappear in the New Documentdialog box and theDocument Settings
dialog box.
Note: You can also specify a custom page size in the New Document dialog box or the Document Settings dialog box;
however, custom page sizes specified in these dialog boxes are not available to other documents you create.
See also
“Change document setup” on page 42
Define document presets
You can save documentsettings for page size, columns, margins, and bleed and slug areas ina preset tosave time and
ensure consistency when creating similar documents.
1 Choose File > Document Presets > Define.
2 Click New in the dialog box that appears.
3 Specify a name for the preset and select basic layout options in the New Document Preset dialog box. (See “New
Document options” on page 40 for a description of each option.)
4 Click OK twice.
You can save a document preset to a separate file and distribute it to other users. To save and load document preset
files, use the Save and Load buttons in the Document Presets dialog box.
Page 52

Create a document using a preset
1 Do one of the following:.
• Choose File > Document Preset > [name of preset].
• Choose File > New > Document, and then choose a preset from the Document Preset menu in the New
Document dialog box.
The New Document dialog box displays the preset layout options.
2 Make changes to the options (if desired) and click OK.
To skip the New Document dialog box, press the Shift key as you select a preset from the Document Preset menu.
Rulers and measurement units
Show or hide rulers
❖ In Normal View Mode (View > Screen Mode > Normal), choose View > Show Rulers or Hide Rulers.
INDESIGN CS3
User Guide
45
See also
“Print a document or book” on page 542
About rulers and measurement units
You can change measurement units for the on-screen rulers and for use in panels and dialog boxes; you can also
change these settings at any time and temporarily override the current measurement units as you enter a value. By
default, rulers begin measuring from the upper-left corner of a page or spread. You can change this by moving the
zero point.
Changing the measurement units doesn’t move guides, grids, and objects, so when ruler tick marks change, they
might not line up with objects aligned to the old tick marks.
A
B
C
Rulers in a document window
A. Labeled tick marks B. Major tick marks C. Minor tick marks
You can set up different measurement systems for horizontal and vertical rulers. The system you select for the
horizontal ruler governs tabs, margins, indents, and other measurements. Each spread has its own vertical ruler;
however, all vertical rulers use the same settings you specify in the Units & Increments preferences dialog box.
Page 53

INDESIGN CS3
User Guide
The defaultunits of measurefor the rulers are picas(a pica equals 12 points). However, you can change customruler
units and control where the major tick marks appear on a ruler. For example, if you change the custom ruler units
for the vertical ruler to 12 points, a major ruler increment appears every 12 points (if such display is possible in the
current magnification). The tick mark labels include your customized major tick marks, so when the ruler reads 3
in the same example, it marks the third instance of the 12-point increment, or 36 points.
Vertical ruler using inches (left), and custom 12-point increments (right)
Setting custom ruler increments in the vertical ruler is useful for lining up a ruler’s major tick marks with a baseline
grid.
See also
“About grids” on page 50
46
“Change the zero point” on page 47
Change measurement units and rulers
1 Choose Edit > Preferences > Units & Increments (Windows) or InDesign > Preferences > Units & Increments
(Mac OS).
2 To change the origin of the zero point, in the Origin menu under Ruler Units, do one of the following:
• To set the ruler origin at the top-left corner of each spread, choose Spread. The horizontal ruler measures across
the entire spread.
• Tosettheruleroriginatthetop-leftcornerofeachpage,choosePage.Thehorizontalrulerstartsatzeroforeach
page in a spread.
• Tosettheruleroriginformultipagespreadsonthetop-leftcorneroftheleftmostpage,aswellasatthetopofthe
binding spine, choose Spine. The horizontal ruler measures from the leftmost page to the binding edge; and from
the binding spine to the rightmost page.
3 To change the measurement system used for rulers, dialog boxes, and panels, choose the desired system for
Horizontal and Vertical, or choose Custom and type the number of points at which you want the ruler to display
major tick marks.
4 To change the value you want used for calculating points, specify the desired point size per inch for Points/Inch.
5 Set any of the following Keyboard Increments:
Cursor Key Controls the increment for the arrow keys when nudging objects.
Size/Leading Controls the increment for increasing or decreasing the point size or leading using the keyboard
shortcuts.
Baseline Shift Controls the increment for shifting the baseline using the keyboard shortcuts.
Page 54

INDESIGN CS3
User Guide
Kerning Controls the increment for kerning using the keyboard shortcuts.
6 Click OK.
You can also change ruler units by right-clicking (Windows) or Control-clicking (Mac OS) a ruler and choosing the
units from the context menu. By right-clicking or Control-clicking at the intersection of the horizontal and vertical
rulers, you can change the ruler units for both rulers at the same time.
See also
“Keys for working with type” on page 638
“Keys for selecting and moving objects” on page 635
Override default measurement units
You can specify a unit of measurement that is different from the default.
❖ Highlight the existing value in a panel or dialog box, and type the new value using the notation in the following
table:
47
To specify: Type these
Inches i
Millimeters mm 48mm 48 millime-
Picas p 3p 3 picas
Points pt
Picas and
points
Ciceros c 5c 5 ciceros
Agates ag 5ag agates
letters after the
value:
in
inch
"
p (before value)
p (between
values)
Examples Result
5.25i
5.25in
5.25inch
5.25”
6pt
p6
3p6 3 picas, 6
5 1/4 inches
ters
6 points
points
Change the zero point
The zero point is the position at which the zeros on the horizontal and vertical rulers intersect. By default, the zero
point is at the top left corner of the first page of each spread. This means that the default position of the zero point
is always the same relative to a spread, but may seem to vary relative to the pasteboard.
The X and Y position coordinates in the Control panel, Info panel, and Transform panel are displayed relative to the
zero point. You can move the zero point to measure distances, to create a new reference point for measurement, or
to tile oversized pages. By default, each spread has one zero point at the upper left corner of the first page, but you
can also locate it at the binding spine, or specify that each page in a spread has its own zero point.
Page 55

INDESIGN CS3
User Guide
Adjust the zero point
When you move the zero point, it moves to the same relative location in all spreads. For example, if you move the
zero point to the top left corner of the secondpage ofa pagespread, it willappear in that positionon the second page
of all other spreads in the document.
❖ Do one of the following:
• To move the zero point, drag from the intersection of the horizontal and vertical rulers to the position on the
layout where you want to set the zero point.
Establishing a new zero point
• To reset the zero point, double-click the intersection of the horizontal and vertical rulers .
• To lock or unlock the zero point, right-click (Windows) or Control-click (Mac OS) the zero point of the rulers,
and choose Lock Zero Point or Unlock Zero Point in the context menu.
48
Change the default zero point
Usingthe Origin setting inthe Preferencesdialog box, you can set the default zero point for rulers aswell as the scope
of the horizontal ruler. The scope determines whether the ruler measures across the page, across the entire spread,
or, for multipage spreads, from the leftmost page to the spine and from the spine outward.
If you set the ruler origin at each spread’s binding spine, the origin becomes locked at the spine. You won’t be able to
reposition the ruler origin by dragging it from the intersection of the rulers unless you choose another origin option.
1 Choose Edit > Preferences > Units & Increments (Windows) or InDesign > Preferences > Units & Increments
(Mac OS).
2 In the Ruler Units section, in the Origin menu, do one of the following:
• To set the ruler origin at the top-left corner of each spread, choose Spread. The horizontal ruler measures across
the entire spread.
• Tosettheruleroriginatthetop-leftcornerofeachpage,choosePage.Thehorizontalrulerstartsatzeroforeach
page in a spread.
• To set the ruler origin for multipage spreads on the top-left corner of the leftmost page, as well as at the top the
binding spine, choose Spine. The horizontal ruler measures from the leftmost page to the binding edge, and from
the binding spine to the rightmost page.
You can also change horizontal ruler origin settings using the context menu that appears when you right-click
(Windows) or Control-click (Mac OS) the horizontal ruler.
Measure objects
The Measure toolcalculates the distancebetween any two pointsin the documentwindow. When you measure from
one point to another, the distance measured is displayed in the Info panel. All measurements except the angle are
calculated in the units of measure currently set for the document.
Page 56

INDESIGN CS3
User Guide
After you use the Measure tool to measure an item, the line or lines remain visible until you take another
measurement or select a different tool.
Measure the distance between two points
1
Make sure the Info panel is visible (Window > Info).
2 Select the Measure tool . (Click and hold the Eyedropper tool to display the Measure tool.)
3 Click the first point and dragto the second point. Shift-drag to constrain the tool’s motion tomultiples of45˚. You
cannot drag beyond a single pasteboard and its spread.
The width and height measurements appear in the Info panel.
Measure angles
1
Make sure the Info panel is visible (Window > Info).
2 Select the Measure tool . (Click and hold the Eyedropper tool to display the Measure tool.)
3 Do one of the following:
• To measure an angle from the x axis, drag the tool.
• Tomeasureacustomangle,dragtocreatethefirstlineoftheangle.Positionthetoolovereitherendpointofthe
measure line. To create the second line of the angle, either double-click and drag, or press Alt (Windows) or
Option (Mac OS) and drag.
49
Whenyoumeasureacustomangle,theInfopanelshowsthelengthofthefirstlineasD1andthelengthofthesecond
line as D2.
Info panel overview
The Info panel displays information for selected objects, the current document, or the area below the current tool,
including values for position, size, and rotation. When you move an object, the Info panel displays its position
relative to its starting point as well.
Unlike other InDesign panels, the Info panel is for viewing only; you cannot enter or edit the values it displays. You
can view additional information about a selected object by choosing Show Options from the panel menu.
A
B
C
Info panel
A. Horizontal (X) position of the cursor B. Vertical (Y) position of the cursor C. Distance an object or tool has moved relative to its starting
position D. Width in current units E. Height in current units F. Degree of rotation
Display the Info panel
❖ Choose Window > Info.
To change the current measurement system, click the small triangle next to the plus icon.
View additional Info panel options
❖ Choose Show Options in the Info panel menu.
D
E
F
Depending on the object or tool selected, you may see the following:
• Values for the fill and stroke colors of the selected object, and information about gradients .
Page 57
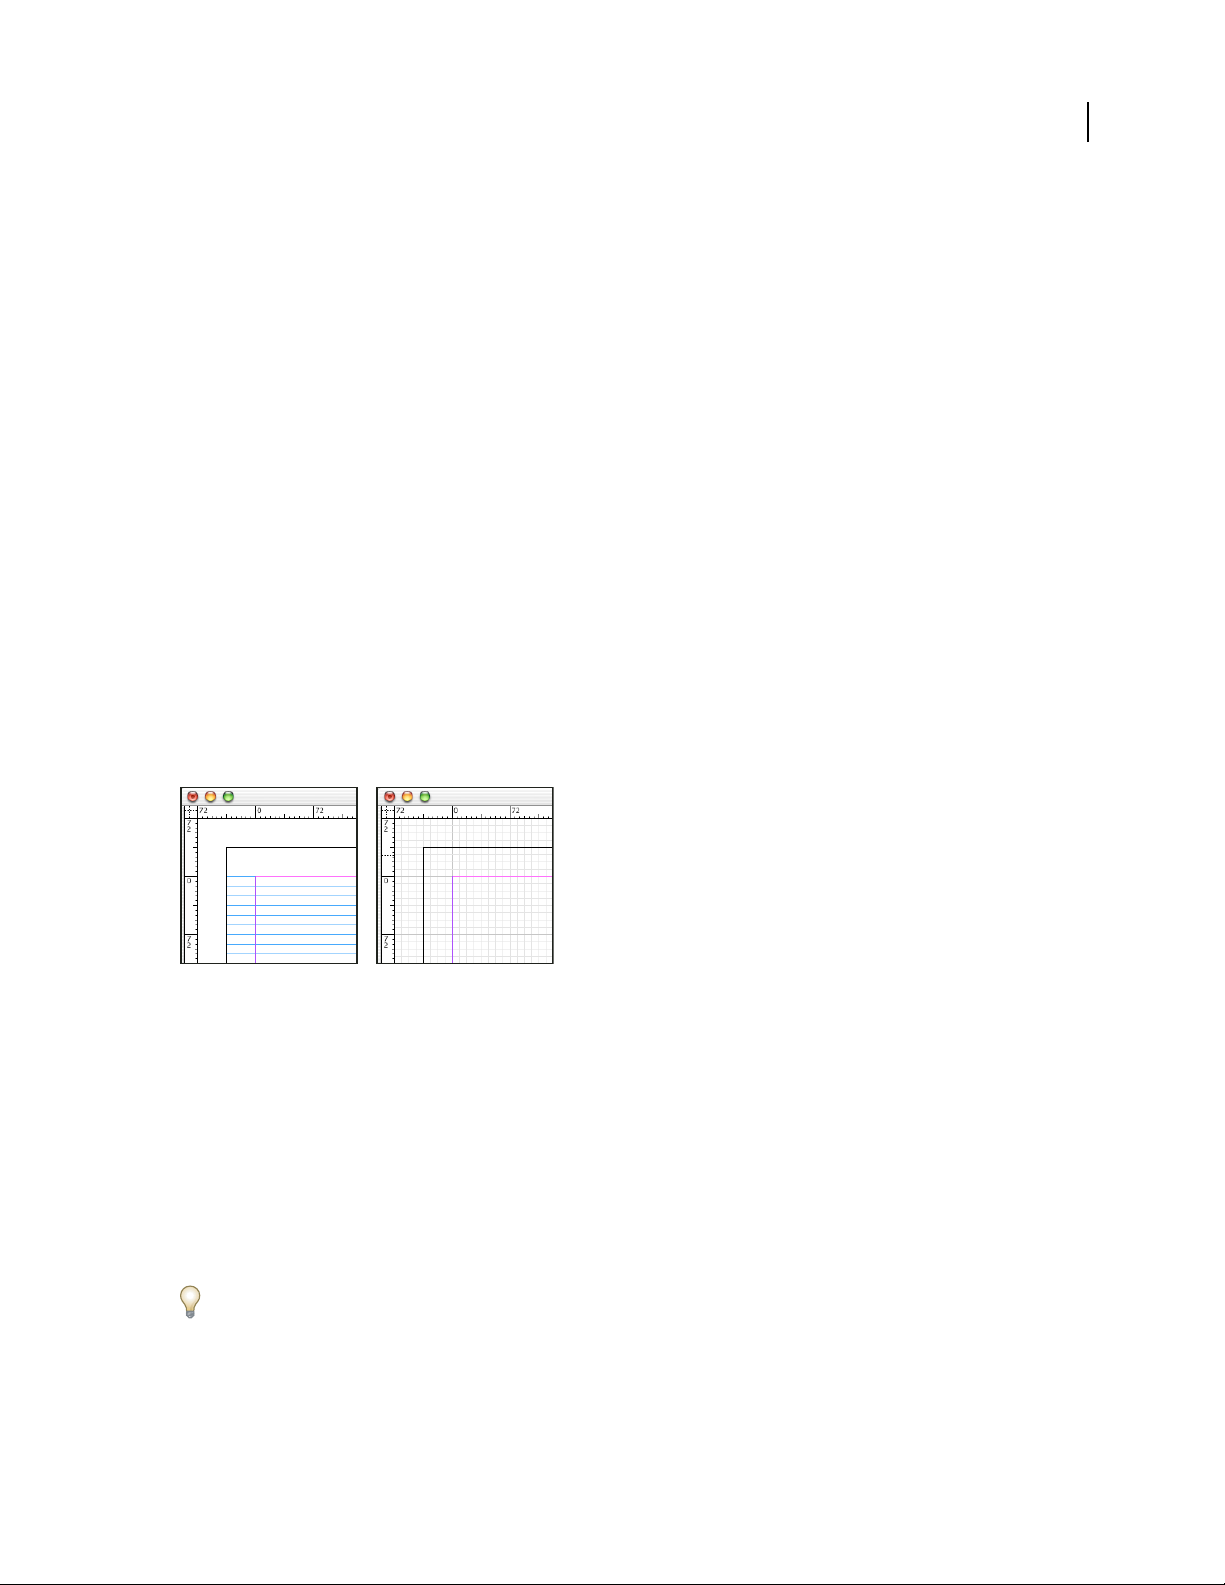
INDESIGN CS3
User Guide
• The names of any swatches. You can display color-space values instead by clicking the small triangle next to the
fill or stroke icon.
• Informationaboutthecurrentdocument,suchaslocation,lastmodifieddate,author,andfilesize,whennothing
in the document is selected.
• Number of characters, words, lines, and paragraphs when you create a text insertion point or select text using one
of the Type tools. (If any text is overset, a “+” sign appears, followed by a number representing the overset
characters, words, or lines.)
• File type, resolution, and color space when a graphic file is selected. Resolution is displayed as both actual pixels
perinch(theresolutionofthenativegraphicfile)andeffectivepixelsperinch(theresolutionofthegraphicafter
it has been resized in InDesign). If color management has been enabled, the ICC color profile is also displayed.
• The shear angle or horizontal and vertical scaling if the Shear tool, Scale tool, or the Free Transform tool is
selected.
Grids
About grids
Two kinds of nonprinting grids are available: a baseline grid for aligning columns of text, and a document grid for
aligning objects. On the screen, a baseline grid resembles ruled notebook paper, and a document grid resembles
graph paper. You can customize both kinds of grids.
50
Baseline grid (left) and document grid (right)
When a grid is visible, you can observe the following characteristics:
• The baseline grid covers entire spreads, but the document grid covers the entire pasteboard.
• Baseline grids and document grids appear on every spread and cannot be assigned to any master.
•
The documentgrid can appear in front of or behindall guides, layers, and objects, butcannot be assigned to any layer.
The document baseline grid direction follows the column direction set in the Margins And Columns dialog box.
Set up a baseline grid
Use Grid Preferences to set up a baseline grid for the entire document.
YoucansetupabaselinegridforaframebyusingtheTextFrameOptions.(See“Setbaselinegridsforatextframe”
on page 128.)
1 Choose Edit > Preferences > Grids (Windows) or InDesign > Preferences > Grids (Mac OS).
2 Specify a baseline grid color by choosing a color in the Color menu. You can also choose Custom in the Color menu.
Page 58
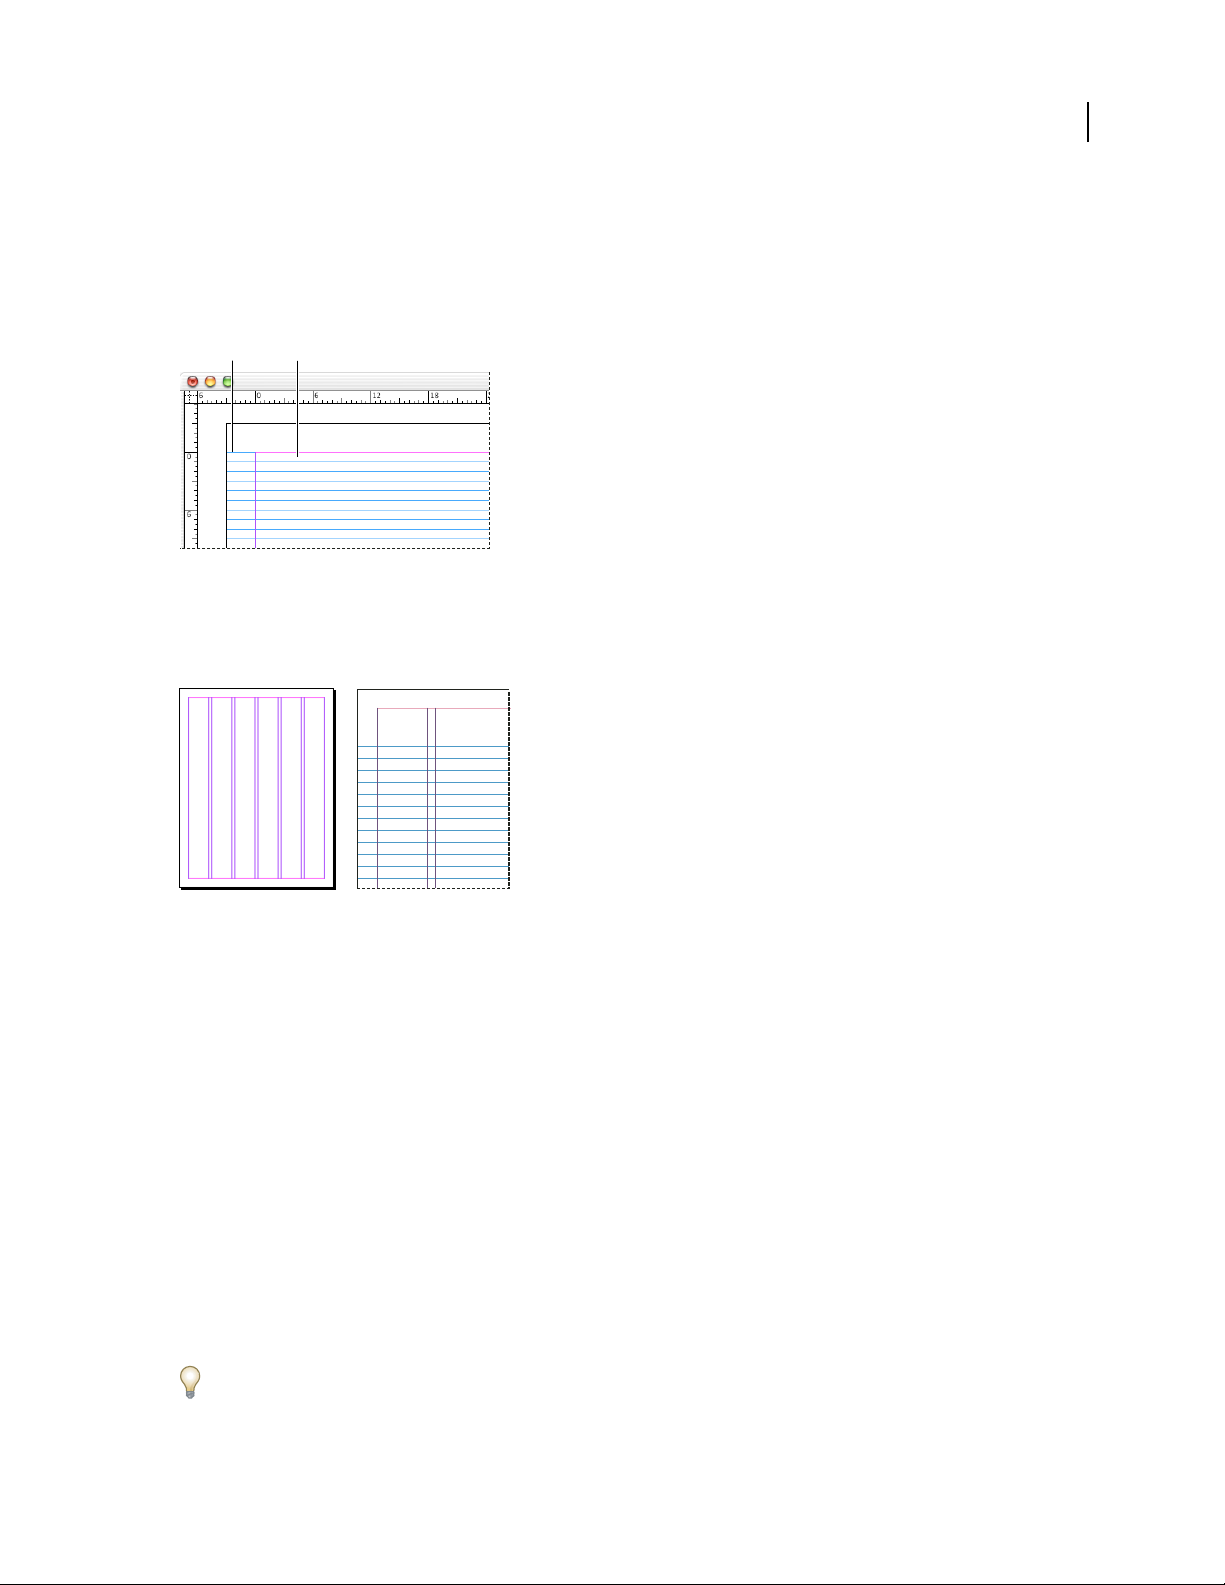
INDESIGN CS3
User Guide
3 For Start, type a value to offset the grid from either the top of the page or the top margin of the page, depending
ontheoptionyouchoosefromtheRelativeTomenu.Ifyouhavetroublealigningtheverticalrulertothisgrid,try
starting with a value of zero.
4 For Increment Every, type a value for the spacing between grid lines. In most cases, type a value that equals your
body text leading, so that lines of text align perfectly to this grid.
51
A
Baseline grid in document window
A. First grid line B. Increment between grid lines
B
5 For View Threshold,type a value to specify the magnification below which thegrid does not appear,and click OK.
Increase the view threshold to prevent crowded grid lines at lower magnifications.
Baseline grid at magnification below view threshold (left) and above view threshold (right)
6 Click OK.
Note: The Snap to Guides command controls both snapping to guides and snapping to the baseline grid.
Set up a document grid
1 Choose Edit > Preferences > Grids (Windows) or InDesign > Preferences > Grids (Mac OS).
2
Specify a document grid colorby choosinga color in the Color menu. You canalso choose Custom in the Color menu.
3 To set horizontal grid spacing, specify a value for Gridline Every in the Horizontal section of the Document Grid
section, and then specify a value for Subdivisions between each grid line.
4 To set vertical grid spacing, specify a value for Gridline Every in the Vertical section of the Document Grid
section, and then specify a value for Subdivisions between each grid line.
5 Do one of the following, and click OK:
• To put the document and baseline grids behind all other objects, make sure that Grids in Back is selected.
• To put the document and baseline grids in front of all other objects, deselect Grids in Back.
To put guides behind all other objects, you can also choose Guides in Back in the context menu that appears when
you right-click (Windows) or Control-click (Mac OS) an empty area of the document window.
Page 59

INDESIGN CS3
User Guide
Show or hide grids
• To show or hide the baseline grid, choose View > Grids & Guides > Show/Hide Baseline Grid.
• To show or hide the document grid, choose View > Grids & Guides > Show/Hide Document Grid.
Snap objects to the document grid
1 Choose View > Grids & Guides and make sure that Snap to Document Grid is selected (checked). If it is not
selected, click it.
Note: The Snap to Guides command controls both snapping to guides and snapping to the baseline grid.
2 To specify the snap-to zone, choose Edit > Preferences > Guides & Pasteboard (Windows) or InDesign >
Preferences > Guides & Pasteboard (Mac OS), type a value for Snap to Zone, and click OK. The Snap to Zone value
is always in pixels.
To snap an object to a grid, drag an object toward a grid until one or more of the object’s edges is within the grid’s
snap-to zone.
Ruler guides
52
Create ruler guides
Rulerguides are differentfrom grids in thatthey can be positioned freelyon apage or on a pasteboard.You can create
two kinds of ruler guides: page guides, which appear only on the page on which you create them, or spread guides,
which span all pages and the pasteboard of a multiple-page spread. You can drag any ruler guide to the pasteboard.
A ruler guide is displayed or hidden with the layer on which it was created.
New ruler guides always appear on the target spread. For example, if several spreads are visible in the document
window and you drag a new guide into the window, the new guide becomes visible only on the target spread.
A B
Guides in the document window
A. Spread guide B. Page guide
See also
“About layers” on page 69
Create a ruler guide
1
Make sure that both rulers and guidesare visible,make sure the correct spread is targeted, and view the document
in Normal View mode, not Preview mode.
2 If the document contains multiple layers, click a layer name in the Layers panel to target the layer.
Page 60

INDESIGN CS3
User Guide
3 Do one of the following:
• To create a page guide, position the pointer inside a horizontal or vertical ruler and then drag to the desired
locationonthetargetspread.Ifyoudroptheguideontothepasteboard,itspansthepasteboardandspread;itwill
act as a page guide if you later drag it onto a page.
• To create a spread guide, drag from the horizontal or vertical ruler, keeping the pointer in the pasteboard but
positioning the guide at the desired location on the target spread.
• To create a spread guide when the pasteboard is not visible (for example, when you’ve zoomed in), press Ctrl
(Windows) or Command (Mac OS) as you drag from the horizontal or vertical ruler to the target spread.
• To create a spread guide without dragging, double-click a specific position on the horizontal or vertical ruler. If
you want to snap the guide to the nearest tick mark, hold down the Shift key when you double-click the ruler.
• Tocreate vertical and horizontal guidessimultaneously, press Ctrl (Windows) or Command (Mac OS) asyou drag
from the target spread’s ruler intersection to the desired location.
53
A vertical and horizontal guide created concurrently
To reposition a ruler guide numerically, select the guide and enter values for X and Y in the Control panel.
Create a set of evenly spaced page guides
1
If the document contains multiple layers, click a layer name in the Layers panel to target the layer.
2 Choose Layout > Create Guides.
3 For Number, type a value to specify the number of rows or columns you want to create.
4 For Gutter, type a value to specify the spacing between rows or columns. Start with a low value, such as 1 pica;
large gutters leave little space for columns.
Columns created with the Create Guides command are not the same as those created with the Layout > Margins And
Columnscommand.Forexample,columnscreatedusingCreateGuidescannotcontroltextflowwhenatextfileis
placed. Use the Margins And Columns command to create major column divisions appropriate for autoflow text,
and use the Create Guides command to create column grids and other layout aids.
5 For Fit Guides To, click Margins to create the guides within the page margins, or click Page to create the guides
within the page edges.
Page 61

INDESIGN CS3
User Guide
Ruler guides evenly spaced within page margins (left) and page edges (right)
6 To delete any existing guides (including guides on locked or hidden layers), select Remove Existing Ruler Guides.
7 If you like, select Preview to see the effect of your settings on the page, and then click OK.
Note: The Create Guides command can create page guides only; it cannot create spread guides.
To space existing guides a uniform distance apart, select the guides (by dragging or pressing Shift as you click with
the mouse). Then, select Use Spacing from the Control panel, type the space value in the text box, and press Enter or
Return to confirm. Click either Distribute Horizontal Centers or Distribute Vertical Centers to the left of the
Use Spacing option.
54
Show or hide guides
• To show or hide all margin, column, and ruler guides, choose View > Grids & Guides > Show/Hide Guides.
• To show or hide ruler guides on one layer only without changing the visibility of the layer’s objects, double-click
the layer name in the Layers panel, select or deselect Show Guides, and then click OK.
• To show or hide guides and all other non-printing elements, click the Preview Mode icon at the bottom of the
To o lb o x .
Select ruler guides
Unselected ruler guides appear light blue. Selected ruler guides are highlighted in their layer color. When a guide is
selected, the Reference Point icon in the Control panel changes to or , representing the selected guide.
• To select a single ruler guide, use the Selection tool or the Direct Selection tool and click the guide to
highlight it in its layer color.
If you can’t select a ruler guide and the View > Grids & Guides > Lock Guides command is already deselected, the
guide might be on that page’s master, or on a layer where guides are locked.
• To select multiple ruler guides, hold down Shift as you click guides using the Selection or Direct Selection tool.
You can also drag over multiple guides, as long as the selection marquee doesn’t touch or enclose any other object.
• To select all ruler guides on the target spread, press Ctrl+Alt+G (Windows) or Command+Option+G (Mac OS).
Move, edit, or delete ruler guides
You can change the attributes of individual ruler guides, and you can move, cut, copy, paste, or delete multiple ruler
guides simultaneously. Cut or copied ruler guides can be pasted to other pages or documents, but not to other
programs. To change attributes of specific guides, you must select the guides you want to change. When no guides
are selected, the Ruler Guides command sets the defaults for new guides only.
Page 62

INDESIGN CS3
User Guide
See also
“Paste objects into different layers” on page 72
Move ruler guides
❖ Using Selection tool or the Direct Selection tool , do any of the following:
• To move a ruler guide, drag it.
• To move multiple ruler guides, shift-select the guides you want to move, and then drag them.
Move selected guides just as you would any other selected object, including nudging with the arrow keys and using
the Control or Transform panels.
• To make a guide snap to a ruler tick mark, press Shift as you drag it. Or select the guide, press and hold down the
Shift key, and then click the mouse button.
• To move a spread guide, drag the part of the guide that’s on the pasteboard, or press Ctrl (Windows) or Command
(Mac OS) as you drag the guide from within the page.
• To move guides to another page or document, select one or more guides, choose Edit > Copy or Edit > Cut, go to
another page, and then choose Edit > Paste. If you’re pasting onto a page of the same size and orientation as the
guides’ original page, the guides appear in the same position.
Note: The Paste Remembers Layers option affects the layer on which pasted guides appear.
55
Delete ruler guides
• To delete individual guides, select one or more ruler guides and then press Delete. (You can also drag ruler guides
and drop them on a ruler to delete them.)
• To delete all ruler guides on the target spread, first press Ctrl+Alt+G (Windows) or Command+Option+G
(Mac OS) to select the guides, and then press Delete.
Customize ruler guides
1
Do one of the following:
• To change options for one or more existing ruler guides, select those ruler guides.
• To set default options for new ruler guides, deselect all guides by clicking in an empty area.
2 Choose Layout > Ruler Guides.
3 For View Threshold, specify the magnification belowwhich ruler guides do notappear. This prevents ruler guides
from appearing too close together at lower magnifications.
4 For Color, choose a color or choose Custom to specify a custom color in the system color picker. Then click OK.
YoucansetthecurrentmagnificationastheviewthresholdfornewrulerguidesbypressingAlt(Windows)orOption
(Mac OS) as you drag the ruler guides you’ve selected.
Lock or unlock ruler guides
• To lock or unlock all ruler guides, choose View > Lock Guides to select or deselect the menu command.
• To lock or unlock ruler guides on one layer only, without changing the visibility of the layer’s objects, double-click
the layer name in the Layers panel, select or deselect Lock Guides, and then click OK.
Page 63

INDESIGN CS3
User Guide
Change ruler guide stacking order
By default, ruler guides appear in front of all other guides and objects. However, some ruler guides may block your
view of such objects as lines with narrow stroke widths. You can change the Guides in Back preference to display
ruler guides in front of or behind all other objects. However, regardless of the Guides in Back setting, objects and
ruler guides are always in front of margin and column guides. Also, although putting guides on different layers
organizes them structurally, it does not affect their visual stacking order—the Guides in Back preference stacks all
ruler guides as a single set in relation to all page objects.
A
B
C
D
Default stacking order
A. Ruler guides B. Page objects C. Margin and column guides D. Page
1 Choose Edit > Preferences > Guides & Pasteboard (Windows) or InDesign > Preferences > Guides & Pasteboard
(Mac OS).
2 Select Guides in Back, and click OK.
56
Snap objects to guides and grids
To precisely align objects to guides, use the Snap to Guides and Snap to Document Grid commands. Object edges
will snap to (be pulled toward) the nearest grid intersection or guide when you draw, move, or resize the objects.
The exact range within which an object snaps to guides is called the snap-to zone, which you can adjust. When you
select both the Snap to Guides and the Snap to Document Grid commands, the grid takes precedence.
Keep the following guidelines in mind as you align objects to guides and grids:
• To snap an object to a guide, drag an object toward a guide until one or more of the object’s edges is within the
guide’s snap-to zone.
• Guidesmustbevisibleforobjectstosnaptothem.However,objectscansnaptothedocumentandbaselinegrids
whether the grids are visible or not.
• Objects on one layer snap to ruler guides visible on any other layer. If you don’t want objects to snap to guides on
a certain layer, hide that layer’s guides.
• For the baselines of text to snap to the baseline grid, press the Align to Baseline Grid button for individual
paragraphs or paragraph styles.
1 Choose View > Grids & Guides and make sure that Snaps To Guides is selected (checked).
Note: The Snap to Guides command controls both snapping to guides and snapping to the baseline grid.
2 To specify the snap-to zone, choose Edit > Preferences > Guides & Pasteboard (Windows) or InDesign >
Preferences > Guides & Pasteboard (Mac OS), type a value for Snap to Zone, and click OK. The Snap to Zone value
is always in pixels.
Page 64

INDESIGN CS3
User Guide
Pages and spreads
About pages and spreads
When you select the Facing Pages option in the File > Document Setup dialog box, document pages are arranged in
spreads. A spread is a set of pages viewed together, such as the two pages visible whenever you open a book or
magazine. Every InDesign spread includes its own pasteboard, which is an area outside a page where you can store
objects that aren’t yet positioned on a page. Each spread’s pasteboard provides space to accommodate objects that
bleed, or extend past the edge of a page.
B
A
C
Pages panel
A. Page icons B. Page with master “A” applied C. Selected spread
57
In a long document, you can move to a page quickly by choosing Layout > Go To Page.
Change the page and spread display
The Pages panel provides information about and control over pages, spreads, and masters (pages or spreads that
automatically format other pages or spreads). By default, the Pages panel displays thumbnail representations of each
page’s content.
1 If the Pages panel isn’t visible, choose Window > Pages.
2 Choose Panel Options in the Pages panel menu.
3 In the Pages and Masters sections:
• Select an icon size for pages and masters.
• Select Show Vertically to display spreads in one vertical column. Deselect this option to allow spreads to be
displayed side-by-side.
• Select Show Thumbnails to display thumbnail representations of the content of each page or master. (This option
is not available if certain options are selected for Icon Size.)
4 In the Panel Layout section, select Pages On Top to display the page icon section above the master icon section,
or select Masters On Top to display the master icon section above the page icon section.
5 Choose an option in the Resize menu to control how the sections are displayed when you resize the panel:
• To resize both the Pages and Masters sections of the panel, choose Proportional.
• To maintain the size of the Pages section and resize only the Masters section, choose Pages Fixed.
• To maintain the size of the Masters section and resize only the Pages section, choose Masters Fixed.
Page 65

INDESIGN CS3
User Guide
Target or select a page or spread
You e i th er select or target pages or spreads, depending on the task you are performing. Some commands affect the
currently selected page or spread, while others affect the target page or spread. For example, you can drag ruler
guides only to the target page or spread, but page-related commands, such as Duplicate Spread or Delete Page, affect
the page or spread selected in the Pages panel. Targeting makes a page or spread active and is helpful when, for
example, several spreads are visible in the document window and you want to paste an object onto a specific spread.
❖ In the Pages panel:
• To both target and select a page or spread, double-click its icon or the page numbers under the icon. If the page or
spread is not visible in the document window, it shifts into view.
You can also both target and select a page or spread by clicking a page, any object on the page, or its pasteboard in
the document window.
The vertical ruler is dimmed alongside all but the targeted page or spread.
• To select a page, click its icon. (Don’t double-click unless you want to select it and move it into view.)
• To select a spread, click the page numbers under the spread icon.
Note: Somespreadoptions,suchasthoseinthePagespanelmenu,areavailableonlywhenanentirespreadisselected.
58
A A A A
1
2–3 4–5
8
6–7
Page 1 is targeted and page 5 is selected (left), and page 1 is targeted and entire spread is selected (right).
A A A A
1
2–3 4–5
8
6–7
Start a document with a two-page spread
Instead of beginning the document with a right-facing (recto) page, you can delete the first page and begin your
document with a left-facing (verso) page that’s part of a spread.
Important: Because of the settings necessary to keep a left-facing page as the starting page, it can be difficult to insert
spreads into a document when following this method. To avoid this difficulty, it is best to work in the document with a
right-facing page starting page (which should be left blank). When you have inserted all of the pages needed in the
document, delete the first page by following the steps below.
1 Make sure page 1 of the document is blank.
2 Choose File > Document Setup. Be sure the document contains at least three pages and that the Facing Pages
option is selected. Click OK.
3 InthePagespanel,selectallthepagesexceptpage1.(Theeasiestwaytodothisistoselectpage2andthenShift-
select the last page of the document.)
4 In the Pages panel menu, deselect Allow Selected Spread To Shuffle.
5 Select page 1. In the Pages panel menu, choose Delete Spread.
Toaddaspreadtoadocumentthatstartsonaleft-facingpage,firstmakesureAllowSelectedSpreadToShuffleis
deselected and Allow Document Pages To Shuffle is selected. Then, insert three pages, and delete the extra page.
Page 66

INDESIGN CS3
User Guide
Add new pages to a document
❖ Do any of the following:
• To add a page after the active page or spread, click the New Page button in the Pages panel or choose Layout >
Pages > Add Page. The new page uses the same master as the existing active page.
• Toaddmultiplepagestotheendofthedocument,chooseFile>DocumentSetup.IntheDocumentSetupdialog
box, specify the total number of pages for the document. InDesign adds pages after the last page or spread.
• Toaddpagesandspecifythedocumentmaster,chooseInsertPagesfromthePagespanelmenuorchooseLayout
> Pages > Insert Pages. Choose where the pages will be added and select a master to apply.
Arrange, duplicate, and remove pages and spreads
You can use the Pages panel to freely arrange,duplicate, andrecombine pages and spreads. Keep the following guidelines in mind when adding, arranging, duplicating, or removing pages within a document:
• InDesign preserves the threads between text frames.
• InDesign redistributes pages according to how the Allow Document Pages To Shuffle command is set.
• Objects that span multiple pages stay with the page on which they cover the most area.
59
See also
“Control spread pagination” on page 60
“Move or copy pages between documents” on page 61
Move pages using Move Pages command
1
Choose Layout > Pages > Move Pages, or choose Move Pages from the Pages panel menu.
2 Specify the page or pages you want to move.
3 For Destination, choose where you want to move the pages, and specify a page if necessary. Click OK.
Move pages by dragging
❖ As you drag, the vertical bar indicates where the page will appear when you drop it. If the black rectangle or bar
touches a spread when Allow Pages to Shuffle is turned off, the page you’re dragging will extend that spread;
otherwise, document pages will be redistributed to match the Facing Pages setting in the File > Document Setup
dialog box.
In the Pages panel, drag a page icon to a new position within the document.
A A A A
1
2–3
B B B
6–7
Moving a page’s position using the Pages panel
B
[
]
4–5
8
A A A A
1
2–3 4–5
6–7
8
Duplicate a page or spread
❖ In the Pages panel, do one of the following:
• Drag the page range numbers under a spread to the New Page button. The new spread appears at the end of the
document.
Page 67

INDESIGN CS3
User Guide
• Select a page or spread, and then choose Duplicate Page or Duplicate Spread in the Pages panel menu. The new
page or spread appears at the end of the document.
• Press Alt (Windows) or Option (Mac OS) as you drag the page icon or page range numbers under a spread to a
new location.
Note: Duplicating a page or spread also duplicates all objects on the page or spread. Text threads from the duplicated
spreadto otherspreads are broken, but all text threads within the duplicated spreadremain intact—asdo all text threads
on the original spread.
Remove a page from a spread while keeping it in the document
1
Select the spread and deselect Allow Selected Spread To Shuffle in the Pages panel menu.
2 In the Pages panel, drag a page out of the spread until the vertical bar is not touching any other pages.
Delete a page or spread from the document
❖ Do one of the following:
• In the Pages panel, drag one or more page icons or page-range numbers to the Delete icon.
• Select one or more page icons in the Pages panel, and click the Delete icon.
• Select one or more page icons in the Pages panel, and then choose Delete Page(s) or Delete Spread(s) in the Pages
panel menu.
60
Control spread pagination
Most documents use two-page spreads exclusively. When you addor remove pagesbefore a spread, the pages shuffle
by default. However, you may want to keep certain pages in a spread together. For example, you can create gatefold
oraccordionfoldoutsbycreatingamultiple-page spread (also called an island spread)andaddingpagestoit.Bynot
allowing pages to shuffle, you can ensure that pages are kept in the same spread.
A
B
C
Pages panel
A. One-page spread B. Four-page spread, identified by brackets around page numbers C. Entire two-page spread selected
See also
“Start a document with a two-page spread” on page 58
Create a multiple-page spread
1
Do one of the following:
• To keep a single spread together, select a spread in the Pages panel, and then deselect Allow Selected Spread To
Shuffle in the Pages panel menu. You can identify an island spread in the Pages panel by the brackets around its
page numbers.
Page 68

INDESIGN CS3
User Guide
• To allow the creation of spreads of more than two pages in the entire document and to preserve those spreads
when you add, remove, orarrange preceding pages, deselect Allow Document Pages To Shuffle on the Pages panel
menu. InDesign will preserve spreads of more than two pages while lettingtwo-page spreads repaginate normally.
2 AddpagestotheselectedspreadeitherbyusingInsertPagestoinsertanewpageinthemiddleofaspreadorby
dragging an existing page to the spread in the Pages panel. To drag an entire spread, drag its page numbers.
61
A A A
1
[2–3]
4–5
6–7 8–9
Adding a page to a spread using the Pages panel
A A A
A
[
2–4
1
9
7–8
]
5–6
Note: You can include up to ten pages in a spread. When you have reached the limit, the black vertical bar will not
appear.
Redistribute pages
You can redistribute a spread’s pages to match the Facing Pages setting in the File > Document Setup dialog box.
❖ Do either of the following:
• If an individual spread has been allowed to shuffle, select the spread, and choose Allow Selected Spread To Shuffle
in the Pages panel menu to select it.
• Ifdocumentpageshavebeenallowedtoshuffleandyouaddedpagestoaspread,chooseAllowDocumentPages
To Shuffle from the Pages panel menu to select it. Click No to redistribute pages. If you click Yes to maintain the
multiple-page spreads, brackets surround the numbers on those spreads in the Pages panel, indicating that those
spreads are not allowed to shuffle.
Move or copy pages between documents
When you move or copy a page or spread from one document to another, all of the items on the page or spread,
including graphics, links, and text, are copied to the new document. Threaded text frames are also included, but text
that is threaded to pages outside the spread does not transfer. If the page or spread you are copying contains styles,
layers, or masters with the same names as their counterparts in the destination document, the destination
document’s settings are applied to the page or spread.
Ifyoucopyapagefromadocumentthathasadifferentsizethanthedocumentyouarecopyingto,itwillberesized
to the dimensions of the destination.
If you want to move or copy a multiple-page spread, deselect Allow Document Pages To Shuffle in the destination
document to keep the spread together.
See also
“Copy masters” on page 64
Move or copy pages between documents
1
To move pages from one document to another, open both documents.
2 Choose Layout > Pages > Move Pages, or choose Move Pages from the Pages panel menu.
3 Specify the page or pages you want to move.
Page 69

INDESIGN CS3
User Guide
4 Choose the destination document name from the Move To menu.
5 For Destination, choose where you want to move the pages, and specify a page if necessary.
6 If you want to remove the pages from the original document, select Delete Pages After Moving.
Note: When you copy pages between documents, their associated masters are copied automatically. If the new document
contains a master with the same name as the master applied to the copied page, however, the master of the new
document is applied to the copied page instead.
Move or copy pages between documents by dragging
1
To move pages from one document to another, make sure that both documents are open and visible.
You can choose Window > Arrange > Tile Horizontally or Tile Vertically to display documents side-by-side.
2 Drag the original document’s page icon to the new document.
3 In the Insert Pages dialog box, specify where the pages will be added.
4 If you want to remove the pages from the original document, select Delete Pages After Inserting.
62
Masters
About masters, stacking order, and layers
A master islike a background thatyou can quickly apply to many pages. Objects on a master appear on all pages with
that master applied. Master items that appear on document pages are surrounded by a dotted border. Changes you
make to a master are automatically applied to associated pages. Masters commonly contain repeating logos, page
numbers, headers, and footers. They can also contain empty text or graphic frames that serve as placeholders on
document pages. A master item cannot be selected on a document page unless the master item is overridden.
Masters can have multiple layers, just like pages in your document. Objects on a single layer have their own stacking
order within that layer. Objects on a master page layer appear behind objects assigned to the same layer in the
document page.
Ifyouwantamasteritemtoappearinfrontofobjectsonthedocumentpage,assignahigherlayertotheobjecton
the master. A master item on ahigher layer appears in front of all objects onlower layers. Merging all layers will move
master items behind document page objects.
A • Section
A • Section
8 • Hibiscus
Master items (top left) appear behind page objects on the same layer (bottom left); moving a master item to a higher layer (top right) moves it
in front of all objects on lower layers (bottom right).
Page 70

INDESIGN CS3
User Guide
Tips and guidelines for masters
• You can compare alternative design ideas by creating a variety of masters and applying them in turn to sample
pages containing typical content.
• To quickly lay out new documents, you can save a set of masters in a document template, along with paragraph
and character styles, color libraries, and other styles and presets.
• If you change column or margin settings on a master, or apply a new master with different column and margin
settings, you can force objects on the page to adjust to the new layout automatically. (See “About automatic layout
adjustment” on page 77.)
• You can thread text frames on a master, but only across a single spread. To automatically flow text across multiple
spreads, thread text frames on the document pages instead.
• Masters cannot contain sections for page numbering. Automatic page numbers inserted on a master display the
correct page number for each section of the document to which the master is applied.
See also
“Override or detach master items” on page 67
Create masters
You can create a new master from scratch or from an existing master page or spread. After you apply master pages
to other pages, any changes made to the source master carry forward to the masters and document pages that are
based on it. With careful planning, this provides an easy way to make layout changes to multiple pages across your
document.
63
For a video on working with master pages, see www.adobe.com/go/vid0069.
See also
“Apply master pages” on page 65
“Base one master on another” on page 64
Create a master from scratch
1
Choose New Master in the Pages panel menu.
2 Specify the following options, and click OK:
• For Prefix, type a prefix that identifies the applied master for each page in the Pages panel. You can type as many
as four characters.
• For Name, type a name for the master spread.
• For Based on Master, choose an existing master spread on which you’ll base this master spread (see “Base one
master on another” on page 64), or choose None.
• For Number of Pages, type a value for the number of pages you want in the master spread (as many as ten).
Create a master from an existing page or spread
• Drag an entire spread from the Pages section of the Pages panel to the Masters section.
• Select a spread in the Pages panel and choose Save As Master from the Pages panel menu.
Page 71

INDESIGN CS3
User Guide
Anyobjectsontheoriginalpageorspreadbecomepartofthenewmaster.Iftheoriginalpageusedamaster,thenew
master is based on the original page’s master.
None
A-Master
None
A-Master B-Master
64
4–5 6–7 8–9
Creating a new master spread based on another page or spread
4–5 6–7 8–9
Base one master on another
You can create a master variationthat is based onand updates with another master (called the parent master)within
the same document. The master spreads based on the parent master are called child masters. For example, if your
document has ten chapters that use master spreads that vary only slightly, base all of them on a master spread that
contains the layout and objects common to all ten. This way, a change to the basic design requires editing just the
parent master instead of editing all ten separately.Vary the formatting onyour child masters. You can override parent
master items on a child master to create variations on a master, just as you can override master items on document
pages. This is a powerful way to keep a consistent yet varied design up to date.
Original parent and child masters (left); when the parent master is modified, the child masters are automatically updated (right)
❖ To base one master on another, in the Masters section of the Pages panel, do either of the following:
• Select a master spread, and choose Master Options for [master spread name] in the Pages panel menu. For Based
on Master, choose a different master, and click OK.
• Select the name of the master spread you want to use as the base and drag it onto the name of another master to
apply it.
AA
[None]
10–11 12–13 14–15
B-Master based on A-Master
[None]
A-Master B-Master A-Master B-Master
10–11 12–13 14–15
Copy masters
Youcancopymasterswithinthesamedocumentorfromonedocumenttoanothertouseasthestartingpointfora
new master. You can also copy masters to other documents when you synchronize documents in a book or import
master pages from another document.
Page 72

INDESIGN CS3
User Guide
See also
“Synchronize book documents” on page 275
“Import a master from another document” on page 68
Copy a master within a document
❖ In the Pages panel, do one of the following:
• Drag the page name of a master spread to the New Page button at the bottom of the panel.
• Select the page name of a master spread, and choose Duplicate Master Spread [spread name] in the panel menu.
When you copy a master, the page prefix of the copied master becomes the next letter in the alphabet.
Copy or move a master to another document
1
Open the document you want to add the master to. Then open the document with the master you want to copy.
2 In the Pages panel of the source document, do either of the following:
• Click and drag the master spread to the destination document’s window to copy it.
• Select the master you want to move or copy. Choose Layout > Pages > Move Master, and choose the destination
document name from the Move To menu. If you want to remove the page or pages from the source document,
select Delete Pages After Moving, and then click OK.
65
Apply master pages
If your document contains custom spreads (such as a 3- or 4-page foldout in a magazine), any master you apply
should contain the same number of pages.
Note: Master items on a document page have a dotted border. If you cannot view master items on a document page, the
master item may be hidden on a lower layer or the master items may be hidden. Choose Show Master Items from the
Pages panel menu.
Apply a master to a document page or spread
• To apply a master to one page, drag the master page icon to a page icon in the Pages panel. When a black rectangle
surrounds the desired page, release the mouse button.
• Toapplyamastertoaspread,dragthemasterpageicontoacornerofthespreadinthePagespanel.Whenablack
rectangle surrounds all pages in the desired spread, release the mouse button.
None
None
A-Master B-Master
10–11 12–13
Applying a master to a page (left) and applying a master to a spread (right)
14–15
Apply a master to multiple pages
❖ Do one of the following:
• In the Pages panel, select the pages to which you wantto apply a new master.Then press Alt (Windows) or Option
(Mac OS) as you click a master.
A-Master B-Master
10–11 12–13 14–15
Page 73

INDESIGN CS3
User Guide
• Choose Apply Master To Pages from the Pages panel menu, select a master for Apply Master, make sure that the
page ranges in the To Pages option are the ones you want, and click OK. You can apply a master to multiple pages
at once. For example, you can type 5, 7-9,13-16 to apply the same master to pages 5, 7-9,and 13-16. (See “Display
absolute or section numbering in the Pages panel” on page 84.)
66
A A A A
1
2–34–5
8
6–7
Applying a master to a discontiguous range of pages
B A B A
1
2–34–5
B
8
6–7
B
Unassign masters from document pages
❖ Apply the None master from the Masters section of the Pages panel.
When you unassign a master from a page, its layout and items no longer apply to the page. If a master contains most
of the elements you want, but you need to customize the appearance of a few pages, you can override master items
and edit or modify them on those document pages, instead of unassigning the master.
Edit the layout of a master
You can edit the layout of master pages at any time; changes you make are automatically reflected on all pages with
that master applied.
Note: When you override or detach a master page object on a particular page, that object may not update to reflect
changes made on the master page.
1 In the Pages panel, double-click the icon for the master you want to edit, or select the master page from the text
box list at the bottom of the document window. The master spread appears in the document window.
2 Make changes to the master.
InDesign automatically updates any pages using that master.
Use multiple views to see the results of master edits. Choose Window > Arrange > New Window, and then choose
Window > Arrange > Tile Horizontally or Tile Vertically. Set one view to a page and the other view to the master
applied to that page. Then edit the master and watch the page update.
Edit the options of an existing master page
You can edit master page options to change the name or prefix of the master, base the master on another master, or
change the number of pages in the master spread.
1 In the Pages panel, click the name of a master spread to select the master spread.
2 Choose Master Options For [master name] in the Pages panel menu.
Delete a master from a document
1 In the Pages panel, select one or more master page icons.
Toselectallunusedmasterpages,chooseSelectUnusedMastersinthePagepanelmenu.
Page 74

INDESIGN CS3
User Guide
2 Do one of the following:
• Drag a selected master page or spread icon to the Delete icon at the bottom of the panel.
• Click the Delete icon at the bottom of the panel.
• Choose Delete Master Spread [spread name] in the panel menu.
Override or detach master items
When you apply a master page to a document page, all objects on the master, called master items, appear on the
document page. Sometimes you want a specific page to be only slightly different from a master. In this situation you
don’t need to re-create the master layout on the page or create a new master. You can override or detach the master
item, and other master items on the document page will continue to update with the master.
Note the difference between overriding and detaching master items on a document page:
Override master item attributes Overriding a master item puts a copy of it on the document page without breaking
its association with the master page. Once the item itself is overridden, you can selectively override one or more
attributes of the item to customize it. For example, you can change the fill color of the local copy. After that, changes
to the fill color on the master page itself will not update to the local copy. However, other attributes, such as size, will
continuetoupdatebecausetheyhavenotbeenoverriddenonthelocalcopy.Overridescanberemovedlatertomake
the object match the master.
67
Attributes you can override for a master page object include strokes, fills, contents of a frame, and any transformations (such asrotating, scaling,shearing orresizing), corner options, textframe options,lock state, transparency, and
object effects.
Detach items from their master On a document page, you can detach (disassociate) a master item from its master.
Theitemmustbeoverriddenonthedocumentpage,creatingalocalcopy,beforeyoucandetachit.Adetacheditem
does not update with the master because its association with the master page is broken.
See also
“Apply text wrap on master page items” on page 198
Override a master item
1
Make sure the master item can be overridden.
You can override a master itemonly if Allow Master Item Overrides On Selection is selected inthe Pages panel menu
for that item.
2 Do either of the following:
• To override specific master items on a document page, press Ctrl+Shift (Windows) or Command+Shift (Mac OS)
and click the item (or drag to select multiple items). Change the selected master items as desired. The item can
now be selected like any other page item, but retains its association with the master page.
• To override all master page items on a document spread, target the spread, and then choose Override All Master
Page Items in the Pages panel menu. You can now select and modify any and all master items as you wish.
Once you override any master item, its dotted bounding box becomes a solid line, to show that a local copy has been
created.
Note: If youoverride a threaded textframe, all visible frames inthat thread are overridden, even if they are on adifferent
page in a spread.
Page 75

INDESIGN CS3
User Guide
Detach a master item
• To detach a single master item from its master, first override it by pressing Ctrl+Shift (Windows) or
Command+Shift (Mac OS) and clicking the item on a document page. Then choose Detach Selection From
Master in the Pages panel menu.
• To detach all overridden master items on a spread, override the master page items you want to detach, and target
that spread in thedocument. (Don’t go to the originalmaster page.) Choose Detach All Objects FromMaster from
the Pages panel menu. If the command isn’t available, there aren’t any overridden objects on that spread.
Prevent a master item from being overridden
In some instances, you want to override all but a few master items. For example, you may want to override master
items such as background images on adocument page, but youwant toprevent apage-numbering header from being
overridden. By preventing the header from being overridden, you can choose the Override All Master Items option
to override all master items except for the header.
1 On the master page, select the item.
2 Deselect Allow Master Item Overrides On Selection on the Pages panel menu.
Master items that do not allow overrides have no frame edge when displayed on the document page. If you prevent
a threaded text frame from being overridden, all text frames in that thread have the same setting applied.
68
Reapply master items
If you’ve overridden master items, you can restore them to match the master page. When you do this, the object’s
attributes revert totheir state on the corresponding master, and will once againupdate when you editthe master. The
local copy of the object is removed, and the master item cannotbe selected, as indicated by itsdotted border. You can
remove overrides for selected objects or all objects on a spread, but not across an entire document at once.
❖ Do one of the following:
• Toremove master overrides fromone or more objects, select objects that were originally master items. In thePages
panel, target a spread and choose Remove Selected Local Overrides in the Pages panel menu.
• Toremoveallmasteroverridesfromaspread,inthePagespanel,targetthespread(ormasterspread)fromwhich
youwanttoremoveallmasteroverrides.ChooseEdit>DeselectAlltomakesurethatnoobjectsareselected.In
the Pages panel, choose Remove All Local Overrides in the Pages panel menu.
If you’ve detached master page objects, you cannot restore them to the master page; however, you can delete the
detached objects and reapply the master to the page.
If you reapply a master to a page that contains overridden master page objects, the objects with overrides are
detached and all master page objects reapplied. This may result intwo copies of some objects onthe page.You’ll need
to delete the detached objects to exactly match the look of the master.
Import a master from another document
You can import masters from another InDesign document (any version) into the active document. If your destination document contains master pages that have different names from any master page in the source document,
those pages and their document page overrides will be unchanged.
1 In the Pages panel menu, choose Load Master Pages.
2 Locate and double-click the InDesign document containing the master pages you want to import.
Page 76

INDESIGN CS3
User Guide
3 Determine what should occur if a loaded master has the same name as a master in the current document.
• Choose Replace Master Pages if you want the masters from the source to override the destination document’s
masters with the same names. If your destination document does not have any overridden items, it is safe to
Replace Master Pages on import.
• Choose Rename Master Pages to change the page prefixes to the next available letter in the alphabet.
Once you have imported masters from a source document, a link is set up between the source document and the
destination document. When you subsequently load masters from the same source document, the association
between overridden items and their parent items on reloaded master pages is maintained. This association lets you
keep master pages in different documents consistent without putting those documents into a book.
If you want to use this method of keeping master pages consistent, you should load the master pages from the source
document before overriding any objects on the master. If your document has overridden items and you have never
imported masters from any source, those overridden items become detached the first time you load from a source
document and replace master pages with the same name as the parent master of the overridden items.
If you subsequently import masters from a different source document, however, and choose Replace Master Pages,
the overridden items may become detached. Any same-named masters from the new source document will be
applied to the document page containing overridden items, creating two sets of objects.
69
Layers
About layers
Each document includes at least one named layer. By using multiple layers, you can create and edit specific areas or
kinds of content in your document without affecting other areas or kinds of content. For example, if your document
prints slowly because it contains many large graphics, you can use one layer for just the text in your document; then,
when it’s time to proofread the text, you can hide all other layers and quickly print the text layer only. You can also
use layers to display alternate design ideas for the same layout, or versions of advertisements for different regions.
Think of layers as transparent sheets stacked on top of each other. If a layer doesn’t have objects on it, you can see
through it to any objects on layers behind it.
Additional layer notes:
• Objects on masters appear at the bottom of each layer. Master items can appear in front of document page objects
if the master page objects are on a higher layer. (See “About masters, stacking order, and layers” on page 62.)
• Layers involve all pages of a document, including masters. For example, if you hide Layer 1 while editing page 1
of your document, the layer is hidden on all pages until you decide to show it again.
• For information on converting layers from Adobe PageMaker® or QuarkXPress, see “Converting QuarkXPress
and PageMaker documents” on page 98.
Page 77
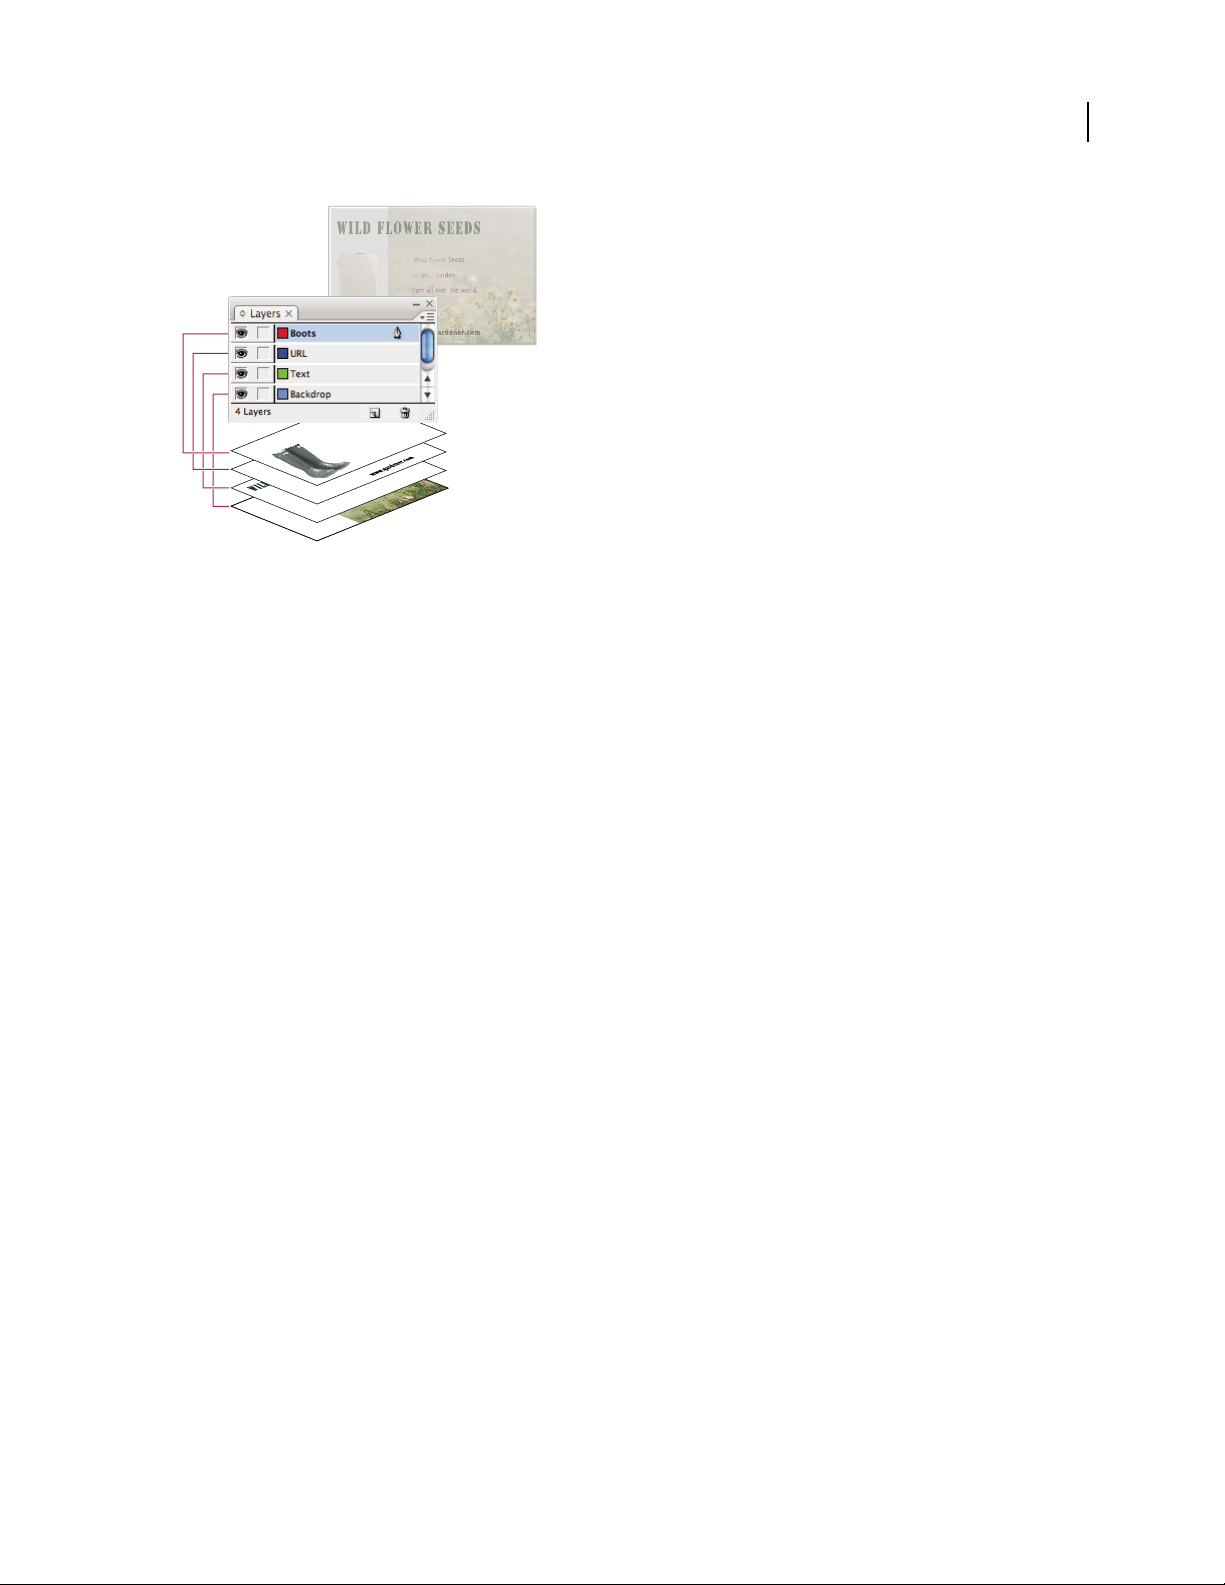
INDESIGN CS3
User Guide
The Layers panel lists layers with the frontmost layer appearing at the top of the panel.
For a video on using layers, see www.adobe.com/go/vid0074.
Create layers
YoucanaddlayersatanytimeusingtheNewLayercommandontheLayerspanelmenuortheNewLayerbuttonat
the bottom of the Layers panel. The number of layers a document can have is limited only by the RAM available to
InDesign.
70
1 Choose Window > Layers.
2 To create a new layer using default settings, do one of the following:
• To create a new layer at the top of the Layers panel list, click the New Layer button.
• To create a new layer above the selected layer, hold down Ctrl (Windows) or Command (Mac OS) as you click the
New Layer button.
Specify layer options
1 Choose New Layer in the Layers panel menu, or double-click an existing layer.
2 Specify the layer options, and then click OK.
Layer options
Color Assign a color to identify the objects on that layer.
Show Layer Select this option to make a layer visible. Selecting this option is the same as the making the eye icon
visible in the Layers panel.
Show Guides Selectthisoptiontomaketheguidesonthelayervisible.Whenthisoptionisnotselectedforalayer,
the guides cannot be made visible, even by selecting View > Show Guides for the document.
Lock Layer Select this option to prevent changes to any objects on the layer. Selecting this option is the same as
making the crossed-out pencil icon visible in the Layers panel.
Lock Guides Select this option to prevent changes to all ruler guides on the layer.
Print Layer Select this option to allow the layer to be prevented from printing. When printing or exporting to PDF,
you can determine whether to print hidden and nonprinting layers.
Page 78

INDESIGN CS3
d
r
d
r
User Guide
Suppress Text Wrap When Layer Is Hidden Select this option if you want text on other layers to flow normally when
the layer is hidden and it contains objects with text wrap applied.
Assign a layer color
Assigning a color to a layer makes it easier to distinguish the layers of different selected objects. For each layer that
contains a selected object, the Layers panel displays a dot in the layer’s color. On the page, each object displays the
color of its layer in its selection handles, bounding box, text ports, text wrap boundary (if used), frame edges
(including the X displayed by an empty graphics frame), and hidden characters. The layer color does not appear for
an deselected frame if its edges are hidden.
1 In the Layers panel, double-click a layer or select a layer and choose Layer Options for [layer name].
2 For Color, choose a color or choose Custom to specify a color in the system color picker.
See also
“Show or hide frame edges” on page 76
Adding objects to layers
Any new objectis placedon thetarget layer, the layer currently displaying the pen icon in the Layers panel. Targeting
a layer also selects it. If multiple layers are selected, targeting one of them doesn’t change the selection, but targeting
a layer outside the selection deselects the other layers.
71
You can add objects to the target layer by any of the following methods:
• Creating new objects with the Type tool or drawing tools.
• Importing, placing, or pasting text or graphics.
• Selecting objects on other layers, and then moving them to the new layer.
You cannot draw or place a new object on a hidden or locked layer. When you select a drawing tool or the Type tool,
or place a file when the target layer is hidden or locked, the pointer changes to the crossed-out-pencil icon when it
is positioned over the document window. Either show or unlock the target layer, or target a visible, unlocked layer.
If you choose Edit > Paste when the target layer is hidden or locked, an alert message gives you the choice of showing
or unlocking the target layer.
When you click a layer in the Layers panel to target it, the pen icon appears on the layer you clicked, and the layer
also highlights to indicate that it is targeted.
Wild owers
for your gar
from all ove
Changing the target layer for the next new object
Wild owers
for your gar
from all ove
Page 79
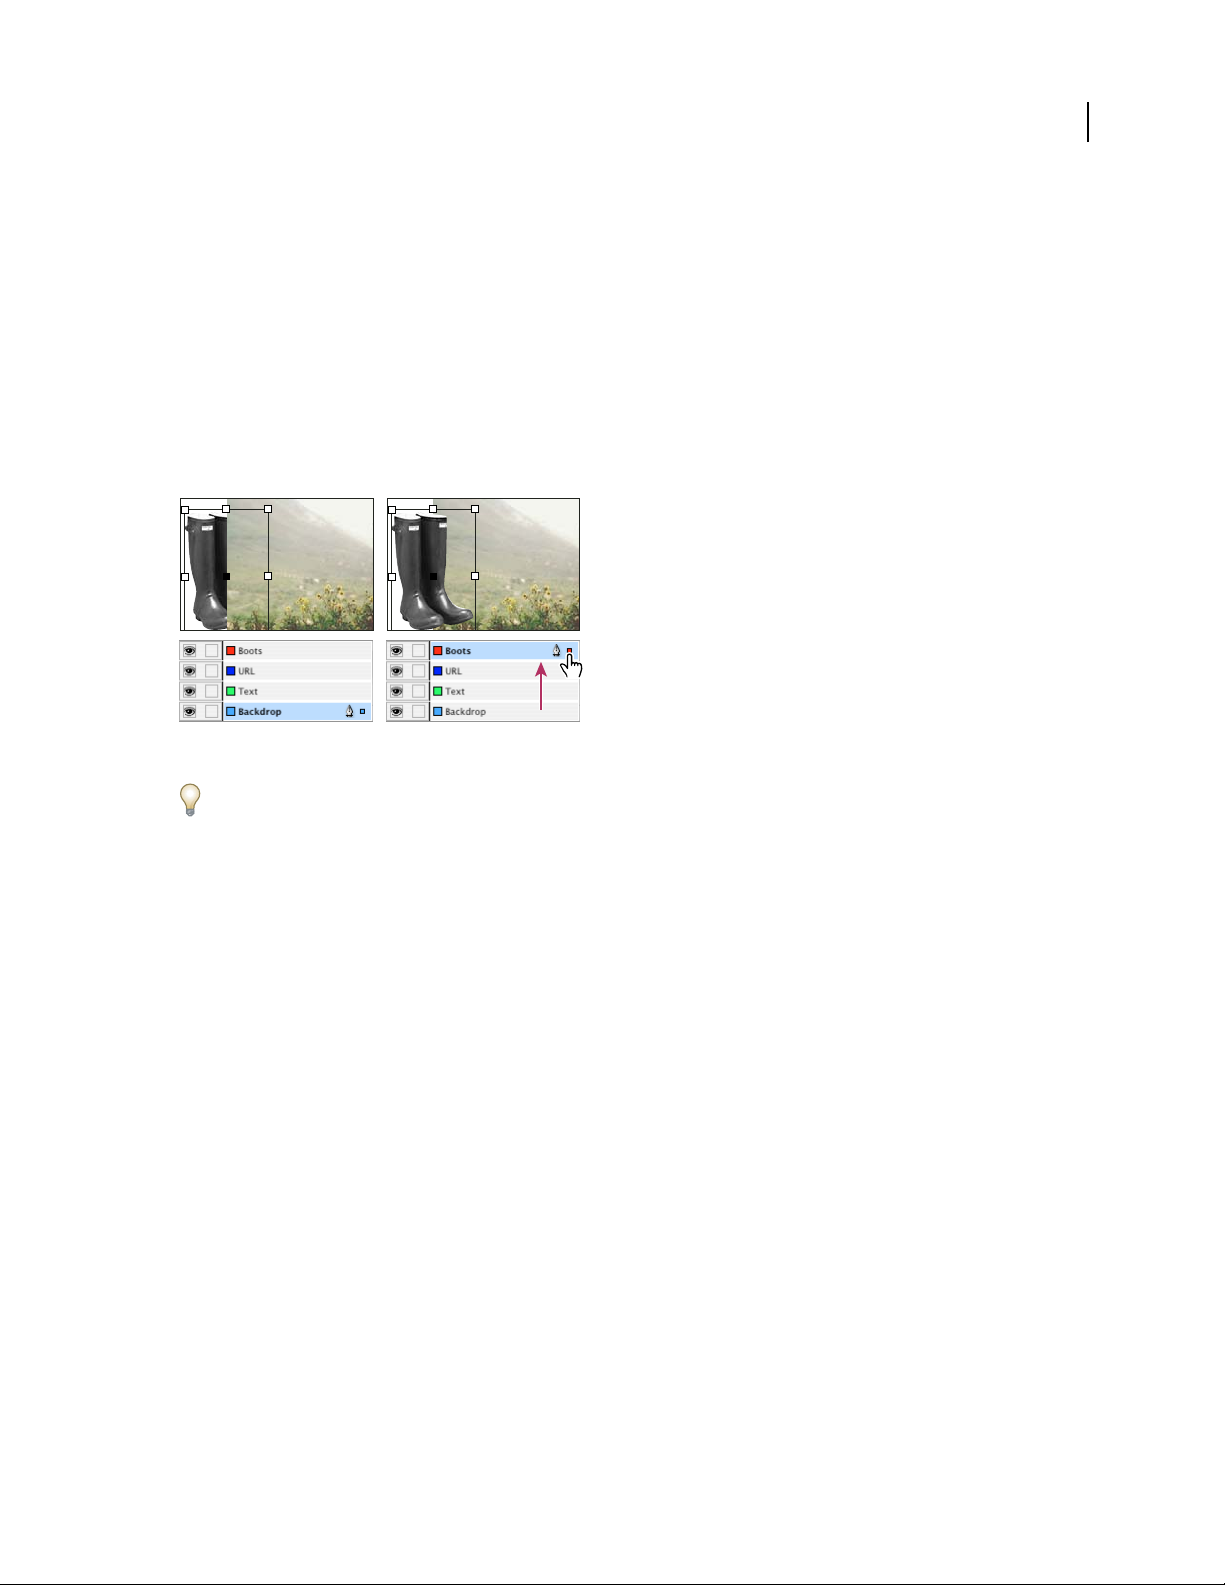
INDESIGN CS3
d
r
d
r
User Guide
Select, move, and copy objects on layers
By default, you can select any object on any layer. In the Layers panel, dots mark layers that contain selected objects.
Thelayer’sselectioncolorhelpsyouidentifyanobject’slayer.Topreventselectingobjectsonaspecificlayer,lockthe
layer.
❖ Do any of the following:
• To select all objects on a specific layer, hold down Alt (Windows) or Option (Mac OS) as you click a layer in the
Layers panel.
• To move or copy objects to another layer, use the Selection tool to select one or more objects on a document page
or master. In the Layers panel, drag the colored dot on the right side of the layer list to move the selected objects
the other layer.
72
Wild owers
for your gar
from all ove
Moving an object to a new layer
To move selected objects to a hidden or locked layer, hold down Ctrl (Windows) or Command (Mac OS) as you drag
the colored dot. To copy selected objects to another layer, hold down Alt (Windows) or Option (Mac OS) as you drag
the colored dot on the right side of the layer list to the other layer. To copy selected objects to a hidden or locked layer,
hold down Ctrl+Alt (Windows) or Command+Option (Mac OS) as you drag the colored dot.
Wild owers
for your gar
from all ove
Paste objects into different layers
The Paste Remembers Layers command affects how objects pasted from other locations interact with existing layers:
• IfthePasteRemembersLayerscommandisselected,objectscutorcopiedfromdifferentlayersretaintheirlayer
assignments when pasted to the new page or position. If you paste objects to a document that doesn’t have the
same layers as the document from which they were copied, InDesign adds the objects’ layer names to the Layers
panel in the second document, and pastes each object on its layer.
• If the Paste Remembers Layers command is deselected, objects cut or copied from different layers are pasted
together on the target layer.
1 Make sure that Paste Remembers Layers is deselected in the Layers panel menu.
2 Select objects and choose Edit > Copy or Edit > Cut.
3 In the Layers panel, click the other layer to target it.
4 Choose Edit > Paste.
Page 80
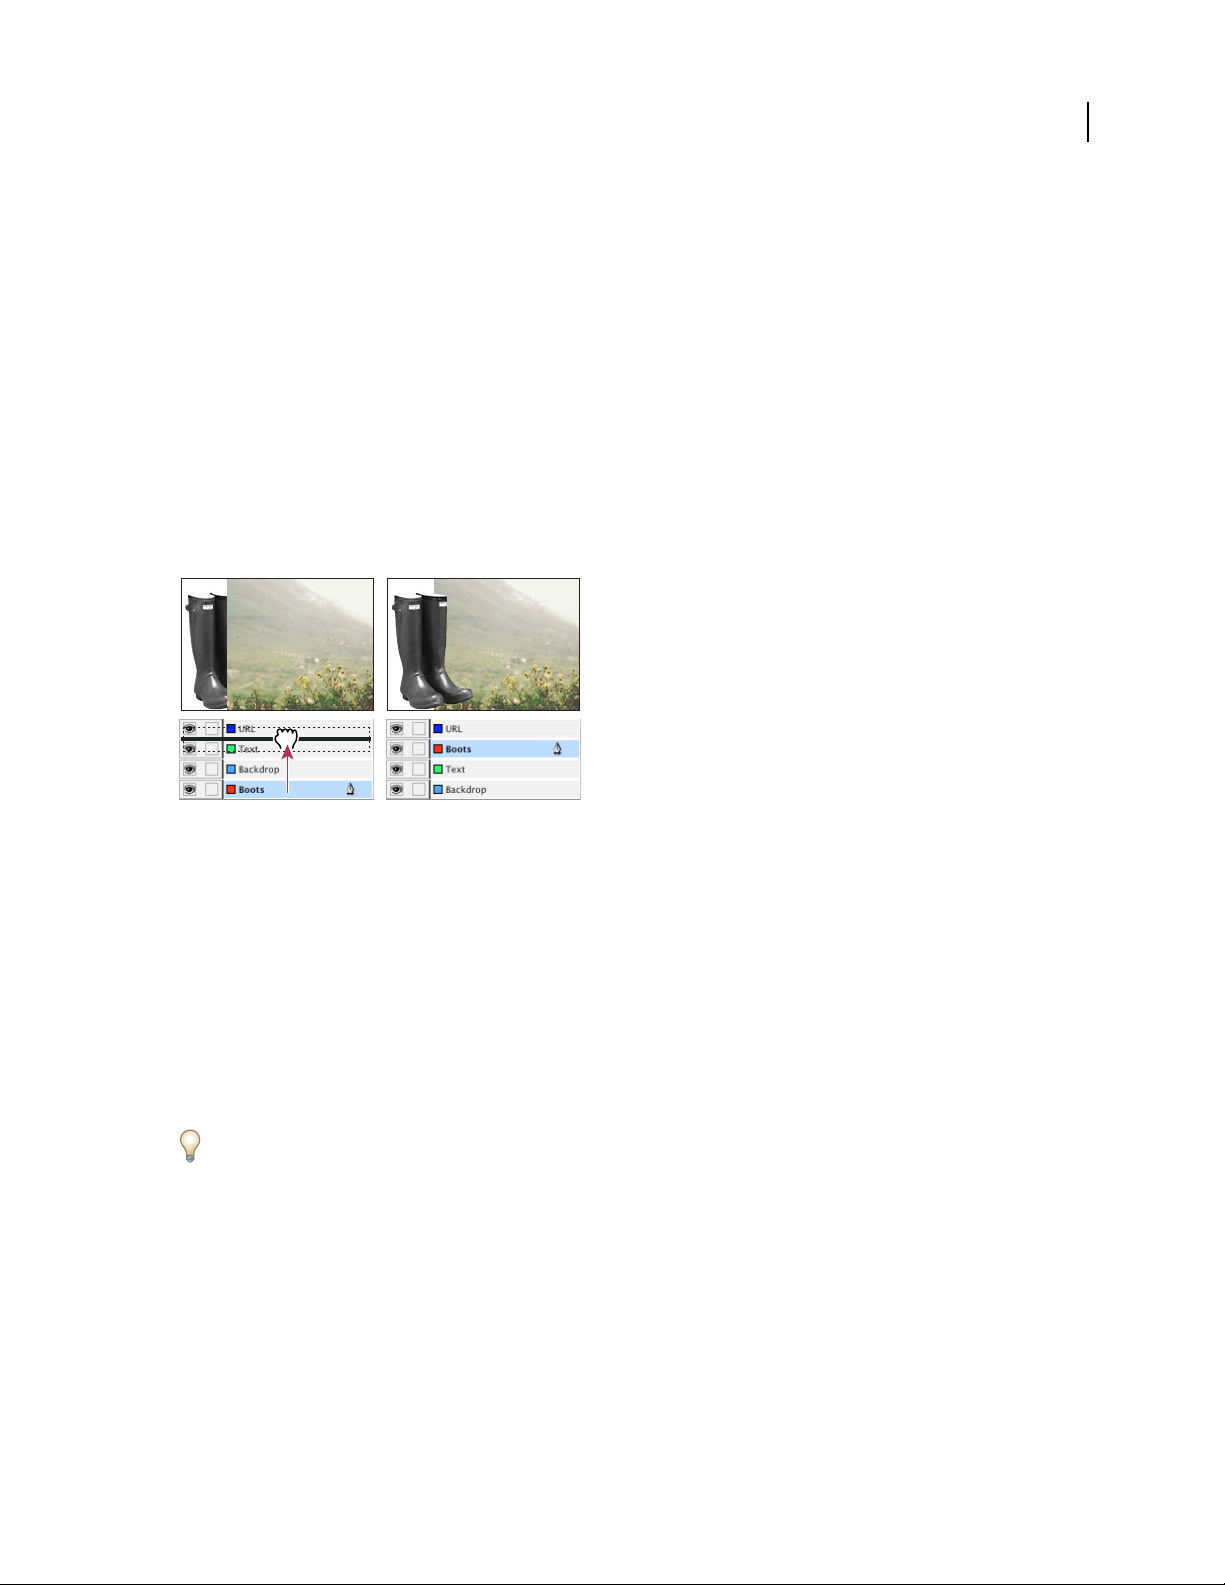
INDESIGN CS3
d
r
d
r
User Guide
Duplicate a layer
When you duplicate a layer, you copy its contents and settings. The duplicate layer then appears above the original
layer in the Layers panel. Any duplicated frames that were threaded to other frames on the layer remain threaded.
Duplicated frames whose originals were threaded to frames on other layers are no longer threaded to those frames.
❖ In the Layers panel, do one of the following:
• Select the layer name and choose Duplicate Layer [layer name] in the Layers panel menu.
• Drag a layer name and drop it on the New Layer button.
Change the order of layers
Change the stacking order of layers in your document by rearranging the layers on the Layers panel. Rearranging
layers changes the order of layers on every page, not just on the target spread.
❖ In the Layers panel, drag a layer up or down in the list. You can also drag multiple selected layers.
73
Wild owers
for your gar
from all ove
Reordering layers
Wild owers
for your gar
from all ove
Show or hide layers
You can hide or display any layer at any time. Hidden layers can’t be edited, and don’t appear on screen or in print.
Hiding layers can be useful when you want to do any of the following:
• Hide parts of a document that are not meant to appear in the final document.
• Hide alternate versions of a document.
• Simplify the display of a document, to make it easier to edit other parts of the document.
• Prevent a layer from printing.
• Speed up screen redraw when a layer contains high-resolution graphics.
By default, text continues to wrap around objects on hidden layers. To ignore text wrap settings for hidden objects,
choose Layer Options from the Layers panel menu, and then select the Suppress Text Wrap When Layer Is Hidden
option.
❖ Do any of the following:
• To hide or show one layer at a time, in the Layers panel, click the square at the far left of a layer name to hide or
show the eye icon for that layer.
• To hide all layers except the selected layer, choose Hide Others in the Layers panel menu.
• To show all layers, choose Show All Layers in the Layers panel menu.
Page 81

INDESIGN CS3
User Guide
Set a layer as nonprinting
1 Select the layer in the Layers panel.
2 Choose Layer Options from the Layers panel menu.
3 To prevent the layer from being printed, deselect Print Layer, and then click OK.
Note: When you print or export to PDF, you will still have the option of printing hidden and nonprinting layers.
See also
“Print a document or book” on page 542
“Export to PDF” on page 473
Lock or unlock layers
Locking is useful forpreventing accidental changes to a layer. Alocked layer displays a crossed-outpencil icon inthe
Layerspanel.Objectsonlockedlayerscannotbeselectedorediteddirectly;however,ifobjectsonlockedlayershave
attributes that can be edited indirectly, they will change. For example, if you edit a tint swatch, objects on locked
layers using that tint swatch will reflect the change. Similarly, putting a series of threaded text frames on both locked
and unlocked layers will not prevent text on locked layers from recomposing.
74
❖ Do any of the following:
• To lock or unlock one layer ata time, in the Layers panel, click a squarein the second column from the left to show
(lock) or hide (unlock) the crossed-out-pencil icon for a layer.
• To lock all layers except the target layer, choose Lock Others in the Layers panel menu.
• To unlock all layers, choose Unlock All Layers in the Layers panel menu.
Delete layers
Remember that each layer is document-wide—it appears on every page of a document. Before deleting a layer,
consider hiding all other layers first, and then turn to each page of the document to verify that it is safe to delete the
remaining objects.
❖ Do any of the following:
• To delete a layer, drag a layer from the Layers panel to the Delete icon or choose Delete Layer [layer name] from
the Layers panel menu.
•
To delete multiple layers, holdCtrl (Windows) or Command (Mac OS) whileyou clickthe layersyou wantto delete.
Drag the layers from the Layers panel to the Delete icon or choose Delete Layers from the Layers panel menu.
• To delete all empty layers, choose Delete Unused Layers in the Layers panel menu.
Merge layers in a document
Youcanreducethenumberoflayersinadocumentwithoutdeletinganyobjectsbymerging layers. When you merge
layers, objects from all selected layers are moved to the target layer. Of the layers you merge, only the target layer
remains in the document; the other selected layers are deleted. You can also flatten a document by merging all layers.
Page 82

INDESIGN CS3
User Guide
Note: If you merge layers containing a mix of page objects and master items, the master items move to the back of the
resulting merged layer.
1 In the Layers panel, select any combination of layers. Be sure to include the layer you want to target as the merged
layer. If you’re flattening the document, select all layers in the panel.
2 Click any selected layer to make it the target layer, indicated by the pen.
3 Choose Merge Layers in the Layers panel menu.
You can also merge identically named layers for exporting to PDF.
See also
“About masters, stacking order, and layers” on page 62
“Export to PDF” on page 473
Laying out frames and pages
About paths and frames
You can draw objects in a document and use them as paths or as frames. Paths are vector graphics like those you
create in a drawingprogram such as Adobe Illustrator®. Frames are identical to paths, with only one difference—they
can be containers for text or other objects. A frame can also exist as a placeholder—a container without contents. As
containers and placeholders, frames are the basic building blocks for a document’s layout.
75
ABC
Paths and frames
A. Path B. Frame as graphic container C. Frame with placed graphic
You can draw both paths and frames using tools in the Toolbox. You can also create frames by simply placing
(importing) or pasting contents into a path.
Because a frame is just a container version of a path, you can do anything to a frame that you can do to a path, such
as add a color or a gradient to its fill or stroke, or edit the shape of the frame itself with the Pen tool. You can even
use a frame as a path, or vice versa, at any time. This flexibility makes it easy to change your design and provides a
wide range of design choices.
Frames can contain text or graphics. A text frame determinestheareatobeoccupiedbytextandhowtextwillflow
through the layout. You can recognize text frames by the text ports in their respective upper left and lower right
corners.
A graphics frame can functionas a border and background, and can crop or maska graphic.When acting as an empty
placeholder, a graphics frame displays a crossbar.
Page 83

INDESIGN CS3
User Guide
Text frame (left) and empty graphics frame (right)
If you don’t see the crossbar inside an empty graphics frame, the frame edges display may be turned off.
For a video on working with objects, see www.adobe.com/go/vid0071.
See also
“Understanding paths and shapes” on page 298
Show or hide frame edges
Unlike paths, you can see the nonprinting strokes (outlines) of frames by default even when the frames aren’t
selected. If the document window is getting crowded, use the Show/Hide Frame Edges command to simplify the
screen display by hiding the frame edges. Doing this also hides the crossbar in a graphics placeholder frame. The
display setting for frame edges doesn’t affect the display of the text ports on text frames.
76
Note: The frame edge is defined as a frame’s stroke, not the outer edge of the stroke’s weight.
❖ Do any of the following:
• To show or hide frame edges, choose View > Show/Hide Frame Edges.
• To hide frame edges, click Preview Mode at the bottom of the Toolbox.
Using placeholders to design pages
When your final text and graphics are available, you can simply add them to a document; InDesign automatically
creates frames when you import them (unless you’re importing text or graphics directly into existing frames).
However, when you don’t have the content yet or you want to block out the design before adding text and graphics,
you can use frames as placeholders.
A
B
Types of placeholders
A. Graphics frame placeholder B. Text frame placeholder
Page 84

INDESIGN CS3
User Guide
For example, you might use any of these strategies:
• Draw text frames using the Type tool, and draw graphics frames using the drawing tools. Thread empty text
frames together so that importing final text takes just one step.
• Draw empty placeholder shapes using drawing tools. When you’re ready to start designating areas for text and
graphics, redefine the placeholders as either text or graphics frames.
• Set frame fitting options for a placeholder frame so that when you place an image in the frame, the image is
cropped and fit accordingly.
See also
“Use document templates” on page 94
“Draw a placeholder shape” on page 301
“Set frame fitting options” on page 385
Redefine the purpose of paths and frames
• To use a path or text frame as a graphics placeholder frame, select a path or an empty text frame, and then choose
Object > Content > Graphic.
• To use a path or graphics frame as a text placeholder frame, select a path or an empty graphics frame, and then
choose Object > Content > Text.
• To use a text or graphics frame as a path only, select an empty frame, and then choose Object > Content >
Unassigne d.
77
Note: When a frame contains text or graphics, you cannot redefine it using the Object > Content menu. However, the
frame automatically redefines itself if you select it and replace its contents.
About automatic layout adjustment
If you use the Document Setup or Margins and Columns commands to make changes to an existing layout, such as
altering column widths or page orientation, you could spend considerable time and effort in rearranging objects to
fit the new layout. The Layout Adjustment feature can do much of that work automatically. For example, you can
quickly reformat a wide four-column document designed for an A4-size page to a tall two-column format on a U.S.
legal-size page. With Layout Adjustment, text and graphics frames are moved and resized as necessary based on the
new relative positions of column guides, page margins, and page edges.
Note: Dragging column guides does not trigger layout adjustment.
TheLayoutAdjustmentfeatureproducesmorepredictableresultswhenalayoutistightlybasedonaframeworkof
margins, page columns, and ruler guides, and where objects are snapped to guides. Results are less predictable when
objects don’t adhere to margins, columns, and guides, or when extraneous ruler and column guides clutter a page.
Layout adjustment is not affected by the document grid or the baseline grid.
Page 85

INDESIGN CS3
User Guide
Page designed vertically, for print (left); page orientation changed for on-screen viewing, with layout automatically refitted by the Layout
Adjustment feature (right)
You can modify the rules in the Layout Adjustment dialog box. The Layout Adjustment feature attempts to approximate the proportions of the old layout in the new layout by doing the following:
• Repositioning margin guides while maintaining margin widths, ifthe page size changes moving column and ruler
guides to maintain proportional distances from page edges, margins, or column guides.
• Adding or removing column guides, if the new layout specifies a different number of columns.
• Moving objects already aligned to any margin, column, or ruler guide, or to anytwo guides perpendicular to each
other, so that the objects stay with those guides if the guides move during layout adjustment.
• Proportionally resizing objects already aligned to two parallel margin, column, or ruler guides or to guides on
three sides, so that the objects stay with those guides if the guides move during layout adjustment.
• Maintain the relative position of objects that are anchored to the text as specified in the Anchored Object Options
dialog box.
• Moving objects to keep them in the same relative position on the page, if the page size changes.
78
Note: Layout Adjustment affects columns inside a text frame differently than it does page columns. If the frame itself is
resized by Layout Adjustment and the Fixed Column Width is not selected in the Object > Text Frame Options dialog
box, text frame columns are resized proportionally. If the Fixed Column Width option is selected, columns are added or
removed as necessary.
Set options for layout adjustment
Note that changing options in the Layout Adjustment dialog box does not immediately change anything. Layout
adjustment is triggered only by changes to page size, page orientation, margins, or column settings, or when a new
master is applied. When you want to restore a layout to its previous state, you must undo the action that triggered
the layout adjustment.
1 Choose Layout > Layout Adjustment.
2 Select Enable Layout Adjustment.
3 Specify the layout adjustment options, and click OK.
Layout Adjustment options
Enable Layout Adjustment Select this option so that layout adjustment will occur whenever you change page size,
page orientation, margins, or columns.
Snap Zone Type a value to specify how near an object must be to the closest margin guide, column guide, or page
edge to snap to that element during layout adjustment.
Allow Graphics And Groups To Resize Select this option to let the Layout Adjustment feature scale graphics, frames,
and groups. When deselected, graphics and groups can be moved by Layout Adjustment, but not resized.
Page 86

INDESIGN CS3
User Guide
Allow Ruler Guides To Move Select this option when you want ruler guides to be repositioned by the Layout
Adjustment feature.
Ignore Ruler Guide Alignments Select this option when ruler guides are not well positioned for layout adjustment.
Objects will still align to column and margin guides and to page edges.
Ignore Object And Layer Locks Select this option when you want the Layout Adjustment feature to reposition
objects that are locked individually, or locked as a result of being on a locked layer.
Numbering pages, chapters, and sections
Add page, section, and chapter numbering
Determine whatkind of numbering you want touse for your document orbook. For long documents, you canassign
chapter numbers. Each document can be assigned only one chapter number. If you want to use different numbering
within a document, you can define ranges of pages as sections; these sections can be numbered differently. For
example, the first ten pages of a document (the front matter) might use Roman numerals, and the rest of the
document might use Arabic numerals.
For a video on numbering pages, see www.adobe.com/go/vid0217.
79
See also
“Number pages, chapters, and paragraphs in a book” on page 277
“Creating book files” on page 274
Add an automatically updated page number
Yo u c a n a d d a page number marker to your pages to specify where a page number sits on a page and how it will look.
Because a page number marker updates automatically, the page number it displays is always correct—even as you
add, remove, or rearrange pages in the document. Page number markers can be formatted and styled as text.
ear, be sure you
r mailing list so
be kept abreast
iting excursions
Page number on master A (left) and page 5 based on same master (right)
A single InDesign document can contain up to 9,999 pages, but page numbers can be as large as 99,999. (For
example, you can correctly number a 100-page document that starts on page 9,949.) By default, the first page is a
recto (right) page numbered 1. Odd-numbered pages always appear on the right; if you use the Section Options
command to change the first page number to an even number, the first page becomes a verso (left) page.
Page 87

INDESIGN CS3
User Guide
If the automatic page number is on a master page, it displays the master page prefix. On a document page, the
automatic page number displays the page number. On a pasteboard, it displays PB.
1 If necessary, create a new text framelarge enough to hold thelongest page number and any text you want to appear
next to it (such as the section marker or document name). Position the text frame where you want the page number
to appear.
If you want a page number to appear on all pages based on a master, create the page number text frame on a master
page. In addition to the page number, you can add other header and footer variables, such as the creation date or file
name.
2 In the page number text frame, add any text or variables that will come before or after the page number.
3 Position the insertion point where you want the page number to appear, and then choose Type > Insert Special
Character > Markers > Auto Page Number.
The Auto Page Number marker is also available in a context menu. To see the context menu, position the text
insertion point in the page number text frame, right-click (Windows) or Control-click (Mac OS), and choose Insert
Special Character > Markers > Auto Page Number.
By default, pages are numbered using Arabic numerals (1, 2, 3...); however, you can number pages using upper or
lowercase Roman (i, ii, iii...) or alphanumeric (a, b, c...) numbering.
80
Add an automatically updated chapter number
You can add a chapter number variable to your document. Like page numbers, chapter numbers can be updated
automatically and formatted and styled as text. A chapter number variable is commonly used in documents that are
part of a book. A document can have only one chapter number assignedto it; ifyou wantto divide asingle document
into chapters, you can create sections instead.
1 If necessary, create a text frame where you want a chapter number to appear. If you want a chapter number to
appear on several pages, create the text frame on a master page, and apply that master page to the document pages.
2 In the chapter number text frame, add any text that will come before or after the chapter number.
3 Place the insertion point where you want the chapter number to appear, and then choose Type > Text Variables >
Insert Text Variable > Chapter Number.
You can update starting number and format of chapter numbering by choosing Layout > Numbering & Section
Options.
Add an automatically updated section marker
1
Define sections in your document. (See “Define section numbering” on page 81.)
2 On a page or master that you’re using in a section, drag the Type tool to create a text frame large enough for the
section marker text, or click in an existing frame.
3 Choose Type > Insert Special Character > Markers > Section Marker.
On master page A, section marker (left) and section marker with page number marker inserted (right)
Page 88

INDESIGN CS3
User Guide
Change the format of page and chapter numbering
1
Choose Layout > Numbering & Section Options.
2 Under Page Numbering or Chapter Numbering, select a new number format for Style.
3 Click OK.
Define section numbering
By default, page numbers in a book are numbered consecutively. Using Numbering & Section Options, you can
restart page or chapter numbering at a specified page, change the numbering style of both chapters and pages, and
add prefixes and section marker text to the numbers.
You can define a sectionmarker to label section pages automatically. For example, if youspecify A– forSection Prefix
onpage16ofadocumentandincludethesectionprefix,thepagewillappearinthetableofcontentsorindexasA–
16. Text youtype for a sectionmarker appearswhen you choose Type > Insert Special Character > Markers > Section
Marker.
A
B
81
C
Pages panel
A. Section indicator icon shows start of section B. Page number is changed for new section C. Status bar displays document length
Define sections in a document
1
In the Pages panel, select the first page in the section you want to define.
2 Choose Layout > Numbering & Section Options, or choose Numbering & Section Options in the Pages panel.
3 Ifyou’rechangingthenumberingoptionsforanypageotherthanthefirstpageofthedocument,makesurethat
Start Section is selected. This option marks the selected page as the beginning of a new section.
4 As necessary, specify the numbering and section options, and then click OK.
A section indicator icon appears above the page icon in the Pages panel, indicating the start of a new section.
5 To end the section, repeat the section numbering steps on the first page that follows the section.
Edit or remove section numbering
1
In the Pages panel, double-click the section indicator icon that appears above the page icon in the Pages panel.
Or, select a page that uses a section marker, and choose Numbering & Section Options in the Pages panel menu.
2 Do any of the following, and then click OK:
• To change the style or starting number, change section and numbering options.
• To remove a section, deselect the Start Section option.
To quickly identify a section in the Pages panel, position the pointer precisely over any section indicator icon . A
tool tip appears, displaying the starting page number or section prefix.
Page 89

INDESIGN CS3
User Guide
Create headers and footers
Headers and footers run through the top and bottom of the pages in your document, providing important
background information. They can include suchitems as page, chapter, or section numbers; title or heading text; the
author’s name; and the document’s filename and creation or modification date.
You can add many of these items by using text variables. InDesign includes several preset variables, such as Creation
Date and File Name. You can modify these variables, and you can create your own. For example, you can create a
variable that displays the first use of a Heading paragraph style in the header or footer. Once you create or edit the
variables you need, you assemble them on the master page to create your header and footer.
Playing to Strengths
82
1991-2007
226
<Footer Date>
A
A
Using page numbers and variables to create a footer
A. Footer variable inserted on master page B. Variable text on document page that grabs text from the first heading on the page
<Footer Variable>
*
Playing to Strengths
*
B
For a video on creating headers and footers, see www.adobe.com/go/vid0078.
1 If necessary,create oredit the variables you want to use in your headeror footer. (See “Createvariables forrunning
headers and footers” on page 88.)
2 Go to the master page where you want to add the header or footer.
The header or footer will appear on any document page to which the master page is applied.
3 Create a text frame large enough to include all the header or footer information. Place the text frame above or
below where the content of the document pages will appear.
4 Add text, auto page numbers, and variables as needed.
5 Apply the master page to document pages where you want the header or footer to appear.
6 If necessary, create headers and footers for additional master pages.
See also
“Create masters” on page 63
“Create and edit text variables” on page 85
Page 90
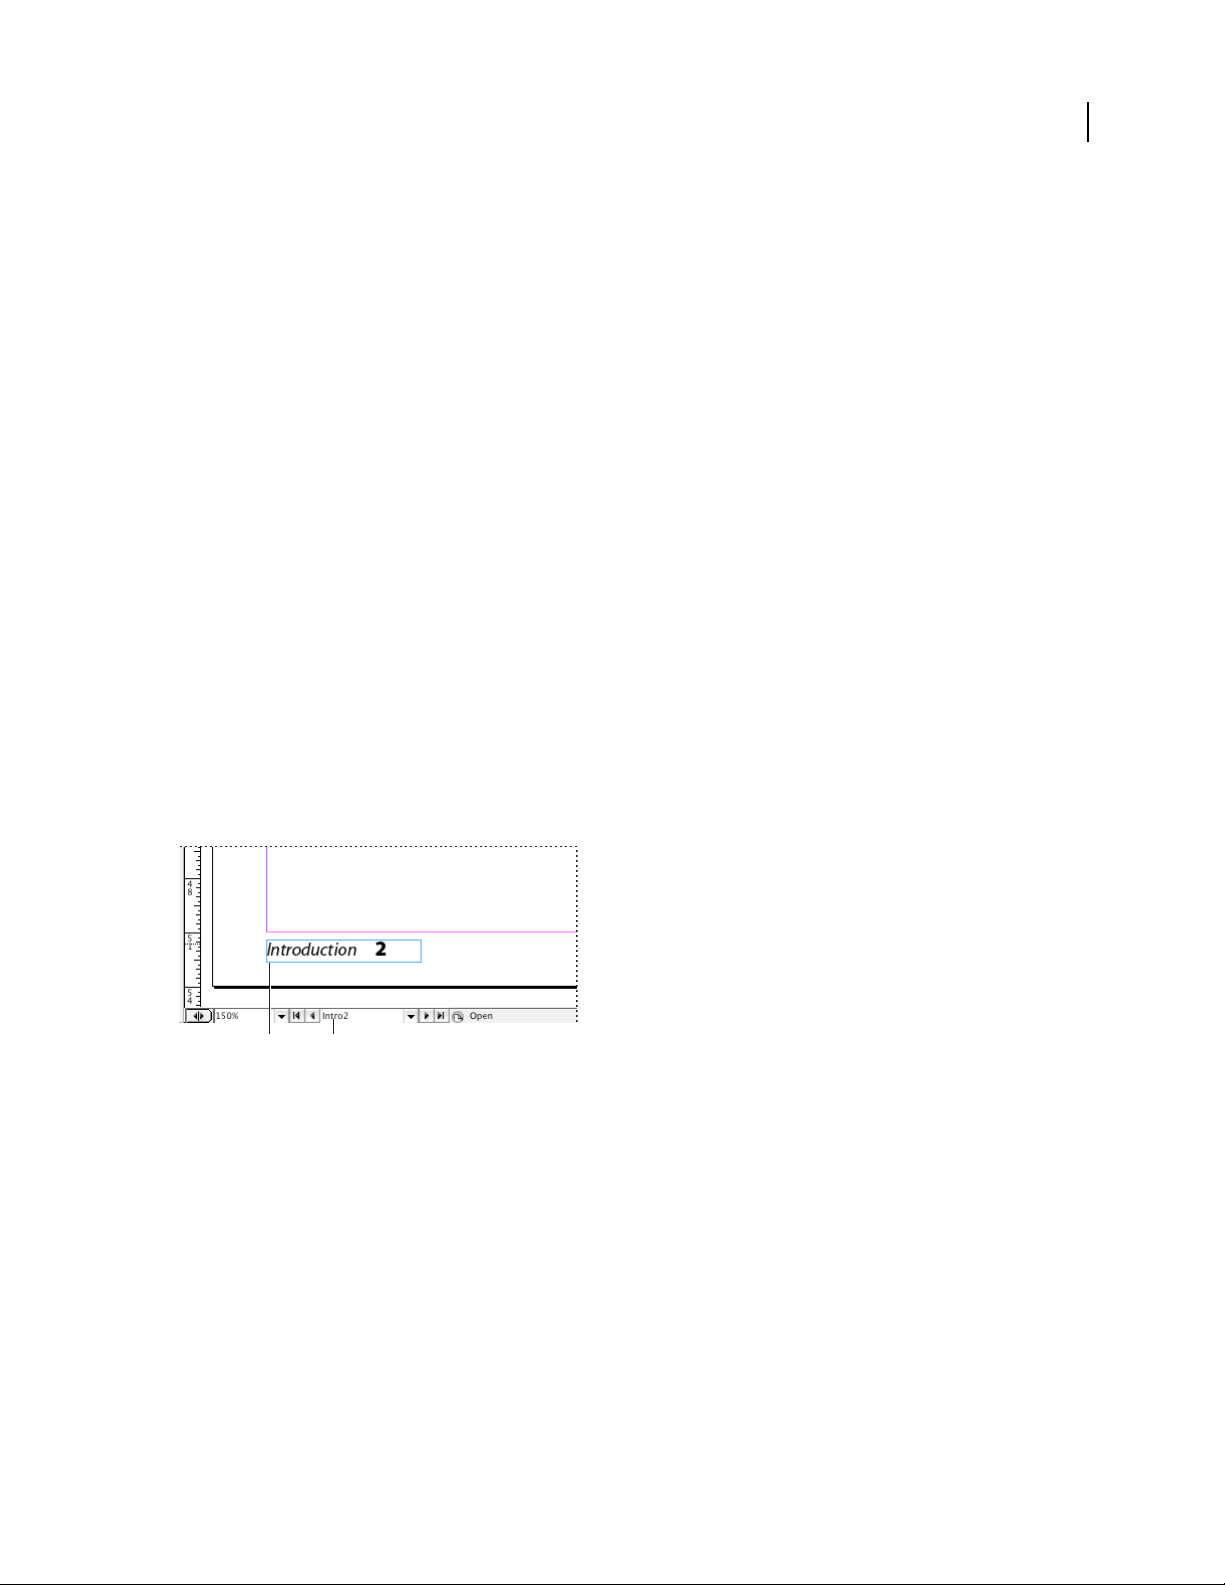
INDESIGN CS3
User Guide
Document numbering options
You can change document numbering options when you choose Layout > Numbering & Section Options or when
you choose Document Numbering Options from the Book panel menu.
Automatic Page Numbering Select if you want the page numbers of the current section to follow the numbering of
the previous section. Using this option, the page numbers in the document or section update automatically when
you add pages prior to it.
Start Page Numbering At Type the starting number for your document or for the first page of the current section.
For example, if you want to restart the numbering for a section, type 1 . The remaining pages in the section will be
renumbered accordingly.
Note: If you chose anon-Arabicpage-numbering style (such as Roman numerals),you still must type an Arabic numeral
in this box.
Section Prefix Type a label for the section. Include the spaces or punctuation you want to appear between the prefix
and the page number (for example, A–16 or A 16). The prefix is limited to eight characters. It cannot be empty, and
you cannot enter a blank spaces by pressing the spacebar—copy and paste a space character from the document
window instead. Note that plus (+) or comma (,) symbolscannot be used in section prefixes. (See “Insert white space
characters” on page 152.)
83
Style (page numbering)
Section Marker Type a label that InDesign inserts on the page at the location of a section marker character that
Choose a page-numbering style from the menu. The style applies to all pages in this section only.
appears when you choose Type > Insert Special Character > Markers > Section Marker.
Include Prefix When Numbering Pages Select if you want the section prefix to appear when you generate a table of
contents or index, or when you print pages that contain automatic page numbers. Deselect this option to display the
section prefix in InDesign but hide the prefix in the printed document, index, and table of contents.
A B
Section prefix in document window
A. Section marker and prefix on the page itself B. Section prefix in the page box at the bottom of the document window
Style (chapter numbering) Choose a chapter-numbering style fromthe menu. This chapter style is used throughout
the document.
Chapter Number If you don’t want chapters to be numbered sequentially in the book, specify the chapter number.
Continue From Previous Document In The Book Select this option to number chapters sequentially in a book.
Same As Previous Document In The Book Select this option if the current document is part of the same chapter as
the previous document in a book.
Page 91

INDESIGN CS3
User Guide
Display absolute or section numbering in the Pages panel
The Pages panel can display absolute numbering (labeling all pages with consecutive numbers, starting at the first
page of the document) or section numbering (labeling pages by section, as specified in the Section Options dialog
box). Changing the numbering display affects how pages are indicated in the InDesign document, as in the Pages
panel and in the page box at the bottom of a document window. However, itdoes not change the appearance of page
numbers on document pages.
1 Choose Edit > Preferences > General (Windows) or InDesign > Preferences > General (Mac OS).
2 For Page Numbering, choose a numbering method in the View menu.
84
A A A
B B
6–7
Pages panel showing absolute numbering (left) and section numbering (right)
B
4–5 iv–1 1 i 2–3 ii–iii
8
A A A
B B
2–3
B
4
Add automatic page numbers for story jumps
You can easily maintain the jump lines of stories that continue to other pages, such as a line that says “Continued on
page 42.” Use a jump line page number to automatically update the number of the page containing a story’s next or
previous threaded text frame when you move or reflow the story’s threaded text frames.
Usually the jump line page number should be in a separate text frame from the story it tracks. That way, the jump
line page number remains in position even if the story’s text reflows.
If you insert an Auto Page Number character in the Find/Change dialog box, jump line page numbers can also be
found.
1 With the Type tool, drag to create a new text frame where you want the jump line to appear.
2 Withthe Selection tool ,position the newtext frameso that it overlaps the frame containing the story you want
to track.
continued on page 42
Make sure text frame touches or overlaps story you want it to track.
3 Select the Type tool and click an insertion point in the new text frame. Then type the text that you want to appear
before the page number, such as “Continued on” or “Continued from”.
4 Then choose Type > Insert Special Character and one of the following options:
Next Page Number Inserts the number of the page containing the story’s next frame. Use this character when
creating a “continued on” jump line.
Page 92

INDESIGN CS3
User Guide
Previous Page Number Inserts the number of the page containing the story’s previous frame. Use this character
when creating a “continued from” jump line.
The page number automatically updates to reflect the current location of the next or previous frame of the story.
5 To prevent the story from being moved without its jump line, Shift-select the frames with the Selection tool, then
choose Object > Group.
6 If necessary, repeat this procedure to add more jump lines.
Note: If an unwanted character appears at the beginning of the page number (so that, for example, a jump line reads
“Cont’d on page A16” instead of“Cont’d onpage 16”),you probablyincluded a section prefix in the Numbering & Section
Options dialog box. Turn off or edit the prefix.
Text variables
Create and edit text variables
A text variable is an item you insert in your document that varies according to the context. For example, the Last
Page Number variable displays the page number of the last page of the document. If you add or remove pages, the
variable is updated accordingly.
85
InDesign includes several preset text variables thatyou can insert in your document. You can editthe format of these
variables, or you can create your own. Some variables, such as Running Header and Chapter Number, are especially
useful for adding to master pages to ensure consistent formatting and numbering. Other variables, such as Creation
Date and File Name, are useful for adding to the slug area for printing.
Note: Adding too much text to a variable may cause overset or compressed text. Variable text does not break across lines.
See also
“Create headers and footers” on page 82
Create or edit text variables
The options available for creating the variable depend on the type of variable you specify. For example, if you choose
the Chapter Number type, you can specify text to appear both before and after the number, and you can specify the
numbering style. You can create several different variables based on the same variable type. For example, you can
create one variable that displays “Chapter 1” and another that displays “Ch. 1.”
Similarly, if you choose the Running Header type, you can specify which style is used as the basis for the header, and
you can select options for deleting end punctuation and changing the case.
1 If you want to create text variables for use in all new documents you create, close all documents. Otherwise, the
text variables you create appear only in the current document.
2 Choose Type > Text Variables > Define.
3 Click New, or select an existing variable and click Edit.
4 Type a name for the variable, such as “Full Chapter” or “Running Title.”
5 From the Type menu, choose a variable type, specify the options for that type, and then click OK.
Page 93

INDESIGN CS3
User Guide
Different options are available depending on the variable type you select.
Text Before / Text After For all variable types (except Custom Text) you can specify text that will be added before or
afterthevariable.Forexample,youcanaddtheword“of”beforetheLastPageNumbervariableandthephrase“total
pages” after the variable tocreate an “of 12 total pages” effect. You can also paste text into the these boxes, but special
characters such as tabs and auto page numbers are stripped out. To insert special characters, click the triangle to the
right of the text box.
Style For all numbered variable types, youcan specify thenumbering style.If [Current Numbering Style] is selected,
the variable uses the same numbering style selected in the document’s Numbering & Section Options dialog box.
Variable types
Chapter Number
A variable created with the Chapter Number type inserts the chapter number. You can insert text before or after the
chapter number, and you can specify a numbering style.
If the document’s chapter number is set to continue from the previous document in the book, you may need to
update the book’s numbering in order for the appropriate chapter number to appear.
Creation Date, Modification Date, and Output Date
Creation Date inserts the date or time the document is first saved; Modification Date inserts the date or time the
documentwaslastsavedtodisk;OutputDateinsertsthedateortimethedocumentstartsaprintjob,exportstoPDF,
or packages the document. You can insert text before and after the date, and you can modify the date format for all
date variables.
86
Date Format You can type date formats directly into the Date Format box, or you can choose format options by
clicking the triangle to the right of the box. For example, the date format “MM/dd/yy” displays as 12/22/07. By
changing the format to “MMM. d, yyyy” the date will display as Dec. 22, 2007.
Date variables use the language applied to text. For example, the creation date may appear in Spanish text as “01
diciembre 2007” and in German as “01 Dezember 2007.”
Abbreviation
M Month number, no
MM Month number, leading
MMM Abbreviated month
MMMM Full month name August
d Day number, no leading
dd Day number,leading zero 05
E Weekday name, abbrevi-
EEEE Full weekday name Friday
Description Example
8
leading zero
08
zero
Aug
name
5
zero
Fri
ated
Page 94

INDESIGN CS3
User Guide
87
Abbreviation
yy or YY Year number, last two
y or YYYY Full year number 2007
G or GGGG Era, abbreviated or
h Hour, no leading zero 4
hh Hour, leading zero 04
H Hour, no leading zero,
HH Hour, leading zero,
m Minute, no leading zero 7
mm Minute leading zero 07
s second, no leading zero 7
ss second, leading zero 07
a AM or PM, two characters PM
z or zzzz Time zone, abbreviated
Description Example
digits
expanded
24-hour format
24-hour format
or expanded
07
AD or Anno Domini
16
16
PST or Pacific Standard Time
File Name
This variable inserts the name of the current file into the document. It’s commonly added to the slug area of the
documentforprintingorusedinheadersandfooters.InadditiontoTextBeforeandTextAfter,youcanchoosethe
following options.
Include Entire Folder Path Select to include the full folder path with the file name. The standard path conventions
for either Windows or Mac OS are used.
Include File Extension Select to include the file name extension.
The File Name variable is updated whenever you save the file with a new name or to a new location. The path or
extension does not appear in the document until it’s saved.
Last Page Number
The LastPage Number typeis useful for addingthe total number of pages in adocument to headers and footers using
thecommon“Page3of12”format.Inthiscase,thenumber12isgeneratedbytheLastPageNumber,andit’supdated
whenever pages are added or removed. You can insert text before or after the last page number, and you can specify
a numbering style. From the Scope menu, choose anoption todetermine whether the last page numberin the section
or document is used.
Note that the Last Page Number variable does not count the pages in the document.
Page 95

INDESIGN CS3
User Guide
Running Header (Paragraph or Character Style)
By default, the Running Headers variables insert the first or last occurrence (on the page) of the text to which the
specified style is applied. See “Create variables for running headers and footers” on page 88 for a description of
Running Header variable options.
Custom Text
This variable is commonly used for inserting placeholder text, or a text string that may need to be changed quickly.
Forexample,ifyou’reworkingonaprojectthatusesacodenameforacompany,youcancreateacustomtextvariable
forthecodename.Whenyouareabletousetherealcompanyname,youcansimplychangethevariabletoupdate
all the occurrences.
To insert special characters in a text variable, click the triangle to the right of the text box.
Create variables for running headers and footers
Bydefault,theRunningHeadervariablesinsertthefirstoccurrence(onthepage)ofthetexttowhichthespecified
style is applied.
1 If your content is not already formatted, create and apply the paragraph style or character style for the text you
want to appear in the header (such as a title or heading style).
2 Choose Type > Text Variables > Define.
3 Click New, and then type a name for the variable.
4 From the Type menu, choose Running Header (Paragraph Style) or Running Header (Character Style).
5 Specify the following options:
Style Choose the style to display in your header or footer.
88
Use Decide whether you want the first or last occurrence of the style that’s applied on the page. First On Page is
defined as the first paragraph (or character) that begins on a page, not one that begins on a previous page and ends
on the current page. If there is no occurrence of the style on the page, the previous occurrence of the applied style is
used. If there is no previous occurrence in the document, the variable is empty.
Delete End Punctuation If selected, the variable displays the text minus any end punctuation (periods, colons, excla-
mation marks, and question marks).
Change Case Select this option to change the case of the text that appears in the header or footer. For example, you
may want to use sentence case in your footer, even though the heading on the page appears in title case.
6 Click OK, and then click Done in the Text Variables dialog box.
You can now insert the variable in a header or footer you create on the master page.
See also
“Create headers and footers” on page 82
Insert text variables
1 Place the insertion point where you want the variable to appear.
2 Choose Type > Text Variables > Insert Variable, and then choose the variable you want to insert.
Page 96

INDESIGN CS3
User Guide
Thevariableappearsonthepageasifyou’dtypeditinthedocument.Forexample,theCreationDatevariablemight
appear as December 22, 2007. If you choose Type > Show Hidden Characters, the variable instance is surrounded by
a box using the current layer color.
Delete, convert, and import text variables
Use the Text Variables dialog box to delete, convert, and import text variables.
Delete text variables
If you want to delete an instance of text variable inserted in a document, simply select the variable and press
Backspace or Delete. You can also delete the variable itself. When you do so, you can decide how to replace the
variables inserted in the document.
1 Choose Type > Text Variables > Define.
2 Select the variable, and then click Delete.
3 Specify how the variable will be replaced by specifying a different variable, converting the variable instances to
text, or deleting the variable instances altogether.
Convert text variables to text
• To convert a single instance, select the text variable in the document window, and then choose Type > Text
Variables > Convert Variable To Text.
• To convert all instances of the text variable in the document, choose Type > Text Variables > Define, select the
variable, and then click Convert To Text.
89
Import text variables from another document
1
Choose Type > Text Variables > Define.
2 Click Load, and then double-click the document that has the variables you want to import.
3 In the Load Text Variables dialog box, make sure that a check mark appears next to the variables you want to
import. If any existing variable has the same name as one of the imported variables, choose one of the following
options under Conflict With Existing Text Variable, and then click OK:
Use Incoming Definition Overwrites the existing variable with the loaded variable and applies its new attributes to
all text in the current document that used the old variable. The definition of the incoming and existing variables are
displayed at the bottom of the Load Text Variables dialog box so that you can view a comparison.
Auto-Rename Renames the loaded variable.
4 Choose Done, and then click OK.
You can also copy variables to other documents when you synchronize a book file.
Page 97

Chapter 4: Working with documents
Open, save, and export Adobe InDesign CS3 content using a variety of different formats. If you’re switching to
InDesign from QuarkXPress or Adobe PageMaker, learn the best way to convert your files.
Working with files and templates
Recommended workflow for InDesign documents
You can improve performance and prevent many problems by establishing a good workflow to use with Adobe
InDesign.
Maintain a clean computer system
Over time, changes occur to software and hardware that can lead to performance loss and system problems. Defragmenting the hard disk, removing older versions of software, updating device drivers, optimizing memory, running
virusprotectionutilities,andperformingothermaintenancetaskscanpreventapplicationsandfilesfrombecoming
damaged. Performing these tasks regularly helps ensure that InDesign opens, displays, and prints documents as
expected.
90
Create a project folder
Before you begin a project, determine which files you’ll need and how you’ll store them. Create a folder for storing
your document and its linked files. InDesign maintains links to files you place in a document, but if a link is broken,
InDesignlooksforthefileinthedocument’sfolder.Storingadocumentanditslinkedfilesinthesamefoldermakes
it easy to move them from one computer to another. Storing files in one folder also ensures that InDesign finds the
original graphics when printing a document. If InDesign cannot locate a linked graphic, it won’t reflect changes you
make to the original graphic, and it may print the graphic poorly or not at all.
If your project consists of multiple documents (for example, chapters in a book), you may find it useful to create a
project folder that contains a folder for each document and its linked files.
Consider using a template
Use a template if you frequently create similar projects. Templates let you create consistent documents more quickly
while protecting the original file. For example, if you create a monthly newsletter, your template might include ruler
guides, page numbers, the newsletter masthead, and styles you want to use in each issue. (See “Use document
templates” on page 94.)
Open documents locally
Before you open a document storedon a networkvolume or onremovable media, copythe document and any linked
graphics to your local hard disk. The slower access time and data transfer rate of a network volume or removable
media can cause data to become lost or corrupted, possibly damaging the document.
Solve problems before converting a file
Damaged Adobe PageMaker or QuarkXPress® files usually remain damaged when opened in InDesign. If an error
or other unexpected behavior occurs with a converted file, open the original file in the source application and
troubleshoot it for damage.
Page 98

INDESIGN CS3
User Guide
Save documents
Save documents frequently, and create backup copies of important files. You can clear unnecessary data from a
document by using the Save As command. When you use the Save command, InDesign appends new information
to the document but doesn’t remove outdated data, such as information about a deleted graphic. When you use the
Save As command, however, InDesign completely rewrites the document, including only information about objects
and pages currently in the document. A document that contains only necessary data occupies less hard drive space
and redraws and prints more quickly.
Practice good design habits
• Create styles in a document. Creating styles with no documents open can cause duplicate styles to appear when
you create a new document. To share styles in documents, save the styles and load them.
• Useappropriatefonts.Whenchoosingfontsforadocument,considerhowyouintendtoformatandprintthetext.
InDesign works best with Microsoft® OpenType®, Type 1 (also called PostScript), and TrueType fonts. Damaged
or poorlyconstructed fontscan damage an InDesign document or cause itto print with unexpected results, so use
reliable fonts created by established font vendors. If you workwith a service bureau, find out its font requirements.
• Avoid using too many text frames. Use as few text frames as possible to keep the document file size smaller and
the layout easier to manipulate.
Be smart with art
• Use the appropriate graphics file format. When you create graphics for a project, consider how you plan to print
the document. For best results, use native Photoshop and Illustrator files rather than converting them to EPS or
TIFF. If you intend to print the document at a service bureau, ask the service bureau which graphic formats work
best with the output device it uses. The service bureau can also advise you on the optimal resolution for images.
• Store graphics externally. When you import a graphic file, InDesign creates a link to the graphic by default.
Linking helps minimize the filesize of the document and improves the performance of InDesign. When you print
the document,the original graphic filemust be available and linked. If InDesign can’t find the original, the graphic
may print as a low resolution preview or as a gray box.
• In some cases, itworks betterto transform (for example,skew or rotate) graphicsbefore placingthem in InDesign.
When you print a graphic that istransformed in InDesign, InDesign sendsthe graphic to the printerin its untransformed state and then appends the transformation instructions to it. This process may cause longer print times
and require more printer memory to perform the transformation.
91
Verify links and fonts before you print
To ensure that a document prints correctly, verify that all links are intact and all fonts are available. A link becomes
broken if youdelete, move, or rename the original graphic. Use the Preflight and Package features before handing off
files to a service bureau.
For a video on creating documents, see www.adobe.com/go/vid0068.
Open InDesign documents
In general, you open document and template files the same way you do in other programs. When you open an
InDesign template, it opens as a new, untitled document by default. In Windows, document files use the extension
.indd, template files use the extension .indt, library files use the extension .indl, and book files use the extension
.indb.
Page 99

INDESIGN CS3
User Guide
You can also use the File > Open command to open files from InDesign 1.x and later (including Asian-language
versions), InDesign Interchange (.inx) files, Adobe PageMaker 6.0 and later, QuarkXPress 3.3 and 4.1, and QuarkXPress Passport 4.1. In addition, other software vendors may make plug-in software that lets you open other file
formats.
To view additional information about an InDesign document, hold down Ctrl+Shift and choose Help > About
InDesign (Windows) or hold down Command+Shift (Mac OS) and choose InDesign > About InDesign.
1 Choose File > Open and select one or more documents.
2 Do one of the following, and then click Open:
• Select Normal (Windows) or Open Normal (Mac OS) to open the original document or a copy of a template.
• Select Original (Windows) or Open Original (Mac OS) to open an original document or template.
• Select Copy (Windows) or Open Copy (Mac OS) to open a copy of a document or template.
3 If a warning message appears telling you that the color settings in the document are different from the color
settings in the application, click OK in the Embedded Profile Mismatch dialog box. When the Profile or Policy
Mismatch dialog box appears, select an option, and click OK. For more information, see “About missing and
mismatched color profiles” on page 456.
Note: Warning messages are off by default, but you can show warnings if you change the default settings in the Color
Settings dialog box (Edit > Color Settings.)
92
4 If a warning message appears telling you that the document contains missing fonts, do one of the following:
• Click OK. InDesign will automatically format the text with a substitute.
• Click Find Font to search for and list fonts used throughout your document.
For more information on finding missing fonts, see “Find and change fonts” on page 145.
5 If a warning message appears telling you that the document contains missing or modified links, do one of the
following:
• Click Fix Links Automatically to let InDesign locate the missing files or give you an opportunity to locate them.
• Click Don’t Fix to defer fixing the links until later. You can then fix the links yourself at any time using the Links
panel.
If you’re working with a managed file from an Adobe Version Cue® project, the document title bar provides
additional information about the status of the file.
See also
“Save backwards to previous InDesign versions” on page 96
“Add documents to a book file” on page 274
“Color management policy options” on page 457
Page 100

INDESIGN CS3
User Guide
Choosing word lists when opening documents
Whenopeningadocument,youmayseeanalertmessageaskingifyouwanttousethewordlistinthedocumentor
an exception word list in the user dictionary. An exception word list includes words that were added to the User
Dictionary while the document was worked on. If you know which exception word list you use, click its button. If
you’re not sure, click either button, choose Edit > Spelling > Dictionary to inspect the word lists, and then, if
necessary,chooseEdit>Preferences>Dictionary(Windows)orInDesign>Preferences>Dictionary(MacOS)to
reset the word list used for composition.
See also
“Hyphenation and spelling dictionaries” on page 155
Convert earlier versions of InDesign documents
❖ To convert previous versions of InDesign documents to the current version, choose File > Open and open the file.
Keep in mind the following points:
• If you used third-party plug-ins to create an earlier version of a document, check with the manufacturer to make
sure that they are installed correctly for and are compatible with InDesign CS3 before you convert the document.
(See “Configure plug-ins” on page 591.)
• Whenyouconvertadocument,youmayseeanalertmessageaskingifyouwanttousetheexceptionwordlistin
the user dictionary or theone inthe document. For information about this alert message, see“Choosingword lists
when opening documents” on page 93.
• Library files created in earlier versions of InDesign will open and convert in InDesign CS3, even if the library is
locked. You have to specify a name and location for the converted library files; the default naming convention is
filename-X.indl.
• InDesign CS2 can’t open InDesign CS3 documents directly. You must update InDesign CS2 with special plug-ins
and choose File > Export in InDesign CS3 to save documents in INX format before opening them in previous
versions. (See “Save backwards to previous InDesign versions” on page 96.)
93
About Adobe Bridge
Adobe Bridge is a cross-platformapplication included with Adobe Creative Suite 3 componentsthat helpsyou locate,
organize, and browse the assets you need to create print, web, video, and audio content. You can start Bridge from
any Creative Suite component (except Acrobat® 8), and use it to access both Adobe and non-Adobe asset types.
From Adobe Bridge, you can:
• Manage image, footage, and audio files: Preview, search, sort, and process files in Bridge without opening
individual applications. You can also edit metadata for files, and use Bridge to place files into your documents,
projects, or compositions.
• Drag assets from Bridge into the InDesign document window, or drag assets from the document window into
Bridge to create snippets.
• Work with Adobe Version Cue®-managed assets.
• Perform automated tasks, such as batch commands.
• Synchronize color settings across color-managed Creative Suite components.
• Start a real-time web conference to share your desktop and review documents.
 Loading...