

Page 1

Chapter 1:
User Guide
Copyright
Page 2

© 2005 Adobe Systems Incorporated. All rights reserved.
Adobe InCopy® CS2 User Guide for Windows® and Macintosh
If this guide is distributed with software that includes an end user agreement, this guide, as well as the software described in it, is furnished under license and may be used or
copied only in accordance with the terms of such license. Except as permitted by any such license, no part of this guide may be reproduced, stored in a retrieval system, or transmitted, in any form or by any means, electronic, mechanical, recording, or other wise, without the prior written permission of Adobe Systems Incorporated.Pleasenotethatthe
content in this guide is protected under copyright law even if it is not distributed with software that includes an end user license agreement.
Thecontent of this guideisfurnished forinformational useonly, is subjecttochangewithout notice,and should notbeconstrued as acommitmentbyAdobe Systems Incorporated. Adobe Systems Incorporated assumes no responsibility or liability for any errors or inaccuracies that may appear in the informational content contained in this guide.
Please remember that existing artwork or images that you may want to include in your project may be protected under copyright law. The unauthorized incorporation of such
material into your new work could be a violation of the rights of the copyright owner. Please be sure to obtain any permission required from the copyright owner.
Any references to company names in sample templates are for demonstration purposes only and are not intended to refer to any actual organization.
Adobe, the Adobe logo, Acrobat, Adobe Garamond, GoLive, Illustrator, InCopy, InDesign, the OpenType logo, Photoshop, PostScript, Reader, Version Cue, and XMP are either
registered trademarks or trademarks of Adobe Systems Incorporated in the United States and/or other countries.
Apple, Mac, Mac OS, and Macintosh are trademarks of Apple Computer, Inc. registered in the U.S. and other countries. Microsoft, OpenType, and Windows are trademarks of
Microsoft Corporation registered in the U.S and/or other countries. Pantone, Inc. is the copyright owner of color data and/or software which are licensed to Adobe Systems Incorporated to distribute for use only in combination with Adobe InDesign. PANTONE Color Data and/or Software shall not be copied onto another disk or into memory unless as
part of the execution of Adobe InDesign.
THE PROXIMITY/MERRIAM-WEBSTER DATABASE, © 1990, Merriam-Webster Inc., © 1990 - All rights reserved, Proximity Technology Inc., THE
PROXIMITY/FRANKLIN ELECTRONIC PUBLISHERS INC. DATABASE, © 1994, Franklin Electronic Publishers Inc., © 1994 All rights reserved, Proximity Technology Inc.
THE PROXIMIT Y/FRANKLIN ELECTRONIC PUBLISHERS INC. DATABASE, © 1994, Franklin Electronic Publishers Inc., © 1997 - All rights reserved, Proximity Technology
Inc. THE PROXIMITY/WILLIAM COLLINS SONS & CO. LTD. DATABASE, © 1990, William Collins Sons & Co. Ltd., © 1990 - All rights reserved, Proximity TechnologyInc.
THE PROXIMITY/WILLIAM COLLINS SONS & CO. LTD. DATABASE, © 1990, William Collins Sons & Co. Ltd., © 1997 - All rights reserved, Proximity Technology Inc. THE
PROXIMITY/WILLIAM COLLINS SONS & CO. LTD. DATABASE, © 1984, William Collins Sons & Co. Ltd., © 1988 - All rights reserved, Proximity Technology Inc. THE
PROXIMITY/DR. LLUIS DE YZAGUIRRE I MAURA DATABASE, © 1991, Dr. Lluis de Yzaguirre i Maura, © 1991 All rights reserved, Proximity Technology Inc. THE
PROXIMITY/MUNKSGAARD INTERNATIONAL PUBLISHERS LTD. DATABASE, © 1990, Munksgaard International Publishers Ltd., © 1990 - All rights reserved, Proximity
Technology Inc. THE PROXIMITY/VAN DALE LEXICOGRAFIE BV DATABASE, © 1990, Van Dale Lexicografie bv, © 1990 - All rights reserved, Proximity Technology Inc.
THE PROXIMITY/VAN DALE LEXICOGRAFIE BV DATABASE, © 1995, Van Dale Lexicografie bv, © 1996 - All rights reserved, Proximity Technology Inc. THE
PROXIMITY/VAN DALE LEXICOGRAFIE BV DATABASE, © 1997, Van Dale Lexicografie bv, © 1997 - All rights reserved, Proximity Technology Inc. THE PROXIMITY/IDE
A.S. DATABASE, © 1989, IDE a.s., © 1989 - All rights reser ved, Proximity Technology Inc. THE PROXIMITY/IDE A.S. DATABASE, © 1990, IDE a.s., ©1990 - All rights reserved,
Proximity Technology Inc. THE PROXIMITY/HACHETTE DATABASE, © 1992, Hachette, © 1992 - All rights reserved, Proximity Technology Inc. THE
PROXIMITY/EDITIONS FERNAND NATHAN DATABASE, © 1984, Editions Fernand Nathan, © 1989 - All rights reserved, Proximity Technology Inc. THE
PROXIMITY/TEXT & SATZ DATENTECHNIK DATABASE, © 1991, Text & Satz Datentechnik, © 1991 - All rights reserved, Proximity Technology Inc. THE
PROXIMITY/BERTELSMANN LEXICON VERLANG DATABASE, © 1997, Bertelsmann Lexicon Verlang, © 1997 - All rights reserved, Proximity Technology Inc. THE
PROXIMITY/WILLIAM COLLINS SONS & CO. LTD./BERTELSMANN LEXICON VERLANG DATABASE, © 1986/1997, William Collins Sons & Co. Ltd./Bertelsmann
Lexicon Verlang, © 1997 - All rights reserved, Proximity Technology Inc. THE PROXIMITY/WILLIAM COLLINS SONS & CO. LTD./BERTELSMANN LEXICON VERLANG
DATABASE, © 1990/1997, William Collins Sons & Co. Ltd./ Bertelsmann Lexicon Verlang, © 1997 - All rights reserved, Proximity Technology Inc. THE PROXIMITY/S.
FISCHER VERLAG DATABASE, © 1983, S. Fischer Verlag, © 1997 - All rights reserved, Proximity Technology Inc. THE PROXIMITY/ZANICHELLI DATABASE, © 1989,
Zanichelli, © 1989 - All rights reserved, Proximity Technology Inc. THE PROXIMITY/MORPHOLOGIC INC. DATABASE, © 1997, MorphoLogic Inc., © 1997 - All rights
reserved, Proximity Technology Inc. THE PROXIMITY/RUSSICON COMPANY LTD. DATABASE, © 1993-1995, Russicon Company Ltd., © 1995 - All rights reserved,
Proximity Technology Inc. THE PROXIMITY/ESPASSA-CALPE DATABASE, © 1990, Espassa-Calpe, © 1990 - All rights reserved, Proximity Tec hn ology In c.
Color-database derived from Sample Books © Dainippon Ink and Chemicals, Inc., licensed to Adobe Systems Incorporated. Portions © Eastman Kodak Company, 1999 and used
under license. All rights reserved. Portions © The Focoltone Colour Systems, and used under license. This product includes software developed by the Apache Software
Foundation (
Notice to U.S. government end users. The software and documentation are “commercial items.” Consistent with 48 C.F.R. §12.212 or 48 C.F.R. §§227.7202-1 through 227.72024, as applicable, the commercial computer software and commercial computer software documentation are being licensed to U.S. government end users (A) only as commercial
items and (B) with only those rights as are granted to all other end users pursuant to the terms and conditions set forth in the Adobe standard commercial agreement for this
software. Unpublished rights reserved under the copyright laws of the United States.
Adobe Systems Incorporated, 345 Park Avenue, San Jose, California 95110-2704, USA
www.apache.org). Portions © 1984-1998 Faircom Corporation. All rights reserved. Portions © by Trumatch, Inc. and used under license.
Page 3

Contents
Chapter 1: Getting started
Installation and registration . . . . . . . . . . . . . . . . . . . . . . . . . . . . . . . . . . . . . . . . . 1
Adobe Help Center . . . . . . . . . . . . . . . . . . . . . . . . . . . . . . . . . . . . . . . . . . . . . . . . . 2
Using Help . . . . . . . . . . . . . . . . . . . . . . . . . . . . . . . . . . . . . . . . . . . . . . . . . . . . . . . . . 3
Tips and training . . . . . . . . . . . . . . . . . . . . . . . . . . . . . . . . . . . . . . . . . . . . . . . . . . . . 6
What’s new . . . . . . . . . . . . . . . . . . . . . . . . . . . . . . . . . . . . . . . . . . . . . . . . . . . . . . . . 10
Chapter 2: Work area
Work area basics . . . . . . . . . . . . . . . . . . . . . . . . . . . . . . . . . . . . . . . . . . . . . . . . . . . 12
Customizing preferences and defaults . . . . . . . . . . . . . . . . . . . . . . . . . . . . . . 17
Viewing stories . . . . . . . . . . . . . . . . . . . . . . . . . . . . . . . . . . . . . . . . . . . . . . . . . . . . 18
Viewing documents . . . . . . . . . . . . . . . . . . . . . . . . . . . . . . . . . . . . . . . . . . . . . . . 24
Moving through a story . . . . . . . . . . . . . . . . . . . . . . . . . . . . . . . . . . . . . . . . . . . . 25
Recovery and undo . . . . . . . . . . . . . . . . . . . . . . . . . . . . . . . . . . . . . . . . . . . . . . . . 27
iii
Chapter 3: Adobe Version Cue
Using Adobe Version Cue . . . . . . . . . . . . . . . . . . . . . . . . . . . . . . . . . . . . . . . . . . 29
Working with Version Cue projects . . . . . . . . . . . . . . . . . . . . . . . . . . . . . . . . . 34
Working with files in Version Cue . . . . . . . . . . . . . . . . . . . . . . . . . . . . . . . . . . . 42
Disconnecting from projects . . . . . . . . . . . . . . . . . . . . . . . . . . . . . . . . . . . . . . . 53
Deleting files, folders, and projects . . . . . . . . . . . . . . . . . . . . . . . . . . . . . . . . . 54
Version Cue versions . . . . . . . . . . . . . . . . . . . . . . . . . . . . . . . . . . . . . . . . . . . . . . . 58
Version Cue alternates . . . . . . . . . . . . . . . . . . . . . . . . . . . . . . . . . . . . . . . . . . . . . 63
Editing and synchronizing offline files . . . . . . . . . . . . . . . . . . . . . . . . . . . . . . 68
The Version Cue Administration utility . . . . . . . . . . . . . . . . . . . . . . . . . . . . . . 70
Creating and editing projects in Version Cue Administration . . . . . . . . 76
Backing up and restoring from Version Cue Administration . . . . . . . . . 81
Working with users and privileges . . . . . . . . . . . . . . . . . . . . . . . . . . . . . . . . . 83
Viewing logs, reports, and workspace information . . . . . . . . . . . . . . . . . . 87
Version Cue PDF reviews . . . . . . . . . . . . . . . . . . . . . . . . . . . . . . . . . . . . . . . . . . . 88
Chapter 4: Working with InCopy documents
Using an InCopy workflow . . . . . . . . . . . . . . . . . . . . . . . . . . . . . . . . . . . . . . . . . 93
Working with stand-alone documents . . . . . . . . . . . . . . . . . . . . . . . . . . . . . . 97
Saving and exporting . . . . . . . . . . . . . . . . . . . . . . . . . . . . . . . . . . . . . . . . . . . . . . 99
Working with frames, grids, rulers, and guides . . . . . . . . . . . . . . . . . . . . . 101
Using layers . . . . . . . . . . . . . . . . . . . . . . . . . . . . . . . . . . . . . . . . . . . . . . . . . . . . . . 107
Importing graphics . . . . . . . . . . . . . . . . . . . . . . . . . . . . . . . . . . . . . . . . . . . . . . . 108
Importing options . . . . . . . . . . . . . . . . . . . . . . . . . . . . . . . . . . . . . . . . . . . . . . . . 112
Transforming graphics . . . . . . . . . . . . . . . . . . . . . . . . . . . . . . . . . . . . . . . . . . . .116
Controlling how graphics display . . . . . . . . . . . . . . . . . . . . . . . . . . . . . . . . . . 118
Including metadata in a story . . . . . . . . . . . . . . . . . . . . . . . . . . . . . . . . . . . . . 121
Page 4

Chapter 5: Sharing content between InCopy and InDesign
Understanding a basic managed-file workflow . . . . . . . . . . . . . . . . . . . . . 124
Getting started with shared content . . . . . . . . . . . . . . . . . . . . . . . . . . . . . . . 126
Shared content . . . . . . . . . . . . . . . . . . . . . . . . . . . . . . . . . . . . . . . . . . . . . . . . . . . 134
Wrapping up your work session . . . . . . . . . . . . . . . . . . . . . . . . . . . . . . . . . . . 138
Chapter 6: Text
Adding text . . . . . . . . . . . . . . . . . . . . . . . . . . . . . . . . . . . . . . . . . . . . . . . . . . . . . . 145
Editing text . . . . . . . . . . . . . . . . . . . . . . . . . . . . . . . . . . . . . . . . . . . . . . . . . . . . . . . 149
Using glyphs and special characters . . . . . . . . . . . . . . . . . . . . . . . . . . . . . . . 153
Finding and changing text . . . . . . . . . . . . . . . . . . . . . . . . . . . . . . . . . . . . . . . . 158
Using text macros . . . . . . . . . . . . . . . . . . . . . . . . . . . . . . . . . . . . . . . . . . . . . . . . 163
Tracking and reviewing changes . . . . . . . . . . . . . . . . . . . . . . . . . . . . . . . . . . 165
Using editorial notes . . . . . . . . . . . . . . . . . . . . . . . . . . . . . . . . . . . . . . . . . . . . . . 168
Creating footnotes . . . . . . . . . . . . . . . . . . . . . . . . . . . . . . . . . . . . . . . . . . . . . . . . 174
Copyfitting text . . . . . . . . . . . . . . . . . . . . . . . . . . . . . . . . . . . . . . . . . . . . . . . . . . . 177
Checking spelling . . . . . . . . . . . . . . . . . . . . . . . . . . . . . . . . . . . . . . . . . . . . . . . . . 179
Using the thesaurus . . . . . . . . . . . . . . . . . . . . . . . . . . . . . . . . . . . . . . . . . . . . . . 185
iv
Chapter 7: Styles
Creating, editing, and deleting styles . . . . . . . . . . . . . . . . . . . . . . . . . . . . . . 187
Applying styles . . . . . . . . . . . . . . . . . . . . . . . . . . . . . . . . . . . . . . . . . . . . . . . . . . . 191
Drop caps and nested styles . . . . . . . . . . . . . . . . . . . . . . . . . . . . . . . . . . . . . . 195
Chapter 8: Setting type
Fonts . . . . . . . . . . . . . . . . . . . . . . . . . . . . . . . . . . . . . . . . . . . . . . . . . . . . . . . . . . . . . 200
Leading . . . . . . . . . . . . . . . . . . . . . . . . . . . . . . . . . . . . . . . . . . . . . . . . . . . . . . . . . . 204
Kerning and tracking . . . . . . . . . . . . . . . . . . . . . . . . . . . . . . . . . . . . . . . . . . . . .205
Formatting characters . . . . . . . . . . . . . . . . . . . . . . . . . . . . . . . . . . . . . . . . . . . . 208
Changing the case of type . . . . . . . . . . . . . . . . . . . . . . . . . . . . . . . . . . . . . . . . 213
Formatting paragraphs . . . . . . . . . . . . . . . . . . . . . . . . . . . . . . . . . . . . . . . . . . . 214
Aligning text . . . . . . . . . . . . . . . . . . . . . . . . . . . . . . . . . . . . . . . . . . . . . . . . . . . . . 218
Setting indents . . . . . . . . . . . . . . . . . . . . . . . . . . . . . . . . . . . . . . . . . . . . . . . . . . . 220
Setting tabs . . . . . . . . . . . . . . . . . . . . . . . . . . . . . . . . . . . . . . . . . . . . . . . . . . . . . . 223
Using bullets and numbering . . . . . . . . . . . . . . . . . . . . . . . . . . . . . . . . . . . . . 227
Adjusting hyphenation and justification . . . . . . . . . . . . . . . . . . . . . . . . . . . 232
Composing text . . . . . . . . . . . . . . . . . . . . . . . . . . . . . . . . . . . . . . . . . . . . . . . . . . 236
Chapter 9: Tables
Creating tables in InCopy . . . . . . . . . . . . . . . . . . . . . . . . . . . . . . . . . . . . . . . . . 238
Selecting table cells, rows, and columns . . . . . . . . . . . . . . . . . . . . . . . . . . . 242
Editing tables . . . . . . . . . . . . . . . . . . . . . . . . . . . . . . . . . . . . . . . . . . . . . . . . . . . . . 243
Formatting tables . . . . . . . . . . . . . . . . . . . . . . . . . . . . . . . . . . . . . . . . . . . . . . . . . 246
Adding headers and footers to a table . . . . . . . . . . . . . . . . . . . . . . . . . . . . . 251
Adding strokes and fills to tables . . . . . . . . . . . . . . . . . . . . . . . . . . . . . . . . . . 252
Page 5

Chapter 10: Printing
Setting up a printer . . . . . . . . . . . . . . . . . . . . . . . . . . . . . . . . . . . . . . . . . . . . . . . 256
Printing stories . . . . . . . . . . . . . . . . . . . . . . . . . . . . . . . . . . . . . . . . . . . . . . . . . . . 257
Chapter 11: Creating Adobe PDF files
Understanding Adobe PDF . . . . . . . . . . . . . . . . . . . . . . . . . . . . . . . . . . . . . . . 261
Exporting to Adobe PDF . . . . . . . . . . . . . . . . . . . . . . . . . . . . . . . . . . . . . . . . . . 262
Chapter 12: Creating XML Files
Opening, saving, and exporting XML files . . . . . . . . . . . . . . . . . . . . . . . . . . 266
XML tags . . . . . . . . . . . . . . . . . . . . . . . . . . . . . . . . . . . . . . . . . . . . . . . . . . . . . . . . . 268
Structuring documents for XML . . . . . . . . . . . . . . . . . . . . . . . . . . . . . . . . . . . 274
Validating XML content . . . . . . . . . . . . . . . . . . . . . . . . . . . . . . . . . . . . . . . . . . . 279
Chapter 13: Keyboard shortcuts
Customizing keyboard shortcuts . . . . . . . . . . . . . . . . . . . . . . . . . . . . . . . . . . 281
Default keyboard shortcuts . . . . . . . . . . . . . . . . . . . . . . . . . . . . . . . . . . . . . . . 282
Index . . . . . . . . . . . . . . . . . . . . . . . . . . . . . . . . . . . . . . . . . . . . . . . . . . . . . . . . . . . . 290
v
Page 6

Chapter 1: Getting started
Installation and registration
To install
1 Close any Adobe® applications that are open.
2 Insert the product CD into your computer’s CD drive.
3 Double-click the CD icon, and then follow the on-screen instructions.
After the installation, you may be prompted to activate your copy of the product. (See “To activate” on page 1.)
For more detailed instructions about installing the product, see the How To Install file on the product CD. For
instructions about uninstalling the product, see the How To Uninstall file on the product CD.
To activate
Activation is a simple, anonymous process you must complete within 30 days of installing the product. Activation
allows you to continue using the product, and it helps prevent casual copying of the product onto more computers
than the license agreement allows. To learn more about activation, visit the Adobe website at
www.adobe.com/activation/main.html.
1
1 Start the product to access the Activation dialog box. (If you’ve just installed Adobe Creative Suite or Adobe
Photoshop®, the Activation dialog box appears automatically.)
2 Follow the on-screen instructions.
Important: If you intend to install the product on a different computer, you must first transfer the activation to that
computer. To transfer an activation, choose Help > Transfer Activation.
For more detailed instructions about activating the product and transferring an activation, see the How To Install file
on the product CD.
To register
Register your Adobe product to receive complimentary support on installation and product defects and notifications
about product updates. Registering your product also gives you access to the wealth of tips, tricks, and tutorials in
Adobe Studio® and access to Adobe Studio Exchange, an online community where users download and share
thousands of free actions, plug-ins, and other content for use with Adobe products. Adobe Studio is available in
English, French, German, and Japanese. Find it from the home page of the Adobe website.
❖ Do one of the following:
• Install and activate the software to access the Registration dialog box, and then follow the on-screen instructions.
An active Internet connection is required.
• Register at any time by choosing Help > Registration.
Page 7
ADOBE INCOPY CS2
User Guide
See also
“Adobe Studio” on page 7
“Extras” on page 9
Adobe Help Center
About Adobe Help Center
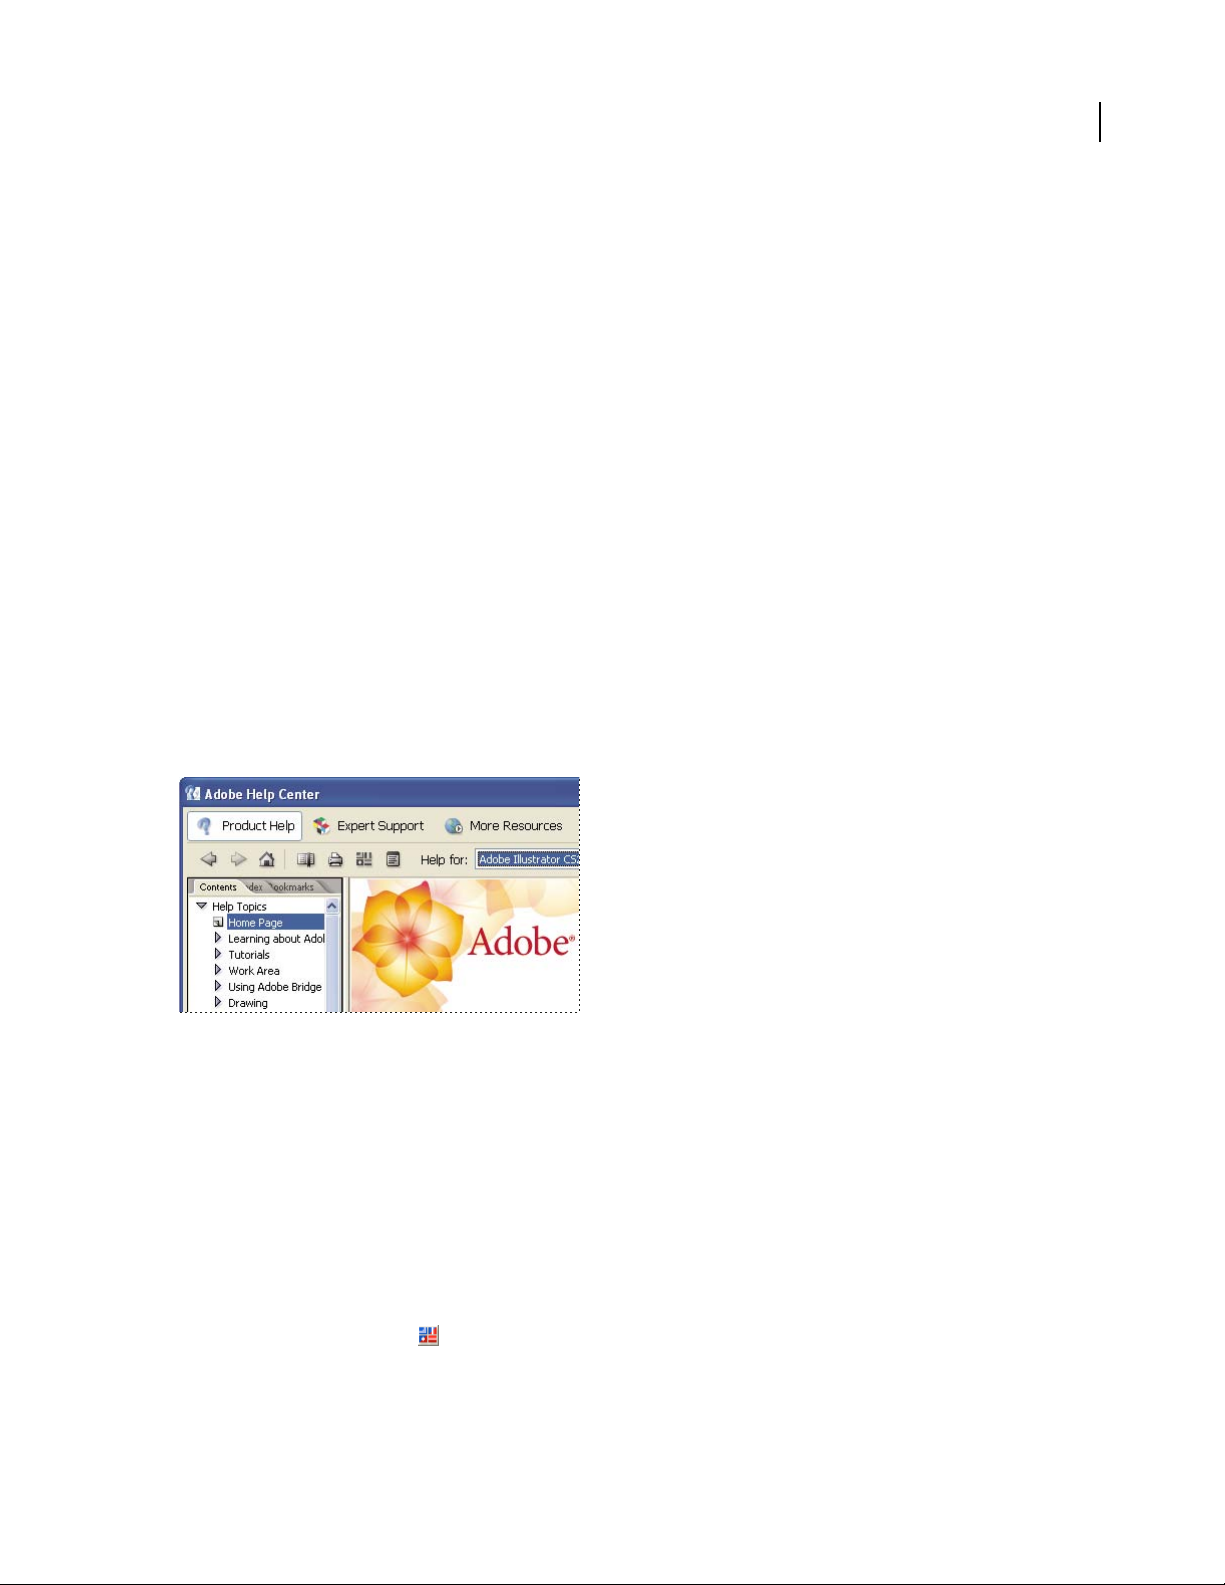
Adobe Help Center is a free, downloadable application that includes three primary features.
Product Help Provides Help topics for Adobe Photoshop Elements and Adobe CS2 products installed on your
system. (If none of these products are installed, Help topics for them aren’t available.) Help topics are updated periodically and can be downloaded through Adobe Help Center preferences.
Expert Support Provides information about Adobe Expert Support plans and lets you store details about plans
you’ve purchased. If you have an active support plan, you can also use the Expert Support section to submit web
cases—questions sent to Adobe support professionals over the web. To access links in the Expert Support section,
you must have an active Internet connection.
2
More Resources Provides easy access to the extensive resources on Adobe.com, including support pages, user
forums, tips and tutorials, and training. You can also use this area to store contact information for friends, colleagues,
or support professionals, or even websites you turn to for inspiration or troubleshooting information.
Product Help, Expert Support, and More Resources in Adobe Help Center
See also
“Using Help” on page 3
“To search Help topics” on page 5
“To navigate Help” on page 4
To check for updates
Adobe periodically provides updates to software and to topics in Adobe Help Center. You can easily obtain these
updates through Adobe Help Center. An active Internet connection is required.
1 Click the Preferences button .
2 In the Preferences dialog box, click Check For Updates. If updates are available, follow the on-screen directions to
download and save them.
Page 8

ADOBE INCOPY CS2
User Guide
To set Adobe Help Center preferences
1 Click the Preferences button . Set any of the following options:
Region Specifies your geographical location. Changing this option may affect which services are available to you.
Language Specifies the language in which Expert Support content is displayed.
Display Renewal Reminders For Expert Support Contracts Displays reminder screens when your Expert Support
plan has almost expired. Deselect this option if you’d like to turn off these reminders.
Enable Auto Login For Web Case Submission Allows youtosubmitsupport questionsoverthe web. This option is
available only if you have an active Expert Support plan.
User Interface Language Specifies the language in which Adobe Help Center interface text is displayed.
Check For Updates Searches for new updates to software and Help topics as they become available from Adobe.
Network Administrators Displays options for network administration.
2 Click OK.
To display More Resources
The More Resources section in Adobe Help Center provides easy access to some of the content and services available
from the Adobe website, including support, training, and tutorials.
3
❖ To display this section, click More Resources.
To add contact information in More Resources
1 Click More Resources, and then click Personal Contacts.
2 Do any of the following:
• To add a contact, click New, type the contact information you want to save, and click OK.
• To edit a contact, click a contact in the list, click Edit, make changes to the information, and click OK.
• To delete a contact, click a contact in the list, and then click Delete. To confirm the deletion, click Yes when
prompted, or click No to cancel.
Using Help
Using Help
The complete documentation for using your Adobe product is available in Help, a browser-based system you can
access through Adobe Help Center. Help topics are updated periodically, so you can always be sure to have the most
recent information available. For more information, see “To check for updates” on page 2.
Important: Adobe Help systems include all of the information in the printed user guides, plus additional information
not included in print. The Resources and Extras CD included with the software also includes a PDF version of the
complete Help content, optimized for printing.
Page 9
A B C D E
ADOBE INCOPY CS2
User Guide
4
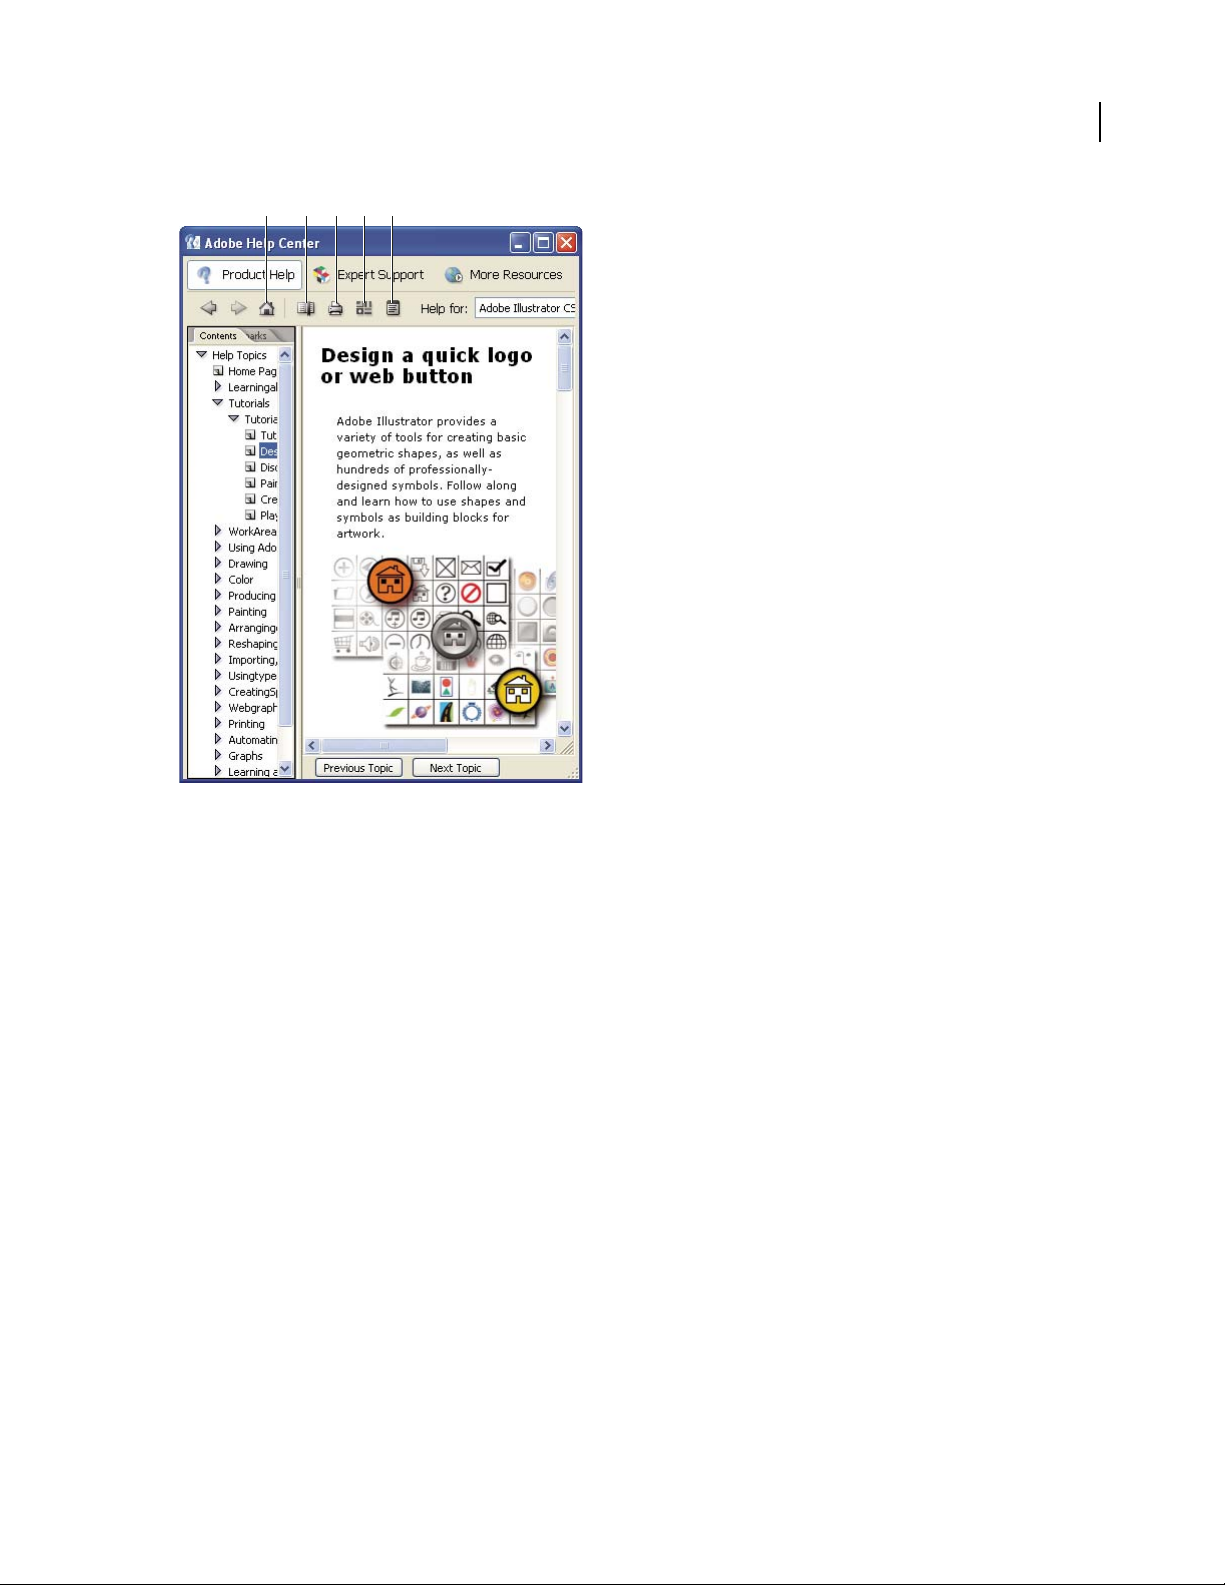
Product Help section of Adobe Help Center
A. Returns you to Help home page B. Adds bookmark for current topic C. Prints contents of right pane D. Opens Preferences dialog
box E. Opens About Adobe Help Center window
See also
“To navigate Help” on page 4
“To search Help topics” on page 5
To navigate Help
❖ Do any of the following:
• To view Help for a product, choose the product name from the Help For menu. (To view only topics that apply
across all Creative Suite products, choose Adobe Creative Suite.)
• To expand or collapse a section, click the blue triangle to the left of the section name.
• To display a topic , click its title.
See also
“To use bookmarks” on page 6
Page 10
ADOBE INCOPY CS2
User Guide
To search Help topics
Search using words or phrases to quickly find topics. You can search Help for one product or for all Adobe products
you’ve installed. If you find a topic that you may want to view again, bookmark it for quick retrieval.
1 In Adobe Help Center, click Product Help.
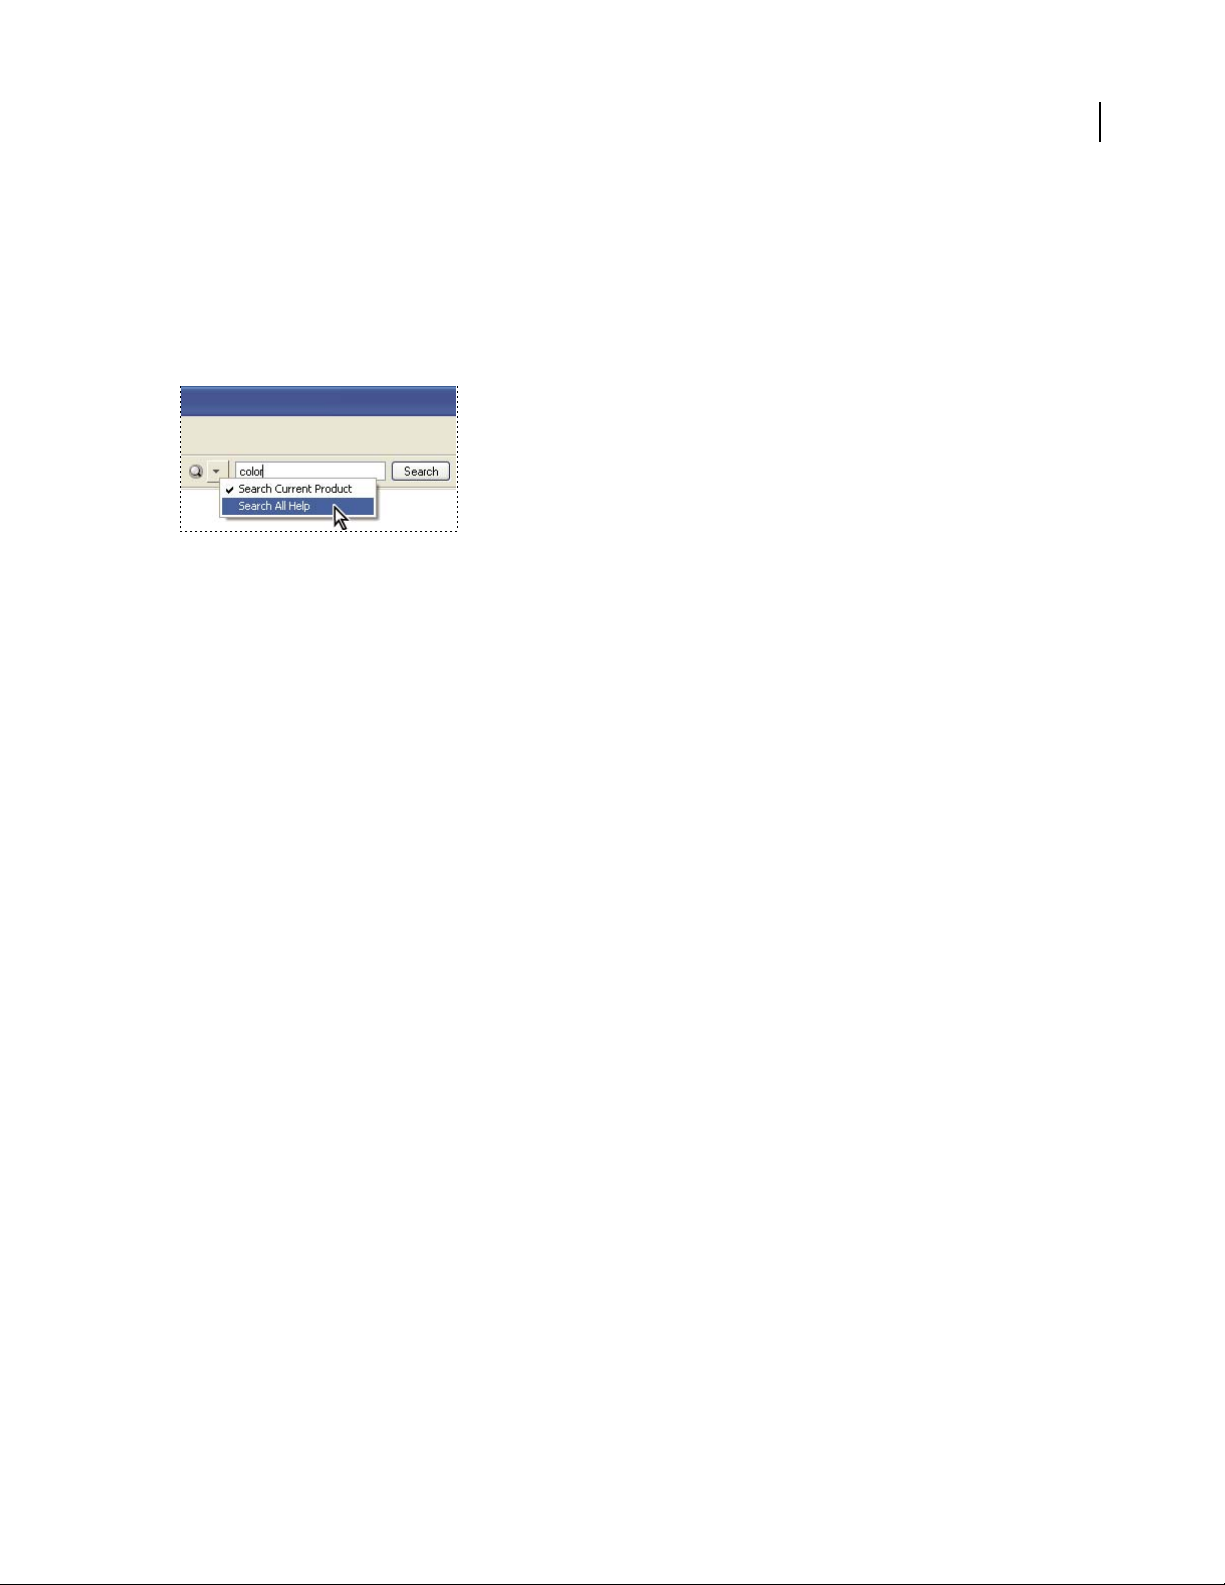
2 Type one or more words in the Search box. To search across Help for all Adobe products you have installed, click
the black triangle to the left of the Search box and choose Search All Help.
Search Help for one product or for all products you’ve installed
3 Click Search. Topics matching the search words appear in the navigation pane.
4 To view a topic, click its title.
5 To return to the navigation pane, do one of the following:
• Click the Home button.
• Click the Back button.
• Click Next Topic or Previous Topic.
5
See also
“To print a topic from Help” on page 5
“To use bookmarks” on page 6
Search tips
Adobe Help search works by searching the entire Help text for topics that contain all of the words typed in the Search
box. These tips can help you improve your search results in Help:
• If you search using a phrase, such as “shape tool,” put quotation marks around the phrase. The search returns only
those topics containing all words in the phrase.
• Make sure that the search terms are spelled correctly.
• If a search term doesn’t yield results, try using a synonym, such as “web” instead of “Internet.”
To print a topic from Help
1 Select the topic you want to print, and click the Print button.
2 Choose the printer you’d like to use, and then click Print.
Page 11

ADOBE INCOPY CS2
User Guide
To change the view
By default, Adobe Help Center opens in Full view. Full view gives you access to the Product Help, Expert Support,
and More Resources sections. Switch to Compact view when you want to see only the selected Help topic and you
want to keep the Help window on top of your product workspace.
❖ Click the view icon to switch between Full and Compact views.
To use bookmarks
You can bookmark especially helpful topics for easy access, just as you bookmark pages in a web browser, and reread
them at another time.
1 Click the Bookmarks tab in the navigation pane to view the bookmarks.
2 Do any of the following in the Bookmarks pane:
• To create a bookmark, select the topic you want to mark, and click the Bookmark button . When the Bookmark
dialog box appears, type a new name in the text box if desired, and then click OK.
• To delete a bookmark, select it and click the Delete button. Click Yes to confirm the deletion.
• To rename abookmark, select it andthenclick theRenamebutton . In thedialogbox,typeanewnamefor the
bookmark and then click OK.
• To move a bookmark, select it and then click the Move Up button or the Move Down button .
6
Tips and training
Learning resources
Adobe provides a wide range of resources to help you learn and use Adobe products.
• “Tutorials in Help” on page 7: Short step-by-step lessons through Adobe Help Center.
• “Total Training Video Workshop CD” on page 7: Professional training videos from experts.
• “Adobe Studio” on page 7: Videos, tips and tricks, and other learning material on Adobe products.
• Adobe Creative Suite Design Guide (Adobe Creative Suite only): A full-color printed book about using Adobe
Creative Suite 2 as a complete design and publishing toolbox, including five guided projects on print, web, and
mobile workflows.
• “Technical information” on page 8: Reference material, scripting guides, and other in-depth information.
• “Other resources” on page 9: Training, books, user forums, product certification, and more.
• Support: Complimentary and paid technical support options from Adobe.
• “Extras” on page 9: Downloadable content and software.
See also
“About Adobe Help Center” on page 2
Page 12

ADOBE INCOPY CS2
User Guide
Tutorials in Help
The Help system for each Adobe CS2 product includes several step-by-step tutorials on key features and concepts.
These tutorials are also available in the complete, printable, PDF version of the Help contents, included on the
Resources and Extras CD.
To use these tutorials with the product, select the tutorial you want from the Contents pane in Adobe Help Center,
and click the View icon
cation windows, regardless of what window or application is selected. Drag an edge or a corner of the Help window
to resize it.
to switch to Compact view. Compact view keeps the Help window on top of the appli-
See also
“Adobe Studio” on page 7
“Total Training Video Workshop CD” on page 7
“Other resources” on page 9
Total Training Video Workshop CD
Presented by experts in their fields, Total Training videos provide overviews, demos of key new features, and many
useful tips and techniques for beginning and advanced users. Look for accompanying step-by-step instructions to
selected Total Training videos in monthly updates to Adobe Studio.
7
Short Total Training web videos on a variety of products and topics are also available in Adobe Studio, and complete
Total Training courseware can be purchased online from the Adobe Store.
See also
“Adobe Studio” on page 7
“Other resources” on page 9
Adobe Studio
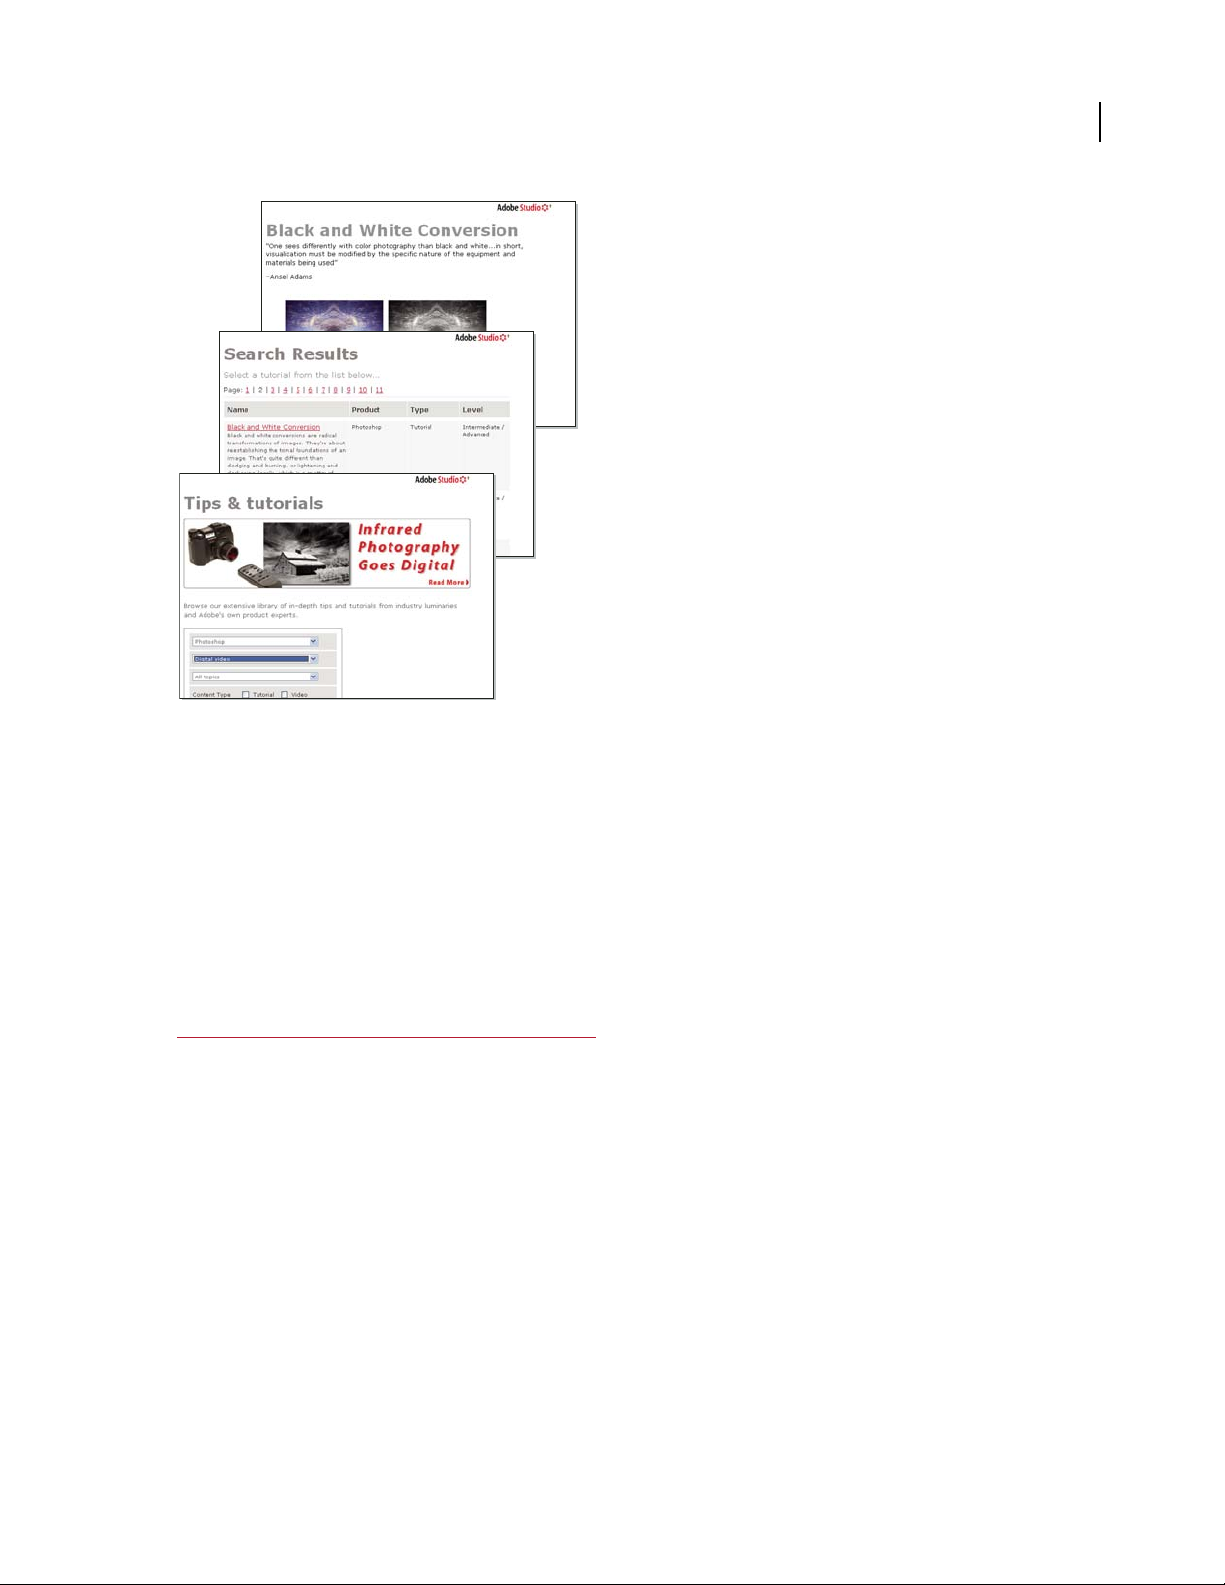
AdobeStudioprovidesahuge wealth of tips andtricks, tutorials, andinstructional contentinvideo, AdobePDF,and
HTML, authored by experts from Adobe and its publishing partners. You can search the entire collection or sort by
product, topic, date, and type of content; new content is added monthly. Adobe Studio is available in English, French,
German, and Japanese. Find it from the home page of the Adobe website.
Page 13
ADOBE INCOPY CS2
User Guide
8
Tips and tutorials in Adobe Studio
See also
“Total Training Video Workshop CD” on page 7
“Other resources” on page 9
Technical information
The Technical information folder on the Resources and Extras CD included with your Adobe product includes
several useful documents in PDF, fully searchable and optimized for printing. These documents provide conceptual
and reference material on various in-depth topics, such as scripting, transparency, and high-end printing. For
complete developer documentation and resources, visit the Developers area of the Adobe website at
http://partners.adobe.com/public/developer/main.html. For additional backgrounders and instructional content,
visit Adobe Studio.
The Resources and Extras CD also includes the entire Help content optimized for printing. Note that the Help
content includes everything in the printed Adobe user guides, plus much more.
See also
“Adobe Studio” on page 7
“Other resources” on page 9
Page 14

ADOBE INCOPY CS2
User Guide
Other resources
Additional sources of information and help are available for Adobe products.
• Visit the Training area of the Adobe website for access to Adobe Press books; online, video, and instructor-led
training resources; Adobe software certification programs; and more.
• Visit the Adobe user forums, where users share tips, ask questions, and find out how others are getting the most
out of their software. User forums are available in English, French, German, and Japanese on the main Support
page of your local Adobe website.
• Visit the Support area of the Adobe website for additional information about free and paid technical support
options. Top issues are listed by product on the Adobe U.S. and Adobe Japan websites.
• Visit the Developers area of the Adobe website to find information for software and plug-in developers, including
SDKs, scripting guides, and technical resources.
• Click More Resources in Adobe Help Center to access many of the resources on the Adobe website and to create
your own list of frequently visited user groups and websites and valuable contacts.
• Look in Bridge Center for RSS feeds on the latest technical announcements, tutorials, and events. To access Bridge
Center, select it in the Favorites panel in Adobe Bridge. (Bridge Center is available with Adobe Creative Suite only.)
See also
“To display More Resources” on page 3
9
“Learning resources” on page 6
Extras
The Resources and Extras CD included with your CS2 product includes a Goodies folder that contains bonus content
and files for use with your Adobe product. For more free content and add-ons, visit Adobe Studio Exchange, an
online community where users download and share thousands of free actions, plug-ins, and other content for use
with Adobeproducts. To visitAdobe Studio Exchange,gotoAdobe Studio from thehomepageofthe Adobewebsite.
In addition, your CS2 product includes Adobe Stock Photos, an integrated service available within Adobe Bridge that
lets you search, view, try, and buy royalty-free stock photography from leading stock libraries. Because of the tight
integration between Stock Photos and CS2 products, you can download images directly into your Adobe Illustrator®,
Adobe InDesign®, and Adobe GoLive® projects. From Photoshop, you can open any downloaded image.
See also
“Adobe Studio” on page 7
Other downloads
The Downloads area of the Adobe website includes free updates, tryouts, and other useful software. In addition, the
Plug-ins section of the Adobe Store provides access to thousands of plug-ins from third-party developers, helping
you automate tasks, customize workflows, create specialized professional effects, and more.
See also
“Other resources” on page 9
Page 15

ADOBE INCOPY CS2
User Guide
What’s new
New features
Collaborative editorial workflow
Adobe InCopy® LiveEdit Workflow plug-ins
InCopy CS2 to enable designers and editors to work simultaneously on the same content without overwriting each
other’s changes. (See “Sharing content” on page 124.)
Assignments Edit only the content that’s assigned to you from InDesign CS2, which may include selected frames
from a page, across spreads, or from the entire document. Easily visualize how your edited copy relates to the design
through the live Layout view. (See “About assignment files” on page 128.)
Paste and transform graphics Place graphics in available frames or paste them inline in text. Use the new Position
tool to resize, move, rotate, shear, or reposition graphics in relation to their frames. (See “About the Position tool” on
page 116.)
Place PSD and PDF layers Selectively display layers and layer comps in Photoshop® (PSD) files, and layers in PDF
files on import. Modify layer visibility in placed graphics. (See “To place a graphic in a frame” on page 108.)
Layers palette Control display of layers in Layout view to gain access to copy in overlapping frames. (See “About
layers” on page 107.)
Use a file check-in and check-out system between InDesign® CS2 and
10
Smart text processing
Drag and drop text
Drag and drop text within or between frames, views, and documents. (See “To drag and drop
text” on page 151.)
Footnotes Create footnotes directly or import them from Microsoft® Word and RTF files. Control their numbering,
formatting, and layout. (See “To create a footnote” on page 174.)
Unformatted paste Automatically format pasted text with the formatting of the destination text, instead of its
original formatting. (See “To paste text” on page 150.)
Dynamic spell checking and automatic text correction Highlight misspelled words, and automatically correct
common mistakes based on your word list. InCopy also intelligently adds or deletes spaces as needed when you copy
and paste. (See “To use dynamic spelling” on page 180 or “To correct spelling errors as you type” on page 180.)
Dictionary management Create and link to multiple user dictionaries, and easily share those dictionaries across a
workgroup. Import word lists into and export them from user dictionaries. (See “To manage user dictionaries” on
page 182.)
WSIWYG font preview Preview samples of font families directly in the Font menu of the Character and Control
palettes. (See
Style enhancements
Selectively load styles
“To apply a font” on page 201.)
Selectively choose which paragraph and character styles to import from other documents,
and easily specify how InCopy handles style name conflicts. (See “To import styles from other documents” on
page 188.)
Quick apply Quickly locate one paragraph or character style among dozens or even hundreds listed by typing part
of its name, and then apply it to your text without taking your hands off the keyboard. (
See “To use Quick Apply to
find and apply styles” on page 192.)
Page 16

ADOBE INCOPY CS2
User Guide
Apply next style Quickly apply a series of styles to a run of text as long as each style used specifies a Next Style in
its definition. For example, apply headline, subhead, byline, and body text styles to an article in one click. (See “To
apply sequential styles to multiple paragraphs” on page 193.)
Style mapping for Microsoft Word documents Specify how InCopy handles style name conflicts when importing
or opening Microsoft Word files. Save the style mapping as a preset to use when importing other Word files. (See “To
convert Word styles to InCopy styles” on page 189.)
Editorial productivity tools
Automated text macros
Automatically replace macro codes with the associated text by typing the macro and
pressing the spacebar. (See “To create a text macro” on page 163.)
Automated bullets and numbering Save time formatting lists by using the new automated bullets and numbering
features. (See
Notes Mode Work with notes in the intuitive way editors prefer, with a single context-sensitive keystroke to create,
“Bulleted and numbered lists” on page 227.)
split, or convert selected text into a note, or back to text again. (See “About editorial notes” on page 168.)
Stand-alone copyfit Define the text area and page size so you can copyfit text without an InDesign layout. Save
custom document setups as presets for ongoing use. (See “To create a stand-alone document” on page 97.)
Customizable change tracking Customize the way tracked changes are displayed on-screen. (See “To set change-
tracking preferences” on page 168.)
11
Overset text indicator Easily identify overset text while quickly entering uncomposed text in Story view. (See
“Copyfitting text” on page 177.)
Vertical depth ruler Display a vertical ruler along the edge of Galley and Story views to measure copy depth as you
edit or write copy. (See “To use the vertical depth ruler” on page 22.)
Position marker Set a position marker at a specific location in your text so you can easily jump to it using a shortcut.
“To jump to a position marker” on page 153.)
(See
Anti-aliasing preferences Adjust the anti-aliasing of text to suit your on-screen preferences. (See “To set Galley
view display preferences” on page 21.)
Versatile file support
Ability to save InCopy documents as templates
Easily transfer story settings such as styles, column widths, and
copy depth to an editor by saving an InCopy document as a template. (See “To define custom document presets” on
page 98.)
Enhanced support for Microsoft Word and RTF files Open and save RTF (.rtf), tagged text, and Text (.txt) files as
native documents in InCopy. Open Microsoft Word (.doc) files as untitled documents that preserve footnotes,
anchored objects, and change tracking, and then edit and save those documents in RTF to share back with writers or
editors working in Word. (See “Microsoft Word and RTF import options” on page 147.)
XML tagging of tables Tag tables, table cells, and table cell content, and easily export and re-import tagged table
content in InCopy files. (See “About XML and InCopy” on page 266.)
Page 17

Chapter 2: Work area
Work area basics
About the work area
By default, the InCopy work area consists of three views of a story (Galley, Story, and Layout views), palettes to help
you monitor and modify artwork, and menus that contain commands for performing tasks.
You can rearrange the work area to best suit your needs by moving, hiding, or showing palettes; zooming in or out;
scrolling to a different area of the document window; or creating multiple windows and views.
See also
“Viewing stories” on page 18
About InCopy toolbars, palettes, and menus
The InCopy window includes a main menu bar, and several customizable toolbars and palettes to provide the
controls you need to work with documents. You can access toolbar functions from the keyboard without ever having
to use the mouse. InCopy also provides floating palettes with groups of tools you use to work on your document. To
help unclutter the work area, you can collapse palettes into side tabs. Once you find a palette arrangement you like,
you can save it as a workspace and use it with other InCopy documents. You can also share these workspaces with
other InCopy users, creating a consistent editing environment across a workgroup.
12
If you’re working with a file from an Adobe Version Cue™ project, the document title bar provides additional information about the status of a file. The Adobe Version Cue Workspace is a feature that is available only as part of Adobe
Creative Suite.
See also
“Version Cue managed projects” on page 29
To show or hide a toolbar
InCopy’s basic toolbars contain buttons for many commonly used tools and commands, such as opening, saving,
printing, scrolling, and zooming. Tool tips identify each tool button.
❖ Choose thetoolbar name from theWindowmenu. Acheck mark appearsnexttothe toolbarnameifitiscurrently
visible.
To customize a toolbar
You can choose the tools you want included in a toolbar, change the orientation, and combine or separate toolbars.
❖ Do any of the following:
• To specify which tools appear on a toolbar, click the triangle at the end of the toolbar, select Customize, and then
select the tools you want to appear. Each menu contains options specific to the chosen toolbar.
• To move a toolbar, drag its title bar.
Page 18
ADOBE INCOPY CS2
User Guide
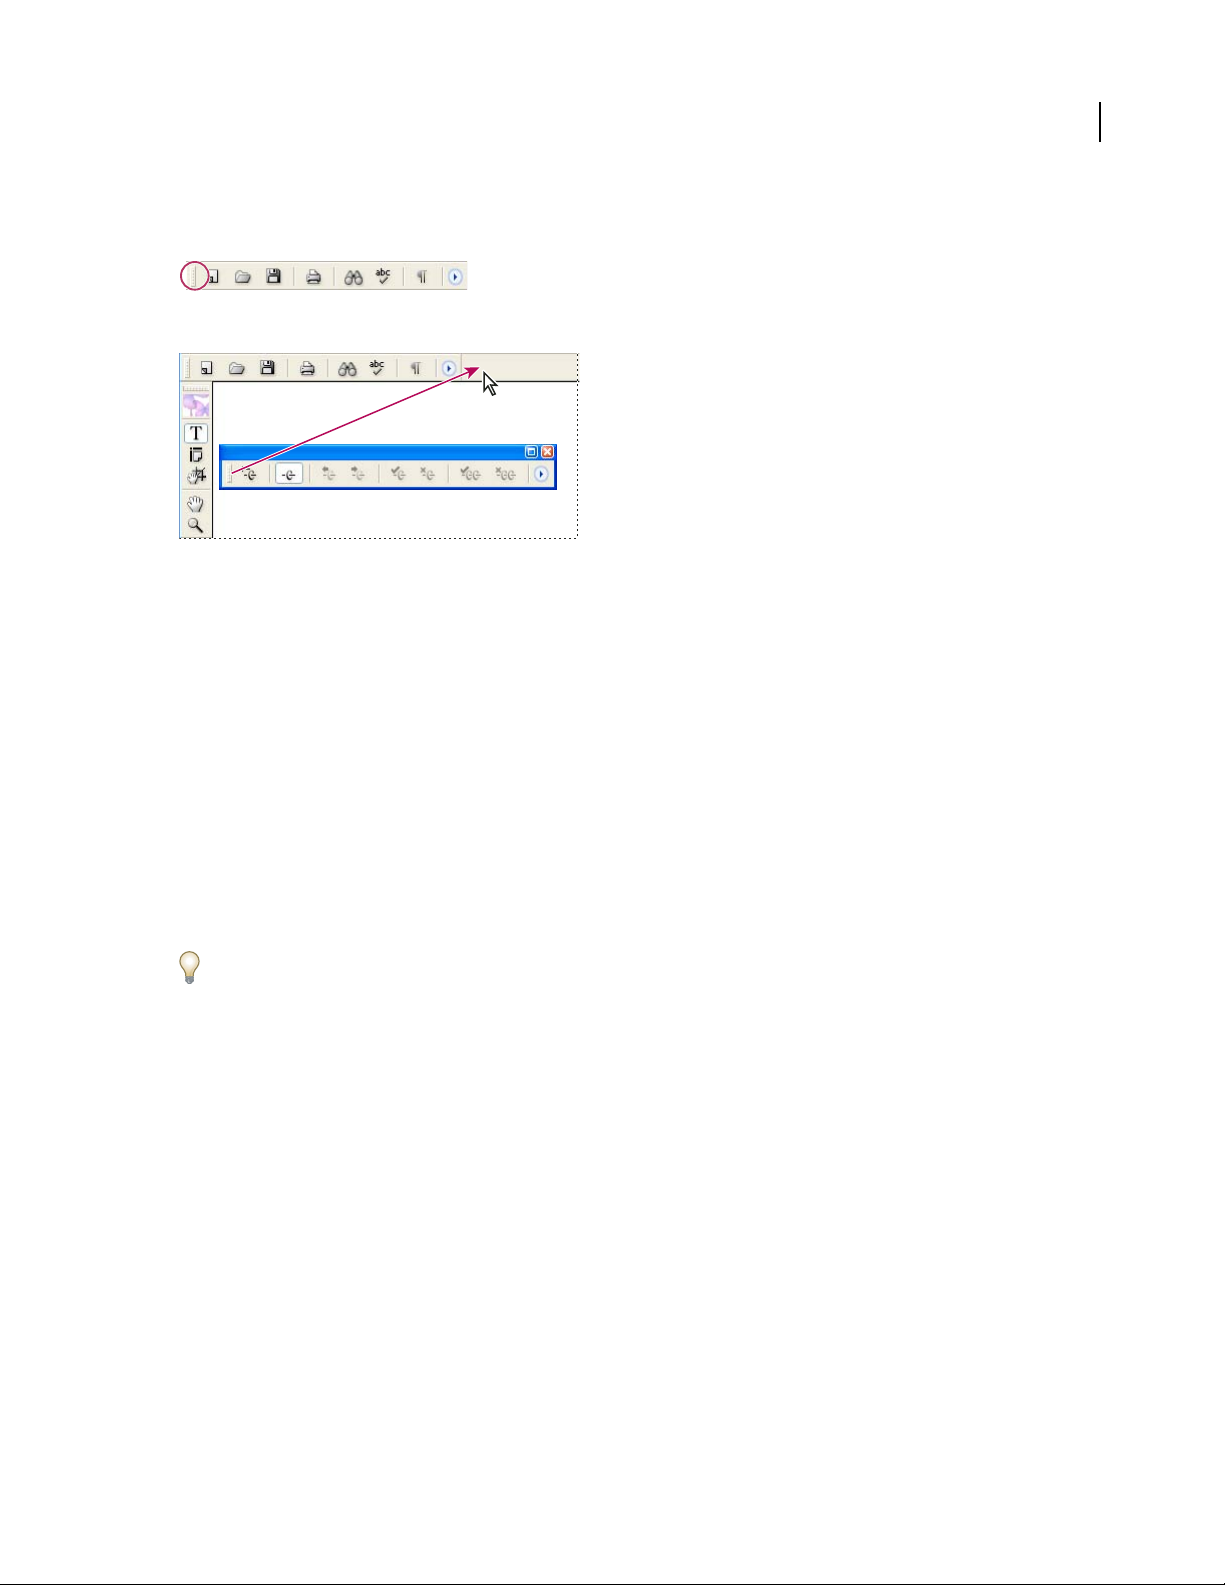
• Tocombinetoolbars,clickthegripperareaofatoolbar,anddragthetoolbarontopofanotheroralongthesame
edge of the application window (Windows) or screen (Mac OS).
Gripper area of the toolbar
Combining toolbars
• To switch a toolbar to a floating palette, click the gripper area of the toolbar, and drag the toolbar away from the
edge of the application window (Windows) or screen (Mac OS).
• To separate a grouped toolbar, click the gripper area of the toolbar, and drag the toolbar away from the group.
Dragging a toolbar out of an existing group creates a new toolbar.
13
About palettes
Most Adobe products include a number of palettes to help you monitor and modify your work. InCopy’s default
palettes appear in side tabs at the right side of the application window (Windows) or screen (Mac OS). You can
display, hide, or move these palettes as you work. You can also open and close individual palettes as needed.
InCopy provides several palettes, each containing options related to a specific aspect of your writing work. For
example, the Paragraph Styles palette contains a list of currently defined paragraph styles you can click to apply to
the paragraph you are working on in the story.
The Scripts palette lets you automate many InCopy tasks using JavaScript, Applescript, or Visual Basic. For more
information, see the Scripting Guide in the Technical folder on the InCopy CD.
Docking palettes
When you dock a palette to another palette, you connect the top edge of one palette to the bottom edge of another.
Docked palettes move together and are shown or hidden together. In contrast, when you group palettes, only the
frontmost palette is visible.
You can dock one palette to another single palette or to a group of palettes. However, you can’t dock a group of
palettes unless you dock each of them individually, because docking involves dragging an individual palette’s tab and
not the title bar.
Page 19
ADOBE INCOPY CS2
Docked palettes
Collapsing palettes
When you start InCopy, several groups of palettes are collapsed into tabs at the side of the application window
(Windows) or screen (Mac OS).
User Guide
14
You can move collapsed palettes into windows of their own or collapse other palettes into side tabs. Palettes collapsed
into side tabs can be grouped and rearranged.
Tabs of collapsed palettes are visible at the side of the screen.
To work with palettes
• To open a palette or palette group, choose Window > [palette name].
• To hide a palette or palette group, click the close button in the upper right (Windows) or upper left (Mac OS)
corner of the palette. Or, choose the palette name from the Window menu.
• To bring a palette to the front of its group, click the palette’s tab, choose the palette name in the Window menu, or
press the palette’s keyboard shortcut.
Page 20
ADOBE INCOPY CS2
User Guide
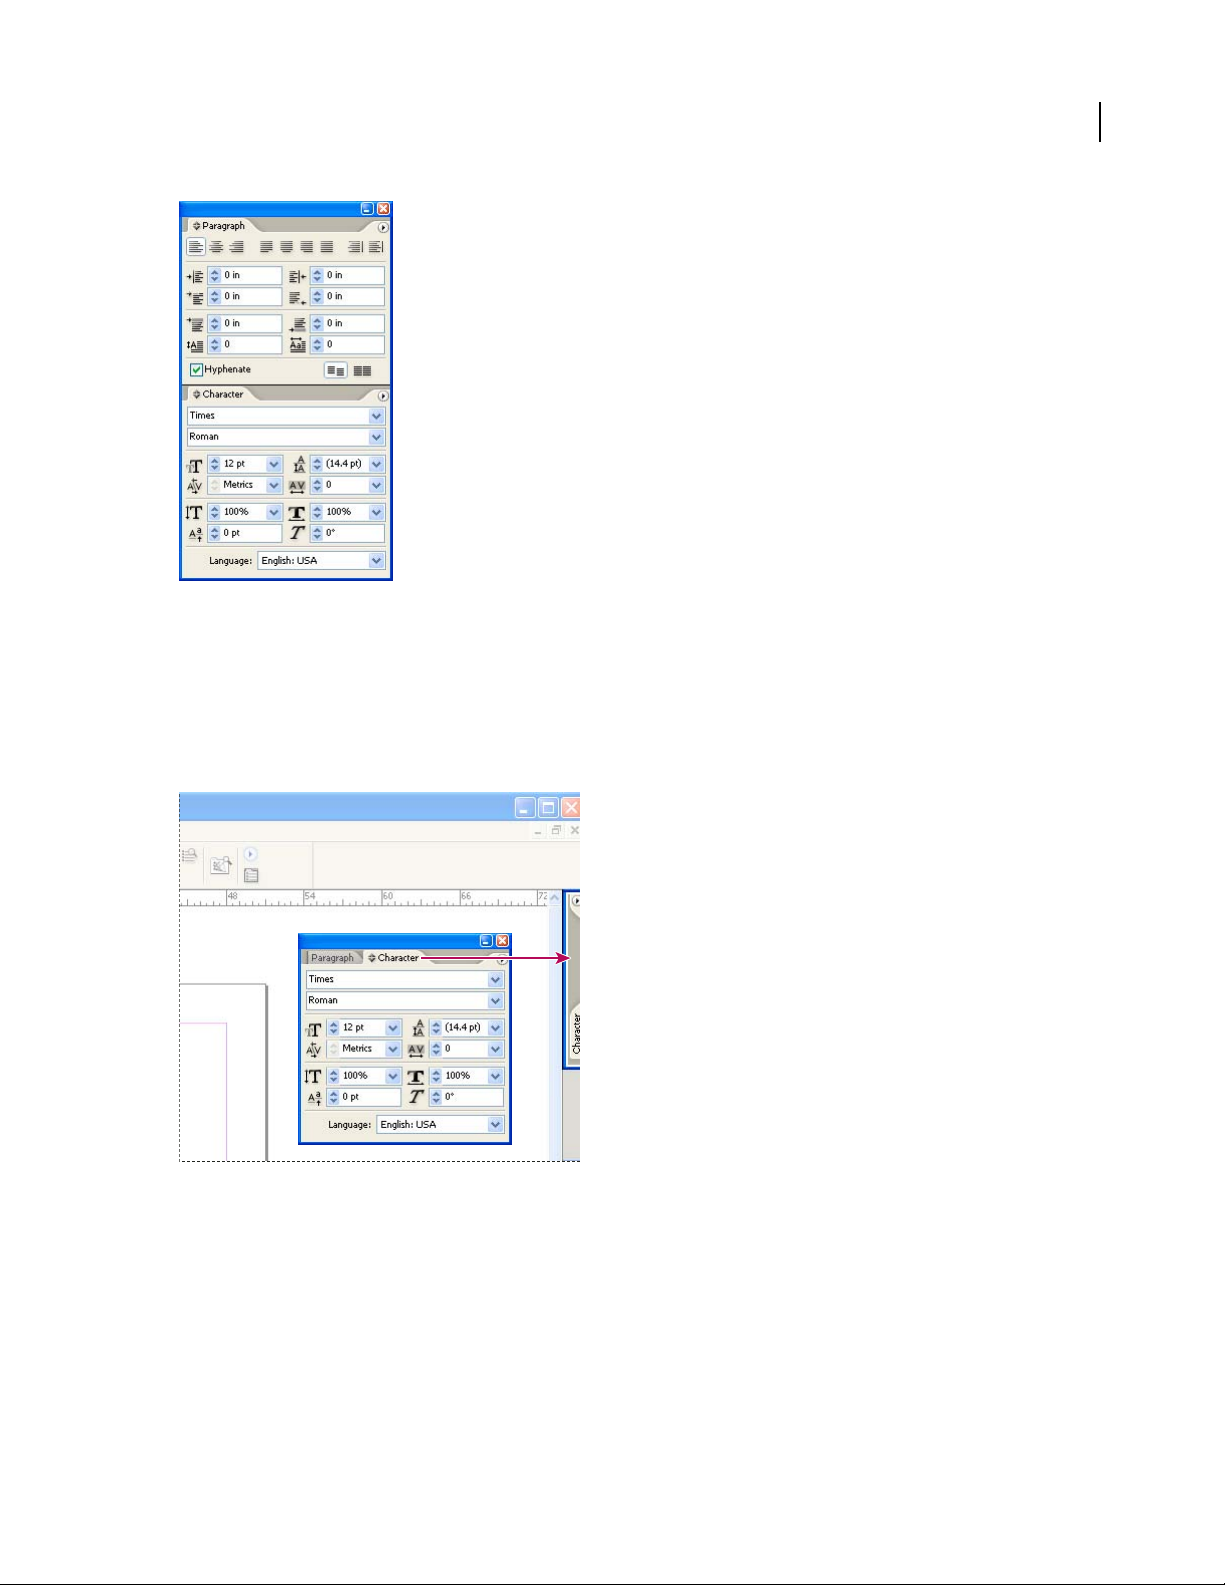
• To move a palette or palette group, drag its title bar.
• To rearrange or separate palettes in a group, drag a palette’s tab. Dragging a palette out of an existing group changes
it to a stand-alone palette.
15
Click the palette’s tab and drag it to a new location (top) to place it in a separate group (bottom).
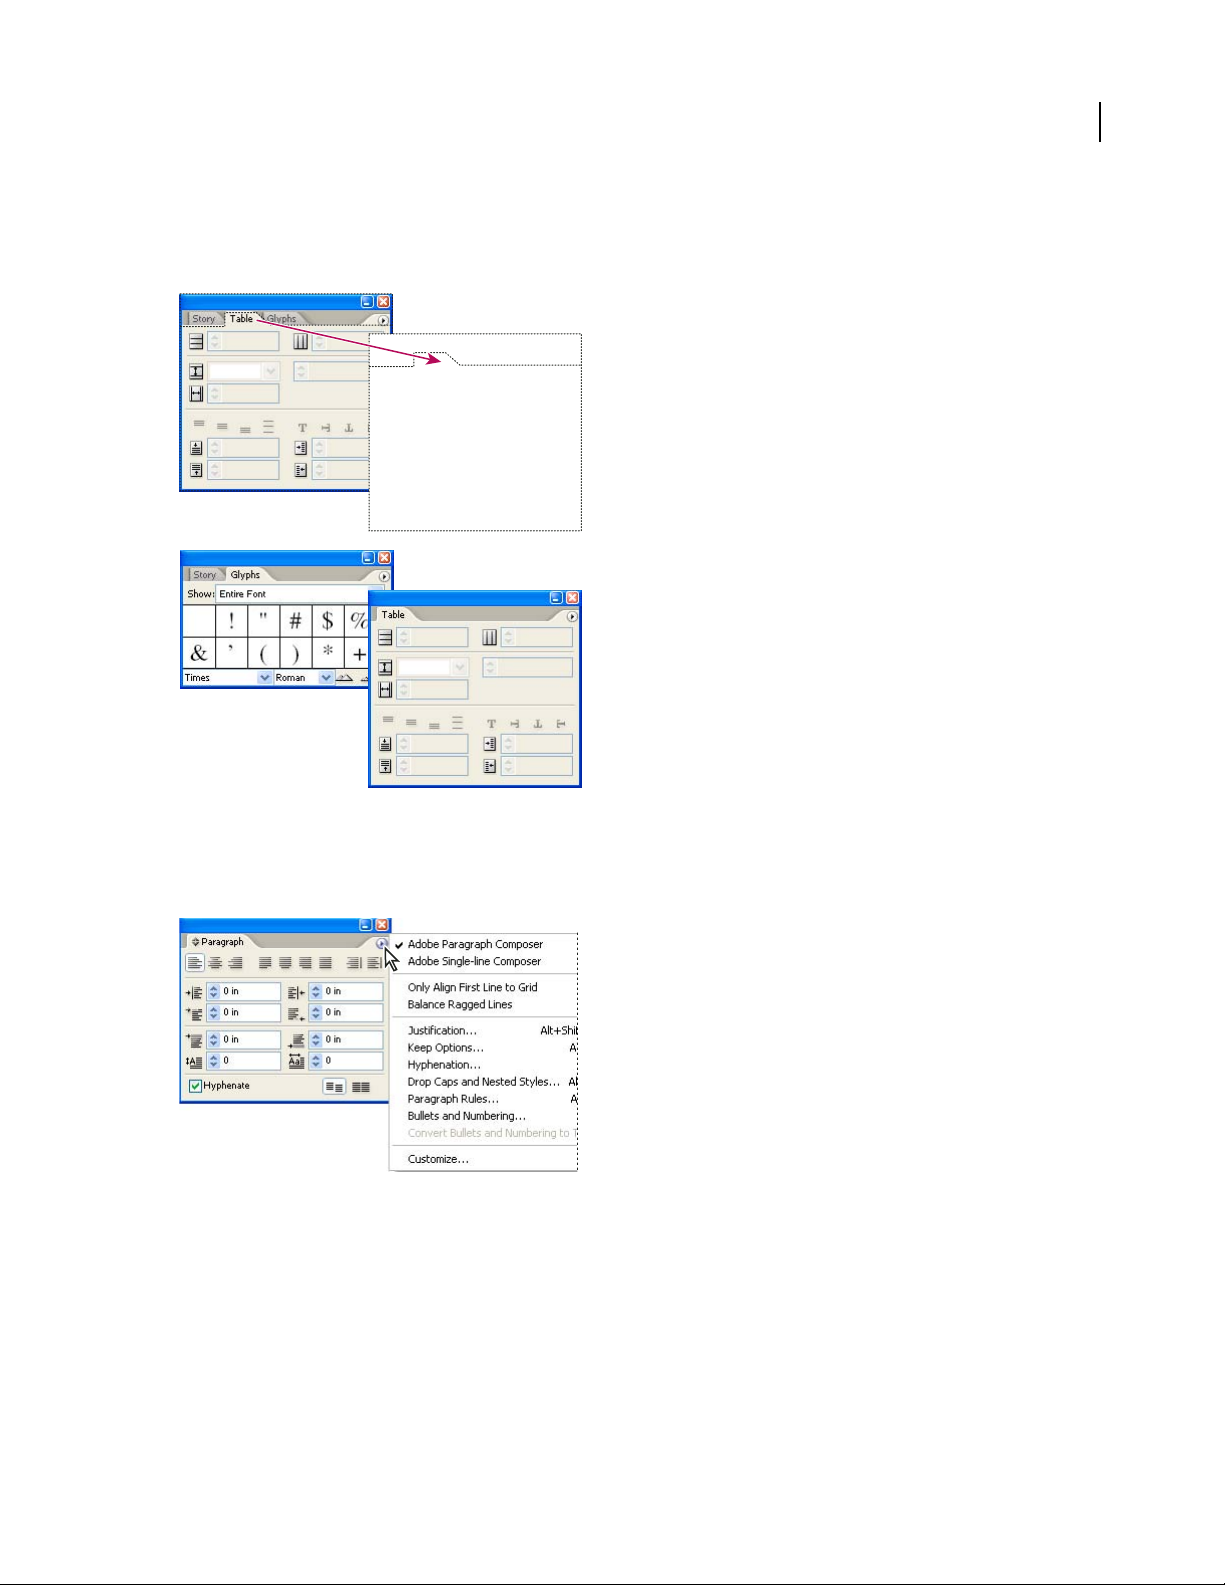
• To move a palette to another group, drag the palette’s tab to that group.
• To display a palette menu, click the triangle in the upper right corner of the palette.
Palette menu
Note: Not all palettes have a palette menu.
• To customize a palette, click the triangle at the top of the palette, select Customize, and then select the tools you
want to appear. The Customize dialog box contains options specific to the chosen palette. (Some palettes do not
include a Customize command and cannot be customized.)
• To change the size of a palette, drag any of its corners (Windows) or the lower right corner (Mac OS).
Note: Resizing one palette does not resize all palettes in that group. Also, not all palettes can be resized.
Page 21

ADOBE INCOPY CS2
User Guide
• (Windows only) To collapse a group to the palette titles only, click the Minimize/Maximize box. Click the box
again to restore the palette display.
• (Mac OS only) To collapse the palette to the title bar only, click the green Expand button in the upper left corner
of a floating palette.
• To dock a palette, drag a palette’s tab to the lower edge of another palette. When the lower edge of the other palette
is highlighted, release the mouse button.
Note: It is important that you drag the palette tab for these drag-and-drop techniques, not the bar across the top of the
palette. The palette tab is where the name of the palette appears, such as “Paragraph” or “Character.”
• To move a set of docked palettes, drag the set’s title bar.
• To display a collapsed palette, click the palette’s tab.
• To convert a collapsed palette to a floating palette, drag a palette’s tab away from the side of the application window
(Windows) or the screen (Mac OS).
• To show or hide all docked palettes, press Alt (Windows) or Option (Mac OS) as you click a palette’s tab.
• To move all palettes in a group, press Alt (Windows) or Option (Mac OS) as you drag.
• To collapse a palette into a side tab, select the palette’s tab and drag it to the left or right side of the application
window (Windows) or of the screen (Mac OS).
• To collapse multiple palettes into one side tab, collapse a palette, and then drag another palette’s name over the
collapsed palette’s tab.
16
To use context menus
Unlike the menus that appear across the top of a window, context-sensitive menus display commands that relate to
the active tool. You can use context menus as a quick way to choose commonly used commands.
1 Position the pointer in the document.
2 Right-click (Windows) or Control-click (Mac OS).
To customize the workspace
You can save the current sizes and positions of palettes on the screen as a custom workspace. The names of
workspaces appear in a Workspace submenu of the Window menu. You can edit the list by adding or deleting a
workspace.
❖ Do one of the following:
• To save custom workspaces,chooseWindow > Workspace > Save Workspace. Type anamefor thenew workspace
and click OK.
• To display a custom workspace, choose it from the Window > Workspace submenu.
• To delete a custom workspace, choose Window > Workspace > Delete Workspace. Select a workspace to delete,
and click Delete.
Page 22

ADOBE INCOPY CS2
User Guide
Customizing preferences and defaults
About preferences
The difference between preferences and defaults is the area to which each applies. Preference settings specify the
initial appearance and behavior of certain InCopy features. Default settings apply to InCopy documents.
Preferences include settings such as palette positions, measurement options, and display options for graphics and
typography.
Note: InCopy preference settings are fully scriptable. To share a consistent set of preferences across user groups, develop
a script to set the preferences, and then have all users in the group run the script on their computers. Do not copy and
paste one user’s preferences files onto another computer, as this might cause application instability. For more information
about scripting, see the InCopy Scripting Guide on the application CD.
To set general preferences
1 Choose Edit > Preferences > General (Windows) or InCopy > Preferences > General (Mac OS).
2 In the General section, choose a display option in the Tool Tips menu. This changes the amount of time that tool
tips are displayed.
3 For Floating Tools Palette, select a layout option. This changes the layout appearance of the toolbox to single or
double column, or single row.
4 Click Reset All Warning Dialogs to display all warnings, even the ones you’ve already dismissed. (As warnings
appear, you can select an option to indicate you do not want to see the warning again.)
17
See also
“Adding text” on page 145
To specify default settings for new documents
If you change settings when no documents are open, your changes set the defaults for new documents. If a document
is open when you change settings, the changes affect only that document.
1 Close all InCopy documents.
2 Change any menu items or palette or dialog box settings.
To restore all preferences and default settings
❖ Do one of the following:
• (Windows) Start InCopy, and then press Shift+Ctrl+Alt. Click Yes when asked if you want to delete your
preference files.
• (Mac OS) While pressing Shift+Option+Command+Control, start InCopy. Click Yes when asked if you want to
delete your preference files.
Page 23
ADOBE INCOPY CS2
User Guide
Viewing stories
Viewing stories
InCopy offers three views of a story: Galley, Story, and Layout. These terms correspond to the terms used in traditional publishing.
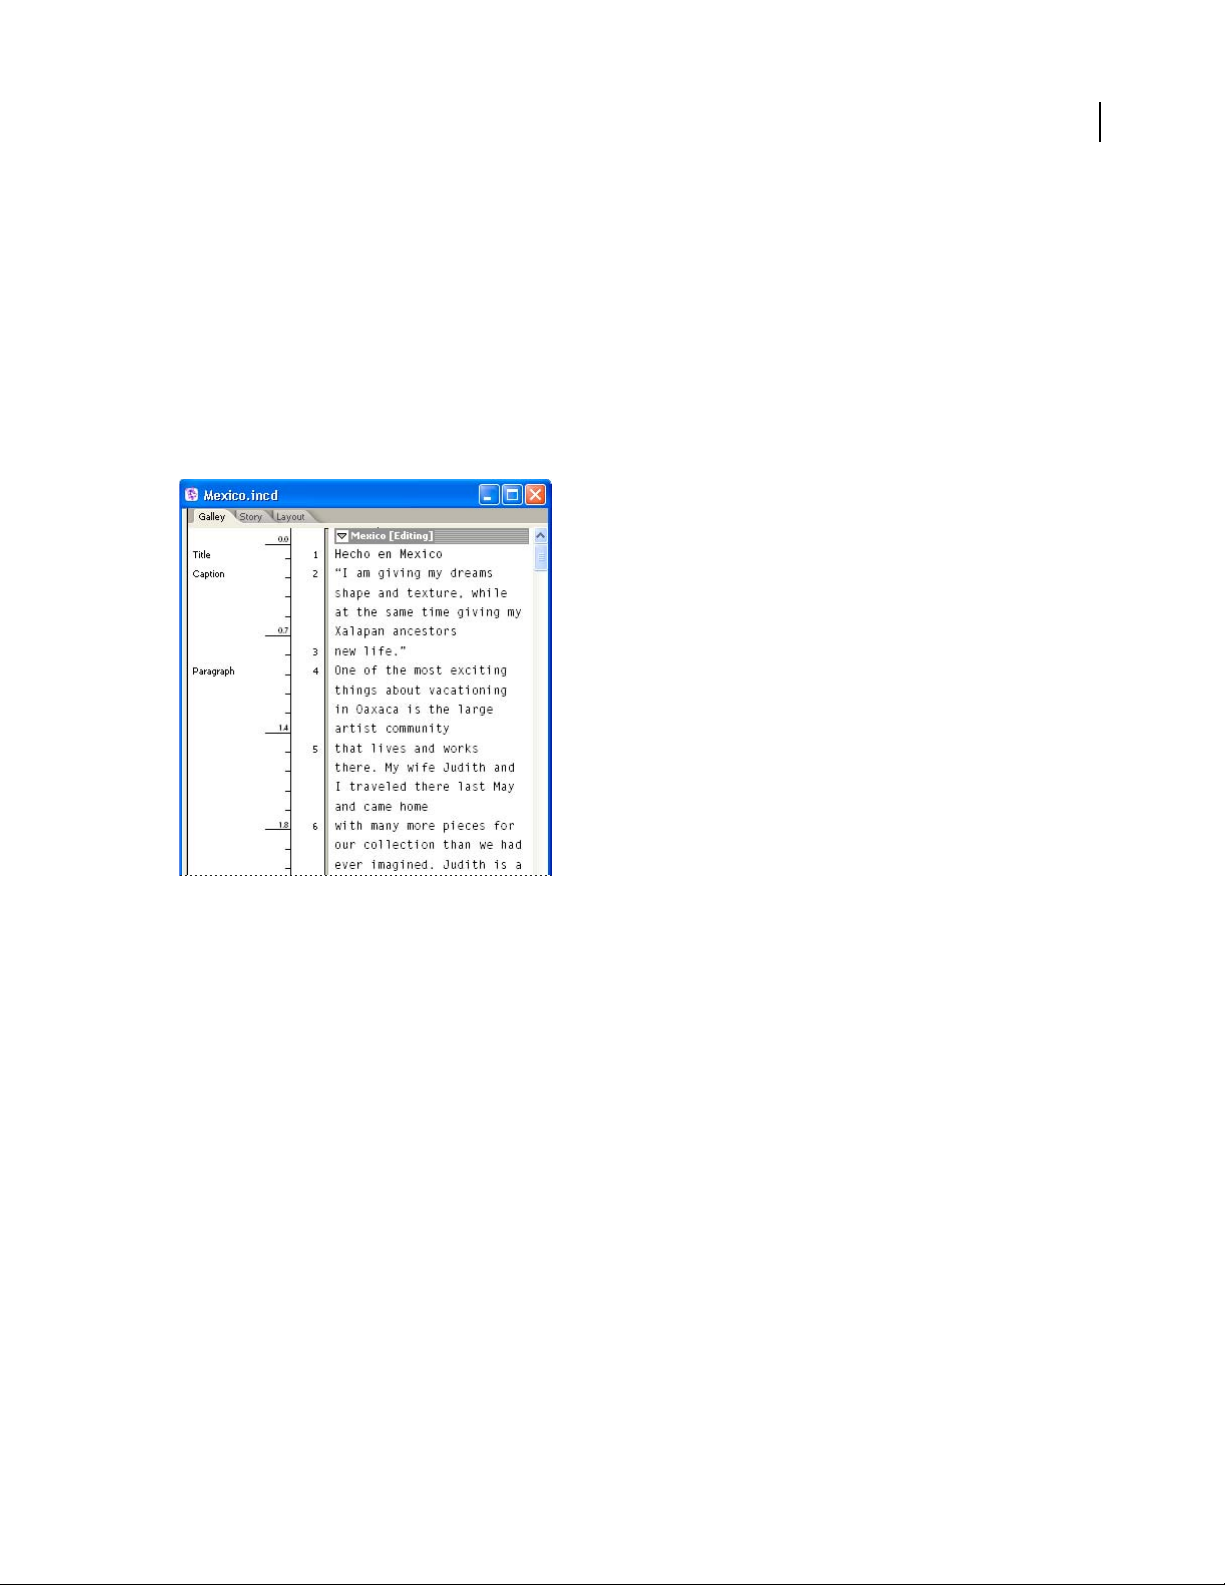
Galley view Displays text with line breaks established in the corresponding InDesign document. If text doesn’t fit
into the assigned layout space, an overset indicator marks the point at which the InCopy text exceeds the space.
Although you can use InCopy to apply formatting, such as paragraph indents and font size, these formats do not
appear in Galley view.
18
Galley view
Story view Displays text in a continuous stream, wrapping the text at the document window. Story view does not
show accurate line endings, so you can concentrate on content. However, if text doesn’t fit into the assigned layout
space, an overset indicator marks the point at which the InCopy text exceeds the space. When using Story view, the
information area displays only paragraph styles. Line numbers are not visible in Story view.
Page 24
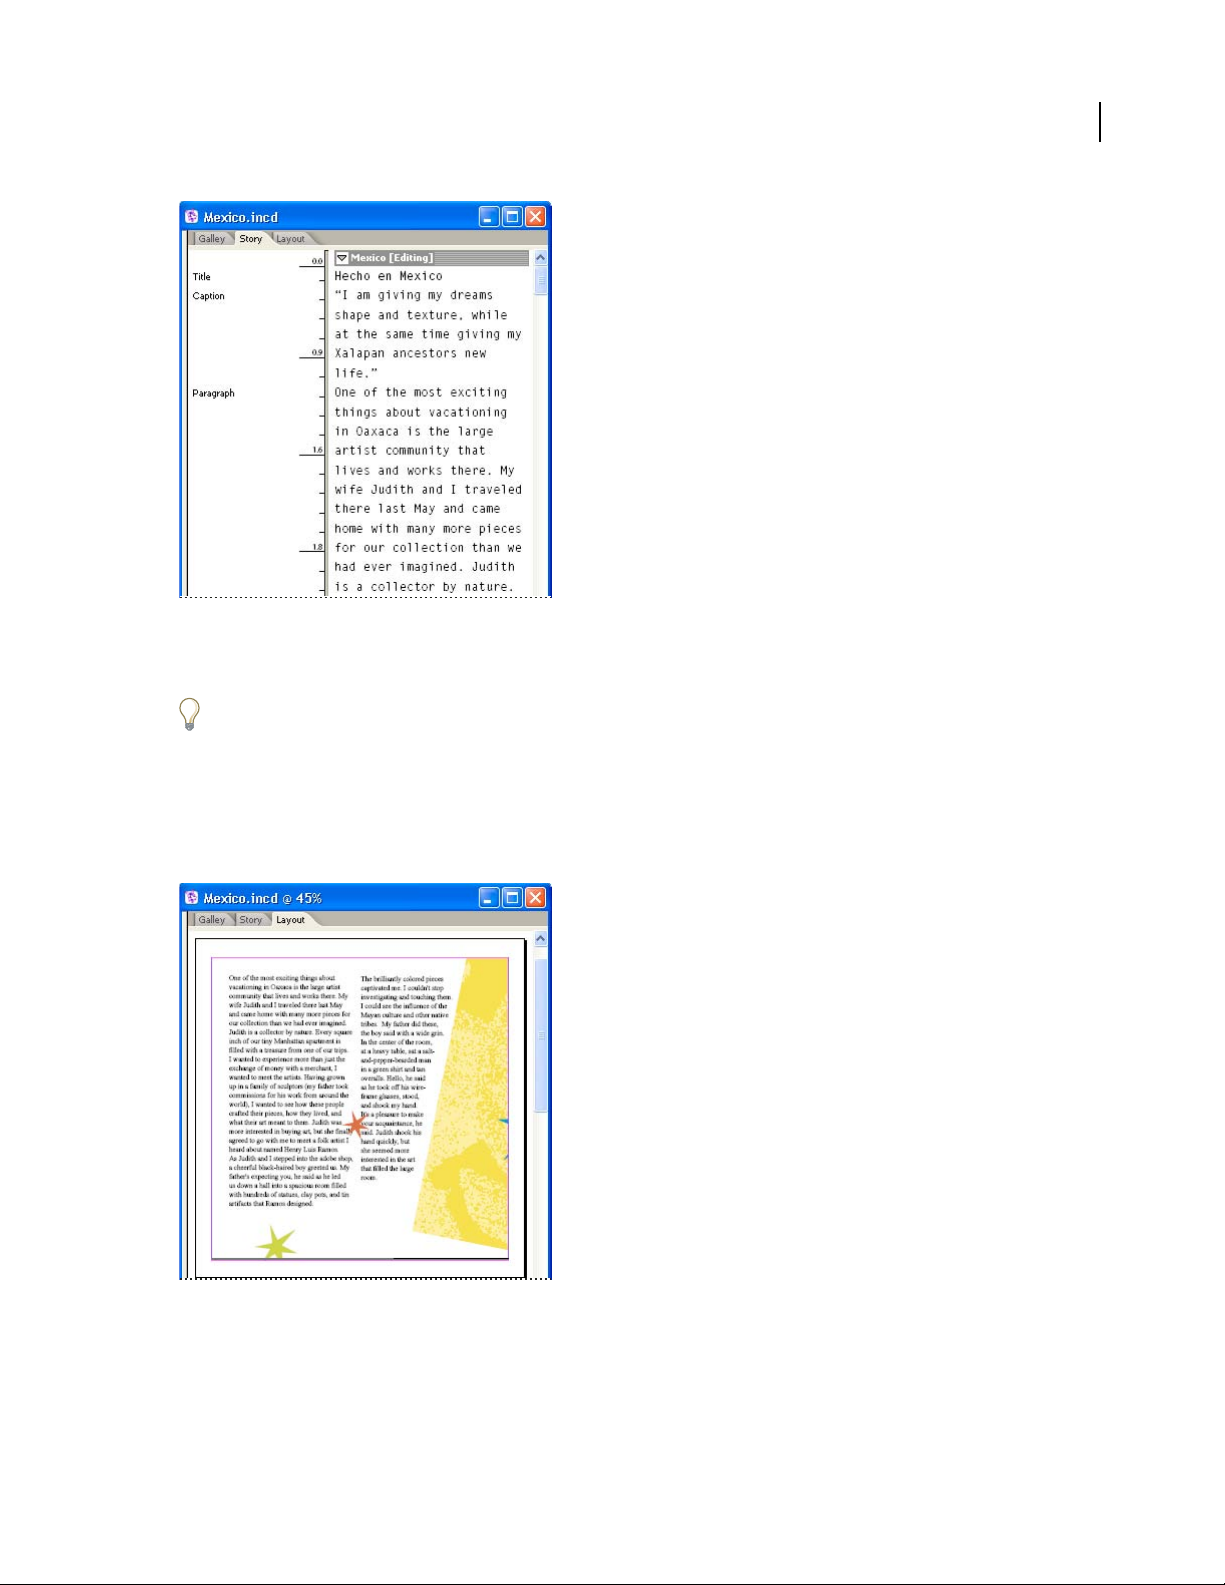
Story view
Story view opens by default when you create a new InCopy story.
ADOBE INCOPY CS2
User Guide
19
To change the default view when a new document is created, close all documents and select the view you want as the
default from the View menu.
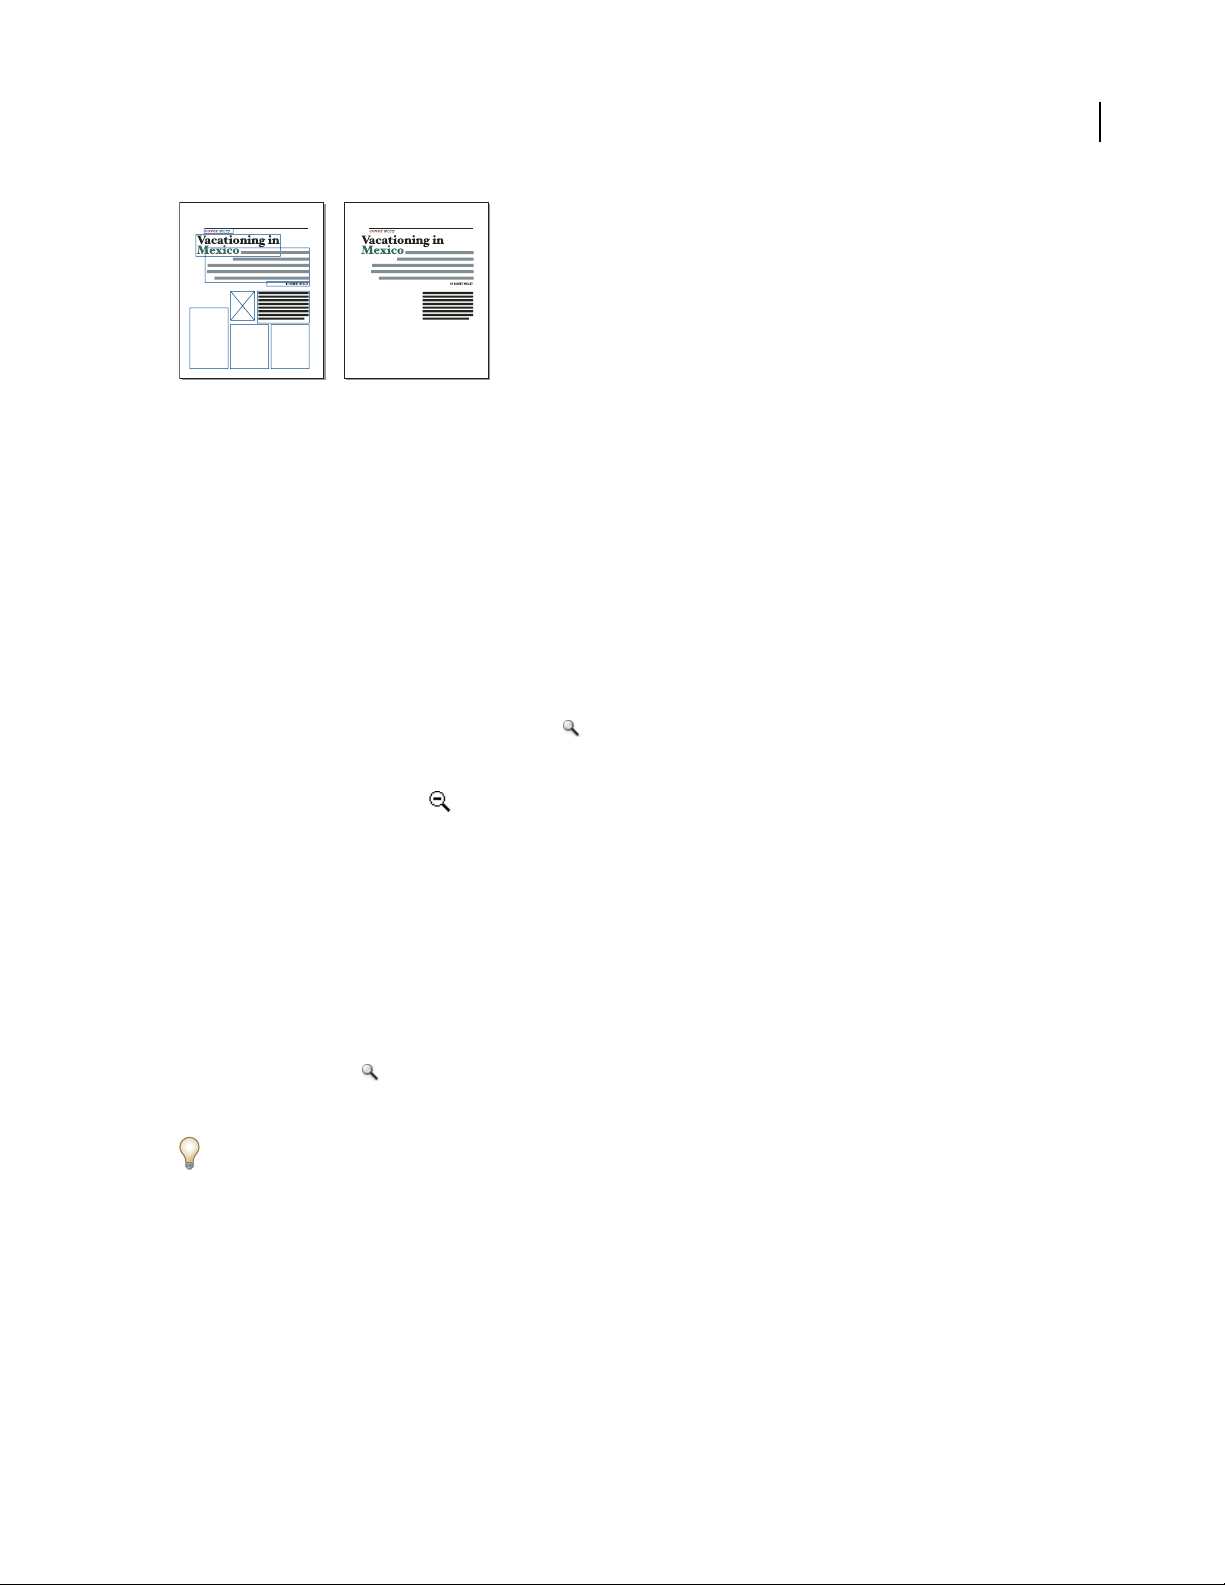
Layout view Shows the text as it will print, with all the formatting. When you use InCopy to synchronize with an
InDesign layout, you can view your text in context with all other page elements in the InDesign document—frames,
columns, graphics, and so on.
In Layout view, you can zoom in and out to inspect different aspects of the layout.
Layout view
Page 25

ADOBE INCOPY CS2
User Guide
See also
“To switch to the Story view” on page 22
“About Layout view” on page 22
To switch between Galley, Story, or Layout view
❖ Do either of the following:
• Choose the view from the View menu.
• Click the Galley, Story, or Layout tab at the top of the editing area.
See also
“Keys for navigating through documents” on page 283
About Galley view
Galley view provides an environment for efficient text processing. Text is easy to read and annotate. You can also use
Galley view to perform copyfitting and other production-related tasks.
Working in Galley view is analogous to working with galley proofs in traditional typesetting. Within the work area,
the text wraps exactly as it will in the final InDesign layout, and all text is displayed in one column, regardless of how
many columns exist in your design. Page breaks, frame breaks, and column breaks are shown by a line with the words
“Page break,” “Frame break,” or “Column break” in the center of the line.
20
Note: When multiple breaks are represented by a single boundary, such as a page break coinciding with a frame break,
the break with the highest priority is displayed. Page breaks have the highest priority, and column breaks have the lowest.
A feature unique to Galley view is the Copyfit break, which indicates the point at which the InCopy text exceeds the
layout space assigned for it in InDesign.
By default, Galley view displays text at 12 points. You can change the font, size, or spacing to make text easier to read
or edit. You can also change the background and font color.
Note: The font display size applies to all stories, rather than individual characters, words, or paragraphs.
The Galley & Story Appearance toolbar controls several settings that you might want to change frequently when
working on a document. These settings include:
• Display font type and size.
• Display leading (single space, 150% space, double space, or triple space).
• Show/hide line number and styles columns.
• Customize Galley & Story Appearance controls.
See also
“Editing overset text” on page 178
“To set Galley view display preferences” on page 21
Page 26

ADOBE INCOPY CS2
User Guide
To change the Galley view display settings
❖ Select an option from the Galley & Story Appearance toolbar. (If the toolbar is not displayed, choose Window >
Galley & Story Appearance to open it. The toolbar appears at the bottom of the application window by default.)
Note: It is important to understand the difference between changing the font display size and applying text formatting.
Both can be done in Galley view. However, changing the font display size does not affect the way text looks in your publi
cation. Applying formatting to text does change the text appearance in Layout view and in your published document.
See also
“To format characters” on page 208
“To format paragraphs” on page 214
To set Galley view display preferences
1 Choose Edit > Preferences > Galley & Story Display (Windows) or InCopy > Preferences > Galley & Story Display
(Mac OS).
2 In the Text Display Options section, specify the following:
Text Color Controls the text color in the work area. Black is the default text color.
21
-
Background Controls the background color of the work area. White is the default background color.
Theme Assigns preset text and background colors.
Override Preview Font Enables you to display one additional font using the correct typeface in the Galley and Story
view. InCopy automatically displays the Symbol, Zapf Dingbats, Webdings, and Wingdings® fonts accurately,
overriding the display font you have chosen.
Enable Anti-aliasing Smooths the jagged edges of type and bitmap images by softening the color transition between
edge pixels and background pixels. Since only the edge pixels change, no detail is lost. You can choose the level of
anti-aliasing to apply. The Default option uses shades of gray to smooth text, and is equivalent to anti-aliasing in
InCopy CS. The LCD Optimized option uses colors, rather than shades of gray, and works best on light-colored
backgrounds with black text. The Soft option uses shades of gray, but produces a lighter, fuzzier appearance.
Cursor Options Controls the cursor display. Choose from four different cursors. Select or deselect Blink.
Note: Any settings made in the Galley & Story Display panel apply to both the Galley and Story views.
To show or hide the information column
The information column appears on the left side of the document window in Galley and Story views. This column
contains read-only information about paragraph styles, line numbers, and the vertical depth of text; you cannot type
in this area.
❖ Do one of the following:
• To change theviewinthe currentdocumentonly, choose View >ShowInfoColumnorView > Hide Info Column.
• To change the default view in the application, with no document open, choose View > Show Info Column or
View > Hide Info Column.
Note: Paragraph styles make it much easier to maintain consistency in your publications. See “About styles” on page 187,
and consult any workflow system documentation your team has adopted concerning in-house guidelines for your project.
Page 27

ADOBE INCOPY CS2
User Guide
To use the vertical depth ruler
When typing text, it is sometimes useful to know the physical depth of a story as it will appear in Layout view, in
addition to the number of lines. The vertical depth ruler draws a ruler along the left edge of the Galley and Story
views. Each tick mark in the ruler aligns to the bottom of a line of text. A value is displayed every five tick marks to
show the total vertical depth of the text to that point. The depth dynamically updates when layout composition for
the portion of the document is complete.
The depth measurement uses the vertical units setting in the Units & Increments Preferences panel.
Note: To aid in copyfitting, the depth of overset text is also calculated and displayed.
1 Click the Galley or Story tab at the top of the editing area.
2 Do either of the following:
• To show or hide only the depth ruler, choose View > Show/Hide Depth Ruler.
• To show or hide only the information column, choose View > Show/Hide Info Column.
3 To hide the ruler, Hide Depth Ruler or Hide Info Column from the View menu.
To switch to the Story view
Use Story view to create content without worrying about the accuracy of line endings or line numbers.
22
❖ Do one of the following:
• Click the Story tab at the top of the editing area.
• Choose View > Story View.
To set Story view preferences
Use the Galley & Story Display section of the Preferences dialog box to customize the display of the Story view.
1 Choose InCopy > Preferences > Galley & Story Display (Mac OS).
2 Specify the options you want.
3 Click OK.
See also
“To set Galley view display preferences” on page 21
About Layout view
In Layout view, you see text and other elements exactly as they are formatted and positioned in an InDesign
document. Stories are laid out in frames, just as they appear in InDesign.
If you are working with a linked story—a managed story within an open InDesign document or Assignment file—
you cannot modify the story layout with InCopy. You can work only with the text and text attributes.
If you are working with a stand-alone InCopy document—an individual InCopy document that is not within an open
InDesign document or Assignment file—you can work with the text and text attributes, and change the page size
using the Document Setup command.
Page 28

ADOBE INCOPY CS2
User Guide
Layout view offers more toolsand View-menucommandsthanthe otherviews.You canuse theHandtool, theZoom
tool, and the Zoom commands to view a spread at various magnifications. You can also use various layout aids, such
as rulers, document grids, and baseline grids.
Note: These viewing options do not affect formatting. For example, zooming in to enlarge your view of the page does not
change the way the story appears in InDesign or when printed.
See also
“Sharing content” on page 124
To switch to Layout view
❖ Do one of the following:
• Click the Layout tab at the top of the editing area.
• Choose View > Layout View.
About frames
In theLayoutviewofadocument in progress,you seeone or more boxesonthe page.These nonprintingboxes might
contain text, graphics, or nothing. The boxes represent frames—spaces in the layout reserved for specific elements.
Each frame is defined to contain either text or a graphic.
23
Text frames Controlwhich storiesappearwhere,and howmuchpageareatheycover.For linkedstories,framesare
defined by the InDesign user. If multiple frames are set aside for a story, the frame configuration determines how the
story text flows through the layout.
Graphics frames Can function as borders and background, and can crop or mask graphics. You can work with
graphics inside frames in InCopy, and you can see the graphics frames from InDesign layouts when you work with
linked documents. You can also work with the frames of inline graphics (embedded in text), but you cannot work
with other graphics frames.
Empty frames Are placeholders. You can distinguish empty text frames from empty graphics frames by their
appearance. A empty box represents an empty text frame; a box with an X across it indicates an empty graphics frame.
You can add text to an empty text frame only if it’s associated with the story exported to InCopy from InDesign. You
can also import or paste graphics into an empty graphics frame in InCopy.
Empty text frame (left) and empty graphics frame (right)
To show or hide frame edges
In Layout view, you can choose to see or hide frame edges. Hiding frame edges also hides the X in an empty graphics
frame.
Page 29
ADOBE INCOPY CS2
Text and graphics frames with frame edges displayed (left) and hidden (right)
❖ Choose View > Show Frame Edges or View > Hide Frame Edges.
Viewing documents
To zoom in or out
In Layout view, you can magnify or reduce your view of a page. The lower left corner of the document window
displays the zoom percentage at all times.
User Guide
24
❖ Do any of the following:
• To magnify a specific area, select the Zoom tool and click the area you want to magnify. Each click magnifies
the view to the next preset percentage, centering the display around the point you click. At maximum magnification, the center of the Zoom tool appears blank. To zoom out, hold down Alt (Windows) or Option (Mac OS)
to activate the Zoom Out tool , and click the area you want to reduce. Each click reduces the view to the
previous preset percentage.
• To magnify the view to the next preset percentage, activate the window you want to view, and choose View >
Zoom In. Choose View > Zoom Out to reduce the view to the previous preset percentage.
• To set a specific magnification level, type or choose a magnification level in the Zoom text box at the lower left
corner of the document window.
• While pressing Ctrl (Windows) or Command (Mac OS), use the mouse scroll wheel or sensor to zoom in or out.
To magnify by dragging
1 Select the Zoom tool .
2 Drag to create a dotted rectangle, called a marquee, around the area you want to magnify.
To activate the Zoom In tool while using another tool, press Ctrl+spacebar (Windows) or Command+spacebar
(Mac OS). To activate the Zoom Out tool while using another tool, press Ctrl+Alt+spacebar (Windows) or
Command+Option+spacebar (Mac OS).
Page 30

ADOBE INCOPY CS2
Zooming in on a selection of text
To display the document at 100%
❖ Do any of the following:
• Double-click the Zoom tool .
• Choose View > Actual Size.
• Type or choose a magnification level of 100% in the Zoom text box at the lower left corner of the document
window.
To fit the page, spread, or pasteboard within the active window
❖ Do any of the following:
• Choose View > Fit Page in Window.
• Choose View > Fit Spread in Window.
• Choose View > Entire Pasteboard.
User Guide
25
Moving through a story
Moving through a story
Some options for moving around within a story depend on whether you’re working in Galley, Story, or Layout view.
In Galley and Story view, you must use the scroll bars to see text that does not fit in the work area. In Layout view,
you can also use the Hand tool, page buttons, and commands.
Scrolling through documents
Youcan usethe scroll bars (along thebottomand rightsidesofthe InCopy window)orscrollwithamousewheel or
sensor in any view.
You can also use the Page Up, Page Down, and arrow keys on your keyboard to move through a story. In Layout view,
pressing Page Up or Page Down shifts to the next or previous page in the layout. In Galley or Story view, Page Up
andPageDownshift theviewbyone screen;the view does notnecessarily go to thenextpagebreak.The Up Arrow
and Down Arrow keys move the insertion point within the copy and scroll the view as necessary so that you can
always see the insertion point.
In Layout view only, you can also use the Hand tool to move the document view in any direction.
Page 31

ADOBE INCOPY CS2
User Guide
To move through a document with the Hand tool
❖ In Layout view, select the Hand tool , and click and drag to push the document in the direction you want it to
move.
Dragging to view another part of the page
To go to another page in Layout view
❖ Do one of the following:
• Click the buttons in the status bar, as shown in the following illustration:
26
A B C D E
Status bar in Layout view
A. First-page button B. Previous-page button C. Page number display box D. Next-page button E. Last-page button
• Choose the page number from the pop-up menu on the status bar.
To jump to position markers
You can set a marker at a specific location in the text so that you can easily return to it using a command or shortcut.
This is useful if you change your place in the document to do another action, for example, to verify a fact in another
area of text. An InDesign document can have only one position marker at a time per session. Inserting a marker
deletes a previously placed marker. Closing a document also deletes a marker.
❖ Choose Edit > Position Marker, and do any of the following:
• To add a marker, make sure you have placed the insertion point in the text and then select Insert Marker.
• To replace an existing marker, select Replace Marker.
• To delete a marker, select Remove Marker.
• To return to a marker, select Go To Marker.
Page 32

ADOBE INCOPY CS2
User Guide
See also
“Keys for navigating through documents” on page 283
Recovery and undo
Recovering a document
InCopy guards your data against unexpected power or system failures by using an automatic recovery feature.
Automatically recovered data exists in a temporary file that is separate from the original document file on disk.
Under normal circumstances you don’t need to think about automatically recovered data, because any document
updates stored in the automatic recovery file are automatically added to the original document file when you choose
the Save or Save As command or exit InCopy normally. Automatically recovered data is important only if you were
not able to save successfully before an unexpected power or system failure.
Even though thedocumentrecoveryfeature exists, youshouldsaveyourfiles oftenand create backup filesincaseof
unexpected power or system failures.
See also
“Version Cue managed projects” on page 29
27
To find recovered documents
1 Restart your computer.
2 Start InCopy.
If automatically recovered data exists, InCopy automatically displays the recovered document. The word [Recovered]
appearsafter thefilenameinthe titlebar of thedocumentwindowtoindicatethatthe document contains unsaved
changes that were automatically recovered.
Note: If InCopy fails after attempting to open a document using automatically recovered changes, the automatically
recovered data may be corrupted.
3 Do one of the following:
• For InCopy files linked to an InDesign publication, choose File > Save.
• For stand-alone InCopy files, choose File > Save As, specify a location and a new file name, and click Save. The
Save As command creates a new file that includes the automatically recovered data.
• To discard any automatically recovered changes and use the last saved version of the file, choose File > Revert
Content.
To change the location of recovered documents
1 Choose Edit > Preferences > File Handling (Windows) or InCopy > Preferences > File Handling (Mac OS).
2 Under Document Recovery Data, click Choose.
3 Specify the new location for the recovered document, click OK, and then click OK again.
Page 33

ADOBE INCOPY CS2
User Guide
To undo mistakes
If you change your mind or make a mistake, you can cancel a lengthy operation before it completes, undo recent
changes, or revert to a previously saved version. You can undo or redo up to several hundred of the most recent
actions (the exact number may be limited by the amount of RAM available and the kinds of actions you have
performed). The series of actions is discarded when you choose the Save As command, close a document, or when
you exit the program.
If you have access to a Version Cue Workspace, you can create and locate different file versions using Version Cue
features in InCopy CS.
❖ Do one of the following:
• To undo the most recent change, choose Edit > Undo [action]. (You cannot undo certain actions, such as
scrolling.)
• To redo an action you just undid, choose Edit > Redo [action].
• To undo all changes made since the last time you saved the project, choose File > Revert Content.
• To stop a change that InCopy isn’t finished processing (for example, if you see a progress bar), press the Esc key
(Windows) or Command+period (Mac OS).
• To close a dialog box without applying changes, click Cancel.
28
See also
“Version Cue managed projects” on page 29
Page 34

Chapter 3: Adobe Version Cue
Using Adobe Version Cue
Version Cue managed projects
Adobe Version Cue® is an innovative set of features designed to increase your productivity when you work alone or
collaborate with others. Version Cue integrates design management into your existing workflows within and across
Adobe Creative Suite components, including Adobe Photoshop CS2, Adobe InDesign CS2, Adobe Illustrator CS2,
Adobe GoLive CS2, Adobe Acrobat 7, and Adobe Bridge. You can also work with Version Cue in Adobe InCopy CS2.
Version Cue streamlines the following tasks in Adobe Creative Suite:
• Creating historical versions and branched alternates of your files.
• Maintaining file security.
• Organizing files into private or shared projects.
• Browsing with file thumbnails, and searching file information and version comments.
• Reviewing file information, comments, and file status in private and shared projects while you browse.
29
In addition, you can use the Version Cue Workspace Administration for more advanced tasks:
• Initiating and managing online reviews of PDF documents.
• Duplicating, exporting, backing up, and restoring projects.
• Viewing information about projects in the Version Cue Workspace.
• Importing files to the Version Cue Workspace using FTP or WebDAV.
• Deleting file versions in batches and removing file locks.
• Creating a roster of project users and defining their project privileges.
• Restricting access to a specific project.
See also
“Availability of Version Cue features” on page 29
Availability of Version Cue features
Different Version Cue features are available in different environments:
• If you use Adobe Creative Suite, you have access to the full set of Version Cue features, including Version Cue
Administration.
• If you use only one component of Adobe Creative Suite, or if you use InCopy and not Adobe Creative Suite, you
have access to thefeaturesofthe Adobedialogbox only.You canuse Bridge,ratherthanthe Adobedialogbox,for
file browsing.
Page 35

ADOBE INCOPY CS2
User Guide
Note: Acrobat 7 and GoLive access Version Cue features differently than other Adobe Creative Suite components and
don’t use the Adobe dialog box.
• If you don’t have Adobe Creative Suite, you can gain access to the full Version Cue feature set by participating in
a shared project; that is, if another user on your network installs Adobe Creative Suite and gives you access to a
Version Cue project in a Version Cue Workspace.
See also
“About the Adobe dialog box” on page 31
“Getting the most out of Version Cue” on page 30
Getting the most out of Version Cue
In Version Cue, you create projects that you and other users access through Adobe Creative Suite components.
Projects keep related files together in one place. Version Cue manages the files in these projects. Because Version Cue
works in all Adobe Creative Suite components, your design process isn’t interrupted when you work on individual
files within a project.
You can use Version Cue in a single application, such as Photoshop CS2, to track changes to a file as you work on it.
In addition, workgroups or an individual worker can use Version Cue across applications. Multiple users can manage
projects that contain files from all Adobe Creative Suite components. Projects can include non-Adobe files, such as
text documents, billing forms, or spreadsheets. When you keep all managed files related to a project in one place, you
eliminate the task of tracking down important files.
30
Here’s an example of how you might use Version Cue with Adobe Creative Suite: You start by creating a new project
and adding a Photoshop file containing the main image for a printed piece. Then, you add art from Illustrator and
text from InDesign. Next, you add GoLive web elements to leverage your printed content for use in a web page. As
you and your team work on each piece of the project, Version Cue creates versions to keep track of changes. When
it’s time to present the project, you create a PDF of each project file and use the Version Cue Administration utility
to set up an online PDF review. Your customers, supervisors, or peer reviewers view and comment on the project
using Acrobat.
Working with Version Cue in GoLive
Version Cue is tightly integrated with GoLive to manage the tasks specific to web page creation. Although you access
Version Cue differently in GoLive than in Photoshop, Illustrator, InCopy, and InDesign, most of the same features
are available.
Working with Version Cue in Acrobat
You access Version Cue from within Acrobat 7 much as you do in the other Adobe Creative Suite components;
however, there are some differences. Most Version Cue features are available in Acrobat 7. For more information on
using Version Cue in Acrobat 7, see Acrobat 7 Help.
See also
“Availability of Version Cue features” on page 29
Page 36

ADOBE INCOPY CS2
User Guide
About the Adobe dialog box
In Adobe Creative Suite 2.0 components (except for GoLive and Acrobat 7) and InCopy CS2, you can use the Adobe
dialog box when you choose the Open, Import, Export, Place, Save, or Save As commands, even if you don’t use
Version Cue. The Adobe dialog box displays additional information, including thumbnails, which make it easy to
identify files. You can use the Adobe dialog box when working with both Adobe and non-Adobe files.
Note: In InDesign, if you deselect Always Save Preview Images With Documents in either the File Handling preferences
or the Save As dialog box, you won’t see thumbnails for InDesign files in the Adobe dialog box or in Bridge.
By default, when you choose the Open, Import, Export, Place, Save, or Save As commands, the operating system (OS)
dialog box appears. To use the Adobe dialog box instead and set it as the default, click Use Adobe Dialog. Use the
View menu options to customize the display. You can change back to the OS dialog box at any time by clicking Use
OS Dialog.
BA C
31
The Adobe Dialog Box
A. Favorites panel B. Project Tools menu C. View me nu
You can use the Adobe dialog box to accomplish these tasks:
• Add frequently used files and folders to the Favorites panel for quick access.
• View thumbnail images of files.
• Determine whether a file is open in another Adobe Creative Suite application on your computer.
• Rename or delete files (Mac OS only).
• Connect to Bridge by using the Reveal In Bridge command.
• View metadata about files in the Properties panel. Metadata includes author, keyword, and copyright information.
• Access Version Cue projects and files as well as non-Version Cue files.
• View detailed information about Version Cue projects, such as the status of individual files.
• View and work with Version Cue versions and alternates.
• Search for files in a Version Cue project.
• Move Version Cue files to the Project Trash.
• Determine which Version Cue files are in use, and who is using them.
• Create a new Version Cue project, or connect to an existing Version Cue project.
Page 37

ADOBE INCOPY CS2
User Guide
See also
“To view Version Cue Workspace, project, and file information” on page 37
“Availability of Version Cue features” on page 29
What’s new in Version Cue CS2
In addition to enhanced performance and reliability, here are some key new features in Version Cue CS2:
Integration with Adobe Bridge View Version Cue projects, work with versions, and make groups of alternates, all
from one central place. From Bridge, you can search for and view all Version Cue files without opening individual
Adobe Creative Suite components. You can manipulate files directly in Bridge to avoid delays as files open or as the
components start up.
Alternates Alternates allow you to leverage an asset and take your designs in a different direction. For example, if
you want to radically transform a photo that is currently used in a project, but you don’t want to alter the original,
you can create an alternate and work with it instead. Use alternates, in addition to versions, to manage your assets.
“About Version Cue alternates” on page 63.
See
Version Cue PDF Review Host online PDF reviews from your own computer or another Version Cue Workspace.
You can include in the review any PDF file in the project, and use the Automatic e-mail generation to quickly invite
users to the review. Review comments are collected in the Version Cue Workspace where all reviewers can see and
reference them as the review progresses.
32
Ability to manage non-Adobe files Store non-Adobe files, such as text documents, schedule spreadsheets, and
billing forms, in a Version Cue proj
ect. You can also create versions of non-Adobe files. See “To save a version of a
non-Adobe file” on page 59.
See also
“Initiating a Version Cue PDF review” on page 88
“Availability of Version Cue features” on page 29
To set Version Cue Workspace preferences
Note: You can perform this task only if you have access to the full Version Cue feature set, which is available in Adobe
Creative Suite or in a shared workspace. See “Availability of Version Cue features” on page 29 for more information.
Use Version Cue preferences to turn Version Cue off (it is on by default), specify Version Cue Workspace settings,
choose the locations of Version Cue folders that hold data and backup files, export projects in your workspace, and
check for updates to Version Cue.
1 Do one of the following to access Version Cue CS2 preferences:
• In Windows, double-click the Version Cue icon in the system tray at the bottom right of the screen.
• In Mac OS, click the Version Cue icon in the menu bar at the top of the screen and choose Version Cue CS2
Preferences from the menu.
2 Choose an option from the Version Cue CS2 menu. Choose On to turn on the Version Cue Workspace, or Off to
turn the workspace off.
3 To automatically turn on Version Cue when the computer starts (recommended), select Turn Version Cue CS2 On
When The Computer Starts.
Page 38

ADOBE INCOPY CS2
User Guide
4 Choose one of the following from the Workspace Access menu:
This Workspace Is Visible To Others Gives others access to your shared Version Cue projects.
This Workspace Is Private Keeps your Version Cue Workspace hidden from other users.
Note: If Version Cue is installed on a computer that uses a firewall and you want to share the workspace with others,
make sure that TCP ports 3703 and 427 are left open and deselect the Internet Connection Firewall option (Windows
only). For information, see Windows Help.
5 In the Settings tab, do any of the following:
• From the Workgroup Size menu, choose the number of people who use the Version Cue Workspace on a typical
day. This setting controls how the workspace handles the potential load.
• From the Optimize For menu, choose the type of project you generally create. By default, this option is set to
Mixed Media, to support workflows that involve both print media (such as InDesign files) and web content
(created in GoLive). If you typically produce only print media, or if you create only web content, choose either
Print Media or Web Media from the Optimize menu.
• In the Memory Usage text box, enter the amount of RAM that you want to make available to Version Cue. The
default is 128 MB. This setting allocates RAM to optimize interoperability between Version Cue and Adobe
Creative Suite components. For more robust requirements, such a larger workgroup or many assets, set the RAM
to 256 MB or higher.
6 Select Show Version Cue CS2 Tray Icon (Windows) or Show Version Cue CS2 Status In Menu Bar (Mac OS) to
keep the Version Cue menu icon visible, giving you quick access to Version Cue Administration and preferences.
7 Click the Locations tab and do one of the following:
• To move the Data folder, where projects, file versions, and user IDs are stored, click the Choose button next to the
current folder location. Select a new location (not a network drive) for the folder. You must choose a location on
the computer in which the Version Cue Workspace is installed. Click OK.
• To move the Backup folder, where project backups are stored, click the Choose button next to the current folder
location. Select a new location for the folder. You must choose a location on the computer in which the Version
Cue Workspace is installed. Click OK.
33
Important: The workspace must be turned off before you change the folder locations. Do not attempt to move these
foldersmanuallyoreditany of thefiles in theVersion CueDatafolder. TheDatafoldercontainsfiles that maintain the
integrity of the Version Cue file versions, metadata, and project information.
8 To export workspace data, click the Export tab, choose an export version and a location for the exported data, and
then click Export.
9 Click the Updates tab, and then click Check For Updates to see whether any updates are available online. If so,
you’re prompted to install the updates.
10 Click OK (Windows) or Apply Now (Mac OS).
If prompted, click Yes (Windows) or Restart (Mac OS) to restart the Version Cue Workspace. (If Version Cue was
running when you changed the settings, you are prompted to restart.)
See also
“To export a Version Cue project to your computer” on page 80
Page 39

ADOBE INCOPY CS2
User Guide
To turn Version Cue on or off
By default, access to Version Cue is turned on in InCopy CS2 and in all Adobe Creative Suite components, except for
Acrobat 7. If you disable Version Cue, you won’t have access to any Version Cue Workspace, which could affect files
in a project. If you disable or enable Version Cue in any Adobe Creative Suite component, that change affects all other
Adobe Creative Suite components except Acrobat 7 (you must always enable or disable Version Cue manually in
Acrobat 7), Bridge, and GoLive (Version Cue is always enabled in Bridge and GoLive), and the Version Cue
Workspace (this is controlled through the Version Cue CS 2 preferences).
Photoshop CS2 Choose Edit > Preferences > File Handling (Windows) or Photoshop > Preferences > File Handling
(Mac OS). Then select or deselect Enable Version Cue Workgroup File Management, and click OK.
Illustrator CS2 Choose Edit > Preferences > File Handling & Clipboard (Windows) or Illustrator > Preferences >
File Handling & Clipboard (Mac OS). Then select or deselect Enable Version Cue, and click OK.
InDesign CS2 Choose Edit > Preferences > File Handling (Windows) or InDesign > Preferences > File Handling
(Mac OS). Then select or deselect Enable Version Cue, and click OK.
InCopy CS2 Choose Edit > Preferences > File Handling (Windows) or InCopy > Preferences > File Handling
(Mac OS). Then select or deselect Enable Version Cue, and click OK.
Acrobat 7 You must manually turn Version Cue on in Acrobat 7 to use it. Choose Edit > Preferences > General
(Windows) or Acrobat > Preferences > General (Mac OS). Then select or deselect Enable Version Cue Workgroup
File Management.
34
Bridge Version Cue is always turned on in Bridge.
GoLive Version Cue is always turned on in GoLive.
See also
“Availability of Version Cue features” on page 29
Working with Version Cue projects
About Version Cue projects
Ve rs i o n C u e u s es projects to store related files and folders. If you work independently, you create a project to gather
all the files you need, view the files in Bridge, and use Version Cue features such as versions and alternates. In a
workgroup, depending on your workflow, you can create one Version Cue project for files that everyone in your
workgroup collaborates on, a different project for files that don’t require collaboration, and yet another project
restricted to specific users.
When you first open a Version Cue project, Version Cue creates a folder named “Version Cue” in your My
Documents(Windows) or Documents(Mac OS) folder,and adds afolderfor theproject to it.Whenyou open afile
from that project, Version Cue adds a working copy of thefiletothe projectfolder. As youeditand save intermediate
changestoyourfile, youare actually editinginthe workingcopy; theoriginalfileonthe VersionCue Workspaceis
protected.
After you open a Version Cue project, a shortcut to that project appears in the list with other Version Cue Workspaces
in Bridge,orinthe Open,Place,orSavedialogboxes.RemoteVersion CueWorkspacesalsoappearinthislistafter
you access them.
Page 40

ADOBE INCOPY CS2
User Guide
Version Cue uses a special folder for each project: the documents folder.Thisfolderiswhere VersionCue stores nonGoLive files for each project. When you access the project from Bridge, InCopy, or any Adobe Creative Suite
component except Acrobat 7, Version Cue automatically opens the documents folder and temporarily displays the
project title as the folder name. (If you access the project using Acrobat 7, the folder is named “documents”.) You’ll
also see the documents folder if you open the working copies folder.
If you create a new Version Cue project from GoLive, or if you add a new or existing website to a project, Version
Cue creates three additional folders for that project:
Web-content folder Contains the home page (index.html) as well as any website content, including pages, images,
styles, and scripts. You can create separate Pages, Images, and Styles subfolders if necessary. Any files or folders
uploaded to a production server should be stored in the web-content folder. Because GoLive uses this folder to
manage a site as it’s created, be careful not to store other types of files in this folder. You can create any type and
number of subfolders in the web-content folder.
Web-data folder Stores different types of reusable site objects, such as Smart Objects, components, and templates.
This folder contains data used to create the final site. To avoid broken links, missing styles, and similar problems,
never store final website content in the web-data folder.
Web-settings folder Stores only the saved settings in the GoLive Site Window and Site Settings dialog boxes.
35
Viewing a Version Cue project in Bridge
See also
“To connect to a remote project” on page 36
“Using working copies” on page 42
“Availability of Version Cue features” on page 29
To open a project
Note: You can perform this task only if you have access to the full Version Cue feature set, available in Adobe Creative
Suite or in a shared workspace. See “Availability of Version Cue features” on page 29 for more information.
1 Do one of the following:
• In Illustrator, InCopy, InDesign, or Photoshop choose File > Open. If the button is visible, click Use Adobe Dialog
(if you see the Use OS Dialog button, you are already using the Adobe dialog box). Click Version Cue in the
Favorites panel.
• In Bridge, click Version Cue in the Favorites panel. Double-click Workspaces to view all available workspaces.
• In Acrobat 7, choose File > Open. Click Version Cue.
Page 41

ADOBE INCOPY CS2
User Guide
2 To open a Version Cue Workspace, double-click it.
Note: If you don’t see a desired Version Cue Workspace, choose Refresh from the Tools menu.
3 To open a project, double-click it.
If theUse AdobeDialogbuttondoesn’t appear in theOpen, Save As,SaveACopy,orPlace dialog boxes, make sure
that you’ve turned on the Version Cue preference in InCopy or in the Adobe Creative Suite component you’re using.
See also
“About the Adobe dialog box” on page 31
“To connect to a remote project” on page 36
“Adding files and folders to a project” on page 47
“To set Version Cue Workspace preferences” on page 32
To connect to a remote project
Note: You can perform this task only if you have access to the full Version Cue feature set, available in Adobe Creative
Suite or in a shared workspace. See “Availability of Version Cue features” on page 29 for more information.
36
When you need to work on Version Cue projects that are located remotely, on a different subnet, you can use the IP
address of the computer to access that Version Cue Workspace. Workspaces on computers within your subnet should
be visible automatically.
1 Do one of the following:
• In Illustrator, InCopy, InDesign, or Photoshop, choose File > Open. If you are using the OS Dialog box, click Use
Adobe Dialog. Click Version Cue in the Favorites panel. Choose Connect To from the Project Tools menu
• In Bridge, choose Tools > Version Cue > Connect To.
• In Acrobat, choose File > Open. Click Version Cue. Choose Connect To from the Project Tools menu.
2 In the Connect To dialog box, enter the Version Cue Client URL (the Version Cue IP or DNS address), a colon,
.
and the port number (3703), for example, http://153.32.235.230:3703. If you have connected to the workspace before,
it’s not necessary to enter the port number.
You can display the Version Cue Workspace Administration utility login page to identify the Version Cue Client
URLs that remote users and WebDAV applications need to access the workspace.
3 Click OK. After you connect to a remote Version Cue Workspace, the dialog box displays all available Version Cue
projects in that workspace.
A shortcut to the remote workspace is automatically included in your list of available Version Cue Workspaces.
See also
“About the Adobe dialog box” on page 31
“To log into Version Cue Administration from an Adobe Creative Suite component” on page 72
Page 42

ADOBE INCOPY CS2
User Guide
To connect to a project using WebDAV
The Version Cue Workspace can communicate with applications that are WebDAV enabled. When Version Cue is
runningonaserver,you canuse it as aWebDAVserver. However, VersionCue's native versioning features aremore
sophisticated than those available through WebDAV. WebDAV capabilities are provided for legacy workflows.
❖ Refertoyourapplication’s documentationfor informationonusing itsWebDAVfeatures, andthenuse theVersion
Cue WebDAV Client URL, the port number (3703), “webdav”, and the project name to identify the project you want
to work with, for example, http://153.32.235.230:3703/webdav/project_name
See also
“Availability of Version Cue features” on page 29
To view Version Cue Workspace, project, and file information
Note: You can perform this task only if you have access to the full Version Cue feature set, available in Adobe Creative
Suite or in a shared workspace. See “Availability of Version Cue features” on page 29 for more information.
For help on viewing information in Acrobat 7, see Acrobat Help.
1 In Illustrator, InCopy, InDesign, or Photoshop, choose File > Open.
2 If the button is available, click Use Adobe Dialog (if you see the Use OS Dialog button instead, you are already
using the Adobe dialog box).
3 Click Version Cue in the Favorites panel.
37
You can resize the Favorites panel to display items with long names: place your cursor over the vertical line to the
right of the Favorites panel and drag it to the right.
4 To change the display of Version Cue Workspaces, projects, or files in the dialog box, do any of the following:
• To view the properties of a file, click the toggle to display the Properties panel.
• To change the display of project, choose a display option from the View menu .
• To sort items in a column, while in detail view, click the column heading. Click the column heading again to
reverse the order.
• To show or hide columns of information while in list view, right-click (Windows) or Control-click (Mac OS) the
Name column heading, and choose Show All, Hide All, or a column name. (The Name column can’t be hidden.)
Visible columns have a check mark to the left of the column name.
• To change the location of a column, drag the column heading to the left or right of another column heading
(Windows), or press Command+Option and drag the column heading to the left or right of another column
heading (Mac OS). The Name column can’t be moved.
• To resize a column of information, drag the vertical dividing line between column headings or double-click the
line to automatically resize the column to fit the widest item in it.
5 To display information about a file, project, or Version Cue Workspace, do one of the following:
• Place the pointer over the item. A summary of file information appears in a tool tip.
• Right-click (Windows) or Control-click (Mac OS) the file and choose Versions (to display information about a
file’s versions) or Alternates (to display information about a file’s alternates).
Note: If you’ve already opened the file in an Adobe Creative Suite component, file status information appears at the
bottom of the file’s window.
Page 43

ADOBE INCOPY CS2
User Guide
See also
“About the Adobe dialog box” on page 31
“Version Cue file statuses” on page 44
To view Version Cue Workspace, project, and file information in Bridge
Note: You can perform this task only if you have access to the full Version Cue feature set, available in Adobe Creative
Suite or in a shared workspace. See “Availability of Version Cue features” on page 29 for more information.
In Bridge, you can choose between two display views: Versions And Alternates View and Details View. Use the
Versions And Alternates View to view thumbnails of files along with thumbnails of Version Cue alternates and
versions. Use the Details View to view thumbnails as well as information about the number of versions or alternates,
enhanced status information, and the current version comment.
1 Start Bridge, and then click Version Cue in the Favorites panel.
2 Click the Version Cue Workspace, project, or file to view its information, or place the pointer over the item to
display a summary of information in a tool tip.
See also
“Version Cue file statuses” on page 44
38
“About Version Cue versions” on page 58
“About Version Cue alternates” on page 63
Creating and editing projects
To begin using Version Cue, you need to create a Version Cue project. When you work with Version Cue, you decide
what a project entails. For example, you can create a project to organize files for an entire publishing effort, or you
can create a project to manage files for specific aspects of an advertising campaign. You can use a project to organize
assets relatedtoaparticular customer or useaprojecttoseparateprivate filesfromfiles that areworkedoncollaboratively. You can add files to projects at any time by using Bridge, InCopy, or any Adobe Creative Suite component.
When you create a Version Cue project, you specify a project name, the Version Cue Workspace that hosts the
project, and a project description. You specify whether to share the project or keep it private. Shared projects are
available to other users; however, you can password-protect shared projects to restrict access to specific users. You
can create private projects on a workspace installed on your computer. If you create a project on a computer that is
used as a server, it must be shared to be accessible.
You can create projects by using Bridge, InCopy, any Adobe Creative Suite component, or the Version Cue Administration utility. The Version Cue Administration utility provides options for specifying advanced project properties.
You create new Version Cue projects with it by importing a folder of files. These files are used as the project starting
point.
Page 44

The Project Tools menu contains frequently used commands
ADOBE INCOPY CS2
User Guide
39
See also
“To create a project” on page 39
“To edit Version Cue project properties” on page 78
“To create a new Version Cue project from a folder” on page 77
“To share or unshare a project” on page 41
“To share or unshare a project from Bridge” on page 42
“Availability of Version Cue features” on page 29
To create a project
Note: You can perform this task only if you have access to the full Version Cue feature set, available in Adobe Creative
Suite or in a shared workspace. See “Availability of Version Cue features” on page 29 for more information.
For information on creating a project in Acrobat 7, see Acrobat Help.
1 In Illustrator, InCopy, InDesign, or Photoshop, choose File > Open. Click Use Adobe Dialog if you’re using the OS
dialog box.
2 Click Version Cue in the Favorites panel.
3 Choose New Project from the Project Tools menu
4 Choose a location for the project from the Location menu.
5 Enter a name for the project in the Project Name box and a description in the Project Info box. (The description
you enter appears as a tool tip when the pointer is over the project in the list of workspaces.)
.
Page 45

ADOBE INCOPY CS2
User Guide
6 To make this project and its files available to others, select Share This Project With Others. (If the Version Cue
Workspace is on a computer other than your own, the Version Cue project is shared by default.)
7 Click OK.
See also
“About the Adobe dialog box” on page 31
To create a project in Bridge
Note: You can perform this task only if you have access to the full Version Cue feature set, available in Adobe Creative
Suite or in a shared workspace. See “Availability of Version Cue features” on page 29 for more information.
1 Start Bridge, and then click Version Cue in the Favorites panel.
2 Choose Tools > Version Cue > New Project.
3 Choose a location for the project from the Location menu.
4 Enter a name for the project in the Project Name box and a description in the Project Info box. The description
you enter appears as a tool tip when the pointer is over the project in the list of workspaces.
5 To make this project and its files available to others, select Share This Project With Others. (If the Version Cue
Workspace is on a computer being used as a server, the Version Cue project is shared by default.)
6 Click OK. The project opens automatically. No Items To Display appears in the Content Area until you add files
to the project.
40
See also
“To add a file or folder to a project in Bridge” on page 48
To edit the properties of a project
Note: You can perform this task only if you have access to the full Version Cue feature set, available in Adobe Creative
Suite or in a shared workspace. See “Availability of Version Cue features” on page 29 for more information.
1 Do one of the following:
• In Illustrator, InCopy, InDesign, or Photoshop, choose File > Open. Click Use Adobe Dialog if you’re using the OS
dialog box. Double-click the host Version Cue Workspace. Select the project, and then choose Edit Properties from
the Project Tools menu.
• In Bridge, select the project and then choose Tools > Version Cue > Edit Properties.
• In Acrobat7,chooseFile > Open.Click VersionCue.Selectthe project, andthenchooseEditPropertiesfromthe
Project Tools menu.
2 In the Edit Properties dialog box, do any of the following, and click Save:
• To change the project name, enter a name in the Project Name text box. The new name will not be reflected on
your (or your workgroup’s) working copies project folder until you disconnect from and reconnect to the project.
• To change the description of the project, enter text in the Project Info box.
• To make this projectand itsfiles availabletoother users, select ShareThisProject With Others.(If theVersion Cue
Workspace is on a computer being used as a server, the Version Cue project is shared by default.) To unshare a
Page 46

ADOBE INCOPY CS2
User Guide
shared project, deselect Share This Project With Others. Note, however, that this action does not delete any
working copies currently in project folders on the workgroup’s computers.
• To view thelocationofworking copies on your computer,expandLocal ProjectFiles.Toopenthe folder,choose
Show Files (Windows) or Show Files in Finder (Mac OS). To change the location of the files, click Change Location
and choose the new location for working copies.
Note: Make sure that you use the Change Location feature to relocate working copies, rather than moving the project
folder manually in the file system.
• Click Advanced Administration to enable lock protection, edit or assign users, or require users to log into the
project. When prompted, log into Version Cue Administration. Depending on your privileges, this option may not
be available.
3 Click Cancel to close the Open dialog box (Version Cue saves your settings even though you clicked Cancel).
See also
“Disconnecting from projects” on page 53
“Deleting files and folders” on page 54
41
“To log into Version Cue Administration from an Adobe Creative Suite component” on page 72
To share or unshare a project
Note: You can perform this task only if you have access to the full Version Cue feature set, available in Adobe Creative
Suite or in a shared workspace. See “Availability of Version Cue features” on page 29 for more information.
At anytime, youcan change aproject’s shared status.ProjectsonaVersionCue Workspacethatother userscan access
are shared by default and can’t be made private. Note that unsharing a project does not delete any working copies
currently in the working copies project folders of your workgroup.
Note: If theVersion CueWorkspace is installedonacomputer that uses afirewalland youwanttoshare theworkspace
with others, make sure that TCP ports 3703 and 427 are left open. If you’re using a Windows machine, deselect the
Internet Connection Firewall option. (For information on the Internet Connection Firewall option, see Windows Help.)
1 Do one of the following:
• In Illustrator, InCopy, InDesign, or Photoshop, choose File > Open. Click Use Adobe Dialog if you’re using the OS
Open dialog box.
• In Acrobat 7, choose File > Open.
2 Click Version Cue in the Favorites panel, and then double-click the host Version Cue Workspace.
3 Select the project, and then do one of the following:
• To share the project, choose Share Project from the Project Tools menu .
• To unshare the project, choose Unshare Project from the Project Tools menu.
• Choose Edit Properties from the Project Tools menu. Select or deselect Share This Project With Others, and click
Save. After you edit the project properties, click Cancel to close the Open dialog box (your settings are saved even
though you clicked Cancel).
Page 47

ADOBE INCOPY CS2
User Guide
See also
“About the Adobe dialog box” on page 31
“To view Version Cue Workspace, project, and file information” on page 37
To share or unshare a project from Bridge
Note: You can perform this task only if you have access to the full Version Cue feature set, available in Adobe Creative
Suite or in a shared workspace. See “Availability of Version Cue features” on page 29 for more information.
At any time, you can make a project shared or unshared. You can keep a Version Cue project unshared only if it is on
your owncomputer. Projects that youcreateonaVersionCue Workspacethatisnot locatedonyourown computer
are shared by default and can't be made private. Note that unsharing a project does not delete any working copies
that others may already have in the working copies project folder on their own computer.
1 Start Bridge, and then click Version Cue in the Favorites panel.
2 Double-click Workspaces.
3 Right-click (Windows) or Ctrl-click (Mac OS) the project and choose either Share Project or Unshare Project from
the menu.
You can also choose Edit > Properties, and then select or deselect Share This Project With Others, and click Save.
42
See also
“To view Version Cue Workspace, project, and file information in Bridge” on page 38
Working with files in Version Cue
Using working copies
Version Cue projects and files reside in the Version Cue Workspace on the host computer. The master copies of files
added to the project, including file versions and other file data, such as comments, version dates, and user IDs, are
saved on this host computer. When you work in files from a Version Cue project, you’re editing a working copy of the
master file on your computer, not the master file on the Version Cue Workspace, which remains protected and
untouched.
As you work, use the Save command to save changes periodically. This command does not create a new version of
the master file but updates your working copy. A new version is created only when you choose the Save A Version
command. This command first updates the working copy, and then adds a new version to the master file on the
Version Cue Workspace. When the working copy of a file matches (is the same version as) the current version in the
workspace, the file is synchronized.
Using working copies of master files, several people can work with the most recent version of a master file. For
example, if two people need access to the same illustration during overlapping periods of time, Version Cue lets each
person work with a working copy of the most recent file version. The second person to access the illustration is
informed that the file is already in use. At that time, the second person can decide whether to continue working with
the file. Working copies give everyone flexible access to project files and allow work to proceed concurrently when
necessary.
Note: Two users can’t edit a file simultaneously in InCopy.
Page 48

ADOBE INCOPY CS2
User Guide
Working copies allow you to work on a file even when the host workspace is unavailable, or offline. Though some
features, such as versions and alternates, can’t be used when you’re working offline, you can edit files and save your
work. When the workspace is online again, you can save a version to update the master file.
There are times when you may wish to delete the working copies of your project files. For example, you may want to
free up space on your hard drive, or are completely finished working on the project. Version Cue lets you delete your
working copies of project files by disconnecting from the project. Disconnecting from a project deletes the working
copies projectfolderonyourharddrive.You candothisatany time if none of theworking copies areInUse by you.
If you accidentally disconnect from a project, new working copies are recreated the next time you access the project
files. If a project is deleted from either the host workspace or your local computer, you can use working copies to
recreate the project with the most current versions of the files.
To relocate working copies of a project, edit the project’s properties and use the Change Location feature. For instructions, see
“To edit the properties of a project” on page 40.
Note: Make sure that you use the Change Location feature to relocate working copies, rather than moving the project
folder manually in the file system.
See also
“Creating and editing projects” on page 38
43
“To create a project” on page 39
“Disconnecting from projects” on page 53
“Deleting files and folders” on page 54
“Editing and synchronizing offline files” on page 68
“To restore a file or folder deleted from a project” on page 57
“Version Cue file statuses” on page 44
“Availability of Version Cue features” on page 29
File protection in Version Cue
Version Cue automatically informs others that a file is being edited. Version Cue assigns In Use status to a file when
you open and edit a file that isn’t being edited by another user. When you save a version, Version Cue removes the
file’s In Use status.
Note: In InCopy, you must choose File > Checkin after saving a version to remove the file’s In Use status.
At times two people may need to work with a file simultaneously. For example, User A may begin editing a file but
be called away before saving a version. If User B works on the file while User A is away, Version Cue ensures that the
two files don’t overwrite each other in the project. User A’s working copy won’t reflect the changes made by User B,
and vice versa. When finished with the file, both users can save a new version of the file to the Version Cue
Workspace. Version Cue alerts all current users of the file about the presence of a new version in the Version Cue
Workspace and gives them the option of downloading the latest version or continuing their current edits. Alternatively,users cansavetheir editsasanalternate.(Version Cuealertsusers whohavethe file open or whore-openafile
that was previously closed while In Use.)
Note: Two users can’t edit a file simultaneously in InCopy.
Page 49

ADOBE INCOPY CS2
User Guide
You can use the Version Cue Workspace Administration utility to assign lock protection to a Version Cue project.
Only the first user to begin editing an available file in a lock-protected project can save the next version of that file
to theVersion Cueproject.Other userswho edit that file simultaneously can’tsavechanges to anew versionofthat
file, even after the first user saves a version. These other users must save the changes as completely new files with
their own version thread; however, they can designate their file as an alternate of the original file.
The ability to access a file in a lock-protected project provides the flexibility to create proofs or experiment with the
design, for example, and then close the file without saving changes.
See also
“Using working copies” on page 42
“Availability of Version Cue features” on page 29
Version Cue file statuses
Filesthatare managedbyVersion Cueare always marked with astatusiconthatdescribes thestate of thefileonthe
VersionCue Workspace. Youcan view afile’sstatuswhile browsing thefiles in aVersion Cueproject,inBridge, and
also in the document window’s Status area after opening a file from the Version Cue Workspace in an Adobe Creative
Suitecomponent.InAcrobat,the status is displayedinthe titlebar.Afile canhavemorethanone status at thesame
time (in some cases only one status is shown).
44
Each file status has a corresponding icon:
Open Thefileisopenonyourcomputer. This status lets youmakeinformeddecisions aboutwhether it’s appro-
priate, for example, to place a file into a layout while the file is still being edited. The Open status is indicated only
for files on your computer.
In Use By Me You are editing the file. Version Cue assigns this status to a file when you make an edit to the file
that changesits content.Youcan manually mark afileinuse before youeditittoindicatetoothersthatyou intend to
make changes to the content.
Synchronized The latest known version of the file is available for editing and you have a working copy of it on
your computer. Version Cue assigns this status when you save a version of the file you’re editing, or when you
manually synchronize a project.
No Working Copy No local copy of the file exists. This status indicates that it will take a few moments to create
a working copy before you can edit the file.
In Use By <user name> Another user is editing the file and has not yet saved a new version.
Conflicted Copies There is a version conflict, or both you and another user are editing the file.
Only Copy The file in the working copies folder is the only copy known to Version Cue and has not been
synchronized with the Version Cue Workspace. This scenario can occur when a file has been saved in an existing
project for the first time while the workspace is offline. Because the workspace is offline, Version Cue displays the
OfflineCopystatusuntil theworkspace is back online, andthenchangesthe status to Only Copy.Version Cuealso
displays this status if you drag a file from one folder into the working copies folder using the file system instead of
Bridge (not recommended). You can edit the file, but it’s important to synchronize(upload thefiletothe workspace)
after you save your changes.
Offline Copy There is a local copy of the file in your working copies folder, but the Version Cue Workspace is
offline. There is no way of checking whether the local copy is synchronized with the latest version on the workspace.
Page 50

ADOBE INCOPY CS2
User Guide
You can edit an offline copy and save these changes; however, you must save a version or synchronize the file once
the workspace comes back online.
Outdated Copy Alocal copy exists, butthere is anewer versionofthe file in theworkspace.Thisstatusindicates
that it will take a few moments to create an up-to-date working copy before you can edit the file.
Unavailable The Version Cue Workspace is offline or you don’t have access privileges. There is no way of
checking the status of the local copy with the workspace. You can edit the local copy and save these changes; however,
you must save a version or synchronize the file once the workspace comes back online.
Deleted Thefileorfolderhas been deletedfromthe project, butnot yetpermanently erased.(Youcan restorea
deleted file or folder).
See also
“Using working copies” on page 42
“To synchronize files” on page 70
“To edit a file in use by another user” on page 46
“Deleting files and folders” on page 54
“Availability of Version Cue features” on page 29
45
To open a file from a project
Note: You can perform this task only if you have access to the full Version Cue feature set, available in Adobe Creative
Suite or in a shared workspace. See “Availability of Version Cue features” on page 29 for more information.
After you add or save a file to a Version Cue project, the file is automatically managed by Version Cue. Managed files
can’tbeoverwritten.Ifyou open afilethat’sinuse by anotheruserorthathas been previously edited andsaved as a
new version, you are prompted to edit the most recent version.
1 Do one of the following:
• In Illustrator, InCopy, InDesign, or Photoshop, choose File > Open. Click Use Adobe Dialog if you’re using the OS
dialog box, and then click Version Cue in the Favorites panel.
• In Acrobat 7, choose File > Open, and then click Version Cue in the dialog box that appears.
• In Bridge, click Version Cue in the Favorites panel.
2 Double-click the host Version Cue Workspace.
3 Double-click the project that contains the file you want to open.
4 Select the file and click Open.
See also
“To edit a file in use by another user” on page 46
“To update a file with the most recent version” on page 46
“About the Adobe dialog box” on page 31
“To search for files in a project” on page 52
Page 51

ADOBE INCOPY CS2
User Guide
To reveal a file in Bridge
❖ Right-click (Windows) or Ctrl-click (Mac OS) the file in the Open dialog box in InCopy or an Adobe Creative
Suite component, and choose Reveal In Bridge.
The file appears in the Bridge window.
To edit a file in use by another user
Note: You can perform this task only if you have access to the full Version Cue feature set, available in Adobe Creative
Suite or in a shared workspace. See “Availability of Version Cue features” on page 29 for more information.
If you don't notice that a file's status is In Use when you open it, Version Cue displays an In Use By alert to remind
you that someone else is already editing a working copy of the file.
Note: In InCopy, you can’t edit a file that’s in use by another user.
1 Open the file, and click one of the following options when the In Use By alert appears:
No, Close Document Closes the file without any alterations.
Yes, Keep Open Keeps the file open so you can work on the document.
2 If you continue working with the document and make a change to the content, Version Cue displays an alert to
remind you that there is the possibility of creating conflicting copies. Click one of the following:
Discard Changes Displays the most recent version of the file from the Version Cue Workspace and discards your
changes to the working copy.
46
Continue Editing Lets you edit the working copy without overwriting the changes made in another user’s working
copy of the same file (Version Cue will prompt each user to save a new version of the file).
3 If the project doesn’t have lock protection applied to it, you can save a new version of your edits. Version Cue
displays an alert warning you that conflicting edits will occur if you continue. Click one of the following:
Cancel Returns you to the open document without saving a version.
Save Version Anyway Updates the master file in the Version Cue Workspace with the new version. (Version Cue
displays an alert to the other user to note that a newer version of the file has been created by you.)
At any point, you can close the document and discard any changes you’ve made.
See also
“To update a file with the most recent version” on page 46
To update a file with the most recent version
Note: You can perform this task only if you have access to the full Version Cue feature set, available in Adobe Creative
Suite or in a shared workspace. See “Availability of Version Cue features” on page 29 for more information.
Page 52

ADOBE INCOPY CS2
User Guide
If another user creates a new version of a file that you have open or that is still marked In Use By Me, Version Cue
promptsyou to update your document with thelatestversion when youopenitorattempt to make changestoit, or
when you bring the document window frontmost in a group of documents.
❖ When the prompt appears, click one of the following:
Discard Changes Updates the document with the most recent version from the Version Cue project. You can
continue editing the file after it is updated. You lose any changes you’ve made even if you have already saved those
changes to the working copy with a Save command.
Continue Editing Leaves the document as is. You can continue editing the file without overwriting the changes in
the more recent version. Instead, you’re prompted to either save a new version of the file when you close it, or to
discard your changes.
See also
“To edit a file in use by another user” on page 46
Adding files and folders to a project
To save versions of a file and take advantage of Version Cue file management, you must add or save the file to a
Version Cue project. You can add assets such as swatch libraries to projects to share them with your workgroup. You
can also add non-Adobe files to Version Cue projects You can add files using any of the following methods:
47
• Add files one at a time from within InCopy or in Adobe Creative Suite.
• Drag one or more files or folders to a Version Cue project using Bridge. Use this method to copy files from one
Version Cue project to another.
• Drag files and folders from open windows on your computer's desktop to a Version Cue project displayed in a
Bridge window.
• Place files directly in the project’s working copies folder, and then synchronize the project to add the files. For more
information, see
“About Version Cue projects” on page 34.
See also
“To create a new Version Cue project from a folder” on page 77
“Availability of Version Cue features” on page 29
To add a file to a project
Note: You can perform this task only if you have access to the full Version Cue feature set, available in Adobe Creative
Suite or in a shared workspace. See “Availability of Version Cue features” on page 29 for more information.
For information on adding a file to a project in Acrobat 7, see Acrobat Help.
1 Open the file in Illustrator, InCopy, InDesign, or Photoshop.
2 Choose File > Save As. Click Use Adobe Dialog if you’re using the OS dialog box.
3 Double-click the host Version Cue Workspace.
4 Double-click the project to open it.
5 Enter a comment for the first version in the Version Comments box, and click Save.
Page 53

ADOBE INCOPY CS2
User Guide
See also
“About the Adobe dialog box” on page 31
To add a file or folder to a project in Bridge
Note: You can perform this task only if you have access to the full Version Cue feature set, available in Adobe Creative
Suite or in a shared workspace. See “Availability of Version Cue features” on page 29 for more information.
1 Start Bridge. In Folders (in the Favorites panel), navigate to the folder in the Version Cue project to which you
want to add files.
2 Navigate to the folder that contains the files or folders you want to add to the project.
3 Select one or more files or folders, and drag them to the Version Cue folder icon you navigated to in step 1.
Note: To copy (not move) the files to a project, hold down Ctrl (Windows) or Option (Mac OS) as you drag the files to
the project.
To add a file or folder from a desktop folder to a project in Bridge
Note: You can perform this task only if you have access to the full Version Cue feature set, available in Adobe Creative
Suite or in a shared workspace. See “Availability of Version Cue features” on page 29 for more information.
48
1 Start Bridge, and click Version Cue in the Favorites panel.
2 Double-click Workspaces.
3 Double-click the Version Cue project and browse to the folder to which you want to add files.
4 Select files and folders in the open folder on your desktop.
5 Drag theseitems from theopenfoldertothe Bridge contentareadisplayingthe VersionCue folder to whichyou
want to add files.
Note: To copy (not move) the files to a project, hold down Ctrl (Windows) or Option (Mac OS) as you drag the files to
the project.
To add files to a project folder without Bridge
Note: You can perform this task only if you have access to the full Version Cue feature set, available in Adobe Creative
Suite or in a shared workspace. See “Availability of Version Cue features” on page 29 for more information.
It’s best to add files using Bridge, but you can add files by dragging them into the documents folder of a Version Cue
project.
1 Do one of the following:
• Locate the project folder inside the My Documents/Version Cue (Windows) or Documents/Version Cue
(Mac OS) folder on your computer.
• If the project folder isn’t already in the My Documents/Version Cue (Windows) or Documents/Version Cue
(Mac OS) folder on your hard disk, create a new folder inside the Version Cue folder. Give the folder the same
name as the existing Version Cue project on the Version Cue Workspace. Inside the new project folder, create a
new folder and name it documents.
Note: These steps work only if the project already exists. You cannot create a new project using this method.
2 Move or copy the items you want to add to the documents folder.
Page 54

ADOBE INCOPY CS2
3 In Illustrator, InCopy, InDesign, Photoshop, or Acrobat, choose File > Open. Click Use Adobe Dialog if you’re
using the OS dialog box.
4 Click Version Cue in the Favorites panel. Open the Version Cue Workspace, and select the project.
5 Choose Synchronize from the Project Tools menu . (Alternatively, you can select the project in Bridge and
synchronize it.) Once the synchronization is complete, the files are added to the project.
See also
“Editing and synchronizing offline files” on page 68
“About the Adobe dialog box” on page 31
“About Version Cue projects” on page 34
To copy or move files between projects or from a project to a desktop folder
❖ Do one of the following:
• To copy a file between projects, start Bridge and navigate to the project folder that contains the file you want to
copy.ChooseFile>NewWindowtoopenanewBridgewindow, andnavigatetothe projectfoldertowhich you
want to add the file. Drag the file from the first project folder to the destination project folder in the second Bridge
window.
• To copy a file from a project to a desktop folder, drag it from the project folder in Bridge to the desktop folder.
User Guide
49
Note: When you copy a file between projects or from a project to a desktop folder, Version Cue copies only the most
current version.
• To move a file between projects, copy it from one project folder to another in Bridge, and then permanently delete
the file from the first proj
ect folder. For instructions on permanently deleting files, see “To delete files or folders
from a project” on page 56 and “To delete a file or folder permanently” on page 58.
• To move a file from a project to a desktop folder, drag it from the project folder in Bridge to the desktop folder,
and then permanently delete the file from the first project folder. For instructions on permanently deleting files,
“To delete files or folders from a project” on page 56 and “To delete a file or folder permanently” on page 58.
see
To save changes to a file
Note: You can perform this task only if you have access to the full Version Cue feature set, available in Adobe Creative
Suite or in a shared workspace. See “Availability of Version Cue features” on page 29 for more information.
If youwanttosavechanges, butaren't readytosaveanewversion as youeditafile youhaveopenedfromaVersion
Cue project, you can use the File > Save command to save your changes to the working copy on your computer. Until
you save a new version to the shared Version Cue Workspace, these changes won’t be available to any other user. You
can also close the file once you save changes to a file, and then reopen it and save a version later.
❖ To save changes to your working copy, choose File > Save.
To place a file from a project into a document
Note: You can perform this task only if you have access to the full Version Cue feature set, available in Adobe Creative
Suite or in a shared workspace. See “Availability of Version Cue features” on page 29 for more information.
Page 55

ADOBE INCOPY CS2
User Guide
While you’re working with a Version Cue project in Illustrator, InCopy, InDesign, or Photoshop, you can add a file
to a document just as you normally would—by using the Place command. The Links palette (in Illustrator, InCopy,
and InDesign) displays additional information about placed files from Version Cue projects, identifying whether a
linked file is being edited, which user is doing the editing, whether it is a member of a group of alternates, and if so,
whether it is the primary (preferred) alternate. You can also use the Links palette to determine whether the linked
file needs to be updated to a newer version from the Version Cue Workspace.
1 In Illustrator, InCopy, InDesign, or Photoshop, choose File > Place.
2 Click Version Cue in the Favorites panel.
3 Double-click the host Version Cue Workspace.
4 Double-click the project containing the file you want to place.
5 Select the file, and click Place.
For complete information on placing files into documents in Adobe Creative Suite, see the specific application’s Help.
Note: When you place a file from a Version Cue project, a copy of that file is placed in your My Documents/Version Cue
(Windows) or Documents/Version Cue (Mac OS) folder of working copies for that project. As a result, you can edit that
file offline, while it’s disconnected from the Version Cue Workspace
See also
“Using the Links palette with project files” on page 50
50
“About Version Cue alternates” on page 63
To place a non-Version Cue file into a document
Note: You can perform this task only if you have access to the full Version Cue feature set, available in Adobe Creative
Suite or in a shared workspace. See “Availability of Version Cue features” on page 29 for more information.
1 With the document open in Illustrator, InCopy, InDesign, or Photoshop, navigate to the file you want to place.
2 Select the file, and click Place (Illustrator) or Open.
For complete information on placing files into documents in Adobe Creative Suite, see the specific application’s Help.
You should always add assets to a Version Cue project before placing them in a Version Cue-managed file. When you
place a non-Version-Cue managed file into a managed file, you cannot keep track of the placed asset's versions, alter
nates, or status.
Using the Links palette with project files
When Version Cue is enabled in Illustrator, InCopy, or InDesign, the Links palette identifies who is editing a linked
file from aVersion Cueproject.Italsodisplaysalinkedfile’sversionsand alternates so that youcan promoteand use
previous versions, update the document with the linked file’s alternates; you can even create versions of linked nonAdobe files.
The Links palette, including the File Status column, functions the same with Version Cue-managed files as it does
with non-Version Cue-managed files. For example, if a newer version of a linked file is on the Version Cue
Workspace, the Modified Artwork icon
update a linked file from a Version Cue project, you use the same procedures used for files that aren’t managed by
Vers i on Cu e .
appears; if a file is missing, the Missing Artwork icon appears. To
-
Page 56

ADOBE INCOPY CS2
User Guide
The Version Cue Edit Status column in the Links palette displays nothing if the linked file is available, or it displays
a status icon.
See Illustrator Help, InCopy Help, or InDesign Help for more information about working with the Links palette and
placed files.
See also
“Availability of Version Cue features” on page 29
“To view alternates and versions in the Links palette” on page 51
“To replace a placed file with an alternate” on page 51
“To replace a placed file with a previous version” on page 52
“To replace a placed file with an alternate derived from a previous version” on page 52
To view alternates and versions in the Links palette
Note: You can perform this task only if you have access to the full Version Cue feature set, available in Adobe Creative
Suite or in a shared workspace. See “Availability of Version Cue features” on page 29 for more information.
When Version Cue is enabled in Illustrator, InCopy, or InDesign, you can view versions and alternates of a placed
file from the Links palette.
51
❖ Do one of the following:
• To view versions of a placed file, choose Versions from the Links palette menu.
• To view alternates of a placed file, choose Alternates from the Links palette menu.
See also
“Using the Links palette with project files” on page 50
“To replace a placed file with an alternate” on page 51
“To replace a placed file with a previous version” on page 52
“To replace a placed file with an alternate derived from a previous version” on page 52
To replace a placed file with an alternate
1 In Illustrator, InCopy, or InDesign, select the file in the Links palette.
2 Choose Alternates from the Links palette menu.
3 Choose an alternate, and click Relink.
See also
“Using the Links palette with project files” on page 50
“To view alternates and versions in the Links palette” on page 51
“To replace a placed file with a previous version” on page 52
“To replace a placed file with an alternate derived from a previous version” on page 52
Page 57

ADOBE INCOPY CS2
To replace a placed file with an alternate derived from a previous version
1 In Illustrator, InCopy, or InDesign, select the file in the Links palette.
2 Click Edit Original and edit the file in its native application.
3 Choose File > Save As, and select Save As Alternate (rename the file if you save it in the original folder).
4 Close the file.
5 In Illustrator, InCopy, or InDesign, select the placed file in the Links palette.
6 Choose Alternates from the Links palette menu.
7 Select the Alternate you created in step 3, and click Relink.
See also
“Using the Links palette with project files” on page 50
“To view alternates and versions in the Links palette” on page 51
“To replace a placed file with an alternate” on page 51
“To replace a placed file with a previous version” on page 52
User Guide
52
To replace a placed file with a previous version
1 In Illustrator, InCopy, or InDesign, select the file in the Links palette.
2 Choose Versions from the Links palette menu.
3 Select a version and click Promote To Current. Enter a version comment if desired, and click Save.
See also
“Using the Links palette with project files” on page 50
“To view alternates and versions in the Links palette” on page 51
“To replace a placed file with an alternate” on page 51
“To replace a placed file with an alternate derived from a previous version” on page 52
To search for files in a project
Note: You can perform this task only if you have access to the full Version Cue feature set, available in Adobe Creative
Suite or in a shared workspace. See “Availability of Version Cue features” on page 29 for more information.
Metadata is automatically added to Version Cue project files as you work with them. In addition, you can manually
add other information to files in Adobe Creative Suite through the File Info dialog box. You can quickly locate files
in a Version Cue project by searching for specific information such as titles, authors, copyright data, keywords, dates,
and locations. The search feature searches through existing files, as well as files deleted from projects. For information on searching in Acrobat 7, see Acrobat Help. You can also search for Version Cue project files in Bridge, both
by version comment and past versions.
1 In Illustrator, InCopy, InDesign, or Photoshop, choose File > Open.
2 If the button is visible, click Use Adobe Dialog (if you see the Use OS Dialog button instead, you are already using
the Adobe dialog box).
Page 58

ADOBE INCOPY CS2
User Guide
3 Click Version Cue in the Favorites panel.
4 Double-click the host Version Cue Workspace.
5 Double-click the project you want to search.
6 Click Project Search
7 Enter information in Project Search.
If youopenanolder versionofafile foundasthe result of asearch, thefilenamewillbeprefacedwithVersion <X> -.
Note: It is best to treatolderversionsasview-onlywhenopenedasthe result of asearch. Although youcan edit an older
version in its native application, do so only if you intend for this version to become a separate asset or to be used as an
alternate. To edit a previous version, first promote it to the new, current version, and then make changes.
.
See also
“About the Adobe dialog box” on page 31
“Version Cue file statuses” on page 44
“Viewing and comparing versions” on page 60
“To view a previous version in its native application” on page 62
53
Disconnecting from projects
Disconnecting from projects
Disconnecting from a project erases the working copies of files on your computer while leaving the master copies on
the Version Cue Workspace intact. Disconnecting also removes shortcuts to the project from Bridge and the Adobe
dialog box. You may want to disconnect to free up more space on your hard drive. Or, you might disconnect from a
projectifsomeone else in your workgroupdeletes aproject from theVersion CueWorkspace (yourworking copies
are not touched by that deletion).
As long as you have saved a version of the working copies there is no harm in discarding them by disconnecting.
When you access the project again, new working copies will be created for the current versions of the files you open.
If youhaveworking copies with theInUse By Me status,you will notbepermitted to disconnect from aproject until
you have saved a version of those files.
When you disconnect from a project, only the working copies and shortcuts on your computer are erased. Leaving
the project intact on the workspace allows others, as well as yourself, to access the master files. When you delete a
project, allworking copies andshortcuts on your owncomputer, alongwiththe master copies of filesand foldersin
the Version Cue Workspace, are erased. However, any working copies and shortcuts on other computers your coworkersoryou previously used to access theproject arenot erased.Tocompletelyremovethe projectand erasethose
working copies and shortcuts, you must select the shortcut or project folder and disconnect, even though the project
has already been deleted.
You can disconnect from a Version Cue project by using Bridge, Photoshop CS2, Illustrator CS2, InCopy CS2, or
InDesign CS2. GoLive CS2 uses a different method for deleting working copies of site files. Disconnect is not
available in Acrobat 7.
Page 59

ADOBE INCOPY CS2
User Guide
See also
“Deleting files and folders” on page 54
“To disconnect from a project in Bridge” on page 54
“To disconnect from a project” on page 54
“Using working copies” on page 42
“Availability of Version Cue features” on page 29
To disconnect from a project
Note: You can perform this task only if you have access to the full Version Cue feature set, available in Adobe Creative
Suite or in a shared workspace. See “Availability of Version Cue features” on page 29 for more information.
Disconnecting from a project removes the files from your computer but doesn’t delete the project from the host
Version Cue Workspace. Disconnect is not available in Acrobat 7.
1 In Illustrator, InCopy, InDesign, or Photoshop, choose File > Open. Click Use Adobe Dialog if you’re using the OS
dialog box.
2 Click Version Cue in the Favorites panel.
3 Open the Version Cue Workspace and select the project from which you want to disconnect.
4 Choose Disconnect from the Project tools menu.
54
Note: You can select any project icon or shortcut to the project when you want to disconnect.
To disconnect from a project in Bridge
Note: You can perform this task only if you have access to the full Version Cue feature set, available in Adobe Creative
Suite or in a shared workspace. See “Availability of Version Cue features” on page 29 for more information.
Disconnecting from a project removes working copies of the project files from your computer but doesn’t delete the
project from the host Version Cue Workspace.
1 Start Bridge, and click Version Cue in the Favorites panel.
2 Double-click Workspaces, and navigate to the project from which you want to disconnect.
3 Right-click (Windows) or Ctrl-click (Mac OS) the project, and then choose Disconnect from the menu.
Note: You can select any project icon or shortcut to the project when you want to disconnect.
Deleting files, folders, and projects
Deleting files and folders
Deleting a file or folder from Version Cue is a two-step process that safeguards against accidental deletions. The first
step is deleting the file or folder and giving it the Deleted status. Deleting hides the file or folder from normal view
butdoesnot eraseit. Thesecondstepispermanently deleting anderasing thefileorfolderand itspreviousversions.
When you delete a folder, the folder and all folders and files nested inside it are hidden and given a Deleted status.
When you permanently delete a folder, its entire contents are erased.
Page 60

ADOBE INCOPY CS2
User Guide
Any user with appropriate privileges can delete files and folders unless the files or folders are marked In Use. In a
workgroup, if a user is editing a file that you need to delete, you can reset the file’s lock by using the Version Cue
Administration utility.
You can restore files or folders that have a Deleted status. Restoring reinstates Version Cue management. Restored
files and folders appear in their previous location in the project folder hierarchy. (Deleted files and folders maintain
their relationship within the project hierarchy until they are permanently deleted.)
In Bridge, InCopy, and in Adobe Creative Suite, you can show hidden and deleted files or folders, and view them in
search results. Additionally, Version Cue has a Project Trash view from which you can view all deleted files in a
project. Use Project Trash to view and handle all deleted files without navigating through the project folder hierarchy.
You can delete individual files or folders in Bridge, InCopy, or any Adobe Creative Suite component.
See also
“Using working copies” on page 42
“To delete a project in Bridge” on page 56
“To disconnect from a project in Bridge” on page 54
55
“To delete a Version Cue project in the Version Cue Administration utility” on page 79
“Availability of Version Cue features” on page 29
Deleting projects
Deleting a project from Version Cue permanently erases all of its master files (including versions and alternates) and
folders from the Version Cue Workspace. This is a one-step process (with confirmation). Deleting a project automatically deletes the working copies of files on your computer as well as any shortcuts to that project. However, the
working copies of files created on other users’ computers are not deleted until they disconnect from the deleted
project. Youcannotrestore deletedprojectsdirectlyinVersion Cue, norcan youdeleteaprojectifany user hasfiles
that are marked In Use.You can delete an entire Version Cue project in Bridge, InCopy, or any Adobe Creative Suite
component. You can also delete projects by using the Version Cue Administration utility, if you have privileges to do
so.
To delete a project
Note: You can perform this task only if you have access to the full Version Cue feature set, available in Adobe Creative
Suite or in a shared workspace. See “Availability of Version Cue features” on page 29 for more information.
For information about deleting a project from Acrobat 7, see Acrobat Help.
1 In Illustrator, InCopy, InDesign, or Photoshop, choose File > Open. Click Use Adobe Dialog if you’re using the OS
dialog box.
2 Click Version Cue in the Favorites panel.
3 Do one of the following:
• Double-click the host Version Cue Workspace and select the project.
• Click the project shortcut.
Page 61

ADOBE INCOPY CS2
User Guide
4 Choose Delete from the Project Tools menu.
5 Click OK in the confirmation dialog box.
You can also delete projects using the Version Cue Administration utility.
See also
“To delete a Version Cue project in the Version Cue Administration utility” on page 79
“To disconnect from a project” on page 54
“About the Adobe dialog box” on page 31
To delete a project in Bridge
Note: You can perform this task only if you have access to the full Version Cue feature set, available in Adobe Creative
Suite or in a shared workspace. See “Availability of Version Cue features” on page 29 for more information.
1 Start Bridge, and then click Version Cue in the Favorites panel.
2 Double-click Workspaces.
3 Right-click the project or the project shortcut, and then choose Delete Project from the menu.
4 Click OK to confirm the deletion.
56
To remove working copies of the files from the deleted project, you need to disconnect from the project.
See also
“To disconnect from a project in Bridge” on page 54
“To delete a project” on page 55
To delete files or folders from a project
Note: You can perform this task only if you have access to the full Version Cue feature set, available in Adobe Creative
Suite or in a shared workspace. See “Availability of Version Cue features” on page 29 for more information.
Once you delete a file or folder from a project, you can then choose to permanently delete it or restore it with its
original data, including file versions and related information. For information about deleting files or folders from
Acrobat 7, see Acrobat Help.
1 In Illustrator, InCopy, InDesign, or Photoshop, choose File > Open. Click Use Adobe Dialog if you’re using the OS
dialog box.
2 Click Version Cue in the Favorites panel.
3 Double-click the host Version Cue Workspace.
4 Double-click the project that contains the file or folder you want to delete.
5 Select the file or folder you want to delete.
6 Do one of the following:
• Choose Delete from the Project Tools menu
• Drag the file to the Project Trash .
Page 62

ADOBE INCOPY CS2
User Guide
Note: If Show Deleted files is not selected in the Project Tools menu, the file will become hidden and removed from view.
If Show Deleted Files is selected, the file or folder will remain visible with the status Deleted.
See also
“To view Version Cue Workspace, project, and file information” on page 37
To delete files from a project in Bridge
Note: You can perform this task only if you have access to the full Version Cue feature set, available in Adobe Creative
Suite or in a shared workspace. See “Availability of Version Cue features” on page 29 for more information.
Once you delete a file from a project, you can then choose to permanently delete it or restore it with its original data,
including file versions and related information.
1 In Bridge, click Version Cue in the Favorites panel, then double-click Workspaces.
2 Double-click the host Version Cue Workspace.
3 Double-click the project that contains the file you want to delete.
4 Select the file and click the Delete Item icon in the toolbar.
Note: If Show Hidden and Deleted files is not selected in the View menu, the file will become hidden and removed from
view. If Show Hidden and Deleted Files is selected, the file will remain visible with the status Deleted.
57
See also
“To view Version Cue Workspace, project, and file information” on page 37
To restore a file or folder deleted from a project
Note: You can perform this task only if you have access to the full Version Cue feature set, available in Adobe Creative
Suite or in a shared workspace. See “Availability of Version Cue features” on page 29 for more information.
For information on restoring files or folders in Acrobat 7, see Acrobat Help.
1 In Illustrator, InCopy, InDesign, or Photoshop, choose File > Open. Click Use Adobe Dialog if you’re using the OS
dialog box.
2 Click Version Cue in the Favorites panel.
3 Double-click the host Version Cue Workspace.
4 Double-click the project that contains the file or folder you want to restore and do one of the following:
• Click Project Trash in the Favorites panel, select the file you want to restore, and choose Restore from the Project
Tools menu
• Choose Show Deleted Items from the Project Tools menu (deleted file and folder names appear in gray in the
dialog box). Select the file or folder you want to restore, and choose Restore from the Project Tools menu.
5 Choose Refresh from the Project Tools menu to update the dialog box.
The file or folder is restored to its original location in the Version Cue project.
Note: To restore a file in a previously deleted folder, you must first restore the folder. Doing so restores the folder and all
its contents.
.
Page 63

ADOBE INCOPY CS2
User Guide
To delete a file or folder permanently
Note: You can perform this task only if you have access to the full Version Cue feature set, available in Adobe Creative
Suite or in a shared workspace. See “Availability of Version Cue features” on page 29 for more information.
You can permanently delete and erase files or folders that have a Deleted status. For information about deleting a file
or folder permanently in Acrobat 7, see Acrobat Help.
1 In Illustrator, InCopy, InDesign, or Photoshop, choose File > Open. Click Use Adobe Dialog if you’re using the OS
dialog box.
2 Click Version Cue in the Favorites panel.
3 Open the Version Cue Workspace and project that contains the file or folder you want to delete permanently.
4 Choose Show Deleted Items from the Project tools menu.
5 Select the file or folder you want to permanently delete, and choose Delete Permanent from the Project Tools
menu.
6 Click OK.
To delete a file permanently in Bridge
Note: You can perform this task only if you have access to the full Version Cue feature set, available in Adobe Creative
Suite or in a shared workspace. See “Availability of Version Cue features” on page 29 for more information.
58
You can permanently delete and erase files that have a Deleted status.
1 Start Bridge. In the Favorites panel, click Version Cue.
2 Double-click Workspaces, then double-click the project that contains the file you want to delete permanently.
3 Right-click (Windows) or Control-click (Mac OS) the file, and choose Delete Permanent.
4 Click OK to confirm the deletion.
Version Cue versions
About Version Cue versions
Versions provide a convenient method of retaining work that was performed in different stages. At any point in your
design process, you can save a version of the file, which Version Cue saves and tracks. Each version is a snapshot of
the file. You can use versions to review ideas or changes with team members or a client before selecting a final version,
or to recover from destructive changes.
Version Cue prevents users from overwriting each other’s work. With this protection capability, multiple users can
work on a file simultaneously. When more than one user is working on a file, Version cue alerts them all when one
user saves a new version, allowing everyone to update the file and work in the latest version.
Note: Two users cannot edit a file simultaneously in InCopy.
You don’t have to save a version every time you save your changes. Using the File > Save command works the same
way in Version Cue-managed files as in non-Version Cue files. You need only save a version when you want to create
a snapshot of the file. For example, if you change the background color or some text in the layout, and then save a
version, you can go back to the previous version without damaging your file. Instead of choosing File > Save As and
saving a new copy of a design, you save a version, which allows you to track changes as they occur.
Page 64

ADOBE INCOPY CS2
User Guide
If you want to continue your work using a previous version instead of the current version, promote the previous
version to the next current version (do this instead of opening the previous version directly). This process keeps the
previous version intact, should you decide to return to it again in the future. If you want a previous version, along
with the current version, to be available for use in a project, you can save the previous version as a separate asset.
When you do this, you can then make the previous version a member of a group of alternates, if desired.
You can view previous versions in their native applications. When you no longer need to keep previous versions of
files, you can delete them individually or in batches.
See also
“Viewing and comparing versions” on page 60
“To save a version of a non-Adobe file” on page 59
“Availability of Version Cue features” on page 29
To save a version
Note: You can perform this task only if you have access to the full Version Cue feature set, available in Adobe Creative
Suite or in a shared workspace. See “Availability of Version Cue features” on page 29 for more information.
To save a new version of a file, you use the Save A Version command, which saves your changes to the Version Cue
Workspace. Versions of a file can be subsequently compared using thumbnails, and viewed, deleted, or promoted
using the Versions command.
59
1 Do one of the following:
• In Photoshop, Illustrator, InCopy, InDesign, or Acrobat 7, choose File > Save A Version.
• In Bridge, choose Tools > Version Cue > Save A Version.
2 In the Save A Version dialog box, enter comments you want to associate with this version.
3 Click Save.
To save a version of a non-Adobe file
Note: You can perform this task only if you have access to the full Version Cue feature set, available in Adobe Creative
Suite or in a shared workspace. See “Availability of Version Cue features” on page 29 for more information.
Bridge opensfiles in theirnativeapplicationssothatyou canmakechanges.You cansaveversionsofnon-Adobe files
only if (1) the files are in a Version Cue project and (2) the files have been opened through Bridge. After you create
versions with this procedure, you can access them from the Versions dialog box in Adobe Creative Suite components,
from InCopy, and from the Versions View of Bridge.
1 Start Bridge.
2 In the Favorites panel, click Version Cue, and then navigate to the project containing the file you want to save as
a version.
3 Double-click the file to open it.
4 When the file opens in its native application, make your changes, and save and close the file.
5 In Bridge, choose Tools > Version Cue > Save A Version.
6 In theSaveAVersiondialogbox,enter comments youwanttoassociate with theversion,and then clickContinue.
Page 65

ADOBE INCOPY CS2
User Guide
Note: You can save versions of nonembedded graphics, image, and text files in InCopy, InDesign, and Illustrator by using
the Edit Original command in the Links palette. After editing the file, save it in its native application. Then, in the Links
palette, select the file and use the Save Link Version command to save a version in the Version Cue project. For more
information, see InCopy Help, InDesign Help, or Illustrator Help.
Viewing and comparing versions
Versions are always available for you to view and compare. Each version is treated as a separate file, which you can
access through the Versions dialog box in all Adobe Creative Suite components and in InCopy. The Versions dialog
box displays thumbnails of all file versions alongside comments, dates, and the login name of the user who created
the version. Each version is numbered sequentially. You can view any version at any time. You can also promote a
version, that is, make a previous version the current one. You can also delete versions if they are irrelevant or if you
need to save disk space. When you delete older versions, the version numbers of the remaining versions remain the
same.
The Versions And Alternates view in Bridge displays versions of all the files in a project. This view is useful for
comparing versions, because all the versions are available in one place for you to view or promote—you don’t need
to search your hard drive for saved files. When you want to compare details of versions, you can choose to view each
version in its native application.
The commenting features of Version Cue maintain a descriptive history of files. Each time you save or promote a
version, you can describe what changes you made. This history helps you track changes made at different stages. Also,
your version comments are searchable; you can search for a particular word to find a version quickly.
60
Viewing versions in Bridge
See also
“Availability of Version Cue features” on page 29
To view versions
Note: You can perform this task only if you have access to the full Version Cue feature set, available in Adobe Creative
Suite or in a shared workspace. See “Availability of Version Cue features” on page 29 for more information.
Page 66

ADOBE INCOPY CS2
User Guide
After opening a file from a Version Cue Workspace, you can quickly access the previous version thumbnails, version
comments, and version dates by using the Versions dialog box.
1 In Illustrator, InCopy, InDesign, or Photoshop, choose File > Open. Click Use Adobe Dialog if you’re using the OS
dialog box.
2 Click Version Cue in the Favorites panel.
3 Double-click the host Version Cue Workspace. Double-click the project to open it.
4 Click the name of the file whose versions you want to view.
5 Choose Versions from the Project Tools menu
6 In the Versions dialog box, do any of the following:
• To create a new file version from an older version, select the version and click Promote To Current Version.
• To open an earlier version in its own window and view details only or create a separate asset from the earlier
.
version, click View Version. The version number appears in the file's title bar to remind you that you shouldn’t edit
it.
• To delete a version, select the version and click Delete.
In Acrobat 7, you can view the Versions dialog box by choosing File > Versions when a Version Cue-managed PDF
file is open.
61
You can view versions of a file while it’s open in an Adobe Creative Suite component: Choose Versions from the status
menu at the bottom of the file window.
See also
“About the Adobe dialog box” on page 31
“About Version Cue versions” on page 58
To view versions in Bridge
Note: You can perform this task only if you have access to the full Version Cue feature set, available in Adobe Creative
Suite or in a shared workspace. See “Availability of Version Cue features” on page 29 for more information.
In Bridge, you can use the Versions And Alternates view to see all versions of all files in a project.
1 Start Bridge, and then select Version Cue in the Favorites panel.
2 Choose View > As Versions And Alternates, or click the Versions And Alternates View icon (located at the lower
right corner).
3 Click the Versions View button in the upper right corner of the window.
4 Double-click a project to view the files.
You can also see previous versions of a file while in other Bridge views. Right-click (Windows) or Ctrl-click (Mac OS)
any file in a Version Cue project and choose Versions.
Page 67

ADOBE INCOPY CS2
User Guide
To view a previous version in its native application
Note: You can perform this task only if you have access to the full Version Cue feature set, available in Adobe Creative
Suite or in a shared workspace. See “Availability of Version Cue features” on page 29 for more information.
❖ Do one of the following:
• In the Versions dialog box, click the version you want to open and click View.
Note: Theversion number appearsinthe file’s titlebar to remind youthatitisnot thecurrent versionand youshouldn’t
edit the file.The file status is Never Saved, because the previous version is only a snapshot of a previous stage of a file.
• In Bridge, use the Versions And Alternates view, click the Versions View button in the upper-right corner of the
window, right-click (Windows) or Control-click (Mac OS) a version, and choose View from the menu.
Version Cue opens the previous version in its own window. You can then edit the previous version and save it as a
new asset or as an alternate. If you edit the previous version, your changes won’t be reflected in the current version
unless you promote the earlier version.
See also
“To view versions in Bridge” on page 61
62
To promote a version
Note: You can perform this task only if you have access to the full Version Cue feature set, available in Adobe Creative
Suite or in a shared workspace. See “Availability of Version Cue features” on page 29 for more information.
Promotingaprevious versionautomatically savesacopy of that previous versionasthe currentversion.Any changes
made between its creation and promotion don’t appear in the new current version.
1 Do one of the following:
• In the Versions dialog box, select the version you want to promote, and click Promote To Current Version.
• In Bridge, using the Versions and Alternates view, click the Versions View button in the upper right corner of the
window, right-click (Windows) or Control-click (Mac OS) a version, and then choose Promote To Current
Versionfromthe menu.Ifyou have aworking copy of thefile, thestatusofthe file changestoOutdatedCopyuntil
you open the file or synchronize.
2 Type a version comment in the Save A Version dialog box. Then click Continue to complete the promotion.
To revert to the last version in Bridge
Note: You can perform this task only if you have access to the full Version Cue feature set, available in Adobe Creative
Suite or in a shared workspace. See “Availability of Version Cue features” on page 29 for more information.
❖ In Bridge, choose Tools > Version Cue > Revert To Last Version.
See also
“To delete file versions in a project” on page 81
“To edit Version Cue project properties” on page 78
Page 68

ADOBE INCOPY CS2
User Guide
To delete a version
Note: You can perform this task only if you have access to the full Version Cue feature set, available in Adobe Creative
Suite or in a shared workspace. See “Availability of Version Cue features” on page 29 for more information.
❖ Do one of the following:
• In the Versions dialog box, click the version you want to delete and click Delete. To delete multiple versions, Shift-
click (Windows) or Control-click (Mac OS) the versions and click Delete. When prompted, confirm the deletion.
• In Bridge, use the Versions And Alternates view, click the Versions View button in the upper right corner of the
window, Right-click (Windows) or Control-click (Mac OS) the version, and then choose Delete from the menu.
Note that the remaining versions are not renumbered.
Using the Version Cue Administration utility, you can delete multiple previous versions of all files in a project simultaneously if you have access privileges. By using this method, you can retain past versions by date or by number of
versions to keep.
See also
“To delete file versions in a project” on page 81
“To edit Version Cue project properties” on page 78
63
“About the Version Cue Administration utility” on page 70
Version Cue alternates
About Version Cue alternates
VersionCue makesiteasytomanagevariationsofadesign throughthe useof alternates. For example, you can create
alternates for variations of a design based on different versions or completely different photos for different editions
of a publication.
Youcan usealternatesinseveral ways.For instance,ifyou make extensivechanges to afile, it maymakemoresense
to save it as an alternate than a version. When you use alternates, your original file remains untouched and you’re
free to continue your design work in a new direction. You can also create alternates for art you’re planning to use in
different media, for example, a high-resolution alternate for print and a lower-resolution alternate for web use. Or,
you can make alternates from files with totally different content. For example, suppose you are creating an article
about fruit production. You might use a photo of an orange for the California edition, a photo of a banana for the
Florida edition, and a photo of an apple for the Washington edition. You can save each photo as an alternate.
You can access alternates from Bridge or directly from the Links palette in InCopy, InDesign, or Illustrator, making
it easy to present a variety of design ideas to clients and creative directors. Version Cue protects alternates the same
way as other assets. When you save an alternate, it appears as a separate file in its project, but Version Cue maintains
a relationship between the original file and any alternates you create.
Page 69

ADOBE INCOPY CS2
User Guide
Version Cue maintains relationships between alternates by creating alternates groups, which you can view together
in the Alternates dialog box. You can manually group files into an alternates group by using the Make Alternates
command. You create alternates from files in different folders by dragging them between Bridge windows. Using this
method youcan addfiles from additional folderstothe groupaswell. Thus,analternatesgroup cancontain multiple
files from multiple folders. You can make an alternate the primary, or preferred, alternate in a group. The primary
alternateisdesignatedbyaspecial status icon,and itsnameisinboldinthe Alternates View.Inthe Alternates dialog
box that appears in Adobe Creative Suite components and in InCopy (in the Links palette or Open dialog box), the
primary alternate appears at the top of the list in the Alternates dialog box.
You can change the primary alternate and remove alternates from the group by using Bridge or the Alternates dialog
box in Adobe Creative Suite components or in InCopy.
Note: Although you can create many alternates groups, a given file can be included in only one of these groups. Also,
alternates must be located within a single project. Alternates are not available in Acrobat 7.
64
Viewing alternates in Bridge
See also
“Availability of Version Cue features” on page 29
To save an alternate
Note: You can perform this task only if you have access to the full Version Cue feature set, available in Adobe Creative
Suite or in a shared workspace. See “Availability of Version Cue features” on page 29 for more information.
If you have a file open and want to create your current work as an alternate to the previous versions, you must use
the Save As command.
1 Choose File > Save As.
2 In the Save As dialog box, select the Save As Alternate option at the bottom of the dialog box.
3 Click Save, and do one of the following:
• If you want to keep the same file name, save the alternates to a different folder.
• If you want to save the alternate in the same folder, change the file name.
The alternate is saved in the project file.
Page 70

ADOBE INCOPY CS2
User Guide
Note: If you don’t change the folder or file name, Version Cue prompts you to create a new version of the file (not an
alternate).
To view alternates from Bridge
Note: You can perform this task only if you have access to the full Version Cue feature set, available in Adobe Creative
Suite or in a shared workspace. See “Availability of Version Cue features” on page 29 for more information.
To quickly see which files have alternates, use the Versions And Alternates view in Bridge. This view includes thumbnails of each alternate, shows the number of alternates, and indicates which alternate is the primary alternate in the
group. From this view, you can make changes to the alternates groups.
1 Start Bridge, and then select Version Cue in the Favorites panel.
2 Click the Versions And Alternates View icon. Then click Alternates View at the top of the screen.
3 Double-click a project to view alternates. To reveal an alternate’s location, right-click (Windows) or Control-click
(Mac OS) the alternate and choose Show File In Browser.
65
A file’s inclusion in a group of alternates is indicated by the Alternates icon
how many alternates are associated with the file and whether the file is the primary alternate
and status information that displays
.
You can also see alternates of a file while in other Bridge views. Right-click (Windows) or Ctrl-click (Mac OS) any
file in a Version Cue project Select and choose Alternates.
To view alternates
Note: You can perform this task only if you have access to the full Version Cue feature set, available in Adobe Creative
Suite or in a shared workspace. See “Availability of Version Cue features” on page 29 for more information.
You can identify files with alternates in the Open, Place, Save, Import, and Export dialog boxes by looking in the
Alternates column, where the number of alternates is displayed. Alternates aren’t available in Acrobat 7.
1 In Illustrator, InCopy, InDesign, or Photoshop, choose File > Open. Click Use Adobe Dialog if you’re using the OS
dialog box.
2 Click Version Cue in the Favorites panel.
3 Double-click the host Version Cue Workspace and the project containing the alternates.
4 Click the file for the alternates you want to view.
5 Choose Alternates from the Project Tools menu .
Note: You can also view alternates from the Links palette in Illustrator or InDesign, or from the status menu at the
bottom of a file window while the file is open in an Adobe Creative Suite component. To view alternates from the Links
palette, choose Alternates from the Links palette menu. To view alternates while a file is open in an Adobe Creative Suite
component, choose Alternates from the menu at the bottom of the file’s window.
Page 71

ADOBE INCOPY CS2
User Guide
To make an alternate the primary
Note: You can perform this task only if you have access to the full Version Cue feature set, available in Adobe Creative
Suite or in a shared workspace. See “Availability of Version Cue features” on page 29 for more information.
❖ Do one of the following:
• In Bridge, click the Versions And Alternates View icon, and then click Alternates View at the top of the screen.
Right-click (Windows) or Control-click (Mac OS) an alternate, and then choose Make Primary Alternate from the
menu.
• In the Alternates dialog box, select the alternate and then click Make Primary Alternate. Click Done to close the
dialog box. (To learn how to access the Alternates dialog box, see “To view alternates” on page 65.)
• In the Open, Save, Place, Import, and Export dialog boxes, right-click (Windows) or Ctrl-click (Mac OS) a file in
a Version Cue project and choose Make Primary Alternate.
See also
“To view alternates from Bridge” on page 65
“To view alternates” on page 65
66
To remove an alternate
Note: You can perform this task only if you have access to the full Version Cue feature set, available in Adobe Creative
Suite or in a shared workspace. See “Availability of Version Cue features” on page 29 for more information.
❖ Do one of the following:
• In Bridge, click the Versions And Alternates View icon, and then click Alternates View at the top of the screen.
Right-click (Windows) or Control-click (Mac OS) an alternate from the group on the right side of the window,
and then choose Remove From Alternates Group.
• In the Alternates dialog box, select the alternate, and then click Remove. Click Done to close the dialog box. (To
learn how to access the Alternates dialog box, see “To view alternates” on page 65.)
• In Open, Save, Place, Import and Export dialog boxes, right-click (Windows) or Ctrl-click (Mac OS) a file in a
Version Cue project and choose Remove Alternate.
See also
“To view alternates from Bridge” on page 65
“To view alternates” on page 65
To use the Make Alternates command
Note: You can perform this task only if you have access to the full Version Cue feature set, available in Adobe Creative
Suite or in a shared workspace. See “Availability of Version Cue features” on page 29 for more information.
When you use the Make Alternates command, you can make different files alternates of each other in an alternates
group. You can select multiple files from more than one folder to make alternates.
1 In Illustrator, InCopy, InDesign, or Photoshop choose File > Open.
2 Navigate to the project containing the files you want to make alternates.
Page 72

ADOBE INCOPY CS2
User Guide
3 Shift-click or Control-click to select the files you want to make alternates. To view files in more than one folder,
click the triangle to the left of the folder name.
4 Right-click (Windows) or Control-click (Mac OS) one of the selected files, and then choose Make Alternates from
the menu.
Note: Although it is possible to reveal files in different projects by using the disclosure triangles, only files within a single
project can be made alternates of each other.
See also
“To view alternates from Bridge” on page 65
“To view alternates” on page 65
To make alternates in Bridge
Note: You can perform this task only if you have access to the full Version Cue feature set, available in Adobe Creative
Suite or in a shared workspace. See “Availability of Version Cue features” on page 29 for more information.
When you make alternates in Bridge, you can make different files alternates of each other in an alternates group.
Alternates are not available in Acrobat 7.
67
❖ To make alternates in Bridge, do one of the following:
• To make alternates from files in one folder in Bridge, navigate to the project containing the files you want to make
alternates. In the Bridge window, Shift-click or Control-click to select the files you want to make alternates and
choose Tools > Version Cue > Make Alternates.
• To make alternates from files in multiple folders in Bridge, navigate to the project containing the files you want to
make alternates, and click Alternates View in the upper right corner of the Bridge window. (If Alternates View
doesn’t appear, click Versions and Alternates View in the lower right corner of the window.) Choose File > New
Window, and navigate to a different folder in the same Version Cue project. Shift-click or Control-click to select
the files you want to make alternates, and drag them to the right of the larger thumbnail showing the file being
viewed in the Alternates view of the first Bridge window.
• To make alternates from a past version of a file in Bridge, navigate to the project containing the file you want to
make an alternate. Right-click the file and choose View. When the file opens in its native application, choose File >
Save As,and either save thefileinadifferent folder or change thefilename. Select Alternates,and then clickSave.
See also
“To view alternates from Bridge” on page 65
“To view alternates” on page 65
To move an alternate to another alternates group
Note: You can perform this task only if you have access to the full Version Cue feature set, available in Adobe Creative
Suite or in a shared workspace. See “Availability of Version Cue features” on page 29 for more information.
Page 73

ADOBE INCOPY CS2
User Guide
Afilecannotbeamember of more than onealternatesgroup.Tomoveanalternate to anothergroup,you must first
remove it from it’s original group and then add it to a new group.
1 Remove the alternate from its group. For instructions, see “To remove an alternate” on page 66.
2 Add the file to a new alternates group. For instructions, see “To save an alternate” on page 64 or “To make alter-
nates in Bridge” on page 67.
Editing and synchronizing offline files
Editing and synchronizing offline files
When youneed to work on filesfromaVersion Cueproject whilethe VersionCue Workspaceisunavailable on the
network, you can edit working copies on your computer. When the Version Cue Workspace is available again, you
must synchronize your files with the workspace to save your latest version to the Version Cue Workspace. You can
synchronize an entire project, just a folder in the project, or a selected file.
Working copies are normally copied on your computer when you open a project from an online workspace. However,
if you haven’t yet edited the file, you can prepare to work offline by synchronizing the entire Version Cue project, or
just the files you need, while the workspace is still online to ensure that you have working copies.
68
When you are working offline, you can’t create multiple versions because the Save A Version command is
unavailable.
In Version Cue CS2, if you intend to work on a file offline, you can manually mark the file In Use before you take
your work offline. When you mark a file In Use, Version Cue creates a working copy of the file for you. (You can mark
a file In Use even if you don’t intend to work offline.) Typically, when you’re editing a file, In Use appears when other
users access a file. When a file’s status is In Use, Version Cue protects the file. When you synchronize your file, the
status of the file returns to Synchronized. Mark In Use is not available in Acrobat 7.
If you have edited an offline file recently, you can open it from the File > Open Recent menu.
See also
“Availability of Version Cue features” on page 29
To manually mark a file as In Use
Note: You can perform this task only if you have access to the full Version Cue feature set, available in Adobe Creative
Suite or in a shared workspace. See “Availability of Version Cue features” on page 29 for more information.
1 Do one of the following:
• In Bridge, click Version Cue in the Favorites panel. Navigate to the file. Select one or more files. Right-click
(Windows) or Ctrl-click (Mac OS) a file, and then choose Mark In Use.
• In Illustrator, InCopy, InDesign, or Photoshop, choose File > Open. Click Version Cue in the Favorites panel, and
then navigate to the file. Select one or more files. Right-click (Windows) or Control-click (Mac OS) a file, and then
choose Mark In Use. (Mark In Use is not available in Acrobat 7.)
2 When you finish editing the file offline and the Version Cue workspace is again available, synchronize the file in
Bridge or in any Adobe Creative Suite component. Version Cue automatically creates a new version of the file. If the
workspace becomes available while you still have the file open, simply save a version.
Page 74

ADOBE INCOPY CS2
User Guide
If you haven’t made any changes, you can manually cancel the In Use By Me status, by choosing Cancel Mark In Use
from the context menu.
See also
“To synchronize files” on page 70
“To synchronize files in Bridge” on page 69
To edit working copies of files from an offline project
Note: You can perform this task only if you have access to the full Version Cue feature set, available in Adobe Creative
Suite or in a shared workspace. See “Availability of Version Cue features” on page 29 for more information.
For information on editing offline files in Acrobat 7, see Acrobat Help.
1 In Illustrator, InCopy, InDesign, or Photoshop, choose File > Open. Click Use Adobe Dialog if you’re using the OS
dialog box.
2 Click Version Cue in the Favorites panel.
3 Double-click the host Version Cue Workspace.
4 Double-click theVersion Cueproject that contains thefile. It maytakeVersion Cueafewseconds to verify that a
Version Cue Workspace or project is unavailable.
5 Double-click a file to open it (the Offline Copy status allows you to open the file).
6 When you finish editing the file, choose File > Save to save the changes to the working copy. When the Version
Cue Workspace becomes available again, synchronize your files.
69
See also
“Editing and synchronizing offline files” on page 68
“To synchronize files” on page 70
“To synchronize files in Bridge” on page 69
To synchronize files in Bridge
Note: You can perform this task only if you have access to the full Version Cue feature set, available in Adobe Creative
Suite or in a shared workspace. See “Availability of Version Cue features” on page 29 for more information.
1 Start Bridge. In the Favorites panel, click Version Cue.
2 Double-click Workspaces.
Page 75

ADOBE INCOPY CS2
User Guide
3 Select the project that contains the master file, and do one of the following:
• To synchronize the entire project, right-click (Windows) or Control-click (Mac OS) the project, and then choose
Synchronize.
• To synchronize a file in the project, open the project, right-click (Windows) or Control-click (Mac OS) the folder
or file, and choose Synchronize from the Project Tools menu.
4 If the master file on the Version Cue Workspace is newer than your working copy and you’ve edited the working
copy, a File Conflict dialog box appears. Specify one or more of the following:
Apply The Following Action To All Subsequent Conflicts Automatically applies the selected option every time
there is a file conflict.
Save A Version Saves your working copy as a new file version to the Version Cue Workspace.
Skip This File Prevents the most recent version from the Version Cue Workspace from being downloaded. (This
option also prevents aversion of your workingcopyformbeing savedtothe workspace.)Choosethisoptiononlyif
you want to keep your edits and disregard the other changes in the master file.
To synchronize files
Note: You can perform this task only if you have access to the full Version Cue feature set, available in Adobe Creative
Suite or in a shared workspace. See “Availability of Version Cue features” on page 29 for more information.
70
For information on synchronizing files in Acrobat, see Acrobat Help.
1 In Illustrator, InCopy, InDesign, or Photoshop, choose File > Open. Click Use Adobe Dialog if you’re using the OS
dialog box.
2 Click Version Cue in the Favorites panel.
3 Select the project that contains the master file, and do one of the following:
• To synchronize the entire project, choose Synchronize from the Project Tools menu .
• To synchronize just a folder or one or more files, open the project, select the folder or files that you want to
synchronize, and choose Synchronize from the Project Tools menu.
4 If the master file on the Version Cue Workspace is newer than your working copy and you’ve edited the working
copy, a File Conflict dialog box appears. Specify one or more of the following:
Apply The Following Action To All Subsequent Conflicts Automatically applies the selected option every time
there is a file conflict.
Save a Version Saves your working copy as a new file version to the Version Cue Workspace.
Skip This File Prevents the most recent version from the Version Cue Workspace from being downloaded. (This
option also prevents aversion of your workingcopyfrombeing savedtothe workspace.)Choosethisoptiononlyif
you want to keep your edits and disregard the other changes in the master file.
The Version Cue Administration utility
About the Version Cue Administration utility
Using the Version Cue Administration utility, you can do more advanced tasks that affect a specified project or an
entire Version Cue Workspace.
Page 76

ADOBE INCOPY CS2
The following table lists the Version Cue-related tasks that you can accomplish through an Adobe Creative Suite
component and those that you can accomplish through the Version Cue Administration utility.
User Guide
71
Task Adobe Cre-
Create, edit, and delete Version Cue projects
Share a project with anyone
who is using Adobe Creative
Suite, an Adobe Creative Suite
component, or a WebDAVenabled application
Delete a file version Yes Yes
Delete multiple file versions at
once
Create Version Cue projects
from remote files via FTP
Create Version Cue projects
from remote files via WebDAV
Import Version Cue 1.0
projects
Back up Version Cue projects
and restore backup versions of
a project
View the amount of disk space
a project uses, its lock protection status, its creator, and its
creation date
ative Suite
components
Yes Yes
Yes Yes
Yes Yes
No Yes
No Yes
No Yes
No Yes
No Yes
Version Cue
Administration
Duplicate or export Version
Cue projects
Edit Version Cue Workspace
preferences
Add and edit users, and define
their project privileges
Change the properties of a
Version Cue project to require
users to log in before accessing it
View all users and their privileges for all projects in the Version Cue Workspace
Remove all In Use locks in a
project or those created by a
specified user
View Version Cue Workspace
logs and reports
Add files to an existing project Yes No
No Yes
No Yes
No Yes
No Yes
No Yes
No Yes
No Yes
Page 77

ADOBE INCOPY CS2
User Guide
72
Task Adobe Cre-
Create file versions Yes No
View file comments and other
information
Search for files using file information (metadata)
Initiate and manage a webbased review of PDF files in
Version Cue projects
ative Suite
components
Yes No
Yes No
No Yes
Version Cue
Administration
Logging into and out of the Version Cue Administration utility
When you install Version Cue on your computer, Version Cue automatically creates a default user login ID with
administrator privileges. You should change the password for this default user login, as it is publicly available for
initial installation and setup. Until you change the default password, the default user login ID can only be used
directly from the computer the Version Cue workspace is located on, not across a network. If the Administration
utilityisinstalled on your computer,you canstart usingthe web-based VersionCue Administration utilitywiththe
Version Cue default login ID (system) and password (system).
Users working in a group with a login ID and password can log into the Version Cue Administration utility. The tasks
that workgroup users can perform are limited by the privileges assigned to their Version Cue login ID by the administrator. However, users whose access level is set to None can’t log into the Version Cue Administration utility.
You can display the Version Cue Administration login web page in the following ways:
• By opening the Version Cue preferences and clicking the Advanced Administration button.
• By clicking the Advanced Administration button in GoLive CS2, Illustrator CS2, InCopy CS2, InDesign CS2,
Photoshop CS2, or Acrobat 7.
• By typing the IP address of the Version Cue Workspace directly into a web browser.
• By selecting Advanced Administration from the Version Cue system tray icon (Windows) or the Version Cue
menu (Mac OS).
See also
“Choosing user privileges” on page 85
To log into Version Cue Administration from an Adobe Creative Suite component
You can log in the same way from InCopy CS2, InDesign CS2, Illustrator CS2, Photoshop CS2, and Acrobat 7.
1 Choose File > Open, and click the Use Adobe Dialog button in the dialog box.
2 Select the Version Cue Workspace you want to administer.
3 Choose Edit Properties from the Tools menu
4 Click Advanced Administration in the Edit Properties dialog box.
.
Page 78

ADOBE INCOPY CS2
User Guide
5 Type your assigned Version Cue login ID and password in the text boxes. (The default for both the ID and
password is system.)
6 Click Log In.
To log into Version Cue Administration from GoLive CS
1 Open the Version Cue site file.
2 Choose Site > Version Control System > Open Version Cue Administration.
3 Type your assigned Version Cue login ID and password in the text boxes. (The default for both the ID and
password is system.)
4 Click Log In.
To log into Version Cue Administration from a web browser
1 In aweb browser, type theIPorDNS addressofthe computer on whichthe VersionCue Workspaceisinstalled.
Precede the address with http:// and follow it with a colon and the port number, for example,
http://153.32.235.230:3703 (IP) or http://myserver.mycompany.com:3703 (DNS). The default port number is 3703.
Note: If you have Version Cue 1.0 installed on your computer, the default port number for Version Cue 2.0 is 50800.
Once Version Cue 1.0 is uninstalled, Version Cue 2.0 defaults to 3703.
73
2 A browser window displays the Adobe Version Cue Administration login page. Type your assigned Version Cue
login ID and password in the text boxes. (The default for both the ID and password is system.)
3 Click Log In.
To log into Version Cue Administration from the Version Cue Preferences dialog box
1 Do one of the following:
• (Windows) Double-click the Version Cue icon in the system tray. In the Edit Project Properties dialog box, click
Advanced Administration.
• (Windows) Right-click the Version Cue icon in the system tray and then choose Version Cue CS2 Preferences.
On Windows, double-click the Version Cue icon to open the preferences dialog box.
• (Mac OS) Click the Version Cue icon at the top of the screen, and then choose Advanced Administration from the
menu.
• (Mac OS) Control-click the Version Cue icon and choose Version Cue CS2 preferences.
Page 79

ADOBE INCOPY CS2
User Guide
On Mac OS, choose Version Cue CS2 Preferences to open the preferences dialog box
2 Type your assigned Version Cue login ID and password in the text boxes. (The default for both the ID and
password is system.)
3 Click Log In.
To log out of Version Cue Administration
❖ Click Log Off at the top of the page.
About Version Cue Administration integrity checks
Each time the Version Cue Workspace restarts, it performs an integrity check and performs repairs if necessary. To
ensure best performance, restart the Version Cue Workspace periodically so it can perform the integrity check and
self-repair.
74
To set Version Cue Workspace Administration preferences
1 Log into the Version Cue Administration utility.
2 Do one of the following:
• Click the Advanced tab, and then click Preferences.
• On the Home page, click Perform Advanced Tasks, and then click Preferences.
3 Set any of the following options:
Workspace Name To change the Version Cue Workspace name, type a name in the text box. This name identifies
the Version Cue Workspace in Adobe Creative Suite components using Version Cue.
Make This Version Cue Workspace Visible To Others. When selected, gives other computers access to the Version
Cue Workspace.
Note: If the Version Cue Workspace is installed on a Windows computer that uses a firewall and you want to share the
workspace with others, make sure that TCP ports 3703 and 427 are left open and deselect the Internet Connection
Firewall option (see Windows Help).
Only Grant Access To Existing Users Specifies whether Version Cue projects are available to a user. Make sure to set
access properties for each desired project and to edit the project’s list of assigned users.
Log Level Defines the amount of information in reports generated by the Version Cue Workspace system. Choose
a log level: Error to list only Version Cue Workspace errors; Warning to list workspace errors and warnings; or Info
to list errors, warnings, and information about tasks performed.
Log Size Sets the maximum size, in kilobytes, for a system report. To reduce the log file size by saving it as a
compressed GZ file, select Compress Log File.
Page 80

ADOBE INCOPY CS2
User Guide
FTP Proxy Specifies the default FTP Proxy server for users importing projects from or exporting projects to an FTP
server, or publishing with GoLive to an FTP server.
HTTP Proxy Specifies the default HTTP Proxy server for users importing projects from or exporting projects to a
WebDAV server, or publishing with GoLive to a WebDAV server.
Color Scheme Sets the background colors of the tabs.
4 Click Save, and then restart Version Cue Administration.
Migrating from Version Cue 1.0 to Version Cue 2.0
If you currently use Version Cue 1.0, you need to migrate your projects and user data to Version Cue 2.0. Keep the
following in mind:
• Version Cue 1.0 and Version Cue 2.0 Workspaces can be installed and function on the same computer simulta-
neously.
• If VersionCue 1.0 andVersion Cue2.0 Workspaces areinstalled on thesamecomputer, AdobeCreativeSuite 1.0
components work only with the Version Cue 1.0 Workspace, because they can communicate only with the port
that the Version Cue 1.0 Workspace uses.
Note: If you uninstall the Version Cue 1.0 Workspace and then restart the Version Cue 2.0 Workspace, the Version Cue
2.0 Workspace then uses the Version Cue 1.0 Workspace’s port, allowing Adobe Creative Suite 1.0 components and Adobe
Creative Suite 2.0 components to work with the Version Cue 2.0 Workspace.
75
• If only the Version Cue 2.0 Workspace is installed, Adobe Creative Suite 1.0 components will work with it.
• Adobe Creative Suite 2.0 components work only with Version Cue 2.0 Workspaces.
• Adobe Creative Suite 1.0 components work with both Version Cue 1.0 and Version Cue 2.0 Workspaces simulta-
neously as long as the workspaces are not located on the same computer.
• You can import Version Cue 1.0 projects and users using the Administration utility (see “To migrate from Version
Cue 1.0 to Version Cue 2.0” on page 75).
To migrate from Version Cue 1.0 to Version Cue 2.0
1 After installing Version Cue 2.0, restart the Version Cue 1.0 Workspace. The activates a migration plug-in.
2 Log into the Version Cue Administration utility.
3 Click the Advanced tab, and then click Import Version Cue 1.0 Data.
4 Select the data you’d like to migrate to Version Cue 2.0:
• Projects and users. Click Next. Select the check box next to the name of any projects you want to import, and click
Next. Then, select the check box next to the name of any users you want to import, and click Next.
• Only projects. Click Next. Then, select the individual projects you want to import, and choose whether to import
all the users assigned to those projects (at this point, you cannot select individual users; you must import either all
users or no users). Click Next. If you choose to import the users, select the users you want to import, and click
Next.
• Only users. Click Next, and, in the next page, select the check box next to the name of any users you want to
import.
5 When the migration process is complete, verify the information you’re importing, and confirm the migration.
Page 81

ADOBE INCOPY CS2
User Guide
6 Uninstall Version Cue 1.0.
7 Restart the Version Cue 2.0 Workspace. This resets the port to allow access from both Adobe Creative Suite 1.0
and Adobe Creative Suite 2.0 components.
Creating and editing projects in Version Cue Administration
To create a new blank Version Cue project
1 Do one of the following:
• In the Home tab, click Create A Project.
• Click the Projects tab, and then click New.
2 In theNew Projectcontent frame, clickBlank Projecttocreateanempty VersionCue project. ClickNexttodisplay
the Create Blank Project content frame.
3 Type a name for your project in the Project Name box.
4 To specify how to treat the imported content’s URL encoding, choose an option from the URL Encoding menu.
5 Set any of the following options:
Share This Project With Others Gives other users access to the project. Users can be on your subnetwork, or they
can be given the Version Cue Workspace IP or DNS address and port number to gain access to the Version Cue
Wo rk s p ac e .
76
Require Login For This Project Ensures that only users with a Version Cue login ID and password have access to
the project.
Enable Lock Protection For This Project Restricts file versioning to sequential versions.
URL Encoding Specifies how the content’s URL encoding is treated. UTF-8 is the default setting.
%HH Escaping Requires that a nonsafe character be encoded as a percent symbol (%) followed by two hexadecimal
digits.
6 Click Save.
7 If you chose to require login, do any of the following in the Assigned Users content frame, and then click Save:
• Choose an option next to each user name in thePrivilegescolumnorchooseanoptionfromthe SetAll To menu
to define each user’s access. These options won’t work unless you select Require Login For This Project.
• To let a user publish the project with GoLive CS2 to a specified FTP or WebDAV server, select the check box in
the Publishing Privilege column next to the user name.
Page 82

ADOBE INCOPY CS2
User Guide
To create a new Version Cue project from a folder
You can create a Version Cue project from the files in a folder on the computer where the Version Cue Workspace is
installed.
1 Log into Version Cue Administration.
2 Do one of the following:
• In the Home tab, click Create A Project.
• Click the Projects tab, and then click New.
3 In the New Project content frame, click Import From Folder.
4 ClickNexttodisplay theImportProject From Folder contentframe.Ifthe contentyou’reimporting is awebsite,
select Import Folder As A Website to import the content to the project’s web-content folder. To specify the folder to
import from, click Browse and select any file in the folder; then click Open. Alternatively, you can type the path to
the desired Version Cue Workspace folder in the text box.
5 Type a name for your project in the Project Name box.
6 Set any of the following options:
Share This Project With Others Gives other users access to the project. Users can be on your subnetwork, or they
can be given the Version Cue Workspace IP or DNS address and port number to gain access to the workspace.
77
Require Login For This Project Ensures that only users with a Version Cue login ID and password have access to
theproject.Notethatifyou select this option afterauser gainsaccess, theusercan stillgainaccesswithout logging
in. Make sure that you change privileges as needed in the project’s list of users.
Enable Lock Protection For This Project Restricts file versioning to sequential versions.
URL Encoding Specifies how the content’s URL encoding is treated. UTF-8 is the default setting.
%HH Escaping Requires that a nonsafe character be encoded as a percent symbol (%) followed by two hexadecimal
digits.
Comments Stores any remarks you type about the project.
7 Do any of the following in the Assigned Users content frame, and then click Save:
• To define each user’s access to the project, choose an option next to each user name in the Privileges column or
choose an option from the Set All To menu. These options won’t work unless you select Require Login For This
Project.
• To let a user publish the project with GoLive CS to a specified FTP or WebDAV server, select the check box in the
Publishing Privilege column next to the user name.
To create a new Version Cue project from a WebDAV server or FTP server
1 Log into Version Cue Administration.
2 Do one of the following:
• In the Home tab, click Create A Project.
• Click the Projects tab, and then click New.
3 In the New Project content frame, do one of the following:
• Click Import From WebDAV Server.
• Click Import From FTP Server.
Page 83

ADOBE INCOPY CS2
User Guide
4 Click Next to display the Import Project From Server content frame.
5 If the content you’re importing is a website, select Import FTP/WebDAV As A Website to import the content to
the project’s web-content folder.
• In the FTP Server or WebDAV Server box, specify the WebDAV server from which to import files, and type the
port number in the Port box.
• To specify a folder, type its path in the Directory box.
• If a user name and password are required to access the server, type that information in the User Name and
Password boxes.
• To use a proxy server to connect to the server, select Proxy.
6 Type a name for your project in the Project Name box.
7 To specify how to treat the imported content’s URL encoding, choose an option from the URL Encoding menu.
8 To comply with the URL syntax requiring nonsafe characters to be encoded as a percent symbol (%) followed by
two hexadecimal digits, select %HH Escaping.
9 Do any of the following, and then click Next:
• To give other Version Cue or WebDAV users access to the project, select Share This Project With Others. (Users
must either be on your subnetwork or be given the Version Cue Workspace IP or DNS address and port number.)
• To require users to log in with a Version Cue login ID and password before accessing the project, select Require
Login For This Project. If selected, this option ensures that only Version Cue users you specify can log in and
access the project.
78
Note: If you select this option after other users have already accessed the project without being authenticated, those users
can still access the project without logging into it. Make sure that you change their privileges as needed in the project’s
list of assigned users.
• To restrict file versioning to sequential versions, select Enable Lock Protection For This Project.
• To include remarks regarding the project, type them in the Comments box.
10 Do any of the following in the Assigned Users content frame, and then click Save:
• To define each user’s access to the project, choose an option next to each user name in the Privileges column or
choose an option from the Set All To menu.
• To let a user publish the project with GoLive to a specified FTP or WebDAV server, select the check box in the
Publishing Privilege column next to the user name.
Note: Youdon’t need to assign usersinorder to give others access to your VersionCue project. Just make sure to deselect
Require Login For This Project in the project properties.
To edit Version Cue project properties
1 Log into the Version Cue Administration utility.
2 Click the Projects tab, and then click a project name.
Page 84

ADOBE INCOPY CS2
User Guide
3 Set any of the following options:
Share This Project With Others Gives other users access to the project. Users can be on your subnetwork, or be
given the Version Cue Workspace IP or DNS address and port number.
Require Login For This Project Ensures that only users with a Version Cue login ID and password have access to
theproject.Notethatifyou select this option afterauser gainsaccess, theusercan stillgainaccesswithout logging
in. Make sure that you change privileges as needed in the project’s list of users.
Enable Lock Protection For This Project Restricts file versioning to sequential versions.
Comments Stores any remarks you type about the project.
Backup Configuration Allows you to back up your project or edit backup settings.
4 Click Save, or click Reset to return the properties to their original values.
See also
“To back up a Version Cue project” on page 82
To duplicate a Version Cue project
Duplicate a project to start new project with the same users and privileges. Version Cue duplicates the folder
hierarchy within the project structure, and you can use that as a basis for the new project. Delete any files from the
duplicated project that are no longer necessary.
79
1 Log into the Version Cue Administration utility.
2 Click the Projects tab.
3 Select the check box next to the name of the project, and click Duplicate.
4 In the Duplicate Project content frame, type a unique name for the project.
5 Edit the project properties.
6 Click Duplicate.
To delete a Version Cue project in the Version Cue Administration utility
1 Log into the Version Cue Administration utility.
2 Click the Projects tab, and do one of the following:
• To delete one or more projects, select the check box next to the name of each project you want to delete.
• To delete all listed projects, select the check box next to the Project Name column label.
3 Click Delete. The Delete Project content frame appears. Click Delete again, or click Cancel to cancel the deletion.
Page 85

ADOBE INCOPY CS2
User Guide
To export a Version Cue project to your computer
Youcan export themostrecentversion of allproject filesfromthe VersionCue Workspace. Youcan usethisexport
to move these files from one host computer (or server) to another or to create a package of the most recent files for
output or simply to create an archive of the final versions.Version Cue still manages projects moved between
computers. If youwanttomoveaproject, youshoulddecidewhether to back it up (sothatall past versions arealso
moved) or export (sothatonlythe currentversionsofproject filesare moved). Formoreinformation aboutbacking
up a project, see
1 Log into the Version Cue Administration utility.
2 Do one of the following:
• Click the Projects tab. Select the check box next to the project you want to export, and click Export.
• Click the Advanced tab, and then click Export Project. The Export Project content frame appears. Select the
project you want to export from the Project Name menu.
3 In the Export Project page, choose the name of the project you want to export, and then choose File from the
Protocol menu.
4 Click Browse, and specify the folder to which you want to export the project. Select any file in the folder, and click
Open.
5 Click Export.
“Backing up and restoring projects in the Version Cue Administration utility” on page 81.
80
You can also export a project by using the Version Cue preferences. For more information, see “To set Version Cue
Workspace preferences” on page 32.
To export a Version Cue project to an FTP or WebDAV server
1 Log into the Version Cue Administration utility.
2 Do one of the following:
• Click the Projects tab. Select the check box next to the project you want to export, and click Export.
• Click the Advanced tab, and then click Export Project. The Export Project content frame appears. Choose the
project you want to export from the Project Name menu.
3 In the Export Project page, choose the name of the project you want to export and then choose either FTP or
WebDAV from the Protocol menu.
4 Specify the FTP or WebDAV server address in the Server Address text box. You don’t need to precede the address
with the chosen protocol. If you want, you can change the default port number in the Port box.
5 To specify a folder, type its path in the Directory box.
6 If a user name and password are required to access the server, type that information in the User Name and
Password boxes.
7 To use a proxy server to connect to the server, select Proxy.
8 If you are connecting to the server through a firewall, or if you specified a port other than 21, select Use Passive
Mode. (This is an option only if you choose FTP in the Protocol menu.)
9 Click Export.
Page 86

ADOBE INCOPY CS2
User Guide
To remove file locks from a Version Cue project
A user with system administrator privileges or with project-specific Administer privileges can remove file locks.
Removing file locks forces the removal of In Use status of files designated by specific project or by user throughout
all the projects.
1 Log into the Version Cue Workspace Administration utility.
2 Click the Advanced tab , and then click Reset Locks (under Maintenance).
3 Do any of the following:
• Choose a project from the Project Name menu.
• Choose a user from the User Name menu.
4 Click Reset Locks to remove the specified file locks.
To delete file versions in a project
Each time you save a file version, the version is stored on the Version Cue Workspace database. This database creates
a file version history that lets you quickly return to any former state of the file. Although a version history is useful,
an extensivehistory takesupalotofdiskspace andcan degradethe performanceofthe VersionCue Workspace. It’s
a good idea to clean up versions to improve performance.
81
1 Log into the Version Cue Workspace Administration page.
2 Click the Advanced tab , and then click Remove Old Versions.
3 Choose a project from the Project Name menu.
4 To delete versions, select Delete All Versions Older Than, and then choose a month, day, and year.
5 To specify the maximum number of versions to remain in the workspace after you click Delete, select Number Of
Versions To Keep, and then type a number in the text box.
6 Click Delete.
Backing up and restoring from Version Cue Administration
Backing up and restoring projects in the Version Cue Administration utility
The Version Cue Administration utility creates backups of all the information in a Version Cue project. Project
backups are stored on the Version Cue file system, in the Backups folder. You can then easily restore a backup copy
that represents a Version Cue project as it was on a specific date. Restored project backups do not replace the original
Version Cue project; restored projects are given different project names. You can use a project backup to move a
project from one Version Cue Workspace to another while retaining all the versions of that project.
You can customize a backup configuration for your projects. You can back up a project using a new configuration or
an existing configuration. A backup configuration includes the ability to schedule a recurring backup for the project.
Page 87

ADOBE INCOPY CS2
User Guide
To back up a Version Cue project
The backup configuration used to back up a project is set in the Version Cue project preferences.
1 Log into the Version Cue Administration utility.
2 Click the Projects tab.
3 Select the check box next to the project name, and then click Backup.
4 In the Backup Name text box, accept the name, or type a new name.
5 Choose the project components you want to back up: Files (which is always selected), Project File Versions to back
up all versions of the files, Project Metadata to back up embedded information entered in Adobe Creative Suite
components, and Users/User Assignments to back up information about the users and their project privileges.
6 Click Backup. When the backup is complete, a status page appears.
See also
“To edit Version Cue project properties” on page 78
To restore a Version Cue project backup copy
1 Log into the Version Cue Administration utility.
2 Click the Projects tab.
3 Click Backup List.
4 Click the name of the backup that you want to restore.
5 In the New Project Name box, type a name that is different from those of other projects in the Version Cue
Wo rk s p ac e .
6 Do any of the following, and then click Restore:
• To retain the list of users that were assigned to the project, select Restore Users.
• To retain the same privileges for each assigned user, select Restore User Assignments.
• To add remarks, type them in the Comments box.
82
To create a new backup configuration
New backup configurations are created in the project’s preferences. When you create a new configuration, it becomes
the default for the project.
1
Log into the Version Cue Administration utility.
Click the Projects tab.
2
Select the name of the project for which you want to create a new backup configuration.
3
Under Backup Configurations in the Edit Properties page, click New.
4
Type a name for the backup configuration in the Configuration Name box.
5
Select what you want to back up in the Include list of options: Files (which is always selected), Project File Versions
6
to back up all the versions of the project, Project Metadata to back up embedded information entered in Adobe
Creative Suite components, and Users/User Assignments to back up information about the users and their project
privileges.
7 (Optional) Add remarks to the backup file in the Comments box.
Page 88

ADOBE INCOPY CS2
User Guide
8 Choose an option from the Repeat menu if you want backups to occur automatically (choose Don’t Repeat if you
want to back up the project manually).
9 Click Save to save the new configuration and to see a list of backup configurations.
To back up all data in the Version Cue Workspace
It’s important to back up projects in a Version Cue Workspace from time to time. Rather than doing this project by
project, you can instead back up the complete Version Cue Workspace. You can also use this backup to move a
complete workspace from one computer to another. If you restore abackupcopyofthe VersionCue Workspace, all
current data on the workspace, including Version Cue projects, files, and versions, is replaced by the backup.
Workspace backup files are saved to the default Backups folder in the Version Cue application folder.
1 Log into the Version Cue Administration utility.
2 Click the Advanced tab , and then click Backup Version Cue Data.
3 To add remarks about the workspace backup, type them in the Comments box.
4 Click Save. After the back up is complete, click OK to view the list of workspace backups.
To replace a project with a previous backup
To replace current projects on a Version Cue Workspace with a previous version, you first restore the backup. When
you do this, Version Cue Administration turns off automatically. You must restart Version Cue on the host
workspace; it cannot be done remotely.
83
1 Log into the Version Cue Administration utility.
2 Click the Advanced tab, and then click Administer Backups.
3
Click the name of the backup you want to restore. Click Restore. The Version Cue Workspace turns off. Close the
browser. (Notice that the Version Cue icon in the system tray indicates that it’s off
4 Turn on the Version Cue Workspace.
5 Log into the Version Cue Administration utility.
.)
Working with users and privileges
Creating and editing users
All users with a Version Cue user name and login (except those whose access level is set to None) can log into the
Version Cue Workspace Administration utility. However, the tasks they can perform are limited by the privileges
assigned to their user names.
To restrict the Version Cue projects that a user can access, you can edit the project’s existing user names. Or, to restrict
access further, you can create new Version Cue user names and assign them to a specific project. Creating new names
gives you the most control over a project.
Note: Only users who have system administrator privileges can create new user names.
Page 89

ADOBE INCOPY CS2
User Guide
If you’ve configured the Version Cue Workspace to be visible to others in the Version Cue Administration utility, you
don’t need to create and assign Version Cue user names to let other Adobe Creative Suite or WebDAV users access
your Version Cue projects and the Version Cue Workspace. The users simply need either to be on your subnetwork
or be given the Version Cue Workspace IP or DNS address and port number. After a user accesses the Version Cue
Workspace without using a Version Cue user name, the user name for the user’s own computer is automatically
added to the list of users in the Version Cue Workspace, and the password is left blank.
If you’ve configured the Version Cue Workspace so it grants access only to existing users, you’ll need to create Version
Cue user names to let other Adobe Creative Suite or WebDAV users access your Version Cue projects and the Version
Cue Workspace.
To create new Version Cue user names
To create new user names in a Version Cue Workspace, you need system administrator privileges.
1 Log into the Version Cue Administration utility.
2 Do one of the following:
• From the Home page, click Add A User.
• Click the Users tab, and then click New in the content frame.
3 In the New User content frame, choose the level of access to give the user from the Admin Access Level menu:
None Denies the user access to the Version Cue Workspace Administration utility, however, the user can access
Version Cue projects while working in an Adobe Create Suite component.
84
User Gives the user access to some administrator privileges, such as viewing other users’ information, creating new
projects, and backing up and restoring projects.
System Administrator Grants the user all privileges.
4 Type the user’s name in the User Name box.
5 Type a unique login in the Login box. The login is needed in Adobe Creative Suite components, if a project
requires it, to log into the Version Cue Workspace Administration utility.
6 Type a password for the user in the Password box, and type it again in the Verify Password box.
7 (Optional) Type a phone number, an e-mail address, and comments in the remaining text boxes. Make sure to
enter an e-mail address if the user will participate in Version Cue PDF reviews and will receive invitation e-mails.
8 To define theuser’sproject access,choosethe user’s projectprivilegesnexttoeachproject name in thePrivileges
column. To give the user the same privileges for every project, choose an option from the Set All To menu.
9 To let a user publish a project to a specified FTP or WebDAV server, select the check box in the Publishing
Privilege column next to the project name.
10 Click Save.
Page 90

ADOBE INCOPY CS2
User Guide
To edit a Version Cue user name
To edit a user’s privileges, you need system administrator privileges.
1 Log into the Version Cue Workspace Administration page.
2 Do one of the following:
• Click Edit Users in the Home page.
• Click the Users tab.
3 Click the user name of the user name you want to edit.
4 Edit the user properties and privileges.
5 Click Save.
To duplicate or delete a Version Cue user name
You can duplicate a Version Cue user to set up a new user with the same project privileges as the original user.
Complete this procedure, and then change the duplicate user name and login as required.
1 Log into the Version Cue Workspace Administration page.
2 Click the Users tab.
3 Select the check box next to each user name you want to duplicate or delete. To select all listed user names, select
the check box next to the User Name column label.
4 Do one of the following:
• Click Duplicate. Edit the user’s properties in the Duplicate User content frame and click Save.
• Click Delete. To confirm the deletion, click Delete in the Delete User content frame.
85
Choosing user privileges
Version Cue user logins are associated with one of three levels of privilege: None, User, or System Administrator.
Users with privileges set to None can’t access the Version Cue Workspace Administration utility but can access
Version Cue projects while working in an Adobe Creative Suite component or an application that supports WebDAV.
The following table describes the privileges associated with the User and System Administrator levels.
Administration utility task User System
Create and update Version Cue
user login IDs
Read other Version Cue users’
login information
Update own user login information excluding login ID privilege
level
Duplicate and delete user IDs No Yes
Import and export user lists No Yes
No Yes
Yes Ye s
Yes Ye s
Administrator
Page 91

ADOBE INCOPY CS2
User Guide
86
Administration utility task User System
Create new projects (users must
have Project Creation Allowed
selected in their privileges)
Delete or restore project backups No Yes
Perform all tasks listed in the
Advanced content frame
Change the Administration utility
color scheme in the Advanced
preferences
Reset locks and remove file versions from projects to which the
user is assigned and also granted
Administer privileges
Back up, delete, and restore all
Version Cue Workspace data
View Version Cue Workspace
information, logs, and reports;
and save reports
Delete reports for projects to
which the user is assigned and
also granted Administer privileges.
Yes Ye s
No Yes
Yes Ye s
Yes Ye s
No Yes
Yes Ye s
Yes Ye s
Administrator
To export a list of users
If you want to add a set of users to another computer with a Version Cue Workspace, you can export the list and then
copy it to the UsersExport folder in the Version Cue application folder of another computer with a Version Cue
Wo rk s p ac e .
1 Log into the Version Cue Administration utility.
2 Click the Users tab.
3 Select the check box next to each user name you want to export. To select all listed user names, select the check
box next to the User Name column label.
4 Click Export List. The Export Users content frame displays the list of users to be exported.
5 Click Next, and type a name for the list in the Name box. If you like, type remarks in the Comments box.
6 Click Save. The Export Users content frame displays the list of exported users.
7 The location of the user list appears under the Export Users heading. To import this list into another Version Cue
Workspace, copy this file into the destined workspace’s Data/UsersExport folder in the Version Cue application
folder. Note that this folder can be moved and may be in a different location on the workspace.
To import users from a list
1 Log into the Version Cue Administration utility.
2 Click the Users tab, and then click Import List.
Page 92

ADOBE INCOPY CS2
User Guide
3 Click the name of the user list you want to import.
4 Select the check box next to each user name you want to import, or select the check box next to the User Name
column label to select all listed user names.
5 Click Next.
Viewing logs, reports, and workspace information
Viewing Version Cue Workspace information and reports
You can display the Version Cue Workspace version, name, licensee, serial number, Java version, database version,
Version Cue client URL (IP or DNS address), WebDAV client URL, copyright, and patent information with the
Version Cue Workspace Administration utility.
Users who are working in Adobe Creative Suite can use the Version Cue Client URL to connect to Version Cue
projects when they’re not on the workspace’s subnetwork. Users who are working in applications that support
WebDAV can use the WebDAV Client URL to connect to Version Cue projects.
You can also display and manage three kinds of reports (import, export, and publish) and the Version Cue Workspace
log file, which tracks all server operations according to the level of detail you specify.
87
Display time varies according to the size of the log file. The default log file size is 1024K. If the log file exceeds a
specified size limit, the system creates a new log file and saves the old one. Log files are saved in the Logs folder,
located in the Version Cue application folder.
To view Version Cue Workspace information
1 Log into the Version Cue Administration utility.
2 Do any of the following:
• Click the Home tab. Workspace information is listed under About This Workspace.
• Click the Advanced tab, and then select Workspace Info.
• Click About at the top of the page to display copyright and patent information. A window opens, listing infor-
mation about the Version Cue Workspace.
To view the Version Cue Workspace log file
1 Log into the Version Cue Administration utility.
2 Click the Advanced tab, and then select Workspace Log. The Workspace Log content frame displays information
about the Version Cue Workspace history.
3 Do any of the following:
• To change the number of rows displayed, choose an option from the Rows To Display menu.
• To navigate to a different page of the log, click Next, End, Beginning, or Previous, if available.
To view a Version Cue report
1 Log into the Version Cue Administration utility.
2 Click the Advanced tab, and then select Reports.
Page 93

ADOBE INCOPY CS2
User Guide
3 Choose the type of report you want to view from the Reports menu.
4 To view availablereports fromasingleproject,choosethe projectnamefromthe Filter By menu.Toviewavailable
reports from all projects on the Version Cue Workspace, choose All.
5 Clickthe project’snameinthe ProjectNamecolumn. Thecontent framedisplaysthe report.Chooseoptions from
the available menus to change how the report appears.
6 To save an HTML copy of the report to your computer, click Save, and specify a location.
7 To return to the report list, click Report List.
To delete Version Cue reports
1 Log into the Version Cue Administration utility.
2 Click the Advanced tab, and then select Reports.
3 Choose the type of report you want to delete from the Reports menu:
• To delete all reports from a single project, choose the project name from the Filter By menu.
• To delete all reports from two or more projects on the Version Cue Workspace, choose All.
4 Select the check box next to each project whose reports you want to delete. To select all project reports, select the
check box next to the Project Name column label.
5 Click Delete.
88
Version Cue PDF reviews
About Version Cue PDF reviews
Using Version Cue you can set up and conduct web-based reviews of PDF documents that are in a Version Cue
Workspace. You can invite selected reviewers by e-mail, create the e-mail message in your e-mail program, and
include a direct link to the review document in the e-mail. Invited reviewers only need Adobe Acrobat software and
a Version Cue login to access the PDF document using their web browser. As the review progresses, reviewers upload
their comments to the Version Cue Workspace. In an open review, all reviewers can see each other’s comments in the
PDF document as the review progresses.
You can specify when the review ends or stop a review at any time. When a review is complete, you can view all
comments either in the context of the original document or as a list in the Version Cue Administration utility. When
you view the comments in the context of the PDF document, all of the Acrobat commenting tools are available,
including printing.
Version Cue PDF reviews are especially useful in the late stages of a project when there isn’t time to arrange a traditional paper-based review. They are also useful when reviewers are dispersed over a wide geographical area. Aggregated comments make it easy to summarize comments and track the progress of the review.
Initiating a Version Cue PDF review
You use the Version Cue Administration utility to initiate and manage a Version Cue PDF review. From the Version
Cue PDF review area in the utility, you can start reviews and invite reviewers, find reviews in which you’re participating, search for review documents, view review comments (as well as filter the comments by reviewer), stop
reviews, and delete finished reviews. You can also reopen completed reviews.
Page 94

ADOBE INCOPY CS2
User Guide
Keep in mind the following requirements for using Version Cue PDF review:
• To use Version Cue PDF review, reviewers need a Version Cue login name and privileges that allow them to log
into the Version Cue Workspace hosting the review.
• To view the PDF and add comments, users need Acrobat 7.0 Professional. For more information about
commenting in Acrobat, see Acrobat Help.
• To access a review, users need an Internet connection.
To start a new Version Cue PDF review
You can start a Version Cue PDF review for any version of any PDF document that is in a Version Cue Workspace,
providedthatyou have appropriateprivilegestoaccessthe VersionCue Administration utility. Only oneversion of
a PDF document may be in active review at any point in time.
At any time, to return to the main Version Cue CS2 Review page, click the Home button . To return to Version
Cue Administration, click Version Cue CS2 Administration.
1 Log into the Version Cue Administration utility. (For instructions, see “To log into Version Cue Administration
from the Version Cue Preferences dialog box” on page 73 and “To log into Version Cue Administration from a web
browser” on page 73.)
2 Click the Version Cue CS2 Review link at the top of the page.
3 Do one of the following:
• In the main Version Cue CS2 Review page, click Start A Review.
• Click the Documents tab, and choose Not Started from the Review Status menu.
4 In the Document List, click the name of the PDF document you want to review.
5 Choose the version you want to review, and then click Start Review.
6 In the Start Review page, enter review information:
• To set an end date for the review, select Deadline, and then choose the end date from the Year, Month, and Day
menus.
• To let reviewers see each other’s comments, select Open under Review Mode. Select Private if you want reviewers
to see only their own comments.
• If you want to add a description of the review, type the information in the Description box.
• To add reviewers, select the reviewers’ names in the Reviewers section (click the check box next to the Reviewers
column label to select or deselect all reviewers).
89
Note: If a reviewer is outside your everyday workgroup and doesn’t have a Version Cue login, you’ll need to set one up
in advance. You must also provide network access—typically through a firewall—for outside reviewers.
7 Click Next.
8 To send an e-mail invitation to reviewers, select Send E-Mail Invitation, and then modify the Mail Subject and
Mail Message as desired. In the E-Mail Recipients section, choose reviewers you wish to invite by e-mail.
9 Click Start Review to activate the review.
10 If you chose to invite reviewers by e-mail, Version Cue starts your e-mail program and displays an e-mail message
addressed to the reviewers. The e-mail includes a direct link to the document being reviewed. Confirm the contents
of the review e-mail, and send it.
Page 95

ADOBE INCOPY CS2
User Guide
To locate PDF reviews
After you locate a PDF review, you can open it, view or delete review comments, stop or restart a review, or delete
the review from the Version Cue Workspace.
1 Log into the Version Cue Administration utility.
2 Click the Version Cue CS2 Review link at the top of the page.
3 Do one of the following:
• If you don’t know the name of the PDF document under review, or want to view all active reviews, click Active
Reviews in the Home tab. Alternatively, click the Documents tab and choose Active from the Review Status menu.
• If you don’t know the name of the PDF document for which a review has been completed, or want to view all
completed reviews, click Finished Reviews in the Home tab. Alternatively, click the Documents tab and choose
Finished from the Review Status menu.
• If you want to search for a PDF document that is under review or for which a review has been completed, click
Search Documents in the Home tab, and choose search criteria from the Project Name, Review Status, and List
Entries menus. To find a PDF document by its name, enter the name or part of it in the Document Name field.
Click Search.
To set viewing options in the Document List
You can filter the Document List in the Documents tab by doing one or more of the following:
90
• To display only PDF documents in a specific project, choose that project from the Project menu.
• To limit the number of documents displayed, choose an option from the List Entries menu (use the arrows to the
right of the List Entries menu to view additional files).
• To limit the list according to document name, enter part of a document name in the Document Name field and
press Enter (Windows) or Return (Mac OS). (To view all files again, delete the text in the Document Name field
and press Enter or Return.)
• To sort the list by the entries in a column, click the column heading. (Click the heading again to reverse the sort
order.)
To open an active or completed PDF review
1 Locate the active or completed review (see “To locate PDF reviews” on page 90).
2 Click the PDF document name in the Document List, and then select any of the versions in the Document History
list.
To stop a PDF review
1 Locate the active review (see “To locate PDF reviews” on page 90).
2 Click the PDF document name in the Document List.
3 In the Document History list, select the active review and click Stop Review.
Page 96

ADOBE INCOPY CS2
User Guide
To restart a completed PDF review
1 Locate the completed review (see “To locate PDF reviews” on page 90).
2 Click the PDF document name in the Document List.
3 In theDocumentHistory list,selectthe completedreviewand clickStart Review.Adjustreviewsettingsasdesired.
Note: After you click Start Review, you see a series of screens that refer to starting, rather than restarting, a review.
However, this procedure does restart the review of the existing document.
See also
“To start a new Version Cue PDF review” on page 89
To delete a PDF review
When you delete a review, Version Cue permanently removes the review comments. However, review comments for
a PDF file are also deleted if you permanently delete the file itself from the Version Cue Workspace. Note that if you
delete only a version of a PDF file from the workspace, the review comments for that version are deleted.
1 Locate the active or completed review (see “To locate PDF reviews” on page 90).
2 Click the PDF document name in the Document List.
3 In the Document History list, select a version and click Delete Review.
4 When Version Cue prompts you to delete the review, click Delete.
91
See also
“Deleting files and folders” on page 54
To edit review settings
1 Locate the active or completed review (see “To locate PDF reviews” on page 90).
2 Click the PDF document name in the Document List.
3 Select one of the versions in the Document History list, and click Edit Review Settings.
4 Do any of the following:
• To setorchange an enddatefor thereview, select Deadline, andthenchoosethe enddatefromthe Year,Month,
and Day menus.
• To let reviewers see each other’s comments, select Open under Review Mode. Select Private if you want reviewers
to see only their own comments.
• If you want to add or edit a description of the review, type the information in the Description box.
• To add or remove reviewers, select or deselect the reviewers’ names in the Reviewers section (click the check box
next to the Reviewers column heading to select or deselect all reviewers).
5 Click Next.
6 To send an e-mail invitation to reviewers, select Send E-Mail Invitation, and then modify Mail Subject and Mail
Message as desired. In the E-Mail Recipients section, choose reviewers you wish to invite by e-mail
7 Click Save Review. If you chose to invite reviewers by e-mail, Version Cue starts your e-mail program and displays
an e-mail message addressed to the reviewers. This e-mail includes a direct link to the document being reviewed.
Confirm the contents of the review e-mail, and send it.
Page 97

ADOBE INCOPY CS2
User Guide
About PDF review comments
Review comments include, in addition to the text of the comment itself, information about who created the comment
and when, what type of comment was created, and what page of the document the comment appears on. Different
comment types are distinguished by their icons. You can use any of the Acrobat commenting tools in a Version Cue
PDF review.
Version Cue stores review comments in the Version Cue Workspace. You can view comments in the Version Cue
Administration utility or directly in the PDF document. To view all review comments directly in the document, you
must access the document either by using the link from the review invitation or by opening the review document
from the Version Cue Administration utility. (If you open the review document from the Open dialog box in Acrobat
or from Bridge, the review comments aren’t visible.)
For more information about Acrobat commenting tools, search for “commenting” in Acrobat Help.
To view or delete PDF review comments
1 Locate the review (see “To locate PDF reviews” on page 90).
2 Click the PDF document in the Document List.
3 Do one of the following:
• To view all review comments directly in the PDF document, click the version name.
• To view review comments in the Version Cue Administration utility, select the version in the Document History
list and click View Comments.
92
To view any of the comments in the context of the PDF document, select a comment and then click Open In Acrobat.
• To delete review comments in the Version Cue Administration utility, select the comment and click Delete
Comments. (To select all comments, click the check box next to the Page column heading.)
Page 98

Chapter 4: Working with InCopy documents
Using an InCopy workflow
About InCopy workflows
Tight integration between InCopy and InDesign enables a workflow that lets writers, editors, and designers work
simultaneously on the same InDesign document, without overwriting each other’s work. The workflow system
allows users to check files out and in, thereby preserving file integrity.
InCopy users can view their content contributions within the context of layouts without installing InDesign. Using
InCopy, writers and editors can take full control of text, including typesetting functions such as applying formatting
styles (usually imported from InDesign), copyfitting, adjusting line and page breaks, setting hyphenation, kerning,
and so on. InCopy users can import graphics to enhance their stories, and make limited transformations on those
graphics, such as scaling and cropping. When the content is ready, InCopy can be used to update the document in
InDesign. In addition, InDesign users can share design updates with InCopy users, ensuring they are working with
the latest layouts.
93
Typically, a system integrator customizes the interaction between InCopy and InDesign, setting up and defining the
workflow system for the group. The workflow system controls file creation, synchronization (with the master server),
and viewing. InCopy and InDesign work with several different workflow systems, including the built-in system
enabled by the InCopy LiveEdit Workflow plug-ins for small workgroups. For specific details about your workflow
system, talk to the system integrator. For more information about the workflow enabled by the LiveEdit Workflow
plug-ins, see
“Sharing content” on page 124.
Methods of working on content in InCopy
Content is either a body of text that flows through one or more frames, or an imported graphic. There are four basic
ways to work on content in InCopy: open an assignment file, open a linked InCopy file, open an InDesign file with
linked InCopy files, or create a stand-alone InCopy document.
Open an assignment file created in InDesign
InDesign users can create an assignment file and populate it with pointers to selected frames, spreads, or documents.
This method lets the InDesign user associate related components (heading, body, graphics, captions, and so on), and
then assign them to different InCopy users for writing and editing. InCopy users open the assignment file (which is
much smaller than the InDesign file), and then work on only the components assigned to them. The live layout view
shows how their edited copy relates to the InDesign layout, without opening the entire InDesign document.
However, if the layout changes, the InDesign user must update assignments in order to notify InCopy users about
the changes. (For more information, see “About assignment files” on page 128.)
Page 99

ADOBE INCOPY CS2
User Guide
94
An InDesign document (.indd) with an assignment file (.inca) composed of three linked content files (.incx). The assignment and its components
are listed in the Assignments palette and are opened in InCopy.
Open linked InCopy files exported from InDesign
In certain workflows, InDesign users might export text and graphics as separate files, rather than wrapping them
inside an assignment file. Exporting separate files is useful if you work on unrelated graphics or bodies of text.
However, InCopy users will not be able to see how the content fits within the InDesign layout, unless they open the
InDesign file or assignment file in InCopy. This can be time-consuming for a large InDesign document, especially if
it is located on another networked computer. (For more information about exporting InDesign content using this
method, see
“To export content as separate InCopy files (InDesign)” on page 131.)
Page 100

ADOBE INCOPY CS2
User Guide
95
An InDesign document (.indd) with three linked, but unassigned content files (.incx) opened in InCopy
Open an InDesign document with linked InCopy files
To see all page items in the context of the entire layout, InCopy users can open the InDesign document in InCopy.
This can be time-consuming, compared to opening a compact assignment file, but it is useful for editing and
copyfitting if seeing the overall layout is important. You can edit text in any view, using the exact styles in the layout.
If the InDesign user changes the layout, you are notified when he saves the InDesign document.
Compose the content entirely in InCopy
You can create content directly in InCopy. You can type text, assign fonts and styles, and import graphics from other
applications (such as Illustrator and Photoshop) to enhance the text. You can also assign tags for future XML use.
This is a good option in an editorial workflow where the content precedes the design. You can also set up and modify
the text area, page size, and orientation for stand-alone documents. But if the story is later linked to an InDesign
document, the InDesign settings override the settings used in InCopy. The majority of this chapter is devoted to
working with stand-alone documents. (See “To create a stand-alone document” on page 97.)
 Loading...