

User Manual
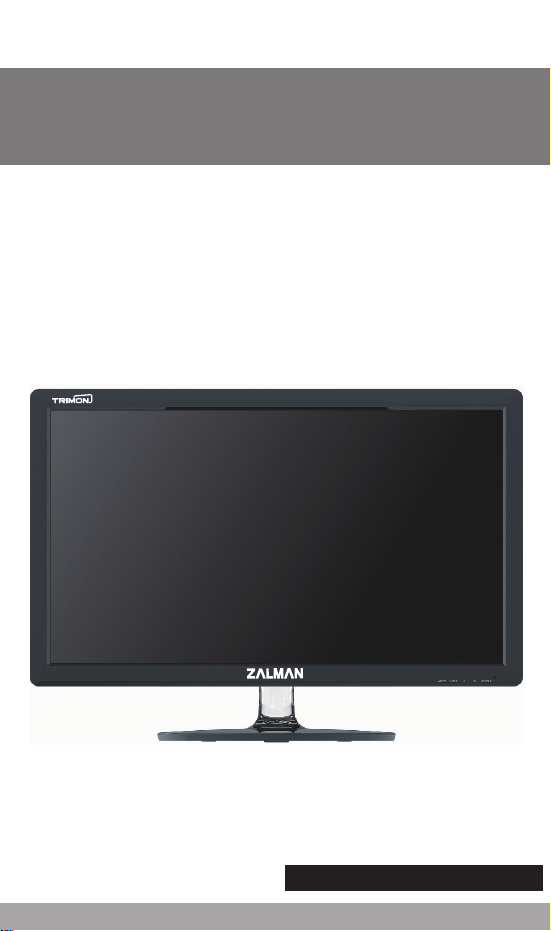
Model.: TM270VA LED
Slim & Stylish Monitor Ever
WWW.ZALMAN.COM
Ver 1.1

Language / langue / Sprache / lengua / язык / 語 / 言語 / 언어
English ……………………………………………………………3
français …………………………………………………………11
Deutsch …………………………………………………………19
español …………………………………………………………27
русский ………………………………………………………… 35
中 文 …………………………………………………………43
日 本 語 ………………………………………………………… 51
한 국 어 ………………………………………………………… 59

ENGLISH
WWW.ZALMAN.COM
3
Cautions for Safety
Before using the product, please read the following cautions to properly use the product.
Cautions are divided into "Warning" and "Attention."
Warning
Attention
■ Please connect power plug to the grounded outlet.
■ Do not touch the power plug with a wet hand. It may cause electric shock.
■ Do not plug many electric appliances to a single outlet. It may cause re or trouble.
■ Use the adapter provided with the LED monitor only. Using other adapters may
cause re or trouble.
■ Do not use damaged power cord or plug. Do not use loose outlet.
It may cause electric shock or re.
■ When connecting power plug to the outlet, push the plug into the outlet to the end
so that the plug is rmly xed. Instable connection may cause re.
If you do not follow the instruction, serious injury or large accident
in the worst case may occur.
If you do not follow the instruction, light injury or product damage may occur.
1. Introduction
■ Acknowledgement
Thank you for purchasing the product.
ZALMAN LED monitor is a high-resolution monitor with various advantages
such a scomplete shutout of electromagnetic wave, reduction of power consumption,
and ecient use of space.
This manual is for correct use of the monitor. Please read the manual thoroughly to
make the best use of the excellent features of the product.
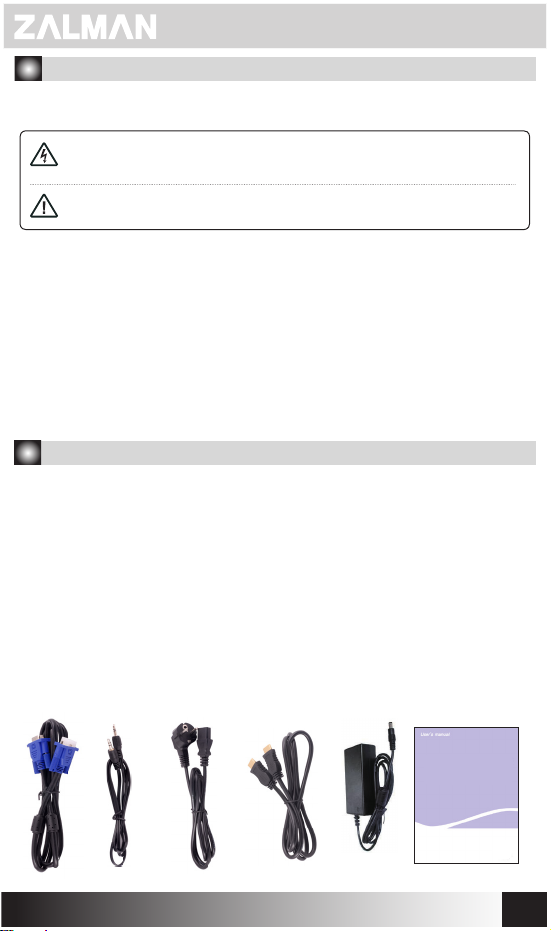
■ Package Contents
Check if the following items are included in the package and if any of the items are
missing, please contact your distributor.
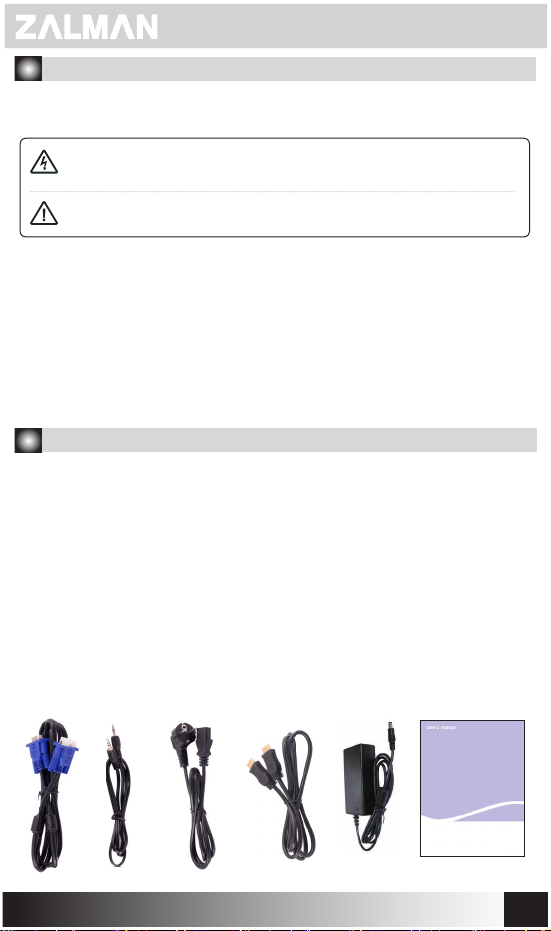
Monitor, adapter, power cord, D-sub cable, DVI cable, audio cable, manual, HDMI cable
■ Monitor ■ Adaptor ■ Power Cord ■ D-SUB Cable ■ Audio Cable
■ User Manual ■ HDMI Cable
WWW.ZALMAN.COM
USER
MANUAL
4
2. Monitor Installation
1. Connect Signal Cable
Connect the signal cable connector to D-Sub, HDMI port and fasten two bolts
rmly for grounding.
2. Connect Power Cable
Connect one end of the power cord to AC adapter and the other to the wall outlet or
multiple outlets. Then connect the DC cable of the AC adapter to the power
connector of the monitor.
3. Turn on the Monitor
Turn on the monitor and computer.
When you turn on the monitor, green or light green LED will be on. If LED is red or
ickering, check the connection of video signal cable. If LED is o, press the ' '
button gently.
4. Cautions in Installation
1. Install in the stable place.
2. Install where there is no moisture or dust.
3. Avoid the place exposed to direct sunlight or heating appliances.
4. Do not block the ventilation holes.
5. Avoid objects with strong magnetic forces.
3. Notice
■ This monitor complies with international VESA DPMS standard.
■ This monitor obtained the electromagnetic compatibility certicate for home use,
and therefore it can be used in all type of areas including the residential area.
■ Due to the characteristic of the LED panel, the brightness on the top and bottom
of the screen can be more or less dierent due to the dierence in the viewing angle.
■ Due to the characteristic of the LED panel, viewing the same image for a long time
can cause image retention which will disappear over time.
The optimum resolution is 1920 × 1080.
■ When you use this monitor for the rst time, if you are not satised with the screen,
you can change settings through the menu.
■ VESA hole is on the back of the monitor. (100 × 100mm)
■ Use the adapter provided with the monitor to supply power to the monitor.
Using other adapters can cause trouble and is not covered by the warranty for
free repair service.
■ This monitor can generate noise with few VGA card or at a specic frequency.
When the noise is generated, adjust manually.
WWW.ZALMAN.COM
5
4. Monitor Layout and Buttons
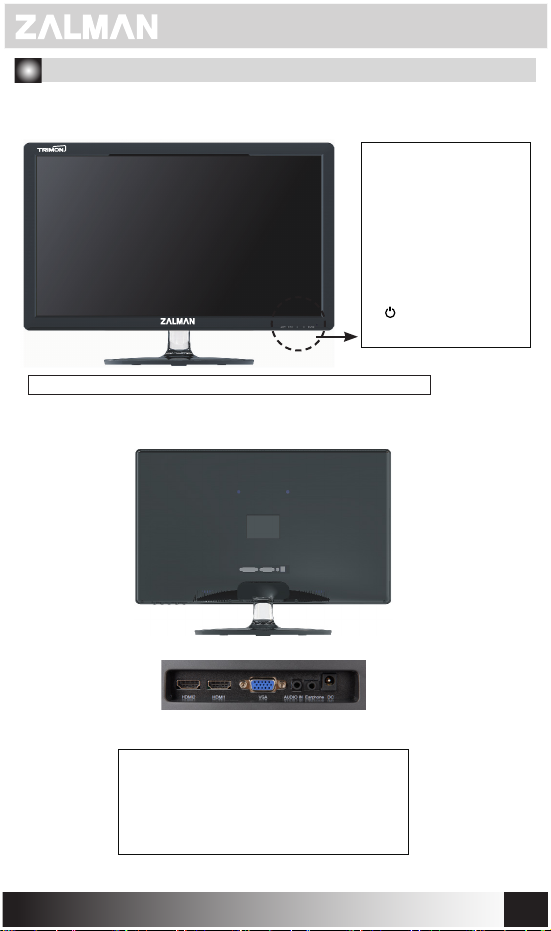
■ Front
1. AUTO
(Automatic Screen Adjustment)
2. MENU (Menu, Select)
3. ◀ (Move Down or Left)
4. ▶ (Move Up or Right)
5. ' '
( Power ON or OFF)
LED Status: Blue (Power is on / Red indicates power saving mode)
■ Back
⑤ ④ ③ ② ①
1. DC IN: Power connector.
2. Earphone: Earphone cable connector.
3. AUDIO IN: Audio cable connector.
4. VGA: PC D-Sub cable connector.
5. HDMI: PC and HDMI cable connector
WWW.ZALMAN.COM
6
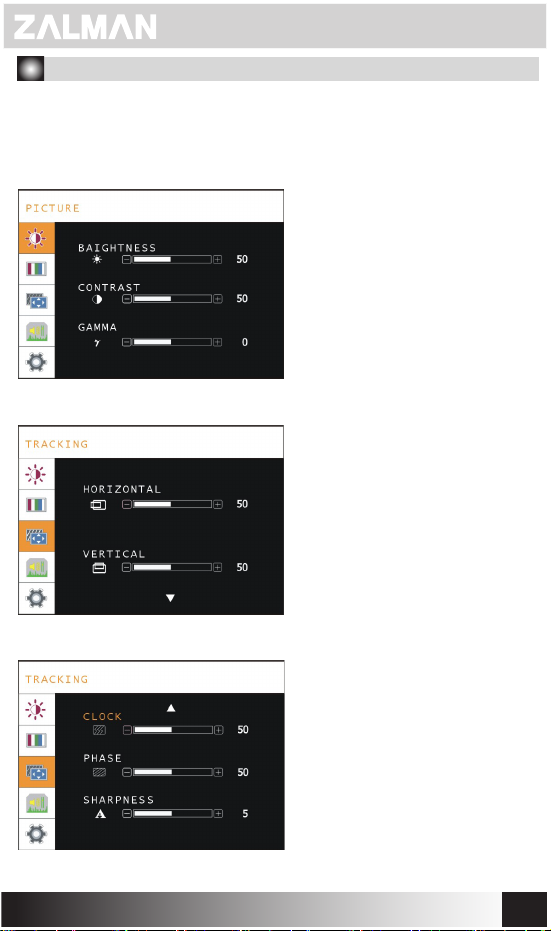
5. LED Screen Setting Menu
■ Menu Loading
When you press the MENU button, the setting menu appears on the LED screen.
Using ◀ and ▶ buttons to congure the setting and press the MENU button again.
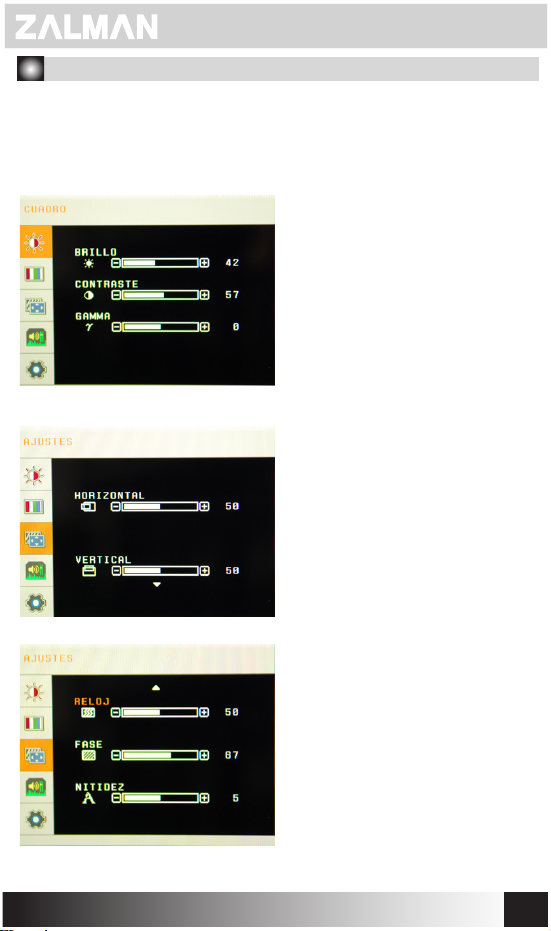
Brightness
Adjusts the brightness of the screen.
Contrast
Adjusts the contrast of the screen.
Gamma
Adjusts the gamma of the screen.
Horizontal Position / Vertical Position
Adjusts the horizontal/vertical positions
of the screen.
WWW.ZALMAN.COM
Frequency
Adjusts the frequency of the screen.
Phase
Adjusts the phase of the screen.
Sharpness
Adjusts the sharpness of the screen.
7
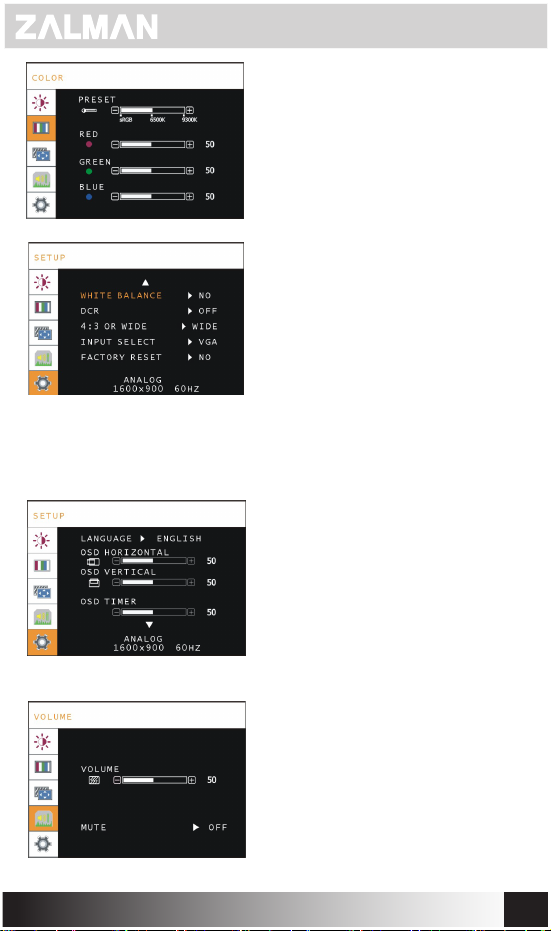
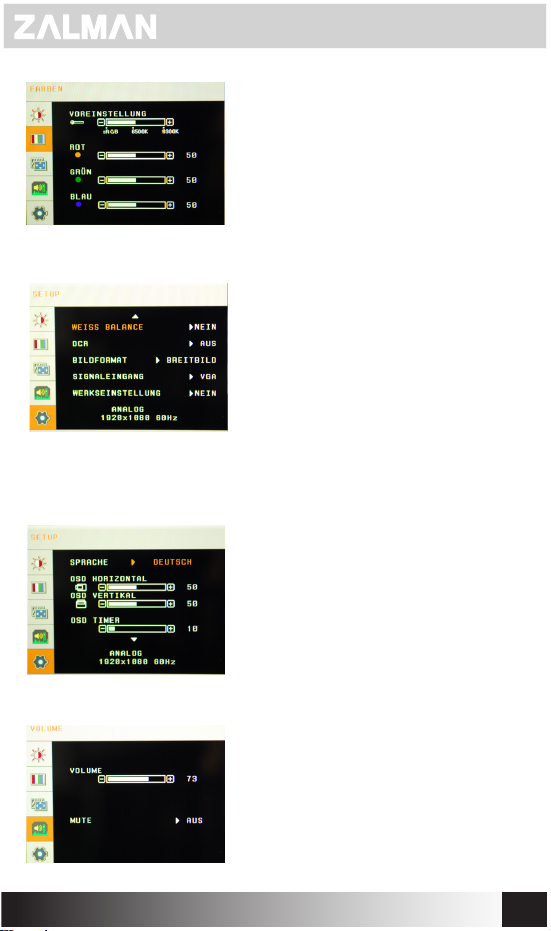
Preset (sRGB / 6500K / 9300K)
Adjusts the color temperature of the screen.
User Setting (Red / Green / Blue)
Allows the user to adjust the color of the
screen.
White Balance
Automatically adjusts the White Balance.
DCR ON/OFF
Turns on/o the dynamic contrast ratio
feature.
Maintain Aspect Ratio
Toggles between wide ratio
(16:9 or 16:10) and 4:3 ratio.
INPUT SELECT
Sets input signal to VGA(D-SUB) or HDMI.
nitialization
I
Resets all settings to the factory setting.
Language
Sets the language for the monitor and OSD.
OSD Horizontal Position
Adjusts the horizontal position of OSD.
OSD Vertical Position
Adjusts the vertical position of OSD.
OSD Time
Adjusts the display length of OSD.
WWW.ZALMAN.COM
Volume
Adjusts the volume of the speaker.
Mute
Turns the speaker on/o.
8
6. Monitor Specication
Model.
Screen Size
Optimum
Resolution
Resolution
Pizel Pitch
Brightness
Contrast Ratio
DCR
Viewing Angle
Response Type
Display Colors
Input
Horizontal Sync
Vertical Sync
Built-in Speaker
Adapter
Specication
Dimensions
TM270VA LED
27"(68cm)
1920 x 1080
16 : 9 Wide
0.311 mm * 0.311 mm
300cd/m²
5,000 : 1
20,000,000 : 1
Horizontal 170˚
Vertical 160˚
G to G 2ms
16.7 M
D-Sub (15 Pin)
HDMI x 2
Audio
31.5~94 KHz
60 ~ 75 Hz
2W + 2W (8Ω)
12V / 4A
646 * 453 *170mm
Certication
WWW.ZALMAN.COM
CB, CE, KC, VCCI, GOST
9
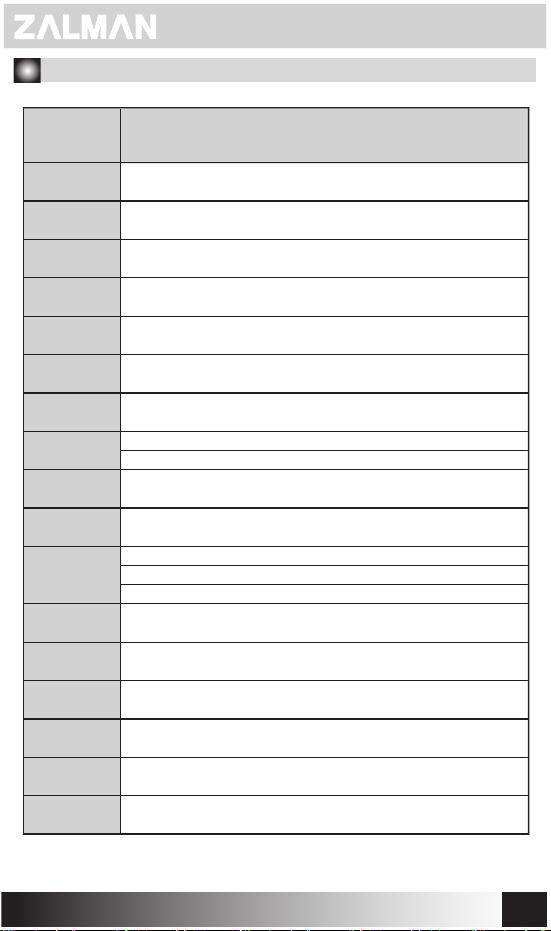
7. Troubleshooting
The monitor does not show anything.
■
- Check if the power cord of the monitor is disconnected.
- Check if the ' ' of the monitor is o.
- Check if the power of the system is o.
- Check if the signal cable of the monitor is disconnected.
The screen is too dark.
■
- Go into OSD menu and adjust brightness and contrast.
The monitor is too hot.
■
- Give at least 5cm of room from other objects for ventilation.
The image is twisted or ickering.
■
- Check PC setting and select appropriate resolution to readjust the frequency.
There are spots of white and black.
■
- Use the monitor for about 20 minutes and clean the screen with the cloth for
cleaning glasses or very soft cloth using LED exclusive cleansing solution.
The color of the image is strange.
■
- Check if the signal cable is twisted or damaged.
[ ZALMAN LED MONITOR WARRANTY POLICY ]
ZALAMN LED Monitors are covered by
conditions herein.
* WARRANTY PERIOD
The warranty hereof shall mean a period of 2 years from the date of purchase.
* HOW TO GET SERVICE:
You may visit “Where to buy” section on ZALMAN website below to check who the local distributor
in your region area. (http://www.zalman.com/Company/Network/Network_eng.asp)
WARRANTY TERMS AND CONDITIONS ON ZALMAN LED MONITORS
1.ZALMAN guarantee that the monitor you have purchased is free from manufacturing defects in
materials and workmanship when dispatched from our warehouse. The receipt of purchase shall
be provided as proof of the date of purchase and the warranty period commences as of that date.
2.During the warranty period, ZALMAN LED monitors will be picked up, repaired and returned
by the ZALMAN authorized distributor(s)/reseller(s) or may be delivered and collected by the
customer.
3.Notwithstanding the foregoing, this warranty shall not be construed to come with international
warranty service. The warranty service only covers monitors which have been purchased in the
local country. Extra charges will apply if service or replacement is requested in a different country.
4.Proof of purchase will be required in the event of discrepancy with alternative record(s) of sale.
5.The warranty automatically becomes void if the product has been physically damaged or
rendered defective –
(a)as a result of an accident, misuse, re, lightning, malicious damage, water damage, abuse or
other circumstances beyond ZALMAN’s control;
2 years limited warranty
as stated in the terms and
WWW.ZALMAN.COM
10

(b) by the use of parts or peripherals not authorized by ZALMAN;
(c) as a result of normal wear and tear;
(d) by use in an improper operating environment;
(e) by modication of the monitor;
(f) by the serial number or product code sticker being removed or defected;
(g) as a result of servicing by anyone other than an ZALMAN authorized service centre or its
authorized service agent(s)
(h) as a result of the monitor not being operated in conformity with ZALMAN’s user manual.
6.The customer must ensure that the monitor is packed in appropriate packing for all handling.
Any damage due to improper packing will be chargeable to the customer.
7.The ZALMAN authorized distributor(s)/reseller(s) may charge the customer at current applicable
hourly rates if the technician determines that the problem is;
(a) user related;
(b) caused by changes made to the normal settings of the monitor;
(c) caused by the customer’s computer or electrical power supply;
(d) due to cause(s) that are not covered by this warranty.
8.The customer must ensure that they are available when the distributor(s)/reseller(s)’
representative arrives to pick up or deliver the monitor. Any additional visits made due to the
customer’s unavailability will be chargeable to the customer; or else the customer can choose to
deliver or fetch the monitor to (from) the distributor(s)/reseller(s) at their own cost.
9.Software-related faults resulting from incorrect software installation or usage or
software viruses or software-inherent bugs shall not be considered as product faults and may
incur a charge for rectication.
10.Defective pixel in LED panel monitors are not a warranty issue unless they are beyond the
criteria prescribed in panel manufactures’’ specication for pixel defects. Please refer to ZALMAN
LED Monitor Pixel Policy Below.
[ ZALMAN LED Monitor Defective Pixel Policy
The defective monitors will be replaced with new one or refurbished in accordance with a period of
usage and number of non-performing pixel of monitor.
– One to one exchange with new one:
- More than 1 bright non-performing pixels in A-ZONE and more than 3 bright non-performing
pixels in B-ZONE appearing in 30 days from end-user invoice purchase date
- More than 2 bright non-performing pixels in A-ZONE and more than 2 bright non-performing pixel
in B-ZONE appearing in 30 days from end-user invoice purchase date
-
More than 3 bright non-performing pixels in A-ZONE in 30 days from end-user invoice purchase date
-
More than 5 bright non-performing pixels in B-ZONE in 30 days from end-user invoice purchase date
– One to one exchange with the refurbished one:
- More than 1 bright non-performing pixels in A-ZONE and more than 3 bright non-performing
pixels in B-ZONE appearing after 30 days from end-user invoice purchase date
- More than 2 bright non-performing pixels in A-ZONE and more than 2 bright non-performing
pixels in B-ZONE appearing after 30 days from end-user invoice purchase date
- More than 3 bright non-performing pixels in A-ZONE after 30 days from end-user invoice
purchase date
- More than 5 bright non-performing pixels in B-ZONE after 30 days from end-user invoice
purchase date
Except dark non-performing pixels
※
]
B-ZONE B-ZONE B-ZONE
B-ZONE A-ZONE B-ZONE
B-ZONE B-ZONE B-ZONE
WWW.ZALMAN.COM
11

français
WWW.ZALMAN.COM
12
Précaution pour la sécurité
Pour utiliser correctement, lire le contenu suivant avant d’utiliser.
La précaution est divisée en "l’avertissement" et "l’attention".
Avertissement :
Attention:
■ Connecter la prise électrique à la prise de courant reliée à la terre.
■ Ne pas toucher la prise électrique avec la main mouillée. Ça peut provoquer
une électrocution.
■ Ne pas utiliser les diverses machine électriques dans une prise de courant en même
temps. Ça peut provoquer un incendie et une panne.
■ Ne pas utiliser d’autre que l’adaptateur fourni avec l’écran LED. Ça peut provoquer
un incendie et une panne.
■ Ne pas utiliser la prise électrique endommagée ou la prise de courant lachée.
Ça peut provoquer une électrocution ou un allumage.
■ Pour brancher sur la prise de courant, appuyer à fond pour ne pas bouger la
prise électrique. Ça peut provoquer un incendie quand la connection est instable.
Quand on ne respecte pas la précaution, il peut y avoir une blessure
grave ou un accident grave dans le pire des cas.
Quand on ne respecte pas la précaution, il peut y avoir une blessure
légère ou un dégât du produit.
1. Description de produit
■ Mot de salutation
Je vous remercie d’avoir acheté notre produit.
Notre écrant LCD, qui a de haute résolution, a des qualités de l’interruption parfaite de l’onde
électronique, l’économie de la consommation électrique et l’utilisation ecace de l’espace.
Pour utiliser l’écran correctement, lire le mode d’emploi avant de l’utiliser an de proter
la performance remarquable de ce produit.
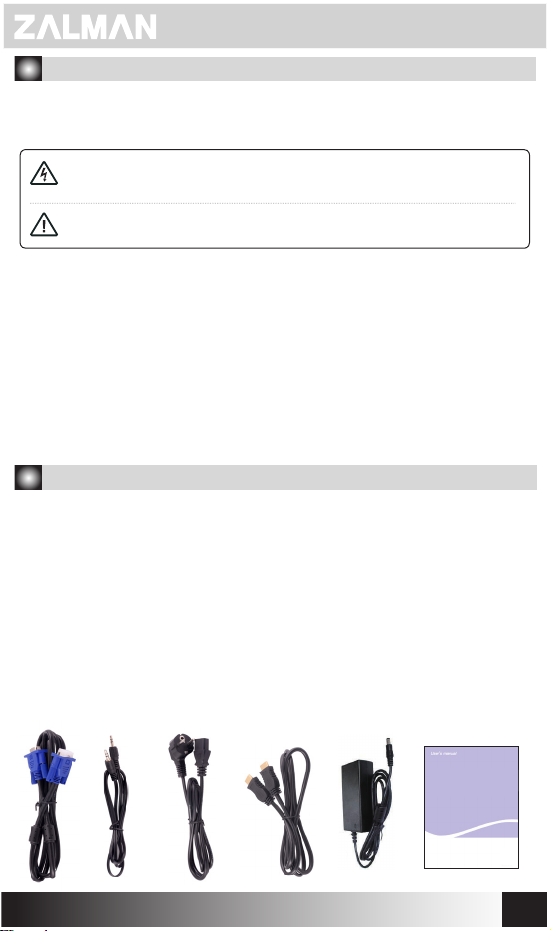
■ Identication de produit
Identier des articles au dessous dans le paquage s’il y a un article manquant, contacter
le point de vente.
Écrant, Adaptateur, prise électrique, câble de d-sub, câble d’audio, mode d’emploi , 2 câbles de HDMI
Écrant
■
■
Câble d’audio
■
Adaptateur
Mode d’emploi
■
■
■
Prise électrique
Câbles de HDMI
■
Câble de d-sub
WWW.ZALMAN.COM
mode d’emploi
13

2.Installation de produit
1. Connection du câble de signal
Connecter le connecteur du câble de signal au port de D-Sub, HDMI et bien
serrer les deux boulons pour la mise à la terre.
2. Connection du câble de puissance
Un côté de la prise électrique se connecte à l’adaptateur AC et un autre côté
se connecte au mur ou à la multi-prise de courant. Et Le câble de DC venu de
l’adaptateur AC se connecte à la prise d’allimentation d’écran.
Allumer la d’écran
3.
Allumer la puissance d’ordinateur et d’écran.
Après que l’écran est allumé, Le LED vert ou vert clair est allumé. Si la couleur
de LED est rouge ou clignotant, il faut vérier la connection du câble de signal
de vidéo. Si le LED est éteint, appuyer légèrement le bouton de ' '.
4. Précaution lors de l’installation
1. Installer dans un endroit stable.
2. installer dans un endroit où il n’y a pas d’humidité et de poussières.
3. Eviter le rayon direct et l’alentours de chauoir.
4. Ne pas fermer le trou de ventilation.
5. Eviter l’alentours d’un substance magnétique.
3.Renseignements écrits
■ Cet écran respecte le norme de standard international de VESA DPMS.
■ Cet écran est conforme à l’appareil ménager et inscrit à la conformité de
l’onde électronique. On peut l’utiliser dans la zone résidentielle et toutes les zones.
■ Cet écran peut être diérent de la luminosité en haut et en bas par la diérence
de l’agle de vue par la caractéristique du panel LED.
■ Cet écran peut avoir l’image persistante par la caractéristique du panel LED
quand le même image pendant longtemps est resté et cela se disparaît avec
le temps.
La résolution optimale est 1920 × 1080.
■ Quand vous utilisez la première fois cet écran et vous n’êtez pas satisfait de
l’écran, modiez l’établissement au menu.
■ Le trou de VESA est l’arrière de cet écrant. (100 × 100mm)
■ Pour la prise électrique de cet écran, utiliser l’adaptateur fourni dans ce produit.
Dans le cas d’utilisation d’un autre adaptateur, ça peut provoquer une panne
et le service après vente n’est pas gratuit.
■
Cet écran peut génerer le bruit avec certaines cartes de VGA ou certaines fréquences.
Il faut régler manuellement dans le cas du bruit.
WWW.ZALMAN.COM
14

4.Composition d’écrant et description de bouton
■ Façade
1. réglage automatique
d’écran
2. MENU, sélection
3. ◀ en bas,
aller à gauche
4. ▶ en haut,
aller à droite
5. Allumer/eteindre
' '
Etat de LED : en vert c’est allumé /en rouge c’est en mode d’économie.
■ arrière
⑤ ④ ③ ② ①
1. DC IN : c’est le plot d’entrée de la puissance.
2. Ecouteur : c’est le plot de connection du câble d’ecouteur.
3. AUDIO IN : c’est le plot de connection du câble d’audio.
4. VGA : c’est le plot de connection du câble de D-Sub d’ordinateur.
5. HDMI : c’est le plot de connection du câble d’ordinateur et de HDMI.
WWW.ZALMAN.COM
15

5. Menu d’établissement d’écran LED
■ Ouvrir le menu
Appuyer le bouton de MENU pour faire apparaître le munu d’établissement sur l’écran.
Sélectionner l’établissement voulu par le boutonn de ◀ ou ▶ et appuyer le bouton de
MENU.
Réglage de luminosité
Régler la luminosité de l’écran.
Réglage de clair-obscur
Régler le clair-obscur de l’écran.
Réglage de Gamma
Régler la Gamma de l’écran.
WWW.ZALMAN.COM
Bouger à gauche et
Régler la localité horizontale/verticale.
Réglage de fréquence
Régler la valeur de fréquence de l’écran.
Réglage de phase
Régler la valeur de phase de l’écran.
Réglage de acuité
Régler la valeur de acuité de l’écran.
horizontale/verticale
16

Prédénie (sRGB / 6500K / 9300K)
Régler la températeur de couleur de l’écran.
Réglage d’utilisateur (rouge / vert / bleu)
Régler la couleur de l’écran par utilisateur.
balance des blancs
Régler balance des blancs d’écran
Allumer/éteindre DCR
On peut allumer et éteindre la fonction
des taux de clair-obscur dynamique.
Input Select
Etablir le signal d’entrée par le plot de VGA
(D-SUB) & HDMI.
Taux en longueur et larger xés
Changer l’écran en argeur
(16:9 ou 16:10) et en taux de 4:3.
Initialisation
Toutes les valeurs d’établissement est
modiées en valeurs d’ établissement
initiée de sortie d’usine.
Sélection de langue
Etablir la langue de menu d’OSD et d’écran.
Aller à gauche et à droite du menu
Régler la localité horizontale de l’écran d’OSD.
Aller en haut et en bas du menu
Régler la localité verticale de l’écran d’OSD.
Établissement d’heure du menu
Régler le temps d’attente sur l’écran d’OSD.
WWW.ZALMAN.COM
Réglage du volume sonore
Régler le volume sonore du haut-parleur.
Pas de son
Allumer et éteindre la fonction du haut-parleur.
17
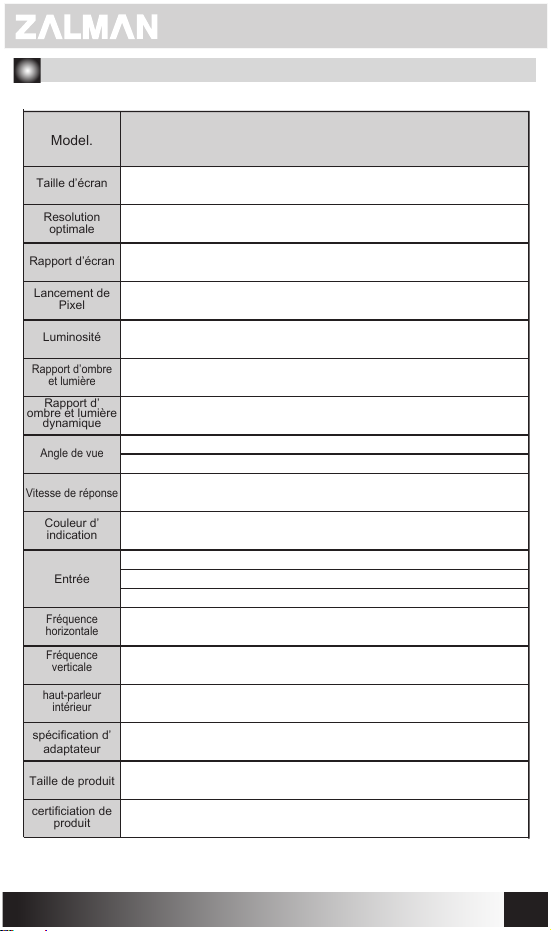
6. Norme d’écran
Model.
Taille d’écran
Resolution
optimale
Rapport d’écran
Lancement de
Pixel
Luminosité
Rapport d’ombre
et lumière
Rapport d’
ombre et lumière
dynamique
Angle de vue
Vitesse de réponse
Couleur d’
indication
Entrée
Fréquence
horizontale
Fréquence
verticale
haut-parleur
intérieur
spécication d’
adaptateur
Taille de produit
certiciation de
produit
TM270VA LED
27"(68cm)
1920 x 1080
16 : 9 Wide
0.311 mm * 0.311 mm
300cd/m²
5,000 : 1
20,000,000 : 1
Horizontal 170˚
Vertical 160˚
G to G 2ms
16.7 M
D-Sub (15 Pin)
HDMI x 2
Audio
31.5~94 KHz
60 ~ 75 Hz
2W + 2W (8Ω)
12V / 4A
646 * 453 *170mm
CB, CE, KC, VCCI, GOST
WWW.ZALMAN.COM
18

7.saisir l’erreur simple
■ Je ne vois pas d’écran.
- Verier si la prise électrique de l’écran est déconnectée.
- Verier si la ' ' de l’écran est allumée.
- Verier si la puissance du système est allumée.
- Verier si le câble du signal d’écran est déconnecté.
■
L’écran est sombre.
- régler la luminosité et les taux de clair-sombre dans le menu d’OSD.
■
L’écran est trop chaud.
- pour aérer, il faut écarter plus de 5cm depuis d’autres objets.
■
L’écran est déformé ou clignotant.
- vériler l’établissement d’ordinateur et sélectionner la résolution convenable et
régler la fréquence à nouveau.
■
Il y a des tâches noires.
- après avoir utilisé l’écran à peu près 20 minutes, l’essuyer avec le tissu très doux ou
le tissu pour des lunettes en utilisant la liquide nettoyante pour LED.
■
Manque de couleur
- vérier si la broche du câble de signal est tordue ou cassée.
[ Garantie pour l’écran LED ZALMAN ]
Les écrans LED de ZALMAN bénécient d’une garantie limitée de 2 ans conformément
aux présents termes et conditions.
Durée de garantie
La présente garantie s’applique pendant une période de 2 ans à compter de la date d’
achat.
Pour obtenir le service :
Vous pouvez visiter la rubrique “Où acheter” du site Web de ZALMAN ci-dessous ande
contacter votre distributeur local. (http://www.zalman.com/Company/Network/
Network_eng.asp)
[ TERMES ET CONDITIONS CONCERNANT LES ECRANS LED ZALMAN ]
1.ZALMAN garantit que l’écran que vous avez acheté est exempt de tout défaut de
fabrication, matériel ou de main-d’œuvre, à sa sortie d’usine. Le ticket de caisse sera
demandé comme preuve de la date d’achat à compter de laquelle la garantie prend eet.
2.Pendant la période de garantie, les écrans LED ZALMAN seront ramassés, réparés
puis retournés par le distributeurs/revendeur agréé par ZALMAN, ou expédiés puis
récupérés par le consommateur lui-même.
3.Néanmoins, la présente garantie ne couvre pas le service de garantie international. Le
service de garantie s’applique uniquement aux écrans ayant été achetés dans le pays.
Des frais supplémentaires seront appliqués si un service ou un remplacement est
demandé dans un autre pays.
WWW.ZALMAN.COM
19

4.La preuve d’achat sera demandée en cas de décalage avec un enregistrement de vente
alternatif.
5.La garantie devient automatiquement nulle si le produit a été physiquement endommagé
ou rendu défectueux par :
(a) Un accident, un mauvais emploi, un incendie, la foudre, un acte de malveillance, un
dégât des eaux, un abus ou d’autres circonstances hors du contrôle de ZALMAN ;
(b) L’utilisation des composants ou des périphériques non autorisés par ZALMAN ;
(c) L’usure normale ;
(d) L’utilisation dans un environnement inapproprié ;
(e) La modication de l’écran ;
(f) Le numéro de série ou le code produit eacé ou endommagé ;
(g) Une réparation eectuée par un centre de service ou un technicien non agréé par
ZALMAN ;
(h) Une utilisation de l’écran non conforme au mode d’emploi de ZALMAN.
6. Le consommateur doit vérier que l’écran est emballé de façon appropriée pour toute
manutention. Tout endommagement dû à un emballage inapproprié pourra être facturé au
consommateur. .
7.ZALMAN autorise que le distributeur/revendeur met à la charge du consommateur les
tarifs horaires applicables si le technicien détermine que le problème :
(a) Vient de l’utilisateur ;
(b) Est causé par des modications eectuées sur les paramètres normaux de l’écran ;
(c) Est cause par l’ordinateur ou l’alimentation électrique du consommateur ;
(d) Est dû à des facteurs non couvertes par la garantie.
8.Le consommateur doit assurer sa présence lorsque le représentant du distributeur/
revendeur arrive pour enlever ou livrer l’écran. Toute autre visite eectuée due à l’
indisponibilité du consommateur sera facturée au consommateur ; sinon le consommateur
peut opter pour expédier ou récupérer l’écran à ses frais.
9.Les défauts du logiciel dus à l’installation ou à l’usage incorrect du logiciel, ou encore à
des virus ou des bugs inhérents au logiciel n’étant pas considérés comme défauts du
produit, leur réparation pourrait engendrer des frais de réparation.
10.Les pixels défectueux dans les écrans panneaux LED ne sont pas couverts par la
garantie à moins qu’ils soient au dessus des critères prescrits dans la spécication du
fabricant. Veuillez consulter la politique de ZALMAN ci-dessous en matière de pixels de l’
écran LED :
[ Politique de ZALMAN sur les pixels défectueux de l’écran LED ]
Les écrans défectueux seront remplacés par un autre écran neuf ou révisé, en fonction de
la durée d’utilisation et du nombre de pixels morts de l’écran.
– Echange avec un écran neuf :
- Plus d’un pixel mort blanc de la zone A et plus de trois pixels morts blancs de la zone B
ont apparu dans les 30 jours après la date d’achat.
- Plus de deux pixels morts blancs de la zone A et plus de deux pixels morts blancs de la
zone B ont apparu dans les 30 jours après la date d’achat.
- Plus de trois pixels morts blancs de la zone A ont apparu dans les 30 jours après la date d’
achat.
- Plus de cinq pixels morts blancs de la zone B ont apparu dans les 30 jours après la date d’
achat.
WWW.ZALMAN.COM
20

– Echange avec un écran révisé :
- Plus d’un pixel mort blanc de la zone A et plus de trois pixels morts blancs de la zone B
ont apparu au-delà de 30 jours après la date d’achat.
- Plus de deux pixels morts blancs de la zone A et plus de deux pixels morts blancs de la
zone B ont apparu au-delà de 30 jours après la date d’achat.
- Plus de trois pixels morts blancs de la zone A ont apparu au-delà de 30 jours après la
date d’achat.
- Plus de cinq pixels morts blancs de la zone B ont apparu au-delà de 30 jours après la
date d’achat.
※ Excepté les pixels morts noirs
B-ZONE B-ZONE B-ZONE
B-ZONE A-ZONE B-ZONE
B-ZONE B-ZONE B-ZONE
WWW.ZALMAN.COM
21

Deutsch
WWW.ZALMAN.COM
22
Sicherheitshinweise
Lesen sie bitte vor dem ersten Gebrauch folgende Informationen, um eine richtige
Benutzung sicher zu stellen.
Sicherheitshinweise werden in diezwei Kategorien "Warnung" und "Achtung" untergliedert.
Warnung :
Achtung :
■ Der Stecker muss an eine geerdete Steckdose angeschlossen werden.
■ Kein Anfassen des Steckers mit der nassen Hand. Es besteht die Gefahr eines
Elektroschocks.
■ Keine Nutzung von mehreren Elektrogeräten an einer Buchse gleichzeitig.Es besteht
die Gefahr eines Brandes undFehlfunktion.
■ Benutzen Sie nur den Adapter, der mit dem LED Monitor mitgeliefert ist.Es besteht die
Gefahr eines Brandes undFehlfunktion.
■ Benutzen Sie nicht ein beschädigtes Stromkabel, Stecker oder Steckdose. Die Gefahr
eines Elektroschocks oder Brandes besteht.
■ Beim Anschluss des Steckers an die Steckdose, schieben Sie bitte den Steckerbis
zum innersten Ende fest. In dem Fall eines beweglichen Anschlusses, besteht die
Gefahr eines Brandes.
falls die Anweisungen missachtet werden, könnenschwere Verletzungen
oder im schlimmsten Fall ein großes Schäden entstehen.
falls die Anweisungen missachtet werden, könnenleichte Verletzungen
oder ein leichter Schaden an dem Produkt entstehen.
1. Produktbeschreibung
■ Einleitender Gruß
Wir bedanken uns sehr für den Einkauf unseres Produktes.
Unser LCD Monitor ist ein Hochauösungmonitor, der den Vorteil einer perfekten
Isolierung von elektromagnetischen Wellenund dem geringen Stromverbrauch durch
eine eziente Raumverwendunggarantiert.
Diese Bedienungsanleitung ist für die Aufstellung des Monitors, bitte lesen Sie daher
genau diese Beschreibung, um die beste Verwendung ihres neuen Geräts sicher
zu stellen.
■ Produktartikel überprüfen
Wenn Sie das Paket önen, überprüfen Sie bitte, ob die folgenden Artikel enthalten sind.
Falls Sie fehlende Artikel bemerken, nehmen Sie bitte Kontakt mit der
Monitor, Adapter, Stromkabel, D-Sub Kabel, Audiokabel, Bedienungsanleitung ,
HDMI-Kabel
Monitor
■
Audiokabel
■
■
Adapter
Bedienungsanleitung
■
■
Stromkabel
■
■
Verkaufsstelle auf.
D-Sub Kabel
HDMI-Kabel
WWW.ZALMAN.COM
Bedienungsanleitung
23
2.Produktinstallation
1. Anschluss des Signalkabel
Stecken Sie das Signalkabel in eine der BuchsenD-Sub, HDMI ein, und
schrauben Sie die zwei Bolzen fest, um die Verbindung sicherzustellen.
2. Anschluss des Stromkabels
Stecken Sie eine Seite des Stromkabels in den AC Adapter, und die Andere in
die Steckdose. Schließen sie danach das DC-Kabel des AC-Adapters an die
Stombuchse ihres Monitors.
3. Schalten Sie den Monitor
Schalten Sie den Strom von Monitor und Computer zuerst ein.
Nach dem Einschalten des Monitiors, die grüne oder gelbgrüne LED wird
eingeschaltet. Falls LED rot oder einfach blinkt, überprüfen Sie den Anschluß
des Signalkabels. Falls LED ausgeschaltet ist, drücken Sie den ' ' leichtein.
4. Hinweise für die Installation
1. Installation auf stabilem Grund.
2. Kein Aufstellen in feuchten oder staubigen Räumen.
3. Vermeiden von direkter Sonneneinstrahlung oder der Nähe zu Heizkörpern.
4. Kein Versperren der Lüftungsschlitze.
5. Vermeiden von Nähe zu elektromagnetischen Objekten.
3.Hinweise
■ Dieser Monitor unterliegt dem Standard der internationalen Norm von VESA DPMS.
■ Dieser Monitor ist für die Benutzung im Haus geeignet, d.h. elektromagnetisch geprüft.
Er kann nicht nur im Wohngebiet sondern auch in allen anderen Gegenden benutzt
werden.
■ Dieser Monitor wird die leicht verschiedenen Auösungen auf den oberen und unteren
Bildschirmteilen je nach dem Ansichtspunkt wegen dem Charakteristikum von LED
PANEL anzeigen.
■ Dieser Monitor könnte Nachabbildungenwegen dem Charakteristikum von LED PANEL
anzeigen, welches aber nach bestimmter Zeit verschwindet.
Die beste Auösung ist 1920 × 1080.
■ Beim ersten Gebrauch dieses Monitors kann die Konguration geändert werden,
falls die Auösung nicht zufriedenstellend ist.
■ Es gibt ein VESA-Loch an dem hinteren Teil dieses Monitors.(100 × 100mm)
■ Der Strom für diesen Monitor soll durch den mitgelieferten Adapter geliefert werden.
Durch den Gebrauch eines anderen Adapters, besteht die Gefahr der Fehlfunktion,
und das Recht für den freien A/S wird entzogen.
■
Beim Gebrauch dieses Monitors, kann es Geräusche mit einigen VGA Karte oder bei
der spezischen Welle geben. Passen Sie in diesem Fall den Monitor an.
WWW.ZALMAN.COM
24

4. Monitorkonguration und Tasten
■ Vorderer
1. AUTO : Automatische
Bildschirmanpassung
2. MENU , Auswahl
3. ◀ Unten,
links Bewegung
4. ▶ oben,
rechts Bewegung
5. ' '
Strom Ein/Aus-Schalten
LED Zustand : blau ; Strom eingeschaltet / rot ; im Sparmoduséconomie.
■ Hinterer Teil
⑤ ④ ③ ② ①
1. DC IN : Stromeingang Anschluß
2. Earphone : Kopfhörer Kabel Anschluß
3. AUDIO IN : Audiokabel Anschluß
4. VGA : PC D-Sub Kabel Anschluß
5. HDMI : Kabelanschluß zwischen PC und HDMI
WWW.ZALMAN.COM
25

5. LED Bildschirmkongurationsmenü
■ Aufruf vom Menü
Durch das Klicken derMENU-Taste, erscheint das Kongurationsmenü auf dem LCD
Bildschirm. Die gewünschte Konguration wird durch ◀,▶ Tasten ausgewählt, und durch
das Drücken Menütaste. bestätigt.
Anpassung der Helligkeit
Die Helligkeit des Bildschirms wird
angepaßt.
Anpassung der Lichtintensität
Die Lichtintensität des Bildschirms
wird angepaßt.
Gamma
Die gamma des Bildschirms wird
angepaßt.
WWW.ZALMAN.COM
Bildschirmbewegung
Bildschirmstelle wird vertikal/horizontal
angepaßt.
Wellenanpassung
Der Wellenwert des Bildschirms wird angepaßt.
Phasenanpassung
Bildschirmphase wird angepasst.
Schärfe
Stellt die Schärfe des Bildschirms.
vertikal/horizontal
26
Automatische Farbenanpassung
Die Farbentemperatur wird angepasst.
Benutzeranpassung (Rot / grün / blau)
Die Bildschirmfarben werden durch den Benutzer
direkt angepasst.
Weißabgleich
Bildschirms Weißabgleich
DCR ON/OFF
Die Funktion der dynamischen Bestrahlungsstärke
wird ON/OFF
Statische Zuordnung der vertikalen und
horizontalen Rate
Bildschirm wird von der Breite (16:9 oder 16:10)
und 4:3 Rate gewechselt.
Signaleingang
Inputsignal wird dem VGA(D-SUB) & HMDI Anschluß
zugeteilt.
Initialisierung
Alle Kongurationswerte werden durch die
Anfangswerte aus der Fabrik eingesetzt.
Sprachenauswahl
Die Sprache für den Monitor und OSD-Menu wird
ausgewählt.
Menübewegung links-rechts
Die horizontale Stellung von OSD-Bildschirm wird
angepasst.
Menübewegung oben-unten
Die vertikale Stellung von OSD-Bildschirm wird
angepasst.
Menüzeiteinstellung
Die Wartezeit von OSD-Bildschirm wird angepasst.
wird angepaßt.
WWW.ZALMAN.COM
Lautstärkeanpassung
Die Lautstärke von Lautsprecher wird angepasst.
Stummschalten
Die Funktion von Lautsprecher wird EIN/ AUS geschaltet.
27

6. Monitor Produktnorm
Model.
Bildschirmgröße
Optimale
Auösung
Rapport d’écran
Pixelabstand
Helligkeit
Kontrast
Dynamischer
Kontrast
Blickwinkel
Ansprechzeit
Farbdisplaz
Eingabe
Horizontale
Frequenz
Vertikale
Frequenz
Interner
Lautsprecher
Adapterfeature
TM270VA LED
27"(68cm)
1920 x 1080
16 : 9 Wide
0.311 mm * 0.311 mm
300cd/m²
5,000 : 1
20,000,000 : 1
Horizontal 170˚
Vertical 160˚
G to G 2ms
16.7 M
D-Sub (15 Pin)
HDMI x 2
Audio
31.5~94 KHz
60 ~ 75 Hz
2W + 2W (8Ω)
12V / 4A
Produktgröße
Produktzertikat
CB, CE, KC, VCCI, GOST
WWW.ZALMAN.COM
646 * 453 *170mm
28

7. FAQ
■ Keine Erscheinen eines Bildes auf dem Bildschirms
- Überprüfen Sie, ob das Stromkabel richtig angeschlossen ist.
- Überprüfen Sie, ob der Monitor eingeschaltet ist.
- Überprüfen Sie, ob der PC eingeschaltet ist.
- Überprüfen Sie, ob das Signalkabel des Monitors ausgesteckt ist.
■
Bildschirm ist dunkel.
- Passen Sie die Helligkeit und die Lichtintensität imOSD-Menü an.
■
Monitor ist zu heiß.
- Bitte achten Sie auf 5cm Entfernung von den Lüftungsschlitzen zu anderen Objekten.
■
Bildschirm ist verzerrt oder blinkt
- Überprüfen sie bitte ihre PC-Konguration (u.a. die Bildschirmauösung).
■
Bestand des Schwarz/Weiß Flecks.
- Zwanzig Minuten nach der Nutzung, reinigen Sie bitte den Monitor mit einem sanften
und weichen Tuch und durch die Benutzung vonSpülüssigkeit.
■
Farbenknappheit
- Überprüfen Sie, ob der Signalkabelpin verzerrt oder beschädigt ist.
[ ZALMAN LED MONITOR GARANTIEBESTIMMUNGEN ]
ZALMAN LED-Monitor wurde von 2 Jahre begrenzte Garantie nach den untengenannten
Bestimmungen abgedeckt.
- Die Garantiezeit : Die Garantiezeit beträgt 2 Jahre ab Kaufdatum.
- Inanspruchnahme des Kundendienstes:
Wenden Sie "Where to Buy" auf untengenannten ZALMAN Webseite, um die lokalen
Händler in Ihrer Region Gebiet zu nden.
(http://www.zalman.com/Company/Network/Network_eng.asp)
[ GARANTIE BEDINGUNGEN FÜR ZALMAN LED-Monitore ]
1.Sie erhalten auf unsere Produkte Garantie für Material- und Verarbeitungsfehler, die wir
entweder durch Reparatur, oder Austauschlieferung beseitigen. Bei der Anmeldung von
Garantieansprüchen muss der Kunde den vom Händler ausgestellten Kassenbeleg
vorlegen, als Nachweis von Kaufs sowie die Garantiezeit, die ab diesem Zeitpunkt zur
Verfügung gestellt wird.
2.Während der Garantiezeit wird LED ZALMAN Monitore abgeholt, repariert und
zurückgeliefert von der ZALMAN Vertragsverteiler (en) / reseller (s) oder Lieferung und
Abholung durch den Kunden.
3.Ungeachtet dessen, gilt diese Garantie nicht so auszulegen, mit der internationalen
Garantie-Service kommen. Die Garantieleistung gilt nur für Monitore, die in der örtlichen
Land gekauft wurden. Zusatzkosten wird berechnet, wenn die Service oder Ersatz in
einem anderen Land beantragt wird.
4. Im Falle einer Diskrepanz mit alternativen Rekord (n) der Verkauf wird ein
Kaufnachweis verlangt.
WWW.ZALMAN.COM
29

5. Der Garantieanspruch erlischt automatisch, wenn das Produkt beschädigt wurde oder
defekt(a) als Folge eines Unfalls, Missbrauch, Feuer, Blitzschlag, böswillige Beschädigung,
Wasserschäden, Missbrauch oder andere Umstände, die außerhalb der Kontrolle von
\ ZALMAN;
(b) durch die Verwendung von Teilen oder Peripheriegeräte nicht von Zalman zugelassen
sind;
(c) als Folge von normalem Verschleiß ;
(d) durch die Verwendung in einer ungeeigneten Betriebsumgebung;
(e) durch Modikation des Monitors;
(f) durch die Seriennummer oder Produkt-Code-Aufkleber entfernt wird oder defekt;
(g) als Folge der Wartung von jemand anderem als einem autorisierten Service-Center
ZALMAN oder deren autorisierte Service-Stelle (n);
(h) als Ergebnis der Monitor nicht in Übereinstimmung mit ZALMAN im Benutzerhandbuch
betrieben.
6. Der Kunde muss sicherstellen, dass der Monitor in sachgemäßer Verpackung für alle
Behandlung gepackt ist. Die Kunden sind gebührenpichtig, wenn die Schäden wegen
der unsachgemäßen Verpackung ist.
7.Der Zalman Vertragsverteiler (n) / reseller (n) kann den Kunden auch von aktuell
gültigen Stundenlohn fordern, wenn der Techniker feststellt, dass das Problem ist;
(a) kundenbezogen;
(b) durch Änderungen an den normalen Einstellungen des Monitors verursacht werden;
(c) durch den Rechner des Kunden oder elektrische Stromversorgung verursacht werden;
(d) aufgrund verursachen (s), die nicht durch diese Garantie abgedeckt sind.
8.Der Kunde muss sicherstellen, dass sie erreichtbar sind, wenn der Vertreter von
Verteiler (n) / Reseller (en) besucht, den Monitor abzuholen oder zu liefern. Die Kunden
sind gebührenpichtig für alle zusätzliche Besuche wegen Nichtverfügbarkeit des Kunden.
Oder der Kunde kann den Monitor an (ab) Verteiler/ reseller auf eigene Kosten liefern oder
holen lassen.
9.Software-bezogenen Störungen wegen dem fehlerhaften Software-Installation oder
Nutzung oder Software-Viren oder Software-inhärente Fehler gelten nicht als
Produktsfehler angesehen werden und kann eine Gebühr für Nachbesserung entstehen.
10.Defekte Pixel in LED-Panel-Monitore sind keine Garantie Problem, insofern sie nicht
über die Kriterien von Panelfertigungsspezikation für Pixelfehlern vorgeschrieben sind.
Bitte beachten Sie untengenannten ZALMAN LED-Monitor-Pixel-Richtlinien.
[ ZALMAN LED Monitor-Defektive-Pixel Bestimmungen ]
Die defekte Monitore werden eine neue oder renovierte nach Übereinstimmung der Frist
von Nutzung und die Anzahl der Non-Performing-Pixel-Monitor ersetzt werden.
- Eins zu eins Austausch mit einer neue:
- Mehr als 1 hellen Non-Performing-Pixel in A-Zone und mehr als 3 helle Non-Performing Pixel in B-Zone erscheint in 30 Tagen von dem Kaufsdatum der Rechnung von Endkunden.
- Mehr als 2 hellen Non-Performing-Pixel in A-Zone und mehr als 2 helle Non-Performing Pixel in B-Zone erscheint in 30 Tagen von dem Kaufsdatum der Rechnung von Endkunden.
- Mehr als 3 hellen Non-Performing-Pixel in A-Zone erscheint in 30 Tagen von dem
Kaufsdatum der Rechnung von Endkunden.
- Mehr als 5 hellen Non-Performing-Pixel in B-Zone erscheint in 30 Tagen von dem
Kaufsdatum der Rechnung von Endkunden
WWW.ZALMAN.COM
30

- Eins zu eins Austausch mit dem renovierte ein:
- Mehr als 1 hellen Non-Performing-Pixel in A-Zone und mehr als 3 helle Non-Performing Pixel in B-Zone erscheint nach 30 Tagen von dem Kaufsdatum der Rechnung von
Endkunden.
- Mehr als 2 hellen Non-Performing-Pixel in A-Zone und mehr als 2 helle Non-Performing Pixel in B-Zone erscheint nach 30 Tagen von dem Kaufsdatum der Rechnung von
Endkunden.
- Mehr als 3 hellen Non-Performing-Pixel in A-Zone erscheint in 30 Tagen von dem
Kaufsdatum der Rechnung von Endkunden.
- Mehr als 5 hellen Non-Performing-Pixel in B-Zone erscheint in 30 Tagen von dem
Kaufsdatum der Rechnung von Endkunden
※ Außer dunkel Non-Performing-Pixel
B-ZONE B-ZONE B-ZONE
B-ZONE A-ZONE B-ZONE
B-ZONE B-ZONE B-ZONE
WWW.ZALMAN.COM
31

español
WWW.ZALMAN.COM
32

Precaución para la seguridad
Antes de usarlo, por favor use correctamente después de leer lo siguiente.
La precaución está dividida en dos, “Advertencia” y “Cuidado”.
Advertencia :
Cuidado :
■ Conecte el enchufe de la energía a la toma de corriente conectada a tierra.
■ No toque el enchufe con mano mojada. Puede causar sacudida eléctrica.
■ No use varios aparatos eléctricos en una toma de corriente al mismo tiempo. Puede
causar incendio y avería.
■ Use sólo el adaptador ofrecido con el monitor de LED. Puede causar incendio y
avería.
■ No use cable o enchufe dañado y toma de corriente aojada. Puede causar sacudida
eléctrica o incendio.
■ En caso de conectar el enchufe de energía a la toma de corriente, métalo
correctamente hasta la parte nal para que no se mueva el enchufe.
En caso de conexión inestable, puede ocurrir incendio.
Caso de que puedan ocurrir daños serios o en el caso peor, accidentes
graves cuando no observe las indicaciones.
Caso de que puedan ocurrir daños livianos y perjuicio del producto
cuando no observe las indicaciones.
1.Información sobre producto
■ Palabras de saludo
Gracias por comprar los productos de nuestra compañía.
El monitor de LCD de nuestra compañía es el monitor que realiza una imagen de alta
resolución con los méritos de interrumpir perfectamente la onda electrónica, reducir el
consumo de energía eléctrica, aprovechar ecientemente espacio, etc.
Esta instrucción de uso es para que usen de manera correcta el monitor, por lo cual ruego
que la lean detalladamente antes de usarlo y utilicen sucientemente la capacidad
excelente de este producto.
■ Conrmación de ítems
Conrme si se encuentran los ítems siguientes después de abrir el empaque y si hay
ítems omitidos, por favor contacte con la agencia de venta.
Cuerpo principal de monitor, adaptador, cable de energía, cable de d-sub,
cable de audio, instrucción de uso, cable de HDMI
■ Monito ■ Adaptador ■ Cable de energía ■ Cable de d-sub
■ Cable de audio ■ Instrucción de uso ■ Cable de HDMI
WWW.ZALMAN.COM
instrucción
de uso
33

2. Instalación de producto
1. Conexión de cable de señal
Meta el conector de cable de señal en puertos de D-Sub, HDMI y aprete
bien dos pernos para asegurarse de la conexión a tierra.
2. Conexión de cable de energía
Conecte un lado de cable de energía al adaptador de CA y el otro a la toma de
corriente en la pared o la múltiple
Y conecte el cable de CD que sale del adaptador de CA al gato de energía del
monitor.
3. Encienda el monitor
Primero prenda la energía de monitor y de computadora..
Después de prenderse el monitor, se enciende LED del color verde o el verde
claro. Si LED es del color rojo y parpadea, revise la conexión de cable de señal
de video. Si está apagado LED, oprima ligeramente el interruptor de ' '.
4. Precauciones al instalar
1. Instálelo en el lugar estable.
2. Instálelo en el lugar libre de humedad y polvo.
3. Evite el rayo solar directo o instálelo lejos de calefacción.
4. Instálelo para no cubrir el hoyo de ventilación.
5. Instálelo lejos de los materiales magnéticos.
3. Información.
■ Este monitor sigue a la norma de estándar internacional VESA DPMS.
■ Este monitor es el aparato registrado con aprobación de onda electrónica para uso
doméstico, y se puede usar no sólo en el área residencial sino también todas las áreas.
■ Este monitor puede mostrar la luminosidad distinta de la parte arriba y de la abajo por
la diferencia de ángulo de vista por la característica del panel de LED.
■ Este monitor puede generar la imagen consecutiva por la característica del panel
de LED si deja la misma imagen por tiempo largo, y esa imagen consecutiva desaparece
con el paso de tiempo.
La óptima resolución es 1920 × 1080.
■ Si la imagen no está satisfactoria al usar el monitor por primera vez, puede cambiar el
ajuste en el MENÚ.
■ En la parte trasera del monitor hay oricio de VESA. (100 × 100mm)
■ Para la energía de este monitor, use el adaptador incorporado en este producto.
Si usa adaptador de otro producto, puede causar avería y no se soluciona con
el servicio gratuito.
■
En este monitor se puede generar ruido en algunas tarjetas de VGA o en la frecuencia
especíca. Al producirse el ruido, por favor ajústelo manualmente.
WWW.ZALMAN.COM
34

4. Composición de monitor y guía sobre botones
■ Parte delantera
1. AUTO : Auto-ajuste
de pantalla
2. MENÚ :Menú, selección
3. ◀ : mover abajo,
a la izquierda
4. ▶ : mover arriba,
a la derecha
5. ' ' : Encender,
apagar energía
Estado de LED : Se enciende el color azul / El rojo es el modo de ahorro.
■ parte trasera
⑤ ④ ③ ② ①
1. DC IN : Terminal de entrada de energía.
2. Earphone : Terminal de conexión de cable de auricular.
3. AUDIO IN : Terminal de conexión de cable de audio.
4. VGA : Terminal de conexión de cable de D-Sub de PC.
5. HDMI : Terminal de conexión de PC con cable de HDMI.
WWW.ZALMAN.COM
35
5. Menú de ajuste de pantalla de LED
■ Ir a Menú
Si oprime el botón de MENÚ, aparece el menú de ajuste en la pantalla de LCD.
Después de seleccionar el ajuste con los botones de ◀,▶ oprima el botón de MENÚ.
Ajuste de luminosidad
Ajusta la luminosidad de pantalla.
Ajuste de brillo
Ajusta el brillo de pantalla.
Ajuste de Gamma
Ajusta el gamma de pantalla.
Mover la pantalla horizontal/vertical
Ajusta la posición horizontal/vertical
WWW.ZALMAN.COM
Ajuste de frecuencia
Ajusta el valor de frecuencia de pantalla.
Ajuste de posición
Ajusta el valor de posición de pantalla.
Ajuste de nitidez
Ajusta el valor de nitidez de pantalla.
36

Preestablecido (sRGB / 6500K / 9300K)
Ajusta la temperatura de color de pantalla.
Ajuste de usuario (rojo / verde / azul)
El usuario ajusta personalmente el color de pantalla.
balance de blancos
Ajusta el balance de blancos de pantalla.
DCR ON/OFF
Puede encender/apagar la función de razón
de brillo dinámico.
Razón ja de longitud y latitud
Se convierten en la pantalla ancha
(16:9 o 16:10)y la pantalla de razón de 4:3.
Input select
Ajusta la señal de entrada con terminal de
VGA(D-SUB) or HDMI
Inicialización
Cambia todos los valores de ajuste a los
valores de fábrica.
Selección de idioma
Ajusta el idioma de monitor y OSD
(Display en pantalla)
Mover Menú a la derecha y a la izquierda
Ajusta la posición horizontal de la pantalla de OSD.
Mover Menú arriba y abajo
Ajusta la posición vertical de la pantalla de OSD.
Ajuste de tiempo de menú
Ajusta el tiempo de espera de la pantalla de OSD.
WWW.ZALMAN.COM
Ajuste de volumen
Ajusta el volumen de altavoz.
No sonido
Enciende/apaga la función de altavoz.
37

6. Dimensión de monitor
Model.
Dimensión
de pantalla
Óptima
resolución
Razón de
pantalla
Pixel Pitch
luminosidad
Razón de brillo
Razón de brillo
móvil
Ángulo de vista
Velocidad de
respuesta
Color de indicación
Ingresar
Frecuencia
horizontal
Frecuencia
vertical
Altavoz
incorporado
Especicación de
adaptador
Dimensión de
producto
Certicado de
producto
TM270VA LED
27"(68cm)
1920 x 1080
16 : 9 Wide
0.311 mm * 0.311 mm
300cd/m²
5,000 : 1
20,000,000 : 1
Horizontal 170˚
Vertical 160˚
G to G 2ms
16.7 M
D-Sub (15 Pin)
HDMI x 2
Audio
31.5~94 KHz
60 ~ 75 Hz
2W + 2W (8Ω)
12V / 4A
646 * 453 *170mm
CB, CE, KC, VCCI, GOST
WWW.ZALMAN.COM
38

7. Solucionar errores simples
■ No aparece imagen.
- Verique si el cable de energía de monitor está desconectado.
- Verique si la ' ' de monitor está apagada.
- Verique si la energía de sistema está apagada.
- Verique si el cable de señal de monitor está desconectado.
■ La pantalla está oscura.
- Ajuste la luminosidad y la razón de brillo entrando en el menú de OSD.
■ El monitor está demasiado caliente
- Lo separa en más de 5 cm desde otros objetos para ventilación.
■ La imagen está torcida o parpadea.
- Verique el ajuste de PC y ajuste nuevamente la frecuencia seleccionado la resolución
adecuada.
■ Hay mancha en blanco y negro.
- Después de usar el monitor por unos 20 minutos, límpielo con tela de limpiar las gafas
o tela muy suave usando el líquido de lavamiento de uso exclusivo para LED.
■ Fenómeno de falta de color
- Verique si el prendedor de cable de señal está torcido o roto.
[ Política de Garantía de Monitor de LED de ZALMAN ]
Se ofrece 2 años de garantía para el monitor de LED de ZALMAN en los términos y las
condiciones abajo mencionado.
Período de garantía
La garantía se ofrece durante 2 años a partir de la fecha de compra.
Cómo usar el servicio de garantía
Se puede conrmar el distribuidor local en su región en la página de “Where to buy” del
Web site de ZALMAN(http://www.zalman.com/Company/Network/Network_eng.asp)
[ Términos y condiciones de garantía de monitor de LED de ZALMAN ]
1.ZALMAN garantiza que el monitor que compró el usuario está libre de defectos en
manufacturación en los materiales y el aspecto tecnológico en el momento de la salida de
la fábrica. Se debe presentar el comprobante de compra como prueba de la fecha de
compra, y el período de garantía se inicia a partir de esta fecha de compra-
2.Durante el período de garantía, el monitor de LED de ZALMAN se puede recoger,
reparar o devolver por el distribuidor/vendedor ocial o se puede entregar o recoger por el
cliente.
3.A pesar de esto, esta garantía no se interprete en el ofrecimiento del servicio de
garantía internacional. El servicio de garantía se limita al monitor comparado en el país
local.
4.En caso de haber discrepancia de registros de venta, se requiere un comprobante de
compra.
WWW.ZALMAN.COM
39

5. La garantía se anula automáticamente en caso de los daños o defectos por las causas
como siguen:
(a) Como resultado de accidente, mal uso, incendio, relámpago, daño intencional, daño
por agua, uso excesivo u otras situaciones fuera de control de ZALMAN
(b) Por uso de las partes o aparatos periféricos no autorizados por ZALMAN
(c) Como resultado de desgaste normal
(d) Por uso en el ambiente de operación inadecuado
(e) Por modicación de monitor
(f) Por eliminación o daño del número serial o etiqueta del código de producto
(g) Como resultado de servicio por otra persona que no es del centro de servicio ocial o
agencia de servicio ocial de ZALMAN
(h) Como resultado de uso de monitor que no es de acuerdo al manual de usuario de
ZALMAN
6. El cliente debe empacar el monitor en el paquete adecuado para cualquier tratamiento.
El costo del daño por empaque inadecuado se podrá cargar a cliente.
7.El distribuidor/vendedor ocial de ZALMAN podrá pedir la taza de servicio por hora
actualmente aplicable si el técnico considera como siguen:
(a) Problema relacionado con usuario
(b) Problema por el cambio de ajuste normal del monitor
(c) Problema por el computador o la energía de cliente
(d) Problema por las causas a las que no se aplica esta garantía
8. El cliente no debe estar ausente cuando el agente del distribuidor/vendedor visite para
recoger o entregar el monitor. El costo de la revisita por ausencia del cliente se podrá
cargar al cliente.
9. No se consideran como defecto de producto los averíos relacionados con instalación
de software incorrecta o virus de software o el bicho del software mismo y en este caso
se puede generar costo de reparación.
EE10. El pixel de monitor de panel de LED no se puede cubrir por garantía a menos que
exceda el criterio estipulado en las normas de la compañía manufacturera de panel. Por
favor ver la política de pixel de monitor de LED abajo descrita.
[ Política de Pixel de Monitor de LED de ZALMAN]
El monitor defectuoso se reemplaza con un producto nuevo o restaurado o se repara de
acuerdo al período de uso de monitor y el número de pixel defectuoso.
– Intercambio de uno por uno con producto nuevo
- Más de 1 pixel defectuoso en ZONA-A y más de 3 pixel defectuosos en ZONA-B
aparecido dentro de 30 días desde la fecha de compra en la factura del usuario nal.
- Más de 2 pixeles defectuosos en ZONA-A y más de 2 pixeles en ZONA-B aparecidos
dentro de 30 días desde la fecha de compra en la facture del usuario nal
- Más de 3 pixeles defectuosos en ZONA-Z aparecidos dentro de 30 días desde la fecha
de compra en la factura del usuario nal
- Más de 5 pixeles defectuosos en ZONA- B aparecidos dentro de 30 días de compra en
la factura del usuario nal
WWW.ZALMAN.COM
40

– Intercambio de uno por uno con producto restaurado
- Más de 1 pixel defectuoso en ZONA-A y más de 3 pixeles defectuosos en ZONA-B
aparecidos después de 30 días desde la fecha de compra en la facture del usuario nal
- Más de 2 pixeles defectuosos en ZONA-A y más de 2 pixeles defectuosos en ZONA-B
aparecidos después de 30 días desde la fecha de compra en la facture del usuario nal
- Más de 3 pixeles defectuosos en ZONA-A después de 30 días desde la fecha de compra
en la facture del usuario nal
- Más de 5 pixeles defectuosos en Zona B después de 30 días desde la fecha de compra
en la factura del usuario nal
※ Excepto pixel oscuro
B-ZONE B-ZONE B-ZONE
B-ZONE A-ZONE B-ZONE
B-ZONE B-ZONE B-ZONE
WWW.ZALMAN.COM
41

русский
WWW.ZALMAN.COM
42

Меры предосторожности.
Во избежание неполадок перед тем как перейти к установке внимательно ознакомь
тесь с мерами предосторожности.
В данной инструкции для соблюдения мер предосторожности есть два вида знаков
«предупреждение» и «внимание»
Предупреждение :
Внимание:
■ Используйте только шнур питания заземленный надлежащим образом.
■ Во избежание удара током не прикасайтесь к шнуру питания мокрыми руками.
■ Не размещайте что-либо на шнуре питания или рядом с ним воизбежание возгор
ания и получения травм.
■ Во избежание поломок или пожара для подсветки LED используйте только данны
й адаптер.
■ Воизбежание получения электрического шока или ожега не используйте поврежд
енные шнуры, вилки и розетки.
■ В случае если шнур соединен с сетью електро-питания убедитесь , что он крепко
закрепленн и не болтается, так как может произойти возгорание при соприкоснов
ении с окружающими предметами.
предупреждение появляется в случае нарушения инструкции мер
предосторожности, если действия могут привести к серьезным
неполадкам или к поломке.
Знак «внимание» появляется в случае нарушения инструкции
мер предосторожности если действия могут привести к незначите
льным повреждениям.
1. Введение.
■ Слова приветствия
Мы благодарим Вас за покупку нашего товара. Наш LCD монитор отличается
высоким качеством изображения, он легкий , не выделяет радиционное излучение,
а так же обладает функцией энергосбережения. Перед тем как начать использовать
наш монитор мы предлагаем Вам внимательно ознакомиться с инструкцией по эксп
луатации.
■ комплектация
После вскрытия упаковки убедитесь в наличии всех перечисленных ниже предметов,
в случае отсутсвия любого из предметов свяжитесь с торговым агентом.
Монитор с подставкой, адаптер переменного тока, сетевой шнур, сигнальный кабель
D-sub, аудиокабель, инструкция по применению, Кабель HDMI.
■ Монитор с подставкой ■ адаптер переменного тока ■ Cетевой шнур
■ Cигнальный кабель D-sub ■
■
Кабель HDMI.
Aудиокабель
ung ■
инструкция по применению
WWW.ZALMAN.COM
инструкция по
применению
43

2. Установка монитора
1. Подключение сигнальных кабелей.
Подсоедините штекер сигнального кабеля к порту D-sub, HDMI и зак
рутите на болты.
2. Подключение сетевого кабеля
Подсоедините шнур питания к адаптеру переменного тока, после чего во
ткните вилку в розетку. Адаптер переменного тока присоедините к монит
ору
3. Включите монитор
Включите монитор и компьютер, если состояние экрана нормальное, заг
орится зеленый свет индикатора (или синий). Если индикатор загорится к
расным цветом, нажимать ' ' кнопку.
4. Меры предосторожности при установке монитора.
1. Установите монитор в безопасном месте.
2. Не устанавливайте монитор во влажном месте или в местах подверженных
бо льшому скоплению пыли.
3. Не устанавливайте монитор вблизи с нагревательными аппаратами,
а так же на солнце во избежание нагревания монитора.
4. Обеспечьте достаточную циркуляцию воздуха
5. Не размещайте монитор рядом с магнитными устройствами.
3. Инструкция.
■ Данный монитор соответствует международному стандарту VESA DPMS.
■ Данный монитор получил регистрацию ЕМС для бытового использования
поэтому может использоваться в жилых районах и т.д.
■ Особенностью панели LED является возможность регулировки яркости экрана
взависимости от угла зрения
■ Характерной чертой панели LED является возникновение остаточного
изображени я при перегреве монтора, которое со временем исчезает.
Оптимальное разрешение 1920x1080
■ Если при включение монитора Вас не удовлетворяет изображение на экране вы
можете поменять настройки в MENU
■ На задней панели есть отверстие VESA (100x100мм)
■ Данный монитор желательно использовать с предоставленным в комплекте
адаптером. При использовании других адаптеров возможны поломки, устранение
которых не предусморены гарантией.
■
Так же на определенных частотах видеокарты возможно возникновение шума,
которое можно урегулировать вручную.
WWW.ZALMAN.COM
44

4. Кнопки и разъемы.
■ Передняя
1. AUTO- автоматическое
регулирование экрана
2. MENU меню, выбор меню
3.◀ - перемещение вниз,
влево
4.▶ - перемещение вверх,
вправо
5. ' ' - питание ON
(включение) или OFF
(выключение)
Состояние LED(светодиодная подсветка): зеленый индикатор: ' ' ВКЛ.
/красный индикатор: режим ожидания
■ задняя панели
⑤ ④ ③ ② ①
1. DC IN: питание
2. Earphone: вход наушников
3. AUDIO IN: вход аудио кабеля
4. VGA: ПК D-Sub: вход видео кабеля
5. HDMI: Вход соединения ПК с кабелем HDMI
WWW.ZALMAN.COM
45

5. Меню настроек экрана LED
■ Вызов меню
После нажатия кнопки MENU на экране появиться установочное меню, на котором
посредством кнопок ◀ и ▶ вы можете отрегулировать светодиодную подсветку.
После регулировки снова нажмите кнопку MENU и ваши настройки сохранятся.
Яркость
Настройки яркости экрана
Контрастность
Настройки контрастности экрана
гамма
Настройки гамма экрана
Перемещение горизонтальность /вертикальность
Положение по вертикали и горизонтали.
WWW.ZALMAN.COM
Частота
Установка значения частоты на экране
Фаза
Установка значения Фаза экрана
четкость
Установка значения четкость экрана
46

Предуст (sRGB / 6500K / 9300K)
Настройки цветовой температуры
Настройки пользователя
(красный / зеленый / синий)
Пользователь может вручную урегулиро вать
цвет экрана
баланс белого
регулирует баланс белого экрана
DCR ON/OFF
Используется для регулировки динам
ической контрастности
INPUT SELECT
Настройки входного сигнала VGA(D-SUB) or HDMI
Формат
Соотношение сторон 4:3 и ширина
(16:9 или 16:10)
Инициализация
Восстановление заводских настроек
Выбор языка
Возможна установка с монитора или при пом
ощи OSD меню
Перемещение меню влево/вправо
Горизонтальное положение OSD меню
Перемещение меню вверх/вниз
Вертикальное положение OSD меню
Таймер OSD меню
Настройки времени отображения OSD меню
WWW.ZALMAN.COM
Звук
Настройки громкости микрафона
Беззвучный режим
Настройки микрофона ВКЛ/ВЫКЛ
47

6. Спецификация
Model.
Размер экрана
Оптимальное
разрешение
разрешение
экрана
шаг пикселя
яркость
контрастность
динамическая
контрастность
угол обзора
скорость отклика
цветовая
передача
ввод
частота горизонтал
ьной развертки
частота вертикаль
ной развертки
встроенный
микрофон
адаптер
TM270VA LED
27"(68cm)
1920 x 1080
16 : 9 Wide
0.311 mm * 0.311 mm
300cd/m²
5,000 : 1
20,000,000 : 1
Horizontal 170˚
Vertical 160˚
G to G 2ms
16.7 M
D-Sub (15 Pin)
HDMI x 2
Audio
31.5~94 KHz
60 ~ 75 Hz
2W + 2W (8Ω)
12V / 4A
размер изделия
сертификат
товар
CB, CE, KC, VCCI, GOST
WWW.ZALMAN.COM
646 * 453 *170mm
48

7. Устранение неполадок
■ Если экран не функционирует
- Убедитесь подсоединен ли штекер монитора
- Убедитесь включен ли монитор
- Убедитесь функционирует ли система питания
- Убедитесь подсоедены ли правильно к монитору видео кабели
■ Изображение тусклое
- Зайдите в OSD меню отрегулируйте яркость и контрастность монитора
■ Монитор перенагревается
- Все предметы должны размещаться на расстоянии не менее 5 см от дисплея,
нельзя ничего размещать на мониторе.
■ Изображение вспыхивает и дрожит
- Проверьте настройки компьютера и выберите нужное разрешение, затем
перенастройте разрешение.
■ Есть вкрапления черных и белых точек
- Где-то через 20 мин. После включения монитора протрите его мягой тканью
или специальной тканью для ухода за очками и светодиодовой подстветки
■ Отсутствие цвета
- Проверьте не поврежден ли разъем видеокабеля и надежно ли он присоединен
[Гарантийные обязательства ZALMAN на LED-мониторы]
LED-мониторы ZALMAN сопровождаются 2-летней гарантией согласно условиям и п
оложениям данных гарантийных обязательств.
Гарантийный срок
Гарантийный срок составляет 2 года с даты приобретения изделия.
Как воспользоваться услугами гарантийного обслуживания:
Вы можете посетить раздел «Где купить» на интернет-сайте ZALMAN по ссылке, дан
ной ниже, и получить информацию об официальном дистрибьюторе в Вашем регионе.
Условия и положения гарантийных обязательств ZALMAN на LED-мониторы
1. ZALMAN гарантирует отсутствие в мониторах, приобретенных у компании ZALMAN, дефект
ов материала и качества изготовления на момент отправки изделия со склада компании. Для
подтверждения даты покупки и гарантийного срока, начинающегося с этой даты, необходимо
наличие товарного чека.
2. В течение срока гарантии сбор, ремонт и возврат LED-мониторов ZALMAN осуществляет ав
торизованный дистрибьютор/торговый посредник компании ZALMAN. Также покупатель может
осуществить отправку или доставку монитора самостоятельно.
3.Независимо от вышеизложенного, данные гарантийные обязательства не могут быть истол
кованы как международные гарантийные условия. Гарантийное обслуживание распространяе
тся только на мониторы, приобретенные в Вашей стране. В случае гарантийного ремонта или
обмена в другой стране с Вас могут быть взысканы дополнительные издержки.
WWW.ZALMAN.COM
49

4. В случае несоответствия данных о приобретении монитора могут быть запрошены дополни
тельные документы, подтверждающие факт покупки.
5. Данные гарантийные обязательства не распространяются на случаи повреждений и дефект
ов, возникших –
(а) в результате несчастных случаев, неправильной эксплуатации, воздействия огня, молн
ий, умышленного нанесения повреждений, воздействия воды, использования с нарушени
ем норм или при других обстоятельствах, находящихся за гранью ответственности компан
ии ZALMAN;
(б) из-за использования деталей и периферийного оборудования, не сертифицированных ком
панией ZALMAN;
(в) в результате естественного износа;
(г) из-за эксплуатации в условиях агрессивной среды;
(д) из-за несанкционированного внесения изменений в конструкцию монитора;
(е)
из-за повреждения или отсутствия серийного номера изделия или наклейки с кодом продукта;
(ж) в результате обслуживания изделия организацией, не являющейся авторизованным серви
сным центром или авторизованным агентом компании ZALMAN.
(з) в результате нарушения правил эксплуатации, указанных в инструкциии пользователя
ZALMAN;
6. Перед осуществлением любых операций с монитором Покупатель должен удостовериться
в том, что монитор был упакован надлежащим образом. Любые расходы связанные с повреж
де ниями, вызыванными нарушением упаковки, оплачиваются Покупателем.
7. Авторизованный дистрибьютор/торговый посредник ZALMAN может потребовать от покупат
еля оплаты затраченного на ремонт времени в случае, если технический сотрудник выявит, ч
то
(а) поломка возникла по вине пользователя;
(б) повреждение вызвано изменениями, внесенными в стандартные настройки монитора;
(в) причиной повреждения стал компьютер Покупателя либо сбой электропитания;
(г) повреждение вызвано причинами, не указанными в этом гарантийном обязательстве;
8. Покупатель должен быть доступен в момент прибытия представителя авторизованного дис
трибьютора/торгового посредника ZALMAN с целью приема и транспортировки поврежденног
о монитора. Любые дополнительные визиты, возникшие по причине недоступности Покупател
я, будут оплачены за его счет; также Покупатель может произвести отправку или доставить м
онитор самостоятельно дистрибьютору/торговому посреднику за свой счет.
9. Неполадки, связанные с программным обеспечением, возникшие в результате его некоррек
тной установки или использования, а также из-за вирусных программ или программных сбоев
не могут считаться производственным дефектом и устраняются за счет Покупателя.
10. Наличие дефектных пикселей на LED-панели монитора не является гарантийным случае
м, если оно не соответствует условиям, описанным в спецификации дефектных пикселей дл
я производителей панелей. Вы может ознакомиться с Нормами для пикселей LED-мониторов
ZALMAN ниже.
[ Нормы для пикселей LED-мониторов ZALMAN ]
Дефектные мониторы будут заменены новыми или отремонтированы в зависимости от пери
ода эксплуатации и количества дефектных пикселей.
- Замена монитора на новый:
- более 1 яркого дефектного пикселя в зоне А и более 3 ярких дефектных пикселей в
зоне Б, возникших в течение 30 дней с даты покупки монитора конечным пользоват
елем
- более 2 ярких дефектных пикселей в зоне А и более 2 ярких дефектных пикселей в
зоне Б, возникших в течение 30 дней с даты покупки монитора конечным пользоват
елем
WWW.ZALMAN.COM
50

- более 5 ярких дефектных пикселей в зоне Б, возникших в течение 30 дней с даты покупки мо
нитора конечным пользователем
- Замена монитора на отремонтированный:
- более 1 яркого дефектного пикселя в зоне А и более 3 ярких дефектных пикселей в зоне Б, в
озникших по истечении 30 дней с даты покупки монитора конечным пользователем
- более 2 ярких дефектных пикселей в зоне А и более 2 ярких дефектных пикселей в зоне Б,
возникших по истечении 30 дней с даты покупки монитора конечным пользователем
- более 3 ярких дефектных пикселей в зоне А, возникших по истечении 30 дней с даты покупк
и монитора конечным пользователем
-более 5 ярких дефектных пикселей в зоне Б, возникших по истечении 30 дней с даты покупки
монитора конечным пользователем
※ Темные дефектные пиксели не учитываются
B-ZONE B-ZONE B-ZONE
B-ZONE A-ZONE B-ZONE
B-ZONE B-ZONE B-ZONE
WWW.ZALMAN.COM
51

中 文
WWW.ZALMAN.COM
52

安全注意事项
请使用前仔细阅读下列内容后,正确使用。注意事项区分为两种;"警告" 和 "注意"。
警告 :
当违反指示事项时, 有可能造成严重的伤害,最严重的情况下会出现大型事故。
当违反指示事项时, 有可能造成轻微的伤害或产品损伤。
注意 :
■ 电源插头必须连接至已接地好的插座上。
■ 当手有水分时不要触摸电源插头。 这种行为很可能成为触电的原因。
■ 在同一个插座上不要插满多种电子产品的插头。
这种行为很可能成为火灾及故障的原因。
■ 除和LED显示器配套提供的适配器以外,请勿临时使用适配器。
这种行为很可能成为火灾及故障的原因。
■ 请勿使用被损坏的电源插销、插头、插口松动的插座。
这种行为很可能成为触电或火灾的原因。
■ 将电源插头连接至插座, 电源插头正确插入到位,确保不出现插头松动现象。
接触不良有可能成为火灾的原因。
1、产品介绍
■ 致辞
非常感谢惠顾本公司的产品。
本公司LCD显示器拥有诸多优点:完美地屏蔽电子波;降低电耗;有效运用空间;实现高
分辨率画面。
为了指导用户正确使用显示器,我们准备了本使用说明书。请使用前认真阅读一遍,
并充分感受本产品的优异性能。
■ 确认部件
打开包装后,请确认是否有下列部件。若有遗漏的部件,请和购买本产品的商店联系。
显示器主机、适配器、 电源插销、D-sub电缆、DVI电缆、音频电缆, 使用说明书
、HDMI 电缆
显示器主机
■
音频电缆
■
■
■
适配器
■
使用说明书 ■ HDMI 电缆
WWW.ZALMAN.COM
电源插销
■
D-sub电缆
使用说明书
53

2.产品安装
1. 连接数据线
将数据线的连接器插在D-Sub、、HDMI端口上,拧紧两个螺丝以确保接地
正确。
2. 连接电源电缆
将电源插销的一边插到 AC适配器上,另外一边连接到墙壁或多用插座上。
并将与AC适配器连接的 DC电缆插到显示器的电源插孔上。
3. 打开监听
请先打开显示器和电脑的电源。
显示器启动后, 绿色或浅绿色LED灯变亮。若LED灯显示为红色或闪烁状态,
请再次确认视频数据线是否连接正确。若LED灯还没打开,请轻轻地按 ' ' 开关。
4. 安装时注意事项
1.请安装在安静的地方。
2.请避免潮湿或有灰尘的地方。
3.请避免太阳直射的地方或暖器附近。
4.安装时,请避开通风口。
5.请避开带有磁性的物品。
3.产品介绍
■ 本显示器遵守国际标准视频电子标准协会节电协定(VESA DPMS)。
■ 本显示器为家用电器,已完成电子波适合产品注册,在住宅地区或其他地
区都可以使用。
■ 本显示基于LED板的特性,具有视野角度差异,在画面上会出现上下亮度略
有相异的现象。
■ 本显示器基于LED板的特性,长时间显示同样的画面,会产生图像暂留,
短时之后会自动消失。最佳分辨率为1920 × 1080。
■ 第一次使用本显示器时, 若不满足于画面效果,可在菜单变更设置。
■ 在本显示器的后面部有VESA槽。 (100 × 100mm)
■ 开启本显示器的电源时,请使用在本产品内置的适配器。
若使用其他产品的适配器, 会引起故障并不能享受无偿售后服务。
■
在本显示器的部分VGA卡或特定频率上有可能产生杂音。 出现杂音时,请手动调整。
WWW.ZALMAN.COM
54

4.显示器结构及按钮介绍
■ 前部
LED状态 : 蓝色为开启' ' / 红色为省电模式
■ 后部
1. AUTO
自动画面调整
2. MENU
菜单、选择
3. ◀ 往下
往左移动
4. ▶ 往上
往右移动
5. ' '
电源 ON / OFF
⑤ ④ ③ ② ①
1. DC IN : 电源输入插口。
2. Earphone : 耳机电缆链接插口 。
3. AUDIO IN : 音频电缆链接插口。
4. VGA : PC D-Sub 视频电缆链接插口 。
5. HDMI : PC和 HDMI 视频电缆链接插口。
WWW.ZALMAN.COM
55

5. LED 画面设置菜单
■ 打开菜单
按MENU按钮,在LCD画面上出现设置菜单。
使用◀,▶ 按钮来选择愿意的设置后,再次按MENU按钮。
亮度调节
调整画面亮度。
明暗调节
调整画面明暗的对比度。
GAMMA
调整画面GAMMA。
画面
水平/垂直
调整画面的水平/垂直上限。
移动
WWW.ZALMAN.COM
频率调整
调整画面频率。
位相调整
调整画面的位相值。
56

预设 ( sRGB / 6500K / 9300K)
调整画面的色温。
用户调整 (红色 / 绿色 / 蓝色)
用户自主调整画面的颜色。
白平衡
可以调整画面白平衡。
DCR ON/OFF
可以开启/关闭动态明暗对比功能。
长宽比率固定
可以互相转换宽屏 (16:9或16:10)
和4:3比率的画面。
RGV&DVI
将输入信号用 VGA(D-SUB) or HDMI 插口设置。
初始化
将所有的设置值还原为出厂设置值。
语言选择
设定显示器及OSD菜单的语言。
菜单左右移动
调整OSD画面的水平上限。
菜单下上移动
调整OSD画面的垂直上限。
菜单时间设置
调整OSD画面的等待时间。
WWW.ZALMAN.COM
音量调节
调节喇叭的音量。仕様/製品の認証
静音
开启/关闭喇叭功能。
。
57

6. 显示器的产品规格
Model.
画面大小
最佳分辨率
画面比率
像素间距
亮度
明暗比率
动态明暗比率
视场角
反应速度
标色
输入
水平频率
垂直频率
内置喇叭
TM270VA LED
27"(68cm)
1920 x 1080
16 : 9 Wide
0.311 mm * 0.311 mm
300cd/m²
5,000 : 1
20,000,000 : 1
Horizontal 170˚
Vertical 160˚
G to G 2ms
16.7 M
D-Sub (15 Pin)
HDMI x 2
Audio
31.5~94 KHz
60 ~ 75 Hz
2W + 2W (8Ω)
适配器配置
产品大小
产品认证
CB, CE, KC, VCCI, GOST
WWW.ZALMAN.COM
12V / 4A
646 * 453 *170mm
58

7.排除简单的问题
■ 画面不显示。
- 请确认显示器的电源插销是否没插好。
- 请确认显示器的电源是否关闭。
- 请确认系统的电源是否关闭。
- 请确认显示器的信号电缆是否没插好。
■ 画面太暗。
- 请在OSD菜单上调整亮度和明暗对比。
■ 显示器发烫。
- 为了散热,将显示器与其他物品保持5公分距离。
■ 画面扭曲或闪烁。
- 请确认PC设置事项,并选适当的分辨率、从新调整频率。
■ 画面有黑白的点。
- 先将显示器使用20分钟左右,再用LED专用洗洁精和眼镜布或质地柔软的布
轻轻擦好显示器。
■ 颜色不足现象
- 请确认数据线针是否扭曲或被破损。
[ZALMAN LED显示器质量保证政策]
如下列明示条款,ZALMAN LED显示器提供两年为限的质量保证。
保证期限
保证期限为从购买日起2年。
保证服务使用方法:
在ZALMAN网站(http://www.zalman.com/Company/Network/Network_eng.asp)的
“Where to buy”网页上可确认购买方所在当地代理店。
[ ZALMAN LED显示器的质量保证条款 ]
1. ZALMAN保证用户购买的显示器出库时,在材料及技术方面的制造上无任何瑕疵。作为
证明购买日期的资料,应提供购买发票,从该购买日起计算保证期限。
2. 在保证期限内,ZALMAN LED显示器可由ZALMAN的正式代理店/销售店回收、维修及退
货或可由客户配送及回收。
3. 尽管如上所述,但本保证书尚未解释提供国际保证服务相关内容。保证服务仅限于在相
应国家购买的显示器。在其他国家要求保证服务或交换时,需要追加费用。
4. 发生与销售记录不一致的现象时,要求提供购买证明资料。
5.由于如下事由,出现产品的物理性损伤或瑕疵时,保证自动成为无效。
(a)
事故、误用、火灾、雷击、故意损坏、浸水、过多使用结果或其他脱离ZALMAN控制范 围的状况
(b) 使用ZALMAN不认可的配件或周边设备
(c) 正常磨损
(d) 在不适合的启动环境中使用
(e) 显示器的改造
(f) 序列号或产品代码标签的去除或损坏
(g) 从ZALMAN的正式服务中心或正式服务代理人以外的人接受服务的结果
(h) 未按照ZALMAN的用户手册使用显示器的结果
WWW.ZALMAN.COM
59

6.
客户包装显示器时,应可适应任何处理。由于不适当的包装引起的损伤将会向客户索求 费用。
7. 当维修技术人员对于出现问题做出如下判断时,ZALMAN的正式代理店/销售店可向客户
要求支付当前可适用计时工资。
(a) 与用户相关的问题
(b) 变更显示器的正常设置而产生的问题
(c) 客户的电脑或电源引起的问题
(d) 本质量保证范围以外的原因引起的问题
8. 代理店/销售店代理人为收回或配送显示器而来访时,客户应在现场等候。由于客户不在
现场而重新来访时,将会向客户索求费用。客户可自己付费向代理店/销售店配送或回收显
示器。
9. 有关不正确的软件安装、使用、软件病毒及软件自身错误引起的软件障碍,本公司不承
认是产品缺陷,维修时将会产生维修费用。
10. LED板显示器的像素在不超过面板制造公司的像素规格上所示标准时,不会成为质量保
证对象。请参考下述ZALMAN LED显示器像素政策。
[ ZALMAN LED显示器像素政策 ]
根据瑕疵显示器的使用期限及坏点像素的数量,能够交换新产品或对重组产品进行维修。
– 与新产品的一对一交换:
- 从最终用户账单上的购买日起,在30日以内发生的A-Zone的坏点(亮点)像素超过1个及
B-Zone的坏点(亮点)像素超过3个
- 从最终用户账单上的购买日起,在30日以内发生的A-Zone的坏点(亮点)像素超过2个
B-Zone的坏点(亮点)像素超过2个
- 从最终用户账单上的购买日起,在30日以内发生的A-Zone的坏点(亮点)像素超过3个
- 从最终用户账单上的购买日起,在30日以内发生的B-Zone的坏点(亮点)像素超过5个
– 与重组产品的一对一交换:
- 从最终用户账单上的购买日起,在30日以后发生的A-Zone的坏点(亮点)像素超过1个及
B-Zone的坏点(亮点)像素超过3个
- 从最终用户账单上的购买日起,在30日以后发生的A-Zone的坏点(亮点)像素超过2个
B-Zone的坏点(亮点)像素超过2个
- 从最终用户账单上的购买日起,在30日以后发生的A-Zone的坏点(亮点)像素超过3个
- 从最终用户账单上的购买日起,在30日以后发生的B-Zone的坏点(亮点)像素超过5个
暗点像素除外
※ 暗点像素除外
B-ZONE B-ZONE B-ZONE
B-ZONE A-ZONE B-ZONE
B-ZONE B-ZONE B-ZONE
WWW.ZALMAN.COM
60

日本語
WWW.ZALMAN.COM
61

安全上のご注意
本製品を使用する前に次の内容を詳しく読んで正しくお使いください。
安全上のご注意は「警告」と「注意」の二つに区別されています。
正しく使用されていない場合、深刻な傷害や最悪の時は大きな事故を来た
警告 :
す可能性があるケース
正しく使用されていない場合、軽度の傷害や製品の故障を来たす可能性が
注意 :
あるケース
■ 電源プラグは必ずアース連結されたコンセントに繋げてください。
■ 濡れた手で電源プラグに触れないでください。感電の原因になる場合があります。
■ ひとつのコンセントにタコ配線をしないでください。火災や故障の原因になります。
■ LEDモニターと共に提供されるアダプターを使用してください。他製品と共に使用し
た場合、火災や故障の原因になります。
■ 異常のある電源コードやプラグ、緩くなったコンセントと共に使用しないでくだい。
感電や火災の原因になります。
■ 電源プラグをコンセントに繋げる場合、電源プラグを最後まで正しく差し込んでくだ
さい。不安定な接続は火災の原因になります。
1. 製品の案内
■ あいさつの言葉
弊社の製品をご購入いただき真にありがとうございます。
弊社のLCDモニターは完全な電磁波の遮断と消費電力の軽減、効率的な空間の
活用などを特徴とする高画像モニターです.
この使用説明書は正しくモニターをご利用いただくためのものであり、ご使用の前に
必ずお読みいただくことをお勧めいたします。本製品の優れた性能を充分活用して
いただくことをお望みいたします。
■ 製品の確認
包装を開けて次の品目をご確認ください。もし製品の付属品に足りないものが
ありましたら、お手数ですが、販売店までご連絡ください。
モニター本体、アダプター、電源コード、d-subケーブル, オーディオケーブル、
使用説明書、HDMIケーブル
モニター本体
■
オーディオケーブル
■
■
アダプター
使用説明書
■
■
電源コード
■
■
D-subケーブル
HDMIケーブル
WWW.ZALMAN.COM
使用説明書
62

2.製品の設置
1. シグナルケーブルを繋げる
シグナルケーブルのコネクタをD-Sub、HDMIポートに繋げます。
正しくアースをするために二つのボルトをきちんと締めてください。
2. パワーケーブルを繋げる
パワーコードの一方はACアダプターとつなげ、もう一方はコンセントにつな
げます。そしてACアダプターから伸びているDCケーブルをモニターの電源口
へと繋げます。
3. モニターの電源をオンに
先にモニターとパソコンの電源を入れます。
モニターに電源が入ったら緑、又は黄緑のLEDに電源が入ります。もし
LEDが赤、又は点滅している場合、ビデオシグナルケーブルが正しく繋がれ
ているかをご確認ください。LEDがオフになっていたら ' 'スイッチを軽く
押してください。
4. 設置の際のご注意
1. 安定した場所に設置してください。
2.湿気や埃を避けた場所に設置してください。
3.直射日光や暖房機の近くを避けて設置してください。
4.通風口をふさがないように設置してください。
5.磁波の強い物体の周辺は避けて設置してください。
3.説明文
■ 本製品は国際標準のVESA DPMS規格に則っています。
■ 本製品は家庭用としての電磁波適合登録された機器です。住居はもちろん、
全ての地域での使用が可能です。
■ 本製品はLED PANELの特徴により、視野の角度によって画面の上下などの
明るさの 面で少々の違いが発生する可能性があります。
■ 本製品はLED PANELの特徴により、長い時間同じ画面を映していた場合、
残照が残るケースがありますがこれは時間が経つと消えます。
本製品の最適な解像度は1920 × 1080です。
■ 本製品を初めてご使用になる際、あらかじめ設定された画面にご満足いただけない
場合、MENUでの設定変更をお勧めいたします。
■ 本製品の後ろ側にはVESAホールがあります。 (100 × 100mm)
■ 本製品の電源としては製品に付属されたアダプターの使用をお勧めします。
他の製品のアダプターをご使用になる場合、故障の原因となるばかりか無料
A/Sを受けられなくなります。
■
本製品は一部のVGAカード、又は特定の周波数でノイズが発生する場合があります。
ノイズが発生したら受動での調節をお勧めします。
WWW.ZALMAN.COM
63

4.モニターの構成とボタンの説明
■ 前側
LED状態 : 青色は電源オン / 赤色は節約モードです。
■ 後ろ側
1. AUTO
自動画面調節
2. MENU
メニュー、選択
3. ◀ 下
左へと移動
4. ▶上
右へと移動
5. ' '
電源ON / OFF
⑤ ④ ③ ② ①
1. DC IN : 電源入力端子です。
2. Earphone : イヤーフォンケーブルのコネクタ端子です。
3. AUDIO IN : オーディオケーブルのコネクタ端子です。
4. VGA : パソコンD-Sub ケーブルのコネクタ端子です。
5. HDMI : パソコンとHDMIケーブルのコネクタ端子です。
WWW.ZALMAN.COM
64

5. LED 画面の設定メニュー
■ メニューの呼び出し
MENUボタンを押すとLCDに設定メニューが現れます。◀,▶ ボタンでお望みの
設定を捜し MENUボタンを押します。
明るさ
コントラスト
ガンマ
水平
垂直
明るさの調節
画面の明るさを調節します。
明暗の調節
画面の明暗を調節します。
Gammaの調節
画面のGammaを調節します。
画面を
水平や垂直
へと移動
画面の水平や垂直位置を 調節します。
周波数の調節
画面の周波数の値を調節します。
フェーズの調節
画面のフェーズの値を調節します。
鋭さの調節
画面の鋭さの値を調節します。
WWW.ZALMAN.COM
65

プリセット
赤
言語 ▶ 日本語
OSD 水平
OSD 垂直
プリセット(sRGB / 6500K / 9300K)
画面の色の温度(ケルビン)を 調節します。
ユーザーが調節 (赤 / 緑 / 青)
画面の色をユーザーが 直接調節します。
ホワイトバランス
画面のホワイトバランスを設定します。
DCR ON/OFF
動きのある画像の明暗比率を調節する
機能をON/OFFすることが 出来ます。
Input Select
入力信号をVGA(D-SUB) または HDMI
端子で 設定します。
縦横比率の固定
ワイド(16:9又は16:10)と4:3比率の
画面へと交互に転換します。
初期化する
全ての設定値を工場で出荷された
初期の設定値へと変更します。
言語選択
モニター及びOSDメニューの言語を設
定します。
メニューの左右移動
OSD画面の水平位置を調節します。
メニューの上下移動
OSD画面の垂直の位置を調節します。
メニューの時間設定
OSD画面の待機時間を調節します。
WWW.ZALMAN.COM
ボリュームの調節
最適解像度/内臓スピーカー/アダプターの
仕様/製品の認証
ミュート
スピーカー機能をON/OFFにします。
66

6. モニター製品の規格
Model.
画面の大きさ
最適解像度
画面比率
ピクセルピッチ
明るさ
明暗のバランス
動作の
明暗バランス
視野角
反応速度
色の表示
入力
水平周波数
垂直周波数
内臓スピーカー
アダプターの
仕様
製品の大きさ
製品の認証
TM270VA LED
27"(68cm)
1920 x 1080
16 : 9 Wide
0.311 mm * 0.311 mm
300cd/m²
5,000 : 1
20,000,000 : 1
Horizontal 170˚
Vertical 160˚
G to G 2ms
16.7 M
D-Sub (15 Pin)
HDMI x 2
Audio
31.5~94 KHz
60 ~ 75 Hz
2W + 2W (8Ω)
12V / 4A
646 * 453 *170mm
CB, CE, KC, VCCI, GOST
WWW.ZALMAN.COM
67

7.こんな時には
■ 画面が映りません。
- モニターの電源コードがコンセントから外れていないかご確認ください。
- モニターの電源が入っているかをご確認ください。
- システムの電源が入っているかをご確認ください。
- モニターの信号ケーブルが正しく繋がっているかをご確認ください。
■ 画面が暗すぎます。
- OSDメニューで明るさと明暗比率を調節します。
■ モニターが熱すぎます。
- 換気が出来るように他のものから5センチ以上本製品を離してください。
■ 画面映りが歪んだり点滅したりします。
- パソコンのセッティングを確認し、適切な解像度を選択して周波数を新たに
調節します。
■ 画面に白黒の点が映ります。
- モニターを約20分間使用してから、めがね用の拭き布や柔らかい布にLED専用の
洗浄液をつけて拭いてください。
■ 画面にカラーが足りないような感じがします。
- シグナルパネルのピンが歪んでいないか、又は割れていないか確認してください。
[ジャルマンLEDモニターの品質保証ポリシー]
ジャルマンLEDモニターは、下記の約款に明示されたように、2年限定の品質保証が提供
されます。
保証期間
保証は、購入日から2年間提供されます。
保証サービスのご利用方法
ジャルマンのウェブサイト(http://www.zalman.com/Company/Network/Network_eng.
asp)にある「Where to buy」ページで、お客様のお住まいになっている地域の代理店を確
認することができます。
[ ジャルマンLEDモニターの品質保証約款 ]
1. ジャルマンでは、ユーザーが購入されたモニターに対し、工場出荷時点で、素材や技
術の面において製造上の欠陥がないことを保証いたします。購入日を証明する資料とし
て、
ご購入の際の領収書を提示していただき、その購入日から保証期間が開始されます。
2. 保証期間中に、ジャルマンLEDモニターはジャルマンの公式代理店・販売店が回収、
修理や返品、またはお客様への配送や回収をすることができます。
3.上記にもかかわらず、本保証は国際的な保証サービスを提供するものとは解釈されませ
ん。保証サービスは、その国で購入されたモニターに限ります。他の国にてご購入の製
品に対する保証サービス、又は交換には、追加の料金が適用されます。
4.
販売記録との不一致が発生した場合、ご購入に対する証明資料を要求することとなります。
5.
次のような理由からなる製品の物理的な損傷や欠陥の場合、保証は自動的に無効となります。
(a) 事故、誤使用、火災、落雷、故意による破損、浸水、過剰使用の結果、又はその他ジ
ャルマンの統制範囲を超えた状況
(b) ジャルマンから承認されていない部品や周辺機器の使用
(c) 通常的な磨耗
WWW.ZALMAN.COM
68

(d) 適切を欠いた使用環境での使用
(e) モニターの改造
(f) シリアル番号や製品コードステッカーの除去、又は破損
(g)
ジャルマンの公式サービスセンター、又は公式サービス代理店以外の者によるサービ スの結果
(h) ジャルマンのユーザーマニュアルに反したモニター使用の結果
6.お客様はどのような扱いにも適するようにモニターを包装する必要があります。適切
ではない包装による損害は、お客様に費用が請求される場合があります。
7.ジャルマンの公式代理店・販売店では、修理技術者により次のような問題だと判断さ
れた場合、お客様に現在適用出来る時給を請求することができます。
(a) ユーザーと関連した問題
(b) モニターの正常な設定を変更したことから起因した問題
(c) お客様のパソコン、又は電源から起因した問題
(d) この品質保証が適用されない原因から起因した問題
8.代理店・販売店の代理人が、モニターの修理や配送のために訪問した際、お客様には
在宅されることが求められます。お客様の不在により再訪問することとした場合は、お
客様に費用が請求されることがあります。お客様は、自己負担で代理店・販売店へとモ
ニターを発送したり、又は回収することができます。
9.不確かなソフトウェアのインストールや使用、或いはソフトウェアのウイルス、又は
ソフトウェア自体の欠陥によるソフトウェア関連の障害は、製品の欠陥とは見なされ
ず、修理費用が発生することがあります。
10.LEDパネルモニターのピクセルは、パネル製造元のピクセル規格に表示されている
基準を超えない限り、品質保証の対象とはなりません。下記のジャルマンLEDモニターの
ピクセル関連ポリシーをご参照してください。
[ ジャルマンのLEDモニターピクセル関連ポリシー ]
不具合のあるモニターは、モニターの使用期間やドット抜けピクセルの数に応じ、新製
品やリファビッシュ製品との交換、又は修理となります。
- 新製品との1対1の交換:
-エンドユーザーの請求書上の購入日から30日以内に発生したA-Zoneのドット抜け(輝
点)、ピクセル1つ以上、及びB-Zoneのドット抜け(輝点)ピクセル3つ超過
-エンドユーザーの請求書上の購入日から30日以内に発生したA-Zoneのドット抜け(輝
点)、ピクセル2つ超過、及びB-Zoneのドット抜け(輝点)ピクセル2つ超過
-エンドユーザーの請求書上の購入日から30日以内に発生したA-Zoneのドット抜け(輝
点)、ピクセル3つ超過
-エンドユーザーの請求書上の購入日から30日以内に発生したB-Zoneのドット抜け(輝
点)、ピクセル5つ超過
– リファビッシュ製品との1対1の交換:
- エンドユーザーの請求書上の購入日から30日後に発生したA-Zoneのドット抜け(輝
点)、ピクセル1つ超過、及びB-Zoneのドット抜け(輝点)ピクセル3つ超過
- エンドユーザーの請求書上の購入日から30日後に発生したA-Zoneのドット抜け(輝
点)、ピクセル2つ超過、及びB-Zoneのドット抜け(輝点)ピクセル2つ超過
- エンドユーザーの請求書上の購入日から30日後に発生したA-Zoneのドット抜け(輝
点)、ピクセル3つ超過
- エンドユーザーの請求書上の購入日から30日後に発生したB-Zoneのドット抜け(輝
点)、ピクセル5つ超過
※暗点ピクセルは除く
B-ZONE B-ZONE B-ZONE
B-ZONE A-ZONE B-ZONE
B-ZONE B-ZONE B-ZONE

한 국 어
Ver 1.0

안전을 위한 주의사항
사용하기 전에 다음의 내용을 자세히 읽어 본 후 올바르게 사용해주십시오.
주의 사항은 "경고"와 "주의"가 두 가지로 구분되어 있습니다.
지시사항을 위반하였을 때, 심각한 상해나 최악의 경우 커다란 사고가 발생할
경고
가능성이 있는 경우
지시사항을 위반하였을 때, 경미한 상해나 제품 손상이 발생할 가능성이 있는 경우
주의
■ 전원 플러그는 반드시 접지가 된 콘센트에 연결해 주세요.
■ 젖은 손으로 전원 플러그를 만지지 마십시오. 감전의 원인이 될 수 있습니다.
■ 한 개의 콘센트에 여러가지 전기 제품을 동시에 사용하지 마십시오. 화재 및 고장의
원인이 됩니다.
■ LED 모니터와 함께 제공된 아답타 외에는 사용하지 마십시오. 화재 및 고장의 원인이
됩니다.
■ 손상된 전원 코드나 플러그, 헐거운 콘센트는 사용하지 마십시오. 감전이나 발화의
원인이 될 수 있습니다.
■ 전원 플러그를 콘센트에 연결할 경우, 전원 플러그가 흔들리지 않도록 안쪽 끝까지
정확히 꽂아 주십시오. 접속이 불안정한 경우에는 화재의 원인이 될 수 있습니다.
1. 제품 안내
■ 인사의 말씀
당사 제품을 구입해 주셔서 대단히 감사합니다.
당사 LCD 모니터는 완벽한 전자파 차단과 전력 소비감소, 효율적인 공간 활용 등의 장점을
지닌 고해상 화면을 구현해 주는 모니터입니다.
이 사용설명서는 여러분의 올바른 모니터 사용을 위한 것으로 사용하시기 전에 자세히 읽어
보시고 본 제품의 우수한 성능을 충분히 활용해 주시기 바랍니다.
■ 품목 확인
포장을 여시면 아래 품목들이 들어 있는지 확인 하시고 혹시 빠진 품목들이 있으면 판매처로
연락하여 주시기 바랍니다.
■ 모니터 본체 ■ 아답타 ■ 전원코드 ■ D-SUB 케이블
■ 오디오 케이블 ■ 사용설명서 (제품 보증서) ■ HDMI 케이블
WWW.ZALMAN.COM
사용설명서
71

2. 제품설치
1. 시그널 케이블 연결
시그널 케이블의 커넥터를 D-Sub, HDMI포트에 꽂고 접지를 확실히 하기 위하여 두 개의
볼트를 잘 조여 주십시오.
2. 파워케이블 연결
파워코드의 한 쪽은 AC 어댑터에 꽂고 다른 한 쪽은 벽면 또는 멀티콘센트에 연결하십시오.
그리고 AC어댑터에서 나온 DC케이블을 모니터의 전원잭에 연결하십시오.
3. 모니터 켜기
모니터와 컴퓨터의 파워를 먼저 켜십시오.
모니터가 켜진 후, 녹색 혹은 연두색의 LED가 켜집니다. 만약 LED가 빨간색이거나 깜빡
거리면 비디오 시그널 케이블의 연결을 확인하십시오. LED가 꺼져 있으면 파워 스위치를
가볍게 누르십시오.
4. 실치시 유의 사항
1. 안정된 장소에 설치하여 주십시오.
2. 습기나 먼지가 없는 곳에 설치하여 주십시오.
3. 직사광선이나 난방기구 근처를 피하여 주십시오.
4. 통풍구멍을 막지 않도록 설치하여 주십시오.
5. 자성이 강한 물체의 주변은 피하여 주십시오.
3. 안내문
■ 본 모니터는 국제 표준 VESA DPMS 규격을 따릅니다.
■ 본 모니터는 가정용으로 전자파 적합 등록을 한 기계로써, 주거 지역에서는 물론,
모든 지역에서 사용할 수 있습니다.
■ 본 모니터는 LED PANEL의 특성상 시야각 차이로 화면의 상,하 밝기가 다소
상이할 수 있습니다.
■ 본 모니터는 LED PANEL의 특성상 장시간 동일한 화면을 띄워 놓으면 잔상이
생길 수 있으며 시간이 지나면 없어집니다. 최적의 해상도는 1920 × 1080 입니다.
■ 본 모니터를 처음 사용하실 때, 화면이 만족스럽지 않으실 경우에는 MENU에서 설정을
변경하시면 됩니다.
■ 본 모니터의 후면부는 VESA 홀이 있습니다. (100 × 100mm)
■ 본 모니터의 전원은 본 제품에 내장된 아답타를 사용하시기 바랍니다.
타 제품의 아답타를 사용할 경우, 고장의 원인이 되며 무상 A/S를 받으실 수 없습니다.
■ 본 모니터는 일부의 VGA 카드 또는 특정 주파수에서 노이즈가 발생할 수 있습니다.
노이즈 발생시 수동으로 조정하시기 바랍니다.
WWW.ZALMAN.COM
72

4. 모니터의 구성 및 버튼 안내
■ 전면부
LED 상태 : 청색 전원 켜짐 / 적색은 절약모드입니다.
■ 후면부
1. AUTO 자동 화면 조정
2. MENU 메뉴, 선택
3. ◀ 아래, 왼쪽 이동
4. ▶ 위, 오른쪽 이동
5. ' ' 전원 ON or OFF
⑤ ④ ③ ② ①
1. DC IN : 전원입력 단자
2. Earphone : 이어폰 케이블 연결 단자
3. AUDIO IN : 오디오케이블 연결 단자
4. VGA : PC D-Sub 케이블 연결 단자
5. HDMI : PC와 HDMI 케이블 연결 단자
WWW.ZALMAN.COM
73

5. LED 화면 설정 메뉴
■ 메뉴 불러오기
MENU 버튼을 누르면 LCD 화면에 설정 메뉴가 나타납니다. ◀, ▶버튼으로 원하는 설정을
고른후 MENU 버튼을 누릅니다.
밝기조정
화면의 밝기를 조정합니다.
명암조절
화면의 명암을 조정합니다.
감마
화면의 감마를 조정합니다.
화면 수평/수직 이동
화면의 수평/수직 위치를 조정합니다.
WWW.ZALMAN.COM
주파수 조정
화면의 주파수 값을 조정합니다.
미세 조정
화면을 미세 조정합니다.
선명도 조정
화면의 선명도를 조정합니다.
74

공장지정(sRGB / 6500K / 9300K)
화면의 색상온도를 조정합니다.
사용자조정 (적색/녹색/청색)
화면의 색상을 사용자가 직접 조정합니다.
화이트 발란스
화면의 화이트발란스를 자동으로 조정합니다.
DCR ON/OFF
DCR(동적명암비) 기능을 ON/OFF 할 수
있습니다.
고정종횡비
와이드(16:9 또는 16:10)과 4:3비율의 화면
으로 상호 전환합니다.
INPUT SELECT
입력신호를 VGA (D-SUB)단자 또는 디지털
HDMI 단자로 설정합니다.
초기화
모든 설정 값을 공장 출하 초기 설정값으로
변경합니다.
언어선택
모니터 및 OSD 메뉴 언어를 설정합니다.
메뉴좌우이동
OSD 화면의 수평위치를 조정합니다.
메뉴상하이동
OSD 화면의 수직위치를 조정합니다.
메뉴시간설정
OSD 화면 대기시간을 조정합니다.
WWW.ZALMAN.COM
음량 조절
스피커의 음량을 조절합니다.
소리 없음
스피커 기능을 On/Off합니다.
75

6. 모니터 제품 규격
모델
화면크기
최적해상도
화면 비율
픽셀 피치
밝기
명암비
동적 명암비
시야각
응답속도
표시색상
입력
수평 주파수
수직 주파수
내장스피커
아답터 사양
TM270VA LED
27"(68cm)
1920 x 1080
16 : 9 Wide
0.311 mm * 0.311 mm
300cd/m²
5,000 : 1
20,000,000 : 1
Horizontal 170˚
Vertical 160˚
G to G 2ms
16.7 M
D-Sub (15 Pin)
HDMI x 2
Audio
31.5~94 KHz
60 ~ 75 Hz
2W + 2W (8Ω)
12V / 4A
제품 크기
제품 인증
CB, CE, KC, VCCI, GOST
WWW.ZALMAN.COM
646 * 453 *170mm
76

7. 문제해결
■ 화면이 나타나지 않아요.
- 모니터의 전원 코드가 빠져 있는지 확인하여 보십시오.
- 모니터의 전원이 꺼져 있는지 확인하여 보십시오.
- 시스템의 전원이 꺼져 있는지 확인하여 보십시오.
- 모니터의 신호 케이블이 빠져 있는지 확인하여 보십시오.
■ 화면이 어두워요.
- OSD 메뉴에 들어가 밝기와 명암비를 조절합니다.
■ 모니터가 너무 뜨거워요.
- 환기를 위해서 다른 물건들로 부터 5cm 이상 뗍니다.
■ 화면이 뒤틀리거나 깜박거립니다.
- PC 셋팅을 확인하고 적절한 해상도를 선택하여 주파수를 새로 조정합니다.
■ 흑백의 점 얼룩이 있어요.
- 모니터를 약 20분 가량 사용하신 후 LED 전용 세정액을 사용하여 안경 닦는 천이나,
매우 부드러운 천으로 닦아 냅니다.
■ 컬러의 부족 현상
- 시그널 케이블 핀이 뒤틀렸거나 깨지지 않았는지 확인합니다.
WWW.ZALMAN.COM
77

제품 보증서
제품명 모델명
구입일 년 월 일 Serieal No.
구입처 판매 금액
1. 품질 보증기간 : 제품 구입일로부터 1년 (단, 구입영수증이 있을 때)
2. 무상 A/S : 품질 보증기간 내에 제품 자체 성능상의 하자 및 불량 발생시
3. 유상 A/S : 품질 보증기간 이후에 제품 사용상의 문제 발생시. 단, 아래와 같은 사항에
대해서는 품질 보증기간 이내라도 무상 A/S 처리가 되지 않으며 소비자 부담으로
처리됩니다.
☞ 본 사용 설명서에 명시된 설치 전 주의사항 및 유의사항을 지키지 않은 경우
☞ 사용자의 고의나 과실 및 부주의로 인하여 변형, 파손/파괴된 경우
☞ 사용자의 임의 개조에 의한 변형 및 고장이 발생된 경우
☞ 품질 보증 스티커가 제거 또는 회손 되었을 경우
☞ 천재 지변으로 인해 고장이 발생된 경우
4. 교환 및 환불
1) 교환 : 제품 구입일로부터 1개월 이내에 제품 자체 성능상의 하자 또는 불량 발생시
동일 제품으로 교환하여 드립니다.
2) 환불 : 제품 구입 후 10일 이내에 제품 및 포장의 훼손이 없는 경우에만 구입처를 통해
환불 받으실 수 있습니다.
(단, 제품 구입시 발급해 드린 영수증을 제시하셔야 환불이 가능합니다)
5. A/S
1) 운영시간 : 평일- 09:00~18:00 (공휴일,토.일요일 휴무)
2) 접수 방법
① 방문 접수 : 본사를 직접 방문할 경우 사전 연락 후 방문해 주시기 바랍니다.
② 택배 접수 : 택배(우편)를 이용하실 경우 아래의 주소로 성함, 주소, 연락처 및 불량
증상을 적은 메모지를 넣어서 보내주십시오.
※ A/S 의뢰 시 제품 박스가 필요하오니 보관하여 주십시오.
3) 접수처
◆ 본사 - 서울 금천구 가산동 448 대륭테크노타운 3차 1009호 ☏ 1588-3936
※ A/S 의뢰 시 제품은 A/S접수처로 보내시는 것을 원칙으로 합니다.
※ 제품 교환은 구입처 또는 본사 및 총판 대리점에서 가능하며, 기타 A/S는 본사에서만
가능합니다.
6. 제품 운송비용
1) 무상 A/S의 경우 : 왕복 비용 모두 당사에서 부담합니다.
2) 유상 A/S 및 보증기간 이후 : 왕복 비용 모두 고객 부담입니다.
WWW.ZALMAN.COM
78
 Loading...