


4gb66014.fm Page 3 Monday, April 14, 2003 2:58 PM
INSTRUCTIONS FOR USE
INSTALLATION
ELECTRICAL CONNECTION
BEFORE USING THE OVEN
HINTS FOR PROTECTING THE ENVIRONMENT
PRECAUTIONS AND GENERAL SUGGESTIONS
OVEN ACCESSORIES
CLEANING THE OVEN AND ITS ACCESSORIES
TROUBLESHOOTING GUIDE
AFTER SALES SERVICE
DECLARATION OF CONFORMITY 

3
4gb66014.fm Page 4 Monday, April 14, 2003 2:58 PM
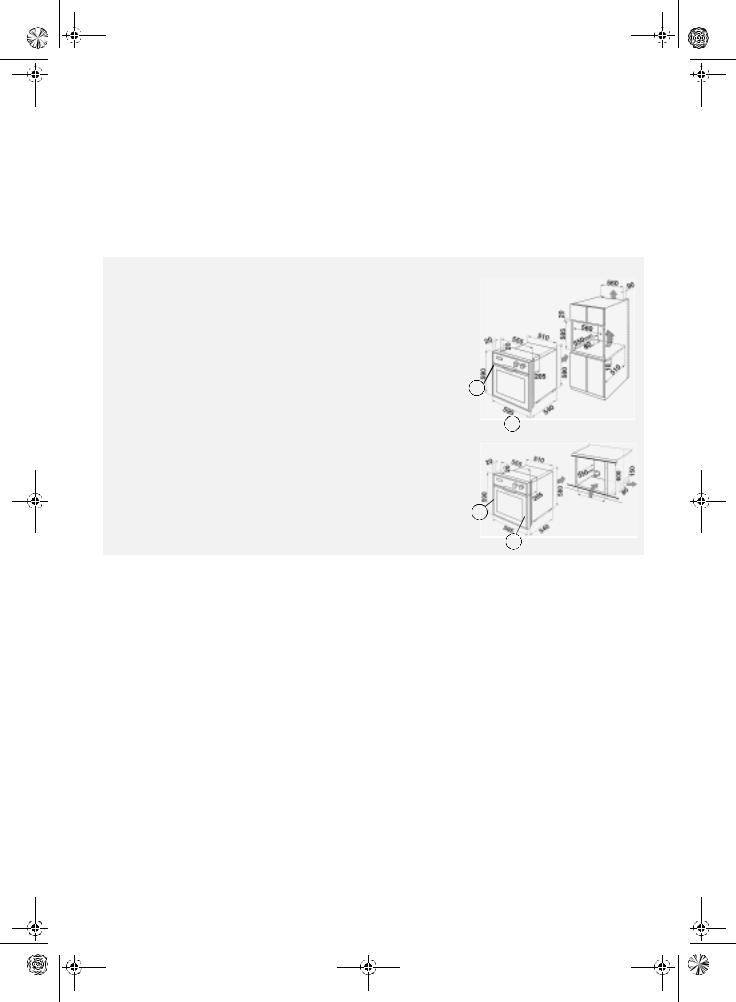
Installation
Technical information for the installer
•Unpack the oven to make the connections.
•Rest the oven on the polystyrene base to avoid damaging it.
•Do not lift the oven by the door handle, but hold it at the sides.
•Make sure that the appliance has not been damaged during transport.
•The dimensions of the oven and the unit are given in the picture below.
•Units in contact with the oven must be heat resistant (90°C).
•If plastic laminates or the sealing material are not sufficiently heat resistant, bubbles may form, the surface may be deformed or the coating may detach.
•House the oven in the unit cavity, lifting it at the sides and making sure that the supply cable is not trapped.
•To ensure correct ventilation, respect the ventilation
openings indicated in the picture (200 mm2 minimum).
•Fasten the oven to the unit with the screws (A) as shown.
•The oven can also be fitted under a cooktop.
A
A
A
A
4

4gb66014.fm Page 5 Monday, April 14, 2003 2:58 PM
•There must be a gap of at least 5 mm between the upper edge of the oven and the lower edge of the working surface. This gap must never be closed by strips or unit reinforcing pieces. When the oven is installed, make sure that the sides do not touch the front edges of the unit or the adjacent drawers and door (see below picture).
No Contacts
5
 Loading...