

Whirlpool 3369089 User Manual
ion instructions
IMPORTANT:
Installer: Leave Installation Instructions
with the homeowner.
Homeowner: Keep Installation
Instructions for future reference.
Save Installation Instructions for local
electrical inspector's use.
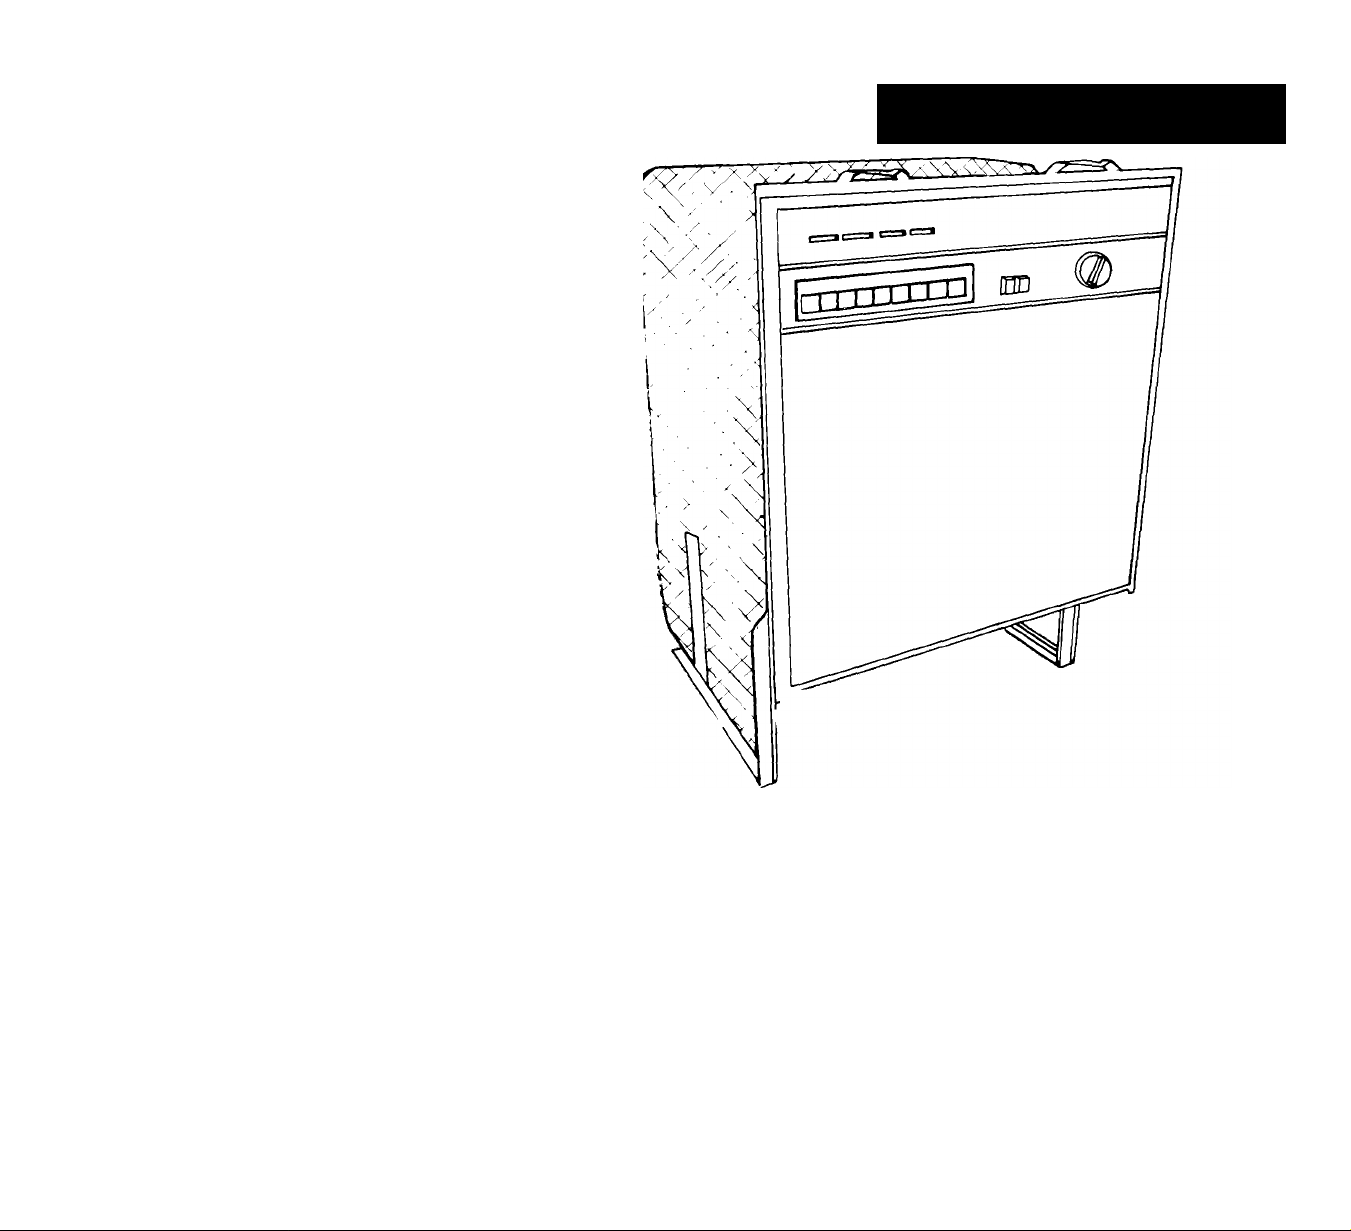
Undercounter
Dishwasher
Part No. 3369089
Whirlpool
Home^^Appliances
Before you start...
Proper installatior^ is your resporisibility,
Moke sure you have everything
necessary for correct installation.
It is the responsibility of the customer
to contact a qualified installer to
assure that the plumbing and
electrical installations are adequate
and meet all national and local codes
and ordinances.
IMPORTANT: Observe all governing codes and ordinances.
I
Electrical ground
is required. See
Electrical requirements.
Do Not install dishwasher
over corpeted flooring.
Proper eiectrical, drain ond water
supply lines must be available or must
be installed as specified within shaded
area. See Electrical, Water and Drain
requirements. Plumbing and wiring
should not cross in front of mofor or
dishwasher legs.
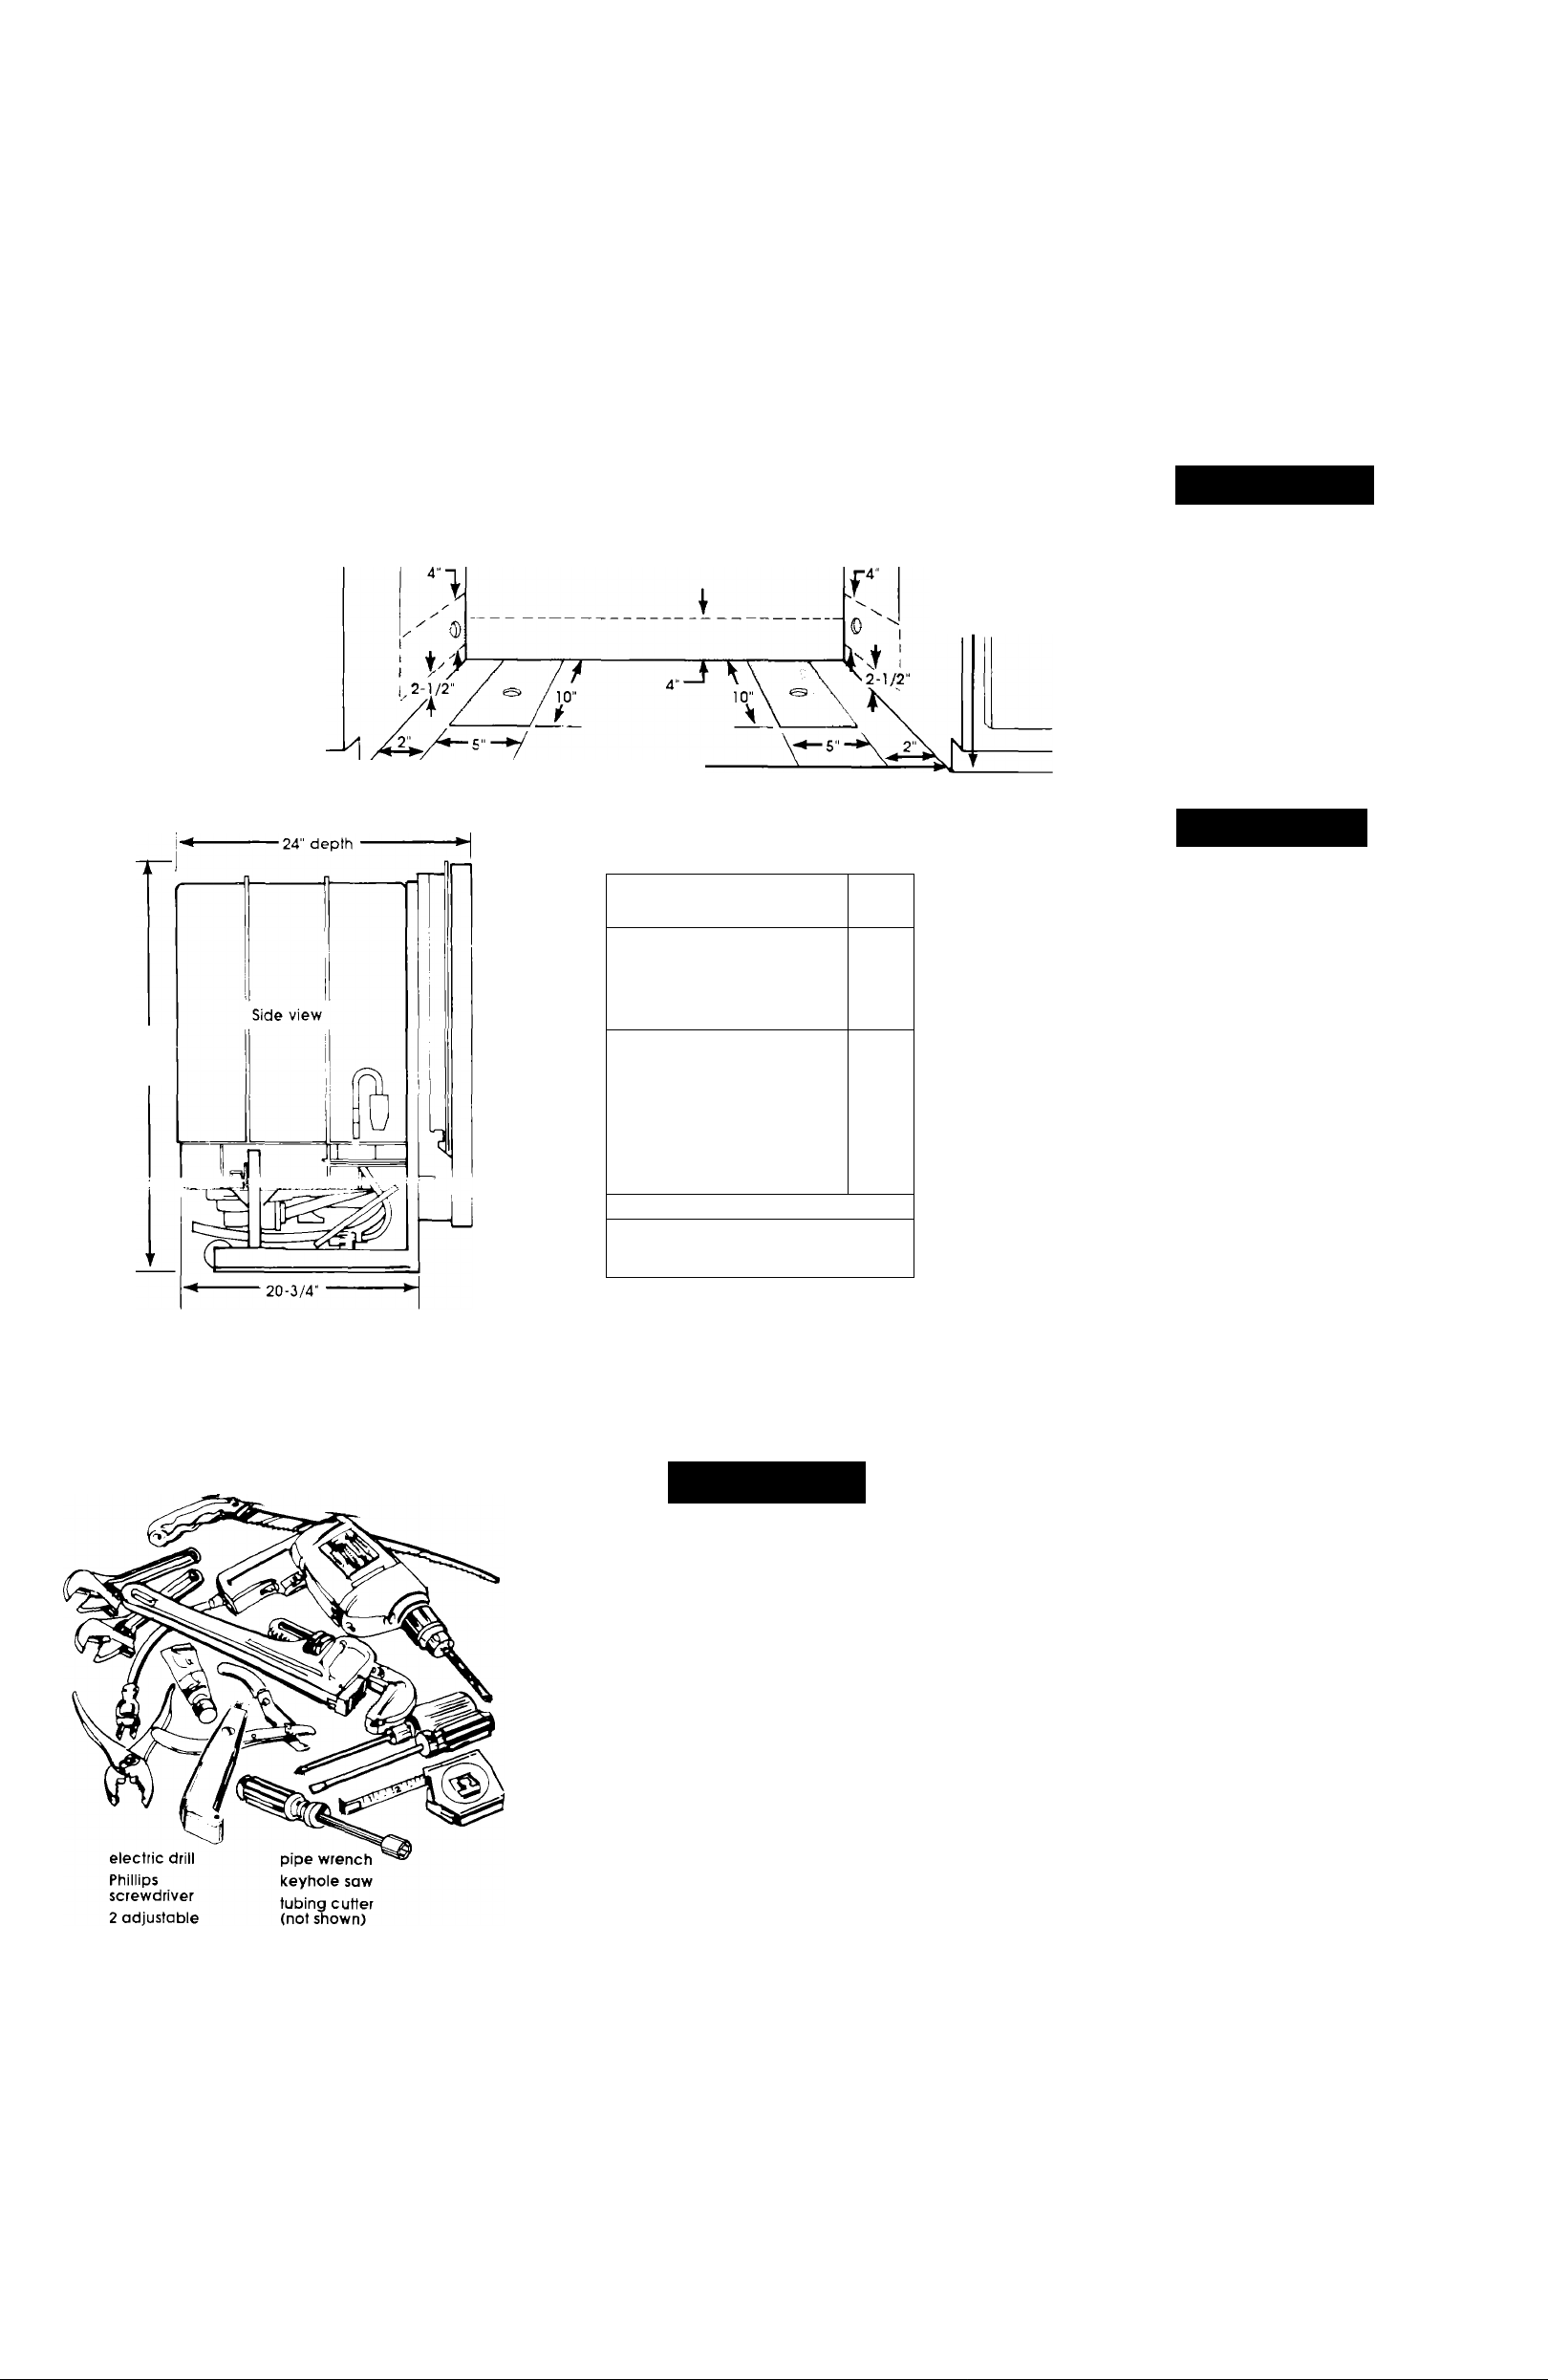
Cut:
Water line: 1 /2"
hole or larger.
Drain line: 1 -1 /2"
hole or loiger.
Electrical line 1 /2"
hole or larger.
The unshaded
area must be free
of pipes or wires.
■ 24" opening-
Figure 1
Grommet
required for
electrical
cable hole
(metal cabinets)
width
23-7/8".
width
r ^
--------------------------------
Back view
I; 1
corner location
2" min, door to
cabinet or wall '
24".,
--------^
34" min.
underside
counter
height
Check location where dishwasher will
be installed. The location should
provide:
• Eosy access to water, electricity
and drainage lines.
• Convenient loading — the best
position is left or right of kitcnen sink,
• Opening that is square for proper
dishwasher operation and
appearance.
• Cabinet front that is perpendicular
to floor.
• Protection so that water inlet valve
and drain cannot freeze.
• 1/4" minimum clearance between
motor and flooring to prevent the
motor from overheating.
AWARNING
Electrical Shock Hazard
• Electrical wiring and
components must not contact
any plumbing material or drain
hose.
• Cabinet opening must
completely enclose sides, top
and back of dishwasher.
Failure to do so may result in
personal injury from exposed
wiring.
ACAUnON
Personal Injury/Product Damage
Avoid opening dishwasher door
before dishwasher is installed.
Dishwasher, before it is installed,
may tip over when door is opened
resulting in personal injury or
product damo'^«^
33-7/8"
min.
heighi
Tools
needed for
installation:
wrenches
flat-blade
screwdriver
measuring tape
pliers
Parts sttoolied
SttpplK
pipe-joint
compound
wire stripper and
utility knife
5/16 and 1/4 inch
nut driver or hex socket
for installation:
2, drain hose
clamps
drain hose
2, No. 10 X 1/2"
Phillips-head screws
Figure 2
! '
p*
Electrical
requirements
AWARNING
Electrical Shock Hazard
•Electrical ground is required on
this appliance. Check with a
qualified electrician if you are
in doubt as to whether the
appliance is properly grounded,
mproper connection of the
equipment-grounding conductor
can result in electrical shock.
• Disconnect power to the
junction box.
Failure to do so could result in
serious injury or death.
• This appliance must be
connected to a grounded,
metallic permanent wiring
system, or a grounding
connector should be connected
to the grounding terminal or wire
lead on the appliance.
Failure to do so could result in
serious injury or death.
• Do Not have a fuse in the neutral
or grounding circuit.
This could result in electrical
shock.
• Do Not use an extension cord
with this appliance.
Such use may result in a fire,
electrical shock or other personal
injury.
Read and follow the "Electrical
requirements", "Water requirements"
and "Drain requirements" connection
sections before installing disnwasher.
A 120-volt, 60 Hz, AC only, 15- or 20ampere, fused, electrical supply is
required. Time-delay fuse or circuit
breaker is recommended. It is
recommended that a separate
circuit serving only this appliance be
provided.
It is the personal responsibility and
obligation of the customer to
contact a qualified electrician to
assure that the electrical installation
is adequate and in conformance
with the National Electrical Code,
ANSI/NFPA 70— latest edition, and all
local codes and ordinances.
The dishwasher must be connected
with copper wire only.
Wiring methods
Pick one method to follow
depending upon your dishwasher
and local codes,
A. Direct wire method (cable connecting dishwasher to a junction box)
Recommended grounding method
1. Disconnect the power supply.
Panel A
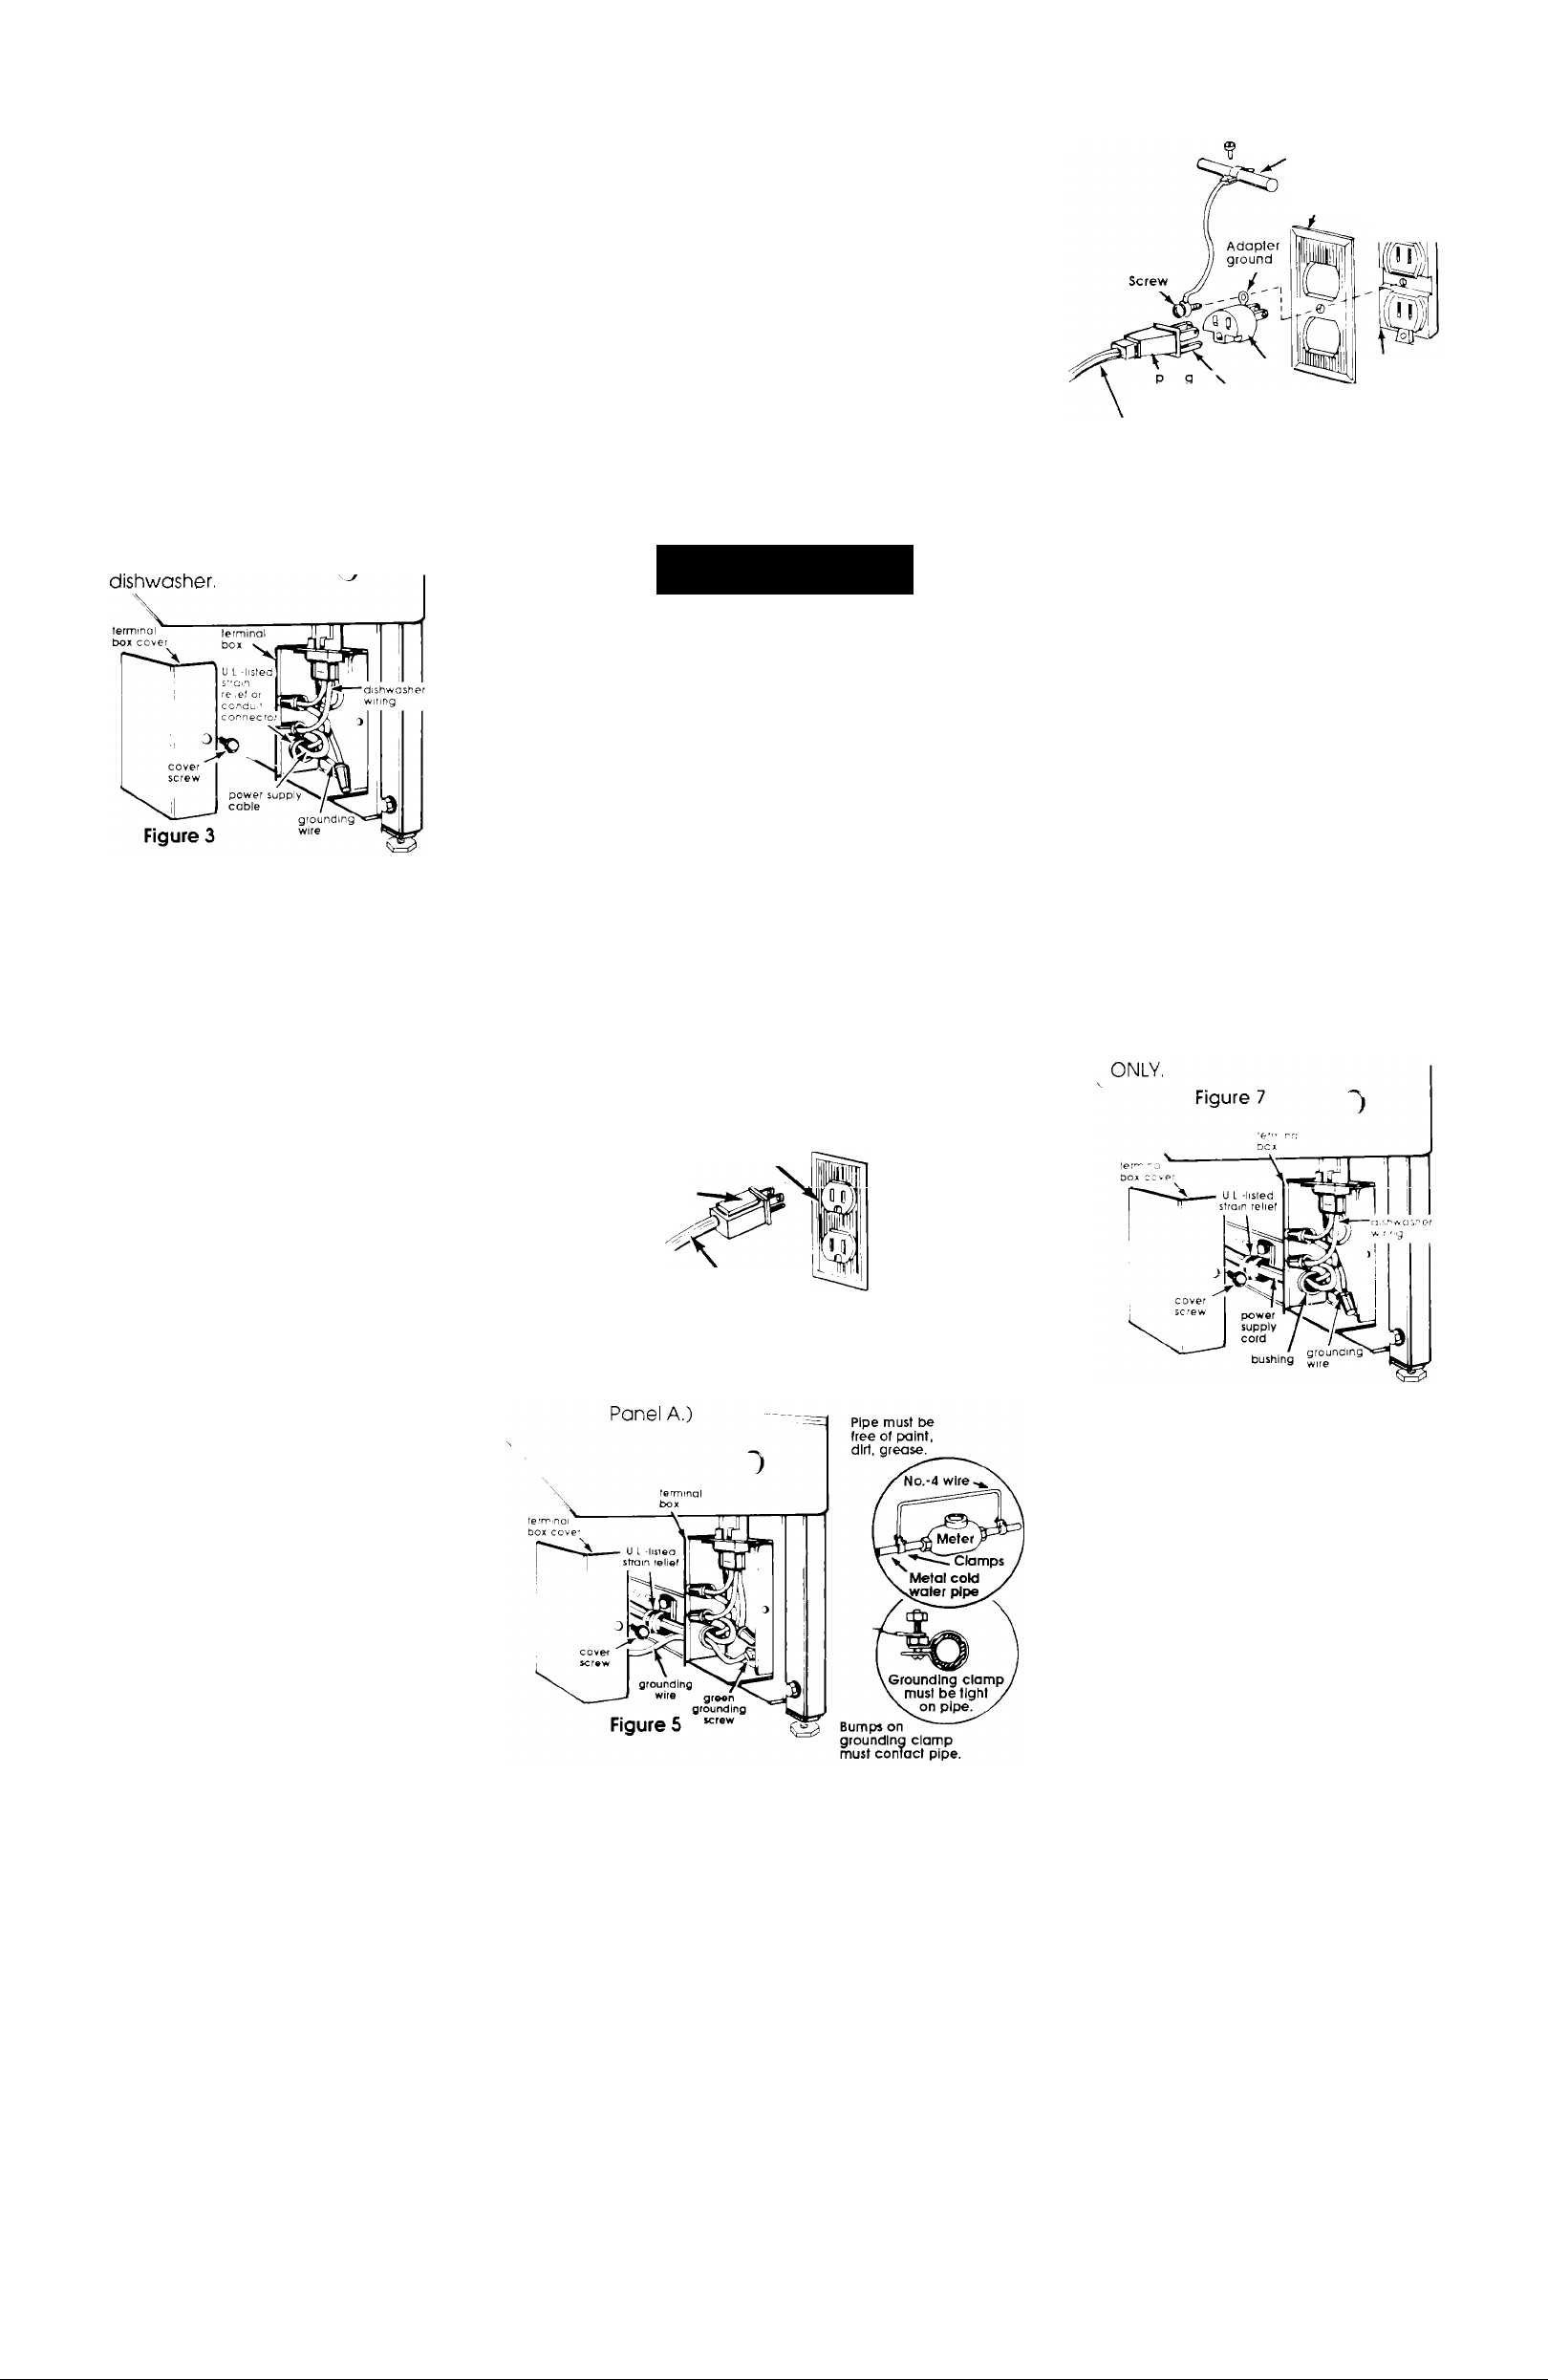
2. Run flexible, armored or non
metallic sheathed, copper cable
(with grounding wire) from the fused
disconnect, circuit breaker or
junction box through the 1 /2" or
larger cabinet hole to the
dishwasher location. The cable must
extend 24" from the back wall,
The hole cut through a wood
cabinet should be sanded until
smooth.
The hole cut through a metal cabi
net must be covered with a grom
met (Part No. 302797), available from
your authorized dealer.
A U.L.-listed strain relief or conduit
connector must be installed at each
end of the power supply cable (at
the dishwasher and at the junction
box). Wire sizes (COPPER WIRE ONLY)
must conform with the rating of the
3. Remove the dishwasher terminal
box cover. Connect the white and
black wires of the power supply
cable to the white and black leads
in the terminal box with twist-on wire
connectors. (See Figure 3.)
4. Connect the power supply
grounding wire to the green, ground
ing wire inside the terminal box with
a twist-on wire connector.
(See Figure 3.)
5. Replace terminal box cover.
Temporary grounding method
THIS, HOWEVER IS NOT
RECOMI^ENDED.
If the recommended grounding
method is impossible — connect a
separate, grounding wire (No. 16
minimum) to the green, grounding
screw inside the terminal box. Con
nect the other end of the separate
grounding wire to a grounded, metal
cold water pipe. (See Figure 5.)
Do not connect to electrical supply
until dishwasher is permanently
grounded.
Do Not ground to a gas supply pipe
or hot water pipe.
* Grounded, cold water pipe must have
metal continuity to electrical ground and
not be interrupted by plastic, rubber or other
insulating connectors such as hoses, fittings,
washers or gaskets (ihcludihg water meter or
pump). Any insulating electrical connector
should be jumped, as shown, with a length of
N0.-4 copper wire securely clamped to bare
metal at both ends. (See Figure 5.)
grounded in accordance with the
National Electrical Code ANSI/NFPA
70-latest edition, and all local codes
and ordinances. Follow the
Instructions packaged with the
flexible cord.
Dishwashers equipped with a power
supply cord have a 3-prong,
grounding plug. It must be plugged
into a mating, 3-prong, grounding-
type receptacle (See electrical
requirements. Panel A). If a mating
wall receptacle is not available, it is
the personal responsibility and
obligation of the customer to have a
properly grounded, 3-prong, wall
receptacle installed by a qualified
electrician. (See Figure 4.)
Recommended
grounding method
AWARNING
Electrical Shock Hazard
• Electrical ground is required
on this appliance.
• Improper connection of the
equipment-grounding
conductor can result in a risk
of electrical shock.
• Check with a qualified
electrician if you are in doubt
as to whether the appliance is
properly grounded. Do Not
modify or remove the power
supply cord plug. If plug does
not fit the outlet, have a proper
outlet installed by a qualified
electrician.
• Do Not use an extension cord
with this appliance.
• Do Not hove a fuse in
the neutral.
Failure to follow these instructions
could result ina fire, electrical
shock or other personal injury.
3-prong, grounding-type
wall receptacle
3-prong,
grounding
plug
power supply cord
1. Have a 3-prong, grounding-type,
wall receptacle available or Installed
by a qualified electrician on the
rear wall of one cabinet next to
dishwasher opening, (See Figure 1,
■ cTe
Figure 4
Temporary grounding method
Grounding assembly attached
to grounded metal
сою water pipe
with paint removed.
Cover-plate
3-prong
grounding
Power supply cord
^ Adapter
plug Grounding prong
2-prong
type wall
receptacle
Figure 6
If changing and properly grounding
the electrical supply is impossible,
and where local codes permit
(consult your electrical inspector), a
temporary adapter may be plugged
into the 2-prong, wall receptacle to
mate with the 3-prong, power supply
cord. (See Figure 6.)
If this is done, you must connect a
separate, copper grounding wire
from the adapter ground to the
grounded, metal cold water pipe*.
(See Figure 6.)
Do Not connect to electrical supply
until appliance is permanently
grounded.
Do Not ground to a gas supply pipe
or hot water pipe.
IF POWER CORD CANNOT BE USED...
When local codes do not permit use
of a power cord with an undercoun
ter dishwasher, the power cord must
be removed and dishwasher wired
directly, IF THE POWER SUPPLY CORD
IS REMOVED, THE DISHWASHER MUST
BE CONNECTED WITH COPPER WIRE
1. Disconnect the power supply.
2. Remove terminal box cover.
3. Remove twist-on wire connectors
from the power cord wires and
grounding wires, (See Figure 7.)
4. Disconnect the strain relief (behind
the terminal box) from the dish
washer frame.
5. Remove power cord, strain relief
and terminal box bushing,
6. See "A. Direct wire method," Panels
A and B, for further instructions.
B. Power supply cord method
(connecting dishwasher to
outlet)
Local codes may permit the use of a
U.L.-listed, flexible, three-conductor,
power supply cord terminated with a
three-prong, grounding-type plug.
It is recommended that cord kit.
Part No. 4317824, available from your
Whirlpool dealer or parts supplier, be
used. If the cord kit is not available
locally, the flexible cord used must
be a U.L.-listed, three-conductor,
16-gauge cord that meets the
National Electrical Code ANSI/NFPA
70-latest edition, and all local codes
and ordinances. The length of the
cord must not exceed six feet. It
must be routed so that it does not
touch the dishwasher motor or the
lower portion of the dishwasher tub.
A strain relief (Part No. 596556),
available form your dealer or parts
supplier, or a similar part must be
used to secure the flexible cord to
the dishwasher frame or terminal
box. The flexible cord must be
plugged into a mating, three-prong,
grounding-type wall receptacle
Panel B
2. For added personal safety, use a
separate grounding wire. Remove
terminal box cover. Feed grounding
wire through the hole in the terminal
box where the power cord enters.
Connect the separate grounding
wire to the green, grounding screw
inside the terminal box. Connect the
other end of the separate grounding
wire to a grounded, metal cold
water pipe*. (See Figure 5.)
3. Replace terminal box cover.
Do Not connect to electrical supply
until appliance is permanently
grounded.
Do Not ground to a gas supply
pipe or hot water pipe.
'Grounded, cold water pipe must have metal
continuity to electrical ground and not be
interrupted by plastic, rubber or other
electrical insulating connectors such as hoses,
fittings, washers or gaskets (including water
meter or pump). Any electrical insulating
connector should be jumped, as shown, with
a length ot No.-4 wire securely clamped to
bare metal at both ends.
Water
requirements
The hot water line to the dishwasher
must provide between 15 -120 psi
water pressure. The hot water heater
should be set to deliver 140°F water
temperature to the dishwasher for
best results.
Use 3/8" O.D. copper tubing or 1/2"
plastic tubing minimum inlet line.
Dishwasher inlet valve has 3/8“ N.P.T.
internal pipe threads.
Drain
requirements
Drain line connection to house
plumbing must be minimum 20"
above floor to prevent siphoning.
Drain hose, supplied, meets
AHAM DW-1 test standards. Cut
1 -1 /2" hole in cabinet wall for drain
hose. Additional drain line (a
minimum of 1/2" I.D, and no longer
than 20 feet) can be used if needed,
 Loading...