

CD 2604 MP3X
User manual
Mode d’emploi
Bedienungsanleitung
Gebruiksaanwijzing
Istruzioni d’uso
Instrucciones de manejo
Modo de emprego
Bruksanvisning
Betjeningsvejledning
Käyttöohje
www.vdodayton.com

pg3_class1.p65 6/12/02, 10:23 AM1
A
2
7
9
8
1
3
4
5
6
B
3
2
C
D
E
SD/
MMC
F
1
3

This page is a blank page.
4
INTRODUCTION
BEFORE STARTING
Thank you for purchasing this product which
has been designed and manufactured
according to applicable Safety Regulations,
following the highest standards and subjected
to rigorous testing. Please familiarise yourself
with the device by reading carefully this
instruction manual. Use the device as intended,
then keep this manual handy in your car for
future reference.
ENVIRONMENT
This booklet is printed on low-chlorine
recyclable paper.
PREVENTIVE MAINTENANCE
To ensure good connection between the
set and the detachable front, it is advisable
to clean the connectors with a cotton swab
slightly moistened with cleaning fl uid or alcohol
periodically.
CONTENTS
INTRODUCTION . . . . . . . . . . . . . . . . . . . . . . 5
BEFORE STARTING . . . . . . . . . . . . . . . . . . . 5
ENVIRONMENT . . . . . . . . . . . . . . . . . . . . 5
PREVENTIVE MAINTENANCE . . . . . . . . 5
INSTALLATION. . . . . . . . . . . . . . . . . . . . . . . . 5
PREPARATION . . . . . . . . . . . . . . . . . . . . . 5
CONNECTORS. . . . . . . . . . . . . . . . . . . . . 5
SECURITY . . . . . . . . . . . . . . . . . . . . . . . . 8
HOME PAGE . . . . . . . . . . . . . . . . . . . . . . . . . 8
SETUP . . . . . . . . . . . . . . . . . . . . . . . . . . . 9
AUDIO. . . . . . . . . . . . . . . . . . . . . . . . . . . 14
TUNER . . . . . . . . . . . . . . . . . . . . . . . . . . 15
CD/MP3 Player . . . . . . . . . . . . . . . . . . . . 18
CD/MP3/DVD Changer . . . . . . . . . . . . . . 20
TELEPHONE. . . . . . . . . . . . . . . . . . . . . . 21
AUXILIARY . . . . . . . . . . . . . . . . . . . . . . . 23
SD/MMC PLAYBACK
(for CD and MP3 function). . . . . . . . . . . . 23
CAR COMPUTER . . . . . . . . . . . . . . . . . . 24
SPECIAL FUNCTIONS . . . . . . . . . . . . . . . . 24
CONFIGURATION. . . . . . . . . . . . . . . . . . 24
TROUBLESHOOTING . . . . . . . . . . . . . . . . . 25
INSTALLATION
If your car is equipped with ISO connectors,
simply insert them in the connectors of the
car radio. If not, you can use an adaptor cable
(Refer to the table on the separate installation
card). Ensure all cables are installed so that
they cannot be damaged by sharp edges or
moving parts.
PREPARATION
The device must be connected to a 12V DC
electrical system with a negative terminal earth
(car chassis).
Warning: Installation that does not conform
to these requirements may result in malfunction,
damage or fi re!
To avoid the risk of a short circuit during
installation, disconnect the negative terminal
of the battery until the set has been securely
installed and connected. (see Installation card
Fig.1).
CONNECTORS
Connector A** (see Fig.2)
a-Power Supply
1- Brown wire A8: connect to an earthing
point on the car chassis.
2- Red wire A7: connect to a permanent 12V
supply, main power supply for the set.
Ensure that this connection can handle a
current of 10A.
3- Yellow/red wire A4: connect to the switched
12V supply of the ignition.
Note: The ON/OFF logic function exists
only when wire A7 (red) is connected to the
permanent 12V supply.
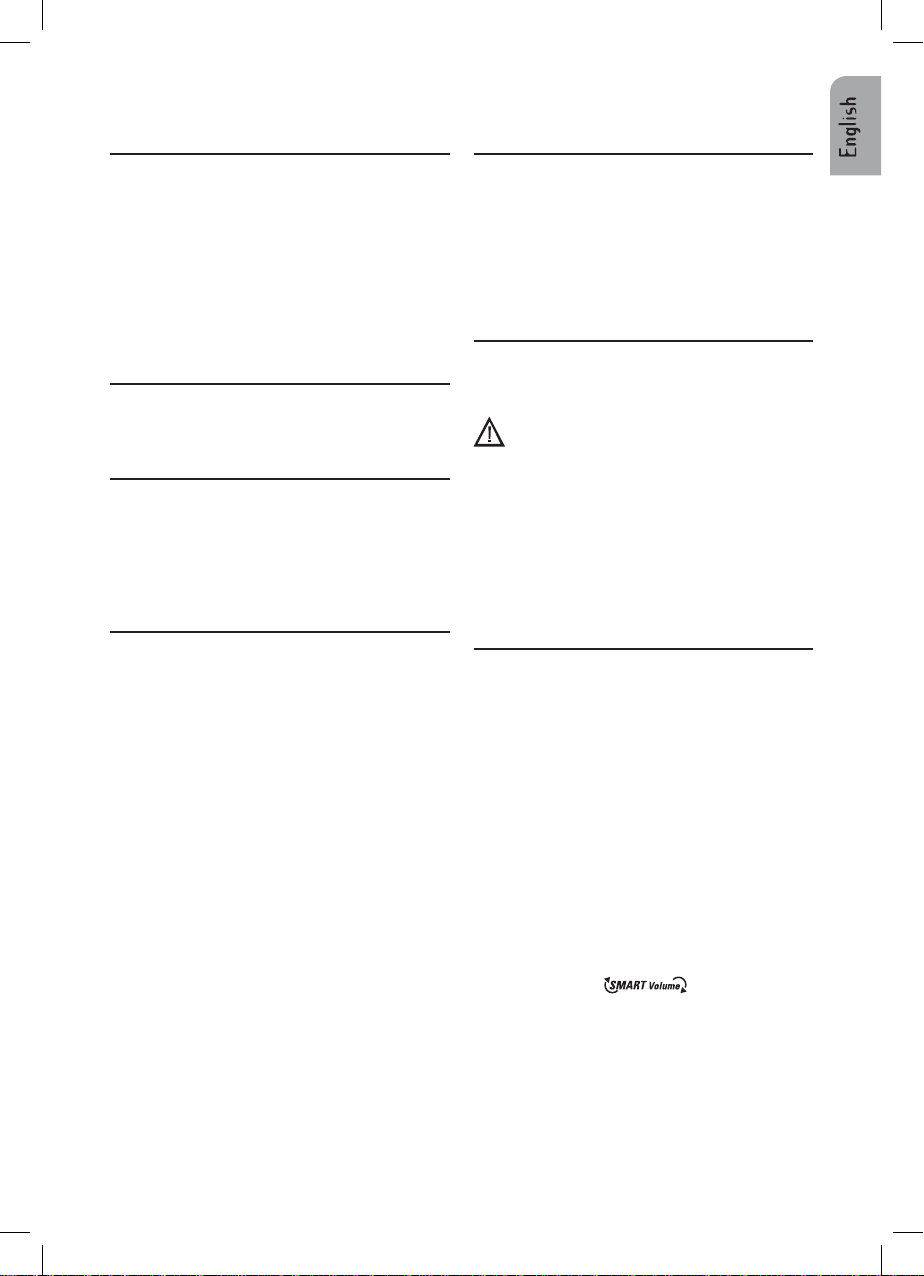
b-Optional connections
SMART Volume (
Intelligent volume control which automatically
adjust the volume depending on your car’s
speed. Connect pin A1 to a signal from the
speedometer of your car. Some cars are
already prepared for it (e.g. VW & Vauxhall/Opel
cars), please consult your dealer. If not, you
may need a more detailed installation requiring
extra equipment to enable your car to become
compatible.
):
5

This can only be accomplished by
persons familiar with automotive electrical and
mechanical systems.
After connection, see “SPECIAL FUNCTIONS”
for calibration procedure.
You are entirely responsible for deciding
whether it is safe to continue driving.
Wired Remote Control
Use the Pins 8 & 9 to connect wired remote
control accessories.
Electronic or Motorised Antenna
Connect pin A5 to the power supply for an
electronic antenna or the control wire for the
relay of an automatic motorised antenna.
Do not use this connection for direct power
supply to the antenna motor.
Connector B**
Loudspeakers (use 4 ohm loudspeakers only)
Do not connect any of the loudspeaker leads to
earth or directly to a booster/amplifi er without
high level input or via an external fader! You can
connect the loudspeaker leads directly to an
amplifi er with high level input:
Connecting 4 loudspeakers:
Front Rear
Left (+) Green B5 White B7
Left (-) Green/black B6 White/black B8
Right (+) Grey B3 Blue B1
Right (-) Grey/black B4 Blue/black B2
** For this accessory, contact your dealer.
Connector C
These specifi c set connectors belong to
accessories sold separately (contact your dealer)
a-Yellow Connector C1 for line out (see Fig.4).
You can connect a power amplifi er with 2 or 4
additional loudspeakers to this set using the
RCA cable.
1- Use the red socket to right channel and
white socket to left channel.
2- Use the blue wire (Pin 6) to Amplifi er
Remote On/Off.
b-Green Connector C2
Cables used for Car Computer control
(temperature sensor), Steering Wheel remote
control (see Fig.5). Please consult your dealer
for the accessories and correct interface.
Temperature Sensor
You can connect a temperature sensor to the
Pin 7 that will automatically give you a visual and
audible signal when the outside temperature
drops below 3°C. Use the Car Computer menu
to activate/deactivate this feature.
Warning: The temperature sensor is only
an aid and cannot be used to determine exact
road conditions.
6
c-Blue Connector C3 (MP3/DVD changer)
Cable used for CD, MP3 or DVD changer are
come with changer. (see Fig.6).
Connector D
These specifi c set connectors belong to
accessories sold separately (contact your dealer)
a-Connector D1
You can connect our Hands-free Phone Kit
(available separately) via this connector (Fig7).
With this accessory, the battery of your mobile
phone could be charged, and the audio outputof
the mobile phone can be played through the car
loudspeakers.
Check with your dealer for more details about
this accessory.
Telephone In
If you are using your own car kit please consult
your dealer for the appropriate interface.
Telephone Mute
Use this input (pin 5) or the TEL_MUTE pink
wire to connect your telephone mute signal.
Or you can connect the telephone mute signal
from the phone to the pink wire of the headunit.
Note : Before using your telephone, set the
phone system and confi gure its appropriate
detection level in the SETUP- Menu.
b-Connector D3 (fi g. 8)
- External Remote Display
You can show the content of headunit on
a specifi c car remote display via connector D3.
Contact your dealer for an ‘EDI Box’ of the
specifi c car which is sold separately.
- External Remote Control
You can connect an infra red remote eye
(available separately) via D3 to remote control
the headunit.
Audio In
You can connect external audio equipments via
Aux-in RCA cables.
Red wire- for Right Channel
White wire- for Left Channel input.
Rear Seat mute
Connect the external device (eg. DVD player)
input to the ‘Rear Seat mute wire’ (Blue) to mute
the rear speaker sound from the head unit.

MOUNTING
METAL SLEEVE (fi g. 11 )
Install the metal sleeve (dimension 182x53
mm) in the dashboard. For optimal performance
of the CD player, the metal sleeve should be
positioned horizontally (between -10 and +30).
Fix metal sleeve into place by pressing the
metal tags outwards using a screwdriver.
CONNECTING THE RADIO (fi g. 9)
- Ensure the battery is disconnected.
- Insert aerial plug E into aerial socket (good
reception is only possible with a good aerial).
Fix antenna adaptor if needed. Use hook (J)
on back of set to secure fi xing.
- Insert power supply connector A into
socket A’.
- Insert loudspeaker connector B into
socket B’.
- (Optional) Remove the protective cover
from socket C’.
- (Optional) Insert the yellow line-out
connector C1 into socket C1’.
- (Optional) Insert the blue CD changer
connector C3 into socket C3’.
- (Optional) Insert the green connector C2
into socket C2’.
The green connector slides between the yellow
connector C1 and the blue connector C3.
You need at least one of these connections to
keep C2 in place.
MOUNTING RADIO
This radio can be properly installed either from
conventional Front Mounting or Rear Mounting.
FRONT MOUNTING
- Slide the radio into the metal sleeve until the
springs at either side of the radio snap
into the openings of the sleeve. (fi g.14).
- Finally reconnect the negative car battery
terminal (fi g. 15).
REMOVING RADIO (using the two U- brackets
supplied)
- Remove the trimplate around the front
panel (fi g. 13).
- Insert both U-brackets into the holes on the
front of the set until they lock. Pull out the
radio (fi g. 14)
REAR MOUNTING (fi g. 13)
- Remove the trim plate around the front panel
and the side springs.
- Select a position where the screw holes of
the mounting bracket and the screw holes
of the radio become aligned and tighten the
screws at 2 places on each side.
- Only use M5 screws that are not longer than
6mm.
REPLACING THE FUSE (fi g. 10)
- Replace with a 10A blade-type fuse. The
new fuse must be of exactly this value and
type otherwise the set will not be adequately
protected. Ignoring this procedure may lead
to damage to the set, which will invalidate the
guarantee.
INTERFERENCE SUPPRESSION
- Most modern cars have suffi cient interference
suppression. If you experience interference
generated by the car, consult your garage.
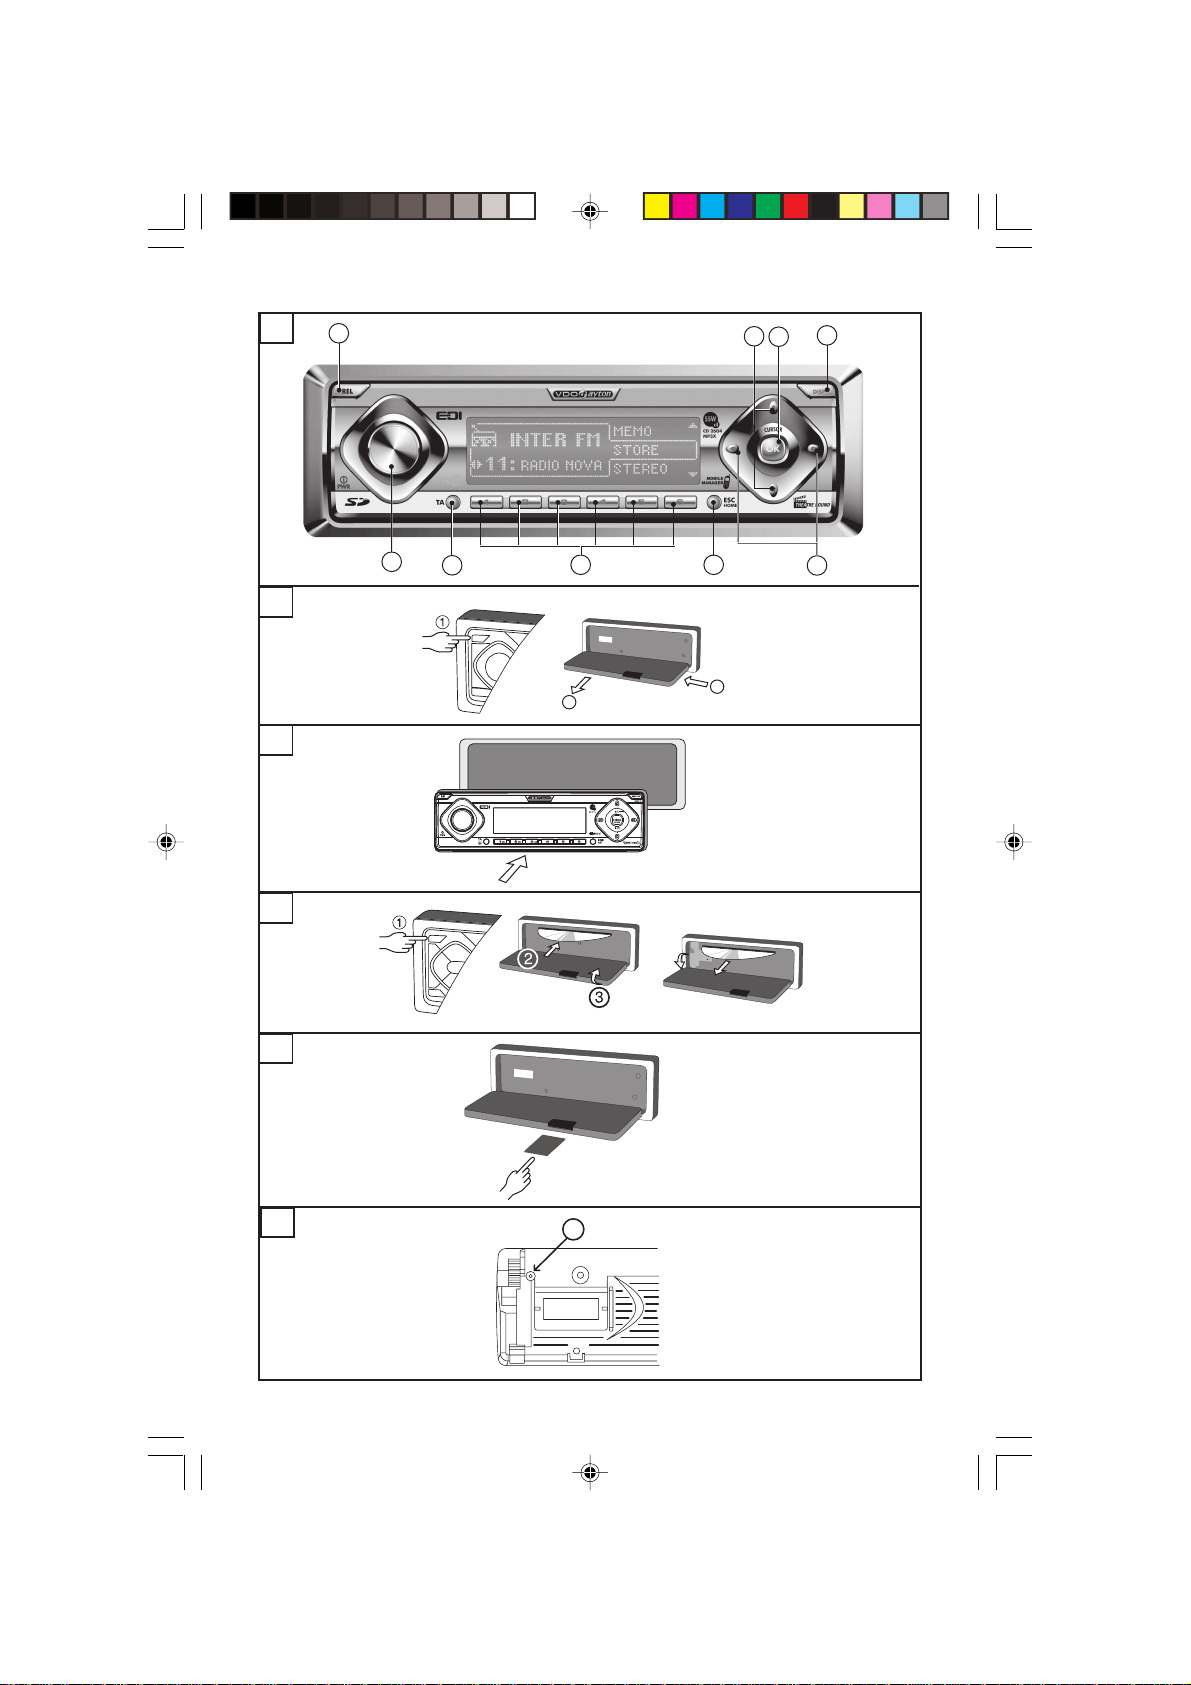
FRONT PANEL PRESENTATION
For illustration, see page 3, fi gure A.
1. PWR ............. Short press: Switch on; mute /
demute (when set is on)
Long press: Switch off
Rotary Knob: Volume up / down
2. REL ................ Flip down the detachable panel.
3. TA ................. Traffi c Announcement
4. 1 2 3 4 5 6 .....Short press: Recall preset 1, 2,
3, 4, 5 or 6 (Tuner)
Long press: Enter preset store
mode (Tuner)
5. ESC/HOME ..... Short press: Exit from current
function/menu; Go to main
source menu
6. / ............. Short press: Scroll through list
of features;
Search low / higher frequency
(Tuner);
Next / previous track (CD / MP3)
7. / ............. Short press: Scroll through list
of features;
Next / previous Directory (MP3);
Next / previous 5 tracks (CD)
8. OK ................ Short press: To enter menu; To
activate function; To select
feature.
9. DISP ............. Short press: Display mode
7

SECURITY
FRONT
REMOVING THE FRONT
1- Press the REL key.
2- Pull the front towards you. Follow the
diagram mounted on the back of the
detachable unit.
3- Take the detachable front with you when you
leave the car.
4- Keep the front in its protective cover.
REPLACING THE FRONT
1- Put the left side of the front into the socket of
the set.
2- Push the right side of front into place until it
clicks into position.
Note 1 : If you hear a warning signal, the front is
not properly replaced.
Note 2 : To ensure good connection between
the set and the detachable unit, it is advisable
to clean frequently the connections with a
cotton swab from time to time.
HOME PAGE
Switching On/Off
• Short press (left) rotary knob to switch
on the set.
• Long press rotary knob for more than 2
seconds to switch off the set.
SELECTING A SOURCE
Your car radio is designed for different types of
sources. You can view the source menu by long
or short press on the HOME/ESC key (depends
on which level of source view you are currently
in).
> TUNER
> CD/MP3
> CD/MP3/DVD CHANGER
> TELEPHONE
> AUXILIARY IN
> SD/MMC
> CAR COMPUTER
> SETUP
> SOUND
LOCKING THE DETACHABLE FRONT
The detachable front can be locked by a D2 x
10 screw.
- Remove the trim plate
- Flip down the detachable front.
- Insert a D2 x 10 screw (inside the
accessories bag) in position (1).
WARNINGS
Warning LED
When the engine is switched off and the front
is removed, the warning LED fl ashes.You can
switch off the warning LED (see SETUP menu,
Warning LED function).
IDENTIFICATION NUMBER
The set has a unique identifi cation number
(stated on the ‘Security card’).This card is
required as a proof of ownership when the set
is stolen, when the detachable front is lost or
when requesting service.
Press OK to activate the selected source.
VOLUME
Please make sure you can still hear the traffi c
(horns, sirens..….)
- Turn the volume knob to adjust the volume.
The volume automatically increase or
decrease if the SMART Volume connection
has been installed and selected (See
Installation).
Note : You can adjust the start-up volume. When
the start-up volume is set to maximum level, it
may be extremely loud when you switch on the
set. See ‘SETUP’, option ‘START VOL’.
Mute
• Press Power rotary knob to mute/demute the
sound when the set is switched on.
Note: You can set the mute level to SILENT,
-20dB, -12dB or -6dB.
8

DISPLAY Key
• Short press on the DISP key will bring you to different display modes of animation
and nature of information.
Four Display modes are available:
Mode 1: detailed audio info
Mode 2: no status or clock
Mode 3: no action box, no status, only feedback fi eld shown, animation by default
Mode 4: action box is shown and the feedback fi eld is used for car computer info; the status area is
only showing TA fl ag
If animation is turned ON, it can be shown in display modes 2 and 3, in the background layer:
Mode 2: animation behind the upper half screen only
Mode 3: animation on complete screen
See below mode 1 to 4 screens of Tuner and MP3 mode display:
Tuner Mode CD MP3 Mode
Mode 1
Mode 2
Mode 3
Mode 4
SETUP
The setup menu allows you to confi gure the main options of your car radio.
1. Press HOME and select SETUP menu.
2. Press ( / ) to scroll through the list of features:
• System
• Volume
• Tuner
• Car Computer
• Warning
• Display
3. Press OK to select the feature.
4. Press ESC to exit.
Note: The unit only allows ONE connection of either CIM or EDI at one time. If CIM is turn on, the
EDI will not be shown in the SETUP display and vice versa.
9

Arrow up
/down
SYSTEM LED ON, OFF Enable/Disable the blinking LED
LOGIC ON, OFF Allows the use of the headunit
,
Usage
when ignition is OFF.
when the vehicle ignition is
not turn on. (only if the A7 wire
is connected to a permanent
supply).
EDI ON, OFF, OPEL_8,
OPEL_10
CHANGER ON, OFF Enable/Disable the changer
AUX-IN ON, OFF Enable/Disable the function of an
SWRC ON, OFF Allows the user to operate the
HF MUTE HFREE OFF,
MUTE LO, MUTE HI,
HFREE LO, HFREE HI
HF LEVEL HFREE 1, 2, 3 - To adjust the handsfree volume
VOLUME START VOL START 1, 2, 3, ….47 - Select the start-up volume when
- Select ‘EDI on’ when external
EDI Box is connected.
- Select ‘OPEL 08’ ‘OPEL 10’ to
activate OPEL remote display.
(either EDI or CIM Box can be
connected one at a time).
connected to the set.
auxiliary device connected to the
set.
headunit with wired steering
remote control.
- Select ‘HFREE OFF’ if no car
phone is connected to the set.
Select MUTE LO or MUTE HI
(according to phone type) when
you want to mute the set’s sound
output when receiving phone call.
- Select ‘HFREE LO’ or ‘HFREE
HI’ (according to phone type) to
automatically interrupt the set’s
sound output when using your
handsfree kit.
level of the headunit.
power on.
After select the Startup Volume
level (Vref),
If the set is switched off and on
after a couple of ten seconds:
If volume < or = Vref, startup = last
play volume level.
If volume > Vref, startup = Vref.
If volume = 0 (mute), startup =
Vref.
10

Arrow up
/down
VOLUME SMART VOL SVOL OFF, 1, 2, 3, 4 Select the SMART volume (Speed
TA VOL TAVOL 0, 1, 2,…..47 Select volume level of Traffi c
TA OFFSET -2, -1, 0, 1, 2 To offset the TA Volume level with
TA FADER F7 -0 –R7 Adjust the front and rear fader
CD OFFSET -2, -1, 0, 1, 2 Volume level of CD relative to
MP3 OFFSET -2, -1, 0, 1, 2 Volume level of MP3 relative to
CDC OFFSET -2, -1, 0, 1, 2 Changer volume level relative to
CIM VOL TEL LEVEL -2, -1, 0, 1, 2 CIM telephone volume level
AUX VOL AUX LEVEL -2, -1, 0, 1, 2 Adjust the Aux-in volume level
MUTE SILENT, -20dB, -12dB,
BEEP BEEP OFF, 1, 2, 3, 4, 5 Select the volume level of
TUNER TUNE EUROPE, USA, ASIA Select the continent area for
RDS ON, OFF To activate/deactivate RDS.
,
-6dB
Usage
Dependent Volume Control)
compensation level (only when
connected and calibrated, see
‘SMART volume’ in connectors
and ‘SPECIAL FUNCTIONS’).
Level 1 gives a smaller increase
while level 4 gives a greater
increase with respect to the car’s
speed.
Announcement, News bulletins
and Alarm messages.
reference to tune radio setting.
level of Traffi c Announcement,
New bulletins and Alarm
messages.
tuner.
tuner.
tuner.
relative to tuner.
relative to tuner.
Select mute level
confi rmation beeps.
tuning
REGION AUTO, ON, OFF - Select ‘REG ON’ to maintain
regional programe,
- Select ‘REG AUTO’ to switch
programme when the next signal
is stronger,
- Select ‘REG OFF’ to directly
switch to the programme of the
next region.
11

Arrow up
/down
TUNER AF ON, OFF Select ‘OFF’ to prevent the radio
NEWS ON, OFF Activate/deactivate News feature.
,
Usage
from returning to Alternative
Frequencies for the current
station.
CAR
COMP
TA EON DX, LOCAL With local only strongest EON-TA
STEREO ON, OFF Activate/deactivate Stereo.
MW BAND ON, OFF Activate/deactivate MW.
LW BAND ON, OFF Activate/deactivate LW.
SW BAND ON, OFF Activate/deactivate SW.
SET TEMP OFF, C, F Select the unit of temperature
SET SPEED OFF, km/h, mph Select the unit of the speed
BATT WARN OFF, 10.6 V to 14.4 VOLT Select a battery value for warning;
RDS CLOCK RDS CLOCK, MANUAL
CLOCK
CLOCK ON, OFF Activate/deactivate the clock.
CLOCK TYPE 12h, 24h Select the clock format: 12 hours
SET CLOCK 21:58 If ‘MANUAL CLOCK’ is selected,
DATE ON, OFF Activate/deactivate the date
DD/MM/YR DD/MM/YR, YR/MM/DD,
MM/DD/YR
stations are selected.
With DX only stations with a lower
fi eldstrength are used.
display °C (Celsius) or F
(Fahrenheit)
display.
If the battery voltage is below this
value, a warning will be displayed.
To manually set the clock or
automatically update via RDS.
or 24 hours.
Press OK button to start function.
/ ) button to change
Use (
digits, (
or minutes.
Press OK to confi rm settings.
display.
To select the display format of the
calendar date.
/ ) button to select hour
12

CAR
COMP
Arrow up
/down
SET DATE 01/01/2005 To set date display,
SVC ALERT ON, OFF Activate/deactivate CAR
DISTANCE KM, MILE To set the distance travel unit.
,
Usage
Press OK button to start function
/ ) button to select
Use (
day, month, year, (
to change digits. Press OK to
confi rm settings.
SERVICE alert.
/ ) button
WARNING TEMP WARN ON/OFF To set the frost warning wh en
SPEED WARN OFF/ 50 Kmh to 250 Kmh
OFF/ 31 mph to 156 mph
DISPLAY BRIGHTNESS AUTO, 1, 2, 3, .…6 To set the brightness for the
SCROLL OFF, ONCE, ON To set scroll display in MP3 mode.
ANIMATION OFF,
CUBES
ALIEN
FIRE
STARS
the temperature lower than 3 °c,
warning is activated.
To set the speed value for
warning, if you exceed this value.
Note: You can use this function
only when the speed signal is
connected and calibrated.
LCD screen. Use (
to set value from 1 (dim) to 6
(brightness) or Auto with auto
brightness adjustment depends on
ambient brightness.
Use this function to set type of
animations.
,
,
,
/ ) button
RANDOM
,
13

AUDIO
You can set the audio options after enter the SOUND mode.
1. Press the HOME key to select SOUND source.
2. Press OK to enter SOUND mode.
3. Press ESC/HOME to go back to previous menu or HOME page.
You can adjust the sound characteristics to your preference by pressing (
Press OK to confi rm selection.
Arrow up
STYLE
THREATRE ON, OFF
BASS -7 TO +7
TREBLE -7 TO +7
BALANCE -7 TO +7
FADAR -7 TO +7
LOUD OFF, LOW, MID, HIGH
BASS CENTRE (boost) FREQ 60, 80, 100, 120 Hz
TREBLE CENTRE (boost) FREQ 8, 10, 12, 15 KHz
RESET Press “OK” key
CONFIRMATION OF RESET Press “OK” key
/down ,
USER, FLAT, JAZZ, VOCAL, ELECTRO, CLASSIC,
ROCK
/ ) or ( / ) buttons.
14

TUNER
You can select the radio stations options after
enter the tuner source.
Listening to radio
If the unit is in radio mode:
1. Press OK button to enter TUNER menu.
If the unit is not in radio mode:
1. Press the HOME button.
2. Select TUNER from the SOURCE menu.
3. Press OK button.
BAND
Selecting waveband
Your radio is designed for reception of the FM,
MW, LW and SW wavebands.
1. Press OK to enter Tuner menu.
2. Press (
3. Use ( / ) button to select the type of BAND.
- FM LIST
- FM PRESET
- FM AST
- MW PRESET
- MW AST
- LW PRESET
- SW PRESET
4. Press OK to select the required BAND.
Automatic Search
Use search tuning to automatically search for
a station.
1. Use (
2. Use ( / ) button to scroll through the
AUTO STORE
Automatically storing stations (Auto store)
Your radio can automatically memorize the 20
strongest FM stations in the FM AST band and
20 strongest MW (AM) stations in the MW(AM)
AST band.
1. Press OK to enter Tuner specifi c menu.
2. Press ( / ) keys to select AUTO STORE.
3. Press OK to actuate Autostore.
• The set gives a beep and then mutes.
• When it has fi nished, you hear a beep
/ ) button to select BAND.
) button to tune to a station of a lower
frequency or (
memorized stations list of the selected
waveband.
followed by the station stored on preset 1.
) button a higher frequency.
STORE
Storing preselected stations (PRESET)
You can manually store 20 FM stations, 20 MW
stations and 10 LW stations and
10 SW stations in the preset.
• You can store the desired stations directly
on the preset button (1 to 6) by pressing
the button for more than 2 seconds.
• You can store the station in Present 1 to
20 by doing the following:
- Select <FM PRESET> at BAND to enable
this function.
1. Tune in to the desired station.
2. Press OK to enter Tuner menu.
3. Press (
4. Use (
(1 to 20) to be stored.
5. Press OK to store the stations in the
selected preset number.
Note: When storing an FM station, the relevant
RDS information and AF mode (on/off) are also
stored in the preset.
SWAP
You can change the preset station numbering
by swapping 2 selected stations.
1. Tune in to the desired station.
2. Press OK to enter Tuner special menu.
3. Press (
4. Use ( / ) key to scroll preset stations
(Preset 1 to 20).
5. Press OK to swap the preset station.
Note: This function does not apply to FM LIST
waveband.
SCAN
This function allows you to scan the stations or
the presets of the current band.
1. Press OK to enter Tuner special menu.
2. Press (
3. Use (
10 sec, 15 sec) or (OFF) to disable SCAN
function.
4. Press OK to activate the SCAN function.
/ ) keys to select STORE.
/ ) key to select the preset number
/ ) keys to select SWAP.
/ ) keys to select SCAN.
/ ) keys to select scan time (5 sec,
15

NAME
Use this function to name a radio station with
maximum of 8 characters (Only apply to non
RDS stations).
1. Press OK to enter Tuner special
menu.
2. Press (
3. Press OK to enter function.
ENTERING NAME
1. Scroll through the letters with (
keys.
2. Use (
uppercase or lowercase letters,
numbers or symbols.
3. Press OK to select desired character
and ESC or DEL to delete previous
character.
4. Press OK again to confi rm the same.
EDIT
1. Use (
2. Press ESC to delete previous
characters.
3. Scroll through the letters with (
keys.
4. Press OK to select desired character.
DELETE
1. Use ( / ) button to select DEL.
2. Press ESC to delete previous
characters.
3. Press OK or QUIT to exit function.
TUNE
1. Press OK to enter Tuner special menu.
2. Press (
3. Use ( / ) key to select auto or manual
tuning for tuner.
• Auto Loc to search for strong stations fi rst
and then weak stations.
• Auto DX to search for all receivable
stations.
• Manual - allows you to search for
station based on frequency step.
/ ) keys to select NAME.
/ )
/ ) keys to get to the
/ ) button to select EDIT.
/ )
/ ) keys to select TUNE.
STATION
With this function, you can view all preset
stations in a list, scroll and select the station
from the list.
1. Press OK to enter Tuner menu.
2. Press OK to view the preset station list.
3. Use (
4. Press OK to select the station.
LIST UPDATE
Activate list update will store all stations
(max 60) that the tuner can pick up at the car
locations. This function only available in ‘FM list’
Band
1. Go to 'FM LIST' band.
2. Press OK to enter Tuner Special menu.
3. Press (
4. Press OK to activate the list update.
LIST BY FUNCTION
You can list all stations receivable at car
location by classifi ed them based on Strength,
PI code, Country code, PTY or Name. This
will help you to easy access the required tuner
stations.
1. Press ( / ) to search for stations in FM
- Strength
- PI code
- Country
- PTY
- Name
2. For country and PTY mode, press OK to
3. Press ( / ) key to scroll COUNTRY
4. Press OK to activate the selection.
/ ) keys to select desired memorized
station.
/ ) button to select 'LIST UPDATE'.
List within level
enter next level to select specifi c country
code (code 1, 2….F) or PTY (NEWS,
SPORTS, NATION…)
codes and PTY modes.
FM SENSOR
This function allows area mode selection.
Based on car location and geography
surrounding, user can select CITY,
MOUNTAIN, COUNTRYSIDE or ALL TERRAIN
for best tuner reception.
1. Press OK to enter Tuner menu.
2. Press ( / ) keys to select FM SENSOR.
3. Use ( / ) keys to select FM sensor type
16

Country codes for the countries in the European Broadcasting Area.
Country Country Code Country Country Code
Albania AL Macedonia MK
Algeria DZ Madeira (Portugal) PT
Andorra AD Malta MT
Austria AT Moldova MD
Azores (Portugal) PT Monaco MC
Belgium BE Morocco MA
Belarus BY Netherlands NL
Bosnia Herzegovina BA Norway NO
Bulgaria BG Palestine PS
Canaries (Spain) ES Poland PL
Croatia HR Portugal PT
Cyprus CY Romania RO
Czech Republic CZ Russian Federation RU
Denmark DK San Marino SM
Egypt EG Slovakia SK
Estonia EE Slovenia SI
Faroe (Denmark) DK Spain ES
Finland FI Sweden SE
France FR Switzerland CH
Germany DE Syrian Arab Republic SY
Gibraltar (United Kingdom) GI Tunisia TN
Greece GR Turkey TR
Hungary HU Ukraine UA
Iceland IS United Kingdom GB
Iraq IQ Vatican City State VA
Ireland IE Yugoslavia YU
Israel IL
Italy IT
Jordan JO
Latvia LV
Lebanon LB
Libya LY
Liechtenstein LI
Lithuania LT
Luxembourg LU
Country Code (1 to F)
123456789ABCDEF
DE DZ AD IL IT BE RU PS AL AT HU MT DE EG
GR CY SM CH JO FI LU BG DK GI IQ GB LY RO FR
MA CZ PL VA SK SY TN LI IS MC LT YU ES NO
IE TR MK NL LV LB HR SE BY
MD EE UA PT SI BA
Note: To ensure the headunit refresh with latest radio stations. It is recommended to perform a
LIST UPDATE before activate the LIST BY FUNCTION.
17

RADIO DATA SYSTEM (RDS) ON FM
Many FM stations broadcast RDS information.
This set uses the RDS information to offer you
many advantages including:
DISPLAY OF STATION NAME
The set displays the name of the station instead
of its frequency.
AUTOMATIC FREQUENCY (AF)
The set remains tuned to the current station
by continually searching for the best possible
alternative frequency for reception.
Note : You can switch off AF when not required,
see ‘SETUP’, ‘Tuner’ option ‘AF’.
ALARM MESSAGES (PTY ALARM)
This set automatically receives emergency
messages made by the broadcaster.
• During the messages the display shows
'ALARM' and the station-name alternately.
TRAFFIC ANNOUNCEMENTS (TA)
You can activate the TA mode to give priority
so as to hear announcements related to these
subjects, (even if you play a CD/MP3 or mute
the set).
Activate/deactivate TA
1. Press TA button to activate/deactivate TA.
Activate/deactivate NEWS*
1. Go to ‘SETUP’, ‘TUNER’ and select option
‘NEWS’, set the value to ON.
Note:
You can switch off RDS features if not required.
1. Go to SETUP, TUNER and select
option RDS to OFF.
• All above RDS related features e.g. TA,
NEWS* etc... will be deactivated when
option 'RDS' is set to 'OFF'.
CD/MP3 Player
Loading CD in the CD player
1. Press REL to open the front.
2. Insert the CD (label upwards) into the
slot.
3. Close the front: The playback starts.
Ejecting CD from the CD Player
1. Press REL to open the front.
2. Press the EJECT button to eject the CD.
3. Remove the disc.
4. Close the front.
Listening to CD/MP3
If the CD is already inserted:
1. Press the HOME button.
2. Use the (
3. Press OK to get to the CD source.
You can set the CD options after selecting
the CD source.
Note 1: If fi rst track is a data track, the disc
will treat as MP3. (If no *.MP3 fi le was found
throughout the disc, then it will treat as audio
disc). If fi rst track is an audio track, the disc will
treat as audio disc.
/ ) button to select CD source.
If you activate TA/NEWS mode :
• You will hear the Traffi c/NEWS*
Announcements when broadcast.
• If the tuned station does not enable the
reception of Traffi c Announcements, the
display shows
‘NO TA’. The radio automatically searches an
appropriate station.
News announcements may be interrupted
by Traffi c Announcements (if the TA mode is
switched on).
Interrupting Traffi c Announcement
If you do not wish to continue listening to a
particular Traffi c Announcement or News mode,
you can interrupt it without switching off the
mode.
1. Press TA button once.
• The set will return to the previous operating
mode.
18
Note 2: If the ‘Disc Name’ is programmed to
the disc, each time this disc is reloaded in the
systems (CD drive or CD Changer), the ‘Disc
Name’ stored in the memory will be displayed in
the start up sequence.
Note 3: If TA and NEWS are set to ON,
announcements will interrupt CD playback.
CD playback
This CD player is suitable only for 12cm disc
and can read both audio and MP3 format CD.
Please do not use irregular shaped CD.
MP3 playback
You are able to listen to MP3 fi les that conform
to MPEG1/2 & 2.5-Layer 3 at bit rate up to
320kbps or Variable Bit Rate (VBR) burned ID3
tag on a CD-R or CD-RW disc in ISO9660 level
1 and 2 format are also supported.

Changing directory in MP3
1. Press (
directory.
• Playback begins on the fi rst fi le in the
chosen directory.
• When the end of directory is reached, the
playing function continues with the fi rst
track of the next directory.
Notes on MP3
1. The unit cannot read an MP3 fi le that has a
fi le extension other than "MP3".
2. The unit can play up to maximum 300 tracks
and support maximum 50 directories per disc.
3. The unit may not play the fi rst track in the
order that you wrote them to the disc
4. The unit plays only the fi rst session if the disc
contains both CD audio tracks and MP3 fi le.
5. When playing a disc of 8k bps or variable bit
rate (VBR), the elapsed playing time in the
display window may not be correct.
6. To display up to 30 characters for a song title,
album title and artist's name, 32 characters
for directory name, ID3TAG version 1.1 is
required. Characters other than uppercase/
lowercase letters ("Aa to Zz") and underscore
("_") may not be displayed.
7. To enjoy high quality sound, we recommend
converting to MP3 fi les with sampling
frequency of 44.1 kHz and a fi xed bit rate of
128kbps.
8. Make sure that a MP3 CD-R/CD-RW is
burned that is formatted as a data disc and
NOT as an audio disc.
9. MP3 fi les are not compatible with packet
write data transfer.
Playing a CD-R or CD-RW
Depending on the type of CD-R/CD-RW CD,
surface condition of the disc, as well as the
performance and condition of the CD writer,
certain CD-R/CD-RW CD may not operate
normally on this unit.
Playing a “copy protected” non-conforming
audio CD
Due to use of copy protection schemes of
some audio CDs which are non conformance to
international audio CDs standards (Red Book),
these type of copy protected disc(s) may not
play on this unit.
Previous/Next track
1. Use the (
next song track.
2. Press the ( / ) buttons for previous or next
5 tracks (for audio CD).
/ ) button to select desired
/ ) buttons to select previous or
Fast Backward/Forward
1. Press and hold the (
backward and fast forward.
• Normal playback resumes when you
release the button.
SCAN Track
Use this function to activate the track scan to
listen to the fi rst few seconds of each track.
1. Press OK to enter CD menu.
2. Press (
3. Use (
10 sec, 15 sec) or (OFF) to disable SCAN
function.
• SCAN function will launch upon selection of
scan time.
RANDOM
To activate or deactivate the random track, disc
on directory play
1. Press OK to enter CD menu.
2. Press (
a. CD: ON, OFF
b. MP3: OFF, DIR, ALL
• RANDOM mode will launch upon selection of
the entry above.
REPEAT
To continually repeat current track.
1. Press OK to enter CD menu.
2. Press ( / ) button to select.
a. CD: OFF, SONG
b. MP3: OFF, SONG, DIR
• REPEAT mode will launch upon selection of
the entry above.
ID3
To view the ID3 information of MP3 disc (song
title, artist name, album title, year).
1. Press OK to enter CD menu.
2. Use ( / ) button to scroll to ID3 mode.
3. Press OK to enter ID3 mode.
4. Use ( / ) button to scroll screen.
PLAYLIST (for MP3 disc only)
You can create your own playlist. A same disc
only can created one playlist. The headunit can
have 10 playlist for MP3 disc each 50 songs.
1. Press OK to enter CD menu.
2. Use ( / ) button to scroll to PLAYLIST
mode.
3. Press OK to go to the list.
4. Use ( / ) button to select desired track.
/ ) button to select SCAN mode.
/ ) button to select scan time (5 sec,
/ ) button to select.
/ ) buttons for fast
19

Add playlist (for MP3 disc only)
This function is to add the song you desired to
the play list.
To add playlist of MP3.
1. Select desired song.
2. After the song start playing, press OK to
enter CD menu..
3. Use (
4. Press OK to add song to playlist.
Delete playlist (for MP3 disc only)
1. Press OK to enter CD menu.
2. Use ( / ) button to scroll to DELETE.
3. Use (
a. This playlist
b. Other playlist
4. If select this playlist, Press OK to remove
If select other playlist, Press OK to view
a. Use (
b. Press OK to delete the selected playlist.
CD TEXT
Use this function to view CD text.
1. Press OK to view CD text.
• Songname
• Artist
Name (CD title)
Use this function to name up to max 25 audio
CD and 10 MP3 CD (for MP3 disc,only can
name disc after the playlist is created) with
a maximum of 8 characters in each title: this
name will appear on display during playback.
1. Press OK to enter CD menu.
2. Use the (
3. Use ( / ) button to select ENTER,EDIT or
4. Press OK to display an alphanumeric list as
/ ) button to select ADD function.
/ ) button to scroll to select.
current playlist.
playlist.
/ ) button to scroll to the playlist
you want to delete.
/ ) button to scroll to NAME
DELETE.
typewriter.
4. Press OK again to confi rm the name.
DELETE
1. Press OK to delete the name.
Note:
• The title is attributed when all characters
and spaces are confi rmed. If the memory is
full, the CD/MP3 NAME function is no longer
available: you have to delete a CD/MP3 name.
• To delete a character, press ESC, or use (
button to go to the DEL and press OK.
CD R/W (multi-session)
Use this function to enable or disable play of
CD-R/RW disc with multi-session.
1. Press OK to enter CD menu.
2. Use the ( / ) button to scroll to CD R/W
3. Use the ( / ) button to select ON or OFF.
)
CD/MP3/DVD Changer
Loading disc (CD/MP3/DVD) in the changer
If a changer is connected, you can use the
following function (for more information about
the CHANGER, contact your dealer). This unit
is compatible with analogue mode Changer
only.
First you must set the CHANGER option (in
setup, SYSTEM menu) to ON.
1. Check that the disc magazine is loaded with
discs.
2. Select CHANGER from HOME page.
3. Press OK to confi rm selection.
4. Select the desired disc with the (
• At the end of the disc, playback
automatically continues with the next disc.
Any missing disc is automatically skipped.
Note 1: If the magazine is not in place or the
magazine is empty, user cannot select changer
source.
/ ) keys.
ENTERING NAME
1. Scroll through the letters with (
2. Use (
or lowercase letters, numbers or the
symbols.
3. Press OK to select desired character and
ESC to delete previous character.
4. Press OK again to confi rm the name.
EDIT
1. Press ESC to delete previous characters.
2. Scroll through the letters with ( / ) keys.
3. Press OK to select desired character.
/ ) keys to get to the uppercase
/ ) keys.
20
Note 2: TA and NEWS announcements may
interrupt disc playback.
Note 3: Some discs contain text data (song
titles, singer's name, etc.) which are displayed
on screen during CHANGER playback.
Ejecting CD from the CD Changer
1. OPEN the front.
2. Press the EJECT button to eject the CD.
3. Close the front.
Note: In eject error case, the CD is reloaded.

Playing a CD-R or CD-RW
Depending on the type of CD-R/CD-RW CD,
surface condition of the disc, as well as the
performance and condition of the CD writer,
certain CD-R/CD-RW CD may not operate
normally on this unit.
Playing a “copy protected” non-conforming
audio CD
The system may not be able to play or play
properly copy-protected audio CDs which do
not correspond to the Compact Disc Audio
Standard.
Previous/Next track
1. Use the (
next song track.
Note: When playing an audio CD in DVD/MP3
changer, press ( / ) key for previous or next
5 tracks.
Previous/Next Disc
1. Press the ( / ) buttons for previous or next
disc. (CD Changer)
2. Disc 1 to 6 can also be selected by pressing
presets 1 to 6 for CD/MP3/DVD Changer.
/ ) buttons to select previous or
SCAN TRACK
Use this function to activate the track scan to
listen to the fi rst few seconds of each track.
1. Press OK to enter CD menu.
2. Press (
3. Use (
SCAN.
a. CD Changer & DVD Changer: OFF, ON
b. MP3 Changer: OFF, 5 sec, 10 sec, 15 sec.
Note: For DVD Changer, the function is same
as CD Changer.
/ ) button to select SCAN mode.
/ ) button to select SCAN to disable
TELEPHONE with CIM Box /
Handsfree Car Kit
Telephoning by means of the handset while
driving is dangerous and is illegal in almost all
countries. Use the telephone in conjunction with
a hands-free unit, or pull over in a suitable place
where you will not endanger other road users.
Your headunit is designed to work with CIM Box
and/or Handsfree Car Kit to have maximum
handsfree functionality.
Get the phone connect correctly before it can
function properly.
Changing Directory
Changing directory of MP3 disc in the MP3/
DVD Changer
1. Select a directory with the ( / ) keys.
2. Playback begins on the fi rst fi le in the chosen
directory. When the end of the directory is
reached, the playing function continues with
the fi rst track on the next directory.
RANDOM
To activate or deactivate the random track, disc
on directory play
1. Press ( / ) button to select the random
operations from various options.
a. CD Changer & DVD Changer: OFF, ON
b. MP3 Changer: OFF, DIR, ALL
2. Press OK to enter random function.
REPEAT
To activate or deactivate the song, disc,
directory repeat playback function.
1. Press (
a. CD Changer & DVD Changer: OFF
SONG, DISC
b. MP3 Changer: OFF, SONG, DIR
2. Press OK to start function.
/ ) button to select:
Note: For VDOdayton CIM Box (CI3000 or
CIX3000 Blue) and Handsfree Car Kit, consult
your dealers for details.
Note: When bluetooth ON, pairable with
external device. When bluetooth OFF, not
pairable with external device.
ENTER PHONE MODE:
1. Press HOME to select SOURCE PHONE.
2. Press OK to enter Phone mode.
3. Use (
4. Use (
Note: CIM box has to be connected to the
headunit before you can enter PHONE mode.
INCOMING CALLS
When there is an incoming call, ring tone will
come out via radio speaker and current function
source will be paused.
1. Press OK to accept the call and start
2. Press ESC or QUIT to stop the conversation.
/ ) button to select telephone
function.
/ ) button to select an option.
conversation.
21

Headunit, CIM Box and Handsfree Kit connectivity / Setup:
Depends on the connectivity and setup, headunit will response differently.
1) Headunit and Handsfree car kit
Headunit Setup menu Receive incoming call
HFREE OFF Headunit no action, continue playing
CIM OFF
CIM OFF
2) Headunit, CIM Box and Handsfree car kit (with speakers)
Headunit Setup menu Receive incoming call
CIM OFF
CIM ON
HFREE HI
HFREE LO
HFREE OFF Headunit no action, continue playing
HFREE HI
HFREE LO
HFREE OFF Headunit no action, continue playing
HFREE HI
HFREE LO
HFREE OFF Headunit continue playing current
HFREE HI
HFREE LO
current source.
Display shows ‘Phone’, ready to receive
call. Phone sound output via car
speakers.
current source.
Display shows ‘Phone’, ready to receive
call. Phone sound output via car
speakers.
current source. Phone sound output via
car kit speaker.
Headunit no action, continue playing
current source. Phone sound output via
car kit speaker.
source. Phone sound output via car kit
speaker.
Headunit continue playing current
source. Phone sound output via car kit
speaker.
3) Headunit, CIM Box and Handsfree car kit (without car kit speakers, audio output connect
to headunit via D1 connector)
Headunit Setup menu Receive incoming call
CIM OFF
CIM ON
HFREE OFF Headunit no action, continue playing
HFREE HI
HFREE LO
HFREE OFF Do not connect this way, phone does
HFREE HI
HFREE LO
current source.
Display shows ‘Phone’, ready to receive
call. Only Handsfree operation, no
CIM function (dial out/message/call
list…etc)
not work.
Display shows full CIM function, Phone
sound output via car speakers.
22

INCOMING SMS
1. Screen shows incoming message and
telephone number.
2. Press ( / ) to select READ or QUIT.
3. Press OK to read message.
4. Press ( / ) to scroll message if it is a long
message.
5. Press ( / ) to DEL/CALL/QUIT message.
PHONE BOOK
Personal phone book in the mobile phone are
stored in SIM and/or phone memory.
You can download both phonebook from SIM
and/or memory to CIM Box and later display on
headunit screen.
1. Select source PHONE.
2. Press (
3. Press (
4. Press OK to perform download function.
(Download function may take few minutes
depends on memory size).
PHONE BOOK (Make Call)
1. When download completed, you can list the
phonebook in alphabetical order by select
‘Cache’ and press OK.
2. Press ( / ) to select required contact person.
3. Press OK to show phone number (if the
contact person name is from phone memory)
or to activate the phone call directly (if the
contact person name is from SIM card).
4. Press OK to make a call (if the contact
person name is from phone memory).
CALL LIST
Show list of MISSED CALL, LAST DIAL and
RECEIVED.
1. Press ( / ) to scroll to MISSED CALL or
RECEIVED CALLS OR LAST DIAL.
2. Press OK again to make a call.
DIAL NUMBER
1. Press OK to enter typewriter.
2. Use ( / / / ) and OK button to key in
the number
3. Press DEL to delete the error digit.
4. Press OK to activate the dialing.
5. Press QUIT to stop the call.
6. Press ESC to get out of the Dial mode.
CALLING
1. Press ESC or QUIT to end call.
CONVERSATION
During conversation the user can press QUIT to
end the conversation.
/ ) to select PHONEBOOK.
/ ) to select DOWNLOAD.
SOFTWARE
1. Use (
2. Press (
/ ) button to select SOFTWARE
UPDATE or BLUETOOTH PAIRING.
/ ) and OK button to select the
options and next setting.
AUXILIARY
This function enables or disables an auxiliary
device connected to the set.
1. Press HOME key to enter HOME page.
2. Use ( / ) button to select AUX IN.
3. Press OK button to activate the device.
Note: Aux-In in the SETUP mode must be
turned ON fi rst.
SD/MMC PLAYBACK
(for CD and MP3 function)
You can use the smart card or multimedia card
to play the music fi les.
1. Press REL to open the front.
2. Insert the SD/MMC (label upwards) into the
slot.
3. Close the front and Press HOME
key to enter HOME page.
4. Press OK to enter SD/MMC mode.
5. Press (
6. Press ( / ) for MP3 directory.
Note: There are many different SD/MMC cards
in the market, due to different format, tolerance
and deviation, it may not be played on this unit.
ID3
To view the ID3 information of MP3 disc (song
title, artist name, album title, year).
1. Press OK to enter SD/MMC menu.
2. Use ( / ) button to scroll to ID3 mode.
3. Press OK to enter ID3 mode.
4. Use ( / ) button to scroll screen.
SCAN Track
Use this function to activate the track scan to
listen to the fi rst few seconds of each track.
1. Press OK to enter SD/MMC menu.
2. Press (
3. Use ( / ) button to select scan time (5 sec,
10 sec, 15 sec) or (OFF) to disable SCAN
function.
• SCAN function will launch upon selection of
scan time.
/ ) button for previous or next track.
/ ) button to select SCAN mode.
23

RANDOM
To activate or deactivate the random track, disc
on directory play
1. Press OK to enter SD/MMC menu.
2. Press (
a. CD: ON, OFF
b. MP3: OFF, DIR, ALL
• RANDOM mode will launch upon selection of
the entry above.
REPEAT
To continually repeat current track.
1. Press OK to enter SD/MMC menu.
2. Press (
a. CD: OFF, SONG
b. MP3: OFF, SONG, DIR
• REPEAT mode will launch upon selection of
the entry above.
/ ) button to select.
/ ) button to select.
CAR COMPUTER
You can set the computer parameters.
Car computer menu
1. Press HOME key to select COMPUTER
source.
2. Press OK to enter car COMPUTER mode.
3. Use the ( / ) button to select function.
4. Use the (
5. Press ESC/HOME to go back previous menu
or HOME page.
SPEED INFO
1. Use ( / ) button to select SPEED INFO.
2. Use ( / ) button to select: Max (Maximum
speed), Average (Average speed) or Actual
(Actual speed).
Note: You can use this function only when the
speed signal is connected and calibrated.
TRAVEL
You can view the travel time and distance with
this function.
1. Use ( / ) keys to select TRAVEL to view
information.
TEMPERATURE
1. Use (
TEMPERATURE.
/ ) button to choose settings.
/ ) button to select and view the
BATTERY VOLTAGE
1. Use (
BATTERY voltage.
CLOCK/DATE
1. Use (
RESET TRIP
1. Use (
2. Use (
3. Press OK to activate reset.
CAR ALERT SERVICE
1. Use ( / ) button to select SERVICE.
2. Use ( / ) button keys to select:
Note: Service alert will sound and shown on
display when preset date or distance is reach.
User can select OK to STOP or ‘SLEEP’. If OK
is selected, service alert will be cancelled. If
‘SLEEP’ is selected, service alert will sound
again every 15 minutes until it is cancelled.
“Service Alert” , once shows in display , it will
go to sleep for another 15 min and alert the
user every 15 mins until it is cancelled
/ ) button to select and view
/ ) button to view CLOCK/DATE.
/ ) button to select RESET TRIP.
/ ) button to select: MAX SPEED, AV.
SPEED, TRIP or ALL DATA.
NEXT SERVICE DATE or AFTER.
SPECIAL FUNCTIONS
CONFIGURATION
Calibrating the Speed
To avoid unneccessary distraction we advise
that this procedure is carried out with the help
of somebody else.
1. While stationary, hold down the 'OK'
key and turn on the set.
2. The set mutes.
Display shows 'RE-CALIBRATION'
and '50KM/H' (30 MPH) alternately.
3. Now drive to 50KM/H (30 MPH).
Always obey the highway code and
current traffi c restrictions and conditions!
4. Once 50KM/H (30 MPH) is reached, press
OK key. You hear a beep and display shows
'CALIBRATION OK'.
5. Now turn the set off and then on again to
return to normal operation. Level 2 is chosen
as default value for SMART Volume.
Note: You can use this function only if the
temperature sensor is connected.
24
Note: If you want to abort the calibration before
reaching the speed, press ESC.

SMART VOLUME (SDVC- Signal dependent
volume control)
See ‘INSTALLATION’ for connection
instructions.
To compensate for surrounding noise, this
function automatically increases the volume
of the set with respect to the car’s speed. Four
compensation levels can be selected. Level 1
gives a small increase while level 4 gives a
greater increase. See ‘SETUP’, option ‘SMART
VOL’ to select the level until you fi nd one which
suits your car.
TELEPHONE IN WITH HANDSFREE CARKIT
You can connect the headunit to handsfree car
kit to have a simple handsfree function.
Go to ‘SETUP’ mode, enter ‘SYSTEM’, select
the options [HFREE OFF, MUTE LO, MUTE HI,
HFREE LO, HFREE HI]
- Select ‘HFREE OFF’ if no car phone is
connected to the set.
- Select ‘HFREE LO’ or ‘HFREEHI’ (according
to phone type) to automatically interrupt
the set’s sound output when using your car
phone.
Note: Consult your dealer for appropriate
telephone in adaptor cable to your car kit.
TELEPHONE MUTE
You can mute the headunit speaker sound by
connecting the telephone mute signal to the
headunit mute wire (pink).
Go to ‘SETUP’ mode, enter SYSTEM, select
either ‘MUTE LO’ or ‘MUTE HI’ depends on type
of handphone. If it is set wrongly, set’s display
will show ‘phone’ and sound will be muted.
CLOCK FUNCTION
Setting the clock (manually)
- See ‘SETUP’, option ‘CLOCK’.
Note:
You can select 12 hour or 24 hour clock display.
RDS clock (auto update)
You can select an automatic update of the clock
via the RDS radio signal.
- See ‘SETUP’, option ‘CLOCK’.
The transmitted time via RDS can be incorrect.
SERVICE REMINDER
- See ‘SETUP’ option ‘SERVICE ALERT’.
SERVICE DISTANCE UNIT
- See ‘SETUP’ option ‘DISTANCE’.
INTERVAL DISTANCE OF SERVICE
- See ‘CAR COMPUTER’, option ‘SERVICE
ALERT’ to select the right interval distance.
Note:
- ‘SERVICE’ function is only valid when car
speed has calibrated.
SPEEDING WARNING
You can set a safety speed, when your drive
speed is faster than your setting safety speed,
the radio will remind you. See ‘SETUP’ option
‘WARNING’ to set your safety speed.
Note:
- This function is only valid when car speed has
calibrated.
TEMP WARNING
You can set this function to warn you when
temperature is lower than 3 degree Celsius.
See ‘SETUP’, option ‘WARNING’.
TROUBLESHOOTING
SYMPTOMS CAUSE/REMEDY
NO POWER Verify:
The radio does not function.
> the set is well inserted in the dashboard (see
MOUNTING).
> the set is well connected (see Installation
Card and INSTALLATION)
The set does not function and the display
screen does not light up.
> Switch off the set.
> Check the fuse (see INSTALLATION).
NO SOUND Verify:
The display screen lights up but the set gives
no sound (or only a whistle).
> Increase the volume: if you are listening to
the radio, move to an area where the station
reception is better.
> Check the antenna and its connection (see
INSTALLATION).
> Check if the station search is fi nished.
> If your mobile phone is connected, check the
Phone setting.
Verify the speakers connections to B (see
INSTALLATION) and the speakers balance (see
Sound Menu).
25

There is no sound from the loudspeakers (front
and rear), either for radio or for CD.
There is no sound from the loudspeakers after
having connected a telephone.
Verify your telephone installation:
> connection inside the TEL IN connector D1
(see INSTALLATION)
> the detection level setting (see SETUP Init
Menu).
There is no sound from the subwoofer after
having connected an external amplifi er
Verify your external amplifi er installation:
> connection of the external amplifi er on D2
(see INSTALLATION)
SOUND TROUBLE Verify:
The sound level is too low during traffi c
announcements or news bulletins
Adjust the volume for announcements (see
Sound Setup Menu).
The sound level decreases Display the set
temperature: if the temperature is too hot, the
sound level automatically decreases.
The telephone sound is distorted
> decrease the telephone sound volume until
no more distortion.
> increase with the set, the phone volume (see
SETUP Menu).
CD ERRORS Verify:
During use of the CD player or the MP3 player,
the set does not function and displays ERROR
CD. During use of the CD changer, the set
does not function and displays ERROR CD.
> the CD is properly inserted in the CD player,
> the player contains at least one CD,
> the disc has been correctly inserted; no dirty,
exotic or damaged disc has been loaded; the
player front is properly shut.
> the magazine is properly inserted in the CD
changer,
> the changer contains at least one CD,
> the discs have been correctly inserted; no
dirty, exotic or damaged discs have been
loaded; the changer front is properly shut.
CD name not available in the CD menu Delete
at least one CD name using the Del name
function. Remember that you can name more
than 50 CD names.
CDC ERROR Verify:
> The display shows CDC ERR the link
between the CD changer and the amplifi er is
inoperative.
> If the headunit does not work with Changer,
check whether Changer is switched to
ANALOGUE mode.
Contact your dealer.
TEMPERATURE ERROR Verify:
The display shows TEMP ERR Verify the
temperature sensor is well connected (see
INSTALLATION).
The display shows HI TEMP
The audio system has switched to heatprotection mode: the sound level is reduced.
The audio system will return to normal
performance as soon as the ambient
temperature has dropped.
FUNCTION ERROR Verify:
SDVC not available
> the speedometer is well connected in A1 (see
CONFIGURATION)
> the speed calibration is not calibrated (see
CONFIGURATION)
26
 Loading...