


 Loading...
Toshiba Personal Computer
Satellite A200
Maintenance Manual
TOSHIBA CORPORATION
[CONFIDENTIAL]

Copyright
© 2007 by Toshiba Corporation. All rights reserved. Under the copyright laws, this manual cannot be reproduced in any form without the prior written permission of Toshiba. No patent liability is assumed with respect to the use of the information contained herein.
Toshiba Personal Computer Satellite A200 Maintenance Manual
First edition March 2007
Disclaimer
The information presented in this manual has been reviewed and validated for accuracy. The included set of instructions and descriptions are accurate for the A200 Series at the time of this manual's production. However, succeeding computers and manuals are subject to change without notice. Therefore, Toshiba assumes no liability for damages incurred directly or indirectly from errors, omissions, or discrepancies between any succeeding product and this manual.
Trademarks
IBM is a registered trademark, and OS/2 and PS/2 are trademarks of IBM Corporation. Microsoft, MS-DOS, Windows, DirectSound and DirectMusic are registered trademarks of Microsoft Corporation.
Intel and Pentium are registered trademarks, and SpeedStep is a trademark of Intel Corporation. Sound Blaster is a registered trademark of Creative Technology Ltd.
Centronics is a registered trademark of Centronics Data Computer Corporation. Photo CD is a trademark of Eastman Kodak.
All other properties are trademarks or registered trademarks of their respective holders.
ii |
[CONFIDENTIAL] Satellite A200 Series Maintenance Manual |

Preface
This maintenance manual describes how to perform hardware service maintenance for the Toshiba Personal Computer Satellite A200, referred to as the M100 Series in this manual.
The procedures described in this manual are intended to help service technicians isolate faulty Field Replaceable Units (FRUs) and replace them in the field.
SAFETY PRECAUTIONS
Four types of messages are used in this manual to bring important information to your attention. Each of these messages will be italicized and identified as shown below.
DANGER: “Danger” indicates the existence of a hazard that could result in death or serious bodily injury if the safety instruction is not observed.
WARNING: “Warning” indicates the existence of a hazard that could result in bodily injury if the safety instruction is not observed.
CAUTION: “Caution” indicates the existence of a hazard that could result in property damage if the safety instruction is not observed.
NOTE: “Note” contains general information that relates to your safe maintenance service.
Improper repair of the computer may result in safety hazards. Toshiba requires service technicians and authorized dealers or service providers to ensure the following safety precautions are adhered to strictly.
Be sure to fasten screws securely with the right screwdriver. If a screw is not fully fastened, it could come loose, creating a danger of a short circuit, which could cause overheating, smoke or fire.
If you replace the battery pack or RTC battery, be sure to use only the same model battery or an equivalent battery recommended by Toshiba. Installation of the wrong battery can cause the battery to explode.
Satellite A200 Series Maintenance Manual |
[CONFIDENTIAL] |
iii |

The manual is divided into the following parts:
Chapter 1 Hardware Overview describes the M100 Series system unit and each FRU.
Chapter 2 Troubleshooting Procedures explains how to diagnose and resolve FRU problems.
Chapter 3 Test and Diagnostics describes how to perform test and diagnostic operations for maintenance service.
Chapter 4 Replacement Procedures describes the removal and replacement of the FRUs.
Appendices The appendices describe the following:
Handling the LCD module
Board layout
Pin assignments
Keyboard scan/character codes
Key layout
Screw torque list
Reliability
Conventions
This manual uses the following formats to describe, identify, and highlight terms and operating procedures.
Acronyms
On the first appearance and whenever necessary for clarification, acronyms are enclosed in parentheses following their definition. For example:
Read Only Memory (ROM)
Keys
Keys are used in the text to describe many operations. The key top symbol as it appears on the keyboard is printed in boldface type.
Key operation
iv |
[CONFIDENTIAL] Satellite A200 Series Maintenance Manual |

Some operations require you to simultaneously use two or more keys. We identify such operations by the key top symbols separated by a plus (+) sign. For example, Ctrl + Pause (Break) means you must hold down Ctrl and at the same time press Pause (Break). If three keys are used, hold down the first two and at the same time press the third.
User input
Text that you are instructed to type in is shown in the boldface type below:
DISKCOPY A: B:
The display
Text generated by the computer that appears on its display is presented in the typeface below:
Format complete
System transferred
Satellite A200 Series Maintenance Manual |
[CONFIDENTIAL] |
v |

Table of Contents
Chapter 1 Hardware Overview |
|
|
1.1 |
Features ............................................................................................................................ |
1-1 |
1.2 |
System Unit ...................................................................................................................... |
1-5 |
1.3 |
2.5-inch Hard Disk Drive ................................................................................................. |
1-6 |
1.4 |
Optical device Drives ....................................................................................................... |
1-8 |
1.5 |
Power Supply ................................................................................................................. |
1-10 |
1.6 |
Batteries.......................................................................................................................... |
1-12 |
Chapter 2 Troubleshooting Procedures |
|
|
2.1 |
Troubleshooting Introduction........................................................................................... |
2-3 |
2.2 |
Troubleshooting Flowchart ............................................ |
2-Error! Bookmark not defined. |
2.3 |
Power Supply Troubleshooting........................................................................................ |
2-9 |
2.4Display Troubleshooting ...................................……….2-Error! Bookmark not defined.
2.5 |
Keyboard Troubleshooting............................................................................................. |
2-17 |
2.6 |
External USB Devices Troubleshooting ........................................................................ |
2-19 |
2.7 |
TV-Out Failure Troubleshooting ................................................................................... |
2-21 |
2.8 |
TouchPad Troubleshooting ............................................................................................ |
2-23 |
2.9 |
Speaker Troubleshooting................................................................................................ |
2-25 |
2.10Optical drive troubleshooting.................................................................................……2-27
2.11 |
Modem Troubleshooting ................................................................................................ |
2-30 |
2.12 |
Express card Troubleshooting........................................................................................ |
2-32 |
2.13 |
IEEE 1394 Troubleshooting........................................................................................... |
2-34 |
2.14 |
Wireless LAN Troubleshooting ..................................................................................... |
2-36 |
2.15 |
Camera Troubleshooting .............................................................................................. |
2-38 |
2.16Bluetooth Troubleshooting…………………...…………………………….………… 2-40
2.174 in 1 card Troubleshooting……………………………………………………..……..2-42
2.181st HDD Troubleshooting………………………………………………………………2-44
2.192nd HDD Troubleshooting……………………………………..…………………….....2-46
vi |
[CONFIDENTIAL] Satellite A200 Series Maintenance Manual |

Chapter 3 Tests and Diagnostics
3.1The Diagnostic Test…………………………………….……...………………………..3-3
3.2Executing the Diagnostic Test…………………………………………………………..3-5
3.3Display Configuration…………………….……………………………………………..3-9
3.4Speaker Audio Test……………………………………………………………………..3-10
3.5Fan ON/OFF Test………………………………………………………….……………3-11
3.6Main Battery Charge Test………………………………………………….…………...3-12
3.7FDD Test………………………………………………………………….…………….3-13
3.8ODD Test………………………………………………………………….……………3-14
3.9Keyboard Test………………………………………………………….……………….3-15
3.10Mouse (Pad) Test………………………………...…………………….………………3-17
3.11LCD Pixels Mode Test…………………………...………………….…………………3-19
3.12Magnetic switch Test……………...…………………………………….……………..3-20
3.13LAN Test…………………………………………………….……………..…………..3-21
3.14RTC Test………………………………………………….………..…………………..3-24
3.15Read 1394 GUID……………………………………….……………..……………….3-25
3.16Speaker EQ Type Check&Re-Write…………………………….……………………...3-26
3.17Button Test……………………………………………………….……………………..3-27
3.181st HDD Test…………………………………….………….…………………………..3-28
3.192nd HDD Test…………………………………..……………………………………….3-31
3.20Satellite LED Test………………………………………………………………………3-34
Chapter 4 Replacement Procedures
4.1General
………………………………………………………………………………..Error
!Bookmark not defined.
4.2Battery
………………………………………………………………………………...Erro r! Bookmark not defined.
4.3PC Card
……………………………………………………………………………….Error!
Bookmark not defined.
Satellite A200 Series Maintenance Manual |
[CONFIDENTIAL] |
vii |

4.4Memory Card
.... ………………………………………………………………………..Error!
Bookmark not defined.
4.5HDD
…………………………………………………………………………………Erro r! Bookmark not defined.
4.6Expansion Memory
………………………………………………………………….Error! Bookmark not defined.
4.7Optical Drive Module
……………………………………………………………….Error! Bookmark not defined.
4.8Optical Drive
... ………………………………………………………………………...Error!
Bookmark not defined.
4.9Keyboard
…………………………………………………………………………….Error!
Bookmark not defined.
4.10Display Assembly
.......... ……………………………………………………………………Error!
Bookmark not defined.
4.11Display Mask
... ………………………………………………………………………...Error!
Bookmark not defined.
4.12FL Inverter Board
.......... ……………………………………………………………………Error!
Bookmark not defined.
4.13LCD Module
.. …………………………………………………………………………Error!
Bookmark not defined.
4.14WLAN antennas
........ ……………………………………………………………………..Error!
Bookmark not defined.
4.15Camera and Microphone
…………………………………………………………….Error! Bookmark not defined.
4.16Bluetooth module
.......... ……………………………………………………………………Error!
Bookmark not defined.
viii |
[CONFIDENTIAL] Satellite A200 Series Maintenance Manual |

4.17Touch Pad
……………………………………………………………………………Error!
Bookmark not defined.
4.18Fingerprint Module
.............…………………………………………………………………..Error!
Bookmark not defined.
4.19Speakers
……………………………………………………………………………...Error!
Bookmark not defined.
4.20Function Button Board
………………………………………………………………Error! Bookmark not defined.
4.21USB Board
.…………………………………………………………………………..Error!
Bookmark not defined.
4.22MDC Card
…………………………………………………………………………...Error!
Bookmark not defined.
4.23Wireless Module
..........…………………………………………………………………….Error!
Bookmark not defined.
4.24System Fan
.…………………………………………………………………………..Error!
Bookmark not defined.
4.25System Board
.....………………………………………………………………………..Error!
Bookmark not defined.
4.26VGA Board
..………………………………………………………………………….Error!
Bookmark not defined.
4.27CPU
…………………………………………………………………………………Erro r! Bookmark not defined.
Appendices |
|
|
Appendix A Handling the LCD Module ................................................................................. |
A-1 |
|
Appendix B |
Board Layout ...................................................................................................... |
B-1 |
Appendix C |
Pin Assignments.................................................................................................. |
C-1 |
Satellite A200 Series Maintenance Manual |
[CONFIDENTIAL] |
ix |

Appendix D |
Keyboard Scan/Character Codes......................................................................... |
D-1 |
Appendix E |
Key Layout.......................................................................................................... |
E-1 |
Appendix F |
Series Screw Torque List .................................................................................... |
F-1 |
Appendix G |
Reliability ............................................................................................................ |
G-1 |
x |
[CONFIDENTIAL] Satellite A200 Series Maintenance Manual |
Chapter 1
Hardware Overview
[CONFIDENTIAL]

1 Hardware Overview
1-ii |
Minnesota 10M/10MG Series Maintenance Manual |

|
|
|
1 Hardware Overview |
|
|
|
|
Chapter 1 |
Contents |
|
|
1.1 |
Features...................................................................................................................... |
|
1-1 |
1.2 |
System Unit................................................................................................................ |
|
1-5 |
1.3 |
2.5-inch Hard Disk Drive........................................................................................... |
1-6 |
|
1.4 |
Optical device Drives................................................................................................. |
1-8 |
|
1.5 |
Power Supply |
........................................................................................................... |
1-10 |
1.6 |
Batteries ................................................................................................................... |
|
1-12 |
Minnesota 10M/10MG Series Maintenance Manual |
1-iii |

1 Hardware Overview
Figures |
|
|
Figure 1-1 |
2.5-inch HDD ................................................................................................ |
1-6 |
Tables |
|
|
Table 1-1 |
2.5-inch HDD specifications ......................................................................... |
1-6 |
Table 1-2 |
DVD-ROM & CD-RW drive specifications ................................................. |
1-8 |
Table 1-3 |
DVD Super Multi Double Layer drive specifications................................... |
1-9 |
Table 1-4 |
Battery specifications .................................................................................. |
1-12 |
1-iv |
Minnesota 10M/10MG Series Maintenance Manual |

1.1 Features |
1 Hardware Overview |
1.1Features
The Minnesota 10M/10MG Series Personal Computer uses extensive Large Scale Integration (LSI), and Complementary Metal-Oxide Semiconductor (CMOS) technology extensively to provide compact size, minimum weight and high reliability. This computer incorporates the following features and benefits:
CPU
•Intel® CoreTM 2 Duo Processor
•Intel® CoreTM Duo Processor
•Intel® Pentium® Dual Core Processor
•Intel® Celeron® M Processor
Chipset
•Mobile Intel® 945PM Express Chipset
•Mobile Intel® 945GM Express Chipset
•Mobile Intel® 943GML Express Chipset
Memory
•Two DDRII SO-DIMM, up to 4GB with Intel 945PM/GM Chipset or up to 2GB with Intel 943GML Chipset
BIOS
•1024MB Flash ROM for system BIOS
•Suspend to RAM/Disk
•Password protection
–Power on password
–Supervisor password
–HDD password for WW
–No HDD password for JP
•Various hot key for system control
•Refreshable
•Complete ACPI 2.0 function
•SMBIOS V2.4
•Supports JSB memory Boot, USB Super Fetch, SD Super Fetch
Power
•Universal AC adapter, 90~264VAC, 47~63Hz.
Offers constant voltage 19V output source with 65W max output power capacity for Minnesota 10M
Offers constant voltage 19V output source with 75W max output power capacity for Minnesota 10M
Offers constant voltage 19V output source with 90W max output power capacity for Minnesota 10MG
Minnesota 10M/10MG Series Maintenance Manual |
1-1 |

1 Hardware Overview |
1.1 Features |
•3 cells of Li-Ion 18650 size, smart battery pack with 2000mAH x 10.8V (21.6W)
•6 cells of Li-Ion 18650 size, smart battery pack with 4000mAH x 10.8V (43.2W)
•9 cells of Li-Ion 18650 size, smart battery pack with 6000mAH x 10.8V (64.8W)
•Approximately 12 hours or longer charging time to 100% battery capacity with system switched on.
•Approximately 4 hours charge time to 100% battery capacity with system switched off.
•Discharge time in shutdown mode is approximately 1 month
HDD
•One/Dual 2.5", 9.5/12.5mm Hard Disk, up to 400GB (200GB+200GB)
•SATA 1.5Gb/s
•9.5/12.5mmH, 2.5” SATA HDD Support
VGA
•Intel® 945GM for Integrated Graphics
•Intel® 943GML for Integrated Graphics
•nVIDIA GeForce® Go 7300
Fixed Optical drive
•12.7mm height, DVD-ROM & CD-RW combo device
•12.7mm height, DVD Super-multi device
•12.7mm height, DVD Super-multi device with Label Flash
Optional Devices
•Express Card
•Build-in antenna for wireless LAN module
•Build-in antenna for Bluetooth module
•MDC Modem
Keyboard
•86/87 keys
•Standard pitch 19.05mm, 2.5±0.3mm travel length
•Windows key, Application key
•Vista key supported
Touch Pad with Two Buttons
•Left button
•Right button
I/O Ports
•Four USB (V2.0) ports
•One DDC2b compliant 15-pin VGA port (RGB)
•One S-Video port
1-2 |
Minnesota 10M/10MG Series Maintenance Manual |

1.1 Features |
1 Hardware Overview |
•One microphone port
•One headphone-out jack
•Digital/Rotary volume control
•Wireless communication switch
•One DC-in jack
•One RJ-11 jack for 56kbps V.92 modem
•One RJ-45 jack with LED indicator
•Kensington lock
•One IEEE 1394a port
•Fingerprint authentication
•One 4-in-1 push-push type flash card connector and card reader
•Built-in camera with microphone
•One type II PCMCIA slot with shutter door
•One SIM card reader
Express Card Slot
•TI 8402 card bus controller for the model with Bridge media slot
•PC Card 95 supported with one Type II Card socket
•With Shutter door
•No ZV-Port support
Wireless LAN module
•Dual-band built-in antenna for wireless LAN communication
•WLAN module b/g, a/b/g, and a/b/g/n
5 in 1 Card Reader Organization
•TI 8402 controller
•SD, miniSD, MMC, Memory Stick/PRO, and xD card supported
•ACPI 2.0 compliant
Excellent Power Management Function
•Standby mode, Suspend to RAM or Suspend to disk mode, using time out or hot key
•HDD local standby mode by time out
•LCD local standby mode by time out
•Low battery alarm by beep
•Auto-backlight off when LCD cover closed
•Full ACPI 2.0 supported
•LCD auto-dim mode by time out
Minnesota 10M/10MG Series Maintenance Manual |
1-3 |

1 Hardware Overview |
1.1 Features |
Switches
•Power button
•Two programmable launch buttons
•Four control buttons for CD playing
•Wireless communication switch
Security
•Fingerprint authentication
AC Adapter
•Universal AC adapter module
•Liteon & Delta 65W, 75W and 90W adapters
•Output voltage: 19Vdc
•Input Voltage/Frequency range: 90-264Vac, 47-63Hz
Display
•15.4” (16:10) TFT screen with a resolution of 1280 horizontal x 800 vertical pixels, CSV VA, high brightness approximately 200nits, WXGA
•15.4” (16:10) TFT screen with a resolution of 1280 horizontal x 800 vertical pixels, CSV, brightness approximately 150nits, WXGA
Video RAM
•NVIDIA GeForce® Go 7300, up to 256MB VRAM (GDDR2)
Universal Serial Bus (USB)
The computer has four Universal Serial Bus (USB) ports that comply with the USB 2.0 standard, which enable data transfer speeds more than 40 times faster than USB 1.1 (which this computer also supports.) The USB drives may be used to transfer data at low, full, and high speeds.
Bluetooth module
Some computers in this series are equipped with Bluetooth functionality (Version 2.0 + EDR) with antenna. Bluetooth is a short-range wireless technology used to create PANs (Personal Area Networks) among your devices, as well as with other nearby devices such as cell phones and digital cameras.
OS
•Windows Vista Home Basic/ Home Premium (32/64 bit support)
•Windows Vista Business (32/64 support)
•Vista Premium Logo
1-4 |
Minnesota 10M/10MG Series Maintenance Manual |

1.2 System Unit |
1 Hardware Overview |
1.2System Unit
The system unit is composed of the following major components:
Processor
•Intel® CoreTM 2 Duo Processor T7600/T7400/T7200/T5600/T5500/T5300/T5200
•Intel® CoreTM Duo Processor T2450/T2350
•Intel® Pentium® Dual Core Processor T2080/T2060
•Intel® Celeron® M Processor 530/520
System Logic
•Mobile Intel® 945PM with ICH7M Chipset
•Mobile Intel® 945PM with ICH7M Chipset
•Mobile Intel® 943GML with ICH7M Chipset
Memory
•Two DDR-II 533/667MHz SO-DIMM
•Supports Dual channel
•Up to 2GB with 256MB/512MB/1GB module for Intel 945PM/945GM/943GML Chipset
•Up to 4GB with 2GB module for Intel 945PM/945GM Chipset
Video RAM (Depending on the model you purchased)
•nVIDIA GeForce® Go 7300, up to 256MB VRAM (GDDR2)
Audio subsystem
•Realtek High Definition Audio Codec ALC861
−Microphone-in and headphone-out
−Volume control: Digital control, rotary type, without mute function
−Supports Microsoft Outlook Express audio
Minnesota 10M/10MG Series Maintenance Manual |
1-5 |
1 Hardware Overview |
1.3 2.5-inch Hard Disk Drive |
1.32.5-inch Hard Disk Drive
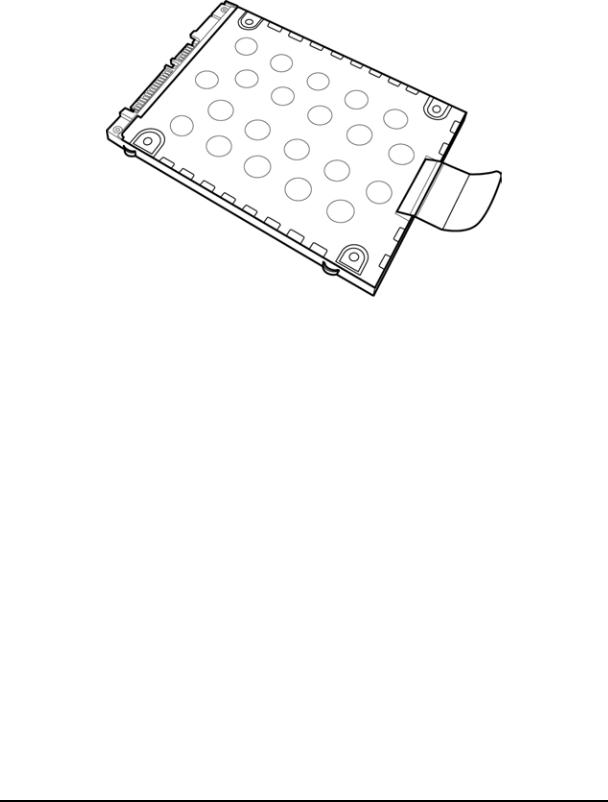
The internal HDD is a random access non-volatile storage device. It has a non-removable 2.5-inch magnetic disk and mini-Winchester type magnetic heads. The computer supports up to 250G HDD.
The HDD is shown in Figure 1-1. Specifications are listed in Table 1-1.
Figure 1-1 2.5-inch HDD
Items |
40GB |
60GB |
80GB |
100GB |
|
|
|
|
|
|
|
Formatted |
37.26 |
55.89 |
74.52 |
93.15 |
|
capacity (GB) |
|||||
|
|
|
|
||
Logical Blocks |
78,140,160 |
117,210,240 |
156,301,488 |
195,371,568 |
|
(LBA) |
|||||
|
|
|
|
||
Rotational |
5400 |
5400 |
5400 |
5400 |
|
speed (rpm) |
|||||
|
|
|
|
||
Toshiba HDD |
8 |
8 |
8 |
8 |
|
Buffer (MB) |
|||||
|
|
|
|
||
Hitachi HDD |
8 |
8 |
8 |
8 |
|
Buffer (MB) |
|||||
|
|
|
|
||
Fujitsu HDD |
8 |
8 |
8 |
8 |
|
Buffer (MB) |
|||||
|
|
|
|
||
Bytes per sector |
512 |
512 |
512 |
512 |
|
|
Table 1-1 |
2.5-inch HDD specifications |
|
||
1-6 |
Minnesota 10M/10MG Series Maintenance Manual |
1.3 2.5-inch Hard Disk Drive |
1 Hardware Overview |
Items |
120GB |
160GB |
200GB |
|
250GB |
|
|
|
|
|
|
|
|
Formatted |
111.8 |
|
149.05 |
186.31 |
|
232.89 |
capacity (GB) |
|
|
||||
|
|
|
|
|
|
|
Logical Blocks |
234,441,648 |
312,581,808 |
390,720,968 |
|
488,397,168 |
|
(LBA) |
|
|||||
|
|
|
|
|
|
|
Rotational |
5400 |
|
5400/4200 |
5400/4200 |
|
4200 |
speed (rpm) |
|
|
||||
|
|
|
|
|
|
|
Toshiba HDD |
8 |
|
8 |
8 |
|
N/A |
Buffer (MB) |
|
|
||||
|
|
|
|
|
|
|
Hitachi HDD |
8 |
|
8 |
N/A |
|
N/A |
Buffer (MB) |
|
|
||||
|
|
|
|
|
|
|
Fujitsu HDD |
8 |
|
8 |
8 |
|
8 |
Buffer (MB) |
|
|
||||
|
|
|
|
|
|
|
Bytes per sector |
512 |
|
512 |
512 |
|
512 |
Table 1-1 |
2.5-inch HDD specifications (Continued) |
|
||||
Minnesota 10M/10MG Series Maintenance Manual |
1-7 |

1 Hardware Overview |
1.4 Optical Disc Device |
1.4Optical Disc Device
1.4.1DVD-ROM & CD-RW
The DVD-ROM and CD-RW drive accepts 12-cm (4.72-inch) and 8-cm (3.15-inch) discs. At maximum, the drive can play back a DVD at 8x speed, read CD-ROM at 24x speed, and write CD-R at 24x speed and high speed CD-RW at 10x speed or Ultra speed CD-RW at 24X speed.
The specifications of the DVD-ROM & CD-RW drive are listed in Table 1-2.
Item |
DVD-ROM mode |
|
CD-ROM mode |
|
|
|
|
Data transfer rate (Mbytes/s) |
33.3 (U-DMA transfer mode 2) |
|
|
16.6 (PIO mode 4, Multiword DMA mode 2) |
|||
Access time (ms) |
150 |
|
130 |
Average random access |
|
||
|
|
|
|
Data buffer size (Mbytes) |
2MB |
|
|
|
|
|
|
|
DVD: |
|
|
|
DVD-VIDEO, DVD-ROM |
|
|
Formats supported |
CD: |
|
|
|
|
|
|
|
CD-DA, CD-ROM, CD-R, CD-RW, CD-ROMXA, |
||
|
PhotoCD (single/multi-session), CD-EXTRA, CD-Text |
||
|
|
|
|
Table 1-2 |
DVD-ROM & CD-RW drive specifications |
||
1-8 |
Minnesota 10M/10MG Series Maintenance Manual |

1.4 Optical Disc Device |
1 Hardware Overview |
1.4.2 DVD Super Multi Double Layer
The DVD Super Multi drive accepts 12-cm (4.72-inch) and 8-cm (3.15-inch) discs. At maximum, the drive can play back a DVD at 8x speed, read CD-ROM at 24x speed, and write CD-R at 24x speed and CD-RW at 10x and DVD-R at 8x speed and DVD-RW at 4x speed and DVD+R at 8x speed and DVD+RW at 4x speed and DVD-RAM at 5x speed and DVD+R DL at 2.4x speed and DVD-R DL at 2x speed.
The specifications of the DVD Super Multi Double Layer drive are listed in Table 1-3.
Item |
DVD-ROM mode |
|
CD-ROM mode |
|
|
|
|
Data transfer rate |
33.3 (U-DMA transfer mode 2) |
|
|
(Mbytes/s) |
16.6 (PIO mode 4, Multiword DMA mode 2) |
|
|
Access time (ms) |
130 |
|
130 |
Average random access |
|
||
|
|
|
|
Data buffer size (Mbytes) |
2MB |
|
|
|
DVD: |
|
|
|
|
||
|
DVD-VIDEO, DVD-ROM, DVD-R, DVD-RW, DVD-RAM, DVD+R, |
||
|
DVD+RW, DVD+R DL, DVD-R DL |
|
|
Formats supported |
CD: |
|
|
|
|
||
|
CD-DA, CD-ROM, CD-R, CD-RW, CD-ROMXA, |
||
|
PhotoCD (single/multi-session), CD-EXTRA, CD-Text |
||
|
|
|
|
Table 1-3 |
DVD Super Multi Double Layer drive specifications |
||
Minnesota 10M/10MG Series Maintenance Manual |
1-9 |

1 Hardware Overview |
1.5 Power Supply |
1.5Power Supply
This specification defines the performance and characteristics of the 65W, 75W, 90W, and 120W AC adapter power supply. It supplies a constant voltage 19V output source for the Minnesota 10M/10MG Series Personal Computer.
A/D conversion
•The EC uses 10-bit sampling for A/D conversion to determine the following values:
–Battery and temperature
AC adapter and battery check
•The EC checks the following by A/D converted values:
–Battery installed
•The EC checks the following by GPIO values:
–AC adapter connected
Abnormal check
•The EC determines whether the condition is abnormal, and if so, stores an error code into the error register.
Input port management
•The EC monitors the following input signal status:
–System power ON/OFF status
–Direct CD power ON/OFF status
Beep and LED control
•Beep is caused by the low battery status.
•The EC controls the following two kinds of LED
–DC IN LED (one color: blue)
•Blue: indicates AC adapter is connected
–Battery LED (two colors: orange and blue)
•Blue solid: The battery is fully charged.
•Orange: The computer is quick-charging the battery / the battery is low.
Power ON/OFF sequence
•When power is turned on or off, the EC starts the power on or off sequence.
–SQ0-4: power ON sequence
–SQ5-B: power OFF sequence
1-10 |
Minnesota 10M/10MG Series Maintenance Manual |

1.5 Power Supply |
1 Hardware Overview |
Battery charging control
•The EC controls the following.
–The quick charging ON/OFF
–The detection of full charge
Detection of the low battery
•The EC detects the low battery point by the gas gauge.
–LB10M: The system will be driven by the battery for 12 more minutes.
–LB0: The battery won’t be able to drive the system after 3 minutes.
–LB1: The battery can drive the system only during the suspend process.
–LB2: The battery cannot drive the system.
New battery installation
•When a new battery is installed, the EC communicates with the E2PROM in the battery to read information of the newly installed battery.
Battery capacity calculation
•The EC reads battery remaining and percentage capacity from the battery through SMBus.
Minnesota 10M/10MG Series Maintenance Manual |
1-11 |

1 Hardware Overview |
1.6 Batteries |
1.6Batteries
The computer has two types of battery:
Main battery pack (18650 size)
RTC battery
The removable main battery pack is the computer’s main power source when the AC adapter is not attached.
The battery specifications are listed in the table below.
Battery name |
Material |
Output voltage |
Capacity |
|
|
|
|
Main battery (3 cells) |
Lithium-Ion |
10.8V |
2000mAH |
|
|
|
|
Main battery (6 cells) |
Lithium-Ion |
10.8V |
4000mAH |
|
|
|
|
Main battery (9 cells) |
Lithium-Ion |
10.8V |
6000mAH |
|
|
|
|
RTC battery (Maxell |
Lithium-Ion |
3.0V |
14 mAH |
ML1220T10) |
|
|
|
RTC battery (Maxell |
Lithium-Ion |
3.0V |
18 mAH |
ML1220HT10) |
|
|
|
|
|
|
|
RTC battery (Sanyo |
Lithium-Ion |
3.0V |
15 mAH |
ML1220T28) |
|
|
|
|
|
|
|
RTC battery (Panasonic |
Lithium-Ion |
3.0V |
17 mAh |
ML1220/B) |
|
|
|
Table 1-4 Battery specifications
1-12 |
Minnesota 10M/10MG Series Maintenance Manual |

1.6 Batteries |
1 Hardware Overview |
1.6.1 Main Battery
Battery charging is controlled by a power supply microprocessor that is mounted on the system board. The power supply microprocessor controls whether the charge is on or off and detects a full charge when the AC adapter and battery are attached to the computer. The system charges the battery using quick charge or trickle charge.
Quick Battery Charge
When the AC adapter is attached, there are two types of quick charges: quick charge when the system is powered off and normal charge when the system is powered on.
The times required for charges are listed in the table below.
Status |
Charging time |
|
|
Normal charge (power on) |
12 hours or longer |
|
|
Quick charge (power off) |
About 4 hours |
|
|
NOTES
1.The time required for normal charge is affected by the amount of power the system is consuming. Use of the fluorescent lamp and frequent disk access diverts power and lengthens the charge time.
2.Using quick charge, the power supply microprocessor automatically stops the charge after eight hours regardless of the condition of the battery. Overcharging could cause the battery to explode.
If any of the following occurs, the battery quick charge process stops.
1.The battery becomes fully charged.
2.The AC adapter or battery is removed.
3.The battery or output voltage is abnormal.
4.The battery temperature is abnormal.
5.The battery SMBus communication fails.
6.The battery cell is bad.
Detection of full charge
A full charge is detected from the battery pack through SMBus when the battery is charging.
Minnesota 10M/10MG Series Maintenance Manual |
1-13 |

1 Hardware Overview |
1.6 Batteries |
1.6.2 RTC battery
The RTC battery provides power to keep the current date, time and other setup information in memory while the computer is turned off. The table below lists the charging time and data preservation period of the RTC battery. The RTC battery is charged by the adapter or main battery, while the computer is powered on.
Status |
Time |
|
|
Charging Time (power on) |
About 24 hours |
|
|
Data preservation period (full charge) |
1 month |
|
|
1-14 |
Minnesota 10M/10MG Series Maintenance Manual |

Chapter 2
Troubleshooting Procedures
Loading...