


{
STIHL FSA 65, 85
Instruction Manual Manual de instrucciones
Warning!
Read and follow all safety precautions in Instruction Manual – improper use can cause serious or fatal injury.
Advertencia!
Lea y siga todas las precauciones de seguridad dadas en el manual de instrucciones – el uso incorrecto puede causar lesiones graves o mortales.
Instruction Manual 1 - 31
Manual de instrucciones 33 - 65
Contents
|
|
Guide to Using this Manual |
2 |
|
|
|
Important Safety Instructions |
2 |
|
|
|
Safety Precautions and Working |
|
|
Manual |
|
Techniques |
3 |
|
|
Description of Operation |
12 |
||
Instruction |
|
Approved Combinations of Cutting |
12 |
|
|
|
Using the Unit |
||
Original |
|
Attachment and Deflector |
13 |
|
|
Adjusting the Loop Handle |
13 |
||
|
|
Mounting the Deflector |
14 |
|
|
recycled.be |
Adjusting Nylon Line |
14 |
|
|
Supply |
15 |
||
|
|
Connecting Charger to Power |
|
|
|
can |
Charging the Battery |
15 |
|
|
paper |
Light Emitting Diodes (LED) on |
|
|
|
|
|
||
|
oils, |
Battery |
16 |
|
|
Light Emitting Diodes (LED) on |
|
||
paperfree-chlorineon |
vegetablecontaininks |
|
||
Charger |
18 |
|||
|
|
|||
|
|
Switching On |
18 |
|
|
|
Switching Off |
19 |
|
|
|
Storing the Machine |
20 |
|
Printed |
Printing |
Replacing Nylon Line |
21 |
|
Maintenance and Care |
23 |
|||
|
|
Main Parts |
24 |
|
|
|
Specifications |
25 |
|
2010 |
|
Special Accessories |
26 |
|
|
Troubleshooting |
27 |
||
|
|
|||
STIHLANDREAS© AG & Co. KG, |
8621-284-0458-A. M8.L10.FST. 0020000003591GB |
Maintenance and Repairs |
29 |
|
{ |
29 |
|||
|
|
Battery Recycling |
||
|
|
Disposal |
29 |
|
|
|
Trademarks |
30 |
|
|
|
Addresses |
31 |
English
Allow only persons who fully understand this manual to operate your trimmer.
To receive maximum performance and satisfaction from your STIHL trimmer, it is important that you read, understand and follow the safety precautions and the operating and maintenance instructions in the chapters "Important Safety Instructions" and "Safety Precautions and Working Techniques" before using your trimmer. For further information you can go to www.stihlusa.com.
Contact your STIHL dealer or the STIHL distributor for your area if you do not understand any of the instructions in this manual.
 Warning!
Because a trimmer is a high-speed cutting tool and is battery-powered, some special safety precautions must be observed to reduce the risk of personal injury. Careless or improper use may cause serious or even fatal injury.
Make sure your unit is equipped with the proper deflector and handle for the type of cutting attachment being used.
Always wear proper eye protection.
FSA 65, FSA 85 |
1 |

English
Guide to Using this Manual
Pictograms
All the pictograms attached to or embossed on the machine are shown and explained in this manual.
Symbols in Text
Many operating and safety instructions are supported by illustrations.
The individual steps or procedures described in the manual may be marked in different ways:
N A bullet marks a step or procedure.
A description of a step or procedure that refers directly to an illustration may contain item numbers that appear in the illustration. Example:
N Loosen the screw (1). N Lever (2) ...
In addition to the operating instructions, this manual may contain paragraphs that require your special attention. Such paragraphs are marked with the symbols and signal words described below:
Danger!
Indicates an imminent risk of severe or fatal injury.
 Warning!
Indicates a hazardous situation which, if not avoided, could result in severe or fatal injury.
Caution!
Indicates a risk of property damage, including damage to the machine or its individual components.
Engineering Improvements
STIHL’s philosophy is to continually improve all of its products. As a result, engineering changes and improvements are made from time to time. Therefore, some changes, modifications and improvements may not be covered in this manual. If the operating characteristics or the appearance of your machine differ from those described in this manual, please contact your STIHL dealer for assistance.
Important Safety
Instructions
 Warning!
When using electric trimmers, basic safety precautions should always be followed to reduce the risk of fire, electric shock and personal injury, including the following:
READ ALL INSTRUCTIONS
1.Avoid Dangerous Environment – Don’t use trimmers in damp or wet locations.
2.Don’t Use In Rain.
3.Keep Children Away –
All visitors should be kept at a distance from work area.
4.Dress Properly –
Do not wear loose clothing or jewelry. They can be caught in moving parts. Use of rubber gloves and substantial footwear is recommended when working outdoors. Wear protective hair covering to contain long hair.
5.Use Safety Glasses –
Always use face or dust mask if operation is dusty.
6.Use Right Tool –
Do not use tool for any job except that for which it is intended.
7.Avoid Unintentional Starting – Do not carry trimmer with battery
plugged in. Be sure trigger switch is not depressed when inserting the battery.
2 |
FSA 65, FSA 85 |
8.Don’t Force Trimmer –
It will do the job better and with less likelihood of a risk of injury at the rate for which it was designed.
9.Don’t Overreach –
Keep proper footing and balance at all times.
10.Stay Alert –
Watch what you are doing. Use common sense. Do not operate trimmer when you are tired.
11.Store Trimmer Indoors –
When not in use, trimmer should be stored indoors in a dry, and high, locked place with battery removed and retaining latch on ƒ– out of reach of children.
12.Maintain Trimmer With Care – Keep cutting attachment clean for best performance and to reduce the risk of injury. Follow instructions for changing accessories. Keep handles dry, clean, and free from oil and grease.
13.Check Damaged Parts –
Before further use of the trimmer, a guard or other part that is damaged should be carefully checked to determine that it will operate properly and perform its intended function. Check for alignment of moving parts, binding of moving parts, breakage of parts, mounting, and any other condition that may affect its operation. A guard or other part that is damaged should be properly repaired or replaced by an authorized service center unless indicated elsewhere in this manual.
14.Keep Guards In Place And In Working Order
15.Keep Hands And Feet Away From Cutting Area And Cutting Attachment
16.Replacement Parts –
When servicing, use only identical STIHL replacement parts
SAVE THESE INSTRUCTIONS
English
Safety Precautions and
Working Techniques
Because this trimmer is a high-speed, fast-cutting power tool and is batterypowered, special safety precautions must be observed to reduce the risk of personal injury.
It is important that you read, fully understand and observe the following safety precautions and warnings. Read the instruction manual and the safety precautions periodically. Careless or improper use may cause serious or fatal injury.
The terminology utilized in this manual when referring to the power tool reflects the types of cutting attachments that may be mounted on it. The term "trimmer" is used to designate an FSA unit that is equipped with a nylon line head.
 Warning!
As more fully explained later in these Safety Precautions, to reduce the risk of personal injury, make sure your unit is equipped with the proper handle and deflector for the type of cutting attachment you are using. Use only cutting attachments that are specifically authorized by STIHL for use on your FSA model. To reduce the risk of severe or fatal injury from loss of control, never attempt to use a metal blade or rigid polymer blade.
FSA 65, FSA 85 |
3 |
English
Have your STIHL dealer show you how to operate your power tool. Observe all applicable local safety regulations, standards and ordinances.
The use of noise emitting power tools may be restricted to certain times by national or local regulations.
 Warning!
Do not lend or rent your power tool without the instruction manual. Be sure that anyone using it understands the information contained in this manual.
Warning!
The use of this machine may be hazardous. If the rotating line comes in contact with your body, it may cut you. When it comes in contact with solid foreign objects such as rocks or bits of metal, it may fling them directly or by ricochet in the direction of bystanders or the operator. Striking such objects could damage the cutting attachment. Thrown objects, including broken heads, may result in serious or fatal injury to the operator or bystanders.
Use your trimmer equipped with the appropriate cutting attachment only for cutting grass and similar material.
 Warning!
Do not use it for other purposes, since misuse may result in personal injury or property damage, including damage to the machine.
 Warning!
Minors should never be allowed to use this power tool. Bystanders, especially children, and animals should not be allowed in the area where it is in use.
Warning!
To reduce the risk of injury to bystanders and damage to property, never let your power tool run unattended. When it is not in use (e.g. during a work break), shut it off and make sure that unauthorized persons do not use it. To do this, move retaining latch to ƒand remove the battery from the power tool.
Most of these safety precautions and warnings apply to the use of all STIHL trimmers. Different models may have different parts and controls. See the appropriate section of your instruction manual for a description of the controls and the function of the parts of your model.
Always remove the battery and move retaining latch to ƒbefore transporting, storing or carrying out any work on the power tool. This avoids the risk of the motor starting unintentionally.
STIHL recommends the use of original STIHL replacement parts. They are specifically designed to match your model and meet your performance requirements.
Safe use of a trimmer involves
1.the operator
2.the power tool
3.the use of the power tool.
THE OPERATOR
Physical Condition
You must be in good physical condition and mental health and not under the influence of any substance (drugs, alcohol, etc.) which might impair vision, dexterity or judgment. Do not operate this machine when you are fatigued.
 Warning!
Be alert – if you get tired, take a break. Tiredness may result in loss of control. Working with any power tool can be strenuous. If you have any condition that might be aggravated by strenuous work, check with your doctor before operating this machine.
Proper Clothing
Warning!
To reduce the risk of injury, the operator should wear proper protective apparel.
The deflector provided with your power tool will not protect the operator from all foreign objects (gravel, glass, wire, etc.) thrown back by the rotating cutting attachment. Thrown objects may also ricochet and strike the operator.
4 |
FSA 65, FSA 85 |

 Warning!
To reduce the risk of injury to your eyes never
operate your power tool unless wearing goggles or properly fitted protective glasses with
adequate top and side protection complying with ANSI Z 87.1 (or your applicable national standard.) To reduce the risk of injury to your face STIHL recommends that you also wear a face shield or face screen over your goggles or protective glasses.
Clothing must be sturdy and snug-fitting but allow
complete freedom of movement. Wear long
pants made of heavy material to help protect your legs. Do not wear shorts.
Avoid loose-fitting jackets, scarfs, neckties, jewelry, flared or cuffed pants, unconfined long hair or anything that could become caught on branches, brush or the moving parts of the unit. Secure hair so it is above shoulder level.
Good footing is very important. Wear sturdy boots with nonslip soles. Never wear sandals, flipflops or go barefoot.
Always wear gloves when handling the machine. Heavy-duty, nonslip gloves improve your grip and help to protect your hands.
THE POWER TOOL
For illustrations and definitions of the power tool parts see the chapter on "Main Parts."
 Warning!
Never modify this power tool in any way. Only attachments supplied by STIHL and expressly approved by STIHL for use with the specific STIHL model are authorized. Although certain unauthorized attachments are useable with STIHL power tools, their use may, in fact, be extremely dangerous. For the cutting attachments authorized by STIHL for your unit, see the chapter "Approved Combinations of Cutting Attachment and Deflector" in the instruction manual or the STIHL "Cutting Attachments, Parts & Accessories" catalog.
If your power tool is subjected to unusually high loads for which it was not designed (e.g. heavy impact or a fall), always check that it is in good condition before continuing work – see also "Before Starting Work." Make sure the safety devices are working properly. Do not continue operating your power tool if it is damaged. In case of doubt, have the machine checked by your STIHL servicing dealer.
English
Battery
 Warning!
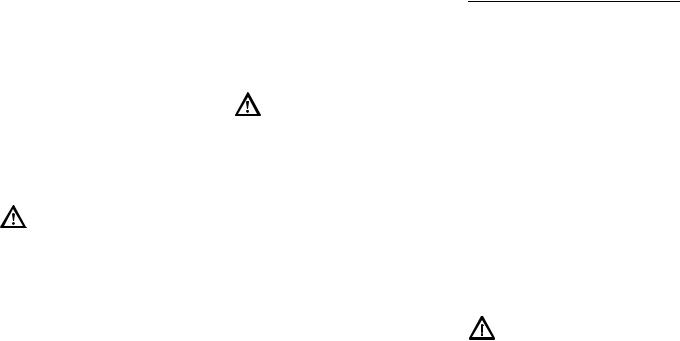
Risk of fire, explosion and / or burns, including chemical burns. Do not disassemble, crush, heat above 212 °F (100 °C), expose to fire
or incinerate. Never expose the battery to microwaves or high pressures.
Do not place the battery on or near fires, stoves or in other high-temperature locations. Do not place the battery in direct sunlight or store it inside a vehicle in hot weather. Doing so may cause the battery to generate heat, rupture or ignite. Using the batteries in this manner may also result in a loss of performance and a shortened life expectancy.
In case of fire: Stay clear of any vapors or gases generated, taking wind direction into account. If possible without danger, remove battery from the vicinity of the fire. In principle, cooling the battery or extinguishing the fire with water is possible. It is preferable to extinguish the fire with a multipurpose dry chemical fire extinguisher. As for any fire, evacuate the area and fight the fire from a safe distance. Once the fire has been extinguished, the area should be monitored (fire watch) in case of a flareup, until the battery has cooled sufficiently. Restrict access to the area until completion of clean-up. Do not touch the burnt battery or any spilled liquids. Use inert absorbent to absorb spilled liquids.
FSA 65, FSA 85 |
5 |
English
Use and store the battery only within a temperature range from 14 °F (-10 °C) and no more than 122 °F
(+ 50 °C). Protect the battery from direct sunlight.
 Warning!
Use STIHL batteries only with STIHL power tools and charge them only with STIHL chargers. Replace battery with STIHL AP battery only. Use only original STIHL rechargeable batteries.
Charge the battery before use.
Protect from rain – do not immerse in fluids.
 Warning!
Do not open, drop, hit or damage battery. Never insert objects into the battery's cooling slots, since they may damage the battery. The battery contains safety features and devices which, if damaged, may cause the battery to generate heat, rupture or ignite. Never use or charge a defective, damaged, cracked or deformed battery.
Immediately discontinue use of the battery if, while using, charging or storing, it emits an unusual smell, feels hot or appears abnormal in any other way.
 Warning!
Fluid may leak from the battery if it is damaged or is not used properly – avoid contact with the skin! Leaking battery fluid can cause skin irritation and chemical burns. In the event of accidental contact, immediately rinse thoroughly with mild soap and water. If fluid gets into your eye(s), do not rub your eye(s) but rinse water over the open eye(s) for 15 minutes at least. Also seek medical attention immediately.
 Warning!
Never bridge (short circuit) the battery terminals with metallic objects, since this may damage the battery and possibly cause a fire. Keep a battery that is not in use away from metal objects (e.g. nails, coins, jewelry). Do not use metal containers for transporting batteries.
Store the battery out of reach of children in a cool and dry area away from direct sunlight and excess heat or cold (14 °F
– 122 °F (-10 °C – +50 °C)).
Charger
Use only original STIHL chargers.
Use only for charging geometrically matching STIHL type AP batteries with a maximum capacity of 10 Ah and a maximum voltage of 42 V.
Never charge defective, leaking or deformed batteries.
Connect the charger only to a power supply with the voltage and frequency specified on the rating plate. Always connect the charger to a properly installed wall outlet.
Never use a charger with damaged housing, damaged power supply cord or damaged plug. Do not operate the charger if it has received a sharp blow, been dropped or otherwise damaged in any way.
Do not open or dissassemble charger – no user serviceable parts inside.
Store charger out of the reach of children.
Protect the charger from rain and dampness. Keep charger dry.
Use and store charger only indoors in dry rooms.
Operate charger at temperatures between 41 °F (5 °C) and 104 °F (40 °C).
Allow the charger to cool down normally
– do not cover it.
Never bridge the contacts of the charger with metallic objects (e.g. nails, coins, jewelry) – short circuit. The charger may be damaged by a short circuit.
In the event of smoke or fire in the charger, disconnect it from outlet immediately.
 Warning!
To reduce the risk of electric shock or short circuit, do not insert any objects into the charger's cooling slots.
6 |
FSA 65, FSA 85 |

 Warning!
The charger heats up during the charging process. Do not operate on an easily combustible surface (e.g. paper, texiles) or in an easily combustible environment
– risk of fire.
 Warning!
Do not operate in a hazardous location, i.e. in a location where there are combustible liquids (fumes), vapors or dusts. Chargers can produce sparks, which may ignite the dust or vapors – risk of explosion.
Check the charger's power supply cord and plug regularly for dam-
age. If the power supply cord or plug is damaged, immediately disconnect the plug from the wall outlet to avoid the risk of electric shock.
Never jerk the power supply cord to disconnect it from the wall outlet. To unplug, grasp the plug, not the cord. Have a damaged power supply cord repaired by an experienced electrician.
Do not use the power supply cord for any other purpose, e.g. for carrying or hanging up the charger.
Never use power supply cords that do not comply with regulations.
Make sure the power supply cord is located and / or marked so that it will not be stepped on, tripped over, come in contact with sharp edges or moving parts or otherwise be subjected to damage or stress.
FSA 65, FSA 85
An extension cord should not be used unless absolutely necessary. If an extension cord must be used, plug the charger into a properly wired 16 gauge (AWG 16) or heavier gauge extension cord with blades that are the same number, size and shapes as the blades on the charger.
To reduce the risk of electric shock:
–Always connect the charger to a properly installed wall outlet.
–Make sure the insulation of the power supply cord and plug is in good condition.
Unplug the power supply cord from the outlet when charger is not in use.
Never store the battery in the charger.
THE USE OF THE POWER TOOL
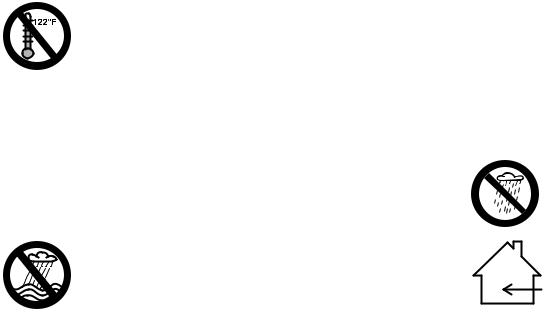
Transporting the Unit
Warning!
To reduce the risk of injury from loss of control and line contact, never carry or transport your power tool with the cutting attachment moving.
 Warning!
Always switch off the power tool, move retaining latch to ƒand remove the battery – even when you carry the unit for short distances. When transporting it in a vehicle, properly secure the power tool to prevent turnover and damage.
English
Remove the battery from the power tool. This avoids the risk of the motor starting unintentionally.
3905BA000 KN
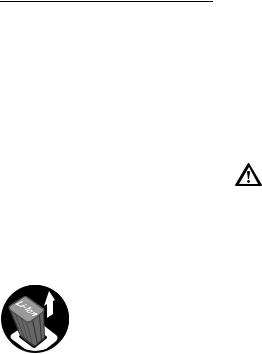
It may be carried only in a horizontal position. Grip the shaft in a manner that the machine is balanced horizontally. Keep the cutting attachment behind you.
Before Starting Work
Warning!
Always check your power tool for proper condition and operation before starting, particularly the trigger switch, trigger switch lockout and retaining latch. The trigger switch and the trigger switch lockout must move freely and always spring back to the idle position (retaining latch on ‚). Never attempt to modify the controls or safety devices.
Warning!
Never operate your power tool if it is damaged, improperly adjusted or maintained, or not completely or securely assembled.
Keep the handles clean and dry at all times; it is particularly important to keep them free of moisture, pitch, oil, grease
7
English
or resin in order for you to maintain a firm grip and properly control your power tool.
 Warning!
To reduce the risk of personal injury
to the operator from line contact and thrown
objects, make sure your unit is equipped with the proper deflector and handle for the type of cutting attachment being used (see chapter on "Approved Combinations of Cutting Attachment and Deflector").
Keep the deflector adjusted properly at all times (see chapter on "Mounting the Deflector" of your instruction manual.)
Adjust the hand grip to suit your size before starting work. The machine should be properly balanced for proper control and less fatigue in operation.
Warning!
The cutting attachment must be properly tightened and in safe operating condition. Inspect for loose parts (nuts, screws, etc.). Regularly check the condition and tightness of the cutting attachment – with the motor stopped, retaining latch on ƒand battery removed! Replace damaged cutting attachments before using the power tool.
Check contacts in battery compartment for foreign matter. Keep clean.
Fit the battery correctly – it must engage audibly.
For specific starting instructions, see the appropriate section of your instruction manual.
 Warning!
Your power tool is a one-person machine. Do not allow other persons in the general work area, even when starting.
During Operation
Holding and Controlling the Power Tool
Always hold the unit firmly with both hands on the handles while you are working. Wrap your fingers and thumbs around the handles.
Warning!
To reduce the risk of injury from loss of control, never work on a ladder or on any other insecure support. Never hold the cutting attachment above waist height.
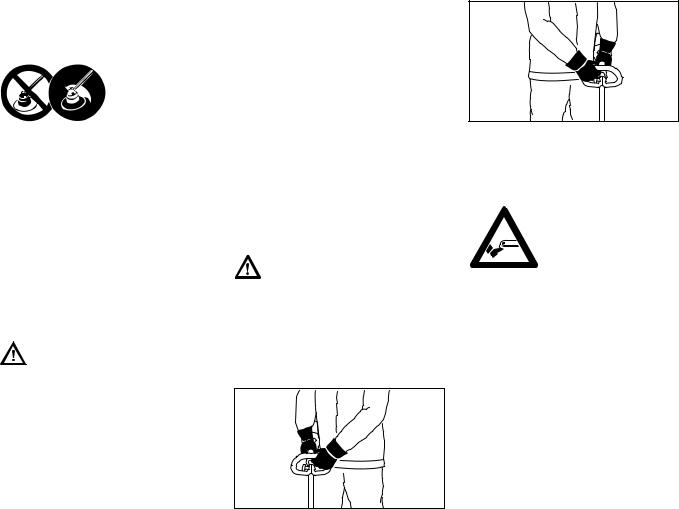
Right-Handers
3905BA001 KN
Right hand on the control handle and left hand on the loop handle.
Left-Handers
3905BA026 KN
Left hand on the control handle and right hand on the loop handle.
 Warning!
Never attempt to operate your power tool with one hand. Loss of control of
the power tool resulting in serious or fatal injury may result. To reduce
the risk of cut injuries, keep hands and feet away from the cutting attachment. Never touch a moving cutting attachment with your hand or any other part of your body.
 Warning!
Do not overreach. Keep proper footing and balance at all times. Special care must be taken in slippery conditions and in difficult, overgrown terrain. Watch for hidden obstacles such as tree stumps, roots and ditches to avoid stumbling. For better footing, clear away fallen branches, scrub and cuttings. Be extremely cautious when working on slopes or uneven ground.
8 |
FSA 65, FSA 85 |
Working Conditions
Operate your power tool only under good visibility and daylight conditions only. Work carefully.
 Warning!
If the vegetation being cut or the surrounding ground is coated with a chemical substance (such as an active pesticide or herbicide), read and follow the instructions and warnings that accompanied the substance at issue.
 Warning!
Inhalation of certain dusts, especially organic dusts such as mold or pollen, can cause susceptible persons to have an allergic or asthmatic reaction. Substantial or repeated inhalation of dust and other airborne contaminants, in particular those with a smaller particle size, may cause respiratory or other illnesses. Control dust at the source where possible. Use good work practices, such as operating the unit so that the wind or operating process directs any dust raised by the power tool away from the operator. Follow the recommendations of EPA / OSHA / NIOSH and occupational and trade associations with respect to dust ("particulate matter.") When the inhalation of dust cannot be substantially controlled, i.e., kept at or near the ambient (background) level, the operator and any bystanders should wear a respirator approved by NIOSH / MSHA for the type of dust encountered.
Operating Instructions
 Warning!
In the event of an emergency, switch off the motor immediately, move retaining latch to ƒand remove the battery.
Warning!
The cutting attachment continues to rotate for a short period after the trigger switch is released (flywheel effect.)
Warning!
The rotating cutting attachment may fling foreign objects directly or by ricochet a great distance.
 15m (50ft)
To reduce the risk of eye and other injury always wear proper eye protection (see the chapter on "Proper Clothing") and ensure that bystanders are at least
50 feet (15 m) away. To reduce the risk of damage to property, also maintain this distance from such objects as vehicles or windows. Any coworkers who must be in the restricted area should also wear goggles or protective glasses.
Switch off the motor immediately if you are approached.
English
Never use metal blades or rigid polymer blades on this trimmer. Only the provided cutting attachment with nylon line is authorized.
Warning!
Before you start work, examine the area for
stones, glass, fence wire,
metal, trash or other solid
objects. The cutting attachment could throw
objects of this kind.
Warning!
This trimmer is normally to be used at ground level with the cutting attachment parallel to the ground. Use of a trimmer above ground level or with the cutting attachment perpendicular to the ground may increase the risk of injury, since the cutting attachment is more fully exposed and the power tool may be more difficult to control.
Warning!
During cutting, check the tightness and the condition of the cutting attachment at regular short intervals with the motor and attachment stopped. If the behavior of the attachment changes during use, switch off the motor immediately, wait until the cutting attachment stops, and check the nut securing the attachment for tightness and the attachment for cracks, wear and damage.
FSA 65, FSA 85 |
9 |
English
 Warning!
A loose head may vibrate, crack, break or come off the trimmer, which may result in serious or fatal injury. Make sure that the cutting attachment is properly tightened. If the head loosens after being properly tightened, stop work immediately. The retaining nut may be worn or damaged and should be replaced. If the head continues to loosen, see your STIHL dealer. Never use a trimmer with a loose cutting attachment.
Warning!
Replace a cracked, damaged or wornout head immediately, even if damage is limited to superficial cracks. Such attachments may shatter at high speed and cause serious or fatal injury.
 Warning!
If the head or deflector becomes clogged or stuck, always switch off the motor, remove the battery and make sure the cutting attachment has stopped before cleaning. Grass, weeds, etc. should be cleaned from around the head at regular intervals.
 Warning!
To reduce the risk of unintentional rotation of the cutting attachment and injury, always switch off the motor, move retaining latch to ƒand remove the battery before replacing the cutting attachment.
 Danger!
Do not rely on the tool’s insulation against electric shock. To reduce the risk of electrocution, never operate this power tool in the vicinity of any wires or
cables (power, etc.) which may be carrying electric current.
Check the cutting attachment at regular short intervals during operation, or immediately if there is a noticeable change in cutting behavior:
–Switch off the motor.
–Move retaining latch to ƒ.
–Remove the battery.
–Check condition and tightness, look for cracks.
The drive motor is not waterproof. Never work with the power tool in the rain or in wet or very damp locations.
Do not leave the machine outdoors in the rain.
Be particularly alert and cautious when wearing hearing protection because your ability to hear warnings (shouts, alarms, etc.) is restricted.
USING THE CUTTING ATTACHMENT
For an illustration of the cutting attachment and instructions on proper mounting see the chapter on "Replacing Nylon Line" in your instruction manual.
Mowing heads are to be used only on trimmers equipped with a line-limiting blade in the deflector in order to keep the line at the proper length (see "Main Parts" chapter in your instruction manual.)
Do not use with mowing line longer than the intended length. With a properly mounted deflector, the built-in linelimiting blade will automatically adjust the line to its proper length.
Using the unit with an overly long nylon cutting line increases the load on the motor and reduces its operating speed. This results in overheating and damage to important components (e.g. polymer housing components.)
 Warning!
To reduce the risk of serious injury, never use wire or metal-reinforced line or other material in place of the nylon cutting lines. Pieces of wire could break off and be thrown at high speed toward the operator or bystanders.
STIHL AutoCut mowing head
Nylon cutting cord advances automatically when tapped against the ground (TapAction).
After Finishing Work
Always clean dust and dirt off the power tool – do not use any grease solvents for this purpose.
10 |
FSA 65, FSA 85 |
MAINTENANCE, REPAIR AND STORING
If you make a warranty claim for a component which has not been serviced or maintained properly or if nonapproved replacement parts were used, STIHL may deny coverage.
 Warning!
Use only identical STIHL replacement parts for maintenance and repair. Use of non-STIHL parts may cause serious or fatal injury.
Strictly follow the maintenance and repair instructions in the appropriate section of your instruction manual.
Please also refer to the maintenance chart in this manual.
Always move retaining latch to ƒand remove the battery from the power tool before carrying out any repairs or maintenance work, such as replacing the cutting attachment. This avoids the risk of the motor starting unintentionally.
 Warning!
Always switch off the motor, move retaining latch to ƒ, remove the battery and make sure that the cutting attachment is stopped before doing any maintenance or repair work or cleaning the power tool. Do not attempt any maintenance or repair work not described in your instruction manual. Have such work performed by your STIHL servicing dealer only.
Warning!
Never repair damaged or broken heads. This may cause parts of the cutting attachment to come off and result in serious or fatal injuries.
Tighten all nuts, bolts and screws after each use.
Regularly check the electrical contacts and ensure that the insulation of the power cord and plug of the charger is in good condition and shows no sign of aging.
Electrical components, e.g. power cord of charger, may only be repaired or replaced by a qualified electrician.
Clean plastic components with a cloth. Do not use aggressive detergents. They may damage the plastic.
Do not spray the machine with water.
Do not clean your machine with a pressure washer. The solid jet of water may damage parts of the machine.
Keep the battery guides free from foreign matter – clean as necessary.
English
Store the power tool in a dry, locked location with the retaining latch on ƒ, the battery removed and out of reach of children.
FSA 65, FSA 85 |
11 |

English
Description of Operation
The power tool is operated with a rechargeable battery. Use only STIHL chargers to recharge the battery.
Data exchange
The power tool, battery and charger communicate with each other. The charger charges the battery and the battery supplies the necessary power only if data exchange functions properly. For this reason you should operate your power tool only with the approved STIHL batteries and STIHL chargers.
12
Using the Unit
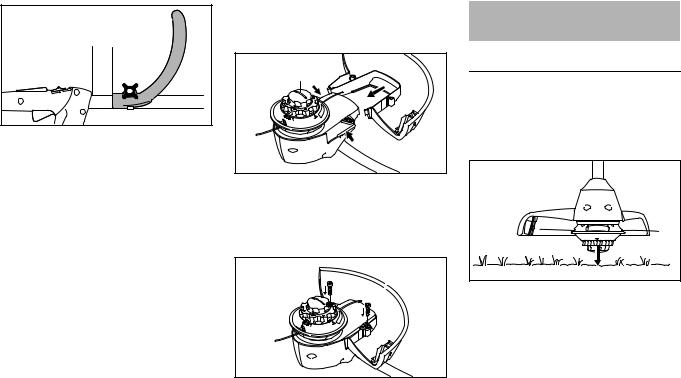
Mowing |
3905BA002 KN |
NHold the unit with both hands – one hand on the control handle – one hand on the loop handle.
NStand upright – hold the power tool in a relaxed position.
NMake sure the cutting attachment is not touching the ground or any other objects.
NSwing the trimmer back and forth in an arc.
NThe cutting height is determined by the distance of the mowing line from the lawn surface.
NAvoid contact with fences, walls, rocks, etc. since it will result in a higher rate of wear.
Working with bump guard
The bump guard comes standard with the FSA 85. It is available as a special accessory for the FSA 65.

 1
1
3905BA003 KN
The bump guard (1)
–Limits the cutting range of the mowing line
–reduces the risk of the rotating mowing line causing damage (e.g. tree bark)
The mowing head may continue to rotate briefly after you switch off your power tool – wait for the mowing head to come to a standstill before adjusting the bump guard – do not adjust it with your foot.
Disposal
NDo not throw cuttings into the garbage can – they can be composted.
FSA 65, FSA 85
Approved Combinations of
Cutting Attachment and
Deflector
Cutting attachment
3905BA004 KN
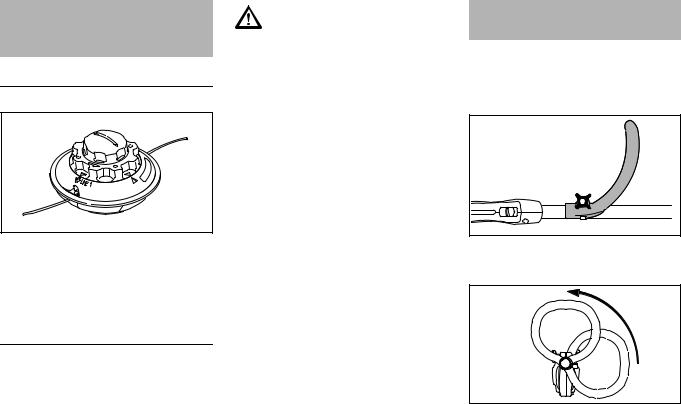
The trimmer comes from the factory with the AutoCut C 4-2 mowing head already fitted. For safety reasons no other cutting attachments may be mounted to the trimmer.
Deflector
The trimmer is supplied with a deflector. Only this deflector may be mounted to the trimmer – no other deflectors are permitted. For further information see "Mounting the Deflector".
Warning!
Use only the provided deflector in order to reduce the risk of injury from thrown objects and contact with the cutting attachment.
Make sure your unit is equipped with the provided handle in order to reduce the risk of injury from loss of control and contact with the cutting attachment.
Do not use rigid polymer blades, metal cutting attachments or circular saw blades on this unit.
Only the provided mowing head may be used.
English
Adjusting the Loop Handle
Your new power tool comes with the loop handle mounted on the shaft, but it must be turned and lined up to suit your requirements.
1 |
KN |
|
3905BA005 |
NLoosen the star knob (1) on the handle.
3905BA006 KN
NTurn the handle to the vertical position.
FSA 65, FSA 85 |
13 |
English
 A
A 
3905BA007 KN
The loop handle can be adjusted to suit the height and reach of the operator and the application by changing
distance (A).
Recommendation: distance (A): about 4.0 in
NSlide the handle to the required position.
NTighten down the star knob so that the handle cannot be rotated on the shaft.
Mounting the Deflector |
Adjusting Nylon Line |
|
|
1
3905BA008 KN
NPosition your trimmer so that the mowing head (1) faces up.
The motor housing has guide slots (arrows) to correctly locate the deflector.
3 |
2 |
|
3 |
||
|
3905BA009 KN
NPush the deflector (2) into the guide slots as far as stop.
NInsert the screws (3) and tighten them down firmly.
Adjusting Nylon Line
NHold the rotating mowing head above the ground – tap it on the ground once – about 1.2 in. of fresh line is advanced.
2
1 |
KN |
|
3905BA010 |
||
|
The blade (1) on the deflector (2) trims surplus line to the correct length – avoid tapping the mowing head more than once at a time.
Line feed operates only if both lines still have a minimum length of 1.0 in.
If the line is shorter than 1.0 in: N Switch off the trimmer.
NMove the retaining latch to ƒand remove the battery.
N Turn the trimmer on its back.
NPress down the cap on the spool as far as stop.
NPull the ends of the lines out of the spool.
If the spool is empty, see "Replacing Nylon Line".
14 |
FSA 65, FSA 85 |
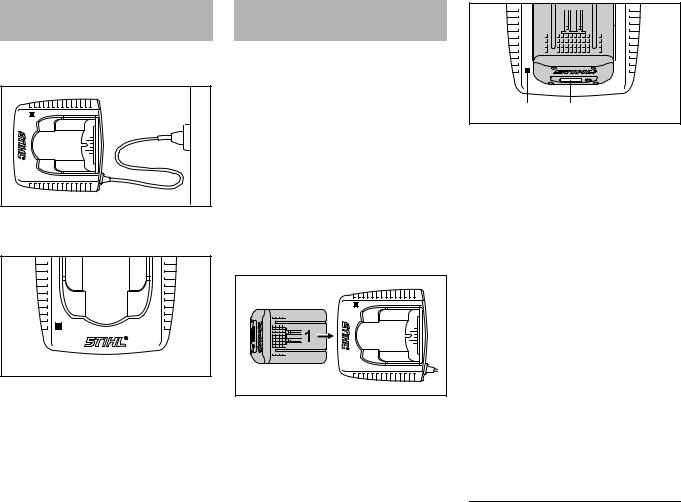
Connecting Charger to Power Supply
Mains voltage and operating voltage must be the same.
1 2
3901BA015 KN
NInsert the mains plug (1) in the wall outlet (2).
1 |
KN |
|
3901BA019 |
A self test is performed after the charger is connected to the power supply. During this process the light emitting diode (1) on the charger lights up green for about 1 second, then red and goes off again.
Charging the Battery
The battery is given a charge of about 30% before leaving the factory.
Recommendation: Fully charge the battery before using your power tool for the first time.
NConnect the charger to the power supply – mains voltage and operating voltage of the charger must be the same – see "Connecting Charger to Power Supply".
Operate the charger only in enclosed and dry rooms at ambient temperatures between 41°F (5°C) and 104°F (40°C).
2 |
3901BA009 KN |
NPush the battery (1) into the charger (2) until you feel noticeable resistance – then push it as far as stop.
English
3 |
4 |
3901BA014 KN |
The light emitting diode (3) on the charger comes on when the battery is inserted – see "Light Emitting Diodes (LED) on Charger"
Charging begins as soon as the light emitting diodes (4) on the battery light up green – see "Light Emitting Diodes (LED) on Battery".
The charge time is dependent on a number of factors, including battery condition, ambient temperature, etc., and may therefore vary from the charge time in the "Specifications".
The battery becomes hot during operation. If a hot battery is inserted in the charger, it may be necessary to cool it down before charging. The charging process begins only after the battery has cooled down. The time required for cooling may prolong the charge time.
The battery and charger become warm during the charging process.
AL 300 charger
This charger is equipped with a battery cooling fan which is audible when it is running.
FSA 65, FSA 85 |
15 |

English
AL 100 charger
This charger waits for the battery to cool down before starting the charging process. The battery is cooled normally by heat transfer to the ambient air.
End of charge
The charger switches itself off automatically when the battery is fully charged:
–Light emitting diodes on the battery go off
–The light emitting diode on the charger goes off
–The charger's fan is switched off (if charger is so equipped)
Remove the charged battery from the charger.
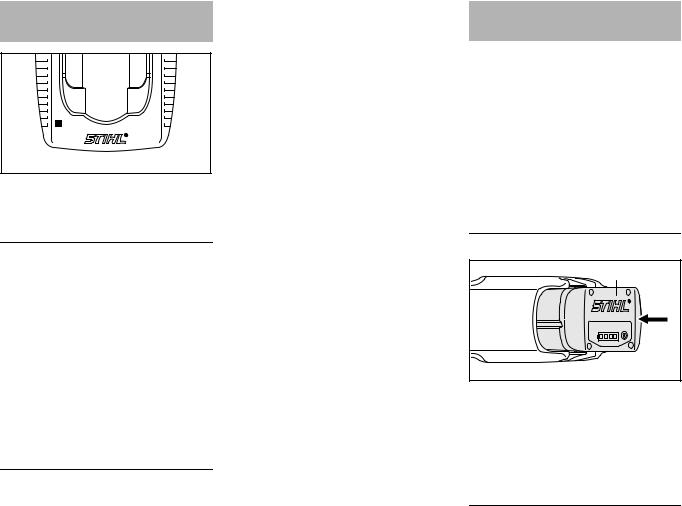
Light Emitting Diodes (LED) on Battery
Four LEDs indicate the charge state of the battery as well as any problems that occur with the battery or the machine.
1 |
3901BA010 KN |
NPress button (1) to activate the display – display switches off automatically after 5 seconds
The LEDs can be green, red or flashing.
LED is continuously green.
LED flashes green.
LED is continuously red.
LED flashes red.
During charging
The LEDs indicate the progress of charging by lighting up continuously or flashing.
During charging, the current charging capacity is indicated by a flashing green LED.
0 - 20 % |
|
|
20 - 40 % |
|
|
40 - 60 % |
|
|
60 - 80 % |
|
|
80 - 100 % |
KN |
|
3901BA016 |
||
|
When the charging process is completed, the LEDs on the battery switch off automatically.
If the LEDs on the battery are continuously red or flash red – see "If the red LEDs are continuously red / flash".
16 |
FSA 65, FSA 85 |

During work
The green LEDs indicate the charge state by lighting up continuously or flashing.
80 - 100 %
60 - 80 %
40 - 60 %
20 - 40 %
0 - 20 % |
KN |
|
3901BA016 |
||
|
If the LEDs on the battery are continuously red or flash red – see "If the red LEDs are continuously red / flash".
If the red LEDs are continuously red / flash
|
|
|
|
|
|
|
|
|
|
|
|
|
|
3901BA017 KN |
|
|
|
|
|
|
|
|
|
|
|
|
|
|
|
|
|
|
|
|
|
|
|
|
|
|
|
|
|
|
|
|
|
|
|
|
|
|
|
|
|
|
|
|
|
|
|
|
|
|
|
|
|
|
|
|
|
|
|
|
|
|
|
|
|
|
|
|
|
|
|
|
|
|
|
|
|
|
|
|
|
|
|
|
|
|
|
|
|
|
|
|
|
|
|
|
|
|
|
|
|
|
|
|
|
|
|
|
|
|
|
|
|
|
|
|
|
|
|
|
|
|
|
|
|
|
|
|
|
|
|
|
|
|
|
|
|
|
|
|
|
|
|
|
|
|
|
|
|
|
|
|
|
|
|
|
|
|
|
|
|
|
|
|
|
|
|
|
|
|
|
|
|
|
|
|
|
|
|
|
|
|
|
|
|
|
|
|
|
|
|
|
|
|
|
|
|
|
|
|
|
|
|
|
|
|
|
|
|
|
|
|
|
|
|
|
|
|
|
|
|
|
|
||
|
|
|
|
|
|
|
|
|
|
|
|
|
|
||
|
|
|
|
|
|
|
|
|
|
|
|
|
|
|
|
|
|
|
|
|
|
|
|
|
|
|
|
|
|
|
|
1 |
LED is continu- |
|
Battery is too hot |
||||||||||||
ously red: |
|
1) 2)/cold 1) |
|||||||||||||
4 |
LEDs flash red: |
|
Fault in battery 3) |
||||||||||||
3 |
LEDs are contin- |
|
Machine is too hot |
||||||||||||
uously red: |
|
– allow it to cool off |
|||||||||||||
|
|
|
|
|
|
|
|
|
|
|
|
|
|
|
|
3 |
LEDs flash red: |
|
Fault in machine 4) |
||||||||||||
1)During charging: The charging process starts automatically after the battery has cooled down / warmed up.
2)During work: Machine switches off automatically – let the battery cool off for a while, it may help to remove the battery from the machine for this.
English
3)Remove battery from the machine and reinsert it. Turn on the machine
–if the LEDs still flash, the battery is faulty and must be replaced.
4)Remove battery from the machine and reinsert it. Turn on the machine
–if the LEDs still flash, the machine is faulty and must be checked by a servicing dealer – STIHL recommends STIHL servicing dealers.
FSA 65, FSA 85 |
17 |
English
Light Emitting Diodes (LED) on Charger
1 |
KN |
|
3901BA019 |
The light emitting diode lights up green or flashes red.
Green continuous light ...
... means the following: The battery
–is being charged
–is too hot and must cool down before it is charged
See also "Light Emitting Diodes (LED) on Battery".
The green light emitting diode on the charger goes off as soon as the battery is fully charged.
Red flashing light ...
... means the following:
–No electrical contact between battery and charger – remove and refit the battery
–Faulty battery – see also "Light Emitting Diodes (LED) on Battery".
–Charger faulty – have checked by a servicing dealer. STIHL recommends a STIHL servicing dealer.
Switching On
The battery is given a charge of about 30% before leaving the factory.
Recommendation: Fully charge the battery before using your power tool for the first time.
NIf necessary, remove the cover from the battery compartment before fitting the battery, i.e. depress both locking tabs to unlock and remove the cover.
Fitting the battery
1 |
3905BA011 KN |
NInsert the battery (1) in the power tool – the battery slides into the compartment – press it down carefully until it snaps into position – the battery must be flush with the top of the housing.
Switching On
NMake sure you have a secure and balanced footing.
NStand upright – hold the power tool in a relaxed position.
18 |
FSA 65, FSA 85 |
NMake sure the cutting attachment is not touching the ground or any other objects.
NHold the unit with both hands – one hand on the control handle – one hand on the loop handle.
Trigger Switch
Motor speed can be controlled with the trigger switch. Motor speed is increased progressively by squeezing the trigger switch (FSA 85 only).
 2
2
KN3905BA012
NUnlock the power tool by moving the retaining latch (2) to ‚.
2 |
|
3 |
|
4 |
3905BA013 KN |
NPush down the trigger switch lockout (3) and depress the trigger switch (4) and hold them in that position.
The motor runs only if the retaining latch (2) is on ‚ and the trigger switch lockout (3) and trigger switch (4) are operated simultaneously.
English
Switching Off
1 |
|
2 |
3905BA014 KN |
NRelease the trigger switch lockout (1) and the trigger switch (2).
3 |
|
2 |
3905BA015 KN |
NMove the retaining latch (3) to ƒ– the trigger switch (2) cannot be operated – the power tool is locked to prevent start-up.
Always remove the battery from the power tool during work breaks and after finishing work.
FSA 65, FSA 85 |
19 |
 Loading...