


BR 380
Table of contents
 Loading...
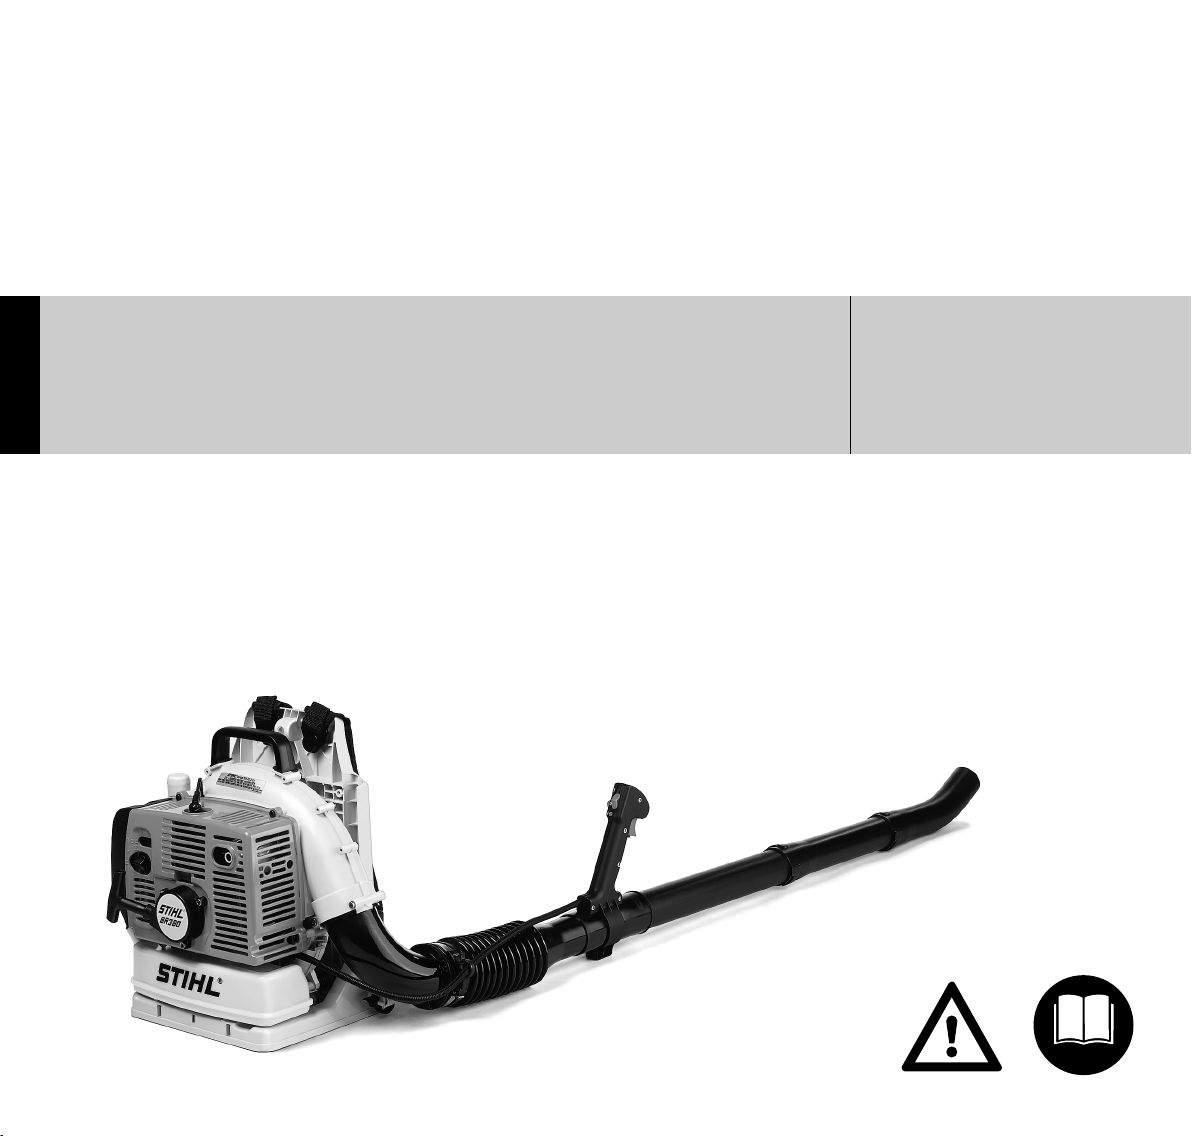
STIHL BR 340, 380
STIH)
Instruction Manual
Manual de instrucciones
Warning!
For safe operation follow all safety
precautions in Instruction Manual - improper
use can cause serious injury.
Advertencia!
Para su seguridad durante el manejo de este
producto, siga siempre las precauciones de
seguridad dadas en el manual de
instrucciones - el uso indebido puede causar
lesiones graves.

Contents
English / USA
Guide to Using this Manual .............. 2
Safety Precautions ........................... 3
Assembling the Blower ................... 12
Fuel ................................................ 13
Fueling ............................................ 14
Information
Before You Start ............................. 15
BA_SE_171_005_01_01.fmPrinted on chlorine-free paper.
Starting / Stopping
the Engine ...................................... 15
Operating Instructions .................... 18
Cleaning the Air Filter ..................... 18
Motor Management ........................ 19
Adjusting the Carburetor ................ 20
Catalytic Converter* ........................ 21
Checking the Spark Plug ................ 21
Engine Running Behavior ............... 22
Spark Arresting Screen*
in Muffler ......................................... 23
Replacing Starter Rope
and Rewind Spring ......................... 23
Storing the Machine ........................ 26
Maintenance Chart ......................... 27
Parts and Controls .......................... 28
Specifications ................................. 30
Special Accessories ....................... 31
Maintenance and Repairs ............... 31
Printing inks contain vegetable oils; paper can be recycled.
STIHL Incorporated Federal
and California Emission Control
Warranty Statement ........................ 32
Allow only persons who understand this
Manual to operate your blower.
To receive maximum performance and
satisfaction from your STIHL blower, it is
important that you read and understand
the maintenance and safety precautions,
starting on page 3, before using your
blower.
Contact your STIHL dealer or the STIHL
distributor for your area if you do not
understand any of the instructions in this
Manual.
!Warning!
Because a blower is a high-speed tool,
some special safety precautions must
be observed as with any other power
tool to reduce the risk of personal injury.
Careless or improper use may cause
serious or even fatal injury.
STIHL's philosophy is to continually
improve all of its products. As a result,
engineering changes and improvements
are made from time-to-time. If the
operating characteristics or the
appearance of your blower differs from
those described in this Manual, please
contact your STIHL dealer for
information and assistance.
* see “Guide to Using this Manual”
STIHl
© ANDREAS STIHL AG & Co. KG, 2005
0458 453 8621 A. M15. G5. PM. Printed in USA
1BR 340, BR 380

English / USA
Guide to Using this Manual
Pictograms
All the pictograms attached to the
machine are shown and explained in
this manual.
The operating and handling instructions
are supported by illustrations.
Symbols in text
The individual steps or procedures
described in the manual may be marked
in different ways:
: A bullet marks a step or procedure
without direct reference to an
illustration.
A description of a step or procedure that
refers directly to an illustration may
contain item numbers that appear in the
illustration.
Example:
Loosen the screw (1)
Lever (2) ...
In addition to the operating instructions,
this manual may contain paragraphs
that require your special attention. Such
paragraphs are marked with the
symbols described below:
Warning where there is a risk of an
accident or personal injury or
serious damage to property.
Caution where there is a risk of
damaging the machine or its
individual components.
Note or hint which is not essential
for using the machine, but may
improve the operator’s understanding of the situation and result
in better use of the machine.
Note or hint on correct procedure in
order to avoid damage to the
environment.
Equipment and features
This instruction manual may refer to
several models with different
features. Components that are not
installed on all models and related
applications are marked with an
asterisk (*). Such components may
be available as special accessories
from your STIHL dealer.
Engineering improvements
STIHL’s philosophy is to continually
improve all of its products. As a result,
engineering changes and improvements
are made from time to time. If the
operating characteristics or the
appearance of your machine differ from
those described in this manual, please
contact your STIHL dealer for
assistance.
Therefore some changes, modifications
and improvements may not be covered
in this manual.
2
BR 340, BR 380

Safety Precautions
English / USA
Warning!
The use of any blower
may be dangerous. It is
important that you read,
fully understand and
observe the following safety
precautions.
!Warning!
Reread the owner`s
manual and the safety
instructions peri-
odically.
Do not lend or rent your machine without
the owner`s manual.
Be sure that anyone using your unit
understands the information contained
in this manual.
!Warning!
Careless or improper use of the machine
may cause serious injury. Have your
STIHL Dealer show you how to operate
your blower. Observe all applicable
local safety regulations, standards and
ordinances.
!Warning!
Minors should never be allowed to use a
blower. Bystanders, especially children,
and animals should not be allowed in the
area where a machine is in use.
Never let the unit run unattended.
Most of these safety precautions and
warnings apply to the use of all STIHL
blowers. Different models may have
different parts and controls.
See the appropriate section of your
owner`s manual for a description of the
controls and function of the parts of your
machine.
Safe use of a blower involves
1. the operator
2. the blower
3. the use of the blower.
THE OPERATOR
Physical Condition
You must be in good physical condition
and mental health and not under the
influence of any substance (drugs,
alcohol, etc.) which might impair vision,
dexterity or judgment. Do not operate a
blower when you are fatigued.
Be alert - if you get tired while operating
your machine, take a break. Tiredness
may result in loss of control. Working
with any blower can be strenuous. If you
have any condition that might be
vated by strenuous work, check
aggra
with
your doctor before operating the
machine.
Your STIHL blower is equipped with an
antivibration system (AV). The AV
system is designed to reduce the
transmission of engine vibrations to the
operator's body. An AV system is
recommended for those operators who
use blowers on a regular or sustained
basis.
Keep the AV system well maintained. A
blower with loose components or with
damaged or worn AV buffers will tend to
have higher vibration levels.
!Warning!
The ignition system of your unit
produces an electromagnetic field of a
very low intensity. This field may
interfere with some pacemakers. To
reduce the risk of serious or fatal injury,
persons with pacemaker should consult
their physician and the pacemaker
manufacturer before operating this tool.
3BR 340, BR 380

English / USA
Proper Clothing
!Warning!
To reduce the risk of injury, the operator
should wear proper protective apparel.
Clothing must be sturdy and snug-fitting,
but allow complete freedom of movement.
!Warning!
Avoid loose-fitting jackets,
flared or cuffed pants,
scarfs, unconfined long
hair or anything that could
be drawn into the air
intake.
Use of gloves when
working with the blower is
recommended.
Good footing is most
important. Wear sturdy
shoes with nonslip soles.
!Warning!
To reduce the risk of injury associated
with the inhalation of dust, use an
appropriate dust respirator for the
material being blown.
!Warning!
Use of this product can generate dust,
mists, and fumes containing chemicals
known to cause respiratory disease,
cancer, birth defects, or other reproductive harm. If you are unfamiliar with the
risks associated with the particular dust,
mists or fumes at issue, consult your
employer, governmental agencies such
as OSHA and NIOSH and other sources
on hazardous materials. If the substance
being blown or vacuumed is a commercial substance, review the material
safety data sheet for that substance and
/ or consult the material manufacturer /
supplier. The state of California and
some other authorities, for instance,
have published lists of substances
known to cause cancer, reproductive
toxicity, etc.
Control dust, mist and fumes at the
source where possible. In this regard
use good work practices and follow the
recommendations of OSHA / NIOSH
and occupational and trade associations. When the inhalation of toxic dust,
mists and fumes cannot be eliminated,
the operator and any bystanders should
always wear a respirator approved by
NIOSH / MSHA for the substance at
issue.
!Warning!
Dust with silica in its composition may
contain crystalline silica. Silica is a basic
component of sand, quartz, brick, clay,
granite and numerous other minerals
and rocks, including masonry and concrete products.
Repeated and / or sub-stantial inhalation
of airborne crystalline silica can cause
serious or fatal respira-tory disease,
including silicosis. In addi-tion, the state
of California and some other authorities
have listed respirable crystalline silica as
a substance known to cause cancer.
When encountering such materials,
always follow the re-spiratory
precautions mentioned above.
!Warning!
Breathing asbestos dust is dangerous
and can cause severe or fatal injury, respiratory illness or cancer. The use and
disposal of asbestos containing
have been strictly regulated by OSHA
and the Environmental Protection
Agency. Do not blow or disturb asbestos
or asbestos containing products, such
as asbestos insulation. If you have any
reason to believe that you might be
disturbing asbestos, immediately
your employer or a local OSHA
representative.
products
contact
4
BR 340, BR 380

English / USA
!Warning!
Proper eye protection is a must. Even
though the discharge is directed away
from the operator, ricochets and bounce
backs can occur during blower
operations.
Never operate a blower
unless wearing goggles
or properly fitted safety
glasses with adequate
top and side protection
which comply with
ANSI Z 87.1 (or your applicable national
standard).
Fellow workers must also wear personal
protective equipment.
!Warning!
Blower noise may damage your hearing.
Wear sound barriers (ear plugs or ear
mufflers) to help protect your hearing.
Continual and regular users should have
their hearing checked regulary.
THE BLOWER
For illustrations and definitions of the
blower parts see the chapter on "Parts
and Controls"!
!Warning!
Never modify a blower in any way. Only
attachments supplied by STIHL or
expressly approved by STIHL for use
with the specific STIHL blower models
are authorized. Although certain
unauthorized attachment are useable for
the STIHL blower, their use may be
extremely dangerous.
THE USE OF THE BLOWER
Transport
Always turn off the engine before taking
the machine off your back and putting it
down. When transporting your unit in a
vehicle, properly secure it to prevent
turnover, fuel spillage and damage to the
machine.
Adjust carrying harness to suit your size
before starting work.
!Warning!
Before starting work, always inspect the
rubber buffers which connect the engine
to the pack frame. If the buffers are torn
or damaged, they should be replaced by
your STIHL dealer. Failure of one or
more buffers may cause the engine or
fuel tank to hit or rub against other parts,
and may lead to serious injury from
increased vibrations or from fire as the
result of fuel leakage.
Fuel
This STIHL unit uses an oil-gasoline
mixture for fuel (see the chapter on
"Fuel" of your owner`s manual).
5BR 340, BR 380
English / USA
!Warning!
Gasoline is an extremely
flammable fuel. If spilled
or ignited by a spark or
other ignition source, it
can cause fire and serious
burn injury or property
damage.
!Warning!
To reduce the risk of serious injury from
burns, never attempt to refuel the unit
until it has been completely removed
from the operator.
Use extreme caution when handling
gasoline or fuel mix.
Do not smoke or bring any fire or flame
near the fuel.
Fueling instructions
Fuel your machine in well-ventilated
areas, outdoors only. Always shut off the
engine and allow it to cool before
refueling. Relieve fuel tank pressure by
loosening fuel cap slowly. Never remove
fuel filler cap while engine is running.
Select bare ground for fueling and move
at least 10 feet (3 m) from the fueling
spot before starting the engine. Always
tighten fuel filler cap securely after
fueling. Wipe off any spilled fuel before
starting your blower and check for
leakage.
!Warning!
Check for fuel leakage while refueling
and during operation. If fuel or oil
leakage is found, do not start or run the
engine until leak is fixed and spilled fuel
has been wiped away. Take care not to
get fuel on your clothing. If this happens,
change your clothing immediately.
Always store gasoline in approved
container.
!Warning!
In order to reduce the risk of fuel spillage
and fire from an improperly tightened
fuel cap, correctly position and tighten
the fuel cap in the fuel tank opening.
!Warning!
Unit vibrations can cause
an improperly tightened
fuel filler cap to loosen or
come off and spill
quantities of fuel. In order
to reduce the risk of fuel
spillage and fire, tighten the fuel filler cap
by hand as securely as possible.
6
BR 340, BR 380

English / USA
Before Starting
!Warning!
Never operate your machine if it is
damaged, improperly adjusted or not
completely and securely assembled.
You should always inspect your unit
before starting it. Make sure the controls
and safety devices are working properly.
!Warning!
To reduce the risk of injury from thrown
parts, check your fanwheel and fan
housing for damage (cracks, nicks,
chipping). If any damage is found, stop
using the unit and contact your STIHL
dealer for repair.
: Throttle trigger must move freely
and spring back to idle position
when released.
: Stop switch must move easily to $
: Tightness of spark plug boot - if boot
is loose, sparks may occur and
ignite fuel vapor!
: Condition of fanwheel and fan
housing.
Starting
!Warning!
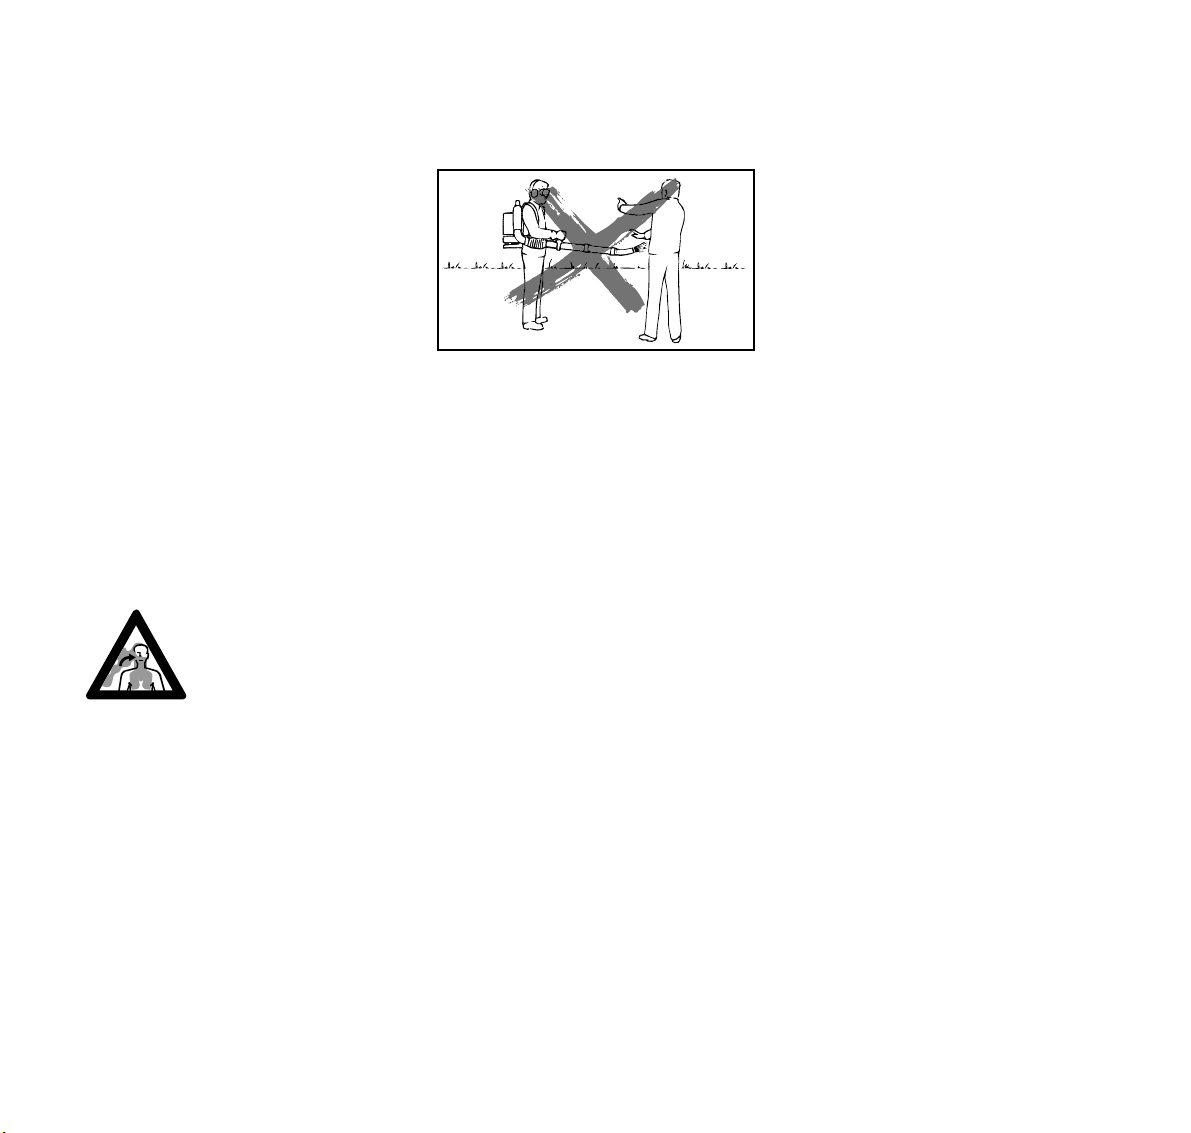
Your blower is a one-person machine.
To reduce the risk of eye or other injury
from thrown objects, insure that bystanders are at least 50 feet (15m) away
during use.
Stop the operation immediately if you
are approached.
For specific starting instructions, see the
appropriate section of your owner`s
manual. Place the machine on firm
ground or other solid surface in an open
area. Maintain good balance and secure
footing.
!Warning!
When you pull the starter grip, don`t
wrap the starter rope around your hand.
Do not allow the grip to snap back, but
guide the starter rope slowly back to
permit the rope to rewind properly.
Failure to follow this procedure may
result in injury to hand or fingers and
may damage the starter mechanism.
The assistance of another person may
be needed in placing the unit on your
back after starting. In order to reduce the
risk of injury to the assistant from thrown
objects or from contact with fumes, the
engine should be kept at idle speed
during this brief period, and your
assistant should not stand in the area of
the outlet nozzle or exhaust. Otherwise,
the unit should be started and operated
without assistance.
7BR 340, BR 380

English / USA
Muffler and Catalytic Converter
!Warning!
The muffler and other parts of the engine
(e.g. fins of the cylinder, spark plug)
become hot during operation and remain
hot for a while after stopping the engine.
To reduce risk of burns do not touch the
muffler and other parts while they are
hot.
!Warning!
To reduce the risk of fire or burn injury,
let the unit cool down before refueling
your power tool after use.
!Warning!
Never disassemble or modify your
muffler. The muffler could be damaged
and cause an increase in heat radiation
or sparks, thereby increasing the risk
of fire or burn injury. You may also
permanently damage the engine. Have
your muffler serviced and repaired by
your STIHL servicing dealer only.
!Warning!
To reduce the risk of fire or burn injury,
keep the area around the muffler clean.
Remove all debris such as pine needles,
branches or leaves.
!Warning!
Some STIHL blower
models are equipped with
a catalytic converter,
which is designed to
reduce the exhaust
emissions of the engine
by a chemical process in the muffler.
Due to this process, the muffler does not
cool down as rapidly as conventional
mufflers when the engine returns to idle
or is shut off. To reduce the risk of fire
and burn injuries, the following specific
safety precautions must be observed.
!Warning!
Since a muffler with a catalytic converter
cools down less rapidly than
conventional mufflers, always set your
backpack blower down in the upright
position and never locate it where the
muffler is near dry brush, grass, wood
chips or other combustible materials
while it is still hot.
Let the engine cool down sitting on
concrete, metal, bare ground or solid
wood (e.g. the trunk of a felled tree)
away from any combustible substances.
!Warning!
An improperly mounted or damaged
cylinder housing or a damaged/
deformed muffler shell may interfere
with the cooling effect of the catalytic
converter. To reduce the risk of fire or
burn injury, do not continue work with a
damaged or improperly mounted
cylinder housing or a damaged/
deformed muffler shell. Your muffler is
furnished with a screen designed to
reduce the risk of fire from the emission
of hot particles. Due to the heat from the
catalytic reaction, this screen on a
catalytic converter will normally stay
clean and need no service or
maintenance. If you experience loss of
performance and you suspect a clogged
screen, have your muffler maintained by
a STIHL servicing dealer.
8
BR 340, BR 380
English / USA
Working instructions
Work carefully.
When working with the blower, always
wear it on your back using the carrying
harness. Wrap your fingers tightly
around the handle, keeping the control
handle cradled between your thumb and
forefinger. Keep your hand in this
position to have your machine under
control at all times.
Make sure your control handle (and grip
for vacuum attachment) are in good
condition and free of moisture, pitch, oil
or grease.
Operate the blower under good visibility
and daylight conditions only.
!Warning!
Your blower produces
poisonous exhaust fumes
as soon as the combustible engine is running.
These gases (e.g. carbon
monoxide) may be colorless and odorless. To reduce the risk of
serious or fatal injury from breathing
toxic fumes, never start or run the blower
indoors or in poorly ventilated locations.
Ensure proper ventilation when working
in trenches or other confined areas.
Keep the space behind and beside the
engine clear at all times to allow for the
escape of hot and toxic exhaust fumes.
!Warning!
To reduce the risk of personal injury, do
not direct air blast towards bystanders,
since the high pressure of the air flow
could injure eyes and could blow small
objects at great speed.
!Warning!
Always shut off the engine before
cleaning or servicing the unit or
replacing parts.
!Warning!
The blower fan between the air intake
and output openings rotates whenever
the engine is running.
Never insert any foreign object into the
air intake of the machine or into the
nozzle of the blower. It will damage the
353BA039 KN
fan wheel and may cause serious injury
to the operator or bystanders as a result
of the object or broken parts being
thrown out at high speed.
Do not place the blower on the ground
when operating at high speed, because
small objects such as sand, grass, dust,
etc. may be pulled into the air intake and
damage the fan wheel.
To reduce the risk of stumbling and loss
of control,do not walk backward while
operating the machine.
In an emergency, you may slip out of the
harness and throw off the machine
quickly. Try slipping out of the harness a
number of times before using the
machine in order to become
accustomed with it.
Do not throw off the machine while
practising as it could damage the
machine.
Pay attention to the direction of the wind,
i.e., do not work against the wind.
9BR 340, BR 380

English / USA
Using the Blower
The blower is designed for singlehanded operation. It is carried as a
backpack and operated with the right
hand on the control handle.
The powerful ground-level airstream can
be aimed highly accurately and
effectively. It enables the operator to
quickly blow-sweep large areas.
The blower may be used only for the
operations described in your manual.
The blower can be used for clearing
leaves, grass, paper, dust and light snow
in yards, gardens, sports stadiums,
parks, driveways and parking lots. It is
also suitable for clearing forest paths.
Other applications are blowing out
pipes, drains, gutters and your carport.
Working techniques
To minimize blowing time, use rakes and
brooms to loosen debris before blowing.
Recommended working techniques to
minimize airborne debris and pollution:
: In dusty conditions, slightly dampen
surfaces.
: Use the full blower nozzle extension
so the air stream can work close to
the ground.
: Do not direct debris at people,
children, pets, at open windows or
freshly-washed cars. Blow debris
safely away.
: After using blowers, CLEAN UP.
Dispose of debris in trash
receptacles. Do not blow debris
onto neighboring properties.
Recommended working techniques to
minimize noise:
: Operate power equipment only at
reasonable hours - not early in the
morning, late at night or during the
noon-break when people might be
disturbed. Comply with times listed
in local ordinances. Usual
recommendations are 9:00 a.m. to
12:00 a.m. and 03:00 p.m. to 5:00
p.m. on workdays for professionals.
Special considerations should be
given to neighbors on weekends.
: Fewer engines mean less noise;
therefore use only one piece of
power equipment at a time, when
possible.
: Operate power blowers at the
lowest possible throttle speed to do
the job.
: Check your equipment before
operation, especially the muffler, air
intakes and air filters.
Conserve water by using power blowers
instead of hoses for those lawn and
garden applications where a blower can
be properly used, such as cleaning
patios or porches.
10
BR 340, BR 380
English / USA
Using the Vacuum Attachment
(special accessory)
The vacuum is designed to pick up dry
material such as leaves, grass, small
twigs and bits of paper.
!Warning!
To reduce the risk of
personal injury from fire
and explosion, never
attempt to pick up hot or
burning substances (e.g.
smoldering ashes,
glowing cigarettes)
or combustible fluids (e.g.
gasoline, paint thinners).
MAINTENANCE, REPAIR AND
STORING
Maintenance, replacement, or repair
of the emission control devices and
systems may be performed by any
nonroad engine repair establishment
or individual. However if you claim
warranty for a component which has
not been serviced or maintained properly or if nonapproved replacement
parts were used, STIHL may deny
warranty.
Use only identical STIHL replacement
parts for maintenance and repair. Use of
parts manufactured by others may
cause serious or fatal injury.
Follow the maintenance and repair
instructions in the appropriate section of
your owner's manual. Refer to the
maintenance chart at the last pages of
this manual.
!Warning!
Always stop the engine and make sure
that the fan is stopped before doing any
maintenance or repair work or cleaning
the blower. Do not attempt any maintenance or repair work not described in your
owner's manual. Have such work
performed at your STIHL servicing
dealer only.
Check fuel filler cap for leaks at regular
intervals. Use the specified spark plug
and make sure it and the ignition lead
are always in good condition.
Tighten all nuts, bolts and screws except
the carburetor adjustment screws after
each use.
!Warning!
A worn or damaged muffler is a fire
hazard and may cause loss of hearing.
Check to see that the muffler is in good
condition. The blower must not be
ted if the muffler is not functioning properly or has been removed.
Remember that the risk of forest fires is
greater in hot weather. Use the spark
arresting muffler supplied with the unit.
Never touch a hot muffler or burn will
result.
opera-
!Warning!
In order to reduce the risk of fire, do not
modify or remove any part of the muffler
or spark arrestor.
Keep spark plug and wire connection
tight and clean. The spark plug electrode
gap should be checked with a feeler
gauge at least every 50 operating hours
and reset if necessary. Fit a new spark
plug if the electrodes are badly pitted.
For any maintenance please refer to the
maintenance chart and to the warranty
statement near the end of this manual.
Store blower in a dry, high or locked
location and out of reach of children.
Before storing for longer than a few
days, always empty the fuel tank.
11BR 340, BR 380
English / USA
Assembling the Blower
5
4
10
7
2
3
1
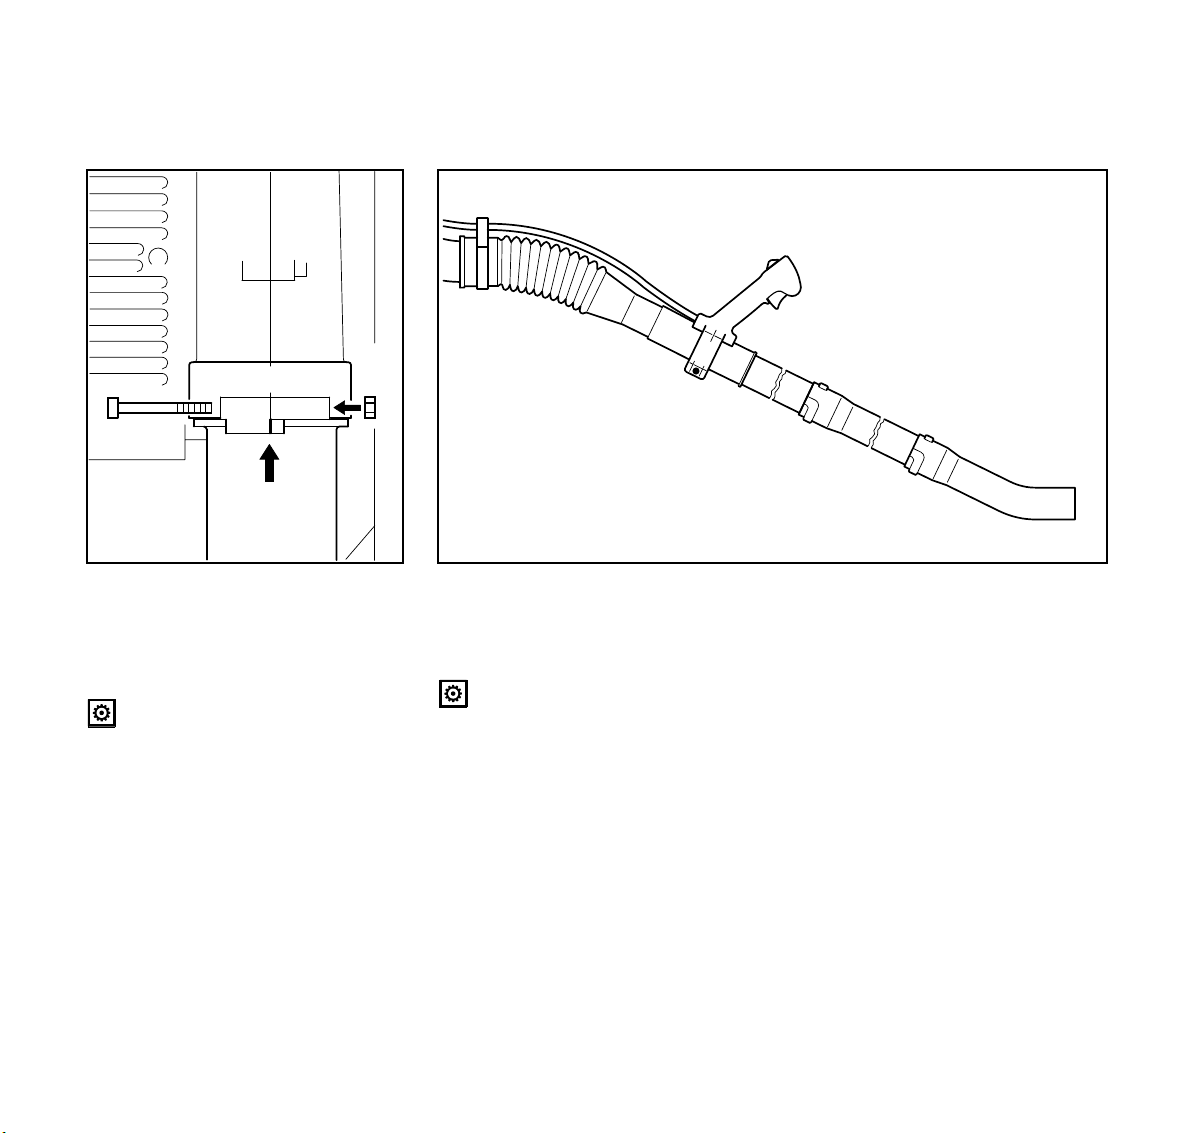
Mounting the Elbow
A combination wrench and carburetor
screwdriver are stowed on the underside
of the blower.
The throttle cable is already
connected. Make sure it is not
kinked during assembly.
: Push the elbow (1) into the stub (2)
as far as it will go – the stops on the
elbow and stub must line up.
: Fit the nut (3) in the hexagon recess
in the stub.
: Insert the screw in the nut from the
other side and tighten moderately –
the elbow must still turn freely.
353BA002 KN
: Secure the throttle cable (4) in
position with the retainer (5).
Mounting the Blower Tubes
Operate the machine only with
both blower tubes properly
mounted.
: Push the blower tube (6) into the
pleated hose (7).
: Push blower tube (8) onto the end of
blower tube (6) and rotate it
clockwise until the bayonet coupling
locks.
11
6
8
9
373BA001 KN
: Push the nozzle (9) onto the blower
tube (8) and rotate it clockwise until
the bayonet coupling locks.
: Rotate the pleated hose (7)
counterclockwise as far as stop and
leave it in that position.
: Turn the control handle (10)
counterclockwise to the horizontal
position.
: Rotate the complete blower tube
assembly until the nozzle discharge
opening points in the same direction
as the control handle.
: Tighten down the clamp screw (11).
12
BR 340, BR 380
10
11
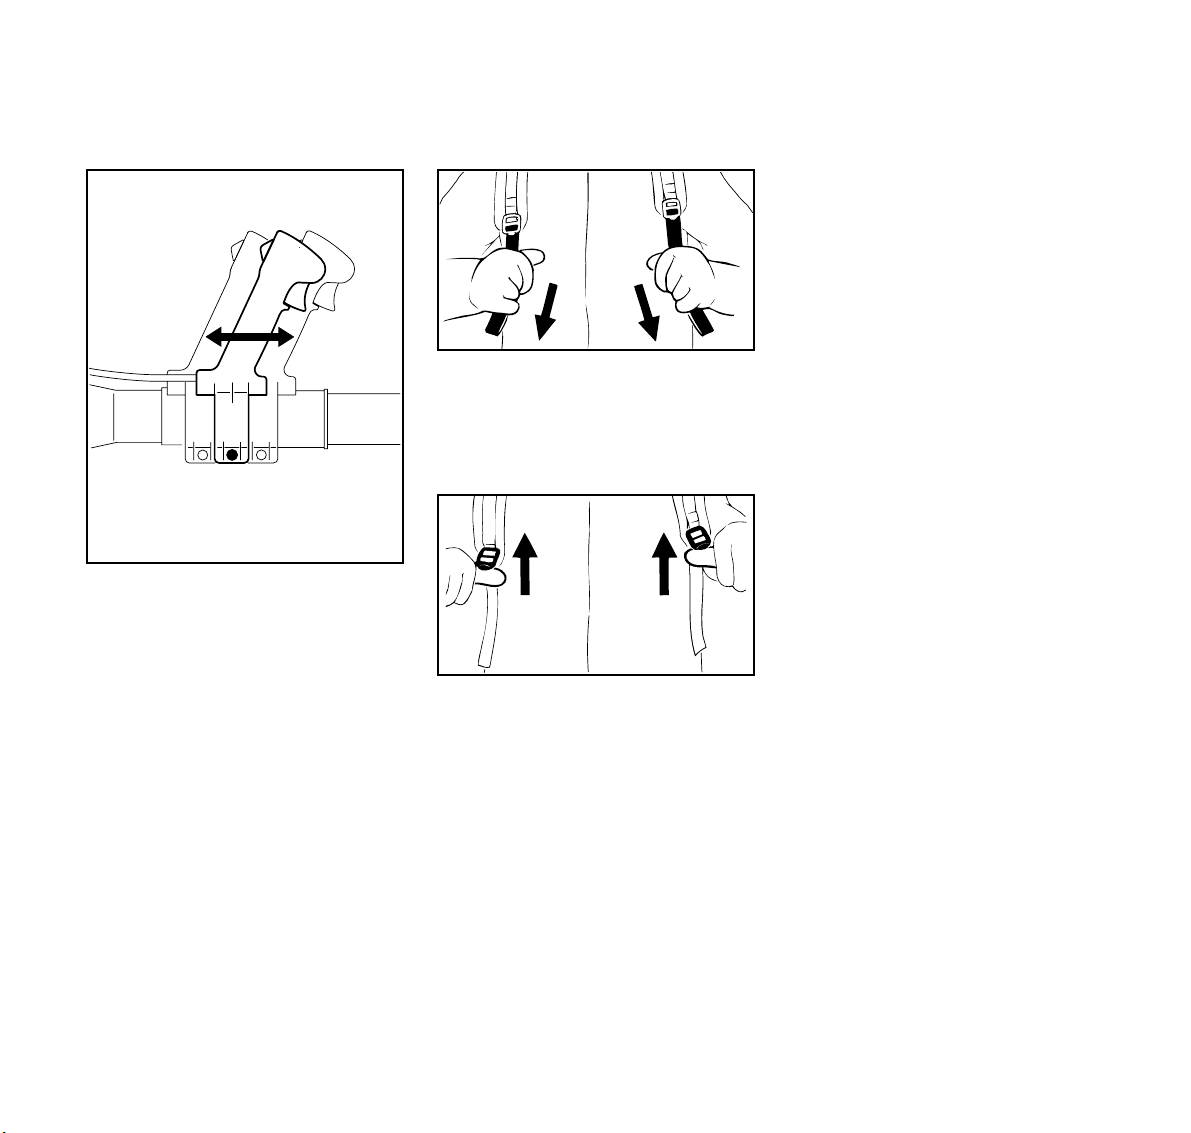
Adjusting the Control Handle
: Put the unit on your back.
: Loosen the clamp screw (11).
: Slide the control handle (10) along
the pleated hose to the most
comfortable position.
: Tighten down the clamp screw (11).
Adjusting the Harness Straps
: Pull the ends of the straps
downward to tighten the harness.
373BA002 KN
Loosening the Harness Straps
: Lift the tabs of the two sliding
adjusters.
: Adjust the straps so that the
backplate is held firmly and
comfortably against your back.
English / USA
Fuel
This engine is certified to operate on
unleaded gasoline and the STIHL twostroke engine oil at a mix ratio of 50:1.
Your two-stroke engine requires a
mixture of high-quality gasoline and
quality two-stroke air cooled engine oil.
Use mid-grade unleaded gasoline with a
373BA003 KN
minimum octane rating of 89 (R+M/2). If
the octane rating of the mid-grade
gasoline in your area is lower, use
premium unleaded fuel.
Fuel with a lower octane rating may
increase engine temperatures. This, in
turn, increases the risk of piston seizure
and damage to the engine.
The chemical composition of the fuel is
also important. Some fuel additives not
only detrimentally affect elastomers
(carburetor diaphragms, oil seals, fuel
lines, etc.), but magnesium castings and
catalytic converters as well. This could
cause running problems or even
373BA004 KN
damage the engine. For this reason
STIHL recommends that you use only
nationally recognized high-quality
unleaded gasoline!
13BR 340, BR 380
English / USA
Fueling
Use only STIHL two-stroke engine oil or
equivalent high-quality two-stroke
engine oils that are designed for use
only in air cooled two-cycle engines.
We recommend STIHL 50:1 two-stroke
engine oil since it is specially formulated
for use in STlHL engines.
Do not use BIA or TCW rated (twostroke water cooled) mix oils or other
mix oils that state they are for use in both
water cooled and air cooled engines
(e.g., outboard motors, snowmobiles,
chainsaws, mopeds, etc.).
Take care when handling gasoline.
Avoid direct contact with the skin and
avoid inhaling fuel vapor. When filling at
the pump, first remove the canister from
your vehicle and place the canister on
the ground before filling. Do not fill fuel
canisters that are sitting in or on a
vehicle.
The canister should be kept tightly
closed in order to avoid any moisture
getting into the mixture.
The machine‘s fuel tank and the canister
in which fuel mix is stored should be
cleaned as necessary.
Fuel mix ages
Only mix sufficient fuel for a few days
work, not to exceed 3 months of storage.
Store in approved fuel-canisters only.
When mixing, pour oil into the canister
first, and then add gasoline. Close the
canister and shake it vigorously by hand
to ensure proper mixing of the oil with
the fuel.
Gasoline
Oil (STIHL 50:1 or
equivalent high-quality oils)
US gal. US fl.oz
12.6
2 1/2 6.4
5 12.8
Dispose of empty mixing-oil canisters
only at authorized disposal locations.
373BA030 KN
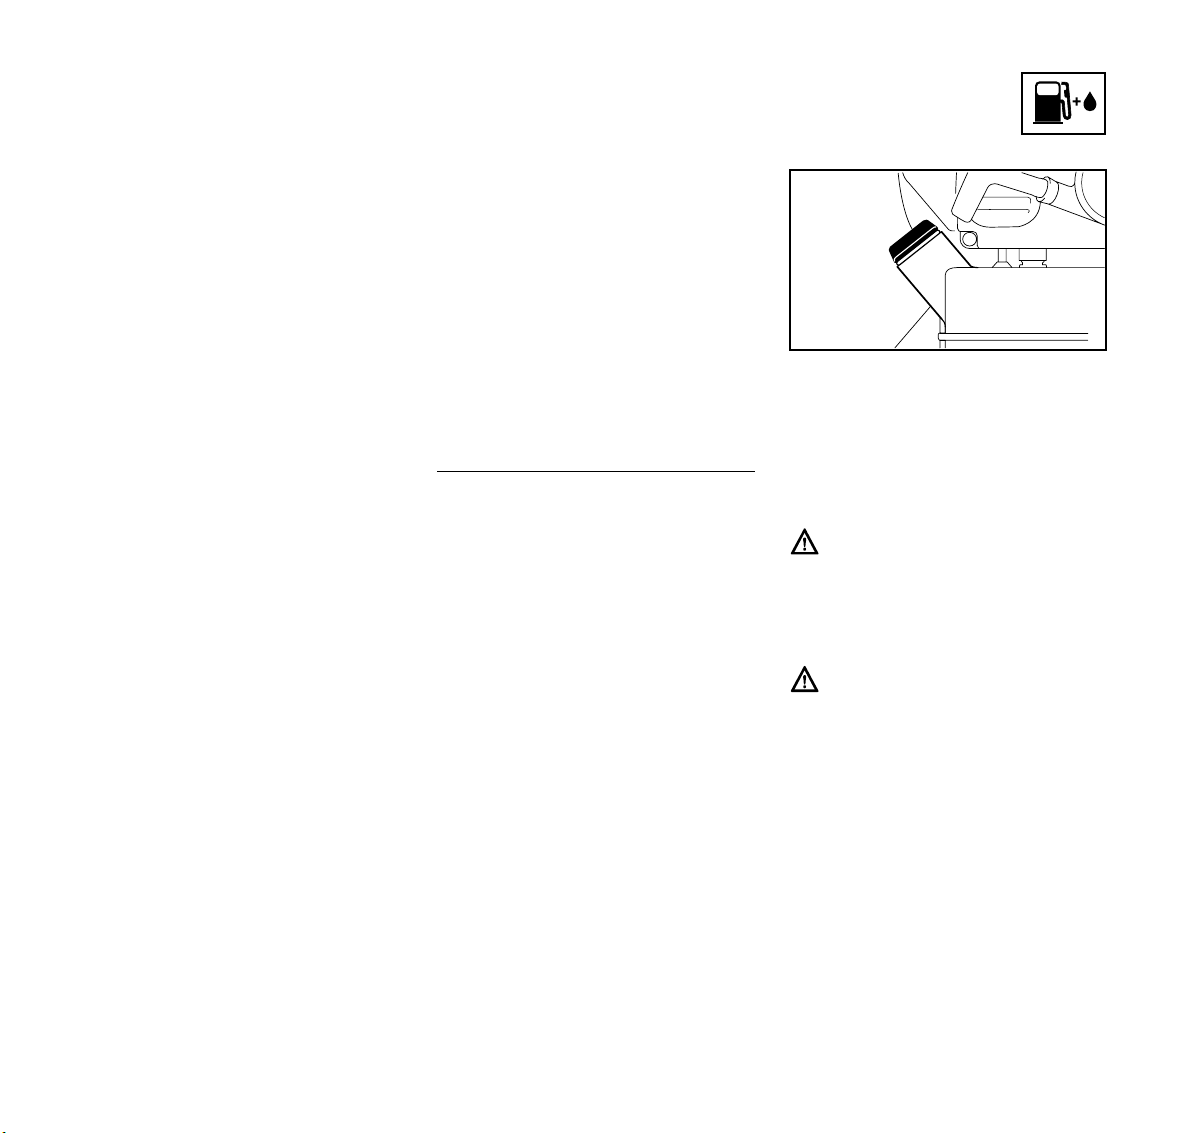
Before fueling, clean the filler cap and
the area around it to ensure that no dirt
falls into the tank.
Always thoroughly shake the mixture in
the canister before fueling your
machine.
In order to reduce the risk of burns
or other personal injury from
escaping gas vapor and fumes,
remove the fuel filler cap carefully
so as to allow any pressure build-up
in the tank to release slowly.
After fueling, tighten fuel cap
as securely as possible by hand.
14
BR 340, BR 380
English / USA
Change the fuel pick up body
every year.
Before storing your machine for a long
period, drain and clean the fuel tank and
run engine until carburetor is dry.
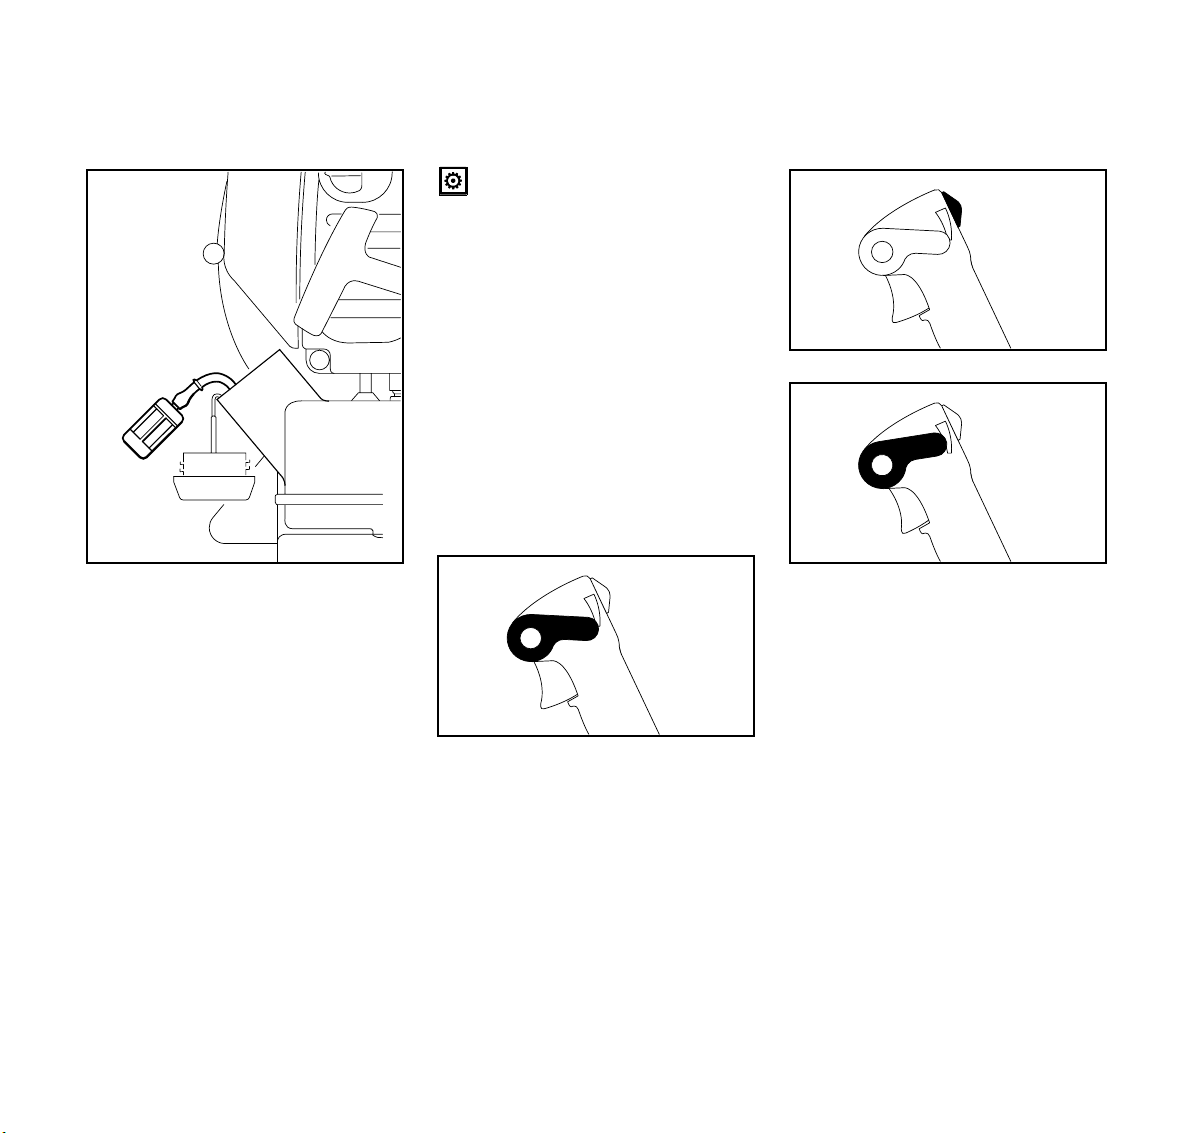
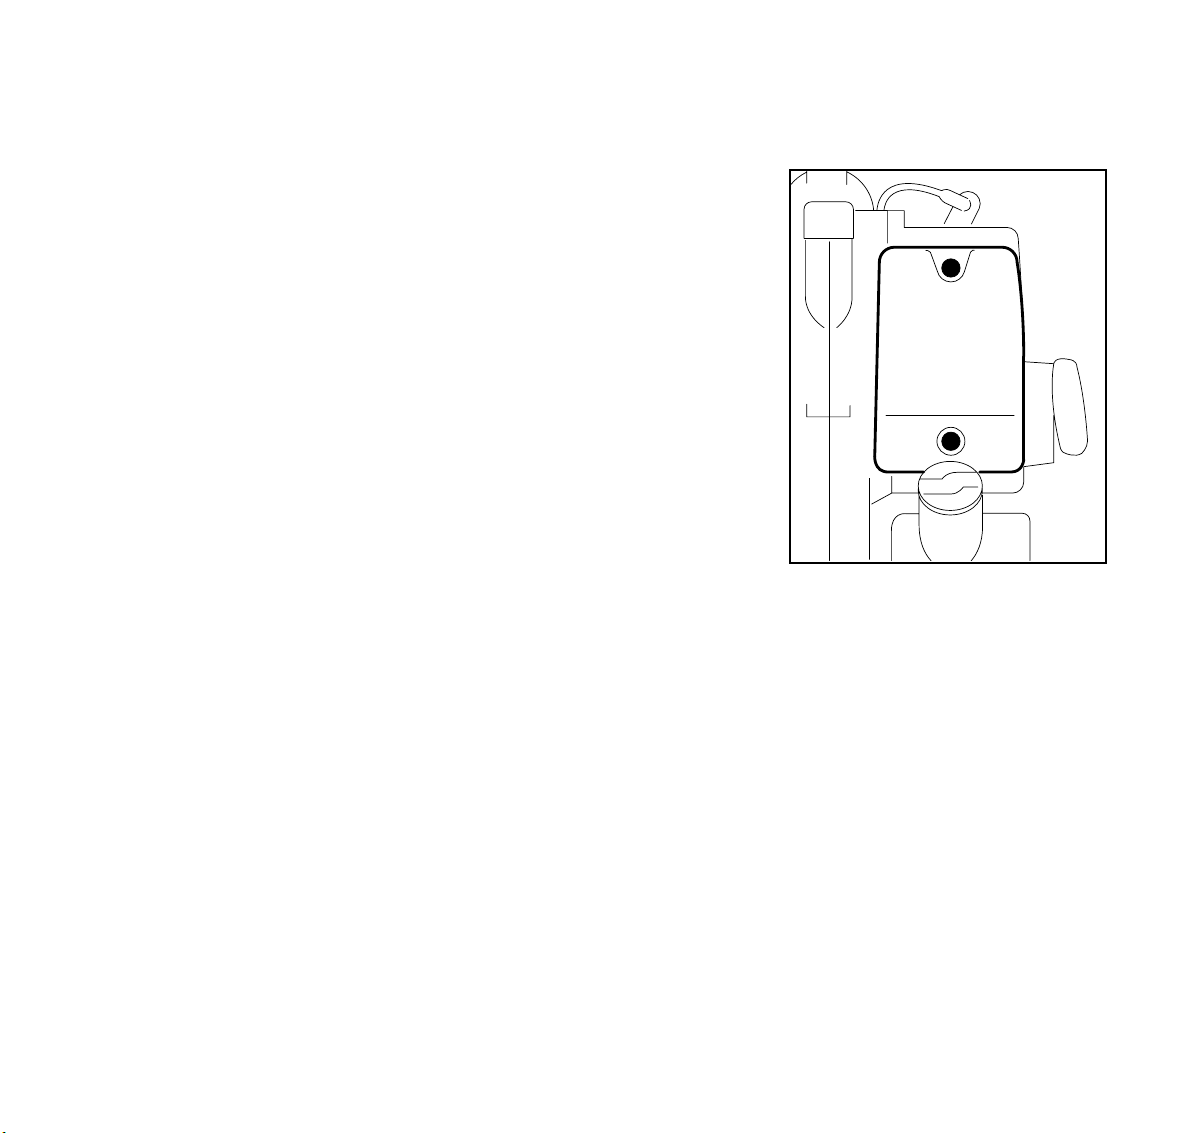
Information Before You Start
With the engine stopped and before
starting, check the air intakes
between the backplate and
powerhead for blockages and clean
if necessary.
A protective screen is available as a
special accessory to keep the air
intakes clear.
Always move the setting lever to the idle
position before shutting off the engine
because the throttle cable will otherwise
disconnect itself from the throttle trigger.
The throttle cable reconnects itself
automatically when the setting lever is
moved to the idle position.
373BA007 KN
Setting lever in idle position.
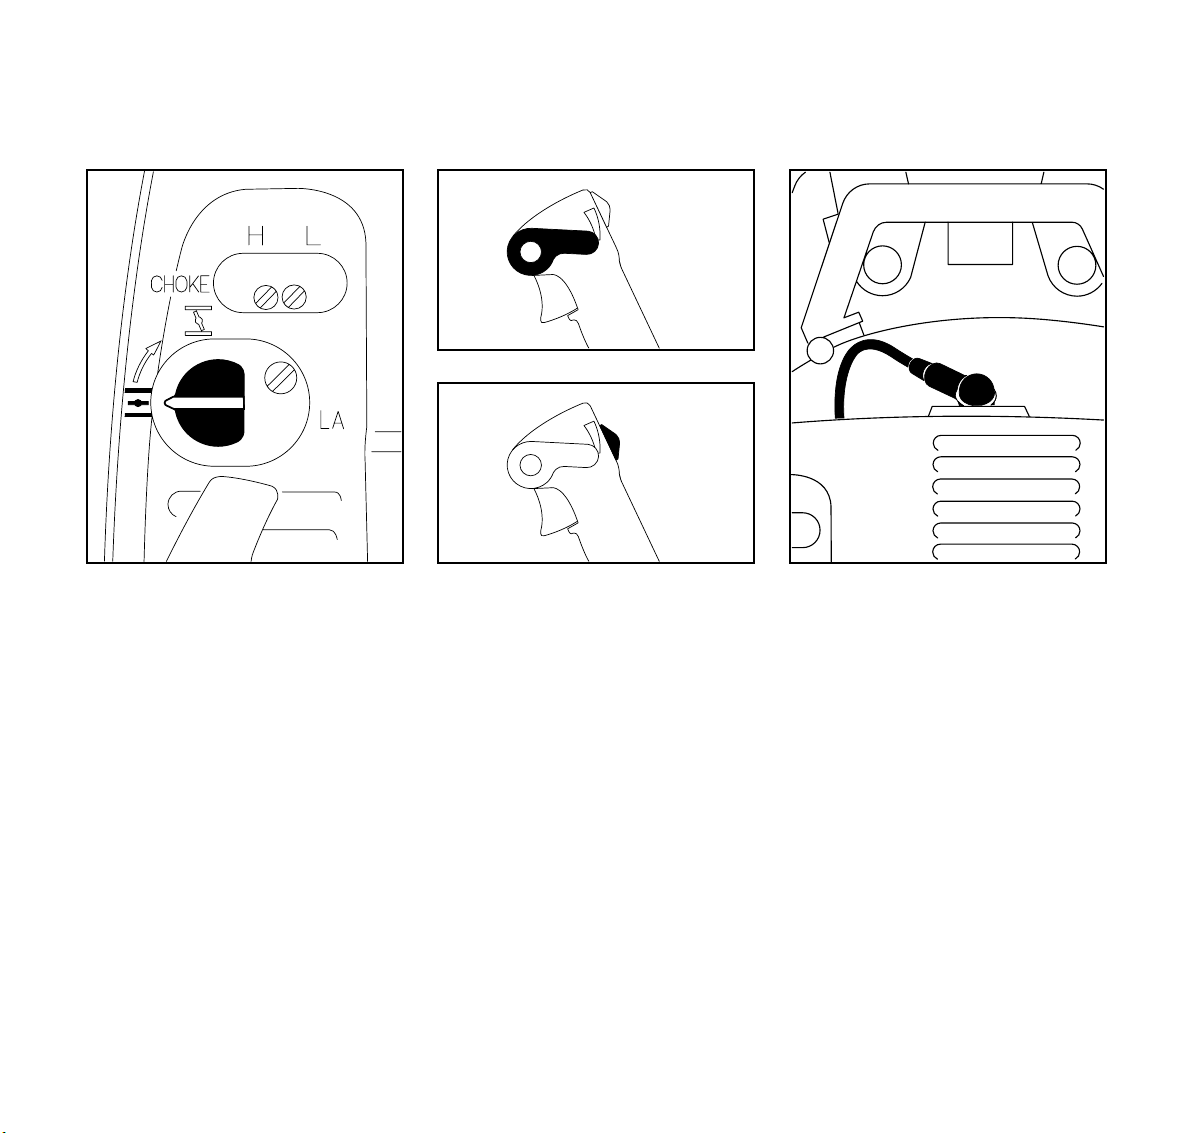
Starting / Stopping the Engine
1
2
: Observe safety precautions – see
chapter “Safety Precautions and
Working Techniques”.
: Slide the stop switch (1) to #
: Move the setting lever (2) to the
373BA037 KN
center position – this is the
starting throttle position
Note:
The setting lever can be used to select
any throttle opening between idle speed
(lower stop) and full throttle (upper stop).
Set the lever to idle position before
switching off the engine.
373BA008 KN
373BA009 KN
15BR 340, BR 380

English / USA
373BA010 KN373BA011 KN
: Pull the starter grip slowly with your
right hand until you feel it engage
and give it a brisk strong pull. Do not
pull the starter rope out all the way
as it might otherwise break.
: Do not let the starter grip snap back.
: Guide it slowly back into the housing
so that the starter rope can rewind
properly.
373BA012 KN
: If the engine is cold, turn the choke
knob to g
: If the engine is warm, turn the
choke lever to e
Also use this position if the engine
has been running but is still cold.
16
: Put the unit on the ground. Check
that bystanders are well clear of the
general work area and the nozzle.
: Make sure you have a firm footing:
Hold the unit with your left hand on
the housing and put one foot against
the base plate to prevent it slipping.
BR 340, BR 380
English / USA
2
373BA014 KN
1
When engine begins to fire:
: If engine is cold:
Turn choke knob to e and continue
cranking until engine runs.
: If engine is warm:
Continue cranking until engine runs.
373BA013 KN
As soon as engine runs:
: Move the setting lever (2) to the
lower stop so that the engine settles
down to idle speed.
To shut down the engine:
: Slide the stop switch (1) to $
At very low outside temperatures:
Allow engine to warm up
As soon as engine runs:
: Move the setting lever to the lower
stop – the engine settles down to
idle speed.
: Open throttle slightly – warm up
engine for a short period.
373BA015 KN
If the engine does not start:
If you did not turn the choke knob to e
quickly enough after the engine began to
fire, the combustion chamber is flooded.
: Pull off the spark plug boot.
: Unscrew and dry off the spark plug.
: Set the stop switch to 0
: Open the throttle fully.
: Pull the starter rope several times to
clear the combustion chamber.
373BA016 KN
17BR 340, BR 380
English / USA
Operating Instructions Cleaning the Air Filter
: Fit the spark plug and reconnect the
spark plug boot.
: Move the stop switch to #
: Turn the choke knob to e
even if the engine is cold.
: Now start the engine.
Fuel tank run until dry and then
refueled
: Pull the starter rope several times to
prime the fuel line.
During break-in period
A factory new machine should not be run
at high revs (full throttle off load) for the
first three tank fillings. This avoids
unnecessary high loads during the
break-in period. As all moving parts
have to bed in during the break-in
period, the frictional resistances in the
engine are greater during this period.
The engine develops its maximum
power after about 5 to 15 tank fillings.
During operation
After a long period of full-throttle
operation, allow engine to run for a while
at idle speed so that the heat in the
engine can be dissipated by flow of
cooling air. This protects enginemounted components (ignition,
carburetor) from thermal overload.
After finishing work
Wait for engine to cool down. Drain the
fuel tank. Store the machine in a dry
place. Check tightness of nuts and
screws (not adjusting screws) at regular
intervals and retighten as necessary.
1
2
1
373BA017 KN
Dirty air filters reduce engine power
increase fuel consumption and make
starting more difficult.
If there is a noticeable loss of engine
power
: Turn choke knob to g
: Release the screws (1) and pull
off the filter cover (2).
18
BR 340, BR 380
English / USA
Motor Management
3
4
: Remove the main filter (3) from the
cover and inspect it –
if it is dirty or damaged, fit a new
one.
: Take the prefilter (4) out of the filter
cover.
: Make sure the prefilter is dry –
knock it out on the palm of your
hand or blow out with compressed
air.
: Always replace a damaged prefilter.
5
: Clean the filter cover and filter
chamber.
: Install the main filter and prefilter
elements in the filter cover.
: Fit the cover on the filter base (5)
and tighten it down firmly.
373BA018 KN
Exhaust emissions are controlled by the
design of the fundamental engine
parameters and components (e.g.
carburation, ignition, timing and valve or
port timing) without the addition of any
major hardware.
Note:
Always install a new prefilter when
you change the main filter.
19BR 340, BR 380
English / USA
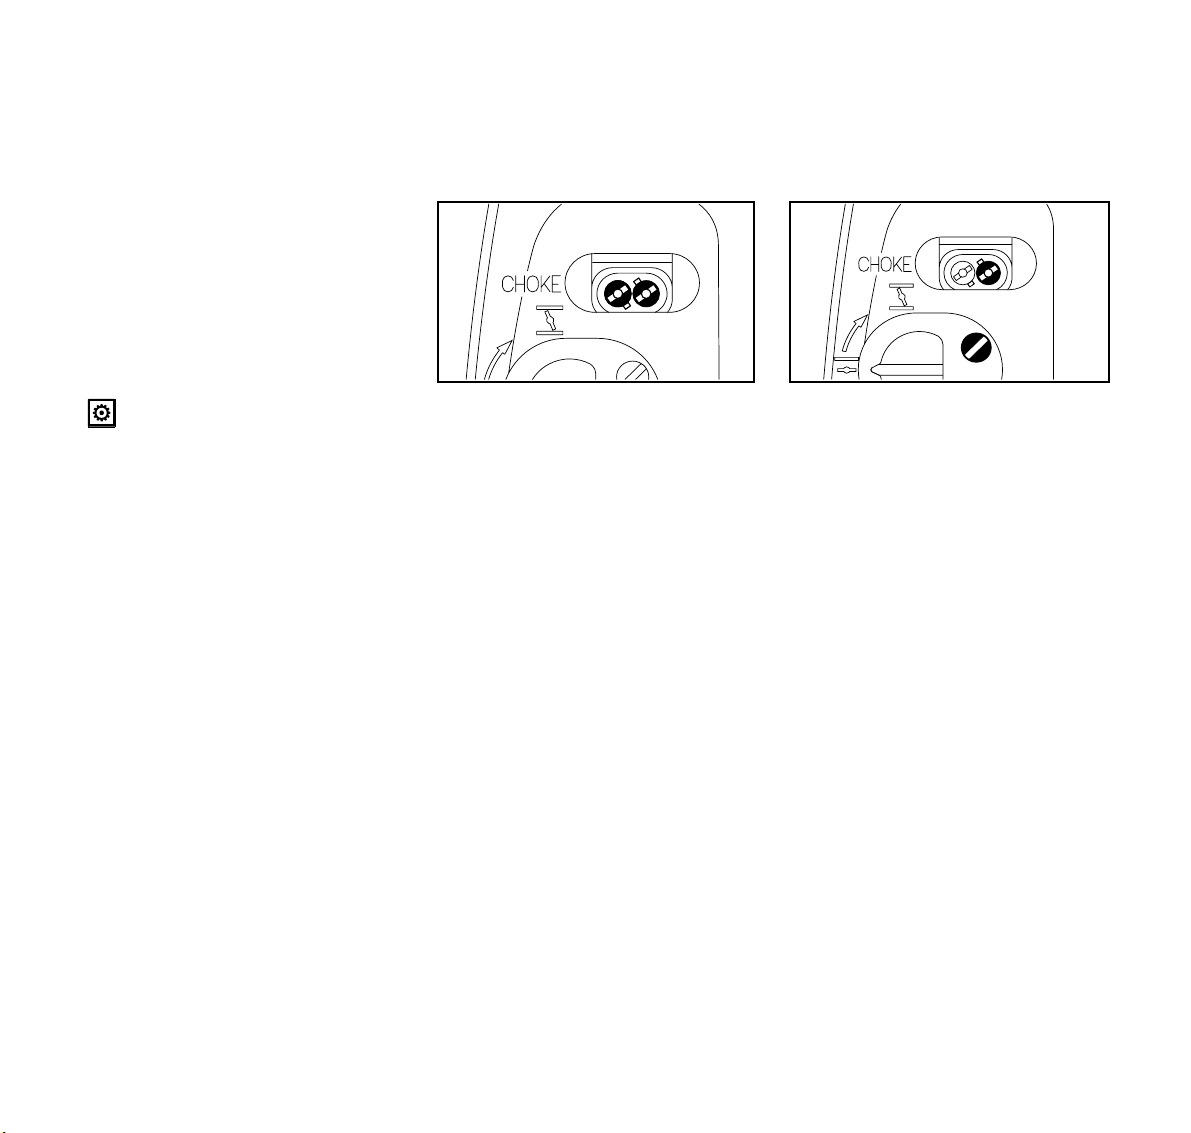
Adjusting the Carburetor
General Information
The carburetor comes from the factory
with a standard setting.
This setting provides an optimum
fuel-air mixture under most operating
conditions.
With this carburetor it is only possible to
correct the adjustment of the high speed
screw within fine limits.
If the setting is too lean, there is a
risk of engine damage due to
insufficient lubrication and
overheating.
Standard Setting
L
H
: Shut off the engine.
: Turn the high speed screw (H) and
low speed screw (L) counterclockwise as far as stop (max. 1/4
turn).
Adjusting Idle Speed
373BA043 KN
Engine stops while idling
: Carry out standard setting on the
low speed screw.
: Turn idle speed screw (LA)
clockwise until the engine runs
smoothly.
Erratic idling behavior, poor
acceleration
: Carry out standard setting on the
low speed screw.
: Turn low speed screw (L)
counterclockwise until the engine
runs and accelerates smoothly.
L
LA
373BA044 KN
20
It is usually necessary to change the
setting of the idle speed screw (LA)
after every correction to the low speed
screw (L).
BR 340, BR 380
Loading...