Spektrum SPMAR7200BX User Manual

Spektrum AR7200BX Governor |
|
Firmware Update |
® |
Important: When using the AR7200BX with larger helicopters (500-size and larger): It is necessary that you connect a DSMX® remote receiver (not included) to the AR7200BX before binding . See “Receiver Installation” for more information.
IMPORTANT: You must download and install the latest AR7200BX receiver firmware at http://ar7200bx.beastx.com/ BEFORE installing the governor update.
Required
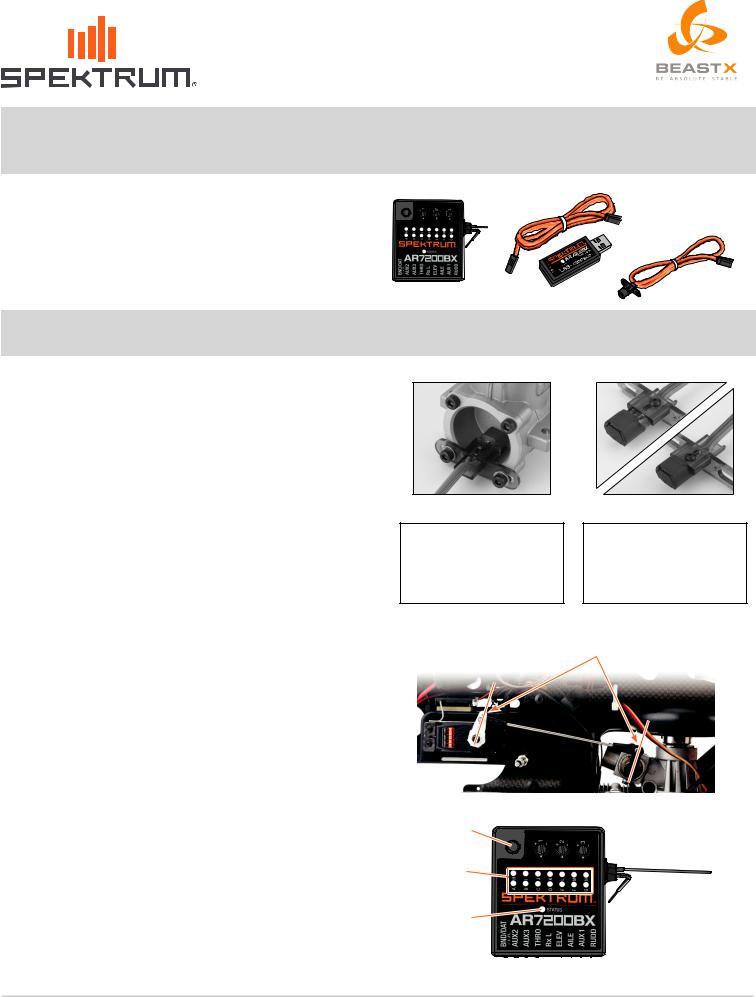
• Spektrum™ AR7200BX Flybarless Controller
• Spektrum AR7200BX USB Updater (SPMA3030 or BTXA76007)
• Governor Sensor
–Aircraft RPM Sensor (SPM9560) or
– RPM Sensor (optical sensor) (SPM1452)
 WARNING: For first-time use or when making mechanical changes that involve throw, always ensure you reset the servo limits to prevent binding. Not doing so will cause the helicopter to crash, resulting in property damage and injury.
RPM Sensor Installation
Mount the RPM sensor and bracket to the backplate screws of your engine as shown.
•Threadlock must be used on the screws.
•The RPM sensor bracket is adjustable by extending or retracting the rpm sensor and fastening the screw in place.
•Connect the RPM sensor to Aux 3.
Preparing Your Transmitter
1.Program the throttle channel travel to 100% for both high and low endpoints.
2.Select a linear throttle curve. You will program your normal throttle curves later.
Throttle Arm Setup
1.Disconnect the throttle linkage from the throttle arm.
2.Make sure the throttle curve in your transmitter is linear.
3.Move the throttle stick to 50% and make sure the throttle barrel is open 50%.
4.Adjust the throttle arm and the servo arm so they are parallel to each other.
5.Select holes in the servo horn and the throttle arm to achieve the full range of throttle motion.The transmitter servo travel must stay above 100%.
6.Program your normal throttle curves for flying.
Navigating the Governor Setup Menus
•Enter the Governor Setup Menu by pressing the Setup Button on the
AR7200BX before power-up and holding it for approximately 2 seconds until the LED at menu point (A) illuminates.
•There are 9 menu points (Menu LED, A, B, C, D, E, F, G, H, I).
•Menu points are shown by the menu LEDs located to the right of the alphabetical letters on the case.
•Menu status is shown on the LED located next to “Status” close to the center of the case.
•Quickly press the Setup Button to move from one menu point to the next.
•Press and hold the Setup Button to change or save a value.
DX9 screens shown
Parallel
Setup Button
Menu Point
LEDs
Status LED
1

Menu A
Governor Off/On:
1.The first time you power on the AR7200BX, the governor will be OFF (Status LED will be OFF).You must turn the governor ON to access all of the menu options.
2.To turn the governor ON, press and hold the Setup Button until the Status
LED is RED.
3.Quickly press the Setup Button to move to Menu B.
Status-LED
OFF |
Governor OFF |
|
|
Red Solid |
Governor ON |
|
|
Menu B
Sensor Test Mode:
Each time the RPM sensor is triggered, the Status LED will turn RED, indicating that the sensor is detecting crankshaft rotation.
Press the Setup Button to move to Menu C.
Status-LED
OFF |
RPM Sensor OFF |
|
|
Red Solid |
RPM Sensor ON |
|
|
Important: The Sensor Test does not guarantee governor performance, but will confirm if the sensor is detecting crankshaft rotation.
Menu C
Setting the Throttle Low Point:
The Status LED will turn Solid Blue when the receiver detects a valid low throttle point.
1.Lower the transmitter throttle stick and confirm that the carburetor is fully closed (Not idle position).
2.Confirm that the Status LED is Blue.
3.Press the Setup Button to save the low throttle position.The AR7200BX will save the setting and move to Menu D.
Menu D
Setting the Throttle High Point:
The Status LED will turn Solid Blue when the receiver detects a valid high throttle point.
1.Raise the transmitter throttle stick and confirm that the carburetor is fully open.
2.Confirm that the Status LED is Blue.
3.Press the Setup Button to save the high throttle position.The AR7200BX will save the setting and move to Menu E.
Status-LED
OFF |
Throttle is outside the valid range. |
Blue Solid |
Valid low throttle point |
Status-LED
OFF |
Throttle is outside the valid range. |
Blue Solid |
Valid high throttle point |
Menu E
Checking Activation Points for Throttle and RPM channel:
•The Status LED will turn Blue when the throttle is above the activation threshold (above 25% throttle).
•The Status LED will turn Red when the RPM channel is above the activation threshold (5% above or below the center position).
To activate the governor, ALL of the following conditions must be met:
•The RPM channel is 5% above or below the center position.
•The throttle channel is above 25%.
•The RPM reaches 60% of the programmed target RPM.
The governor deactivates if ANY of the following conditions are met:
•The RPM channel is within 5% of the center position.
•The throttle channel is below 25%.
•The RPM is lower than 60 RPM.
After confirming the activation points, press the button to move to Menu F.
Status-LED |
|
|
|
OFF |
|
|
|
Blue Solid |
Above 25% throttle |
Red Solid |
5% above or below center position |
Purple Solid |
Both Red and Blue conditions are met. |
|
|
2
 Loading...