


14SH654
SERGER MODEL 14SH654 DETAILED THREADING GUIDE
3 / 4 – Thread Sergers
Step 1:
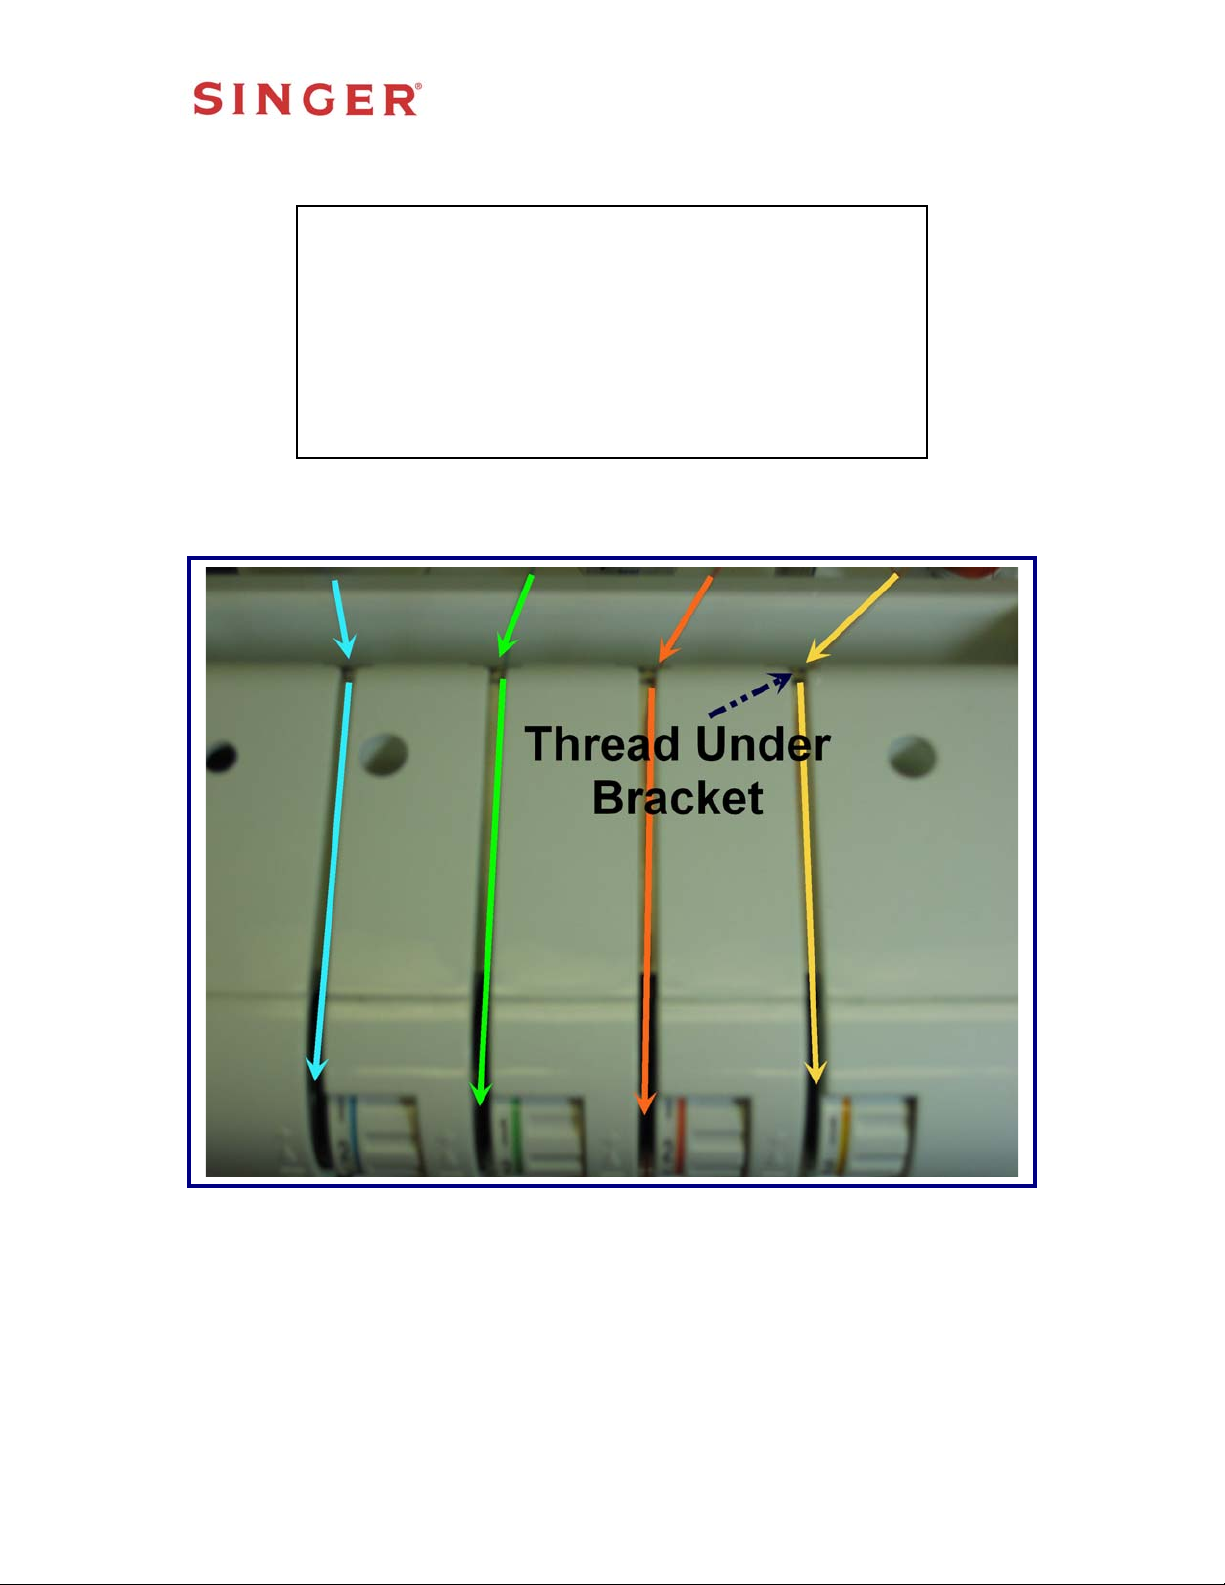
Threading the Upper Guides:
• Make sure the thread slips under the guide
located on the top at the back of the serger.
• Insert the thread by slipping it under from right to
left.
© 2005 SINGER SEWING COMPANY
Step 2:
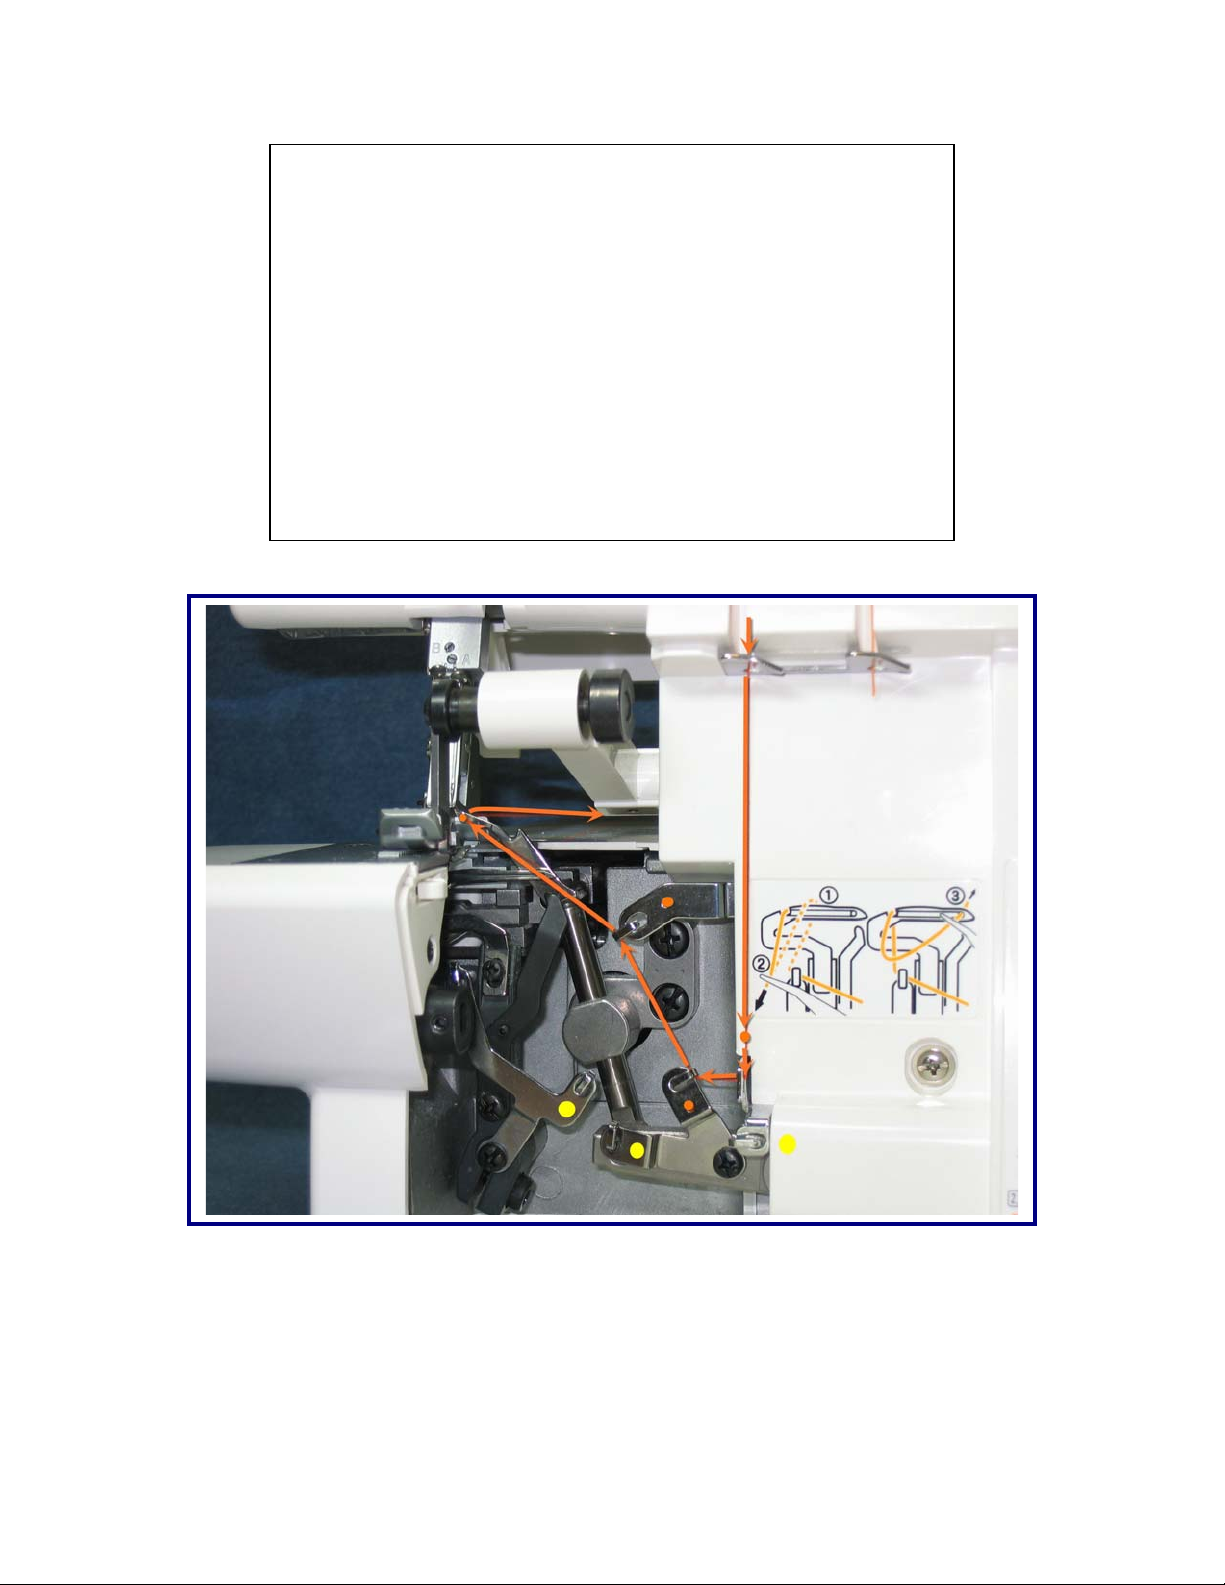
Threading Upper Looper: (ORANGE)
• Always begin threading your serger by starting with
the upper (orange) looper.
• Slip the thread behind the first guide directly below the
tension dial from right to left.
• Slip the thread behind the next 4 guides (these are
indicated by orange dots below the guide).
• Next thread the eye of the looper, and then pull the
thread towards the back of the serger, leaving
approximately 8 inches of thread.
Step 3:
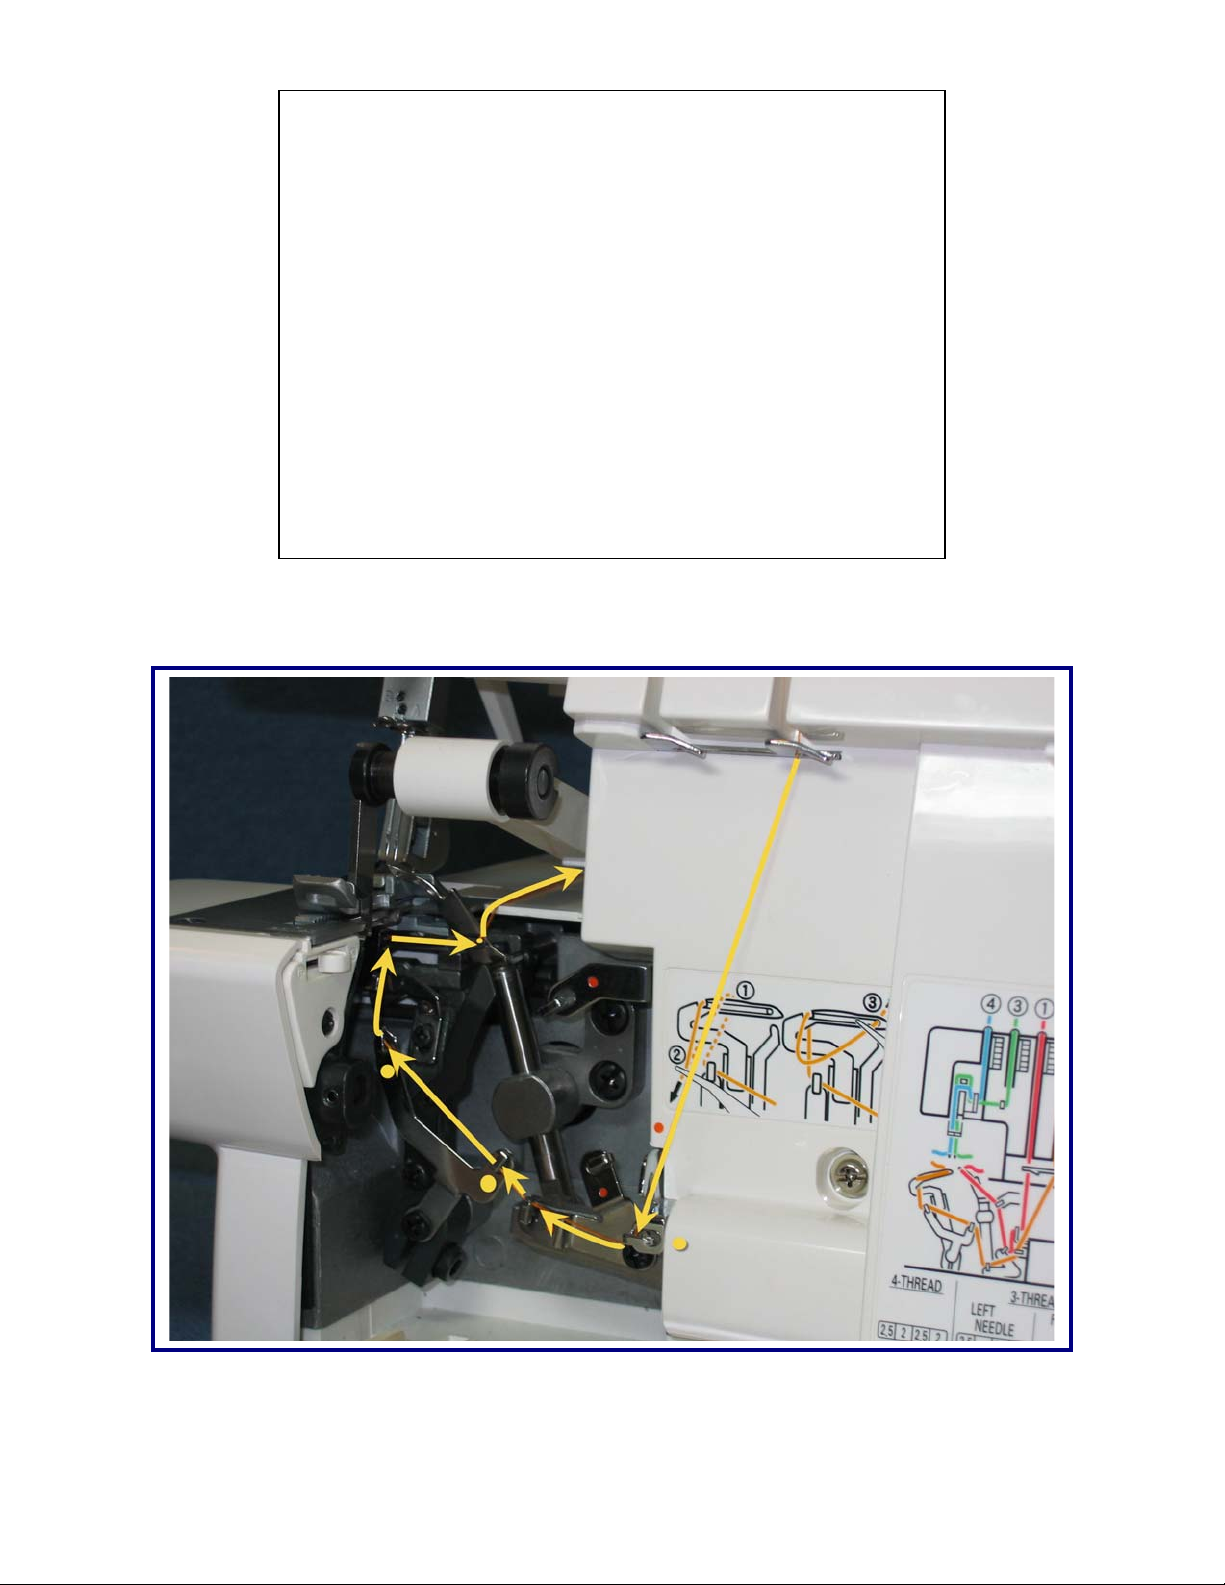
Threading Lower Looper: (YELLOW)
• Slip the thread behind the first guide directly below
the tension dial from right to left.
• Slip thread behind the 4 yellow thread guides (these
are indicated by yellow dots below the guide).
• Slip thread behind the lower looper using the
tweezers as shown in photo #2, until the thread slips
into the notch located at the far left on the looper.
• Next thread the eye of the looper, and then pull the
thread over the top of the upper (orange) looper and
then towards the back of the serger, leaving
approximately 8 inches of thread.
Photo #1
 Loading...