

Page 1
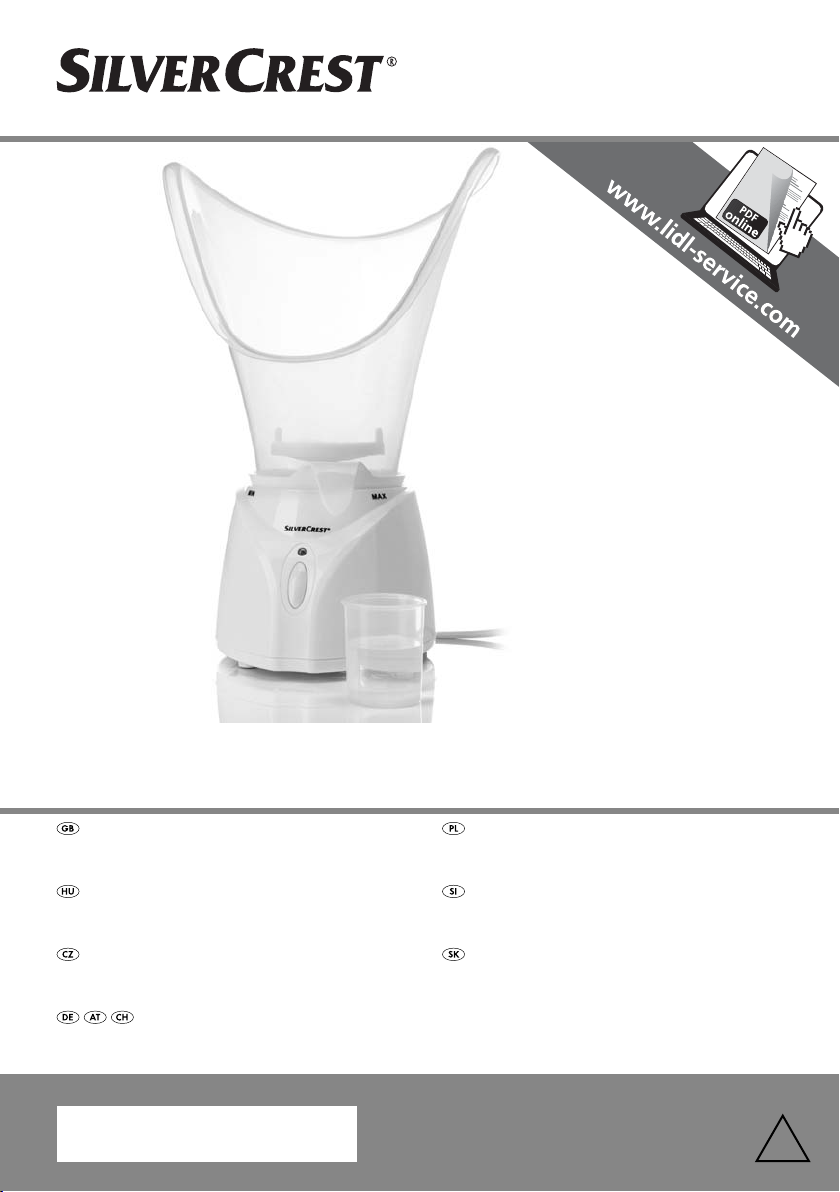
FACIAL SAUNA SGS 80 A2
FACIAL SAUNA
Operating instructions
ARCSZAUNA
Használati utasítás
OBLIČEJOVÁ SAUNA
Návod k obsluze
GESICHTSSAUNA
Bedienungsanleitung
IAN 91000
SAUNA DO TWARZY
Instrukcja obsługi
OBRAZNA SAVNA
Navodila za uporabo
SAUNA NA TVÁR
Návod na obsluhu
4
Page 2
Before reading, unfold the page containing the illustrations and familiarise yourself with all functions of
the device.
Przed przeczytaniem proszę rozłożyć stronę z ilustracjami, a następnie proszę zapoznać się z wszystkimi
funkcjami urządzenia.
Olvasás előtt kattintson az ábrát tartalmazó oldalra és végezetül ismerje meg a készülék mindegyik
funkcióját.
Pred branjem odprite stran s slikami in se nato seznanite z vsemi funkcijami naprave.
Před čtením si otevřete stranu s obrázky a potom se seznamte se všemi funkcemi přístroje.
Pred čítaním si odklopte stranu s obrázkami a potom sa oboznámte so všetkými funkciami prístroja.
Klappen Sie vor dem Lesen die Seite mit den Abbildungen aus und machen Sie sich anschließend mit allen
Funktionen des Gerätes vertraut.
GB Operating instructions Page 1
PL Instrukcja obsługi Strona 9
HU Használati utasítás Oldal 17
SI Navodila za uporabo Stran 25
CZ Návod k obsluze Strana 33
SK Návod na obsluhu Strana 41
DE / AT / CH Bedienungsanleitung Seite 49
Page 3
A
B
Page 4

Content Page
Introduction 2
Intended Use 2
Items supplied 2
Description of the appliance 2
Technical data 2
Safety instructions 3
Preparing the facial sauna for use 4
...with the face mask . . . . . . . . . . . . . . . . . . . . . . . . . . . . . . . . . . . . . . . . . . . . . . . . . . . . . . . . .4
...with the nose mask . . . . . . . . . . . . . . . . . . . . . . . . . . . . . . . . . . . . . . . . . . . . . . . . . . . . . . . .4
Utilisation 4
Operation 5
Using aroma and herb containers 6
Cleaning and care 6
Storage 7
Disposal 7
Warranty & Service 7
Importer 8
- 1 -
Page 5
Facial Sauna
Introduction
Congratulations on the purchase of your new appliance.
You have clearly decided in favour of a quality
product. These operating instructions are a part of
this product. They contain important information in
regard to safety, use and disposal. Before using the
product, familiarise yourself with all of these operating
and safety instructions. Use the product only as
described and only for the specified areas of application. In addition, pass these documents on, together
with the product, to any future owner.
Intended Use
This facial sauna is intended for facial cosmetic care
using steam.
This appliance is intended for domestic use only, it
has not been designed for commercial applications!
Description of the appliance
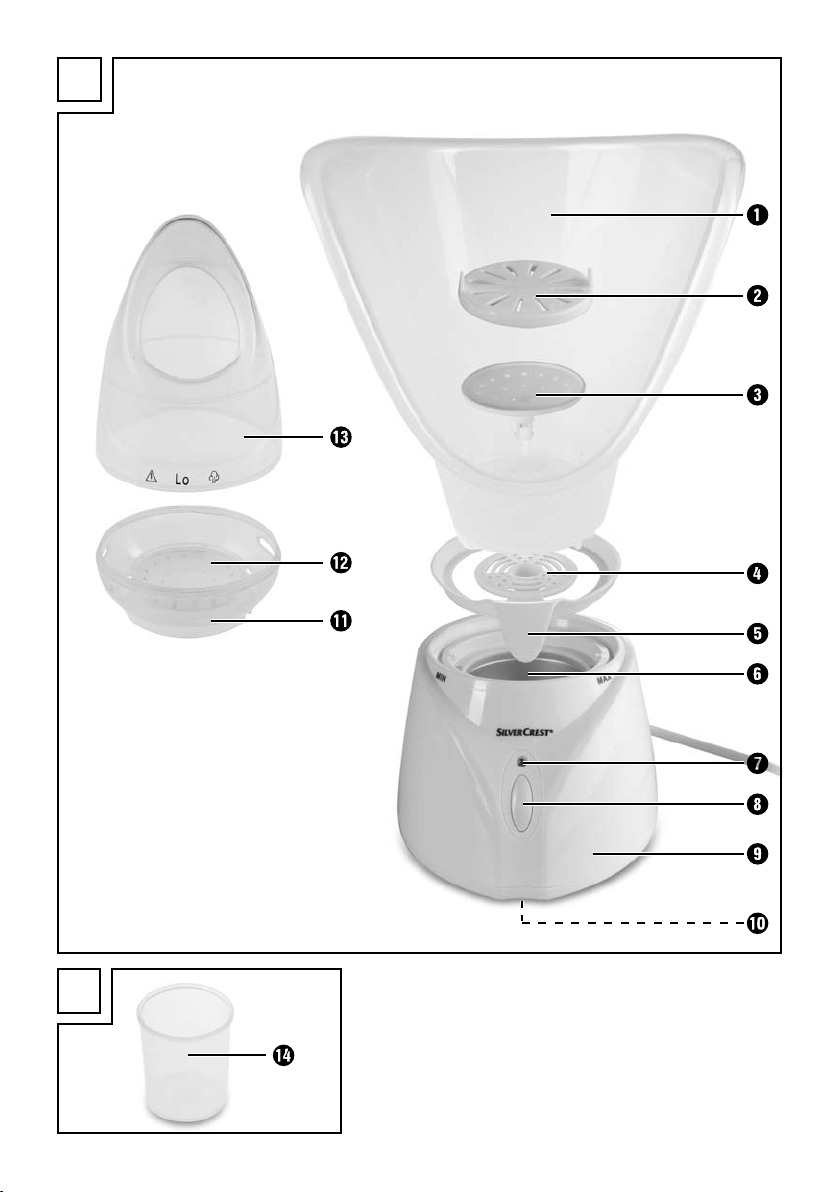
Figure A:
1 Face mask
2 Lid of aroma and herb container (fits the aroma
and herb container of the face mask and the
nose mask)
3 Aroma and herb container
4 Steam regulator
5 Handle of the steam re#gulator
6 Water bowl
7 Control lamp
8 Lo/Hi/Off button
9 Heating unit
0 Cable winder
q Bottom part of nose mask
w Aroma and herb container
e Top part of nose mask
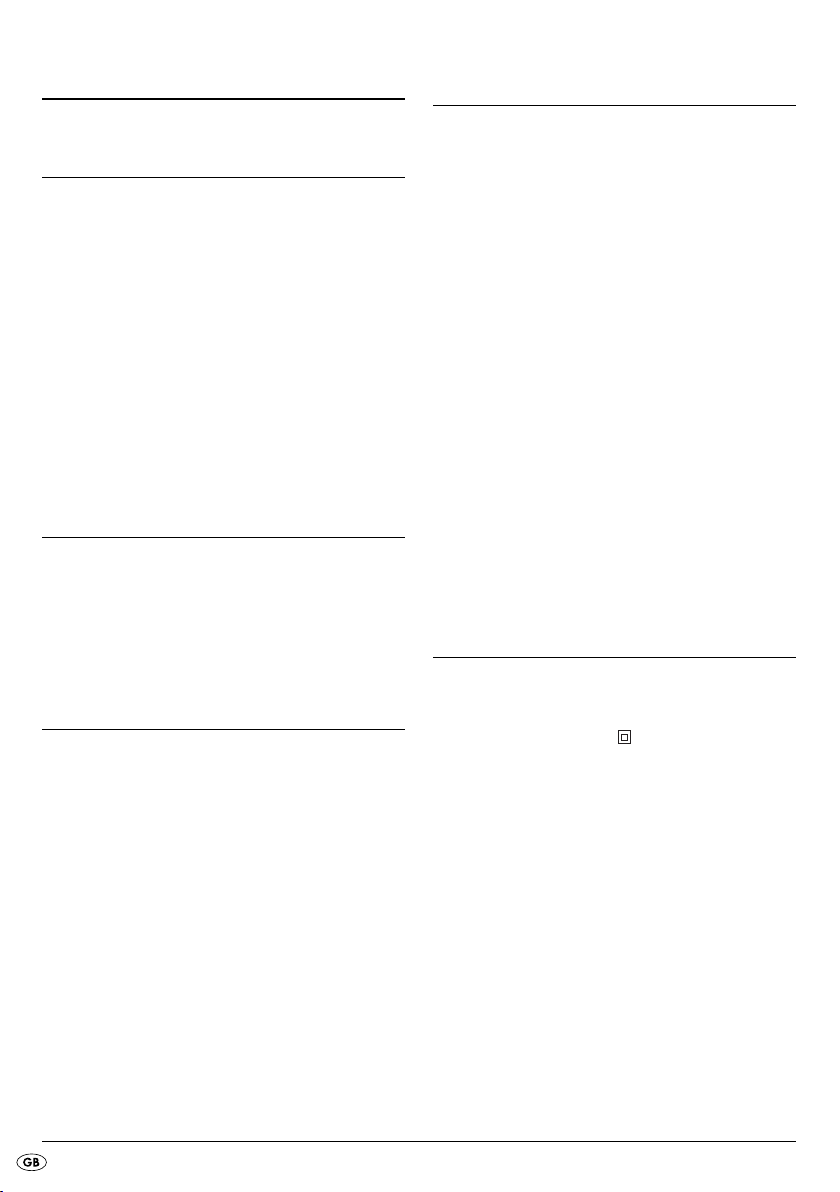
Figure B:
r Measuring cup
Technical data
Items supplied
Face mask
Nose mask
Steam controller
Heating unit
Measuring beaker
Operating instructions
Rated voltage: 220 - 240 V ~ / 50 Hz
Power consumption: 75 - 95 W
Protection class: II /
- 2 -
Page 6
Safety instructions
Risk of personal injury!
• Place the appliance only on firm and level surfaces. There is a risk of scalding
should hot liquids be spilled during use!
• This appliance may be used by children of the age of 8 years or more and by
persons with reduced physical, sensory or mental capabilities orlack of experience and/or knowledge if they are being supervised or have been instructed
with regard to the safe use of the appliance and have understood the potential
risks.
• Children must not play with the appliance.
• Cleaning and user maintenance should not be performed by children, unless
they are being supervised.
• Do not operate the appliance adjacent to water, for example, in the bathtub or
next to washbasins.
• Connect the appliance only to wall power sockets supplying the type of electrical
current detailed on the model plate.
• NEVER submerse the appliance in water or other liquids!
The appliance could become irreparably damaged!
• NEVER heat the appliance up without liquids!
• Do NOT fill the appliance with solvents or other inflammable fluids!
• Always disconnect the power cable by pulling on the plug itself.
Do NOT pull on the power cable itself!
• Arrange for defective power plugs and/or cables to be replaced at once by
qualified technicians or our Customer Service Department.
• Do NOT reach into the interior of the appliance when it is in use.
There is a risk of being burnt/scalded!
• Clean the appliance after every use so as to avoid the accumulation of fats
and other residues.
Risk of electric shock!
Do not use this appliance in the close vicinity of baths, washbowls or other
receptacles containing water.
- 3 -
Page 7

Preparing the facial sauna for use
• Unwind the cable from the cable winder 0 and
guide it through the recess on the underside of
the heating unit 9.
• Place the heating unit 9 on a level, non-slip and
water resistant surface.
• Using the measuring cup r fill the water bowl 6
with water. Orientate yourself with the scale on
the measuring cup r for how long you wish to use
the appliance (approx. 5, approx.10 or approx.
15 minutes). Use the scale that is appropriate to
the respective steam setting (Hi or Lo).
Warning!
NEVER fill the water bowl 6 with a water volume that
exceeds the “Hi 15 min.” marking ( in the measuring
cup r). Otherwise, the water could overflow and
then permeate into the interior of the appliance.
This could damage the appliance irreparably!
...with the face mask
If you wish to use the appliance with the face mask 1,
proceed as follows:
• Place the steam regulator 4 on the water bowl 6
so that the handle 5 points to the front.
• Place the face mask 1 on the heating unit 9:
The lugs on the heating unit 9 must grip in the
recesses on the underside of the face mask 1.
Then turn the face mask 1 clockwise so that it
sits firmly on the heating unit 9.
• Insert the plug into a power socket.
The Facial Sauna is now ready for use.
...with the nose mask
If you wish to use the appliance with the nose mask,
proceed as follows:
Note:
The steam regulator 4 is not needed when using
the nose mask.
• Place the lid of the aroma and herb container 2
onto the aroma and herb container w in the lower
part of the nose mask q in such a way that it is
secure.
• Fit the upper e and lower parts of the nose
mask q together so that they are securely
connected.
• Place the assembled nose mask onto the heating
unit 9:
The lugs on the heating unit 9 must engage in
the recesses on the underside of the nose mask.
Then rotate the nose mask clockwise so that it
is sitting securely on the heating unit 9.
• Insert the power plug into a power socket.
The Facial Sauna is now ready for use.
Utilisation
Attention!
This facial sauna may not be used if you suffer from
one of the following ailments:
• with acarodermatitis
• with erythrodermia
• with swellings in the facial area
• with heart illnesses
• with diabetes
• wounds in the facial area
• with eczema
• with psoriasis
- 4 -
Page 8
Should you be pregnant or have other health issues,
consult your doctor before using the appliance.
Utilisation of the facial sauna prepares your skin
admirably for further treatments, for example deep
cleansing, moisture provision, face masks etc. The
steam invigorates the skin, opens the pores and
impurities can be better removed.
Operation
Prepare the facial sauna as described under
“Preparing the facial sauna for use”.
• Press once on the Lo/Hi/Off button 8. The con-
trol lamp 7 glows green (low steam level "Lo").
The water in the water bowl 6 is heated just sufficiently to produce a small amount of steam.
For more steam, press on the Lo/Hi/Off button 8
once more. The control lamp 7 glows red (high
steam level "Hi"). The water is heated more strongly
and so produces more steam.
Attention!
• If you feel uncomfortable or perceive the steam
as unpleasant, either hold your face a little further away from the face mask 1 / nose mask or
reduce the volume of steam. Should the feeling
of discomfort continue, stop using the appliance.
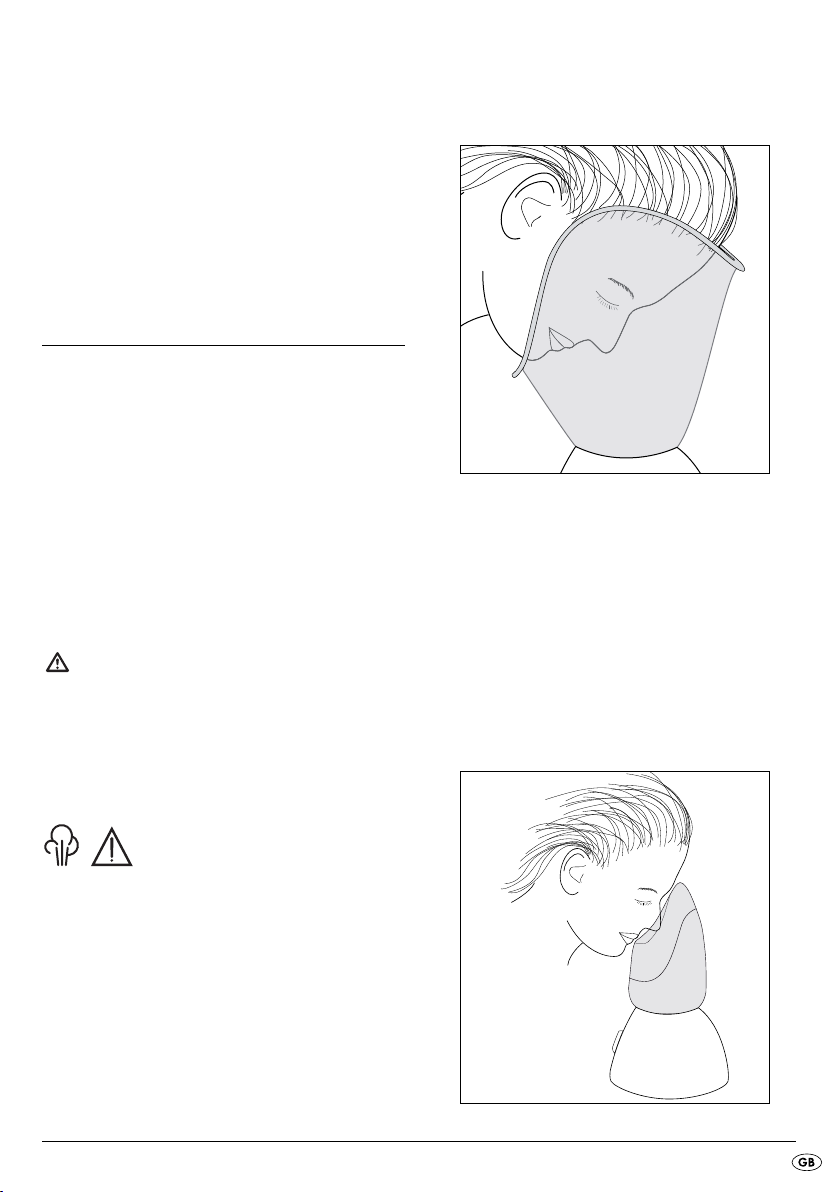
• Hold your face over the face mask 1. Close
your eyes and relax:
• You can also regulate the steam volume as follows:
Slide the handle of the steam regulator 5 to the
right (in the MAX direction) to increase the steam
volume.
Slide the handle of the steam regulator 5 to the
left (in the MIN direction) to decrease the steam
volume.
• Hold your nose over the nose mask. Close your
eyes and relax:
Attention! Hot steam!
• Since the human nasal mucous membrane is
extremely sensitive, never use the appliance with
steam level "Hi" when using the nose mask.
- 5 -
Page 9

• When the water in the water bowl 6 has eva-
porated, the appliance switches itself off automatically. If you wish to switch the appliance off
prematurely, press the Lo/Hi/Off button 8 repeatedly until the control lamp 7 extinguishes.
Note:
After 30 minutes the appliance switches itself off
automatically, even if there is still water in the water
bowl 6.
• Put herbs or a cotton wool ball sprinkled with
aroma essence into the aroma and herb container 3/w.
• Press the two catches of the lid of the aroma and
herb container 2 together and place it onto the
aroma and herb container 3/w.
Release the catches so that the lid 2 is securely
attached.
• Now assemble the face mask 1/nose mask
onto the heating unit 9 as described under
"Preparing the facial sauna for use".
Using aroma and herb
containers
You can enrich the steam with various herbs and
aromas. This can contribute to both relaxation and
the treatment of the skin.
Note:
Only those types of herbs and aromas can be employed that are intended and suitable for use in a
facial sauna.
Note:
The lid of the aroma and herb container 2 fits the
aroma and herb containers of the face mask 3 and
the nose mask w.
Before connecting the face mask 1/nose mask
with the heating unit 9:
• Press the two catches of the lid of the aroma and
herb container 2 together and lift it from the
respective aroma and herb container 3/w.
Face mask 1 only:
Press the two pins on the underside of the aroma
and herb container 3 through the opening in the
base of the face mask 1 so that the pins engage
and the aroma and herb container 3 is securely
attached.
The rising steam will now be directed through the
aroma and herb container 3/w and thus takes on
the fragrance.
Cleaning and care
Danger!
Before cleaning the appliance, remove the power
plug and allow it to cool down! Risk of injury!
The facial sauna should be thoroughly cleaned after
every usage. If you do not, microbes could quickly
develop in the warm moisture which, with further
utilisation of the appliance, could lead to negative
effects on ones health.
Warning!
Do not use abrasive, aggressive or chemical
cleaning agents! These damage the surfaces of the
appliance and cause irreparable damage.
• Dismantle the appliance.
Removing the face mask:
• Remove the face mask 1 from the heating unit 9:
Turn the face mask 1 anti-clockwise until it can
be lifted off.
- 6 -
Page 10
• Lift the steam regulator 4 from the heating unit 9.
• Remove the lid from the aroma and herb container 2:
For this, press the two locking devices together
until the lid 2 allows itself to be removed.
• Pull out the aroma and herb container 3:
Press the pins that are protruding from the underside of the face mask 1 together and pull on the
aroma and herb container 3 at the same time.
Removing the nose mask:
• Remove the nose mask from the heating unit 9:
Turn the nose mask anti-clockwise until it can be
lifted off.
• Pull the lower q and upper parts e of the nose
mask apart.
• Remove the lid 2 (if fitted) from the aroma and
herb container w:
To do this, press the two catches together until
the lid 2 can be removed.
Clean the face mask 1, the two parts of the nose
mask q/e, the lid of the aroma and herb container 2, the steam regulator 4, the aroma and herb
container 3 and the measuring cup r in a mild
soapy solution. Rinse everything off with fresh water
and then dry off.
Storage
Allow the appliance to cool down and clean it
(see section “Cleaning and care”).
Store the facial sauna at a clean, dry location.
Wind the power cable around the cable storage 0
on the underside of the appliance.
Disposal
Do not dispose of the appliance in your
normal domestic waste. This product is
subject to the European guideline
2002/96/EC.
Dispose of the appliance through an approved disposal centre or at your community waste facility.
Observe the currently applicable regulations.
In case of doubt, please contact your waste disposal
centre.
Dispose of all packaging materials in an
environmentally friendly manner.
Warranty & Service
Clean the heating unit 9 and the water bowl 6
with a lightly moistened cloth. For stubborn soiling
use a mild detergent on the cloth.
As soon as scale deposits form in the water bowl 6,
clean the water bowl 6 with a commercially available descaling agent that is suitable for aluminium.
Pay heed to the usage instructions for the descaling
agent.
Reassemble the facial sauna after cleaning.
The warranty for this appliance is for 3 years from
the date of purchase. The appliance has been manufactured with care and meticulously examined before
delivery.
Please retain your receipt as proof of purchase. In the
event of a warranty claim, please make contact by
telephone with our Service Department. Only in
this way can a post-free despatch for your goods be
assured.
The warranty covers only claims for material and
manufacturing defects, but not for transport damage,
for wearing parts or for damage to fragile components, e.g. buttons or batteries. This product is for
private use only and is not intended for commercial
use.
- 7 -
Page 11

The warranty is void in the case of abusive and improper handling, use of force and internal tampering
not carried out by our authorized service branch.
Your statutory rights are not restricted in any way by
this warranty.
The warranty period will not be extended by repairs
made under warranty. This applies also to replaced
and repaired parts. Any damage and defects extant
on purchase must be reported immediately after unpacking the appliance, at the latest, two days after
the purchase date. Repairs made after the expiration
of the warranty period are subject to payment.
Service Great Britain
Tel.: 0871 5000 720 (£ 0.10/Min.)
E-Mail: kompernass@lidl.co.uk
IAN 91000
Hotline availability:
Monday to Friday 08:00 - 20:00 (CET)
Importer
KOMPERNASS HANDELS GMBH
BURGSTRASSE 21
44867 BOCHUM
GERMANY
www.kompernass.com
- 8 -
Page 12

Spis treści Strona
Wprowadzenie 10
Użytkowanie zgodnie z przeznaczeniem 10
Wyposażenie podstawowe 10
Opis urządzania 10
Dane techniczne 10
Wskazówki dotyczące bezpieczeństwa 11
Przygotowanie aparatu do sauny twarzowej 12
...z maskà na twarz . . . . . . . . . . . . . . . . . . . . . . . . . . . . . . . . . . . . . . . . . . . . . . . . . . . . . . . . .12
...z maskà na nos . . . . . . . . . . . . . . . . . . . . . . . . . . . . . . . . . . . . . . . . . . . . . . . . . . . . . . . . . .12
Zastosowanie 12
Obsługa 13
Używanie dyfuzora zapachu 14
Czyszczenie i konserwacja 14
Przechowywanie 15
Utylizacja 15
Gwarancja i serwis 15
Importer 16
- 9 -
Page 13
Sauna do twarzy
Wprowadzenie
Gratulujemy Ci zakupu naszego urządzenia.
Jest to produkt wysokiej jakości. Instrukcja obsługi
stanowi część tego produktu. Zawiera ona ważne
wskazówki dotyczące bezpieczeństwa, użytkowania i
utylizacji urządzenia. Przed przystąpieniem do
użytkowania produktu zapoznaj się z wszystkimi
wskazówkami obsługi i bezpieczeństwa. Używaj
produkt zgodnie z opisem i w podanych obszarach
użytkowania. W razie przekazania produktu następnej osobie, nie zapomnij dołączyć również instrukcji obsługi.
Użytkowanie zgodnie
z przeznaczeniem
Sauna twarzowa służy do kosmetycznej pielęgnacji
twarzy za pomocą pary.
Aparat przeznaczony jest wyłącznie do użytku
domowego i nie jest przewidziany do zastosowań
komercyjnych!
Wyposażenie podstawowe
Opis urządzania
Rysunek A:
1 Maska na twarz
2 Pokrywa pojemnika na aromaty i zioła (pasuje
do pojemnika na aromaty i zioła maski na twarz
i maski na nos)
3 Dyfuzor zapachu
4 Regulator natężenia pary
5 Dźwignia regulatora pary
6 Zbiornik
7 Lampka kontrolna
8 Przycisk Lo/Hi/Off
9 Wytwarzacz pary
0 Schowek na kabel zasilający
q Dolna część maski na nos
w Pojemnik na aromaty i zioła
e Górna część maski na nos
Rysunek B:
r Kubek pomiarowy
Dane techniczne
Napięcie znamionowe:220 - 240 V~ / 50 Hz
Pobór mocy: 75 - 95 W
Klasa ochrony: II /
Maska na twarz
Maska na nos
Regulator pary
Wytwarzacz pary
Miarka
Instrukcja obsługi
- 10 -
Page 14
Wskazówki dotyczące
bezpieczeństwa
Niebezpieczeństwo obrażeń!
• Aparat należy stawiać wyłącznie na stabilnym i płaskim podłożu. W przypadku
wylania się gorącej cieczy podczas użytkowania występuje niebezpieczeństwo
oparzenia!
• Urządzenie może być użytkowane przez dzieci powyżej 8 roku życia, a także
przez osoby o ograniczonej sprawności fizycznej, ruchowej bądź umysłowej
lub nieposiadające doświadczenia i / lub wiedzy, gdy będą one przebywały
pod opieką lub zostaną im przekazane wskazówki dotyczące właściwego
używania urządzenia i zrozumieją one, jakie zagrożenia wiążą się z użytkowaniem urządzenia.
• Nie dawaj urządzenia dzieciom do zabawy.
• Czyszczeniem i konserwacją nie mogą zajmować się dzieci bez nadzoru osoby
dorosłej.
• Aparatu nie należy użytkować w pobliżu wody, np. w wannie lub przy
umywalce.
• Aparat można podłączyć wyłącznie do sieci elektrycznej o napięciu podanym
na tabliczce znamionowej.
• Aparatu nie wolno zanurzać w wodzie lub w innej cieczy! Może dojść do
jego trwałego uszkodzenia!
• Nie uruchamiaj aparatu bez wody!
• Do aparatu nie wolno wlewać rozpuszczalników ani innych palnych cieczy!
• Przewód zasilający należy odłączać od gniazdka, trzymając bezpośrednio za
wtyczkę.
Nie ciągnąć za kabel!
• Naprawę uszkodzonej wtyczki lub kabla sieciowego zleć niezwłocznie
wykwalifikowanemu personelowi lub serwisowi.
• Nie dotykaj wewnętrznych części aparatu, gdy jest on włączony.
Występuje niebezpieczeństwo oparzenia!
• Po każdym użyciu oczyść aparat, aby uniknąć gromadzenia się w nim tłuszczu i
innych pozos-tałości.
Niebezpieczeństwo porażenia prądem!
Niniejszego urządzenia nie wolno używać w pobliżu wanny, prysznica
ani żadnych innych pojemników z wodą.
- 11 -
Page 15
Przygotowanie aparatu do
sauny twarzowej
• Rozwiń kabel sieciowy ze schowka 0 i przeciągnij
go przez wycięcie w części dolnej wytwarzacza
pary 9.
• Postaw wytwarzacz pary 9 na płaskiej i nieśliskiej
powierzchni odpornej na działanie wody.
• Przy użyciu miarki r napełnij wodą zbiornik 6.
Za pomocą podziałki na miarce r, możesz się
zorientować, jak długo będziesz mógł używać
urządzenie (ok. 5, ok.10 lub15 minut).
Uwzględnij podziałkę, odpowiadającą danemu
stopniowi wytwarzania pary (Hi lub Lo).
Ostrzeżenie!
Nie napełniaj zbiornika 6 w wytwarzaczu pary
ilością wody, przekraczającą podziałkę “Hi 15 min.”
(w podziałce r). W przeciwnym wypadku woda
może się przelać i dostać do wnętrza aparatu.
Grozi to jego trwałym uszkodzeniem.
...z maską na twarz
Aby używać urządzenia z maską na twarz 1,
należy postępować w następujący sposób:
• Regulator pary 4 postaw na zbiorniku 6 w taki
sposób, by dźwignia 5 była skierowana do
przodu.
• Załóż maskę 1 na wytwarzacz pary 9:
Noski w dolnej części maski 9 muszą trafić w
otwory w wytwarzaczu pary 1.
Następnie obróć maskę 1 w kierunku zgodnym
z ruchem wskazówek zegara tak, aby była
dobrze zaciśnięta na wytwarzaczu pary 9.
• Podłącz wtyczkę do gniazdka zasilania.
Aparat jest teraz gotowy do użycia.
...z maską na nos
Aby używać urządzenia z maską na nos, należy
postępować w następujący sposób:
Wskazówka:
Regulator pary 4 nie jest potrzebny przy korzystaniu z maski na nos.
• Umieść pokrywę pojemnika na aromaty i zioła 2
na pojemniku w w dolnej części maski na nos w
taki sposób q, by była ona prawidłowo zamo-
cowana.
• Złóż górną e i dolną część maski na nos q
tak, by były prawidłowo ze sobą połączone.
• Załóż tak złożoną maskę na nos na wytwornicę
pary 9:
Wypusty na module grzewczym 9 muszą znaj-
dować się w wycięciach w dolnej części maski na
nos. Obróć maskę na nos w prawo tak, by była
pewnie zamocowana na wytwornicy pary 9.
• Podłącz wtyk do gniazda sieciowego.
Aparat jest teraz gotowy do użycia.
Zastosowanie
Uwaga!
Aparatu do sauny twarzowej nie wolno używać
w przypadku następujących chorób i dolegliwości:
• zapalenie skóry
• zaczerwienienie skóry
• obrzęk w obrębie twarzy
• choroby serca
• cukrzyca
• rany w obrębie twarzy
• wypryski
• łuszczyca
- 12 -
Page 16

Kobiety ciężarne oraz osoby z innymi problemami
zdrowotnymi powinny skonsultować z lekarzem
używanie aparatu do sauny twarzowej.
Zastosowanie aparatu do sauny twarzowej przygotowuje optymalnie skórę do dalszych zabiegów
takich, jak głębokie oczyszczanie, nawilżanie,
odżywianie itd. Para ożywia skórę, otwiera pory
i umożliwia lepsze usuwanie zanieczyszczeń.
Obsługa
Przygotuj aparat zgodnie z opisem zawartym
w akapicie “Przygotowanie aparatu do sauny
twarzowej”.
• Naciśnij jeden raz przycisk Lo/Hi/Off 8. Lampka
kontrolna 7 zapala się na zielono (niższy stopień
wytwarzania pary „Lo“). Woda w zbiorniku 6
zostanie podgrzana tak, aby powstawała niewielka ilość pary.
Aby uzyskać więcej pary naciśnij jeszcze raz
przycisk Lo/Hi/Off 8. Lampka kontrolna 7 za-
pala się na czerwono (wyższy stopień wy-twarzania pary „Hi“). Woda jest silniej podgrzewana i powstaje więcej pary.
• Pochyl się tak, aby twarz znalazła się nad maską
parową 1. Zamknij oczy i odpręż się:
• Ilość wytwarzanej pary można regulować
w następujący sposób:
Aby zwiększyć ilość pary, przesuń regulator natężenia pary 5 w prawo (w kierunku napisu MAX).
Aby zmniejszyć ilość pary, przesuń regulator natężenia pary 5 w lewo (w kierunku napisu MIN).
• Trzymaj nos nad maską na nos. Zamknij oczy
i odpręż się:
Uwaga!
• Jeśli nie będziesz się czuć dobrze lub będziesz
odczuwać parę jako nieprzyjemną, odsuń nieznacznie twarz od maski na twarz 1 / maski
parowej lub zmniejsz ilość wytwarzanej pary.
Jeśli nieprzyjemne odczucie będzie się utrzymywało, przerwij zabieg.
Uwaga! Gorąca para!
• Ponieważ śluzówka nosa człowieka jest bardzo
wrażliwa,, nigdy nie używaj urządzenia z maską na nos w ustawieniu regulatora pary „Hi”.
- 13 -
Page 17
• Gdy woda znajdująca się w zbiorniku 6 wy-
paruje, urządzenie samoczynnie wyłączy się.
Jeśli chcesz wcześniej wyłączyć aparat, naciskaj
przycisk Lo/Hi/Off 8 tyle razy, aż zgaśnie
lampka kontrolna 7.
Wskazówka:
Po upływie 30 minut urządzenie automatycznie się
wyłącza, nawet gdy w zbiorniku 6 będzie się
znajdowała woda.
• Umieść zioła lub wacik nasączony kroplami
olejku aromatycznego w pojemniku na aromaty
i zioła 3/w.
• Ściśnij oba mocowania pokrywy pojemnika
na aromaty i zioła 2 i umieść pokrywę na
pojemniku 3/w. Zwolnij mocowania, aby pokrywa 2 została prawidłowo zamocowana.
• Nasępnie załóż maskę na twarz 1/maskę na
nos na wytwornicę pary 9 zgodnie z opisem
zawartym w akapicie „Przygotowanie aparatu
do sauny twarzowej”.
Używanie dyfuzora zapachu
Za pomocą pary możesz rozprowadzić zapach
różnych ziół i olejków. Przyczynia się to do osiągnięcia
odprężenia i uzyskania lepszych efektów kosmetycznych.
Wskazówka:
Wolno stosować tylko zioła i olejki aromatyczne,
które są przewidziane i nadają się do zastosowania
w aparatach do sauny twarzowej.
Wskazówka:
Pokrywa pojemnika na aromaty i zioła 2 pasuje do
pojemnika na aromaty i zioła maski na twarz 3,
a także do pojemnika na aromaty i zioła maski na
nos w.
Przed połączeniem maski na twarz 1/maski na
nos z wytwornicą pary 9:
• Ściśnij oba mocowania pokrywy pojemnika
na aromaty i zioła 2 i zdejmij pokrywę
z pojemnika 3/w.
Tylko w przypadku maski na nos 1:
Wciśnij obie wypustki w dolnej części pojemnika
na aromaty i zioła 3 w otwór w dolnej części
maski na twarz 1 tak, by wypustki zatrzasnęły się
i zamocowały pojemnik 3.
Unosząca się para przepływa przez pojemnik
na aromaty i zioła 3/w i roznosi zapach.
Czyszczenie i konserwacja
Niebezpieczeństwo!
Przed każdym czyszczeniem wyjmij wtyczkę z
gniazda i odczekaj, aż aparat ochłodzi się!
Niebezpieczeństwo obrażeń!
Aparat do sauny twarzowej należy dokładnie oczyścić
po każdym użyciu. W przeciwnym wypadku ciepłe
zawilgocenie urządzenia spowoduje szybkie
rozmnożenie się drobnoustrojów, które przy ponownym użyciu aparatu mogą mieć negatywny
wpływ na zdrowie.
Ostrożnie!
Nie używaj agresywnych, chemicznych lub rysujących powierzchnię środków czyszczących! Mogą
one uszkodzić powierzchnie urządzenia i
spowodować w nim trwałe szkody.
• Rozmontuj urządzenie.
Zdejmowanie maski na twarz:
• Zdejmij maskę parową 1 z wytwarzacza pary 9:
Obróć maskę parową 1 w kierunku przeciwnym
do ruchu wskazówek zegara tak, by można ją
było zdjąć.
- 14 -
Page 18

• Regulator pary 4 zdejmij z wytwarzacza pary 9.
• Zdejmij pokrywę 2 z dyfuzora zapachu:
W tym celu ściśnij obie blokady, aż będzie
możliwe wyjęcie pokrywy 2.
• Zdejmij pojemnik na aromaty i zioła 3:
Ściśnij wypustki, wystające z dolnej części maski
na twarz 1 i wyciągnij pojemnik na aromaty
i zioła 3.
Zdejmowanie maski na nos:
• Zdejmij maskę na nos z wytwornicy pary 9:
Obróć maskę na nos w lewo na tyle, aby można
było ją zdjąć z wytwornicy pary.
• Odciągnij od siebie dolną q i górną część e
maski na nos.
• Zdejmij pokrywę 2 (o ile jest założona)
z pojemnika na aromaty i zioła w:
W tym celu ściśnij obie blokady, aż będzie
możliwe zdjęcie pokrywy 2.
Oczyść maskę na twarz 1, obie części maski na
nos q/e, pokrywę pojemnika na aromaty i zioła 2,
regulator pary 4, pojemnik na aromaty i zioła 3
oraz kubek pomiarowy r w łagodnym roztworze
mydła. Wypłucz wszystkie części czystą wodą
i wysusz je.
Wytwarzacz pary 9 i zbiornik 6 na wodę wyczyść lekko zwilżoną szmatką. W celu wyczyszczenia
przyschniętych zabrudzeń dodaj na szmatkę delikatnego środka do mycia naczyń.
Gdy zauważysz ślady osadów z kamienia w zbiorniku 6, wyczyść zbiornik 6 specjalnym środkiem
do usuwania osadów z kamienia przystosowanym
do powierzchni z aluminium.
Przeczytaj instrukcję obsługi zamieszczoną na pojemniku środka do usuwania osadów z kamienia.
Po zakończeniu czyszczenia złóż aparat.
Przechowywanie
Odczekaj, aż aparat ochłodzi się, a następnie
oczyść go (patrz rozdział “Czyszczenie i konserwacja”).
Aparat do sauny twarzowej przechowuj w suchym
miejscu.
Zwiń kabel do schowka 0 na spodzie aparatu.
Utylizacja
Urządzenia nie należy wyrzucać wraz
z normalnymi odpadami domowymi.
Niniejszy produkt podlega działaniom,
przewidziamyn w przepisach dyrektywy europejskiej 2002/96/EC.
Urządzenie należy usuwać w akredytowanych zakładach utylizacji odpadów lub komunalnych zakładach utylizacji odpadów.
Należy przestrzegać aktualnie obowiązujących
przepisów. W razie pytań i wątpliwości odnośnie
zasad utylizacji należy skontaktować się z najbliższym zakładem utylizacji odpadów.
Materiał opakowaniowy należy przekazywać do utylizacji zgodnie z przepisami o
ochronie środowiska.
Gwarancja i serwis
Urządzenie objęte jest 3-letnią gwarancją, licząc
od daty zakupu. Urządzeniezostało starannie wyprodukowane i poddane skrupulatnej kontroli przed
wysyłką.
Paragon należy zachować jako dowód dokonania
zakupu. W przypadku roszczeń gwarancyjnych należy skontaktować się telefonicznie z serwisem. Tylko w ten sposób można zagwarantować bezpłatną
wysyłkę zakupionego produktu.
- 15 -
Page 19

Gwarancja obejmuje wyłącznie wady materiałowe
i fabryczne, natomiast nie obejmuje szkód powstałych podczas transportu, części ulegających zużyciu ani uszkodzeń części łatwo łamliwych/podatnych na uszkodzenia mechaniczne, np. wyłączników,
akumulatorów. Produkt przeznaczony jest wyłącznie
do użytku domowego, a nie do zastosowań profesjonalnych.
Gwarancja traci ważność w przypadku niewłaściwego używania urządzenia, używania niezgodnego z
przeznaczeniem, użycia siły lub ingerencji w urządzenie dokonywanej poza naszymi autoryzowanymi
punktami serwisowymi. Niniejsza gwarancja nie ogranicza ustawowych praw nabywcy urządzenia.
Okres gwarancji nie ulega wydłużeniu o czas trwania
usługi gwarancyjnej. Dotyczy to również wymienionych i naprawionych części. Szkody i wady zauważone już w chwili zakupu należy zgłosić od razu po
rozpakowaniu, nie później niż po upływie dwóch
dni od daty zakupu. Po upływie okresu gwarancyjnego wszystkie naprawy będą wykonywane płatnie.
Serwis Polska
Tel.: 22 397 4996
E-Mail: kompernass@lidl.pl
IAN 91000
Czas pracy infolinii:
od poniedziałku do piątku, w godzinach
08:00 - 20:00 czasu środkowoeuropejskiego
Importer
KOMPERNASS HANDELS GMBH
BURGSTRASSE 21
44867 BOCHUM
GERMANY
www.kompernass.com
- 16 -
Page 20

Tartalomjegyzék Oldalszám
Bevezető 18
Rendeltetésszerű használat 18
Tartozékok 18
A készülék leírása 18
Műszaki adatok 18
Biztonsági utasítás 19
Az arcgőzölő üzemkésszé tétele 20
...az arcmaszkkal . . . . . . . . . . . . . . . . . . . . . . . . . . . . . . . . . . . . . . . . . . . . . . . . . . . . . . . . . .20
...az orrmaszkkal . . . . . . . . . . . . . . . . . . . . . . . . . . . . . . . . . . . . . . . . . . . . . . . . . . . . . . . . . .20
Felhasználás 20
Működtetés 21
Az aroma- és gyógynövénytartály használata 22
Tiszítás és ápolás 22
Tárolás 23
Ártalmatlanítás 23
Garancia és szerviz 23
Gyártja 24
- 17 -
Page 21

Arcszauna
Bevezető
Gratulálunk új készüléke megvásárlásához.
Vásárlásával kiváló minőségű termék mellett döntött. A használati útmutató a termék része. Fontos
tudnivalókat tartalmaz a biztonságra, használatra
és ártalmatlanításra vonatkozólag. A termék használata előtt ismerkedjen meg a használati és biztonsági
utasításokkal. Csak a leírtak szerint és a megadott
célokra használja a terméket. A készülék harmadik
személynek történő továbbadásakor adja a termékhez valamennyi leírást is.
Rendeltetésszerű használat
A készülék leírása
„A“ ábra:
1 arcmaszk
2 aroma- és gyógynövényes tartály (az arcmaszk
és orrmaszk aroma- és gyógynövényes tartályára
illik)
3 aroma- és gyógynövénytartály
4 gőzszabályzó
5 gőzszabályzó nyele
6 vizestál
7 ellenőrző lámpa
8 Lo/Hi/Off gomb
9 fűtőegység
0 kábelfelcsévélő
q az orrmaszk alsó része
w aroma- és gyógynövénytartály
e az orrmaszk felső része
Az arcgőzölő az arc gőzzel történő szépségápolására
szolgál.
A készüléket csak magánhasználatra, nem pedig
ipari és kereskedelmi célokra tervezték.
Tartozékok
arcmaszk
orrmaszk
gőzszabályozó
fűtőegység
mérőpohár
használati útmutató
„B“ ábra:
r mérőtartály
Műszaki adatok
Névleges feszültség: 220 - 240 V ~ / 50 Hz
Teljesítményfelvétel: 75 - 95 W
Védettségi osztály: II /
- 18 -
Page 22

Biztonsági utasítás
Sérülésveszély!
• Helyezze a készüléket biztonságos és csúszásmentes felületre. Ha üzemelés
közben kilocsolná a forró folyadékot, megégetheti magát!
• A készüléket 8 éves kor feletti gyermekek és csökkent fizikai, érzékszervi vagy
mentális képességű vagy tapasztalattal illetve tudással nem rendelkező személyek felügyelet mellett használhatják, vagy ha felvilágosították őket a készülék
biztonságos használatáról és megértették az ebből eredő veszélyeket.
• Gyerekeknek nem szabad a készülékkel játszani.
• Felügyelet nélküli gyerekek nem végezhetnek karbantartási és tisztítási munkát
a készüléken.
• Ne üzemeltesse a készüléket víz, mint például kád vagy mosdó közelében.
• Csak a típuscímkén megadott feszültségű konnektorra csatlakoztassa a készüléket.
• Ne merítse a készüléket vízbe vagy más folyadékba!
A készülékben helyrehozhatatlan kár keletkezhet!
• A készüléket ne melegítse fel folyadék nélkül!
• Ne töltsön oldószert vagy más gyúlékony folyadékot a készülékbe!
• A hálózati csatlakozót ne a csatlakozónál fogva húzza ki a csatlakozó aljzatból.
Ne a vezetéket húzza!
• A veszélyek elkerülése érdekében a sérült hálózati csatlakozót vagy vezetéket
azonnal cseréltesse ki engedélyeztetett szakemberrel vagy az ügyfélszolgálattal.
• Üzemelés közben ne nyúljon a készülék belsejébe.
Megégetheti magát!
• A készüléket használat után mindig tisztítsa meg, hogy elkerülje a zsír és más
visszamaradt anyag lerakódását.
Áramütés veszélye!
Semmiképpen ne használja a készüléket kád, zuhanyozó vagy más folyadékot tartalmazó edény közelében.
- 19 -
Page 23

Az arcgőzölő üzemkésszé tétele
• Tekerje le a hálózati kábelt a kábelcsévélőről 0 és
helyezze a fűtőegység 9 alján lévő mélyedésbe.
• Helyezze a fűtőegységet 9 sík, csúszásmentes
és vízre nem érzékeny felületre.
• A mérőpohár r segítségével töltsön vizet a
vizestálba 6. A mérőpoháron r lévő mérce
szerint döntse el, hogy mennyi ideig szeretné
használni a készüléket (kb. 5, kb.10 vagy kb.
15 percig). Használja azt a mércét, amelyik
illik az adott gőzölési fokozathoz (Hi vagy Lo).
Figyelmeztetés!
Ne töltsön a (mérőpohárban lévő r) “Hi 15 min.”
jelölésnél több vizet a vizestálba 6. A készülék
különben túlfolyhat és a víz a készülék belsejébe
juthat. A készülékben helyrehozhatatlan kár keletkezhet.
...az arcmaszkkal
A készüléket az alábbi módon lehet az arcmaszkkal 1 használni:
• Úgy helyezze a gőzszabályzót 4 a vizestálra 6,
hogy a nyél 5 előre mutasson.
• Helyezze az arcmaszkot 1 a fűtőegységre 9:
Az arcmaszk 1 alsó részén lévő füleknek a a fűtőegységen 9 lévő mélyedésbe kell nyúlniuk.
Ezután fordítsa el az arcmaszkot 1 az óramutató járásával megegyező irányban, hogy szorosan illeszkedjen a fűtőegységre 9.
• Dugja be a csatlakozót a konnektorba.
Az arcgőzölő ezzel üzemkész.
...az orrmaszkkal
A készüléket az alábbi módon lehet az orrmaszkkal
használni:
Tudnivaló:
A gőzszabályzóra 4 nincsen szükség, ha az
orrmaszkot használjuk.
• Úgy helyezze az aroma- és gyógynövényes tartály fedelét 2 az orrmaszk alsó részében q
található aroma- és gyógynövényes tartályra w,
hogy szorosan illeszkedjen.
• Úgy dugja össze az orrmaszk felső e és alsó
részét q, hogy szorosan össze legyenek kapcsolva.
• Helyezze az összedugott orrmaszkot a fűtőegységre 9:
A fűtőegységen 9 lévő füleknek az orrmaszk
alsó részén lévő mélyedésekbe kell nyúlniuk.
Ezután fordítsa el az orrmaszkot az óramutató
járásával megegyező irányban, hogy szorosan
illeszkedjen a fűtőegységre 9.
• Dugja be a csatlakozót az aljzatba.
Az arcgőzölő ezzel üzemkész.
Felhasználás
Figyelem!
Az alábbi betegségek esetén nem szabad használni
az arcgőzölőt:
• bőrgyulladás
• bőrpír
• arcduzzanat
• szívbetegségek
• cukorbetegség
•arcseb
• ekcéma
• pikkelysömör
- 20 -
Page 24

Terhesség vagy más egészségügyi probléma esetén
használat előtt kérje ki orvosa véleményét.
Az arcgőzölő használata a bőrt optimálisan készíti
fel az azt követő kezelésekre, például mélytisztításra,
hidratálásra, arcpakolásra, stb. A gőz élénkíti a
bőrt, megnyitja a pórusokat és a szennyeződéseket
jobban el lehet távolítani.
Működtetés
Az "Arcgőzölő üzemkésszé tétele" részben leírtak
alapján készítse elő az arcgőzölőt.
• Nyomja meg egyszer a Lo/Hi/Off gombot 8.
Az ellenőrzőlámpa 7 zölden világít (alacsony
„Lo“ gőzölési fokozat). A vizestálban 6 lévő víz
éppen annyira melegszik fel, hogy kis gőz képződjön.
Ha több gőzt szeretne, nyomja meg még egyszer
a Lo/Hi/Off gombot 8. Az ellenőrzőlámpa 7 pirosan világít (nagy „Hi“ gőzölési fokozat). A víz erősebben melegszik fel és több gőz keletkezik.
Figyelem!
• Ha rosszul lenne vagy kellemetlennek érezné
a gőzt, tartsa messzebb az arcát az arcmaszktól
1/orrmaszktól vagy csökkentse a gőz mennyiségét. Ha továbbra is rosszul érezné magát, hagyja abba a gőzölést.
• Tartsa az arcát az arcmaszk 1 fölé. Csukja be
a szemét és lazuljon el:
• A gőz mennyiségét az alábbiak szerint lehet
még szabályozni:
Tolja el a gőzszabályzó 5 nyelét jobbra
(a MAX irányába), hogy növelje a gőz mennyiségét.
Tolja el a gőzszabályzó 5 nyelét balra (a MIN
irányába), hogy csökkentse a gőz mennyiségét.
• Tartsa az orrát az orrmaszkba. Csukja be a
szemét és lazuljon el.
Figyelem! Forró gőz!
• Mivel az emberi orr nyálkahártyája nagyon
érzékeny, ne használja a készüléket az orrmaszk
alkalmazása közben „Hi“ gőzfokozaton!
- 21 -
Page 25

• Ha elfogyott a vizestálból 6 a víz, a készülék
automatikusan kikapcsol.Ha a készüléket előtte
ki szeretné kapcsolni, nyomja meg annyiszor
a Lo/Hi/Off gombot 8, amíg az ellenőrzőlámpa 7 ki nem alszik.
Tudnivaló:
30 múlva a készülék magától kikapcsol, még ha
van is víz a vizestálban 6.
• Helyezze be a gyógynövényeket vagy aromaolajjal átitatott vattát az aroma- és gyógynövénytartályba 3/w.
• Nyomja meg az aroma- és gyógyfüves tartály
fedelének a két reteszét 2 és tegye rá az aroma- és gyógyfüves tartályra 3/w. Engedje el a
reteszeket, hogy a fedél 2 szorosan illeszkedjen.
• Szerelje fel az arcmaszkot 1/az orrmaszkot
a fűtőegységre 9 az “Az arcgőzölő üzemkésszé tétele” részben leírtak alapján.
Az aroma- és gyógynövénytartály használata
A gőzbe különböző gyógynövényeket és aromát
is keverhet. Ez fokozhatja a bőr ellazulását és a
szépségápolást.
Tudnivaló:
Csak olyan gyógynövényeket vagy aromaanyagokat
szabad használni, melyek arcgőzölőbe valók és
erre a célra alkalmasak.
Tudnivaló:
Az aroma- és gyógynövényes tartály 2 fedele ráillik
az arcmaszk aroma- és gyógynövényes tartályra 3,
valamint az orrmaszk aroma- és gyógynövényes
tartályára w.
Mielőtt összakapcsolná az arcmaszkot 1/az
orrmaszkot a fűtőegységgel 9:
• Nyomja meg az aroma- és gyógyfüves tartály
fedelének a két reteszét 2 és emelje le az
aroma- és gyógyfüves tartályról 3/w.
Csak az arcmaszknál 1 a következőképpen:
Nyomja át az aroma- és gyógyfüves tartály 3 alján
lévő két pöcköt az arcmaszk 1 alján lévő nyíláson,
hogy a pöckök bepattanjanak és az aroma- és
gyógyfüves tartály 3 szorosan illeszkedjen.
A felszálló pára az aroma- és gyógynövénytartályba 3/w jut és így felveszi az aromát.
Tiszítás és ápolás
Veszély!
Tisztítás előtt mindig húzza ki a csatlakozót és
hagyja lehűlni a készüléket! Sérülésveszély!
Használat után alaposan tisztítsa meg az arcgőzölőt. Ellenkező esetben a meleg nedvesség miatt
gyorsan csíra képződhet, mely a készülék ismételt
használata esetén egészségügyi panaszokat okozhat.
Vigyázat!
Ne használjon erős hatású, súroló vagy vegyi tisztítószereket! Ezeket kárt tehetnek a felületben és helyrehozhatatlan károkat okozhatnak a készülékben.
• Ne szedje szét a készüléket.
Az arcmaszk szétszerelése:
• Vegye le az arcmaszkot 1 a fűtőegységről 9:
Fordítsa el az arcmaszkot 1 az óramutató járásával ellentétes irányban, hogy le lehessen emelni.
- 22 -
Page 26

• Emelje le a gőzszabályzót 4 a fűtőelemről 9.
• Vegye le a fedelet 2 az aroma- és gyógynövény-
tartályról :
Ehhez nyomja össze mindkét reteszt, amíg
a fedelet 2 le nem lehet venni.
• Húzza ki az aroma- és gyógynövényes tartályt 3:
Nyomja össze az arcmaszk 1 alján kiálló pöc-
köket és húzza ki az aroma- és gyógynövényes
tartályt 3.
Az orrmaszk levétele:
• Vegye le az orrmaszkot 1 a fűtőegységről 9:
Fordítsa el az orrmaszkot az óramutató járásával ellentétes irányban, hogy le lehessen emelni.
• Húzza szét az orrmaszk alsó q és felső részét e.
• Vegye le az aroma- és gyógynövényes tartály 2
fedelét (ha rá volt téve) w:
Ehhez nyomja össze mindkét reteszt, amíg a
fedelet 2 le nem lehet venni.
Enyhe szappanos vízben tisztítsa meg az arcmaszkot 1, az orrmaszk mindkét részét q/e, az aroma-
és gyógynövényes tartály 2fedelét, a gőzszabályzót 4, az aroma- és gyógynövényes tartályt 3 és
a mérőpoharat r. Mindent öblítsen le tiszta vízzel
és szárítsa meg.
Tárolás
Hagyja lehűlni a készüléke tés tisztítsa meg (lásd
a “Tisztítás és ápolás” részt).
Az arcgőzölőt száraz helyen tárolja.
Tekerje rá a kábelt a készülék alján lévő kábelfelcsévélőre 0.
Ártalmatlanítás
Semmi esetre se dobja a készüléket a
háztartási hulladékba. Jelen termékre
a 2002/96/EC számú európai utasítás
rendelkezési vonatkoznak.
A készüléket engedélyeztetett hulladékgyűjtő
helyen vagy a helyi hulladékeltávolító üzemnél
tudja kidobni.
Vegye figyelembe az érvényben lévő idevonatkozó
előírásokat. Ha kérdése merülne fel, vegye fel a
kapcsolatot a hulladékfeldolgozó vállalattal.
A csomagolóanyagot juttassa környezetvédő ártalmatlanítóhelyre.
Enyhén nedves ronggyal tisztítsa meg a fűtőegységet 9 és a vizes tálat 6. Makacs szennyeződések
esetén tegyen enyhe mosogatószert a megnedvesített
kendőre.
Ha vízkő képződne a vizes tálkában 6, akkor a
vizes tálkát 6 a kereskedelemben kapható, alumíniumhoz is alkalmas vízkőoldóval tisztítsa.
Vegye figyelembe a vízkőoldó használati utasítását.
Tisztítás után szerelje össze az arcgőzölőt.
Garancia és szerviz
A készülékre 3 év garanciát adunk a vásárlás dátumától számítva. A készüléket gondosan gyártottuk,
és szállítás előtt lelkiismeretesen ellenőriztük.
Kérjük, a vásárlás igazolására őrizze meg a pénztári blokkot. Kérjük, garanciaigény esetén vegye fel
a kapcsolatot telefonon az Ön közelében lévő szervizzel. Csak ebben az esetben garantálhatjuk, hogy
ingyen tudja beküldeni az árut.
A garancia csak anyag- és gyártási hibára vonatkozik, nem pedig szállítási kárra, kopásra vagy törékeny részek (pl. kapcsoló vagy elem) sérülésére. A termék kizárólag magánhasználatra, nem üzleti
használatra készült.
- 23 -
Page 27

A garancia érvényét veszti visszaélésszerű vagy
szakavatatlan kezelés, erőszak alkalmazása vagy
olyan beavatkozások esetén, amelyeket nem engedélyeztetett szervizelő üzleteink hajtottak végre. Az
ön törvényes jogait ez a garancia nem korlátozza.
A garanciaidő nem hosszabbodik a jótállással.
Ez a kicserélt vagy javított alkatrészekre is érvényes.
Az esetlegesen már a megvételkor meglévő károkat
és hiányosságokat azonnal kicsomagolás után, legkésőbb két nappal a vétel dátumától számítva jelezni kell. A garanciális idő lejárta után esedékes javítások térítéskötelesek.
Szerviz Magyarország
Tel.: 0640 102785
E-Mail: kompernass@lidl.hu
IAN 91000
Az ügyfélszolgálati forródrót elérhetősége:
hétfőtől péntekig 8.00 és 20.00 óra között
(közép-európai idő szerint)
Gyártja
KOMPERNASS HANDELS GMBH
BURGSTRASSE 21
44867 BOCHUM
GERMANY
www.kompernass.com
- 24 -
Page 28

Kazalo vsebine Stran
Uvod 26
Namenska uporaba 26
Vsebina kompleta 26
Opis naprave 26
Tehnični podatki 26
Navodila za varno uporabo 27
Priprava savne za uporabo 28
... z masko za obraz . . . . . . . . . . . . . . . . . . . . . . . . . . . . . . . . . . . . . . . . . . . . . . . . . . . . . . . .28
... z masko za nos . . . . . . . . . . . . . . . . . . . . . . . . . . . . . . . . . . . . . . . . . . . . . . . . . . . . . . . . .28
Opozorila v zvezi z uporabo 28
Uporaba 29
Posoda za dišave in zelišča 30
Čiščenje in vzdrževanje 30
Shranjevanje 31
Odstranitev 31
Proizvajalec 31
Servis 31
Garancijski list 32
- 25 -
Page 29

Obrazna savna
Uvod
Iskrene čestitke ob nakupu vaše nove naprave.
Odločili ste se za kakovosten izdelek. Ta navodila
za uporabo so sestavni del vašega izdelka. Vsebujejo pomembne napotke za njegovo varnost, uporabo
in odstranitev. Preden izdelek začnete uporabljati, si
preberite vse napotke za njegovo varno uporabo.
Izdelek uporabljajte samo na opisani način in le za
navedena področja uporabe. Ob predaji naprave
tretji osebi zraven priložite tudi vso dokumentacijo.
Namenska uporaba
Obrazna savna je namenjena za lepotilno nego
obraza s paro.
Aparat je namenjen le za zasebno in ne za poslovno
uporabo!
Vsebina kompleta
Maska za obraz
Maska za nos
Regulator pare
Grelna enota
Merilna posoda
Navodilo za uporabo
Opis naprave
Slika A:
1 maska za obraz
2 pokrov posode za dišave in zelišča (primeren za
posodo za dišave in zelišča za masko za obraz
in masko za nos)
3 posoda za dišave in zelišča
4 regulator pare
5 ročaj regulatorja pare
6 posoda za vodo
7 kontrolna lučka
8 gumb za moč pare (Lo/Hi/Off)
9 grelna enota
0 navijalo za kabel
q spodnji del maske za nos
w posoda za dišave in zelišča
e zgornji del maske za nos
Slika B:
r merilni lonček
Tehnični podatki
Nazivna el. napetost: 220 - 240 V ~ / 50 Hz
Poraba el. toka: 75 - 95 W
Razred zaščite: II /
- 26 -
Page 30

Navodila za varno uporabo
Nevarnost poškodb!
• Aparat postavljajte le na trdno in ravno podlago. Če se med uporabo razlijejo
vroče tekočine, se lahko opečete!
• Otroci v starosti od 8 let naprej in osebe z zmanjšanimi telesnimi, zaznavnimi ali
duševnimi sposobnostmi ali s pomanjkanjem izkušenj in/ali znanja lahko napravo
uporabljajo pod nadzorom ali če so bile poučene o njeni varni uporabi in razumejo nevarnosti, ki izhajajo iz uporabe naprave.
• Otroci se ne smejo igrati z napravo.
• Otroci ne smejo izvajati čiščenja in uporabniškega vzdrževanja naprave, razen če
so stari 8 let in več in pod nadzorom.
• Aparata ne uporabljajte v bližini vode, npr. v kopalni kadi ali poleg umivalnika.
• Aparat uporabljajte le priklopljenega v električno omrežje z napetostjo, navedeno na tipski tablici.
• Aparata ne polagajte v vodo ali druge tekočine!
V nasprotnem primeru se lahko aparat nepopravljivo poškoduje!
• Na aparatu ne vklapljajte gretja, če v njem ni tekočine!
• V aparat ne vlivajte nobenih razredčil ali drugih vnetljivih tekočin!
• Električni kabel iz vtičnice vedno vlecite za električni vtič.
Ne vlecite za sam kabel!
• Poškodovane električne vtiče ali kable naj vam takoj zamenjajo pooblaščeni
strokovnjaki ali servis, da ne bi prišlo do nesreč.
• Med delovanjem aparata ne segajte v njegovo notranjost.
Če to storite, se lahko opečete!
• Po vsaki uporabi aparat očistite, da se v njem ne bi nabirale maščobe in drugi
ostanki.
Nevarnost zaradi električnega udara!
Te naprave ne uporabljajte v bližini kopalnih kadi, podstavka prhe ali drugih
posod, ki vsebujejo vodo.
- 27 -
Page 31

Priprava savne za uporabo
• Odvijte električni kabel z navijala 0 in ga položite
skozi odprtino na spodnji strani grelne enote 9.
• Grelno enoto 9 postavite na ravno, nedrsečo in
za vodo neobčutljivo površino.
• Z merilno posodo r v posodo za vodo 6 nalijte
vodo. Pri tem upoštevajte merilno skalo na merilni
posodi r in želen čas uporabe aparata (pribl. 5,
pribl. 10 ali pribl. 15 minut). Uporabite območje
na skali, ki se ujema z ustrezno močjo pare (Hi velika moč ali Lo - majhna moč).
Opozorilo!
Vode v posodo za vodo 6 na aparatu nikoli ne
nalivajte dlje od oznake za veliko moč "Hi 15 min."
(v merilni posodi r). V nasprotnem primeru lahko
voda steče iz posode za vodo v notranjost aparata.
Pri tem se aparat lahko nepopravljivo poškoduje!
... z masko za obraz
Če napravo želite uporabljati z masko za obraz 1,
naredite naslednje:
• Položite regulator pare 4 tako na vodno posodo 6, da ročaj 5 kaže naprej.
• Namestite masko za obraz 1 na grelno enoto 9:
Zatiči na grelni enoti 9 se morajo prilegati v odprtine na spodnji strani maske za obraz 1.
Potem masko za obraz 1 obrnite v smeri urnega
kazalca, tako da se trdno prilega grelni enoti 9.
• Omrežni vtič vtaknite v omrežno vtičnico.
Obrazna savna je sedaj pripravljena za uporabo.
... z masko za nos
Če napravo želite uporabljati z masko za nos,
naredite naslednje:
Napotek:
Regulatorja pare 4 pri uporabi maske za nos ne
potrebujete.
• Pokrov posode za dišave in zelišča 2 na posodo
za dišave in zelišča w v spodnjem delu maske
za nos q, namestite tako, da bo trdno pritrjen.
• Zgornji e in spodnji del maske za nos q, sestavite tako, da bosta trdno povezana.
• Sestavljeno masko za nos namestite na grelno
enoto 9:
Zatiči na grelni enoti 9 se morajo prilegati v
odprtine na spodnji strani maske za nos. Potem
masko za nos obrnite v smeri urnega kazalca,
da se bo trdno prilegala grelni enoti 9.
• Električni vtič vtaknite v električno vtičnico.
Obrazna savna je sedaj pripravljena za uporabo.
Opozorila v zvezi z uporabo
Pozor!
Obrazne savne ne smejo uporabljati osebe
z naslednjimi obolenji:
• vnetja kože
• pordelost kože
• otekline na in okrog obraza
• srčna obolenja
• sladkorna bolezen
• rane na in okrog obraza
• ekcemi
• luskavica (psoriaza)
- 28 -
Page 32

Noseče uporabnice in osebe z drugimi zdravstvenimi
problemi naj se pred uporabo posvetujejo z
zdravnikom.
Obrazna savna kožo optimalno pripravi na druge
postopke, npr. globinsko čiščenje, vlaženje, zaščitne
maskare za obraz, itd. Para kožo poživi, odpre pore,
zato se nečistoče lažje odstranijo.
Uporaba
Obrazno savno pripravite po opisu v poglavju
„Priprava savne za uporabo“.
• Enkrat pritisnite gumb za majhno/veliko moč
pare oz. izklop (Lo/Hi/Off) 8. Kontrolna
lučka 7 sveti zeleno (nizka moč pare „Lo“).
Voda se v posodi za vodo 6 segreje le toliko,
da zadošča za nastanek majhne količine pare.
Za več pare znova pritisnite gumb za majhno/
veliko moč pare oz. izklop (Lo/Hi/Off) 8. Kon-
trolna lučka 7 sveti rdeče (visoka moč pare „Hi“).
Voda se segreje močneje in nastaja več pare.
• Obraz držite nad masko za obraz 1. Zaprite
oči in se sprostite:
Količino pare lahko dodatno nastavite na
naslednji način::
Ročaj regulatorja pare 5 potisnite na desno
(proti oznaki MAX), da povečate količino pare.
Ročaj regulatorja pare 5 potisnite na levo
(proti oznaki MIN), da zmanjšate količino pare.
Pozor!
• Če se počutite neugodno ali paro občutite kot
neprijetno, obraz nekoliko bolj odmaknite od
maske za obraz 1/maske za nos ali zmanjšajte
količino pare. Če neprijetno počutje ne mine,
z uporabo naprave prenehajte.
Pozor! Vroča para!
• Ker je človekova nosna sluznica zelo občutljiva,
naprave z masko za nos nikoli ne uporabljajte
z visoko stopnjo pare „Hi”.
• Nos držite nad masko za nos. Zaprite oči in se
sprostite:
- 29 -
Page 33

• Ko aparat v paro spremeni vso vodo v posodi
za vodo 6, se samodejno izklopi. Če ga želite
izklopiti prej, tolikokrat pritisnite gumb za majhno/
veliko moč pare oz. izklop (Lo/Hi/Off) 8, da
kontrolna lučka 7 ugasne.
Napotek:
Čez 30 minut se aparat samodejno izklopi, tudi če
se v posodi za vodo 6 še nahaja voda.
• Zelišča ali blazinico bombažne vate, nakapljano z dišavo, položite v posodo za dišave in
zelišča 3/w.
• Oba zapaha pokrova posode za dišave in zelišča 2 stisnite skupaj in pokrov namestite na
posodo za dišave in zelišča 3/w.
Zapaha spustite, da se pokrov 2 trdno pritrdi.
• Sedaj nataknite masko za obraz 1/masko
za nos na grelno enoto 9, kot je opisano
v poglavju “Priprava savne za uporabo”.
Posoda za dišave in zelišča
Paro lahko obogatite z različnimi zelišči in dišavami.
To bo pripomoglo k sprostitvi ter polepšanju in negi
kože.
Napotek:
Uporabljati se smejo le tista zelišča in dišave, ki so
predvidene in primerne za uporabo v obrazni savni.
Napotek:
Pokrov posode za dišave in zelišča 2 je primeren za
posodo za dišave in zelišča za masko za obraz 3
kot tudi za posodo za dišave in zelišča za masko
za nos w.
Preden masko za obraz 1/masko za nos povežete
z grelno enoto 9:
• Oba zapaha pokrova posode za dišave in
zelišča 2 stisnite skupaj in pokrov dvignite z
ustrezne posode za dišave in zelišča 3/w.
Samo pri maski za obraz 1:
Oba nastavka na spodnji strani posode za dišave
in zelišča 3 potisnite skozi odprtino na dnu maske
za obraz 1, da se nastavka zaskočita in je posoda
za dišave in zelišča 3 trdno pritrjena.
Para se sedaj dviga skozi posodo za dišave in
zelišča 3/w in se pri tem navzame arome.
Čiščenje in vzdrževanje
Nevarnost!
Pred vsakim čiščenjem električni vtič izvlecite iz električne vtičnice in počakajte, da se aparat ohladi!
V nasprotnem primeru se lahko poškodujete!
Obrazno savno po vsaki uporabi temeljito očistite.
V nasprotnem primeru zaradi toplote in vlage hitro
pride do tvorbe klic, ki ob ponovni uporabi aparata
lahko povzročijo zdravstvene zaplete.
Opozorilo!
Za čiščenje ne uporabljajte nobenih jedkih, ostrih
ali kemičnih sredstev! Taka sredstva poškodujejo
površino in nepopravljivo poškodujejo aparat.
• Napravo razstavite.
Snemite masko za obraz:
• Masko za obraz 1 snemite z grelne enote 9:
Masko 1 obrnite v obratni smeri urnega kazalca,
da jo lahko snamete.
- 30 -
Page 34

• Snemite regulator pare 4 z grelne enote 9.
• Snemite pokrov 2 posode za dišave in zelišča:
To storite tako, da obe blokadi stisnete skupaj,
s čimer deblokirate pokrov 2, da ga nato lahko
snamete.
• Izvlecite posodo za dišave in zelišča 3 ven:
Nastavka, ki štrlita iz spodnje strani maske za
obraz 1, stisnite skupaj in istočasno povlecite
za posodo za dišave in zelišča 3.
Shranjevanje
Počakajte, da se aparat ohladi in ga očistite (glejte
poglavje Čiščenje in vzdrževanje).
Obrazno savno shranjujte na suhem mestu.
Kabel navijte na navijalo 0 na spodnji strani aparata.
Odstranitev
Odstranjevanje maske za nos:
• Masko za nos snemite z grelne enote 9:
Masko obrnite v obratni smeri urnega kazalca,
da jo lahko snamete.
• Spodnji q in zgornji del e maske za obraz
potegnite narazen.
• S posode za dišave in zelišča w snemite po-
krov 2 (če je nataknjen):
V ta namen oba zapaha stisnite skupaj, da
pokrov 2 lahko odstranite.
Masko za obraz 1, oba dela maske za nos q/e,
pokrov posode za dišave in zelišča 2, regulator pare
4, posodo za dišave in zelišča 3 in merilni lonček r
operite v blagi milnici. Vse skupaj sperite s čisto
vodo in počakajte, da se posuši.
Z rahlo navlaženo krpo očistite grelno enoto 9 in
posodo za vodo 6. V primeru trdovratne umazani-
je na krpo dajte še blago sredstvo za pomivanje.
Kakor hitro v posodi za vodo 6 pride do nastajanja vodnega kamna, posodo za vodo 6 očistite s
sredstvom za odstranjevanje vodnega kamna iz
trgovine, ki mora biti primerno za aluminij.
Upoštevajte navodila za uporabo sredstva za odstranjevanje vodnega kamna.
Po čiščenju obrazno savno znova sestavite.
Naprave v nobenem primeru ne
odvrzite v običajne hišne smeti. Ta
proizvod je podvržen evropski
Direktivi 2002/96/EC.
Napravo oddajte pri podjetju, registriranem za
predelavo odpadkov, ali pri svojem komunalnem
podjetju za predelavo odpadkov.
Upoštevajte trenutno veljavne predpise. V primeru
dvoma se obrnite na svoje podjetje za predelavo
odpadkov.
Embalažo oddajte za okolju primerno
odstranitev.
Proizvajalec
KOMPERNASS HANDELS GMBH
BURGSTRASSE 21
44867 BOCHUM
GERMANY
www.kompernass.com
Servis
Servis Slovenija
Tel.: 080080917
E-Mail: kompernass@lidl.si
IAN 91000
Dosegljivost telefonske sluÏbe za stranke:
Od ponedeljka do petka od 8:00 do 20:00
(po srednjeevropskem času)
- 31 -
Page 35

Garancijski list
1. S tem garancijskim listom jamčimo Kompernass
Handels GmbH, da bo izdelek v garancijskem
roku ob normalni in pravilni uporabi brezhibno
deloval in se zavezujemo, da bomo ob izpolnjenih spodaj navedenih pogojih odpravili morebitne poma-njkljivosti in okvare zaradi napak v
materialu
ali izdelavi oz. po svoji presoji izdelek zamenjali
ali vrnili kupnino.
2. Garancija je veljavna na ozemlju Republike
Slovenije.
3. Garancijski rok za proizvod je 3 leta od dneva
nabave.
4. Kupec je dolžan okvaro javiti pooblaščenemu
servisu oz. se informirati o nadaljnjih postopkih
na zgoraj navedeni telefonski številki. Svetujemo
vam, da pred tem natančno preberete navodila
o sestavi in uporabi izdelka.
5. Kupec je dolžan pooblaščenemu servisu predložiti garancijski list in račun, kot potrdilo in dokazilo
o nakupu.
6. V primeru, da proizvod popravlja nepooblaščeni
servis ali oseba, kupec ne more uveljavljati zahtevkov iz te garancije.
7. Vzroki za okvaro oz. nedelovanje izdelka morajo
biti lastnosti stvari same, in ne vzroki, ki so zunaj
proizvajalčeve oz. prodajalčeve sfere. Kupec ne
more uveljavljati zahtevkov iz te garancije, če se
ni držal priloženih navodil za sestavo in uporabo
izdelka ali, če je izdelek kakorkoli spremenjen
ali nepravilno vzdrževan.
8. Jamčimo servisiranje in rezervne dele za minimalno dobo, ki je zahtevana s strani zakonodaje.
9. Obrabni deli oz. potrošni material so izvzeti iz
garancije.
10. Vsi potrebni podatki za uveljavljanje garancije se nahajajo na dveh ločenih dokumentih
(garancijski list, račun).
11. Ta garancija proizvajalca ne izključuje pravic
potrošnika, ki izhajajo iz odgovornosti prodajalca za napake na blagu.
Prodajalec:
Lidl d.o.o.k.d., Pod lipami 1, SI-1218 Komenda
- 32 -
Page 36

Obsah Strana
Úvod 34
Účel použití 34
Rozsah dodávky 34
Popis přístroje 34
Technické údaje 34
Bezpečnostní pokyny 35
Příprava obličejové sauny k provozu 36
...s obličejovou maskou . . . . . . . . . . . . . . . . . . . . . . . . . . . . . . . . . . . . . . . . . . . . . . . . . . . . . .36
...s nosní maskou . . . . . . . . . . . . . . . . . . . . . . . . . . . . . . . . . . . . . . . . . . . . . . . . . . . . . . . . . .36
Používání 36
Obsluha 37
Používat nádoby s aromou a bylinkami 38
Čištění a údržba 38
Úschova 39
Likvidace 39
Záruka & servis 39
Dovozce 40
- 33 -
Page 37

Obličejová sauna
Úvod
Gratulujeme Vám k zakoupení nového přístroje.
Vaším nákupem jste si vybrali kvalitní výrobek. Návod k obsluze je součástí tohoto výrobku. Obsahuje
důležité pokyny a upozornění ohledně bezpečnosti,
použití a likvidace. Před použitím výrobku si dobře
přečtěte provozní a bezpečnostní pokyny. Výrobek
používejte pouze předepsaným způsobem a v uvedených oblastech použití. Při předávání výrobku třetím osobám předávejte i tyto podklady.
Účel použití
Obličejová sauna slouží k ošetřování pleti pomocí
páry.
Přístroj je určen pouze pro použití v soukromé sféře
a není určen pro podnikatelské nebo průmyslové
účely!
Popis přístroje
Obrázek A:
1 Obličejová maska
2 Víko nádoby na aroma a bylinky (je vhodné pro
použití s nádobou na aroma a bylinky, která je
součástí obličejové a nosní masky)
3 Nádoba na aromy a bylinky
4 Regulátor páry
5 Páčka regulátoru páry
6 Miska na vodu
7 Kontrolní žárovka
8 Lo/Hi/Off-tlačítko
9 Topná jednotka
0 Navíjení kabelu
q Dolní díl nosní masky
w Nádoba na aroma a bylinky
e Horní díl nosní masky
Obrázek B:
r Odměrka
Technické údaje
Rozsah dodávky
Obličejová maska
Nosní maska
Regulátor páry
Topná jednotka
Měrná nádobka
Návod k obsluze
Jmenovité napětí: 220 - 240 V ~ / 50 Hz
Příkon: 75 - 95 W
Třída ochrany: II /
- 34 -
Page 38

Bezpečnostní pokyny
Nebezpečí poranění!
• Postavte přístroj pouze na pevnou a rovnou podložku. Při rozlití horké tekutiny
během provozu hrozí nebezpečí popálení!
• Děti starší 8 let a osoby s omezenými fyzickými, smyslovými nebo duševními
schopnostmi, nebo nedostatkem zkušeností a / nebo znalostÍ mohou používat
tento přístroj pouze tehdy, pokud jsou pod dohledem nebo pokud byly poučení
o bezpečném používání přístroje a pokud porozuměly z toho vyplývajícímu
nebezpečí.
• Děti se nesmí hrát s přístrojem.
• Čištění a uživatelskou údržbu nesmí provádět děti, ledaže by byly pod dohledem
dospělé osoby.
• Neprovozujte přístroj v blízkosti vody, jako např. ve vaně nebo vedle umyvadla.
• Přístroj připojujte pouze do zástrčky s napětím, uvedeným na identifikační ta-
bulce.
• Neponořujte přístroj do vody nebo jiných kapalin! Přístroj se může nezvratně
poškodit!
• Přístroj nikdy nevyhřívejte bez kapaliny!
• Nenaplňujte přístroj ředidly nebo jinými zápalnými tekutinami!
• Síťovou zástrčku vytáhněte ze zásuvky vždy na síťovém konektoru.
Nikdy netahejte za samotný kabel!
• Poškozené zástrčky nebo síťový kabel nechte ihned vyměnit autorizovanými od-
borníky nebo zákaznickým servisem - vyhnete se tím nebezpečí.
• Nezasahujte během provozu do vnitřka přístroje. Hrozí nebezpečí popálenin!
• Vyčistěte přístroj po každém použití, aby se tak zabránilo usazení tuku a jiných
zbytků a nečistot.
Nebezpečí zásahu elektrickým proudem!
Tento přístroj v žádném případě nepoužívejte v blízkosti van, sprch nebo jiných nádrží obsahujících vodu.
- 35 -
Page 39

Příprava obličejové sauny
k provozu
• Odviňte síťový kabel z navíjení kabelu 0 a
provlečte jej přes otvory na spodní straně topné
jednotky 9.
• Postavte topnou jednotku 9 na rovnou, bezklu-
zovou a na vodu necitlivou plochu.
• Pomocí odměrky r nalejte vodu do misky na
vodu 6. Orientujte se dle stupnice na odměrce r,
jak dlouho chcete přístroj použít (cca. 5, cca. 10
nebo cca. 15 minut). Použijte ten stupeň stupnice,
který se hodí k příslušnému stupni páry (Hi nebo
Lo).
Varování!
Nikdy nenalijte do misky na vodu 6 více vody, než
po označení “Hi 15 min.” (na odměrce r). Voda
v přístroji by jinak mohla přetéct a vniknout dovnitř
přístroje. Může dojít k neopravitelnému poškození
přístroje.
...s obličejovou maskou
Chcete-li přístroj používat s obličejovou maskou 1,
postupujte takto:
• Regulátor páry 4 nastavte na misce na vodu 6
tak, aby páčka 5 ukazovala dopředu.
• Nasaďte obličejovou masku 1 na topnou jed-
notku 9:
Úchytky na topné jednotce 9 musí zasahovat
do vyhloubenin na spodní straně obličejové masky 1.
Otočte potom obličejovou masku 1 ve směru
hodinových ručiček tak, aby pevně dosedala na
topnou jednotku 9.
• Síťovou zástrčku zasuňte do síťové zásuvky.
Nyní je obličejová maska připravená k provozu.
...s nosní maskou
Chcete-li přístroj používat s nosní maskou, postupujte
takto:
Upozornění:
Regulátor páry 4 není při použití nosní masky
zapotřebí.
• Nasaďte víko nádoby na aroma a bylinky 2
na tuto nádobu w v dolním dílu nosní masky q
tak, aby pevně sedělo.
• Sestavte dohromady horní e a dolní díl nosní
masky q tak, aby byly pevně spojené.
• Nasaďte sestavenou nosní masku na topnou
jednotku 9:
Úchytky na topné jednotce 9 musejí zasahovat
do vyhloubenin na spodní straně nosní masky.
Otočte potom nosní masku ve směru hodinových
ručiček tak, aby pevně dosedala na topnou jednotku 9.
• Zasuňte zástrčku do síťové zásuvky.
Nyní je obličejová maska připravená k provozu.
Používání
Pozor!
U následujících onemocnění se nesmí obličejová
sauna používat:
• při zánětu kůže
• při očervenění kůže
• při otocích v oblasti obličeje
• při srdečních onemocnění
• při cukrovce
• rány v oblasti obličeje
• při ekzémech
• při psoriáze
- 36 -
Page 40

V případě těhotenství nebo jiných zdravotních
problémů se před použitím poraďte s lékařem.
Použití obličejové sauny připraví optimálně Vaší kůži
pro další ošetření pleti, jako například hluboké vyčištění
pleti, dodání vlhkosti, pleťové masky, atd. Pára oživí
kůži, otevře póry a nečistoty se mohou lépe odstranit.
Obsluha
Připravte obličejovou saunu tak, jak je popsáno
pod bodem “Příprava obličejové sauny k provozu”.
• Stiskněte jednou tlačítko Lo/Hi/Off 8. Kontrolní
žárovka 7 svítí zeleně (nízký stupeň dání páry
„Lo“). Voda v misce na vodu 6 se ohřeje právě
na takovou teplotu, aby vzniklo jenom trochu páry.
Chcete-li více páry, stiskněte tlačítko Lo/Hi/
Off 8 po druhé. Kontrolní žárovka 7 svítí
červeně (vysoký stupeň dání páry „Hi“). Voda
se ohřívá silněji a vytvoří se více páry.
Pozor!
• Necítíte-li se dobře nebo je vám pára nepříjemná,
oddalte obličej o trochu více od obličejové
masky 1 / nosní masky nebo snižte množství
páry. Je-li Vám i nadále nevolno, přerušte použití.
• Držte Vaší tvář nad obličejovou maskou 1.
Zavřete oči a uvolněte se.
• Množství páry můžete dodatečně regulovat takto:
Ke zvýšení množství páry posuňte páčku regulátoru páry 5 doprava (směrem k MAX).
Ke snížení množství páry posuňte páčku regulátoru páry 5 doleva (směrem k MIN).
• Mějte nos nad nosní maskou.
Zavřete oči a uvolněte se:
Pozor! Horká pára!
• Protože nosní sliznice člověka je velmi citlivá,
nepoužívejte přístroj během aplikace s nosní
maskou nikdy na stupni páry "Hi".
- 37 -
Page 41

• Jakmile se voda v misce na vodu 6 vypaří,
se přístroj automaticky vypne. Chcete-li přístroj
vypnout předem, stiskněte tak často tlačítko Lo/Hi/
Off 8, dokud nezhasne kontrolní žárovka 7.
Upozornění:
Po 30 minutách se přístroj automaticky vypne, i když
je voda v misce na vodu 6.
Používat nádoby s aromou a
bylinkami
Do páry můžete přiměšovat různé bylinky a aromy.
Toto může přispět k uvolnění a ošetření pleti.
Upozornění:
Smí se používat pouze takové bylinky nebo aromatické látky, které jsou určené a vhodné pro použití
v obličejové sauně.
Upozornění:
Víko nádoby na aroma a bylinky 2 je určeno jak
pro nádobu obličejové masky 3, tak i pro nádobu
nosní masky w.
Předtím než obličejovou masku 1/ nosní masku
spojíte s topnou jednotkou 9:
• Stlačte obě aretace víka nádoby na aroma
a bylinky 2 k sobě navzájem a sejměte ho
z příslušné nádoby na aroma a bylinky 3/w.
Pouze u obličejové masky 1:
Protlačte oba čepy na spodní straně nádoby na
aroma a bylinky 3 otvorem na dně obličejové
masky 1 tak, aby čepy zaaretovaly a nádoba na
aroma a bylinky 3 pevně držela.
• Vložte bylinky nebo aromatickým olejem pokapaný bavlněný hadřík do nádoby na aroma
a bylinky 3/w.
• Stlačte obě aretace víka nádoby na aroma
a bylinky 2 k sobě navzájem a nasaďte jej
na příslušnou nádobu 3/w. Pusťte aretace,
aby víko 2 přesně dopadlo na nádobu.
• Namontujte nyní obličejovou masku 1/ nosní
masku na topnou jednotku 9 tak, jak je popsáno
v bodě "Příprava obličejové sauny k provozu".
Stoupající pára je nyní vedena nádobou na aroma
a bylinky 3/w, a přijímá tak aroma.
Čištění a údržba
Nebezpečí!
Před každým čištěním vytáhněte síťový konektor ze
zástrčky a nechte přístroj vychladnout!
Nebezpečí poranění!
Po každém použití by se měla obličejová sauna řádně
vyčistit. Jinak se mohou prostřednictvím teplé vlhkosti
velice rychle tvořit zárodky, které mohou vést při
opětovném použití přístroje k ohrození zdraví.
Pozor!
Nepoužívejte agresivní, abrazivní nebo chemické
čisticí prostředky! Tyto poškodí povrchy a vedou k
neopravitelným škodám na přístroji.
• Proveďte demontáž přístroje.
Sejmutí obličejové masky:
• Odebrání obličejové masky 1 z topné jednotky 9:
Otočte obličejovou masku 1 v protisměru hodino-
vých ručiček, dokud se nedá nadzvednout.
- 38 -
Page 42

• Regulátor páry 4 nadzvedněte z topné jednot-
ky 9.
• Sejměte víčko 2 nádoby na aromy a bylinky:
Stiskněte k tomu obě zablokování k sobě, dokdu
se nedá víčko 2 uvolnit.
• Vytáhněte nádobu na aroma a bylinky 3:
Stiskněte čepy, které vyčnívají na spodní straně
obličejové masky 1, k sobě navzájem a současně zatáhněte za nádobu na aroma a bylinky 3.
Sejmutí nosní masky:
• Sejměte nosní masku z topné jednotky 9:
Otáčejte nosní maskou proti směru hodinových
ručiček, dokud se nedá nadzvednout.
• Oddělte od sebe dolní q a horní díl e nosní
masky.
• Sejměte víko 2 (pokud je nasazené) z nádoby
na aroma a bylinky w:
Stiskněte k tomu obě aretace k sobě navzájem,
až lze víko 2 uvolnit.
Omyjte obličejovou masku 1, oba díly nosní
masky q/e, víko nádoby na aroma a bylinky 2,
regulátor páry 4, nádobu na aroma a bylinky 3
a odměrku r jemným mýdlovým roztokem.
Opláchněte vše čistou vodou a vysušte.
Úschova
Nechte přístroj vychladnout a vyčistěte jej (viz kapitolu “Čištění a ošetřování”).
Ukládejte obličejovou saunu na čisté a suché místo.
Naviňte kabel do vinutí na kabel 0 na spodní straně
přístroje.
Likvidace
V žádném případě nevyhazujte přístroj
do běžného domovního odpadu. Tento
výrobek musí plnit ustanovení evropské směrnice 2002/96/EC.
Zlikvidujte přístroj prostřednictvím firmy na likvidaci
s příslušným povolením nebo zařízení na likvidaci
komunálního odpadu.
Dodržujte aktuální platné předpisy. V případě
pochybností kontaktujte příslušnou firmu, která
se zabývá likvidací odpadu.
Veškeré obalové materiály nechte zlikvidovat v souladu s ekologickými předpisy.
Topnou jednotku 9 a misku na vodu 6 vyčistěte
lehce navlhčeným hadříkem. V případě většího znečištění přidejte na hadřík trochu jemného čisticího
prostředku.
Jakmile se v misce na vodu 6 začne tvořit vodní kámen, vyčistěte misku na vodu 6 běžným, na hliník
vhodným prostředkem pro odstranění vodního kamene. Dodržujte přitom návod k obsluze výrobce
odstraňovače vodního kamene.
Po vyčištění složte obličejovou saunu opět dohromady.
Záruka & servis
Na tento přístroj platí 3 letá záruka od data zakoupení. Přístroj byl vyroben s nejvyšší pečlivostí a před
odesláním prošel výstupní kontrolou.
Uschovejte si, prosím, pokladní lístek jako doklad o
nákupu. V případě uplatňování záruky kontaktujte
telefonicky Vaší servisní službu. Pouze tak může být
zajištěno bezplatné zaslání Vašeho zboží.
Záruka se vztahuje pouze na chyby materiálu nebo
výrobní závady, ale ne na škody,vzniklé při přepravě, ne na součásti, podléhající rychlému opotřebení
nebo na poškození křehkých dílů, jako jsou např.
spínače nebo akumulátory. Výrobek je určen pouze
pro privátní použití, ne průmyslové.
- 39 -
Page 43

Při nesprávném a neodborném využívání, při použití
násilí a při zásazích, které nebyly provedeny našimi
autorizovanými servisními provozovnami, záruční
nároky zanikají. Vaše práva vyplývající ze zákona
touto zárukou nejsou omezena.
Záruční doba se zárukou neprodlouží. Toto platí
také pro náhradní díly a opravené součásti. Případné škody a vady, existující už při koupi, se musí hlásit ihned po vybalení, nejpozději však do dvou dnů
od data nákupu. Po uplynutí záruční doby se provedené opravy musí zaplatit.
Servis Česko
Tel.: 800143873
E-Mail: kompernass@lidl.cz
IAN 91000
Dostupnost horké linky:
pondělí až pátek 8:00 hod. – 20:00 hod. (SEČ)
Dovozce
KOMPERNASS HANDELS GMBH
BURGSTRASSE 21
44867 BOCHUM
GERMANY
www.kompernass.com
- 40 -
Page 44

Obsah Strana
Úvod 42
Používanie v súlade s účelom použitia 42
Obsah dodávky 42
Opis prístroja 42
Technické údaje 42
Bezpečnostné pokyny 43
Príprava tvárovej sauny na prevádzku 44
... s maskou na tvár . . . . . . . . . . . . . . . . . . . . . . . . . . . . . . . . . . . . . . . . . . . . . . . . . . . . . . . . .44
... s nosovou maskou . . . . . . . . . . . . . . . . . . . . . . . . . . . . . . . . . . . . . . . . . . . . . . . . . . . . . . .44
Používanie 44
Ovládanie 45
Používanie nádržky na arómy a bylinky 46
Čistenie a údržba 46
Uskladnenie 47
Likvidácia 47
Záruka a servis 47
Dovozca 48
- 41 -
Page 45

Sauna na tvár
Úvod
Srdečne vám gratulujeme ku kúpe tohto nového
prístroja.
Rozhodli ste sa tým pre vysokokvalitný výrobok. Návod
na používanie je súčasťou tohto výrobku. Obsahuje
dôležité pokyny týkajúce sa bezpečnosti, používania a likvidácie zariadenia. Pred používaním tohto
výrobku sa oboznámte so všetkými pokynmi na ovládanie a bezpečnostnými pokynmi. Výrobok používajte
iba tak, ako je tu opísané a iba v tých oblastiach
použitia, ktoré sú tu uvedené. Pri odovzdávaní výrobku tretej osobe s ním odovzdajte aj všetky podklady.
Používanie v súlade s účelom
použitia
Tvárová sauna slúži na kozmetické ošetrovanie pleti
pomocou pary.
Prístroj je určený len na používanie v domácnostiach.
Nie je koncipovaný na komerčné účely.
Obsah dodávky
Opis prístroja
Obrázok A:
1 Maska na tvár
2 Veko nádržky na arómy a bylinky (je vhodné
pre nádržku na arómy a bylinky masky na tvár
a nosovej masky)
3 Nádržka na arómy a bylinky
4 Regulátor pary
5 Rukoväť regulátora pary
6 Miska na vodu
7 Kontrolka
8 Tlačidlo Lo/Hi/Off (Slabo, silno, vyp.)
9 Vyhrievacia jednotka
0 Navíjanie kábla
q Spodná časť nosovej masky
w Nádržka na arómy a bylinky
e Horná časť nosovej masky
Obrázok B:
r Odmerka
Technické údaje
Menovité napätie: 220 - 240 V~ / 50 Hz
Príkon: 75 - 95 W
Trieda ochrany: II /
Maska na tvár
Nosová maska
Regulátor pary
Vyhrievacia jednotka
Odmerná nádobka
Návod na používanie
- 42 -
Page 46

Bezpečnostné pokyny
Riziko poranenia!
• Postavte prístroj na rovný a pevný podklad. Pri rozliatí horúcich tekutín počas
prevádzky hrozí nebezpečenstvo popálenia!
• Tento prístroj môžu používať deti od 8 rokov, ako aj osoby so zníženými fyzickými, senzorickými alebo mentálnymi schopnosťami, prípadne s nedostatočnými
skúsenosťami alebo znalosťami, ak sú pod dohľadom alebo boli dostatočne poučené o bezpečnom používaní prístroja a pochopili z toho vyplývajúce riziká.
• Deti sa s prístrojom nesmú hrať.
• Čistenie ani užívateľskú údržbu nesmú robiť deti, okrem prípadu, ak sú pod
dohľadom.
• Nepoužívajte prístroj v blízkosti vody, napríklad pri vani alebo umývadle.
• Prístroj zapojte len do zásuvky s napätím, aké je uvedené na typovom štítku
prístroja.
• Nikdy neponárajte prístroj do vody ani do iných tekutín!
Prístroj by sa mohol neopraviteľne poškodiť!
• Nikdy nezohrievajte prístroj bez tekutiny!
• Nedávajte do prístroja žiadne rozpúšťadlá ani iné horľavé tekutiny!
• Po použití vždy vytiahnite prívodný kábel z elektrickej zásuvky.
Nikdy neťahajte za kábel samotný!
• Poškodenú sieťovú šnúru alebo zástrčku nechajte ihneď vymeniť oprávnenému
odborníkovi alebo v zákazníckom servise, aby ste sa vyhli ohrozeniu zdravia.
• Počas prevádzky nesiahajte do vnútra prístroja.
Hrozí nebezpečenstvo popálenia!
• Po každom použití prístroj vyčistite, aby ste zabránili usadzovaniu tuku a iných
usadenín.
Nebezpečenstvo úrazu elektrickým prúdom!
V žiadnom prípade nepoužívajte tento prístroj v blízkosti vaní, sprchovacích kútov a iných nádob, v ktorých je voda.
- 43 -
Page 47

Príprava tvárovej
sauny na prevádzku
• Odviňte sieťovú šnúru z navíjadiel kábla 0
a vložte ju do vyhĺbeniny na spodnej strane vyhrievacej jednotky 9.
• Postavte vyhrievaciu jednotku 9 na rovný, ne-
šmykľavý a voči vode odolný povrch.
• Pomocou odmerky r naplňte vodu do misky na
vodu 6. Riaďte sa podľa stupnice na odmerke r,
v závislosti od toho, ako dlho chcete prístroj používať (približne 5, 10 alebo 15 minút). Použite
stupnicu, ktorá patrí k príslušnému stupňu pary
(Hi - silný, alebo Lo - slabý).
Varovanie!
Nikdy nedávajte viac vody než po značku „Hi
15 min.“ (na odmerke r) do misky na vodu 6.
Inak by sa mohol prístroj preplniť a voda by sa
dostala do jeho vnútrajška. Mohli by ste tým prístroj
neopraviteľne poškodiť.
... s nosovou maskou
Ak chcete zariadenie používať s nosovou maskou
postupujte nasledujúcim spôsobom:
Upozornenie:
Regulátor pary 4 pri používaní nosovej masky nie
je potrebný.
• Nasaďte veko nádržky na arómy a bylinky 2
na nádržku na arómy a bylinky w v spodnej
časti nosovej masky q tak, aby pevne držalo.
• Zložte hornú e a spodnú časť nosovej masky
q dohromady tak, aby tieto boli pevne spojené.
• Nasaďte dohromady zloženú nosovú masku na
vyhrievaciu jednotku 9:
Výčnelky na vyhrievacej jednotke 9 musia zapadnúť do vyhĺbenín na spodnej strane nosovej
masky. Potom otočte nosovú masku v smere
hodinových ručičiek tak, aby pevne sedela na
vyhrievacej jednotke 9.
• Zastrčte zástrčku do elektrickej zásuvky.
... s maskou na tvár
Ak chcete zariadenie používať s maskou na tvár 1
postupujte nasledujúcim spôsobom:
• Položte regulátor pary 4 na misku s vodou 6
tak, aby rukoväť 5 smerovala vpred.
• Nasaďte tvárovú masku 1 na vyhrievaciu jed-
notku 9:
Výčnelky na vyhrievacej jednotke 9 musia zapadnúť do vyhĺbenín na spodnej strane tvárovej
masky 1.
Potom otočte tvárovú masku 1 v smere hodino-
vých ručičiek tak, aby pevne sedela na vyhrievacej jednotke 9.
• Zasuňte sieťovú zástrčku do zásuvky.
Teraz je tvárová sauna pripravená na prevádzku.
Teraz je tvárová sauna pripravená na prevádzku.
Používanie
Pozor!
Pri nasledujúcich ochoreniach nesmiete tvárovú
masku používať:
• pri zápaloch pokožky
• pri sčervenaní pokožky
• pri opuchoch v tvárovej oblasti
• pri srdcových ochoreniach
• pri cukrovke
• pri poraneniach v tvárovej oblasti
• pri ekzémoch
• pri lupienke
- 44 -
Page 48

Ak ste tehotná alebo máte iné zdravotné problémy,
pred používaním požiadajte o radu lekára.
Pri používaní tvárovej sauny sa vaša pokožka optimálne pripraví na ďalšie ošetrovanie, ako je napríklad hĺbkové čistenie, zvlhčovanie, tvárové masky
a pod. Para oživí pokožku, otvorí póry, a nečistoty
sa potom dajú ľahšie odstrániť.
Ovládanie
Pripravte tvárovú saunu podľa opisu v časti „Príprava
tvárovej sauny na prevádzku“.
• Raz stlačte tlačidlo Lo/Hi/Off 8. Kontrolka 7
sa rozsvieti zeleno (slabý prúd pary „Lo“). Voda
v miske na vodu 6 sa zohreje len natoľko, aby
sa vytvorilo málo pary.
Ak potrebujete viac pary, stlačte tlačidlo Lo/Hi/
Off 8 ešte raz. Kontrolka 7 sa rozsvieti červeno
(silný prúd pary „Hi“). Voda sa zohreje silnejšie
a vznikne viac pary.
Pozor!
• Ak by ste sa necítili dobre alebo by vám bola para
nepríjemná, odkloňte sa tvárou trochu ďalej od
masky na tvár 1 / nosovej masky alebo znížte
množstvo pary. Ak bude nepríjemný pocit pretrvávať, prerušte použitie.
• Dajte si tvár nad masku na tvár 1. Zatvorte oči
a uvoľnite sa.
• Množstvo pary môžete dodatočne regulovať
takto:
Ak chcete množstvo pary zvýšiť, posuňte rukoväť
regulátora pary 5 doprava (smerom k MAX).
Ak chcete množstvo pary znížiť, posuňte rukoväť
regulátora pary 5 doľava (smerom k MIN).
• Držte váš nos nad nosovou maskou. Zatvorte oči
a uvoľnite sa:
Pozor! Horúca para!
• Pretože nosová sliznica človeka je veľmi citlivá,
nepoužívajte zariadenie počas aplikácie s nosovou maskou nikdy s parným stupňom „Hi“.
- 45 -
Page 49

• Keď sa voda z misky na vodu 6 odparí, prístroj sa
automaticky vypne. Keď chcete prístroj predčasne
vypnúť, dovtedy stláčajte tlačidlo Lo/Hi/Off 8,
kým nezhasne kontrolka 7.
Upozornenie:
Po 30 minútach sa prístroj automaticky vypne, aj
keď je ešte voda v miske na vodu 6.
Používanie nádržky
na arómy a bylinky
Paru môžete obohatiť o rôzne arómy a bylinky.
To prispieva k uvoľneniu a kozmetickému ošetreniu
pleti.
Upozornenie:
Smú sa používať len také bylinky a aromatické látky,
ktoré sú určené a vhodné pre použitie v tvárovej
saune.
• Do nádržky na arómy a bylinky 3/w vložte
bylinky alebo aromatickým olejom pokvapkaný
tampón z bavlnenej vaty.
• Stlačte obe zaisťovacie spojky veka nádržky na
arómy a bylinky 2 dohromady a nasaďte ho
na nádržku na arómy a bylinky 3/w.
Pusťte zaisťovacie spojky tak, aby veko 2
pevne dosadalo.
• Teraz namontujte masku na tvár 1/nosovú
masku na vyhrievaciu jednotku 9 tak, ako to je
popísané v časti „Príprava tvárovej sauny na prevádzku“.
Vystupujúca para sa teraz odvádza cez nádržku na
arómy a bylinky 3/w a unáša so sebou aj arómu.
Čistenie a údržba
Pozor!
Pred každým čistením vytiahnite sieťovú zástrčku a
nechajte prístroj vychladnúť! Riziko poranenia!
Upozornenie:
Veko nádržky na arómy a bylinky 2 je vhodné pre
nádržku na arómy a bylinky masky na tvár 3, ako
aj na nádržku na arómy a bylinky nosovej masky w.
Skôr než spojíte masku na tvár 1/ nosovú masku
s vyhrievacou jednotkou 9:
• Stlačte obidve zaisťovacie spojky veka nádržky
na arómy a bylinky 2 dohromady a zdvihnite ho
od príslušnej nádržky na arómy a bylinky 3/ w.
Len pri maske na tvár 1:
Stlačte obidve západky na spodnej strane nádržky
na arómy a bylinky 3 cez otvor na dne masky na
tvár 1 tak, aby západky zaskočili a aby nádržka
na arómy a bylinky 3 pevne sedela.
Po každom použití by ste mali tvárovú saunu poriadne
vyčistiť. Inak sa môžu pod vplyvom teplej vlhkosti
začať rýchlo vytvárať zárodky, ktoré môžu pri ďalšom použití prístroja viesť k ohrozeniu zdravia.
Varovanie!
Nepoužívajte žiadna agresívne, drsné ani chemické
čistiace prostriedky! Tieto poškodzujú povrchové
časti a vedú k neopraviteľným škodám na prístroji.
• Zariadenie rozoberte.
Odoberanie masky na tvár:
• Snímte masku na tvár 1 z vyhrievacej jednotky 9:
Otočte masku na tvár 1 proti smeru hodinových
ručičiek, až sa dá nadvihnúť.
- 46 -
Page 50

• Zdvihnite regulátor pary 4 z vyhrievacej jednotky 9.
• Snímte kryt 2 z nádržky na arómy a bylinky:
Za tým účelom stlačte obe zaisťovacie spojky
k sebe, až sa dá kryt 2 uvoľniť.
• Nádržku na arómy a bylinky 3 vytiahnite von:
Stlačte dohromady západky, ktoré vyčnievajú
na spodnej strane masky na tvár 1 a súčasne
potiahnite za nádržku na arómy a bylinky 3.
Odoberanie nosovej masky:
• Odoberte nosovú masku z vyhrievacej jednotky 9:
Otáčajte nosovú masku proti smeru hodinových
ručičiek, až dokiaľ ju nemôžete nadvihnúť.
• Spodnú časť q a hornú časť e nosovej masky
roztiahnite od seba.
• Odoberte veko 2 (ak je nasadené) z nádržky
na arómy a bylinky w:
Za tým účelom stlačte obe zaisťovacie spojky
k sebe, dokiaľ sa nedá veko 2 uvoľniť.
Masku na tvár 1, obidva diely nosovej masky q/e,
veko nádržky na arómy a bylinky 2, regulátor
pary 4, nádržku na arómy a bylinky 3 a odmerku r vyčisťte slabým mydlovým roztokom.
Potom všetko opláchnite čistou vodou a nechajte
celkom vyschnúť.
Uskladnenie
Nechajte prístroj vychladnúť a vyčistite ho (pozri
kapitola „Čistenie a údržba“).
Tvárovú saunu uskladňujte na suchom mieste.
Naviňte kábel do priestoru na navíjanie kábla 0
na spodnej strane prístroja.
Likvidácia
Prístroj v žiadnom prípade nevyhadzujte do normálneho domového odpadu.
Tento výrobok podlieha európskej
smernici 2002/96/EC.
Zlikvidujte prístroj v príslušnom zariadení (firme)
na likvidáciu odpadu.
Dodržte aktuálne platné predpisy. V prípade
pochybností sa obráťte na zariadenia na likvidáciu
odpadu.
Všetok baliaci materiál zlikvidujte
ekologickým spôsobom.
Záruka a servis
Vyhrievaciu jednotku 9 a misku na vodu 6 čistite
mierne navlhčenou utierkou. V prípade odolnejších
nečistôt môžete pridať na utierku jemný prostriedok
na umývanie.
Keď sa začnú vytvárať vápenné usadeniny (vodný
kameň) v miske 6, vyčistite misku na vodu 6 bežne
dostupným odvápňovačom vhodným aj pre hliník.
Riaďte sa pritom návodom na používanie odvápňovača.
Po čistení znova poskladajte celú tvárovú saunu.
Na tento prístroj máte trojročnú záruku od dátumu
nákupu. Prístroj bol starostlivo vyrobený a pred expedíciou dôkladne vyskúšaný.
Uschovajte si, prosím, účtenku ako dôkaz o nákupe.
V prípade uplatňovania záruky sa spojte s opravovňou telefonicky. Len tak sa dá zabezpečiť bezplatné
zaslanie tovaru.
Záruka platí len na chyby materiálu a výroby, nie
na poškodenia spôsobené prepravou, opotrebením
ani na poškodenia krehkých častí, ako sú spínače
alebo akumulátory. Výrobok je určený výlučne na
súkromné používanie a nie na komerčné účely.
- 47 -
Page 51

Záruka prestáva platiť pri zaobchádzaní nezodpovedajúcom účelu, pri neprimeranom zaobchádzaní,
pri používaní násilia a pri zásahoch, ktoré neurobil
nami autorizovaný servis. Práva vyplývajúce zo zákona nie sú touto zárukou obmedzené.
Záručná doba sa nepredlžuje o dobu trvania záručných opráv. To platí aj na vymenené alebo opravené diely. Prípadné poškodenia a nedostatky zistené
už pri nákupe musíte ohlásiť ihneď po vybalení, najneskoršie však do dvoch dní od dátumu zakúpenia.
V prípade opráv spadajúcich do obdobia po uplynutí záručnej doby ste povinní uhradiť vzniknuté
náklady.
Servis Slovensko
Tel.: 0850 232001
E-Mail: kompernass@lidl.sk
IAN 91000
Dostupnosť hotline:
pondelok až piatok od 8:00 hod. - 20:00 hod. (SEČ)
Dovozca
KOMPERNASS HANDELS GMBH
BURGSTRASSE 21
44867 BOCHUM
GERMANY
www.kompernass.com
- 48 -
Page 52

Inhaltsverzeichnis Seite
Einleitung 50
Bestimmungsgemäßer Gebrauch 50
Lieferumfang 50
Gerätebeschreibung 50
Technische Daten 50
Sicherheitshinweise 51
Gesichtssauna betriebsbereit machen 52
...mit der Gesichtsmaske . . . . . . . . . . . . . . . . . . . . . . . . . . . . . . . . . . . . . . . . . . . . . . . . . . . . .52
...mit der Nasenmaske . . . . . . . . . . . . . . . . . . . . . . . . . . . . . . . . . . . . . . . . . . . . . . . . . . . . . .52
Anwendung 52
Bedienen 53
Aroma- und Kräuterbehälter benutzen 54
Reinigen und Pflegen 54
Aufbewahren 55
Entsorgen 55
Garantie und Service 55
Importeur 56
- 49 -
Page 53

Gesichtssauna
Einleitung
Herzlichen Glückwunsch zum Kauf Ihres neuen
Gerätes.
Sie haben sich damit für ein hochwertiges Produkt
entschieden. Die Bedienungsanleitung ist Bestandteil dieses Produkts. Sie enthält wichtige Hinweise
für Sicherheit, Gebrauch und Entsorgung. Machen
Sie sich vor der Benutzung des Produkts mit allen
Bedien- und Sicherheitshinweisen vertraut. Benutzen
Sie das Produkt nur wie beschrieben und für die angegebenen Einsatzbereiche. Händigen Sie alle
Unterlagen bei Weitergabe des Produkts an Dritte
mit aus.
Gerätebeschreibung
Abbildung A:
1 Gesichtsmaske
2 Deckel der Aroma- und Kräuterbehälter
(passt auf den Aroma- und Kräuterbehälter der
Gesichtsmaske und der Nasenmaske)
3 Aroma- und Kräuterbehälter
4 Dampfregler
5 Griff des Dampfreglers
6 Wasserschale
7 Kontrollleuchte
8 Lo/Hi/Off-Taste
9 Heizeinheit
0 Kabelaufwicklung
q unterer Teil der Nasenmaske
w Aroma- und Kräuterbehälter
e oberer Teil der Nasenmaske
Bestimmungsgemäßer
Gebrauch
Die Gesichtssauna dient zur Gesichts-Schönheitspflege
durch Dampf.
Das Gerät ist nur für den privaten Gebrauch bestimmt
und nicht für gewerbliche Zwecke konzipiert!
Lieferumfang
Gesichtsmaske
Nasenmaske
Dampfregler
Heizeinheit
Messbecher
Bedienungsanleitung
Abbildung B:
r Messbecher
Technische Daten
Nennspannung: 220 - 240 V ~ / 50 Hz
Leistungsaufnahme: 75 - 95 W
Schutzklasse: II /
- 50 -
Page 54

Sicherheitshinweise
Verletzungsgefahr!
• Stellen Sie das Gerät nur auf eine feste und ebene Unterlage. Beim
Verschütten von heißer Flüssigkeit während des Betriebes besteht
Verbrennungsgefahr!
• Dieses Gerät kann von Kindern ab 8 Jahren sowie von Personen mit
reduzierten physischen, sensorischen oder mentalen Fähigkeiten
oder Mangel an Erfahrung und/oder Wissen benutzt werden, wenn
sie beaufsichtigt oder bezüglich des sicheren Gebrauchs des Gerätes unterwiesen wurden und die daraus resultierenden Gefahren verstanden haben.
• Kinder dürfen nicht mit dem Gerät spielen.
• Reinigung und Benutzer-Wartung dürfen nicht durch Kinder durchgeführt werden, es sei denn, sie sind beaufsichtigt.
• Betreiben Sie das Gerät nicht in der Nähe von Wasser, wie zum Beispiel in der Badewanne oder neben Waschbecken.
• Betreiben Sie das Gerät nur an einem Stromnetz mit der auf dem Typenschild angegebenen Spannung.
• Tauchen Sie das Gerät nicht in Wasser oder andere Flüssigkeiten!
Das Gerät kann irreparabel beschädigt werden!
• Heizen Sie das Gerät niemals ohne Flüssigkeit auf!
• Füllen Sie keine Lösungsmittel oder andere entzündliche Flüssigkeiten
in das Gerät!
• Ziehen Sie das Netzkabel immer am Netzstecker aus der Steckdose.
Ziehen Sie nicht am Kabel selbst!
• Lassen Sie beschädigte Netzstecker oder Netzkabel sofort von autorisiertem Fachpersonal oder dem Kundenservice austauschen, um
Gefährdungen zu vermeiden.
• Fassen Sie während des Betriebes nicht in das Innere des Gerätes.
Es besteht Verbrennungsgefahr!
• Reinigen Sie das Gerät nach jeder Benutzung, um Ansammlungen
von Fett und anderen Rückständen zu vermeiden.
Gefahr durch Stromschlag!
Dieses Gerät nicht in der Nähe von Badewannen, Duschwannen
oder anderen Gefäßen benutzen, die Wasser enthalten.
- 51 -
Page 55

Gesichtssauna betriebsbereit
machen
• Wickeln Sie das Netzkabel von der Kabelaufwicklung 0 und legen Sie es durch die Aussparung an der Unterseite der Heizeinheit 9.
• Stellen Sie die Heizeinheit 9 auf eine ebene,
rutschfeste und wasserunempfindliche Fläche.
• Füllen Sie mit Hilfe des Messbechers r Wasser
in die Wasserschale 6. Orientieren Sie sich an
der Skala am Messbecher r, wie lange Sie
das Gerät benutzen wollen (ca. 5, ca.10 oder
ca.15 Minuten). Nutzen Sie die Skala, die zu
der jeweiligen Dampfstufe (Hi oder Lo) passt.
Warnung!
Füllen Sie nie mehr Wasser als bis zur “Hi 15 min.”Markierung (im Messbecher r) in die Wasserschale 6 ein. Das Gerät kann ansonsten überlaufen
und Wasser ins Innere des Gerätes gelangen. Das
Gerät kann irreparabel beschädigt werden.
...mit der Gesichtsmaske
Wenn Sie das Gerät mit der Gesichsmaske 1 be-
nutzen wollen, gehen Sie folgendermaßen vor:
• Legen Sie den Dampfregler 4 so auf die Wasserschale 6, dass der Griff 5 nach vorne zeigt.
• Setzen Sie die Gesichtsmaske 1 auf die
Heizeinheit 9:
Die Nasen an der Heizeinheit 9 müssen in
die Aussparungen an der Unterseite der Gesichtsmaske 1 greifen. Drehen Sie dann die
Gesichtsmaske 1 im Uhrzeigersinn, so dass
sie fest auf der Heizeinheit 9 sitzt.
• Stecken Sie den Netzstecker in eine Netzsteckdose.
Die Gesichtssauna ist nun betriebsbereit.
...mit der Nasenmaske
Wenn Sie das Gerät mit der Nasenmaske benutzen
wollen, gehen Sie folgendermaßen vor:
Hinweis:
Der Dampfregler 4 wird bei der Benutzung der
Nasenmaske nicht benötigt.
• Setzen Sie den Deckel des Aroma- und Kräuterbehälters 2 so auf den Aroma- und Kräuterbehälter w im unteren Teil des Nasenmaske q,
dass er fest sitzt.
• Stecken Sie den oberen e und den unteren Teil
der Nasenmaske q zusammen, so dass diese
fest verbunden sind.
• Setzen Sie die zusammengesetzte Nasenmaske
auf die Heizeinheit 9:
Die Nasen an der Heizeinheit 9 müssen in die
Aussparungen an der Unterseite der Nasenmaske greifen. Drehen Sie dann die Nasenmaske im
Uhrzeigersinn, so dass sie fest auf der Heizeinheit 9 sitzt.
• Stecken Sie den Netzstecker in eine Netzsteckdose.
Die Gesichtssauna ist nun betriebsbereit.
Anwendung
Achtung!
Bei folgenden Erkrankungen dürfen Sie die
Gesichtssauna nicht benutzen:
• bei Hautentzündungen
• bei Hautrötungen
• bei Schwellungen im Gesichtsbereich
• bei Herzerkrankungen
• bei Diabetes
• Wunden im Gesichtsbereich
• bei Ekzemen
• bei Schuppenflechte
- 52 -
Page 56

Fragen Sie vor der Verwendung einen Arzt, wenn
Sie schwanger sind oder andere gesundheitliche
Probleme haben.
Die Anwendung der Gesichtssauna bereitet Ihre Haut
optimal auf weitere Behandlungen, wie zum Beispiel
Tiefenreinigung, Feuchtigkeitszufuhr, Gesichtsmasken
usw., vor. Der Dampf belebt die Haut, öffnet die Poren
und Verunreinigungen können besser beseitigt werden.
Bedienen
Bereiten Sie die Gesichtssauna wie unter „Gesichtssauna betriebsbereit machen” vor.
• Drücken Sie einmal die Lo/Hi/Off-Taste 8. Die
Kontrollleuchte 7 leuchtet grün (niedrige
Dampfstufe „Lo“). Das Wasser in der Wasserschale 6 wird so erhitzt, dass ein wenig Dampf
entsteht.
Für mehr Dampf, drücken Sie die Lo/Hi/OffTaste 8 ein weiteres Mal. Die Kontrollleuchte 7
leuchtet rot (hohe Dampfstufe „Hi“). Das Wasser
wird stärker erhitzt und es entsteht mehr Dampf.
• Halten Sie Ihr Gesicht über die Gesichtsmaske 1.
Schließen Sie die Augen und entspannen Sie sich:
• Sie können die Dampfmenge zusätzlich wie folgt
regulieren:
Schieben Sie den Griff des Dampfreglers 5
nach rechts (Richtung MAX), um die Dampfmenge
zu erhöhen.
Schieben Sie den Griff des Dampfreglers 5
nach links (Richtung MIN), um die Dampfmenge
zu verringern.
Achtung!
• Sollten Sie sich unwohl fühlen oder den Dampf
als unangenehm empfinden, halten Sie Ihr Gesicht ein wenig weiter von der Gesichtsmaske 1 /
der Nasenmaske entfernt oder reduzieren Sie die
Dampfmenge. Sollte das Unwohlsein anhalten,
brechen Sie die Anwendung ab.
Achtung! Heißer Dampf!
• Da die Nasenschleimhaut des Menschen sehr
empfindlich ist, benutzen Sie das Gerät während
der Anwendung mit der Nasenmaske nie mit der
Dampfstufe „Hi“.
• Halten Sie Ihre Nase über die Nasenmaske.
Schließen Sie die Augen und entspannen Sie sich:
- 53 -
Page 57

• Wenn das Wasser in der Wasserschale 6 ver-
dampft ist, schaltet sich das Gerät automatisch
aus. Wenn Sie das Gerät vorher ausschalten
möchten, drücken Sie so oft die Lo/Hi/OffTaste 8, bis die Kontrollleuchte 7 erlischt.
Hinweis:
Nach 30 Minuten schaltet sich das Gerät automatisch aus, auch wenn sich noch Wasser in der Wasserschale 6 befindet.
Aroma- und Kräuterbehälter
benutzen
Sie können den Dampf mit verschiedenen Kräutern
und Aromen versetzen. Dies kann zur Entspannung
und zur Schönheitspflege der Haut beitragen.
Hinweis:
Es dürfen nur solche Kräuter oder Aromastoffe
verwendet werden, die für den Gebrauch in einer
Gesichtssauna vorgesehen und geeignet sind.
• Legen Sie Kräuter oder einen mit Aroma-Öl
betröpfelten Baumwoll-Wattebausch in den
Aroma- und Kräuterbehälter 3/w.
• Drücken Sie die beiden Verriegelungen vom
Deckel der Aroma-und Kräuterbehälter 2 zusammen und setzen Sie ihn auf den Aroma- und
Kräuterbehälter 3/w. Lassen Sie die Verriege-
lungen los, so dass der Deckel 2 fest sitzt.
• Montieren Sie nun die Gesichtsmaske 1/die
Nasenmaske an der Heizeinheit 9 wie unter
„Gesichtssauna betriebsbereit machen” beschrieben.
Der aufsteigende Dampf wird nun durch den
Aroma- und Kräuterbehälter 3/w geleitet und
nimmt so das Aroma auf.
Reinigen und Pflegen
Gefahr!
Ziehen Sie vor jeder Reinigung den Netzstecker und
lassen Sie das Gerät abkühlen! Verletzungsgefahr!
Hinweis:
Der Deckel der Aroma-und Kräuterbehälter 2 passt
auf den Aroma- und Kräuterbehälter der Gesichtsmaske 3, sowie auf den Aroma- und Kräuterbehälter der Nasenmaske w.
Bevor Sie die Gesichtsmaske 1/die Nasenmaske mit
der Heizeinheit 9 verbinden:
• Drücken Sie die beiden Verriegelungen des
Deckel der Aroma-und Kräuterbehälter 2 zusammen und heben Sie ihn vom jeweiligen Aroma- und Kräuterbehälter 3/w.
Nur bei der Gesichtsmaske 1:
Drücken Sie die beiden Zapfen an der Unterseite
des Aroma- und Kräuterbehälters 3 durch die Öffnung am Boden der Gesichtsmaske 1, so dass die
Zapfen einrasten und der Aroma- und Kräuterbehälter 3 fest sitzt.
Nach jeder Benutzung sollten Sie die Gesichtssauna
gründlich reinigen. Ansonsten können sich durch die
warme Feuchtigkeit schnell Keime bilden, die, bei
erneutem Gebrauch des Gerätes, zu Gesundheitsbeeinträchtigungen führen können.
Warnung!
Benutzen Sie keine aggressiven, scheuernden oder
chemischen Reinigungsmittel! Diese beschädigen die
Oberflächen und führen zu irreparablen Schäden
am Gerät.
• Nehmen Sie das Gerät auseinander.
Gesichtsmaske abnehmen:
• Nehmen Sie die Gesichtsmaske 1 von der
Heizeinheit 9 ab:
Drehen Sie die Gesichtsmaske 1 gegen den
Uhrzeigersinn, bis sie sich abheben lässt.
- 54 -
Page 58

• Heben Sie den Dampfregler 4 von der Heizein-
heit 9.
• Nehmen Sie den Deckel der Aroma- und
Kräuterbehälter 2 ab:
Drücken Sie hierzu die beiden Verriegelungen
zusammen, bis sich der Deckel 2 lösen lässt.
• Ziehen Sie den Aroma- und Kräuterbehälter 3
heraus:
Drücken Sie die Zapfen, die auf der Unterseite
der Gesichtsmaske 1 herausragen, zusammen
und ziehen Sie gleichzeitig am Aroma- und Kräuterbehälter 3.
Nasenmaske abnehmen:
• Nehmen Sie die Nasensmaske von der Heizeinheit 9 ab:
Drehen Sie die Nasenmaske gegen den Uhrzeigersinn, bis diese sich abheben lässt.
• Ziehen Sie das untere q und das obere Teil e
der Nasenmaske auseinander.
• Nehmen Sie den Deckel 2 (falls aufgesteckt)
von dem Aroma- und Kräuterbehälter w ab:
Drücken Sie hierzu die beiden Verriegelungen
zusammen, bis sich der Deckel 2 lösen lässt.
Reinigen Sie die Gesichtsmaske 1, die beiden Teile
der Nasenmaske q/e, den Deckel der Aromaund Kräuterbehälter 2, den Dampfregler 4, den
Aroma- und Kräuterbehälter 3 und den Messbecher r in milder Seifenlauge. Spülen Sie alles mit
klarem Wasser und trocknen Sie es ab.
Reinigen Sie die Heizeinheit 9 und die Wasserschale 6 mit einem leicht angefeuchteten Tuch.
Bei hartnäckigen Verschmutzungen geben Sie ein
mildes Spülmittel auf das Tuch.
Sobald sich Kalkrückstände in der Wasserschale 6
bilden, reinigen Sie die Wasserschale 6 mit
einem handelsüblichen, für Aluminium geeignetem
Entkalkungsmittel. Beachten Sie die Bedienungsanleitung des Entkalkers.
Setzen Sie nach der Reinigung die Gesichtssauna
wieder zusammen.
Aufbewahren
Lassen Sie das Gerät abkühlen und reinigen Sie es
(siehe Kapitel „Reinigen und Pflegen”).
Bewahren Sie die Gesichtssauna an einem trockenen
Ort auf.
Wickeln Sie das Netzkabel um die Kabelaufwicklung 0 an der Unterseite des Gerätes.
Entsorgen
Werfen Sie das Gerät keinesfalls in den
normalen Hausmüll. Dieses Produkt
unterliegt der europäischen Richtlinie
2002/96/EC.
Entsorgen Sie das Gerät über einen zugelassenen
Entsorgungsbetrieb oder über Ihre kommunale
Entsorgungseinrichtung.
Beachten Sie die aktuell geltenden Vorschriften.
Setzen Sie sich im Zweifelsfall mit Ihrer Entsorgungseinrichtung in Verbindung.
Führen Sie alle Verpackungsmaterialien
einer umweltgerechten Entsorgung zu.
Garantie und Service
Sie erhalten auf dieses Gerät 3 Jahre Garantie ab
Kaufdatum. Das Gerät wurde sorgfältig produziert
und vor Anlieferung gewissenhaft geprüft.
Bitte bewahren Sie den Kassenbon als Nachweis
für den Kauf auf. Bitte setzen Sie sich im Garantiefall mit Ihrer Servicestelle telefonisch in Verbindung.
Nur so kann eine kostenlose Einsendung Ihrer Ware
gewährleistet werden.
Die Garantieleistung gilt nur für Material- oder
Fabrikationsfehler, nicht aber für Transportschäden,
Verschleißteile oder für Beschädigungen an zerbrechlichen Teilen, z. B. Schalter oder Akkus. Das
Produkt ist lediglich für den privaten und nicht für
den gewerblichen Gebrauch bestimmt.
- 55 -
Page 59

Bei missbräuchlicher und unsachgemäßer Behandlung, Gewaltanwendung und bei Eingriffen, die
nicht von unserer autorisierten Service-Niederlassung vorgenommen wurden, erlischt die Garantie.
Ihre gesetzlichen Rechte werden durch diese
Garantie nicht eingeschränkt.
Die Garantiezeit wird durch die Gewährleistung
nicht verlängert. Dies gilt auch für ersetzte und reparierte Teile. Eventuell schon beim Kauf vorhandene
Schäden und Mängel müssen sofort nach dem
Auspacken gemeldet werden, spätestens aber zwei
Tage nach Kaufdatum. Nach Ablauf der Garantiezeit anfallende Reparaturen sind kostenpflichtig.
Service Deutschland
Tel.: 0800 5435 111
E-Mail: kompernass@lidl.de
IAN 91000
Service Österreich
Tel.: 0820 201 222 (0,15 EUR/Min.)
E-Mail: kompernass@lidl.at
IAN 91000
Service Schweiz
Tel.: 0842 665566 (0,08 CHF/Min.,
Mobilfunk max. 0,40 CHF/Min.)
E-Mail: kompernass@lidl.ch
IAN 91000
Erreichbarkeit Hotline:
Montag bis Freitag von 8:00 Uhr - 20:00 Uhr (MEZ)
Importeur
KOMPERNASS HANDELS GMBH
BURGSTRASSE 21
44867 BOCHUM
GERMANY
www.kompernass.com
- 56 -
Page 60

KOMPERNASS HANDELS GMBH
BURGSTRASSE 21
44867 BOCHUM
DEUTSCHLAND / GERMANY
www.kompernass.com
Last Information Update · Stan informacji · Információk állása
Stanje informacij · Stav informací · Stav informácií · Stand der
Informationen: 06 / 2013 · Ident.-No.: SGS80A2-032013-3
IAN 91000
4
 Loading...