


R-TUNED (Ultimate Street Racing)
Service and Parts Manual
To be used in conjuction with RTV Service Manual

TABLE OF CONTENTS
TABLE OF CONTENTS (THIS PAGE) |
i |
DEFINITION OF SITE MAINTENANCE |
iii |
HANDLING PRECAUTIONS |
1 |
GAME PLAY |
5 |
TEST MODE |
20 |
ERROR CODE |
46 |
TURNING ON POWER (SOFTWARE INSTALLATION) |
48 |
REPLACING PARTS |
52 |
DEDICATED PARTS LIST |
62 |
WIRE COLOUR CODE TABLE |
71 |
SCHEMATIC DIAGRAMS |
72 |
This Manual covers information dedicated to R-Tuned “Ultimate Street Racing” only. For generic information and parts list, please refer to the RTV Service and Parts manual which accompanies this product.
CONTENTS OF TABLE

INTRODUCTION
INTRODUCTION
This manual is intended to provide detailed descriptions together with all the necessary information covering the general operation of electronic assemblies, electro-mechanicals, servicing control, spare parts, etc. for the product, “R-Tuned, Ultimate Street Racing”.”
This manual is intended for the owners, personnel and managers in charge of operation of the product.
Operate the product after carefully reading and sufficiently understanding the instructions.
In the unlikely event that the product does not function correctly, DO NOT allow anyone other than a technician to touch the internal system. Turn off the power to the machine, making sure to unplug the electrical cord from the outlet, and contact the office listed below or the point of purchase for this product.
Use of this product is unlikely to cause physical injuries or damage to property. However, points that require special attention are indicated by bold text, the word “IMPORTANT” and the symbol below.
Indicates important information that, if ignored, may result in the mishandling of the product and cause faulty operation or damage to the product.
Sega Amusements U.S.A., Inc.
800 Arthur Avenue, Elk Grove Village, IL 60007-5215, U.S.A.
TEL: 1-847-364-9787
TOLL FREE: 1-888-877-2669
FAX: 1-847-427-1065
SEGA AMUSEMENTS EUROPE, LTD.
42, Barwell Business Park, Leatherhead Road, Chessington, Surrey, KT9 2NY United Kingdom
Telephone: +44 (0) 208 391 8090 |
Facsimile: +44 (0) 208 391 8099 |
e-mail: mailbox@sega.co.uk |
http://www.sega-amusements.co.uk |
|
|
|
SPECIFICATIONS |
Installation space: |
928 mm (36.5 in.) [Width] x 1,756 mm (69.1 in.) [Depth] |
Height: |
2,192 mm (86.3 in.) |
Weight: |
255 kg (562.2 lbs.) |
Power, maximum current: 458 W, 4.34 A (AC 120 V, 60 Hz Area) |
|
|
464 W, 2.40 A (AC 220 V, 50 Hz Area) |
|
460 W, 2.20 A (AC 220 V, 60 Hz Area) |
|
462 W, 2.30 A (AC 230 V, 50 Hz Area) |
|
472 W, 2.19 A (AC 240 V, 50 Hz Area) |
Power, current: |
474 W, 5.1 A, (Max.) (AC 110 V, 60 Hz; Taiwan) |
|
265 W, 2.6 A, (Min.) (AC 110 V, 60 Hz; Taiwan) |
Monitor: |
29 Type Color Monitor |
|
|
NOTE: The contents herein described are subject to change without notice.
ii
 Definition of 'Site Maintenance Personnel or Other Qualified Individuals'
Procedures not described in this manual or marked as 'to be carried out by site maintenance personnel or other qualified professionals' should not be carried out by personnel without the necessary skill or technology. Work carried out by unqualified persons may cause serious accidents, including electrocution.
Parts replacement, maintenance inspections and troubleshooting should be carried out by site maintenance personnel or other qualified professionals. This manual includes directions for potentially dangerous procedures which should only be carried out by professionals with the appropriate specialized knowledge.
The site maintenance personnel or other qualified professionals mentioned in this manual are defined as follows:
Site maintenance personnel:
Individuals with experience in maintaining amusement equipment, vending machines, etc., working under the supervision of the owner/operator of this product to maintain machines within amusement facilities or similar premises by carrying out everyday procedures such as assembly, maintenance inspections, and replacement of units/ expendable parts.
Activities to be carried out by site maintenance personnel:
Amusement equipment/vending machine assembly, maintenance inspection and replacement of units/expendable parts.
Other qualified professionals:
Persons employed by amusement equipment manufacturers, or involved in design, production, testing or maintenance of amusement equipment. The individual should have either graduated from technical school or hold similar qualifications in electrical/electronics/mechanical engineering.
Activities to be carried out by other qualified professionals:
Amusement equipment/vending machine assembly, repair/adjustment of electrical/electronic/mechanical parts.
INTRODUCTION
iii

1 HANDLINGPRECAUTIONS
When installing or inspecting the machine, be very careful of the following points and pay attention to ensure that the player can enjoy the game safely.
Non-compliance with the following points or inappropriate handling running counter to the cautionary matters herein stated can cause personal injury or damage to the machine.
•Beforeperformingwork,besuretoturnthepoweroff.Performingtheworkwithoutturningthe power off can cause an electric shock or short circuit. In the case work should be performed in the status of power on, this manual always states to that effect.
•To avoid an electric shock or short circuit, do not plug in or unplug quickly.
•To avoid an electric shock, do not plug in or unplug with a wet hand.
•Do not expose power cords or earth wires on the surface, (floor, passage, etc.). If exposed, the power cords and earth wires are susceptible to damage. Damaged cords and wires can cause an electric shock or short circuit.
•To avoid causing a fire or an electric shock, do not put things on or damage the power cords.
•When or after installing the product, do not unnecessarily pull the power cord. If damaged, the power cord can cause a fire or an electric shock.
•In case the power cord is damaged, ask for a replacement through where the product was purchased from or the office herein stated. Using the cord as is damaged can cause fire, an electric shock or leakage.
•Be sure to perform grounding appropriately. Inappropriate grounding can cause an electric shock.
•Be sure to use fuses meeting the specified rating. Using fuses exceeding the specified rating can cause a fire or an electric shock.
•Be sure that connections such as IC BD are made properly. Insufficient insertion can cause an electric shock.
•Specification changes, removal of equipment, conversion and/or addition, not designated by SEGA are not permitted.
- Failure to observe this may cause a fire or an electric shock. Non-compliance with this instruction can have a bad influence upon physical conditions of the players or the onlookers, or result in injury during play.
- SEGA shall not be held responsible for damage, compensation for damage to a third party, caused by specification changes not designated by SEGA.
• If work or parts replacement not indicated in this manual is carried out, an accident may occur. If it is necessary to carry out work not indicated in this manual, be sure to have it done by the office indicated in this manual or by the point of purchase. Also, please inquire regarding details of the work involved.
• Be sure to perform periodic maintenance inspections herein stated.
1 HANDLINGPRECAUTIONS
1 HANDLINGPRECAUTIONS
•For the IC board circuit inspections, only the logic tester is allowed. The use of a multiple-purpose tester is not permitted, so be careful in this regard.
•When cleaning the CRT surfaces, use a soft and dry cloth. Do not apply chemicals such as thinners, benzene, etc.
•Static electricity from your body may damage some electronics devices on the IC board. Before handling the IC board, touch a grounded metallic surface so that the static electricity can be discharged.
•Do not turn the power on and off continuously. Repeatedly turning the power on and off may cause product malfunction or parts damage.
•Some parts are not designed and manufactured specifically for this game machine. The manufacturers may discontinue, or change the specifications of such general-purpose parts. If this is the case, SEGA cannot repair or replace a failed game machine whether or not a warranty period has expired.
CONCERNING THE STICKER DISPLAY
This SEGA product has stickers attached describing the product manufacture No. (Serial No.) and Electrical Specifications. It also has a Sticker describing where to contact for repair and for purchasing parts.
When inquiring about or asking for repairs, mention the Serial No. and Name of Machine indicated on the Sticker. The Serial Number indicates the product register. Identical machines could have different parts depending on the date of production. Also, improvements and modifications might have been made after the publication of this manual. In order to ensure you order the correct parts, mention the Serial No. when contacting the applicable places.
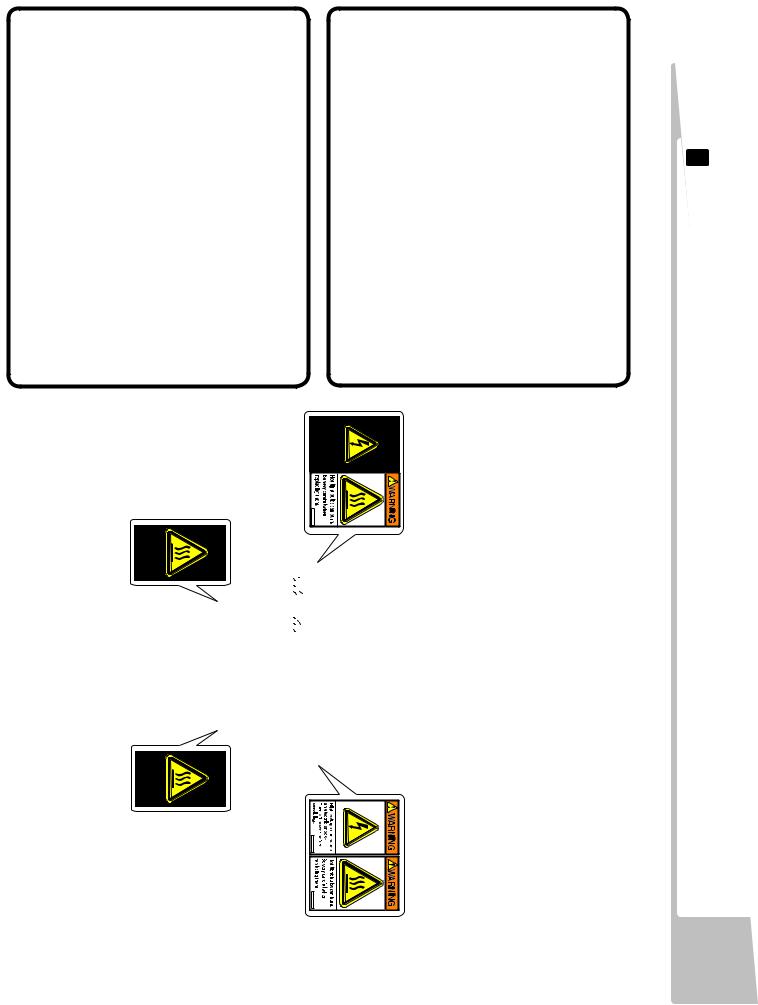
CONCERNING THE WARNING LABELS
This SEGA product has warning displays on stickers, labels and/or printed instructions adhered/attached to or incorporated in the places where a potentially hazardous situation could arise. The warning displays are intended for accident prevention for customers and for avoiding hazardous situations relating to maintenance and servicing work. Some portions of the cabinet contain high voltage and may cause accidents if touched.
When performing maintenance, be very careful of the warning displays. It is especially important that any complex repair and replacement work not mentioned herein should be performed by those technical personnel who have knowledge of electricity and technical expertise. In order to prevent accidents, caution any customer ignoring the warnings to cease and desist immediately
1 HANDLINGPRECAUTIONS

1 HANDLINGPRECAUTIONS
440-CS0186-EG
440-DS0013XEG
SEE A
 SEE A
SEE A
Serial No. Display
Electrical Specifications Display

2 PLAYING THE GAME
 2-1 GAME OUTLINE
This product is a racing game set in real places.
Vehicles are equipped with an unlimited booster and drifts can be achieved by simply turning the steering wheel, enabling anyone to enjoy street racing.
Choose from either one-player Single Player Mode or Versus Mode where 2 to 4 players can race at the same time. Record personal data such as the cars you have earned, player name and best times using the R-Tuned Garage Card.
2-1-1 BASIC CONTROLS
●GAS
The car accelerates.
●BRAKE
The car decelerates and will stop if you continue to press the brake.
●STEERING
Changes the direction the car is going.
●BOOST BUTTON
Press down while moving to make the car accelerate rapidly.
There are 2 BOOST buttons on the left and the right of the steering wheel, each with the same function. The resulting boost effect will be the same whether you press either button or both at the same time.
●SHIFT LEVER
Change gears when using manual transmission.
If you accelerate without using the shift lever for a certain period of time, the car will automatically switch to automatic transmission.
●VIEW CHANGE BUTTON
Switch between 3 different views.
BOOST and Steering Wheel Vibration
Hold one of the BOOST buttons on the steering wheel to accelerate rapidly.
While boosting, the steering wheel will vibrate vigorously for an intense racing experience.
The level of steering wheel vibration can be set to NORMAL or LIGHT in Test Mode. See “2-3-8 FORCE FEEDBACK” for more information about settings.
When starting the game, the player can voluntarily select either AGGRESSIVE (BOOST vibration ON) or MILD (BOOST vibration OFF).
NOTE: BOOST can only be changed in Single Player Mode. The steering wheel response cannot be changed in Versus Mode. It is automatically set to AGGRESSIVE. However, the MILD setting will be activated if you insert a card with which you have previously played using the MILD setting in Single Player Mode.
2 PLAYINGTHE
GAME

2 PLAYINGTHE
GAME
1-1-1 FIG. 01
2-1-2 CAR SELECTION
Choose from 20 models of popular Japanese and American cars.
2-1-2 TABLE 01
MAKE |
MODEL |
|
|
TOYOTA |
SUPRA (JZA80), CELICA (ZZT231), CELICA (ST205) |
|
|
NISSAN |
SKYLINE (BNR34), SKYLINE (BNR32), FAIRLADY Z (Z33), |
|
FAIRLADY Z (Z32) |
|
|
HONDA |
NSX (NA1), S2000 (AP1), INTEGRA (DC2) |
|
|
MAZDA |
RX-7 (FD3S), RX-7 (FC3S), RX-8 (SE3P) |
|
|
MITSUBISHI MOTORS |
LANCER EVOLUTION IX (CT9A), ECLIPSE (D32A) |
|
|
SUBARU |
IMPREZA WRX (GC8), LEGACY B4 (BL5) |
|
|
FORD |
MUSTANG (2006) |
|
|
CHEVROLET |
CORVETTE (2005) |
|
|
PONTIAC |
GTO (2004) |
|
|
2-1-3 RACE COURSE
There are 4 areas with 4courses each, for a total of 16 courses. All courses are circuit tracks.
The more stars a course has, the higher its level of difficulty.
2-1-3 TABLE 01
Course Name |
Difficulty (1-5) |
Laps |
|
|
|
Shinjuku A |
***** |
5 |
|
|
|
Shinjuku B |
***** |
3 |
|
|
|
Shinjuku C |
***** |
3 |
|
|
|
Shinjuku D |
***** |
3 |
|
|
|
Shibuya A |
***** |
3 |
|
|
|
Shibuya B |
***** |
3 |
|
|
|
Shibuya C |
***** |
2 |
|
|
|
Shibuya D |
***** |
5 |
|
|
|
Hong Kong A |
***** |
4 |
|
|
|
Hong Kong B |
***** |
2 |
|
|
|
Hong Kong C |
***** |
2 |
|
|
|
Hong Kong D |
***** |
2 |
|
|
|
New York A |
***** |
5 |
|
|
|
New York B |
***** |
3 |
|
|
|
New York C |
***** |
2 |
|
|
|
New York D |
***** |
4 |
|
|
|
2 PLAYINGTHE
GAME

2 PLAYINGTHE
GAME
 2-2 MODE OUTLINE
2-2-1 SINGLE PLAYER MODE
Race against 3 computer-controlled rivals in this mode. You can win prize money depending on your results.
●Battle
Four players race simultaneously competing for the top position.
Scores are calculated based on your performance in the race, and the goal is to finish in first place with the highest score possible.
●TimeAttack
Race alone and attempt to beat the times set by your 3 rivals.
The game will end if the time reaches zero.
Time is added when you pass a checkpoint or complete a lap.
Record the password displayed on the Result Screen and register it on the Internet to participate in the Internet Ranking.
■Rivals
Within each area there is one rare rival with more prize money than normal rivals.
In addition, there is a boss that will sometimes appear in any of the areas. You can receive even more prize money against the boss.
■Course Skill
Course Skill is a value that indicates your proficiency at each course. It increases based on the results of battles against your rivals.
As this value increases, your rivals also become stronger, but the prize money and score you can get will also increase. One of the game’s objectives is to increase your Course Skill to MAX for every course.
2-2-2 VERSUS MODE
This mode allows players to compete against other machines in the same location.
Players win money based on results. Prize money varies depending on the of players competing.
When one player passes a checkpoint, time is added for all player.
When a player crosses the finish line, the remaining time for all other players will change to 10 seconds, and if they cannot finish within 10 seconds, time will be up and the race will end.
When this happens, a player's finishing place will be determined by their position when time runs out.
■Versus Win Total Display
You will receive a star each time you finish 1st in Versus Mode.
This will be displayed beneath your name during races to show your opponents how many times you have won.
1-2-2 FIG. 01

 1-3 HOW TO PLAY
1 Insert coins. The game will start automatically when you have met the required amount of credits.
NOTE: If QUICK START is set to OFF in Test Mode, the game will not begin until the START button is pressed. See 2-3-4 GAME ASSIGNMENTS for more information about QUICK START settings.
2 PLAYINGTHE
GAME
1-3 FIG. 01
2 The game will wait for opponents from possible opponent machines not being played. Versus Mode will begin if sufficient coins are inserted into another machine while you are waiting for opponents. The wait for opponents will end when the countdown reaches zero or when the number of players reaches the set amount, and the game will begin with the current number of waiting players. (Single Player Mode will begin if there is one player.)
NOTE: You will not be taken to the waiting for opponents screen if there is only a single machine or the machine has not been set up for Versus Mode.
■How to Stop Waiting for Opponents
To go straight to Single Player Mode without connecting with opponents, press the VIEW CHANGE button and the Brake Pedal simultaneously.
1-3 FIG. 02
1-3 FIG. 03 |
|

2 PLAYINGTHE
GAME
3 Select the car you will use. Use the steering wheel to select the car and the shift lever to choose the car level. Confirm your selection with the Accelerator.
NOTE: The BOOST button can also be used to select left and right, and the START button can be used to confirm.
1-3 FIG. 04
Inserting Card
If you want to use a “R-Tuned Garage Card/IC Card”, insert it while on the Car Selection Screen.
The card information will be shown with a confirmation window displaying “Use this card?.” Choose YES to use the card.
Level Selection
When using a card, you can select the car level if you have earned cars.
The higher a car’s level, the greater the horsepower it will have and the flashier it will look.
4 |
Select the car body color and neon color |
(undercarriage lights). |
Choose the neon color using the steering wheel or BOOST button and the body color using the shift lever, then confirm your selection with the
Accelerator or the START button.
Colors crossed out by an “X” cannot be selected. These can be used after meeting certain conditions when using a card.
1-3 FIG. 05
5 Select the course. Use the steering wheel to select the course and confirm your selection with the Accelerator.
NOTE: The BOOST buttons can also be used to select left and right, and the START button can be used to confirm.
In Versus Mode, course confirmation is decided by the most votes. If 2 courses have the same number of votes, then the course with the lowest difficulty rating will be chosen.
1-3 FIG. 06
10

6 Select the game mode. Use the steering wheel to select the mode and confirm your selection with the Accelerator. (Only in Single Player Mode.)
NOTE: The BOOST button can also be used to select left and right, and the START button can be used to confirm.
1-3 FIG. 07
Push the shift lever up (forward) while on the Game Mode Selection Screen to change how the steering wheel reacts when you press the BOOST button. (The steering wheel response cannot be changed in Versus Mode. It is automatically set to AGGRESSIVE. However, the MILD setting will be activated if you insert a card with which you have previously played using the MILD setting in Single Player Mode.)
NOTE: Releasing the lever will cause it to return to its original position. Confirm your selection while holding the lever in place.
AGGRESSIVE: |
The steering wheel moves from left to right, giving you a dynamic controls experience. |
MILD: |
Vibrations during boosting is set to OFF. |
|
1-3 FIG. 08 |
|
|
7 |
Various tutorials related to the game are displayed while the game is loading. |
When the game starts, first demo is shown, and then play begins. |
2 PLAYINGTHE
GAME
11

Game Screens
The content of the on-screen display is different for Single Player Mode (Battle), Single Player Mode (Time Attack) and Versus Mode.
■ Single Player Mode (Battle)
2 PLAYINGTHE
GAME
1-3 FIG. 09
■ Single Player Mode (TimeAttack)
1-3 FIG. 10
■ Versus Mode
1-3 FIG. 11
12
Changing Between Automatic and Manual Transmission
This game employs a semi-automatic transmission system. Transmission is normally set to automatic (AT) but the shift lever may be used to change gear during gameplay to change to manual transmission (MT). Additionally, transmission can be set to MT from the outset by moving the shift lever during the pre-race countdown. If you
accelerate without using the shift lever for a certain period of time when using MT, the car will automatically switch to automatic transmission.
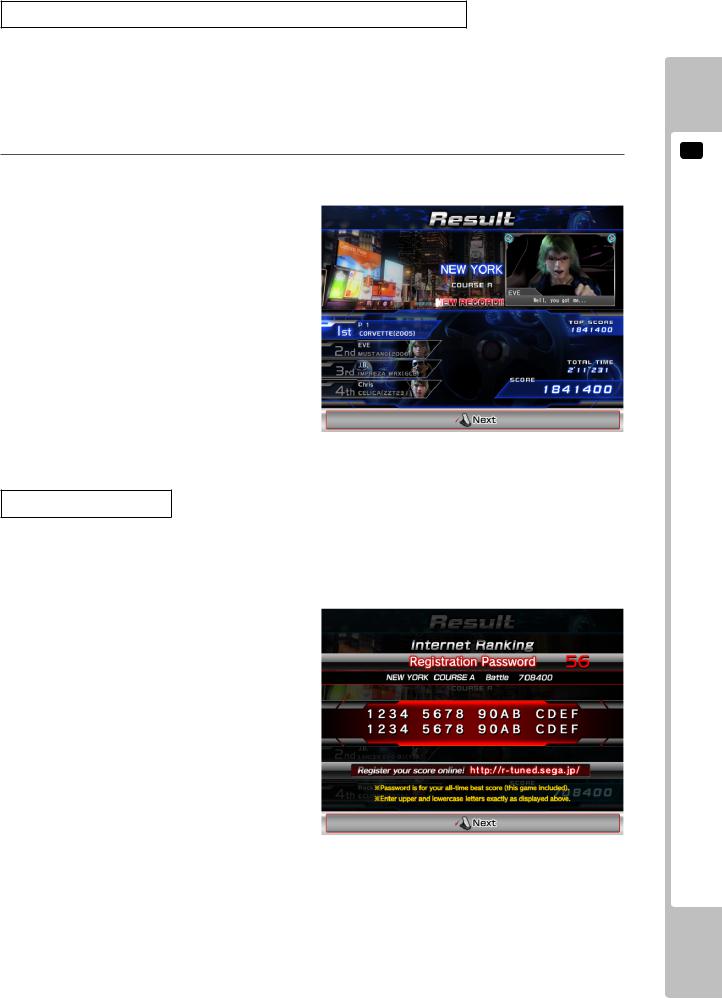
8 When the race is over, results will be displayed (Result Screen). The information displayed on-screen will vary depending on the mode.
1-3 FIG. 12
Internet Ranking
Follow the instructions on the Result Screen and press the VIEW CHANGE button. The “Best score for that course saved on the card” will be displayed by a password. (A password will only be displayed when playing using a card.)
Register this password on the official R-Tuned website (http://r-tuned.sega.jp) to participant in the Internet Ranking.
|
1-3 FIG. 13 |
|
|
9 |
In Single Player Mode only, after a race is over you can use the prize money to buy new cars. |
Use the steering wheel to select the car that you want to buy and step on theAccelerator to confirm your |
choice. Stepping on the brake, will end the Shop Screen without purchasing anything.
NOTE: The BOOST button can also be used to select left and right, and the START button can be used to confirm.
2 PLAYINGTHE
GAME
13
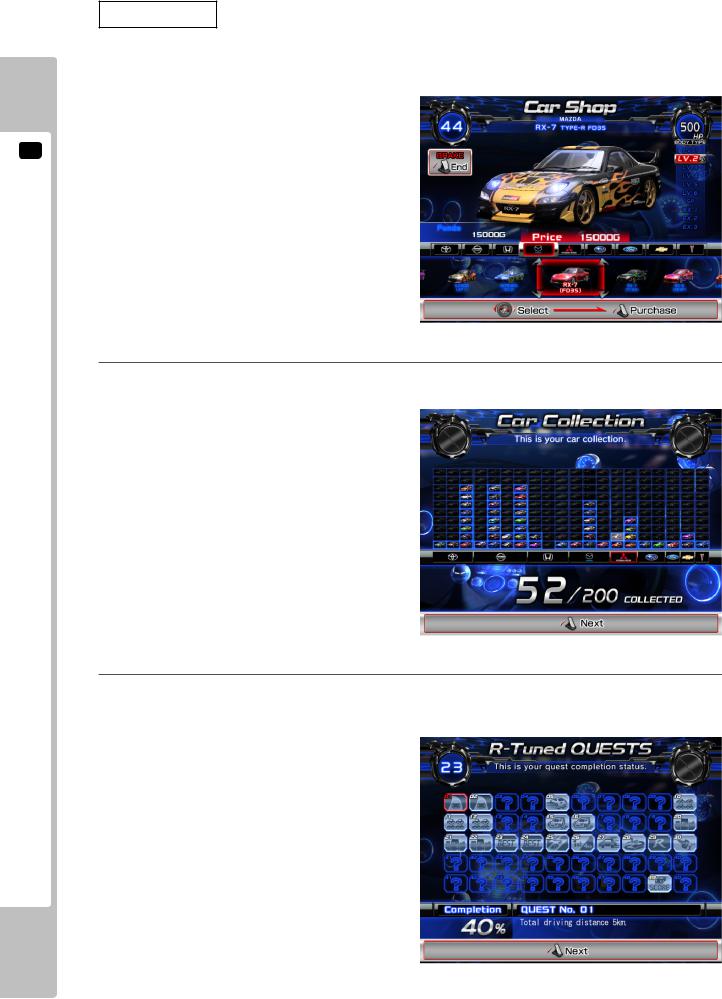
Car Levels
The higher a car’s level, the greater the horsepower it will have and the flashier it will look.
In the Car Shop you can buy cars one level up from your current car. However, you will be unable to buy cars of some levels unless certain conditions have been met.
2 PLAYINGTHE
GAME
1-3 FIG. 14
10 Your current car collection is displayed only in Single Player Mode. Use the accelerator to move to the next car.
1-3 FIG. 15
11 Your current quest completion status is displayed only in Single Player Mode. View the details of each quest by selecting it with the steering wheel or shift lever. Use the accelerator to move to the next quest.
1-3 FIG. 16
14

Quests
Quests are missions with conditions that must be met, such as “Take 1st Place on Shinjuku Course A.” There are 50 quests in total. If you meet the hidden clear conditions, the quest will be marked as “Complete.”
The completion of all quests is one of the objectives of the game.
Unlocking Limited Colors
When you complete specific quests, you will then be able to use previously unavailable body and neon colors.
12 If you achieve a Ranking in Single Player Mode, you can enter your name. This name (5 English letters) will be displayed on the advertising screen.
Additionally, when creating a new card, you can enter your name and save it to the card regardless of your result. Enter up to 5 English letters or symbols.
If you achieve a Ranking when using a card, the name saved on the card will be the name displayed in the Rankings.
NOTE: If LANGUAGE is set to JAPANESE in Test Mode, you can enter your name up to 5 hiragana characters, katakana characters, symbols or English letters. See 2-3-4 GAME ASSIGNMENTS for more information about LANGUAGE settings.
Use the steering wheel to move the cursor left and right and the shift bar to move the cursor up and down.
Confirm with theAccelerator or START button.
1-3 FIG. 17
13 In Single Player Mode only, the Continue Screen will display “CONTINUE?” when the game is over.
Insert the required coins and press the START button to re-enter the Car Selection Screen and continue playing.
1-3 FIG. 18
2 PLAYINGTHE
GAME
15
2 PLAYINGTHE
GAME
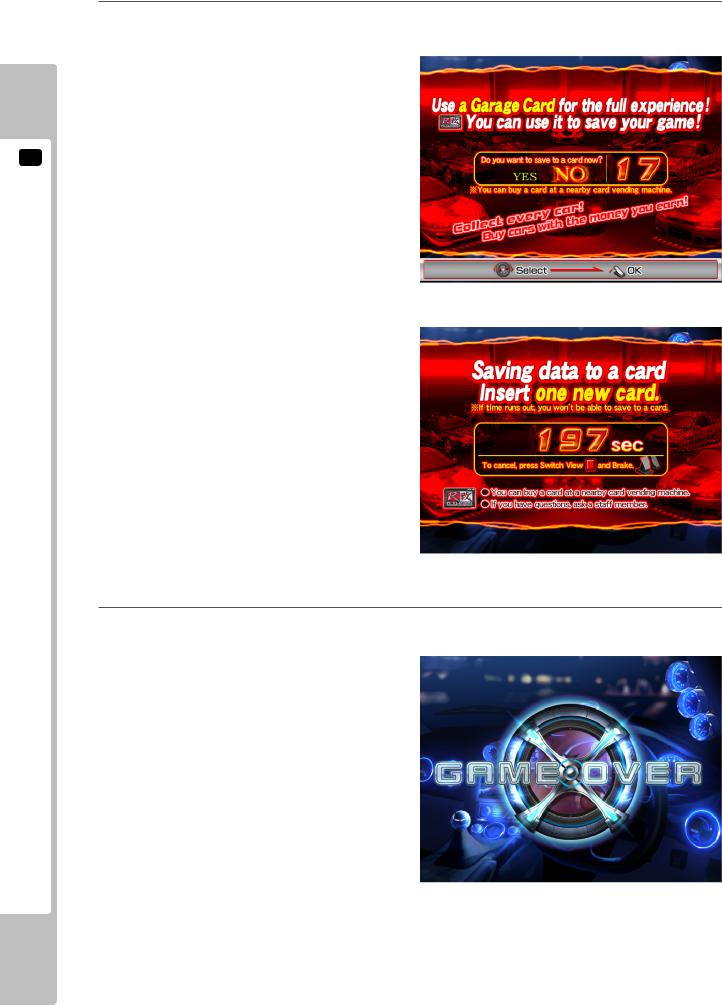
14 Even after a game ends, if you insert a new card, data from the game just played can be saved to the card. To save your data to a card, follow the on-screen instructions and insert your new card.
1-3 FIG. 19
1-3 FIG. 20
15 When either Single Player Mode or Versus Mode finish, the game is over. If you were using a card, it will be ejected.
1-3 FIG. 21
16
 2-4 HINTS FOR PLAYING THE GAME
●BOOST
Hold the BOOST buttons to accelerate rapidly.
While pressed, the steering wheel will vibrate vigorously.
The BOOST buttons can be pressed an unlimited number of times, but you will lose a lot of time if you collide with an opponent or a wall while using it.
●Drift
Turn the steering wheel dramatically before going into a turn to skid sideways (drift) through the turn. This eliminates the need for braking.
The trick is to turn the steering wheel long before the corner, even when driving in a straight line. If you use BOOST while drifting, you will lose control of the car and be unable to corner properly.
●High-Speed Drift
Pressing the accelerator just before or while drifting will carry out a “high-speed drift” from which it is very difficult to decelerate. The sound of a high-speed drift is different from that of a standard drift.
●SLIPSTREAM
It is possible to achieve a speed faster than the top speed of your car by following close behind an opponent. When doing this, the word “SLIP STREAM” will be displayed above your speedometer.
2 PLAYINGTHE
GAME
17

 2-5 R-TUNED GARAGE CARD (OPTIONAL)
1-5-1 R-TUNED GARAGE CARD OVERVIEW
Playing with a “R-Tuned Garage Card” allows you to save a variety of data including player name, cars you have won, in-game currency (funds), best times for each course, and game progress.
2 PLAYINGTHE
GAME
1-5-1 FIG. 01
How to Use a Garage Card
After inserting coins, insert the card into the slot before you select your car. When you finish playing, all data will automatically be recorded on the card and then it will be ejected.
A card can only be used a limited number of times (300 times). The number of uses remaining can be viewed on the Car Selection Screen.
A card can no longer be used once it has run out. However, it is possible to transfer the data to an unused card by updating it.
Updating a Garage Card
It is possible to transfer card data to an unused card. Only unused cards can be updated. You will no longer be able to use the old card from which the unused card has been updated. It possible to update to a new card even if the number of uses on the old card has reached zero.
The card update procedure is as follows.
|
|
1 |
While on the Car Selection Screen, insert the original card and the unused card at the same time. |
|
When “Update this card?” appears, use the steering wheel (or BOOST button) to select YES and confirm |
2 your selection by pressing the accelerator (or the START button). |
|
3 |
The data is updated to the new card. The old card can no longer be used. |
Suspension of Card Use for Closing Time
15 minutes before the set time, “IC card use will be over soon” will be displayed.
10 minutes before the set time, “IC card use is over for today” is displayed and cards will no longer be accepted. If play ends and it is within 10 minutes before the set time, it will not be possible to continue. Additionally, cards will not be accepted after playing.
18

2-5-2 CARD RESTORE MODE
It may be necessary to restore a card in Card Restore Mode as a write error can cause data to become corrupted. However, note that it may not always be possible to restore a card. Data can only be restored using the cabinet in which the write error occurred.
Card Restore Overview
R-Tuned Garage Cards data is saved to the RAM in the LINDBERGH arcade board in case of write errors.
The data from up to 10 damaged cards can be saved in the cabinet. The oldest data will be overwritten if the number of saved card data exceeds 10.
How to Enter Restore Mode, Controls
1 |
Press the TEST Button with the shift lever pushed up (forward). |
See “2-1 Switch Unit” for the location of the TEST Button. |
|
2 |
Follow the on-screen instructions and insert the card to be restored. |
If the card can be restored, “Reading card...” and “Restoring card…” will be displayed automatically. |
|
|
“Restoration complete.” will appear when restoration is complete. |
|
|
3 |
Press the TEST Button to return to the game. |
1-5-3 CARD ERROR MESSAGES
MESSAGE |
CAUSE |
|
|
Load failed. |
Failed to read the card. |
|
|
Cannot use this card. |
A card from another game or a card that cannot be recognized as an “R-Tuned |
|
Garage Card” has been inserted. |
|
|
Cannot use card: |
The card inserted has already been updated. |
card has been updated. |
|
|
|
Cannot use card: |
The data saved on the card is damaged. |
date is damaged. |
|
|
|
Could not update: |
A combination of two cards other than one old card and one new card has been |
invalid card combination. |
inserted. |
|
|
Save failed. Current game |
Failed to write to the card. |
status not saved. |
|
|
|
Unable to restore card. |
Card cannot be restored in Card Restore Mode for one of many reasons. For |
|
example, the data is not stored in the cabinet, the card has an error, or two cards |
|
have been inserted simultaneously. |
|
|
2 PLAYINGTHE
GAME
19
 Loading...