


 Loading...
Samsung YP-T10JABH, YP-T10JQW, YP-T10JQ, YP-T10JQB, YP-T10JAW Manual
...YP-T10
MP3 Player
user manual
imagine the possibilities
Thank you for purchasing this Samsung product.
To receive more complete service, please register your product at
www.samsung.com/global/register

features of your new MP3 Player
Good looking. Smart. Reliable. And lots of fun. Your new MP3 player is all this and more. Its compact silhouette takes up the tiniest space in your pocket, and its state-of-the-art technology delivers rich sound, vibrant pictures. You’ll love your new MP3 player, whether you’re exercising, downloading your favorite tunes, watching videos or even listening to FM Radio.
Use it once, and you’ll wonder how you ever lived without it.
PUTTING THE “MULTI” IN MULTIMEDIA LONGER PLAY TIME AND SHORTER
We call it an MP3 player, but it’s much more than that. It allows you to view pictures, text, and videos and listen to FM radio.
The built-in Bluetooth wireless technology turns your MP3 player into your own personal network.
TOUCH NAVIGATION!
You can tap on the touch pad to navigate through the menus.
WHERE FORM MEETS FUNCTION
Sure, it’s sleek and good-looking. But it’s easy to hold and use, too.
DOWNLOADING!
A fully charged battery can play up to 30 hours of music or 4 hours of video. Download times are shorter. Because of its USB 2.0 capability, the player is much faster than models with USB 1.1.
ACOUSTIC WONDER
Your new MP3 player has built-in DNSe™ (Digital Natural Sound engine), Samsung’s unique sound technology created to deliver richer, deeper sound for an unbelievable listening experience.

safety information
What the icons and signs in this user manual mean :
Means that death or serious personal injury is a risk.
WARNING
|
Means that there is a potential risk for personal injury or |
CAUTION |
material damage. |
|
To reduce the risk of fire, explosion, electric shock, or personal injury when using your MP3 Player, follow
CAUTION these basic safety precautions:
|
Means hints or referential pages that may be helpful to |
NOTE |
operate the player. |
Do NOT attempt.
Do NOT disassemble.
Do NOT touch.
Follow directions explicitly.
Unplug the power plug from the wall socket.
Call the service center for help.
These warning signs are here to prevent injury to you and others. Please follow them explicitly.
After reading this section, keep it in a safe place for future reference.
safety information
This manual describes how to properly use your new mp3 player. Read it carefully to avoid damaging the player and injuring yourself. Pay particular attention to the following serious warnings:
PROTECT YOURSELF
 Do not disassemble, repair, or modify this product on your own.
CAUTION
CAUTION
Do not get the product wet or drop it in water. If the product gets wet, do not switch it on because you could get an electric shock. Instead,
contact a Samsung Customer Service Center near you.
Do not use the earphones while you are driving a bicycle, automobile or motorcycle.
It can cause a serious accident, and furthermore, is prohibited by law in some areas.
Using the earphones while walking or jogging on a road, in particular, on a crosswalk can lead to a serious accident.
For your safety, make sure the earphone cable does not get in the way of your arm or other surrounding objects while you are taking exercise or a walk.
Do not place the product in damp, dusty, or sooty areas because these WARNING environments could lead to fire or electric shock.
PROTECT YOURSELF
Using earphones or headphones for an extended time may cause serious WARNING damage to your hearing.
If you are exposed to sound louder than 85db for an extended time, you may adversely affect your hearing. The louder the sound is, the more seriously damaged your hearing may be (an ordinary conversation is between 50 to 60db and road noise is approximately 80db). You are strongly advised to set the volume level to
medium (the medium level is usually less than 2/3 of the maximum).
If you feel a ringing in the ear(s), lower the volume or stop using the earphones or headphones.
PROTECT YOUR MP3 PLAYER
CAUTION
CAUTION
NOTE
Do not leave the player in temperatures above 95°F (35°C), such as a sauna or a parked car.
Do not cause excessive impact on the player by dropping it.
Do not place heavy objects on top of the player.
Prevent any foreign particles or dust from entering into the product.
Do not place the product near magnetic objects.
Be sure to backup important data. Samsung is not responsible for data loss.
Use only accessories provided by or approved by Samsung.
Do not spray water on the product. Never clean the product with chemical
substances such as benzene or thinner, as it may cause fire, electric shock or deteriorate the surface.
Failure to follow these instructions may lead to physical injuries or damage to the player.
When printing this user manual, we recommend that you print in color and check “Fit to Page” in the print option for better viewing.

contents
THE BASICS
10
10What’s included
11Your MP3 Player
14Screen displays
17Using the touch button
18Charging the battery
19Caring for the battery
19Turning the power on & off
20Playing music
20Controlling the volume
21Disabling the buttons
21Browsing for files using “File Browser”
22Changing the settings and preferences
22Menu style settings
23Sound settings
24Display settings
25Language settings
26Date&time settings
27System settings
29 Resetting the system
SAMSUNG MEDIA STUDIO
30
30PC requirements
31Installing Samsung Media Studio
32Transferring files to the player with Samsung Media Studio

contents
LISTENING TO MUSIC
35
WATCHING A VIDEO
50
35Listening by category
36Pausing
36 Searching within a track
36Playing from the beginning of the current track
36Playing the previous track
36Playing the next track
37Creating a playlist using Samsung Media Studio
37Creating a Playlist
38Adding music files to a playlist you’ve created
39Transferring a playlist to your player using media studio
40Creating a playlist on your MP3 player
41Playing a playlist
42Deleting a file from the playlist
42Deleting all files from the playlist
43Using the music menu
50To pause playing during the playback
51To move to a specific frame
51To play the previous video file
51To play the next video file
52Using the video menu

contents
VIEWING PICTURES 54 |
Viewing pictures |
54 55 |
Using the picture Menu |
LISTENING TO FM RADIO
59
USING THE DATACAST
68
ENJOYING
THE PRIME PACK
71
59To use the mute function
60To search for fm stations
61Using the FM radio menu
68Registering a channel
69Creating a new channel group
69Transferring a datacast from <Media Studio>
70Viewing Datacasts
71Reading text
72Using the Text menu
76 Voice Recording

contents
USING BLUETOOTH
78
TROUBLESHOOTING
85
APPENDIX
88
78What is Bluetooth?
79Using a Bluetooth stereo headset
82Using the Bluetooth menu
83Bluetooth settings
85 Troubleshooting
88Menu Tree
89Product Specifications
91License
the basics
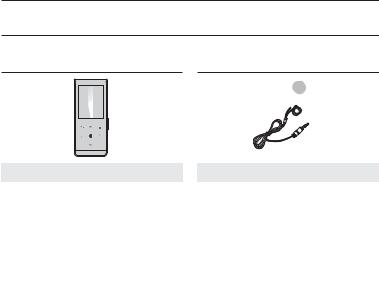
WHAT’S INCLUDED
Your new mp3 player comes with these accessories. If you’re missing any of these items, contact Samsung Customer Service Center.
Player |
|
Earphones |
|
|
|
USB Cable |
Installation CD |
The accessories in your box may look slightly different than these.
10 _ the basics
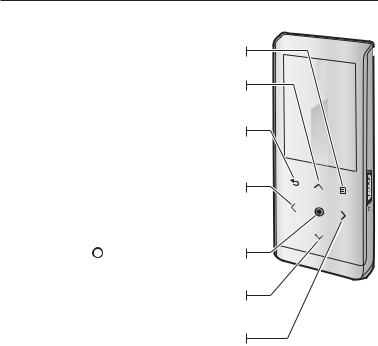
YOUR MP3 PLAYER
Screen display
Power & Hold switch 

Slide and hold in the opposite direction of the arrow for power on/off.
Slide in the direction of the arrow to lock the button functions.
Reset Hole |
|
If a player malfunction occurs, |
|
press the reset hole with a pointed |
|
object to re-initialize the system. |
the basics _ 11 |
YOUR MP3 PLAYER (Continued)
These buttons are ‘Touch’ buttons.
 Menu button
Tap to display the menu screen.
 Up volume button
Tap to increase the volume or move to an upper item/menu.
 Back button
Tap to move to the previous screen. Press and briefly hold to move to the main menu screen.
 Left file browser button
Tap to move to the previous track/menu or play the current track from the beginning.
Press and briefly hold to quickly scan tracks.
 Play/Pause, Select button
Tap to select the play/pause and function, move to the next screen.
 Down volume button
Tap to reduce the volume or move to a lower item/menu.
 Right file browser button
Tap to move to next track/menu. Press and briefly hold to quickly scan tracks.
12 _ the basics
YOUR MP3 PLAYER (Continued)
USB connection port 
Microphone
 Earphone connection jack
 Neck string hole

 Earphones
Labeled “L” for the left earpiece and “R” for the right earpiece. Also serves as an antenna for FM Radio in the MP3 player.
the basics _ 13
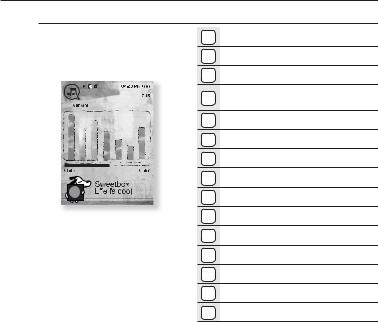
SCREEN DISPLAYS |
|
|
|
|
Music |
|
|
|
|
|
|
1 |
Bluetooth/Lock Indicator |
|
8 |
1 |
2 |
Parent Menu Indicator |
|
9 |
2 |
3 |
Battery Status |
|
3 |
||||
Songs |
|
Current track playing / Total |
||
|
4 |
|||
10 |
4 |
number of tracks Indicator |
||
|
||||
11 |
5 |
5 |
Play Speed Indicator |
|
12 |
6 |
6 |
Current Time |
|
13 |
|
7 |
Total Play Time |
|
|
7 |
|||
14 |
8 |
Play/Pause, Search Indicator |
||
|
|
|||
|
|
9 |
Music Mode Indicator |
|
15 |
|
10 |
Play Mode Indicator |
|
|
|
|||
|
|
11 |
DNSe Mode Indicator |
|
|
|
12 |
Music Play Screen |
|
|
|
13 |
Play Status Bar |
|
|
|
14 |
Current Play Time |
|
|
|
15 |
Music Title |
 The screen pictures are for illustration purposes only. The actual screen may differ.
NOTE
14 _ the basics
SCREEN DISPLAYS (Continued)
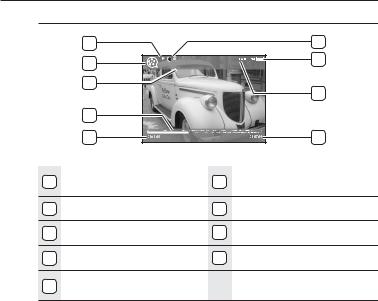
Video
5 |
1 |
6 |
2 |
Video Track 1 |
|
7 |
3 |
|
|
8 |
|
9 |
4 |
1 |
Bluetooth/Lock Indicator |
6 |
Video Mode Indicator |
2 |
Battery Status |
7 |
File Name |
3 |
Current Time |
8 |
Play Status Bar |
4 |
Total Play Time |
9 |
Current Play Time |
|
Play/Pause, Search |
|
|
5 |
Indicator |
|
the basics _ 15

SCREEN DISPLAYS (Continued) |
||||
Picture |
|
|
|
|
5 |
|
1 |
1 |
Bluetooth/Lock Indicator |
6 |
|
2 |
2 |
Battery Status |
|
|
3 |
Current file /Total number of |
|
|
Pictures |
|
||
7 |
Picture Image1.jpg |
3 |
files Indicator |
|
8 |
|
4 |
4 |
Current Time |
|
|
|
5 |
Music Play Status |
|
|
|
6 |
Picture Mode Indicator |
|
|
|
7 |
Parent Menu Indicator |
|
|
|
8 |
File Name |
|
[Preview Screen] |
|
|
|
FM Radio
1 |
1 Bluetooth/Lock Indicator |
4 |
2 |
2 |
Battery Status |
|
|||
5 |
3 |
3 |
Current Time |
MANUAL |
|
|
|
6 |
|
4 |
Radio Mode Indicator |
|
|
Manual/Preset Indicator |
|
|
|
5 |
|
|
|
6 |
Current Frequency(MHz) Indicator |
16 _ the basics
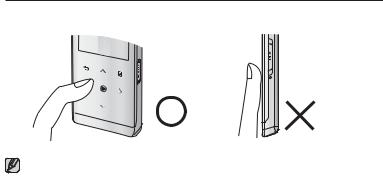
USING THE TOUCH BUTTON
Tap on touch screen with your fingertip.
To avoid damage to the touch screen, do not use any object other than your fingers NOTE to operate it.
Do not tap on the touch screen if your fingers are not clean.
Do not tap on the touch screen with gloves on.
The touch screen may not function if you use a fingernail or other instruments such as a ballpoint pen.
the basics _ 17
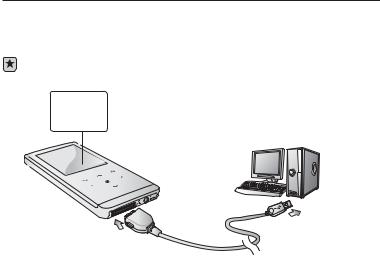
CHARGING THE BATTERY
Charge it before using the player for the first time and when you haven’t used it for a long time.
The battery for your mp3 player will fully charge in about 3 hours, although total charging time varies depending on your PC environment.
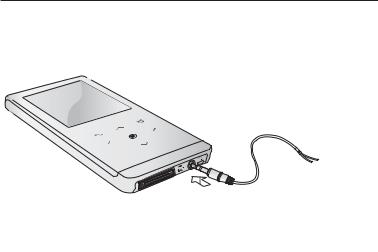
Before you start - Remove the earphones before connecting the USB cable.
Screen Display
USB connected
Charging...
Fully Charged
2
1

1.Connect the other (larger) end of the USB cable to the USB Connection Port on the bottom of the player.
2.Connect the USB cable to the USB port ( ) on your PC.
18 _ the basics
CARING FOR THE BATTERY
Your battery will last longer if you follow these simple guidelines for caring and storing it.
•Recharge and store the battery within the temperature range of 5°C~35°C (40°F~95°F).
•Do not overcharge (longer than 12 hours).
Excessive charging or discharging may shorten the battery’s life.
•Battery life naturally shortens slowly over time.
If you are charging the player while it is connected to a laptop computer, make sure
NOTE the laptop’s battery is also fully charged or that the laptop is plugged into its power source.
TURNING THE POWER ON & OFF
Turning the Power on
Slide and hold the 
 switch in the opposite direction of the arrow.
Power is turned on.
Turning the Power off
Slide and hold the 
 switch in the opposite direction of the arrow again.
Power is turned off.
Your mp3 player will be automatically turned off when none of the buttons have NOTE been pressed for a specific length of time in the pause mode. The factory setting for
<Auto Power Off> is 1 minute, but you can change this length of time. See page 28 for more information.
the basics _ 19
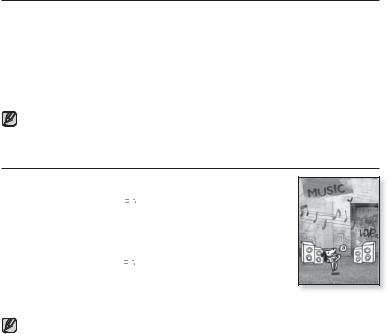
PLAYING MUSIC
Load music files onto your new mp3 player using Samsung Media Studio. Learn more about Media Studio on page 32.
1.Press and briefly hold [ ] to move to the main menu screen.
2.Tap [
 ] to select <Music> and tap [
 ].
].
3.Use [ ] and [
 ] to select a music file of your choice.
4.Tap [ ].
].
The music file will begin playing.
Tap [ ] to move to the previous screen.
NOTE Press and briefly hold [ ] to move to the main menu screen.
Music |
CONTROLLING THE VOLUME
Tap [ ].
].
You will see a volume control icon.
The range of volume is set between 0 to 30.
Tap [ ] to increase the volume or [
 ] to decrease it.
Music |
20 _ the basics
DISABLING THE BUTTONS
The hold function disables all the other buttons on the mp3 player, so that if you accidentally bump one-while working out, for example-your music won’t be interrupted.
1.Slide the  switch in the direction of the arrow.
2.Slide the  switch in the opposite direction of the arrow to release the Lock function.
Music |
BROWSING FOR FILES USING “File Browser”
Search easily for files using the “File Browser” function.
1.Press and briefly hold [ ] to move to the main menu screen.
2.Tap [
 ] to select <File Browser> and tap [
 ].
].
The <File Browser> folder list containing “Music, Playlists, Video, Pictures, Datacasts, Texts and Recorded Files” appears.
3.Tap [ ] to select a desired folder.
4.Tap [ ] to bring up the file list in the selected folder.
Tap [ ] to move to the previous screen.
5.Tap [ ] to select a desired file.
6.Tap [ ].
].
The file will start playing.
the basics _ 21
CHANGING THE SETTINGS AND PREFERENCES
Your mp3 player comes with settings and preferences that were set up at the factory, but you can change these pre-set values to truly customize your player.
Tap [ ] to move to the previous screen.
NOTE Press and briefly hold [ ] to move to the main menu screen.
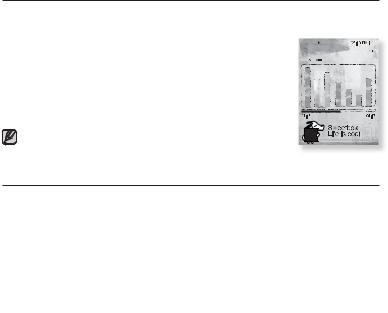
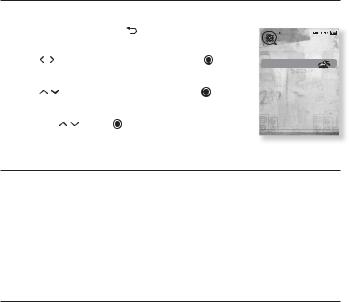
Menu Style Settings
You can change the menu design and font and delete background image of the main menu.
1.Press and briefly hold [ ] to move to the main menu screen.
2.Tap [
 ] to select <Settings> and tap [
 ].
].
The <Settings> menu appears.
3.Tap [ ] to select <Menu Style> and tap [
 ].
].
The <Menu Style> menu appears.
4.Use the [ ] and [
 ] to set functions.
Tap [ ] to move to the next item/select the menu.
Tap [ ] to move up or down through the current menu.
 Settings
Menu Style
Sound
Display
Language
Date & Time
System
Menu Style Setting Options
Menu Design : You can change the style of the main menu screen. Select from <Sammy>, <Pendant> and <My Skin>.
Color Tone : You can change the menu and screen background color. If you set <Sammy> in <Menu Design>, <Color Tone> will be disabled.
Font : You can change the font type of the menu language. Select one from 3 font types. In some menu languages, <Font> will be disabled.
Reset My Skin : Initializes the background image of the screen display to its default image. If you set <Sammy> or <Pendant> in <Menu Design>, <Reset My Skin> will be disabled.
22 _ the basics
CHANGING THE SETTINGS AND PREFERENCES (Continued)
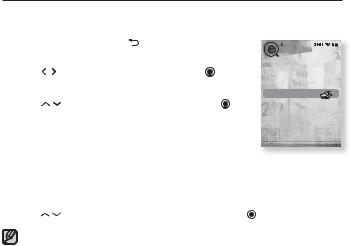
Sound Settings
You can set Master EQ, Beep Sound and Volume Limit. |
|
|
|||||
1. |
Press and briefly hold [ ] to move to the main |
|
|
|
|||
|
|
|
|
||||
|
menu screen. |
|
|
|
Settings |
|
|
|
|
|
|
|
|
|
|
|
|
|
|
|
|
|
|
2. |
Tap [ ] to select <Settings> and tap [ |
]. |
|
|
Menu Style |
|
|
|
|
Sound |
|
||||
|
The <Settings> menu appears. |
|
|
|
Display |
|
|
3. |
Tap [ |
] to select <Sound> and tap [ |
]. |
|
|
Language |
|
|
|
Date & Time |
|
||||
|
The <Sound> menu appears. |
|
|
|
System |
|
|
|
|
|
|
|
|
||
4. |
Use the [ |
] and [ ] to set functions. |
|
|
|
|
|
|
|
|
|
|
|
|
|
Sound Setting Options
Master EQ : You can optimize sound settings.
Tap [
 ] to select the frequency you want to adjust. Tap [
 ] to adjust the selected frequency’s level and then tap [
 ].
].
Beep Sound : Sets the beep sound for button operations to on or off. Select from <Off> and <On>. During music playback, the beep will be disabled even if set to <On>.
Volume Limit : You can avoid hearing damage by setting the limit of the volume when using the earphone. <On> will limit the maximum volume level to 15.
The maximum volume level when volume limit is set to <Off> is 30.
Even if you have selected <Off>, the volume will be set back to 15 to avoid hearing damage when you turn the player back on.
the basics _ 23

CHANGING THE SETTINGS AND PREFERENCES (Continued)
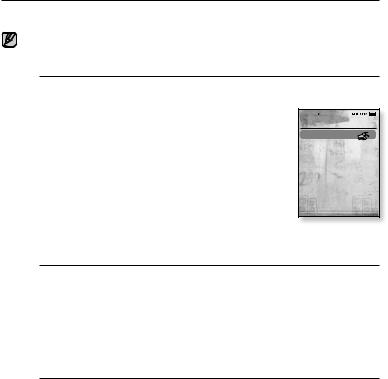
Display Settings
Change the display off time and brightness of your screen.
1. Press and briefly hold [ ] to move to the main menu screen.
2. Tap [
 ] to select <Settings> and tap [
 ].
].
The <Settings> menu appears.
3. Tap [ ] to select <Display> and tap [
 ].
].
The <Display> menu appears.
4.Use the [ ] and [
 ] to set functions.
Display Setting Options
Display Off : If no buttons are tapped within the time set shown below, the screen display will automatically be turned off. Select either <15 sec>, <30 sec>, <1 min>, <3 min>, <5 min> or <Always On>. Press any button to turn it back on.
Brightness : You can adjust the brightness of the display screen. Select a level from <0-10>, where 10 is the brightest.
24 _ the basics
CHANGING THE SETTINGS AND PREFERENCES (Continued)
Language Settings
The menus on your new mp3 player can be set to appear in any one of multiple languages. You can change your preference language easily.
1. |
Press and briefly hold [ |
] to move to the main |
|
|
|
|
||
|
|
|
|
|||||
|
menu screen. |
|
|
|
|
Settings |
|
|
|
|
|
|
|
|
|
|
|
|
|
|
|
|
|
|
|
|
2. |
Tap [ |
] to select <Settings> and tap [ |
]. |
|
|
Menu Style |
|
|
|
|
Sound |
|
|||||
|
The <Settings> menu appears. |
|
|
|
Display |
|
||
3. |
Tap [ |
] to select <Language> and tap [ ]. |
|
|
Language |
|
||
|
|
Date & Time |
|
|||||
|
|
|
|
|
|
|
|
|
|
The <Language> list appears. |
|
|
|
System |
|
||
|
|
|
|
|
|
|||
|
<English>, < >, <Français>, <Deutsch>, |
|
|
|
|
|||
|
<Italiano>, < >, < |
>, < |
>, |
|
|
|
|
|
|
<Español>, <Ɋɭɫɫɤɢɣ>, <Magyar>, <Nederlands>, |
|
|
|
|
|||
|
<Polski>, <Português>, <Svenska>, <ѳъѕ>, <ýeština>, <ƧnjnjLjǎNJNjƽ>, |
|
||||||
|
<Türkçe>, <Norsk>, <Dansk>, <Suomi>, <Español (Sudamérica)>, |
|
||||||
|
<Português (Brasil)>, <Indonesia>, <TiӃng ViӋt>, <Bulgarian>, <Română>, |
|
||||||
|
<ɍɤɪɚʀɧɫɶɤɚ>, <Slovenšþina>, <Slovenský>. |
|
|
|
|
|
||
4. |
Tap [ |
] to select a desired language and tap [ |
]. |
|
|
|||
The supported languages can be changed or added.
NOTE
the basics _ 25
CHANGING THE SETTINGS AND PREFERENCES (Continued)
Date&Time Settings
You can set the current time and date.
1.Press and briefly hold [ ] to move to the main menu screen.
2.Tap [
 ] to select <Settings> and tap [
 ].
].
The <Settings> menu appears.
3.Tap [ ] to select <Date & Time> and tap [
 ].
].
The <Date & Time> screen appears.
4.Tap [
 ] to move to <Year, Month, Date, Hour, Min, AM/PM> and tap [
 ] to set each item.
5.Tap [ ].
].
6.Tap [
 ] to select <Yes> and tap [
 ].
].
The time setting is completed.
 Settings
Menu Style
Sound
Display
Language
Date & Time
System
26 _ the basics
CHANGING THE SETTINGS AND PREFERENCES (Continued)
System Settings
Choose the sleep timer, start mode, auto power off, default setting that’s right for you.
1.Press and briefly hold [ ] to move to the main menu screen.
2.Tap [
 ] to select <Settings> and tap [
 ].
].
The <Settings> menu appears.
3.Tap [ ] to select <System> and tap [
 ].
].
The <System> menu appears.
4.Use the [ ] and [
 ] to set functions.
 Settings
Menu Style
Sound
Display
Language
Date & Time
System
the basics _ 27

CHANGING THE SETTINGS AND PREFERENCES (Continued)
System Setting Options
Sleep : Turns off power automatically after the preset time. Select either <Off>, <15min>, <30min>, <60min>, <90min>, or <120min>.
Start Mode : You can set the start screen displayed when you turn on the player. Select from <Main Menu> and <Last State>. Select <Main Menu> to start the system with the main menu screen while <Last State> will use the last used menu screen.
Auto Power Off : Automatically turns power off when there is no button operation after the preset time in the pause mode. Select either <15sec>, <30sec>, <1min>, <3min>, <5min> or <Always On>.
Default Set : Returns all settings to the default value. Select either <Yes> or <No>. <Yes> initializes all settings to default. <No> cancels default settings.
Format : Formats the internal memory. Select either <Yes> or <No>. Selecting <Yes> will format the internal memory and delete all files on the player. Selecting <No> does not format the internal memory. Check before formatting it.
About : Checks the firmware version and memory capacity. <Firmware Version> displays the current firmware version.
<Used> indicates the usage, <Available> indicates the remaining capacity and <Total> indicates the total memory capacity.
Regarding the Built-In Memory
NOTE 1GB=1,000,000,000 bytes : actual formatted capacity may be less as the internal firmware uses a portion of the memory.
28 _ the basics

RESETTING THE SYSTEM
If your mp3 player won’t turn on, won’t play music, or isn’t recognized by your computer when you connect it, you may have to reset the system.
Press the Reset hole at the rear of the player with a pointed object such as a safety clip.
The system will be initialized.
Your settings and files will not be affected.
the basics _ 29
Loading...