


Samsung UN40D5003BF, UN32D4003BD, UN26D4003BD, UN19D4003BD, LN32D403E2D User Manual
...Contact SAMSUNG WORLDWIDE
If you have any questions or comments relating to Samsung products, please contact the SAMSUNG customer care center.
Comuníquese con SAMSUNG WORLDWIDE
Si desea formular alguna pregunta o comentario en relación con los productos de Samsung, comuníquese con el centro de atención al cliente de SAMSUNG.
Country |
Customer Care Center |
Web Site |
Address |
|
|
|
|
Samsung Electronics Canada Inc., Customer |
|
|
|
|
Service 55 Standish Court Mississauga, |
|
CANADA |
1-800-SAMSUNG(726-7864) |
www.samsung.com |
Ontario L5R 4B2 Canada |
|
|
||||
Samsung Electronique Canada Inc., |
||||
|
|
|
||
|
|
|
Service à la Clientèle 55 Standish Court |
|
|
|
|
Mississauga, Ontario L5R 4B2 Canada |
|
|
|
|
|
|
|
|
|
Samsung Electronics America, Inc. |
|
U.S.A |
1-800-SAMSUNG(726-7864) |
www.samsung.com |
85 Challenger Road |
|
|
|
|
Ridgefield Park, NJ 07660-2112 |
BN68-03703A-02
User Manual
imagine the possibilities
Thank you for purchasing this Samsung product. To receive more complete service, please register your product at
www.samsung.com/register
Model _____________ Serial No. _____________
Figures and illustrations in this User Manual are provided for reference only and may differ from actual product appearance. Product design and specifications may be changed without notice.
Important Warranty Information Regarding Television Format Viewing
See the warranty card for more information on warranty terms.
Wide screen format LCD/LED Displays (16:9, the aspect ratio of the screen width to height) are primarily designed to view wide screen format fullmotion video. The images displayed on them should primarily be in the wide screen 16:9 ratio format, or expanded to fill the screen if your model offers this feature and the images are constantly moving. Displaying stationary graphics and images on screen, such as the dark sidebars on nonexpanded standard format television video and programming, should be limited to no more than 5% of the total television viewing per week. Additionally, viewing other stationary images and text such as stock market reports, video game displays, station logos, web sites or computer graphics and patterns, should be limited as described above for all televisions. Displaying stationary images that exceed the above guidelines can cause uneven aging of LCD/LED Displays that leave subtle, but permanent burned-in ghost images in the LCD/LED picture. To avoid this, vary the programming and images, and primarily display full screen moving images, not stationary patterns or dark bars. On LCD/LED models that offer picture sizing features, use these controls to view different formats as a full screen picture.
Be careful in the selection and duration of television formats used for viewing. Uneven LCD/LED aging as a result of format selection and use, as well as burned-in images, are not covered by your Samsung limited warranty.
•SAMSUNG ELECTRONICS NORTH AMERICAN LIMITED WARRANTY STATEMENT
Subject to the requirements, conditions, exclusions and limitations of the original Limited Warranty supplied with Samsung Electronics (SAMSUNG) products, and the requirements, conditions, exclusions and limitations contained herein, SAMSUNG will additionally provide Warranty Repair Service in the United States on SAMSUNG products purchased in Canada, and in Canada on SAMSUNG products purchased in the United States, for the warranty period originally specified, and to the Original Purchaser only.
The above described warranty repairs must be performed by a SAMSUNG Authorized Service Center. Along with this Statement, the Original Limited Warranty Statement and a dated Bill of Sale as Proof of Purchase must be presented to the Service Center. Transportation to and from the Service Center is the responsibility of the purchaser. Conditions covered are limited only to manufacturing defects in material or workmanship, and only those encountered in normal use of the product.
Excluded, but not limited to, are any originally specified provisions for, in-home or on-site services, minimum or maximum repair times, exchanges or replacements, accessories, options, upgrades, or consumables.
For the location of a SAMSUNG Authorized Service Center, please call toll-free:
–– In the United States : 1-800-SAMSUNG (1-800-726-7864)
–– In Canada : 1-800-SAMSUNG
Still image warning
Avoid displaying still images (such as jpeg picture files) or still image elements (such as TV channel logos, panorama or 4:3 image format, stock or news bars at screen bottom etc.) on the screen. Constant displaying of still pictures can cause ghosting of LCD/LED screen, which will affect image quality. To reduce risk of this effect, please follow below recommendations:
•Avoid displaying the same TV channel for long periods.
•Always try to display any image on full screen, use TV set picture format menu for best possible match.
•Reduce brightness and contrast values to minimum required to achieve desired picture quality, exceeded values may speed up the burnout process.
•Frequently use all TV features designed to reduce image retention and screen burnout, refer to proper user manual section for details.
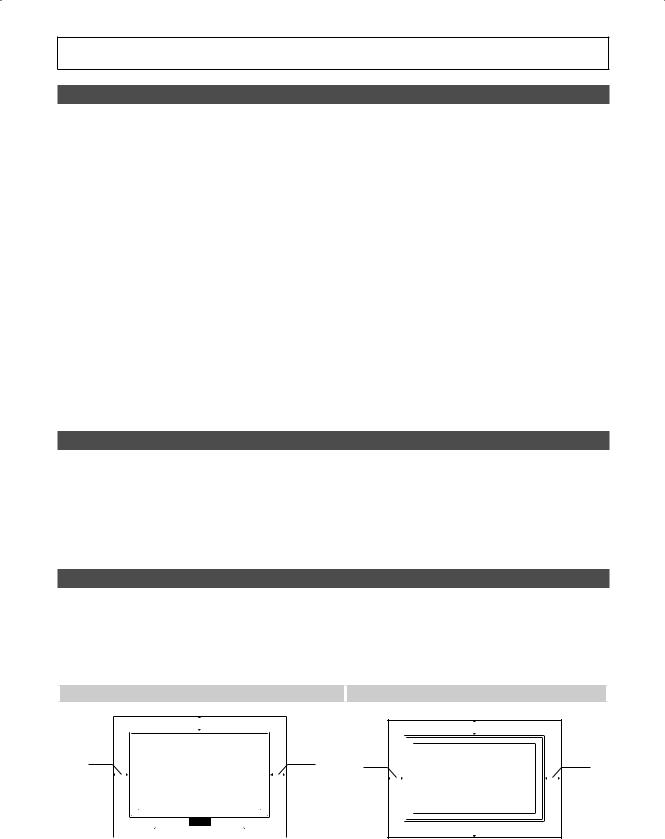
Securing the Installation Space
Keep the required distances between the product and other objects (e.g. walls) to ensure proper ventilation.
Failing to do so may result in fire or a problem with the product due to an increase in the internal temperature of the product.
When using a stand or wall-mount, use parts provided by Samsung Electronics only.
xx If you use parts provided by another manufacturer, it may result in a problem with the product or an injury due to the product falling.The appearance may differ depending on the product.
Be careful when you contact the TV because some parts can be somewhat hot.
|
|
Installation with a stand. |
|
|
|
|
Installation with a wall-mount. |
||||
|
|
|
4inches |
|
4inches |
|
|
|
4inches |
||
|
|
|
|
|
|
|
|||||
4inches |
|
|
|
|
|||||||
|
4inches |
|
|
|
|
4inches |
|||||
|
|
|
|
|
|
|
|
|
|
||
|
|
|
|
|
|
|
|
|
|
|
|
|
|
|
|
|
|
|
|
|
|
|
|
 4inches
© 2011 Samsung Electronics Co., Ltd. All rights reserved.
2 English

Contents |
|
|
Getting Started |
|
|
yy |
List of Features.......................................................... |
4 |
yy |
Accessories............................................................... |
4 |
yy Viewing the Control Panel.......................................... |
5 |
|
yy Viewing the Remote Control...................................... |
6 |
|
yy Connecting to an Antenna......................................... |
7 |
|
yy Plug & Play (Initial Setup)........................................... |
7 |
|
Connections |
|
|
yy Connecting to an AV Device...................................... |
8 |
|
yy Changing the Input source....................................... |
10 |
|
Basic Features |
|
|
yy How to Navigate Menus.......................................... |
11 |
|
yy |
Channel Menu......................................................... |
11 |
|
Seeing Channels |
11 |
|
Using Favorite Channels |
12 |
|
Memorizing channels |
12 |
|
Editing channels |
12 |
|
Other Features |
12 |
yy |
Picture Menu........................................................... |
14 |
|
Changing the Preset Picture Mode |
14 |
|
Adjusting picture settings |
14 |
|
Changing the Picture Options |
14 |
yy |
Sound Menu............................................................ |
16 |
|
Changing the Preset Sound Mode |
16 |
|
Adjusting sound settings |
16 |
|
Sound Settings |
16 |
yy |
Setup Menu............................................................. |
17 |
|
Setting the Time |
17 |
|
Using the Sleep Timer |
17 |
|
Setting the On/Off Timer |
17 |
|
Locking Programs |
18 |
|
Other Features |
19 |
yy |
Support Menu......................................................... |
20 |
Advanced Features |
|
|
yy |
Media Play............................................................... |
21 |
|
Connecting a USB Device |
21 |
Other Information |
|
|
yy Installing the Wall Mount.......................................... |
25 |
|
yy Securing the TV to the Wall |
|
|
|
(depending on the model)........................................ |
27 |
yy Securing the TV to the Wall...................................... |
29 |
|
yy |
Anti-Theft Kensington Lock..................................... |
29 |
yy |
Troubleshooting....................................................... |
30 |
|
Storage and Maintenance |
32 |
yy |
Specifications.......................................................... |
33 |
|
License |
33 |
yy |
Dimensions.............................................................. |
34 |
yy |
Index....................................................................... |
35 |
 Engl is h
Check the Symbol!
|
|
t |
|
O |
|
|
|
This function can be used by pressing |
Note : |
Step by step guide : |
|
|
|
the TOOLS button on the remote |
Important information |
Informs you how to access |
|
|
|
control. |
|
the menu. |
|
|
|
|
|
|
3 |
|
|
|
|
English |
Getting Started
List of Features
■■ Excellent Digital Interface & Networking : With a built-in HD digital tuner, nonsubscription HD broadcasts can be viewed without a cable box / STB (Set-Top-Box) satellite receiver.
■■ Media Play: Allows you to play music files, and pictures saved on a USB device. (P. 21) ■■ Self Diagnosis: You can check picture and sound operation. (P. 20)
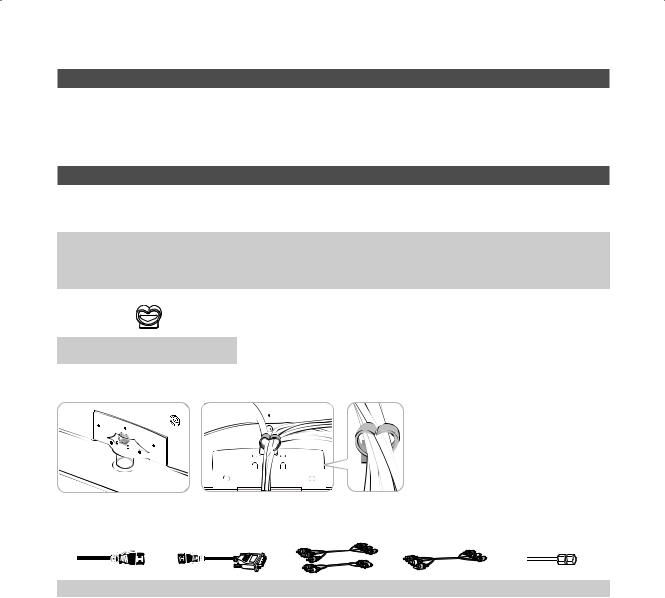
Accessories
Please make sure the following items are included with your TV. If any items are missing, contact your dealer.The items' colors and shapes may vary depending on the models.
■■ |
Remote Control (BN59-01006A) & Batteries (AAA x 2) |
■■ |
Cleaning Cloth (BN63-01798B) |
■■ |
Warranty Card / Safety Guide / Quick Setup Guide |
■■ |
Power Cord |
■■ |
Owner’s Instructions |
|
|
Holder wire stand (UN40D5003BF Model only)
Assembling Holder-wire stand (UN40D5003BF Model only)
Input Cables (Sold Separately)
HDMI |
HDMI-DVI |
Component |
Composite (AV) |
Coaxial (RF) |
|
|
|
|
|
4 English
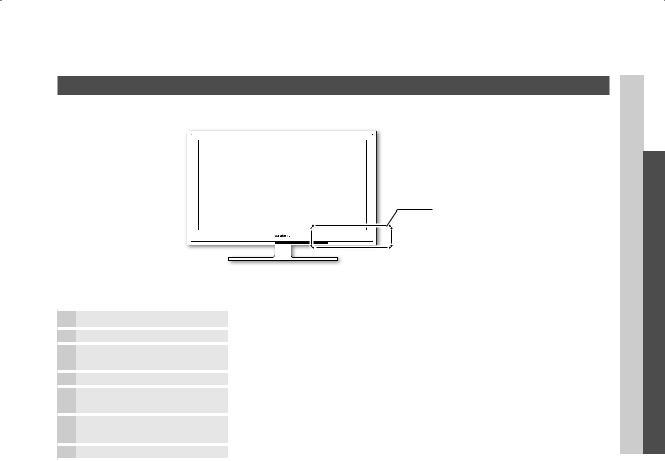
Viewing the Control Panel
The product color and shape may vary depending on the model.
Control Panel
|
|
|
|
|
|
|
|
|
|
|
|
|
|
|
|
|
|
|
|
|
|
|
|
|
Speakers |
||||
P (Power) |
|
Press to turn the TV on and off. |
|||
Remote control sensor |
|
Aim the remote control towards this spot on the TV. |
|||
SOURCEE |
|
Toggles between all the available input sources. In the on-screen menu, use this |
|||
|
button as you would use the EnTERE button on the remote control. |
||||
|
|
||||
MEnU |
|
Displays an on-screen menu of your TV’s features. |
|||
y |
|
Adjusts the volume. In the on-screen menu, use the ybuttons as you would |
|||
|
use the ◄ and ► buttons on the remote control. |
||||
|
|
||||
z |
|
Changes the channels. In the on-screen menu, use the z buttons as you |
|||
|
would use the ▼ and ▲ buttons on the remote control. |
||||
|
|
||||
Power Indicator |
|
Blinks and turns off when the power is on and lights up in standby mode. |
|||
Standby mode
Do not leave your TV in standby mode for long periods of time (when you are away on a holiday, for example). A small amount of electric power is still consumed even when the power button is turned off. It is best to unplug the power cord.
 Started getting 01
English 5
Getting Started
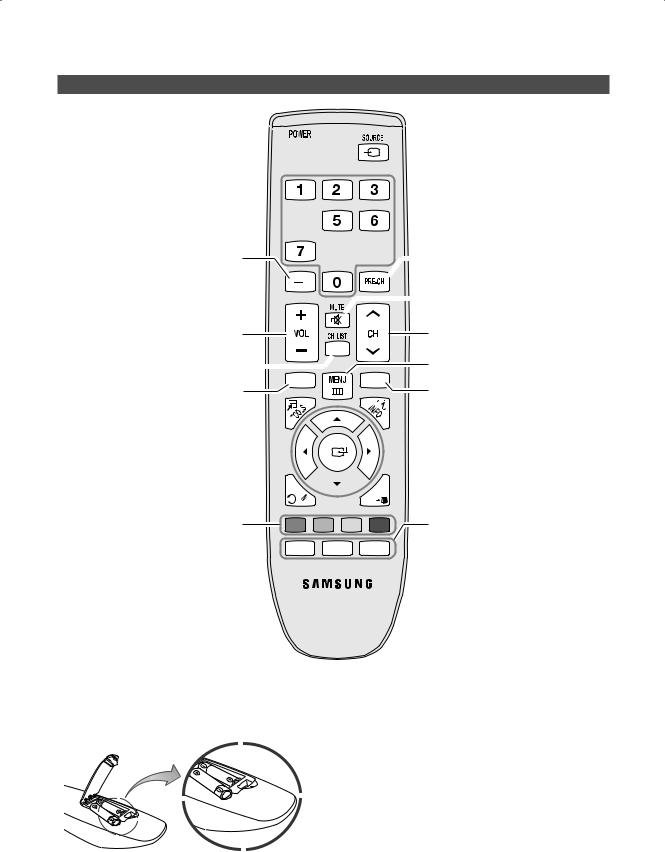
Viewing the Remote Control
Turns the TV on and off.

Press to directly access to channels. 

Press to select additional channels (digital) being broadcast by the same station. For example, to select channel ‘54-3’, press ‘54’, then press ‘-’ and ‘3’.
 Display and select the available video sources. (P. 10)

 Return to the previous channel.
 Cut off the sound temporarily.
Adjusts the volume. |
Change channels. |
Displays the channel list on the screen. (P. 11) 
MEDIA.P
View the Media Play. (P. 21)
Quickly select frequently used functions.
Select on-screen menu items and change menu values.
Displays the main on-screen menu.
FAV.CH
Display favorite channel lists on the screen. (p. 12)
 Press to display information on the TV screen.
Return to the previous menu.


 Exit the menu.
Buttons used in the Channel list, |
A |
B |
C |
D |
MTS: Press to choose stereo, mono or |
Media Play menu, etc. |
MTS |
|
P.SIZE |
CC |
Separate Audio Program (SAP |
|
|
broadcast). (P. 16) |
|||
|
|
|
|
|
P.SIZE: Choose the picture size. (P. 15) |
|
|
|
|
|
CC: Controls the caption decoder. (P. 19) |
Installing batteries (Battery size: AAA)
nOTE
x Use the remote control within 23 feet from TV.
x Bright light may affect the performance of the remote control. Avoid use when nearby fluorescent lights or neon signs.
x The Color and shape may vary depending on the model.
6 English
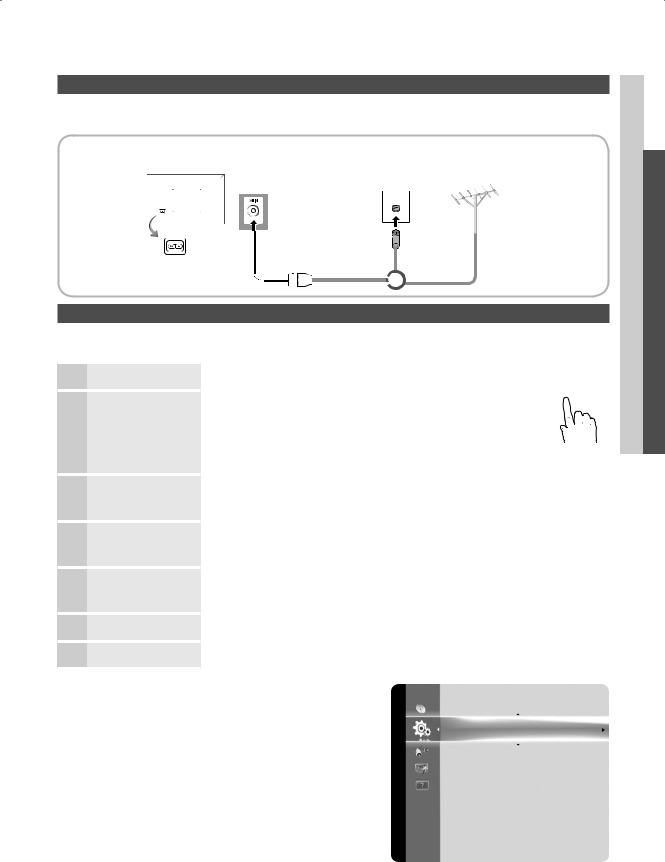
Connecting to an Antenna
When the TV is initially powered on, basic settings proceed automatically.Connecting the power cord and antenna.
The position of power input port may differ depending on the model.
TV Rear Panel |
|
VHF/UHF Antenna |
|
Cable |
|
|
|
 Started ettingG 01
or
Plug & Play (Initial Setup)
When the TV is initially powered on, a sequence of on-screen prompts will assist in configuring basic settings. Press the POWERPbutton. Plug & Play is available only when the Input source is set to TV.
1 |
Selecting a language |
2 |
Selecting Store Demo |
or Home Use |
3 |
Selecting an antenna |
4 |
Selecting a channel |
5 |
ModeSetting the Clock |
6 |
Viewing the HD |
Connection Guide |
|
7 |
Enjoy your TV. |
Press the ▲ or ▼ button, then press the ENTEREbutton. |
POWER |
||
P |
|||
Select the desired OSD (On Screen Display) language. |
|||
Press the ◄ or ► button, then press the ENTEREbutton. |
|||
y |
Select the Home Use mode. Store Demo Mode is for retail |
||
|
y environments. |
||
yy To return the unit’s settings from Store Demo to Home Use (standard): Press the volume button on the TV. When you see the volume in the OSD, press and hold MENU for 5 sec.
Press the ▲ or ▼ button, then press the ENTEREbutton. Select Air, Cable or Auto.
In Cable mode, you can select the correct signal source among STD, HRC, and IRC by pressing the ▲, ▼, ◄ or ► button, then press the ENTEREbutton.
The channel search will start automatically.
For more information, refer to Channel → Auto Program. (P. 12)
Press the ENTEREbutton at any time to interrupt the memorization process. Set the Clock Mode automatically or manually.
If you select the Auto, set the daylight saving time. Select the time zone where you live.
The connection method for the best HD screen quality is displayed.
Press the ENTEREbutton.
If You Want to Reset This Feature...
OO MENUm→ Setup → Plug & Play → ENTERE
Setup
Plug & Play |
|
Language |
: English |
Time |
|
Game Mode |
: Off |
V-Chip |
|
Caption |
|
Melody |
: Medium |
English 7

Connections
Connecting to an AV Device
Using an hDMI cable or hDMI to DVI Cable: hD connection (up to 1080p)
We recommend using the HDMI connection for the best quality HD picture.
Available devices: DVD, Blu-ray player, HD cable box, HD STB (Set-Top-Box) satellite receiver
BD/DVD player/
HD cable/sat box
TV Rear
HDMI OUT
DVI OUT
hDMI In 1(DVI), 2
xWhen using an HDMI/DVI cable connection, you must use the hDMI/DVI In jack for video. A DVD, Blu-ray player, HD cable box, HD STB satellite receiver, cable box, or STB satellite receiver may require a DVI-HDMI (DVI to HDMI) cable or DVI-HDMI (DVI to HDMI) adapter.
xThe picture may not display normally (if at all) or the audio may not work if an external device that uses an older version of HDMI mode is connected to the TV. If such a problem occurs, ask the manufacturer of the external device about the HDMI version and, if out of date, request an upgrade.
xBe sure to purchase a certifi ed HDMI cable. Otherwise, the picture may not display or a connection error may occur.
xIf an HDMI to DVI cable is connected to the hDMI In 1(DVI) port, the audio does not work.
Using a Component Cable: (up to 1080p), Using an Audio/Video Cable: (480i only)
Available devices: DVD, Blu-ray player, cable box, STB satellite receiver, VCR
TV Rear
When connecting to AV In, the color of
Y |
W R |
R |
W |
R |
B |
G |
the AV In [Y/VIDEO] jack (Green) does not |
match the color of the video cable (Yellow).
For better picture quality, the Component connection is recommended over the A/V connection.
Y |
R |
W |
VIDEO OUT AUDIO OUT VCR
R |
W |
R |
B |
G |
AUDIO OUT COMPONENT OUT |
Blu-ray player |
WY |
WR W |
R |
B |
G |
|
|
R-AUDIO-L |
R-AUDIO-L |
PR |
PB |
Y |
Yellow Red White Red Blue Green |
8 English

Display Modes (HDMI/DVI Input)
19", 26", 32" : Optimal resolution is 1360x768@60Hz.
Mode |
Resolution |
Horizontal Frequency (KHz) |
Vertical Frequency (Hz) |
Pixel Clock Frequency (MHz) |
Sync Polarity (H / V) |
|
|
|
|
|
|
|
|
IBM |
640 x 350 |
31.469 |
70.086 |
25.175 |
+ / - |
|
|
|
|
|
|
||
720 x 400 |
31.469 |
70.087 |
28.322 |
- / + |
||
|
||||||
|
|
|
|
|
|
|
MAC |
640 x 480 |
35.000 |
66.667 |
30.240 |
- / - |
|
|
|
|
|
|
||
832 x 624 |
49.726 |
74.551 |
57.284 |
- / - |
||
|
||||||
|
|
|
|
|
|
|
|
|
31.469 |
59.940 |
25.175 |
- / - |
|
|
|
|
|
|
|
|
|
640 x 480 |
37.861 |
72.809 |
31.500 |
- / - |
|
|
|
|
|
|
|
|
|
|
37.500 |
75.000 |
31.500 |
- / - |
|
|
|
|
|
|
|
|
|
|
37.879 |
60.317 |
40.000 |
+ / + |
|
|
|
|
|
|
|
|
VESA DMT |
800 x 600 |
48.077 |
72.188 |
50.000 |
+ / + |
|
|
|
|
|
|
||
|
46.875 |
75.000 |
49.500 |
+ / + |
||
|
|
|||||
|
|
|
|
|
|
|
|
|
48.363 |
60.004 |
65.000 |
- / - |
|
|
|
|
|
|
|
|
|
1024 x 768 |
56.476 |
70.069 |
75.000 |
- / - |
|
|
|
|
|
|
|
|
|
|
60.023 |
75.029 |
78.750 |
+ / + |
|
|
|
|
|
|
|
|
|
1360 x 768 |
47.712 |
60.015 |
85.500 |
+ / + |
|
|
|
|
|
|
|
Display Modes (HDMI/DVI Input)
22", 40" : Optimal resolution is 1920 x 1080@60Hz.
Mode |
Resolution |
Horizontal Frequency (KHz) |
Vertical Frequency (Hz) |
Pixel Clock Frequency (MHz) |
Sync Polarity (H / V) |
|
|
|
|
|
|
|
|
IBM |
640 x 350 |
31.469 |
70.086 |
25.175 |
+/- |
|
|
|
|
|
|
||
720 x 400 |
31.469 |
70.087 |
28.322 |
-/+ |
||
|
||||||
|
|
|
|
|
|
|
|
640 x 480 |
35.000 |
66.667 |
30.240 |
-/- |
|
|
|
|
|
|
|
|
MAC |
832 x 624 |
49.726 |
74.551 |
57.284 |
-/- |
|
|
|
|
|
|
|
|
|
1152 x 870 |
68.681 |
75.062 |
100.000 |
-/- |
|
|
|
|
|
|
|
|
|
640 x 480 |
31.469 |
59.940 |
25.175 |
-/- |
|
|
|
|
|
|
|
|
|
640 x 480 |
37.861 |
72.809 |
31.500 |
-/- |
|
|
|
|
|
|
|
|
|
640 x 480 |
37.500 |
75.000 |
31.500 |
-/- |
|
|
|
|
|
|
|
|
|
800 x 600 |
37.879 |
60.317 |
40.000 |
+/+ |
|
|
800 x 600 |
48.077 |
72.188 |
50.000 |
+/+ |
|
|
|
|
|
|
|
|
|
800 x 600 |
46.875 |
75.000 |
49.500 |
+/+ |
|
|
|
|
|
|
|
|
|
1024 x 768 |
48.363 |
60.004 |
65.000 |
-/- |
|
|
|
|
|
|
|
|
|
1024 x 768 |
56.476 |
70.069 |
75.000 |
-/- |
|
|
|
|
|
|
|
|
|
1024 x 768 |
60.023 |
75.029 |
78.750 |
+/+ |
|
VESA DMT |
|
|
|
|
|
|
1152 x 864 |
67.500 |
75.000 |
108.000 |
+/+ |
||
|
|
|
|
|
|
|
|
1280 x 1024 |
63.981 |
60.020 |
108.000 |
+/+ |
|
|
|
|
|
|
|
|
|
1280 x 1024 |
79.976 |
75.025 |
135.000 |
+/+ |
|
|
|
|
|
|
|
|
|
1280 x 800 |
49.702 |
59.810 |
83.500 |
-/+ |
|
|
|
|
|
|
|
|
|
1280 x 800 |
62.795 |
74.934 |
106.500 |
-/+ |
|
|
|
|
|
|
|
|
|
1280 x 960 |
60.000 |
60.000 |
108.000 |
+/+ |
|
|
1360 x 768 |
47.712 |
60.015 |
85.500 |
+/+ |
|
|
|
|
|
|
|
|
|
1440 x 900 |
55.935 |
59.887 |
106.500 |
-/+ |
|
|
|
|
|
|
|
|
|
1440 x 900 |
70.635 |
74.984 |
136.750 |
-/+ |
|
|
|
|
|
|
|
|
|
1680 x 1050 |
65.290 |
59.954 |
146.250 |
-/+ |
|
|
|
|
|
|
|
|
VESA DMT / DTV CEA |
1920 x 1080p |
67.500 |
60.000 |
148.500 |
+/+ |
|
|
|
|
|
|
|
Connections 02
English 9
Connections
nOTE
x For HDMI/DVI cable connection, you must use the hDMI In 1(DVI) jack. x The interlace mode is not supported.
x The set might operate abnormally if a non-standard video format is selected. x PC(D-Sub) input is not supported.
x If an HDMI to DVI cable is connected to the hDMI In 1(DVI) port, the audio does not work.
SERVICE
Connector for service only.
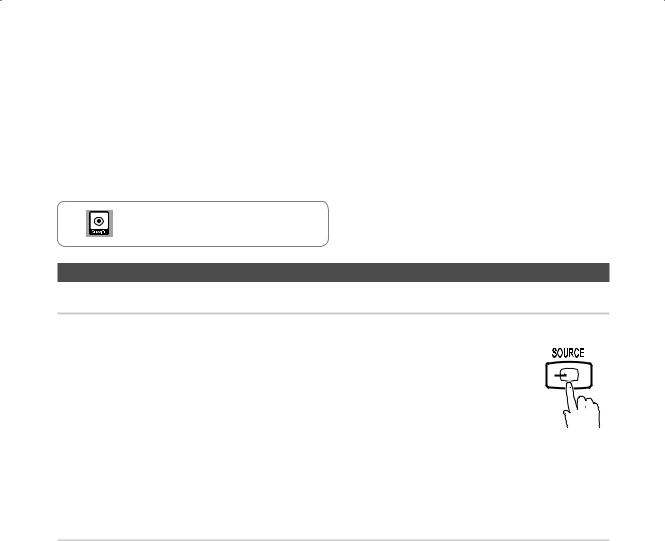
Changing the Input source
Source list
O MEnUm→ Input → Source list → EnTERE
Use to select TV or an external input sources such as a DVD / Blu-ray player / cable box / STB satellite receiver.
■TV / AV / Component / hDMI1/DVI / hDMI2
You can only choose external devices that are connected to the TV. In the Source list, connected inputs will be highlighted.
PC(D-Sub) input is not supported. If you want to connect PC to the TV, use hDMI1/DVI input.
You can use the Edit name and Information when you press the TOOlS button in the Source list.
Information
You can see detailed information about the selected external device.
Edit name
O MEnUm→ Input → Edit name → EnTERE
■VCR / DVD / Cable STB / Satellite STB / PVR STB / AV Receiver / game / Camcorder / PC / DVI PC / DVI / TV / IPTV / Blu-ray / hD DVD / DMA: Name the device connected to the input jacks to make your input source selection easier.
When connecting a PC to the hDMI In 1(DVI) port with HDMI cable, you should set the TV to PC mode under Edit name.
When connecting a PC to the hDMI In 1(DVI) port with HDMI to DVI cable, you should set the TV to DVI PC mode under Edit name.
When connecting an AV devices to the hDMI In 1(DVI) port with HDMI to DVI cable, you should set the TV to DVI mode under Edit name.
10 English
Basic Features
how to navigate Menus
Before using the TV, follow the steps below to learn how to navigate the menu and select and adjust different functions.
MEDIA.P FAV.CH
1
2
3


 4
4
1MEnU button: Displays the main on-screen menu.
2EnTERE/ Direction button: Move the cursor and select an item. Confi rm the setting.
3RETURn button: Returns to the previous menu.
4EXIT button: Exits the on-screen menu.
how to Operate the OSD (On Screen Display)
The access step may differ depending on the selected menu.
1 |
MEnU m |
2 |
▲ / ▼ |
3 |
EnTER E |
4 |
▲ / ▼ |
5 |
◄ / ► |
6 |
EnTER E |
7 |
EXIT e |
The main menu options appear on the screen:
Picture, Sound, Channel, Setup, Input, Application, Support.
Select an icon with the ▲ or ▼ button.
Press EnTEREto access the sub-menu.
Select the desired submenu with the ▲ or ▼ button.
Adjust the value of an item with the ◄ or ► button. The adjustment in the OSD may differ depending on the selected menu.
Press EnTEREto confi rm the selection.
Press EXIT.
Channel Menu
¦ Seeing Channels
Channel list
O MEnUm→ Channel → Channel list → EnTERE
Add, delete or set Favorite channels and use the program guide for digital broadcasts.
Select a channel in the All Channels, Added Channels, Favorite or Programmed screen by pressing the ▲ / ▼ buttons, and pressing the EnTEREbutton. Then you can watch the selected channel.
|
6 |
|
Air |
|
Added |
6-1 |
|
♥TV #6 |
|
7-1 |
|
♥TV#7 |
||
Channels |
|
|||
9 |
|
Air |
||
|
8 |
|
Air |
|
|
9-1 |
|
♥TV #9 |
|
|
10 |
|
Air |
|
|
10-1 |
|
♥TV #10 |
|
|
11-1 |
|
♥TV #11 |
|
Air |
|
Zoom |
|
Select TTools |
B |
C |
|||
■ All Channels: Shows all currently available
channels.
■

 Added Channels: Shows all added channels.
■* Favorite: Shows all favorite channels.
■Programmed: Shows all currently reserved
programs.
Using the color buttons with the Channel list
xB Green (Zoom): Enlarges or shrinks a channel
number.
xC Yellow (Select): Selects multiple channel lists.
Select desired channels and press the Yellow button to set all the selected channels at the same time. The cmark appears to the left of the selected channels.
xT(Tools): Displays the Channel list option menu. (The Options menus may differ depending on the situation.)
Channel Status Display Icons
Icons Operations
c A channel selected.
* A channel set as a Favorite.
) A reserved program.
( A program currently being broadcast.
Features Basic 03
English 11
 Loading...