

Page 1

Backup Scanner Module
Catalog Number 1747-BSN
Installation Instructions
Publication 1747-5.38
Page 2

2 Backup Scanner Module
Important User Information
Because of the variety of uses for the products described in this publication, those
responsible for the application and use of this control equipment must satisfy
themselves that all necessary steps have been taken to assure that each
application and use meets all performance and safety requirements, including any
applicable laws, regulations, codes and standards.
The illustrations, charts, sample programs and layout examples shown in this
guide are intended solely for purposes of example. Since there are many
variables and requirements associated with any particular installation,
Allen-Bradley does not assume responsibility or liability (to include intellectual
property liability) for actual use based upon the examples shown in this
publication.
Allen-Bradley publication SGI-1.1, Safety Guidelines for the Application,
Installation, and Maintenance of Solid-State Control (available from your local
Allen-Bradley office), describes some important differences between solid-state
equipment and electromechanical devices that should be taken into consideration
when applying products such as those described in this publication.
Reproduction of the contents of this copyrighted publication, in whole or in part,
without written permission of Allen-Bradley Company, Inc., is prohibited.
Throughout this manual we use notes to make you aware of safety
considerations:
ATTEN T I O N :
that can lead to personal injury or death, property damage or economic
!
Attention statements help you to:
• identify a hazard
• avoid the hazard
• recognize the consequences
Important: Identifies information that is critical for successful
Publication 1747-5.38
loss.
application and understanding of the product.
Identifies information about practices or circumstances
Page 3
Backup Scanner Module 3
For More Information
As part of our effort to preserve, protect, and improve our environment,
Allen-Bradley is reducing the amount of paper we use. Less paper means more
options for you. In addition to traditional printed publications and CD-ROM
versions, we now offer on-line materials with the most up-to-date information
you can get. We recommend that you read the related publications listed below
before starting up your control system.
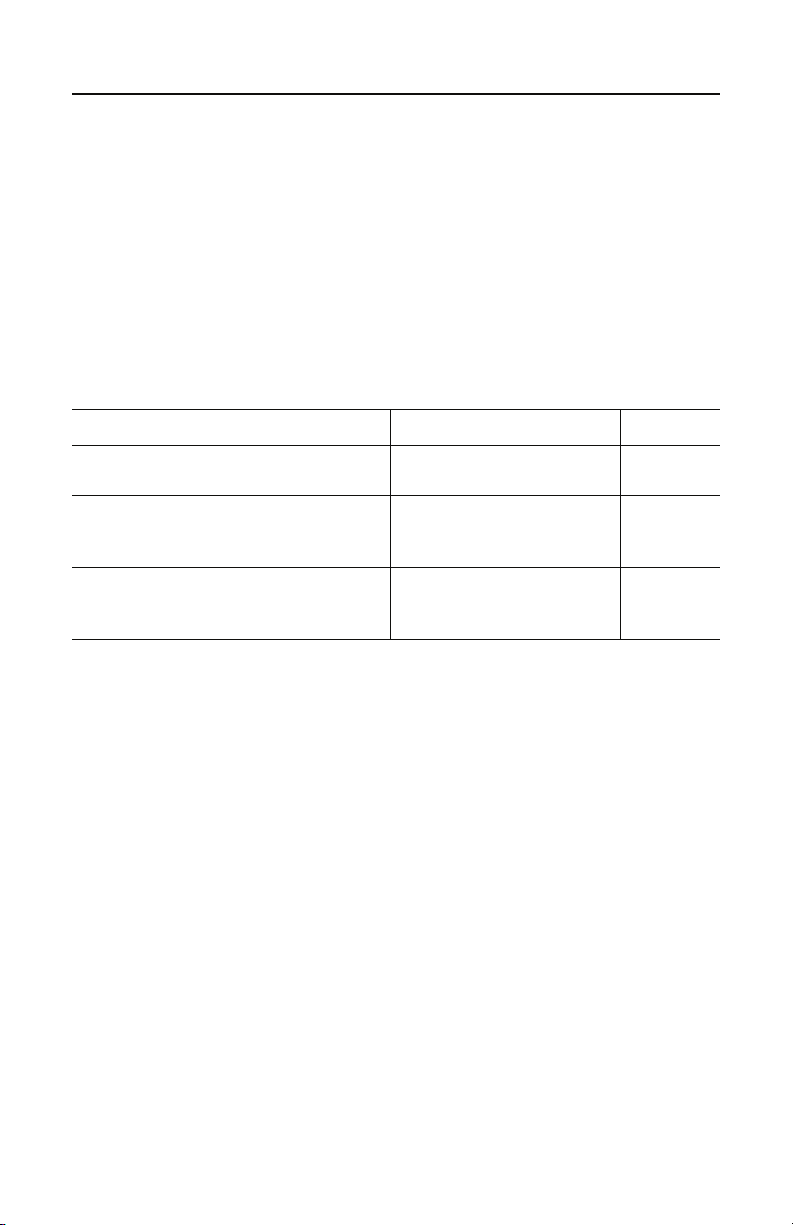
Related Publications
For Refer to this Document Pub. No.
A more detailed description on how to install,
configure, and operate your Backup Scanner.
A more detailed description on how to install
and use your modular SLC 500™ system
A reference manual that contains status file
data and instruction set information for SLC
500 processors.
Backup Scanner
User Manual
SLC 500 Modular Hardware
Style Installation and Operation
Manual
SLC 500™ and MicroLogix™
1000 Instruction Set Reference
Manual
1747-6.22
1747-6.2
1747-6.15
How to Get More Information
If you would like a manual, you can:
• download a free electronic version from the internet at
www.theautomationbookstore.com
• purchase a printed manual by:
– contacting your local distributor or Rockwell Automation representative
– visiting www.theautomationbookstore.com and placing your order
– calling 1.800.963.9548 (USA/Canada) or 001.330.725.1574 (Outside
USA/Canada)
Publication 1747-5.38
Page 4

4 Backup Scanner Module
Safety Considerations
This equipment is UL certified for ordinary locations only. The module is
C-UL certified for use in Class I, Division 2, Groups A, B, C, D, or nonhazardous locations only. The following attention statement applies to use in
hazardous locations.
Explosion Hazard
Class I, Division 2.
power has been switched off, and the area is known to be
non-hazardous.
while circuit is live unless the area is known to be nonhazardous.
Note:
ATTENTION:
• Substitution of components may impair suitability for
!
• Do not replace components or disconnect equipment unless
• Do not connect or disconnect connectors or operate switches
The temperature code rating is marked on the product
label.
Environnements dangereux
Cet équipement est certifié UL pour une utilisation en environnements ordinaires
seulement. Le module est certifié UL Canada pour une utilisation en
environnements de Classe 1, Division 2, Groupes A, B, C, D, ou non dangereux.
La mise en garde suivante s’applique à une utilisation dans des environnements
dangereux.
ATTEN T I O N :
• La substitution de composants peut rendre cet équipement
!
DANGER D’EXPLOSION
impropre à une utilisation en environnement de Classe 1,
Division 2.
Remarque :
Publication 1747-5.38
• Couper le courant ou s’assurer que l’emplacement est
désigné non dangereux avant de remplacer les composants.
• Couper l’alimentation ou s’assurer que l’environnement est
classé non dangereux avant de brancher ou débrancher des
connecteurs ou de faire fonctionner des commutateurs.
Le taux du code de température est indiqué sur l’étiquette
du produit.
Page 5

Backup Scanner Module 5
Overview
The 1747-BSN Backup Scanner Module provides a high-speed communication
channel between two modular SLC 500™ (5/02 or higher) processors. The 1747BSN backup system uses a set of modules, with one or more 1747-BSN modules
residing in the primary system and one or more complementary modules in the
secondary or backup system. The primary system controls the operation of
remote I/O, while the secondary system monitors communications via the highspeed serial link (HSSL) and is available to take over control in the event of a
fault in the primary system.
The backup scanner has the capability to switch between two communication
channels. The first channel is configurable as Remote I/O (RIO) or Data
Highway Plus™ (DH+). The second channel is used to switch one RS232/485
channel in order to provide connection for electronic operator interfaces.
A backup system using the 1747-BSN modules supports up to eight BSN
modules in each processor chassis, connected by a local status link (LSL). Only I/
O residing in remote chassis is backed up. Local I/O is not backed up. Examples
of RIO and DH+ system configurations are shown in Figures 1 and 2 on page 6.
Note: During the transfer of control from one processor to
another (switchover), the output modules in the remote
chassis maintain their last state until the secondary
processor program takes control. The secondary
processor program is not synchronized with the primary
program.
Publication 1747-5.38
Page 6

6 Backup Scanner Module
Figure 1 RIO System Configuration
Processor Processor
RS232
1747-BSN
HSSL
Remote I/O
1747-ASB
Remote I/O
Figure 2 DH+ System Configuration
1747-BSN
RS232/DH485 to Operator
Interface Device
1747-ASB
Processor Processor
RS232
Publication 1747-5.38
DH+
1747-BSN
HSSL
DH+
1747-BSN
To DH+ Network
RS232/DH485 to Operator
Interface Device
Page 7

Backup Scanner Module 7
The 1747-BSN module provides backup functionality for the following:
• DH+ or RIO on a single pair of modules - Both may be backed up when two
or more pairs of modules are used.
• RS232 - Any RS232 device communicating with channel 0 of the SLC
controller may be backed up provided hardware-handshake lines are not
required. These ports only allow switchover of the transmit, receive and
ground wires for RS232.
Features
Figure 3 Hardware Features
Local Status
Link (LSL)
BACKUP SCANNER
PRI
SEC
ERR
RIO
FLT
HSSL
Status LEDs
High Speed Serial
Link (HSSL)
Publication 1747-5.38
Page 8

8 Backup Scanner Module
Status LEDs
The table below describes the six LEDs located on the module’s front panel.
To
ensure that they are operating correctly, all LEDs are illuminated during power-up.
LED Definition Status and Color Indication
PRI Primary Steady Green The module is in the primary mode.
SEC Secondary Steady Amber The module is in the secondary mode.
Steady Green The RIO link is working properly.
A remote device is not configured or
connected correctly, or is faulted.
The RIO link has a fault. The scanner is
connected incorrectly, or all devices are
configured improperly, have no power,
or are faulted.
The communication channel is not
configured as RIO.
A communications error has been
detected on the HSSL.
RIO RIO Communication
Backup Module
ERR
Error
HSSL
High Speed Serial
Link Communication
FLT Fault
Flashing Green
Flashing Red
Steady Red There is a configuration error.
Off
Flashing Red The module is not ready for switchover.
Off The module is ready for switchover.
Flashing Green The link is operating with no errors.
Off
Steady Red A hardware fault has occurred.
Flashing Red The module is not configured properly.
High-Speed Serial Link (HSSL)
The high-speed serial link supports communication between the primary and
secondary backup scanner modules. The baud rate is 2M baud, and the link
supports a distance of up to 4.5 m (15 feet).
The HSSL also transfers a limited number of SLC 500 data table files from the
primary to the secondary processor. The data table transfer is controlled by an
application program in the processor.
Publication 1747-5.38
Page 9

Backup Scanner Module 9
Local Status Link (LSL)
The local status link is a 57.6K baud serial link used to exchange status between
up to eight 1747-BSN modules residing in the same chassis. The illustration
below shows the LSL and HSSL connections between primary and secondary
chassis with more than one 1747-BSN module.
Figure 4 LSL and HSSL Connections
Processor
LSL
1747-BSN #1
1747-BSN #2
Processor
1747-BSN #3
HSSL#1
HSSL#2
HSSL#3
1747-BSN #1
1747-BSN #2
1747-BSN #3
LSL
DIP Switches
The locations of the six-position configuration DIP switch and the four-position
module address DIP switch are shown on page 10.
Publication 1747-5.38
Page 10

10 Backup Scanner Module
Figure 5 DIP Switch Locations
Configuration Switch
Module Address Switch
O
N
12 3456
12 34
O
N
123456
123
4
Configuration Switch
The six-position Configuration DIP Switch is used to select the baud rate,
configure the communication channel, and identify each individual BSN module
and the last BSN module. The tables below define the DIP switch configuration
settings.
DIP Switch
Posit ion
1 and 2 Set the communication channel baud rate.
3 Channel configuration.
This user identification switch differentiates between BSN
4
modules in the primary system and BSN modules in the
secondary system, helping determine if switchover has
occurred.
5 Reserved.
6 Identifies the last module in the local status link.
Definition Setting
see the table on
page 11
DH+ = ON
RIO = OFF
User selectable
Last module = ON
All others = OFF
Publication 1747-5.38
Page 11

Backup Scanner Module 11
Baud Rate Settings
Position 1 Position 2 Baud Rate
ON ON 57.6K
ON OFF 115.2K
OFF ON 230.4K
OFF OFF Disabled
Module Address Switch
The four-position Module Address DIP switch configures the BSN address in the
LSL. The table below shows the address that corresponds to each setting.
Note:
Switch Position
123
OFF OFF OFF 1
ON OFF OFF 2
OFF ON OFF 3
ON ON OFF 4
OFF OFF ON 5
ON OFF ON 6
OFF ON ON 7
ON ON ON 8
Switch position 4 is not used.
1747-BSN Address
Configuration Errors
The module reports the following configuration errors by flashing the fault LED:
• two 1747-BSN modules are configured with the same address
• LSL addresses are not consecutive (addresses must be numbered 0, 1, 2,
etc.)
• last LSL switch is not set in the last module in the link
• last LSL switch is set in a module that is not the last in the link, or
• primary and secondary modules do not have the same configuration settings
(secondary module shows the configuration error)
Publication 1747-5.38
Page 12

12 Backup Scanner Module
Switchover Conditions
The 1747-BSN module transfers control from the primary to the secondary
processor (switchover) if one of the following fault conditions occurs in the
primary system:
• power failure
• major fault in the processor
• 1747-BSN module fault
• primary processor mode change from Run to Program
Note:
In order for switchover to occur, both primary and
secondary modules must be working without faults prior
to the event that triggers the switchover.
Installation
ATTENTION:
!
wire the module.
Determining Power Requirements
The BSN module is powered through the backplane of the I/O chassis. Before
installation, make sure that your modular SLC power supply has adequate reserve
capacity. The BSN module requires 800 mA at 5V.
Important: Use separate power sources for the primary and secondary
processors to protect against interruptions and incoming power
failures.
Disconnect system power before attempting to install, remove, or
Publication 1747-5.38
Page 13

Backup Scanner Module 13
Inserting the Module into the Chassis
1.
Disconnect power.
2.
Align the full-sized circuit board with the chassis card guides of the leftmost slot of the first I/O module group in the I/O chassis. The first slot of
the chassis is reserved for the processor.
3.
Slide the module into the chassis until the top and bottom latches catch.
Figure 6 Inserting the Module
Wiring
Terminal Wiring
ATTENTION:
!
The backup scanner module contains a green removable terminal block. The
terminal pinout is shown on page 14.
or wire the removable terminal wiring block.
Disconnect power to the SLC before attempting to install, remove
Publication 1747-5.38
Page 14

14 Backup Scanner Module
Figure 7 Terminal Pinout
LSL (Line 1 – Blue)
LSL (Shield)
LSL (Line 2 – Clear)
232 / 485 (A) to CPU
232 / 485 (B) to CPU
232 / 485 (COM) to CPU
DH+ (Line 1) to CPU
DH+ (Shield) to CPU
DH+ (Line 2) to CPU
Release Screw
Release Screw
HSSL (Line 1 – Blue)
HSSL (Shield)
HSSL (Line 2 – Clear)
232 / 485 (A) to Link
232 / 485 (B) to Link
232 / 485 (COM) to Link
RIO / DH+ (Line 1) to Link
RIO / DH+ (Shield) to Link
RIO / DH+ (Line 2) to Link
Use Belden™ 9463 cable when wiring the module.
2
Terminal screws accept a maximum of two #14 AWG (2mm
) wires. Tighten
terminal screws only tight enough to immobilize wires. Maximum torque on
terminal screws is 0.9 Nm (8 in-lbs.).
ATTENTION:
tightening of the slotted release screws. Maximum torque on the release screws
!
is 0.6 Nm (5.3 in-lbs.).
To avoid cracking the terminal block, alternate the removal and
For Remote I/O Installations
1. To ensure a proper earth ground of the cable shield, follow these steps:
2. Strip back enough of the RIO cable to expose enough shield drain wire to
reach a chassis mounting bracket.
3. Attach the ring terminal lug to the end of the shield drain wire.
4. Attach the ring terminal lug to the SLC chassis mounting bracket.
Important: The RIO cable shield must be grounded at the backup scanner end
only.
Publication 1747-5.38
Page 15

Backup Scanner Module 15
HSSL Wiring
Connect the HSSL to establish communication between the primary and
secondary systems. Maximum cable length for the HSSL is 4.5 m (15 ft.).
Local Status Link Wiring
If you have more than one 1747-BSN module in the chassis, connect the LSL in
series between modules in the same chassis. This enables BSN modules in the
same chassis to exchange status information in order to perform switchovers in
unison.
RIO Link Wiring
The backup scanner module is connected to other devices on the RIO link in a
daisy-chain (serial) configuration. There are no restrictions governing the space
between devices, provided the maximum cable distance is not exceeded.
A ½ watt terminating resistor must be attached across lines one and two at each
end of the RIO link. The value of the resistor depends on the baud rate and
extended node capability, as shown in the table that follows.
Note:
To use extended node, all devices on the RIO link must support it. Refer
to each device’s user manual.
Using
Extended Node
Capability
Not Using
Extended Node
Capability
Baud Rate
57.6K baud 3048 m (10,000 ft.)
115.2K baud 1524 m (5,000 ft.)
230.4K baud 762 m (2,500 ft.)
57.6K baud 3048 m (10,000 ft.)
115.2K baud 1524 m (5,000 ft.)
230.4K baud 762 m (2,500 ft.)
Max. Cable Distance
(Belden™ 9463)
Resistor Size
1/2 Watt
82
Ω
Gray-Red-Black-Gold
1/2 Watt
150
Brown-Green-Brown-Gold
Ω
82
1/2 Watt
Ω
Gray-Red-Black-Gold
Publication 1747-5.38
Page 16

Specifications
Operating Specifications
Backplane Current Consumption
Operating Temperature
Storage Temperature
Humidity
Noise Immunity
Agency Certification
(when product or packaging is marked)
800 mA at 5V
+32°F to +140°F (0°C to +60°C)
-40°F to +185°F (-40C to +85°C)
5 to 95% without condensation
NEMA Standard ICS 2-230
UL listed
C-UL listed – Class I, Division 2, Groups A, B, C, D
Temp. Code T3C
CE compliant for all applicable directives
Network Specifications
Baud Rate Determination of Maximum Cable Length and Terminating
Resistor Size
Baud Rate Maximum Cable Distance Terminating Resistor Size
1/2 Watt
150
57.6K baud 3048 meters (10,000 feet)
115.2K baud 1525 meters (5,000 feet)
230.4K baud 750 meters (2,500 feet)
Ω
Brown-Green-Brown-Gold
1/2 Watt
150
Ω
Brown-Green-Brown-Gold
82
1/2 Watt
Ω
Gray-Red-Black-Gold
DIP switch configuration settings are shown on page 10.
Publication 1747-5.38 – September 1999 40071-040-01 (A)
1999 Rockwell International. All Rights Reserved. Printed in USA
©
 Loading...