

Page 1
TALADRO PERCUTOR
MARTELLO PERFORATORE
Antes de empezar a leer abra las dos páginas que contienen las imágenes y, en seguida, familiarícese
con todas las funciones del dispositivo.
Prima di leggere aprire le due pagine con le immagini e prendere confidenza con le diverse funzioni
dell’apparecchio.
Before reading, unfold both pages containing illustrations and familiarise yourself with all functions of
the device.
Klappen Sie vor dem Lesen die beiden Seiten mit den Abbildungen aus und machen Sie sich anschließend
mit allen Funktionen des Gerätes vertraut.
Kompernaß GmbH
Burgstraße 21
44867 Bochum
(Germany)
Estado de las informaciones · Versione delle informazioni
Last Information Update · Stand der Informationen:
04 / 2008 · Ident.-No.: PEBH1010042008-5
PEBH 1010
TALADRO PERCUTOR
Instrucciones de utilización y de seguridad
HAMMER DRILL
Operation and Safety Notes
MARTELLO PERFORATORE
Indicazioni per l’uso e per la sicurezza
BOHRHAMMER
Bedienungs- und Sicherheitshinweise
ES Instrucciones de utilización y de seguridad Página 5
IT / MT Indicazioni per l’uso e per la sicurezza Pagina 15
GB / MT Operation and Safety Notes Page 25
DE / AT Bedienungs- und Sicherheitshinweise Seite 35
Page 2
10 21
3
4
5
6
9
8
A B
C D E
7
Page 3

Introducción
Uso correcto ..............................................................................................................Página 6
Equipamiento.............................................................................................................Página 7
Volumen del envío .....................................................................................................Página 7
Datos técnicos ...........................................................................................................Página 7
Indicaciones generales de seguridad para herramientas
eléctricas
1. Seguridad en el lugar de trabajo ........................................................................Página 8
2. Seguridad eléctrica ..............................................................................................Página 8
3. Seguridad de las personas ..................................................................................Página 9
4. Manejo y uso cuidadoso de las herramientas eléctricas ..................................Página 9
Indicaciones de seguridad del taladro percutor .....................................................Página 10
¡Cuidado! ¡Cables! ...................................................................................................Página 10
Accesorios originales / -complementos ....................................................................Página 10
Puesta en funcionamiento
Montar el mango adicional .....................................................................................Página 10
Tope ...........................................................................................................................Página 11
Introducir / cambiar las herramientas ......................................................................Página 11
Mandril de sujeción rápida para broca de vástago cilíndrico ..............................Página 11
Seleccionar función con interruptor de selección de función ................................Página 12
Seleccionar la dirección de giro ..............................................................................Página 12
Preseleccionar el número de revoluciones ..............................................................Página 12
Conexión y desconexión ..........................................................................................Página 12
Índice
Mantenimiento y limpieza .....................................................................Página 13
Eliminación ...........................................................................................................Página 13
Informaciones
Asistencia ...................................................................................................................Página 13
Declaración de conformidad / Fabricante ..............................................................Página 14
5 ES
Page 4

Introducción
En estas instrucciones de uso / en el aparato se utilizan los siguientes pictogramas:
W
n
V
¡Lea las instrucciones de uso!
¡Siga las indicaciones de prevención
y seguridad!
¡Tenga cuidado con las descargas
eléctricas! ¡Peligro de vida!
¡Peligro de explosión!
Portabrocas, Made In Germany Regulación de la posición de cincelado
Vatio (Potencia efectiva) Regular la posición de cincelado
Dimensión de la rotación en
punto muerto
0
Voltios (Tensión alterna)
~
¡Mantener fuera del alcance
de los niños!
Clase de protección II
Interruptor para seleccionar
la función del aparato
Cincelar
Taladrar con percusión
Taladrar
Use gafas de protección, protección
auditiva, mascarilla y guantes de
protección.
¡Proteger el aparato de la humedad!
¡Controle regularmente el buen estado
del aparato, el cable de alimentación
y la clavija!
¡Evacue el embalaje y el aparato
de forma respetuosa con el medio
ambiente!
Taladro percutor neumático con
función de cincelado PEBH 1010
Q
Introducción
Familiarícese con el funcionamiento del
dispositivo antes de ponerlo en marcha
e infórmese sobre cómo trabajar adecuadamente con herramientas eléctricas. Para ello, lea
las siguientes instrucciones. Guarde estas instrucciones
en un lugar seguro. En caso de transferir el dispositivo a terceros entrégueles toda la documentación.
6 ES
Q
Uso correcto
El taladro percutor PEBH 1010 es adecuado para:
- Taladrar con percusión en ladrillo, cemento
y roca natural
- Taladrar en madera, plástico y metal
- Atornillar en madera, plástico y metal
- Cincelar en cemento, roca y enlucido
Cualquier otro uso o modificación distinto al descrito
se considera como no adecuado y conlleva considerables peligros de accidente.
El fabricante no asumirá la responsabilidad por los
daños ocasionados debido a un uso distinto del
adecuado.
El aparato no ha sido diseñado para uso industrial.
Page 5
7 ES
Introducción
Q
Equipamiento
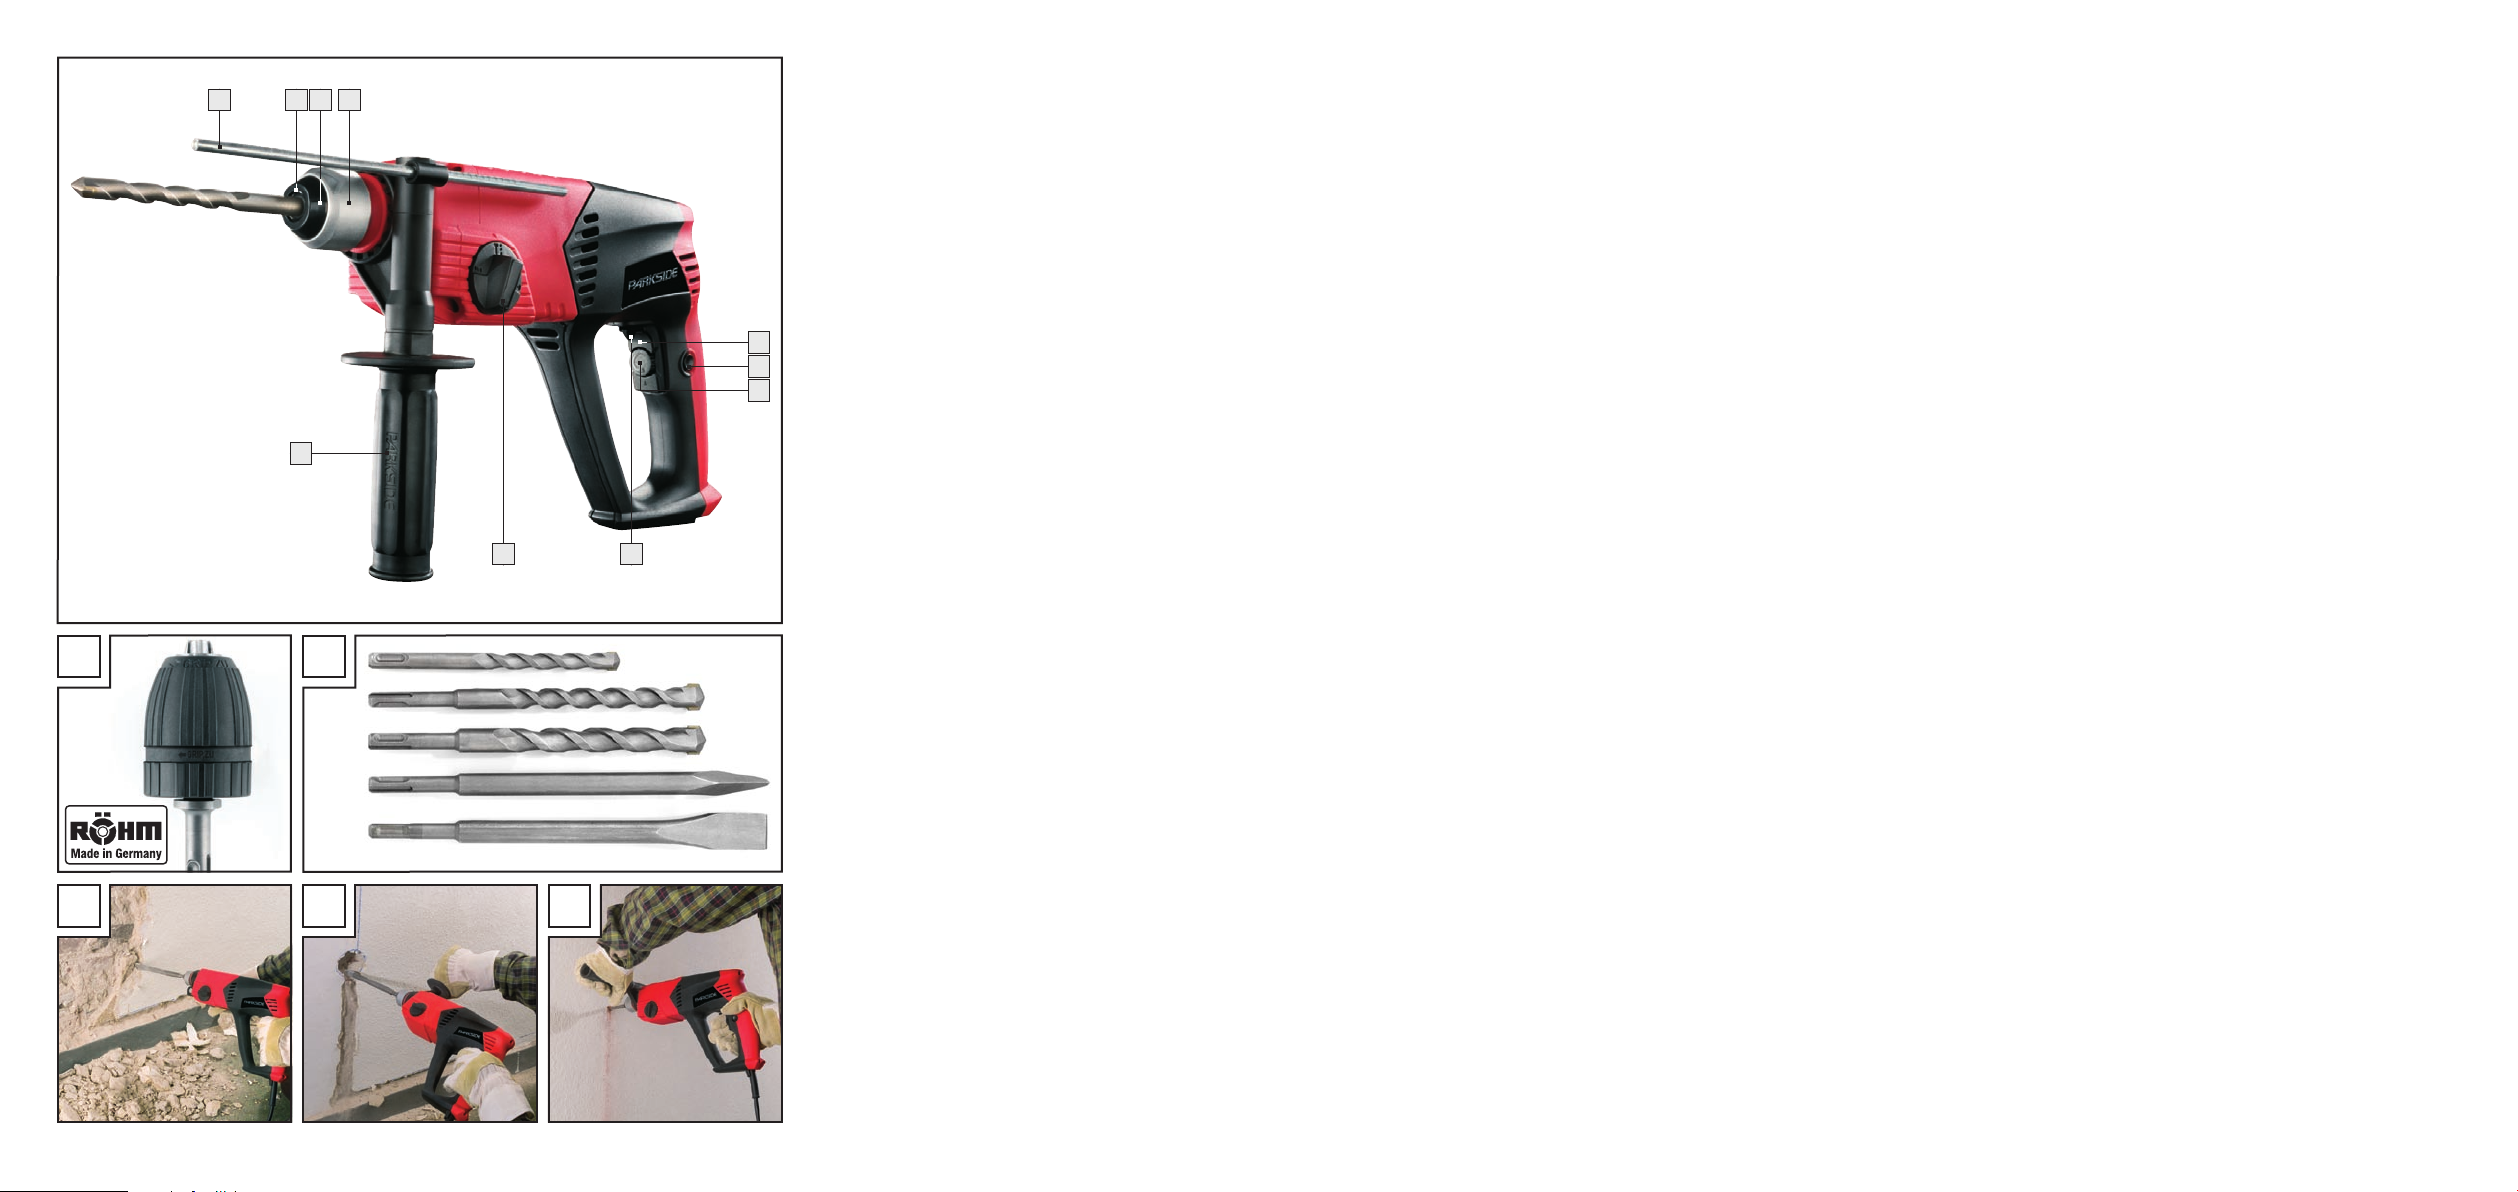
1
Alojamiento de la herramienta (portabrocas)
2
Tapa de goma para proteger del polvo
3
Tapa de bloqueo / desbloqueo
4
Interruptor de CONEXIÓN / DESCONEXIÓN
5
Botón de bloqueo
6
Rueda de ajuste de preselección de número
de revoluciones
7
Interruptor para marcha hacia la izquierda /
derecha
8
Interruptor de selección de función
9
Mango adicional
10
Tope de metal
Q
Volumen del envío
1 taladro percutor
1 mango adicional
1
-portabrocas de pinzado rápido (13 mm)
con adaptador (véase fig. A)
3 brocas (véase fig. B)
1 cincel plano (véase fig. B)
1 cincel puntiagudo (véase fig. B)
1 tope de metal
1 lata de grasa lubricante
1 maletín de transporte
1 manual de instrucciones
1 cuaderno „Garantía y asistencia“
Q
Datos técnicos
Absorción nominal: 1010 W
Tensión nominal: 230 V ~, 50 Hz
Revoluciones en vacío: n
0 - 1.100 min
0
-1
Frecuencia de percusión: 0 - 5.800 / min
Fuerza de percusión: 2,2 Joule
Diámetro de perforación: máx. 13 mm para acero
máx. 32 mm para madera
máx. 26 mm para cemento
máx. 82 mm con segueta
Clase de protección: II / &
Información sobre ruido y vibración:
Valor de medición calculado según EN 60745.
El nivel de presión acústica A evaluado del aparato
es normalmente de 99,6 dB (A). Tolerancia K = 3 dB.
El nivel de ruido al trabajar puede superar los
112,6 dB (A).
¡Debe llevarse protección auditiva!
Valores totales de vibración (suma de los vectores
de tres direcciones) calculados según EN 60745:
Taladrar con percusión
en hormigón: Valor de emisión
de vibraciones
a
= 13,462 m / s2,
h
Tolerancia K = 1,5 m / s
Cincelar: Valor de emisión
de vibraciones
Tolerancia K = 1,5 m / s
¡ADVERTENCIA!
a
= 12,320 m / s2,
h
El nivel de vibración indi-
2
cado en estas instrucciones se ha determinado
egún un procedimiento de medición fijado en la
norma EN 60745 y puede usarse como base para
la comparación con otros aparatos.
El nivel de vibraciones variará dependiendo del
uso de la herramienta eléctrica y puede en muchos
casos superar el valor indicado en estas instrucciones. Podría subestimarse la carga de vibraciones si
se usa con regularidad la herramienta eléctrica de
este modo.
Advertencia: Para un cálculo exacto de la carga
de oscilación durante un determinado intervalo de
trabajo se deben tener en cuenta los tiempos en los
que la máquina está desconectada o está conectada
pero no está funcionando. Esto podría reducir considerablemente la carga de oscilación en el intervalo total de trabajo.
2
,
Page 6

Introducción / Indicaciones generales de seguridad para herramientas eléctricas
PEBH 1010
~
50 Hz · 1010 W · n
230 V
Date of manufacture: 04-2008
KH 3162
Kompernaß GmbH · 44867 Bochum (Germany) · www.kompernass.com
1.100 min
0
-1
Indicaciones generales
de seguridad para
herramientas eléctricas
¡ADVERTENCIA!
e indicaciones de seguridad!
El incumplimiento de las advertencias e indicaciones
de seguridad puede provocar descargas eléctricas,
incendios y / o lesiones graves.
¡GUARDAR TODAS LAS ADVERTENCIAS E
INDICACIONES DE SEGURIDAD POR SI LAS
NECESITA EN UN FUTURO!
¡Lea las advertencias
1. Seguridad en el lugar de
trabajo
a) Mantenga el lugar de trabajo limpio
y bien iluminado. El desorden y los lugares
de trabajo mal iluminados pueden provocar
accidentes.
b)
dos, gases o polvos inflamables. Las
c)
cuando la esté utilizando. Las distracciones
No utilice el aparato en
áreas potencialmente explosivas en las que haya líqui
herramientas eléctricas producen chispas que
podrían encender el polvo o los vapores.
Mantenga a los niños y a
otras personas alejados de
la herramienta eléctrica
pueden hacerle perder el control del aparato.
2. Seguridad eléctrica
Evite el peligro de muerte
por descarga eléctrica:
a) El enchufe debe ser el adecuado para
la toma de corriente. No se debe modificar de ningún modo el enchufe del
aparato. No utilice nunca adaptadores con los aparatos que
están provistos de derivación a tierra.
Los conectores sin modificar y las tomas adecuadas reducen el riesgo de descarga eléctrica.
b) Evite el contacto físico con superficies
conectadas a tierra, como tubos metálicos, radiadores, cocinas o frigoríficos. Existe un riesgo muy elevado de descar-
ga eléctrica si su cuerpo deriva a tierra.
c)
Mantenga el aparato protegido
de la lluvia y la humedad. Si
penetra agua en un aparato eléctrico
aumenta el riesgo de descarga eléctrica.
d)
No utilice el cable para otros
fines, como para transportar
o colgar el aparato o para
tirar de la clavija de red al desenchu-
farlo. Mantenga el cable al resguardo
del calor, del aceite, de los bordes afilados o de las piezas móviles del aparato. Los cables dañados o retorcidos aumen-
tan el riesgo de descarga eléctrica.
e) Al trabajar con herramientas eléctricas
al aire libre, utilice sólo cables de extensión que también estén autorizados
para su uso en exteriores. El uso de una
extensión adecuada para su empleo en exteriores disminuye el riesgo de descarga eléctrica.
f) Si es inevitable usar esta herramienta
eléctrica en un entorno húmedo, utilice un interruptor de corriente de defecto. El uso de un interruptor de corriente de
defecto reduce el riesgo de descarga eléctrica.
8 ES
Page 7

9 ES
Indicaciones generales de seguridad para herramientas eléctricasIntroducción / Indicaciones generales de seguridad para herramientas eléctricas
3. Seguridad de las personas
a) Sea cuidadoso en todo momento,
preste atención a lo que hace y proceda con prudencia al trabajar con una
herramienta eléctrica. No utilice el
aparato si está cansado o si se encuentra bajo el efecto de drogas, alcohol o medicamentos. Un simple mo-
mento de descuido durante el uso del aparato
podría causar lesiones graves.
b)
equipo de protección personal, como mascari-
c)
d) Extraiga las herramientas de ajuste o
e) Evite posturas inadecuadas. Procure
f) Utilice ropa adecuada. No use joyas
g) Si los dispositivos de aspiración y re-
Lleve equipo de protección
individual y siempre unas
gafas de protección. Si lleva
lla antipolvo, zapatos de seguridad antideslizantes, casco de seguridad o protección auditiva,
en función del tipo y la utilización de la herramienta eléctrica, reducirá el riesgo de daños.
Evite una conexión accidental del aparato.
Asegúrese de que la herramienta
eléctrica esté desconectada antes de
conectarla al suministro eléctrico,
antes de sostenerla o moverla. Si al
mover el aparato ha puesto el dedo sobre el
interruptor de CONEXIÓN / DESCONEXIÓN
o si ha conectado el aparato, podrían producirse accidentes.
llaves antes de encender el aparato.
Cualquier herramienta o llave que se encuentre
en una pieza giratoria del aparato puede
provocar lesiones.
estar en una posición segura y mantenga en todo momento el equilibrio.
De este modo podrá controlar mejor el aparato, especialmente en situaciones inesperadas.
ni ropas flojas. Mantenga su cabello,
ropa y guantes alejados de las partes
móviles. La ropa floja, las joyas o el pelo lar-
go pueden engancharse en las piezas móviles.
colección de polvo están montados,
asegúrese de que estén conectados y
sean correctamente utilizados. El uso
de estos dispositivos disminuye los peligros
causados por el polvo.
4. Manejo y uso cuidadoso de
las herramientas eléctricas
a) No sobrecargue el aparato. Emplee
en su trabajo la herramienta eléctrica
adecuada para el mismo. Si usa la
herramienta adecuada dentro de la potencia
indicada trabajará mejor y de forma más
segura.
b) No utilice una herramienta eléctrica
cuyo interruptor tenga algún defecto.
Una herramienta eléctrica que no se puede
encender o apagar es un peligro y debe
repararse.
c) Retire la clavija del enchufe antes de
realizar ajustes en el aparato, cambiar accesorios o depositar el aparato
sobre una superficie. Esta medida de pre-
caución evita que se ponga en marcha el aparato por accidente.
d) Conserve las herramientas eléctricas
que no use fuera del alcance de los niños. No permita utilizar el aparato a
personas que no estén familiarizadas
con él o que no hayan leído estas indicaciones. Las herramientas eléctricas son pe-
ligrosas si las usan personas sin experiencia.
e) Cuide el aparato. Compruebe que las
piezas móviles funcionen correctamente y no se atasquen, y que no
haya piezas rotas o tan dañadas que
perjudiquen al funcionamiento del
aparato. Haga reparar las piezas dañadas antes de usar el equipo. La cau-
sa de muchos accidentes es el uso de he
rramientas eléctricas que no han recibido el
mantenimiento adecuado.
f) Mantenga las herramientas de corte
afiladas y limpias. Las herramientas de
corte con filos cortantes conservadas cuidadosamente se enganchan menos y son más
fáciles de manejar.
Page 8
Indicaciones generales de seguridad para... / Puesta en funcionamiento
g) Utilice la herramienta eléctrica, los ac-
cesorios, las herramientas adicionales, etc. de acuerdo con estas indicaciones y del modo que se describe
para este tipo de aparato en concreto.
Tenga en cuenta las condiciones de
trabajo y la actividad que se va a realizar. El uso de herramientas eléctricas para
fines diferentes de los previstos puede provocar situaciones peligrosas.
Indicaciones de seguridad
del taladro percutor
J Utilice un protector de oídos.
El efecto de los ruidos puede provocar pérdida auditiva.
J Utilícelo con el mango adicional
que se entrega junto con el aparato.
Perder el control del aparato puede ocasionar
lesiones.
J Desconecte la herramienta eléctrica
inmediatamente si la pieza de inserción
se atasca. Esté preparado para fuerzas de
reacción altas que causan un retroceso del
aparato.
J Pensando en su seguridad se ha equi-
pado el taladro percutor PEBH 1010
con un acoplamiento de sobrecarga.
Este acoplamiento hace que se interrumpa
automáticamente el accionamiento si la herramienta de taladrado se engancha. A pesar de
ello, asegúrese siempre de que está situado en
un lugar seguro, sujete el taladro percutor fuertemente con ambas manos y utilice siempre el
mango adicional
J
TÓXICOS! Trabajar con polvo nocivo / tóxico
supone un riesgo para la salud de quien maneja
el aparato o de las personas que estén cerca.
J No trabaje con materiales que contie-
nen amianto. El amianto puede ser cancerí-
geno.
J Asegúrese de que las ranuras de ventilación
no estén tapadas durante el funcionamiento
¡Lleve gafas de protección y
9
.
mascarilla antipolvo! ¡POLVOS
9
del aparato. No introduzca ningún objeto en
las ranuras de ventilación.
Q
¡Cuidado! ¡Cables!
¡ADVERTENCIA!
golpear líneas eléctricas, de gas o agua al
trabajar con herramientas eléctricas. Si es
necesario compruebe la superficie con un detector
de líneas, antes de taladrar o perforar una pared.
Q
Accesorios originales /
Asegúrese de no
-complementos
J Utilice sólo los accesorios y complemen-
tos indicados en las instrucciones de
uso. El uso de herramientas complementarias
u otros accesorios diferentes a los recomendados en las instrucciones de uso, puede suponer
un riesgo de lesiones para usted.
Q
Puesta en funcionamiento
¡Tenga en cuenta la tensión de red! La tensión tiene que coincidir con las indicaciones de la
placa de características del aparato (los aparatos
que están caracterizados con 230 V ~, también
pueden conectarse a una corriente de 220 V ~).
Q
Montar el mango adicional
Advertencia: Por motivos de seguridad sólo
puede utilizarse este aparato con el mango adicio-
9
nal
montado (véase también las fig. D, E).
j Coloque el mango adicional
llo del husillo y apriételo girándolo en sentido
contrario a las agujas del reloj.
9
sobre el cue-
10 ES
Page 9
11 ES
Q
Tope
j Introduzca el tope 10 en el mango adicional 9.
j Seleccione la profundidad de perforación
necesaria desplazando el tope
Q
Introducir / cambiar las
10
.
herramientas
Introducir la herramienta:
j Antes de introducir la herramienta engrase ligera-
3
hacia
1
.
3
.
mente el alojamiento para la herramienta
j Para colocarla estire la tapa de bloqueo /
desbloqueo
mienta.
j Suelte la tapa de bloqueo / desbloquedo
De este modo se bloquea el alojamiento.
Compruebe que la herramienta está correctamente bloqueada estirándola. Debido al sistema
la herramienta tiene un juego radial.
Extraer la herramienta:
j Para extraer la herramienta también debe esti-
rar la tapa de bloqueo / desbloqueo
atrás.
3
hacia atrás y coloque la herra-
Puesta en funcionamiento
Compruebe que la herramienta está correctamente bloqueada estirándola.
Extraer el portabrocas de pinzado rápido
RÖHM para broca de vástago cilíndrico:
j Para extraer el portabrocas estire la tapa de
bloqueo / desbloqueo
el portabrocas.
Introducir herramientas:
¡ADVERTENCIA!
LESIONES! Antes de realizar cualquier trabajo
en el aparato asegúrese de que el aparato está
apagado y el enchufe desconectado.
El portabrocas de pinzado rápido RÖHM permite
cambiar las herramientas rápidamente sin medios
auxiliares adicionales.
Soltar el alojamiento para la herramienta
e insertar la herramienta:
j Sujete fuertemente el manguito posterior del
portabrocas de pinzado rápido y gire el manguito delantero hasta que la herramienta (p.ej.
broca de vástago cilíndrico) pueda insertarse.
j Introduzca la herramienta.
3
hacia atrás y extraiga
¡PELIGRO DE
Q
-Mandril de sujeción
rápida para broca de vástago
cilíndrico
¡ADVERTENCIA!
vástago cilíndrico en el modo de taladro percutor
o de cincelado!
j Coloque el interruptor de selección de función
sobre el símbolo de taladrar
Insertar el portabrocas de pinzado rápido
RÖHM para broca de vástago cilíndrico:
j Para colocar el portabrocas adicional para
broca de vástago cilíndrico (véase también fig. A)
estire la tapa de bloqueo / desbloqueo
atrás y coloque el portabrocas.
j Suelte la tapa de bloqueo / desbloquedo
De este modo se bloquea el alojamiento.
No utilice la broca de
.
3
hacia
3
Tensar la herramienta:
j Sujete fuertemente el manguito posterior del
portabrocas de pinzado rápido y gire el manguito delantero con fuerza hasta oír “clic –
clac, clac clac“. Ahora el portabrocas está
bloqueado.
j Vuelva a soltar el bloqueo girando el manguito
delantero en el sentido opuesto.
8
Utilizar herramientas roscadas:
j Utilice un soporte de puntas correspondiente, si
quiere utilizar puntas o insertos de destornillador.
j Utilice únicamente insertos / puntas que se
adapten al cabezal del tornillo.
j Coloque el interruptor de selección de función
sobre el símbolo de taladrar
.
.
8
Page 10
Q
Seleccionar función con
interruptor de selección
de función
Indicación: Cambie la función sólo
con el aparato desconectado, de lo
contrario podría dañarlo. Dependiendo
del área de aplicación, puede optar entre cuatro
funciones al girar el interruptor de selección de fun-
8
ción
.
j Gire el interruptor de selección de función
de modo que el símbolo deseado engatille en
la marcación con la flecha.
Las funciones están marcadas como sigue:
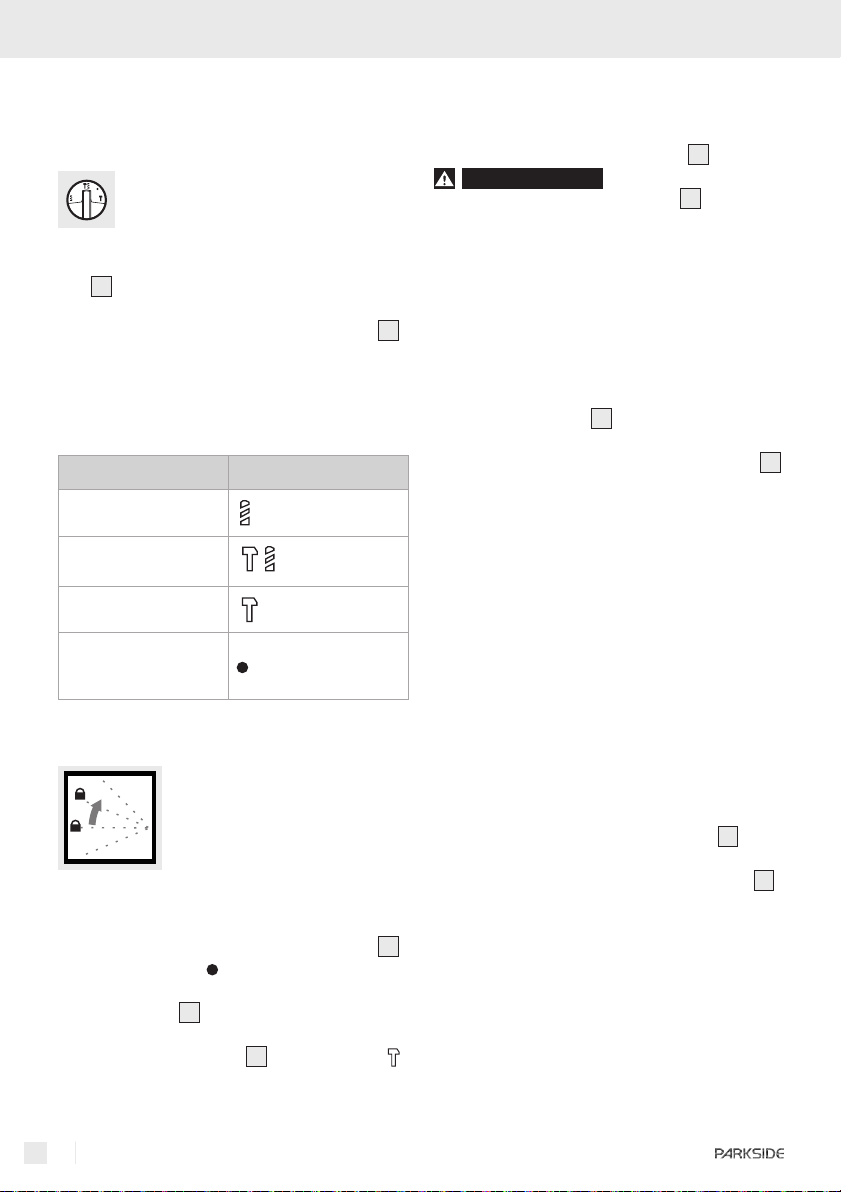
Función Símbolo
Taladrar / Atornillar
8
Q
Seleccionar la dirección de giro
Seleccione el sentido de giro regulando el conmutador a la derecha / o a la izquierda
¡ADVERTENCIA!
La utilización / ajuste del
conmutador a la derecha- / izquierda
7
7
realizarse cuando el aparato no está en funcionamiento
Q
Preseleccionar el número
de revoluciones
El número de revoluciones deseado durante el funcionamiento puede preseleccionarse individualmente
con la rueda de ajuste
6
.
Si se preselecciona un número de revoluciones bajo,
el interruptor de CONEXIÓN / DESCOENXIÓN
se activa automáticamente sólo de manera limitada
(debido al reducido número de revoluciones).
.
sólo puede
4
Taladrar con
percusión
Cincelar
Regulación de la posición de cincelado
Regular la posición de cincelado:
Esta función representa una consi-
derable reducción del esfuerzo de
trabajo gracias al ajuste de posiciones individuales del ángulo del
cincel. Ello le permitirá colocar la
herramienta en la posición necesaria para el proceso de cincelado (véase también fig. C, D).
j Gire el interruptor de selección de función
hasta la posición
.
8
j Gire la herramienta en el alojamiento para
herramientas
1
hasta la posición necesaria.
j Para el proceso de cincelado gire el interruptor
de selección de función
8
hasta la posición .
Números de revoluciones recomendados:
(orientativos, dado el caso, determine el número
de revoluciones más adecuado realizando una
prueba práctica):
- Número de revoluciones elevado: para taladrar
con percusión en cemento o piedra, para cincelar
- Número de revoluciones medio: para taladrar
en acero o madera
- Número de revoluciones reducido: para atornillar
Número de revoluciones reducido /
elevado:
j Gire la rueda de ajuste hasta la posición de
selección de número de revoluciones
El interruptor de CONEXIÓN / DESCONEXIÓN
dispone de un ajuste variable de la velocidad.
j Pulsando el interruptor se aumenta el número
de revoluciones progresivamente.
Q
Conexión y desconexión
En el funcionamiento con taladro percutor puede
seleccionar entre funcionamiento momentáneo o
continuo. Para trabajos cortos utilice el funcionamiento
6
.
4
12 ES
Page 11
13 ES
Puesta en funcionamiento / Mantenimiento y limpieza / Eliminación / Informaciones
momentáneo y para trabajos más prolongados el
funcionamiento continuo. El manejo del ajuste deseado funciona como sigue:
Conectar el funcionamiento momentáneo:
j Pulse el interruptor CONEXIÓN / DESCO-
NEXIÓN
4
.
Desconectar el funcionamiento
momentáneo:
j Suelte el interruptor CONEXIÓN / DESCO-
NEXIÓN
4
.
Activar el funcionamiento continuo:
j Pulse el interruptor CONEXIÓN / DESCO-
NEXIÓN
bloquéelo con el botón de fijación
4
y, mientras sigue pulsado,
5
.
Desactivar el funcionamiento continuo:
j Pulse el interruptor CONEXIÓN / DESCO-
NEXIÓN
Q
Mantenimiento y limpieza
¡ADVERTENCIA!
4
y vuelva a soltarlo.
¡PELIGRO DE
LESIONES! Antes de efectuar trabajos en el
dispositivo, desenchúfelo siempre de la corriente.
j El aparato debe mantenerse siempre limpio,
seco y libre de aceite o grasas lubricantes.
j El interior del taladro percutor no debe entrar
en contacto con líquidos.
j Limpie regularmente el taladro, a ser posible,
inmediatamente después de finalizar el trabajo.
j Utilice un paño seco para limpiar el aparato.
Nunca utilice gasolina, disolventes o detergentes agresivos para el plástico.
j Limpie el alojamiento para herramientas
1
regularmente.
¡PRECAUCIÓN! ¡TENSIÓN PREVIA! Para
ello estire la tapa de bloqueo / desbloqueo
3
hacia atrás y, con una palanca, extraiga la
tapa de goma para proteger del polvo
Suelte la tapa de bloqueo / desbloquedo
2
.
3
lentamente.
j Limpie las piezas con un pincel y lubríquelas.
Q
Eliminación
El embalaje se compone de materiales
reciclables que puede desechar en los
puntos locales de recogida selectiva.
¡No tire las herramientas eléctri-
cas en la basura doméstica!
Según la Directiva europea 2002 / 96 / CE sobre
residuos de aparatos eléctricos y electrónicos y en
cumplimiento con el derecho nacional, las herramientas eléctricas usadas se tienen que separar y
reciclar sin dañar el medioambiente.
Para deshacerse de un aparato que ya no sirva
pregunte a las autoridades locales o municipales.
Q
Informaciones
Q
Asistencia
Consulte los puntos de atención al cliente de su
país en la documentación de la garantía.
¡ADVERTENCIA!
Haga reparar los
aparatos únicamente por personal
técnico cualificado y con repuestos
originales. Así se garantiza que el aparato
seguirá siendo seguro.
¡ADVERTENCIA!
Si es necesario cam-
biar el enchufe o el cable de alimenta-
ción, encargue este trabajo al fabricante
del aparato o a su servicio de atención
al cliente. Así se garantiza que el aparato
seguirá siendo seguro.
Page 12

Informaciones
Q
Declaración de conformidad /
Fabricante
Nós, Kompernaß GmbH, Burgstr. 21,
44867 Bochum, Alemania, declaramos que este
produto cumpre as seguintes directivas CE:
Directiva sobre maquinaria (98 / 37 / EG)
Directriz de baja tensión UE
(2006 / 95 / EG)
Compatibilidad electromagnética
(2004 / 108 / EG)
Tipo / denominación del producto:
Parkside Taladro percutor neumático con función
de cincelado PEBH 1010
Bochum, 30.04.2008
Hans Kompernaß
- Gerente -
Queda reservado el derecho a realizar modificaciones técnicas
para el perfeccionamiento del dispositivo.
14 ES
Page 13

15 IT/MT
Introduzione
Uso corretto ...............................................................................................................Pagina 16
Equipaggiamento ......................................................................................................Pagina 17
Fornitura .....................................................................................................................Pagina 17
Dati tecnici .................................................................................................................Pagina 17
Istruzioni di sicurezza generali per utensili elettrici
1. Sicurezza dell’area di lavoro ..............................................................................Pagina 18
2.
Sicurezza elettrica ................................................................................................Pagina 18
3. Sicurezza delle persone .......................................................................................Pagina 18
4. Utilizzo attento di dispositivi elettrici ...................................................................Pagina 19
Indicazioni di sicurezza per martelli perforatori .....................................................Pagina 19
Attenzione linee! .......................................................................................................Pagina 20
Accessori originali / apparecchi aggiuntivi .............................................................Pagina 20
Messa in esercizio
Montare la maniglia aggiuntiva...............................................................................Pagina 20
Finecorsa di profondità .............................................................................................Pagina 20
Inserire / sostituire gli attrezzi ...................................................................................Pagina 20
Portapunte veloce per punte con gambo cilindrico ................................................Pagina 21
Selezionare la funzione con Interruttore di selezione della funzione ....................Pagina 21
Selezionare la direzione della rotazione ................................................................Pagina 22
Selezionare il numero di giri ....................................................................................Pagina 22
Accensione e spegnimento .......................................................................................Pagina 22
Indice
Manutenzione e Pulizia ............................................................................Pagina 22
Smaltimento ........................................................................................................Pagina 23
Informazioni
Assistenza ..................................................................................................................Pagina 23
Dichiarazione di conformità / Produttore .................................................................Pagina 23
Page 14

Introduzione
In queste istruzioni d'uso / sull'apparecchio sono riportati i seguenti pittogrammi:
W
n
V
Leggere il manuale di istruzioni
per l’uso!
Rispettare le avvertenze e le
indicazioni per la sicurezza!
Attenzione, rischio di scossa elettrica!
Pericolo di morte!
Pericolo di esplosione!
Mandrino portapunta,
Made In Germany
Watt (potenza attiva) Regolare la posizione dello scalpello
Velocità a vuoto di misurazione
0
Volt (tensione alternata)
~
Tenere lontano i bambini dall’apparecchio elettrico!
Classe di protezione II
Interruttore per la selezione della
funzione dell‘apparecchio
Scalpellare
Perforazione a martello
Forare
Regolazione della posizione dello
scalpello
Indossare occhiali protettivi, protezioni
per l’udito, mascherina antipolvere e
guanti protettivi.
Proteggere l’apparecchio elettrico
dall’umidità!
Fare attenzione a che l’apparecchio,
il cavo di alimentazione e la spina
non siano danneggiati!
Smaltire l’imballaggio dell’apparecchio
in modo ecocompatibile!
Martello perforatore con
funzione di scalpello PEBH 1010
Q
Introduzione
Prima della prima messa in funzione
dovete sempre studiare bene le funzioni
dell’apparecchio e vi dovete informare
sull‘uso corretto delle attrezzature elettriche. Leggete
bene il seguente manuale d’uso. Conservate bene
questo manuale. In caso di cessione a terzi dell’apparecchio, dovete consegnare anche tutta la documentazione.
16 IT/MT
Q
Uso corretto
Il martello perforatore PEBH 1010 è adatto per
quanto segue:
- perforazioni a martello in teglie, calcestruzzo
e pietra naturale
- forare legno, plastica e metallo
- avvitare legno, plastica e metallo
- scalpellare calcestruzzo, pietra e stucco
Ogni altro uso oppure modifica dell’apparecchio
non è corretto e può causare seri pericoli di incidenti.
Il produttore non è responsabile per danni causati
dall’uso improprio.
L’apparecchio non è destinato all’utilizzo commerciale.
Page 15

17 IT/MT
Introduzione
Q
Equipaggiamento
1
Accoglimento attrezzi (Portapunta)
2
Tappo in gomma parapolvere
3
Coperchio di bloccaggio / sbloccaggio
4
Interruttore ON / OFF
5
Tasto di arretramento
6
Rotella per la selezione del numero di giri
7
Interruttore rotazione a destra / sinistra
8
Interruttore di selezione della funzione
9
Maniglia aggiuntiva
10
Fine corsa di profondità in metallo
Q
Fornitura
1 martello perforatore
1 maniglia aggiuntiva
1
portapunte veloce (13 mm)
con adattatore (vedi Fig. A)
3 punte (vedi Fig. B)
1 scalpello piatto (vedi Fig. B)
1 scalpello appuntito (vedi Fig. B)
1 fine corsa di profondità in metallo
1 scatola di grasso per la lubrificazione
1 valigetta
1 manuale d’uso
1 fascicolo “Garanzia e Assistenza”
Q
Dati tecnici
Assorbimento nominale: 1010 W
Tensione nominale: 230 V ~, 50 Hz
N° di giri a vuoto: n
0 - 1.100 / min
0
Frequenza dei colpi: 0 - 5.800 / min
Energia dei colpi: 2,2 Joule
Diametro di foratura: max. 13 mm per acciaio
max. 32 mm per legno
max. 26 mm
per calcestruzzo
max. 82 mm
con sega da traforo
Classe di protezione: II / &
Generalmente il valore di livello sonoro ponderato
A generato dall’apparecchio è di 99,6 dB (A).
Scostamento di K = 3 dB. Il valore di livello sonoro
nel corso di esecuzione di una lavorazione può
superare gli 112,6 dB (A).
Utilizzare strumenti di
protezione dell‘udito!
Valori complessivi di vibrazione (somma vettoriale
di tre direzioni) rilevata ai sensi delle disposizioni
di cui alla norma EN 60745:
Foratura a martello
in calcestruzzo: valore di emissione di oscillazioni
Scostamento K = 1,5 m / s
Scalpellatura: valore di emissione di oscillazioni
Scostamento K = 1,5 m / s
ATTENZIONE!
a
= 13,462 m / s2,
h
a
= 12,320 m / s2,
h
Il valore relativo al livello di
2
2
vibrazioni indicato nelle presenti istruzioni d’uso è
stato misurato in conformità alla procedura di misurazione esplicata nella norma EN 60745 e può
essere utilizzato per il confronto tra apparecchi.
Il livello di vibrazioni si modifica a seconda del tipo
di utilizzo dell’apparecchio elettrico, ed in alcuni
casi può essere superiore al valore indicato nelle
presenti istruzioni d’uso. Il carico di vibrazione
potrebbe essere sottostimato qualora l’apparecchio
elettrico fosse regolarmente utilizzato in tale modo.
Nota: Per una corretta valutazione dell’affaticamento
da vibrazioni durante un determinato periodo di
lavorazione devono essere considerati anche i tempi
in cui l’apparecchio è disinserito o è funzionante,
senza però essere utilizzato. Ciò può ridurre in
misura notevole l’affaticamento da vibrazioni lungo
il periodo di lavorazione complessivo.
PEBH 1010
~
50 Hz · 1010 W · n
230 V
Date of manufacture: 04-2008
KH 3162
Kompernaß GmbH · 44867 Bochum (Germany) · www.kompernass.com
1.100 min
0
-1
Informazioni per il rumore e le vibrazioni:
I valori di misurazione sono stati rilevati in conformità alle disposizioni della norma EN 60745.
Page 16

Istruzioni di sicurezza generali per utensili elettrici
Istruzioni di sicurezza generali per utensili elettrici
ATTENZIONE!
zioni e gli avvisi di sicurezza!
Eventuali mancanze nell’osservanza delle indicazioni e degli avvisi di sicurezza possono provocare una
scossa elettrica, un incendio e / o gravi lesioni.
CONSERVARE TUTTE LE INDICAZIONI E GLI
AVVISI DI SICUREZZA PER EVENTUALI NECESSITA’
FUTURE!
Leggere tutte le indica-
1. Sicurezza dell’area di lavoro
a) Mantenere l’area di lavoro pulita e
ben illuminata. Il disordine ed aree di lavoro
poco illuminate possono determinare incidenti.
b)
esplosiva, gas e polveri. Gli utensili elettrici
c)
In caso di distrazione potreste perdere il con-
Non lavorare con l’apparec-
chio in un’atmosfera dove si
trovino liquidi infiammabili,
generano scintille che possono infiammare la
polvere o i gas.
Durante l’utilizzo del disposi-
tivo elettrico tenere lontani
bambini e persone estranee.
trollo dell’apparecchio.
di tubi, caloriferi, cucine economiche
e frigoriferi. Sussiste un elevato rischio di
scossa elettrica, qualora il Vostro corpo fosse
messo a terra.
c)
apparecchio elettrico accresce il rischio di
d)
o per estrarre la spina dalla presa elet-
e) In caso di lavori all’aperto utilizzare
f) Qualora non si possa evitare l‘eserci-
Mantenere l’apparecchio lon-
tano da pioggia o umidità. La
penetrazione di acqua in un
scossa elettrica.
Non utilizzare il cavo in modo
non conforme, cioè per tirare
l’apparecchio, per appenderlo
trica. Tenere il cavo lontano da calore,
olio, spigoli acuti o di parti in movimento
dell’apparecchio. Cavi danneggiati o attor-
cigliati accrescono il rischio di scossa elettrica.
solamente prolunghe ammesse anche
per un loro utilizzo all‘aperto. L’utilizzo
di una tale prolunga riduce il rischio di scossa
elettrica.
zio dell’elettroutensile in un ambiente
umido, fare uso di un interruttore
differenziale, circostanza che riduce il
rischio di una scossa elettrica.
3. Sicurezza delle persone
2. Sicurezza elettrica
Evitare il pericolo di morte
a seguito di scossa elettrica:
a) La spina di connessione dell’apparec-
chio deve essere adatta alla presa elettrica nella quale essa viene inserita.
In nessun caso l’adattatore deve
essere modificato. Non utilizzare
spine con apparecchi messi a terra.
Spine non modificate e prese adatte riducono
il rischio di una scossa elettrica.
b)
Evitare il contatto del corpo con superfici
messe a terra, quali ad esempio quelle
18 IT/MT
a) Fare sempre estrema attenzione a ciò
che si fa e accostarsi al lavoro con il
dispositivo elettrico sempre in modo
cosciente. Non utilizzare l’apparecchio
quando si è stanchi o sotto l’influsso
di droghe, alcol o medicinali. Un solo at-
timo di disattenzione nell’utilizzo dell’apparecchio può provocare serie lesioni.
b)
Indossando l’equipaggiamento di protezione
Indossare sempre l’equipag-
giamento di protezione personale e gli occhiali protettivi.
personale, quale una mascherina antipolvere,
scarpe di sicurezza antisdrucciolevoli, un casco di protezione o una protezione auricolare,
a seconda del tipo e dell’utilizzo dell’apparecchiatura elettrica, riduce il rischio di lesioni.
Page 17

19 IT/MT
Istruzioni di sicurezza generali per utensili elettrici
c) Evitare qualsiasi avvio involontario
dell’utensile. Assicurarsi che l’utensile
sia disinserito prima di collegarlo alla
rete di alimentazione elettrica, di sollevarlo o di trasportarlo. Se
durante il trasporto dell’apparecchio il dito
dell’utilizzatore si trova sull’interruttore
ON / OFF oppure l’apparecchio è inserito,
possono determinarsi incidenti.
d) Prima di avviare l’apparecchio,
rimuovere il dispositivo di regolazione
o la chiave per dadi. Un utensile o una
chiave che si trovi in una parte di apparecchio
in rotazione può provocare lesioni.
e) Mantenere una postura del corpo nor-
male. Assicurarsi di avere un
sostegno sicuro e mantenere sempre
l’equilibrio. In questo modo è possibile con-
trollare meglio l’apparecchio, in modo particolare in caso di situazioni impreviste.
f) Indossare un abbigliamento appro-
priato. Non indossare un abbigliamento largo o bigiotteria. Mantenere
capelli, abbigliamento e guanti lontano da parti in movimento. Abbigliamen-
to sciolto, gioielli o capelli lunghi possono essere trascinati da parti in movimento.
g) Quando vengono montati dispositivi
di aspirazione e di cattura della polvere, assicurarsi che questi siano stati
montati ed utilizzati correttamente.
L’utilizzo di questi dispositivi riduce i pericoli
provocati dalla polvere.
4. Utilizzo attento
di dispositivi elettrici
a) Non sovraccaricare l’apparecchio. Per
un determinato lavoro utilizzare sempre il dispositivo elettrico a ciò appropriato. Con il dispositivo elettrico appropriato
si lavora meglio e con maggiore sicurezza nello
specifico ambito di utilizzo.
b) Non utilizzare dispositivi elettrici il cui
interruttore sia difettoso. Un dispositivo
elettrico che non si può più accendere e spegnere
rappresenta un pericolo, e deve essere riparato.
c) Estrarre la spina dalla presa elettrica
prima di eseguire regolazioni
all‘apparecchio, sostituire accessori o
riporre l‘apparecchio. Queste misure di
prudenza impediscono l’avvio involontario
dell’apparecchio.
d) Mantenere dispositivi elettrici non uti-
lizzati fuori dalla portata di bambini.
Non fare utilizzare l’apparecchio da
persone che non lo conoscano o del
quale non abbiano letto le istruzioni
d’uso. I dispositivi elettrici sono pericolosi se
utilizzati da persone inesperte.
e) Avere cura dell’apparecchio. Control-
lare se parti mobili dell’apparecchio
funzionano perfettamente e non si
bloccano, se parti di esso sono rotte o
danneggiate, che la funzionalità
dell’apparecchio non sia messa a
rischio. Fare riparare le parti danneggiate prima di utilizzare di nuovo l’apparecchio. Molti incidenti sono provocati
dal fatto che i dispositivi elettrici non vengono
sottoposti ad una corretta manutenzione.
f) Mantenere gli utensili di taglio affilati
e puliti. Utensili di taglio curati con attenzione
e fornitidi bordi taglienti si incastrano meno frequentemente e sono semplici da guidare
durante il lavoro.
g) Utilizzare dispositivi elettrici, accesso-
ri, i dispositivi da inserire ecc, in conformità alle presenti istruzioni e nel
modo descritto per questo particolare tipologia di apparecchio. In questo
senso, tenere presente le
condizioni di lavoro e l’attività da eseguire. L’utilizzo di dispositivi elettrici per scopi
diversi da quelli previsti può provocare
situazioni di pericolo.
Indicazioni di sicurezza
per martelli perforatori
J Portare cuffie di protezione.
Il rumore può provocare perdite
all‘udito.
Page 18

Istruzioni di sicurezza generali per utensili elettrici / Messa in esercizio
J Utilizzare la maniglia aggiuntiva 9
fornita con l‘apparecchio. La perdita di
controllo può provocare lesioni.
J Disinserire immediatamente l’appa-
recchio qualora la punta si bloccasse.
L’utilizzatore deve essere preparato ad elevate
coppie di reazione che provocano contraccolpi.
J Per garantire un utilizzo sicuro da
parte dell’utilizzatore, il martello perforatore PEBH 1010 è fornito di un innesto di sicurezza, il quale fa in modo
che l’azionamento venga automaticamente interrotto qualora l’attrezzo di
foratura dovesse incastrarsi. E’ tuttavia
necessario che l’utilizzatore assuma una postura
di sicurezza e tenga il martello perforatore
bene con entrambe le mani e lo utilizzi sempre
con la maniglia aggiuntiva
J
Indossare occhiali protettivi e
9
.
una mascherina antipolvere!
POLVERI VELENOSE! La lavorazione che
genera polveri dannose / velenose rappresenta
un pericolo per la salute dell’utilizzatore o delle
persone che si trovano nelle vicinanze.
J Non lavorare materiale contenente
asbesto, giacché tale materiale è considerato cancerogeno.
J Assicurarsi che le aperture di ventilazione non
siano coperte durante la lavorazione. Non inserire alcun oggetto in tali aperture.
consigliati o da altri accessori indicati nel manuale
di istruzioni può comportare il pericolo di lesioni.
Q
Messa in esercizio
Osservate la tensione di rete! La tensione
deve corrispondere alle indicazioni sulla targhetta
dell’apparecchio (apparecchi con l’indicazione di
230 V possono essere collegati anche a 220 V).
Q
Montare la maniglia aggiuntiva
Nota: Per ragioni di sicurezza l’apparecchio deve
essere usato solo con maniglia aggiuntiva
9
mon-
tata (vedi anche Fig. D, E).
j Inserite la maniglia aggiuntiva
9
sul collo
del mandrino e serratela, ruotandola in senso
antiorario.
Q
Finecorsa di profondità
j Inserire il finecorsa di profondità 10 nella
maniglia aggiuntiva
9
.
j Scegliere la profondità desiderata spostando il
finecorsa di profondità
10
.
Q
Attenzione linee!
ATTENZIONE!
Accertarsi di non intercettare linee di corrente, condutture di gas
o acqua, mentre si lavora con un elettroutensile. Controllare eventualmente con un rilevatore
di linee, prima di perforare o fendere una parete.
Q
Accessori originali /
apparecchi aggiuntivi
J Utilizzare solo accessori e apparecchi
aggiuntivi indicati nel manuale di
istruzioni. L’uso di apparecchi diversi da quelli
20 IT/MT
Q
Inserire / sostituire gli attrezzi
Inerire l’attrezzo:
j Ingrassate leggermente l’accoglimento
dell’attrezzo
, prima di inserire l’attrezzo.
1
j Tirate per questo il coperchio di bloccaggio /
bloccaggio
3
all’indietro ed inserite l’attrezzo.
j Rilasciate il coperchio di bloccaggio / bloccag-
3
gio
. In questo modo di blocca l’accoglimento.
Tirando l’attrezzo, si controlla il bloccaggio
corretto. L’attrezzo possiede un gioco radiale.
Togliere l’attrezzo:
j Tirate il coperchio di bloccaggio / bloccaggio
3
all’indietro, per togliere l’attrezzo.
Page 19

21 IT/MT
Messa in esercizio
Q
-portapunte veloce per
punte con gambo cilindrico
ATTENZIONE!
gambo cilindrico assieme alla funzione di perforatore a martello oppure scalpello!
j Porre il selettore di funzioni
perforatore
Inserire il portapunte veloce RÖHM per
punte a gambo cilindrico:
j Tirate per questo il coperchio di bloccaggio /
bloccaggio
per punte a gambo cilindrico (vedi anche Fig. A).
j Rilasciate il coperchio di bloccaggio / bloccag-
3
gio
. In questo modo di blocca l’accoglimento.
Tirando l’attrezzo, si controlla il bloccaggio
corretto.
Togliere il portapunte veloce RÖHM per
punte a gambo cilindrico:
j Tirate il coperchio di bloccaggio / bloccaggio
all’indietro, per togliere il portapunte aggiuntivo.
Inserire l’attrezzo:
ATTENZIONE!
ELETTRICHE! Prima di ogni lavoro sull’apparecchio
assicuratevi, che l’apparecchio è spento e che la
spina è stata tolta.
Non usate il trapano con
8
sul simbolo del
.
3
all’indietro ed inserite il portapunte
PERICOLO DI SCARICHE
3
j Sbloccate nuovamente il bloccaggio, ruotando
la boccola anteriore nell’altra direzione.
Utilizzo di attrezzi avvitatori:
j Usate un portamandrino adatto, quando volete
inserire degli inserti / bit per avvitare.
j Usate solamente inserti / bit, che sono adatti al
portamandrino.
j
Portate l’interruttore di selezione della funzione 8
s
ul simbolo del trapano .
Q
Selezionare la funzione
con Interruttore di selezione
della funzione
Nota: Cambiate solamente la funzione
ad apparecchio spento, altrimenti l’ap-
parecchio potrebbe venire danneggiato.
A seconda il campo d’utilizzo, potete scegliere tra
quattro funzioni, ruotando l’interruttore per la selezione della funzione
j Ruotate l’interruttore per la selezione della
funzione
si incastra alla marcatura della freccia.
La funzione è descritta come segue:
Funzione Simbolo
8
.
8
in modo che il simbolo desiderato
Il portapunte veloce RÖHM vi permette un veloce
cambio degli attrezzi senza altri attrezzi ausiliari.
Sbloccare l’accoglimento dell’attrezzo
ed inserire l’attrezzo:
j Tenete ferma la boccola del portapunte veloce
e ruotate la boccola anteriore, fino a quando è
possibile inserire l’attrezzo (p.es. punta con
gambo cilindrico).
j Inserite l’attrezzo.
Serrate l’attrezzo:
j Tenete ferma la boccola posteriore del porta-
punte veloce e ruotate la boccola anteriore
fino a quando si sente “click – clack, clack
clack”. Adesso il portapunte è serrato.
Forare / avvitare
Perforazione a
martello
Scalpellare
Spostamento
della posizione
dello scalpello
Page 20

Messa in esercizio / Manutenzione e Pulizia
Spostamento della posizione dello
scalpello:
Questa funzione permette una
semplificazione del lavoro, grazie
alla regolazione della posizione
angolare dello scalpello. Vi per-
mette di ruotare l’attrezzo per
scalpellare (vedi anche Fig. C, D) nella posizione
necessaria.
j Ruotate l’interruttore per la selezione della
funzione
j Ruotate l’attrezzo nell’accoglimento
8
nella posizione .
1
nella
posizione desiderata.
j Ruotate l’interruttore per la selezione della
funzione
Q
Selezionare la direzione
8
nella posizione .
della rotazione
Selezionare il senso di rotazione regolando l’interruttore di corsa destra / sinistra
ATTENZIONE!
L’utilizzo / la regolazione
dell’interruttore di corsa destra / sinistra
avvenire solamente con apparecchio completamente
fermo.
7
.
7
può
Numero di giri basso / alto:
j Rotate la rotella per la selezione del numero
6
di giri
L’interruttore ON / OFF
.
4
dispone di una regola-
zione variabile della velocità.
j Premeno l’interruttore, il numero di giri aumenta
in modo continuo.
Q
Accensione e spegnimento
Potete scegliere tra esercizio momentaneo e continuo.
Per lavori brevi si utilizza l’esercizio momentaneo
e per lavori lunghi l’esercizio continuo. L’utilizzo
dell’impostazione desiderata avviene come segue:
Accensione esercizio momentaneo:
j Premete l’interruttore ON / OFF
4
.
Spegnimento esercizio momentaneo:
j Rilasciate l’interruttore ON / OFF
4
.
Accendere l’esercizio continuo:
j Premete l’interruttore ON / OFF
quando premuto, con il tasto di arretramento
4
e serratelo,
5
.
Q
Selezionare il numero di giri
Con la rotella per la selezione del numero di giri 6,
potete selezionare individualmente il numero di giri.
Selezionando un numero di giri basso, l’interruttore
ON / OFF
4
può essere premuto automaticamente
solo in modo limitato (dovuto al numero di giri ridotto).
I campi consigliati dei numeri di giri:
(non vincolanti, rilevate voi stessi la giusta impostazione con un test pratico):
- Alto numero di giri: Per perforare a martello in
calcestruzzo oppure pietra, per scalpellare
- Numero di giri medio: Per perforare acciaio o
legno
- Numero di giri basso: Per avvitare
22 IT/MT
Spegnimento esercizio continuo:
j Premete l’interruttore ON / OFF
Q
Manutenzione e Pulizia
4
e rilasciatelo.
ATTENZIONE!
PERICOLO DI SCARICHE
ELETTRICHE! Prima di eseguire qualsiasi intervento
sull’apparecchio estrarre la spina dalla presa.
j L’apparecchio deve essere sempre pulito,
asciutto e sgrassato.
j Non devono giungere liquidi all’interno del
perforatore a martello.
j Pulite periodicamente il perforatore a martello,
possibilmente subito dopo ogni lavoro.
j Usate un panno asciutto per pulire il carter.
Non usate mai benzina, solventi oppure detergenti che potrebbero danneggiare la plastica.
Page 21

23 IT/MT
Manutenzione e Pulizia / Smaltimento / Informazioni
j Pulite periodicamente l’accoglimento degli
attrezzi
1
.
ATTENZIONE! TENSIONE DI POLARIZZAZIONE! Tirate per questo il coperchio di
bloccaggio / bloccaggio
vate il coperchio in gomma parapolvere
3
all’indietro e solle-
2
.
Rilasciate lentamente il coperchio di bloccaggio /
bloccaggio
3
.
j Pulite il pezzi costruttivi con un pennello ed
ingrassateli.
Q
Smaltimento
L’imballaggio è composto da materiali
ecologici, che possono essere smaltiti
presso i siti di riciclaggio locali.
Non gettare gli utensili elettrici
nei rifiuti domestici!
In conformità alla direttiva europea 2002 / 96 / EG
sui rifiuti di apparecchiature elettriche ed elettroniche
e relativa trasposizione nel diritto nazionale, gli
utensili elettrici usati devono essere raccolti separatamente e riciclati in maniera compatibile con
l’ambiente.
Informazioni sulle possibilità di smaltimento di apparecchi giunti al termine della loro vita utile sono
disponibili presso le amministrazioni comunali.
essere eseguita esclusivamente dal
fabbricante dell’apparecchio o dal
relativo servizio clienti, a garanzia della sicu-
rezza dell’apparecchio.
Q
Dichiarazione di conformità /
Produttore
Noi, la Kompernaß GmbH, Burgstr. 21,
44867 Bochum, Germania, dichiariamo la
conformità di questo prodotto con le seguenti
normative europee:
Normativa per le macchine (98 / 37 / EG)
Normativa CE per bassa tensione
(2006 / 95 / EG)
Compatibilità elettromagnetica
(2004 / 108 / EG)
Tipo / Descrizione del prodotto:
Parkside Martello perforatore con funzione di
scalpello PEBH 1010
Bochum, 30.04.2008
Q
Informazioni
Q
Assistenza
Il centro di assistenza competente per ciascun paese
è indicato nei documenti di garanzia.
ATTENZIONE!
Affidare la riparazione
dell’apparecchio esclusivamente a
personale specializzato e qualificato e
con pezzi di ricambio originali, a garan-
zia della sicurezza dell’apparecchio.
ATTENZIONE!
La sostituzione della
spina o del cavo di alimentazione deve
Hans Kompernaß
- Amministratore -
Sono riservate modifiche tecniche per lo sviluppo dell’apparecchio.
Page 22

24
Page 23

25 GB/MT
Table of content
Introduction
Intended Use .............................................................................................................. Page 26
Equipment ...................................................................................................................Page 27
Scope of Delivery.......................................................................................................Page 27
Technical Information .................................................................................................Page 27
General safety advice for electrical power tools
1. Workplace safety ..................................................................................................Page 28
2. Electrical safety ......................................................................................................Page 28
3. Personal safety .......................................................................................................Page 28
4. Careful handling and use of electrical power tools ............................................Page 29
Safety advice for hammer drill ..................................................................................Page 29
Attention! Service lines! .............................................................................................Page 30
Original ancillaries / accessories ..............................................................................Page 30
Preparing for use
Assembling the Additional Handgrip........................................................................Page 30
Depth stop .................................................................................................................. Page 30
Inserting / Removing Tools .........................................................................................Page 30
Quick action chuck for round-shank drills .................................................................Page 30
Selecting the Function with the Function Selector Switch ........................................Page 31
Selecting the Angle of Rotation .................................................................................Page 32
Pre-selecting the Speed ..............................................................................................Page 32
Switching ON / OFF ..................................................................................................Page 32
Maintenance and Cleaning .....................................................................Page 32
Disposal ...................................................................................................................Page 32
Information
Service centre ............................................................................................................Page 33
Declaration of conformity / Producer ........................................................................Page 33
Page 24

Introduction
The following pictograms are used in these operating instructions / on the device:
Read instruction manual! Device function selector switch
Observe caution and safety notes!
Caution – electric shock!
Danger to life!
Explosive material!
Drill chuck, Made In Germany Chisel position adjuster
W
n
V
Watts (Effective power) Adjusting the chisel position
Rated idle running speed
0
Voltage
~
Keep children away from electrical
power tools!
Safety class II
Pneumatic hammer drill with
chiselling action PEBH 1010
Q
Introduction
Please make sure you familiarise yourself
fully with the way the device works before
you use it for the first time and that you
understand how to handle electrical power tools
correctly. Further details can be found in the operating
instructions. Keep these instructions in a safe place.
If you pass the device on to anyone else, please
ensure that you also pass on all the documentation.
Q
Intended Use
The PEBH 1010 hammer drill is suitable for:
- hammer drilling in bricks, concrete and
- drilling in wood, plastic and metal
- screwing in wood, plastic and metal
- chiselling in concrete, stone and plaster
Any other use of or changes to the device is considered to be inappropriate and harbours a considerable danger of accidents.
The manufacturer does not accept liability for damage
or losses occurring as a result of the device being
used for purposes other than those stated above.
The device is not intended for commercial use.
Chiselling
Hammer drilling
Drilling
Wear hearing protection, dust
protection mask, protective glasses
and protective gloves.
Protect electrical power tools from
moisture!
Check that the device, mains lead
and plug are in good condition!
Dispose packaging and appliance in
an environmentally-friendly way!
natural stone
26 GB/MT
Page 25

27 GB/MT
Introduction
Q
Equipment
1
Tool holder (drill chuck)
2
Rubber dust protection cap
3
Locking / unlocking cap
4
ON / OFF switch
5
Locking button
6
Wheel for speed pre-selection
7
Clockwise / counter-clockwise switch
8
Function selector switch
9
Additional handgrip
10
Metal bit stop
Q
Scope of Delivery
1 Hammer drill
1 Additional handgrip
1
quick-action drill chuck
(13 mm) with adapter (see Fig. A)
3 Drills (see Fig. B)
1 Flat chisel (see Fig. B)
1 Pointed chisel (see Fig. B)
1 Metal bit stop
1 Tin of lubricating grease
1 Carrying case
1 Operating instructions
1 „Guarantee and Service“ booklet
The sound pressure level (A-weighted) of the
device is typically 99,6 dB (A). Uncertainty K = 3 dB.
The sound level while working can exceed
112,6 dB (A).
Wear ear protection!
The total vibration (vector sum of three directions) is
calculated in accordance with EN 60745:
Hammer drilling
in concrete: Vibration emission value
Uncertainty K = 1.5 m / s
Chiselling: Vibration emission value
Uncertainty K = 1.5 m / s
WARNING!
a
= 13.462 m / s2,
h
a
= 12.320 m / s2,
h
The vibration level given in these
2
2
instructions has been measured in accordance with
a standardised measurement procedure specified
in EN 60745 and can be used to compare devices.
Different uses of the device give rise to different vibration levels and in many cases they may exceed the
values given in these instructions. It is easy to underestimate the vibration load if the electrical power tool is
used regularly in particular circumstances.
Q
Technical Information
Rated power
consumption: 1010 W
Rated voltage: 230 V ~, 50 Hz
Idle-running speed: n
0 - 1.100 / min
0
Impact frequency: 0 - 5.800 / min
Impact energy: 2.2 joules
Drill hole diameter: max. 13 mm for steel
max. 32 mm for wood
max. 26 mm for concrete
max. 82 mm
with compass saw
Protection class: II / &
Noise and vibration data:
Values determined in accordance with EN 60745.
Note: If you wish to make an accurate assessment
of the vibration loads experienced during a particular period of working, you should also take into
account the intervening periods of time when the
device is switched off or is running but is not actually in use. This can result in a much lower vibration
load over the whole of the period of working.
PEBH 1010
~
50 Hz · 1010 W · n
230 V
Date of manufacture: 04-2008
KH 3162
Kompernaß GmbH · 44867 Bochum (Germany) · www.kompernass.com
1.100 min
0
-1
Page 26

General safety advice for electrical power tools
General safety advice for
electrical power tools
WARNING!
and instructions!
Failure to observe the safety advice and instructions
may result in electric shock, fire and / or serious injury.
KEEP ALL THE SAFETY ADVICE AND INSTRUCTIONS
IN A SAFE PLACE FOR FUTURE REFERENCE!
Read all the safety advice
1. Workplace safety
a) Keep your working area clean and
well lit. Untidy or poorly lit working areas
can lead to accidents.
b)
are inflammable liquids, gases or
c)
Distractions can cause you to lose control of
Do not work with the device
in potentially explosive environments in which there
dusts. Electrical power tools create sparks,
which can ignite dusts or fumes.
Keep children and other peo-
ple away while you are operating the electrical tool.
the device.
2. Electrical safety
To avoid danger to life from
electric shock:
a)
The mains plug on the device must match
the mains socket. The plug must not
be modified in any way. Do not use
an adapter plug with devices fitted
with a protective earth. Unmodified
plugs and matching sockets reduce the risk of
electric shock.
b) Avoid touching earthed surfaces such
as pipes, radiators, ovens and refrigerators with any part of your body.
There is an increased risk of electric shock if
your body is earthed
.
c) Keep the device away from
rain or moisture. Water entering
an electrical device increases the
risk of electric shock.
d)
device, to hang up the device or to pull
e) When working outdoors with an
f) Use a residual current device (RCD)
Do not use the mains lead for
any purpose for which it was
not intended, e.g. to carry the
the mains plug out of the mains socket.
Keep the mains lead away from heat,
oil, sharp edges or moving parts of the
device. Damaged or tangled mains leads
increase the risk of electric shock.
electrical power tool always use extension cables that are also approved
for use outdoors. The use of an extension
cable suitable for outdoor use reduces the risk
of electric shock.
for protection if operating the electrical power tool in a moist environment
is unavoidable. The use of an RCD reduces
the risk of electric shock.
3. Personal safety
a) Remain alert at all times, watch what
you are doing and always proceed
with caution. Do not use the device if
you are tired or under the influence of
drugs, alcohol or medication. One mo-
ment of carelessness when using the device
can lead to serious injury.
b)
personal protective equipment such as dust
c) Avoid unintentional operation of the
Wear personal protective
equipment and always wear
safety glasses. The wearing of
masks, non-slip safety shoes, safety helmets or
ear protectors, appropriate to the type of electrical power tool used and work undertaken,
reduces the risk of injury.
device. Check that the electrical power
tool is switched off before you connect
it to the mains, pick it up or carry it.
28 GB/MT
Page 27

29 GB/MT
General safety advice for electrical power tools
Accidents can happen if you carry the device
with your finger on the ON / OFF switch or with
the device switched on.
d) Remove any setting tools or spanners
before you switch the device on. A tool
or spanner left attached to a rotating part of a
device can lead to injury.
e) Avoid placing your body in an unnat-
ural position. Keep proper footing
and balance at all times. By doing this
you will be in a better position to control the
device in unforeseen circumstances.
f) Wear suitable clothing. Do not wear
loose clothing or jewellery. Keep your
hair, clothing and gloves clear of moving parts. Loose clothing, jewellery or long
hair can become trapped in moving parts.
g) If vacuum dust extraction and collection
devices are fitted do not forget to
that they are properly connected
correctly used. The use of these devices re-
duces the hazard presented by dust.
check
and
4. Careful handling and use of
electrical power tools
a) Do not overload the device. Always
use an electrical power tool that is
intended for the task you are undertaking. By using the right electrical power
tool for the job you will work more safely and
achieve a better result.
b) Do not use an electrical power tool if
its switch is defective. An electrical power
tool that can no longer be switched on and off
is dangerous and must be repaired.
c) Pull the mains plug from the socket
before you make any adjustments to
the device, change accessories or
when the device is put away. This pre-
caution is intended to prevent you from unintentionally starting the device.
d) When not in use always ensure that
electrical power tools are kept out of
reach of children. Do not let anyone
use the device if he or she is not famil-
iar with it or has not read the instructions and advice. Electrical power tools are
dangerous when they are used by inexperienced people.
e) Look after the device carefully. Check
that moving parts are working properly and move freely. Check for any
parts that are broken or damaged
enough to detrimentally affect the
functioning of the device. Have damaged parts repaired before you use
the device. Many accidents have their origins
in poorly maintained electrical power tools.
f) Keep cutting tools clean and sharp.
Carefully maintained cutting tools with sharp
cutting edges are less likely to jam and are
easier to control.
g) Use the electrical power tool, accesso-
ries, inserted tools etc. in accordance
with these instructions and advice,
and the stipulations drawn up for this
particular type of device. In doing
this, take into account the working
conditions and the task in hand. The
use of electrical power tools for purposes other
than those intended can lead to dangerous
situations.
Safety advice
for hammer drill
J Wear ear protection. The effect
of noise can cause hearing loss.
J Use the auxiliary handle
with the device. Loss of control can lead to
injury.
J If the inserted tool jams, switch off the
electrical power tool immediately. Be
prepared for high reaction torques as they may
cause kickback.
J For your safety, the hammer drill
PEBH 1010 has been fitted with an
overload clutch. This ensures that the drive
is automatically disengaged if the drill bit jams.
Nevertheless, you must always keep proper
9
supplied
Page 28

General safety advice for electrical power tools / Preparing for use
footing and balance, hold the hammer drill
firmly with both hands and use the auxiliary
9
handle
J
.
Wear safety glasses and a
dust mask! POISONOUS
DUSTS! Working with harmful / noxious dusts
represents a risk to the health of the person operating the device and to anyone near the
working area.
J Do not drill any material containing
asbestos. Asbestos is a known carcinogen.
J Do not allow the ventilation slots to become
covered while the device is operating. Do not
insert any objects into the ventilation slots.
Q
Attention! Service lines!
WARNING!
Take steps to ensure that
you do not hit upon any service lines
(electricity, gas, water) when working
with electrical appliances. Check, if need be
with a service line detector, before you start to cut
or bore into a surface.
Q
Original ancillaries / accessories
J Use only the ancillaries and accessories
that are detailed in the operating instructions. The use of ancillaries and acces-
sories other than those recommended in the
operating instructions could lead to an increased
risk of personal injury for you.
Q
Assembling the Additional
Handgrip
Note: For safety reasons this device may only be
used when the additional handgrip
assembled (see also Fig. D, E).
j Attach the additional handgrip
neck and turn it in an anticlockwise direction
until it is tight.
Q
Depth stop
j Setting the depth stop 10 in the auxiliary han-
9
dle
.
j Set the required drilling depth by sliding the
depth stop
Q
Inserting / Removing Tools
10
.
Inserting a Tool:
j Before inserting the tool, apply a small amount
of grease to the tool holder
j In order to insert the tool, pull the locking / un-
locking cap
3
to the rear and insert the tool.
j Release the locking / unlocking cap
locks the tool holder in place. Pull the tool to
ensure that it is firmly locked in place. The tool
has some radial play inherent in the system.
Removing a Tool:
j In order to remove the tool, pull the locking /
unlocking cap
3
to the rear.
9
is correctly
9
to the spindle
1
.
3
. This
Q
Preparing for use
Note the mains voltage! The voltage of the
mains socket must match that shown on the rating
plate on the device (Devices marked with 230 V~
can also be operated at 220 V~).
30 GB/MT
Q
quick action chuck
for round-shank drills
WARNING!
for hammer drilling or chiselling work!
j Set the function selector switch
symbol
Do not use the round-shank drill
8
.
to the drill
Page 29

31 GB/MT
Preparing for use
Inserting the RÖHM Quick-Action Drill
Chuck for Round-Shank Drills:
j To insert the additional drill chuck for round-
shank drills (see also Fig. A), pull the locking /
unlocking cap
3
towards the rear and insert
the additional drill chuck.
j Release the locking / unlocking cap
3
. This
locks the tool holder in place. Pull the tool to
ensure that it is firmly locked in place.
Removing the RÖHM Quick-Action Drill
Chuck for Round-Shank Drills:
j In order to remove the additional drill chuck,
pull the locking / unlocking cap
3
towards the
rear and take out the additional drill chuck.
Inserting Tools:
WARNING!
DANGER OF INJURY! Before
making any modifications to the device ensure that
it is switched off and that the mains plug has been
removed from the socket.
The RÖHM quick-action drill chuck allows you to
change the tool quickly without any additional
implements.
Releasing the tool holder and inserting
a tool:
j Hold the rear sleeve of the quick-action drill
chuck tightly and turn the front sleeve until it is
wide enough for the tool (e.g. round-shank
drill) to be inserted.
j Then insert the tool.
Clamping the Tool:
j Hold the rear sleeve of the quick-action drill
chuck tightly and turn the front sleeve forcefully
until you hear a repeated clicking noise. The
drill chuck is now locked in place.
j The lock can be released again by turning the
front sleeve in the opposite direction.
Using Assembly Tools for Screws and Nuts:
j Use an appropriate bit holder if you would like
to use screwdriver inserts / bits for screwing.
j You should only use inserts / bits which fit the
screw head.
j Turn the function selector switch
symbol
Q
Selecting the Function with the
.
8
to the drill
Function Selector Switch
Note: The function must only be changed
when the device is switched off, as oth-
erwise it may be damaged. Depending
on the intended use, you can select between four
functions by turning the function selector switch
j Turn the function selector switch
8
so that the
desired symbol locks into place next to the
arrow mark.
The functions are marked as follows:
Function Symbol
Drilling / screwing
Hammer drilling
Chiselling
Chisel position
adjustment
Adjusting the Chisel Position:
This function makes chiselling work
considerably easier by the setting of
individual angle positions for the
chisel. This enables you to turn the
tool for the chiselling work (see
also Fig. C, D) to the required position.
j Turn the function selector switch
position
.
j Turn the tool in the tool holder
8
to the
1
to the re-
quired position.
j For the chiselling work turn the function selector
8
switch
to the position .
8
.
Page 30

Preparing for use / Maintenance and Cleaning / Disposal
Q
Selecting the Angle of Rotation
Select the direction of rotation by setting the rotation
direction switch
WARNING!
direction switch
standstill.
Q
Pre-selecting the Speed
7
.
Do not use or set the rotation
7
unless the device has come to a
Switching off temporary operation:
j Release the ON / OFF switch
Switching on permanent operation:
j Press the ON / OFF switch
on position by means of the locking button
Switching off permanent operation:
j Press the ON / OFF switch
again.
4
.
4
and lock it in the
4
and release it
5
.
With the wheel on the speed pre-selector 6 you
can pre-select the operating speed to your individual requirements.
If a low speed has been pre-selected, the ON / OFF
4
switch
is automatically restricted in the extent to
which it can be pulled back (due to the reduced
speed of rotation).
Recommended speed ranges:
(non-binding; if necessary, you should determine
the correct setting by a practical test):
- High-speed: for hammer drilling in concrete or
stone and for chiselling
- Medium speed: for drilling into steel or wood
- Low speed: for screwing
Low speed / high speed:
j Turn the wheel for speed pre-selection
The ON / OFF switch
4
has a variable speed
6
.
control.
j By pressing the switch you can increase the
speed continuously.
Q
Switching ON / OFF
Q
Maintenance and Cleaning
WARNING!
DANGER OF INJURY!
Always pull the mains plug out of the socket before
doing any work on the device.
j Always keep the device clean, dry and free of
oil or grease.
j No liquids must be allowed to enter the hammer
drill.
j Clean the hammer drill regularly, preferably
always immediately after finishing your work.
j Please use a dry cloth for cleaning the housing.
Under no circumstances should you use petrol,
solvent or cleaning agents which might attack
the plastic.
j Clean the tool holder
1
regularly.
CAUTION! UNDER TENSION! To do so,
pull the locking / unlocking cap
3
towards the
rear and lever off the rubber dust protection
2
cap
. Release the locking / unlocking cap 3
slowly.
j Clean the components with a brush and apply
a small amount of grease to them.
When operating the hammer drill you can choose
between temporary and permanent operation. Use
the temporary operation for small jobs and permanent operation for long jobs. Your desired setting is
operated as follows:
Switching on temporary operation:
j Press the ON / OFF switch
32 GB/MT
4
.
Q
Disposal
The packaging is wholly composed of
environmentally-friendly materials that can
be disposed of at a local recycling centre.
Do not dispose of electrical
power tools with the household
rubbish!
Page 31

33 GB/MT
Disposal / Information
In accordance with European Directive
2002 / 96 / EC (covering waste electrical and electronic equipment) and its transposition into national
legislation, worn out electrical power tools must be
collected separately and taken for environmentally
compatible recycling.
Contact your local refuse disposal authority for
more details of how to dispose of your worn out
electrical devices.
Q
Information
Q
Service centre
The service centre for your country is shown in the
warranty documentation.
WARNING!
Have your device repaired
only by qualified specialist personnel
using original manufacturer parts only.
This will ensure that your device remains safe
to use.
WARNING!
If the plug or mains lead
needs to be replaced, always have the
replacement carried out by the manufacturer or its service centre. This will
ensure that your device remains safe to use.
Q
Declaration of conformity /
Producer
We, Kompernaß GmbH, Burgstr. 21,
44867 Bochum, Germany, hereby declare that this
product complies with the following EU directives:
Machinery Directive (98 / 37 / EG)
EU Low Voltage Directive (2006 / 95 / EG)
Electromagnetic Compatibility
(2004 / 108 / EG)
Type / Description of product:
Parkside Pneumatic hammer drill with chiselling
action PEBH 1010
Bochum, 30.04.2008
Hans Kompernaß
- Managing Director -
We reserve the right to make technical modifications in the course
of further development.
Page 32

34
Page 33

35 DE/AT
Inhaltsverzeichnis
Einleitung
Bestimmungsgemäßer Gebrauch ............................................................................... Seite 36
Ausstattung .................................................................................................................. Seite 37
Lieferumfang ................................................................................................................ Seite 37
Technische Daten ........................................................................................................ Seite 37
Allgemeine Sicherheitshinweise für Elektrowerkzeuge
1. Arbeitsplatz-Sicherheit ............................................................................................ Seite 38
2. Elektrische Sicherheit .............................................................................................. Seite 38
3. Sicherheit von Personen ......................................................................................... Seite 39
4. Verwendung und Behandlung des Elektrowerkzeugs .......................................... Seite 39
Sicherheitshinweise für Bohrhämmer ......................................................................... Seite 40
Achtung Leitungen! .....................................................................................................Seite 40
Originalzubehör / -zusatzgeräte ................................................................................ Seite 40
Inbetriebnahme
Zusatz-Handgriff montieren ........................................................................................ Seite 40
Tiefenanschlag ............................................................................................................Seite 40
Werkzeuge einsetzen / entnehmen ............................................................................ Seite 41
Schnellspannfutter für Rundschaftbohrer ................................................................... Seite 41
Funktion auswählen mit Funktions-Wahlschalter........................................................Seite 41
Drehrichtung auswählen ............................................................................................. Seite 42
Drehzahl vorwählen .................................................................................................... Seite 42
Ein- und ausschalten .................................................................................................... Seite 42
Wartung und Reinigung ............................................................................. Seite 43
Entsorgung ............................................................................................................. Seite 43
Informationen
Service ......................................................................................................................... Seite 43
Konformitätserklärung / Hersteller .............................................................................. Seite 44
Page 34

Einleitung
In dieser Bedienungsanleitung / am Gerät werden folgende Piktogramme verwendet:
W
n
V
Bedienungsanleitung lesen!
Warn- und Sicherheitshinweise
beachten!
Vorsicht vor elektrischem Schlag!
Lebensgefahr!
Explosionsgefahr!
Schnellspannbohrfutter Meißelposition-Verstellung
Watt (Wirkleistung) Meißelposition verstellen
Bemessungs-Leerlaufdrehzahl
0
Volt (Wechselspannung)
~
Kinder vom Elektrowerkzeug
fernhalten!
Schutzklasse II
Schalter zum Wählen der
Gerätefunktion
Meißeln
Hammerbohren
Bohren
Tragen Sie einen Gehörschutz, eine
Atem- / Staubschutzmaske, eine
Schutzbrille und Schutzhandschuhe.
Elektrowerkzeug vor Nässe schützen!
Lebensgefahr durch elektrischen
Schlag bei beschädigtem Netzkabel
oder Netzstecker!
Entsorgen Sie Verpackung und Gerät
umweltgerecht!
Pneumatischer Bohrhammer
mit Meißelfunktion PEBH 1010
Q
Einleitung
Machen Sie sich vor der ersten Inbetriebnahme
mit den Funktionen des Gerätes vertraut
und informieren Sie sich über den richtigen
Umgang mit Elektrowerkzeugen. Lesen Sie hierzu
die nachfolgende Bedienungsanleitung. Bewahren Sie
diese Anleitung gut auf. Händigen Sie alle Unterlagen
bei Weitergabe des Gerätes an Dritte ebenfalls aus.
36 DE/AT
Q
Bestimmungsgemäßer
Gebrauch
Der Bohrhammer PEBH 1010 ist geeignet zum:
- Hammerbohren in Ziegel, Beton und
natürlichem Gestein
- Bohren in Holz, Kunststoff und Metall
- Schrauben in Holz, Kunststoff und Metall
- Meißeln in Beton, Gestein und Verputz
Jede andere Verwendung oder Veränderung des
Gerätes gilt als nicht bestimmungsgemäß und birgt
erhebliche Unfallgefahren.
Für aus bestimmungswidriger Verwendung
entstandene Schäden übernimmt der Hersteller
keine Haftung.
Das Gerät ist nicht für den gewerblichen Einsatz
bestimmt.
Page 35

37 DE/AT
Einleitung
Q
Ausstattung
1
Werkzeugaufnahme (Bohrfutter)
2
Staubschutz-Gummikappe
3
Ver- / Entriegelungskappe
4
EIN- / AUS-Schalter
5
Arretierknopf
6
Stellrad zur Drehzahlvorwahl
7
Schalter Rechts- / Linkslauf
8
Funktions-Wahlschalter
9
Zusatz-Handgriff
10
Tiefenanschlag aus Metall
Q
Lieferumfang
1 Bohrhammer
1 Zusatz-Handgriff
1
-Schnellspannbohrfutter (13 mm)
mit Adapter (siehe Abb. A)
3 Bohrer (siehe Abb. B)
1 Flachmeißel (siehe Abb. B)
1 Spitzmeißel (siehe Abb. B)
1 Tiefenanschlag aus Metall
1 Dose Schmierfett
1 Tragekoffer
1 Bedienungsanleitung
1 Heft „Garantie und Service“
Q
Technische Daten
Nennaufnahme: 1010 W
Nennspannung: 230 V ~, 50 Hz
Leerlaufdrehzahl: n
0 - 1.100 / min
0
Schlagfrequenz: 0 - 5.800 / min
Schlagenergie: 2,2 Joule
Bohrungsdurchmesser: max. 13 mm für Stahl
max. 32 mm für Holz
max. 26 mm für Beton
max. 82 mm mit Lochsäge
Schutzklasse: II / &
Geräusch und Vibrationsinformationen:
Messwerte ermittelt entsprechend EN 60745.
Der A-bewertete Schalldruckpegel des Gerätes
beträgt typischerweise 99,6 dB (A). Unsicherheit
K = 3 dB. Der Geräuschpegel beim Arbeiten kann
112,6 dB (A) überschreiten.
Gehörschutz tragen!
Schwingungsgesamtwerte (Vektorsumme dreier
Richtungen) ermittelt entsprechend EN 60745:
Hammerbohren
in Beton: Schwingungsemissionswert
Meißeln: Schwingungsemissionswert
WARNUNG!
a
= 13,462 m / s2,
h
Unsicherheit K = 1,5 m / s
a
= 12,320 m / s2,
h
Unsicherheit K = 1,5 m / s
2
2
Der in diesen Anweisungen
angegebene Schwingungspegel ist entsprechend
einem in EN 60745 genormten Messverfahren gemessen worden und kann für den Gerätevergleich
verwendet werden.
Der Schwingungspegel wird sich entsprechend dem
Einsatz des Elektrowerkzeugs verändern und kann
in manchen Fällen über dem in diesen Anweisungen
angegebenen Wert liegen. Die Schwingungsbelastung könnte unterschätzt werden, wenn das Elektrowerkzeug regelmäßig in solcher Weise verwendet wird.
Hinweis: Für eine genaue Abschätzung der
Schwingungsbelastung während eines bestimmten
Arbeitszeitraumes sollten auch die Zeiten berücksichtigt werden, in denen das Gerät abgeschaltet
ist oder zwar läuft, aber nicht tatsächlich im Einsatz
ist. Dies kann die Schwingungsbelastung über den
gesamten Arbeitszeitraum deutlich reduzieren.
Page 36

Einleitung / Allgemeine Sicherheitshinweise für Elektrowerkzeuge
PEBH 1010
~
50 Hz · 1010 W · n
230 V
Date of manufacture: 04-2008
KH 3162
Kompernaß GmbH · 44867 Bochum (Germany) · www.kompernass.com
1.100 min
0
-1
Allgemeine
Sicherheitshinweise
für Elektrowerkzeuge
WARNUNG!
hinweise und Anweisungen.
Versäumnisse bei der Einhaltung der Sicherheitshinweise und Anweisungen können elektrischen Schlag,
Brand und / oder schwere Verletzungen verursachen.
BEWAHREN SIE ALLE SICHERHEITSHINWEISE
UND ANWEISUNGEN FÜR DIE ZUKUNFT AUF!
Lesen Sie alle Sicherheits-
1. Arbeitsplatz-Sicherheit
a) Halten Sie Ihren Arbeitsbereich sauber
und gut beleuchtet. Unordnung und unbe-
leuchtete Arbeitsbereiche können zu Unfällen
führen.
b)
der sich brennbare Flüssigkeiten, Gase
c)
fern. Bei Ablenkung können Sie die Kontrolle
Arbeiten Sie mit dem Elektro-
werkzeug nicht in explosionsgefährdeter Umgebung, in
oder Stäube befinden. Elektrowerkzeuge
erzeugen Funken, die den Staub oder die
Dämpfe entzünden können.
Halten Sie Kinder und andere
Personen während der Benutzung des Elektrowerkzeugs
über das Gerät verlieren.
2. Elektrische Sicherheit
Vermeiden Sie Lebensgefahr
durch elektrischen Schlag:
a) Der Anschlussstecker des Elektrowerk-
zeuges muss in die Steckdose passen.
Der Stecker darf in keiner Weise verändert werden. Verwenden Sie keine
Adapterstecker gemeinsam mit
schutzgeerdeten Elektrowerkzeugen.
Unveränderte Stecker und passende Steckdosen
verringern das Risiko eines elektrischen Schlages.
b) Vermeiden Sie Körperkontakt mit ge-
erdeten Oberflächen, wie von Rohren,
Heizungen, Herden und Kühlschränken.
Es besteht ein erhöhtes Risiko durch elektrischen
Schlag, wenn Ihr Körper geerdet ist.
c)
Halten Sie Elektrowerkzeuge
von Regen oder Nässe fern.
Das Eindringen von Wasser in ein
Elektrogerät erhöht das Risiko eines elektrischen
Schlages.
d)
Zweckentfremden Sie das
Kabel nicht, um das Elektrowerkzeug zu tragen, aufzu-
hängen oder um den Stecker aus der
Steckdose zu ziehen. Halten Sie das
Kabel fern von Hitze, Öl, scharfen
Kanten oder sich bewegenden Geräteteilen. Beschädigte oder verwickelte Kabel
erhöhen das Risiko eines elektrischen Schlages.
e) Wenn Sie mit einem Elektrowerkzeug
im Freien arbeiten, verwenden Sie nur
Verlängerungskabel, die auch für den
Außenbereich zugelassen sind. Die
Anwendung eines für den Außenbereich
geeigneten Verlängerungskabels verringert
das Risiko eines elektrischen Schlages.
f) Wenn der Betrieb des Elektrowerk-
zeuges in feuchter Umgebung nicht
vermeidbar ist, verwenden Sie einen
Fehlerstromschutzschalter. Der Einsatz
eines Fehlerstromschutzschalters vermindert
das Risiko eines elektrischen Schlages.
38 DE/AT
Page 37

39 DE/AT
Allgemeine Sicherheitshinweise für Elektrowerkzeuge
3. Sicherheit von Personen
a) Seien Sie stets aufmerksam, achten
Sie darauf, was Sie tun und gehen Sie
mit Vernunft an die Arbeit mit einem
Elektrowerkzeug. Benutzen Sie kein
Elektrowerkzeug, wenn Sie müde sind
oder unter dem Einfluss von Drogen,
Alkohol oder Medikamenten stehen.
Ein Moment der Unachtsamkeit beim Gebrauch
des Elektrowerkzeuges kann zu ernsthaften
Verletzungen führen.
b)
licher Schutzausrüstung wie Staubmaske,
c) Vermeiden Sie eine unbeabsichtigte
d) Entfernen Sie Einstellwerkzeuge oder
e) Vermeiden Sie eine abnormale Körper-
f) Tragen Sie geeignete Kleidung. Tragen
Tragen Sie persönliche Schutz-
ausrüstung und immer eine
Schutzbrille. Das Tragen persön-
rutschfeste Sicherheitsschuhe, Schutzhelm oder
Gehörschutz, je nach Art und Einsatz des
Elektrowerkzeuges, verringert das Risiko von
Verletzungen.
Inbetriebnahme. Vergewissern Sie
sich, dass das Elektrowerkzeug ausgeschaltet ist, bevor Sie es an die
Stromversorgung anschließen, es aufnehmen oder tragen. Wenn Sie beim Tra-
gen des Elektrowerkzeuges den Finger am
Schalter haben oder das Gerät bereits eingeschaltet an die Stromversorgung anschließen,
kann dies zu Unfällen führen.
Schraubenschlüssel, bevor Sie das
Elektrowerkzeug einschalten. Ein Werk-
zeug oder Schlüssel, der sich in einem drehenden
Geräteteil befindet, kann zu Verletzungen führen.
haltung. Sorgen Sie für einen sicheren
Stand und halten Sie jederzeit das
Gleichgewicht. Dadurch können Sie das
Elektrowerkzeug in unerwarteten Situationen
besser kontrollieren.
Sie keine weite Kleidung oder Schmuck.
Halten Sie Haare, Kleidung und Handschuhe fern von sich bewegenden
Teilen. Lockere Kleidung, Schmuck oder lange
Haare können von sich bewegenden Teilen
erfasst werden.
g) Wenn Staubabsaug- und -auffangein-
richtungen montiert werden können,
vergewissern Sie sich, dass diese
angeschlossen sind und richtig verwendet werden. Die Verwendung einer
Staubabsaugung kann Gefährdungen durch
Staub verringern.
4. Verwendung und Behandlung
des Elektrowerkzeugs
a) Überlasten Sie das Gerät nicht. Ver-
wenden Sie für Ihre Arbeit das dafür
bestimmte Elektrowerkzeug. Mit dem
passenden Elektrowerkzeug arbeiten Sie besser
und sicherer im angegebenen Leistungsbereich.
b) Benutzen Sie kein Elektrowerkzeug,
dessen Schalter defekt ist. Ein Elektrowerkzeug, das sich nicht mehr ein- oder ausschalten
lässt, ist gefährlich und muss repariert werden.
c) Ziehen Sie den Stecker aus der Steck-
dose, bevor Sie Geräteeinstellungen
vornehmen, Zubehörteile wechseln
oder das Gerät weglegen. Diese Vor-
sichtsmaßnahme verhindert den unbeabsichtigten Start des Elektrowerkzeuges.
d) Bewahren Sie unbenutzte Elektrowerk-
zeuge außerhalb der Reichweite von
Kindern auf. Lassen Sie Personen das
Gerät nicht benutzen, die mit diesem
nicht vertraut sind oder diese Anweisungen nicht gelesen haben. Elektrowerk-
zeuge sind gefährlich, wenn sie von unerfahrenen
Personen benutzt werden.
e) Pflegen Sie Elektrowerkzeuge mit
Sorgfalt. Kontrollieren Sie, ob bewegliche Teile einwandfrei funktionieren
und nicht klemmen, ob Teile gebrochen
oder so beschädigt sind, dass die Funktion des Elektrowerkzeuges beeinträchtigt ist. Lassen Sie beschädigte Teile vor
dem Einsatz des Gerätes reparieren.
Viele Unfälle haben ihre Ursache in schlecht
gewarteten Elektrowerkzeugen.
f) Halten Sie Schneidwerkzeuge scharf
und sauber. Sorgfältig gepflegte
Page 38

Allgemeine Sicherheitshinweise für Elektrowerkzeuge / Inbetriebnahme
Schneidwerkzeuge mit scharfen Schneidkanten
verklemmen sich weniger und sind leichter
zu führen.
g) Verwenden Sie Elektrowerkzeug,
Zubehör, Einsatzwerkzeuge usw.
entsprechend diesen Anweisungen.
Berücksichtigen Sie dabei die Arbeitsbedingungen und die auszuführende
Tätigkeit. Der Gebrauch von Elektrowerk-
zeugen für andere als die vorgesehenen Anwendungen kann zu gefährlichen Situationen
führen.
Sicherheitshinweise
für Bohrhämmer
J Tragen Sie einen Gehörschutz.
Die Einwirkung von Lärm kann
Gehörverlust bewirken.
J Benutzen Sie den mit dem Gerät gelie-
ferten Zusatzhandgriff
der Kontrolle kann zu Verletzungen führen.
J Schalten Sie das Elektrowerkzeug so-
fort aus, wenn das Einsatzwerkzeug
blockiert. Seien Sie auf hohe Reaktionsmo-
mente gefasst, die einen Rückschlag verursachen.
J Zu Ihrer Sicherheit ist der Bohrhammer
PEBH 1010 mit einer Überlastkupplung
ausgestattet. Diese bewirkt, dass der An-
trieb automatisch unterbrochen wird, wenn das
Bohrwerkzeug verklemmt. Sorgen Sie dennoch
immer für einen sicheren Stand, halten Sie den
Bohrhammer fest mit beiden Händen und benutzen Sie immer den Zusatz-Handgriff
J
Tragen Sie Schutzbrille und
Staubmaske! GIFTIGE STÄUBE!
Die durch die Bearbeitung entstehenden
schädlichen / giftigen Stäube stellen eine
Gesundheitsgefährdung für die Bedienperson
oder in der Nähe befindliche Personen dar.
J Bearbeiten Sie kein asbesthaltiges
Material. Asbest gilt als krebserregend.
J Stellen Sie sicher, dass die Lüftungsschlitze
während des Betriebes nicht abgedeckt sind.
Führen Sie keine Gegenstände in die Lüftungsschlitze ein.
9
. Der Verlust
9
.
Q
Achtung Leitungen!
WARNUNG!
Vergewissern Sie sich,
dass Sie nicht auf Strom-, Gas- oder Wasserleitungen stoßen, wenn Sie mit einem
Elektrowerkzeug arbeiten. Prüfen Sie ggf. mit
einem Leitungssucher, bevor Sie in eine Wand bohren
bzw. aufschlitzen.
Q
Originalzubehör / -zusatzgeräte
J Benutzen Sie nur Zubehör und
Zusatzgeräte, die in der Gebrauchsanweisung angegeben sind. Der Ge-
brauch anderer als in der Bedienungsanleitung
empfohlenen Einsatzwerkzeuge oder anderen
Zubehörs kann eine Verletzungsgefahr für Sie
bedeuten.
Q
Inbetriebnahme
Beachten Sie die Netzspannung! Die Spannung muss mit den Angaben auf dem Typenschild
des Gerätes übereinstimmen (Geräte, die mit
230 V ~ bezeichnet sind, können auch an 220 V ~
angeschlossen werden).
Q
Zusatz-Handgriff montieren
Hinweis: Aus Sicherheitsgründen dürfen Sie dieses
Gerät nur mit ordnungsgemäß montiertem ZusatzHandgriff
j Stecken Sie den Zusatz-Handgriff
9
verwenden (siehe auch Abb. D, E).
9
auf den
Spindelhals und drehen Sie ihn gegen den
Uhrzeigersinn fest.
Q
Tiefenanschlag
j Setzen Sie den Tiefenanschlag 10 in den
Zusatz-Handgriff
9
ein.
j Wählen Sie durch Verschieben des Tiefenan-
10
schlags
die erforderliche Bohrtiefe.
40 DE/AT
Page 39

41 DE/AT
Inbetriebnahme
Q
Werkzeuge einsetzen /
entnehmen
Werkzeug einsetzen:
j Fetten Sie vor dem Einsetzen des Werkzeugs
die Werkzeugaufnahme
1
leicht ein.
j Ziehen Sie zum Einsetzen die Ver- / Entriege-
lungskappe
3
nach hinten und setzen Sie das
Werkzeug ein.
j Lassen Sie die Ver- / Entriegelungskappe
3
los. Dadurch wird die Aufnahme verriegelt.
Überprüfen Sie durch Ziehen des Werkzeugs
die einwandfreie Verriegelung. Das Werkzeug
hat systembedingt ein radiales Spiel.
Werkzeug entnehmen:
j Ziehen Sie zum Entnehmen des Werkzeugs die
Ver- / Entriegelungskappe
Q
-Schnellspannfutter für
3
nach hinten.
Rundschaftbohrer
WARNUNG!
nicht im Hammerbohr- oder Meißelbetrieb!
j Stellen Sie den Funktions-Wahlschalter
das Bohrersymbol
RÖHM-Schnellspannbohrfutter für
Rundschaftbohrer einsetzen:
j Ziehen Sie zum Einsetzen des Zusatzbohrfut-
ters für Rundschaftbohrer (siehe auch Abb. A)
die Ver- / Entriegelungskappe
und setzen Sie das Zusatzbohrfutter ein.
j Lassen Sie die Ver- / Entriegelungskappe
Dadurch wird die Aufnahme verriegelt. Überprüfe
Sie durch Ziehen des Werkzeugs die einwandfreie Verriegelung.
RÖHM-Schnellspannbohrfutter für
Rundschaftbohrer entnehmen:
j Ziehen Sie zum Entnehmen des Zusatzbohrfutters
die Ver- / Entriegelungskappe
und entnehmen Sie das Zusatzbohrfutter.
Benutzen Sie Rundschaftbohrer
8
auf
.
3
nach hinten
3
los.
3
nach hinten
Werkzeuge einsetzen:
WARNUNG!
VERLETZUNGSGEFAHR!
Schalten Sie vor allen Arbeiten am Gerät das
Gerät aus und ziehen Sie den Netzstecker.
Das RÖHM-Schnellspannbohrfutter ermöglicht
Ihnen einen schnellen Werkzeugwechsel ohne
zusätzliche Hilfsmittel.
Werkzeugaufnahme lösen und
Werkzeug einsetzen:
j Halten Sie die hintere Hülse des Schnellspann-
bohrfutters fest und drehen Sie die vordere
Hülse so weit auf, bis das Werkzeug (z.B.
Rundschaftbohrer) eingesetzt werden kann.
j Setzen Sie das Werkzeug ein.
Werkzeug spannen:
j Halten Sie die hintere Hülse des Schnellspann-
bohrfutters fest und drehen Sie die vordere
Hülse kräftig zu, bis „clack – click, click click “
zu hören ist. Das Bohrfutter ist nun verriegelt.
j Lösen Sie die Verriegelung wieder, indem Sie
die vordere Hülse in Gegenrichtung drehen.
Schraubwerkzeuge verwenden:
j Verwenden Sie einen entsprechenden Bithalter,
wenn Sie Schraubendrehereinsätze / -bits zum
Schrauben benutzen wollen.
j Bringen Sie ausschließlich Einsätze / Bits zum
Einsatz, die zum Schraubenkopf passen.
j Stellen Sie den Funktions-Wahlschalter
das Bohrersymbol
Q
Funktion auswählen mit
n
Funktions-Wahlschalter
Hinweis: Ändern Sie die Funktion nur
.
bei ausgeschaltetem Gerät, ansonsten
kann es beschädigt werden. Je nach
Einsatzbereich
tions-Wahlschalters
können Sie durch Drehen des Funk-
8
zwischen vier Funktionen
auswählen.
j Drehen Sie den Funktions-Wahlschalter
dass die gewünschte Symbolik an der PfeilMarkierung einrastet.
8
8
auf
so,
Page 40

Inbetriebnahme
Die Funktionen sind wie folgt gekennzeichnet:
Funktion Symbol
Bohren / Schrauben
Hammerbohren
Meißeln
MeißelpositionVerstellung
Meißelposition verstellen:
Diese Funktion stellt durch Einstellen
von individuellen Winkelpositionen
des Meißels eine erhebliche
Arbeitserleichterung dar. Sie er-
möglicht Ihnen, das Werkzeug für
den Meißelvorgang (siehe auch Abb. C, D) in die
erforderliche Position zu drehen.
j Drehen Sie den Funktions-Wahlschalter
die Position
.
8
in
j Drehen Sie das Werkzeug in der Werkzeug-
aufnahme
1
in die erforderliche Position.
j Drehen Sie für den Meißelvorgang den Funk-
tions-Wahlschalter
8
in die Position .
Empfohlene Drehzahlbereiche:
(Ermitteln Sie ggf. die richtige Einstellung durch
einen praktischen Test):
- hohe Drehzahl: zum Hammerbohren in Beton
oder Stein, zum Meißeln
- mittlere Drehzahl: zum Bohren in Stahl oder Holz
- geringe Drehzahl: zum Schrauben
Niedrige Drehzahl / hohe Drehzahl
einstellen:
j Drehen Sie das Stellrad zur Drehzahlvorwahl
Der EIN- / AUS-Schalter
4
verfügt über eine
6
variable Geschwindigkeitsregelung.
j Durch Drücken des Schalters erhöhen Sie die
Drehzahl.
Q
Ein- und ausschalten
Sie können beim Betrieb des Bohrhammers zwischen
Moment- und Dauerbetrieb auswählen. Benutzen
Sie für kürzere Arbeiten den Momentbetrieb und
für lang andauernde Arbeiten den Dauerbetrieb.
Die Bedienung Ihrer gewünschten Einstellung
funktioniert wie folgt:
Momentbetrieb einschalten:
j Drücken Sie den EIN- / AUS-Schalter
4
.
.
Q
Drehrichtung auswählen
Wählen Sie die Drehrichtung durch Verstellen des
Schalters Rechts- / Linkslauf
WARNUNG!
des Schalters Rechts- / Linkslauf
7
.
Die Benutzung / Verstellung
7
darf nur bei Still-
stand des Gerätes erfolgen.
Q
Drehzahl vorwählen
Mit dem Stellrad zur Drehzahlvorwahl 6 können
Sie die Drehzahl individuell vorwählen.
Bei Vorwahl einer niedrigen Drehzahl kann der
EIN- / AUS-Schalter
4
nur noch begrenzt gedrückt
werden.
42 DE/AT
Momentbetrieb ausschalten:
j Lassen Sie den EIN- / AUS-Schalter
Dauerbetrieb einschalten:
j Drücken Sie den EIN- / AUS-Schalter
stellen Sie ihn im gedrückten Zustand mit dem
Arretierknopf
5
fest.
Dauerbetrieb ausschalten:
j Drücken Sie den EIN- / AUS-Schalter
lassen Sie ihn wieder los.
4
los.
4
und
4
und
Page 41

43 DE/AT
Wartung und Reinigung / Entsorgung /Informationen
Q
Wartung und Reinigung
WARNUNG!
VERLETZUNGSGEFAHR!
Schalten Sie vor allen Arbeiten am Gerät das
Gerät aus und ziehen Sie den Netzstecker.
j Das Gerät muss stets sauber, trocken und frei
von Öl oder Schmierfetten sein.
j Es dürfen keine Flüssigkeiten in das Innere des
Bohrhammers gelangen.
j Reinigen Sie den Bohrhammer regelmäßig, am
besten immer direkt nach Abschluss der Arbeit.
j Verwenden Sie zum Reinigen des Gehäuses
ein trockenes Tuch. Verwenden Sie auf keinen
Fall Benzin, Lösungsmittel oder Reiniger, die
Kunststoff angreifen.
j
S
äubern Sie regelmäßig die Werkzeugauf-
1
nahme
.
VORSICHT! VORSPANNUNG! Ziehen
Sie dazu die Ver- / Entriegelungskappe
3
nach
hinten und hebeln Sie die Staubschutz-Gummi-
2
kappe
lungskappe
ab. Lassen Sie die Ver- / Entriege-
3
langsam los.
j Reinigen Sie die Bauteile mit einem Pinsel und
fetten Sie diese ein.
Q
Informationen
Q
Service
Die zuständige Servicestelle Ihres Landes
entnehmen Sie bitte den Garantieunterlagen.
WARNUNG!
Lassen Sie Ihre Geräte
nur von qualifiziertem Fachpersonal
und nur mit Originalersatzteilen reparieren. Damit wird sichergestellt, dass die Si-
cherheit des Gerätes erhalten bleibt.
WARNUNG!
Lassen Sie den Austausch
des Steckers oder der Anschlussleitung
immer vom Hersteller des Elektrowerkzeugs oder seinem Kundendienst ausführen. Damit wird sichergestellt, dass die
Sicherheit des Gerätes erhalten bleibt.
Q
Entsorgung
Die Verpackung besteht aus umweltfreund-
lichen Materialien, die Sie über die örtlichen Recyclingstellen entsorgen können.
Werfen Sie Elektrowerkzeuge
nicht in den Hausmüll!
Gemäß Europäischer Richtlinie 2002 / 96 / EG
müssen verbrauchte Elektrowerkzeuge getrennt
gesammelt und einer umweltgerechten Wiederverwertung zugeführt werden.
Möglichkeiten zur Entsorgung des ausgedienten
Gerätes erfahren Sie bei Ihrer Gemeinde- oder
Stadtverwaltung.
Page 42

Informationen
Q
Konformitätserklärung /
Hersteller
Wir, Kompernaß GmbH, Burgstr. 21,
44867 Bochum, Germany, erklären hiermit für
dieses Produkt die Übereinstimmung mit folgenden
EG-Richtlinien:
Maschinenrichtlinie (98 / 37 / EG)
EG Niederspannungsrichtlinie
(2006 / 95 / EG)
Elektromagnetische Verträglichkeit
(2004 / 108 / EG)
Typ / Gerätebezeichnung:
Parkside Pneumatischer Bohrhammer
mit Meißelfunktion PEBH 1010
Bochum, 30.04.2008
Hans Kompernaß
- Geschäftsführer -
Technische Änderungen im Sinne der Weiterentwicklung
sind vorbehalten.
44 DE/AT
 Loading...