

Page 1
Thank you for purchasing this product.
For optimum performance and safety, please read these
instructions carefully.
Please keep this manual for future reference.
Muchísimas gracias por haber adquirido este aparato.
Lea con atención estas instrucciones para obtener las máximas
prestaciones y seguridad.
Guarde este manual para su consulta en el futuro.
Tack för valet av denna apparat.
Läs igenom bruksanvisningen noga för bästa resultat och för
säkerhets skull.
Spara denna bruksanvisning.
Tak fordi du har valgt dette produkt.
Læs venligst denne betjeningsvejledning omhyggeligt, således at
optimal ydelse og sikkerhed opnås.
Gem vejledningen til senere brug.
Dziękujemy za zakupienie tego produktu.
Proszę dokładnie zapoznać się z tą instrukcją obsługi, aby jak
najlepiej wykorzystać to urządzenie i zapewnić jego bezpieczne
użytkowanie.
Prosimy o zachowanie niniejszej instrukcji obsługi.
Niniejsza instrukcja została opracowana na podstawie or yginalnej
publikacji fi rmy Panasonic Corporation.
Děkujeme za zakoupení tohoto výrobku.
Pro dosažení optimálního výkonu a z bezpečnostních důvodu si
pečlivě přečtěte tyto pokyny.
Uschovejte si prosím tento návod k obsluze.
Operating Instructions
Instrucciones de funcionamiento
Bruksanvisning
Betjeningsvejledning
Instrukcja obsługi
Návod k obsluze
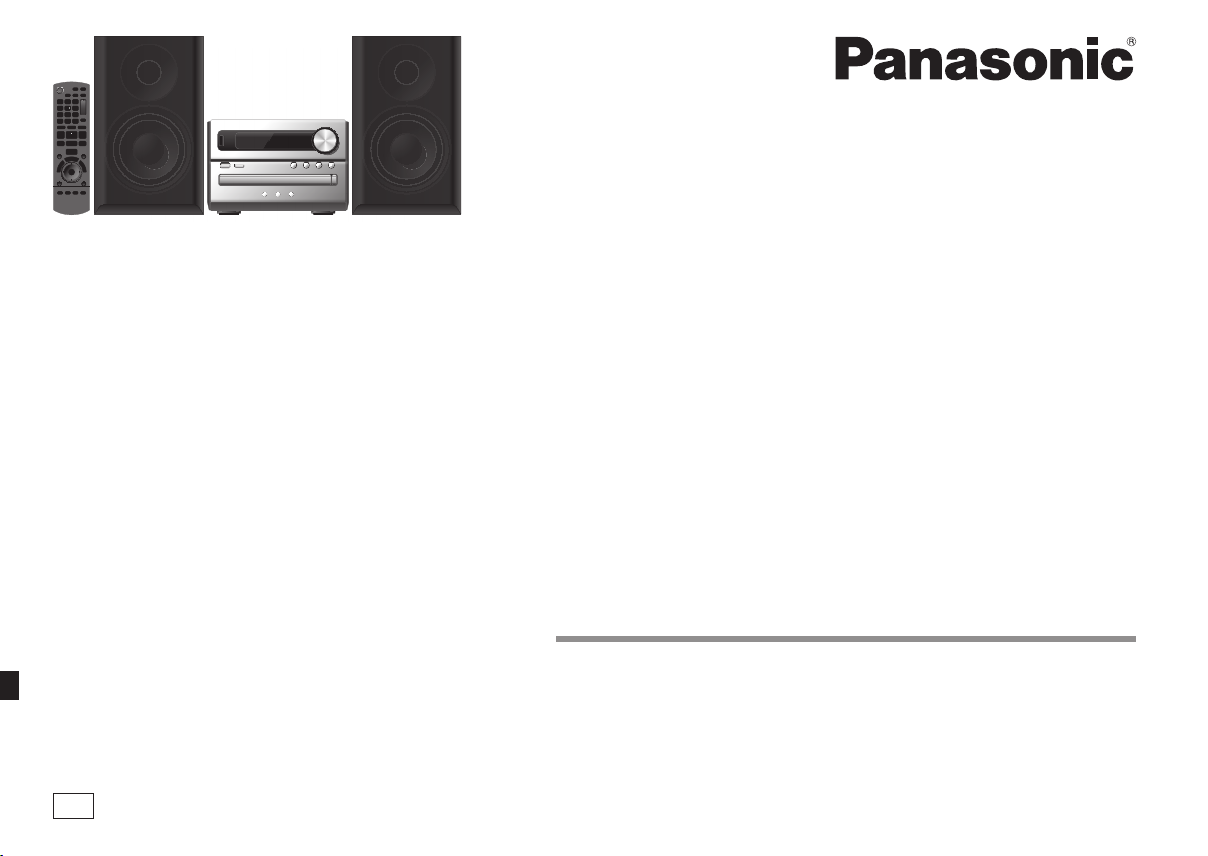
CD Stereo System
Sistema estéreo con reproductor de
discos compactos
CD-stereoanläggning
CD-stereoanlæg
Zestaw stereo z CD
Stereosystém s CD
Model No. SC-PM04
EC
RQT9699-E
Page 2
ENGLISH
2
Operations in these instructions are described
mainly using the remote control, but you can perform
the operations on the main unit if the controls are
the same.
Your unit may not look exactly the same as illustrated.
These operating instructions are applicable for the
following system:
ENGLISH
System
Main unit
Speakers
Inside of product
Tuo t t een s i s ällä
Produktets innside
RQT9699
2
2
Back of product
Laitteen takaosa
På baksiden av produktet
SC-PM04
SA-PM04
SB-PM02
Safety precautions
WARNING!
Unit
• To reduce the risk of fi re, electric shock or product
damage,
– Do not expose this unit to rain, moisture, dripping or
splashing.
– Do not place objects fi lled with liquids, such as
vases, on this unit.
– Use only the recommended accessories.
– Do not remove covers.
– Do not repair this unit by yourself. Refer servicing to
qualifi ed service personnel.
CAUTION!
Unit
• To reduce the risk of fi re, electric shock or product
damage,
– Do not install or place this unit in a bookcase, built-in
cabinet or in another confi ned space. Ensure this unit
is well ventilated.
– Do not obstruct this unit’s ventilation openings with
newspapers, tablecloths, curtains, and similar items.
– Do not place sources of naked fl ames, such as
lighted candles, on this unit.
• This unit is intended for use in moderate climates.
• Install this unit so that the AC mains lead can be
unplugged from the socket outlet immediately if any
problem occurs.
• This unit may receive radio interference caused by
mobile telephones during use. If such interference
occurs, please increase separation between this unit
and the mobile telephone.
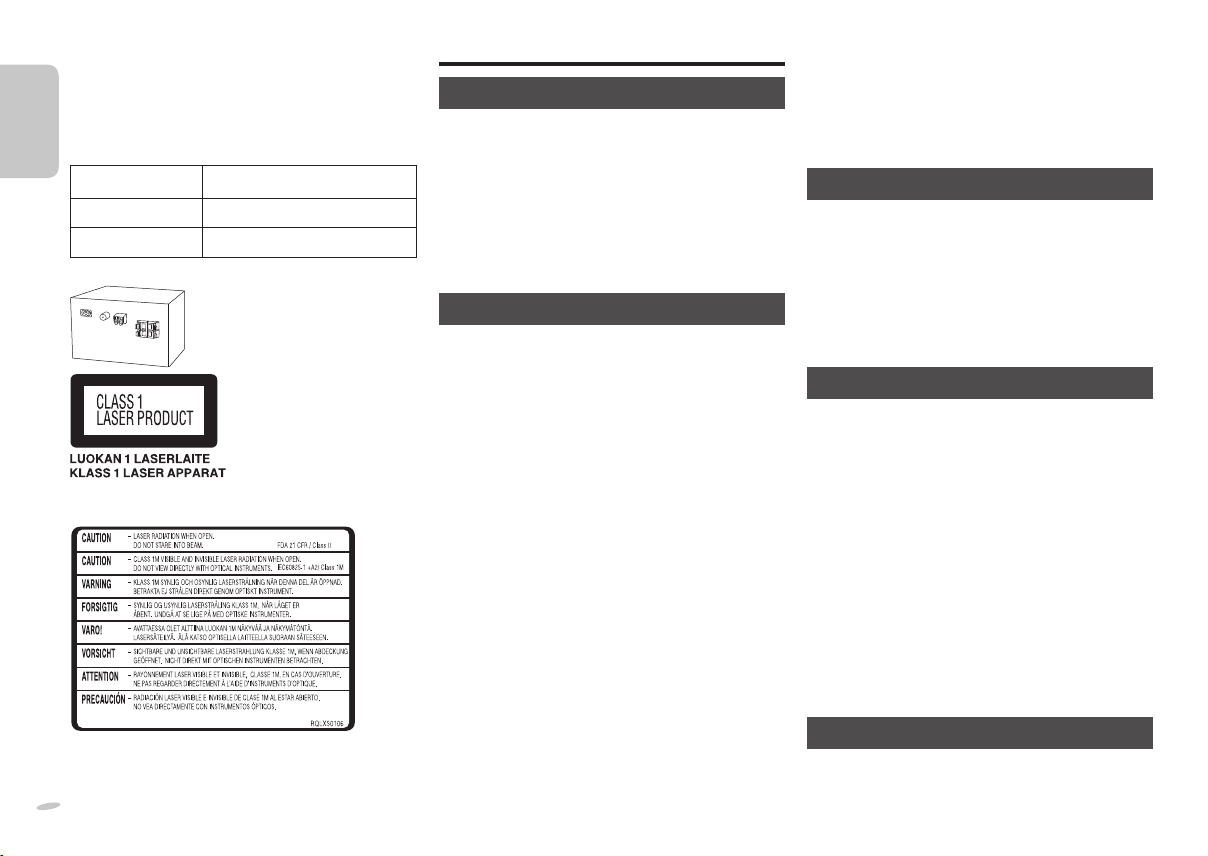
• This unit utilizes a laser. Use of controls or adjustments
or performance of procedures other than those specifi ed
herein may result in hazardous radiation exposure.
Battery
• Do not break open or short-circuit the battery.
• Do not charge the alkaline or manganese battery.
• Do not use the battery if the cover has peeled off.
• Do not heat or expose to fl ame.
• Do not leave the battery(ies) in a car exposed to
direct sunlight for a long period of time with doors and
windows closed.
• Remove the battery if you do not use the remote
control for a long period of time. Keep in a cool, dark
area.
• Danger of explosion if battery is incorrectly replaced.
Replace only with the type recommended by the
manufacturer.
• When disposing the batteries, please contact your local
authorities or dealer and ask for the correct method of
disposal.
SUOMI
VAROITUS!
• Vähennä tulipalon, sähköiskun tai laitteiston
vahingoittumisen vaaraa:
– Tätä laitetta ei saa altistaa sateelle, kosteudelle,
roiskeille tai tippuville nesteille.
– Älä aseta laitteen päälle nestettä sisältäviä esineitä,
kuten maljakoita.
– Käytä vain suositeltuja lisävarusteita.
– Älä avaa laitteen koteloa.
– Älä korjaa laitetta itse. Anna huolto pätevän
huoltohenkilön tehtäväksi.
HUOMIO!
• Vähennä tulipalon, sähköiskun tai laitteiston
vahingoittumisen vaaraa:
– Älä asenna tai laita tätä laitetta kabinettityyppiseen
kirjakaappiin tai muuhun suljettuun tilaan, jotta
tuuletus onnistuisi.
– Älä peitä laitteen tuuletusaukkoja sanomalehdellä,
pöytäliinalla, verholla tai muulla vastaavalla esineellä.
– Älä aseta palavaa kynttilää tai muuta avotulen
lähdettä laitteen päälle.
• Tämä laite on tarkoitettu käytettäväksi leudossa
ilmastossa.
• Asenna laite siten, että vaihtovirtajohto voidaan irrottaa
pistorasiasta välittömästi ongelmien ilmetessä.
• Tämä on laserlaite. Muiden kuin tässä määritettyjen
hallinta- tai säätötoimintojen käyttö tai toimenpiteiden
suoritus saattaa aiheuttaa vaarallisen altistumisen
säteilylle.
NORSK
ADVARSEL!
• For å redusere faren for brann, elektrisk støt eller
skade på apparatet:
– Dette apparatet må ikke utsettes for regn, fuktighet,
drypp eller sprut.
Page 3
ENGLISH
3
– Ikke plasser objekter som er fylt med væske, som
vaser, på apparatet.
– Bruk kun anbefalt tilbehør.
–Fjern ikke deksler.
– Dette apparatet må ikke repareres på egen
hånd. Overlat servicearbeider til kvalifi sert
servicepersonell.
FORSIKTIG!
• For å redusere faren for brann, elektrisk støt eller
skade på apparatet:
– Ikke plasser apparatet i en bokhylle, et innebygget
kabinett eller et annet lukket sted. Pass på at
apparatet er godt ventilert.
– Apparatets ventilasjonsåpninger må ikke dekkes til
med aviser, duker, gardiner eller lignende.
– Plasser ikke åpen ild, slik som levende lys, oppå
apparatet.
• Dette apparatet er beregnet til bruk under moderate
klimaforhold.
• Strømuttaket må befi nne seg i nærheten slik at den
lett kan kobles fra uttaket umiddelbart om det oppstår
problemer.
• Dette apparatet anvender en laser. Betjening av
kontroller, justeringer eller andre inngrep enn de som
er beskrevet i denne bruksanvisning, kan føre til farlig
bestråling.
Supplied accessories
Please check and identify the supplied accessories.
& 1 x AC mains lead
& 1 x Remote control
(N2QAYB000555)
& 1 x FM indoor antenna
& 1 x AM loop antenna
Information for Users on Collection and Disposal of
Old Equipment and used Batteries
These symbols on the products, packaging,
and/or accompanying documents mean that
used electrical and electronic products and
batteries should not be mixed with general
household waste.
For proper treatment, recovery and recycling
of old products and used batteries, please
take them to applicable collection points, in
accordance with your national legislation and
the Directives 2002/96/EC and 2006/66/EC.
By disposing of these products and batteries
correctly, you will help to save valuable
resources and prevent any potential
negative effects on human health and the
environment which could otherwise arise from
inappropriate waste handling.
For more information about collection and
recycling of old products and batteries, please
contact your local municipality, your waste
disposal service or the point of sale where you
purchased the items.
Penalties may be applicable for incorrect
disposal of this waste, in accordance with
national legislation.
For business users in the European Union
If you wish to discard electrical and electronic
equipment, please contact your dealer or
supplier for further information.
[Information on Disposal in other
Countries outside the European Union]
These symbols are only valid in the European
Union. If you wish to discard these items,
please contact your local authorities or dealer
and ask for the correct method of disposal.
Note for the battery symbol (bottom two
symbol examples):
This symbol might be used in combination
with a chemical symbol. In this case it
complies with the requirement set by the
Directive for the chemical involved.
Contents
Safety precautions ...................................2
Supplied accessories ............................... 3
Preparing the remote control ..................3
Placement of speakers .............................4
Making the connections ...........................4
Control guide ............................................5
Discs .......................................................... 6
FM/AM radio ..............................................7
USB ............................................................ 7
Clock and timers .......................................8
Sound adjustment ....................................8
Optional equipments ................................ 8
Maintenance .............................................. 9
Troubleshooting guide .............................9
Specifi cations .........................................10
Preparing the remote control
R6/LR6, AA (not included)
Use alkaline or manganese batteries.
Insert so the poles (+ and –) match those in the remote
control.
Aim at the remote control signal sensor (Z page 5).
Distance: Within approximately 7 m
Angle: Approximately 20° up and down, 30° left and
right
3
3
RQT9699
ENGLISH
Page 4
ENGLISH
4
Placement of speakers
Making the connections
Connect the AC mains lead only after all the other connections have been made.
ENGLISH
Speakers are designed identically so that no left or right
channel orientation is necessary.
You cannot take the front net off the speakers.
Use only the supplied speakers
Using other speakers can damage the unit and sound
quality will be negatively affected.
• Keep your speakers at least 10 mm away from the
system for proper ventilation.
• These speakers do not have magnetic shielding. Do
not put them near TVs, PCs or other equipment easily
infl uenced by magnetism.
• You can damage your speakers and shorten their
useful life if you play sound at high levels over
extended periods.
• Reduce the volume in the following cases to avoid
damage.
– When playing distorted sound.
– When adjusting the sound quality.
Caution
• Use the speakers only with the recommended
system. Failure to do so can damage the
amplifi er and speakers, and can cause fi re.
Consult a qualifi ed service person if damage
occurs or if a sudden change in performance is
apparent.
• Do not attach these speakers to walls or
ceilings.
RQT9699
4
4
1 Connect the AM loop antenna.
Stand the antenna up on its base until it clicks.
(6:)
SPEAKERS
(SB-PM02)
(6:)
4 Connect the AC mains lead.
Do not use an AC mains lead from other equipment.
To household
mains socket
2 Connect the FM indoor antenna.
Place the antenna where reception is best.
Tap e
3 Connect the speakers.
B
A
Red
Be careful not to cross (short-circuit)
or reverse the polarity of the speaker
wires as doing so may damage the
speakers.
Conserving power
The system consumes approximately 0.3 W when it
is in standby mode. Disconnect the power supply if
you do not use the system.
Some settings will be lost after you disconnect the
system. You have to set them again.
(6:)
(6:)
Black
(6:)
(6:)
Page 5
ENGLISH
5
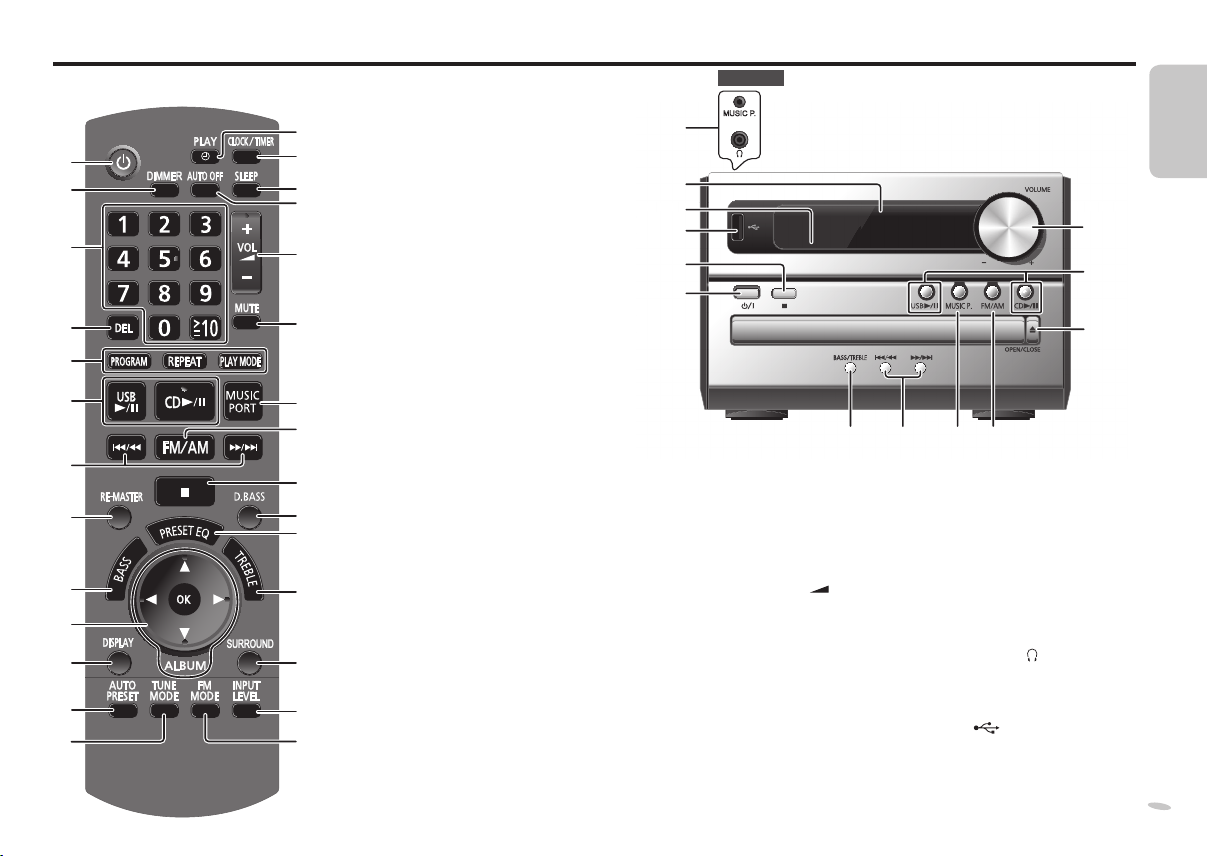
Control guide
Refer to the numbers in parentheses for page references.
A Standby/on switch [`], [1] (8, 10)
N
Press to switch the unit from on to
standby mode or vice versa. In standby
A
B
C
D
E
F
G
H
I
J
K
L
M
O
mode, the unit is still consuming a small
amount of power.
P
Q
B [DIMMER]
Dims the display panel. Press again to
cancel.
R
C Numeric buttons [1 to 9, 0, ≧10]
To select a 2-digit number
example: 16: [≧10] ] [1] ] [6]
To select a 3-digit number
S
example: 226: [≧10] ] [≧10] ] [2] ]
D [DEL] (6)
E [PROGRAM] (6, 7)
T
[REPEAT] (6)
[PLAY MODE] (6, 7)
U
F [4/9, USB] (7)
[4/9, CD] (6)
V
G [2/3 ], [5/6] (6, 7, 8)
H [RE-MASTER] (8)
W
X
I [BASS] (8)
J [R/T] (6, 8)
[Y/U] have the exact same functions as
Y
those of [2 /3] or [5/6 ].
[OK] (6, 8)
K [DISPLAY] (6, 7)
L [AUTO PRESET] (7)
Z
M [TUNE MODE] (7)
N [#, PLAY] (8)
a
O [CLOCK /TIMER] (8)
b
P [SLEEP] (8)
[2] ] [6]
Top of unit
MUSIC P.
c
d
e
f
V
A
Q [AUTO OFF]
This function allows you to turn the
unit off (except in radio mode) after
the unit is left unused for about
30 minutes. “AUTO OFF” is activated
as the factory preset.
To cancel, press the button again.
R Volume control [+/–, VOL
[+/ –, VOLUME]
S [MUTE]
Mutes the sound. Press again to
cancel.
“MUTE” is also cancelled when the
volume is adjusted or the unit is
turned off.
T [MUSIC PORT], [MUSIC P.] (8, 9 )
U [FM/AM] (7)
],
g
V [8] (6, 7)
W [D.BASS] (8)
X [PRESET EQ] (8)
Y [TREBLE] (8)
Z [SURROUND] (8)
a [INPUT LEVEL] (9)
b [FM MODE] (7)
c MUSIC P. (music port) jack (9)
Headphones jack,
d Display panel
e Remote control signal sensor
f USB port,
g [BASS/TREBLE] (8)
h [x, OPEN/CLOSE] (6)
U
T
G
(7)
(9)
ENGLISH
R
F
h
RQT9699
5
5
Page 6
ENGLISH
6
Discs
Basic play
1 Press [ x, OPEN /CLOSE] on the main unit to
ENGLISH
open the tray.
The unit turns on, load a disc with the label facing up.
Press [x, OPEN/CLOSE] again to close the tray.
2 Press [4/9, CD] to start play.
Stop
playback
Pause play
Skip tracks
Search
through
tracks
Skip album
Play Mode function
Press [ PLAY MODE] to select the desired mode.
1-TRACK
1TR
1-ALBUM
1ALBU M
RANDOM
RND
1-ALBUM
RANDOM
1ALBU M RND
This function does not work with “Program play”.
RQT9699
6
6
Press [ 8 ].
Press [4/9, CD]. Press again to resume
play.
Press [ 2 /3] or [5/6].
Press and hold [2 /3] or [5/6]
during play or pause.
Press [ R/T].
Play one selected track on the disc.
Press the numeric buttons to select the
track.
Play one selected album on the disc.
Press [R/T ] to select the album.
Play a disc randomly.
Play all tracks in one selected album
randomly.
Press [R/T ] to select the album.
Program play
This function allows you to program up to 24 tracks.
1 Press [4/9, CD] and then [8].
2 Press [ PROGRAM].
“PGM” is shown.
3 Press the numeric buttons to select the track.
Repeat this step to program other tracks.
4 Press [4/9, CD] to start play.
3 Press [R/T] to select the album.
4 Press [5/ 6] once and then the numeric
buttons to select the track.
5 Press [ OK].
6 Repeat steps 3 to 5 to program other tracks.
7 Press [4/9, CD] to start play.
Cancel
program
mode
Replay the
program
Check
program
contents
Clear the last
track
Clear all
programmed
tracks
• The program memory is cleared when you open the
disc tray.
• To repeat program play or selected play mode, press
[ REPEAT]. Press again to cancel.
Press [PROGRAM] in the stop mode.
Press [PROGRAM] then [4/9, CD] in
the stop mode.
Press [2 /3] or [5/6 ] when
“PGM” is displayed in the stop mode.
To check while programming, press
[PROGRAM] twice after “PGM”
appears, then press [2 /3] or
[5/6 ].
Press [ DEL] in the stop mode.
Press [8] in the stop mode. “CLR ALL”
is displayed. Within 5 seconds, press
the button again to clear all tracks.
Checking the track information
You can view the information of the current track from the
display panel.
Press [ DISPLAY] during play or pause.
• This unit supports ver. 1.0 and 1.1 ID3 tags.
• Text data that is not supported will not be displayed.
NOTE about using a DualDisc
The digital audio content side of a DualDisc does not
meet the technical specifi cations of the Compact Disc
Digital Audio (CD-DA) format so playback may not be
possible.
NOTE on CDs
• This unit can access up to 99 tracks.
• This unit can play MP3 fi les and CD-DA format audio
CD-R/RW that have been fi nalised.
• It may not be able to play some CD-R/RW due to the
condition of the recording.
NOTE on MP3s
• Files are treated as tracks and folders are treated as
albums.
• This unit can access up to 999 tracks, 255 albums and
20 sessions.
• Disc must conform to ISO9660 level 1 or 2 (except for
extended formats).
• To play in a certain order, prefi x the folder and fi le
names with 3-digit numbers in the order you want them
to play.
Limitations on MP3 play
• If you have recorded MP3s on the same disc as
CD-DA, only the format recorded in the fi rst session
can be played.
• Some MP3s may not be played due to the condition of
the disc or recording.
• Recordings will not necessarily be played in the order
you recorded them.
MPEG Layer-3 audio coding technology licensed from
Fraunhofer IIS and Thomson.
Page 7
ENGLISH
7
FM/AM radio
Manual tuning
1 Press [ FM/AM] to select “FM” or “AM”.
2 Press [ TUNE MODE] to select “MANUAL”.
3 Press [ 2/3 ] or [5/6] to select the
frequency of the required station.
To tune automatically
Press and hold [2/3] or [5/6] until the
frequency starts changing rapidly.
• Auto tuning may be interrupted when there is excessive
interference.
• To cancel auto tuning, press [2/3] or [5/6 ]
once again.
To improve the sound quality
When “FM” is selected
Press [ FM MODE] to display “MONO”.
Press again to cancel.
• “MONO” is also cancelled if the frequency is changed.
• Turn off “MONO” for normal listening.
When “AM” is selected
Press and hold [ TUNE MODE].
Each time you press and hold the button: BP 2
RDS broadcasting
This unit can display the text data transmitted by the
radio data system (RDS) available in some areas.
Press [ DISPLAY] to display:
Station name
(PS)
RDS displays may not be available if reception is poor.
Program type
]
(PTY)
]
BP 1
Frequency
(FREQ)
Memory preset
30 FM and 15 AM stations can be preset.
Automatic presetting
1 Press [PLAY MODE] to select “CURRENT” or
“LOWEST” frequency.
2 Press [ AUTO PRESET] to start presetting.
Manual presetting
1 Press [TUNE MODE] to select “MANUAL”.
2
Press
[2 /3] or [5/6 ]
required station.
to tune to the
3 Press [ PROGRAM].
4 Press the numeric buttons to select a channel.
The station occupying a channel is erased if another
station is preset to that channel.
5 Repeat steps 2 to 4 to preset more stations.
Selecting a preset station
1 Press [TUNE MODE] to select “PRESET”.
2 Press
Alternatively, press the numeric buttons to select the
channel.
This system can also receive AM broadcasts allocated in
10 kHz steps.
Press and hold [FM/AM].
After a few seconds the display changes to a fl ashing
display of the current minimum frequency. Release the
button when the minimum frequency changes.
• To return to the original step, repeat the above steps.
• After changing the setting, previously preset frequency
[2 /3] or [5/6 ] to select the
channel.
AM allocation setting
will be cleared.
(by main unit only)
USB
The USB connectivity enables you to connect and play
MP3 tracks from USB mass storage device.
Preparation
Before connecting any USB mass storage device to the
unit, ensure that the data stored therein has been backed
up.
Do not use a USB extension cable. The USB mass
storage device connected via the cable will not be
recognised by this unit.
1 Reduce the volume and connect the USB mass
storage device to the USB port.
Hold the main unit when connecting or disconnecting
the USB mass storage device.
2 Press [ 4/9, USB] to start play.
Stop
playback
For other operations, they are similar as those
described in “Discs” (Z page 6).
Compatible devices
Devices which are defi ned as USB mass storage class:
• USB devices that support bulk only transfer.
• USB devices that support USB 2.0 full speed.
Supported formats
• Track must have the extension “.mp3” or “.MP3”.
• CBI (Control/Bulk/Interrupt) is not supported.
• A device using NTFS fi le system is not supported.
[Only FAT 12/16/32 (File Allocation Table 12/16/32) fi le
system is supported.]
• Depending on the sector size, some fi les may not work.
• Maximum album: 255 albums
• Maximum track: 2500 tracks
• Maximum track in one album: 999 tracks
Press [ 8 ]. “RESUME” is displayed.
The position is memorised.
Press [4/9, USB] to resume play.
Press [8] again to clear the position.
7
7
RQT9699
ENGLISH
Page 8
ENGLISH
8
Clock and timers
Setting the clock
This is a 24-hour clock.
ENGLISH
1 Press [ CLOCK/TIMER] to select “CLOCK”.
2 Within 10 seconds, press [R/T] to set the time.
3 Press [ OK].
• Press [CLOCK/TIMER] to display the clock for few
seconds.
• Reset the clock regularly to maintain accuracy.
Using the sleep timer
This function enables you to turn off the unit
automatically after the set time.
Press [ SLEEP] to select your desired time
(in minutes) .
Press [SLEEP] to show the remaining time and press
[SLEEP] again to select your desired time.
• The play and sleep timer can be used together.
• The sleep timer always has priority. Make sure not to
overlap timer settings.
RQT9699
8
8
Using the play timer
You can set the timer to come on at a certain time to
wake you up
Turn the unit on and set the clock.
Prepare the music source you want to listen to; disc,
radio, USB or music port source and set the volume.
.
1 Press [CLOCK/TIMER] to select “# PLAY 1”,
“# PLAY 2” or “# PLAY 3”.
2 Within 10 seconds, press [R/T] to set the
starting time.
3 Press [OK].
4 Repeat steps 2 and 3 to set the fi nishing time.
To activate the timer
5 Press [ #, PLAY] to turn on “# PLAY 1”,
“# PLAY 2” or “# PLAY 3”.
“# ” is shown.
6 Press [ `] to turn off the unit.
OFF120MIN90MIN60MIN30MIN
Change the
settings
Change the
source or
volume
Check the
settings
Cancel
• The timer will start at the preset time, with the volume
increasing gradually to the preset level.
• The unit must be in standby mode for the timer to
function.
Repeat steps 1 to 4 and 6
(Z see above).
1) Press [#, PLAY] twice to clear timer
indicator from the display.
2) Make changes to the source or
volume.
3) Perform steps 5 and 6
(Z see above).
Press [CLOCK/TIMER] to select
“# PLAY 1”, “# PLAY 2” or “# PL AY 3”.
Press [#, PLAY] twice to clear the timer
indicator from the display.
Sound adjustment
Preset EQ Press [ PRESET EQ] to select “HEAVY”,
Bass or
Tre bl e
Surround
sound
D.Bass Press [ D.BASS] to select “ON D.BASS”
Re-master
“SOFT”, “CLEAR”, “VOCAL” or “FLAT”.
1) Press [ BASS] or [ TREBLE]
(main unit: [ BASS/ TREBLE]) to select
“BASS” or “TREBLE”.
2) Press [ 2/3] or [5/6] to
adjust the level (–4 to +4).
Press [ SURROUND] to select
“ON SURROUND” or
“OFF SURROUND”.
If interference in FM stereo reception
increases, cancel the surround sound
effect.
or “OFF D.BASS”.
Press [ RE-MASTER] to select
“ON RE-MASTER” or
“OFF RE-MASTER”.
Optional equipments
Avoid interfering with other Panasonic
equipment
Other Panasonic audio or video equipment may start
functioning when you operate the unit using the supplied
remote control.
To solely operate this system, synchronise the main
unit with its corresponding remote control to operate in
“REMOTE 2” mode.
1 Press and hold [ MUSIC P.] on the main unit and
[2] until “REMOTE 2” is displayed.
2
Press and hold [ OK] and [2] for at least 2 seconds.
To change the mode back to “REMOTE 1”, repeat steps 1
and 2 by replacing [2] with [1].
Page 9

ENGLISH
9
Portable audio equipment
Turn off the equalizer function (if there is any) of the
portable audio equipment before you plug into the
MUSIC P. jack. Otherwise, sound from the speaker may
be distorted.
1 Plug the audio cord into the MUSIC P. jack.
2 Press [ MUSIC PORT] (main unit: [MUSIC P.]) and
play the portable audio equipment.
To adjust the sound input level
Press [ INPUT LEVEL] to select “HIGH” or “NORMAL”.
• Select “NORMAL” if the sound is distorted during
“HIGH” input level.
• Cords and the equipment are not included.
• For details, refer to the portable audio equipment’s
instruction manual.
Connecting to headphones
Connect headphones (not included) to the headphones
jack.
Plug type: Ø 3.5 mm stereo
• Avoid listening for prolonged periods of time to prevent
hearing damage.
• Excessive sound pressure from earphones and
headphones can cause hearing loss.
• Listening at full volume for long periods may damage
the user’s ears.
Maintenance
To clean this unit, wipe with a soft, dry cloth.
• Never use alcohol, paint thinner or benzine to clean
this unit.
• Before using chemically treated cloth, read the
instructions that came with the cloth carefully.
Troubleshooting guide
Before requesting service, make the following checks.
If you are in doubt about some of the check points, or if
the solutions indicated do not solve the problem, consult
your dealer for instructions.
■ Common problems
No response when remote control buttons are
pressed.
• Check that the batteries are installed correctly.
Distorted sound or no sound.
• Turn the volume up.
• Turn off the unit, determine and correct the cause.
Turn the unit on again. It may be caused by straining of
the speakers through excessive volume or power, and
using the unit in a hot environment.
A “humming” sound can be heard during play.
• An AC mains lead or fl uorescent light is near the unit.
Keep other appliances and cords away from the unit.
■ Discs
Incorrect display or play will not start.
• You have not inserted the disc correctly; insert it
correctly.
• Disc may be dirty. Wipe it clean.
• Replace the disc if it is scratched, warped, or nonstandard.
• Condensation has formed: wait 1 to 2 hours for it to
evaporate.
■ Radio
A beat sound is heard.
• Turn off any television nearby or move the unit away
from any television.
• Switch to either BP 1 or BP 2 when in AM tuner mode.
A low hum is heard during AM broadcast.
• Separate the antenna from other cables and cords.
■ USB
No response when [
• Disconnect the USB device and then reconnect it.
Alternatively, turn the unit off and on again.
The USB drive or its contents cannot be read.
• The USB drive format or its contents is/are not
compatible with the system.
• The USB host function of this product may not work
with some USB devices.
• USB devices with storage capacity of more than
8 gigabytes may not work in some instances.
Slow operation of the USB device.
• Large fi le size or high memory USB fl ash drive takes
longer time to read.
4/9
, USB] is pressed.
■ Unit displays
“NO PLAY”
• Examine the content. You can only play supported
format.
• If there are more than 255 albums or folders (audio and
non-audio), some of the MP3 fi les in these albums may
not be read and played. Transfer these music albums
to another USB. Alternatively, reformat the USB device
and save these music albums prior to saving the other
non-audio folders.
ENGLISH
9
9
RQT9699
Page 10
“F61” or “F76”
• Check and correct the speaker cords connection. If this
does not fi x the problem, consult the dealer.
• Disconnect the USB device. Turn the unit off and on
again.
“ERROR”
ENGLISHENGLISH
• Incorrect operation performed. Read the instructions
and try again.
“ADJ UST CLOC K”
• Clock is not set. Adjust the clock accordingly.
“ADJ UST TI M ER”
• Play timer is not set. Adjust the play timer accordingly.
“AUTO OFF”
• The unit has been left unused for about 29 minutes and
will turn off in a minute. Press any button to cancel.
Memory reset (Initialisation)
When the following situations occur, refer to the
instructions below to reset the memory:
• There is no response when buttons are pressed.
• You want to clear and reset the memory contents.
To reset memory
1) Disconnect the AC mains lead. (Wait at least
3 minutes before proceeding to step 2.)
2) While pressing and holding down [ 1] on the
main unit, reconnect the AC mains lead.
Continue to press and hold the button
(approximately 10 seconds) until “– – – – – – – –”
is shown.
3) Release [1].
All the settings are returned to the factory preset.
You will need to reset the memory items.
RQT9699
1010
10
Specifi cations
■ Amplifi er section
RMS output power stereo mode
Front Ch (both ch driven)
5 W per channel (6
Total RMS stereo mode power 10 W
■ FM/AM tuner, terminals section
Preset station FM 30 stations
AM 15 stations
Frequency Modulation (FM)
Frequency range
87.50 MHz to 108.00 MHz (50 kHz step)
Antenna terminals 75
Amplitude Modulation (AM)
Frequency range 522 kHz to 1629 kHz (9 kHz step)
520 kHz to 1630 kHz (10 kHz step)
Headphone jack
Terminal Stereo, 3.5 mm jack
Output level (CD, 1 kHz, –20 dB)
0.7 mW + 0.7 mW, 32
Music port (top)
Sensitivity
Normal 490 mV, 15 k
High 100 mV, 15 k
Terminal Stereo, 3.5 mm jack
■ Disc section
Disc played (8 cm or 12 cm)
CD, CD-R/RW (CD-DA, MP3
Pick up
Wavelength 790 nm (CD)
Laser power CLASS I
NORSK
Bølgelengde 790 nm (CD)
Laserstyrke Ingen farlig stråling sendes ut
Audio output (Disc)
Number of channels 2 ch (FL, FR)
FL = Front left channel
FR = Front right channel
MPEG-1 Layer 3, MPEG-2 Layer 3
), 1 kHz, 10% THD
(unbalanced)
(Max)
)
■ USB section
USB Port
USB standard USB 2.0 full speed
Media fi le format support MP3 (*.mp3)
USB device fi le system FAT12, FAT16, FAT32
USB port power 500 mA (Max)
■ Speaker section
Type 1 way, 1 speaker system (Bass refl ex)
Speaker unit(s)
Full range 10 cm cone type
Impedance 6
Output sound pressure 83 dB/W (1 m)
Frequency range 61 Hz to 17 kHz (–16 dB)
95 Hz to 15 kHz (–10 dB)
Dimensions (W x H x D) 139 mm x 224 mm x 136 mm
Mass 1.3 kg
■ General
Power supply AC 220 to 240 V, 50 Hz
Power consumption 12 W
Dimensions (W x H x D) 184 mm x 123 mm x 228 mm
Mass 1.1 kg
Operating temperature range 0°C to +40°C
Operating humidity range
35% to 80% RH (no condensation)
Power consumption in standby mode:
0.3 W (approximate)
1) Specifi cations are subject to change without notice.
Mass and dimensions are approximate.
2) Total harmonic distortion is measured by the digital
spectrum analyzer.
Page 11
Las operaciones de estas instrucciones se
describen principalmente usando el mando
a distancia, pero puede realizar las mismas
operaciones en la unidad principal si los controles
son los mismos.
Es posible que su unidad no se parezca exactamente a
la que se muestra.
Estas instrucciones de funcionamiento se aplican al
siguiente sistema:
Sistema
Unidad principal
Altavoces
Lado posterior del aparato
Parte interior del aparato
SC-PM04
SA-PM04
SB-PM02
Precauciones de seguridad
¡ADVERTENCIA!
Unidad
• Para reducir el riesgo de incendios, descargas
eléctricas o daños en el producto,
– No exponga este aparato a la lluvia, humedad, goteo
o salpicaduras.
– No coloque encima del mismo objetos con líquidos
como, por ejemplo, fl oreros.
– Utilice solamente los accesorios recomendados.
– No quite las tapas.
– No reparar esta unidad usted mismo. Solicite las
reparaciones al personal de servicio cualifi cado.
¡CUIDADO!
Unidad
• Para reducir el riesgo de incendios, descargas
eléctricas o daños en el producto,
– Para mantener bien ventilada esta unidad, no la
instale ni la ponga en un estante de libros, mueble
empotrado u otro espacio de dimensiones reducidas.
– No obstruya las aberturas de ventilación de la
unidad con periódicos, manteles, cortinas u objetos
similares.
– No coloque objetos con llama descubierta, una vela
por ejemplo, encima de la unidad.
• Esta unidad ha sido diseñada para ser utilizada en
climas moderados.
• Instale esta unidad de forma que el cable de
alimentación de CA se pueda desconectar de la toma
de corriente inmediatamente si ocurre algún problema.
• Esta unidad puede tener interferencias causadas
por teléfonos móviles durante su utilización. Si
tales interferencias resultan evidentes, aumente la
separación entre la unidad y el teléfono móvil.
• Esta unidad utiliza un láser. Usar los controles, hacer
los ajustes o los pasos requeridos en forma diferente
de la aquí expuesta puede suponer en exposición
peligrosa a la radiación.
Pila
• No abra forzando o cortocircuitando la pila.
• No cambie la pila alcalina o de manganeso.
• No utilice la pila si la cubierta protectora está
levantada.
• No caliente o exponga a las llamas.
• No deje la(s) pila(s) en un automóvil expuesto a luz
solar directa durante un largo período de tiempo con
las puertas y ventanas cerradas.
• Quite la pila si no utiliza el mando a distancia durante
un largo periodo de tiempo. Guárdela en una zona
fresca y oscura.
• Hay peligro de explosión si se sustituye
incorrectamente la pila. Solo sustituir con el mismo tipo
recomendado por el fabricante.
• Al desechar las baterías, por favor contacte con sus
autoridades locales o distribuidor y consulte el método
correcto de eliminación.
RQT9699
22
11
ESPAÑOLESPAÑOL
Page 12

3
ESPAÑOL
Información para Usuarios sobre la Recolección y
Eliminación de aparatos viejos y baterías usadas
Estos símbolos en los productos, embalajes
y/o documentos adjuntos, signifi can que
los aparatos eléctricos y electrónicos y las
baterías no deberían ser mezclados con los
desechos domésticos.
Para el tratamiento apropiado, la
recuperación y el reciclado de aparatos viejos
y baterías usadas, por favor, observe las
normas de recolección aplicables, de acuerdo
a su legislación nacional y a las Directivas
2002/96/CE y 2006/66/CE.
Al desechar estos aparatos y baterías
ESPAÑOL
RQT9699
3
12
correctamente, Usted estará ayudando a
preservar recursos valiosos y a prevenir
cualquier potencial efecto negativo sobre la
salud de la humanidad y el medio ambiente
que, de lo contrario, podría surgir de un
manejo inapropiado de los residuos.
Para mayor información sobre la recolección
y el reciclado de aparatos y baterías viejos,
por favor, contacte a su comunidad local,
su servicio de eliminación de residuos o al
comercio donde adquirió estos aparatos.
Podrán aplicarse penas por la eliminación
incorrecta de estos residuos, de acuerdo a la
legislación nacional.
Para usuarios empresariales en la Unión
Europea
Si usted desea descartar aparatos eléctricos
y electrónicos, por favor contacte a su
distribuidor o proveedor a fi n de obtener
mayor información.
[Informacion sobre la Eliminación en otros
Países fuera de la Unión Europea]
Estos símbolos sólo son válidos dentro
de la Unión Europea. Si desea desechar
estos objetos, por favor contacte con sus
autoridades locales o distribuidor y consulte
por el método correcto de eliminación.
Nota sobre el símbolo de la bateria (abajo,
dos ejemplos de símbolos):
Este símbolo puede ser usado en
combinación con un símbolo químico. En este
caso, el mismo cumple con los requerimientos
establecidos por la Directiva para los
químicos involucrados.
Contents
Precauciones de seguridad ..................... 2
Accesorios suministrados .......................3
Preparación del mando a distancia ........3
Colocación de los altavoces....................4
Conexiones ...............................................4
Guía de control ........................................5
Discos ........................................................ 6
Radio FM/AM ............................................ 7
USB ............................................................ 7
Reloj y temporizadores ...........................8
Ajuste del sonido .....................................8
Equipos opcionales ..................................8
Mantenimiento .......................................... 9
Guía para la solución de problemas ....... 9
Especifi caciones ....................................10
Accesorios suministrados
Por favor, compruebe e identifi que los accesorios
suministrados.
& 1 x Cable de alimentación
de CA
& 1 x Mando a distancia
(N2QAYB000555)
& 1 x Antena interior
de FM
& 1 x Antena de
cuadro de AM
Preparación del mando a distancia
R6/LR6, AA
(no suministrada)
Use pilas alcalinas o de manganeso.
Introdúzcalas de forma tal que los polos (+ y –)
concuerden con los del mando a distancia.
Apunte al sensor de señal del mando a distancia
(Z página 5)
Distancia: Dentro de aproximadamente 7 m
Ángulo: Aproximadamente 20° arriba y abajo,
.
30° izquierda y derecha
Page 13
4
ESPAÑOL
Colocación de los altavoces
Conexiones
Conecte el cable de alimentación de CA solo después de haber hecho todas las demás
conexiones.
Los altavoces han sido diseñados idénticamente por
lo que no es necesario orientar el canal derecho o
izquierdo.
No quite la rejilla frontal de los altavoces.
Utilice solamente los altavoces suministrados
La utilización de otros altavoces puede dañar la unidad y
la calidad del sonido se verá afectada negativamente.
• Mantenga sus altavoces alejados un mínimo de
10 mm del sistema para disponer de una ventilación
apropiada.
• Estos altavoces no disponen de blindaje magnético.
No lo ponga cerca de la TV, el PC u otros equipos
afectados fácilmente por el magnetismo.
• Si reproduce el sonido con niveles altos durante largos
periodos de tiempo podrá dañar los altavoces y reducir
su duración.
• Reduzca el volumen para evitar daños en los casos
siguientes.
– Cuando reproduzca sonido distorsionado.
– Cuando ajuste la calidad del sonido.
Cuidado
• Use los altavoces sólo con el sistema
recomendado. De lo contrario, se podrían dañar
el amplifi cador y los altavoces, y se podría
ocasionar un incendio. Consulte a un técnico
de servicio especializado si se ha producido
algún daño o un cambio repentino en su
funcionamiento.
• No instale estos altavoces en paredes ni techos.
1 Conecte la antena de cuadro de AM.
Coloque la antena de cuadro sobre su base hasta
que haga clic.
(6:)
SPEAKERS
(SB-PM02)
(6:)
4 Conecte el cable de alimentación de CA.
No utilice el cable de alimentación CA de otro equipo.
A la toma de CA
2 Conecte la antena interior de FM.
Coloque la antena en la posición que ofrezca
la mejor recepción.
Cinta
adhesiva
3 Conecte los altavoces.
B
A
Rojo
Tenga cuidado de no cortocircuitar
ni invertir la polaridad de los cables
de los altavoces, ya que pueden
dañarse.
Conservación de la energía
El sistema consume aproximadamente 0,3 W
cuando está en modo en espera. Desconecte el
suministro eléctrico si no utiliza el sistema.
Se perderá alguna función después de desconectar
el sistema. Tiene que ajustarlos de nuevo.
(6:)
(6:)
Negro
(6:)
(6:)
4
13
ESPAÑOL
RQT9699
Page 14
5
ESPAÑOL
Guía de control
Los números entre paréntesis indican la página de referencia.
A Botón de alimentación en
A
B
C
ESPAÑOL
D
E
F
G
H
I
J
K
L
M
RQT9699
5
14
N
O
P
Q
R
S
T
U
V
W
X
Y
Z
a
b
espera/conectada [`], [1] (8, 10)
Pulse este botón para cambiar del modo
de alimentación conectada al modo de
alimentación en espera o viceversa. En
el modo de alimentación en espera, el
aparato consume una pequeña cantidad
de corriente.
B [DIMMER]
Reduce la iluminación de la pantalla.
Vuelva a pulsar para cancelar.
C Botones numéricos [1 a 9, 0, ≧10]
Para seleccionar un número de 2 dígitos;
ejemplo: 16: [≧10] ] [1] ] [6]
Para seleccionar un número de 3 dígitos;
ejemplo: 226: [≧10] ] [≧10] ] [2] ]
D [DEL] (6)
E [PROGRAM] (6, 7)
[REPEAT] (6)
[PLAY MODE] (6, 7)
F [4/9, USB] (7)
[4/9, CD] (6)
G [2/3 ], [5/6] (6, 7, 8)
H [RE-MASTER] (8)
I [BASS] (8)
J [R/T] (6, 8)
[Y/U] tienen exactamente las mismas
funciones que [2/3] o [5/ 6].
[OK] (6, 8)
K [DISPLAY] (6, 7)
L [AUTO PRESET] (7)
M [TUNE MODE] (7)
N [#, PLAY] (8)
O [CLOCK /TIMER] (8)
[SLEEP] (8)
P
[2] ] [6]
Encima de la unidad
MUSIC P.
c
d
e
f
V
A
g
Q [AUTO OFF]
Esta función le permite apagar el
aparato (excepto en modo de radio)
después de alrededor de 30 minutos
sin utilizarlo. “AUTO OFF” se activa
según la confi guración de fábrica.
Para cancelar, pulse el botón de
nuevo.
R Control de volumen [+/ –, VOL
[+/ –, VOLUME]
S [MUTE]
Silencia el sonido. Vuelva a pulsar
para cancelar.
“MUTE” también se cancela cuando
se ajusta el volumen o se apaga el
aparato.
T [MUSIC PORT], [MUSIC P.] (8, 9 )
U [FM/AM] (7)
T
G
V [8] (6, 7)
W [D.BASS] (8)
X [PRESET EQ] (8)
Y [TREBLE] (8)
Z [SURROUND] (8)
a [INPUT LEVEL] (9)
],
b [FM MODE] (7)
c Entrada de MUSIC P.
d Visualizador
e Sensor de señal del mando a
f Puerto USB,
g [BASS/TREBLE] (8)
h [x, OPEN/CLOSE] (6)
U
(puerto de música) ( 9)
Entrada de auriculares,
distancia
R
F
h
(9)
(7)
Page 15
6
ESPAÑOL
Discos
Reproducción básica
1 Pulse [x, OPEN/CLOSE] en la unidad principal
para abrir la bandeja.
La unidad se enciende, introduzca un disco con la
parte impresa hacia arriba.
Vuelva a pulsar [x, OPEN/CLOSE] para cerrar la
bandeja.
2 Pulse [4/9, CD] para iniciar la reproducción.
Parar la
reproducción
Pausar la
reproducción
Saltar pistas
Buscar por
pistas
Saltar álbum
Función de modo de reproducción
Pulse [PLAY MODE] para seleccionar el modo
deseado.
1-TRACK
1TR
1-ALBUM
1ALBU M
RANDOM
RND
1-ALBUM
RANDOM
1ALBU M RND
Esta función no funciona con “Reproducción
programada”.
Pulse [8 ].
Pulse [4/9, CD]. Vuelva a pulsar para
reanudar la reproducción.
Pulse [2 /3] o [5/6].
Mantenga pulsado [2 /3] o
[5/6 ] durante la reproducción o
la pausa.
Pulse [R/T ].
Reproduce una pista seleccionada del
disco.
Pulse los botones numéricos para
seleccionar la pista.
Reproduce un álbum seleccionado del
disco.
Pulse [R/T ] para seleccionar el álbum.
Reproduce un disco aleatoriamente.
Reproduce aleatoriamente todas las
pistas de un álbum seleccionado.
Pulse [R/T ] para seleccionar el álbum.
Reproducción programada
Esta función le permite programar hasta 24 pistas.
1 Pulse [4/9, CD] y luego [8].
2 Pulse [PROGRAM].
Se muestra “PGM”.
3 Pulse los botones numéricos para seleccionar
la pista.
Repita este paso para programar otras pistas.
4 Pulse [4/9, CD] para iniciar la reproducción.
3 Pulse [R/T ] para seleccionar el álbum.
4 Pulse [5/6] una vez y después los botones
numéricos para seleccionar la pista.
5 Pulse [OK].
6 Repita los pasos 3 a 5 para programar otras
pistas.
7 Pulse [4/9, CD] para iniciar la reproducción.
Cancelar
el modo de
programación
Reproducir el
programa otra
vez
Comprobar el
contenido del
programa
Borrar la última
pista
Borrar todas
las pistas
• La memoria del programa se borra cuando se abre la
bandeja de disco.
• Para repetir la reproducción de un programa o el
modo de reproducción que haya seleccionado, pulse
[REPEAT]. Vuelva a pulsar para cancelar.
Pulse [PROGRAM] en el modo de
parada.
Pulse [PROGRAM] y a continuación
[4/9, CD] en modo de parada.
Pulse [2 /3] o [5/6]
cuando aparezca “PGM” en el modo
de parada.
Para comprobar mientras programa,
pulse [PROGRAM] dos veces
después de que aparezca “PGM”, y
pulse [2/3] o [5/6].
Pulse [DEL] en el modo de parada.
Pulse [8 ] en el modo de parada. Se
visualiza “CLR ALL”. Pulse el botón
antes de que pasen 5 segundos para
borrar todas las pistas.
Cómo comprobar la información de la
pista
Puede ver la información sobre la pista en curso desde
el panel de visualización.
Pulse [DISPLAY] durante la reproducción o en el
modo pausa.
• Este aparato puede visualizar etiquetas ID3 (versiones
1.0 y 1.1).
• Los datos de texto no compatibles no se pueden
visualizar.
NOTA sobre el uso de DualDisc
La cara de contenido de audio digital de un DualDisc
no cumple las especifi caciones técnicas del formato
Compact Disc Digital Audio (CD-DA) por lo que la
reproducción puede que no sea posible.
NOTA sobre los CD
• Esta unidad puede tener acceso a un máximo de 99
pistas.
• Esta unidad puede reproducir archivos MP3 y CD-R /RW
de audio de formato CD-DA que hayan sido cerrados.
• Algunos CD-R/ RW tal vez no puedan ser reproducidos
debido a la condición de la grabación.
NOTA sobre los MP3
• Los archivos son tratados como pistas y las carpetas
como álbumes.
• Este aparato puede tener acceso a un máximo de
999 pistas, 255 álbumes y 20 sesiones.
• Los discos deben cumplir con la norma ISO9660 nivel
1 ó 2 (excepto para los formatos extendidos).
• Para reproducir en un orden determinado, prefi je los
nombres de las carpetas y los archivos con números
de 3 dígitos en el orden en que quiera reproducirlos.
Limitaciones en la reproducción de MP3
• Si ha grabado archivos MP3 en el mismo disco que
CD-DA, se podrá reproducir únicamente el formato
grabado en la primera sesión.
• Algunos archivos MP3 no se podrán reproducir debido
a la condición del disco o de la grabación.
• Las grabaciones no se reproducirán necesariamente
en el orden de grabación.
Tecnología de codifi cación de audio MPEG Layer-3
licenciado de Fraunhofer IIS y Thomson.
6
15
ESPAÑOL
RQT9699
Page 16

7
ESPAÑOL
Radio FM/AM
Sintonización manual
1 Pulse [FM /AM] para seleccionar “FM” o “AM”.
2 Pulse [TUNE MODE] para seleccionar “MANUAL”.
3 Pulse [2 /3] o [5/6 ] para seleccionar la
frecuencia de la emisora requerida.
Para sintonizar automáticamente
Mantenga pulsado [2 /3] o [5/6] hasta que la
frecuencia empiece a cambiar rápidamente.
• La sintonización automática tal vez se interrumpa
ESPAÑOL
cuando las interferencias sean excesivas.
• Para cancelar la sintonización automática, pulse
[2/3] o pulse nuevament [5/6].
Para mejorar la calidad de sonido
Cuando “FM” esté seleccionado
Pulse [FM MODE] para visualizar “MONO”.
Vuelva a pulsar para cancelar.
• “MONO” también se cancelará si se cambia la
frecuencia.
• Deje “MONO” apagado para la escucha normal.
Cuando “AM” esté seleccionado
Mantenga pulsado [TUNE MODE] .
Cada vez que mantenga pulsado el botón: BP 2
Emisiones RDS
Este aparato puede visualizar datos de texto transmitidos
por el sistema de datos de radio (RDS) disponible en
algunas zonas.
Pulse [DISPLAY] para visualizar:
Nombre de la
emisora (PS)
Las visualizaciones RDS tal vez no se encuentren
disponibles si la recepción no es adecuada.
RQT9699
7
16
Tipo de programa
]
(PTY)
Frecuencia
]
(FREQ)
Grabación de emisoras en memoria
Se pueden presintonizar 30 emisoras FM y 15 AM.
Presintonización automática
1 Pulse [PLAY MODE] para seleccionar la
frecuencia “CURRENT” (actual) o “LOWEST”
(la más baja) .
2 Pulse [AUTO PRESET] para iniciar la
presintonización.
Presintonización manual
1 Pulse [TUNE MODE] para seleccionar “MANUAL”.
2
Pulse [2/3] o [5/6] para sintonizar la
emisora deseada.
3 Pulse [PROGRAM].
4 Pulse los botones numéricos para seleccionar
el canal.
La emisora que ocupa un canal se borrará si se
presintoniza otra emisora en ese canal.
5 Repita los pasos de 2 a 4 para presintonizar más
emisoras.
Selección de una emisora presintonizada
1 Pulse [TUNE MODE] para seleccionar “PRESET”.
2 Pulse [2 /3] o [5/6 ] para seleccionar el
BP 1
canal.
Alternativamente, pulse los botones numéricos para
seleccionar el canal.
Confi guración de asignación AM
(unidad principal solamente)
Este sistema también puede recibir emisiones AM
asignadas en intervalos de 10 kHz.
Mantenga pulsado [FM/AM] .
Pasados algunos segundos, la pantalla cambia y
muestra la frecuencia mínima actual parpadeando.
Cuando cambie la frecuencia mínima, suelte el botón.
• Para volver al paso original, repita los pasos de arriba.
• Después de cambiar la confi guración, la frecuencia
predefi nida previamente se borrará.
USB
La conectividad USB le permite conectar y reproducir
pistas MP3 de dispositivos de tipo de almacenamiento
masivo USB.
Preparación
Antes de conectar cualquier dispositivo USB de
almacenamiento masivo a la unidad, asegúrese de
que se ha hecho una copia de seguridad de los datos
almacenados.
No use un cable de extensión USB. Esta unidad no
reconocerá el dispositivo de almacenamiento masivo
USB conectado a través del cable.
1 Reduzca el volumen y conecte el dispositivo USB
de almacenamiento masivo al puerto USB.
Sostenga la unidad principal cuando conecte o
desconecte el dispositivo de almacenamiento masivo
USB.
2 Pulse [4/9, USB] para iniciar la reproducción.
Parar la
reproducción
Otras funciones existentes, son parecidas a las
descritas en “Discos” (Z página 6).
Dispositivos compatibles
Dispositivos defi nidos como tipo de almacenamiento
masivo USB:
• Dispositivos USB que soportan sólo transferencia en
masa.
• Dispositivos USB que soportan USB 2.0 a velocidad
plena.
Formatos admitidos
• La pista debe tener la extensión “.mp3” o “.MP3”.
• CBI (en inglés, Control/Bulk /Interrupt) no se admite.
• Un dispositivo que utilice el sistema de archivos
NTFS no es admitido. [Sólo se admiten el sistema de
archivos FAT 12/16/ 32 (Tabla de asignación de archivo
12/16/3 2)] .
• Dependiendo del tamaño del sector, algunos archivos
pueden no funcionar.
• Máximo de álbumes: 255 álbumes
• Máximo de pistas: 2500 pistas
• Máximo de pistas en un álbum: 999 pistas
Pulse [8 ]. Se visualizará “RESUME”.
Se memorizará la posición.
Pulse [4/9, USB] para reanudar la
reproducción.
Vuelva a pulsar [8] para borrar la
posición.
Page 17
8
ESPAÑOL
Reloj y temporizadores
Puesta en hora
Éste es un reloj de sistema de 24 horas.
1 Pulse [CLOCK/TIMER] para seleccionar
“CLOCK”.
2 En un lapso de 10 segundos, pulse [R/T] para
confi gurar la hora.
3 Pulse [OK].
• Pulse [CLOCK/TIMER] para visualizar el reloj durante
unos segundos.
• Vuelva a poner en hora el reloj con regularidad para
mantener su precisión.
Utilización del temporizador para dormir
Esta función le permite apagar la unidad
automáticamente después de la hora fi jada.
Pulse [SLEEP] para seleccionar la hora deseada
(en minutos).
OFF120MIN90MIN60MIN30MIN
Vuelva a pulsar [SLEEP] para mostrar la hora y luego
pulse [SLEEP] para seleccionar el tiempo deseado.
• El temporizador para reproducción y para dormir
pueden usarse al mismo tiempo.
• El temporizador para dormir siempre tiene prioridad.
Asegúrese de no superponer los ajustes del
temporizador.
Utilización del temporizador de
reproducción
Puede ajustar la hora para activarse a una hora
determinada y despertarle.
Encienda el aparato y ponga en hora el reloj.
Prepare la fuente de música que desea escuchar; fuente
de disco, radio, USB o puerto de música y ajuste el
volumen.
1 Pulse [CLOCK/TIMER] para seleccionar
“# PLAY 1”, “# PLAY 2” o “# PLAY 3”.
2 En un lapso de 10 segundos, pulse [R/T] para
ajustar la hora de inicio.
3 Pulse [OK].
4 Repita los pasos 2 y 3 para ajustar la hora de
fi nalización.
Para activar el temporizador
5 Pulse [#, PLAY] para encender “# PL AY 1”,
“# PLAY 2” o “# PL AY 3”.
Se muestra “# ”.
6 Pulse [` ] para apagar el aparato.
Cambiar la
confi guración
Cambiar la
fuente o el
volumen
Comprobar la
confi guración
Cancelar
• El temporizador se pondrá en marcha a la hora
programada y el volumen aumentará gradualmente
hasta el nivel seleccionado.
• El aparato debe estar en modo de espera para que el
temporizador funcione.
Repita los pasos de 1 a 4 y 6 (Z ver
arriba).
1) Pulse [#, PLAY] dos veces
para borrar el indicador del
temporizador de la pantalla.
2) Cambie la fuente o el volumen.
3) Ejecute los pasos 5 y 6 (Z ver
arriba).
Pulse [CLOCK/TIMER] para
seleccionar “ # PLAY 1”, “# PL AY 2”
o “# PL AY 3”.
Pulse [#, PLAY] dos veces para
borrar el indicador del temporizador
de la pantalla.
Ajuste del sonido
Ecualizador
preajustado
(Preset EQ)
Graves o
agudos
Sonido
ambiente
D.Bass Pulse [D.BASS] para seleccionar
Re-master
Pulse [PRESET EQ] para seleccionar
“HEAVY”, “SOFT”, “CLEAR”, “VOCAL”
o “FLAT”.
1) Pulse [BASS] o [TREBLE] (unidad
principal: [BASS/TREBLE]) para
seleccionar “BASS” o “TREBLE”.
2) Pulse [2 /3] o [5/6] para
ajustar el nivel (–4 a +4).
Pulse [SURROUND] para seleccionar
“ON SURROUND” o “OFF SURROUND”.
Si aumentan las interferencias con la
recepción estéreo de FM, cancele el
efecto de sonido envolvente.
“ON D.BASS” o “OFF D.BASS”.
Pulse [RE-MASTER] para seleccionar
“ON RE-MASTER” o “OFF RE-MASTER”.
Equipos opcionales
Evite interferir con otros equipos
Panasonic
Otros equipos de audio o vídeo de Panasonic podrían
empezar a funcionar cuando utilice la unidad a través del
mando a distancia proporcionado.
Para operar únicamente este sistema, sincronice
la unidad principal con su mando a distancia
correspondiente para funcionar en modo “REMOTE 2”.
1 Mantenga pulsado [MUSIC P.] en la unidad
principal y [2] hasta que aparezca “REMOTE 2”.
2 Mantenga pulsado [OK] y [2] durante por lo
menos 2 segundos.
Para cambiar el modo de nuevo a “REMOTE 1” repita los
pasos 1 y 2 sustituyendo [2] por [1].
8
17
ESPAÑOL
RQT9699
Page 18

9
ESPAÑOL
Equipo portátil de audio
Desconecte la función ecualizador (si existe) del equipo
portátil de audio antes de enchufar en la entrada del
MUSIC P. (puerto de música). De lo contrario, el sonido
del altavoz saldrá distorsionado.
1 Enchufe el cable de audio a la entrada MUSIC P..
2
Pulse [MUSIC PORT] (unidad principal: [MUSIC P.])
y reproduzca el equipo portátil de audio.
Para ajustar el nivel de entrada del sonido
Pulse [INPUT LEVEL] para seleccionar “HIGH” (alto)
o “NORMAL” (normal) .
• Seleccione “NORMAL” (normal) si se distorsiona el
ESPAÑOL
sonido durante el nivel de entrada “HIGH” (alto).
• Los cables y el equipo no se suministran.
• Consulte los detalles en el manual de instrucciones del
equipo portátil de audio.
Conexión con los auriculares
Conecte los auriculares (no suministrada) en la toma de
auriculares.
Tipo de clavija: estéreo de Ø 3,5 mm
• Procure evitar utilizarlos mucho rato con el fi n de evitar
lesiones auditivas.
• La presión sonora excesiva de los auriculares puede
causar pérdida de audición.
• Escuchar a alto volumen durante mucho tiempo puede
dañar sus oídos.
Mantenimiento
Utilice un paño suave y seco para limpiar esta
unidad.
• No utilice nunca alcohol, diluyente de pintura o
gasolina para limpiar esta unidad.
• Antes de utilizar un paño impregnado químicamente,
lea con atención las instrucciones, las instrucciones
del mismo.
RQT9699
9
18
Guía para la solución de problemas
Antes de solicitar el servicio de reparaciones haga
las comprobaciones indicadas en la tabla de abajo. Si
tiene alguna duda acerca de algunos de los puntos de
comprobación o si las soluciones indicadas no resuelven
el problema, consulte a su distribuidor para obtener
instrucciones.
■ Problemas comunes
No hay respuesta cuando se pulsan los botones del
mando a distancia.
• Compruebe que las pilas estén correctamente
instaladas.
Sonido distorsionado o sin sonido.
• Suba el volumen.
• Apague la unidad, determine la causa y corríjala.
Vuelva a encender la unidad. Podría causarse por
sobrecargar los auriculares con una potencia o
volumen excesivos, y por utilizar la unidad en un
ambiente caliente.
Se puede oír un zumbido durante la reproducción.
• Un cable de alimentación de CA o una luz fl uorescente
se encuentran cerca de la unidad. Mantenga los otros
aparatos y cables alejados de la unidad.
■ Discos
Visualización incorrecta o la reproducción no se
inicia.
• No ha introducido correctamente el disco; introdúzcalo
correctamente.
• El disco podría estar sucio. Límpielo bien.
• Sustituya el disco si está rayado, deformado o no es un
disco convencional.
• Se ha formado condensación: espere 1 a 2 horas para
que se evapore.
■ Radio
Se oye un sonido rítmico.
• Apague cualquier televisor cercano o aleje la unidad
del mismo.
• Cambie a BP 1 o BP 2 cuando se encuentre en el
modo de sintonización de AM.
Se oye un leve zumbido durante las emisiones en
AM.
• Separe la antena de otros cables y conductores.
■ USB
No hay respuesta cuando se pulsa [4/9, USB].
• Desconecte el dispositivo USB y a continuación
vuélvalo a conectar. De modo alternativo, apague la
unidad y vuélvala a encender.
No se puede leer el dispositivo USB o su contenido.
• El formato del dispositivo USB o su contenido no son
compatibles con el sistema.
• La función de servidor USB de este producto puede no
funcionar con algunos dispositivos USB.
• Los dispositivos USB con capacidad de
almacenamiento superiores a 8 GB pueden no
funcionar en algunos casos.
Funcionamiento lento del dispositivo USB.
• Lleva más tiempo leer los archivos grandes o los
dispositivos USB con mucha memoria.
■ La unidad visualiza
“NO PLAY”
• Compruebe el contenido. Solo puede reproducir
formato admitido.
• Si hay más de 255 álbumes o carpetas (de audio o no),
algunos de los archivos MP3 de estos álbumes podrían
no leerse ni reproducirse. Transfi era estos álbumes
de música a otro USB. Alternativamente, reformatee
el dispositivo USB y guarde estos álbumes de música
antes de guardar las otras carpetas que no son de
audio.
Page 19

10
ESPAÑOL
“F61” o “F76”
• Compruebe y corrija la conexión de los cables de los
altavoces. Si esto no resuelve el problema, consulte a
su distribuidor.
• Desconecte el dispositivo USB. Apague la unidad y
vuelva a encenderla.
“ERROR”
• Se ha realizado una operación incorrecta. Lea las
instrucciones y vuelva a intentarlo.
“ADJ UST CLOC K”
• El reloj no está confi gurado. Ajuste el reloj
correctamente.
“ADJ UST TI M ER”
• El temporizador de reproducción no está confi gurado.
Ajuste el temporizador de reproducción correctamente.
“AUTO OFF”
• La unidad no ha sido utilizada durante alrededor de
29 minutos, y se apagará dentro de un minuto. Pulse
cualquier botón para cancelar.
Restablecer la memoria del sistema
(Inicialización)
Cuando ocurre la siguiente situación, consulte las
instrucciones de abajo para restablecer la memoria:
• Los botones no funcionan.
• Usted desea borrar y restablecer el contenido de la
memoria.
Para restablecer la memoria del sistema
1) Desconecte el cable de alimentación de CA.
(Espere al menos durante 3 minutos antes de
proseguir al paso 2).
2) Mientras mantenga pulsado [1 ] en la unidad
principal, vuelva a conectar el cable de
alimentación de CA.
Siga manteniendo pulsado el botón
(aproximadamente unos 10 segundos), hasta que
se muestre “– – – – – – – – ”.
3) Suelte [1].
Todos los valores vuelven a los predeterminados
en fábrica.
Usted necesitará restablecer los elementos de la
memoria.
Especifi caciones
■ Sección del amplifi cador
Modo estéreo de potencia de salida RMS
Canal frontal (ambos canales accionados)
5 W por canal (6
distorsión armónica total del 10%
Potencia total del modo estéreo RMS 10 W
■ Sintonizador de FM/AM, sección de
terminales
Emisora presintonizada 30 emisoras de FM
15 emisoras de AM
Modulación de frecuencia (FM)
Gama de frecuencias
87,50 MHz a 108,00 MHz (en pasos de 50 kHz)
Terminales de antena 75
Modulación de amplitud (AM)
Gama de frecuencias
522 kHz a 1629 kHz (en pasos de 9 kHz)
520 kHz a 1630 kHz (en pasos de 10 kHz)
Entrada de auriculares
Terminal Estéreo, entrada de 3,5 mm
Nivel de salida (CD, 1 kHz, –20 dB)
0,7 mW + 0,7 mW, 32
Puerto de música (encima)
Sensibilidad
Normal 490 mV, 15 k
Alto 100 mV, 15 k
Terminal Estéreo, entrada de 3,5 mm
■ Sección de discos
Discos reproducidos (8 cm o 12 cm)
CD, CD-R/RW (CD-DA, MP3
Dispositivo de lectura
Longitud de onda 790 nm (CD)
Potencia de láser CLASS I
Salida de audio (Disco)
Número de canales 2 canales (FL, FR)
FL = Canal izquierdo frontal
FR = Canal derecho frontal
MPEG-1 Layer 3, MPEG-2 Layer 3
), 1 kHz,
(desequilibrado)
(Máx.)
)
■ Sección USB
Puerto USB
Estándar USB USB 2.0 velocidad total
Soporte de formato de archivos de medios
MP3 (*.mp3)
Sistema de archivos de dispositivo USB
FAT12, FAT16, FAT32
Corriente puerto USB 500 mA (Máx.)
■ Sección de altavoces
Tipo
Sistema de 1 altavoz de 1 vía (Refl ector de bajos)
Altavoz(ces)
Gama completa Tipo cónico de 10 cm
Impedancia 6
Presión acústica de salida 83 dB/W (1 m)
Gama de frecuencias 61 Hz a 17 kHz (–16 dB)
95 Hz a 15 kHz (–10 dB)
Dimensiones (An x Al x Prf)
139 mm x 224 mm x 136 mm
Peso 1,3 kg
■ Generalidades
Alimentación 220 a 240 V CA, 50 Hz
Consumo energético 12 W
Dimensiones (An x Al x Prf)
184 mm x 123 mm x 228 mm
Peso 1,1 kg
Gama de temperaturas de funcionamiento
0 °C a +40 °C
Gama de humedad de funcionamiento
35% a 80% humedad relativa (sin condensación)
Consumo en el modo de espera:
0,3 W (aproximados)
1) Las especifi caciones están sujetas a cambios sin
previo aviso.
Los pesos y las dimensiones son aproximados.
2) La distorsión armónica total se mide con el analizador
de espectro digital.
10
19
ESPAÑOL
RQT9699
Page 20

2
SVENSKA
Funktionerna som beskrivs i denna bruksanvisning
baseras i huvudsak på styrning via fjärrkontroll, men
under förutsättning att kontrollerna är samma så kan
funktionerna även utföras via huvudenheten.
Din enhet kanske inte ser exakt likadan ut som på bilden.
Dessa användarinstruktioner är tillämpbara på följande
system:
System
Huvudenhet
Högtalare
SVENSKA
Apparatens insida
Tuo t t een s i s ällä
Produktets innside
RQT9699
2
20
Produktens baksida
Laitteen takaosa
På baksiden av produktet
SC-PM04
SA-PM04
SB-PM02
Säkerhetsföreskrifter
VARNING!
Enhet
• För att reducera risken för brand, elektrisk stöt eller
produktskada:
– Utsätt inte den här apparaten för regn, fukt, droppar
eller skvätt.
– Placera inga föremål fyllda med vätska, som t.ex.
vaser, på denna enhet.
– Använd endast rekommenderade tillbehör.
– Avlägsna inte höljen.
– Försök inte reparera denna enhet på egen hand.
Låt utbildad servicepersonal utföra service och
reparationer.
FÖRSIKTIGHET!
Enhet
• För att reducera risken för brand, elektrisk stöt eller
produktskada:
– För att apparaten ska få god ventilation, installera
eller placera den inte i en bokhylla, ett inbyggt skåp
eller i andra begränsade utrymmen.
– Se till att enhetens ventilationsöppningar inte är
förtäppta av tidningar, bordsdukar, gardiner eller
liknande föremål.
– Ställ inga föremål med öppen låga, så som ett tänt
stearinljus, ovanpå enheten.
• Denna enhet är avsedd för användning på platser med
tempererat klimat.
• Installera denna enhet så att AC-strömsladden kan
kopplas ur från uttaget direkt om något problem
uppstår.
• Det kan inträffa att den här enheten under
användningen tar emot radiostörningar, orsakade av
mobiltelefoner. Öka avståndet mellan enheten och
mobiltelefonen om störningarna är uppenbara.
• I denna produkt används laser. Om apparaten och
dess funktioner används eller justeras på annat sätt än
vad som specifi ceras i denna bruksanvisning kan den
avge farlig strålning.
Batteri
• Bryt inte upp och kortslut inte batteriet.
• Återuppladda inte alkaliskt batteri eller brunstensbatteri.
• Använd inte batteriet om höljet skalats av.
• Värm inte upp och utsätt inte batteriet för öppen eld.
• Lämna inte batteriet(/erna) i en bil som utsätts för
direkt solljus under en längre period med dörrar och
fönster stängda.
• Ta ur batteriet om du inte ska använda fjärrkontrollen
under en längre tidsperiod. Förvara på en sval, mörk
plats.
• Explosionsrisk förekommer om batteriet inte sätts i
korrekt. Ersätt endast med sort som rekommenderas
av tillverkaren.
• När du gör dig av med batterierna, var god kontakta
dina lokala myndigheter eller din lokala återförsäljare
och fråga efter rätt metod för avfallshantering.
SUOMI
VAROITUS!
• Vähennä tulipalon, sähköiskun tai laitteiston
vahingoittumisen vaaraa:
– Tätä laitetta ei saa altistaa sateelle, kosteudelle,
roiskeille tai tippuville nesteille.
– Älä aseta laitteen päälle nestettä sisältäviä esineitä,
kuten maljakoita.
– Käytä vain suositeltuja lisävarusteita.
– Älä avaa laitteen koteloa.
– Älä korjaa laitetta itse. Anna huolto pätevän
huoltohenkilön tehtäväksi.
HUOMIO!
• Vähennä tulipalon, sähköiskun tai laitteiston
vahingoittumisen vaaraa:
– Älä asenna tai laita tätä laitetta kabinettityyppiseen
kirjakaappiin tai muuhun suljettuun tilaan, jotta
tuuletus onnistuisi.
– Älä peitä laitteen tuuletusaukkoja sanomalehdellä,
pöytäliinalla, verholla tai muulla vastaavalla esineellä.
– Älä aseta palavaa kynttilää tai muuta avotulen
lähdettä laitteen päälle.
• Tämä laite on tarkoitettu käytettäväksi leudossa
ilmastossa.
• Asenna laite siten, että vaihtovirtajohto voidaan irrottaa
pistorasiasta välittömästi ongelmien ilmetessä.
• Tämä on laserlaite. Muiden kuin tässä määritettyjen
hallinta- tai säätötoimintojen käyttö tai toimenpiteiden
suoritus saattaa aiheuttaa vaarallisen altistumisen
säteilylle.
NORSK
ADVARSEL!
• For å redusere faren for brann, elektrisk støt eller
skade på apparatet:
– Dette apparatet må ikke utsettes for regn, fuktighet,
drypp eller sprut.
Page 21

3
SVENSKA
– Ikke plasser objekter som er fylt med væske, som
vaser, på apparatet.
– Bruk kun anbefalt tilbehør.
–Fjern ikke deksler.
– Dette apparatet må ikke repareres på egen
hånd. Overlat servicearbeider til kvalifi sert
servicepersonell.
FORSIKTIG!
• For å redusere faren for brann, elektrisk støt eller
skade på apparatet:
– Ikke plasser apparatet i en bokhylle, et innebygget
kabinett eller et annet lukket sted. Pass på at
apparatet er godt ventilert.
– Apparatets ventilasjonsåpninger må ikke dekkes til
med aviser, duker, gardiner eller lignende.
– Plasser ikke åpen ild, slik som levende lys, oppå
apparatet.
• Dette apparatet er beregnet til bruk under moderate
klimaforhold.
• Strømuttaket må befi nne seg i nærheten slik at den
lett kan kobles fra uttaket umiddelbart om det oppstår
problemer.
• Dette apparatet anvender en laser. Betjening av
kontroller, justeringer eller andre inngrep enn de som
er beskrevet i denne bruksanvisning, kan føre til farlig
bestråling.
Medföljande tillbehör
Var god kontrollera och pricka av de medföljande
tillbehören.
& 1 x AC-strömsladd
& 1 x Fjärrkontroll
(N2QAYB000555)
& 1 x FM-inomhusantenn
& 1 x AM-ramantenn
Information för användare om hopsamling och
avfallshantering av gammalt material och använda
batterier
Dessa symboler på produkter, förpackningar
och/eller medföljande dokument betyder
att man inte ska blanda elektriska och
elektroniska produkter eller batterier med
vanliga hushållssopor.
För att gamla produkter och använda batterier
ska hanteras och återvinnas på rätt sätt ska
man ta dem till passande uppsamlingsställe
i enlighet med nationella bestämmelser och
direktiven 2002/96/EC och 2006 /66/EC.
När du kasserar dessa produkter och
batterier på rätt sätt hjälper du till att spara
på värdefulla resurser och förebygga en
potentiell negativ inverkan på människors
hälsa och på miljön som annars skulle kunna
uppstå p.g.a. otillbörlig avfallshantering.
För mer information om uppsamling
och återvinning av gamla produkter och
batterier, var god kontakta din kommun, din
avfallshanterare eller det försäljningsställe där
du köpte din artikel.
Olämplig avfallshantering kan beläggas med
straff i enlighet med nationella bestämmelser.
För affärsanvändare inom den Europeiska
Unionen
Om du vill kassera elektrisk eller elektronisk
utrustning, var god kontakta din återförsäljare
eller leverantör för ytterligare information.
[Information om avfallshantering i länder
utanför den Europeiska unionen]
Dessa symboler är endast giltiga inom den
Europeiska Unionen. Om du vill kassera
dessa föremål, var god kontakta dina lokala
myndigheter eller din lokala återförsäljare och
fråga efter rätt metod för avfallshantering.
Notering till batterisymbolen (nedtill, två
symbolexempel):
Denna symbol kan användas i kombination
med en kemisk symbol. I detta fall iakttar
den de krav som ställs upp i direktivet för den
aktuella kemikalien.
Innehåll
Säkerhetsföreskrifter ...............................2
Medföljande tillbehör ...............................3
Förbereda fjärrkontrollen .........................3
Högtalarnas placering .............................. 4
Koppla anslutningarna .............................4
Kontrollschema ......................................... 5
Skivor .........................................................6
FM/AM-radio ............................................. 7
USB ............................................................ 7
Klocka och timer ......................................8
Ljudjustering ............................................ 8
Tillvalsutrustning ......................................8
Underhåll ................................................... 9
Felsökningsschema .................................9
Specifi kationer ........................................10
Förbereda fjärrkontrollen
R6/LR6, AA (medföljer ej)
Använd alkaliska eller brunstens-batterier.
Sätt i batterierna så att polerna (+ och –) matchar
polerna i fjärrkontrollen.
Rikta fjärrkontrollen mot fjärrkontrollsensorn
(Z sidan 5).
Avstånd: Inom ungefär 7 m
Vinkel: Ungefär 20° uppåt och nedåt, 30° till vänster
och till höger
3
21
RQT9699
SVENSKA
Page 22

4
SVENSKA
Högtalarnas placering
Koppla anslutningarna
Anslut inte AC-strömsladden innan alla andra kopplingar utförts.
Högtalarna har utformats identiskt och därmed behövs
ingen kanalorientering åt vänster eller höger.
Högtalarnas nät kan inte tas bort.
Använd endast de medföljande högtalarna
Om andra högtalare används kan enheten skadas och
ljudkvaliteten påverkas negativt.
• Ställ högtalarna på åtminstone 10 mm avstånd från
systemet för ordentlig ventilation.
SVENSKA
• De här högtalarna är inte magnetiskt avskärmade.
Placera dem inte nära TV-apparater, datorer eller
andra apparater som lätt påverkas av magnetism.
• Du kan skada dina högtalare och förkorta deras
livslängd om du spelar med hög volym under längre
perioder.
• Sänk volymen i följande fall för att undvika skada.
– Vid uppspelning av ljud med distorsion.
– Vid justering av ljudkvaliteten.
Försiktighet
• Använd endast högtalarna med det
rekommenderade systemet. Om du inte gör
det kan förstärkaren och högtalarna skadas;
dessutom kan det medföra brandfara. Kontakta
kvalifi cerad servicepersonal om skador
har uppstått eller om du upplever plötsliga
förändringar i funktionen.
• Montera inte dessa högtalare på väggar eller i
tak.
RQT9699
4
22
1 Anslut AM ramantenn.
Ställ antennen på sin fot tills det klickar till.
SPEAKERS
(SB-PM02)
4 Anslut AC-strömsladden.
Använd inte en AC-strömsladd från någon annan
utrustning.
Till vägguttaget
2 Anslut FM-inomhusantennen.
Placera antennen på en plats där du får bäst mottagning.
(6:)
(6:)
Spara ström
Systemet förbrukar ungefär 0,3 W i standbyläge.
Koppla ur strömförsörjningen om du inte använder
systemet.
En del inställningar förloras då du kopplar ur
systemet. Du behöver ställa in dem igen.
Självhäftande
tejp
3 Anslut högtalarna.
B
A
Röd
Var försiktig att inte korsa (kortsluta)
eller kasta om polariteten på
högtalarkablarna eftersom detta kan
skada högtalarna.
(6:)
(6:)
Svart
(6:)
(6:)
Page 23

5
SVENSKA
Kontrollschema
Nummer inom parantes hänvisar till en viss sida.
N
A
B
C
D
E
F
G
H
I
J
K
L
M
O
P
Q
R
S
T
U
V
W
X
Y
Z
a
b
A Strömställare standbyläge/på [` ], [1]
(8, 10)
Tryck på knappen för att ställa apparaten
i standbyläge då den är på, eller tvärtom.
Apparaten förbrukar en aning ström även
när den står i standbyläge.
B [DIMMER]
För att reglera ljuset i displaypanelen.
Tryck på knappen igen för att avbryta.
C Sifferknapparna [1 till 9, 0, ≧10]
För att välja ett 2-siffrigt nummer
exempel: 16: [≧10] ] [1] ] [6]
För att välja ett 3-siffrigt nummer
exempel: 226: [≧10] ] [≧10] ] [2] ]
[2] ] [6]
D [DEL] (6)
E [PROGRAM] (6, 7)
[REPEAT] (6)
[PLAY MODE] (6, 7)
F [4/9, USB] (7)
[4/9, CD] (6)
G [2/3 ], [5/6] (6, 7, 8)
H [RE-MASTER] (8)
I [BASS] (8)
J [R/T] (6, 8)
[Y/U] har exakt samma funktioner som
de för [2 /3] eller [5/6 ].
[OK] (6, 8)
K [DISPLAY] (6, 7)
L [AUTO PRESET] (7)
M [TUNE MODE] (7)
N [#, PLAY] (8)
O [CLOCK /TIMER] (8)
P [SLEEP] (8)
Enhetens överdel
MUSIC P.
c
d
e
f
V
A
Q [AUTO OFF]
Denna funktion gör det möjligt
att stänga av enheten (förutom i
radioläge) efter att den varit oanvänd
i ca. 30 minuter. ”AUTO OFF” är
aktiverat som fabriksinställning.
För att avbryta, tryck en gång till på
knappen.
R Volymkontroll [+/ –, VOL
[+/ –, VOLUME]
S [MUTE]
Stänger av ljudet. Tryck på knappen
igen för att avbryta.
”MUTE”-läget avbryts också när
volymen justeras eller om enheten
stängs av.
T [MUSIC PORT], [MUSIC P.] (8, 9)
U [FM/AM] (7)
],
g
V [8] (6, 7)
W [D.BASS] (8)
X [PRESET EQ] (8)
Y [TREBLE] (8)
Z [SURROUND] (8)
a [INPUT LEVEL] (9)
b [FM MODE] (7)
c MUSIC P. (Musikport)-uttag (9)
Hörlursuttag,
d Displaypanel
e Sensor för fjärrkontrollsignaler
f USB-port,
g [BASS/TREBLE] (8)
h [x, OPEN/CLOSE] (6)
U
(7)
T
G
(9)
R
F
h
SVENSKA
RQT9699
5
23
Page 24

6
SVENSKA
Skivor
Grundläggande uppspelning
1 Tryck på [x, OPEN/CLOSE] på huvudenheten för
att öppna skivfacket.
Enheten sätts på, sätt i en skiva med etiketten vänd
uppåt.
Tryck på [x, OPEN/CLOSE] igen för att stänga
skivfacket.
2 Tryck på [4/9, CD] för att starta uppspelning.
Stoppa
uppspelning
Pausa en
uppspelning
Hoppa över
ett spår
Söka igenom
spår
SVENSKA
Hoppa över
album
Uppspelningsfunktioner
Tryck på [PLAY MODE] för att välja det önskade
läget.
1-TRACK
1TR
1-ALBUM
1ALBU M
RANDOM
RND
1-ALBUM
RANDOM
1ALBU M RND
RQT9699
Denna funktion fungerar inte med ”Programmerad
6
uppspelning”.
24
Tryck på [8].
Tryck på [4/9, CD]. Tryck en gång till
för att återuppta uppspelning.
Tryck på [2 /3] eller [5/6 ].
Tryck och håll nere [2 /3] eller
[5/6 ] vid uppspelning eller paus.
Tryck på [R/T].
Spela upp ett valt spår på skivan.
Tryck på sifferknapp för att välja spår.
Spela upp ett valt album på skivan.
Tryck på [R/T] för att välja album.
Spelar upp en skiva slumpvis.
Spela upp alla spår på ett valt album
slumpvis.
Tryck på [R/T] för att välja album.
Programmerad uppspelning
Det går att programmera upp till 24 spår.
1 Tryck på [4/9, CD] och därefter [8].
2 Tryck på [PROGRAM].
”PGM” visas.
3 Tryck på sifferknapp för att välja spår.
Upprepa detta steg för att programmera andra spår.
4 Tryck på [4/9, CD] för att starta uppspelning.
3 Tryck på [R /T] för att välja album.
4 Tryck en gång på [5/6 ] och därefter
sifferknapparna för att välja önskat spår.
5 Tryck på [OK] .
6 Upprepa steg 3 till 5 för att programmera fl er
spår.
7 Tryck på [4/9, CD] för att starta uppspelning.
Avbryta
programmeringsläget
Spela om
programmeringen
Kontrollera
programmeringens
innehåll
Radera senast valda
spår
Radera samtliga
inprogrammerade
spår
• Programminnet raderas när du öppnar skivfacket.
• För att repetera programmerad uppspelning eller
annat valt uppspelningsläge, tryck [REPEAT]. Tryck på
knappen igen för att avbryta.
Tryck på [PROGRAM] i
stoppläge.
Tryck på [PROGRAM] och
därefter [4/9, CD] i stoppläge.
Tryck på [2 /3] eller
[5/6 ] i stoppläge när
”PGM” visas.
För att kontrollera under
programmering, tryck på
[PROGRAM] två gånger efter
att ”PGM” visas, tryck därefter
på [2/3] eller [5/6].
Tryck på [DEL] i stoppläge.
Tryck på [8] i stoppläge.
”CLR ALL” visas. Tryck på
knappen igen inom 5 sekunder
om du vill radera alla spår.
Kontrollera spårinformationen
Du kan se informationen för det aktuella spåret från
displaypanelen.
Tryck på [DISPLAY] under uppspelning eller paus.
• Denna enhet stödjer version 1.0 och 1.1 ID3-taggar.
• Textdata som inte stöds visas inte.
OBSERVERA om att använda en DualDisc
Sidan med det digitala ljudinnehållet på en DualDisc
uppfyller inte de tekniska specifi kationerna för Compact
Disc Digital Audio (CD-DA) formatet och därför kanske
inte uppspelningen fungerar.
OBSERVERA för CD-skivor
• Denna enhet kan komma åt upp till 99 spår.
• Denna enhet kan spela MP3-fi ler samt CD-DA
ljudformat från CD-R/RW som har slutbehandlats.
• Det kan hända att vissa CD-R/RW inte går att spela på
grund av inspelningens kvalitet.
OBSERVERA för MP3
• Filer behandlas som spår, och mappar behandlas som
album.
• Denna enhet kan tillgå upp till 999 spår, 255 album och
20 inspelningstillfällen.
• Skivorna måste överensstämma med ISO9660 nivå 1
eller 2 (förutom utökade format).
• För att spela upp i en viss ordning, ge mapparna och
fi lerna namn med ett 3-siffrigt prefi x i enlighet med den
ordning som du vill spela dem.
Begränsningar vid MP3-uppspelning
• Om du har spelat in MP3 på samma skiva som
, kan endast det format som spelades in under
CD-DA
den första sessionen spelas upp.
• Vissa MP3-fi ler kan inte spelas upp på grund av
skivans skick eller inspelning.
• Inspelningar spelas inte nödvändigtvis upp i den
ordning du spelade in dem.
MPEG Layer-3-ljudkodningsteknik licenserad från
Fraunhofer IIS och Thomson.
Page 25

7
SVENSKA
FM/AM-radio
Manuell stationsinställning
1 Tryck på [FM/AM] för att välja ”FM” eller ”AM”.
2 Tryck på [TUNE MODE] för att välja ”MANUAL”.
3 Tryck på [2 /3] eller [5/6] för att välja
frekvensen för den önskade radiostationen.
För automatisk sökning
Tryck och håll nere [2 /3] eller [5/6 ] tills
frekvensen börjar ändras snabbt.
• Den automatiska sökningen kan avbrytas om det
förekommer mycket störningar.
• Tryck på [2/3] eller [5/6] ytterligare en gång
för att avbryta den automatiska stationsinställningen.
För att förbättra ljudkvaliteten
När ”FM” har valts
Tryck på [FM MODE] för att visa ”MONO”.
Tryck på knappen igen för att avbryta.
• ”MONO”-läget avbryts också om frekvensen ändras.
• Stäng av ”MONO” för normalt lyssnande.
När ”AM” har valts
Tryck och håll nere [TUNE MODE] .
Varje gång du trycker och håller nere knappen:
BP 1
BP 2
RDS-sändningar
Denna enhet kan visa de textdata som sänds via det
radiodatasystem (RDS) som fi nns tillgängligt i vissa
områden.
Tryck på [DISPLAY] för att visa:
Stationsnamn
(PS)
Det kan inträffa att alla displayerna för RDS inte är
tillgängliga om mottagningen är dålig.
]
Programtyp
(PTY)
]
Frekvens
(FREQ)
Förinställning av minnet
30 FM- och 15 AM-stationer kan ställas in som förval.
Automatisk förinställning
1 Tryck på [PLAY MODE] för att välja ”CURRENT”
(aktuell) eller ”LOWEST” (lägsta) frekvens.
2 Tryck på [AUTO PRESET] för att starta
förinställningen.
Manuell förinställning
1 Tryck på [TUNE MODE] för att välja ”MANUAL”.
2
Tryck på [2 /3] eller [5/6] för att söka
upp önskad radiostation.
3 Tryck på [PROGRAM].
4 Tryck på sifferknapparna för att välja kanalplats.
Den station som fi nns förinställd på en kanal raderas
om en annan station senare förinställs på samma
kanal.
5 Upprepa stegen 2 till 4 för att förinställa fl er
stationer.
Välja en förinställd station
1 Tryck på [TUNE MODE] för att välja ”PRESET”.
2 Tryck på [2 /3] eller [5/6] för att välja
kanalplats.
Alternativt, tryck på sifferknapparna för att välja kanal.
AM-allokeringsinställning
(endast på huvudenheten)
Detta system kan även ta emot AM-sändningar
allokerade i 10 kHz steg.
Tryck och håll nere [FM/AM].
Efter några sekunder ändras displayen till en blinkande
display med aktuell minimumfrekvens. Släpp knappen
när minimumfrekvensen ändras.
• För att återgå till ursprungsläget, upprepa stegen ovan.
• Efter att du ändrat inställningen raderas den tidigare
förinställda frekvensen.
USB
USB-anslutningsmöjligheten gör att du kan ansluta
och spela upp MP3-spår eller fi ler från USBmasslagringsenheter.
Förberedelser
Innan du ansluter en USB-masslagringsenhet
till enheten, se till att data lagrad däri har
säkerhetskopierats.
Det är ej rekommenderat att använda en USBförlängningskabel. USB-masslagringsenhet som
anslutits via kabeln kommer ej att kännas igen av denna
enhet.
1 Sänk volymen och anslut USB-
masslagringsenheten till USB-porten.
Håll i huvudenheten när USB-masslagringsenhet
ansluts eller kopplas från.
2 Tryck på [4/9, USB] för att starta uppspelning.
Stoppa
uppspelning
Övriga användarfunktioner är liknande de som
beskrivs i ”Skivor” (Z sidan 6).
Kompatibla enheter
Enheter som defi nieras som USB-masslagringsenheter:
• USB-enheter som stöder bulk only transfer.
• USB-enheter som stöder USB 2.0 full hastighet.
Format som stöds
• Spår måste ha ändelsen ”.mp3” eller ”.MP3”.
• CBI (på engelska Control/Bulk/Interrupt) stöds ej.
• En enhet som använder NTFS-fi lsystem stöds ej.
[Endast FAT 12/16/32 (Filfördelningsupplägg 12/16/32)
fi lsystem stöds.]
• Beroende på sektorstorleken, kanske vissa fi ler inte
fungerar.
• Maximalt antal album: 255 album
• Maximalt antal spår: 2500 spår
• Maximalt antal spår på ett album: 999 spår
Tryck på [8]. ”RESUME” visas.
Positionen minneslagras.
Tryck på [4/9, USB] för att återuppta
uppspelningen.
Tryck på [8] igen för att radera
positionen.
7
25
RQT9699
SVENSKA
Page 26

8
SVENSKA
Klocka och timer
Inställning av klockan
Klockan har 24-timmarsvisning.
1 Tryck på [CLOCK /TIMER] för att välja ”CLOCK”.
2 Inom 10 sekunder, tryck på [R/T ] för att ställa in
tiden.
3 Tryck på [OK] .
• Tryck på [CLOCK /TIMER] för att visa klockan ett par
sekunder.
• Ställ om klockan regelbundet för att upprätthålla
noggrannheten.
Användning av insomningstimern
Denna funktion gör det möjligt att stänga av enheten
automatiskt efter inställd tid.
SVENSKA
Tryck på [SLEEP] för att välja önskad tid (i minuter).
Tryck på [SLEEP] för att visa den återstående tiden och
tryck på [SLEEP] igen för att välja den önskade tiden.
• Uppspelnings- och insomningstimern kan användas
tillsammans.
• Insomningstimern har högst prioritet. Se till att tiderna
inte överlappar varandra.
RQT9699
8
26
Använda uppspelningstimer
Du kan ställa in timern till att sättas på vid en viss tid
för att väcka dig.
Starta enheten och ställ in klockan.
Förbered musikkällan du vill lyssna på; skiva, radio, USB
eller musikportkälla och ställ in volymen.
1 Tryck på [CLOCK /TIMER] för att välja
”# PLAY 1”, ”# PLAY 2” eller ”# PLAY 3”.
2 Inom 10 sekunder, tryck på [R/T ] för att ställa in
starttiden.
3 Tryck på [OK] .
4 Upprepa steg 2 och 3 för inställning av sluttid.
För att aktivera timern
5 Tryck på [#, PLAY] för att starta ”# PLAY 1”,
”# PLAY 2” eller ”# PLAY 3”.
”# ” visas.
6 Tryck på [ `] för att stänga av enheten.
OFF120MIN90MIN60MIN30MIN
Ändra
inställning
Ändra källa
eller volym
Kontrollera
inställning
Avbryta
• Timern startar vid den inställda tiden. Volymen ökar
successivt till inställd nivå.
• Enheten måste vara i beredskapsläget för att timern
ska fungera.
Upprepa steg 1 till 4 och 6
(Z se ovan).
1) Tryck på [#, PLAY] två gånger för
att radera timerindikatorerna från
displayen.
2) Ändra källa eller volym.
3) Utför steg 5 och 6 (Z se ovan).
Tryck på [CLOCK /TIMER] för att välja
”# PLAY 1”, ”# PLAY 2” eller
”# PL AY 3”.
Tryck på [#, PLAY] två gånger för
att radera timerindikatorerna från
displayen.
Ljudjustering
EQ-förval
(Preset EQ)
Bas eller
diskant
Surroundljud Tryck på [SURROUND] för att välja
D.Bass Tryck ner [D.BASS] för att välja
Re-master
Tryck på [PRESET EQ] för att välja
”HEAVY”, ”SOFT”, ”CLEAR”, ”VOCAL”
eller ”FLAT”.
1) Tryck på [BASS] eller [TREBLE]
(huvudenhet: [BASS/TREBLE]) för
att välja ”BASS” eller ”TREBLE”.
2) Tryck på [2/3] eller [5/6]
för att justera nivån (–4 till +4).
”ON SURROUND” eller
”OFF SURROUND”.
Om störningar vid stereomottagning
på FM-bandet tilltar, stäng av
surroundeffekten.
”ON D.BASS” eller ”OFF D.BASS”.
Tryck ner [RE-MASTER] för att välja
”ON RE-MASTER” eller
”OFF RE-MASTER”.
Tillvalsutrustning
Undvik störningar kopplade till annan
Panasonic-utrustning
Annan ljud- eller videoutrustning från Panasonic kan
aktiveras när du använder medföljande fjärrkontroll för
att styra enheten.
För att endast använda detta system, synkronisera
huvudenheten med dess korresponderande fjärrkontroll
för att använda enheten i ”REMOTE 2”-läge.
1 Tryck och håll nere [MUSIC P.] på huvudenheten
och [2] tills ”REMOTE 2” visas.
2 Tryck och håll nere [OK] och [2] i minst
2 sekunder.
Ändra läget tillbaka till ”REMOTE 1” genom att upprepa
steg 1 och 2 och ersätt [2] med [1].
Page 27

9
SVENSKA
Bärbar ljudutrustning
Stäng av equalizer-funktionen (om sådan fi nns) på den
bärbara ljudutrustningen innan du ansluter till MUSIC P.
(musikportens) uttag. Annars kan ljudet från högtalaren
bli förvrängt.
1 Anslut ljudkabeln till MUSIC P.-uttaget.
2
Tryck på [MUSIC PORT] (huvudenhet: [MUSIC P.])
och spela upp den portabla ljudutrustningen.
För att justera den ingående ljudnivån
Tryck på [INPUT LEVEL] för att välja ”HIGH” (hög)
eller ”NORMAL” (normal) .
• Välj ”NORMAL” (normal) om ljudet förvrängs under
”HIGH” (hög) ingångsnivå.
• Sladdar och utrustning medföljer ej.
• För detaljer, se den bärbara ljudutrustningens
bruksanvisning.
Ansluta till hörlurar
Anslut hörlurarna (medföljer ej) till hörlursuttaget.
Typ av kontakplugg: Ø 3,5 mm stereo
• Undvik att lyssna en längre tid för att förhindra
hörselskador.
• För starkt ljudtryck från öronsnäckor och hörlurar kan
orsaka hörselskador.
• Lyssning på full volym under längre perioder kan skada
användarens öron.
Underhåll
Torka av enheten med en mjuk torr trasa för att göra
rent enheten.
• Använd aldrig alkohol, målarthinner eller ren bensin för
att rengöra enheten.
• Innan kemiskt behandlade rengöringsdukar används,
bör anvisningarna som medföljer duken läsas igenom
noggrant.
Felsökningsschema
Utför följande kontroller innan du begär service. Om
du tvekar över några av kontrollpunkterna, eller om de
angivna åtgärderna inte löser problemet, rådgör med din
återförsäljare för närmare anvisningar.
■ Vanliga problem
Inget händer när knapparna på fjärrkontrollen trycks in.
• Kontrollera att batterierna är rätt isatta.
Förvrängt ljud eller inget ljud.
• Skruva upp volymen.
• Stäng av enheten, undersök orsaken till felet och
rätta till det, och sätt sedan på apparaten igen. Sätt
på enheten igen. Det kan bero på överbelastning av
högtalarna på grund av alltför hög volym eller uteffekt,
eller att apparaten använts på en alltför varm plats.
Ett ”surrande” ljud hörs under uppspelning.
• Det fi nns en AC-strömsladd eller fl uorescerande
belysning i närheten av enheten. Håll andra
anordningar och sladdar på avstånd från enheten.
■ Skivor
Felaktig display eller uppspelningen startar inte.
• Du har inte fört in skivan ordentligt; för in den
ordentligt.
• Skivan kan vara smutsig. Rengör den.
• Byt ut skivan om den är repig, böjd eller av annat
format än standardformat.
• Det har bildats kondens: vänta i 1 till 2 timmar så att
kondensen hinner förångas.
■ Radio
Det hörs ett dunkande ljud.
• Stäng av ev. TV-apparater i närheten eller fl ytta
enheten bort från ev. TV-apparater.
• Växla till antingen BP 1 eller BP 2 i läget AM tuner.
Ett lågt brummande hörs vid mottagning av AMsändningar.
• Skilj antennen från andra kablar och ledningar.
■ USB
Inget händer när [4/
• Koppla ur USB-enheten och återanslut den sedan.
Alternativt, stäng av och sätt på enheten igen.
USB-enheten eller dess innehåll kan ej läsas.
• USB-enhetens format eller dess innehåll är ej
kompatibelt med systemet.
• USB-funktionen hos denna produkt fungerar eventuellt
inte med vissa USB-enheter.
• USB-enheter med lagringskapaciteter på mer än
8 gigabyte fungerar eventuellt inte i vissa fall.
USB-enheten fungerar långsamt.
• Stor fi lstorlek eller USB-fl ashdriver med stor
minneskapacitet tar längre tid att läsa.
9
,
USB] trycks in.
■ Enheten visar
”NO PLAY”
• Kontrollera innehållet. Du kan endast spela upp format
som det fi nns stöd för.
• Om det fi nns mer än 255 album eller mappar (ljud
eller icke-ljud), kanske inte en del av MP3-fi lerna
på dessa album kan läsas och spelas upp. Överför
dessa musikalbum till en annan USB-enhet.
Alternativt, omformatera USB-enheten och spara
dessa musikalbum innan du sparar de andra ickeljudmapparna.
9
27
RQT9699
SVENSKA
Page 28

”F61” eller ”F76”
• Kontrollera och korrigera anslutningarna av
högtalarsladdarna. Om detta inte löser problemet, vänd
dig till försäljaren.
• Koppla ur USB-enheten. Stäng av och sätt på enheten
igen.
”ERROR”
• En felaktig operation har utförts. Läs bruksanvisningen
och försök igen.
”ADJ UST CLOCK”
• Klockan är inte inställd. Justera klockan i enlighet
därmed.
”ADJ UST TIME R”
• Uppspelningstimern är inte inställd. Justera
uppspelningstimern i enlighet därmed.
”AUTO OFF”
• Enheten har inte används på 29 minuter och kommer
att stängas av om en minut. Tryck på valfri knapp för
att avbryta.
SVENSKASVENSKA
Minnesåterställning (Initialisering)
Återställ minnet, genom att följa de instruktioner som
ges nedan, om någon av följande situationer skulle
uppstå:
• Det händer ingenting när knapparna trycks in.
• Du vill radera och återställa innehållet i minnet.
För att återställa minnet
1) Dra ur AC-strömsladden. (Vänta i minst
3 minuter innan du fortsätter till steg 2.)
2) Håll [1] på huvudenheten intryckt, och sätt
samtidigt i AC-strömsladden igen.
Fortsätt tryck och håll nere knappen (ungefär
10 sekunder) tills ”– – – – – – – –” visas.
3) Släpp [1].
Alla inställningar återgår till de fabriksinställda
värdena.
De inställningar som tidigare var lagrade i minnet
måste göras om.
RQT9699
1010
28
Specifi kationer
■ Förstärkardel
RMS-uteffekt stereoläge
Främre Kanal (båda kanaler drivna)
5 W per kanal (6
Total RMS-stereolägeseffekt 10 W
■ FM/AM-tuner, uttag
Förinställda stationer FM 30 stationer
AM 15 stationer
Frekvensmodulering (FM)
Frekvensomfång
87,50 MHz till 108,00 MHz (i steg om 50 kHz)
Antennuttag 75
Amplitudmodulering (AM)
Frekvensomfång
522 kHz till 1629 kHz (i steg om 9 kHz)
520 kHz till 1630 kHz (i steg om 10 kHz)
Hörlursuttag
Uttag Stereo, 3,5 mm-uttag
Utnivå (CD, 1 kHz, –20 dB)
0,7 mW + 0,7 mW, 32
Musikport (överdel)
Känslighet
Normal 490 mV, 15 k
Hög 100 mV, 15 k
Uttag Stereo, 3,5 mm-uttag
■ Skivdelen
Skivor som kan spelas (8 cm eller 12 cm)
CD, CD-R/RW (CD-DA, MP3
Pickup
Våglängd 790 nm (CD)
Lasereffekt CLASS I
Laserstyrka Ingen farlig strålning
NORSK
Bølgelengde 790 nm (CD)
Laserstyrke Ingen farlig stråling sendes ut
Ljudutgång (Skiva)
Antal kanaler 2 kanaler (FL, FR)
FL = Främre vänster kanal
FR = Främre höger kanal
MPEG-1 Layer 3, MPEG-2 Layer 3
), 1 kHz, 10% THD
(obalanserat)
(Max.)
)
■ USB-delen
USB-port
USB-Standard USB 2.0 full hastighet
Mediafi lformatstöd MP3 (*.mp3)
USB-enhet fi lsystem FAT12, FAT16, FAT32
USB-port ström 500 mA (Max.)
■ Högtalardelen
Typ 1-vägs, 1-elementsystem (basrefl ex)
Högtalarenhet(er)
Full räckvidd 10 cm kontyp
Impedans 6
Utgående ljudtryck 83 dB/W (1 m)
Frekvensomfång 61 Hz till 17 kHz (–16 dB)
95 Hz till 15 kHz (–10 dB)
Yttermått (B x H x D) 139 mm x 224 mm x 136 mm
Vikt 1,3 kg
■ Allmänt
Nätdel Växelström 220 till 240 V, 50 Hz
Effektförbrukning 12 W
Yttermått (B x H x D) 184 mm x 123 mm x 228 mm
Vikt 1,1 kg
Temperaturområde för drift 0°C till +40°C
Luftfuktighetsområde för drift
35% till 80% RH (ingen kondens)
Effektförbrukning i standbyläge:
0,3 W (ungefär)
1) Tekniska data kan ändras utan föregående
meddelande.
Angivna mått och vikter är ungefärliga.
2) Den totala harmoniska distorsionen har uppmätts med
en digital spektralanalysator.
Page 29

Betjeningen beskrives i denne betjeningsvejledning
primært i forhold til brug af fjernbetjening, men du
kan også foretage betjeningen på selve enheden,
hvis knapperne er tilsvarende.
Din enhed ser måske ikke præcis ud, som den afbildede.
Disse betjeningsvejledning gælder følgende system:
System
Hovedenhed
Højttalere
Bagsiden af apparatet
Indersiden af apparatet
SC-PM04
SA-PM04
SB-PM02
Sikkerhedsforskrifter
ADVARSEL!
Apparatet
• For at mindske risikoen for brand, elektrisk stød eller
beskadigelse af produktet:
– Undlad at udsætte apparatet for regn, fugt, dryp eller
tilsprøjtning.
– Undlad at placere væskefyldte genstande som f.eks.
vaser oven på apparatet.
– Benyt kun anbefalet tilbehør.
– Undlad at fjerne kabinettet.
– Forsøg ikke at udføre reparationer selv. Service må
kun udføres af autoriseret servicepersonale.
BEMÆRK!
Apparatet
• For at mindske risikoen for brand, elektrisk stød eller
beskadigelse af produktet:
– Lad være med at stille det i et skab eller et andet lille,
lukket rum. Placér apparatet på et godt ventileret
sted.
– Tildæk ikke apparatets ventilationsåbninger med
aviser, duge, gardiner og lignende ting.
– Anbring ikke kilder til åben ild, som for eksempel
tændte stearinlys, oven på apparatet.
• Dette apparat er beregnet til brug i et moderat klima.
• Enheden skal installeres således, at strømledningen
straks kan tages ud af stikkontakten, hvis der opstår
problemer.
• Dette apparat kan modtage radiointerferens forårsaget
af mobiltelefoner under brug. Hvis interferens
forekommer, bedes du venligst øge afstanden mellem
apparatet og mobiltelefonen.
• I dette apparat anvendes en laser. Brug af
betjeningsknapper eller reguleringer eller
fremgangsmåder udover de i denne
betjeningsvejledning angivne, kan medføre fare for
bestråling.
Batteri
• Batteriet må ikke åbnes, og det må aldrig kortsluttes.
• Et alkalisk eller mangan-batteri må ikke oplades.
• Anvend ikke batteriet, hvis dækslet er blevet fjernet.
• Batteriet må ikke opvarmes eller udsættes for åben ild.
• Undlad at efterlade batteriet/batterierne i en bil i direkte
sollys i en længere periode med døre og vinduer
lukket.
• Hvis du ikke skal bruge fjernbetjeningen i længere
tid, skal batteriet tages ud. Opbevares på et køligt og
mørkt sted.
• Fare for eksplosion, hvis batteriet ikke udskiftes
korrekt. Udskift kun med den type, der anbefales af
fabrikanten.
• Når batterierne skal bortskaffes, bedes du kontakte
de lokale myndigheder eller forhandleren for at få
oplysninger om den korrekte bortskaffelsesmetode.
RQT9699
22
29
DANSKDANSK
Page 30

3
DANSK
Brugerinformation om indsamling og bortskaffelsse
af elektronikskrot og brugte batterier
Disse symboler på produkter, emballage og /
eller ledsagedokumenter betyder, at brugte
elektriske og elektroniske produkter og
batterier ikke må smides ud som almindeligt
husholdningsaffald.
Sådanne gamle produkter og batterier skal
indleveres til behandling, genvinding resp.
recycling i henhold til gældende nationale
bestemmelser samt direktiverne 2002/96/EF
og 2006/66/EF.
Ved at bortskaffe sådanne produkter og
batterier på korrekt vis hjælper du med til at
beskytte værdifulde ressourcer og imødegå
de negative påvirkninger af det menneskelige
helbred og miljøet, som vil kunne være følgen
af usagkyndig affaldsbehandling.
Ønsker du mere udførlig information om
indsamling og recycling af gamle produkter
og batterier, kan du henvende dig til din
kommune, deponeringsselskabet eller stedet,
hvor du har købt produkterne.
Usagkyndig bortskaffelse af elektronikskrot
og batterier kan eventuelt udløse bødeforlæg.
For kommercielle brugere i Den
Europæiske Union
Når du ønsker at kassere elektriske eller
DANSK
RQT9699
3
30
elektroniske apparater, bedes du henvende
dig til din forhandler eller leverandør for
nærmere information.
[Information om bortskaffelse i lande uden
for Den Europæiske Union]
Disse symboler gælder kun inden for Den
Europæiske Union. Ønsker du at kassere
sådanne produkter, bedes du forhøre dig hos
din forhandler eller kommune med henblik på
en hensigtsmæssig bortskaffelse.
Information om batterisymbol (to
eksempler nedenfor):
Dette symbol kan optræde sammen med et
kemisk symbol. I så fald opfylder det kravene
for det direktiv, som er blevet fastlagt for det
pågældende kemikalie.
Indholdsfortegnelse
Sikkerhedsforskrifter ...............................2
Medfølgende tilbehør ...............................3
Klargøring af fjernbetjeningen ...............3
Placering af højttalerne ............................ 4
Tilslutninger .............................................. 4
Betjeningsvejledning ..............................5
CD’er .......................................................... 6
FM/AM radio ..............................................7
USB ............................................................ 7
Ur og timere ..............................................8
Indstilling af lyd ........................................8
Eksternt udstyr .........................................8
Vedligeholdelse ........................................9
Fejlfi nding .................................................9
Specifi kationer ........................................10
Medfølgende tilbehør
Kontroller, at alt tilbehør er med.
& 1 x Netledning
& 1 x Fjernbetjening
(N2QAYB000555)
& 1 x FM-indendørsantenne
& 1 x AM-rammeantenne
Klargøring af fjernbetjeningen
R6/LR6, AA
(medfølger ikke)
Brug alkaline- eller manganbatterier.
Isæt således, at polerne (+ og –) matcher dem på
fjernbetjeningen.
Sigt på fjernbetjeningens signalsensor (Z side 5).
Afstand: Indenfor ca. 7 m
Vinkel: Ca. 20° op og ned, 30° venstre og højre
Page 31

4
DANSK
Placering af højttalerne
Tilslutninger
Tilslut først strømledningen, når alle andre stik er sat i.
Højttalerne er symmetrisk ens indeni, så der er ingen
grund til at vende dem i venstre eller højre retning.
Højttalernes frontstof kan ikke aftages.
Brug kun de medfølgende højttalere
Anvendelse af andre højttalere end de medfølgende kan
beskadige apparatet, og lydkvaliteten vil blive påvirket i
negativ retning.
• Lad der være en afstand på mindst 10 mm mellem
højttalerne og musikanlægget, således at en ordentlig
ventilation sikres.
• Disse højttalere er ikke magnetisk afskærmede. De
må ikke placeres i nærheden af tv’er, pc’er eller andet
udstyr, som let bliver påvirket af magnetisme.
• Højttalerne kan lide skade og deres levetid kan
afkortes, hvis der afspilles høj lyd i længere tid.
• Sænk lydstyrken i de følgende tilfælde for at undgå, at
højttalerne lider skade.
– Når forvrænget lyd afspilles.
– Når lydkvaliteten indstilles.
Bemærk
• Brug kun højttalerne med det anbefalede anlæg.
I modsat fald kan forstærkeren og højttalerne
blive beskadiget, og der kan være risiko for
brand. Rådfør dig med en tekniker, hvis skaden
er sket, eller hvis anlægget pludseligt ikke
fungerer, som det skal.
• Disse højttalere bør ikke fastgøres til en væg
eller et loft.
1 Tilslut AM-rammeantennen.
Anbring antennen på antennefoden indtil der
lyder et klik.
SPEAKERS
(SB-PM02)
4 Tilslut Vekselstrøm (AC) netledningen.
Undlad at anvende strømledning fra andet udstyr.
Til husets
stikkontakt
2 Tilslut FM-indendørsantennen.
Placer antennen, hvor modtagelsen er bedst.
Tap e
3 Tilslut højttalerne.
B
A
Røde
Undgå omhyggeligt at krydse
(6:)
(6:)
(kortslutte) eller vende
højttalerledningernes polaritet, da
dette kan med medføre beskadigelse
af højttalerne.
Spar på strømmen
Systemet bruger ca. 0,3 W når det er i standbytilstand. Hvis du ikke bruger systemet, skal du koble
strømforsyningen fra.
Nogle indstillinger går tabt efter du har frakoblet
systemet. Du skal indstille dem igen.
Sorte
(6:)
(6:)
DANSK
(6:)
(6:)
RQT9699
4
31
Page 32

5
DANSK
Betjeningsvejledning
Tallene i parentes er sidehenvisninger.
A
B
C
D
E
F
G
H
DANSK
I
J
K
L
M
RQT9699
5
32
A Standby/Tænd afbryder [` ], [1]
N
O
P
Q
R
S
T
U
V
W
X
Y
Z
a
b
(8, 10)
Tryk for at tænde/slukke for apparatet.
Der bruges en smule strøm, når apparatet
står i standby.
B [DIMMER]
Dæmpning af displaybelysning. Tryk på
tasten igen for at annullere.
C Nummertaster [1 til 9, 0, ≧10]
Valg af et 2-cifret nummer
eksempel: 16: [≧10] ] [1] ] [6]
Valg af et 3-cifret nummer
eksempel: 226: [≧10] ] [≧10] ] [2] ]
[2] ] [6]
D [DEL] (6)
E [PROGRAM] (6, 7)
[REPEAT] (6)
[PLAY MODE] (6, 7)
F [4/9, USB] (7)
[4/9, CD] (6)
G [2/3 ], [5/6] (6, 7, 8)
H [RE-MASTER] (8)
I [BASS] (8)
J [R/T] (6, 8)
[Y/U] har præcis de samme funktioner
som [2 /3] eller [5/6 ].
[OK] (6, 8)
K [DISPLAY] (6, 7)
L [AUTO PRESET] (7)
M [TUNE MODE] (7)
N [#, PLAY] (8)
O [CLOCK /TIMER] (8)
P [SLEEP] (8)
Enhedens top
MUSIC P.
c
d
e
f
V
A
Q [AUTO OFF]
Med denne funktion slukkes enheden
(bortset fra i radio-tilstand), hvis
den ikke benyttes i 30 minutter.
Indstillingen fra fabrikkens side er
“AUTO OFF”.
Tryk på tasten igen for at annullere.
R Lydstyrkeregulering
[+/ –, VOL
S [MUTE]
Til dæmpning af lyden. Tryk på tasten
igen for at annullere.
“MUTE” annulleres også, hvis
lydstyrken reguleres, eller hvis der
slukkes for enheden.
T [MUSIC PORT], [MUSIC P.] (8, 9 )
U [FM/AM] (7)
], [+ /–, VOLUME]
g
V [8] (6, 7)
W [D.BASS] (8)
X [PRESET EQ] (8)
Y [TREBLE] (8)
Z [SURROUND] (8)
a [INPUT LEVEL] (9)
b [FM MODE] (7)
c MUSIC P. (musik-port) jackstik (9)
Hovedtelefonjackstik,
d Displaypanel
e Fjernbetjeningssensor
f USB-port,
g [BASS/TREBLE] (8)
h [x, OPEN/CLOSE] (6)
U
(7)
T
G
R
F
h
(9)
Page 33

6
DANSK
CD’er
Grundlæggende afspilning
1 Tryk på [x, OPEN/CLOSE] på hovedenheden for
at åbne skuffen.
Enheden tændes. Sæt en CD i med mærkaten opad.
Tryk på [x, OPEN/CLOSE] igen for at lukke skuffen.
2 Tryk på [4/9, CD] for at begynde afspilningen.
Stop
afspilning
Pause
afspilning
Springe
spor over
Søg
gennem
spor
Springe
over et
album
Afspilningsfunktion
Tryk på [PLAY MODE] for at vælge den ønskede
indstilling.
1-TRACK
1TR
1-ALBUM
1ALBU M
RANDOM
RND
1-ALBUM
RANDOM
1ALBU M RND
Denne funktion virker ikke med “Programafspilning”.
Tryk på [8].
Tryk på [4/9, CD]. Tryk igen for at
fortsætte afspilningen.
Tryk på [2 /3] eller [5/6 ].
Tryk på [2 /3] eller [5/6 ] og
hold den nede ved afspilning eller pause.
Tryk på [R/T].
Afspiller et valgt spor på CD’en.
Tryk på nummertasterne for at vælge det
ønskede spor.
Afspiller et valgt album på CD’en.
Tryk på [R/T] for at vælge albummet.
Afspiller en CD i tilfældig rækkefølge.
Afspil alle spor på et valgt album i tilfældig
rækkefølge.
Tryk på [R/T] for at vælge albummet.
Programafspilning
Denne funktion gør det muligt at programmere op til 24
spor.
1 Tryk på [4/9, CD] og derefter [8 ].
2 Tr yk på [ PROG RAM].
“PGM” vises.
3 Tryk på nummertasterne for at vælge det ønskede
spor.
Gentag dette trin for at programmere andre spor.
4 Tryk på [4/9, CD] for at begynde afspilningen.
3 Tryk på [R /T] for at vælge albummet.
4 Tryk på [5/6] én gang og så på
nummertasterne for at vælge sporet.
5 Tryk på [OK] .
6 Gentag trinene 3 til 5 for at programmere andre
spor.
7 Tryk på [4/9, CD] for at begynde afspilningen.
Afbryde
programtilstand
Afspille program
igen
Tjek
programindholdet
Slette det
seneste spor
Slette alle
programmerede
spor
• Programhukommelsen slettes, når du åbner CD-skuffe.
• Tryk på [REPEAT] for at gentage programafspilning
eller valgte afspilningstilstande. Tryk på tasten igen for
at annullere.
Tryk på [PROGRAM] i stoppet
tilstand.
Tryk på [PROGRAM] og derefter
[4/9, CD] i stoppet tilstand.
Tryk på [2 /3] eller
[5/6 ], når “PGM” vises i
stoppet tilstand.
For at tjekke under
programmering, trykkes på
[PROGRAM] to gange efter “PGM”
forsvinder, derefter trykkes på
[2/3] eller [5/6].
Tryk på [DEL] i stoppet tilstand.
Tryk på [8] i stoppet tilstand.
“CLR ALL” vises. Tryk på tasten
igen indenfor 5 sekunder, hvis du
vil fravælge alle spor.
Kontrollerer sporinformation
Du kan se informationen for det aktuelle spor på
displaypanelet.
Tryk på [DISPLAY] under afspilning eller pause.
• Denne enhed understøtter ver. 1.0 og 1.1 ID3-mærker.
• Tekstdata, som ikke understøttes, vil ikke blive vist.
BEMÆRK om brugen af DualDisc
Siden med digitalt lydindhold på DualDisc opfylder ikke
de tekniske specifi kationer på Compact Disc Digital
Audio (CD-DA) -formatet, så afspilning vil muligvis ikke
kunne lade sig gøre.
BEMÆRK om CD’er
• Denne enhed kan håndtere op til 99 spor.
• Denne enhed kan afspille MP3-fi ler samt CD-DA format
lyd CD-R/RW’er, som er blevet afsluttet.
• Den vil muligvis ikke være i stand til at afspille nogle
CD-R/RW pga. forhold vedr. indspilningen.
BEMÆRK om MP3
• Filer regnes for spor, og mapper regnes for albummer.
• Dette apparat kan åbne op til 999 spor, 255 albummer
og 20 sessioner.
• Disken skal være i overensstemmelse med ISO9660
niveau 1 eller 2 (med undtagelse af udvidede formater).
• Afspilning i en bestemt rækkefølge. Forsyn mappen og
fi lnavnene med 3-cifrede kønumre i den rækkefølge,
hvori de skal afspilles.
Begrænsninger på afspilning af MP3-fi ler
• Hvis du har optaget MP3-fi ler på den samme disk som
CD-DA, vil kun formatet optaget i første session kunne
afspilles.
• Visse MP3 vil ikke kunne afspilles på grund af diskenes
tilstand eller optagelsens kvalitet.
• Optagelser vil ikke nødvendigvis blive afspillet i den
rækkefølge, du optog dem.
MPEG Layer-3 lydafspillerens indkodningsteknologi er
autoriseret af Fraunhofer IIS og Thomson.
6
33
DANSK
RQT9699
Page 34

7
DANSK
FM/AM radio
Manuel indstilling af stationer
1 Tryk på [FM/AM] for at vælge “FM” eller “AM”.
2 Tryk på [TUNE MODE] for at vælge “MANUAL”.
3 Tryk på [2/3] eller [5/6] for at vælge
frekvensen på den ønskede station.
Automatisk stationssøgning
Tryk på [2 /3] eller [5/6 ] og hold den nede
indtil frekvenserne begynder at skifte meget hurtigt.
• Automatisk søgning kan blive afbrudt, hvis der er for
mange forstyrrelser.
• Tryk en gang til på [2/3] eller [5/6], hvis du
vil annullere den automatiske stationsindstilling.
For at forbedre lydkvaliteten
Når “FM” er valgt
Tryk på [FM MODE] for at få vist “MONO”.
Tryk på tasten igen for at annullere.
• “MONO” annulleres også, hvis der skiftes frekvens.
• Slå “MONO” fra ved normal lytning.
Når “AM” er valgt
Tryk på [TUNE MODE] og hold den nede.
DANSK
Hver gang du trykker på tasten og holder den nede:
BP 1
BP 2
RDS-udsendelser
Apparatet kan vise tekstdata, som sendes via RDS
(Radio Data System) i visse områder.
Tryk på [DISPLAY] for at få vist :
Stationsnavn
(PS)
Det er ikke sikkert, at RDS-displays er tilgængelige, hvis
modtagelsen er dårlig.
RQT9699
7
34
Programtype
]
(PTY)
]
Frekvens
(FREQ)
Forudindstilling
Der kan forindstilles 30 FM og 15 AM-stationer.
Automatisk programmering
1 Tryk på [PLAY MODE] for at vælge “CURRENT”
(aktuelle) eller “LOWEST” (laveste) frekvens.
2 Tryk på [AUTO PRESET] for at starte indstilling
af forvalg.
Manuel programmering
1 Tryk på [TUNE MODE] for at vælge “MANUAL”.
2
Tryk på [2 /3] eller [5/ 6] for at stille ind
på den ønskede station.
3 Tr yk på [ PROG RAM].
4 Tryk på nummertasterne for at vælge en kanal.
En station, som er indstillet på en kanal, vil blive
slettet, hvis en anden station indstilles på denne
kanal.
5 Gentag trinene 2 til 4 for at programmere fl ere
stationer.
Valg af en forvalgt station
1 Tryk på [TUNE MODE] for at vælge “PRESET”.
2 Tryk på [2/3] eller [5/6] for at vælge
kanalen.
Tryk alternativt på nummertasterne for at vælge en kanal.
AM-indstilling
Dette system kan også modtage AM-udsendelser
allokeret i trin på 10 kHz.
Tryk på [FM /AM] og hold den nede.
Efter et par sekunder skifter displayet til et blinkende
display ved den aktuelle minimumfrekvens. Giv slip på
knappen, når minimumsfrekvensen ændres.
• Du kommer tilbage til det oprindelige trin ved at
gentage ovennævnte trin.
• Når du har ændret indstillingen, vil tidligere indstillede
frekvenser blive slettet.
(kun med hovedapparatet)
USB
USB-tilslutningsmuligheden gør, at du kan tilslutte og
afspille MP3-spor fra USB-masselagringsenheder.
Klargøring
Før du slutter USB-masselagringsenheden til enheden,
skal du sørge for, at de data, som opbevares på den, er
blevet sikkerhedskopieret.
Brug ikke et USB-forlængerkabel. USBmasselagringsenheden, der er forbundet via kablet,
bliver ikke genkendt af denne enhed.
1 Reducer lydstyrken og tilslut USB-
masselagringsenheden til USB-porten.
Hold fast i hovedenheden, når du tilslutter eller
frakobler USB-masselagringsenheden.
2 Tryk på [4/9, USB] for at begynde afspilningen.
Stop
afspilning
For andre funktioner, så ligner de dem, der er
beskrevet i “CD’er” (Z side 6).
Kompatible enheder
Enheder, som defi neres som USBmasselagringsenheder.
• USB-enheder, som kun understøtter bulk transfer.
• USB-enheder, som understøtter USB 2.0 med fuld
hastighed.
Understøttede formater
• Sporet skal have fi lendelsen “.mp3” eller “.MP3”.
• CBI (på engelsk Control/Bulk/Interrupt) understøttes
ikke.
• Enheder, som bruger NTFS-fi lsystemer, understøttes
ikke. [Kun FAT 12/16/32 (File Allocation Table
(Filallokeringstabel) 12/16/32) fi lsystemer understøttes.]
• Afhængig af sektorstørrelsen kan det ske, at nogle fi ler
ikke fungerer.
• Maksimalt antal album: 255 albummer
• Maksimalt antal spor: 2500 spor
• Maksimalt antal spor på et album: 999 spor
Tryk på [8]. “RESUME” vises.
Positionen huskes.
Tryk på [4/9, USB] for at fortsætte
afspilningen.
Tryk på [8] igen for at fjerne positionen
fra hukommelsen.
Page 35

8
DANSK
Ur og timere
Indstilling af ur
Dette system er udstyret med et 24-timers digitalur.
1 Tryk på [CLOCK /TIMER] for at vælge “CLOCK”.
2 Indenfor 10 sekunder, tryk på [R /T] for at
indstille tiden.
3 Tryk på [OK] .
• Tryk på [CLOCK/TIMER] for at vise uret i nogle få
sekunder.
• Stil uret regelmæssigt, så det går præcist.
Anvendelse af afbryderautomatikken
Denne funktion giver dig mulighed for automatisk at
slukke enheden efter en vis periode.
Tryk på [SLEEP] for at vælge det ønskede tidspunkt
(i minutter).
OFF120MIN90MIN60MIN30MIN
Tryk på [SLEEP] for at vise tiden, og derefter trykkes igen
på [SLEEP] for at vælge den ønskede tid.
• Afspilningstimeren og afbryderautomatikken kan
bruges sammen.
• Afbryderautomatikken har altid første prioritet. Sørg for,
at tidspunkterne ikke overlapper hinanden.
Brug af timer til afspilning
Du kan sætte timeren til at starte på et bestemt
tidspunkt for at vække dig.
Tænd apparatet og indstil uret.
Klargør den musikkilde, du vil lytte til; CD, radio, USB
eller musikport og indstille lydstyrken.
1 Tryk på [CLOCK /TIMER] for at vælge “# PLAY 1”,
“# PLAY 2” eller “# PLAY 3”.
2 Indenfor 10 sekunder, tryk på [R /T] for at
indstille starttidspunktet.
3 Tryk på [OK] .
4 Gentag trin 2 og 3 for at indstille
afslutningstidspunktet.
Aktivering af timeren
5 Tryk på [#, PLAY] for at tænde for “# PLAY 1”,
“# PLAY 2” eller “# PLAY 3”.
“# ” vises.
6 Tryk på [`] og sluk for apparatet.
Ændre
indstillinger
Ændre kilde
eller lydstyrke
Kontroller
indstillingerne
Annullere
• Timeren starter på det indstillede tidspunkt, og
lydstyrken øges gradvist til det indstillede niveau.
• Apparatet skal være i standby-tilstanden for at timeren
virker.
Gentag trin 1 til 4 og 6 (Z se
ovenfor).
1) Tryk to gange på [#, PLAY] for
at fjerne timerindikatoren fra
displayet.
2) Foretag ændringer af kilden eller
lydstyrken.
3) Udfør trin 5 og 6 (Z se ovenfor).
Tryk på [CLOCK/TIMER] for at
vælge “# PLAY 1”, “# PLAY 2” eller
“# PL AY 3”.
Tryk to gange på [#, PLAY] for at
fjerne timerindikatoren fra displayet.
Indstilling af lyd
Forindstillet EQ
(Preset EQ)
Bas eller
Diskant
Surround lyd Tryk på [SURROUND] for at vælge
D.Bass Tryk på [D.BASS] for at vælge
Re-master
Tryk på [PRESET EQ] for at vælge
“H EAVY”, “SOFT”, “CLEAR ”,
“VOCAL” eller “FLAT”.
1) Tryk på [BASS] eller [TREBLE]
(hovedenhed: [BASS/TREBLE])
for at vælge “BASS” eller
“TREBLE”.
2) Tryk på [2/3] eller
[5/6 ] for at indstille
niveauet (–4 til +4).
“ON SURROUND” eller
“OFF SURROUND”.
Hvis forstyrrelserne i FM-stereomodtagelsen øges, afbrydes
surroundlyd-effekten.
“ON D.BASS” eller “OFF D.BASS”.
Tryk på [RE-MASTER] for at vælge
“ON RE-MASTER” eller
“OFF RE-MASTER”.
Eksternt udstyr
Undgå interferens med andet Panasonicudstyr
Andet Panasonic lyd- eller videoudstyr kan muligvis
blive påvirket, når du styrer denne enhed med den
medfølgende fjernbetjening.
Hvis du udelukkende vil betjene dette system, skal
du synkronisere hovedenheden med den tilsvarende
fjernbetjening, for at betjene det i “REMOTE 2” tilstand.
1 Tryk på [MUSIC P.] på hovedenheden og på [2] og
hold dem nede, indtil “REMOTE 2” vises.
2 Tryk på [OK] og [2] og hold dem nede i mindst 2
sekunder.
Gentag trin 1 og 2, men byt om på [2] og [1], for at skifte
tilstanden tilbage til “REMOTE 1”.
8
35
DANSK
RQT9699
Page 36

9
DANSK
Transportabelt lydudstyr
Sluk for equalizerfunktionen (hvis der er en) på dit
transportable lydudstyr, før du slutter det til MUSIC P.
(musikportens) jackstik. Ellers kan lyden fra højttalerne
blive forvrænget.
1 Sæt audio-kablet i MUSIC P.-jackstikket.
2 Tryk på [MUSIC PORT] (hovedenhed: [MUSIC P.])
for at afspille transportabelt lydudstyr.
Indstilling af lydens indgangsniveau
Tryk på [INPUT LEVEL] for at vælge “HIGH” (høj)
eller “NORMAL” (normal).
• Vælg “NORMAL” (normal) hvis lyden er forvrænget, når
niveauet “HIGH” (høj) har et højt indgangsniveau.
• Ledninger og udstyr medfølger ikke.
• For yderligere oplysninger, se det transportable
lydudstyrs betjeningsvejledning.
Tilslutning til hovedtelefoner
Tilslut hovedtelefonerne (medfølger ikke) til
hovedtelefonjackstikket.
Stiktype: Ø 3,5 mm stereo
• Forebyg høreskader ved at undgå at lytte i længere
tidsrum ad gangen.
• Kraftigt lydtryk fra høretelefoner og hovedtelefoner kan
medføre tab af hørelsen.
DANSK
• Det kan give høreskader at lytte for fuld styrke i
længere tid.
Vedligeholdelse
Hvis apparatet er snavset, rengøres det med en blød,
tør klud.
• Brug aldrig sprit, fortynder eller rensebenzin til
rengøringen.
• Før du anvender en kemisk imprægneret klud, bør
du omhyggeligt læse den vejledning, som følger med
kluden.
RQT9699
9
36
Fejlfi nding
Udfør nedenstående tjek, inden du sender apparatet til
reparation. Rådfør dig med din forhandler, hvis du er i
tvivl om nogen af kontrolpunkterne, eller hvis problemet
ikke kan løses gennem de angivne løsninger.
■ Almindelig problemer
Ingen reaktion, når der trykkes på tasterne på
fjernbetjeningen.
• Kontroller, at batterierne er sat i på korrekt vis.
Forvrænget lyd eller ingen lyd.
• Øg lydstyrken.
• Sluk for enheden, fi nd og afhjælp årsagen. Tænd for
enheden igen. Det kan forårsages af overbelastning
af højttalerne på grund af for høj lydstyrke eller kraft
eller på grund af anvendelse af enheden i for varme
omgivelser.
En “summende” lyd kan høres under afspilning.
• Der er en netledning eller et lysstofrør tæt på enheden.
Hold andet udstyr og andre ledninger væk fra enheden.
■ CD’er
Forkert display eller afspilningen vil ikke starte.
• Du har ikke isat disken korrekt; sæt den korrekt i.
• Disken er måske snavset. Tør den af.
• Udskift disken, hvis den er ridset, skæv eller ikke er
cirkelrund.
• Der er opstået kondens: vent 1 til 2 timer til den er
fordampet.
■ Radio
En hyletone høres.
• Sluk for eventuelle fjernsyn tæt ved eller fl yt enheden
væk fra eventuelle fjernsyn.
• Skift til enten BP 1 eller BP 2, når du er i AMtunermodus.
En dyb brummende lyd høres ved AM-modtagelse.
• Adskil antennen fra andre kabler og ledninger.
■ USB
Intet svar, når der trykkes på [4/
• Frakobl USB-enhed og tilslut det igen. Alternativt, kan
du slukke for det og tænde igen.
USB-drevet eller dets indhold kan ikke læses.
• USB-drevets format eller dets indhold er ikke
kompatibelt med systemet.
• Dette produkts USB host-funktion virker muligvis ikke
med noget USB-enheder.
• USB-enheder med en lagerkapacitet på mere end
8 gigabytes virker muligvis ikke i nogle situationer.
Langsom funktion af USB-enheden.
• Store fi lstørrelser eller USB fl ash-drev med meget
hukommelse tager længere tid at læse.
9,
USB].
■ Enheden viser
“NO PLAY”
• Undersøg indholdet. Du kan kun afspille et understøttet
format.
• Hvis der er mere end 255 albummer eller mapper (lyd
og ikke-lyd), vil nogle MP3-fi ler på disse albummer
ikke kunne afl æses og afspilles. Overfør disse
musikalbummer til en anden USB. Alternativt kan
du omformatere din USB-enhed og gemme disse
musikalbummer, før du gemmer de andre mapper uden
lydfi ler.
Page 37

10
DANSK
“F61” eller “F76”
• Tjek og ret tilslutningen af højttalerkablerne. Hvis dette
ikke løser problemet, så konsulter forhandleren.
• Afkobl USB-enheden. Sluk for enheden og tænd for
den igen.
“ERROR”
• Forkert betjening. Læs betjeningsvejledningen og prøv
igen.
“ADJ UST CLOC K”
• Uret er ikke indstillet. Indstil uret.
“ADJ UST TI M ER”
• Afspilnings-timer er ikke indstillet. Indstil afspilningstimeren.
“AUTO OFF”
• Enheden har ikke været benyttet i ca. 29 minutter og
slukkes om ét minut. Tryk på en vilkårlig tast for at
annullere.
Nulstilling af systemets hukommelse
(Initialisering)
Nulstil hukommelsen ved at gå frem som vist
herunder, hvis de følgende situationer opstår:
• Hvis der ikke er nogen reaktion, når der trykkes på
tasterne.
• Hvis du vil slette og nulstille hukommelsens indhold.
Nulstilling af systemets hukommelse
1) Tag stikket til netledningen ud. (Vent mindst
3 minutter, inden du gå videre til trin 2.)
2) Sæt netledningen i forbindelsen igen, mens du
holder [1] på hovedapparatet inde.
Fortsæt med at trykke og holde knappen nede
(ca. 10 sekunder), indtil “– – – – – – – –” vises.
3) Slip [1].
Alle indstillingerne går tilbage til
fabriksindstillingerne.
Det er herefter nødvendigt at genindstille
hukommelsesposterne.
Specifi kationer
■ Forstærkersektion
RMS udgangseffekt, stereo-tilstand
Frontkanal (begge kanaler drevet)
5 W pr. kanal (6
Total effekt af RMS stereo-tilstand 10 W
■ FM/AM tuner, terminal-sektion
Forindstillet station FM 30 stationer
AM 15 stationer
Frekvensmodulation (FM)
Frekvensområde
87,50 MHz til 108,00 MHz (50 kHz trin)
Antenneterminaler 75
Amplitude-modulation (AM)
Frekvensområde 522 kHz til 1629 kHz (9 kHz trin)
520 kHz til 1630 kHz (10 kHz trin)
Hovedtelefonjackstik
Terminal Stereo, 3,5 mm jackstik
Udgangsniveau (CD, 1 kHz, –20 dB)
0,7 mW + 0,7 mW, 32
Musik-port (top)
Følsomhed
Normal 490 mV, 15 k
Høj 100 mV, 15 k
Terminal Stereo, 3,5 mm jackstik
■ CD-sektion
CD’er, som kan afspilles (8 cm eller 12 cm)
CD, CD-R/RW (CD-DA, MP3
Pickup
Bølgelængde 790 nm (CD)
Laserstyrke CLASS I
Lasereffekt Ingen farlig stråling
Lydudgang (CD)
Antal kanaler 2 kanaler (FL, FR)
FL = Venstre frontkanal
FR = Højre frontkanal
MPEG-1 Layer 3, MPEG-2 Layer 3
), 1 kHz, 10% THD
(ubalanceret)
(Maks.)
■ USB-sektion
USB-port
USB-standard USB 2.0 med fuld hastighed
Mediefi lformat understøttes MP3 (*.mp3)
Filsystem for USB-enhed FAT12, FAT16, FAT32
Strøm til USB-port 500 mA (Maks.)
■ Højttaler–sektion
Type 1-vejs, 1-højttalersystem (Basrefl eks)
Højttalerenhed(er)
Fuldt område 10 cm kegletype
Impedans 6
Udgangslydtryk 83 dB/W (1 m)
Frekvensområde 61 Hz til 17 kHz (–16 dB)
95 Hz til 15 kHz (–10 dB)
Mål (B x H x D) 139 mm x 224 mm x 136 mm
Vægt 1,3 kg
■ Generelt
Strømforsyning AC 220 til 240 V, 50 Hz
Strømforbrug 12 W
Mål (B x H x D) 184 mm x 123 mm x 228 mm
Vægt 1,1 kg
Driftstemperaturområde 0°C til +40°C
Driftsluftfugtighedsområde
35% til 80% RH (ingen kondensering)
Strømforbrug i standby-tilstand: 0,3 W (ca.)
1) Specifi kationerne kan ændres uden varsel.
Mål og vægt er omtrentlige.
2) Total harmonisk forvrængning er målt med den
)
digitale frekvensanalysator.
10
37
DANSK
RQT9699
Page 38

2
POLSKI
W niniejszej instrukcji opisano przede wszystkim
sposoby wykonywania operacji przy użyciu pilota,
można je jednak wykonywać także na urządzeniu
głównym, jeśli są na nim dostępne identyczne
elementy sterujące.
Urządzenie może się nieznacznie różnić od
przedstawionego na ilustracji.
Niniejsza instrukcja obsługi ma zastosowanie do
następującego zestawu:
Zestaw
SC-PM04
Urządzenie główne SA-PM04
Głośniki SB-PM02
Ściana tylna urządzenia
POLSKI
Wewnątrz urządzenia
RQT9699
2
38
Środki ostrożności
OSTRZEŻENIE!
Urządzenie
• Aby ograniczyć niebezpieczeństwo pożaru, porażenia
prądem lub uszkodzenia urządzenia,
– Nie należy wystawiać urządzenia na działanie
deszczu, wilgoci, kapanie lub zachlapanie.
– Na urządzeniu nie należy umieszczać żadnych
przedmiotów napełnionych płynami, np. dzbanków.
– Należy stosować tylko zalecane akcesoria.
– Nie zdejmować pokrywy.
– Użytkownik nie powinien podejmować się naprawy
urządzenia na własną rękę. Ser wis należy zlecić w
autoryzowanym punkcie serwisowym.
UWAGA!
Urządzenie
• Aby ograniczyć niebezpieczeństwo pożaru, porażenia
prądem lub uszkodzenia urządzenia,
– Niniejszego urządzenia nie należy instalować lub
umieszczać w biblioteczce, wbudowanej szafce lub
innej ograniczonej przestrzeni. Należy zapewnić
odpowiednią wentylację urządzenia.
– Nie zasłaniaj otworów wentylacyjnych urządzenia
gazetami, obrusami, zasłonami i podobnymi
przedmiotami.
– Nie umieszczać na urządzeniu źródeł otwartego
ognia, jak np. zapalone świece.
• Urządzenie jest przeznaczone do używania w klimacie
umiarkowanym.
• Urządzenie należy zamontować w taki sposób, aby w
przypadku konieczności odłączenia zasilania możliwe
było niezwłoczne wyjęcie wtyczki z gniazda zasilania.
• To urządzenie może odbierać zakł
użyciem telefonu komórkowego. Jeżeli takie zakłócenia
wystąpią, wskazane jest zwiększenie odległości
pomiędzy urządzeniem a telefonem komórkowym.
• Urządzenie wykorzystuje promień lasera. Sterowanie,
regulacje lub postępowanie w sposób tutaj nie
określony grozi niebezpiecznym naświetleniem
promieniami lasera.
ócenia wywołane
Bateria
• Nie wolno zwierać biegunów baterii ani jej rozbierać.
• Nie ładować baterii alkalicznych ani manganowych.
• Nie wolno używać baterii, z których została zdjęta
warstwa ochronna.
• Nie zbliżać baterii do źródeł ciepła lub ognia.
• Baterii nie należy pozostawiać przez dłuższy czas,
w pojeździe z zamkniętymi drzwiami i oknami,
narażonym na bezpośrednie promieniowanie
słoneczne.
• Jeśli pilot ma nie być używany przez d
należy wyjąć z niego baterię. Przechowywać w
chłodnym, ciemnym miejscu.
• Istnieje niebezpieczeństwo wybuchu w przypadku,
gdy baterie zostaną nieprawidłowo założone. Baterie
należy wymieniać na takie same lub na baterie
równorzędnego typu, zalecane przez producenta.
• Zużyte baterie należy odpowiednio zutylizować.
Właściwą metodę powinny wskazać władze lokalne.
łuższy czas,
Page 39

3
POLSKI
Informacja dla użytkowników o gromadzeniu i
pozbywaniu się zużytych urządzeń i baterii
Niniejsze symbole umieszczane na produktach,
opakowaniach i/lub w dokumentacji
towarzyszącej oznaczają, że nie wolno
mieszać zużytych urządzeń elektrycznych i
elektronicznych oraz baterii z innymi odpadami
domowymi.
W celu zapewnienia właściwego przetwarzania,
utylizacji oraz recyklingu zużytych produktów
i baterii, należy oddawać je do wyznaczonych
punktów gromadzenia odpadów zgodnie
z przepisami prawa krajowego oraz
postanowieniami Dyrektyw 2002/96/WE i
2006/66/WE.
Prawidłowe pozbywanie się w/w produktów
i baterii pomaga oszczędzać cenne zasoby
naturalne i zapobiegać potencjalnemu
negatywnemu wpływowi na zdrowie człowieka
oraz stan środowiska naturalnego, który
towarzyszy niewłaściwej gospodarce odpadami.
Więcej informacji o zbiórce oraz recyklingu
zużytych produktów i baterii można otrzymać od
władz lokalnych, miejscowego przedsiębiorstwa
oczyszczania lub w punkcie sprzedaży, w
którym użytkownik nabył przedmiotowe towary.
Za niewłaściwe pozbywanie się powyższych
odpadów mogą grozić kary przewidziane
przepisami prawa krajowego.
Dotyczy użytkowników fi rmowych
działających na terenie Unii Europejskiej
Chcąc w odpowiedni sposób pozbyć się
urządzeń elektrycznych lub elektronicznych,
należy skontaktować się ze sprzedawcą lub
dostawcą, który udzieli dalszych informacji.
[Informacje o pozbywaniu się w/w urządzeń
w państwach trzecich]
Niniejsze symbole obowiązują wyłącznie
na terenie Unii Europejskiej. Chcąc pozbyć
się w/w urządzeń elektrycznych lub
elektronicznych, należy skontaktować się z
władzami lokalnymi lub sprzedawcą w sprawie
właściwego sposobu wyrzucania tego rodzaju
przedmiotów.
Dotyczy symbolu baterii (symbole
przykładowe):
Ten symbol może występować wraz z
symbolem pierwiastka chemicznego. W takim
przypadku spełnia on wymagania Dyrektywy w
sprawie określonego środka chemicznego.
Spis treści
Środki ostrożności ................................... 2
Dostarczone wyposażenie ....................... 3
Przygotowanie pilota zdalnego
sterowania ............................................ 3
Rozmieszczenie głośników .....................4
Podłączenie ............................................... 4
Sterowanie ................................................5
Płyty kompaktowe ....................................6
Radio FM/AM ............................................ 7
USB ............................................................ 7
Zegar i timer ............................................. 8
Regulacja dźwięku....................................8
Wyposażenie opcjonalne ......................... 8
Konserwacja .............................................9
Rozwiązywanie problemów .....................9
Dane techniczne .....................................10
Dostarczone wyposażenie
Sprawdzić i znaleźć poszczególne elementy
dostarczonego wyposażenia.
& 1 x Przewód zasilania & 1 x Antena
& 1 x Pilot zdalnego
sterowania
(N2QAYB000555)
wewnętrzna FM
& 1 x Antena pętlowa AM
Przygotowanie pilota zdalnego
sterowania
R6/LR6, AA
(nie należy do wyposażenia)
Należy stosować baterie alkaliczne lub manganowe.
Baterie należy włożyć tak, aby ich symbole biegunów
(+ i –) pasowały do oznaczeń wewnątrz pilota zdalnego
sterowania.
Skierować w stronę czujnika sygnału zdalnego
sterowania (Z strona 5).
Odległość: W granicach około 7 m
Kąt: W przybliżeniu 20° w pionie, 30° w poziomie
3
39
POLSKI
RQT9699
Page 40

4
POLSKI
Rozmieszczenie głośników
Podłączenie
Przewód zasilania podłaczyć do gniazdka sieciowego dopiero po wykonaniu wszystkich
pozostałych połączeń.
Zestawy głośnikowe są takie same, nie jest więc
konieczne ustawianie ich w specjalny sposób względem
siebie.
Nie można zdejmować siatek z zestawów głośnikowych.
Prosimy używać tylko zestawów głośnikowych
znajdujących się w wyposażeniu
Użycie innych zestawów głośnikowych może
spowodować uszkodzenie urządzenia i pogorszenie
jakości dźwięku.
• W celu zapewnienia prawidłowej wentylacji zestawy
głośnikowe należy ustawić w odległości przynajmniej
10 mm od urządzenia.
• Niniejsze zestawy głośnikowe nie mają ekranu
magnetycznego. Nie należy ich umieszczać w
pobliżu odbiorników telewizyjnych, komputerów ani
innych urządzeń wrażliwych na oddziaływanie pola
magnetycznego.
• Odtwarzanie bardzo głośnych dźwięków przez dłuższy
czas może uszkodzić zestawy głośnikowe i skrócić ich
żywotność czas eksploatacji.
• Aby uniknąć uszkodzenia, należy zmniejszyć głośność
w następujących przypadkach.
– Podczas odtwarzania zniekształconych dźwięków.
– Podczas regulacji brzmienia dźwięku.
POLSKI
Uwaga
• Zestawów głośnikowych należy używać wyłącznie
z zalecanym urządzeniem. W przeciwnym
wypadku można uszkodzić wzmacniacz i
zestawy głośnikowe oraz spowodować pożar.
W przypadku uszkodzenia lub nagłej zmiany w
jakości odtwarzania należy zwrócić się po radę do
wykwalifi kowanego specjalisty.
RQT9699
• Zestawów głośnikowych nie mocować ani na
4
ścianach ani na sufi cie.
40
1 Podłącz antenę pętlową AM.
Ustaw antenę na jej podstawce aż usłyszysz
kliknięcie.
(6:)
SPEAKERS
(SB-PM02)
(6:)
4 Podłącz przewód zasilania.
Nie stosować przewodów zasilania, pochodzących z
innych urządzeń.
Do domowego
gniazdka zasilającego
2 Podłącz antenę wewnętrzną FM.
Antenę należy zainstalować w miejscu
zapewniającym najlepszy odbiór.
Taśma
klejąca
3 Podłącz głośniki.
B
A
Czerwony
Uważaj, aby nie krzyżować (zwierać)
lub odwracać polaryzacji przewodów
głośnikowych, gdyż można w ten
sposób uszkodzić głośniki.
Oszczędzanie energii
System zużywa około 0,3 W energii w trybie
spoczynku. Gdy system nie jest używany, należy go
odłączać od zasilania.
Po odłączeniu systemu od zasilania niektóre
ustawienia zostaną utracone. Konieczne będzie ich
ponowne ustawienie.
(6:)
(6:)
Czarny
(6:)
(6:)
Page 41

5
POLSKI
Sterowanie
Szczegółowy opis znajduje się na stronie podanej w nawiasie.
A Przełącznik „STANDBY/ ON” [`], [1]
N
A
B
C
D
O
P
Q
R
S
E
F
T
U
G
V
H
I
W
X
Y
J
K
L
M
Z
a
b
(8, 10)
Naciśnij ten przycisk, aby wyłączyć
urządzenie (przełączyć je w stan
gotowości) lub włączyć je z powrotem.
W stanie gotowości urządzenie nadal
pobiera pewną niewielką moc.
B [DIMMER]
Służy do przyciemniania wyświetlacza.
Ponownie naciśnij, aby anulować.
C Przyciski numeryczne [1 do 9, 0, ≧10]
Aby wybrać 2-cyfrowy numer
przykład: 16: [≧10] ] [1] ] [6]
Aby wybrać 3-cyfrowy numer
przykład: 226: [≧10] ] [≧10] ] [2] ]
D [DEL] (6)
E [PROGRAM] (6, 7)
[REPEAT] (6)
[PLAY MODE] (6, 7)
F [4/9, USB] (7)
4/9, CD] (6)
[
G [2/3], [5/6 ] (6, 7, 8)
H [RE-MASTER] (8)
I [BASS] (8)
J [R/T] (6, 8)
[Y/U] posiadają takie same funkcje jak
[2/3] lub [5/6 ].
[OK] (6, 8)
K [DISPLAY] (6, 7)
L [AUTO PRESET] (7)
M [TUNE MODE] (7)
N [#, PLAY] (8)
O [CLOCK/TIMER] (8)
P [SLEEP] (8)
[2] ] [6]
Góra urządzenia
MUSIC P.
c
d
e
f
V
A
Q [AUTO OFF]
Funkcja umożliwia wyłączenie
urządzenia (poza trybem radia) po
około 30 minutach nieużywania.
Aktywna funkcja „AUTO OFF”
stanowi ustawienie fabryczne.
Ponownie naciśnij przycisk, aby
anulować wybór.
R Sterowanie głośnością
[+/–, VOL
S [MUTE]
Służy do wyciszania dźwięku.
Ponownie naciśnij, aby anulować.
Opcja „MUTE” zostaje również
anulowana podczas regulacji
głośności lub wyłączenia urządzenia.
T [MUSIC PORT], [MUSIC P.] (8, 9)
U [FM/AM] (7)
], [+/–, VOLUME]
g
V [8 ] (6, 7)
W [D.BASS] (8)
X [PRESET EQ] (8)
Y [TREBLE] (8)
Z [SURROUND] (8)
a [INPUT LEVEL] (9)
b [FM MODE] (7)
c Gniazdo MUSIC P. (muzyczne) (9)
Gniazdo słuchawek,
d Wyświetlacz
e Czujnik sygnału pilota zdalnego
sterowania
f Gniazdo USB,
g [BASS/TREBLE] (8)
h [x , OPEN/CLOSE] (6)
U
T
G
(7)
(9)
R
F
h
POLSKI
RQT9699
5
41
Page 42

6
POLSKI
Płyty kompaktowe
Odtwarzanie podstawowe
1 Naciśnij [x, OPEN/CLOSE] na urządzeniu, aby
otworzyć podajnik płyt.
Po załączeniu się urządzenia, umieścić płytę
etykietą skierowaną do góry.
Naciśnij ponownie [x, OPEN/CLOSE], aby zamknąć
podajnik płyt.
2 Naciśnij [4/9, CD], aby rozpocząć odtwarzanie.
Zatrzymywanie
odtwarzania
Wstrzymywanie
odtwarzania
Ominięcie
utworów
Wyszukiwanie w
utworach
Ominięcie
albumu
Funkcja trybu odtwarzania
W celu wybrania odpowiedniego trybu naciśnij
[PLAY MODE].
1-TRACK
1TR
1-ALBUM
POLSKI
1ALBUM
RANDOM
RND
1-ALBUM
RANDOM
1ALBUM RND
RQT9699
Funkcja ta nie działa z włączoną opcją „Odtwarzanie
6
42
zaprogramowane”.
Naciśnij [8].
Naciśnij [4/9, CD]. W celu
wznowienia odtwarzania naciśnij
przycisk ponownie.
Naciśnij [2 /3] lub [5/6].
Naciśnij i przytrzymaj [2/3 ]
lub [5/6 ] podczas odtwarzania
lub w trybie pauzy.
Naciśnij [R/T].
Odtwarzaj jeden wybrany utwór z płyty.
Naciskaj odpowiednie przyciski
numeryczne, aby wybrać utwór.
Odtwarzaj jeden wybrany album z płyty.
Naciśnij [R/T], aby wybrać album.
Odtwarzaj losowo wybraną płytę.
Odtwarzaj losowo wszystkie utwory w
jednym wybranym albumie.
Naciśnij [R/T], aby wybrać album.
Odtwarzanie zaprogramowane
Ta funkcja pozwala zaprogramować do 24 utworów.
1 Naciśnij [4/9, CD] i następnie [8].
2 Naciśnij [PROGRAM].
Wyświetlony zostanie symbol „PGM”.
3 Naciskaj odpowiednie przyciski numeryczne, aby
wybrać utwór.
Aby zaprogramować nowe utwory należy powtórzyć
ten krok.
4 Naciśnij [4/9, CD], aby rozpocząć odtwarzanie.
3 Naciśnij [R/T ], aby wybrać album.
4 Aby wybrać utwór, naciśnij jeden raz [5/6],
a następnie odpowiednie przyciski numer yczne.
5 Naciśnij [OK].
6 Powtórz czynności z punktów 3 do 5, aby
zaprogramować pozostałe ścieżki.
7 Naciśnij [4/9, CD], aby rozpocząć odtwarzanie.
Wyłączyć tryb
odtwarzania
zaprogramowanych
utworów
Powtórzyć program Naciśnij [PROGRAM] następnie
Sprawdzić
zawartość programu
Usunąć ostatni
zaprogramowany
utwór
Usunąć wszystkie
zaprogramowane
utwory
Naciśnij [PROGRAM] w trybie
zatrzymanym.
[4/9, CD] tr ybie zatrzymania.
Naciśnij [2 /3] lub
[5/6], kiedy w trybie
zatrzymania wyświetlony jest
„PGM”.
Aby sprawdzić podczas
programowania, dwukrotnie
naciśnij [PROGRAM], zostanie
wyświetlone „PGM”, a następnie
naciśnij [2/3] lub
[5/6].
Naciśnij [DEL] w trybie
zatrzymanym.
W trybie zatrzymania naciśnij
[8]. Wyświetlany jest „CLR ALL”.
Aby skasować wszystkie ścieżki,
naciśnij ponownie przycisk w
ciągu 5 sekund.
• Pamięć programu zostanie skasowana po otworzeniu
podajnika płyt.
• Aby powtórzyć zaprogramowaną kolejność
odtwarzania lub wybrany tryb odtwarzania, naciśnij
[REPEAT]. Ponownie naciśnij, aby anulować.
Sprawdzanie informacji o utworze
Informacje na temat aktualnie odtwarzanego utworu
można wyświetlić na wyświetlaczu.
Naciśnij [DISPLAY] podczas odtwarzania lub pauzy.
• Urządzenie obsługuje etykiety ID3 w wersji 1.0 i 1.1.
• Nieobsługiwane dane tekstowe nie będa wyświetlane.
UWAGA odnośnie stosowania pł yt DualDisc
Strona zawartości cyfrowej audio płyt DualDisc nie spełnia
technicznych specyfi kacji formatu Cyfrowych Płyt Audio
(CD- DA), więc ich odtwarzanie może być niemożliwe.
UWAGA dotycząca płyt CD
• Urządzenie może odtwarzać do 99 utworów.
• To urządzenie może odtwarzać pliki w formacie MP3
oraz płyty audio CD-R/RW formatu CD-DA poddane
fi nalizacji.
• Może ono nie odtwarzać niektórych płyt CD- R/RW ze
względu na stan nagrania.
UWAGA dotycząca MP3
• Pliki są traktowane jako utwory, a foldery jako albumy.
• Urządzenie może odtwarzać do 999 utworów,
255 albumów i 20 sesji.
• Płyty muszą być zgodne ze standardem ISO9660
poziom 1 lub 2 (z wyjątkiem formatów rozszerzonych).
• Aby odtwarzać w określonej kolejno
nazwy folderów i plików 3-cyfrowymi numerami,
zgodnymi z zamierzoną kolejnością odtwarzania.
Ograniczenia dotyczące odtwarzania plików MP3
• Jeżeli pliki w formacie MP3 zostały nagrane na tej
samej płycie, na której nagrano dźwięk w formacie
CD-DA, tylko format nagrany w pierwszej sesji będzie
odtwarzany.
• W niektórych przypadkach plików MP3 nie można
odtworzyć z powodu złego stanu płyty lub nagrania.
• Nagrania nie zawsze odtwarzane są w kolejności
nagrywania.
Technologia kodowania dźwięku MPEG Layer-3
podlega licencji fi rmy Fraunhofer IIS i Thomson.
ści, poprzedź
Page 43

7
POLSKI
Radio FM/AM
Strojenie ręczne
1 Naciśnij [FM/AM], aby wybrać pasmo „FM” lub
„AM”.
2 Naciśnij [TUNE MODE], aby wybrać „MANUAL”.
3 Naciśnij [2/3] lub [5/6], aby wybrać
częstotliwość stacji.
Strojenie automatyczne
Naciśnij i przytrzymaj [2/3 ] lub [5/6], dopóki
częstotliwość nie zacznie się szybko zmieniać.
• Automatyczne strojenie może zostać przerwane z
powodu nadmiernych zakłóceń.
• Aby anulować automatyczne strojenie, ponownie
naciśnij [2/3] lub [5/6].
W celu poprawy jakości dźwięku
Jeśli wybrano pasmo „FM”
Naciśnij i przytrzymaj [FM MODE], aby wyświetlić
„MONO”.
Ponownie naciśnij, aby anulować.
• Tryb „MONO” zostaje również anulowany po zmianie
częstotliwości.
• Podczas słuchania w normalnych warunkach tryb
„MONO” powinien być wyłączony.
Jeśli wybrano pasmo „AM”
Naciśnij i przytrzymaj [TUNE MODE].
Po każdym naciśnięciu i przytrzymaniu przycisku:
BP 2
BP 1
Odbiór RDS
Urządzenie to może wyświetlać dane tekstowe
nadawane przez system danych radiowych (RDS)
dostępny w niektórych rejonach.
Naciśnij [DISPLAY], aby wyświetlić:
Nazwa stacji
(PS)
Informacje RDS mogą być niedostępne, jeżeli odbiór jest
słaby.
Typ programu
]
(PTY)
Częstotliwość
]
(FREQ)
Programowanie stacji
Można zaprogramować 30 stacji FM i 15 stacji AM.
Automatyczne programowanie stacji
1
Aby wybrać „CURRENT” (aktualną) lub „LOWEST”
(najniższą) częstotliwość, naciśnij [PLAY MODE].
2 Naciśnij [AUTO PRESET], aby rozpocząć
programowanie.
Ręczne programowanie stacji
1 Naciśnij [TUNE MODE], aby wybrać „MANUAL”.
2
Naciśnij [2 /3] lub [5/6], aby dostroić
radio do żądanej stacji.
3 Naciśnij [PROGRAM].
4 Naciskaj odpowiednie przyciski numeryczne, aby
wybrać kanał.
Jeśli pod tym samym numerem kanału była już
zaprogramowana inna stacja, informacje o niej
zostaną skasowane.
5 Aby dostroić większą liczbę stacji, należy
powtórzyć kroki od 2 do 4.
Wybieranie zaprogramowanej stacji
1 Naciśnij [TUNE MODE], aby wybrać „PRESET”.
2 Naciśnij [2/3] lub [5/6], aby wybrać
kanał.
Alternatywnie naciskaj odpowiednie przyciski
numeryczne, aby wybrać kanał.
Ustawianie stacji w paśmie AM
(tylko poprzez urządzenie główne)
Ten system jest w stanie odbierać stacje radiowe w
paśmie AM w krokach co 10 kHz.
Naciśnij i przytrzymaj [FM/AM].
Po kilku sekundach wyświetlacz rozpocznie pulsowanie z
aktualnym zakresem częstotliwości. Zwolnij przycisk po
zmianie minimalnego zakresu częstotliwości.
• W celu powrotu do trybu domyślnego, należy
powtórzyć powyższe kroki.
• Po zmianie ustawienia, poprzednio ustawiona
częstotliwość zostanie usunięta.
USB
Połączenie USB umożliwia odtwarzanie plików MP3 z
podłączonych urządzeń pamięci masowej USB.
Przygotowanie
Przed podłączeniem urządzenia pamięci masowej USB
do urządzenia należy upewnić się, że zapisane tam dane
posiadają kopię zapasową.
Nie należy używać przedłużacza USB. Urządzenie
pamięci masowej USB podłączone za pomocą przewodu
nie zostanie wykryte przez urządzenie.
1 Zmniejszyć poziom głośności i podłącz
urządzenie pamięci masowej USB do portu USB.
Przytrzymaj główne urządzenie podczas podłączania
lub rozłączania urządzenia pamięci masowej USB.
2 Naciśnij [4/9, USB], aby rozpocząć odtwarzanie.
Zatrzymywanie
odtwarzania
Pozostałe funkcje obsługi są podobne do opisanych
w części „Płyty kompaktowe” (Z strona 6).
Urządzenia kompatybilne
Urządzenia określone jako pamięci masowe USB:
• Urządzenia USB obsługujące protokół transferu Bulk-
Only.
• Urządzenia USB obsługujące standard USB 2.0 (pełna
prędkość).
Obsługiwane formaty
• Utwory powinny mieć rozszerzenie „.mp3” lub „.MP3”.
• CBI (ang. Control/Bulk/Interrupt) nie jest obsługiwany.
• Urządzenie korzystające z systemu plików NTFS
nie jest obsługiwane. [Obsługiwany jest tylko system
plików FAT 12/16/32 (File Allocation Table 12/16/32).]
• W zależności od rozmiaru sektorów niektóre pliki mogą
nie być dostępne.
• Maksymalna liczba albumów: 255 albumów
• Maksymalna liczba utworów: 2500 utworów
• Maksymalna liczba utworów w jednym albumie:
999 utworów
Naciśnij [8]. Wyświetla się symbol
„RESUME”.
Położenie zostanie zapamiętane.
Naciśnij [4/9, USB], aby wznowić
odtwarzanie.
Naciśnij ponownie [8], aby usunąć
zapamiętane położenie.
7
43
POLSKI
RQT9699
Page 44

8
POLSKI
Zegar i timer
Ustawianie zegara
Jest to zegar 24-godzinny.
1 Naciśnij [CLOCK/TIMER], aby wybrać „CLOCK”.
2 W ciągu 10 sekund naciśnij [R/T] aby ustawić
czas.
3 Naciśnij [OK].
• Aby wyświetlić zegar na kilka sekund, naciśnij
[CLOCK/TIMER].
• Zegar należy regularnie nastawiać, aby zawsze była
ustawiona dokładna godzina.
Korzystanie z timera wyłączającego
Ta funkcja umożliwia automatyczne wyłączanie
urządzenia po zadanym czasie.
Naciśnij [SLEEP], aby wybrać żądany czas
(w minutach).
Naciśnij [SLEEP], aby wyświetlić pozostały czas, a
następnie ponownie naciśnij [SLEEP], aby ustawić
żądany czas.
• Możliwe jest jednoczesne użycie timera odtwarzania i
wyłączającego.
• Timer wyłączający ma zawsze priorytet. Należy
dopilnować, by ustawienia timerów nie zachodziły na
siebie.
POLSKI
RQT9699
8
44
Korzystanie z timera odtwarzania
Timer można ustawić w taki sposób, aby o
określonej godzinie urządzenie włączało się i budziło
użytkownika.
Włącz urządzenie i ustaw zegar.
Przygotuj wybrane źródło muzyki, które chcesz
odtworzyć: płyta, radio, urządzenie USB lub gniazdo
źródła muzyki oraz ustaw głośność.
1
Naciśnij [CLOCK/TIMER], aby wybrać „# PLAY 1”,
„# PLAY 2” lub „# PLAY 3”.
2 W ciągu 10 sekund naciśnij [R/T] aby ustawić
czas rozpoczęcia.
3 Naciśnij [OK].
4 Powtórz kroki 2 i 3, aby ustawić godzinę
zakończenia.
Aby uaktywnić timer
5 Naciśnij [#, PLAY], aby włączyć „# PLAY 1”,
„# PLAY 2” lub „# PL AY 3”.
Wyświetlony zostanie symbol „#”.
OFF120MIN90MIN60MIN30MIN
6 Naciśnij [`], aby wyłączyć urządzenie.
Zmiany
ustawień
Wybieranie
innego źródła
lub głośności
Sprawdzanie
ustawień
Anulowanie
• Timer włączy się o ustawionej godzinie przy głośności
stopniowo zwiększającej się do ustawionego wcześniej
poziomu.
• Aby timer działał, urządzenie musi znajdować się w
trybie gotowości.
Powtórz kroki od 1 do 4 i 6 (Z patrz
wyżej).
1) Nac iśnij dwukrotnie [#, PLAY],
aby usunąć wskazanie timera z
wyświetlacza.
2) Zmień źródło lub głośność.
3) Wykonaj kroki 5 i 6 (Z patrz wyżej).
Naciśnij [CLOCK/TIMER], aby wybrać
„# PLAY 1”, „# PLAY 2” lub „# PLAY 3 ”.
Naciśnij dwukrotnie [#, PL AY],
aby usunąć wskazanie timera z
wyświetlacza.
Regulacja dźwięku
Zaprogramowany
korektor
(Preset EQ)
Tony niskie lub
wysokie
Dźwięk
przestrzenny
D.Bass Naciśnij [D.BASS], aby wybrać
Re-master
Naciśnij [PRESET EQ], aby
wybrać „HEAVY”, „SOFT”,
„CLEAR”, „VOCAL” lub „FLAT”.
1) Nac iśnij [BASS] lub [TREBLE]
(urządzenie główne:
[BASS/TREBLE]) aby wybrać
„BASS” lub „TREBLE”.
2) Naciśnij [2 /3] lub
[5/6], aby wyregulować
poziom (– 4 do +4).
Naciśnij [SURROUND], aby
wybrać „ON SURROUND” lub
„OFF SURROUND”.
Jeśli w odbiorze stereofonicznym
FM nasilają się zakłócenia, należy
wyłączyć dźwięk przestrzenny.
„ON D.BASS” lub „OFF D.BASS”.
Naciśnij [RE- MASTER], aby
wybrać „ON RE-MASTER” lub
„OFF RE-MASTER”.
Wyposażenie opcjonalne
Należy unikać zakłóceń pochodzących
od innego wyposażenie fi rmy Panasonic
Inne wyposażenie audio lub video fi rmy Panasonic może
zacząć funkcjonować podczas stosowania dostarczonego
z urządzeniem pilota zdalnego sterowania.
Aby obsługiwać jedynie system to urządzenia,
zsynchronizuj je z jego pilotem zdalnego sterowania w
celu obsługi w trybie „REMOTE 2”.
1 Naciśnij i przytrzymaj [MUSIC P.] na głównym
urządzeniu i [2] do chwili pojawienia się
„REMOTE 2”.
2 Naciśnij i przytrzymaj [OK] i [2] przynajmniej
przez 2 sekundy.
W celu zmiany trybu powrócić „REMOTE 1”, aby powtórz
czynności 1 i 2 zamianę odwrotnej kolejności, czyli [2] z [1].
Page 45

9
POLSKI
Przenośne urządzenie audio
Przed podłączeniem do gniazda MUSIC P. wyłączyć
funkcję korektora ( jeżeli występuje) przenośnego
urządzenia audio. W przeciwnym razie dźwięk z głośnika
może być zniekształcony.
1 Podłącz przewód audio do gniazda MUSIC P..
2 Naciśnij [MUSIC PORT] (urządzenie główne:
[MUSIC P.]) i odtwórz przenośne urządzenie
audio.
Aby wyregulować poziom dźwięku wejściowego
Naciśnij [INPUT LEVEL], aby wybrać „HIGH”
(wysoki) lub „NORMAL” (normalna).
• Wybierz opcję „NORMAL” (normalna) jeśli w
przypadku wyboru opcji „HIGH” (wysoki) dźwięk jest
zniekształcony.
• Przewody i dodatkowe akcesoria nie należą do
wyposażenia.
• Dodatkowe informacje, patrz instrukcja obsługi
przenośnego urządzenia audio.
Podłączanie do słuchawek
Podłączyć słuchawki (nie należą do wyposażenia) do
gniazda słuchawek.
Typ wtyku: średnicy Ø 3,5 mm, stereo
• Należy unikać długotrwałego słuchania, aby zapobiec
uszkodzeniu słuchu.
• Nadmierne ciśnienie akustyczne dźwięku
wydobywającego się ze słuchawek czy słuchawek
nagłownych może powodować utratę słuchu.
• Głośne słuchanie przez dłuższy okres czasu może
doprowadzić do uszkodzeń w uchu wewnętrznym.
Konserwacja
W celu oczyszczenia urządzenia należy przetrzeć je
miękką, suchą szmatką.
• Do czyszczenia urządzenia nie należy stosować
alkoholu, rozcieńczalnika ani benzyny.
• Przed użyciem chusteczki nasączonej środkiem
chemicznym należy zapoznać się z dołączoną do niej
instrukcją.
Rozwiązywanie problemów
Przed oddaniem urządzenia do naprawy należy
przeprowadzić następujące kontrole. W przypadku
wątpliwości, co do niektórych punktów kontrolnych lub
jeśli podane rozwiązania nie eliminują problemu, należy
zwrócić się po wskazówki do sprzedawcy.
„Czynności wykonywane przez zakłady usługowe
polegające na sprawdzeniu: działania, parametrów
technicznych, czyszczeniu głowic i toru taśmy, regulacji
i czyszczeniu mechanizmu, strojeniu programatorów,
wymianie żarówek i bezpieczników—nie są zaliczane do
ilości napraw stanowiących podstawę wymiany sprzętu
zgodnie z §36, pkt. 1.3. Uchwały Nr. 71 Rady Ministrów z
1983.06.13., opublikowanej w Monitorze Polskim Nr. 21
z 1983.06.29.”
„Uszkodzenia mechaniczne, termiczne, chemiczne
zewnętrznych części metalowych i z tworzyw sztucznych
oraz sznury przyłączeniowe, słuchawkowe—nie
podlegają gwarancji.”
„Aby uchronić sprzęt Hi-Fi przed zniszczeniem w czasie
wyładowań atmosferycznych, należy odłączyć przewód
zasilania sprzętu Hi-Fi z sieci oraz kabel antenowy
(dotyczy instalacji indywidualnych).”
■ Typowe problemy
Brak odpowiedzi przy naciskaniu przycisków pilota
zdalnego sterowania.
• Sprawdź, czy baterie zostały prawidłowo włożone.
Zniekształcenia dźwięku lub brak dźwięku.
• Zwiększ głośność.
• Wyłącz urządzenie, określ i usuń przyczynę. Ponownie
włącz urządzenie. Może to być spowodowane przez
odkształcenia głośników poprzez nadmierny poziom
głośności lub zasilanie albo użytkowanie urządzenia w
gorącym otoczeniu.
Podczas odtwarzania słychać „buczenie”.
• Blisko urządzenia znajduje się przewód zasilania
prądem przemiennym lub fl uorescencyjne oświetlenie.
Utrzymywać urządzenie z dala od innych urządzeń lub
przewodów zasilających.
■ Płyty kompaktowe
Nieprawidłowe odtwarzanie lub brak rozpoczęcia
odtwarzania.
• Płyta została nieprawidłowo umieszczona w napędzie
podajniku płyt; umieść płytę prawidłowo.
• Płyta może być zabrudzona. Należy ją wytrzeć.
• Użyj innej płyty, jeśli jest zarysowana, wygięta lub
niestandardowa.
• Nagromadzenia pary: odczekać 1 do 2 godzin do
czasu odparowania.
■ Radio
Słychać dudnienie.
• Wyłącz pobliski telewizor lub odsuń od niego
urządzenie.
• Przełącz na BP 1 lub BP 2, kiedy znajdujesz się w
trybie tuner AM.
Podczas odbioru w paśmie AM słychać przydźwięk o
niskiej częstotliwości.
• Odsuń antenę od innych kabli i przewodów.
■ USB
Brak odpowiedzi, kiedy naciskany jest [4/9, USB].
• Odłącz urządzenie USB, a następnie podłącz go
ponownie. Można również spróbować wyłączyć i
ponownie włączyć urządzenie.
Nie można odczytać napędu USB lub zapisanych
danych.
• Format napędu USB lub zapisane na nim dane nie są
kompatybilne z systemem.
• Funkcja hosta USB niniejszego urządzenia może nie
działać z niektórymi urządzeniami USB.
• Urządzenia USB, na których można zapisać ponad
8 gigabajtów danych, mogą nie działać w niektórych
przypadkach.
Powolne działanie urządzenia USB.
• Pliki o dużych rozmiarach lub napęd Flash USB z dużą
ilością pamięci wymaga dłuższego czasu wczytywania.
■ Wyświetlacz urządzenia
„NO PLAY”
• Sprawdź zawartość. Odtwarzać można wyłącznie
utwory o obsługiwanym formacie.
• W przypadku większej liczby albumów lub folderów niż
255 (audio lub nie audio) niektóre z plików w formacie
MP3 mogą nie być odczytywane lub odtwarzane.
W takim przypadku należy dokonać transferu tych
muzycznych albumów do innego urządzenia USB.
Również można dokonać formatowania urządzenia
USB, i zapisać te muzyczne albumy w innych
folderach, nie zawierających plików audio.
9
45
POLSKI
RQT9699
Page 46

„F61” lub „F76”
• Sprawdź i popraw podłączenie kabli głośników. Jeśli
problem nadal występuje, należy skonsultować się ze
sprzedawcą.
• Odłącz urządzenie USB. Ponownie wyłącz i włącz
urządzenie.
„ERROR”
• Wykonano nieprawidłową operację. Przeczytaj
instrukcję i spróbuj ponownie.
„ADJUST CLOCK”
• Zegar nie jest ustawiony. Odpowiednio wyreguluj
zegar.
„ADJUST TIMER”
• Timer odtwarzania nie jest ustawiony. Odpowiednio
wyreguluj timer odtwarzania.
„AUTO OFF”
• Urządzenie było nieużywane przez około 29 minut i
zostanie wyłączone za minutę. Naciśnij jakikolwiek
przycisk, aby anulować.
Zerowanie pamięci systemu (Inicjalizacja)
W następujących sytuacjach należy zapoznać się z
poniższymi instrukcjami, aby wyzerować pamięć:
• Brak reakcji po naciśnięciu przycisków.
• Chęć wyczyszczenia i wyzerowania zawartości
pamięci.
Aby wyzerować pamięć systemu
1) Od łącz przewód zasilania. (Odczekaj
przynajmniej 3 minuty przed przystąpieniem
do kroku 2.)
2) Naciskając i przytrzymując [1] na urządzeniu
głównym, podłącz ponownie przewód
zasilania.
Naciskaj i trzymaj przycisk przez kolejne (około
10 sekund), aż wyświetlony zostanie symbol
„– – – – – – – –”.
POLSKIPOLSKI
3) Zwolnij [1].
Przywrócone zostaną wszystkie ustawiania
fabryczne.
Będzie trzeba ponownie ustawić pozycje pamięci.
RQT9699
1010
46
Dane techniczne
■ Sekcja wzmacniacza
Całkowita wyjściowa moc skuteczna w trybie stereo
Kanał przedni (przy użyciu obu kanałów)
5 W na kanał (6
zniekształcenia harmonicznego (THD)
Całkowita moc skuteczna w trybie stereo 10 W
■ Tuner FM/AM, sekcja złączy
Zaprogramowane stacje FM 30 stacji
AM 15 stacji
Modulacja częstotliwościowa (FM)
Zakres częstotliwości
87,50 MHz do 108,00 MHz (w krokach co 50 kHz)
Gniazda antenowe 75
Modulacja amplitudowa (AM)
Zakres częstotliwości
522 kHz do 1629 kHz (w krokach co 9 kHz)
520 kHz do 1630 kHz (w krokach co 10 kHz)
Gniazdo słuchawek
Złącze Stereo, złącze 3,5 mm
Poziom wyjściowy (CD, 1 kHz, –20 dB)
0,7 mW + 0,7 mW, 32
Gniazdo muzyczne (góra)
Czułość
Normalna 490 mV, 15 k
Wysoki 100 mV, 15 k
Złącze Stereo, złącze 3,5 mm
■ Sekcja odtwarzacza płyt CD
Odtwarzane płyty (8 cm lub 12 cm)
CD, CD-R/RW (CD-DA, MP3
Przechwytywanie
Długość fali 790 nm (CD)
Moc lasera CLASS I
Wyjście audio (Płyta)
Liczba kanałów 2 kanałów (FL, FR)
FL = Przedni lewy kanał
FR = Przedni prawy kanał
MPEG-1 Layer 3, MPEG-2 Layer 3
), 1 kHz, 10% całkowitego
(niezrównoważone)
(Maks.)
)
■ Sekcja USB
Port USB
Standard USB Standard USB 2.0 pełnej prędkości
Obsługiwane formaty plików multimedialnych
MP3 (*.mp3)
System plików urządzenia USB
FAT12, FAT16, FAT32
Pobór mocy portu USB 500 mA (Maks.)
■ Sekcja zestawów głośnikowych
Typ System 1-drożny, 1-głośnikowy (Bass-refl ex)
Zestaw(y) głośnikowy(e)
Pełen zakres 10 cm stożkowy
Impedancja 6
Wyjściowe ciśnienie akustyczne 83 dB/W (1 m)
Zakres częstotliwości 61 Hz do 17 kHz (–16 dB)
95 Hz do 15 kHz (–10 dB)
Wymiary (szer. x wys. x głęb.)
139 mm x 224 mm x 136 mm
Masa 1,3 kg
■ Dane ogólne
Zasilanie Prąd przemienny 220 do 240 V, 50 Hz
Pobór mocy 12 W
Wymiary (szer. x wys. x głęb.)
184 mm x 123 mm x 228 mm
Masa 1,1 kg
Zakres temperatur roboczych 0°C do +40°C
Zakres wilgotności roboczych
od 35% do 80% RH (bez kondensacji)
Pobór mocy w trybie gotowości: 0,3 W (około)
1) Dane techniczne mogą ulec zmianie bez
powiadomienia.
Masa i wymiary podane są w przybliżeniu.
2) Wartość całkowitych zniekształceń harmonicznych
została zmierzona przy użyciu cyfrowego analizatora
widma.
Page 47

Činnosti v těchto pokynech jsou popsány většinou
pro použití dálkového ovládání, ale můžete je
provádět i na hlavní jednotce, pokud jsou ovládací
prvky totožné.
Vzhled výrobku nemusí přesně odpovídat uvedeným
obrázkům.
Tento návod k obsluze platí pro následující systém:
Systém
Hlavní jednotka
Reproduktory
Zadní strana přístroje
Uvnitř přehrávače
SC-PM04
SA-PM04
SB-PM02
Bezpečnostní upozornění
UPOZORNĚNÍ!
Přístroj
• Abyste snížili nebezpečí vzniku požáru, úrazu
elektrickým proudem nebo poškození přístroje:
– Nevystavujte tento přístroj dešti, nadměrné vlhkosti,
kapající vodě a postříkání.
– Na přístroj by neměly být umisťovány žádné objekty
naplněné vodou, jako jsou například vázy.
– Používejte pouze doporučené příslušenství.
– Neodstraňujte kryt přístroje.
– Nepokoušejte se přístroj opravit sami. Opravy
přenechejte kvalifi kovaným pracovníkům servisu.
POZOR!
Přístroj
• Abyste snížili nebezpečí vzniku požáru, úrazu
elektrickým proudem nebo poškození přístroje:
– Abyste zajistili dobré ventilační podmínky, nikdy
neinstalujte tento přístroj v knihovně, vestavěné
skříni nebo jiném uzavřeném prostoru.
– Neblokujte ventilační otvory přístroje novinami,
ubrusy, závěsy a jinými materiály.
– Nepokládejte zdroje otevřeného ohně, jako například
hořící svíčky, na přístroj.
• Tento přístroj je konstruován pro použití v mírném
klimatu.
• Nainstalujte tento přístroj tak, aby bylo možné okamžitě
odpojit hlavní napájení (AC) ze zásuvky, jestliže by
došlo k problému.
• Tento přístroj může být během používání rušen
rádiovou interferencí, která je způsobena mobilním
telefonem. Jestliže k takovéto interferenci dojde,
zajistěte větší vzdálenost mezi tímto přístrojem a
mobilním telefonem.
• Tento přístroj pracuje s laserovým paprskem. Při
nesprávném použití ovládacích prvků, stejně jako při
provádění jiných postupů
tomto návodu, může dojít k nebezpečnému vyzařování.
, než které jsou popsány v
Baterie
• Nerozebírejte ani nezkratujte baterie.
• Nedobíjejte alkalické nebo manganové baterie.
• Nepoužívejte baterie, u nichž se loupe obal.
• Nevystavujte baterie teplu nebo ohni.
• Nenechávejte baterie v automobilu vystavené přímému
slunečnímu světlu po delší dobu, když jsou zavřené
dveře a okna.
• Jestliže dálkové ovládání nebudete používat delší
dobu, vyjměte z něj baterie. Skladujte na chladném a
tmavém místě.
• V případě nesprávné výměny baterie hrozí nebezpečí
výbuchu. Vyměňujte pouze za typ baterie, který
doporučuje výrobce.
• Při likvidaci baterií se obraťte na místní úřady nebo
na prodejce a informujte se o správném způsobu
likvidace.
RQT9699
22
47
ČESKYČESKY
Page 48

3
ČESKY
Informace pro spotřebitele o sběru a likvidaci
odpadu z elektrických a elektronických zařízení a
použitých baterií z domácností
Tyto symboly na výrobcích, obalech nebo v
průvodní dokumentaci znamenají, že použitá
ČESKY
RQT9699
3
48
elektrická a elektronická zařízení a baterie
nepatří do běžného domácího odpadu.
Správná likvidace, recyklace a opětovné
použití jsou možné jen pokud odevzdáte tato
zařízení a použité baterie na místech k tomu
určených, za což neplatíte žádné poplatky, v
souladu s platnými národnímu předpisy a se
Směrnicemi 2002/96/EU a 2006/66/EU.
Správnou likvidací přístrojů a baterií
pomůžete šetřit cenné suroviny a předcházet
možným negativním účinkům na lidské
zdraví a na přírodní prostředí, které jinak
mohou vzniknout při nesprávném zacházení
s odpady.
Další informace o sběru, likvidaci a recyklaci
starých přístrojů a použitých baterií Vám
poskytnou místní úřady, provozovny
sběrných dvorů nebo prodejna, ve které jste
toto zboží zakoupili.
Při nesprávné likvidaci odpadu vám hrozí
pokuta v souladu s národní legislativou a
místními předpisy.
Informace pro právnické osoby se sídlem
v zemích Evropské Unie (EU)
Pokud chcete likvidovat elektrická nebo
elektronická zařízení, obraťte se na prodejce
nebo dodavatele s žádostí o další informace.
[Informace o likvidaci v zemích mimo
Evropskou Unii (EU)]
Tyto symboly platí jen v zemích Evropské
unie. Pokud chcete likvidovat tento produkt,
obraťte se na místní úřady nebo prodejce a
informujte se o správném způsobu likvidace.
Poznámka k symbolu baterie (symboly
uprostřed a dole):
Tento symbol může být použit v kombinaci
s chemickým symbolem. V tomto případě
splňuje tento symbol legislativní požadavky,
které jsou předepsány pro chemickou látku
obsaženou v baterii.
Obsah
Bezpečnostní upozornění ........................ 2
Dodávané příslušenství ........................... 3
Příprava dálkového ovladače .................. 3
Umístění reprosoustavy...........................4
Provedení zapojení ................................... 4
Průvodce ovládáním ...............................5
Disky .......................................................... 6
Radio FM/AM ............................................ 7
USB ............................................................ 7
Hodiny a časovače ................................... 8
Nastavení zvuku ......................................8
Volitelné vybavení ....................................8
Údržba .......................................................9
Odstraňování závad .................................9
Specifi kace ..............................................10
Dodávané příslušenství
Zkontrolujte si prosím a identifi kujte dodávané
příslušenství.
& 1 x Kabel přívodu
střídavého proudu
& 1 x Dálkové ovládání
(N2QAYB000555)
& 1 x FM pokojová
anténa
& 1 x AM smyčková
anténa
Příprava dálkového ovladače
R6/LR6, AA
(není v příslušenství)
Použijte alkalické nebo manganové baterie.
Vložte baterie podle pólů (+ a –) do dálkového ovládání.
Namiřte ovladač na snímač signálu dálkového ovládání
(Z str. 5).
Vzdálenost: přibližně 7 m
Úhel: přibližně 20° nahoru a dolů, 30° vlevo a vpravo
Page 49

4
ČESKY
Umístění reprosoustavy
Provedení zapojení
Připojte síťové napájení až poté, co byla provedena všechna ostatní zapojení.
Reproduktory jsou uvnitř těchto reprosoustavy umístěny
symetricky a není tedy třeba tyto reprosoustavy nijak
speciálně orientovat, co se týče levého a pravého kanálu.
Čelní síťky nelze z reproduktorů sejmout.
Použijte pouze reproduktor y dodávané s přístrojem
Použití jiných reproduktorů může poškodit jednotku nebo
negativně ovlivnit kvalitu zvuku.
• Nechte vaše reproduktory alespoň 10 mm od systému
pro správné větrání.
• Tyto reproduktory nemají magnetické stínění.
Neumisťujte je do blízkosti TV, PC nebo jiného zařízení
snadno ovlivnitelného magnetismem.
• Budete-li přehrávat zvuky po delší dobu s velkou
hlasitostí, můžete poškodit reproduktory a zkrátit jejich
životnost.
• V následujících případech snižte hlasitost, aby nedošlo
k poškození reproduktorů.
– Je-li zvuk zkreslený.
– Při nastavování kvality zvuku.
Pozor
• Reproduktory používejte pouze s
doporučovaným systémem. Nedodržení
může vést k poškození zesilovače a/nebo
reproduktorů a může zapříčinit požár.
Kontaktujte kvalifi kovaného servisního
pracovníka, pokud došlo k poškození nebo
ucítíte zjevnou změnu ve výkonu přístroje.
• Neumísťujte reproduktory těsně ke stěnám
nebo stropu.
1 Zapojte AM smyčkovou anténu.
Postavte anténu a zacvakněte ji do podstavce.
(6:)
SPEAKERS
(SB-PM02)
(6:)
4 Zapojte přístroj do sítě.
Nepoužívejte kabely síťového napájení (AC) z jiných
zařízení.
Pro domácí
síťovou zásuvku
2 Zapojte FM pokojovou anténu.
Umístěte anténu tam, kde je příjem nejlepší.
Páska
3 Zapojte reproduktory.
B
A
Červená
Dejte pozor, abyste nepřekřížili
(nezkratovali) či neobrátili polaritu
kabelů reproduktorů – mohlo by dojít
k jejich poškození.
Napájení
Systém v pohotovostním režimu spotřebuje
přibližně 0,3 W. Jestliže systém nepoužíváte,
napájení odpojte.
Některá nastavení se mohou po odpojení
systému ztratit. Musíte je nastavit znovu.
(6:)
(6:)
Černá
(6:)
(6:)
4
49
ČESKY
RQT9699
Page 50

5
ČESKY
Průvodce ovládáním
Podívejte se na čísla v závorkách pro odkaz na stránku.
ČESKY
A
B
C
D
E
F
G
H
I
J
K
L
M
RQT9699
5
50
N
O
P
Q
R
S
T
U
V
W
X
Y
Z
a
b
A Tlačítko přepnutí do pohotovostního
režimu/zapnutí [`], [1] (8, 10)
Stisknutím tohoto tlačítka se přístroj
zapíná z pohotovostního režimu, nebo
naopak vypíná. V pohotovostním režímu
přístroj stále spotřebovává malé množství
el. proudu.
B [DIMMER]
Ztlumit panel displeje. Zrušíte opětovným
stisknutím.
C Číselná tlačítka [1 až 9, 0, ≧10]
Vybrat 2-ciferné číslo
příklad: 16: [≧10] ] [1] ] [6]
Vybrat 3-ciferné číslo
příklad: 226: [≧10] ] [≧10] ] [2] ]
[2] ] [6]
D [DEL] (6)
E [PROGRAM] (6, 7)
[REPEAT] (6)
[PLAY MODE] (6, 7)
F [4/9, USB] (7)
[4/9, CD] (6)
G [2/3], [5/6 ] (6, 7, 8)
H [RE-MASTER] (8)
I [BASS] (8)
J [R/T] (6, 8)
[Y/U] mají přesně stejnou funkci
jako [2/3] nebo [5/6].
[OK] (6, 8)
K [DISPLAY] (6, 7)
L [AUTO PRESET] (7)
M [TUNE MODE] (7)
N [#, PLAY] (8)
O [CLOCK/TIMER] (8)
P [SLEEP] (8)
Horní strana jednotky
MUSIC P.
c
d
e
f
V
A
Q [AUTO OFF]
Tato funkce vám umožní vypnout
přístroj v režimu přehrávání
disků nebo USB pouze tehdy,
je-li přístroj v nečinnosti po
dobu 30 minut. „AUTO OFF“ je
aktivováno coby tovární nastavení.
Stiskněte tlačítko znovu pro
zrušení.
R Ovladač hlasitosti
[+/–, VOL
S [MUTE]
Ztišit zvuk. Zrušíte opětovným
stisknutím.
„MUTE“ je rovněž zrušeno, když
je upravena hlasitost nebo když se
zařízení vypne.
T [MUSIC PORT], [MUSIC P.] (8, 9)
U [FM/AM] (7)
], [+/–, VOLUME]
g
V [8 ] (6, 7)
W [D.BASS] (8)
X [PRESET EQ] (8)
Y [TREBLE] (8)
Z [SURROUND] (8)
a [INPUT LEVEL] (9)
b [FM MODE] (7)
c Zdířka MUSIC P. (hudebního portu) (9)
Konektory pro sluchátka,
d Panel displeje
e Snímač signálu dálkového ovládání
f USB port,
g [BASS/TREBLE] (8)
h [x , OPEN/CLOSE] (6)
U
(9)
(7)
T
G
R
F
h
Page 51

6
ČESKY
Disky
Základní reprodukce
1 Stisknutím tlačítka [x, OPEN/CLOSE] na přístroji
otevřete zásuvku disku.
Přístroj se zapne, vložte disk polepem nahoru.
Stiskněte znovu [x , OPEN/CLOSE] pro uzavření
vozíku.
2 Stiskněte [4/9, CD] pro zahájení přehrávání.
Zastavení
přehrávání
Pozastavení
přehrávání
Přeskakování
skladeb
Vyhledávání
mezi
skladbami
Přeskočit
album
Funkce režimu přehrávání
Stiskněte [PLAY MODE] pro výběr požadovaného
režimu.
1-TRACK
1TR
1-ALBUM
1ALBUM
RANDOM
RND
1-ALBUM
RANDOM
1ALBUM RND
Tato funkce nefunguje s režimem „Programované
přehrávání“.
Stiskněte [8].
Stiskněte [4/9, CD]. Stiskněte znovu
pro obnovení přehrávání.
Stiskněte [2/3] nebo [5/6].
Stiskněte a podržte [2/3] nebo
[5/6] během přehrávání nebo
pauzy.
Stiskněte [R/T].
Přehraje jednu zvolenou skladbu na
disku.
Stiskněte číselná tlačítka pro výběr
skladby.
Přehraje jedno zvolené album na disku.
Stiskněte [R/T] pro výběr alba.
Přehraje jeden disk v náhodném pořadí.
Přehraje všechny skladby na jednom
vybraném albu v náhodném pořadí.
Stiskněte [R/T] pro výběr alba.
Programované přehrávání
Tato funkce vám umožní naprogramovat až 24 skladeb.
1 Stiskněte [4/9, CD] a potom [8].
2 Stiskněte [PROGRAM].
Zobrazí se „PGM“.
3 Stiskněte číselná tlačítka pro výběr skladby.
Opakujte tento krok pro naprogramování dalších
skladeb.
4 Stiskněte [4/9, CD] pro zahájení přehrávání.
3 Stiskněte [R/T] pro výběr alba.
4 Stiskněte [5/6] jednou a potom číselnými
tlačítky vyberte požadovanou skladbu.
5 Stiskněte [OK].
6 Opakujte kroky 3 až 5 pro naprogramování
ostatních skladeb.
7 Stiskněte [4/9, CD] pro zahájení přehrávání.
Zrušení
programovacího
režimu
Opětovné přehrání
programu
Kontrolu
programových
obsahů
Smazání poslední
skladby
Smazání všech
naprogramovaných
skladeb
• Paměť programu se vymaže po otevření zásuvky na
disku.
• Pro opakování přehrávání programu nebo pro výběr
režimu přehrávání stiskněte [REPEAT]. Zrušíte
opětovným stisknutím.
Stiskněte [PROGRAM] v režimu
zastavení.
V režimu zastavení stiskněte
[PROGR AM] a pak [4/9, CD].
Stiskněte [2/3] nebo
[5/6] pokud se zobrazí
„PGM“ v režimu zastavení.
Pro kontrolu během
naprogramování stiskněte
[PROGR AM] dvakrát poté co se
objeví „PGM“, potom stiskněte
[2/3] nebo [5/6].
Stiskněte [DEL] v režimu
zastavení.
Stiskněte [8] v režimu stop.
Zobrazí se „CLR ALL“. Chceteli smazat všechny skladby,
stiskněte toto tlačítko znov
během 5 sekund.
Kontrola informací o skladbě
Můžete prohlížet informace o aktuální skladbě na
displeji.
Stiskněte tlačítko [DISPLAY] během přehrávání nebo
pauzy.
• Tento přístroj podporuje verzi 1.0 a 1.1 ID3 tags.
• Textová data, která nejsou podporována, nebudou
zobrazena.
POZNÁMKA k používání DualDisc
Digitální audio obsah strany disku DualDisc nesplňuje
technické specifi kace formátu Compact Disc Digital
Audio (CD-DA), takže přehrávání nemusí být možné.
POZNÁMKA k CD
• Tento přístroj může zpřístupnit až 99 skladeb.
• Tento přístroj může přehrávat soubory MP3 a CD-DA
format audio CD-R/RW, které byly ukončeny.
• Nemusí být schopný přehrát některá CD -R /RW kvůli
podmínkám nahrávání.
POZNÁMKA k MP3
• Soubory odpovídají skladbám a složky se považují za
alba.
• Tento přístroj má přístup až k 999 skladbám,
255 albům a 20 sekcím.
• Disk musí odpovídat normě ISO9660 úroveň 1 nebo 2
(kromě rozšířených formátů).
• Složce a souborům zadejte názvy s trojcifernou
předponou v pořadí, v jakém je chcete přehrát.
Omezení pro přehrávání MP3
• Nahrajete-li MP3 na stejný disk jako CD-DA, bude
možné přehrávat pouze první nahranou skladbu.
• Některé disky ve formátu MP3 nemusí být možné
přehrát v důsledku stavu disku nebo nahrávky.
Nahrávky nemusí být přehrávány v pořadí, v jakém byly
•
pořízeny.
Technologie audio kódování MPEG Layer-3
licencovaná od Fraunhofer IIS a Thomson.
6
51
ČESKY
RQT9699
Page 52

7
ČESKY
Radio FM/AM
Ruční ladění
1 Stiskněte [FM/AM] pro volbu „FM“ nebo „AM“.
ČESKY
2 Stiskněte [TUNE MODE] pro volbu „MANUAL“.
3 Stiskněte [2/3] nebo [5/6] pro výběr
frekvence požadované stanice.
Pro automatické ladění
Stiskněte a přidržte [2/3] nebo [5/6 ] dokud
se nezačne frekvence rychle měnit.
• Automatické ladění může být přerušeno, pokud
dochází k nadměrnému rušení.
• Pro zrušení automatického ladění stiskněte [2/3]
nebo [5/6].
Pro zlepšení kvality zvuku
Když je vybráno „FM“
Stiskněte [FM MODE] pro zobrazení „MONO“.
Zrušíte opětovným stisknutím.
• „MONO“ se taktéž zruší při změně frekvence.
• Vypněte „MONO“ pro normální poslech.
Když je vybráno „AM“
Stiskněte a podržte [TUNE MODE].
Kdykoliv stisknete a přidržíte toto tlačítko: BP 2
RDS vysílání
Tento přístroj může zobrazovat textové údaje přenášené
rozhlasovým datovým systémem (RDS), který je v
určitých oblastech k dispozici.
Stiskněte [DISPLAY] pro zobrazení:
Název stanice
(PS)
Displej s RDS nemusí být dostupný, pokud bude příjem
slabý.
RQT9699
7
52
Typ program
]
(PTY)
]
Frekvence
(FREQ)
BP 1
Předvolba paměti
Předvoleno může být 30 FM a 15 AM stanic.
Automatická předvolba
1
Pro výběr „CURRENT“ (aktuállní) nebo „LOWEST“
(nejnižší) frekvence stiskněte [PLAY MODE].
2 Stiskněte [AUTO PRESET] pro zahájení
předvolby.
Manuální předvolba
1 Stiskněte [TUNE MODE] pro volbu „MANUAL“.
2
Stiskněte [2/3] nebo [5/6] pro
naladění požadované stanice.
3 Stiskněte [PROGRAM].
4 Stiskněte číselná tlačítka pro výběr kanálu.
Stanice zabírající kanál je vymazána, pokud je na
tentýž kanál předvolená jiná stanice.
5 Opakujte kroky 2 až 4 pro nastavení další
předvoleb stanic.
Volba přednastavení stanice
1 Stiskněte [TUNE MODE] pro výběr „PRESET“.
2 Stiskněte [2/3] nebo [5/6] pro výběr
kanálu.
Nebo stiskněte číselná tlačítka pro výběr kanálu.
Nastavení přiřazení AM
(pouze pomocí hlavní jednotky)
Tento systém může rovněž přijímat vysílání AM v krocích
po 10 kHz.
Stiskněte a přidržte [FM/AM].
Po několika sekundách displej začne blikat a zobrazuje
aktuální minimální frekvenci. Když se minimální
frekvence změní, uvolněte tlačítko.
• Pro návrat k původnímu kroku zopakujte výše uvedené
kroky.
• Po změně nastavení se předchozí předvolená
frekvence vymaže.
USB
Konektivita USB vám umožňuje připojit velkokapacitní
paměťové zařízení přes USB a přehrávat z něj skladby
ve formátu MP3.
Příprava
Před připojením jakéhokoli paměťového zařízení
USB k jednotce zkontrolujte, že jsou uložená data
zazálohovaná.
Nepoužívejte prodlužovací USB kabel. Toto zařízení
nerozpozná zařízení USB s velkokapacitní pamětí
připojení přes kabel.
1 Snižte hlasitost a připojte paměťové zařízení USB
k USB portu.
Při připojování nebo odpojování zařízení USB s
velkokapacitní pamětí hlavní jednotku přidržte.
2 Stiskněte [4/9, USB] pro zahájení přehrávání.
Zastavení
přehrávání
Další ovládací funkce jsou podobné jako funkce
popsané v kapitole „Disky“ (Z str. 6).
Kompatibilní zařízení
Zařízení, která jsou defi nována jako paměťová zařízení
typu USB:
• USB zařízení, která podporují pouze hromadný přenos.
• USB zařízení, která podporují formát USB 2.0.
Podporované formátů
• Skladba musí mít příponu „.mp3“ nebo „.MP3“.
• CBI (v angličtině, Control/Bulk/Interrupt) není
podporováno.
• Zařízení využívající souborový systém NTFS nejsou
podporována. [Podporován je jen souborový systém
FAT 12/16/32 (File Allocation Table 12/16/32).]
• V závislosti na velikosti sektoru nemusí některé
soubory fungovat.
• Maximální počet alba: 255 alb
• Maximální počet skladeb: 2500 skladeb
• Maximální počet skladeb na album: 999 skladeb
Stiskněte [8]. Zobrazí se „RESUME“.
Pozice je uložena do paměti.
Stiskněte [4/9, USB] pro obnovení
přehrávání.
Znovu stiskněte [8] pro vymazání
pozice.
Page 53

8
ČESKY
Hodiny a časovače
Nastavení hodin
Toto jsou hodiny s 24 hodinovým ukazatelem.
1 Stiskněte [CLOCK/TIMER] pro zvolení „CLOCK“.
2 Během 10 sekund, stiskněte [R/T] pro nastavení
času.
3 Stiskněte [OK].
• Stiskněte [CLOCK/TIMER] pro zobrazení hodin na pár
sekund.
• Pro zachování přesného času provádějte pravidelně
opravu času.
Použití automatického vypnutí
Tato funkce vám umožní vypnout přístroj automaticky po
nastaveném čase.
Stiskněte [SLEEP] pro výběr požadovaného času
(v minutách).
OFF120MIN90MIN60MIN30MIN
Stiskněte [SLEEP] pro zobrazení času a potom opět
stiskněte [SLEEP] pro volbu požadovaného času.
• Časovače přehrávání nebo automatického vypnutí
mohou být použity najednou.
• Časovač automatického vypnutí má vždy přednost.
Ujistěte se, že jste nepřesáhli nastavení časovače.
Použití časovače přehrávání
Můžete nastavit časovač, který zajistí zapnutí v určitou
dobu jako budík.
Zapněte přístroj a nastavte hodiny.
Připravte zdroj hudby, který chcete poslouchat; disk,
rádio, USB nebo por t zdroje hudby a nastavte hlasitost.
1
Stiskněte [CLOCK/TIMER] pro zvolení „# PLAY 1“,
„# PLAY 2“ nebo „# PLAY 3“.
2 Během 10 sekund, stiskněte [R/T] pro nastavení
času zapnutí.
3 Stiskněte [OK].
4 Opakujte kroky 2 a 3 pro nastavení konečného
času.
Pro aktivaci časovače
5 Pro zapnutí „# PLAY 1“, „# PLAY 2“ nebo
„# PLAY 3“ stiskněte [#, PLAY].
Zobrazí se „#“.
6 Stiskněte [`] pro vypnutí přístroje.
Změnu
nastavení
Změnu
zdroje nebo
hlasitosti
Změňte
hlasitosti
Zrušení
• Časovač začne v předem zadaném čase a zvuk se
postupně bude zesilovat až do předem zadané úrovně.
• Přístroj musí být v pohotovostním režimu, aby časovač
fungoval.
Opakujte kroky 1 až 4 a 6 (Z viz výše).
1) Sti skn ěte [#, PLAY] pro vymazání
ukazatele èasovaèe z displeje.
2) Změňte zdroj nebo hlasitost.
3) Proveďte kroky 5 a 6 (Z viz výše).
Stiskněte [CLOCK /TIMER] pro zvolení
„# PLAY 1“, „# PLAY 2“ nebo „# PLAY 3“.
Stiskněte [#, PLAY] pro vymazání
ukazatele èasovaèe z displeje.
Nastavení zvuku
Předvolba EQ
(Preset EQ)
Basy nebo
Výšky
Zvuk
surround
D.Bass Stiskněte [D.BASS] pro výběr
Re-master
Stiskněte [PRESET EQ] pro výběr
„HEAVY“, „SOFT“, „CLEAR“, „VOCAL“
nebo „FLAT“.
1) Stiskněte [BASS] nebo [TREBLE]
(hlavní jednotka: [BASS/TREBLE])
pro výběr „BASS“ nebo „TREBLE“.
2) Stiskněte [2/3] nebo
[5/6] pro nastavení úrovně
(–4 až +4).
Stiskněte [SURROUND] pro výběr
„ON SURROUND“ nebo
„OFF SURROUND“.
Pokud vzrůstá rušení během stereo
příjmu FM pásma, vypněte efekt
prostorového zvuku.
„ON D.BASS“ nebo „OFF D.BASS“.
Stiskněte [RE-MASTER] pro výběr
„ON RE-MASTER“ nebo
„OFF RE-MASTER“.
Volitelné vybavení
Zabraňte rušení s jiným zařízením od
Panasonic
Při použití dodaného dálkového ovladače může začít
fungovat I jiné audio- nebo videozařízení Panasonic.
Chcete-li spustit pouze tento systém, synchronizujte
hlavní jednotku s odpovídajícím dálkovým ovládáním pro
provoz v režimu „REMOTE 2“.
1 Stiskněte a držte [MUSIC P.] na hlavním zařízenía
a [2] na dálkovém ovládání dokud se nezobrazí
„REMOTE 2“.
2 Stiskněte a přidržte [OK] a [2] nejméně na
2 sekundy.
Chcete-li režim změnit zpět na „REMOTE 1“, zopakujte
kroky 1 a 2 výše, ale místo [2] stiskněte [1].
8
53
ČESKY
RQT9699
Page 54

9
ČESKY
Přenosné audio zařízení
Vypněte funkci ekvalizátoru (je-li zapnutá) přenosného
audio zařízení, než jej připojíte do zdířky MUSIC P.
(hudebního portu). V opačném případě by mohl být zvuk
z reproduktoru zkreslen.
ČESKY
1 Připojte audio kabel do zdířky MUSIC P..
2 Stiskněte [MUSIC PORT] (hlavní jednotka:
[MUSIC P.]) a přehrajte přenosné audio zařízení.
Nastavení úrovně zvukového vstupu
Stiskněte [INPUT LEVEL] pro výběr „HIGH“ (hlasitý)
nebo „NORMAL“ (normální).
• Je-li zvuk na úrovni vstupu „HIGH“ (hlasitý)
nevyvážený, vyberte „NORMAL“ (normální).
• Kabely a vybavení nejsou v příslušenství.
• Podrobnosti viz návod k obsluze přenosného audio
zařízení.
Připojení ke sluchátkům
Připojte sluchátka (nejsou v příslušenství) do vstupu pro
sluchátka.
Typ konektoru: stereofonní, souosý o průměru Ø 3,5 mm
• Dlouhodobý poslech může způsobit poškození sluchu.
• Příliš hlasitá reprodukce ze sluchátek může způsobit
ztrátu sluchu.
• Dlouhodobý poslech na maximální hlasitost může
poškodit sluch uživatele.
Údržba
K vyčištění přístroje použijte jemný a suchý hadřík.
• Nikdy nepoužívejte k čištění přístroje alkohol, ředidlo
nebo technický benzín.
• Před použitím chemicky impregnované látky si pročtěte
instrukce přiložené k látce.
Odstraňování závad
Před žádostí o servis proveďte následující kontroly. Jsteli na pochybách ohlednì nìkteré z níže uvedených kontrol,
nebo pokud řešení uvedená problém nevyřeší, vyžádejte
si pokyny od svého prodejce.
■ Běžné problémy
Přístroj nereaguje na ovládání tlačítky dálkového
ovladače.
• Zkontrolujte, zda jsou správně vloženy baterie.
Zkreslený zvuk nebo zvuk není slyšet.
• Zesilte hlasitost.
• Zařízení vypněte, určete a opravte příčinu. Přístroj
opět zapněte. Může být způsobeno přetěžováním
reproduktorů nadměrnou hlasitostí nebo výkonem
a používáním přístroje v prostředí s příliš vysokou
teplotou.
Během přehrávání je slyšet hučení.
• V blízkosti přístroje je vedení střídavého proud nebo
zářivkové osvětlení. Udržujte jiná zařízení a kabely
mimo přístroj.
■ Disky
Nesprávné zobrazení nebo se přehrávání nespustí.
• Disk jste nevložili správně; napravte.
• Disk může být špinavý. Očistěte jej.
• Vyměňte disk, pokud je poškrábaný, zdeformovaný
nebo nestandardní.
• Došlo ke kondenzaci vlhkosti: vyčkejte 1 až 2 hodiny,
než se vypaří.
■ Rádio
Je slyšet dunění.
• Vypněte jakoukoli televizi, která je poblíž, nebo zařízení
dejte od televize.
• V režimu ladění AM přepněte na BP 1 nebo BP 2.
Ozývá se slabé bzučení během vysílání v pásmu AM.
• Oddělte anténu od dalších kabelů.
■ USB
Žádná odezva po stisku [4/9, USB].
• Odpojte USB zařízení a znovu jej připojte. Nebo přístroj
vypněte a znovu zapněte.
USB jednotka nebo její obsah nelze číst.
• Formát disku USB nebo obsah disku není kompatibilní
s tímto systémem.
• Funkce USB hostitele tohoto výrobku nemusí s
některými USB zařízeními fungovat.
• USB zařízení s kapacitou větší než 8 GB nemusí v
některých případech fungovat.
Pomalá činnost USB zařízení.
• Velké soubory nebo USB fl ash disky s velkou kapacitou
se mohou dlouho načítat.
■ Displej přístroje
„NO PLAY“
• Zkontrolujte obsah. Můžete přehrávat pouze
podporovaný formát.
• Pokud je zde více než 255 alb nebo složek (zvukových
i nezvukových), nemusí být možné některé MP3
soubory na těchto albech načíst a přehrát. Přeneste
tato hudební alba na jiné USB. Alternativně
přeformátujte USB zařízení a uložte tato hudební alba
před uložením jiných složek, které neobsahují zvuk.
RQT9699
9
54
Page 55

10
ČESKY
„F61“ nebo „F76“
• Zkontrolujte a opravte zapojení kabelových přívodů
reproduktorů. Jestliže přesto nedošlo k vyřešení
problému, kontaktujte prodejce.
• Odpojte USB zařízení. Přístroj opět vypněte a zapněte.
„ERROR“
• Byla vykonána nesprávná operace. Přečtěte si
instrukce a zkuste to znovu.
„ADJUST CLOCK“
• Hodiny nejsou nastaveny. Shodně nastavte hodiny.
„ADJUST TIMER“
• Časovač přehrávání není nataven. Shodně nastavte
časovač přehrávání.
„AUTO OFF“
• Zařízení nebylo používáno po dobu 29 minut a během
minuty se vypne. Zrušíte stiskem libovolného tlačítka.
Znovunastavení paměti (Inicializace)
Pokud dojde k následujícím situacím, obraťte se na
níže uvedený postup pro znovunastavení paměti:
• Není žádná reakce na stisknutí tlačítek.
• Chcete vymazat a znovunastavit obsah paměti.
Znovunastavení paměti
1) Odpojte přístroj od sítě. (Počkejte nejméně
3 minuty, než budete pokračovat krokem 2.)
2) Při stisknutém [1] na hlavní jednotce připojte
přístroj znovu k síti.
Držte stisknuté tlačítko (přibližně 10 sekund),
dokud se nezobrazí „– – – – – – – –“.
3) Uvolněte [1].
Všechna nastavení se vrátí na původní fi remní
nastavení.
Bude třeba znovu nastavit položky v paměti.
Specifi kace
■ Sekce zesilovače
Výstupní výkon RMS ve stereo režimu
Přední kanál (oba kanály napájeny)
5 W na kanál (6
Celkový výstupní výkon RMS 10 W
■ FM/AM tuner, část svorek
Přednastavení stanic 30 stanic FM
15 stanic AM
Frekvenční modulace (FM)
Frekvenční rozsah
87,50 MHz až 108,00 MHz (50 kHz krok)
Anténní konektor 75
Amplitudová modulace (AM)
Frekvenční rozsah
522 kHz až 1629 kHz (9 kHz krok)
520 kHz až 1630 kHz (10 kHz krok)
Konektory pro sluchátka
Konektor Stereo, konektor 3,5 mm
Výstupní úroveň (CD, 1 kHz, –20 dB)
0,7 mW + 0,7 mW, 32
Hudební port (horní)
Citlivost
Normální 490 mV, 15 k
Hlasitý 100 mV, 15 k
Konektor Stereo, konektor 3,5 mm
■ Sekce CD přehrávače
Přehrávaný disk (8 cm nebo 12 cm)
CD, CD-R/RW (CD-DA, MP3
Čtení
Vlnová délka 790 nm (CD)
Výkon laseru CLASS I
Audio výstup (Disk)
Počet kanálů 2 kanálů (FL, FR)
FL = Přední levý kanál
FR = Přední pravý kanál
MPEG-1 Layer 3, MPEG-2 Layer 3
), 1 kHz, 10 % THD
(nesymetrický)
(Max.)
)
■ Sekce USB
USB port
Norma USB USB 2.0 plná rychlost
Podporované formáty souborů médií MP3 (*.mp3)
Souborový system USB zařízení
FAT12, FAT16, FAT32
Napájení USB portu 500 mA (Max.)
■ Sekce reproduktorů
Typ 1-pásmový, 1-reproduktorový systém (Bass refl ex)
Reproduktor(y)
Plný rozsah 10 cm kónický
Impedance 6
Výstupní akustický tlak 83 dB/W (1 m)
Frekvenční rozsah 61 Hz až 17 kHz (–16 dB)
95 Hz až 15 kHz (–10 dB)
Rozměry (Š x V x H) 139 mm x 224 mm x 136 mm
Hmotnost 1,3 kg
■ Všeobecně
Napájení AC 220 až 240 V, 50 Hz
Spotřeba 12 W
Rozměry (Š x V x H) 184 mm x 123 mm x 228 mm
Hmotnost 1,1 kg
Rozsah provozních teplot 0°C až +40°C
Rozsah provozní vlhkosti
35% až 80% RH (bez kondenzace)
Spotřeba v pohotovostním režimu:
0,3 W (přibližně)
1) Technické údaje podléhají změnám bez předchozího
upozornění.
Hmotnost a rozměry jsou přibližné.
2) Celkové harmonické zkreslení je měřeno digitálním
spektrálním analyzátorem.
10
55
ČESKY
RQT9699
Page 56

Der tages forbehold for trykfejl.
Pursuant to at the directive 2004/108/EC, article 9(2)
Panasonic Testing Centre
Panasonic Marketing Europe GmbH
Winsbergring 15, 22525 Hamburg, Germany
EU
Panasonic Corporation
Web Site: http://panasonic.net
© Panasonic Corporation 2012
CzDaSp PoSwEn
RQT9699-E
L0512LL0
 Loading...