

Page 1

Digital Copier
Operating Instructions (For Facsimile)
DP-2500/3000
Options
DA-AR250/AS200/DS200/DS205/DS210/DS215/FG230/FG231/FK200/FK210/FS200/FS205/MD200
D A-N E200 /PC200/P C210/S M08B/S M16B/S M28B/U C200/XN 200/X T200; UE -410047/410 048/403171
GETTING TO
KNOW YOUR
MACHINE
INSTALLING
YOUR MACHINE
PROGRAMMING
YOUR MACHINE
BASIC
OPERATIONS
ADVANCED
FEATURES
NETWORK
FEATURES
PRINTOUT
JOURNALS AND
PROBLEM
SOLVING
LISTS
Before operati ng th is eq ui pm en t, pl ea se re ad
these instructions completely and keep these
operating instructions for future reference.
English
APPENDIX
Page 2
IMPORTANT INFORMATION
When requesting information, supplies or service always refer to the model and serial number of your
machine. The model and serial number plate (Main Name Plate) is located on the machine as shown below.
For your convenience, space is provided below to record information you may need in the future.
Model No.
Serial No.
Date of Purchase
Dealer
Address
Telephone Number
() -
Supplies Telephone Number
() -
Service Telephone Number
() -
Model and Serial
Number
Copyright © 2001 by Matsushita Graphic Communication Systems, Inc.
All rights reserved. Unauthorized copying and distribution is a violation of law. Printed in Japan.
The contents of these Operating Instructions are subject to change without notice.
Page 3

Table of Contents
Getting to Know Your Machine
Safety Information
Function Key
External View
Control Panel
Adjusting the Volume
User Parameters
..................................................................................................................................... 5
.............................................................................................................................................. 9
............................................................................................................................................. 10
......................................................................................................................................... 12
................................................................................................................................15
■ Setting The Ringer Volume ........................................................................... 15
■ Setting the Monitor Volume ........................................................................... 16
........................................................................................................................................ 17
■ Setting the Date and Time .................................... ...... ....... ...... ....... .............. 17
■ Setting Your LOGO ............................ ...... ...... ....... ...... ....... ...... ....... ...... ........ 19
■ Setting Your Character ID ........................ ...... ....... ...... ....... ...... ....... ...... ....... . 21
■ Setting Your ID Number (Fax Telephone Number) ....................................... 23
Programming Your Machine
Phone Book
Customizing Your Machine
............................................................................................................................................... 25
■ Adding Telephone Numbers .......................................................................... 25
■ Editing the Phone Book ................................................................................. 27
...................................................................................................................... 31
■ Setting the Fax Parameters ........................................................................... 31
■ Fax Parameter Table ..................................................................................... 33
Basic Operations
Loading Originals
Basic Transmission Settings
Sending Documents
Receiving Documents
...................................................................................................................................... 37
■ How To Load Originals .................................................................................. 37
■ Sending Non-Standard Size Originals ........................................................... 37
■ Flatbed Scanning .......................................................................................... 37
................................................................................................................... 38
■ Contrast .......................... .......................... .......................... .......................... . 38
■ Resolution ..................................................................................................... 38
■ Original (Text/Photo) ..................................................................................... 39
■ Verification Stamp ......................................................................................... 39
■ Communication Journal (Comm. Journal) ..................................................... 40
................................................................................................................................. 42
■ Memory Transmission ................................................................................... 42
■ Manual Number Dialling ................................................................................ 44
■ Phone Book Dialling ...................................................................................... 46
■ Direct Transmission ....................................................................................... 48
■ Manual Number Dialling (Direct Transmission) ............................................. 48
■ Rotated Transmission ................................................................................... 50
■ Rotation XMT Fax Parameter set to: ............................................................. 50
■ Double-Sided Transmission (Receiving) ....................................................... 50
■ Duplex Scan Select Mode set to: .................................................................. 50
■ Duplex Print Fax Parameter set to: ............................................................... 50
■ Setting the Rotation XMT .............................................................................. 51
■ Duplex Scan .................................................................................................. 53
■ Sending Document(s) Using Duplex Scan .................................................... 53
■ Setting Duplex Print ................................. ...... ....... ....................................... . 55
■ Voice Mode Transmission .................................................. ...... ....... ...... ........ 57
■ Off-Hook Dialling ......................... ....... ...... ..................................................... 57
■ On-Hook Dialling ......................... ....................................... ...... ....... ...... ....... . 59
■ Transmission Reservation ............................................................................. 61
■ Memory Transmission Reservation (Multi-Tasking) ...................................... 61
■ Direct Transmission Reservation (Priority Transmission Reservation) ......... 63
■ Redialling ...................................................................................................... 65
■ Automatic Redialling .............. ...... ....... ...... ...... ....... ...... ....... ...... ..................... 65
■ Manual Redialling .......................................................................................... 65
............................................................................................................................... 66
■ Automatic Reception ................................ ...... ....... ........................................ 66
■ Manual Reception ......................................................................................... 66
■ Print Reduction .. ....... ...... ....... ...... ....... ...... ...... ....... ...... .................................. 68
■ Selecting the Print Reduction Mode .............................................................. 68
■ Receiving Oversize Documents .................................................................... 69
■ Substitute Memory Reception ....................................................................... 70
1
Page 4

Table of Contents
Advanced Features
Batch Transmission
Timer Controlled Communications
Polling
Program Keys
Edit File Mode
Receive To Memory
Fax Cover Sheet
Department Code
........................................................................................................................................................ 77
.................................................................................................................................. 71
■ Real-Time Batch Transmission ..................................................................... 71
■ Delayed Batch Transmission ........................................................................ 71
■ Deferred Transmission .................................................................................. 72
■ Deferred Polling ............................................................................................ 74
■ Deferred Advanced Communication ............................................................. 76
■ Preparing to be Polled ................................................................................... 77
■ Polling Documents from Another Station ...................................................... 79
............................................................................................................................................ 81
■ Setting for Group Dialling .............................................................................. 81
■ Setting for Program Dial ................................................................................ 83
■ Editing for Group Dialling .............................................................................. 85
■ Erasing the Program Key Settings ................................................................ 87
............................................................................................................................................ 89
■ Printing or Viewing a File List ........................................................................ 89
■ Changing the Start Time or the Station of a File ........................................... 91
■ Deleting a File ............................................................................................... 93
■ Printing Out a File ......................................................................................... 95
■ Adding Documents Into a File ................................................ ...... ....... ...... .... 97
■ Retry an Incomplete File ............................................................................... 99
................................................................................................................................... 101
■ Setting the RCV To Memory Password ........................................................ 101
■ Setting RCV To Memory ............................................................................... 102
■ Printing Documents ....................................................................................... 104
........................................................................................................................................ 106
■ General Description ...................................................................................... 106
■ To Use the Fax Cover Sheet ......................................................................... 106
...................................................................................................................................... 109
■ General Description ...................................................................................... 109
■ Setting the Department Code ........................................................................ 109
■ Setting the Department Code Name ............................................................. 111
■ Changing the Department Code ................................................................... 113
■ Deleting the Department Code ...................................................................... 115
■ Sending a Document with Department Code ................................................ 117
■ Sending a Document with Department Code (Voice Mode Transmission) ... 118
■ Printing a Department Code List ................................................................... 120
■ Printing a Department Code Journal ............................................................. 122
......................................................................................................... 72
2
Page 5

Network Feature
Table of Contents
Selective Reception
Password Communications
Confidential Mailbox
Sub-Addressing
.................................................................................................................................. 125
■ Setting the Selective Reception. .............................................. ....... ...... ....... . 12 5
■ General Description ............... ...... ....... ...... ...... ....................................... ....... . 12 7
■ Compatibility with Other Machines ................................................................ 127
■ Setting Password Transmission ........................................ ...... ....... ...... ....... . 12 8
■ Setting Password Reception ......................................................................... 130
■ Using Password Transmission ...................................................................... 132
■ Using Password Reception ........................................................................... 133
................................................................................................................................. 134
■ Confidential Mailbox ...................................................................................... 134
■ Compatibility with Other Machines ................................................................ 134
■ Sending a Confidential Document to a Remote Station's Mailbox ................ 135
■ Polling a Confidential Document from a Remote Station's Mailbox .............. 137
■ Receiving a Confidential Document into Your Machine's Mailbox ................ 139
■ Storing a Confidential Document in Your Machine's Mailbox ........................ 140
■ Printing a Confidential Document from Your Machine's Mailbox .................. 142
■ Deleting a Confidential Document Stored in Your Machine's Mailbox .......... 143
........................................................................................................................................ 145
■ General Description ............... ...... ....... ...... ...... ....................................... ....... . 14 5
■ Setting the Sub-Address into a Phone Book Numbers ................................. 146
■ Sending a Fax with Sub-Address .................................................................. 148
■ Using Manual Number Dialling ...................................................................... 149
■ Use Sub-Address temporarily ...................................................................... 150
..................................................................................................................... 127
Printout Journals and Lists
Journals and Lists
.................................................................................................................................... 153
■ Transaction Journal ....................................................................................... 153
■ Individual Transmission Journal (Ind. XMT Journal) ..................................... 155
■ Communication Journal (Comm. Journal) ..................................................... 158
■ Phone Book List ............................................................................................ 160
■ Group and Program List ................................................................................ 162
■ FAX Parameter List ....................................................................................... 164
Problem Solving
Troubleshooting
........................................................................................................................................ 167
■ If You Have Any of These Problems ............................................................. 167
■ Information Codes ......................................................................................... 169
■ Verification Stamp ......................................................................................... 171
Appendix
Specifications
Options and Supplies
Glossary
Index
............................................................................................................................................................ 181
............................................................................................................................................ 173
............................................................................................................................... 175
..................................................................................................................................................... 176
3
Page 6

This page is intentionally left blank.
4
Page 7
Getting to Know Your Machine
Safety Information
Declaration of Conformity (DoC)
"Hereby Matsushita Graphic Com munication Systems, Inc./ Panasonic Testi ng Centre (Europe) GmbH (PTC),
declares that this ( G3 Facsimile Equippment ) is in co mplia nce with the essent ial re quireme nts and ot her r elevant
provisions of the Directive 1999/5/EC"
Hint:
If you want to get a copy of the original DoC of our products which relates to the R&TTE, please c ontact to our
web address: http://doc.panasonic-tc.de.
Network Compatibility
This product, Model DP-2500/3000 with DA-FG230/FG231-** (** means country suffixes as table below), is
designed as to work with an analogue Public Switched Telephone Network (PSTN) in the each country.
** Country ** Country ** Country ** Country
GETTING TO
KNOW YOUR
MACHINE
AA Austria AJ Spain EE Italy AB U.K./Ireland
AD Denmark AM Switzerland AR Belgium AG Germany
AF Finland AN Norway AS Sweden YG Greece
AH The Netherlands AP Portugal AV France
!
WARNING
• TO PREVENT FIRE OR SHOCK, DO NOT EXPOSE THIS PRODUCT TO RAIN OR ANY TYPE OF MOISTURE.
• TO MINIMIZE THE POSSIBILITY OF SHOCK OR DAMAGE TO THE MACHINE, IT MUST BE PROPERLY
GROUNDED.
• THIS PRODUCT CONTAINS HAZARDOUS RADIATION. IF YO U DO N OT FOLLOW THESE INSTRUCTION S OR
USE CONTROLS, MAKE ADJUSTMENTS OR PROCEDURES OTHER THAN THOSE SPECIFIED HEREIN,
YOU MAY EXPO SE YOURSELF TO HAZARDOUS RADIATION.
• WHEN YOU OPERATE THIS EQUIPMENT, THE SOCKET-OUTLET SHOULD BE NEAR THE EQUIPMENT
AND BE EASILY ACCESSI BLE.
• MAKE SURE THAT THE MACHINE IS INSTALLED IN A SPACIOUS OR WELL VENTILATED ROOM SO AS
NOT TO INCREASE THE AMOUNT OF OZONE IN THE AI R. SINCE OZONE IS HEAVIER THAN AIR, IT IS
RECOMMENDED THAT AIR AT FLOOR LEVEL BE VENTILATED.
• PLUG POWER SUPPLY CORD INTO ORDINARY AC OUTLET BEFORE CONNECTING TELEPHONE LINE
CORD. DISCONNECT TELEPHONE LINE CORD BEFORE UNPLUGGING POWER SUPPLY CORD FROM
AC OUTLET.
• DISCONNECT THE EQUIPMENT IMMEDIATELY SHOULD IT EVER SUFFER PHYSICAL DAMAGE WHICH
RESULTS IN THE INTERNAL PARTS BECOMING ACCESSIBLE IN NORMAL USE. IN THIS INSTANCE
USERS SHOULD HAVE THE EQUIPMENT REPAIRED OR DISPOSE OF.
denotes a potential hazard that could result in serious injury or death.
• IF THE POWER SUPPLY CORD AND/OR TE LE PHONE LIN E CORD OF THIS EQUIPMENT ARE DAMAGED,
THEY MUST BE REPLACED BY THE SPECIAL CORDS SUPPLIED BY AN AUTHORIZED PANASONIC
SERVICE CENTRE.
5
Page 8

GETTING TO KNOW YOUR MACHINE
Safety Information
CAUTION
!
• THIS PRODUCT CONTAINS A LITHIUM BATTERY. DANGER OF EXPLOSION IF BATTERY IS
INCORRECTLY REPLACED.
REPLACE ONLY WITH THE SAME OR EQUIVALENT TYPE. DISPOSE OF USED BATTERIES ACCORDING
TO THE INSTRUCTIONS OF YOUR LOCAL SOLID WASTE OFFICIALS.
• WHEN YOU KNOW THAT A THUNDERSTORM IS COMING, WE RECOMMEND THAT YOU:
(1)UNPLUG THE TELEPHONE LINE CORD FROM THE PHONE JACK.
(2)TURN OFF THE POWER AND UNPLUG THE POWER SUPPLY CORD FROM AC OUTLET.
• THIS EQUIPMENT MAY NOT NECESSARILY PROVIDE FOR THE EFFECTIVE HAND-OVE R OF A CALL TO
OR FROM A TELEPHONE CONNECTED TO THE SAME LINE.
• THE OPERATION OF THIS EQUIPMENT ON THE SAME LINE AS TELEPHONES OR OTHER EQUIPMENT
WITH AUDIBLE WARNING DEVICES OR AUTOMATIC RING DETECTORS WILL GIVE RISE TO BELL
TINKLE OR NOISE AND MAY CAUSE FALSE TRIPPING OF THE RING DETECTOR. SHOULD SUCH
PROBLEM OCCUR, THE USER IS NOT TO CONTACT TELECOM (TELEPHONE COMPANY) FAULTS
SERVICE.
• TO REDUCE THE RISK OF SHOCK OR FIRE, USE ONLY NO. 26 AWG OR LARGER TELEPHONE LINE
CABLE.
• DISCONNECT ALL POWER TO THE MACHINE BEFORE COVER(S) ARE REMOVED. REPLACE THE
COVER(S) BEFORE THE UNIT IS RE-ENERGIZED.
denotes hazards that could result in minor injury or damage to the machine.
6
Page 9

GETTING TO KNOW YOUR MACHINE
Safety Information
IMPORTANT SAFETY INSTRUCTIONS
!
When using your telephone equipment, basic safety precautions should always be followed to reduce the risk of
fire, electric shock and injury to persons, including the following:
• DO NOT USE THIS P R O DUC T NEAR WATER, FOR EXAMPLE, NEAR A BATH TUB, W A SH B OWL, KITCHEN
SINK OR LAUNDRY TUB, IN A WET BASEMENT OR NEAR A SWIMMING POOL.
• AVOID USING A TELEPHONE (OTHER THAN A CORDLESS TYPE) DURING AN ELECTRICAL STORM.
THERE MAY BE A REMOTE RISK OF ELECTRIC SHOCK FROM LIGHTNING.
• DO NOT USE THE TELEPHONE TO REPORT A GAS LEAK IN THE VICINITY OF THE LEAK.
• USE ONLY THE POWER CORD AND BATTERIES INDICATED IN THIS MANUAL. DO NOT DISPOSE OF
BATTERIES IN A FIRE, THEY MAY EXPLODE. CHECK WITH LOCAL CODES FOR POSSIBLE SPECIAL
DISPOSAL INSTRUCTIONS.
GETTING TO
KNOW YOUR
MACHINE
7
Page 10
GETTING TO KNOW YOUR MACHINE
Safety Information
CAUTION
!
denotes hazards that could result in minor injury or damage to the machine.
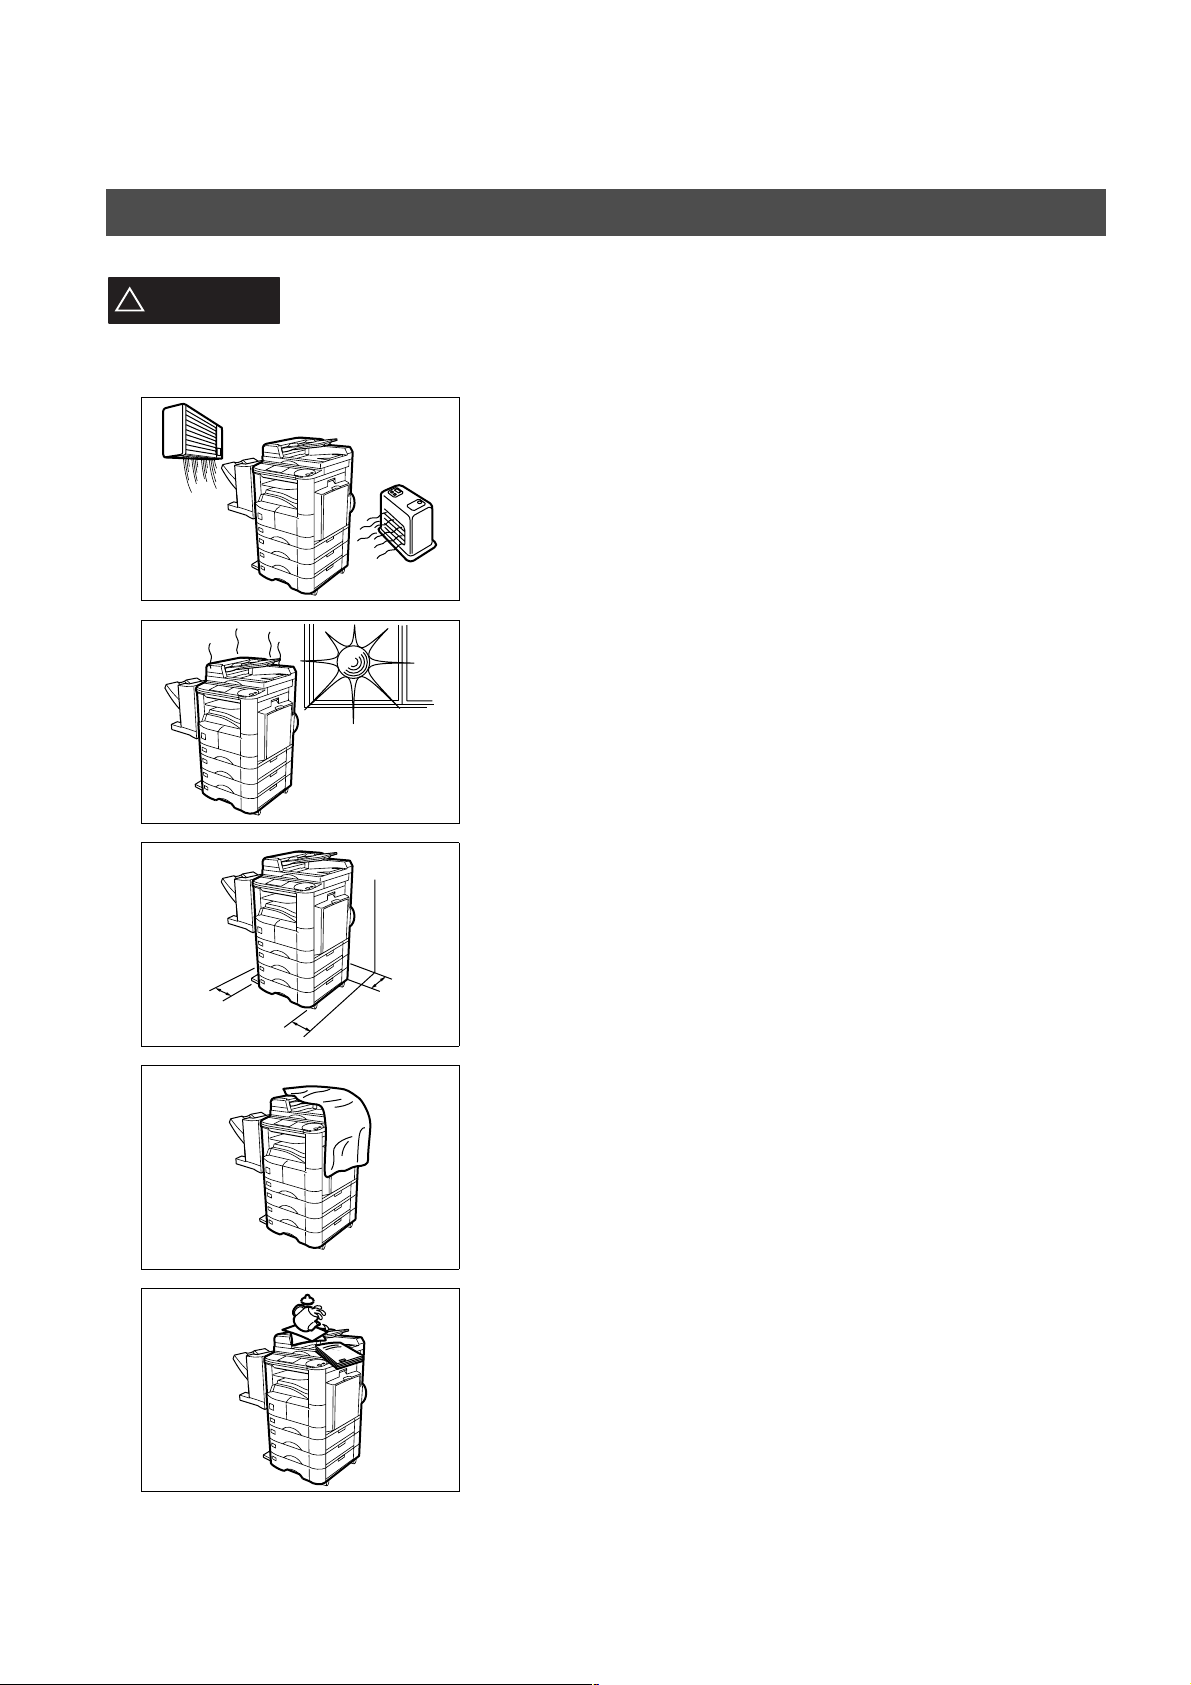
Do not install the machine near heating or an air conditioning unit.
Avoid exposure to direct sunlight.
Install the machine on a flat surface, leave at least 10 cm of space
between the machine and other objects.
8
Do not block the ventilation openings.
Do not place heavy objects or spill liquids on the machine.
Page 11
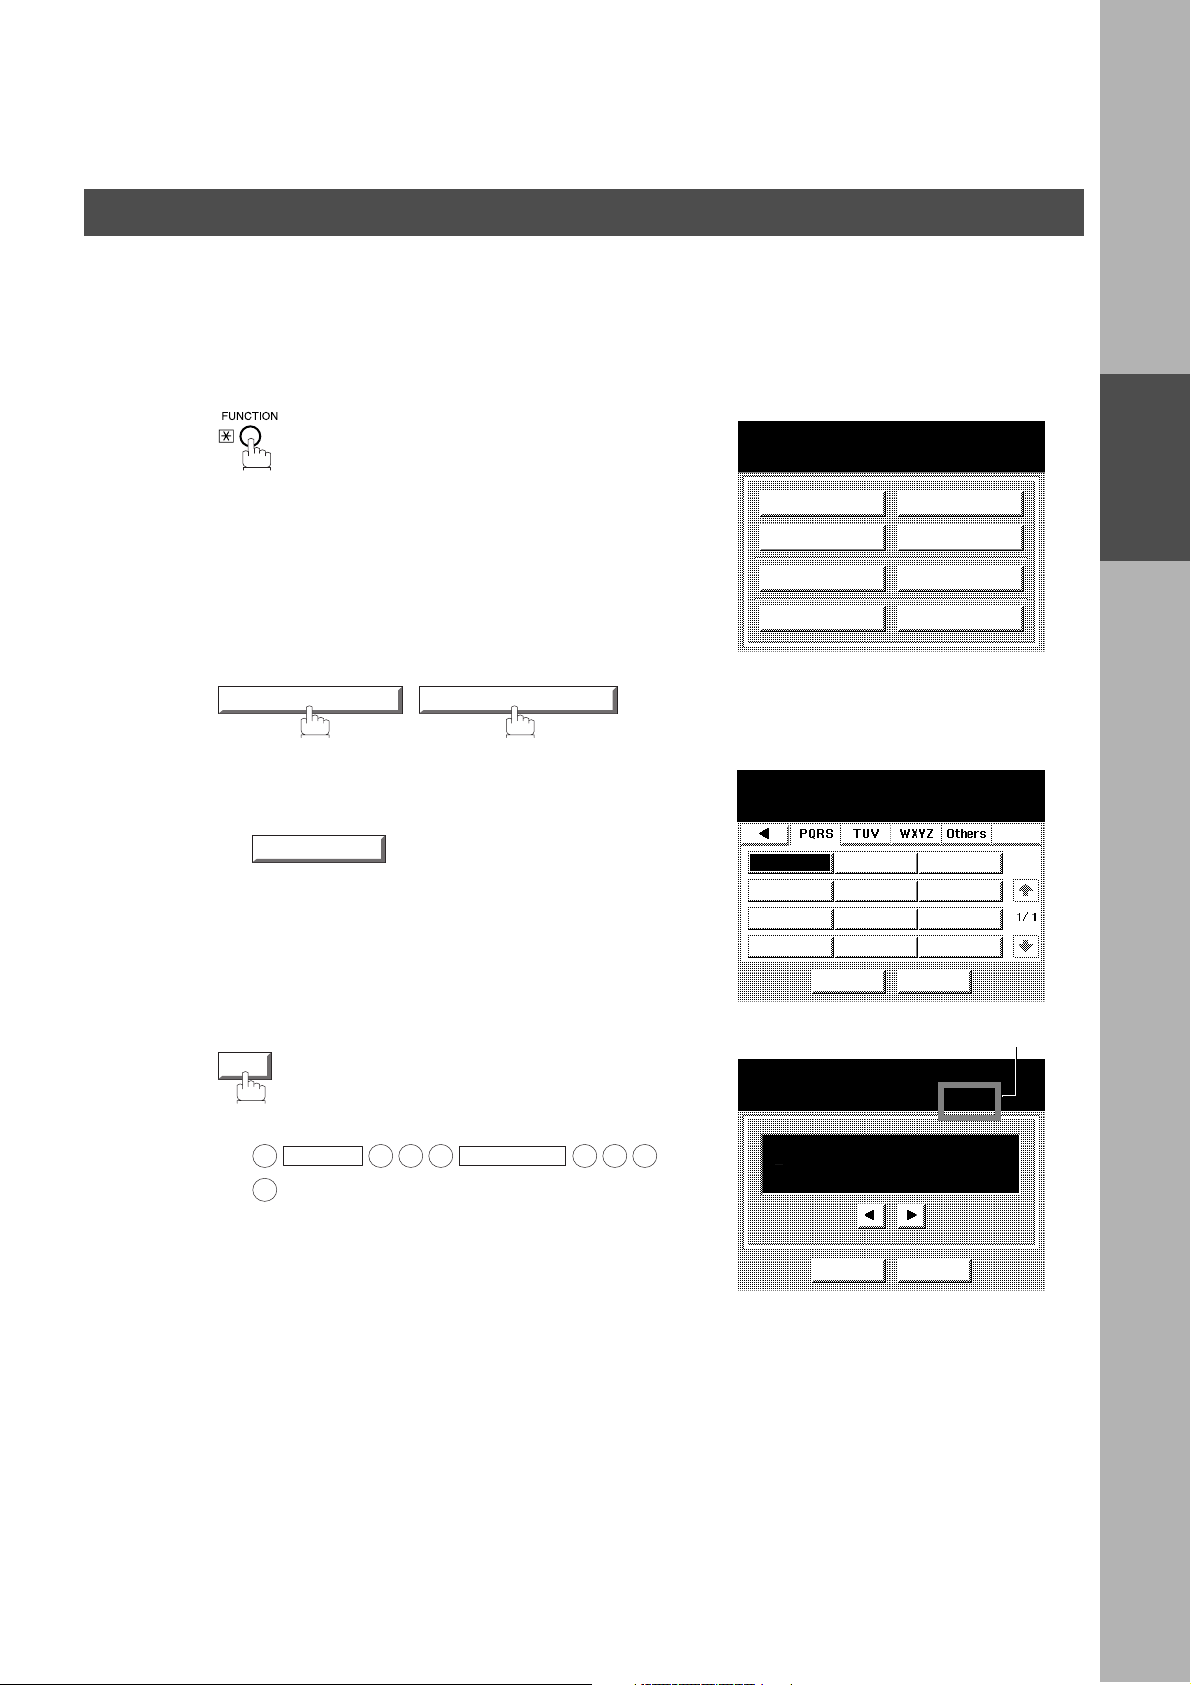
Function Key
GETTING TO KNOW YOUR MACHINE
GETTING TO
KNOW YOUR
MACHINE
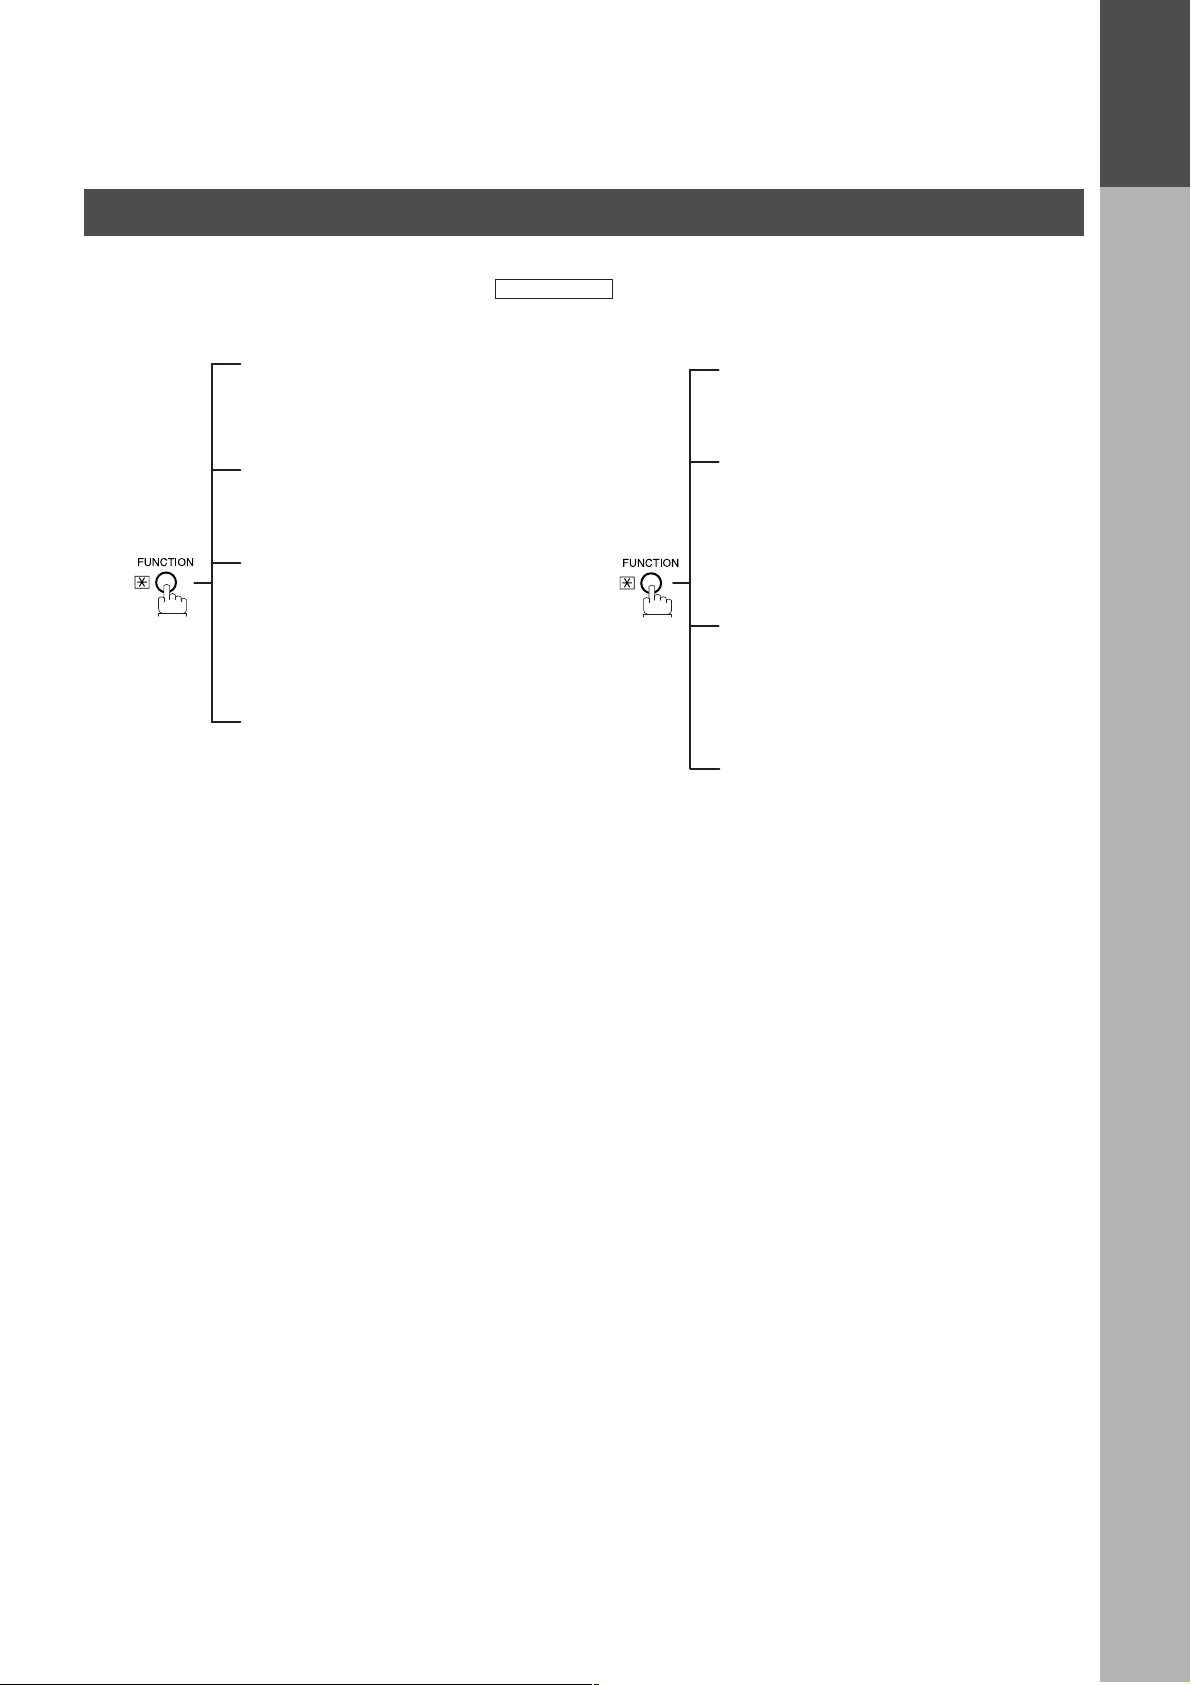
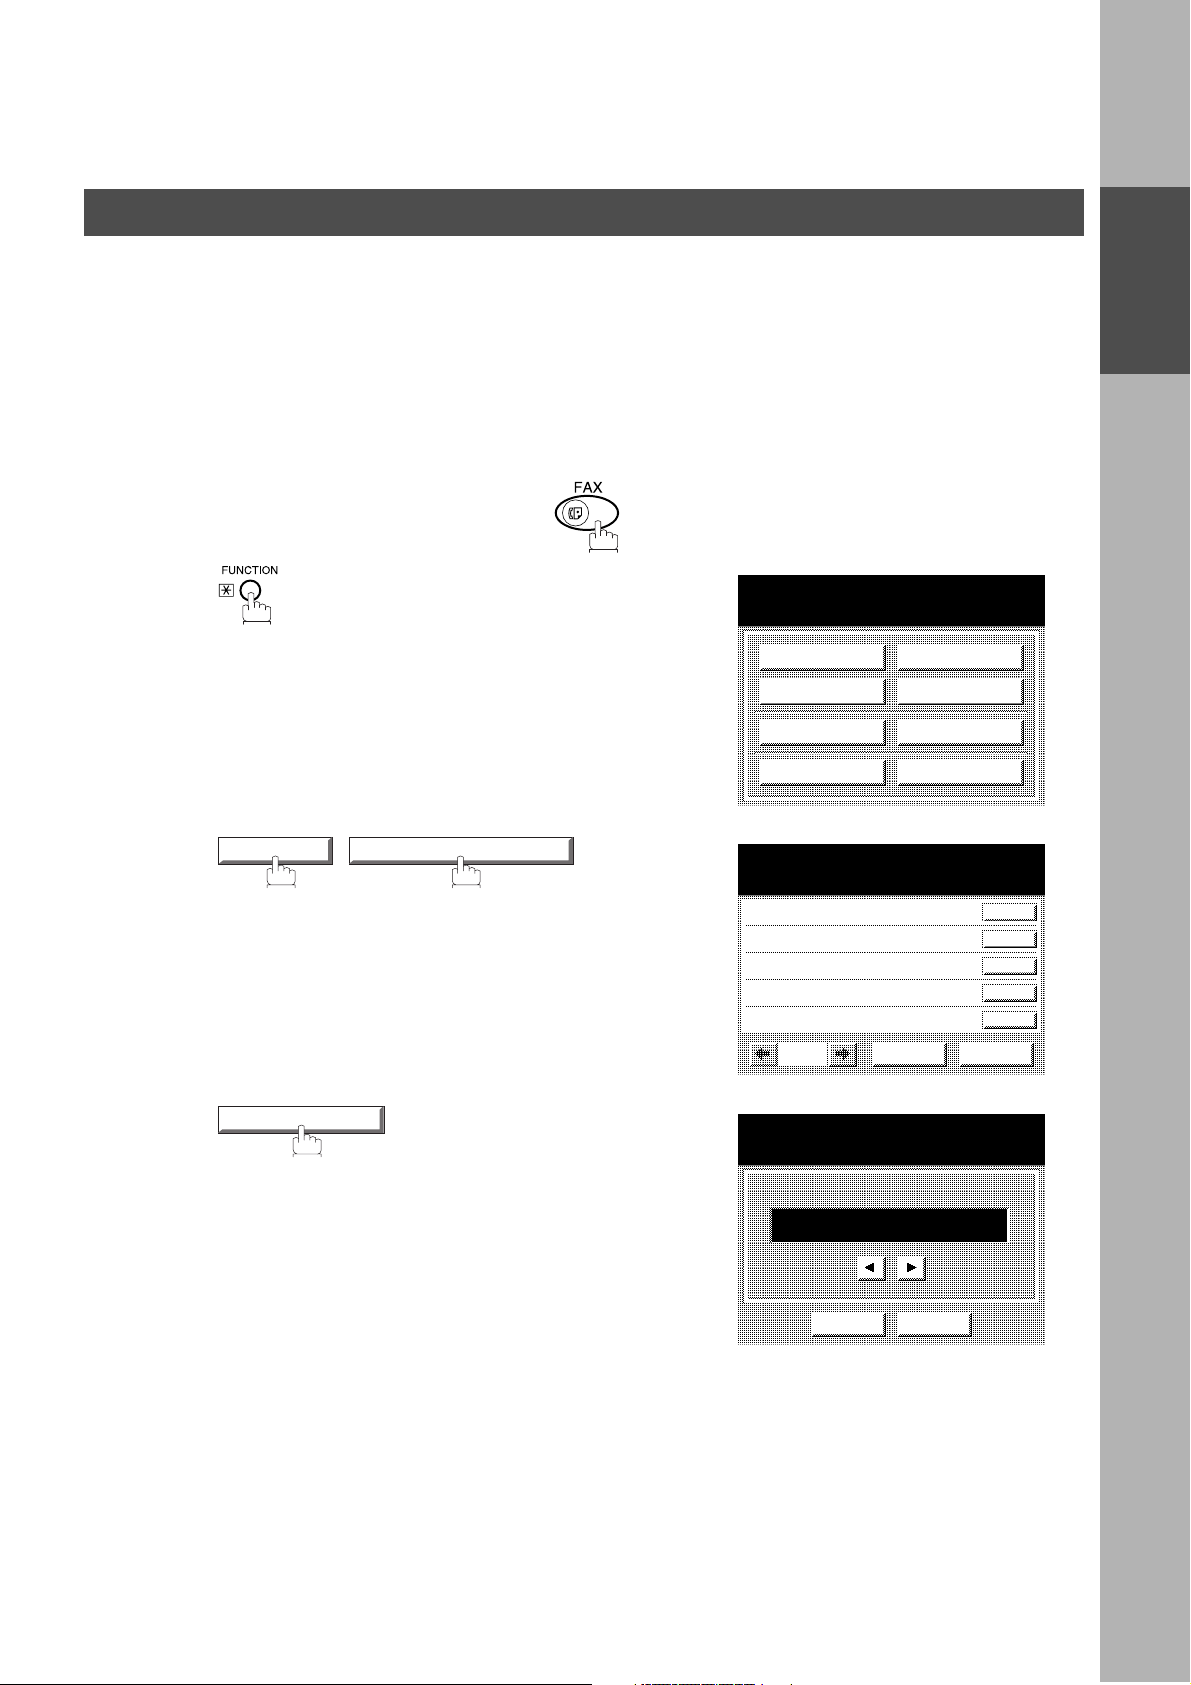
Any function can b e s t arted by first p r es si ng and then selec t th e d esi r ed fu nct io n o n t he di spl ay.
Deferred Communication
01 = XMT
02 = Polling
03 = Advanced Communication
Advanced Communication
02 = Mailbox
04 = Sub-Address XMT
Edit File Mode
01 = File List (Print/View)
02 = Change Time/Station
03 = Delete File
04 = Print File
05 = Add Document
06 = Retry Incomplete File
Set Mode
01 = User Parameters
• Date & Time
• Logo
• Character ID
• ID Number (Fax Tele phone Number )
02 = Phone Book
03 = Program Keys
04 = Fax Parameters
05 = Department Set
FUNCTION
Polling
01 = Polling
02 = Polled
Select Mode
01 = Stamp
02 = Communication Journal = OFF/ON/INC
03 = Duplex Scan
04 = Cover Sheet = OFF/ON
05 = Password-XMT = OFF/ON
06 = RCV To Memor y = OFF/ON/PRINT
Print Out
01 = Journal (Print/View)
02 = Phone Book List
03 = Program List
04 = Fax Parameter List
05 = Individual XMT Journal
Edit Phone Book
01 = Add Telephone
02 = Add EMail Address
03 = Modify Station
04 = Delete Station
External View
9
Page 12

GETTING TO KNOW YOUR MACHINE
External View
WARNING FOR FLEXIBLE CORD
If the fitted moulded plug is unsuitable for the socket outlet in your home then the fuse should be removed and the
plug cut off and disposed of safely.
There is a danger of several electrica l sho ck if the cu t of f pl ug i s in serted i nto a l ive socket outolet. I f a n ew plug
is to be fitted please observe the wiring code as below. If in any doubt please consult a qualified electrician.
Use a fuse as approved by ASTA or BSI to BS1362.
Always replace the fuse cover, never use the plug with the fuse cover omitted.
IMPORTANT
The wires in this mains lead are coloured in accordance with the following code.
Green or Green & Yellow = Earth.
Blue = Neutral. Brown = Live.
As the colours of the wi res in the mains lead of this appliance may not correspond wi th the coloured marki ngs
identifying the terminals in your plug. Proceed as follows.
The wire which is coloured green or green & yellow must be connected to the terminal in the plug which is marked
with the letter E or by the earth symbol or coloured green of green & yellow.
The wire which is col oured blue must be co nnected to t he ter minal which is mar ked with the letter N or coloured
black or blue.
The wire which is coloured brown must be connected to the terminal which is marked with the letter L or coloured
red or brown.
10
Page 13
External View
GETTING TO KNOW YOUR MACHINE
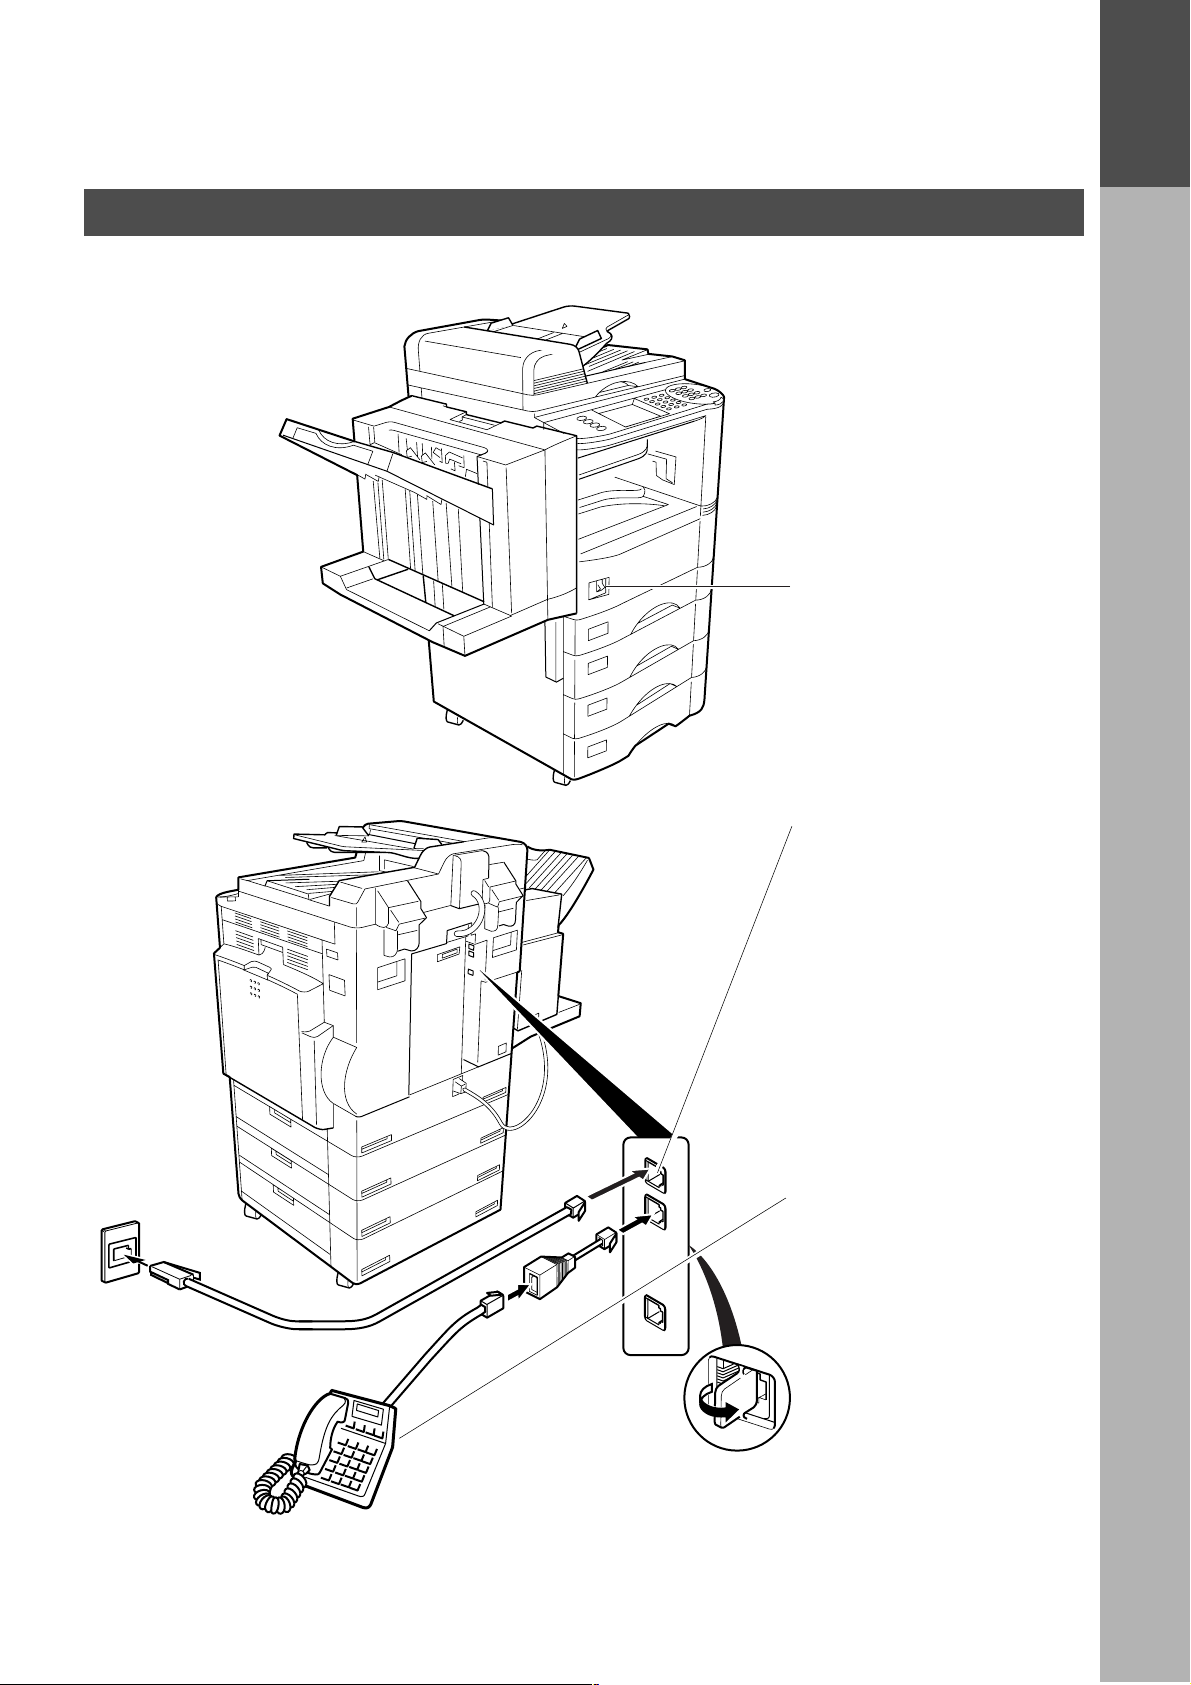
Power s wi tch
• After connecting all cables
and Power Cord, turn the
power switch ON.
GETTING TO
KNOW YOUR
MACHINE
Telephone Line Jack
• Plug one end of the
telephone line cable into
the telephone jack supplied
by the telephone company
and the other end into the
LINE jack on the Rear of
the machine.
Warning : This apparatus
must be properly grounded
through an ordinary AC
outlet.
External Telephone
(Optional)
• You can connect an
additional standard sing le
line telephone to the
machine. To connect the
telephone, break off the
protective tab on the TEL
jack.
11
Page 14

GETTING TO KNOW YOUR MACHINE
CONTRAST
LCD
REDIAL/
PAUSE
LINE
SELECT
FLASH/
SUB-ADDR
SET
ORIGINAL COPY
SIZE SIZE
MONITOR
RESET
ON LINE
ON LINE
DATA
FAX
INTERNET
PRINTER
MULTI-SIZE
FEED
SORT
ENERGY SAVER
DP-3000
INTERRUPT
FUNCTION
COPY
ADD TONER
MON. VOL.
Control Panel
• Used to select the FAX
mode.
• Used to select the
original size manually.
12
ON LINE Indicator
Blinks : When sending
or receiving faxes.
Touch Panel Display
Page 15
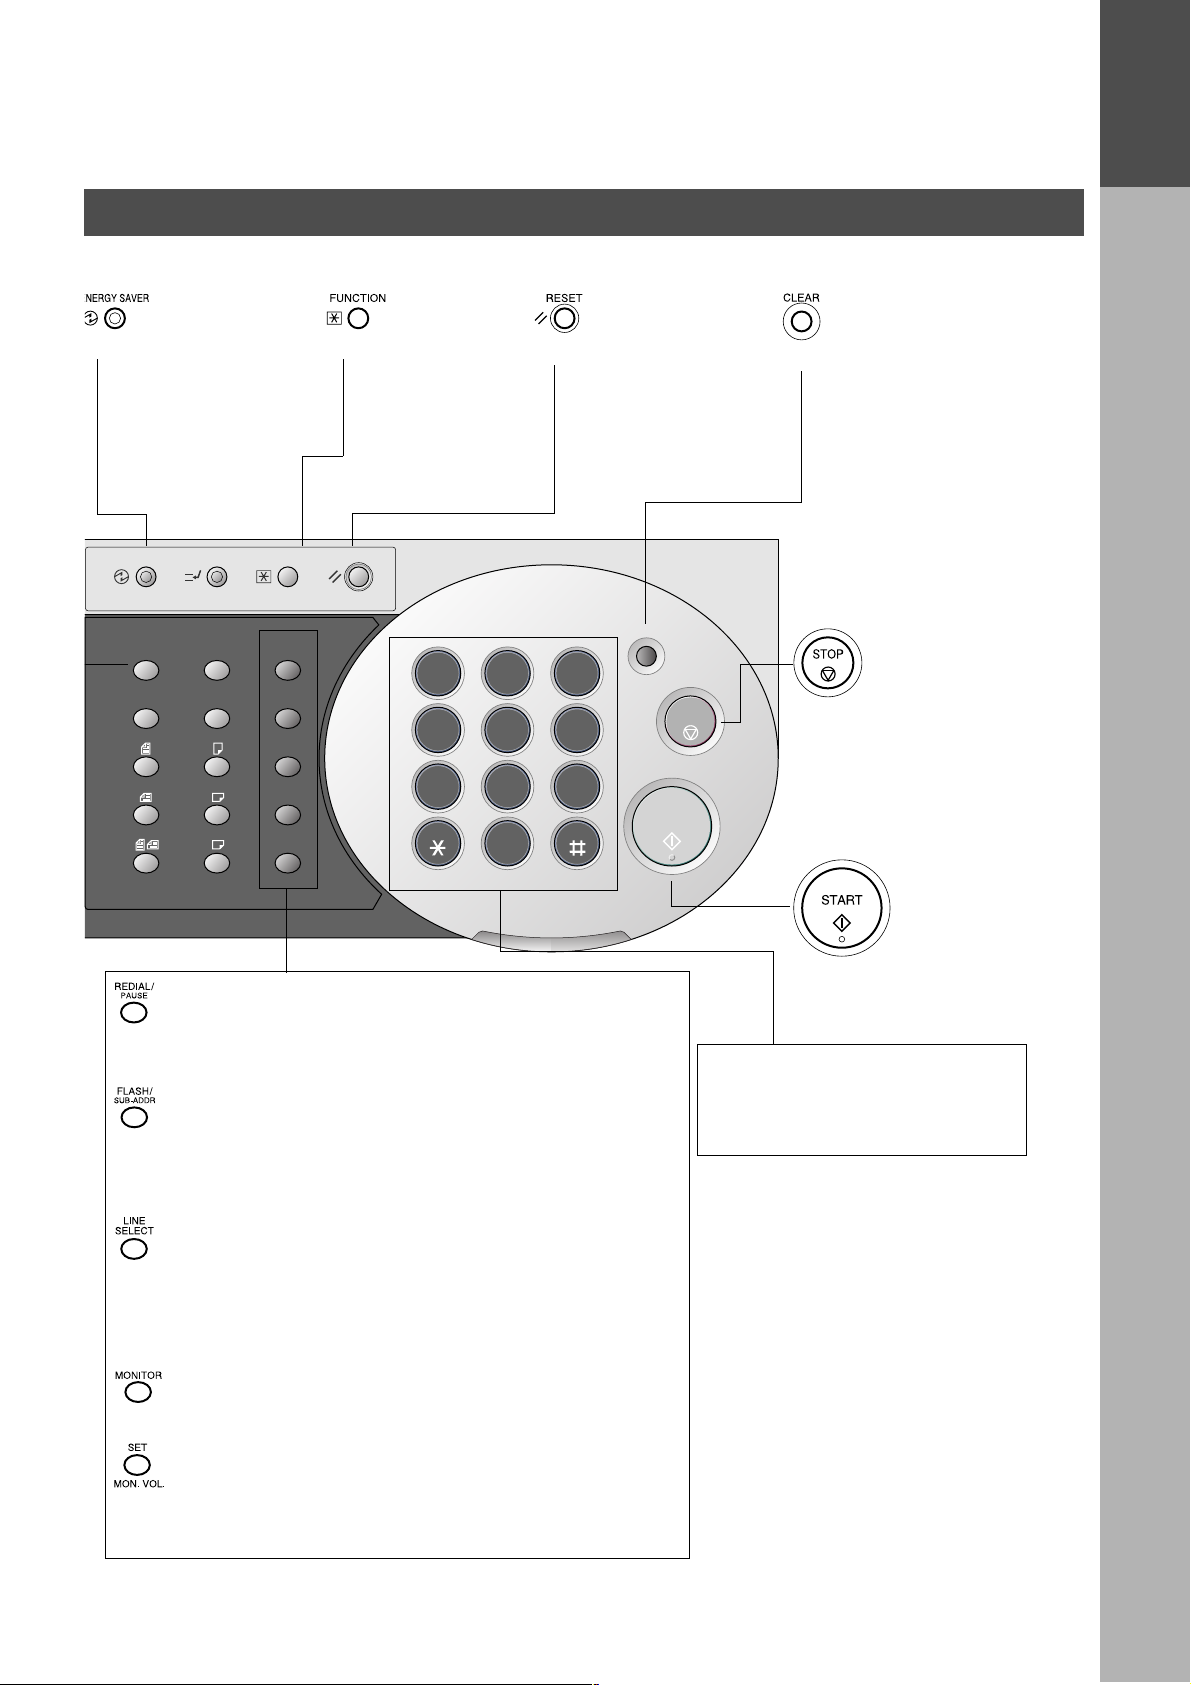
Control Panel
GETTING TO KNOW YOUR MACHINE
GETTING TO
KNOW YOUR
MACHINE
• Used to switch the
machine into energy
saving mode.
For more details, see
page 32 of the
Operating Instructions
(For Copier.)
ENERGY SAVER
ORIGINAL COPY
INTERRUPT
SIZE SIZE
A3
FLS
B4
A4
A4
A5
FUNCTION
REDIAL/
PAUSE
FLASH/
SUB-ADDR
LINE
SELECT
MONITOR
SET
MON. VOL.
• Used to start or
select the
function and
sub-functions.
These functions
are explained in
detail on page 9.
RESET
1 2 3
GHI
4 5 6
PQRS
7 8 9
• Use this button when
resetting all the
previously set
functions.
CLEAR
ABC
JKL
TUV
DEF
MNO
WXYZ
0
ALARM ACTIVE
STOP
START
• Use this button when
correcting entered
numbers or characters.
• Press this button when
you want to stop
telecommunication,
registration operation,
or audible tone.
• Used to enter a pause when recording or dialling a telephone
number, or to redial the last dailled number.
• Used to separate the Sub-Address from the telephone
number when dailling, or to access some features of your
PBX.
• Used to manually select the communications port for each
transmission. Available when the Optional 2nd G3 Fax
Communication Port Kit has been installed. (See Operating
Instructions (For Copier) page 72.)
• Used to start On-Hook dialling.
• Used to set operations.
• Used for adjusting the monitor volume.
• Press this button to
start transmitting or
receiving fax.
Ten Keypad
• Used for manual number
dialling, recording phone
numbers, and numerical entries.
13
Page 16

GETTING TO KNOW YOUR MACHINE
This page is intentionally left blank.
14
Page 17
INSTALLING YOUR MACHINE
Adjusting the Volume
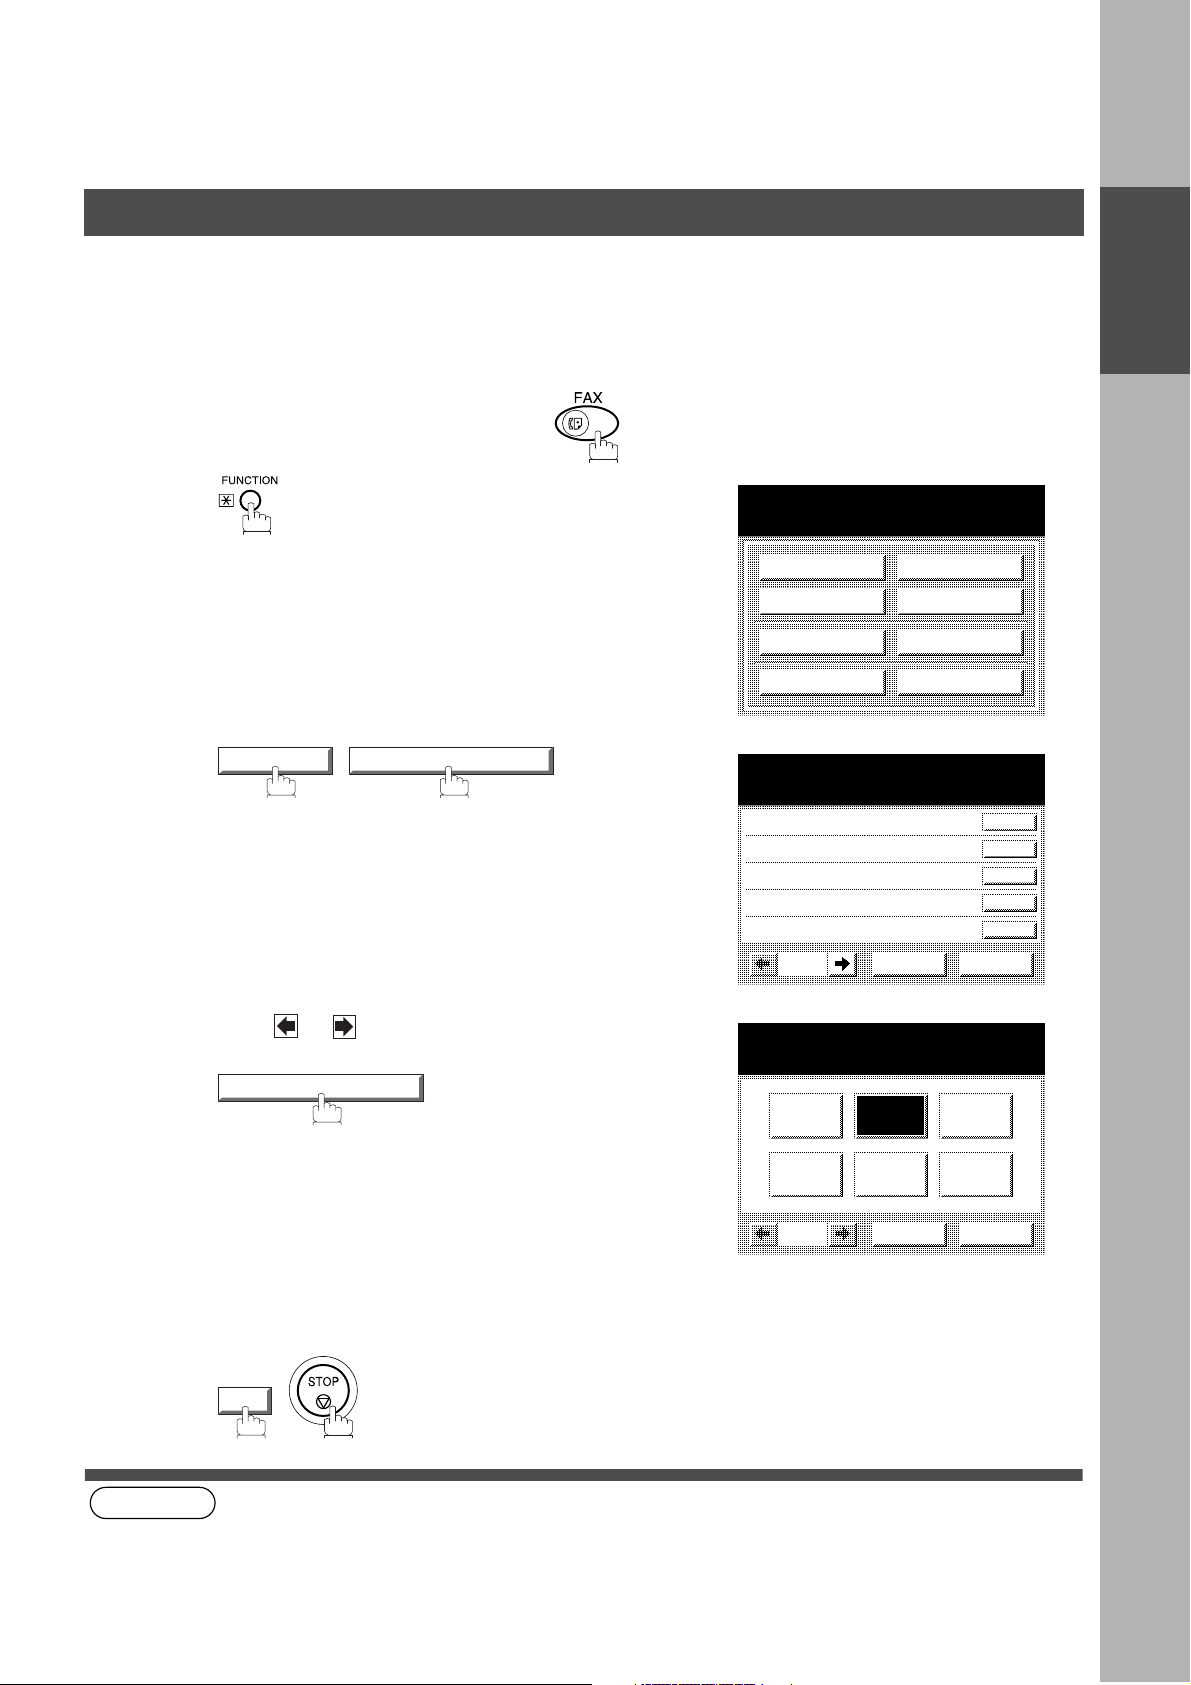
You can adjust the mo nitor an d r inge r volume on your mach ine. The built-in speaker enables you to h ear the di al
tone, dialling signals, and busy tone. The ringer sounds when your machine receives a call. (see Note 1)
Setting The Ringer Volume
Make sure that the FAX lamp is ON. If not, press to select the "FAX MODE".
INSTALLING
YOUR MACHINE
1
2
3
SET MODE 04 FAX PARAMETERS
Press or to scroll the display to the desired
Fax Par ameter.
086 RINGER VOLUME
SELECT A FUNCTION
DEFERRED COMM.
ADVANCED COMM.
EDIT FILE MODE
SET MODE
FAX PARAMETERS
SELECT A FUNCTION
001 CONTRAST (HOME)
002 RESOLUTION (HOME)
003 ORIGINAL (HOME)
004 STAMP
005 MEMORY
01/20
086 RINGER VOLUME
OFF
POLLING
SELECT MODE
PRINT OUT
EDIT PHONE BOOK
CANCEL O K
MEDIUMSOFT
LOUD
CANCEL O K
Select the desired setting for the Ringer Volume.
4
5
NOTE
OK
1. You can also adjust th e volume of the key touc h tone and the volum e of the buz zer in the F ax Parameter N o. 010
(KEY/BUZZER VOLUME). (See page 33)
15
Page 18
INSTALLING YOUR MACHINE
Adjusting the Volume
Setting the Monitor Volume
Make sure that the FAX lamp is ON. If not, press to select the "FAX MODE".
1
2
3
15-AUG-2001 15:00
MONITOR
You will hear the dial tone through the speaker.
>>>>>>>
CANCEL O K
Press or repeatedly to raise or lower the
Volume.
OK
16
Page 19
INSTALLING YOUR MACHINE
User Parameters
Your facsimile machine has several basic settings (User Parameters) to help you keep records of the doc uments
you send or receive. For example, the built-in clock keeps the current date and time, and your LOGO and ID
Number help to identify you when you send or receive documents.
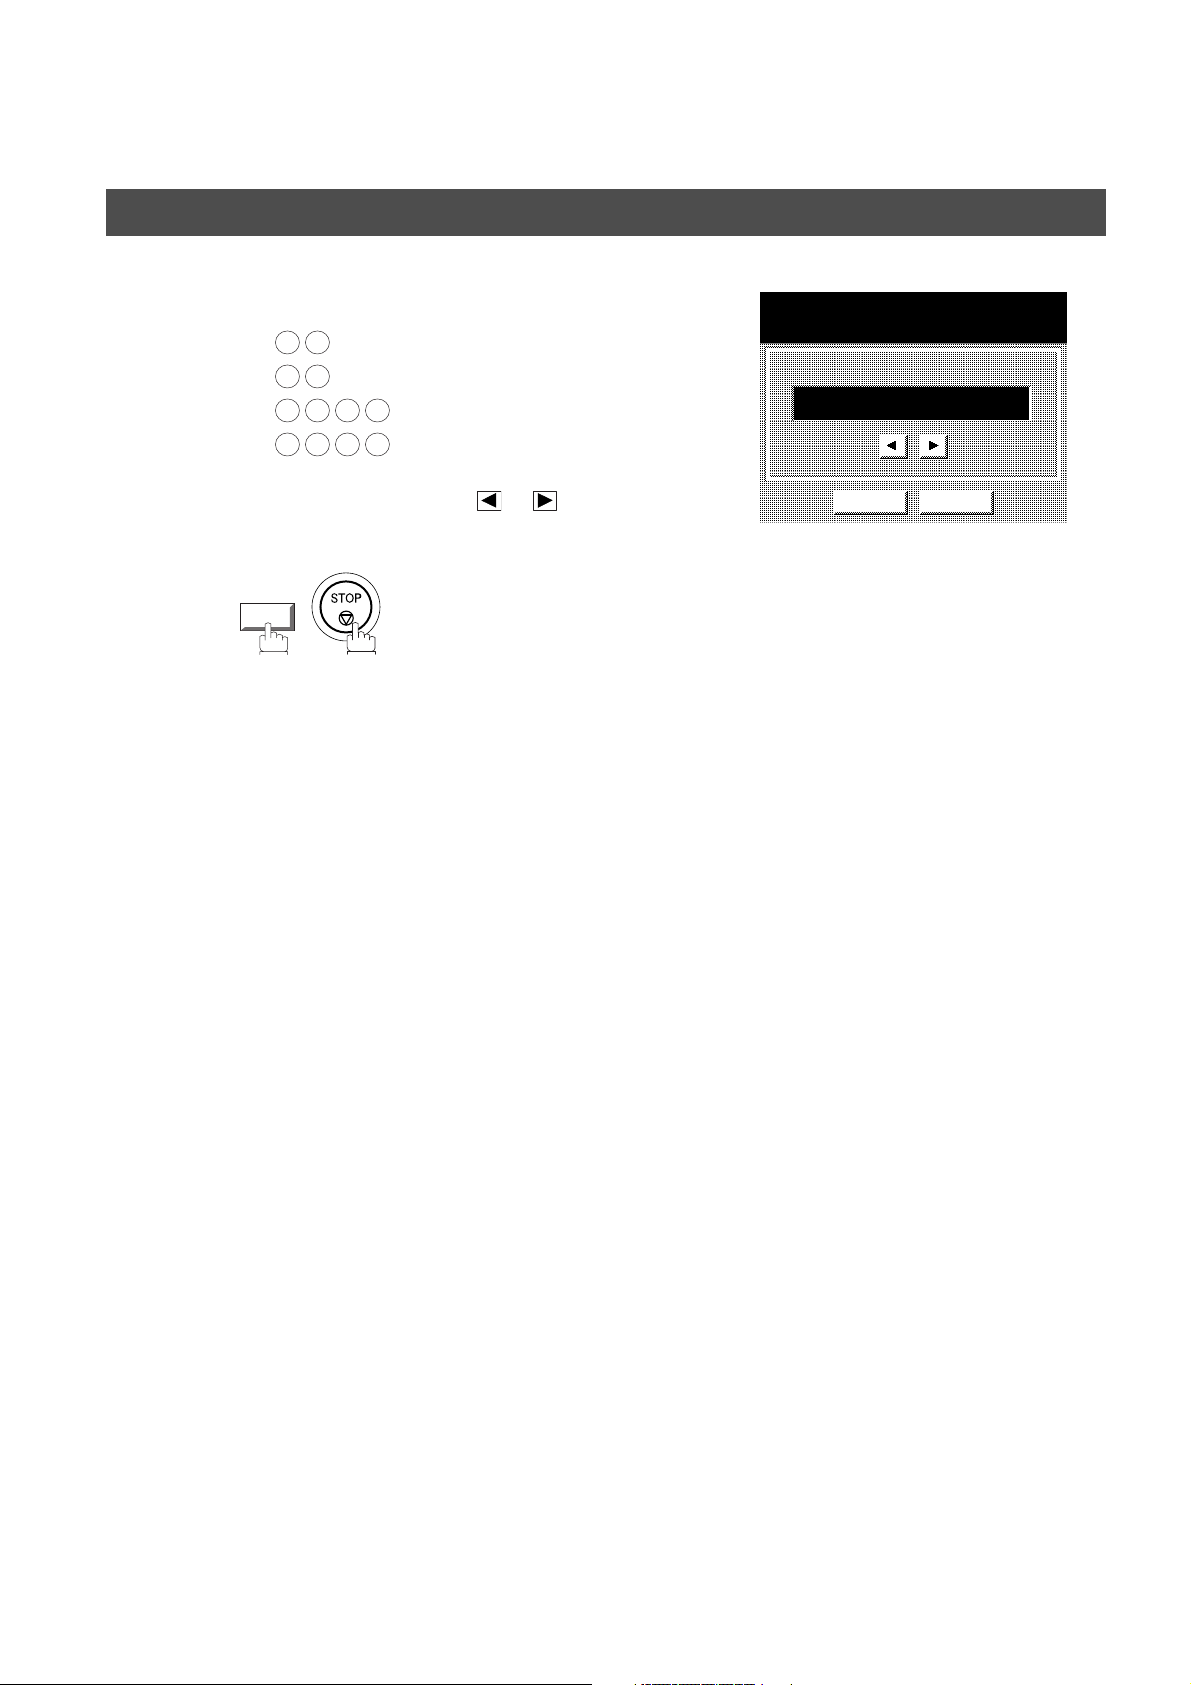
Setting the Date and Time
At standby the display will show the d ate and time. Once the stan dby display is set, it will automatical ly be
updated.
Make sure that the FAX lamp is ON. If not, press to select the "FAX MODE".
INSTALLING
YOUR MACHINE
1
2
3
SET MODE 01 USER PARAMETERS
01 DATE & TIME
SELECT A FUNCTION
DEFERRED COMM.
ADVANCED COMM.
EDIT FILE MODE
SET MODE
USER PARAMETERS
SELECT A FUNCTION
01 DATE & TIME
02 LOGO
03 CHARACTOR ID
04 ID NO.
05
USER PARAMETERS
DATE & TIME
EDIT PHONE BOOK
CANCEL O K
POLLING
SELECT MODE
PRINT OUT
01-01-2001 00:00
CANCEL O K
17
Page 20
INSTALLING YOUR MACHINE
User Parameters
4
5
Enter the new date and time.
Ex:
1 5
0 8
2 0 0 1
1 5 0 0
If you make a mistake, use or to move the cursor
over the incorrect number, then overwrite it with a
correct one.
OK
Date : 15th
Month : August
Year : 2001
Time : 3:00 PM
USER PARAMETERS
DATE & TIME
15-08-2001 15:00
CANCEL O K
18
Page 21
User Parameters
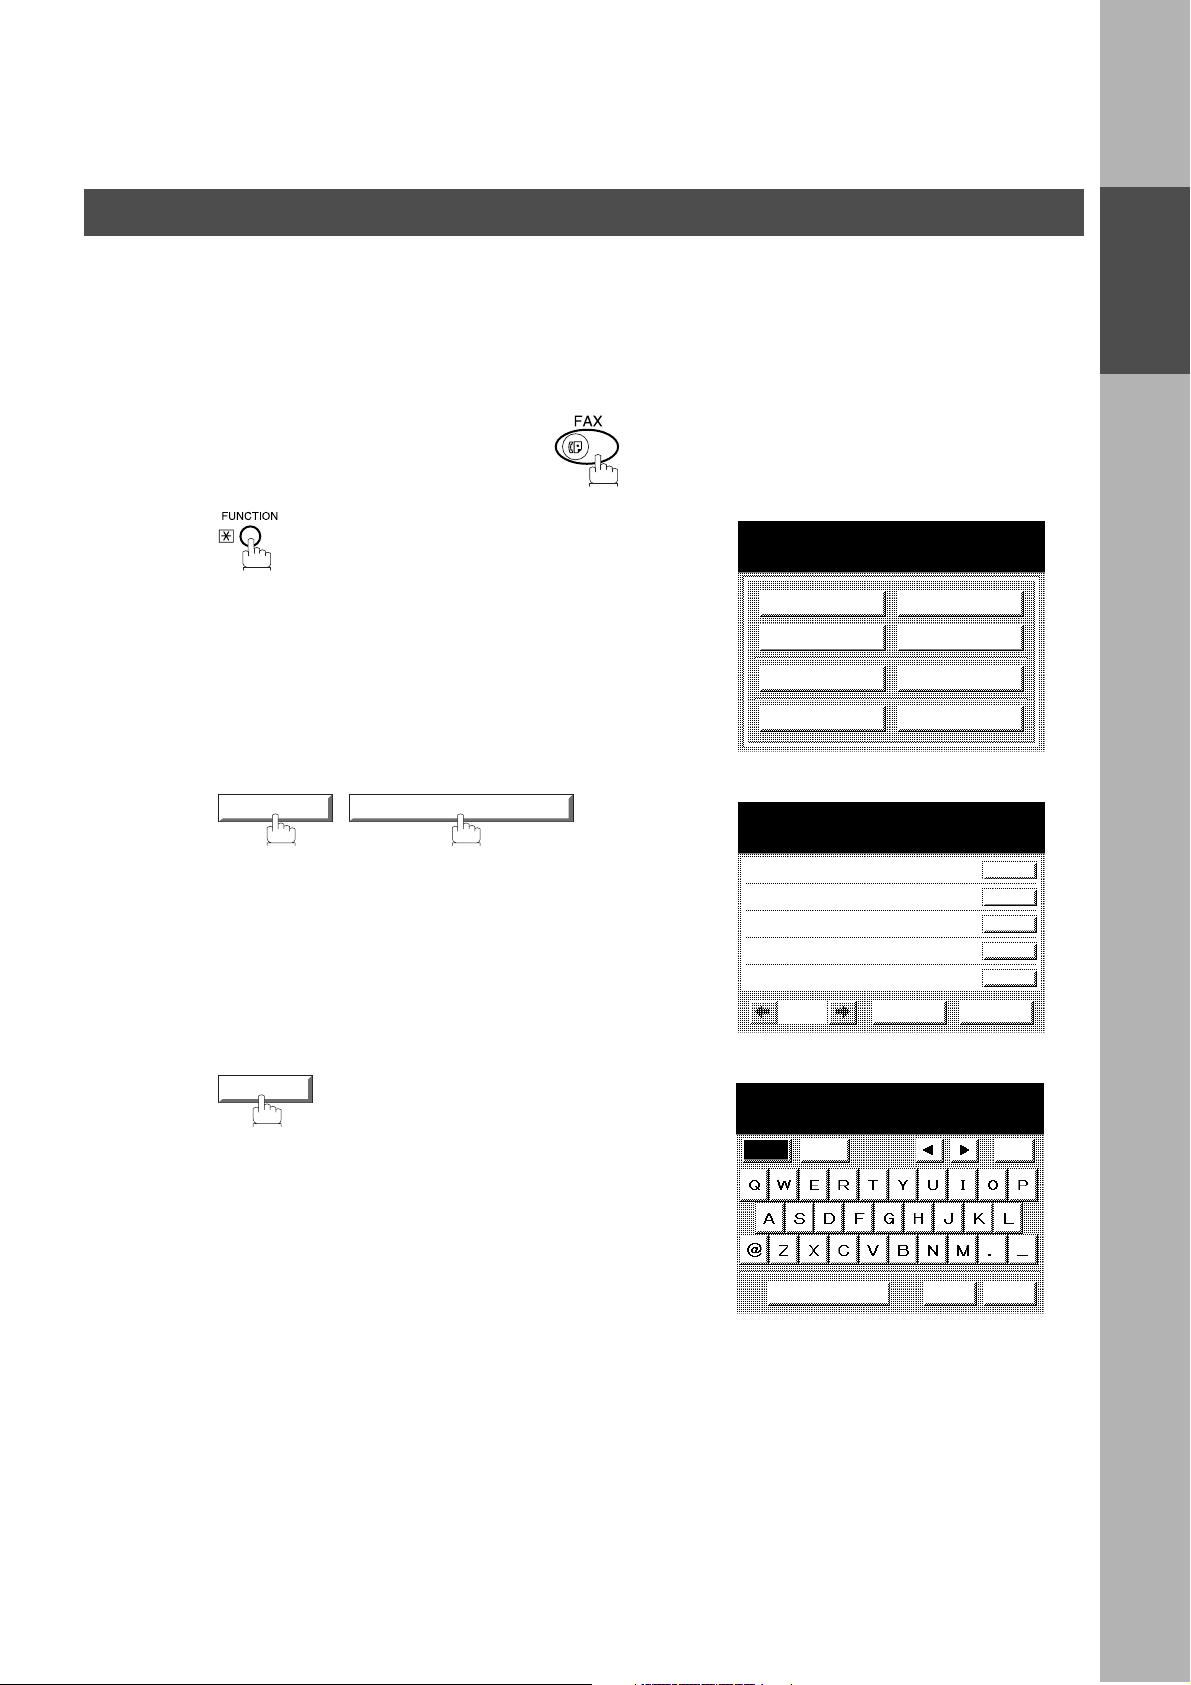
Setting Your LO GO
INSTALLING YOUR MACHINE
When you send a document, your LOGO appears on the top of the copy printed out at the other station.
The LOGO helps to identify you to someone who receives your transmission.
Make sure that the FAX lamp is ON. If not, press to select the "FAX MODE".
1
2
SET MODE 01 USER PARAMETERS
SELECT A FUNCTION
DEFERRED COMM.
ADVANCED COMM.
EDIT FILE MODE
SET MODE
USER PARAMETERS
SELECT A FUNCTION
01 DATE & TIME
02 LOGO
03 CHARACTOR ID
04 ID NO.
05
EDIT PHONE BOOK
CANCEL O K
POLLING
SELECT MODE
PRINT OUT
INSTALLING
YOUR MACHINE
3
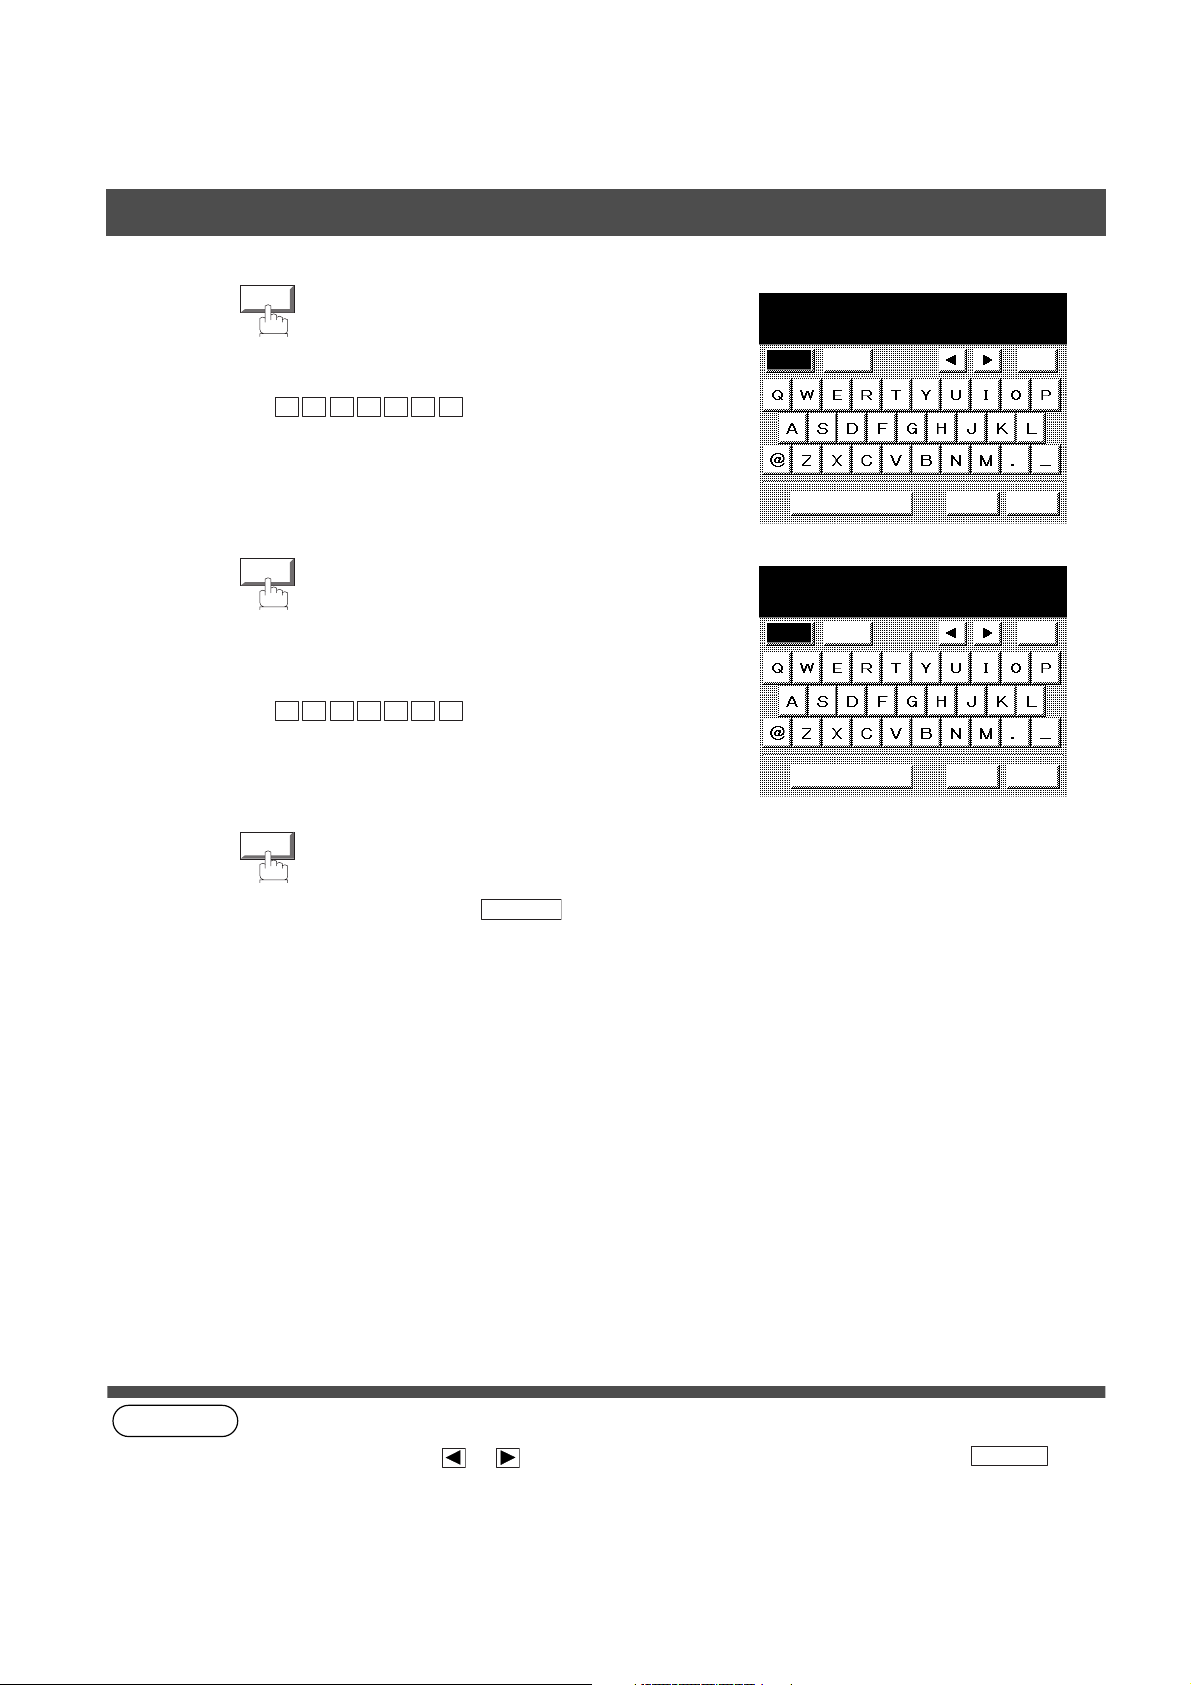
02 LOGO
Caps
LOGO
Symbols
Space
CANCEL
Back
space
OK
19
Page 22
INSTALLING YOUR MACHINE
User Parameters
4
5
Enter your LOGO (max. 25 characters and digits)
by using the QWERTY keyboard.
Ex:
If you make a mistake, use or to move the
cursor one space beyond the incorrect character,
press then re-enter the new character.
A N A S O N I C
P
CLEAR
OK
LOGO
PANASONIC
Caps
Symbols
Space CANCEL
Back
space
OK
20
Page 23
User Parameters
Setting Your Character ID
INSTALLING YOUR MACHINE
If the remote machine has Character ID capabilities, when you are sending or receiving, your Character ID will
appear on the remote machine’s display and the remote machine's Character ID will appear on your display.
Make sure that the FAX lamp is ON. If not, press to select the "FAX MODE".
1
2
SET MODE 01 USER PARAMETERS
SELECT A FUNCTION
DEFERRED COMM.
ADVANCED COMM.
EDIT FILE MODE
SET MODE
USER PARAMETERS
SELECT A FUNCTION
01 DATE & TIME
02 LOGO
03 CHARACTOR ID
04 ID NO.
05
EDIT PHONE BOOK
CANCEL O K
POLLING
SELECT MODE
PRINT OUT
INSTALLING
YOUR MACHINE
3
03 CHARACTER ID
CHARACTER ID
Caps
Symbols
Space CANCEL
Back
space
OK
21
Page 24

INSTALLING YOUR MACHINE
User Parameters
4
5
Enter your Character ID (max. 16 characters and
digits) by using the QWERTY keyboard.
Ex:
If you make a mistake, use or to move the
cursor one space beyond the incorrect character,
press then re-enter the new character.
E A D SPACE O F F I C E
H
CLEAR
OK
CHARACTER ID
HEAD OFFICE
Caps
Symbols
Space CANCEL
Back
space
OK
22
Page 25
INSTALLING YOUR MACHINE
User Parameters
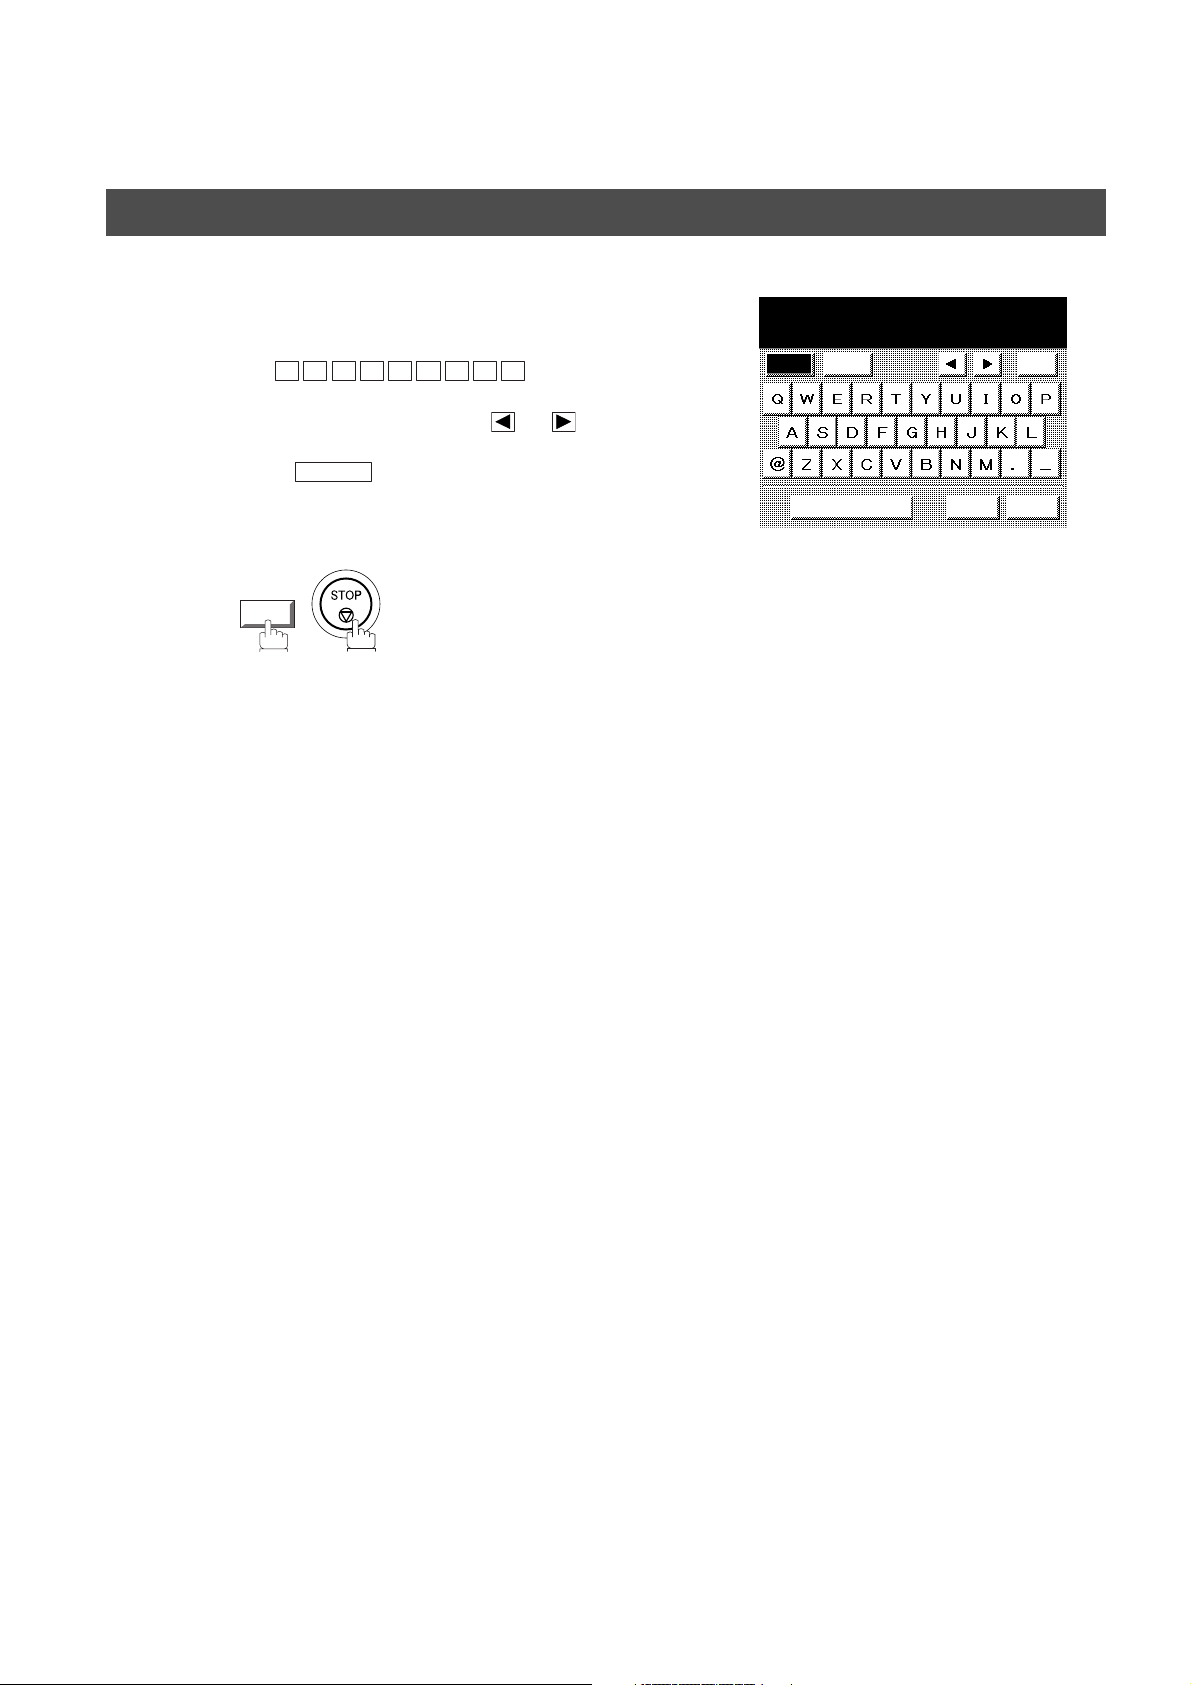
Setting Your ID Num ber (Fax Telephone Number)
If the remote machine does not have a Character ID but it has an ID Number, when sending or receiv ing , your
ID Number will appear on the remote machine's display and their ID Number will appear on your display.
We suggest you use your facsimile telephone number as your ID number. (max. 20 digits)
Make sure that the FAX lamp is ON. If not, press to select the "FAX MODE".
1
2
SET MODE 01 USER PARAMETERS
SELECT A FUNCTION
DEFERRED COMM.
ADVANCED COMM.
EDIT FILE MODE
SET MODE
USER PARAMETERS
SELECT A FUNCTION
01 DATE & TIME
02 LOGO
03 CHARACTOR ID
04 ID NO.
05
EDIT PHONE BOOK
CANCEL O K
POLLING
SELECT MODE
PRINT OUT
INSTALLING
YOUR MACHINE
3
04 ID NO.
USER PARAMETERS
ID NO.
ENTER UPTO 20-DIGITS
-
CANCEL O K
23
Page 26
INSTALLING YOUR MACHINE
User Parameters
4
5
(see Note 1)
Enter your ID (max. 20 digits) by using the Ten
Keypad and the key to enter a space
between numbers..
Ex:
2 0 1
MONITOR
If you make a mistake, use or to move the
cursor one space beyond the incorrect number,
pre s s t h en r e-enter the new number.
CLEAR
OK
MONITOR
MONITOR
1 2 1 2
5 5 5
USER PARAMETERS
ID NO.
ENTER UPTO 20-DIGITS
201 555 1212
CANCEL O K
24
NOTE
1. You may use to enter a "+" character at the beginning of the ID number to indicate the following digit(s) for
your country code.
Ex :+1 201 555 1212 +1 for U.S.A. country code.
+81 3 111 2345 +81 for Japan country code.
Page 27
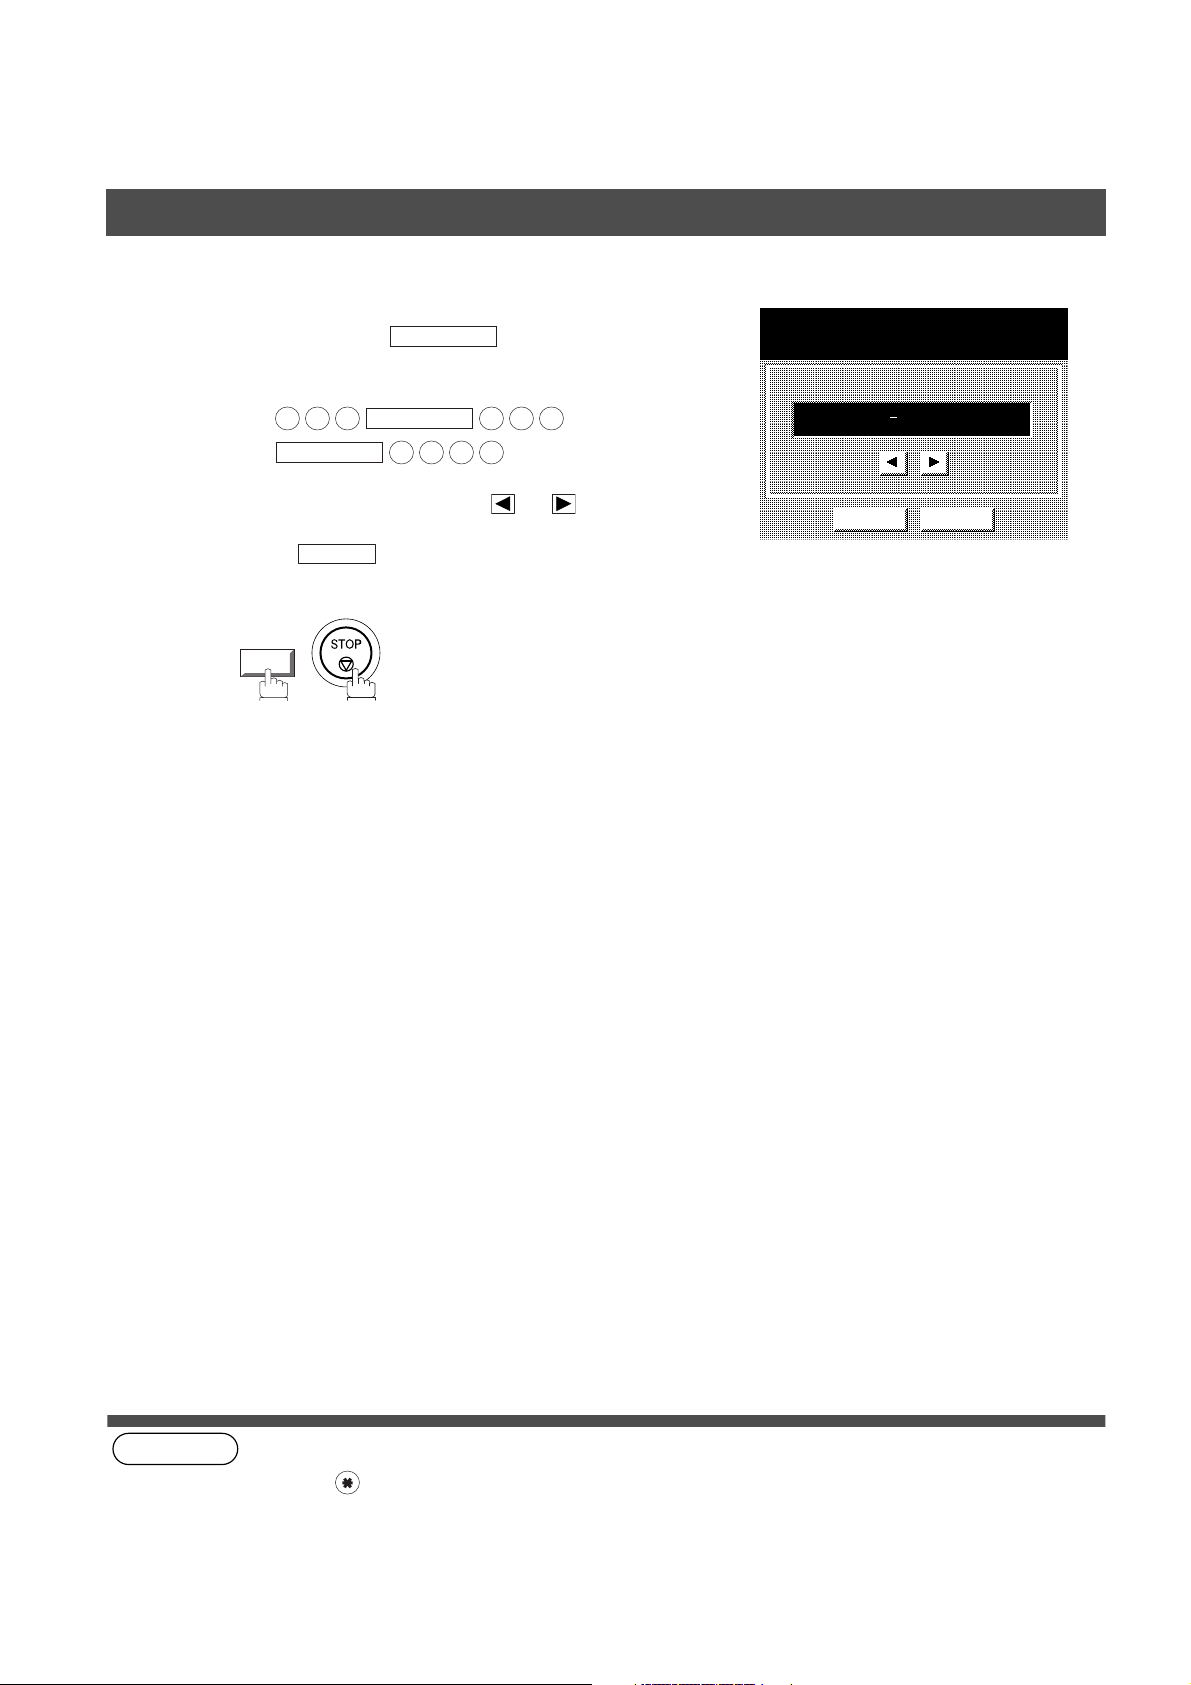
Programming Your Machine
Phone Book
Adding Telepho ne Numbers
The Phone Book contains Speed dialling numbers. To use this dialling method, you must first store the
telephone number(s) using the following procedure.
To add a Telephone Number, follow the steps below
Make sure that the FAX lamp is ON. If not, press to select the "FAX MODE".
1
SELECT A FUNCTION
PROGRAMMING
YOUR MACHINE
2
3
EDIT PHONE BOOK 01 ADD TELEPHONE
Enter the telephone number.
(up to 36 digits including pauses and spaces)
• If your machine has the 2nd G3 Fax Communication
Port Kit installed, you can pre-select which telephone
line should be used for this station by pressing the
LINE SELECT
If "AUTO" is selected, the machine will automatically
select the available telephone line.
key.
DEFERRED COMM.
ADVANCED COMM.
EDIT FILE MODE
SET MODE
PHONE BOOK
ENTER TEL. NO.
AUTO
-
CANCEL O K
PHONE BOOK
ENTER TEL. NO.
AUTO
9 555 1234_
POLLING
SELECT MODE
PRINT OUT
EDIT PHONE BOOK
Note1
Note1
Ex:
MONITOR
9
3 4
5 5 5
MONITOR
CANCEL O K
1 2
25
Page 28

PROGRAMMING YOUR MACHINE
Phone Book
4
5
6
OK
then enter the station name by using the QWERTY
keyboard.
(up to 15 characters)
Ex:
then enter the key name (up to 10 characters) .
(By default, the key name is the first 10 characters
of the station’s name. If you do not want to change
it, press .)
To record another number, repeat Steps 3 to 6.
To return to standby, press .
S
OK
OK
A L E S
OK
SPACE
E P TD
STOP
PHONE BOOK
ENTER NAME
SALES DEPT
Caps
Symbols
Space CANCEL
PHONE BOOK
ENTER KEY NAME
SALES DEPT
Caps
Symbols
Space CANCEL
PHONE BOOK
ENTER TEL. NO.
AUTO
-
Back
space
OK
Back
space
OK
Note1
26
CANCEL O K
(see Note 1)
NOTE
1. This field (AUTO, Line-1 or Line-2) appears only when the 2nd G3 Fax Communication Port Kit is installed.
Page 29
PROGRAMMING YOUR MACHINE
4
Phone Book
Editing the Phone Book
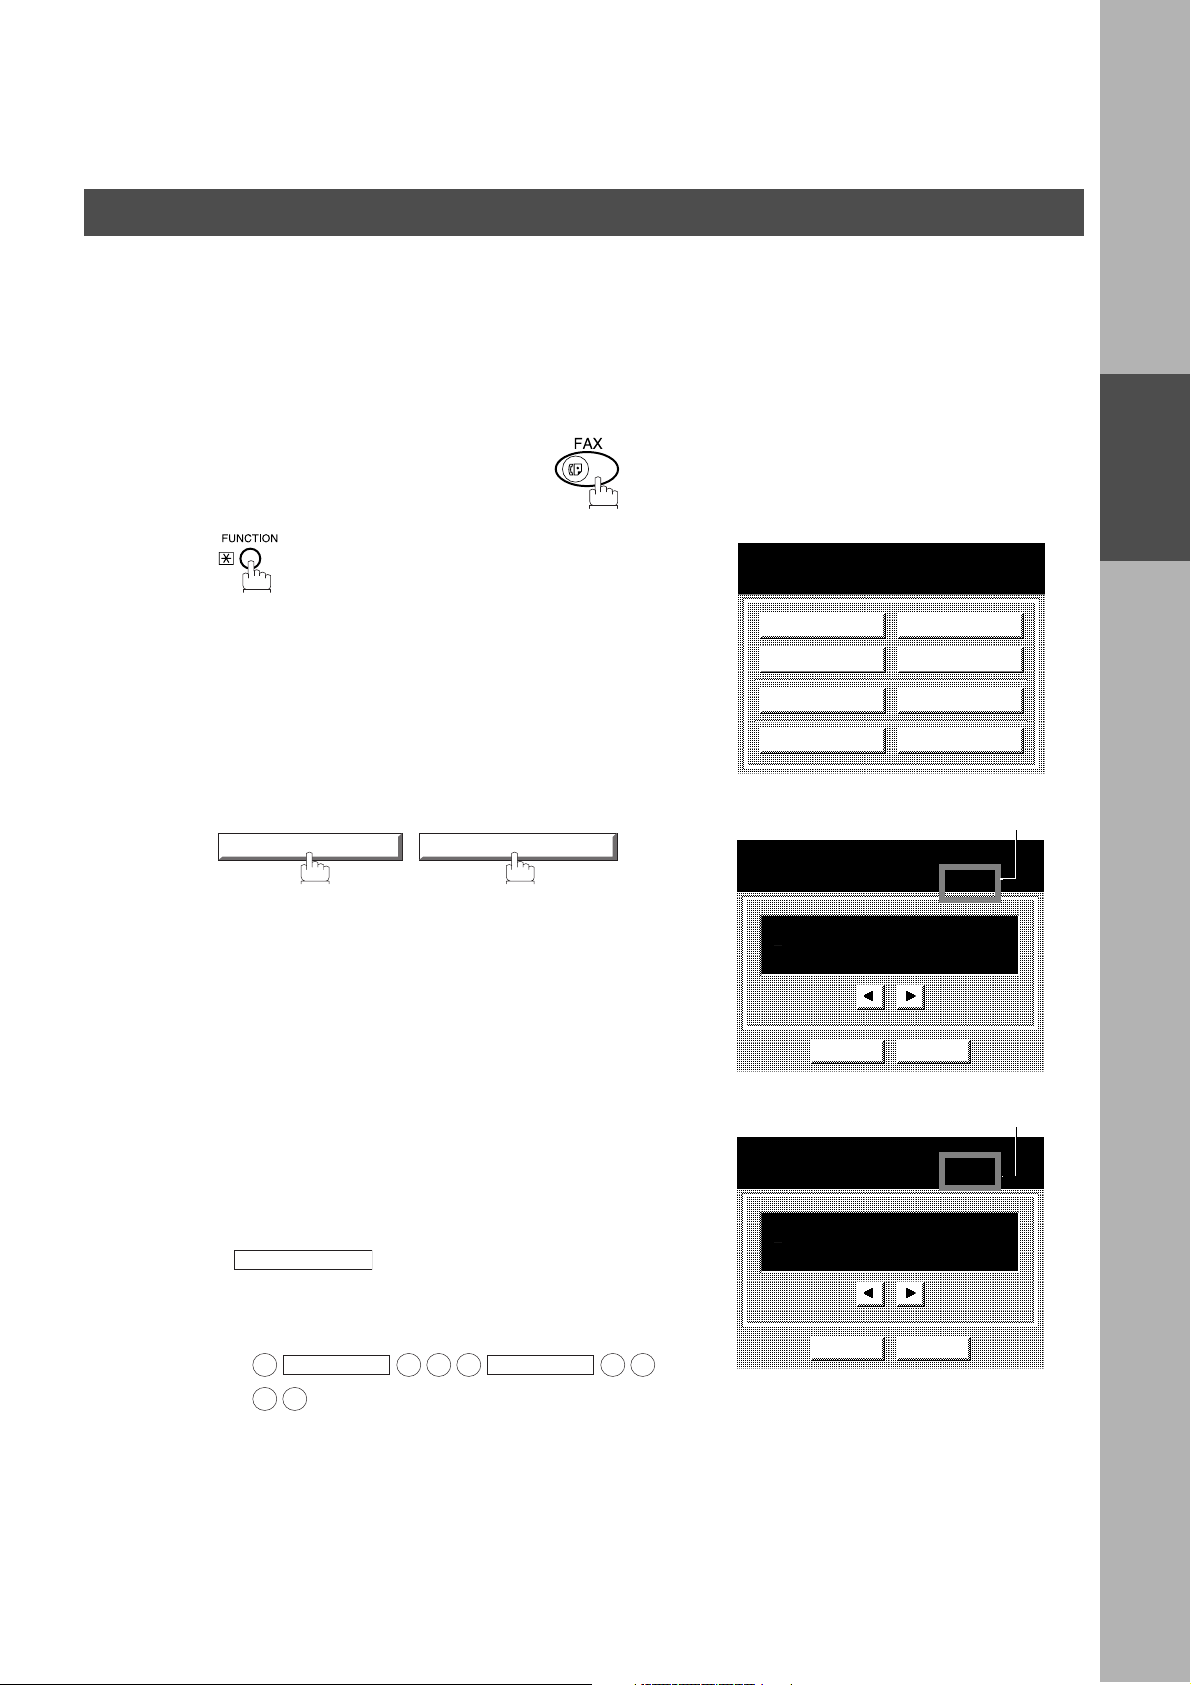
If you have to change or erase any of the Speed dialling numbers, follow the steps below.
To change the settings of a Speed dialling number
1
2
3
EDIT PHONE BOOK 03 MODIFY STATION
Select the station you wish to change.
SALES DEPT
Ex:
SELECT A FUNCTION
DEFERRED COMM.
ADVANCED COMM.
EDIT FILE MODE
SET MODE
MODIFY STATION
SALES DEPT
CANCEL O K
EDIT PHONE BOOK
POLLING
SELECT MODE
PRINT OUT
PROGRAM
DIAL
PROGRAMMING
YOUR MACHINE
4
OK
then enter a new telephone number. (See Note 1)
Ex:
9
6
PAUSE
5 5 5
MONITOR
3
5
Note3
PHONE BOOK
ENTER TEL. NO.
AUTO
9-555 3456_
CANCEL O K
27
Page 30
PROGRAMMING YOUR MACHINE
Phone Book
5
6
7
OK
then enter a new station name. (See Note 1)
Ex:
P A N A F A X
OK
then enter a new key name. (See Note 1)
Ex:
P A N A F A X
OK
PHONE BOOK
ENTER NAME
PANAFAX
Caps
Symbols
Space CANCEL
PHONE BOOK
ENTER KEY NAME
PANAFAX
Caps
Symbols
Space CANCEL
Back
space
OK
Back
space
OK
(see Note 1)
(see Note 2)
(see Note 3)
NOTE
1. If you make a mistake, use or to move the cursor beyond the incorrect number, press then
2. The Phone Book cannot be changed or erased until the communication has finished.
3. This field (AUTO, Line-1 or Line-2) appears only when the 2nd G3 Fax Communication Port Kit is installed.
To return to standby, press .
re-enter the new number.
To change or erase the settings, cancell the communication first by Edit File Mode. (See page 93)
STOP
CLEAR
28
Page 31

Phone Book
To erase an entry from the Phone Book
PROGRAMMING YOUR MACHINE
1
2
3
EDIT PHONE BOOK 04 DELETE STATION
Enter the station you wish to erase.
SALES DEPT
Ex:
SELECT A FUNCTION
DEFERRED COMM.
ADVANCED COMM.
EDIT FILE MODE
SET MODE
DELETE STATION
AMERICA ASIA CHINA
AFRICA BERLIN
ANTARCTICA BRAZIL
APOLLO CANADA
CANCEL O K
DELETE STATION
SALES DEPT
POLLING
SELECT MODE
PRINT OUT
EDIT PHONE BOOK
1/1
PROGRAM
DIAL
PROGRAMMING
YOUR MACHINE
4
OK
CANCEL O K
DELETE STATION
SALES DEPT
9 555 1234
DELETE?
NO YES
29
Page 32

PROGRAMMING YOUR MACHINE
Phone Book
5
(see Note 1)
YES
To return to standby, press .
STOP
30
NOTE
1. If the Phone Book dialling number has been used for a communication reservation, the settings cannot be
changed or erased until the communication has finished.
To change or erase the settings, cancell the communication first by Edit File Mode. (See page 93)
Page 33

PROGRAMMING YOUR MACHINE
Customizing Your Machine
Your facsimile machine has a variet y of adjustable Fax Parameters. These parameters, listed in the Parameter
Table, are preset for you and do not need to be changed. If you do want to make a change, read the table
carefully. Some parameters, such as the Resolution, Contrast, and Verification Stamp parameters, can be
temporarily chan ged by simple key operation just before a transmission is made. When the transmission ends,
however, these parameters return to their preset values (Home position). Other parameters can only be changed
by the procedure described below.
Setting the Fax Parameters
Make sure that the FAX lamp is ON. If not, press to select the "FAX MODE".
PROGRAMMING
YOUR MACHINE
1
2
SET MODE 04 FAX PARAMETERS
SELECT A FUNCTION
DEFERRED COMM.
ADVANCED COMM.
EDIT FILE MODE
SET MODE
FAX PARAMETERS
SELECT A FUNCTION
001 CONTRAST (HOME)
002 RESOLUTION (HOME)
003 ORIGINAL (HOME)
004 STAMP
005 MEMORY
01/20
POLLING
SELECT MODE
PRINT OUT
EDIT PHONE BOOK
CANCEL O K
3
Press or to scroll the display to the desired Fax
Parameter. (See pages 33 to 36)
Ex:
004 STAMP
31
Page 34

PROGRAMMING YOUR MACHINE
Customizing Your Machine
4
5
Enter the new setting value.
ON
Ex:
OK
To set another parameter, press to
return to Step 3 or press to return to
standby.
CANCELL
STOP
004 STAMP
OFF
ON
CANCEL O K
(see Note 1) (see Note 2)
32
NOTE
1. To scroll the display to the desired Fax Parameters in Step 3, press or .
2. To print out a Fax Parameter List, see page 164.
Page 35

Customizing Your Machine
Fax Parameter Table
PROGRAMMING YOUR MACHINE
No. Parameter
001 CONTRAST 1 Lighter Setting the home position for the CONTRAST.
002 RESOLUTION 1 Standard Setting the home position for the RESOLUTION.
003 ORIGINAL 1 TEXT Setting the home position for the ORIGINAL.
004 STAMP 1 Off Setting the home position of the STAMP.
005 MEMORY 1 Off Setting the home position for the MEMORY.
007 HEADER PRINT 1 Inside Selecting the printing position of the header.
Setting
Number
4Normal
7Darker
2Fine
3S-Fine
2 TEXT/PHOTO
3PHOTO
2On
2On
2 Outside
3 No print
Setting Comments
To select the stamp function when the document is stored in
memory, see Fax Parameter No. 28.
Inside : Inside TX copy area.
Outside : Outside TX copy area.
No print : Header is not printed.
PROGRAMMING
YOUR MACHINE
008 HEADER FORMAT 1 Logo, ID No. Selecting the header format.
2From To
009 RCV'D TIME PRINT 1 Invalid Selecting whether the machine prints the received date & time,
2Valid
010 KEY/BUZZER VOLUME 1 Off Selecting the volume of the Key/Buzzer tone.
2Soft
3 Medium
4 Loud
012 CO MM. JOURNAL 1 Off Selecting the home position for the printing mode of the COMM.
2Always
3 Inc. Only
013 AUTO JOURNAL PRINT 1 Invalid Selecting whether the machine prints the journal automatically
2Valid
014 FILE ACCEPTANCE
REPORT
1 Invalid Selecting whether the machine prints the file acceptance journal.
2Valid
remote ID, percentage of reduction and page number on the
bottom of each received document.
Journal Off/Always/INC.
Off : Does not print
Always : Always prints
Inc. Only: When communication has failed.
after every 100 transactions.
If you set this parameter to valid, a report will print after the
document is stored into memory.
33
Page 36

PROGRAMMING YOUR MACHINE
06 RCV TO MEMORY
Customizing Your Machine
No. Parameter
017 RECEIVE MODE 1 Manual Setting the reception mode to automatic or manual.
022 SUBSTITUTE RCV 1 Invalid Selecting whether the machine receives to memory when the
024 PRINT REDUCTION 1 Fixed Selecting the print reduction mode.
025 REDUC TION RATIO 70 70% Selecting the fixed print reduction ratio from 70% to 100%. This
026 POLLING PASSWORD (----) Setting a 4-digit password for secured polling. (See page 77)
027 POLLED FILE SAVE 1 Invalid Selecting whether the machine retains the polled document(s) in
028 STAMP AT MEM. XMT 1 Invalid Selecting whether the machine stamps the originals when storing
Setting
Number
2Auto
2 Valid
2Auto
---- ----
100 100%
2 Valid
2 Valid
Setting Comments
recording paper runs out, toner runs out or the recording paper is
jammed.
Fixed: Reduce received document according to setting of
Parameter No. 25.
Auto: Reduce received document according to the length of
received originals.
parameter functions only when the fixed print reduction is selected
on Fax Parameter No. 24.
memory even after the document(s) is polled once.
into memory.
(depending on the Stamp setting on the Control Panel)
031 INCOMPLETE FILE
SAVE
033 XMT REDUCTION 1 Invalid Selecting whether the machine performs reduction when the
037 RCV TO MEMORY
042 CONF. POLLED FILE
SAVE
043 PASSWORD-XMT 1 Off Setting a 4-digit XMT-Password and selecting whether the
044 PASSWORD-RCV 1 Off Setting a 4-digit RCV-Password and selecting whether the
046 SELECT RCV 1 Invalid Selecting whether the machine performs selective reception. (See
1 Invalid Selecting whether the machine retains the document in m emor y if
2 Valid
2 Valid
(----)
1 Invalid Selecting whether the machine saves the confidential polled file
2 Valid
2On
2On
2 Valid
it is not successfully transmitted.
transmitting original is wider than the recording paper used at the
receiving machine.
Enter a 4-digit password for printing the received document(s) in
memory by using
06 RCV TO MEMORY
When is set to ON, this parameter
is not selectable on the LCD display. (See page 104)
even after the file is polled once.
machine performs and checks the XMT-Password of the receiving
station when transmitting. (See page 128)
machine performs and checks the RCV-Password of the
transmitting station when receiving. (See page 130)
page 125)
FUNCTION
.
SELECT MODE
052 DIAGNOSTIC
34
PASSWORD
(----)
Setting the password for Remote Diagnostic Mode. Please ask
your Panasonic Aut horized Dealer for details.
Page 37

Customizing Your Machine
PROGRAMMING YOUR MACHINE
No. Parameter
053 SUB-ADDRESS
PASSWORD
056 COVER SHEET 1 Off Setting the home position for the Cover Sheet parameter in the
063 PC-FAX RCV MODE
[See Note 2]
077 DEPARTMENT CODE 1 Invalid Selecting whether the machine performs the Multiple Logo or
078 ROTATION XMT 1 Invalid Selecting whether the machine performs rotation transmission.
082 QUICK MEMORY XMT 1 Invalid Selecting whether the machine performs Quick Memory
Setting
Number
2On
1 Print Selecting how the machine will execute the receiving Fax
2 Upload & Print
3 Upload
2Valid
2Valid
2Valid
Setting Comments
(----)
Setting a 20-digit password for secured sub-address
communication.
Select Mode. (See page 106)
document(s).
Print : Print the received document(s).
Upload & Print : Print the received document(s) and upload it’s
file.
Upload :Upload the received document file.
Department Code operation. (See page 109)
Transmission. (See page 44 to 47)
Invalid: Stores all documents into m emory first before dialling the
telephone number.
Valid: Starts dialling the telephone number immediately after
storing the first page.
PROGRAMMING
YOUR MACHINE
085 RCV OUTPUT TRAY 1 Inner 1 Selecting the Output Tray home position for received document(s).
2 I nner 2
3 Outer
086 RINGER VOLUME 1 Off Setting the home position of the ringer volume when your machine
2Soft
3 Medium
4 Loud
088 LINE SELECTION
[See Note 3]
089 LIST OUTPUT TRAY 1 Inner 1 Selecting the Output Tray home position for List printout.
095 DUPLEX PRINT 1 Invalid Selecting whether the machine performs duplex print.
1 Auto Setting the home position for the Telephone Line selection.
2 Line 1
3 Line 2
2 I nner 2
3 Outer
2Valid
Inner 1 : Received document(s) exit to the Bottom Output Tray.
Inner 2 : Received document(s) exit to the Upper Output Tray
(Blue).
receives a call.
Auto: Selects the available telephone line for transmission
automatically.
Line 1: Selects this as the default telephone line, unless manually
selecting an alternate phone line.
Line 2: Selects this as the default telephone line, unless manually
selecting an alternate phone line.
Inner 1 : The List printout exits to the Bottom Output Tray.
Inner 2 : The List printout exits to the Upper Output Tray (Blue).
35
Page 38

PROGRAMMING YOUR MACHINE
Customizing Your Machine
No. Parameter
097 SPECIAL TRAY
No.1 - 3
099 MEMORY SIZE
(Flash Memory)
(see Note 1)
(see Note 2)
(see Note 3)
Setting
Number
1 None Select up to 3 Special Trays that will not be used for printing
2 Tray 1
3 Tray 2
4 Tray 3
5 Tray 4
- - Displays the amount of base and optional memory installed.
Setting Comments
received faxes.
(You can specify one Tray (1 ~ 4) for each selection No. 1, No. 2
and/or No. 3)
(Base Memory + Optional Memory)
36
NOTE
1. The standard settings are printed on the Fax Parameter List. To print out Fax Parameter List, see page 164.
2. This parameter is available only when the Parallel Port Interface Option is installed.
3. This parameter is available only when the G3 Communication Port Option is installed.
Page 39

Basic Operations
Loading Originals
How To Load Originals
1. On the ADF / Inverting ADF 2. On the Platen Glass
Face Up
Original Size
Guide
• Place the ori ginal (s) Face Up on the ADF until the
leading edge placed into the machine stops.
Sending Non-Standard Size Originals
When transmitting non-standard size
document(s), the machine may perform
Rotate Transmission automatically and not
transmit the portion of the document that
exceeds the standard size ("P" portion).
Face Down
• Place a book or an original Face Down on the
Platen Glass, alignin g it with the arrow mar k on
the original size guides.
Rotation XMT
P
The part which
Direction
protrudes from the
Fixed size is not sent.
Original Size
Guide
BASIC
OPERATIONS
Flatbed Scanning
When a book or an original is placed on the Platen Glass, the message “ANOTHER ORIGINAL?” is shown
on the LCD display when is pressed and the scanning is completed.
• If you wish to store another page, press and place another original, then press .
NO
• If is pressed, the machine starts to dial the telephone number.
(see Note 1)
START
YES
START
NOTE
1. When an oversized original is sent to another machine, sometimes, it is reduced in accordance with the other
party’s recording paper size.
EX:
A3 size A4 size
37
Page 40

BASIC OPERATIONS
Basic Transmission Set tin gs
You can temporarily change the transmission settings either before or after you place the original on the ADF.
These settings are as follows:
• Contrast • Communication Journal
• Resolution • Duplex Scan
• Original (Text/Photo) • Cover Sheet
• Stamp • Password-XMT
After the document(s) have been sent, your machine will automatically return to the preset settings.
Contrast (see Note 1)
Your machine is preset to
setting to
Lighter
. If you wish to send a original with darker contrast, change the setting to
Normal
contrast. If you wish to send an original with l ighter contrast, change t he
Darker
DarkerNormalLighter
.
LIGHTER DARKER
Resolution (see Note 2)
Your machine is pres et to Stand ard resolu tion, whic h is suitable for most or iginals. If you want to send it wi th
more detail, change the setting to Fine or Super-Fine.
for standard originals
STD
for detailed originals
38
FINE
for finer detailed originals
S-FINE
(see Note 3)
NOTE
1. To change the preset Contrast position, change the setting of Fax Parameter No. 001. (See page 33)
2. To change the preset Resolution position, change the setting of Fax Parameter No. 002. (See page 33)
3. If you send a photographic original with gray tones, set the Resolution to Fine or S-Fine (406 x 391 dpi) and the
Original setting to Text/Photo or Photo. The reproduction of the received document will be determined by the
capability of the remote station.
Page 41

BASIC OPERATIONS
Basic Transmi ssion Settings
Original (Text/Photo)
The Original setting is useful when sending photographs or illustrations with gray tones. Your machine is
preset to "TEXT". You can select either "TEXT/PHOTO" or "PHOTO" mode.
for text only originals
TEXT
for text and photo originals
TEXT/PHOTO
for photo or illustration originals
PHOTO
BASIC
OPERATIONS
Verification Stamp (see Note 1) (see Note 2)
The Verification Stamp helps you to confirm successful transmissions by stamping the bottom of each
successfully transmitted page with a small mark.
You can temporarily change the stamp setting to either "Off" or "On" by using the Sel ect Mode (
SELECT MODE
01 STAMP
).
FUNCTION
NOTE
1. When you store document(s) into memory, the Verification Stamp will stamp on the original if it is successfully
stored into mem ory. In thi s ca se th e Verifi catio n Stam p is not a confi rma tion t hat the docu ment was succ essf ully
transmitted. If you wish to disable the use of the Verification Stamp when storing document(s) into memory,
change the setting of Fax Parameter No. 028. (See page 34)
2. To change the preset Verification Stamp setting, change the Fax Parameter No. 004. (See page 33)
39
Page 42

BASIC OPERATIONS
Basic Transmission Set tin gs
Communication Journal (Comm. Journal)
A Communication Jour nal lets you verify if the transmission was successful. You can select the condition to
print the Communication Journal as follows.
When COMM. JOURNAL =
When COMM. JOURNAL =
When COMM. JOURNAL =
Make sure that the FAX lamp is ON. If not, press to select the "FAX MODE".
1
OFF
ON
INC.
: a Communication Journal will not print.
: a Communication Journal will print automatically after
every communication.
: a Communication Journal will print only if the
communication has failed.
SELECT A FUNCTION
DEFERRED COMM.
ADVANCED COMM.
EDIT FILE MODE
SET MODE
POLLING
SELECT MODE
PRINT OUT
EDIT PHONE BOOK
40
2
SET MODE 04 FAX PARAMETERS
FAX PARAMETERS
SELECT A FUNCTION
001 CONTRAST (HOME)
002 RESOLUTION (HOME)
003 ORIGINAL (HOME)
004 STAMP
005 MEMORY
01/20
CANCEL O K
Page 43

Basic Transmi ssion Settings
BASIC OPERATIONS
3
4
5
Press or to scroll the display to the desired
Fax Par ameter.
012 COMM. JOURNAL
Select the desired setting.
OK
012 COMM. JOURNAL
OFF INC.ONLYALWAYS
CANCEL O K
BASIC
OPERATIONS
41
Page 44

BASIC OPERATIONS
Sending Documents
You can choose either Memory or Direct Transmission.
Use Memory Transmission if:
• You want to send the document(s) to multiple stations.
• You have to retrieve the original immediately.
• You want to take advantage of Multi-Tasking function.
• You want to take advantage of Batch Transmission.
Use Direct Transmission if:
• The memory is full.
• You want to send the document(s) immediately.
Use Voice Mode Transmission if:
• You want to send the document(s) after talking with the other party first.
• You want to send the document(s) after listening to a voice prompting.
Memory Transmission
Your machine quickly stores the document(s) into the machine's memory.
Then, starts to dial the telephone number.
If the transmission fails, your machine will re-transmit the remaining unsuccessful page(s) automatically.
1
Store document(s)
in memory
2
Transmit Receive
A
Destination A
Destination B
3
A
A
42
Page 45

Sending Docu m en ts
(see Note 1) (see Note 2) (see Note 3) (see Note 4) (see Note 5)
NOTE
1. While storing the File Number of the document(s) being stored is shown at the upper right corner of the display.
It is also printed on the Communication Journal (COMM. JO URNAL), Transaction Journal and File List. The
percentage of memory used is shown on the lower right corner of the display after each page is stored.
2. If memory overflow occurs while storing the document(s), the page will be ejected. The machine will show
"MEMORY FULL" on the display. You will need to reload the last page that was ejected back on the ADF and
send the remaining document(s) again when the memory becomes available.
If Fax Parameter No. 082 (Quick Memory XMT) is set to "Invalid", the machine stores all the document(s) into
memory first before transmitting.
After storing each document, the machine checks the available memory to prevent memory overflow and stops
storing additional documents if the stored data approaches a certain percentage* (around 80%).
Then the mach ine dials an d sends th e memory sto red docu ment(s) first and co ntinu es the tran smission of the
remaining document(s) from the ADF during the same phone call.
If transmitting to multiple stations or if memory overflows while storing a document, the machine prompts you
whether to transmit the successfully stored documents or to cancell the transmission. Press to cancell or
press to transmit.
For image memory capacity, see the Specifications page. (See page 173)
If no action is taken within 10 seconds, the machine will start transmitting the stored documents.
* The percentage varies and is dependent on t he type of docume nts you are storing , machine setti ngs or whether
an optional memory card is installed.
2
BASIC OPERATIONS
MEMORY XMT NO.026
PAGE 01 00%
5551234
MEMORY XMT
MEMORY FULL
1
BASIC
OPERATIONS
3. An Information Code will be displayed if the transmission has failed or no answer at the receiving side after the
last automatic redial.
The document(s) stored for this transmission will be erased from the memory automatically and an information
code is printed for the transmission on the Communication Journal (COMM. JOURNAL).
If you need to ret ain th e inc om pl ete do cu me nt(s ) e ve n a fte r th e las t redial, change Fax Param et er N o . 0 31 (INC .
FILE SAVE) to "Valid" in advance. (See page 34) To retry the incomplete document(s), refer to page 99.
4. To stop the transmission, pre s s .
The displa y shows:
STOP
MEMORY XMT NO.020
COMMUNICATION STOP ?
1:YES 2:NO
Press to stop the transmission. The document(s) you stored will be erased automatically.
If you do not want to erase the document(s), change the setting of Fax Parameter No. 031 (INC. FILE SAVE) to
"Valid" in advance. (See page 34)
Then the fol lo wing display will appear and y ou can s elect w hethe r to sa v e th e file as an incom plete fi le f or ed iting
and/or retry later, or delete the file manually.
1
MEMORY XMT NO.020
SAVE AS INCOMP. FILE?
1:YES 2:NO
5. If you would like to print a Communication Journal (COMM. JOURNAL) after stopping a transmission, press
when the display shows:
MEMORY XMT NO.020
1
PRINT COMM. JOURNAL?
1:YES 2:NO
43
Page 46

BASIC OPERATIONS
Sending Documents
Manual Number Dialling
To dial the telephone number manually, follow the steps below.
Make sure that the FAX lamp is ON. If not, press to select the "FAX MODE".
1
1
2
a
Place original(s) face up on the ADF.
or
b
Place a book or an original face down on the Platen
Glass.
Enter a telephone number from the keypad.
(up to 36 digits)
You can also designate more than one destination.
Ex:
5 5 5 1 2 3
• If your machine does have the 2nd G3 Fax
Communication Port Kit installed, the machine will
automatically select the available telephone line for
transmission (indicated by "AUTO" on the LCD display).
If you wish, you can change which telephone line the
machine should use by selecting Li ne-1 or Line-2 with
the key on the Control Panel.
LINE SELECT
4
15-AUG-2001 15:00
READY TO FAX
ORIGINAL SET
AMERICA ASIA CHINA
AFRICA BERLIN
ANTARCTICA BRAZIL
APOLLO
JOB
STATUS
AMERICA ASIA CHINA
AFRICA BERLIN
ANTARCTICA BRAZIL
APOLLO CANADA
JOB
STATUS
CANADA
MEMORY XMT
XMT MODE ORIGINAL
MEMORY XMT STN(S):0000
5551234_
AUTO
MEMORY XMT
XMT MODE ORIGINAL
LIGHTER DARKER
LIGHTER DARKER
1/1
Note 4
1/1
44
3
The document(s) begin to store into memory with a file
number.
Then star t s d ial li ng the te le pho ne numb er imm edi ate ly
after storing the first page. (See Note 3)
The remaining page(s) continue to store into
memory.
MEMORY XMT NO.026
PAGE 01 00%
5551234
AMERICA ASIA CHINA
AFRICA BERLIN
ANTARCTICA BRAZIL
APOLLO CANADA
MEMORY XMT
JOB
STATUS
XMT MODE ORIGINAL
LIGHTER DARKER
1/1
Page 47

Sending Docu m en ts
(see Note 1)
(see Note 2)
(see Note 3)
(see Note 4)
BASIC OPERATIONS
BASIC
OPERATIONS
NOTE
1. If you want to spec ify two or m ore desti nations, after completing the full telephon e number so you c an
select another destination.
2. If you need a special access number to get an outside line, dial it first then press to enter a pause
(represented by a "-") before dialling the full number.
Ex
: 9 PAUSE 5551234
3. This feature is called “Quick Memory Transmission”. If you wish to store All the original(s) into memory first
before transmitting, change the Fax Parameter No. 082 (QUICK MEMORY XMT) to “ Invalid”. (See page 35)
4. This field (AUTO, Line-1 or Line-2) appears only when the 2nd G3 Fax Communication Port Kit is installed.
SET
PAUSE
45
Page 48

BASIC OPERATIONS
Sending Documents
Phone Book Dialling
Phone Book dialling allows you to dial a full telephone number by pressing a key name that was preprogrammed in the Phone Book. If you want to send the same document(s) to multiple stations, you can save
time in feeding the document( s) by using memor y transmission. That i s, you can store the documen t(s) into
memory and then send it to the desired station(s) automatically.
Make sure that the FAX lamp is ON. If not, press to select the "FAX MODE".
1
1
2
3
a
Place original(s) face up on the ADF.
or
b
Place a book or an original face down on the Platen
Glass.
XMT MODE
Make sure that "MEMORY XMT" is displayed, if
"DIRECT XMT" appears, press to
change to Memory Transmission.
Press the appropriate Index key.
Ex:
PQRS
XMT MODE
15-AUG-2001 15:00
READY TO FAX
ORIGINAL SET
AMERICA ASIA CHINA
AFRICA BERLIN
ANTARCTICA BRAZIL
APOLLO
JOB
STATUS
CANADA
MEMORY XMT
XMT MODE ORIGINAL
15-AUG-2001 15:00 00%
READY TO FAX
ORIGINAL SET
LIGHTER DARKER
1/1
46
4
Press the key name for the desired station.
Ex:
PANASONIC
PANASONIC
SALES DEPT
MEMORY XMT
JOB
STATUS
XMT MODE ORIGINAL
MEMORY XMT
PANASONIC
5551234
PANASONIC
SALES DEPT
MEMORY XMT
JOB
STATUS
XMT MODE ORIGINAL
1/1
LIGHTER DARKER
1/1
LIGHTER DARKER
Page 49

Sending Docu m en ts
If the key name for the station that you want to send to
5
is not displayed on the LCD, press or to scroll
to the desired display page.
You can select multiple destinations (up to 270).
(Manual Number Dialling: 70 stations, Phone Book
Dialling: 200 stations)
6
The original(s) begin to store into memory with a file
number.
The machine starts dialling the telephone number
immediately after storing the first page. (See Note 1)
The remaining page(s) continue to store into
memory.
BASIC OPERATIONS
BASIC
OPERATIONS
(see Note 1)
NOTE
1. This feature is called “Quick Memory Tran smission”. If you wish to store All the document(s) into memory first
before transmitting, change the Fax Parameter No. 082 (QUICK MEMORY XMT) to “ Invalid”. (See page 35)
47
Page 50

BASIC OPERATIONS
Sending Documents
Direct Transmission
If your machine's memory is full or you wish to send the document(s) immediately, use Direct Transmission.
Manual Number Dialling (Direct Transmission)
To dial the telephone number manually, follow the steps below.
Make sure that the FAX lamp is ON. If not, press to select the "FAX MODE".
1
1
2
a
Place original(s) face up on the ADF.
or
b
Place a book or an original face down on the Platen
Glass.
XMT MODE
Make sure that "DIRECT XMT" is displayed, if
"MEMORY XMT" appears, press to
change to Direct Transmission.
XMT MODE
15-AUG-2001 15:00
READY TO FAX
ORIGINAL SET
AMERICA ASIA CHINA
AFRICA BERLIN
ANTARCTICA BRAZIL
APOLLO
JOB
STATUS
AMERICA ASIA CHINA
AFRICA BERLIN
ANTARCTICA BRAZIL
APOLLO CANADA
JOB
STATUS
CANADA
MEMORY XMT
XMT MODE ORIGINAL
15-AUG-2001 15:00 00%
READY TO FAX
ORIGINAL SET
DIRECT XMT
XMT MODE ORIGINAL
LIGHTER DARKER
LIGHTER DARKER
1/1
1/1
48
3
Enter a telephone number from the keypad or
select a station from the Phone Book.
Ex:
5 5 5 1 2 3
4
Page 51

Sending Docu m en ts
BASIC OPERATIONS
4
Your machine starts to dial the telephone number.
(see Note 1) (see Note 2)
DIRECT COMM. NO.027
DIALING
5551234
AMERICA ASIA CHINA
AFRICA BERLIN
ANTARCTICA BRAZIL
APOLLO CANADA
DIRECT XMT
JOB
STATUS
XMT MODE ORIGINAL
LIGHTER DARKER
1/1
BASIC
OPERATIONS
NOTE
1. If you need a special access number to get an outside line, dial it first then press to enter a pause
(represented by a "-") before dialling the full number.
Ex
: 9 PAUSE 5551234
2. To stop the transmission, press .
The display shows:
Press to stop the transmission. The Communication Journal will not print regardless of the printout mode
setting of the Communication Journal.
1
STOP
PAUSE
DIRECT COMM. NO.027
COMMUNICATION STOP?
1:YES 2:NO
49
Page 52

BASIC OPERATIONS
Sending Documents
Rotated Transmission
Letter or A4 Origi nal (s) are plac ed in a Portrait( ) direction, the doc um ent( s) w il l be ro tat ed by 90° and then
transmitted in a Landscape ( ) di recti on . Th e document(s) will be prin ted th e s ame si ze as the transm itt ed
originals at the Receiving Station.
→
Rotation XMT Fax Parameter set to:
• Invalid
Letter or A4 Original Receiving Station:
•Valid
Letter or A4 Original
→
Letter or A4 Paper
Sends with
70% reduction
Receiving Station:
Letter or A4 Paper
Sends with Rotated
Transmission
Double-Sided Transmission (Receiving)
This machine has duplex SCAN & PRINT capabilities. (see Note 1) (see Note 2)
Duplex Scan Select Mode set to:
•Duplex Scan = ON
Duplex Scan
DP-2500/3000
Duplex Print Fax Parameter set to:
• Duplex Print = Valid
Sending Station
Receiving Station
Duplex Print
DP-2500/3000
50
NOTE
1. Rotat ion XMT requir es the use of Memory Transmi ssion.
2. Verification Stamp is is disabled during Duplex Scan.
Page 53

BASIC OPERATIONS
Sending Docu m en ts
Setting the Rotation XMT
Make sure that the FAX lamp is ON. If not, press to select the "FAX MODE".
1
2
SET MODE 04 FAX PARAMETERS
SELECT A FUNCTION
DEFERRED COMM.
ADVANCED COMM.
EDIT FILE MODE
SET MODE
FAX PARAMETERS
SELECT A FUNCTION
001 CONTRAST (HOME)
002 RESOLUTION (HOME)
003 ORIGINAL (HOME)
004 STAMP
005 MEMORY
01/20
POLLING
SELECT MODE
PRINT OUT
EDIT PHONE BOOK
CANCEL O K
BASIC
OPERATIONS
3
Press or to scroll the display to the desired
Fax Par ameter.
078 ROTATION XMT
078 ROTATION XMT
INVALID VALID
CANCEL O K
51
Page 54

BASIC OPERATIONS
Sending Documents
4
5
VALID
OK
078 ROTATION XMT
INVALID VALID
CANCEL O K
52
Page 55

BASIC OPERATIONS
Sending Docu m en ts
Duplex Scan
Sending Document(s) Using Duplex Scan
Make sure that the FAX lamp is ON. If not, press to select the "FAX MODE".
1
Place original(s) on the ADF.
2
3
SELECT MODE 03 DUPLEX SCAN
SELECT A FUNCTION
DEFERRED COMM.
ADVANCED COMM.
EDIT FILE MODE
SET MODE
DUPLEX SCAN
SELECT A FUNCTION
OFF ON
POLLING
SELECT MODE
PRINT OUT
EDIT PHONE BOOK
CANCEL O K
BASIC
OPERATIONS
53
Page 56

BASIC OPERATIONS
Sending Documents
4
5
6
ON
Dial by any combination of the following methods:
OK
• Manual Number Dialling, press after
each station is entered.
(Up to 70 stations)
• Phone Book Dialling. (Up to 200 stations)
SET
15-AUG-2001 15:00 00%
READY TO FAX
ORIGINAL SET
AMERICA ASIA CHINA
AFRICA BERLIN
ANTARCTICA BRAZIL
APOLLO CANADA
DIRECT XMT
JOB
STATUS
XMT MODE ORIGINAL
LIGHTER DARKER
1/1
(see Note 1) (see Note 2)
NOTE
1. The Duplex Scan function will reset back to OFF after the communication is completed.
2. Duplex Scan is only available with the inverting ADF option.
54
Page 57

BASIC OPERATIONS
Sending Docu m en ts
Setting Duplex Print
Make sure that the FAX lamp is ON. If not, press to select the "FAX MODE".
1
2
SET MODE 04 FAX PARAMETERS
SELECT A FUNCTION
DEFERRED COMM.
ADVANCED COMM.
EDIT FILE MODE
SET MODE
FAX PARAMETERS
SELECT A FUNCTION
001 CONTRAST (HOME)
002 RESOLUTION (HOME)
003 ORIGINAL (HOME)
004 STAMP
005 MEMORY
01/20
POLLING
SELECT MODE
PRINT OUT
EDIT PHONE BOOK
CANCEL O K
BASIC
OPERATIONS
3
Press or to scroll the display to the desired
Fax Par ameter.
095 DUPLEX PRINT
095 DUPLEX PRINT
INVALID VALID
CANCEL O K
55
Page 58

BASIC OPERATIONS
Sending Documents
4
5
VALID
OK
095 DUPLEX PRINT
INVALID VALID
CANCEL O K
56
Page 59

BASIC OPERATIONS
Sending Docu m en ts
Voice Mode Transmission
If you wish to send the document(s) after talking with other party first, use Voice Mode Transmission. Your
machine requires an optional fax handset or an external telephone.
Off-Hook Dialling
For Off-Hook Dialling, follow the steps below.
Make sure that the FAX lamp is ON. If not, press to select the "FAX MODE".
1
a
Place original(s) face up on the ADF.
or
BASIC
OPERATIONS
1
b
Place a book or an original face down on the Platen
Glass.
Lift or the external telephone and dial the telephone
2
3
(see Note 1) (see Note 2)
number from the keypad or use Phone Book
Dialling.
Ex:
5 5 5 1 2 3
When you hear the voice of the other party, tell the
other party to prepare to receive a document(s).
Then, when you hear a beep,
and hang up the handset.
4
XMT
ON LINE
AMERICA ASIA CHINA
AFRICA BERLIN
ANTARCTICA BRAZIL
APOLLO CANADA
MEMORY XMT
JOB
STATUS
XMT MODE ORIGINAL
LIGHTER DARKER
1/1
NOTE
1. To stop the transmission, press .
The display shows:
Press to stop the transmission. The Communication Journal will not print regardless of the printout mode
setting of the Communication Journal.
2. The Second Telephone Line (Line-2) is not available for Off-Hook Dialling.
1
STOP
MEMORY XMT NO.020
COMMUNICATION STOP ?
1:YES 2:NO
57
Page 60

BASIC OPERATIONS
Sending Documents
On-Hook Dialling
For On-Hook Dialling, follow the steps below.
1
a
Place original(s) face up on the ADF.
or
1
b
Place a book or an original face down on the Platen
Glass.
2
3
You will hear dial tone through the monitor speaker.
Dial the telephone number from the keypad.
Ex:
5 5 5 1 2 3
4
15-AUG-2001 15:00 00%
MONITOR
AMERICA ASIA CHINA
AFRICA BERLIN
ANTARCTICA BRAZIL
APOLLO CANADA
MEMORY XMT
JOB
STATUS
XMT MODE ORIGINAL
LIGHTER DARKER
1/1
58
Page 61

Sending Docu m en ts
When you hear a beep,
4
(see Note 1) (see Note 2)
BASIC OPERATIONS
BASIC
OPERATIONS
NOTE
1. If you need a special access number to get an outside line, dial it first then press to enter a pause
(represented by a "-") before dialling the full number.
Ex
: 9 PAUSE 5551234
2. The Second Telephone Line (Line-2) is not available for On-Hook Dialling.
PAUSE
59
Page 62

BASIC OPERATIONS
Sending Documents
Transmission Reservation
You can do the following while sending document(s) from memory or receiving document(s).
• Reserve the next transmission into memory. (Up to 50 different files)
• Reserve a priority transmission.
Memory Transmission Reservation (Multi-Tasking)
If your machine is on-line busy transmittin g from memory, receiving or printing received documen ts, you can
reserve a transmission by the following procedure.
Your machine is on-line, the ON LINE lamp is
1
blinking or printing received documents.
2
2
3
a
Place original(s) face up on the ADF.
or
b
Place a book or an original face down on the Platen
Glass.
XMT MODE
Make sure that "MEMORY XMT" is displayed, if
"DIRECT XMT" appears, press to
change to Memory Transmission.
XMT MODE
15-AUG-2001 15:00 00%
READY TO FAX
ORIGINAL SET
AMERICA ASIA CHINA
AFRICA BERLIN
ANTARCTICA BRAZIL
APOLLO CANADA
DIRECT XMT
JOB
STATUS
XMT MODE ORIGINAL
15-AUG-2001 15:00 00%
READY TO FAX
ORIGINAL SET
AMERICA ASIA CHINA
AFRICA BERLIN
ANTARCTICA BRAZIL
APOLLO CANADA
MEMORY XMT
JOB
STATUS
XMT MODE ORIGINAL
LIGHTER DARKER
LIGHTER DARKER
1/1
1/1
60
4
Dial by any combination of the following methods:
• Manual Number Dialling, press after
each station is entered.
(Up to 70 stations)
• Phone Book Dialling. (Up to 200 stations)
SET
Page 63

Sending Docu m en ts
5
Your machine will store the document(s) into
memory.
(see Note 1) (see Note 2)
BASIC OPERATIONS
BASIC
OPERATIONS
NOTE
1. To cancell the memory transmission reservation, see page 93.
2. If the same station has been reserved with different files, the files will be combined and executed in a single
transmission (Batch Transmission). (See page 71)
61
Page 64

BASIC OPERATIONS
Sending Documents
Direct Transmission Reservation (Priority Transmission Reservation)
If you are in a rush to send an urgent document, however there are many files in the memor y, u se Direct
Transmission Reser vation to send the urge nt document. The urge nt document will be se nt immediately after
the current communication is finished.
Note that you cannot send document(s) to multiple stations.
To reserve your machine for sending the urgent documents
Your machine is on-line, the ON LINE lamp is
1
blinking or printing received documents.
2
2
3
a
Place original(s) face up on the ADF.
or
b
Place a book or an original face down on the Platen
Glass.
XMT MODE
Make sure that "DIRECT XMT" is displayed, if
"MEMORY XMT" appears, press to
change to Direct Transmission.
XMT MODE
15-AUG-2001 15:00 00%
READY TO FAX
ORIGINAL SET
AMERICA ASIA CHINA
AFRICA BERLIN
ANTARCTICA BRAZIL
APOLLO CANADA
MEMORY XMT
JOB
STATUS
XMT MODE ORIGINAL
15-AUG-2001 15:00 00%
READY TO FAX
ORIGINAL SET
AMERICA ASIA CHINA
AFRICA BERLIN
ANTARCTICA BRAZIL
APOLLO CANADA
DIRECT XMT
JOB
STATUS
XMT MODE ORIGINAL
LIGHTER DARKER
LIGHTER DARKER
1/1
1/1
62
Page 65

Sending Docu m en ts
Dial by using any one of the following methods:
4
To cancell the direct transmission reservation
• Manual Number Dialling and press
• Phone Book Dialling
(For details, see pages 44 to 47.)
Ex:555 1234
You can make reservation to send an urgent
document to a single station only.
A message “DIRECT XMT RESERVED” will be
shown on the display.
BASIC OPERATIONS
START
1
2
3
Make sure that the document is on the ADF.
and then remove the original from ADF.
DIRECT COMM. NO.013
WAIT TO DIAL
SALES DEPT
SALES DEPT
MEMORY XMT
JOB
STATUS
XMT MODE ORIGINAL
DIRECT COMM. NO.013
COMMUNICATION STOP ?
1:YES 2:NO
SALES DEPT
MEMORY XMT
JOB
STATUS
XMT MODE ORIGINAL
LIGHTER DARKER
LIGHTER DARKER
1/1
1/1
BASIC
OPERATIONS
63
Page 66

BASIC OPERATIONS
REDIAL
REDIAL
Sending Documents
Redialling
Automatic Redialling
If a busy line is detected, the mach ine will redial the number up to 3
times at 3 minute inter val. However, if a busy line is not detected , the
machine will redial only one time. During that time, a message will
appear as shown to the right.
A file number is shown in the upper right hand corner of the display if it
is a memory transmission file.
Manual Redialling (see Note 1)
You can also redial the last dialled number manually by pressing key.
MEMORY XMT NO.014
WAIT TO DIAL
SALES DEPT
AMERICA ASIA CHINA
AFRICA BERLIN
ANTARCTICA BRAZIL
APOLLO CANADA
MEMORY XMT
JOB
STATUS
XMT MODE ORIGINAL
LIGHTER DARKER
1/1
1
2
3
4
Set original(s) face down.
XMT MODE
Make sure that "MEMORY XMT" is displayed, if
"DIRECT XMT" appears, press to
change to Memory Transmission.
XMT MODE
MEMORY XMT STN(S):0000
9 555 1234_
AMERICA ASIA CHINA
AFRICA BERLIN
ANTARCTICA BRAZIL
APOLLO CANADA
MEMORY XMT
JOB
STATUS
XMT MODE ORIGINAL
LIGHTER DARKER
1/1
64
The document(s) are stored into memory with a file
number. Then the machine dials the last dialled
number.
NOTE
1. While the unit is displaying "WAIT TO DIAL", you can press
to start redialling immediately.
Page 67

BASIC OPERATIONS
Receiving Documents
Your machine is provided wit h both automatic and manual recep tion modes. The selection of either r eception
mode is made with Fax Parameter No. 017 (RECEIVE MODE).
Automatic Reception
Your machine will rec eive documets automatically if the Fax Parameter No. 017 (RECEIVE MODE) is set to
“Auto”. (See page 34)
Manual Reception
You may wish to receive documents manually if you use the telephone line in your office primarily as a
personal telephone and occasionally for your facsimile machine.
To receive documents manually, change the Fax Par ameter No. 017 (RECEIVE MODE) to “Manual” (See page
34) and the following message will be shown on the display.
15-AUG-2001 15:00 00%
READY TO FAX
MANUAL RCV
AMERICA ASIA CHINA
AFRICA BERLIN
ANTARCTICA BRAZIL
APOLLO CANADA
MEMORY XMT
JOB
STATUS
XMT MODE ORIGINAL
LIGHTER DARKER
1/1
BASIC
OPERATIONS
65
Page 68

BASIC OPERATIONS
Receiving Documents
To receive documents manually
1
2
3
When the telephone rings, lift the handset.
(See Note 1)
If you hear a beep, the sound tells you that
someone wants to send a document(s).
Remove any documents from the ADF.
Your machine starts receiving the document(s).
15-AUG-2001 17:49 00%
READY TO FAX
PHONE OFF HOOK
AMERICA ASIA CHINA
AFRICA BERLIN
ANTARCTICA BRAZIL
APOLLO CANADA
MEMORY XMT
JOB
STATUS
XMT MODE ORIGINAL
RCV
ON LINE
AMERICA ASIA CHINA
AFRICA BERLIN
ANTARCTICA BRAZIL
APOLLO CANADA
MEMORY XMT
JOB
STATUS
XMT MODE ORIGINAL
LIGHTER DARKER
LIGHTER DARKER
1/1
1/1
4
(see Note 1) (see Note 2)
R
NOTE
1. Your machine requires an optional fax handset or an external telephone connected to the TEL jack on the rear
of the machine.
2. If you receive a document in Super Fine resolution (406 x 391 dpi), it might be divided into multiple pages with
no reduction.
66
Hang up the telephone.
Page 69

BASIC OPERATIONS
Receiving Documents
Print Reduction
This machine can us e each Fixed size plain paper for recording. So metimes, oversized documents sent to
you by the other par ties cannot be printed within a single page. When this occurs, the document will be
divided into separate pages.
This machine is eq uipped with a Print Reduction func tion to solve this problem. Yo u may select the mos t
appropriate setting from the selections described below.
1.Automatic Reduction
Each received document is first stored in memory. Based on the document length, your machine will
automatically calculate a sui table reduction ratio (Lett er & A4: 70% to 100%, Ledger & A 3: 80% to 100%) to
print the en tire d oc ume nt o n a s ing le pag e. If the r eceived doc ume nt i s extremely l ong (over 39% longe r than
the recording paper), the original will be divided into separate pages and will print without reduction.
2. Fixed Reduction
You can pre-deter mine the reduc tion ratio from 70% to 100% in 1 % steps. The received document( s) will be
reduced to the fixed ratio regardless of size.
BASIC
OPERATIONS
Selecting the Print Reduction Mode
Set the Fax Parameters as shown below. (See page 34)
1. To set the Automatic Reduction mode.
(1) No. 024 Print Reduction set to “Auto”.
2. To set the Fixed Reduction mode.
(1) No. 024 Print Reduction set to “Fixed”.
(2) No. 025 Reduction Ratio set to any number between 70% through 100%. (See Note 1)
EX:
A4 to A4 - 96%
A4 to Letter - 90%
Letter to Letter - 96%
Legal to Letter - 75%
(see Note 1)
NOTE
1. If the sending side is s et to p rint th e hea der on the o utside of th e cop y area , more re ductio n r atio wi ll be require d.
67
Page 70

BASIC OPERATIONS
Receiving Documents
Receiving Oversize Documents
If the received document is extremely long ( over 39% longer than the rec ording paper), th e document wi ll be
divided into separate pages. When printing on separate pages, the bottom 13 mm of first page will be
overlapped on top of the next page.
(see Note 1)
Transmitted Document Received Document
Overlap print
13 mm
The received document is divided
into two sheets with overlap printing.
NOTE
1. If the reduction method is set to A utom atic Reducti on mod e, the d ocum ent prin ts wi th no re duction w hen p rinting
separate pages. If the reduction method i s se t to F ix ed R edu cti on m ode , t he printed document is reduced by the
ratio set in Fax Parameter No. 025.
68
Page 71

BASIC OPERATIONS
Receiving Documents
Substitute Memory Reception (see Note 1) (see Note 2)
If the recording paper runs out or jams or if the toner r uns out during reception, the mach ine automatically
starts receiving documents into its i mage data memory. Stored documents are pr inted automatically after
replacing the recording paper or the toner cartridge. (See Note 1 and 2)
1
2
When the machine fini shes the memory recepti on
and there is no recording paper or toner, add Paper
or Out of Toner Indicator appears on the display.
Install the recording paper or replace the toner
cartridge.
The machine will automatically start printing the
document(s) stored in the memory.
15-AUG-2001 15:00 01%
READY TO FAX
MESSAGE IN MEMORY
AMERICA ASIA CHINA
AFRICA BERLIN
ANTARCTICA BRAZIL
APOLLO CANADA
MEMORY XMT
JOB
STATUS
XMT MODE ORIGINAL
MEMORY RCV`D DOC
PRINTING
AMERICA ASIA CHINA
AFRICA BERLIN
ANTARCTICA BRAZIL
APOLLO CANADA
MEMORY XMT
JOB
STATUS
XMT MODE ORIGINAL
LIGHTER DARKER
LIGHTER DARKER
1/1
1/1
BASIC
OPERATIONS
NOTE
1. If the memory overflows, the machine will stop receiving and release the communication line.
The document(s) stored in the memory up to that moment will be printed.
2. If you wish to turn off th e subs titute recepti on func tion, cha nge the s etting of F ax Paramete r No. 0 22 to "In valid ".
(See page 34)
69
Page 72

BASIC OPERATIONS
This page is intentionally left blank.
70
Page 73

Advanced Features
Batch Transmission
To reduce transmiss io n tim e and cos t, thi s feature allows your machine to accu mulate different documents for the
same destination(s) to be transmitted in a single phone call.
Real-Time Batch Transmission
During memory transmission, your machine searches its memory for reserved files (up to 5 files) to transmit to
the same destination, automatically batching and transmitting them in a single phone call.
The following is an example of Real-time Batch Transmission. (See Note 1)
Delayed Batch Transmission
Assign a time for batch transm issi on to a P rogram Key in advance. All transmission (s) us ing the Program Key
are batched and transmitted at the reserved time.
The following is an example of Delayed Batch Transmission.
(see Note 1)
ADVANCED
FEATURES
NOTE
1. The machine can not Batch to a file(s) that is/are Waiting to Redial or is currently being sent, but it will Batch to
files that are pending to dial.
71
Page 74

ADVANCED FEATURES
Timer Controlled Communications
You can send document(s) to one or multip le stations at any preset tim e within the next 24 hours. Up to 50* builtin timers can be set for deferred transmission, deferred polling and deferred Advanced Communications.
Deferred Transmission (see Note 1) (see Note 2)
Make sure that the FAX lamp is ON. If not, press to select the "FAX MODE".
1
a
Place original(s) face up on the ADF.
or
1
b
2
3
Place a book or an original face down on the Platen
Glass.
DEFERRED COMM.
01 XMT
SELECT A FUNCTION
DEFERRED COMM.
ADVANCED COMM.
EDIT FILE MODE
SET MODE
DEFERRED XMT
--:--
CANCEL O K
POLLING
SELECT MODE
PRINT OUT
EDIT PHONE BOOK
72
Page 75

OK
Timer Controlled Communications
ADVANCED FEATURES
4
5
6
Enter the star t tim e from the keypad and press .
(Use a 4-digit, 24-hour clock)
Ex:
2 3 3 0
Dial by any combination of the following methods:
• Manual Number Dialling, press after
each station is entered (up to 70 stations)
• Phone Book Dialling (up to 200 stations)
Ex:
PANASONIC
(11:30 p.m.) and press .
SET
OK
MEMORY XMT STN(S):0000
ENTER STATION(S)
AMERICA ASIA CHINA
AFRICA BERLIN
ANTARCTICA BRAZIL
APOLLO CANADA
MEMORY XMT
JOB
STATUS
XMT MODE ORIGINAL
MEMORY XMT STN(S):0000
PANASONIC
5551234
PANASONIC
SALES DEPT
MEMORY XMT
JOB
STATUS
XMT MODE ORIGINAL
LIGHTER DARKER
LIGHTER DARKER
1/1
1/1
to store document(s) into memory.
ADVANCED
FEATURES
NOTE
1. If you enter a wrong time in Step 4, press then re-enter the correct time.
2. To change or cancell the Deferred Communication settings, see page 91 and 93.
CLEAR
73
Page 76

ADVANCED FEATURES
Timer Controlled Communications
Deferred Polling
Make sure that the FAX lamp is ON. If not, press to select the "FAX MODE".
1
2
DEFERRED COMM.
02 POLLING
SELECT A FUNCTION
DEFERRED COMM.
ADVANCED COMM.
EDIT FILE MODE
SET MODE
DEFERRED POLLING
--:--
CANCEL O K
POLLING
SELECT MODE
PRINT OUT
EDIT PHONE BOOK
74
3
Enter the start time from the keypad and press .
(Use a 4-digit, 24-hour clock)
Ex:
0 3 3 0
(3:30 a.m.) and press .
OK
OK
DEFERRED POLLING
ENTER PASSWORD
4 Digit
CANCEL O K
Page 77

Timer Controlled Communications
ADVANCED FEATURES
4
5
Enter a 4-digit polling password and press .
Ex:
9 8 7 6
Dial by any combination of the following methods:
• Manual Number Dialling, press after
each station is entered (up to 70 stations)
• Phone Book Dialling (up to 200 stations)
Ex:
PANASONIC
and press
OK
SET
OK
POLLING STN(S):0000
ENTER STATION(S)
AMERICA ASIA CHINA
AFRICA BERLIN
ANTARCTICA BRAZIL
APOLLO CANADA
MEMORY XMT
JOB
STATUS
XMT MODE ORIGINAL
POLLING STN(S):0000
PANASONIC
201 555 1234
PANASONIC
SALES DEPT
MEMORY XMT
JOB
STATUS
XMT MODE ORIGINAL
LIGHTER DARKER
LIGHTER DARKER
1/1
1/1
6
(see Note 1)
(see Note 2)
ADVANCED
FEATURES
NOTE
1. If you enter a wrong time in Step 3, press , then re-enter the correct time.
2. To change or cancell the Deferred Communication settings, see page 91 and 93.
CLEAR
75
Page 78

ADVANCED FEATURES
Timer Controlled Communications
Deferred Advanced Communication
Make sure that the FAX lamp is ON. If not, press to select the "FAX MODE".
1
2
DEFERRED COMM. 03 ADVANCED COMM.
SELECT A FUNCTION
DEFERRED COMM.
ADVANCED COMM.
EDIT FILE MODE
SET MODE
DEFERRED ADV. COMM.
--:--
CANCEL O K
POLLING
SELECT MODE
PRINT OUT
EDIT PHONE BOOK
76
3
4
Enter the start time from the keypad and press .
(Use a 4-digit, 24-hour clock)
Ex:
2
3 3 0
Setting each Function:
• Mailbox (see page 134 to144)
• Sub-Address XMT (see page 145 to 151)
(11:30 p.m.) and press
OK
OK
ADVANCED COMM.
SELECT A FUNCTION
01
02 MAILBOX
03
04 SUB-ADDRESS XMT
05
CANCEL O K
Page 79

ADVANCED FEATURES
Polling
Polling means calling other station(s) to retrieve document(s). The other station must know in advance that you
will call and must have the document(s) set on the ADF or store d in the memor y. You may need to set a polling
password, shared by the other station, to ensure security.
Preparing to be Polled
In order to let other stations poll your machine, you must prepare your machine wit h a document(s ) stored in
memory. Be sure to set the polling password before storing the docume nt(s) i nto m emory. After being polled ,
the document(s) stored in mem or y will be erased automa tically. To retain the docu ment(s) in memo r y so that
they can be polled repeatedly change Fax Parameter No. 027 (POLLED FILE SAVE) to "Valid".
Make sure that the FAX lamp is ON. If not, press to select the "FAX MODE".
1
a
1
2
Place original(s) face up on the ADF.
or
b
Place a book or an original face down on the Platen
Glass.
SELECT A FUNCTION
DEFERRED COMM.
ADVANCED COMM.
EDIT FILE MODE
SET MODE
POLLING
SELECT MODE
PRINT OUT
EDIT PHONE BOOK
ADVANCED
FEATURES
77
Page 80

ADVANCED FEATURES
Polling
3
4
POLLING
Enter a 4-digit polling password and then press .
(See Note 3)
Ex:
4 3 2 1
The document(s) are stored into memory.
02 POLLED
and press
OK
OK
POLLING
ENTER PASSWORD
4 Digit
CANCEL O K
STORE NO.007
PAGE 01 01%
AMERICA ASIA CHINA
AFRICA BERLIN
ANTARCTICA BRAZIL
APOLLO CANADA
MEMORY XMT
JOB
STATUS
XMT MODE ORIGINAL
LIGHTER DARKER
1/1
(see Note 1)
(see Note 2)
(see Note 3)
NOTE
1. You can still send or receive documents even when the machine is set to be polled.
2. Only 1 polled file can be store d in memory . If you need to ad d document(s) into the sa me polled file, see page97 .
3. If you have set the polling password in Fax Parameter No. 026, the password will appear on the display.
You can still change the password temporarily by overwriting it with a new one.
78
Page 81

ADVANCED FEATURES
Polling
Polling Documents fr om Another Station
The following procedure lets you poll documents from one or multiple stations. Be sure to set the polling
password before polling. (See page 34)
1
2
POLLING
01 POLLING
SELECT A FUNCTION
DEFERRED COMM.
ADVANCED COMM.
EDIT FILE MODE
SET MODE
POLLING
ENTER PASSWORD
4 Digit
CANCEL O K
POLLING
SELECT MODE
PRINT OUT
EDIT PHONE BOOK
ADVANCED
FEATURES
3
Enter a 4-digit polling password and then press
. (See Note 1)
OK
Ex:
1 1 1 1
and press
OK
POLLING STN(S):0000
ENTER STATION(S)
AMERICA ASIA CHINA
AFRICA BERLIN
ANTARCTICA BRAZIL
APOLLO CANADA
MEMORY XMT
JOB
STATUS
XMT MODE ORIGINAL
LIGHTER DARKER
1/1
79
Page 82

ADVANCED FEATURES
Polling
4
5
Dial by any combination of the following methods:
• Manual Number Dialling, press after
each station is entered (up to 70 stations)
• Phone Book Dialling (up to 200 stations)
Ex:
PANASONIC
SET
POLLING STN(S):0001
PANASONIC
201 555 1234
PANASONIC
SALES DEPT
1/1
MEMORY XMT
JOB
STATUS
XMT MODE ORIGINAL
LIGHTER DARKER
(see Note 1)
80
NOTE
1. If a password is not set in the polled station, you may poll the other station even though your machine has a
password.
Page 83

ADVANCED FEATURES
Program Keys
Your fax machine has sp ecial Program Keys. These keys are useful if you frequently need t o send or poll the
same group of stations. You can use these keys to store a One group key, a sequence of station s to be polle d, a
deferred transmission or polling sequence or an additional Phone Book Dialling station.
Setting for Group Dialling
To set a Program Key for Group Dialling
Make sure that the FAX lamp is ON. If not, press to select the "FAX MODE".
1
2
SET MODE 03 PROGRAM KEYS
01 GROUP DIAL
SELECT A FUNCTION
DEFERRED COMM.
ADVANCED COMM.
EDIT FILE MODE
SET MODE
GROUP DIAL
ENTER GROUP NAME
_
Caps
Symbols
Space CANCEL
EDIT PHONE BOOK
POLLING
SELECT MODE
PRINT OUT
Back
space
OK
ADVANCED
FEATURES
3
Enter the Group Name (up to 15 characters) and
press .
Ex:
OK
GROUP.A and press
OK
GROUP DIAL
KEY NAME
GROUP.A
Caps
Symbols
Space CANCEL
Back
space
OK
81
Page 84

ADVANCED FEATURES
Program Keys
4
5
Enter a Key Name (up to 10 characters) and press
.
OK
Enter the Phone Book Dialling.
If you find an error, press to erase the
displayed station.
CLEAR
GROUP DIAL
ENTER STATION(S)
AMERICA ASIA CHINA
AFRICA BERLIN
ANTARCTICA BRAZIL
APOLLO CANADA
MEMORY XMT
JOB
STATUS
XMT MODE ORIGINAL
GROUP DIAL STN(S):0000
CHINA
101010
AMERICA ASIA CHINA
AFRICA BERLIN
ANTARCTICA BRAZIL
APOLLO CANADA
MEMORY XMT
JOB
STATUS
XMT MODE ORIGINAL
LIGHTER DARKER
LIGHTER DARKER
1/1
1/1
6
You can now set other Program Keys by repeating
the procedures from Step 3, or return to standby by
pressing .
STOP
PROGRAM KEYS
SELECT A FUNCTION
01 GROUP DIAL
02 PROGRAM DIAL
03 MODIFY GROUP DIAL
04 DELETE PROGRAM/GRP
05
CANCEL O K
82
Page 85

ADVANCED FEATURES
Program Keys
Setting for Program Dial
Make sure that the FAX lamp is ON. If not, press to select the "FAX MODE".
1
2
SET MODE 03 PROGRAM KEYS
02 PROGRAM DIAL
SELECT A FUNCTION
DEFERRED COMM.
ADVANCED COMM.
EDIT FILE MODE
SET MODE
PROGRAM DIAL
ENTER PROGRAM NAME
Caps
Symbols
Space CANCEL
SELECT MODE
PRINT OUT
EDIT PHONE BOOK
POLLING
space
OK
Back
ADVANCED
FEATURES
3
Enter the Program Name (up to 15 characters) and
press .
Ex:
OK
PRO.POLL and press
OK
PROGRAM DIAL
KEY NAME
PRO.POLL
Caps
Symbols
Space CANCEL
Back
space
OK
83
Page 86

ADVANCED FEATURES
Program Keys
4
5
Enter the Program Key Name (up to 10 characters)
and press .
Program each Function.
• Deferred Communication (See page 72)
• Advanced Communication (See page 76)
• Polling Communication (See page 77)
OK
SELECT A FUNCTION
DEFERRED COMM.
ADVANCED COMM.
EDIT FILE MODE
SET MODE
POLLING
SELECT MODE
PRINT OUT
EDIT PHONE BOOK
6
You can now set other Program Keys by repeating
the procedures from step 3, or return to standby by
pressing .
STOP
PROGRAM KEYS
SELECT A FUNCTION
01 GROUP DIAL
02 PROGRAM DIAL
03 MODIFY GROUP DIAL
04 DELETE PROGRAM/GRP
05
CANCEL O K
84
Page 87

ADVANCED FEATURES
Program Keys
Editing for Group Dialling
If you have to change or erase any of the Group Dialling, follow the steps below.
To change the setting of Group Dialling
Make sure that the FAX lamp is ON. If not, press to select the "FAX MODE".
1
2
3
SET MODE 03 PROGRAM KEYS
03 MODIFY GROUP DIAL
Enter the Group Dial you wish to change and press
.
OK
Ex:
GROUP.A OK
and press
SELECT A FUNCTION
DEFERRED COMM.
ADVANCED COMM.
EDIT FILE MODE
SET MODE
MODIFY GROUP DIAL
GROUP.A
GROUP.B
GROUP.C
CANCEL O K
GROUP DIAL
ENTER GROUP NAME
GROUP.A
Caps
Symbols
EDIT PHONE BOOK
POLLING
SELECT MODE
PRINT OUT
PROGRAM
DIAL
Back
space
ADVANCED
FEATURES
Space CANCEL
OK
85
Page 88

ADVANCED FEATURES
Program Keys
4
5
6
Enter the new Group Name (up to 15 characters)
and press . (See Note 1)
Ex:
NEW GROUP and press
Enter the new Key Name (up to 10 characters) and
press . (See Note 1)
Ex:
NEW GROUP and press
Edit the Phone Book Dialling.
Press the Phone Book Dialling you wish to enter or
erase the displayed station.
OK
OK
OK
OK
GROUP DIAL
KEY NAME
NEW GROUP
Caps
Symbols
Space CANCEL
GROUP DIAL
ENTER STATION(S)
AMERICA ASIA CHINA
AFRICA BERLIN
ANTARCTICA BRAZIL
APOLLO CANADA
MEMORY XMT
JOB
STATUS
XMT MODE ORIGINAL
GROUP DIAL STN(S):0000
APOLLO
202020
Back
space
OK
1/1
LIGHTER DARKER
AMERICA ASIA CHINA
AFRICA BERLIN
ANTARCTICA BRAZIL
APOLLO CANADA
MEMORY XMT
JOB
7
You can now set other Program Keys by repeating
the procedures from Step 3, or return to standby by
pressing .
(see Note 1) (see Note 2)
STOP
STATUS
XMT MODE ORIGINAL
PROGRAM KEYS
SELECT A FUNCTION
01 GROUP DIAL
02 PROGRAM DIAL
03 MODIFY GROUP DIAL
04 DELETE PROGRAM/GRP
05
CANCEL O K
LIGHTER DARKER
NOTE
1. If you make a mistake, use or to move the cursor one space beyond the incorrect character, press
CLEAR
2. The Group Dialling cannot be changed or erased until the communication has finished. To change or erase the
settings, cancell the communication first by Edit File Mode. (See page 91)
then re-enter a new character.
1/1
86
Page 89

Program Keys
Erasing the Program Key Settings
To erase the settings in a Program Key
ADVANCED FEATURES
1
2
SET MODE 03 PROGRAM KEYS
04 DELETE PROGRAM/GRP
SELECT A FUNCTION
DEFERRED COMM.
ADVANCED COMM.
EDIT FILE MODE
SET MODE
DELETE PROGRAM/GRP
SELECT DELETE PROG.
PRO.POLL
TIMER XMT
MEMORY XMT
JOB
STATUS
XMT MODE ORIGINAL
SELECT MODE
EDIT PHONE BOOK
POLLING
PRINT OUT
1/1
LIGHTER DARKER
ADVANCED
FEATURES
3
Press the Program key you want to erase.
Ex:
PRO.POLL
DELETE PROGRAM/GRP
PRO.POLL
DELETE?
NO YES
87
Page 90

ADVANCED FEATURES
Program Keys
4
5
YES
You can now erase other Program Keys by
repeating the procedures from Step 3, or return to
standby by pressing .
STOP
PROGRAM KEYS
SELECT A FUNCTION
01 GROUP DIAL
02 PROGRAM DIAL
03 MODIFY GROUP DIAL
04 DELETE PROGRAM/GRP
05
CANCEL O K
(see Note 1)
NOTE
1. The Program Key cannot be changed or erased until the communication has finished. To change or erase the
settings, cancell the communication first by Edit File Mode. (See page 91)
88
Page 91

ADVANCED FEATURES
Edit File Mode
Your machine has a document image memory which enables you to reserve memory transmission, memory
deferred transmission, memory polling and so on.
After reser ving the communications in memo ry, you may need to chang e the settings of the communicat ion(s)
while it is still in memory. This section describes how to use the file editing features.
Printing or Viewing a File List
The contents of the communicatio n se ttin gs may have to be modified or deleted. To verify the contents, follow
the steps below to print or view a file list.
Make sure that the FAX lamp is ON. If not, press to select the "FAX MODE".
1
2
3
a
EDIT FILE MODE 01 FILE LIST
LIST
PRINT
SELECT A FUNCTION
DEFERRED COMM.
ADVANCED COMM.
EDIT FILE MODE
SET MODE
FILE LIST
CHECK SETTING
PRESS OK
MEMORY XMT NO.=003
INCOMP SALES DEPT
MEMORY XMT NO.=014
INCOMP SALES DEPT
01/01
FILE LIST
PRINTING
POLLING
SELECT MODE
PRINT OUT
EDIT PHONE BOOK
LIST
PRINT
CANCEL O K
LIST
PRINT
ADVANCED
FEATURES
3
or repeatedly until the display shows a file
b
you want to view.
MEMORY XMT NO.=003
INCOMP SALES DEPT
MEMORY XMT NO.=014
INCOMP SALES DEPT
01/01
89
Page 92

ADVANCED FEATURES
Edit File Mode
4
b
Sample File List
*************** -FILE LIST- *********************** DATE 15-AUG-2001 ***** TIME 15:00 *********
(1) (2) (3) (4) (5) (6)
FILE COMM. TYPE CREATED TIME START TIME PAGES DESTINATION(S)
No.
001 DEFERRED XMT 15-AUG 13:20 20:30 [PANAFAX]
002 MEM. DEF. XMT 15-AUG 13:20 22:30 003 [SALES DEPT] [TOKYO]
-PANASONIC -
************************************ -HEAD OFFICE - ***** - 201 555 1212- *********
Explanation of Contents
(1) File number : If the file is now being e xecuted, an "*" is indicated on the left of the file nu mb er.
(2) Communication type
(3) Stored date/time : Date/time that these files were stored.
(4) Executing time : If the file is a Timer Controlled Communication, the start time is printed in this
column.
If the file is an incomplete file, "INCOMP" is printed in this column.
(5) Number of stored page(s)
(6) Destination : Phone Book Dialling No./Manual Dialling No.
90
Page 93

ADVANCED FEATURES
Edit File Mode
Changing the Start Time or the Station of a File
To change the start time and/or stations in a communication file, follow the steps below.
Make sure that the FAX lamp is ON. If not, press to select the "FAX MODE".
1
2
EDIT FILE MODE 02 CHANGE TIME/STN
SELECT A FUNCTION
DEFERRED COMM.
ADVANCED COMM.
EDIT FILE MODE
SET MODE
CHANGE TIME/STN
CHECK SETTING
PRESS OK
MEMORY XMT NO.=014
INCOMP P.001 SALES DEPT
MEM. DEF. XMT NO.=019
P.001 AMERICA
MEM. DEF. XMT NO.=020
P.001 PANASONIC
01/01
POLLING
SELECT MODE
PRINT OUT
EDIT PHONE BOOK
LIST
PRINT
CANCEL O K
ADVANCED
FEATURES
3
Select the file that you want to change and press
.
OK
MEMORY XMT
20:30
CANCEL O K
91
Page 94

ADVANCED FEATURES
Edit File Mode
4
5
Enter a new start time and press .
To delete the station(s), press or key until
the station you want to delete appears. Then press
DELETE
or
To add additional station(s), press and
select the station(s) that you want to add from the
Phone Book.
.
OK
ADD
CONFIRM DESTINATIONS
CHECK AND PRESS OK
047 001
PANASONIC
5551234
001/001
ADDDELETE
OK
When finished, press
6
OK
92
Page 95

ADVANCED FEATURES
OK
Edit File Mode
Deleting a File
To delete the file in memory, follow the steps below.
Make sure that the FAX lamp is ON. If not, press to select the "FAX MODE".
1
2
EDIT FILE MODE 03 DELETE FILE
SELECT A FUNCTION
DEFERRED COMM.
ADVANCED COMM.
EDIT FILE MODE
SET MODE
DELETE FILE
CHECK SETTING
PRESS OK
MEMORY XMT NO.=014
INCOMP P.001 SALES DEPT
MEM. DEF. XMT NO.=019
P.001 AMERICA
MEM. DEF. XMT NO.=020
P.001 PANASONIC
01/01
POLLING
SELECT MODE
PRINT OUT
EDIT PHONE BOOK
CANCEL O K
ADVANCED
FEATURES
3
Select the file that you want to delete and press .
DELETE FILE
MEM. DEF. XMT 020
MEMORY XMT NO.=014
INCOMP S A L E S D E P T
MEM. DEF. XMT NO.=019
A M E R I C A
MEM. DEF. XMT NO.=020
P A N A S O N I C
01/01
DELETE?
NO YES
CANCEL O K
93
Page 96

ADVANCED FEATURES
Edit File Mode
4
(see Note 1)
(see Note 2)
YES
94
NOTE
1. Your machine cannot delete the file while it is being sent.
2. If you want to delete all files in Step 3, press with no file selected (except the file in progress).
The following message is shown on the display.
DELETE FILE
000
MEMORY XMT NO.=014
INCOMP S A L E S D E P T
MEM. DEF. XMT NO.=019
A M E R I C A
MEM. DEF. XMT NO.=020
P A N A S O N I C
Press to delete all files.
DELETE ALL FILE?
NO YES
01/01
YES
CANCEL O K
OK
Page 97

ADVANCED FEATURES
Edit File Mode
Printing Out a File
To print the contents of the communication file, follow the steps bellow.
Make sure that the FAX lamp is ON. If not, press to select the "FAX MODE".
1
2
EDIT FILE MODE 04 PRINT FILE
SELECT A FUNCTION
DEFERRED COMM.
ADVANCED COMM.
EDIT FILE MODE
SET MODE
PRINT FILE
CHECK SETTING
PRESS OK
MEMORY XMT NO.=014
INCOMP P.001 SALES DEPT
MEM. DEF. XMT NO.=019
P.001 AMERICA
MEM. DEF. XMT NO.=020
P.001 PANASONIC
01/01
POLLING
SELECT MODE
PRINT OUT
EDIT PHONE BOOK
CANCEL O K
ADVANCED
FEATURES
3
Select the file that you want to print and press
.
OK
95
Page 98

ADVANCED FEATURES
Edit File Mode
Your machine will print the file. The document(s)
4
(see Note 1)
will remain in memory even after printing the file.
96
NOTE
1. Your machine cannot print the file while it is being sent.
Page 99

ADVANCED FEATURES
Edit File Mode
Adding Documents Into a File
To add document(s) into the file, follow the steps bellow.
Make sure that the FAX lamp is ON. If not, press to select the "FAX MODE".
1
a
Place original(s) face up on the ADF.
or
1
b
2
3
Place a book or an original face down on the Platen
Glass.
EDIT FILE MODE 05 ADD DOCUMENT
SELECT A FUNCTION
DEFERRED COMM.
ADVANCED COMM.
EDIT FILE MODE
SET MODE
ADD DOCUMENT
CHECK SETTING
PRESS OK
MEMORY XMT NO.=014
INCOMP P.001 SALES DEPT
MEM. DEF. XMT NO.=019
P.001 AMERICA
MEM. DEF. XMT NO.=020
P.001 PANASONIC
01/01
POLLING
SELECT MODE
PRINT OUT
EDIT PHONE BOOK
CANCEL O K
ADVANCED
FEATURES
97
Page 100

ADVANCED FEATURES
Edit File Mode
Select the file that you want to add document(s) to and
4
5
(see Note 1)
press .
Your machine will start storing the document(s) into
a file.
OK
98
NOTE
1. Your machine cannot add document(s) into the file while it is being sent or waiting to redial.
 Loading...