

Panasonic DMR-E65 User Manual
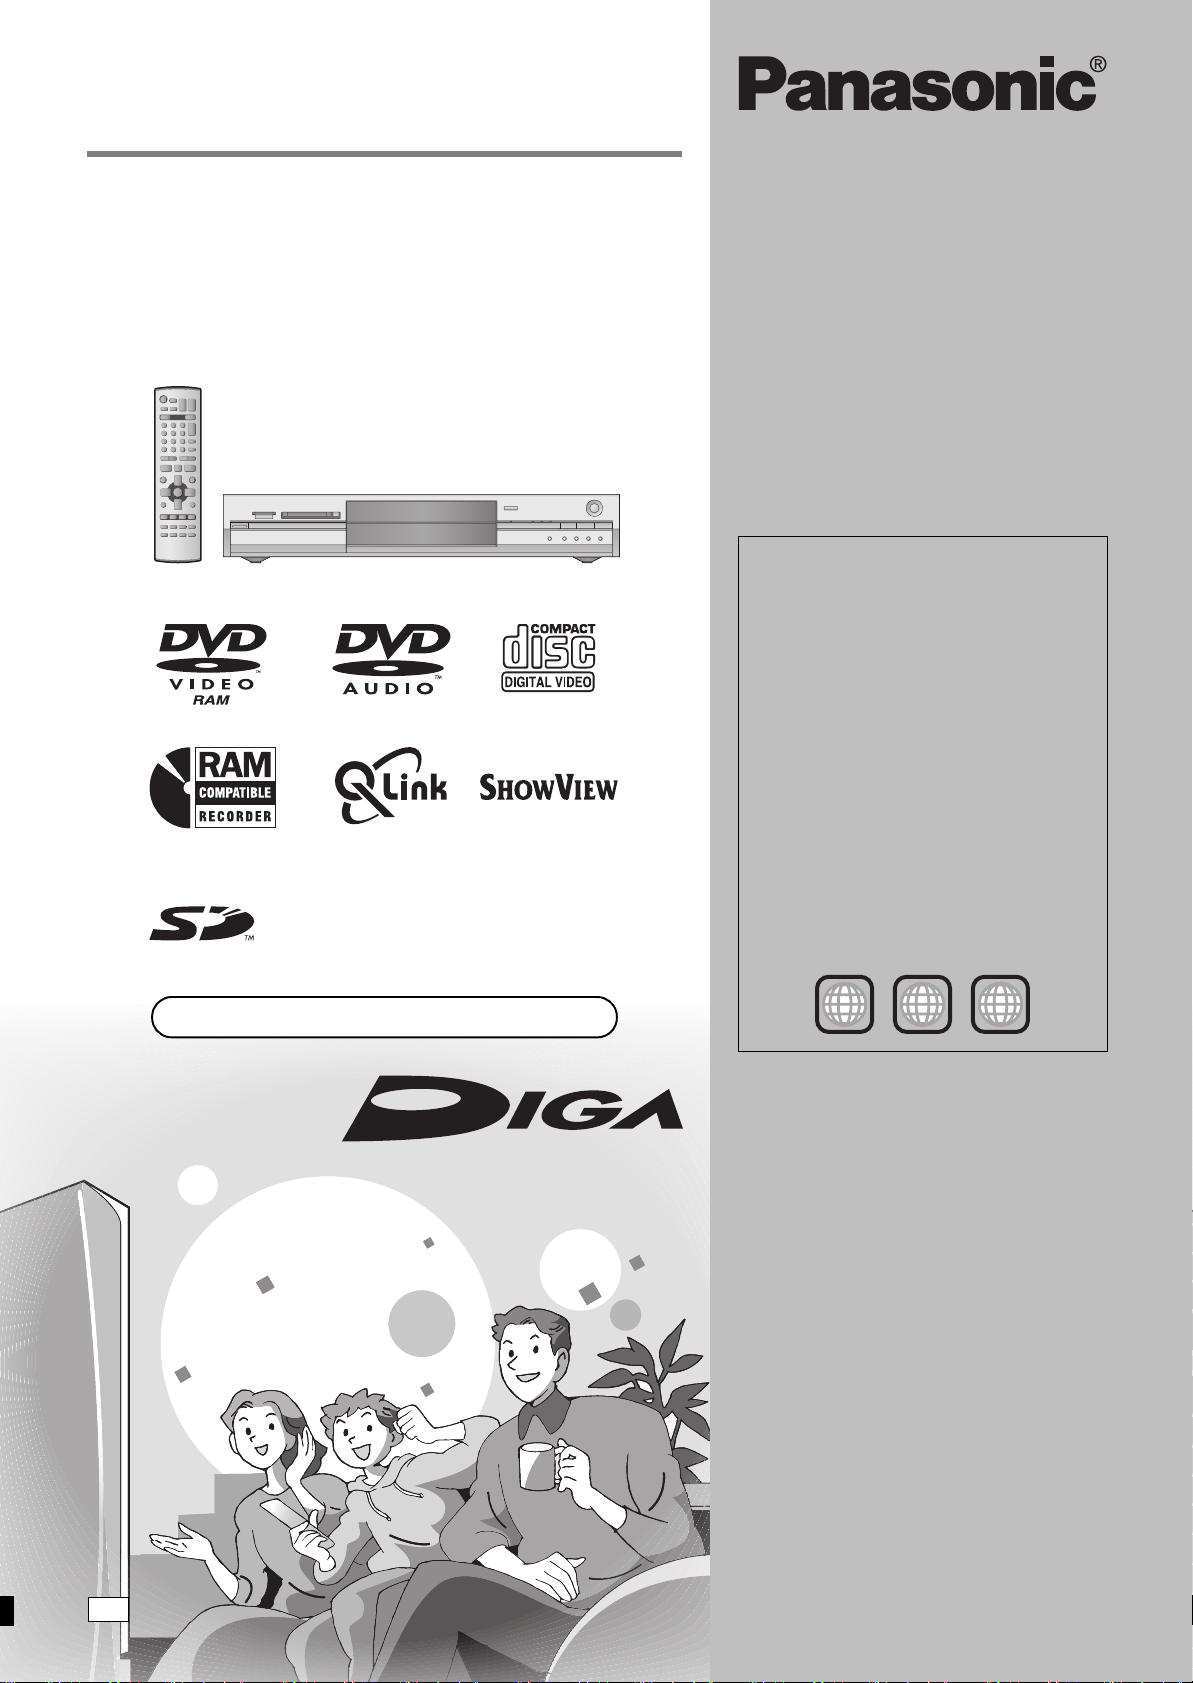
Operating Instructions
Instrucciones de funcionamiento
DVD Video Recorder
Grabadora de DVD vídeo
Model No. DMR-E65
Region number supported by
this unit
Region numbers are allocated to DVD players
and software according to where they are sold.
≥The region number of this unit is “2”.
≥The unit will play DVDs marked with labels
containing “2” or “ALL”.
Web Site: http://www.panasonic-europe.com
Número de región soportado por
esta unidad
A los reproductores DVD y al software se les
asigna números de región según la zona donde
son vendidos.
≥El número de región de esta unidad es el “2”.
≥La unidad reproducirá DVDs con etiquetas que
tengan “2” o “ALL”.
Example:
Ejemplo:
2
2 ALL
3
5
Dear customer
Thank you for purchasing this product. For optimum
performance and safety, please read these
instructions carefully.
Before connecting, operating or adjusting this
product, please read these instructions completely.
Please keep this manual for future reference.
Estimado cliente
Muchísimas gracias por haber adquirido este
aparato.
Lea con atención estas instrucciones para obtener
las máximas prestaciones y seguridad.
Antes de conectar, operar o ajustar este producto,
sírvase leer estas instrucciones completamente.
Guarde este manual.
RQT7542-EEG
SUOMI
CAUTION!
THIS PRODUCT UTILIZES A LASER.
USE OF CONTROLS OR ADJUSTMENTS OR
PERFORMANCE OF PROCEDURES OTHER THAN THOSE
SPECIFIED HEREIN MAY RESULT IN HAZARDOUS
RADIATION EXPOSURE.
DO NOT OPEN COVERS AND DO NOT REPAIR YOURSELF.
REFER SERVICING TO QUALIFIED PERSONNEL.
WARNING:
TO REDUCE THE RISK OF FIRE, ELECTRIC SHOCK OR
PRODUCT DAMAGE, DO NOT EXPOSE THIS APPARATUS
TO RAIN, MOISTURE, DRIPPING OR SPLASHING AND THAT
NO OBJECTS FILLED WITH LIQUIDS, SUCH AS VASES,
SHALL BE PLACED ON THE APPARATUS.
CAUTION!
≥DO NOT INSTALL OR PLACE THIS UNIT IN A BOOKCASE,
BUILT-IN CABINET OR IN ANOTHER CONFINED SPACE.
ENSURE THE UNIT IS WELL VENTILATED. TO PREVENT
Getting started
RISK OF ELECTRIC SHOCK OR FIRE HAZARD DUE TO
OVERHEATING, ENSURE THAT CURTAINS AND ANY
OTHER MATERIALS DO NOT OBSTRUCT THE
VENTILATION VENTS.
≥DO NOT OBSTRUCT THE UNIT’S VENTILATION OPENINGS
WITH NEWSPAPERS, TABLECLOTHS, CURTAINS, AND
SIMILAR ITEMS.
≥DO NOT PLACE SOURCES OF NAKED FLAMES, SUCH AS
LIGHTED CANDLES, ON THE UNIT.
≥DISPOSE OF BATTERIES IN AN ENVIRONMENTALLY
FRIENDLY MANNER.
THIS UNIT IS INTENDED FOR USE IN MODERATE CLIMATES.
This product may receive radio interference caused by mobile
telephones during use. If such interference is apparent, please
increase separation between the product and the mobile
telephone.
The socket outlet shall be installed near the equipment and
easily accessible or the mains plug or an appliance coupler shall
remain readily operable.
VAROI TUS!
LAITTEEN KÄYTTÄMINEN MUULLA KUIN TÄSSÄ
KÄYTTÖOHJEESSA MAINITULLA TAVALLA SAATTAA
ALTISTAA KÄYTTÄJÄN TURVALLISUUSLUOKAN 1
YLITTÄVÄLLE NÄKYMÄTTÖMÄLLE LASERSÄTEILYLLE.
VAROI TUS:
TULIPALO-, SÄHKÖISKUVAARAN TAI TUOTETTA
KOHTAAVAN MUUN VAHINGON VÄHENTÄMISEKSI EI
LAITETTA SAA ALTISTAA SATEELLE, KOSTEUDELLE,
VESIPISAROILLE TAI ROISKEELLE, EIKÄ NESTETTÄ
SISÄLTÄVIÄ ESINEITÄ, KUTEN ESIMERKIKSI MALJAKOITA,
SAA ASETTAA LAITTEEN PÄÄLLE.
VAROI TUS!
≥ÄLÄ ASENNA TAI LAITA TÄTÄ LAITETTA
KABINETTITYYPPISEEN KIRJAKAAPPIIN TAI MUUHUN
SULJETTUUN TILAAN, JOTTA TUULETUS ONNISTUISI.
VARMISTA, ETTÄ VERHO TAI MIKÄÄN MUU MATERIAALI
EI HUONONNA TUULETUSTA, JOTTA VÄLTETTÄISIIN
YLIKUUMENEMISESTA JOHTUVA SÄHKÖISKU- TAI
TULIPALOVAARA.
≥ÄLÄ PEITÄ LAITTEEN TUULETUSAUKKOJA
SANOMALEHDELLÄ, PÖYTÄLIINALLA, VERHOLLA TAI
MUULLA VASTAAVALLA ESINEELLÄ.
≥ÄLÄ ASETA PALAVAA KYNTTILÄÄ TAI MUUTA AVOTULEN
LÄHDETTÄ LAITTEEN PÄÄLLE.
≥HÄVITÄ PARISTOT LUONTOA VAHINGOITTAMATTOMALLA
TAVALLA.
TÄMÄ LAITE ON TARKOITETTU KÄYTETTÄVÄKSI LEUDOSSA
ILMASTOSSA.
Laite tulee asettaa lähelle verkkopistorasiaa ja pistokkeen täytyy
olla sellaisessa asennossa, että siihen on helppo tarttua
ongelman sattuessa.
NORSK
ADVARSEL!
DETTE PRODUKTET ANVENDER EN LASER.
BETJENING AV KONTROLLER, JUSTERINGER ELLER
ANDRE INNGREP ENN DE SOM ER BESKREVET I DENNE
BRUKSANVISNING, KAN FØRE TIL FARLIG BESTRÅLING.
DEKSLER MÅ IKKE ÅPNES, OG FORSØK ALDRI Å
REPARERE APPARATET PÅ EGENHÅND. ALT SERVICE OG
REPARASJONSARBEID MÅ UTFØRES AV KVALIFISERT
PERSONELL.
RQT7542
2
Y
RF IN
VIDEO
R - AUDIO - L
S-VIDEO
AC IN
DANGER
CAUTION
ATTENTION
ADVARSEL
VARO !
VARNING
ADVARSEL
VORSICHT
OPTICAL
DIGITAL AUDIO OUT
(PCM/BITSTREAM)
-
VISIBLE AND INVISIBLE LASER RADIATION WHEN OPEN.
AVOID DIRECT EXPOSURE TO BEAM.
-
VISIBLE AND INVISIBLE LASER RADIATION WHEN OPEN.
AVOID EXPOSURE TO BEAM.
-
RAYONNEMENT LASER VISIBLE ET INVISIBLE EN CAS D’OUVERTURE.
EXPOSITION DANGEREUSE AU FAISCEAU.
-
SYNLIG OG USYNLIG LASERSTRÅLING VED ÅBNING.
UNDGÅ UDSÆTTELSE FOR STRÅLING.
-
AVATTAESSA OLET ALTTIINA NÄKYVÄÄ JA NÄKYMÄTÖN
LASERSÄTEILYLLE. ÄLÄ KATSO SÄTEESEEN.
-
SYNLIG OCH OSYNLIG LASERSTRÅLNING NÄR DENNA DEL
ÄR ÖPPNAD. BETRAKTA EJ STRÅLEN.
-
SYNLIG OG USYNLIG LASERSTRÅLING NÅR DEKSEL ÅPNES.
UNNGÅ EKSPONERING FOR STRÅLEN.
-
SICHTBARE UND UNSICHTBARE LASERSTRAHLUNG, WENN ABDECKUNG
GEÖFFNET. NICHT DEM STRAHL AUSSETZEN.
-
-
OUT
AV4 IN
VIDEO
R - AUDIO - L
S-VIDEO
AV1 (TV)
AV2 (DECODER/EXT)
PB
PR
COMPONENT
RF OUT
VIDEO OUT
(PROGRESSIVE/
INTERLACE)
(FDA 21 CFR)
(IEC60825-1)
(Inside of product)
(Tuotteen sisällä)
(Produktets innside)
RQLS0233
Keep the small memory cards such as the SD
Memory Card out of reach of children. If
swallowed, seek medical advice immediately.
2
ADVARSEL:
FOR Å REDUSERE FAREN FOR BRANN, ELEKTRISK STØT
ELLER SKADER PÅ PRODUKTET, MÅ DETTE APPARATET
IKKE UTSETTES FOR REGN, FUKTIGHET, VANNDRÅPER
ELLER VANNSPRUT. DET MÅ HELLER IKKE PLASSERES
GJENSTANDER FYLT MED VANN, SLIK SOM
BLOMSTERVASER, OPPÅ APPARATET.
ADVARSEL!
≥APPARATET MÅ IKKE PLASSERES I EN BOKHYLLE, ET
INNEBYGGET KABINETT ELLER ET ANNET LUKKET STED
HVOR VENTILASJONSFORHOLDENE ER
UTILSTREKKELIGE. SØRG FOR AT GARDINER ELLER
LIGNENDE IKKE FORVERRER
VENTILASJONSFORHOLDENE, SÅ RISIKO FOR
ELEKTRISK SJOKK ELLER BRANN FORÅRSAKET AV
OVERHETING UNNGÅS.
≥APPARATETS VENTILASJONSÅPNINGER MÅ IKKE
DEKKES TIL MED AVISER, BORDDUKER , GARDINER OG
LIGNENDE.
≥PLASSER IKKE ÅPEN ILD, SLIK SOM LEVENDE LYS, OPPÅ
APPARATET.
≥BRUKTE BATTERIER MÅ KASSERES UTEN FARE FOR
MILJØET.
DETTE APPARATET ER BEREGNET TIL BRUK UNDER
MODERATE KLIMAFORHOLD.
Utstyret bør plasseres i nærheten av AC-stikkontakten, og
støpslet må være lett tilgjengelig hvis det skulle oppstå
problemer.
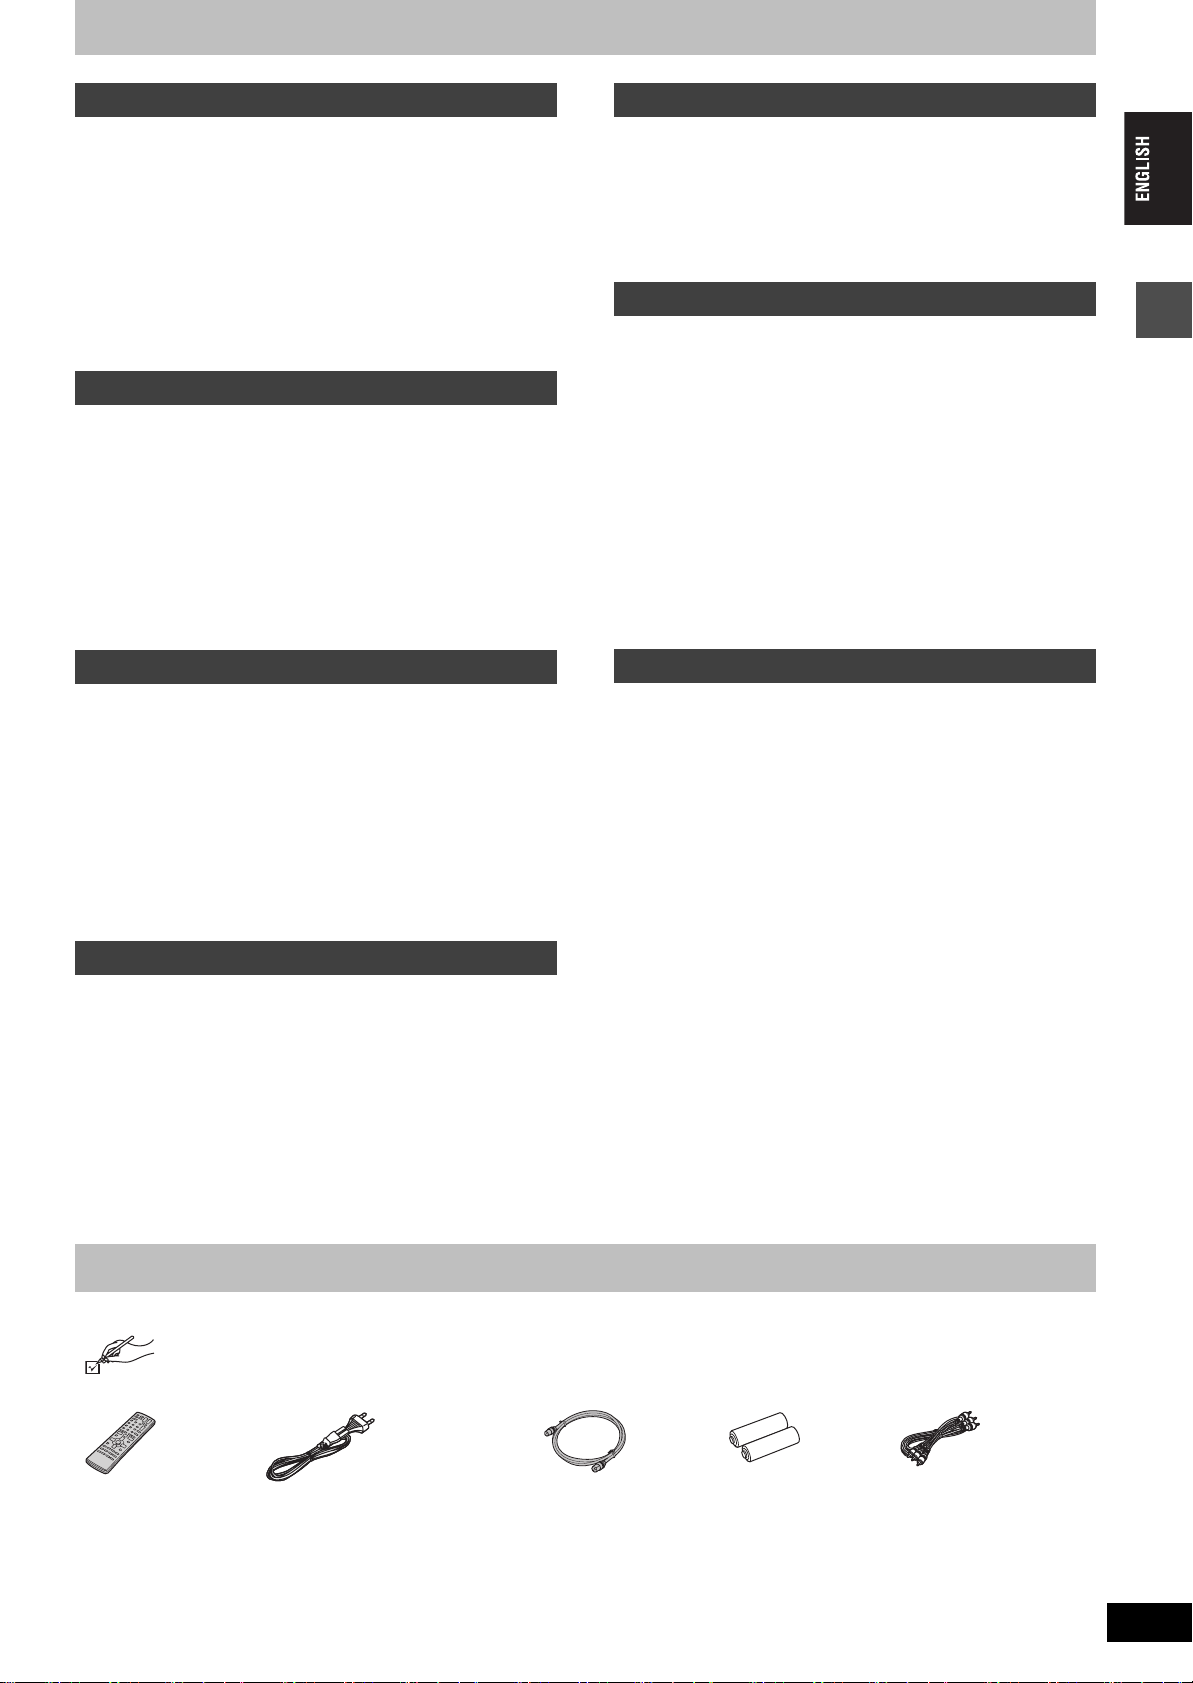
Table of contents
Getting started
Accessories . . . . . . . . . . . . . . . . . . . . . . . . . . . . . . . 3
Useful features . . . . . . . . . . . . . . . . . . . . . . . . . . . . . 4
The remote control. . . . . . . . . . . . . . . . . . . . . . . . . . 4
Control reference guide. . . . . . . . . . . . . . . . . . . . . . 5
STEP 1
STEP 2
STEP 3
Connection . . . . . . . . . . . . . . . . . . . . . . . . . 6
Channel reception settings. . . . . . . . . . . 10
Set up to match your television
and remote control. . . . . . . . . . . . . . . . . . . . . . . . 12
To enjoy progressive video. . . . . . . . . . . . . . . . . . . . . . . . . . . . 12
Disc and card information. . . . . . . . . . . . . . . . . . . 14
Recording
Recording television programmes . . . . . . . . . . . . 16
Recording modes and approximate recording times . . . . . . . . 17
Playing while you are recording . . . . . . . . . . . . . . . . . . . . . . . . 17
Flexible Recording . . . . . . . . . . . . . . . . . . . . . . . . . . . . . . . . . . 18
Direct TV Recording . . . . . . . . . . . . . . . . . . . . . . . . . . . . . . . . 18
Recording from satellite/digital receiver or decoder. . . . . . . . . 18
Timer recording . . . . . . . . . . . . . . . . . . . . . . . . . . . 19
Using SHOWVIEW number to make timer recordings. . . . . . . . . 19
Manually programming timer recordings . . . . . . . . . . . . . . . . . 20
Check, change or delete a programme . . . . . . . . . . . . . . . . . . 21
Linked timer recordings with external equipment (EXT LINK)
. . 21
Playing back
Transfer (Dubbing)
Recording from a video cassette recorder . . . . . 35
Manual recording . . . . . . . . . . . . . . . . . . . . . . . . . . . . . . . . . . . 35
DV automatic recording (DV AUTO REC). . . . . . . . . . . . . . . . . 35
Transferring (dubbing) still pictures . . . . . . . . . . 36
Transferring (dubbing) using the transferring (dubbing) list . . . 36
Transferring (dubbing) all the still pictures of a card
onto a DVD-RAM—COPY ALL PICTURES . . . . . . . . . . . . . . 37
Convenient functions
FUNCTIONS window . . . . . . . . . . . . . . . . . . . . . . . 37
Disc and card management . . . . . . . . . . . . . . . . . 38
Setting the protection . . . . . . . . . . . . . . . . . . . . . . . . . . . . . . . . 38
Providing a disc with a name . . . . . . . . . . . . . . . . . . . . . . . . . . 38
Erasing all titles and play lists—Erase all titles. . . . . . . . . . . . . 38
Erasing all the contents of a disc or card—Format . . . . . . . . . . 39
Enabling DVD-R to be played on other equipment—Finalize . . 39
Entering text . . . . . . . . . . . . . . . . . . . . . . . . . . . . . 40
Changing the unit’s settings . . . . . . . . . . . . . . . . 41
Common procedures . . . . . . . . . . . . . . . . . . . . . . . . . . . . . . . . 41
Summary of settings. . . . . . . . . . . . . . . . . . . . . . . . . . . . . . . . . 41
Tuning . . . . . . . . . . . . . . . . . . . . . . . . . . . . . . . . . . . . . . . . . . . . 45
TV System . . . . . . . . . . . . . . . . . . . . . . . . . . . . . . . . . . . . . . . . 46
Clock settings . . . . . . . . . . . . . . . . . . . . . . . . . . . . . . . . . . . . . . 47
Child Lock . . . . . . . . . . . . . . . . . . . . . . . . . . . . . . . 47
Reference
Getting started
Playing recorded video contents/Playing play-
only discs . . . . . . . . . . . . . . . . . . . . . . . . . . . . . . . 22
Operations during play. . . . . . . . . . . . . . . . . . . . . . . . . . . . . . . 23
Editing operations during play . . . . . . . . . . . . . . . . . . . . . . . . . 24
Changing audio . . . . . . . . . . . . . . . . . . . . . . . . . . . . . . . . . . . . 24
Using menus to play MP3 . . . . . . . . . . . . . . . . . . . 25
Playing still pictures . . . . . . . . . . . . . . . . . . . . . . . 26
Useful functions during still picture play. . . . . . . . . . . . . . . . . . 27
Using on-screen menus and Status messages. . 28
On-screen menus . . . . . . . . . . . . . . . . . . . . . . . . . . . . . . . . . . 28
Status messages . . . . . . . . . . . . . . . . . . . . . . . . . . . . . . . . . . . 29
Editing
Editing titles/chapters . . . . . . . . . . . . . . . . . . . . . . 30
Editing titles/chapters and playing chapters. . . . . . . . . . . . . . . 30
Title operations . . . . . . . . . . . . . . . . . . . . . . . . . . . . . . . . . . . . 31
Chapter operations . . . . . . . . . . . . . . . . . . . . . . . . . . . . . . . . . 31
Creating, editing and playing play lists . . . . . . . . 32
Creating play lists. . . . . . . . . . . . . . . . . . . . . . . . . . . . . . . . . . . 32
Editing and playing play lists/chapters. . . . . . . . . . . . . . . . . . . 33
Play list operations. . . . . . . . . . . . . . . . . . . . . . . . . . . . . . . . . . 33
Chapter operations . . . . . . . . . . . . . . . . . . . . . . . . . . . . . . . . . 33
Editing still pictures. . . . . . . . . . . . . . . . . . . . . . . . 34
Picture and folder operation. . . . . . . . . . . . . . . . . . . . . . . . . . . 34
Accessories
Specifications . . . . . . . . . . . . . . . . . . . . . . . . . . . . 48
Glossary. . . . . . . . . . . . . . . . . . . . . . . . . . . . . . . . . 49
Frequently asked questions. . . . . . . . . . . . . . . . . 51
Error messages . . . . . . . . . . . . . . . . . . . . . . . . . . . 52
Troubleshooting guide . . . . . . . . . . . . . . . . . . . . . 53
Safety precautions . . . . . . . . . . . . . . . . . . . . . . . . 57
Maintenance/Disc and card handling . . . . . . . . . 57
Index. . . . . . . . . . . . . . . . . . . . . . . . . . . . . . . . . . . . 58
Please check and identify the supplied accessories.
∏∏ ∏ ∏∏
1 Remote control
(EUR7721KC0)
1 AC mains lead
≥For use with this unit only. Do not
use it with other equipment.
1 RF coaxial cable 2 Batteries
for remote control
1 Audio/video cable
RQT7542
3
3
Useful features
R6/LR6, AA, UM-3
This DVD Video recorder records high quality images to rapid random access capable DVD-RAM media. This has resulted in
many new features that out perform older tape formats. The following information summarizes a few of these features.
Instant recording
You no longer need to search for empty disc space. By
pressing the recording button, the unit finds available
recording space and begins recording right away. There is no
need to worry about overwriting already recorded content.
SD/PC card slots, DV input terminal
This unit is equipped with interfaces that allow networking
with digital equipment.
≥The SD/PC card slots of this unit let you transfer (dub) digital
camera photographs from a card to DVD-RAM for easy storage
without using a computer.
≥The DV automatic recording function of this unit lets you easily
transfer (dub) digital images to the DVD-RAM by connecting only a
single DV cable.
Instant play
Getting started
There is no need to rewind or search forward. Direct
Navigator guides you to the beginning of the recorded video
immediately.
Chasing playback
There is no need to wait until
recording is complete. Without
stopping recording, you can play the
video currently being recorded from
its beginning.
Simultaneous Recording
and Playback
While recording, you can play
another video programme that was
recorded previously.
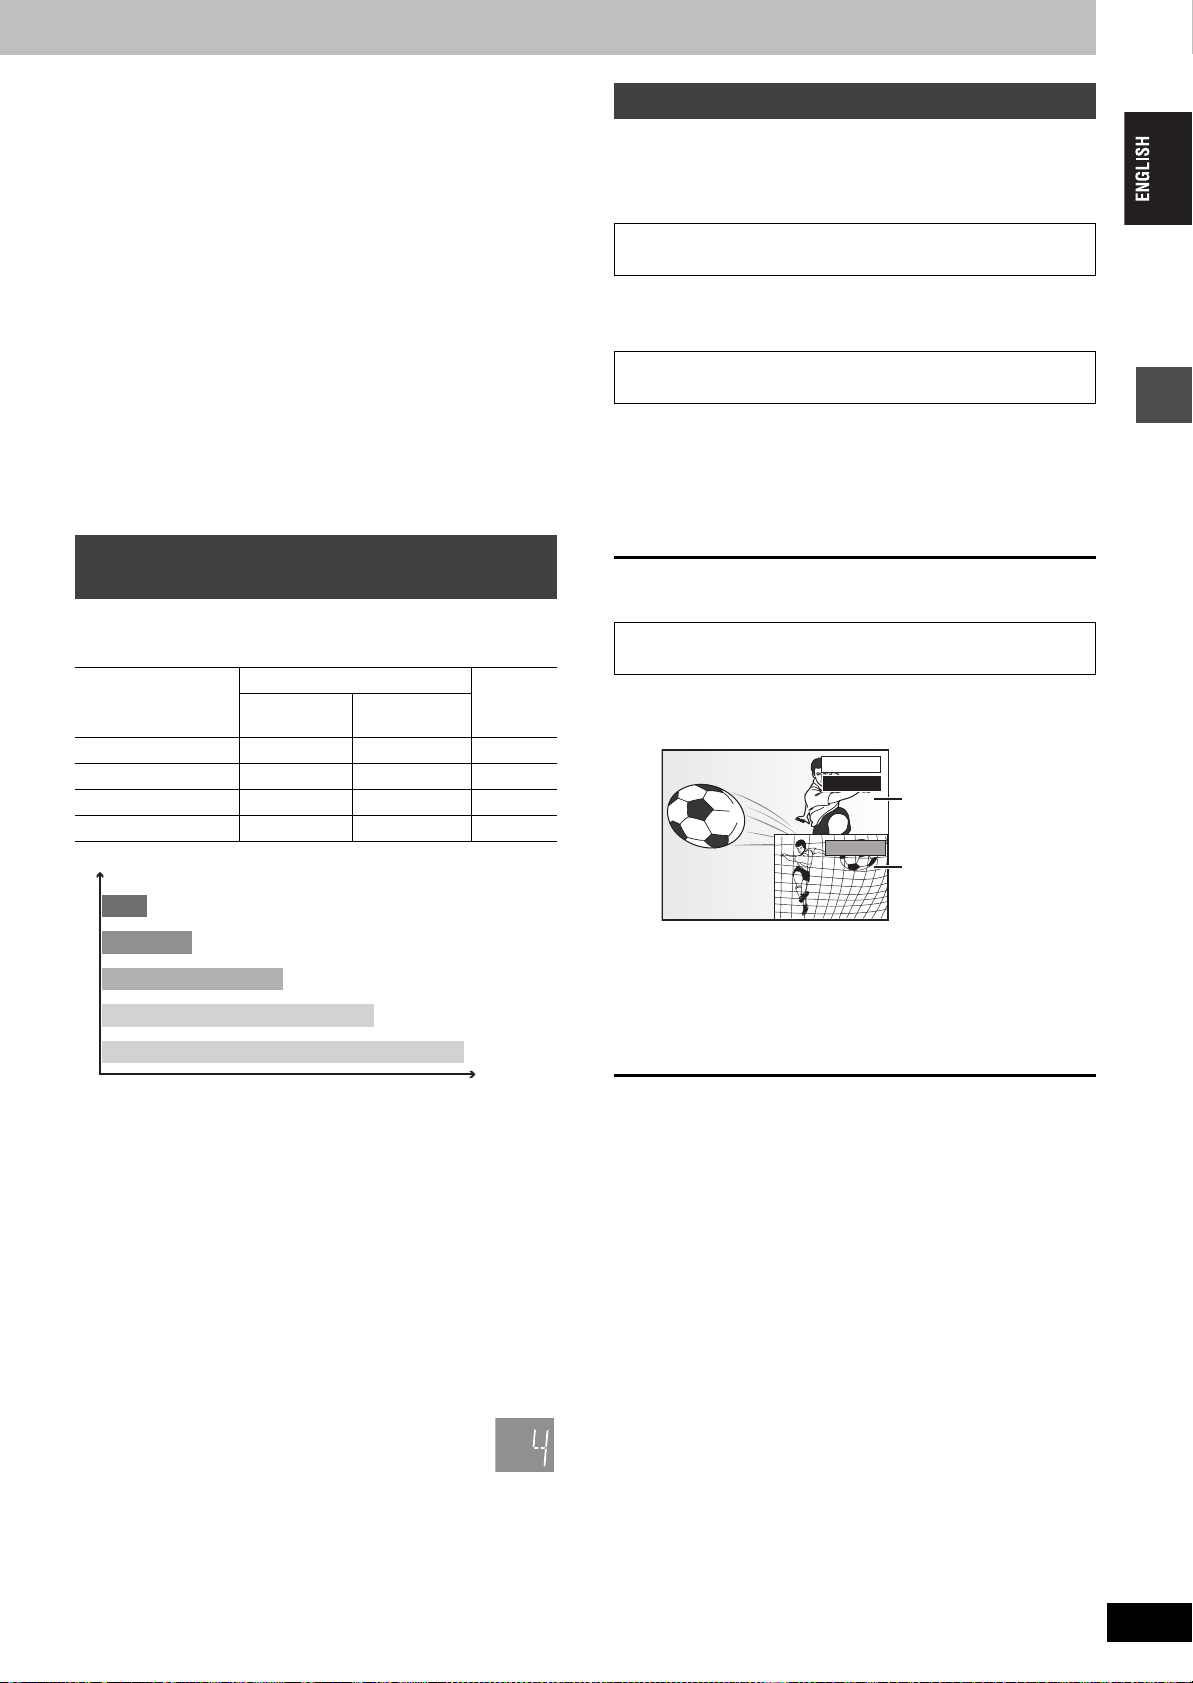
Time Slip
During play and also while recording,
you can jump to the scene you wish
to view by specifying the skip time.
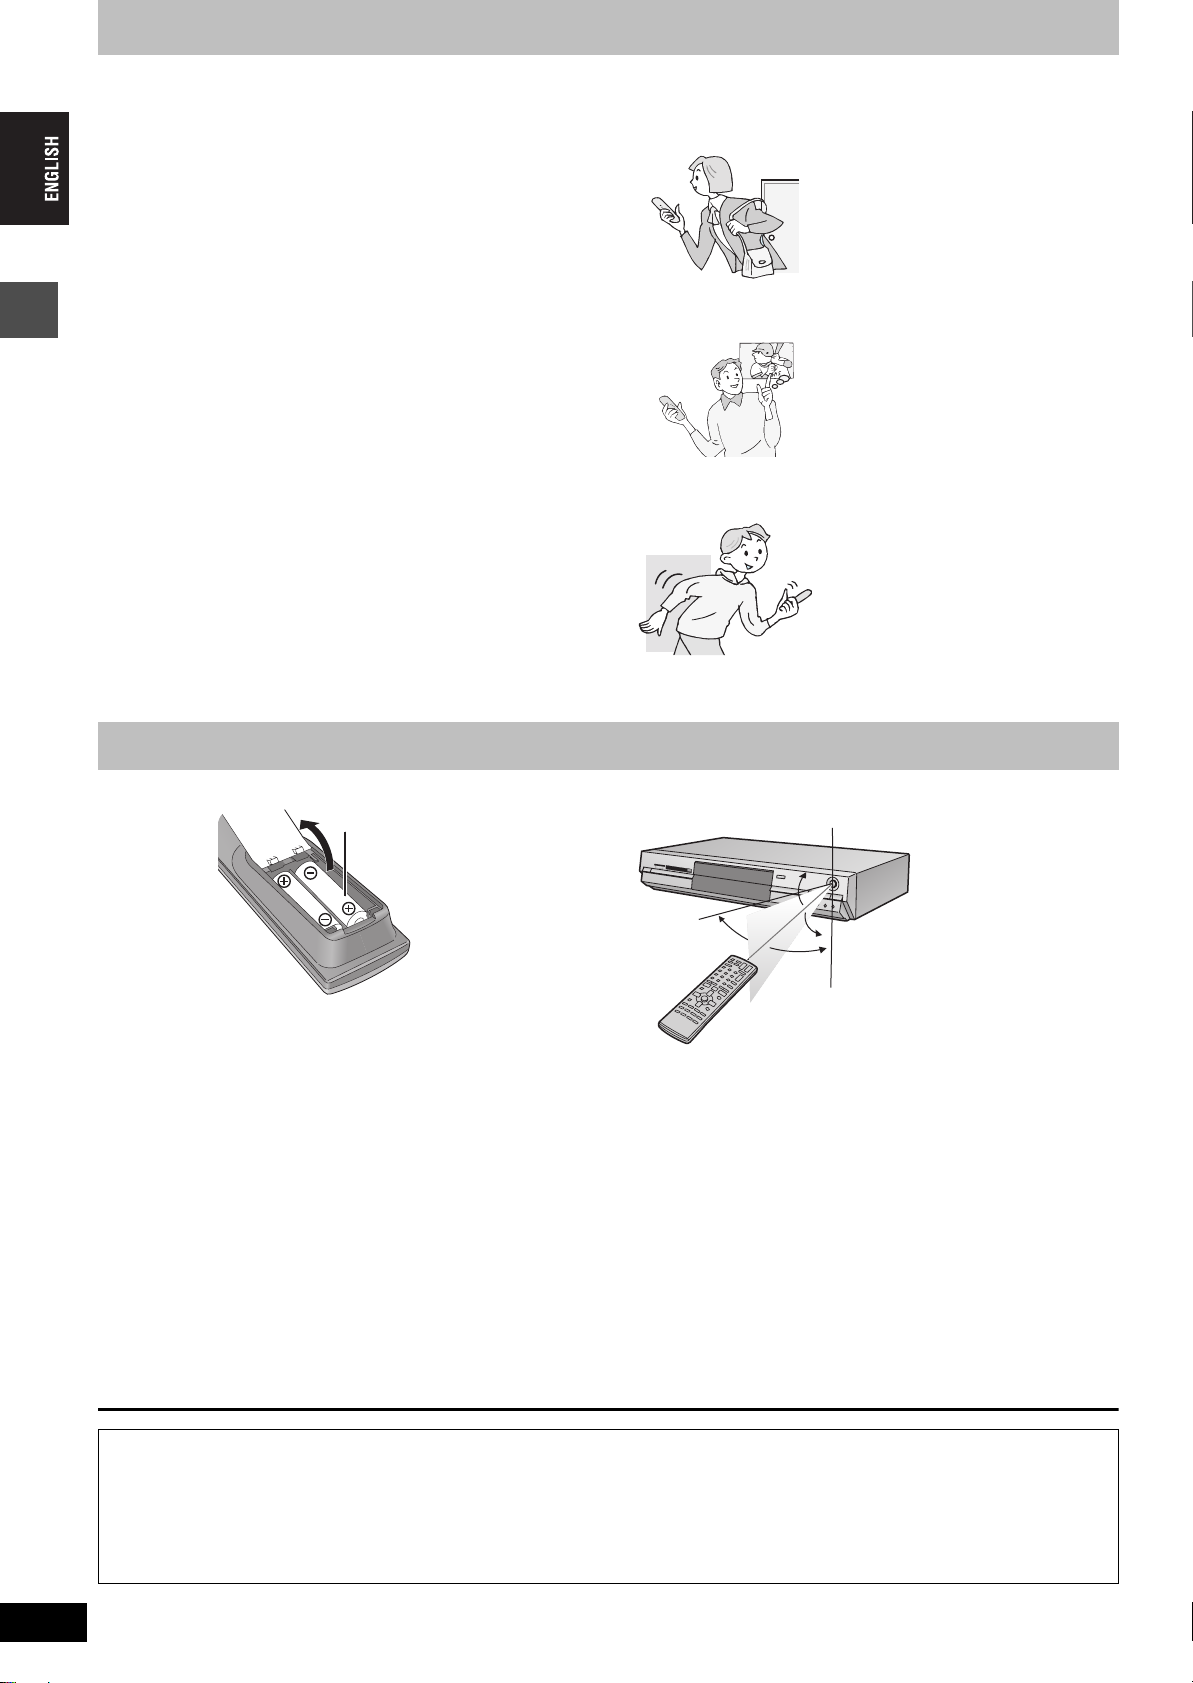
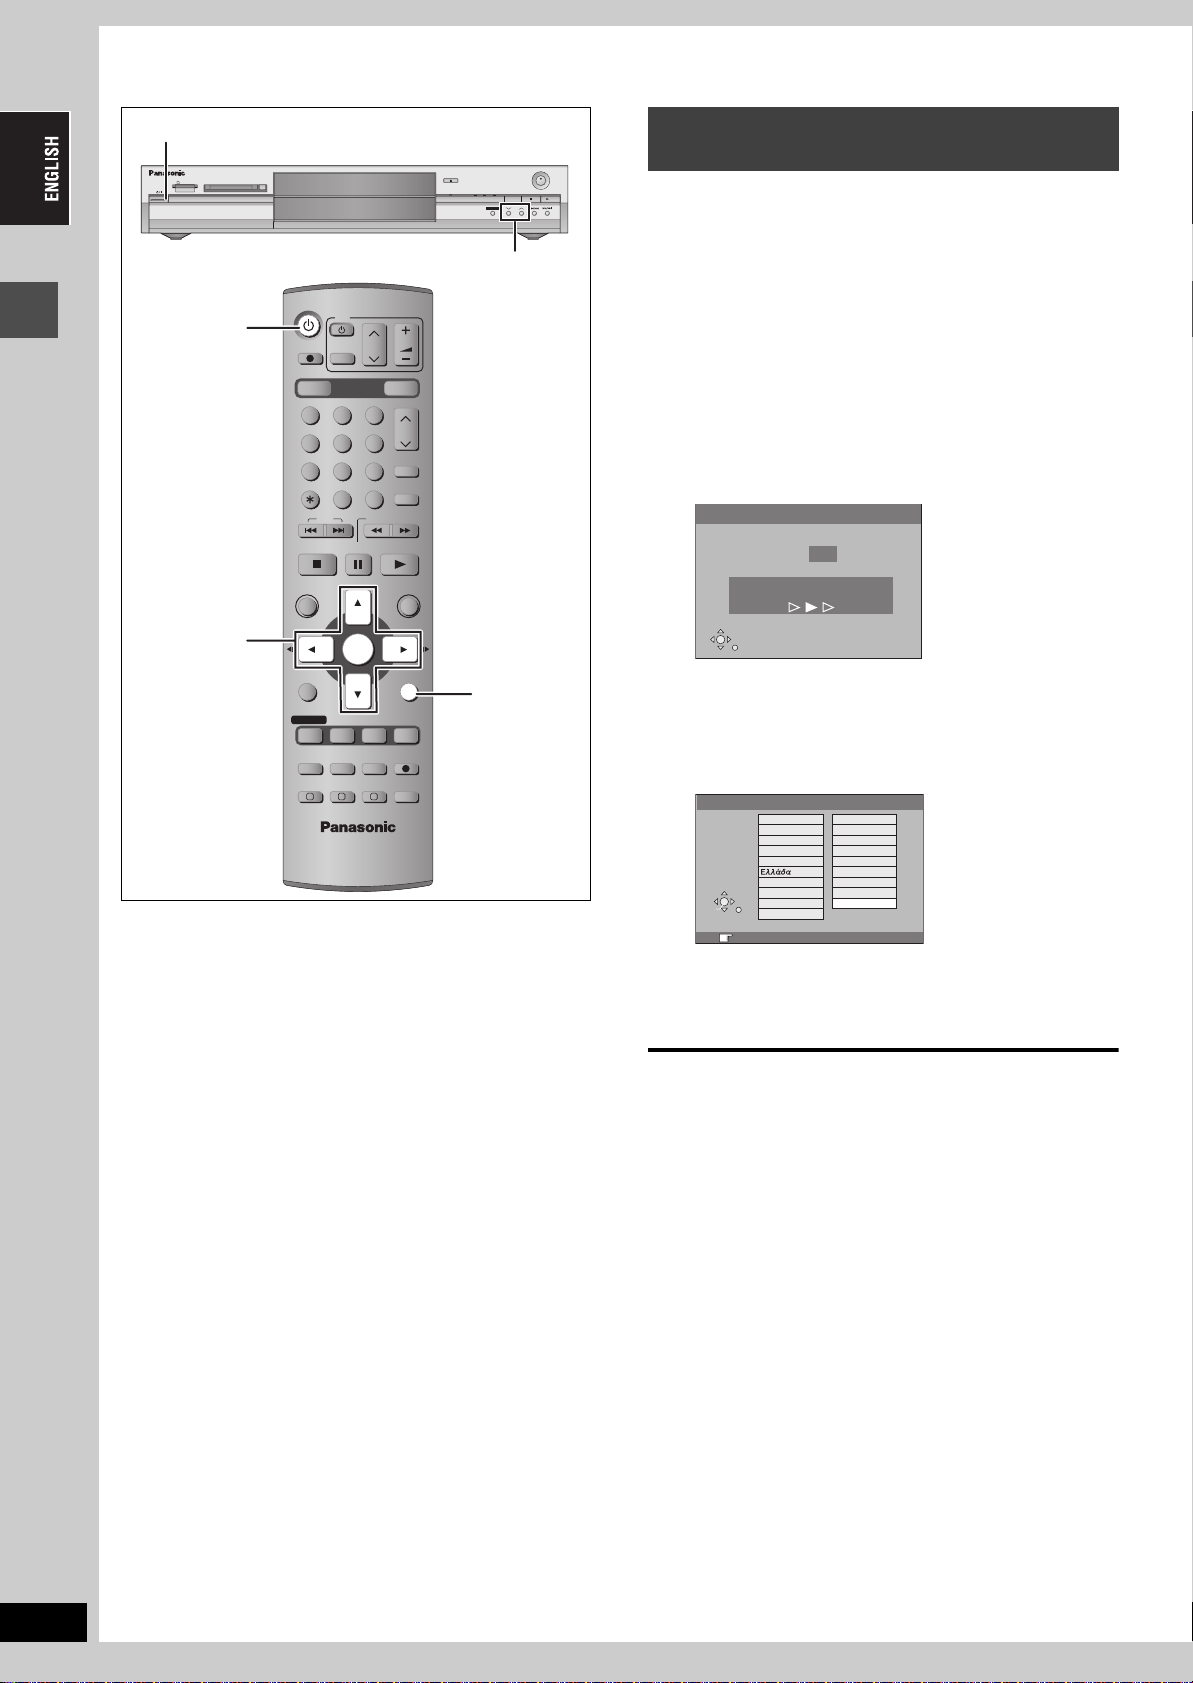
The remote control
∫ Batteries
≥Insert so the poles (i and j) match those in the remote control.
≥Do not use rechargeable type batteries.
≥Do not mix old and new batteries.
≥Do not use different types at the same time.
≥Do not heat or expose to flame.
≥Do not take apart or short circuit.
≥Do not attempt to recharge alkaline or manganese batteries.
≥Do not use batteries if the covering has been peeled off.
Mishandling of batteries can cause electrolyte leakage which can
damage items the fluid contacts and may cause a fire.
Remove if the remote control is not going to be used for a long
period of time. Store in a cool, dark place.
[Note]
If you cannot operate the unit or television using the remote control
after changing the batteries, please re-enter the codes (➡ page 13).
∫ Use
Remote control signal sensor
20˚
30˚
20˚
30˚
7 m directly in front of the unit
RQT7542
4
The manufacturer accepts no responsibility and offers no compensation for loss of recorded or edited material due to a problem
with the unit or recordable media, and accepts no responsibility and offers no compensation for any subsequent damage caused by
such loss.
Examples of causes of such losses are
≥A disc recorded and edited with this unit is played in a DVD recorder or computer disc drive manufactured by another company.
≥A disc used as described above and then played again in this unit.
≥A disc recorded and edited with a DVD recorder or computer disc drive manufactured by another company is played in this unit.
4
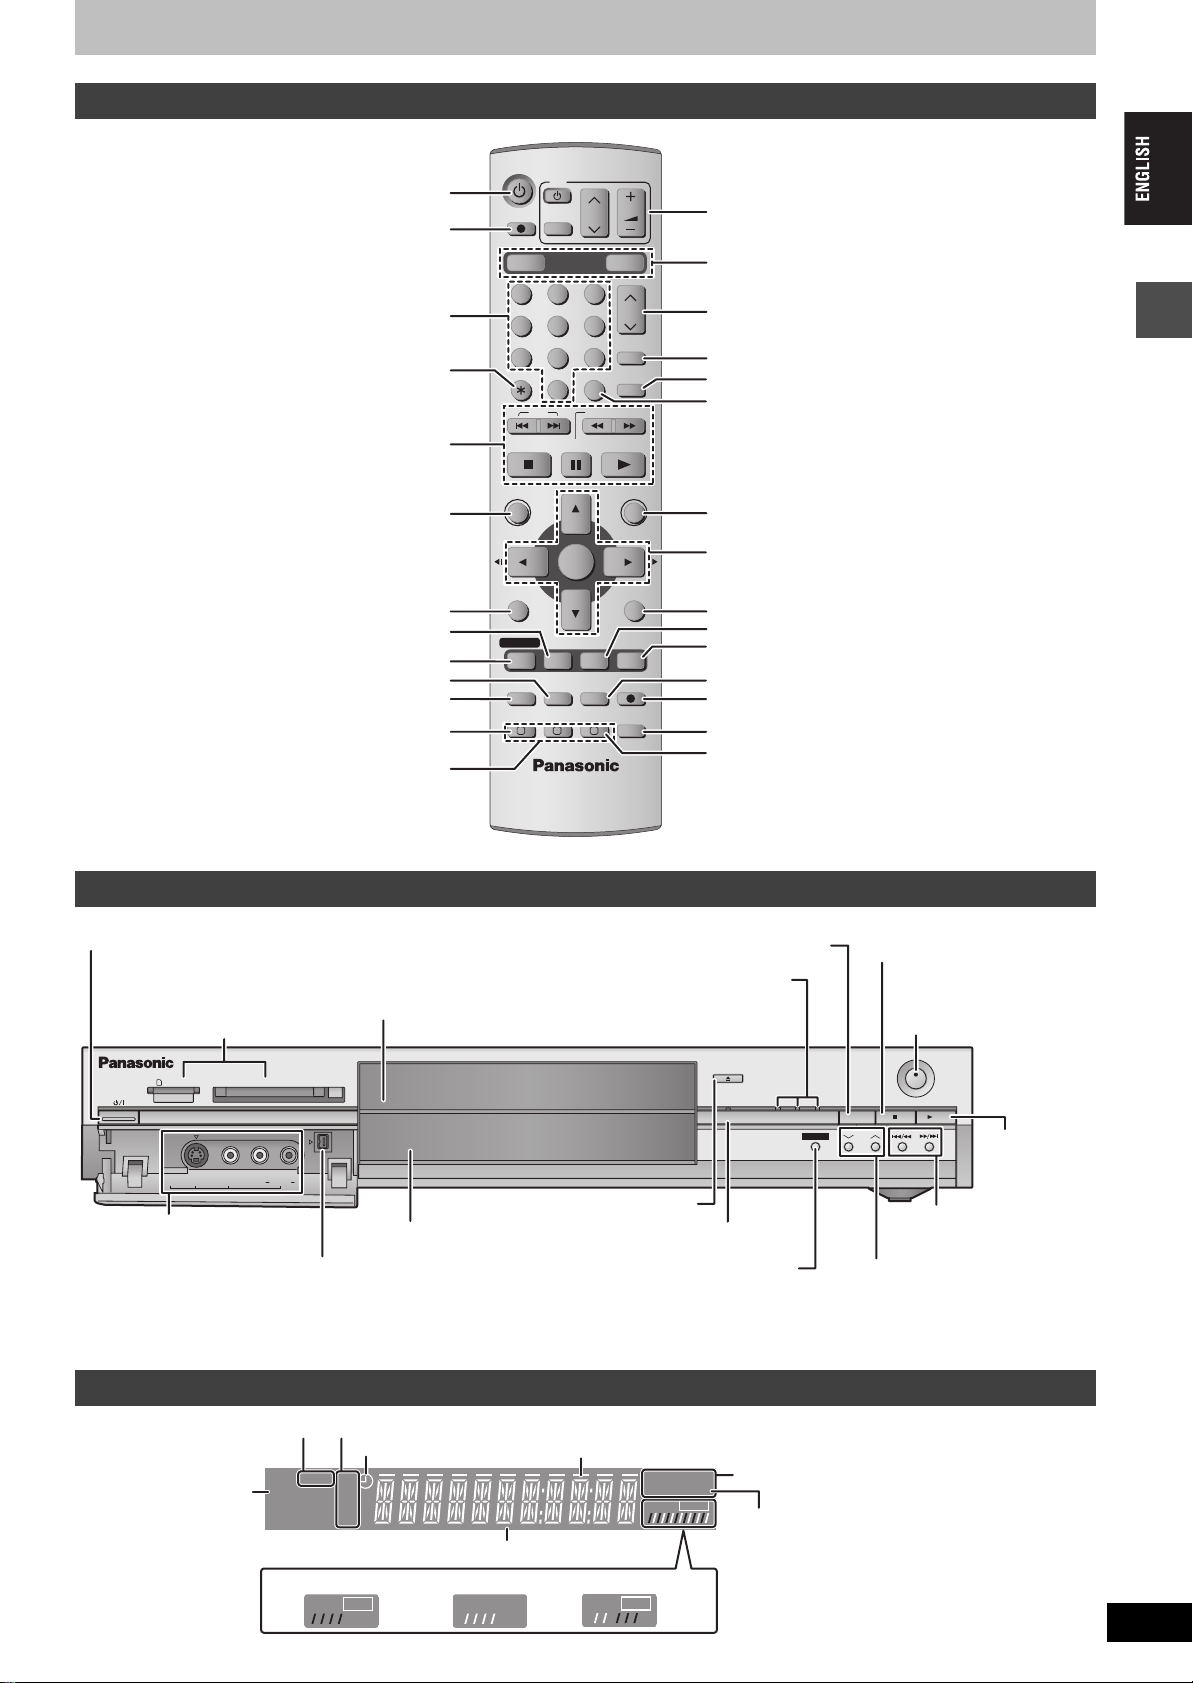
Control reference guide
REC
PLAY
PLAY
REC
Remote control
Turn the unit on (➡ page 10, 11)
Direct TV recording (➡page 18)
Select channels and title numbers etc./
Enter numbers
Basic operations for recording and play
Cancel
DVD
TV
DIRECT TV REC
AV
DRIVE SELECT
DVD
123
456
7809
CANCEL
SKIP
STOP
PAU S E
VOLUM E
CH
SD/PC
ShowView
INPUT SELECT
MANUAL SKIP
SLOW/SEARCH
PLAY/x1.3
Television operations (➡page 13)
Select drive (DVD, SD or PC)
(➡page 16, 22, 27)
CH
Channel select (➡page 16)
HOWVIEW screen (➡page 19)
Show S
Skip 30 seconds forward (➡page 23)
Input select (AV1, AV2, AV3, AV4 or DV)
(➡page 18, 35)
Show Top menu/Direct navigator (➡page 22, 30)
Show sub menu (➡page 30)
Show on-screen menu (➡page 28)
Show timer recording programme screen
(➡page 20)
Erase items (➡page 24)
Programme recording standby/release
Linked timer recordings with external equipment
(➡page 19, 20)
(➡page 21)
Manual tuning operation (➡page 45)
Main unit
Standby/on switch (Í/I) (➡ page 10, 11)
Press to switch the unit from on to standby mode or vice
versa. In standby mode, the unit is still consuming a small
amount of power.
SD/PC card slots (➡ page 26)
SD CARD PC CARD EJECT
AV3
S-VIDEO IN VIDEO IN AUDIO IN DV IN
L/MONO
Connection for camcorder
etc. (➡page 35)
Connection for digital
video (DV) camcorder
(➡page 35)
Rear panel terminals (➡ page 7, 8)
Disc tray (➡page 16, 22)
R
Display (➡below)
ENTER
REC MODEERASE
CREATE
CHAPTER
STATUS
FUNCTIONS
RETURN
TIME SLIP
REC
AUDI O
DIRECT NAVIGATOR
TOP MENU
SUB MENU
PROG/CHECK
TIMER
F
EXT LINK
A B C
DISPLAY
Select drive (➡ page 16, 22, 27)
Lights when the DVD, SD or PC
drive is selected
Open/close disc tray (➡page 16, 22)
Time Slip indicator (➡ page 17)
Skip the specified time/Display the television
image as a picture-in-picture (➡page 17, 23)
Show FUNCTIONS window (➡page 37)
Selection/Enter, Frame-by-frame (➡ page 10, 23)
Return to previous screen
Show status messages (➡ page 29)
Skip the specified time/Display the television image
as a picture-in-picture (➡page 17, 23)
Change recording mode (➡page 16)
Start recording (➡ page 16)
Select audio (➡ page 24)
Create chapter (➡ page 24)
Stop (➡page 16, 23)
Remote control signal sensor/
Start recording (➡ page 16)
OPEN/CLOSE
TIME SLIP
SD PCDVD
DRIVE SELECT
TIME SLIP
REC
CH
/x1.3
Start play
(➡page 22)
Skip/Slow/Search
(➡page 23)
Channel select
(➡page 16)
Getting started
The unit’s display
Linked timer recordings
with external equipment
indicator
Card indicator
EXT
Link
Recording mode
Timer recording indicator
SD PC
XP
SP
LP
EP
Recording
Transferring (dubbing) in progress indicator
Main display section
Playback
DVD
R-AM
VCD
REC
PLAY
Recording/Playback
Disc type
.MIX
D.MIX (multi-channel DVD-Audio only)
When lit: down-mixed audio is played.
When off: the disc prevents down-mixing so only
the two front channels can be played.
RQT7542
5
5
STEP
≥The equipment connections described are examples.
≥Before connection, turn off all equipment and read the appropriate operating instructions.
≥Peripheral equipment and optional cables sold separately unless otherwise indicated.
1
Connection
∫ Recommended connection for your television
What kind of input terminal does your television have?
Scart Highly recommended connection.
AV IN
Component
video
COMPONENT
VIDEO IN
Getting started
S-Video This terminal achieves a more vivid picture than the
S-VIDEO IN
≥You can enjoy high-quality RGB video from this
unit by connecting to an RGB compatible
television.
≥If your television has the Q Link feature, you can
use a variety of useful functions.
These terminals provide a purer picture than the SVideo terminal.
≥If your television is compatible with progressive
scan, you can enjoy high-quality progressive video.
If you have a progressive compatible CRT
television, we cannot recommend this connection
as some flickering may occur.
video terminal.
Required
cable(s)
Fully wired 21pin Scart cable
3 video cables ➡8 ➡11
S-Video cable ➡8 ➡11
Page No. for
connections
➡7
Page No. for TV
settings
➡11
≥If it’s a Q Link
television ➡10
Audio/Video The most basic connection.
AUDIO IN
R L
VIDEO IN
Audio/Video
cable (included)
➡8
➡11
Q Link functions
Q Link offers a range of convenient functions (For further details ➡page 50). Make sure to connect a fully wired 21-pin Scart cable to the
television if using the Q Link function.
The following systems from other manufacturers have similar function to Q Link from Panasonic. For details, refer to your television’s operating
instructions or consult your dealer.
≥Q Link (registered trademark of Panasonic)
≥DATA LOGIC (registered trademark of Metz)
≥Easy Link (registered trademark of Philips)
≥Megalogic (registered trademark of Grundig)
≥SMARTLINK (registered trademark of Sony)
∫ Examples of equipment you can connect to this unit’s terminals
Television
Satellite/digital
receiver or decoder
From AV1, AUDIO/VIDEO OUT or
COMPONENT VIDEO OUT terminals
To AV2 or AV4 input terminals (rear)
From AUDIO OUT terminals or
DIGITAL AUDIO OUT terminal
This unit
To AV3 or DV input terminals (front) (➡ page 35)
Amplifier
Camcorder
RQT7542
6
Video cassette recorder
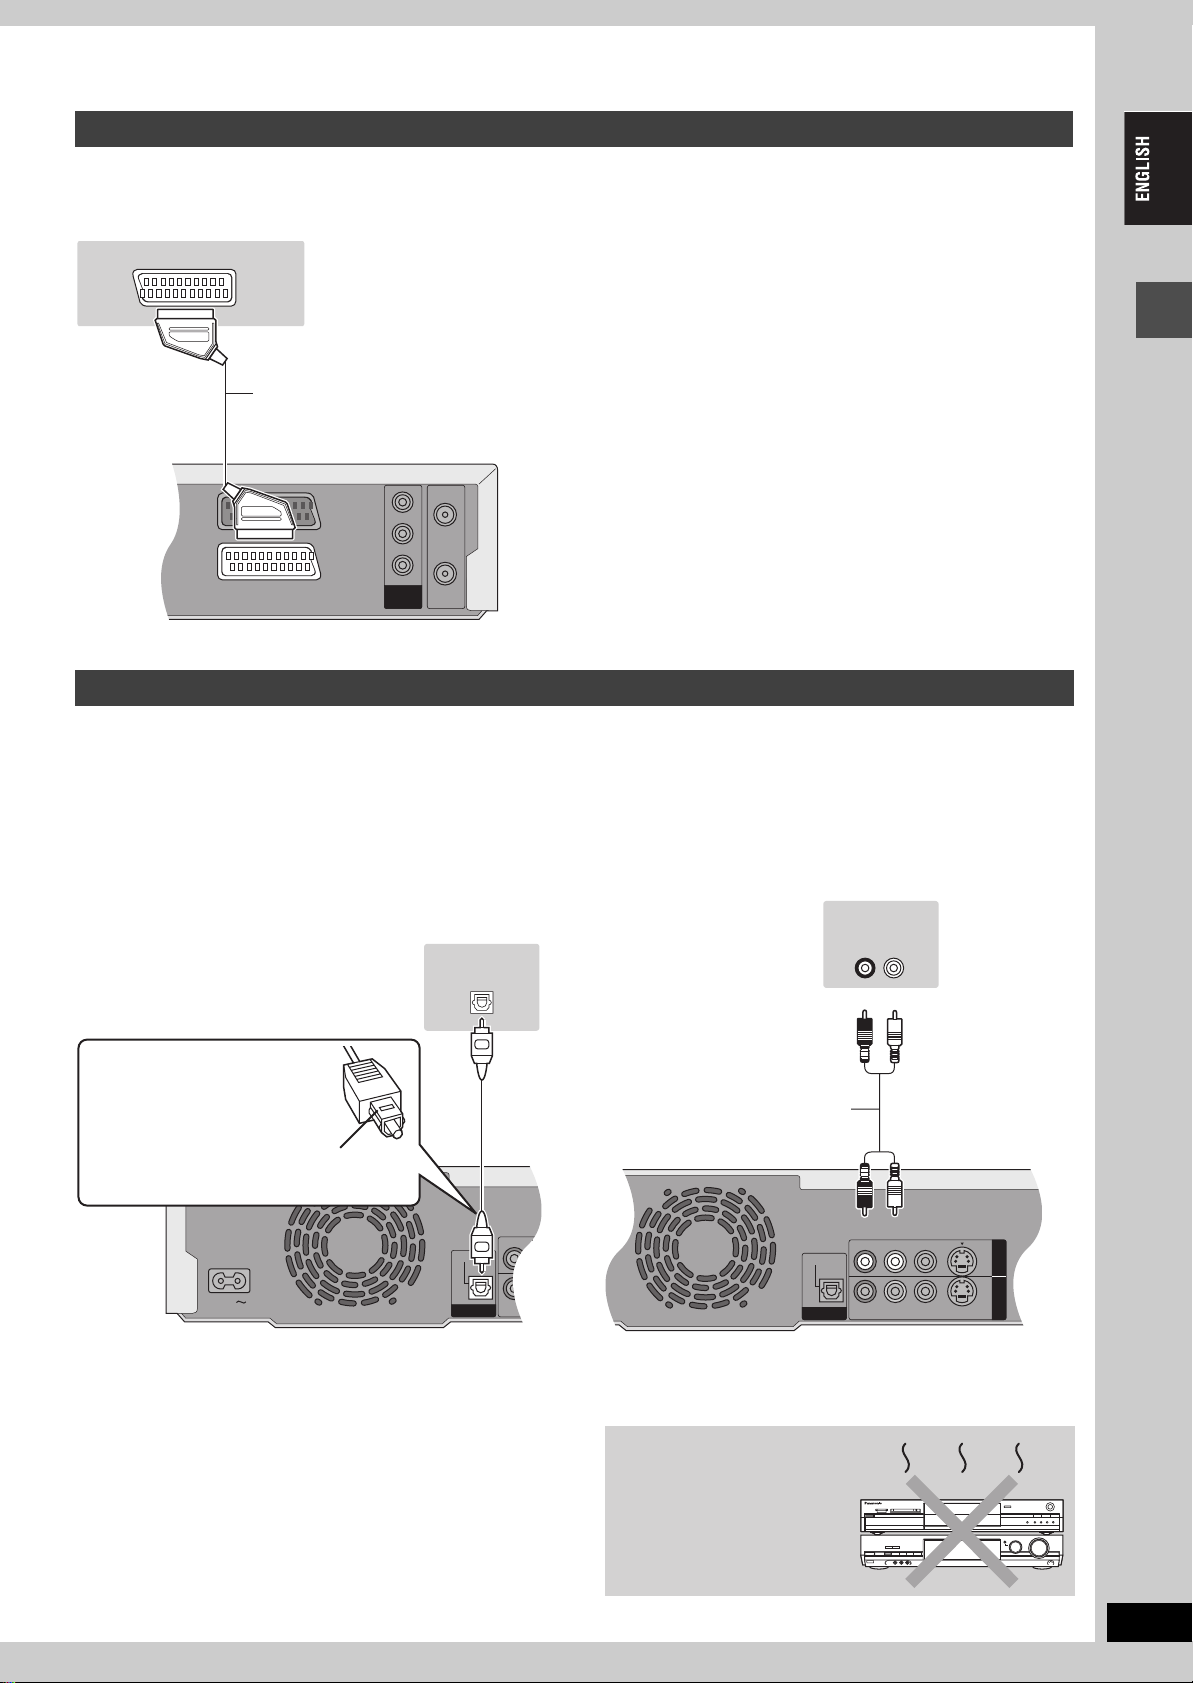
∫ Do not connect the unit through a video cassette recorder
Video signals fed through video cassette recorders will be affected by copyright
protection systems and the picture will not be shown correctly on the television.
≥When connecting to a television with a built in VCR, connect to the input terminals on
the television side, not the VCR side.
∫ When the unit is not to be used for a long time
To save power, unplug it from the household mains socket. This
unit consumes a small amount of power, even when it is turned off
(approx. 3 W).
6
Television
This unit
VCR
Television
VCR
This unit
Before moving the unit, ensure the disc tray is
empty.
Failure to do so will risk severely damaging the disc and
the unit.
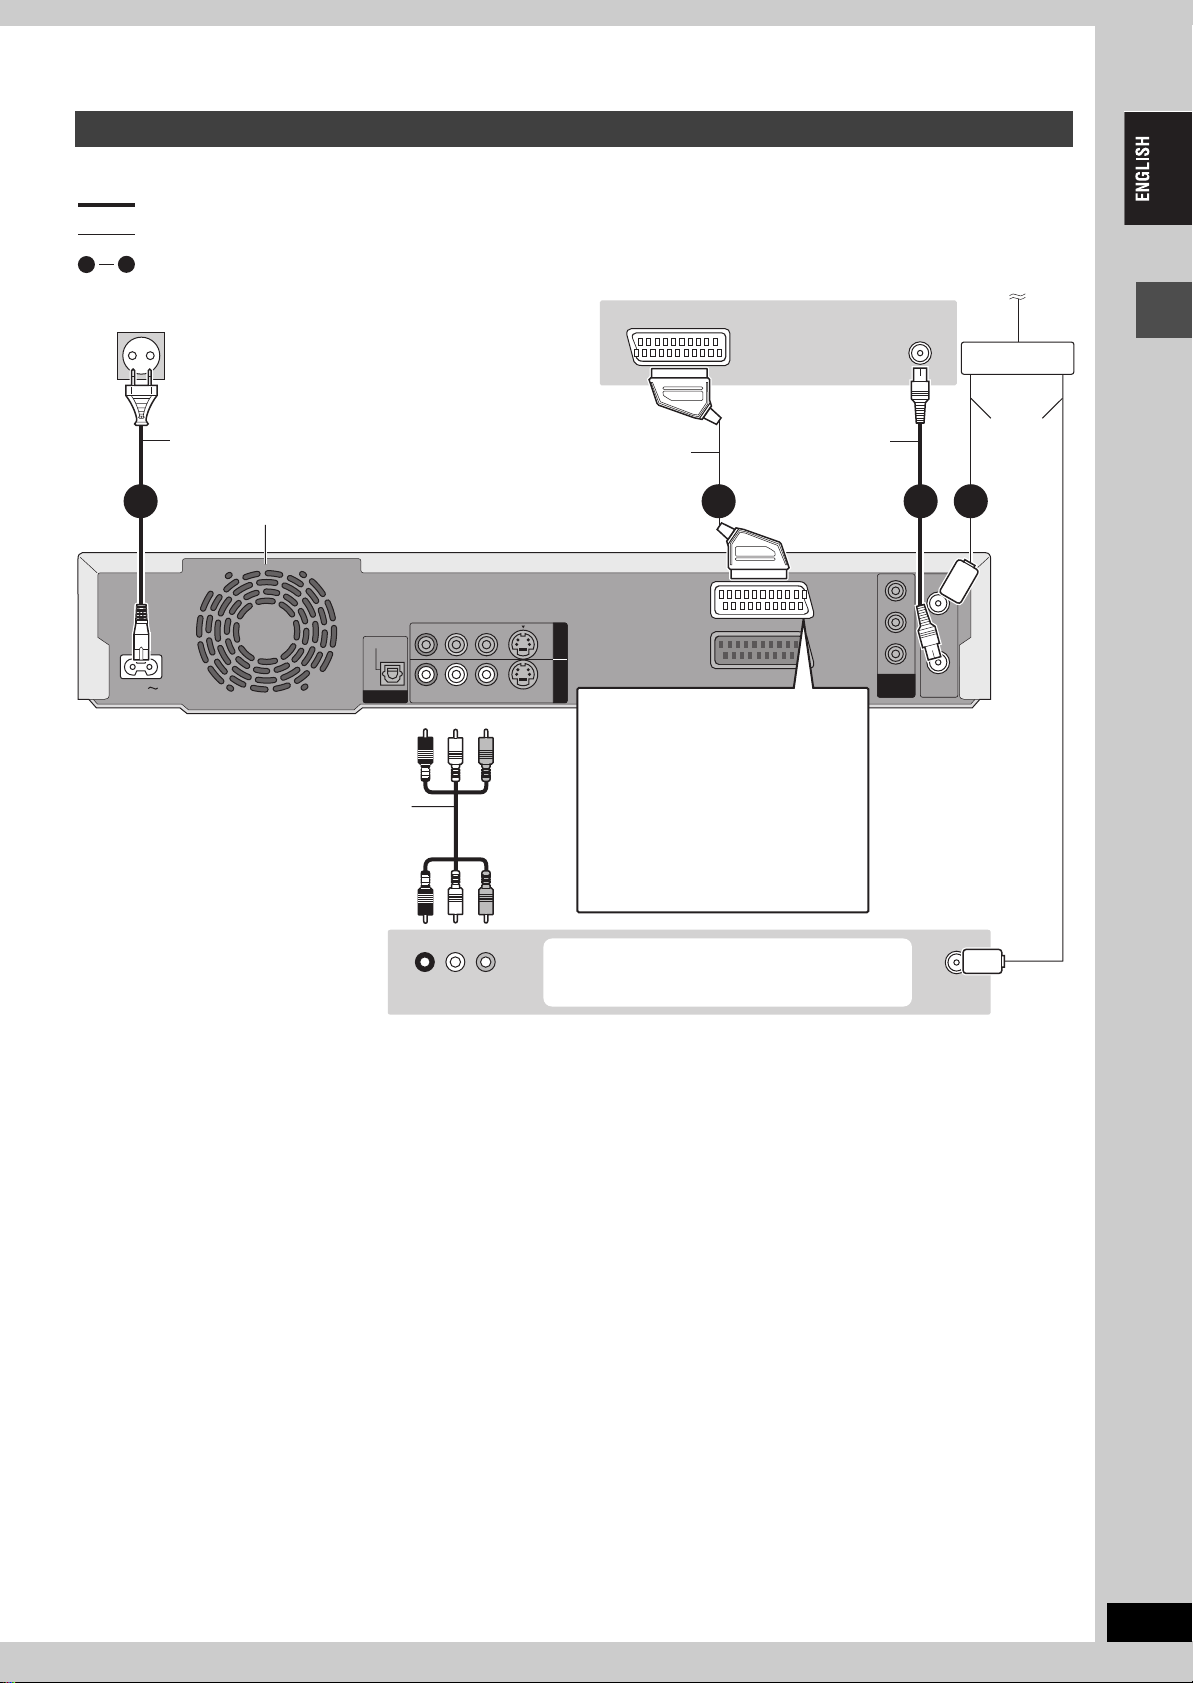
Connecting a television with 21-pin Scart terminal and VCR
When there is no 21-pin Scart terminal on the television (➡ page 8)
indicates included accessories.
indicates accessories not included.
4
1
are required connections. Connect in the numbered order.
To household mains socket
(AC 220–240 V, 50 Hz)
Television’s
rear panel
AV IN
VHF/UHF
RF IN
To the aerial
Splitter
AC mains lead
Connect only after all other
connections are complete.
Cooling fan
AC IN
This unit’s rear panel
OPTICAL
DIGITAL AUDIO OUT
(PCM/BITSTREAM)
Audio/Video cable
VCR’s rear panel
Fully wired 21-pin Scart cable
VIDEO
R - AUDIO - L
R - AUDIO - L
VIDEO
S-VIDEO
S-VIDEO
Red White Yellow
Red White Yellow
R L
AUDIO OUT VIDEO OUT
RF coaxial cable
OUT
AV4 I N
AV1 (TV)
AV2 (DECODER/EXT)
AV1 t e r m inal
If your television is equipped with RGB
input capability, by connecting with a
fully wired 21-pin Scart cable you can
see video using RGB output on this
unit (➡below).
To output in RGB select
“RGB ( without component )” from
“AV1 Output” in the SETUP menu
(➡page 44) after tuning is completed
(➡page 10, 11).
You can also connect with the AV2 terminal
on this unit using the 21-pin Scart cable.
Aerial
cable
2 134
Y
RF IN
PB
PR
COMPONENT
RF OUT
VIDEO OUT
(PROGRESSIVE/
INTERLACE)
Use a splitter if you
also want to connect
the aerial to your VCR.
VHF/UHF
RF IN
Getting started
∫ RGB
This refers to the three primary colours of light, red (R), green (G), and blue (B) and also the method of producing video that uses them. By
dividing the video signal into the three colours for transmission, noise is reduced for even higher quality images.
RQT7542
7
7
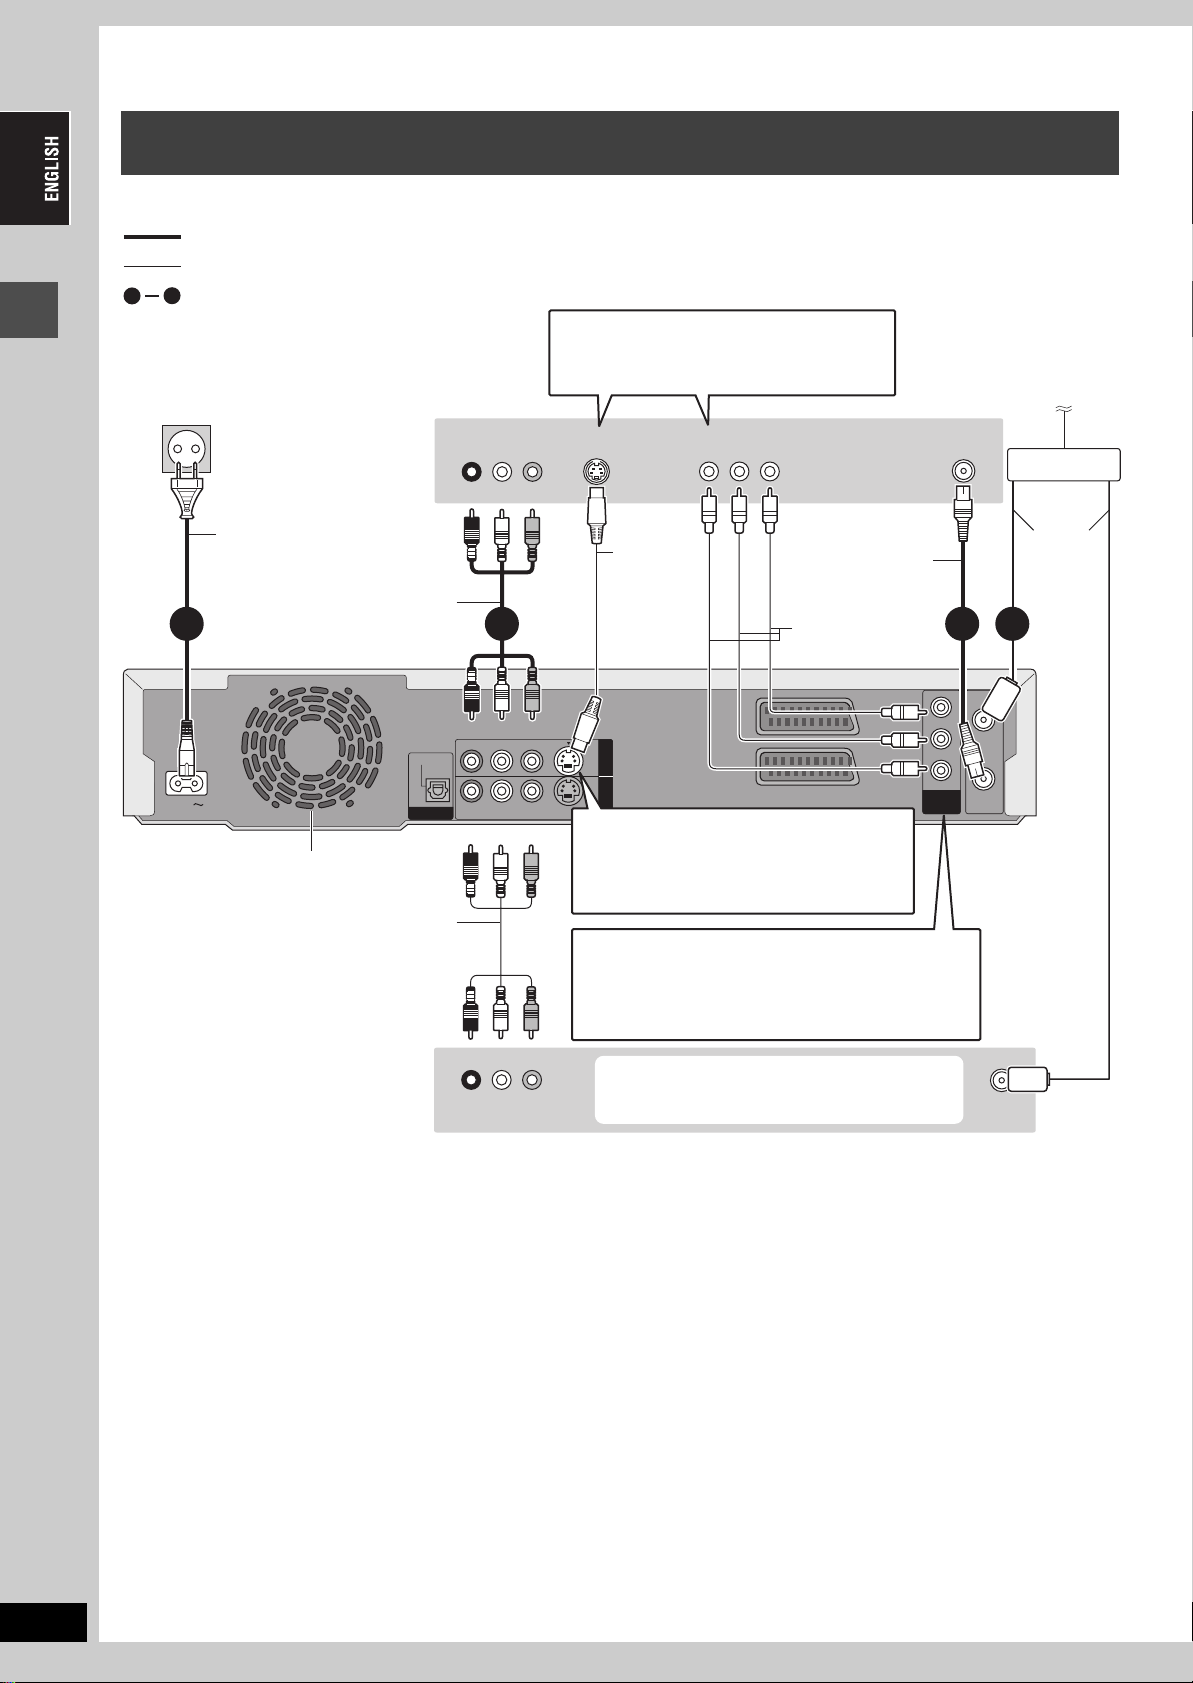
STEP
1
Connection
Connecting a television with AUDIO/VIDEO, S-VIDEO or COMPONENT VIDEO
terminals and VCR
Connecting to the television using the 21-pin Scart cables (➡page 7)
indicates included accessories.
indicates accessories not included.
are required connections. Connect in the numbered order.
4
1
When making this connection, ensure you
connect the audio cables to the corresponding
audio input terminals on the television.
To household mains socket
(AC 220–240 V, 50 Hz)
Getting started
Tel evisio n’s
rear panel
AUDIO IN
VIDEO IN
R L
Red White Yellow
S-VIDEO IN
COMPONENT
VIDEO IN
VHF/UHF
RF IN
To the aerial
Splitter
AC mains lead
Connect only after all other
connections are complete.
AC IN
This unit’s rear panel
Cooling fan
Audio/Video cable
OPTICAL
DIGITAL AUDIO OUT
(PCM/BITSTREAM)
Audio/Video cable
VCR’s rear panel
Red White Yellow
R - AUDIO - L
R - AUDIO - L
VIDEO
VIDEO
S-VIDEO
S-VIDEO
Red White Yellow
Red White Yellow
R L
AUDIO OUT VIDEO OUT
S-Video
cable
OUT
AV4 I N
RF coaxial cable
Video cable
AV1 (TV)
AV2 (DECODER/EXT)
COMPONENT
VIDEO OUT
(PROGRESSIVE/
INTERLACE)
2 134
Y
PB
PR
S-VIDEO OUT terminal
The S-VIDEO OUT terminal achieves a more
vivid picture than the VIDEO OUT terminal.
(Actual results depend on the television.)
COMPONENT VIDEO OUT terminal
These terminals can be used for either interlace or
progressive output and provide a purer picture than the
S-VIDEO OUT terminal (➡below).
≥Connect to terminals of the same colour.
You can also connect with the AV2 terminal
on this unit using the 21-pin Scart cable.
Aerial
cable
RF IN
RF OUT
Use a splitter if
you also want
to connect the
aerial to your
VCR.
VHF/UHF
RF IN
RQT7542
8
∫ Component video output
Component signal outputs the colour difference signals (PB/PR) and luminance signal (Y) separately in order to achieve high fidelity in
reproducing colours. If the television is compatible with progressive output, a high quality picture can be output because this unit’s component
video output terminal outputs a progressive output signal (➡page 49).
For progressive output (➡page 12)
8
Connecting a satellite receiver, digital receiver or decoder
PR
RF IN
RF OUT
COMPONENT
VIDEO OUT
PB
Y
AV1 (TV)
AV2 (DECODER/EXT)
R - AUDIO -
R - AUDIO -
OPTICAL
DIGITAL AUDIO OUT
(PCM/BITSTREAM)
AC IN
R - AUDIO - L
VIDEO
S-VIDEO
R - AUDIO - L
VIDEO
S-VIDEO
OPTICAL
OUT
AV4 I N
DIGITAL AUDIO OUT
(PCM/BITSTREAM)
≥Decoder here means the device used to decode scrambled broadcasts (Pay TV).
≥Change the “AV2 Input” and “AV2 Connection” settings in the SETUP menu to match the connected equipment (➡page 44) after tuning is
completed (➡page 10, 11).
AV OUT
Satellite receiver,
digital receiver or
decoder’s rear panel
21-pin Scart cable
This unit’s
rear panel
(PROGRESSIVE/
INTERLACE)
Connecting an amplifier or system component
∫ To enjoy multi-channel surround sound on
DVD-Video
Connect an amplifier with Dolby Digital, DTS and MPEG decoders
using an optical digital audio cable and change the settings in
“Digital Audio Output” (➡page 43) after tuning is completed
(➡page 10, 11).
≥
You cannot use DTS Digital Surround decoders not suited to DVD.
≥Even if using this connection, output will be only 2 channels when
playing DVD-Audio.
Viewing video from the decoder on the television while the
unit is stopped, or while recording
If you connected the television to the AV1 terminal and the decoder
to the AV2 terminal on this unit, press [0]i[ENTER]. (“DVD”
appears on the unit’s display.)
Press again to cancel. (“TV” appears on the unit’s display.)
≥If the television is compatible with RGB input, the RGB output
signal from the decoder can also be output from the main unit the
same way.
Getting started
∫ Connection to a stereo amplifier
Amplifier’s rear panel
Optical digital audio cable
Do not bend this cable sharply.
Insert fully, with this side facing up.
This unit’s rear panel
Amplifier’s rear panel
AUDIO IN
R L
OPTICAL IN
Red White
Audio cable
Red White
This unit’s rear panel
Do not place the unit on
amplifiers or equipment
that may become hot.
The heat can damage the unit.
RQT7542
9
9
STEP
2
Channel reception settings
Í/ l
Preset Download
(Setup with Q Link functions)
SD CARD PC CARD EJECT
DVD
Í DVD
Getting started
3,4,2,1
ENTER
TV
DIRECT TV REC
AV
DRIVE SELECT
DVD
123
456
7809
CANCEL
SKIP
STOP
PAU S E
DIRECT NAVIGATOR
TOP MENU
ENTER
SUB MENU
CH
INPUT SELECT
SLOW/SEARCH
PLAY/x1.3
OPEN/CLOSE
TIME SLIP
VOLUM E
SD/PC
CH
ShowView
MANUAL SKIP
FUNCTIONS
RETURN
RETURN
PROG/CHECK
DISPLAY
STATUS
TIME SLIP
TIMER
REC MODEERASE
CREATE
CHAPTER
REC
AUDIO
F
EXT LINK
A B C
SD PCDVD
DRIVE SELECT
TIME SLIP
CH
X CH W
REC
/x1.3
When connecting to a television that has the Q Link
function (➡page 50) with a fully wired 21-pin Scart
cable (➡ page 7).
You can download the tuning positions from the television.
This unit’s Auto Clock Setting function synchronizes the time when
the TV channel that is broadcasting time and date information is
tuned.
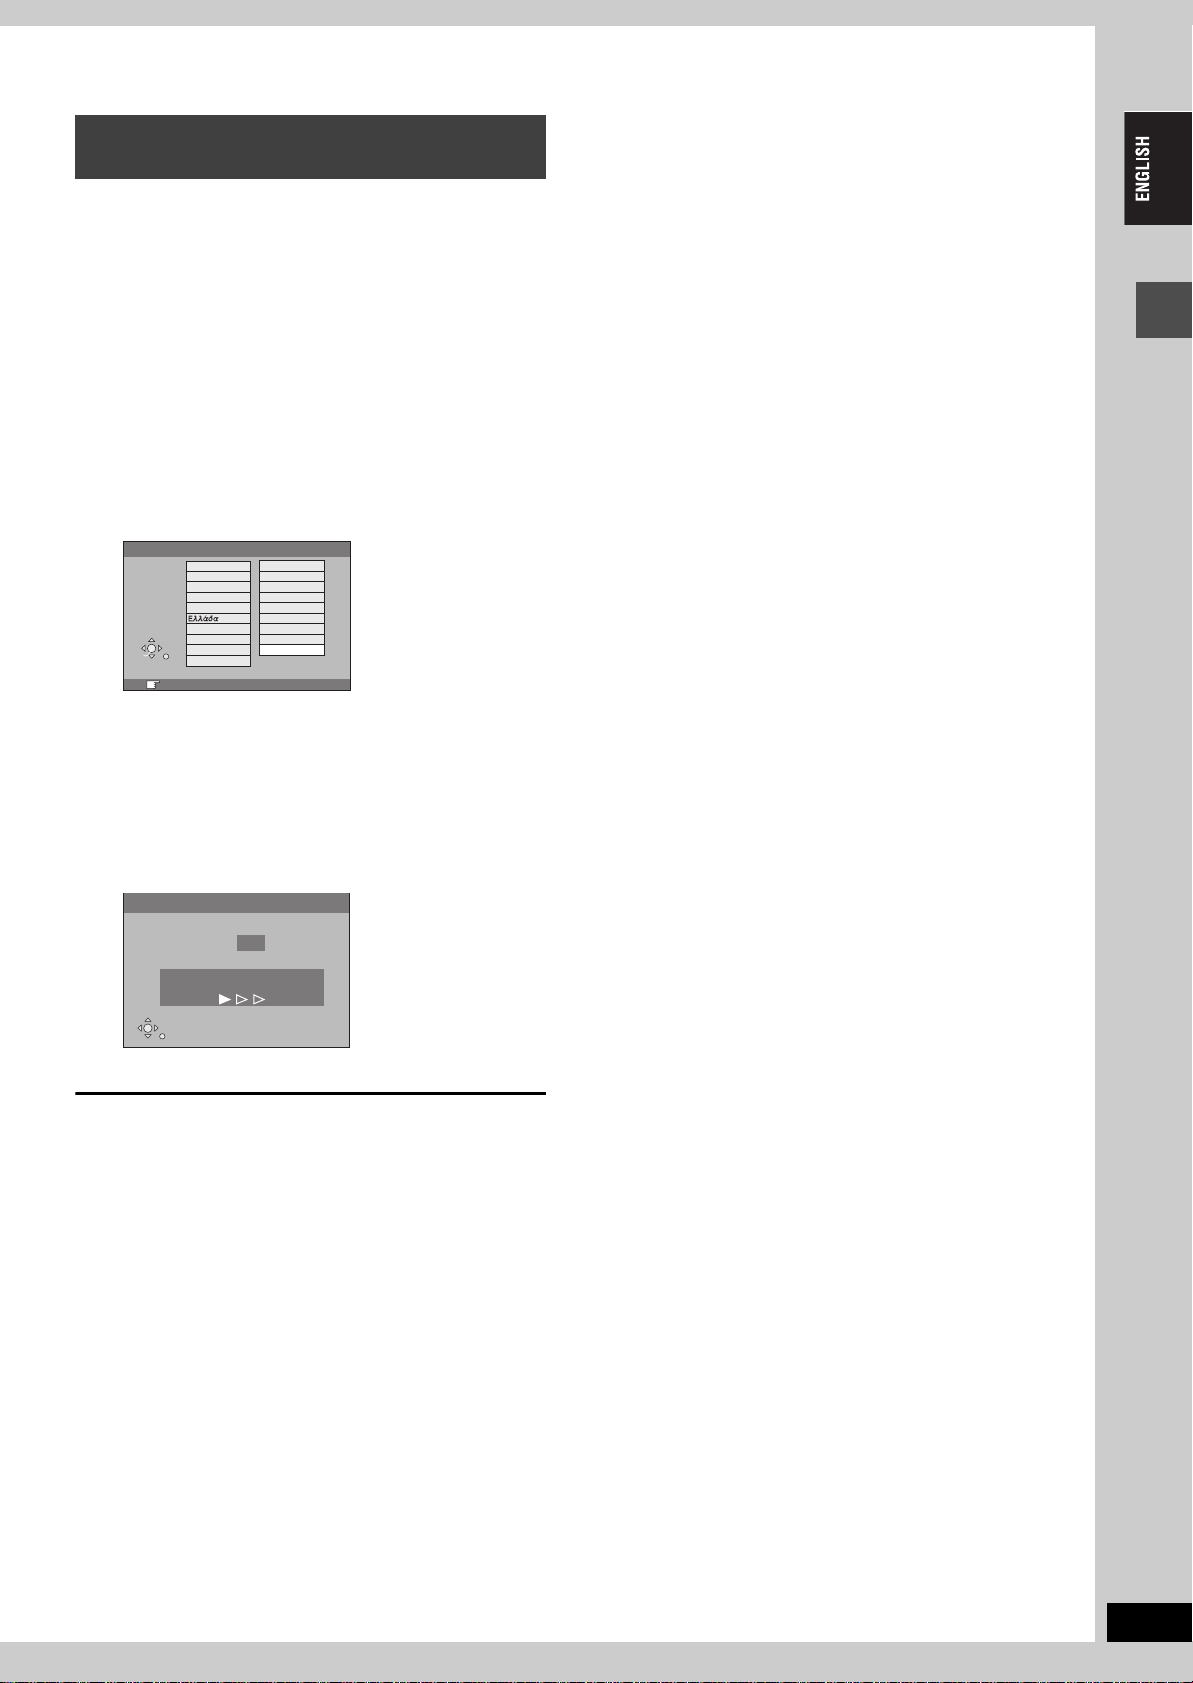
1 Turn on the television and select the
appropriate AV input to suit the
connections to this unit.
2 Press [Í DVD] to turn the unit on.
Downloading from the television starts.
Download from TV
Pos 4
Download in progress, please wait.
RETURN: to abort
RETURN
Downloading is complete when you see the television
picture.
≥If the Country setting menu appears on the television,
press [3, 4, 2, 1] to select the country and press
[ENTER].
Country
België
Belgique
Belgien
Danmark
España
France
SELECT
Italia
Nederland
ENTER
Norge
RETURN
RETURN: leave ENTER: access
If you select “Schweiz”, “Suisse” or “Svizzera” in the Country
setting, or when the television tuning setting has been set to
Switzerland, the “Power Save” setting menu appears. Select
“On” or “Off” (➡ page 41).
Deutschland
Österreich
Portugal
Suomi
Sverige
Schweiz
Suisse
Svizzera
Others
RQT7542
10
To stop partway
Press [RETURN].
∫ If the clock setting menu appears
Set the clock manually (➡ page 47).
∫ To confirm that stations have been tuned
correctly (➡page 45)
∫ To restart Preset Download (➡ page 46)
10
Auto-Setup
(Setup without Q Link functions)
≥When connecting to a television with the VIDEO OUT,
S-VIDEO OUT or COMPONENT VIDEO OUT terminal
(➡page 8).
≥When connecting to a television that does not have
the Q Link function (➡page 50).
This unit’s Auto-Setup function automatically tunes all available TV
stations and synchronizes the time when the TV channel that is
broadcasting time and date information is tuned.
1 Turn on the television and select the
appropriate AV input to suit the
connections to this unit.
2 Press [Í DVD] to turn the unit on.
The Country setting menu appears.
Country
België
Belgique
Belgien
Danmark
España
France
SELECT
Italia
Nederland
ENTER
Norge
RETURN
RETURN: leave ENTER: access
Deutschland
Österreich
Portugal
Suomi
Sverige
Schweiz
Suisse
Svizzera
Others
If you select “Schweiz”, “Suisse” or “Svizzera”, the “Power
Save” setting menu appears. Select “On” or “Off”
(➡page 41).
3 Press [3, 4, 2, 1] to select the
country.
4 Press [ENTER].
Auto-Setup starts. This takes about 8 minutes.
Auto-Setup
Ch 1
Auto-Setup in progress, please wait.
RETURN: to abort
RETURN
Auto-Setup is complete when you see the television picture.
Getting started
To stop partway
Press [RETURN].
∫ If the clock setting menu appears
Set the clock manually (➡page 47).
∫ To confirm that stations have been tuned
correctly (➡ page 45)
∫ To restart Auto-Setup (➡page 46)
You can also use the following method to restart Auto-Setup.
When the unit is on and stopped
Press and hold [X CH] and [CH W] on the main unit until the
Country setting screen appears.
≥All the settings except for the ratings level, ratings password and
time settings return to the factory preset. The timer recording
programmes are also cancelled.
RQT7542
11
11
STEP
3
Set up to match your television and remote control
DVD
TV
VOLUM E
AV
DRIVE SELECT
SKIP
PAU S E
ENTER
CH
SD/PC
ShowView
INPUT SELECT
MANUAL SKIP
SLOW/SEARCH
PLAY/x1.3
FUNCTIONS
RETURN
CH
DIRECT TV REC
DVD
Numbered
buttons
123
456
7809
CANCEL
STOP
DIRECT NAVIGATOR
TOP MENU
3,4,2,1
Getting started
ENTER
SUB MENU
TV operation
buttons
FUNCTIONS
RETURN
PROG/CHECK
DISPLAY
STATUS
TIME SLIP
TIMER
REC MODEERASE
CREATE
CHAPTER
REC
AUDIO
F
EXT LINK
A B C
and press [1].
4 Press [3, 4] to select “TV Aspect”
and press [ENTER].
5 Press [3, 4] to select the TV aspect
and press [ENTER].
SETUP
Tun in g
Others
Disc
Picture
Sound
Display
Connection
≥16:9: 16:9 widescreen television
≥4:3: 4:3 aspect television
[RAM] Titles are recorded as they appear on screen.
[DVD-V] Video recorded for a widescreen is played as Pan
& Scan (unless prohibited by the producer of the
disc) (➡ page 49).
≥Letterbox: 4:3 aspect television
Widescreen picture is shown in the letterbox style
(➡page 49).
16:9 WIDE TV
4:3 TV
SELECT
ENTER
RETURN
TV Aspect
16:9
4:3
Letterbox
To enjoy progressive video
You can enjoy progressive video by connecting this unit’s
COMPONENT VIDEO OUT terminals to an LCD/plasma television
or LCD projector compatible with progressive scan (➡ page 49).
Selecting television type and aspect
Choose the setting to suit your television and preference.
1 While stopped
Press [FUNCTIONS].
1 While stopped
Press [FUNCTIONS].
FUNCTIONS
DVD
Playback
Recording
Dubbing
Edit
Setting
ENTER
RETURN
SD/PC
TIMER RECORDING
DUBBING
SETUP
No Disc
2 Press [3, 4, 2, 1] to select
“SETUP” and press [ENTER].
3 Press [3, 4] to select “Connection”
and press [1].
4 Press [3, 4] to select “Progressive”
and press [ENTER].
5 Press [3, 4] to select “On” and
3 Press [3, 4] to select “Connection”
2 Press [3, 4, 2, 1] to select
“SETUP” and press [ENTER].
SETUP
Tuning
Others
Disc
Picture
Sound
Display
Connection
Manual
Auto-Setup Restart
Download from TV
TAB
SELECT
RETURN
press [ENTER].
Output becomes progressive.
[Note]
≥When connected to a regular television (CRT: Cathode ray tube)
or a multi system television using PAL mode, even if it is
progressive compatible, progressive output can cause some
flickering. Turn off “Progressive” if this occurs (➡ page 29).
≥There is no output from the COMPONENT VIDEO OUT terminals
if “AV1 Output” in the SETUP menu is set to “RGB ( without
component )”. Set this item to either “Video ( with component )” or
“S-Video ( with component )” (➡ page 44).
≥If the unit is connected to the television through VIDEO OUT, S-
VIDEO OUT or AV1 terminal, output will be interlace irrespective
of the settings.
RQT7542
12
To exit the screen
Press [RETURN] several times.
To return to the previous screen
Press [RETURN].
12
SETUP
Disc
Tun in g
Remote Control
Others
Press “±” and “ENTER” together
for more than 2 seconds on the remote
control.
Television operation
You can configure the remote control TV operation buttons to turn
the television on/off, change the television input mode, select the
television channel and change the television volume.
Point the remote control at the television
While pressing [Í TV], enter the code
with the numbered buttons.
e.g., 01: [0] ➡ [1]
Manufacturer and Code No.
Brand Code
Panasonic 01, 02, 03, 04, 45
AIWA 35
AKAI 27, 30
BLAUPUNKT 09
BRANDT 10, 15
BUSH 05, 06
CURTIS 31
DESMET 05, 31, 33
DUAL 05, 06
ELEMIS 31
FERGUSON 10
GOLDSTAR/LG 31
GOODMANS 05, 06, 31
GRUNDIG 09
HITACHI 22, 23, 31, 40, 41, 42
INNO HIT 34
IRRADIO 30
ITT 25
JVC 17, 39
LOEWE 07
METZ 28, 31
MITSUBISHI 06, 19, 20
MIVAR 24
NEC 36
NOKIA 25, 26, 27
NORDMENDE 10
ORION 37
PHILIPS 05, 06
PHONOLA 31, 33
PIONEER 38
PYE 05, 06
RADIOLA 05, 06
SABA 10
SALORA 26
SAMSUNG 31, 32, 43
SANSUI 05, 31, 33
SANYO 21
SBR 06
SCHNEIDER 05, 06, 29, 30, 31
SELECO 06, 25
SHARP 18
SIEMENS 09
SINUDYNE 05, 06, 33
SONY 08
TELEFUNKEN 10, 11, 12, 13, 14
THOMSON 10, 15, 44
TOSHIBA 16
WHITE WESTINGHOUSE 05, 06
Test by turning on the television and changing channels. Repeat
the procedure until you find the code that allows correct operation.
≥If your television brand is not listed or if the code listed for your
television does not allow control of your television, this remote
control is not compatible with your television.
When other Panasonic products
respond to this remote control
If other Panasonic products are placed close together, change the
remote control code on the main unit and the remote control (the
two must match).
Under normal circumstances use the factory set code “DVD 1”.
1 While stopped
Press [FUNCTIONS].
2 Press [3, 4, 2, 1] to select
“SETUP” and press [ENTER].
3 Press [3, 4] to select “Others” and
press [1].
4 Press [3, 4] to select “Remote
Control” and press [ENTER].
5 Press [3, 4] to select the code
(“DVD 1”, “DVD 2” or “DVD 3”) and
press [ENTER].
6 To change the code on the remote control
While pressing [ENTER], press and
hold the numbered button ([1], [2] or
[3]) for more than 2 seconds.
7 Press [ENTER].
∫ When the following indicator appears on the
unit’s display
The unit’s remote
control code
Change the code on the remote control to match the main unit’s
(➡step 6).
[Note]
Executing “Shipping Condition” in the SETUP menu returns the
main unit code to “DVD 1”. Change the remote control code to 1
(➡step 6).
Getting started
RQT7542
13
13
Disc and card information
Discs you can use for recording and play (12 cm/8 cm)
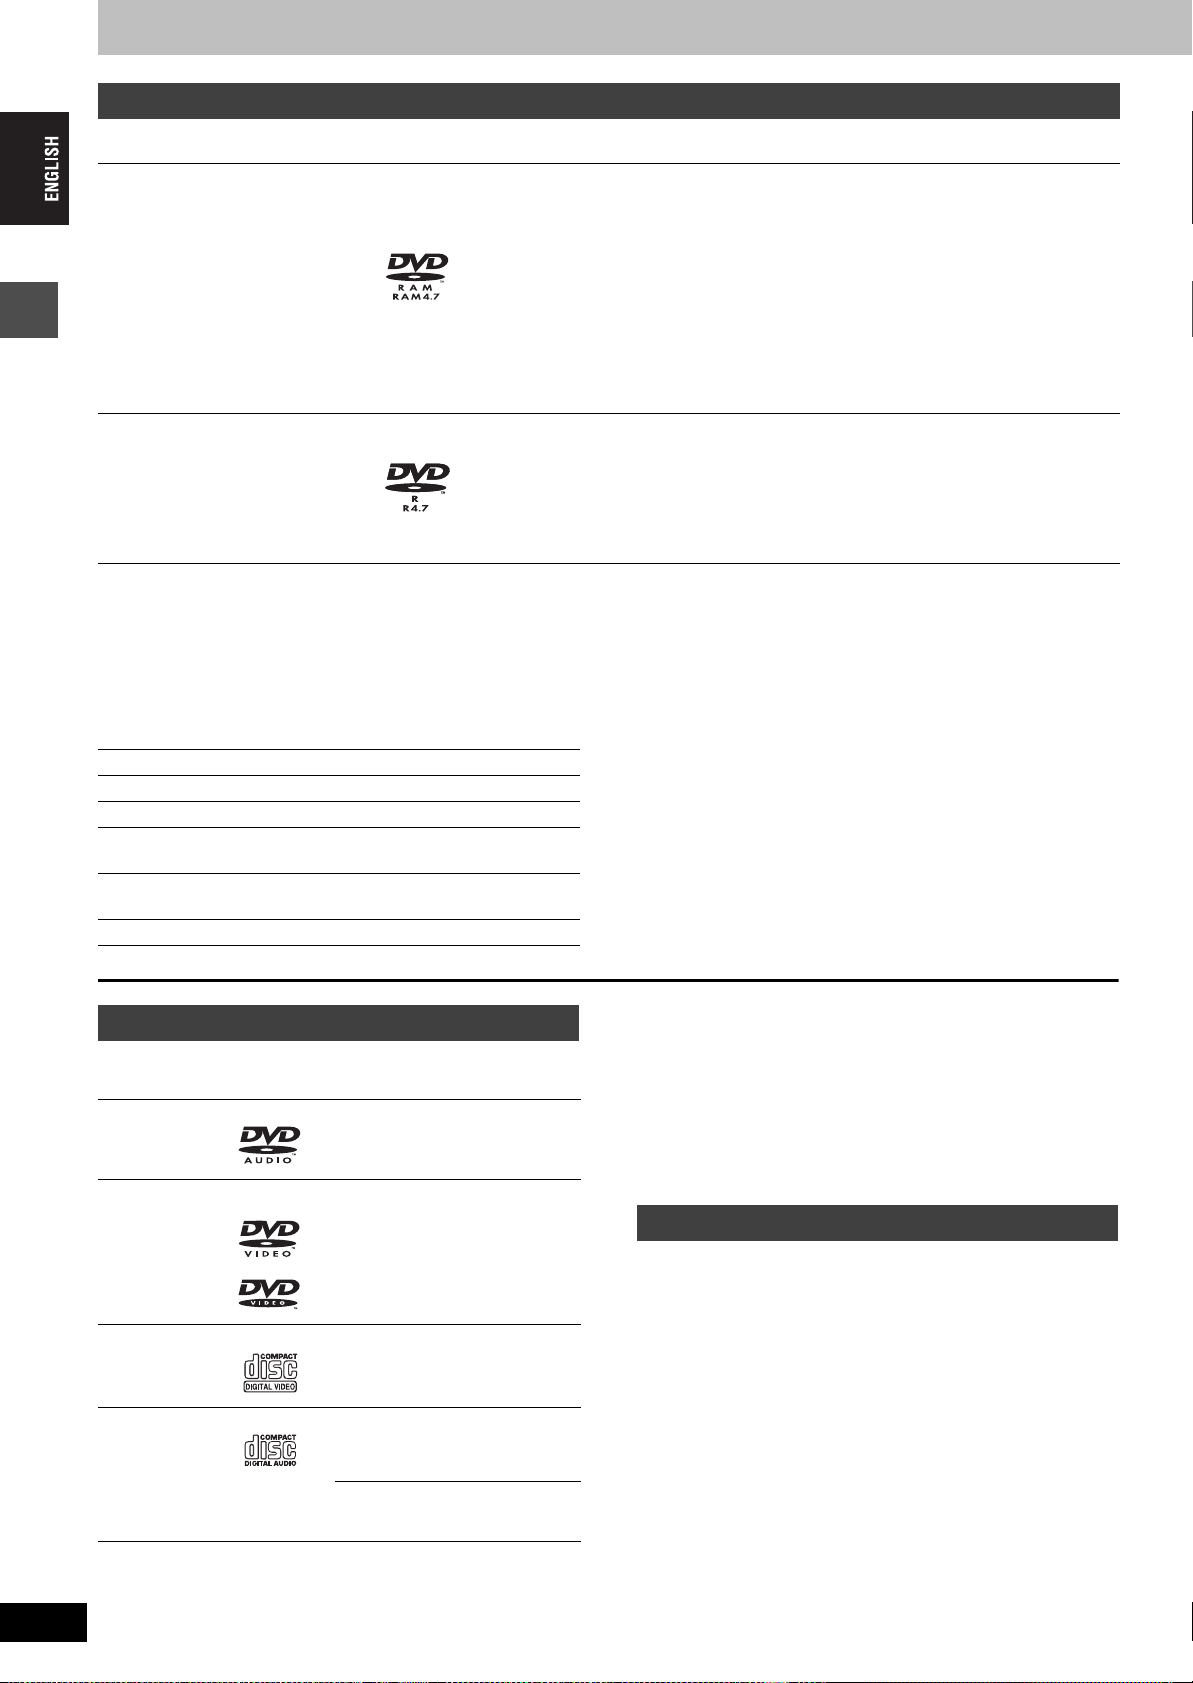
Disc type Logo Instructions
Re-writable discs
≥You can record up to 16 hours [in EP (8Hour) mode on double-sided disc. You cannot
record or play continuously on two sides] (➡ page 17, Recording modes and
DVD-RAM
≥4.7 GB/9.4 GB, 12 cm
≥2.8 GB, 8 cm
Indicated in these instructions with
[RAM]
DVD-R
≥4.7 GB, 12 cm
≥1.4 GB, 8 cm
Getting started
[DVD-R]
≥We recommend using Panasonic discs. DVD-R from other manufacturers may not be recorded or played due to the condition of the recording.
≥This unit cannot record to discs containing both PAL and NTSC signals. Play of discs recorded with both PAL and NTSC on another unit is not
guaranteed.
Which should I use, DVD-RAM or DVD-R?
The following chart indicates the differences. Select based upon
what you require.
(Y: Possible, t: Impossible) DVD-RAM DVD-R
Re-writable Yt
Edit Y§1
Play on other players
Recording both M 1 and M 2 of
bilingual broadcast
Recording broadcasts that allow
one copy
Recording 16:9 aspect picture Y§6
§2
Y
Y
§5
Y
approximate recording times).
≥You can view the title being recorded from the beginning (Chasing playback, Time Slip)
(➡page 17).
≥Scratch and dust resistant cartridge discs and large capacity double sided discs (9.4 GB)
are commercially available.
≥You can record digital broadcasts that allow “One time only recording” when using CPRM
(Content Protection for Recordable Media) compatible discs (➡ page 49).
≥This unit is compatible with 1k–3k recording speed discs.
≥
You can play and transfer (dub) still pictures taken on a digital camera etc. (➡page 26, 36).
One time recording discs (recordable until the disc is full)
≥You can record up to 8 hours [in EP (8Hour) mode] (➡ page 17, Recording modes and
approximate recording times).
≥By finalizing the disc, you can play it in a DVD player as DVD-Video (Play only)
(➡page 39, 49).
≥You cannot record digital broadcasts that allow “One time only recording”.
≥This unit is compatible with 1k–4k recording speed discs.
§ 1 You can erase, enter name and change thumbnail. Available
space does not increase after erasing.
§ 2 Only on DVD-RAM compatible players.
§ 3 After finalizing the disc (➡page 39, 49).
§ 4 Only one is recorded (➡ page 43, Bilingual Audio Selection).
§ 5CPRM (➡ page 49) compatible discs only.
§3
Y
§4
t
t
§ 6 The picture is recorded in 4:3 aspect.
RQT7542
14
Play-only discs (12 cm/8 cm)
Disc type Logo Instructions
DVD-Audio
[DVD-A]
DVD-Video
[DVD-V]
Video CD
[VCD]
Audio CD
[CD]
—
14
High fidelity music discs
≥Played on this unit in 2
channels.
High quality movie and music
discs
Recorded music and video
(including CD-R/RW)
Recorded music and audio
(including CD-R/RW)
CD-R and CD-RW with music
recorded in MP3 (➡ page 25)
≥This unit plays CD-R/CD-RW discs (audio recording discs) which
have been recorded under one of the following standards: CD-DA,
MP3 and Video CD. Close the session or finalize the disc after
recording.
Play may be impossible on some CD-R or CD-RW discs due to the
condition of the recording.
≥The producer of the material can control how discs are played. So
you may not always be able to control play as described in these
operating instructions. Read the disc’s instructions carefully.
Discs that cannot be played
≥2.6 and 5.2 GB DVD-RAM, 12 cm
≥3.95 and 4.7 GB DVD-R for Authoring
≥Unfinalized DVD-R recorded on other equipment (➡page 49,
Finalize)
≥DVD-Video with a region number other than “2” or “ALL”
≥DVD- ROM ≥DV D-RW ≥iR ≥iRW
≥CD-ROM ≥CDV ≥CD-G ≥Photo CD
≥CVD ≥SVCD ≥SACD ≥MV-Disc
≥PD ≥Divx Video Disc, etc.
Cards useable on this unit
Type Instructions
SD Memory Card
MultiMediaCard
SD Memory Card
MultiMediaCard
CompactFlash
SmartMedia
EMORYSTICK
M
xD-Picture Card
Microdrive
ATA Flash PC Card
Mobile hard disk
You can insert directly into the
SD card slot.
[SD]
You can insert into the PC
card slot using an adaptor
(TYPE II PC card adaptor).
[PC]
You can insert directly into the
PC card slot.
§
[PC]
≥You can play and transfer (dub) still pictures taken on a digital camera etc.
(➡page 26, 36).
≥You can set the DPOF (Digital Print Order Format) for automatic printing on your
home printer or at a photo developing store (➡ page 34, 49).
≥Compatible with: FAT 12 or FAT 16
≥We recommend using a Panasonic SD card.
≥You cannot use SD cards that exceed 2 GB.
≥We recommend using this unit to format a card before recording (➡page 39, 49).
≥You may not be able to use the card if formatted on a computer.
§
Content saved on SD media storage (SV-PT1).
You can only play the recorded still pictures and transfer (dub) the data onto other
cards or DVD-RAM.
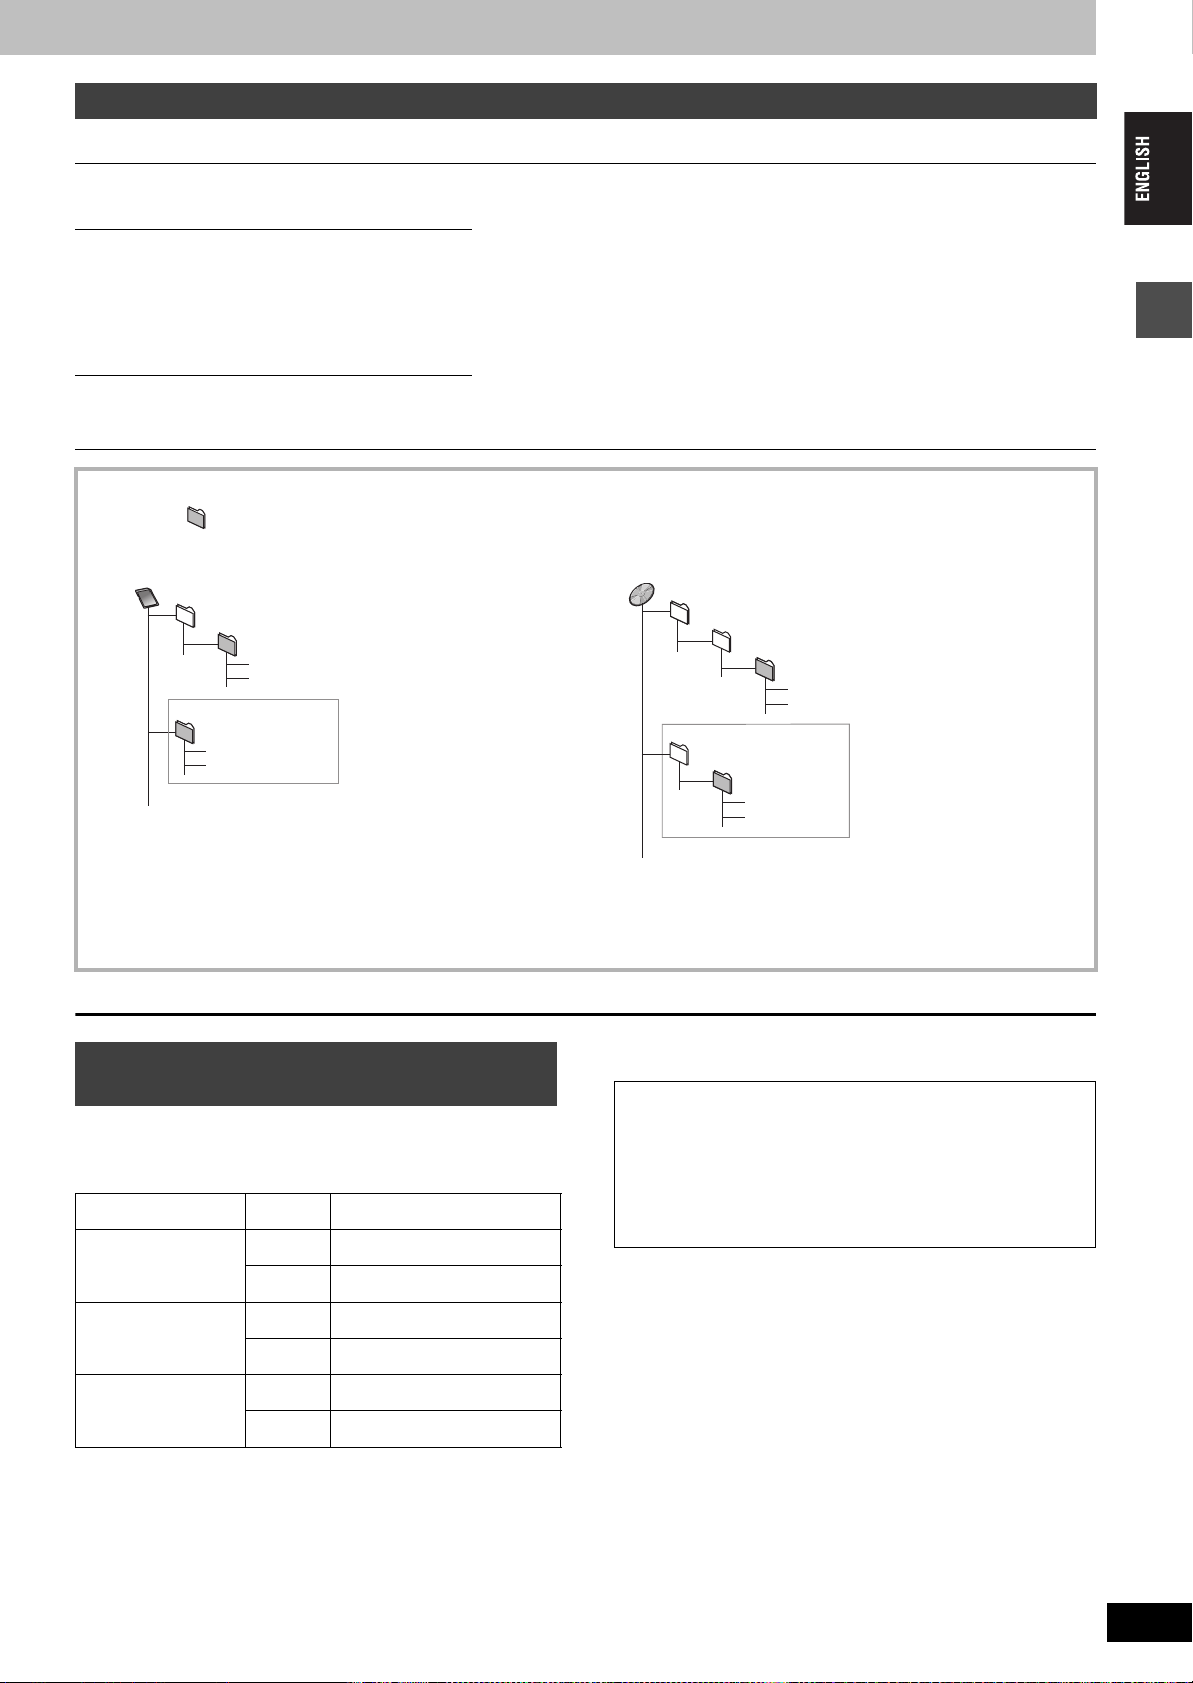
Structure of folders displayed by this unit
The following can be displayed on this unit.
¢¢¢: Numbers XXX: Letters
Card
(Higher folder)
DCIM
¢¢¢XXXXX
XXXX
¢¢¢¢
.JPG
¢¢¢¢
.JPG
.TIF
.TIF
§
XXXX
IM¢¢CDPF or IMEXPORT
XXXX
¢¢¢¢
XXXX
¢¢¢¢
§
Folders can be created on other equipment. However, these folders cannot be selected as a transferring (dubbing) destination.
DVD-RAM
JPEG
DCIM
DCIM¢¢¢
¢¢¢XXXXX
¢¢¢XXXXX
XXXX
XXXX
(Higher folder)
XXXX
¢¢¢¢
¢¢¢¢
XXXX
¢¢¢¢
.JPG
¢¢¢¢
.TIF
.JPG
.TIF
§
≥The folder cannot be displayed if the numbers are all “0” (e.g., DCIM000 etc).
≥If a folder name or filename has been input using other equipment, the name may not be displayed properly or you may not be able to play or
edit the data.
Types of disc for the type of connected
TV
When you use the discs recorded either PAL or NTSC, refer to this
table.
(Y: Possible, t: Impossible)
TV type Disc Yes/No
Multi-system TV
PA L Y
NTSC
§1
Y
Accessory discs
DVD-RAM
9.4 GB, double-sided, type 4 cartridge:
4.7 GB, single-sided, type 2 cartridge:
4.7 GB, single-sided, non-cartridge:
DVD-R
4.7 GB, single-sided, non-cartridge: LM-RF120LE
LM-AD240LE
LM-AB120LE
LM-AF120LE
Getting started
NTSC TV
NTSC
§2
Y
PA L Y
PA L t
PAL TV
NTSC
§1
If you select “NTSC” in “TV System” (➡ page 46), the picture may
be clearer.
§2
Select “NTSC” in “TV System” (➡ page 46).
§3
If your television is not equipped to handle PAL 525/60 signals
Y
§3
(PAL60)
the picture will not be shown correctly.
RQT7542
15
15
Recording television programmes
1 Press [DVD] to select the DVD drive.
The DVD indicator lights up on the unit.
2 Press [< OPEN/CLOSE] on the main
unit to open the tray and insert a disc.
SD CARD PC CARD EJECT
Time Slip indicator
215
OPEN/CLOSE
TIME SLIP
REC
SD PCDVD
DRIVE SELECT
TIME SLIP
/x1.3
CH
≥Press the button again to close the tray.
DVD indicator
TIME SLIP
DVD
TV
VOLUM E
DRIVE SELECT
SKIP
STOP
AV
PAU SE
ENTER
CH
SD/PC
ShowView
INPUT SELECT
MANUAL SKIP
SLOW/SEARCH
PLAY/x1.3
FUNCTIONS
RETURN
1
CH
3
INPUT SELECT
;
1
FUNCTIONS
¥ DIRECT
DIRECT TV REC
TV REC
DVD
Numbered
buttons
123
456
7809
CANCEL
Recording
∫
DIRECT
NAVIGATOR
3,4,2,1
ENTER
DIRECT NAVIGATOR
TOP MENU
SUB MENU
3
∫1
3 Press [WXCH] to select the channel.
4 Press [REC MODE] to select the
Insert label-up.
Insert fully so it clicks into place.
Insert with the arrow facing in.
DVD
SP
R-AM
To select with the numbered buttons:
e.g., 5: [0] ➡ [5]
15: [1] ➡ [5]
recording mode (XP, SP, LP or EP).
DVD
XP
R-AM
RETURN
STATUS
F TIMER
4
TIMER
F
EXT LINK
A B C
REC MODEERASE
CREATE
CHAPTER
TIME SLIP
REC
AUDIO
TIME SLIP
5
AUDIO
≥To record sound using LPCM (XP mode only):
Set the “Audio Mode for XP Recording” to “LPCM” in the
SETUP menu (➡page 43).
Remaining time on the disc
PROG/CHECK
DISPLAY
STATUS
5 Press [¥ REC] to start recording.
[RAM] [DVD-R]
≥You can record up to 99 titles on one disc.
≥
It is not possible to record continuously from one side of a double sided
disc to the other. You will need to eject the disc and turn it over.
≥When using 8 cm DVD-RAM, remove the disc from the cartridge.
≥It is not possible to record CPRM (➡page 49) protected material
onto DVD-R or 2.8 GB DVD-RAM discs.
≥It is not possible to record to a card.
When recording to DVD-R
≥When recording bilingual broadcasts, only the audio selected in
“Bilingual Audio Selection” (➡page 43) is recorded (“M 1” or
“M 2”).
≥In order to play a DVD-R recorded using this unit on
another playback source, the disc must first be finalized
(➡page 39).
XP
DVD
Recording will take place on open space on disc. Data will not
be overwritten.
≥You cannot change the channel or recording mode during
recording.
≥[RAM] You can change the audio being received by pressing
[AUDIO] during recording. (Does not affect the recording of
audio.)
∫ To stop recording
Press [∫].
From the start to the end of the recording is called one title.
[DVD-R]
It takes about 30 seconds for the unit to complete recording
management information after recording finishes.
∫ To pause recording
Press [;].
Press again to restart recording.
(Title is not split into separate titles.)
R-AM
REC
RQT7542
16
16
∫ To specify a time to stop recording—One Touch
Recording
During recording
Press [¥ REC] on the main unit to select the recording
time.
Each time you press the button:
30 (min.) ""# 60 (min.) ""# 90 (min.) ""# 120 (min.)
^" Counter (cancel) ,"" 240 (min.) ,"" 180 (min.) ,}
≥This does not work during timer recordings (➡ page 19) or while
using Flexible Recording (➡page 18).
To stop recording partway
Press [∫].
If a station broadcasts Teletext information
The unit automatically records the programme’s and station’s name
if the station’s Title Page is correctly set (➡ page 45).
[Note]
The unit may take some time in retrieving titles (up to 30 minutes)
and may fail in some cases.
Recording modes and approximate
recording times
Depending on the content being recorded, the recording times may
become shorter than indicated.
(Unit: hour)
DVD-RAM
Mode
XP (High quality) 121
SP (Normal) 242
LP (Long play) 484
EP (Extra long play)
Single-sided
(4.7 GB)
§
) 16 (12§)8 (6
8 (6
Double-sided
(9.4 GB)
XP
SP
LP
EP (6 Hour)
Picture quality
§
EP (8 Hour)
Recording time
§
When “Recording time in EP mode” is set to “EP (6Hour)” in the
SETUP menu.
The sound quality is better when using “EP (6Hour)” than when
using “EP (8Hour)”.
[Note]
When recording to DVD-RAM using “EP (8Hour)” mode, play may
not be possible on DVD players that are compatible with DVD-RAM.
In this case use “EP (6Hour)” mode.
FR (Flexible Recording Mode)
The unit automatically selects a recording rate between XP and EP
(8Hour) that will enable the recordings to fit in the remaining disc
space with the best possible recording quality.
≥You can set when programming timer recordings.
≥All the recording modes from XP to EP appear in the
display.
DVD-R
(4.7 GB)
§
XP
SP
LP
EP
)
Playing while you are recording
While recording to DVD-RAM you can view the title being recorded
from the beginning as well as play a recorded title.
[RAM]
Playing from the beginning of the title you are
recording—Chasing playback
Press [1](PLAY).
Time Slip indicator on the main unit lights.
Playing a title previously recorded while recording—
Simultaneous rec and play
1 Press [DIRECT NAVIGATOR].
2 Press [3, 4, 2, 1] to select a title
and press [ENTER].
Time Slip indicator on the main unit lights.
To exit the DIRECT NAVIGATOR screen
Press [DIRECT NAVIGATOR].
Reviewing the recorded images while recording—
Time Slip
1 Press [TIME SLIP].
Time Slip indicator on the main unit lights.
PLAY
0 min
REC
≥You will hear the playback audio.
Play starts from 30
seconds previous.
The image currently being
recorded
2 Press [3, 4] to select the time and
press [ENTER].
≥Press [TIME SLIP] to show the play images in full. Press
again to show the play and recording images.
∫ To stop play
Press [∫].
∫ To stop recording
2 seconds after play stops
Press [∫].
∫ To stop timer recording
Press [F TIMER].
≥You can also press and hold [∫] on the main unit for more than 3
seconds to stop recording.
Recording
RQT7542
17
17
Recording television programmes
Refer to the control reference on page 16.
[RAM] [DVD-R]
Flexible Recording
The unit sets the best possible picture quality that fits the recording
within the remaining disc space. The recording mode becomes FR
mode.
e.g.,
Recorded
Programme to be recorded
Preparation
Recording
Select the channel to record.
Remain
45 minutes in
SP mode
Recording rate
between SP and LP
60 minutes
1 While stopped
Press [FUNCTIONS].
2 Press [3, 4, 2, 1] to select
“FLEXIBLE REC” and press [ENTER].
FLEXIBLE REC
Recording in FR mode
SELECT
3 Hour 00 Min.
3 Hour 00 Min.
RETURN
Maximum rec. time
Set rec. time
Start Cancel
3 Press [2, 1] to select “Hour” and
“Min.” and press [3, 4] to set the
recording time.
≥You can also set the recording time with the numbered
buttons.
4 When you want to start recording
Press [3, 4, 2, 1] to select “Start”
and press [ENTER].
Recording starts.
To exit the screen without recording
Press [RETURN].
To stop recording partway
Press [∫].
Perfectly fit!
Direct TV Recording
When connected to a television that has the Q Link
function using a fully wired 21-pin Scart cable.
This function allows you to immediately start recording the
programme that you are viewing on the TV.
1 Press [DVD] to select the DVD drive.
The DVD indicator lights up on the unit.
2 Insert a disc. (➡page 16)
3 Press [¥ DIRECT TV REC].
Recording starts.
To stop recording
Press [∫].
Recording from satellite/digital receiver
or decoder
Preparation
≥Connect a satellite/digital receiver or decoder to this unit’s input
terminals (➡ page 9).
≥When recording bilingual programmes
[RAM]
When both M 1 and M 2 is selected on the connected equipment,
you can select the audio type in playback.
[DVD-R]
Select either M 1 or M 2 on the connected equipment. (You cannot
select the audio type in playback.)
≥When the output signal from the external equipment is NTSC,
change the “TV System” to “NTSC” in the SETUP menu
(➡page 46).
≥Press [DVD] to select the DVD drive.
1 While stopped
Press [INPUT SELECT] to select the
input channel for the equipment you
have connected.
e.g., If you have connected to AV2 input terminals, select “AV2”.
2 Press [REC MODE] to select the
recording mode.
3 Select the channel on the other
equipment.
4 Press [¥ REC].
Recording starts.
RQT7542
18
To show the remaining time
Press [STATUS].
18
Remaining
time
DVD-RAM
REC 59
ARD
L R
To skip unwanted parts
Press [;] to pause recording. (Press again to restart recording.)
To stop recording
Press [∫].
 Loading...