


URC-7530 |
Universal Remote
U S E R G U I D E & C O D E B O O K
Retain For Future Reference

Table of Contents
QUICK SET-UP |
2 |
QUICK SEARCH |
3 |
INSTALLING THE BATTERIES |
4 |
THE KEYPAD |
5 |
INSTALLATION |
|
Direct Set-Up |
7 |
The Search Method |
8 |
|
|
SET-UP CODES |
|
Quick Code Reference |
10 |
Televisions |
11 |
Video Recorders |
16 |
|
|
ADVANCED FEATURES |
|
Controlling Colour and Brightness |
19 |
Punch-Through |
19 |
Teletext and Fastext |
20 |
Sleeptimer |
21 |
Scan |
23 |
The AUX Key |
24 |
Changing the Device Keys |
25 |
TROUBLE-SHOOTING |
|
Helpful Hints |
26 |
Consumer Help-Line |
27 |
About Your ONE FOR ALL 3
Your ONE FOR ALL 3 Package contains:
Your ONE FOR ALL 3 Remote
Your ONE FOR ALL 3 Manual
Your manual is divided into two parts: set-up instructions and device codes. You may need this guide again in the future, so please be sure to keep it.
Your ONE FOR ALL 3 needs 2 new “AA/LR6” batteries.
Your ONE FOR ALL 3 can operate three devices: a Television, a Video Recorder and a second Television or Video.

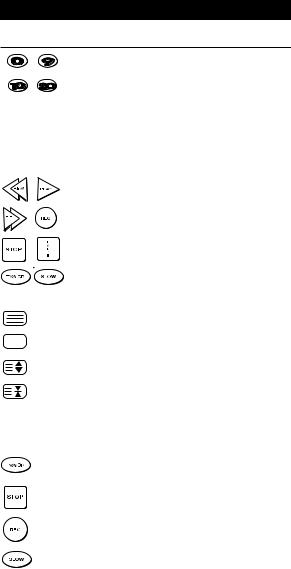
Magic
Device
Keys
Number
Keys
Mute/Scan 
Volume-
Rewind/
Text on
Play/Text off
TV/VCR/Red
Stop/Green
Power
LED
Programme+
Volume+
Programme-
Fast Forward/
Expand
Pause/Hold
Teletext Keys
Slow/Blue
Record/Yellow
1

Quick Set-Up
The instructions below and on the next page can be used to quickly install your new ONE FOR ALL.
You can use the Quick Set-Up below with the codes listed on pages 11-18. If this doesn’t work, try the Quick Search on the next page. The Quick Search can also be used even if your brand is not listed at all.
1. Press device key:
 or
or  or
or 
2. Press and hold until the red light blinks twice. Then release.
3. Enter
(4-digit code). See pages 11-18. The red light will blink twice.
4. Aim remote at your device and press  (or PLAY).
NOTES:
-Make sure your device is switched on.
-The instructions above are a ÒQuickÓ set-up guide. For further explanation, please refer to the pages within.
-Make sure you write your Set-Up codes in the boxes provided inside the battery compartment for easy future reference.
2

Quick Search
1. Aim your ONE FOR ALL at your device and press device key:
 or
or  or
or
2. Press and hold until the red light blinks twice.
3. Press
4. Alternate between the
device key ( ie: |
) |
|
and |
until your |
|
device turns off. |
|
|
5. When device turns off, press . The red light will blink twice. Your device is Set Up.
NOTES:
-Make sure your device is switched on.
-Make sure you aim your ONE FOR ALL at your device during ÒQuick SearchÓ.
-During step 4, you may have to press these keys many times, so please be patient.
-If your VideoÕs original remote control does not have a power key, press PLAY instead of POWER during step 4.
3

Installing the Batteries
Your ONE FOR ALL 3 needs 2 new “AA/LR6” alkaline batteries.
1 |
Remove the battery cover from the |
back of your ONE FOR ALL 3 by |
|
|
pressing down on the tab. |
2
3
Match the batteries to the + and - marks inside the battery case, then insert the batteries.
Press the battery cover back into place.
Important notes:
-In order to avoid having to reprogram your ONE FOR ALL 3 after you remove the batteries, you will need to insert new batteries within 5 minutes. Also it is best that you do not use rechargeable batteries.
-On the inside of the battery compartment door you will find a label on which to write your Set-Up codes after your ONE FOR ALL 3 is set up for your device. Please write down your codes for easy, future reference.
4

|
|
|
|
|
|
The Keypad |
Key |
|
|
|
|
|
Function |
|
|
|
|
|
|
|
LED |
|
|
|
|
|
LED |
|
|
|
|
|
|
The LED (Light Emitting Diode) flashs red to |
|
|
|
|
|
|
show the remote is working. |
|
|
|
|
|
|
MAGIC Key |
|
|
|
|
|
|
The MAGIC key is used to set up your ONE |
|
|
|
|
|
|
FOR ALL 3 and to access special functions. |
|
|
|
|
|
|
Power |
|
||||||
|
|
|
|
|
|
The Power key controls the same function as |
|
|
|
|
|
|
it did on your original remote. |
|
|
|
|
|
|
Device Keys |
|
|
|
|
|
|
The TV, VCR and AUX keys select the home |
|
|
|
|
|
|
entertainment device to be controlled. For |
|
|
|
|
|
|
example pressing the TV key allows the |
|
|
|
|
|
|
remote to control the functions of your |
|
|
|
|
|
|
Television, after pressing VCR you can |
|
|
|
|
|
|
operate your Video Cassette Recorder and |
|
|
|
|
|
|
the AUX key operates a second television or |
|
|
|
|
|
|
video recorder. |
|
|
|
|
|
|
Volume, Programme |
|
|
|
|
|
|
The Volume and Programme keys control |
|
|
|
||||
|
|
|
|
|
|
the two most frequently used functions of |
|
|
|
|
|
|
your Television. They operate just as those on |
|
|
|
|
|
|
your original remote. |
|
|
|
|
|
|
Mute |
|
|
|
|
|
|
The Mute key operates the same function it |
|
|
|
|
|
|
did on your orginal remote control. It is also |
|
|
|
|
|
|
used to activate the Scan feature (see page |
|
23). |
|||||
5
|
The Keypad |
Key |
Function |
_ |
Number Keys |
|
The Number keys (0-9, 10, 20) provide |
|
functions just like your original remote, such |
-/-- |
as direct access programme selection. If your |
original remote uses one/two digit input |
|
|
switching (-/-- symbol), this function can be |
|
obtained by pressing the -/-- key, which is the |
|
same as the 10 key. If your original remote |
|
has an AV, key this function can also be |
|
found under the 20 key. |
|
Video Recorder Keys |
|
After pressing the VCR key, the Video |
|
Recorder keys operate the functions of your |
|
Video Recorder. To prevent accidental |
|
recording, the Record key must be pressed |
|
twice to start recording. |
(on) |
Teletext Keys |
|
After pressing the TV key, the top row of |
||
|
||
(off) |
the VCR keys are used to operate the main |
|
teletext functions. The symbols below the |
||
|
||
(expand) |
keys are for teletext. The text keys are used |
|
to access the teletext functions of your |
||
(hold) |
Television. Of course, your Television must be |
|
teletext capable. For an explanation of the |
||
|
teletext symbols, please refer to page 20 of this |
|
|
manual. For a detailed explanation on how |
|
|
teletext works, please refer to the manual |
|
|
of your Television set. |
|
(red) |
After pressing the TV key, the bottom row |
|
of the Video Recorder keys marked red, |
||
|
green, yellow and blue, allow you to access |
|
(green) |
the fastext functions of your television. |
|
Again, your television must be fastext |
||
|
||
|
capable to operate these functions. For a |
|
(yellow) |
more detailed explanation of teletext and |
|
|
fastext, please refer to the manual of your |
|
(blue) |
television set. |
|
|
6

Installation
Direct Set-Up
Setting Up Your Devices
To set up the ONE FOR ALL 3 for your TV or Video Recorder, follow the instructions below.
To set up your TV:
1 |
|
|
FOR |
ALL |
|
||||
|
ONE |
|
|
|
|||||
|
|
|
|
|
|
|
|
||
|
0009 |
0093, |
0363,041 |
|
|||||
|
Acura |
0087, |
0216 |
|
|
|
|
||
|
0217, |
|
|
|
|
|
|
||
|
Admiral |
0264 |
|
|
|
|
|
|
|
|
Adyson |
0516 |
|
|
|
0037, |
0 |
||
|
Agazi |
0087 0009, |
|
||||||
|
AGB |
0216, |
0274 |
0371, |
|||||
|
Agef |
|
0037, |
0208, |
|
|
|||
|
Aiko |
|
0361, |
|
|
|
|
||
Find your Television code in the Set-Up Code section (starting on page
11). Codes are listed by brand name. The most popular code is listed first. Make sure your Television is switched on.
2 |
|
|
Press and release your ONE FOR ALL 3’s |
|
|
|
TV key, then press and hold down the |
||
|
|
|
MAGIC key until the red light blinks |
|
|
|
|
twice (the light will blink once then |
|
|
|
|
twice). |
|
3 |
|
|
Enter your four-digit TV code using the |
|
_ _ _ _ |
||||
number keys. The red light will blink |
||||
4 |
|
|
twice. |
|
|
|
|||
|
|
Now, aim the ONE FOR ALL 3 at your |
||
|
|
|||
|
|
Television and press POWER. If your |
||
|
|
|
Television switches off, your ONE FOR |
|
|
|
|
ALL 3 should be ready to run your |
|
|
|
|
Television. |
|
5 |
|
|
Turn your device back on and try all the |
|
|
|
remote’s functions to ensure they are |
||
working properly. If the functions do not work properly, repeat steps 1-5 using another code listed under your brand.
Write your code in the four boxes provided in the battery compartment and on page 10 for easy future reference.
Important notes:
-To set up your Video Recorder, follow the same instructions above, only press the VCR key during step 2.
-Some codes are quite similar. If your device does not respond or is not functioning properly with one of the codes, try another code listed under your brand.
-If your Television or Video does not respond, follow steps 1 through 5 with each code listed for your brand. If none of the codes listed for your brand operate your device, try the search method described on page 8, even if your brand is not listed at all.
-If you change programmes on your Television through your Video Recorder, press VCR and not TV, before you use the programme keys.
-Remember, to control your device after the ONE FOR ALL is set up, you must press the device key first (TV, VCR, AUX).
-Write the codes for your devices in the boxes provided on page 10 and in the battery compartment for easy future reference.
7
 Loading...