

Page 1

C-200 ZOOM / D-510 ZOOM
E. NOTICE OF MODIFICATION
1. Matter of the part number (part name) correction........................................E-2
2. Countermeasure of Front Cover scratches .................................................E-3
3. Countermeasure for “ the arrow key does not work”....................................E-6
E-1 Ver.1/Rev.2
Page 2
E. NOTICE OF MODIFICATION
C-200ZOOM / D-510ZOOM
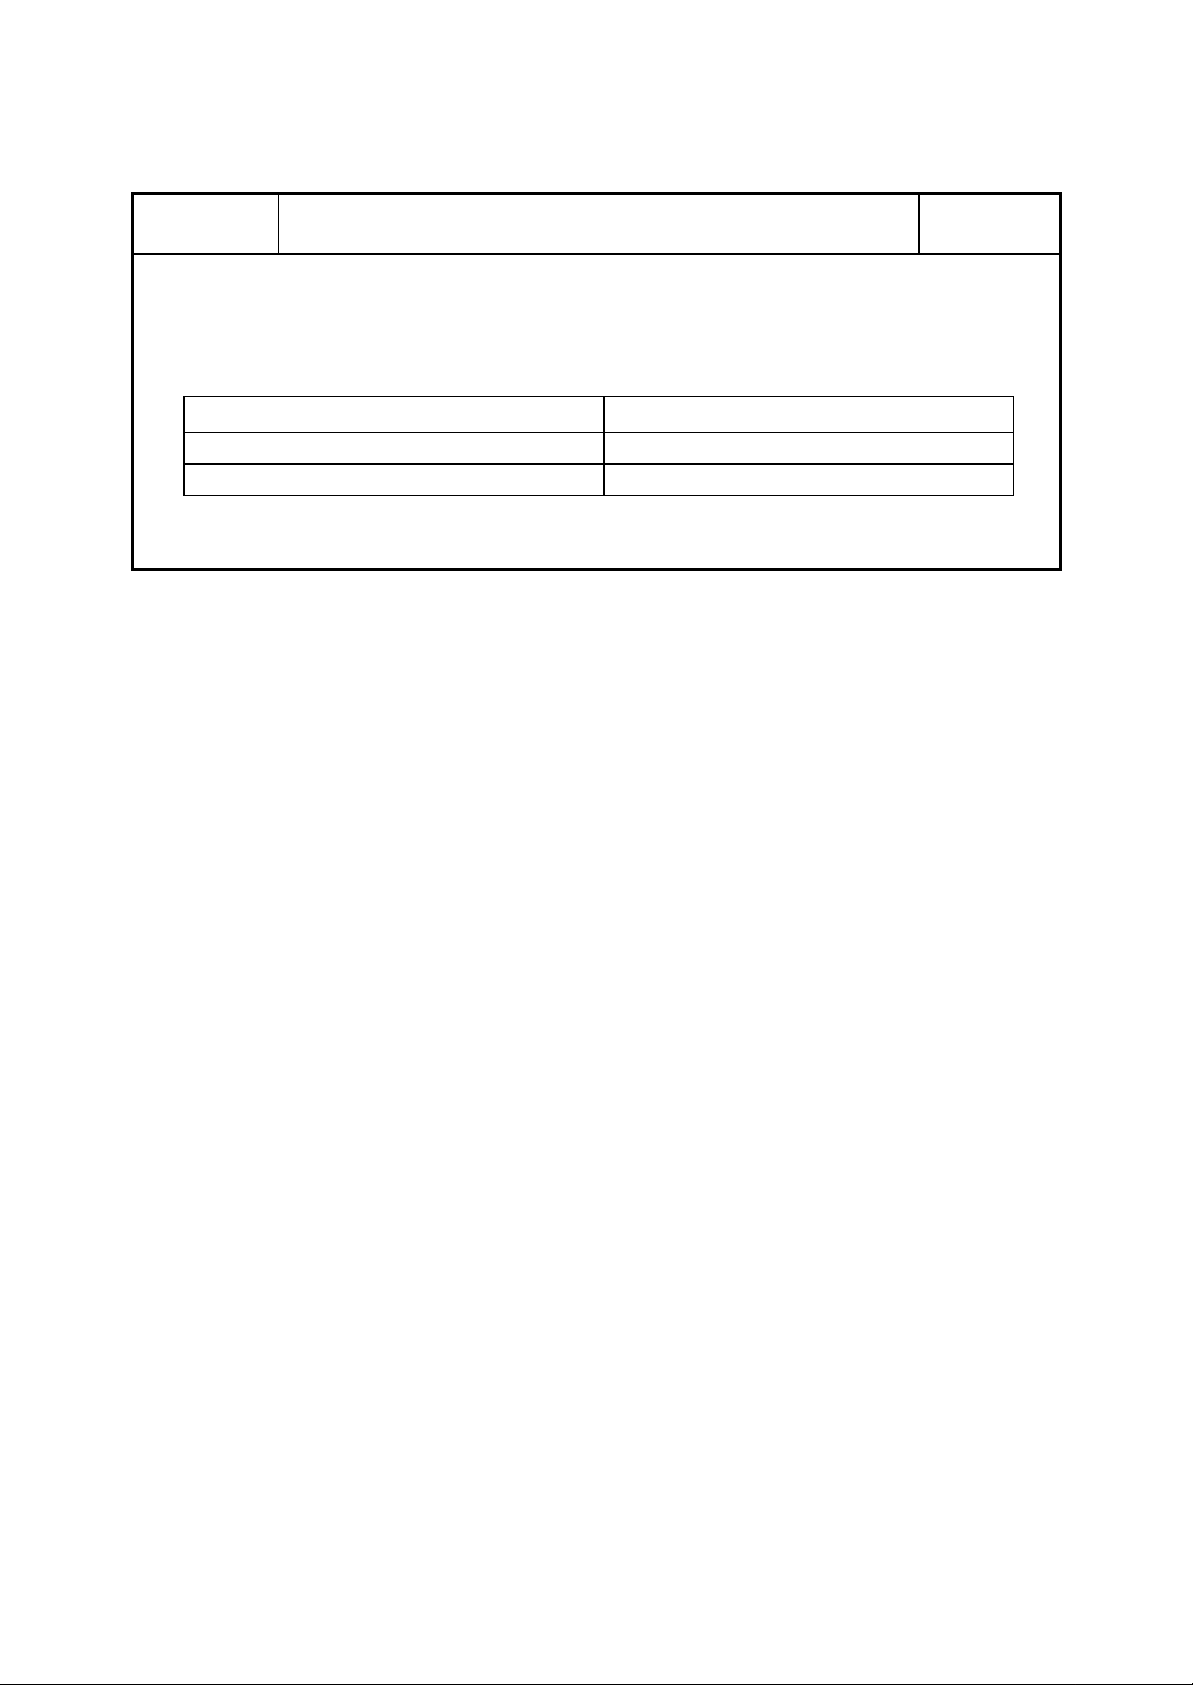
SUBJECT
DESCRIPTION
There was an error in the part number (part name) of the following model.
The part number (part name) is corrected.
Matter of the part number (part name) correction
ERROR CORRECT
VJ120100 (DEC LENS) VJ264200 (DEC LENS)
VJ264200 (LENS,VF(ASSY)) VJ120100 (LENS,VF(ASSY))
2002.02.07
E-2 Ver.1/Rev.2
Page 3
C-200ZOOM / D-510ZOOM
E. NOTICE OF MODIFICATION
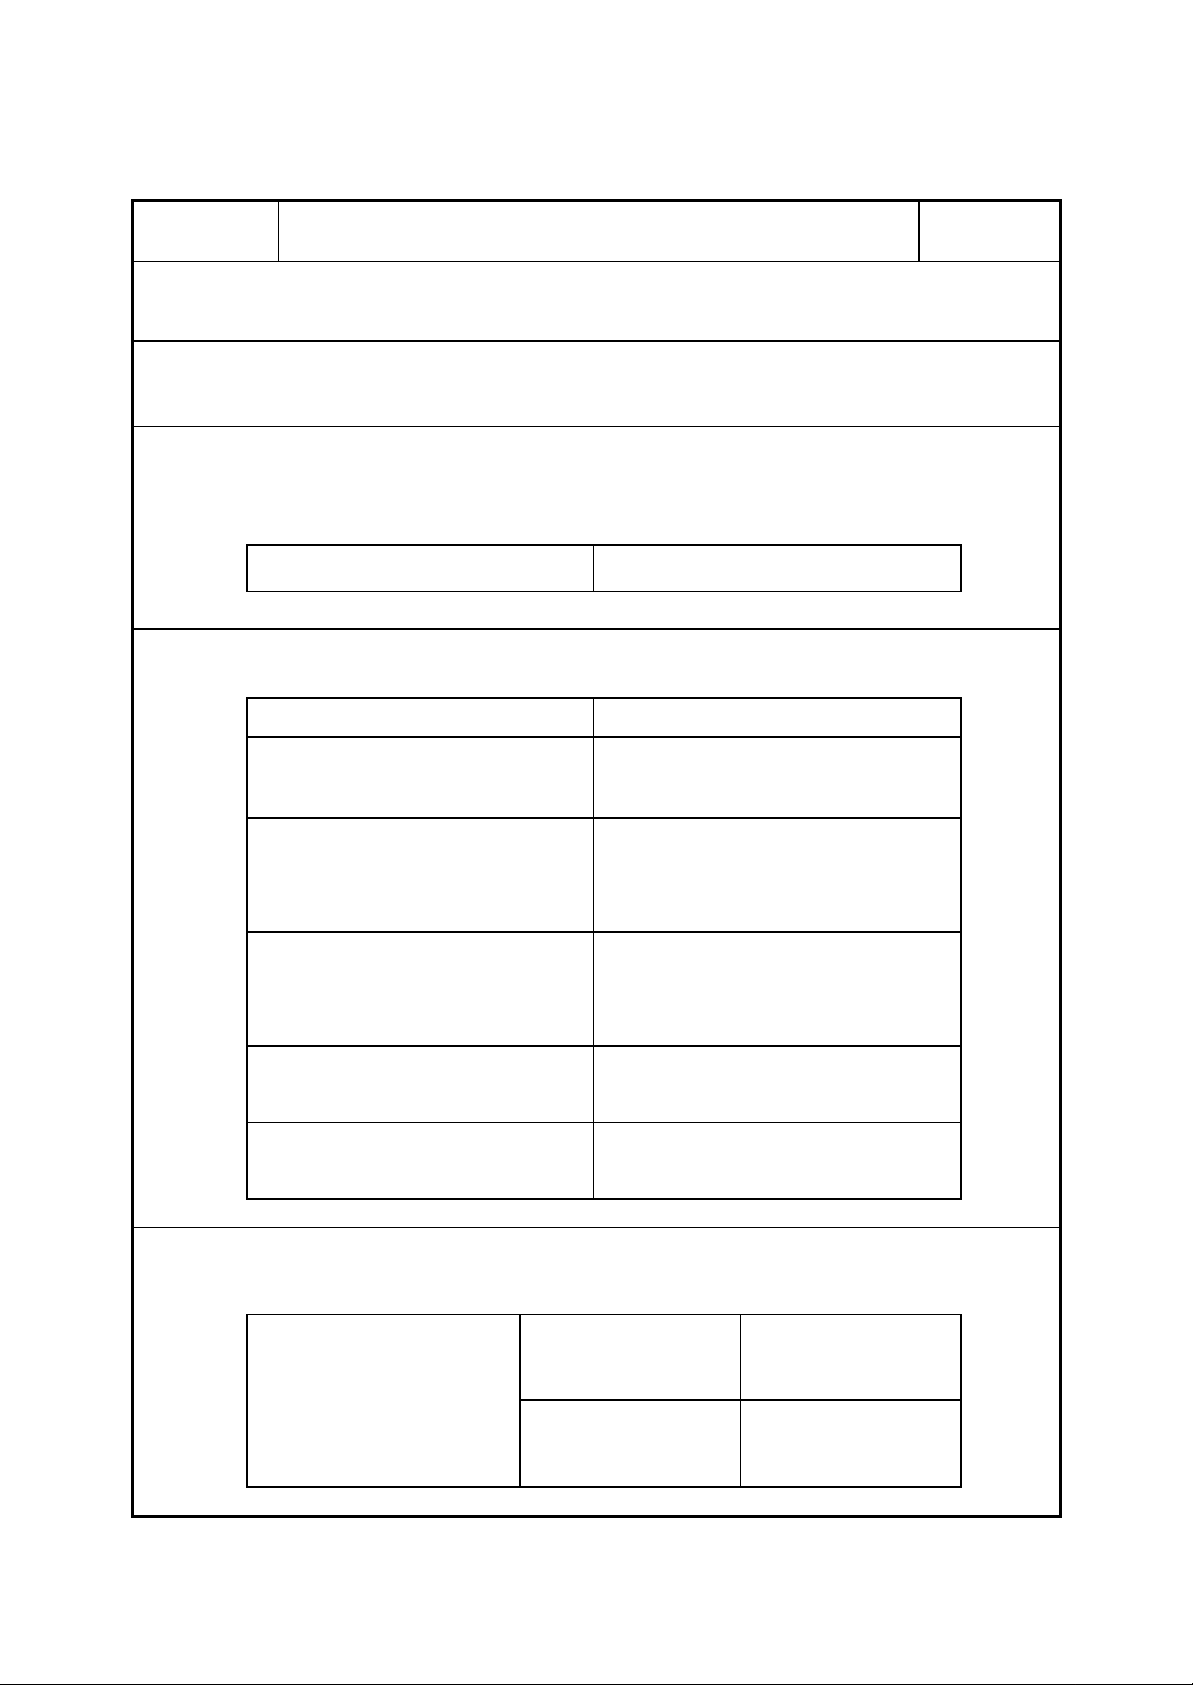
SUBJECT
DESCRIPTION
The grease has been changed for countermeasure of Front Cover scratches.
REASON
Countermeasure of Front Cover scratches
Countermeasure :
The following grease is applied when customer complained.
Countermeasure of Front Cover scratches
2002.02.07
Grease change execution classification:
A high loop FG-30
Destination Serial Number
C-200 ZOOM(J)
OT3305
190345001190515001-
Repair part:
D-510 ZOOM
C-200 ZOOM(E)
C-200 ZOOM(G)
PAL
C-200 ZOOM(G)
NTSC
Front Cover ASSY
188336000188255001188565001189330001189203501189500001-
191306301-
192302001-
C-200Z D-510Z
VC173700 VC164200
Ver.1/Rev.2 E-3
Page 4

E. NOTICE OF MODIFICATION
REMARKS
Change classification :
Only grease application, repair parts is running change.
How to check it :
Check the color of the grease after removing COVER LENS.
Modified grease-----white
Un-modified grease-----yellow
Grease application position :
A
C-200ZOOM / D-510ZOOM
Apply GREASE
(FG-30)
B
Apply
GREASE
(FG-30)
Apply GREASE
(FG-30)
E-4 Ver.1/Rev.2
Page 5

C-200ZOOM / D-510ZOOM
E. NOTICE OF MODIFICATION
A
B
C
Apply GREASE (FG-30) as shown in the above figure.
Ver.1/Rev.2 E-5
Page 6

E. NOTICE OF MODIFICATION
apply glue (
SuperX) to
these positions
to fix it (VC179100).
C-200ZOOM / D-510ZOOM
SUBJECT Countermeasure for “ the arrow key does not work” 2002.02.07
DESCRIPTION
New arrow key (BUTTON MODE A) is supplied as countermeasure for “ Arrow key
does not work“.
Countermeasure :
Replace the arrow key when customer complains about this problem.
Spare part :
1. VC179100 (BUTTON MODE A) is supplied as single part newly.
2. VC160900 (COMPL,CABI BACK) is “Running change” (Parts number is not changed).
Modified (new) : A “N” stamp is printed on. Please refer to Fig1.
Un-modified (old) : No stamp
REMARKS
How to check it and application position:
If it is Un-modified (old) VC160900, replace the arrow key (VC179100) and
Fig.1
If it is Modified (new) VC160900, "N" stamp is printed in this position.
E-6 Ver.1/Rev.2
Page 7

C-200ZOOM / D-510ZOOM
E. NOTICE OF MODIFICATION
Removal and installation of the arrow key
Fig.2
1. Remove the melted plastic carefully so that the boss can
remain.
2. Remove the arrow key and install new arrow key (VC179100).
3. Apply glue (Super X) to area A.
Please refer to Fig.3, Fig.4, and Fig.5.
GOOD
Fig.3
The height of glue is the same as surface of arrow key.
The glue must not be protruded from area A.
Fig.4
Fig.5
NG (The glue amount is too less)
The glue amount is too less and the glue was protruded from
area A.
Note! : The glue protrudes from area A must be wiped out.
NG (The glue amount is too much)
The glue amount is too much and the glue was protruded from
area A.
Note!: The glue protruded from area A must be wiped out.
If the glue is taller than the surface
of arrow key after dried up, the glue
presses down the circuit board.
(especially the boss of the upper
left side)
Ver.1/Rev.2 E-7
If the glue is protruded from area A ,
the glue sticks to the circuit board.
(especially the boss of the bottom
right side.)
 Loading...