

Page 1
Page 2

DESCRIPTION OF KEYS
Use the phone keys as follows:
PWR
Press andhold to
switch the phone
on/off.
SIDE BUTTON
Upper button
increases and
lower button
decreases
volume.
CLR
Deletes
charactersand
clears the
display.
SND
“Dials”the
number on
display.With
displayclear,
redials last
number dialed.
▲▼
Scroll the menu
and memories.
Press and hold for
continual scrolling.
F
Softkeys.
Functionchanges
according to the
operation in
progress.
ABC
Alpha mode/
numeric mode
selection.Also,
gives helpin Menu
facility.
END
Ends a phonecall.
0-9, ∗,#
Keys for
entering
numbers,
letters,and
special
characters.
DRAFT
For internal review only
NHC-4NE - IS136- ver.6
07 March 96
PRINTED IN CANADA
Page 3

Contents
1. Important Safety Information..........................1
Traffic Safety...........................................................1
Operating Environment...........................................1
Emergency Calls ....................................................2
Using this Owner’s Manual .....................................3
2. TheDisplay and Connectors...........................5
3. The Battery ......................................................7
Installing a battery...................................................7
Removing a battery................................................7
Battery Charge.......................................................8
4. Basics.............................................................11
Switching On or Off..............................................11
Signal Strength.....................................................11
Access Codes......................................................11
5. Making and Receiving Calls.........................13
Answering a Call...................................................13
Making a Call........................................................13
Speed Dialing.......................................................13
Last Number Redial..............................................14
1-Touch Dialing.....................................................14
Emergency Key 9.................................................15
Voice MailKey1 ...................................................15
Earpiece Volume...................................................15
Calling Line Identification......................................16
Distinct Ringing....................................................16
Keyguard .............................................................16
Call Waiting..........................................................17
6.Voiceand TextMessages ..............................18
Voice Messages...................................................18
Text Messages .....................................................18
7. ThePersonal Directory .................................21
Alpha Mode .........................................................21
Entering Names....................................................22
Storing Numbers and Names...............................22
Recalling Stored Numbers....................................24
Recalling Stored Names.......................................24
i
Page 4

8. Temporary Listsand Call Timers .................25
To view Dialed Numbers.......................................25
To view Last Received Calls..................................25
To view Missed Calls.............................................25
Notepad...............................................................26
Call Timers ...........................................................26
9.TouchTones....................................................27
Sending Individual Touch Tones............................27
Sending Strings of Touch Tones............................27
Touch Tone Settings in the Phone ........................29
10.The Menu......................................................30
Summary Of Menu Functions...............................31
Menu 01, Memory Functions................................32
Menu 2, Messages...............................................32
Menu 3, Call Settings ...........................................33
Menu 4, Phone Settings ......................................35
Menu 5, Security Options ....................................37
Menu 6, Network Services ...................................39
Menu 7, System Select ........................................43
Menu 8, NAM Selection........................................44
Menu 9, Number Editor .......................................45
Menu 10, Alert Options.........................................45
Menu 11, Activate Keyguard ................................46
11. Data and Fax Calls ......................................47
12. Accessories ................................................49
Approximate battery operation times....................50
Approximate charging times ................................50
Standard Travel Charger (ACH-3U).......................51
Rapid Travel Charger (ACH-4U) ...........................51
Rapid Cigarette LighterCharger (LCH-2) ..............51
Compact Desktop Charging Stand (CHH-2).........52
Compact Desktop Charger Kit (CHH-2K)..............53
Handsfree Desktop Charger (CHH-8)....................53
Handsfree Desktop Charger Kit(CHH-8K) ............53
Mobile Holder (MBH-6).........................................53
Compact Handsfree Car Kit (CARK-10)................54
Complete Car Installation Kit (CARK-11)...............54
Booster Kit (BSHK-4)............................................55
External Audio Handset (HSU-1)...........................55
Belt Clip (BCH-2)..................................................56
13. Care and Maintenance ...............................57
14.Technical Data .............................................58
ii
Page 5

1. Important Safety Information
Traffic Safety
Do not use a hand-held telephone whiledriving a
vehicle. If using a hand-heldtelephone park the vehicle
before conversing.
Always secure the phone initsholder;do not place the
phone on the passenger seat or where itcanbreak
loose in a collision or sudden stop.
The use of an alert device to operate a vehicle’s lights
or horn on public roads is not permitted.
Remember road safety always comes first!
Operating Environment
Remember to follow any special regulations in force in
any area and always switchoff your phone whenever it
is forbidden to use it, or when itmay cause interference
or danger.
Operation of any radio transmittingequipment,
including cellular telephones, may interfere with the
functionality of inadequatelyprotected medical devices.
Consult a physician or the manufacturer of the medical
device if you have any questions.Other electronic
equipment may also be subject to interference.
As with other mobile radio transmittingequipment,
users are advised that for the satisfactory operation of
the equipment and for the safety of personnel,it is
recommended that the equipmentshould only be used
in the normal operating position.
Users are advised to switch off the phone when at a
refueling point (service station). Users are reminded of
the need to observe restrictionsontheuse of radio
equipment in fuel depots (fuelstorageand distribution
areas), chemical plants or where blasting operations are
in progress.
Do not store or carry flammable liquids,gases or
explosive materials in the same compartmentsas the
phone, its parts or accessories.
1
Page 6

Only qualified personnelshouldinstall or service the
phone in a vehicle. Faulty installationor service may be
dangerous and may invalidate the warranty.
Electronic fuel injectionsystems, electronic anti-skid
braking systems, electronic cruise control systems and
other electronic systems can malfunctiondue to the
lack of protection from radiosignals.
Check regularly that all cellular phone equipment in a
vehicle is mounted and operating properly.
Switch off your cellular phonewhen in an aircraft. The
use of cellular telephones in an aircraft may be
dangerous to the operation of the aircraft, disrupt the
cellular network, and is illegal.
Failure to observe these instructions mayleadto
suspension or denial of cellular telephoneservices to
the offender, or legal action or both.
Emergency Calls
IMPORTANT!
This phone, like any cellular telephone, operates using
radio signals, cellular and landlinenetworks, and
user-programmed functions which cannot guarantee
connection in all conditions. Therefore you should never
rely solely upon any cellular phone for essential
communications (e.g. medical emergencies).
Remember, to make or receive any calls this phone
must be switched on and in a service areawith
adequate cellular signal strength.Emergency calls may
not be possible on all cellular networksor when certain
network services and/or phone featuresare in use.
Check with local service providers.
When making an emergency call, remembertogive all
the necessary information as accurately aspossible.
Remember that your cellular phone maybetheonly
means of communication at the scene of an accidentdo not cut off the call untilgiven permission to do so.
2
Page 7

If certain features are inuse(Keyguard, Locking, Call
Restricting, etc.), you may first need toturn those
features off beforeyou can make an emergency call.
Consult this document and your localcellular service
provider.
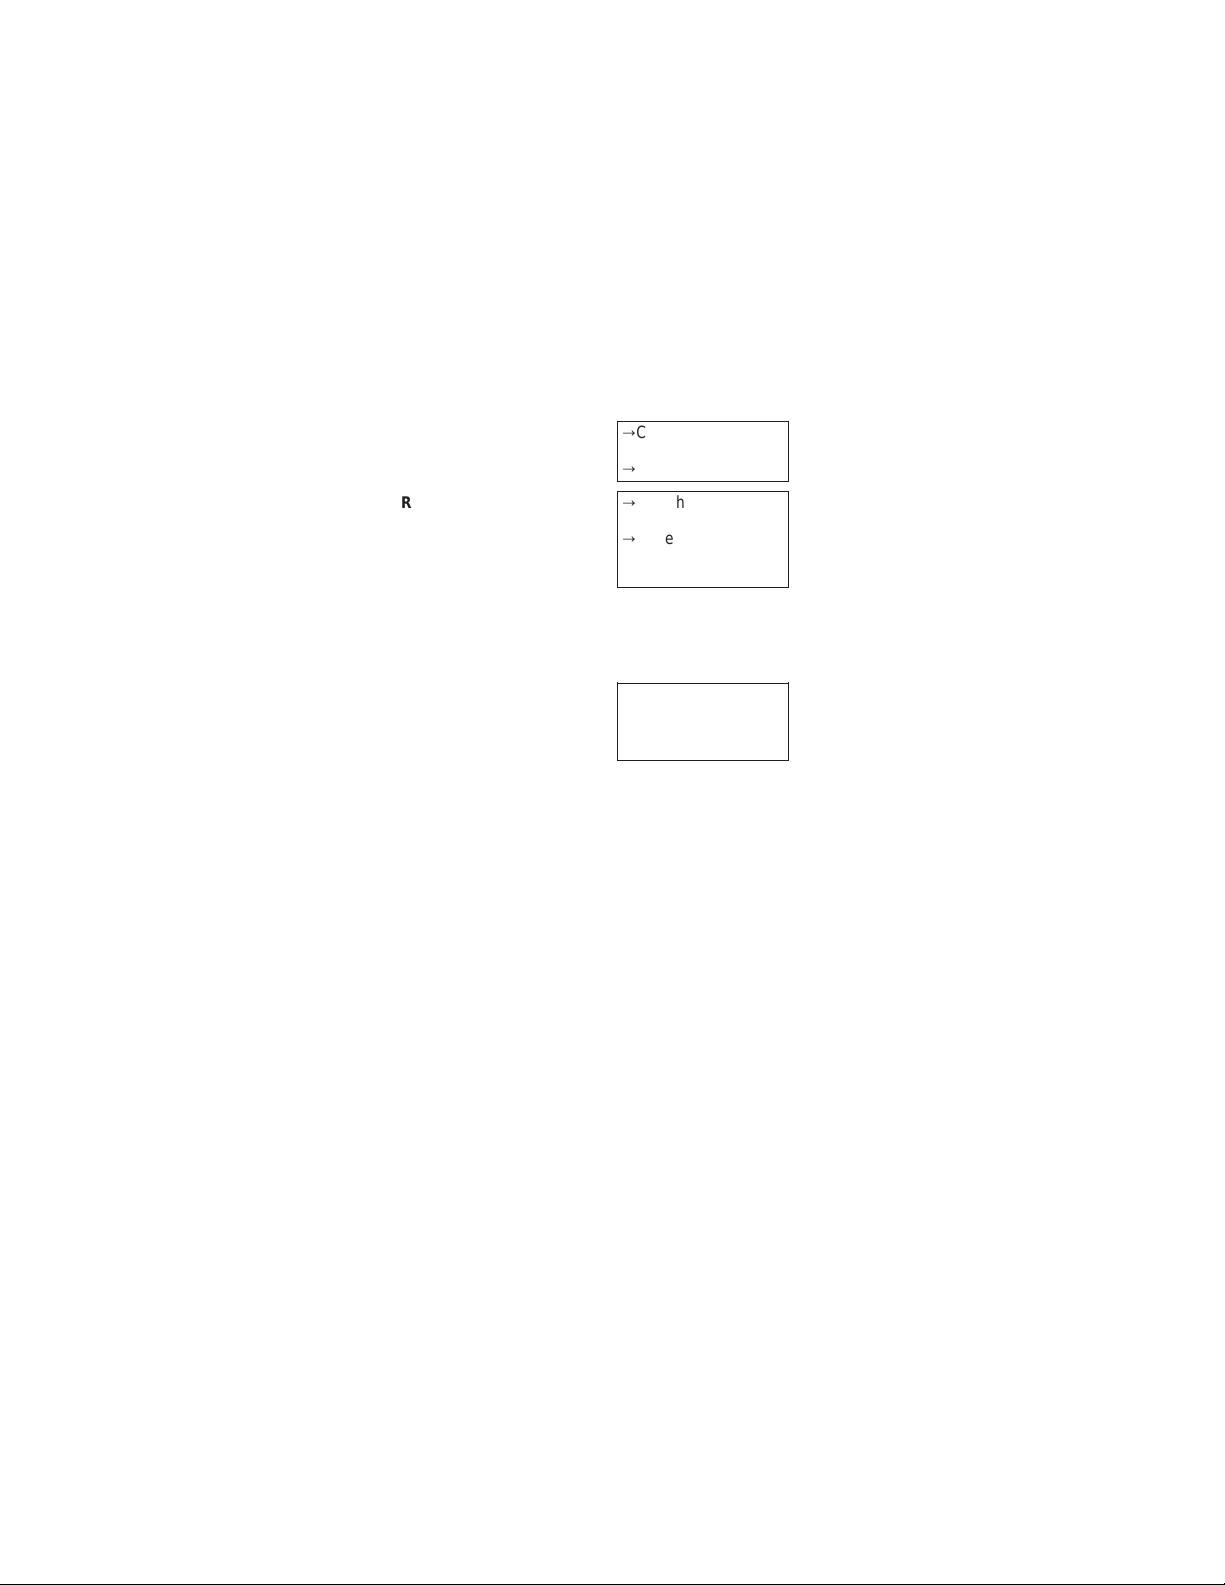
Emergency calling
Note: Emergency numbers vary by location.
→If the phone is not
on, switch it on
→press and hold
to clear display
→key in emergency
number for your
present location (e.g.
911 or other official
emergency number)
→press
U
C
Using this Owner’s Manual
The cellular phone described in this manualis approved
for use in AMPS/TDMA networks. A number of features
included in this guide are called Network Services. They
are special services providedby cellular service
providers.
Before you can take advantage of any ofthese Network
Services, you must subscribe to them throughyour
home service provider. You can then activatethese
functions as described in this guide.The manual
activation commands for various services are not
presented in this guide (e.g. ∗ and # charactersfor
activating or deactivating services).Thephone
nevertheless is capable of handling commands given in
that form. For these commands please consult with
your service provider.
WARNING!
Use only batteries, antennas, chargers, and
accessories approved by the phone manufacturer.The
use of any other types will invalidate any approval or
warranty applying to the telephone, andmay be
dangerous.
3
Page 8

FCC/INDUSTRYCANADA NOTICE
Your phone may cause TV or radio interference (e.g.
when using telephone in close proximityof receiving
equipment). The FCC/Industry Canadacan require you
to stop using your telephone if suchinterference cannot
be eliminated. If you need assistance,contact your
local dealer.
This device complies with parts 15and68of the
FCC rules. Operation is subject tothe condition
that this device does not cause harmful
interference.
4
Page 9
2. The Display and Connectors
The Disp lay
AorB:Network the phone uses
A - A system only
B - B system only
AB - Both systems
No indicator: Home area only
A call is in progress (In Use indicator).
D
The phone is using a digital channel.
The phone is in a network other than yourhome
network (roaming).
Shown continuously: roamingin a home-type system.
Flashing: roaming in a non-home-typesystem.
ABC
The phone is in alpha mode.
A voice message is waiting.
Steady: You have received a text message.
Flashing: Text message memory is full.
Shows a memory location, menu, submenu or option
number.
and bar
Indicates the current signal strength at your location.
The higher the bar, the better the signal.
and bar
Indicates how much charge is left inthebattery. The
higher the bar, the more charge in the battery.
Indicates that there is a list ofoptions to select from.
Also indicates the currently selectedoption.
5
Page 10

Connectors
➌➍
➋
➊
For Fast Cigarette Lighter Charger, FastTravel
Ê
Charger, and Standard Travel Charger
Power connector for Desktop Charger
Ë
CHH-2/CHH-2L
System and data connector for accessories,
Ì
desktop chargers, and HF car kit
For external antenna
Í
6
Page 11

3. The Battery
Your phone is powered by a rechargeable battery. Use
only batteries approved bythe phone manufacturer and
recharge your battery only withthe chargers approved
by the manufacturer.
A new battery’s full
performance is achievedonly
after two or three complete
charge and discharge cycles!
Note: This chapter gives only the basics forbattery
usage. See “Accessories” for more information on
chargers and other accessories.
NICKEL CADMIUM AND NICKEL
METAL HYDRIDE BATTERIESMUST
NiCd
NiMH
BE RECYCLED OR DISPOSEDOF
PROPERLY. MUSTNOT BE DISPOSED
OF IN MUNICIPAL WASTE.
Installing a battery
Insert the battery onto
Ê
the back of the
phone.
Fasten it to the phone
Ë
by sliding slightly upward until the locking
catch clicks.
Removing a battery
Switch off the phone.
Press and hold the
Ê
locking catch.
Slide the battery down.
Ë
Lift the battery away from the phone.
Ì
7
2.
1.
1.
2.
3.
Page 12
Charging a battery with
FastTravelCharger
(ACH-4U)
Connect the lead
Ê
from the charger to
the bottom of the
phone.
Connect the charger
Ë
to a standard 120V AC outlet.
When the battery is charging, the battery
indicator on the right side of the display
scrolls. Allow the battery tocompletely
charge. Charging is finished when the
segments stop scrolling.
The charging times depend on the typeofthe
battery and the charger used.
See the “Accessories” chapter for details.
When charging is finished, disconnectthe charger from
the AC outlet and from the phone.Whenyou
disconnect the power cord of anyaccessory, grasp and
pull the plug, not the cord.
Discharging the battery
Either leave your phone switchedonuntilit turns itself
off or use the battery discharge facilityof any approved
accessory available for your phone. The batterycan be
charged and discharged hundreds of times butitwill
eventually wear out. When theoperating time is
noticeably shorter than normal, it istimeto buy a new
battery.
Battery Charge
The phone gives you a warning tone and the message
BATTERY LOW
remain. When no more batterypower remains, you get
a Recharge Battery Tone and the message
BATTERY
Connect your phone directlyto a charger or place it on
a charging stand with the power on or offto begin
charging.
when only a couple of minutes oftalktime
RECHARGE
. The phone switches itself off.
8
Page 13

Note: In some vehicles, the ignitionmustbe on in order
to charge the phone with the cigarette lighter adapter.
If the message
suspended. Check that the batteryisnot overheated
(over 104°F/40°C), too cold, or connected to a
non-approved charging device. Waitforawhile,
connect the charger to the phone again and retry. If
charging still fails, contact qualifiedservice personnel.
Important Battery Information
For good operation times, discharge the batteryfrom
time to time by leaving your phoneswitched on until it
turns itself off or by using the batterydischarge facility
of any approved accessory availablefor your phone. Do
not attempt to discharge the battery by any other
means.
When a charger is not in use, disconnect itfrom the
power source. Do not leave the batteryconnectedto a
charger for longer than a week; overcharging may
shorten its life.
If left unused, a fully chargedbatterywill discharge itself
in about a week at room temperature.
When the battery is not in use, storeit uncharged in a
cool, dark and dry place.
Temperature extremes affect the ability of your battery
to charge: it may require cooling orwarming first.
Do not short circuit the battery. Accidental short
circuiting can occur when a metallic object(e.g. coin,
clip, or pen) causes direct connectionofthe + and terminals of the battery (metal strips ontheback of the
battery), for example when you carry a sparebattery in
your pocket or purse. Short circuiting the terminal may
damage the battery or the connecting object.
Use the battery only for its intendedpurpose.
Never use any charger or battery that is damagedor
worn out.
NOT CHARGING
is displayed, charging is
9
Page 14

Leaving the battery in hot or cold places,suchas in a
closed car in summer or winter conditions, reduces the
capacity and lifetime of the battery. Always try to keep
the battery between 59°F and 77°F (15°C and 25°C).A
phone with a hot or cold battery maytemporarily not
work, even if the battery is fully charged. NiMH battery
performance is particularly limitedintemperatures
below 14°F (-10°C).
The battery is a sealed unit with no serviceableparts.
Do not attempt to open the case.
Do not dispose of a battery in a fire!Dispose of used
batteries in accordance withlocalregulations. Recycle!
10
Page 15

4. Basics
Switching On or Off Press and hold P for
a second.
When switching on, if your phonehasan extendible
antenna, extend the antenna fully. As with any other
radio transmitting device, avoid unnecessary contact
with the antenna when the phoneisswitched on.
Push in the antenna when you arenot using the phone.
The phone carries out a short self-test andbriefly
displays the phone number in use.
A Personal Reminder Note appears if youhave
programmed one with Menu 4 5. Press left
save it or right
The phone can make and receive callsonly when it is
switched on and is located in thecellular network’s
service area.
The phone automatically switches itselfoff if the
operating temperature exceeds 158°F (70°C).
F (
Erase
) to delete it.
F (
Keep
)to
Signal Strength
The stronger the radio signal, thebetter
the call quality. The higher the column on
the left side of the phone display, the
better the signal at your location.
If the signal strength is not good, try
moving the phone slightly. Inabuilding,
reception may be better near a window.
Access Codes
Your phone uses several access codes that can protect
against unauthorized use of the phone.
When requested to do so, key inthecode (appears as
asterisks) and press left
mistake, press
time.
C repeatedly to erase digits one at a
F (OK). If you make a keying
11
Page 16

Note: Avoid using access codes similartoemergency
numbers such as 911 to prevent accidental dialingof
the emergency number.
Security Code (5 digits)
The Security Code comes with your phoneand is
required with some phonefeatures. Keep it secret and
in a safe place, separate from the phone.
You cannot change the Security Code. If you need a
new one, contact your dealer. The default is 12345.
If you enter an incorrect security code
times in a row, the phone won’t accept any entriesfor
the next five minutes.
Lock Code
You need the 4-digit lock code to turn on the Automatic
Phone Lock in Menu 5 1, or to change the Lock Code
in Menu 5 2. The default Lock Code is 1234.
Enter the 5-digit code
then left
Security Code:
F (
OK
prompt.
(CODE ERROR)
) at
five
12
Page 17
5. Making and Receiving Calls
Answering a Call →Press any key
(except
P, E, A
or volume keys) then
speak
If Keyguard is on, only U answers calls. Pressing
E stops the ringing sound, but doesn’t answerthe
call.
Making a Call
Your phone can make and receive calls only whenitis
switched on and in the cellular network’s service area.
NO SERVICE
cellular service area. No calls canbeplacedor
received. If you try to make a callwhile
displayed, the phone displays
tries to make the call for the next 2 minutes.
Note: Check with your cellular system operatorfor
information about when you need todiala ‘1’ and/or an
area code in addition to the number.
If you make a mistake
dialing
Hanging up Press E
means that you are probablyoutside the
Speed Dialing
The phone recalls the phone numberfrom the memory,
displays it briefly, then dials it.
Note: If you press 1
stored with Menu 2 3, Set Voice Mailbox Number. If
U, the phone dials the number
Õ
Extend antenna fully
Õ
Key in phone
number
Õ
U
WAIT FORSERVICE
NO SERVICE
, and
Õ
Press C once to
delete the last digit, or
Õ
Press and hold C to
clear display
Õ
Key in memory
location number
(2 to 99)
Õ
U
is
13
Page 18
you press 9 U, the phone initiates an emergency call
only if Menu 3 4, Emergency Key 9, is set On!
Last Number Redial
Õ
Clear display with
C
Õ
U
Redialing any of the last
10 numbers
Note: After U, you must press ▼ or ▲ within a
second to scroll through the last 10 dialednumbers.
Otherwise, the phone automaticallydials the most
recently dialed number.
1-Touch Dialing Press and hold the key
The phone recalls the phone numberfrom memory,
displays it briefly, then dials it. To use this feature, Menu
3 3,
One Touch Dialing,
stored numbers in the location corresponding to the
number you pressed. See the “PersonalDirectory”
chapter for details on storing numbers.
Note: If you press 1
stored with Menu 2 3, Set Voice Mailbox Number. If
you press 9
only if Menu 3 4, Emergency Key 9, is set On!
Important!
Official emergency numbers varybylocation (e.g. 911
or other official emergency number). Only one
emergency number is programmed into your phoneto
be dialed automatically by one key emergencydialing,
which may not be the proper number inall
circumstances. One key emergency dialingdoes not
operate when Keyguard is in useor when the phone is
connected to a modem.
must beOnand you must have
U, the phone dials the number
U, the phone initiates an emergency call
Õ
U then ▼ or ▲
within a second
Õ
Once you see the
number you want,
press
U to dial it.
(2 to 8) for a few
seconds until the call
is started.
14
Page 19

Emergency Key 9 →Press 9 then U
OR:
→Press and hold 9 for
more than 3 seconds
The phone dials the preprogrammedemergency
number (e.g. 911) with either of these dialingmethods.
You can also dial an emergency number as usual by
keying in the whole emergency number then
Note: Pressing and holding Emergency Key9 todialan
emergency call does not function when Keyguardis in
use or when the phone is connected to a modem. (See
“Keyguard” later in this chapter for moreinformation on
Keyguard.)
Note: Emergency Key 9 works only ifithas been set
On
in Menu 3 4!
U.
Voice Mail Key 1 Press and hold 1 for
a few seconds.
The phone dials the number stored withMenu2 3,
Voice MailboxNumber
.
Set
EarpieceVolume
Two volume buttons on the side of the phoneadjust the
earpiece volume. The upper volume buttonincreases
and the lower volume button decreasesthe volume.
If an accessory with its own loudspeakerisconnected
to the phone, the volume keys select thevolume for
that accessory.
Muting/Unmuting the
phone’s microphone
Muting and unmuting may be done only during an
active call.
Õ
Press and hold left
F (
Menu
seconds
Õ
Õ
) for few
▼ to
MuteorUnmute
left F (OK)
15
Page 20

Calling Line Identification
If you have subscribed to and activatedthis network
service, the phone displays the caller’s phone number if
the system is able to identify it.Thephone displays the
caller’s name if you have storedthat caller’s nameand
number, and the person calls you from the number you
have stored.
CALLorNO IDCALL
available.
prevented the number from beingshown.
Note: For information about availability of and
subscription to Calling LineIdentification Presentation,
contact your system operator.
displays when the number is not
PRIVATE ID CALL
displays when the caller has
Distinct Ringing
You may set your phone to ring distinctly when
particular people call. To do this, store the person’s
name and number in your phone and includethe
character “!” somewhere in the person’s name. Your
phone rings distinctly whenthere is an incoming call
from that person’s number. For details onstoring
names and numbers, see “The Personal Directory”
chapter.
Note: Distinct Ringing works only when Calling Line
Identification is active.
Keyguard Press left F (
then ∗.
Keyguard prevents accidental keypresses (e.g. when
the phone is in your pocket). Press left
∗ to activate or deactivate keyguard. Youcanalso
activate Keyguard by using left
Keyguard cannot be activatedwhenthe phone is
connected to a car kit or in a handsfreedesktop
charger.
Note: When Keyguard is ON, calls maybe possible to
the emergency number 911 (911
should also work, if Menu 3 4, Emergency Key9,isset
ON. However, pressing and holding Emergency Key9
does not function.
F (
Menu
U). Pressing 9 U
F (
) 11.
Menu
Menu
) then
)
16
Page 21

When placing an emergency call, theemergency
number will be displayed only afteryou have keyed in all
its digits. After the emergency call, Keyguard becomes
active again.
Answering a call with
Keyguard active
During the call the keypad remains unlocked which lets
you operate the phone as usual. After you endthe call,
Keyguard becomes active again.
Press U.
CallWaiting
With Call Waiting, the activecall is put on hold as you
answer the waiting (incoming) call.This service is
available only if you havesubscribedto it through your
network operator. For details on Call Waiting availability
and operation, check with your networkoperator.
17
Page 22

6. Voice and Text Messages
Please check with your operator for the availability of
message features.
Voice Messages
When you receive a voice message,thephone beeps,
lights the voice message indicator ( ), and displays
NEW VOICEMESSAGE
messages if there are more thanone.
To use the methods described below to call your voice
mailbox, you must store your voicemailboxnumber in
your phone, which is described in thissection.
To call your voice
mailbox after receiving a
message
Note that your voice mailbox numbermust bestored in
the phone to use this method (see below).
To call your voice
mailbox any time
. The phone shows the number of
With
NEWVOICE
MESSAGE
Õ
Õ
left F (
U
on display,
Listen
) OR
Press and hold 1
To store your voice
mailbox number in the
phone
Once you enter the number, it is used until you change
it again.
Note: The voice mailbox may be provided bythe
network (and the network operator gives youthe
number to call) or you may make use of your own
answering machine.
Õ
Left F (
Õ
key in voice mailbox
Menu
number
Õ
left F (OK)
) 23
Text Messages
When the text message network service is available
and you have subscribed to it, your phonecan receive
and store text messages. The text message functionis
a network service and may not be supportedbyyour
network.
18
Page 23

Also, to use text messaging, you must have the phone
number of your message service center available. The
phone can store up to 30 text messages, witha
maximum of about 1,900 characters for all messages
combined. Contact your network operatorfordetails
about the text messaging service and the maximum
number of characters allowed in a message.
The network may have its own default messagethat is
displayed when the phone is inthe network coverage
area. This does not prevent the use of your phonein
any way.
Reading Text Messages
When you receive a text message and there is enough
space left in the message memory,
MESSAGE(s)
applicable) and the indicator ( ) are displayed. See
“The Display” for a description of theText Message
indicator.
To read messages
immediately
To read text messages any
time
(or
NEW URGENTorNEW EMERGENCYMESSAGE
(nn)NEWTEXT
With
NEWTEXT
MESSAGE(s)
press left
on display,
F (
Press right F (
then later:
Õ
left F (
Õ
press ▼ to view the
Menu
Read
Quit
) 22
)
first message
Õ
scroll message(s)
with ▼ or ▲
The messages are shown in the orderthatthey were
received or stored. New messages are shown first, in
their order of priority, then old messages, in their
chronological order.
NEW
indicates an unread message and isfollowed by
the date and time of receipt.
OLD
indicates that the message has alreadybeen read.
URGENT
indicates that the message receivedwas
marked “urgent” by the sender.
if
) ,
19
Page 24

EMERGENCY
marked “emergency” by the sender.
LOCKED
will not be overwritten even ifthere is no more space in
memory and there is an attempt to deliver anew
message to your phone.
The Option soft key
indicates that the message receivedwas
indicates that you have lockedthemessage. It
With message on
screen,
Õ
press left F
(
Option
)
Õ
▼ to option you
want
Õ
left F (OK)
Read next
Erase
Lock/Unlock
When a new message arrives and the message
memory is full, the new message automatically
overrides old messages unless they arelocked.
Call back
message and calls that number. You can also just press
shows the next message.
deletes the current message from memory.
allows you to lock and unlock messages.
displays the first number from the current
U while the message is displayed to callbacka
number in the message.
Õ
Setting your phone to
“Pager Mode”
Left F (
Õ
▼to
Õ
left F (OK)
OR
Õ
left F (
On
Menu
Menu
) 38
) #
With “Pager Mode” set toOn, you can receive Voice
Mail Notification and Text Messages. You do not receive
any incoming calls. When you set “Pager Mode”to
the message
setting is Off. “Pager Mode” is a networkservice.
Please check for the availabilityfrom your network
operator.
PAGERONLY
is displayed. The default
On
20
,
Page 25

7. The Personal Directory
You can store up to 100 numbers and associated
names in your “Personal Directory”.
Stored numbers may be up to 16 digitslong.Stored
names may be up to 16 characters long. The phone
provides you with 8 extendednumberlocations (any
you choose) that allow the storednumberto contain up
to 30 digits in addition to the name.
The identical name may be used onlyoncein memory.
REPLACE NAME?
already in memory.
Alpha Mode
To enter names, retrieve numbers based on names,
and view names, press
indicate that you can use keys to enter lettersas well as
numbers, and that you are viewing names rather than
numbers.
When a number is displayed, press
associated name (if there is one). Whena name is
displayed, press
When ABC is displayed, you can enterthese characters:
Key Characters Key Characters
1 1 7 PQRS7
2 ABC2 8 TUV8
3 DEF3 9 WXYZ9
4 GHI4 0 -?!,.:"’&$( )0
5 JKL5 ∗ Enter letters fromsame key again
6 MNO6 # Blank space
appears when you try to store aname
A. The phone displays ABC to
A to see the
A to see the associated number.
Note: If you include the character !inthe stored name,
the phone rings distinctly whenreceiving calls from that
number. See the “Making and Receiving Calls”chapter
for more information.
When entering letters, press andholdthe key to switch
between upper case and lower case letters.Press
to correct a mistake.
C
21
Page 26

When ABC is not displayed, you can usethe∗ key to
enter these special characters:
∗∗ +,links memory locations
∗∗∗ p,creates a pause
∗∗∗∗ w,causes thephone to wait for input
Entering Names
Example Name: Lisa
Press this For thiseffect
Õ
A
Õ
Press and release the
key labeled with the
letter you want until
that letter appears
Õ
for another letter on
the same key, press ∗
in between letters or
wait a few seconds
A alpha mode
5 5 5 L
press and hold4, then4 4 I (lower case)
7 7 7 7 s
2 a
Storing Numbers and Names
You can also enter another location number or scroll
through available locationnumbers with ▼ or ▲ after
the
STORE INLOCATION?
numbers, such as storing your family’s numbers in
locations 20-29. At
2* and the phone would store the numberin the first
available location beginning witha 2 (such as 21).
To fast save
prompt. You may group stored
STORE INLOCATION?
Õ
Key in phone
number
Õ
right F(
Õ
left F (
Õ
key in name
(optional)
Õ
left F (
Õ
left F (OK)
Õ
Key in phone
number
Õ
press and hold right
F (
Memory
Store
Store
you would key in
Memory
)
)
)
22
)
Page 27

To add a name to a stored
phone number
To change the number
stored with a name
To erase stored names and
numbers
Press right F (
change your mind. Press right
the erase function. You may also use Menu 01 5 to
erase.
Note: You cannot undo Erase functions so be careful!
To erase all stored numbers
Quit
) instead of left F (
Õ
Recall stored phone
number
Õ
A then key in name
Õ
right F (
then left
Õ
At
LOCATION?
recalled location
number
Õ
left F (OK) then
left
F (
REPLACE?
Õ
Recall stored number
Õ
C repeatedly to
erase number
Õ
key in new number
Õ
right F (
Õ
left F (
left
F (
REPLACE?
With display empty,
Õ
right F (
Õ
left F (
left
F (
Õ
▼ to name you
want to erase, or key
in name, or press
to see numbers, then ▼
Õ
left F (
F (
Quit
Õ
Left F (
Õ
▼ to
left
F (
Õ
left F (OK) at
YOU SURE?
Memory
F (
STORE IN
enter
OK
) again at
Memory
Store
OK
) again at
Memory
Store
Store)
Erase)
Erase
) if you
) again to exit
Menu
Erase All
OK
)
Store
) then
) then
again
A
) 01 5
then
ARE
)
)
)
)
23
Page 28

Recalling Stored Numbers
Press ▼ or ▲ repeatedly to scrollthrough stored
numbers. Press
A to see corresponding names.
Recalling Stored Names
Press ▼ or ▲ repeatedly to scrollthrough stored
names. Press
To recall numbers by
memory location
Press U to dial the displayed number ordisplayed
name’s number.
To recall numbers by
name
If you enter only the first lettersofthename and there is
more than one name beginning withthese letters, press
▼ or ▲ until you see the name you want.
To begin scrolling at a
particular location
This works for 2-digit locations. Ifyoupress 2∗ then ▼,
the phone begins scrolling at location20, if you have
numbers stored in that location.This ishandy if you
have grouped together storednumbers. (See“Storing
Numbers and Names” earlier in this section.)
Status of the Directory
U to dial the displayed name’s number.
With display empty,
press
▼ or ▲.
With display empty,
press
A then ▼ or ▲.
Õ
Key in location
number
Õ
right F (
Õ
right F (
Õ
Right F (
Õ
key in name or its
first few letters
Õ
right F (
Key in first digit of the
location then ∗ then ▼.
Õ
Left F (
Õ
▼ shows empty
Õ
▼ again shows full
Õ
▼ again shows
hidden
Memory
Find)
Memory
Find)
Menu
)
)
) 01 6
This lets you see how many empty, full, and hidden
locations are in your directory.
24
Page 29

8. Temporary Lists and Call Timers
The phone automatically stores the last 10dialed
numbers, numbers of the last 10 answeredcalls, and
numbers of the last 10 missed calls. It also gives you
10 temporary storage spaces, in a “Notepad”.
Note: The phone displays the phonenumbers of
received and missed calls only if thecellular system is
able to identify the caller.
To view Dialed Numbers
The top right corner of the display shows the location
number of the last dialed number (L0- L9). Press
view associated names, if available. You may also use
Menu 01 1,
want, press
Dialed Calls.
U to dial.
Once you see the number you
To view Last Received Calls
The top right corner of the display shows the location
number of the 10 most recent calls you have answered
(R0-R9). Press
available. You may also use Menu 01 2,
A to view associated names, if
To view Missed Calls With display empty,
Õ
With display empty,
press
U
Õ
▼ or ▲ within a
second
A to
With display empty,
press ∗ then ▼ to
scroll the numbers.
Received Calls
press ∗∗ (+) then ▼.
Õ
If
MISSED CALLS
displayed, press left
F (
List
scroll the list, OR
Õ
(
numbers later
) then ▼ to
Press right F
Quit
) to view the
.
is
The top right corner of the display shows you the
location number (U0-U9) of the calling phonenumbers
of the 10 most recent calls you have notanswered.
Press
A to view associated names, if available. You
may also use Menu 01 3,
Missed Calls
.
25
Page 30

Notepad
The Notepad is “temporary storage” for up to 10
numbers.
Õ
To store numbers and
names in Notepad
See “The Personal Directory” chapter fordetails on
storing numbers.
To see numbers and
names in Notepad
The top right corner of the display shows the location
number of the Notepad (o0 - o9).
To clear temporary lists
and Notepad
This clears Dialed Numbers, ReceivedCalls, Missed
Calls, and the Notepad. You cannot undo this operation
so be careful!
CallTimers
This shows call durations for the currently-selected
NAM. The phone has separate timers for each NAM
(phone number) your phone uses.
Note: The actual time invoiced for calls byyour service
provider may vary, depending upon items such as
network features, rounding off for billing, and taxes.
To clear Call Timers
Store number as
normal, but at
IN LOCATION
Õ
left F (OK)
# then ▼ or ▲
Left F (
Õ
Left F (
Õ
▼ to show duration
of the
Õ
▼ again to show the
duration of
Õ
Left F (
Õ
▼ to
Õ
left F
Õ
key in security code
at
Security code:
left
F
STORE
, press #
Menu
) 01 4
Menu
LAST CALL
ALL CALLS
Menu
CLEARTIMERS
(OK
)
then
(OK
)
) 01 7
) 01 7
26
Page 31

9. Touch Tones
Your phone is a “Touch Tone” phone, meaning that it
creates certain sounds when youpress the keys.
These sounds can be used for many automated, overthe-phone services such as checking yourbank
balance, using your voice mailbox options, andeven
checking airplane arrival and departuretimes.
Touch Tones are called “DTMF” (Dual Tone
Multifrequency) tones inthe phone.
Sending Individual TouchTones
Touch Tones can be used only when a callisactive.You
would use the IndividualTouch Tone feature when, for
example, you are prompted to “press 1 and then the
star (*) button”. You would simply press 1 *.
Note: Individual Touch Tones can be sent only if Menu 4
3 is not set to Off. Menu 4 3 is described inthis section.
Sending Strings of TouchTones
You can transmit Touch Tones one by one by pressing
the keypad during a call. Additionally, youcanstore a
whole digit sequence in a memory locationand send it
as Touch Tones. You could use this for frequently-used
strings of numbers, such as your bank account
number.
The phone sends (as Touch Tones) the digits that are
currently on the display. You may also press andhold
left
F (
Menu
(OK) then left F (
To store a Touch Tone
string
) then press ▼ to
Quit
) to send a string of Touch Tones.
Press keys during call.
During a call, with the
display empty:
Õ
Recall from memory
the string you want to
send
Õ
left F (
then
Send DTMF
Store Touch Tone
strings the same way as
you store phone
numbers.
U
then left F
Menu
)
27
Page 32

For example, you could store your bankaccount
number in the personal directory.
Õ
To store Touch Tone
strings with a phone
number
∗∗∗ creates a “p” (pause) character. When you recall
this number sequence from memory andpress
the phone dials the phone number, pauses 2.5
seconds, then sends the DTMF digits. You can add as
many “p” characters as you need.
∗∗∗∗ creates a “w” (wait) character. When you recall this
number sequence from memory and press
phone dials the phone number, then waits for you to
press the left
a number that then prompts youtoenter information,
such as your bank account number.
To link a stored phone
number to DTMF digits
in another memory
location
F (
DTMF)
. This is handy if you arecalling
Key in the phone
number
Õ
press ∗∗∗ (p) or
∗∗∗∗ (w)
Õ
key in the Touch
Tone string
Õ
store the number in
the normal way
U,
U, the
Õ
Key in the phone
number
Õ
press ∗∗ (+)
Õ
key in memory
location storing the
DTMF string
Õ
store the number in
the normal way
Use this if the phone number and DTMF digits do not fit
in one storage location; it links thephonenumber to
the memory location storing the DTMF string.
∗∗ creates a “+” (link to another memory location).
When you recall this number sequence from memory
and press
displays digits stored inthememory location you have
entered, then sends them as Touch Tones.
U, the phone dials the phone number,
28
Page 33

Entering only a “+” at the end of a storednumber
causes the phone to prompt you for amemory location
after the call is connected. The phoneexpects a
memory location after the “+” character. Enter a
location number and press left
contents of that memory location as Touch Tones.
F (
OK)
to send the
Touch Tone Settings in the Phone
Your phone’s Touch Tone settings are Menu 4 3,
DTMFTones
Menu 4 3, Manual DTMF
Tones
This determines the length of the Individual Touch Tones
when you press keys during calls.Note that regardless
of this setting, strings of Touch Tonescan be sent.
Continuous
hold the key.
regardless of how long youpress the key.
tones off, meaning that no tones are sent when you
press individual keys.
Menu 4 4, Auto DTMF
Length
This determines the length of Touch Tones instrings.
Short
the DTMF tone length to 500 ms.
, and Menu 4 4,
means the tone sounds for as long as you
Fixed
sets the DTMF tone length to 100 ms.
Auto DTMFLength
Õ
Left F (
Õ
▼to your choice
Õ
left F (OK)
sets the tone length to 100 ms,
Õ
Left F (
Õ
▼to your choice
Õ
left F (OK)
.
Menu
Off
turns the
Menu
Long
Manual
) 43
) 44
sets
29
Page 34

10. The Menu
The phone’s menus and submenus allow youto tailor
the phone to suit your tastes.
Menu guidelines
→Left F (
→▼ and ▲ step through menus, submenus, and
options
→
A gives help text on menus and submenus and
goes to the next screen of help text ifthere are
several
→Right
→
C exits the menu facility withoutmaking changes
Scrolling through
the menus
The current setting appears first in lists ofsetting
options.
Entering menus by
number
The menus, submenus and setting options are
numbered. The number is shown inthe display’s top
right corner. Once you reach the menu or submenu you
want, you can also use ▼ or ▲ to see options.
Note: Press the menu, submenu, and setting numbers
within a couple of seconds of each other whenusing
this method.
Menu
) enters the menus
F (
Quit
) goes back one level
→Left F (
→▼ or ▲ to menu
you want
→Left
OK
) enters submenus
and chooses options
→Left F (
menu number then
submenu number then
setting number.
F (
Menu
Select
Menu
)
or
) then
30
Page 35

Summary Of Menu Functions
MEMORY FUNCTIONS
Menu 01
MESSAGES
Menu 2
CALL SETTINGS
Menu 3
PHONE SETTINGS
Menu 4
SECURITY OPTIONS
Menu 5
Dialed Calls01 1
Received Calls01 2
Missed Calls01 3
Clear AllCall Lists01 4
Memory Erase Options01 5
Memory Status 01 6
Call Timers 017
Listen toVoice Messages2 1
Read Messages2 2
Set VoiceMailbox Number2 3
Ringing Volume3 1
Ringing Tone3 2
One-Touch Dialing3 3
Emergency Key 9 3 4
Automatic Redial 3 5
AutomaticAnswer3 6
Calling Card 3 7
Pager Mode 3 8
Lights 4 1
Keypad Tones4 2
Manual DTMFTones4 3
Auto DTMFLength 4 4
Personal Reminder Note 4 5
CountdownTimer 4 6
Restore Settings4 7
Menu List 4 8
Language 4 9
Automatic PhoneLock 5 1
Change LockCode 5 2
Restrict Calls5 3
Outgoing Calls5 3 1
International Calls5 3 2
Incoming Calls5 3 3
Hide Memory 5 4
31
Page 36

NETWORK SERVICES
Menu 6
(see notebelow)
Dual ModeSelection 6 1
Voice Privacy6 2
Call Forwarding 6 3
ForwardAllCalls 6 31
ForwardIf Busy 6 3 2
ForwardIfNot Answered63 3
ForwardIf Outof Reach 6 3 4
Call Waiting6 4
SelectiveCallAcceptance 65
AllowedNumbersList 6 5 1
Blocked NumbersList 6 5 2
Send Own Number6 6
Network FeatureSetting 6 7
SYSTEM SELECTION
Selects whichcellular system touse.
Menu 7
NAM SELECTION
Menu 8
NUMBER EDITOR
Menu 9
ALERT OPTIONS
Menu 10
ACTIVATE KEYGUARD
Menu 11
Menu 6 Note: The items in Menu 6 shown initalics are
visible ONLY when activated with Menu6 7!
Network Services
Some of the menu functions are networkservices.
These functions can be utilizedonlyif provided by your
cellular network. To make use of a network service,you
must first subscribe to it. For availability and
subscription, contact your networkoperator.
Selects thephone’s system and
current phone number.
Allows editing ofthe
currently-displayed number.
Selects typeof ringing or silent
service.
Activates thekeypad locking
mechanism.
Menu 01, Memory Functions
See “The Personal Directory” and “Temporary Lists and
Call Timers” chapters for descriptions of the items in
Menu 01.
Menu 2, Messages
See the “Voice and Text Messages” chapter for
descriptions of these menu items.
32
Page 37

Menu 3, Call Settings
Menu 3 1,Ringing Volume
You hear each ringing level as you scroll through the
volume levels. When the phone isconnectedto a
handsfree desktop charger, handsfree car kit,or
headset, the ringing volume can be set separately for
those accessories with this menu.
Menu 3 2,Ringing Tone
The phone plays a sample of each pattern as you
scroll.
Note: The ringing tone is the same for all accessories.
Menu 3 3, One-Touch Dialing
With this feature on, you can dial any ofthe phone
numbers stored in personal directorylocations 2-9 by
pressing and holding the numberof the personal
directory location.
Note: Pressing
the Emergency Key 9 function is set
holding
with Menu 2 3, Set VoiceMailbox Number.
Menu 3 4, Emergency Key 9
With this feature on, the phone makes anemergency
call when you press 9 then
preprogrammed emergency number 911.
You can also dial an emergency call by pressing and
holding 9 for about three seconds, afterwhich the call is
initiated. However, this method does not work when
Keyguard is active or when thephoneis connected to a
modem.
Menu 3 5, Automatic Redial
When this is on, your phone redials the number you are
trying to call (if the network is busy) upto 10 times.
Press
E to end the call attempts.
Menu 3 6, Automatic Answer
When the phone is connected to the headsetor the
handsfree facility of the car kit,you can set the phone
to answer a call automatically after onering. Thecar kit
must be equipped with the ignitionsense option.
9
and U initiates an emergency call if
1
always initiates a call to the numberstored
On
! Pressing and
U. The phone dials the
33
Page 38

Menu 3 7, Calling Card
To store a calling card
To change stored calling cardinformation (such as your
card number), go through thesesteps,but use the
key to erase already stored information. Key in the new
information then press left
Menu 3 8, Pager Mode
See the “Voice and Text Messages” chapter for a
description of this function.
Making Calling Card
Calls
Õ
Left F (
Õ
▼to the card you
want then left
(OK)
Õ
key in security code
at
Security code:
left
F (
Õ
key in access
number at
Number:
Õ
press A then key in
card name (optional)
Õ
left F (OK)
Õ
key in card number
at
Card ID Code:
left
F (
F (
OK
).
Õ
Key in phone
number
Õ
press and hold U
for a few seconds until
the phone displays
CARD CALL
Õ
press left F (OK)
after
WaitForTone,Then
Press OK
Menu
OK
)
Access
OK
)
prompt
) 37
F
then
then
C
Depending on the type of calling card,there may be an
additional prompt,
F (
OK
) again at this prompt.
Note: This dialing method works onlywith cards that
require you to first dial the access number, then the
phone number, then your card number, in that order.
WaitFor Tone,PressOK Again
. Press left
34
Page 39

Menu 4, Phone Settings
Menu 4 1, Lights
With lights on, the keypad lights come on whenyou
press a key or have an incoming call,andgo off 15
seconds later.
When the phone is connected to a car kit,desktop
charger, or cigarette lighter charger, the lights are on
permanently when this setting is
OFF
, the lights come on when you press akeyor have
an incoming call, and go off 15 secondslater.
Note: You can turn on the lights for 15 seconds by
pressing the power key quicklyregardlessof this
setting.
Menu 4 2,Keypad Tones
You can select the volume level or turn off the sound
the phone makes when you press a key.
Note: The keypad tone volume is set separately for
each accessory you use.
Menu 4 3,Manual DTMF Tones
Menu 4 4, Auto DTMF Length
See the “Touch Tones” chapter for descriptions ofthese
items.
Menu 4 5, Personal
Reminder Note
ON
; when this setting is
Õ
Left F (
Õ
key in a new
Menu
) 45
message or edit the
existing one
Õ
left F (
Õ
▼ to
Õ
left F (OK)
The Personal Reminder Note displays whenthe phone
is switched on. The maximum length is30 characters.
Characters you key in are addedtothe left of the
cursor. Press
cursor.
C to delete characters to the left of the
Option
)
StoreorErase
35
Page 40

Press ▼ or ▲ to move the cursor right or left.
stores the new or edited note for lateruse. The note is
displayed each time you switch the phoneon.
removes the note from the displayand from the
memory.
Next time you switch the phone on, thestored note
displays. Once you have readthenote, press left
(
Keep
) to save it or right F (
displays each time you turn the phone on untilyou
erase it.
Menu 4 6, Countdown
Timer
Erase
) to delete it. It
Õ
Left F (
Õ
key in time to count
down at
Store
Erase
Menu
Set timer:
F
) 46
(appears in h and m)
Õ
left F (OK)
Õ
press right F
(
Quit
) twice to exit
The phone sounds an alarm and displays
COMPLETED
of time you enter. The timer stops if the battery runs out
or if you turn the phone off.
An incoming call overrides the timer alarm. Afteryou
have completed the call,
appears, but the phone does not sound an alarm.
To stop the timer before
it alarms
when it finishes counting downthe amount
COUNTDOWN COMPLETED
Follow the steps
above, but key in 0000
at
To clear the alarm when
it is sounding
Menu 4 7, Restore Settings
You can reset the settings of certain menu functions to
factory defaults (as in a new telephone).
Note: The memory, timers, counters and the language
selection are not reset.
The following settings are settothe values shown:
RingingVolume Level 4 (3in carmode)
RingingTone Type1
One-Touch Dialing Off
Press left F (OK) .
Set timer:
COUNTDOWN
.
36
Page 41

Emergency Key9 Off
AutomaticRedial Off
AutomaticAnswer Off
Pager Mode Off
Lights On
Keypad Tones Level 2
ManualDTMFTones Continuous
Auto DTMFLength Long
Menu List Complete
AutomaticPhone Lock Off
Lock Code 1234
Dual ModeSelection Ana. &Dig.
VoicePrivacy Off
Ringing Options Ring
Menu 4 8, Menu List
This function lets you choose eitherashortenedor
complete menu. The complete menu contains allmenu
items, whereas the short menu showsonly themost
essential menu items, namely:
Messages,Set VoiceMailboxNumber),PhoneSettings (Restore
Settings,Menu List),Alert Options,
Menu 4 9, Language
You can choose the language your phone uses for all of
its displays.
Messages(Listen to Voice
and
Activate Keyguard.
Menu 5, Security Options
Most of the phones security features require a five-digit
security code, which is normally supplied with the
phone. If you forget the security code, contact your
dealer. Since this code allows access to all the
operations of the phone, store it inasafe place,
separately from the phone.
Menu 5 1, Automatic Phone Lock
When you turn this on, the phone’s lock becomes
active after you switch the phoneoff and back on. With
the lock on, you must enter the lock codeeachtime
you want to access memory and menu functions.
To enter the lockcode:
At
Enter lock code:
key
in the lockcode then
press left
F (
OK
).
37
Page 42

When the phone is locked, calls maybepossibleto the
emergency number programmed into your phone(e.g.
911 or other official emergency number) including calls
with the Emergency Key 9. Also, you may callthe
number stored in location 100.
To answer a call with
Auto Lock on:
To call the number in
location 100 with Auto
Lock on:
Note: To unlock the phone permanently after locking it,
you need to enter this function andselectthe
OFF
option.
Menu 5 2, Change Lock code
In a lock code, only digits 0 to 9 areaccepted.Lock
codes are four digits long.
Menu 5 3, Restrict Calls
You can prevent the phone from dialinga number or
receiving a call. Note thatnone ofthe restriction options
prevents calls to the preprogrammed emergency
number 911.
Menu 5 3 1, Outgoing Calls
Allowed
means that all calls can be made as usual.
Blocked
means that no calls can be made.
that calls can be made only to phone numbersstored
in certain personal directorylocations. You are
prompted for a
FROM
: 1 and
stored in locations 1-15. Or, enter
allow only calls to the number storedin location 3.
You can store an area code (for example, 214) in a
memory location (e.g., 15). Then select
enter 15 in the
make calls to only numbers starting with214.
When calls are restricted, callsmay be possible to the
emergency number programmed into your phone(e.g.
911 or other official emergency numbers).
FROM:
TO:
and
15, to allow only calls to the numbers
FROM
: and
Press U.
▼ or ▲ then U
Limited
TO:
value. For example, enter
FROM
: 3 and
Limited
TO:
values. You can then
AUTO LOCK
means
TO:
3, to
, and
38
Page 43

Menu 5 3 2, InternationalCalls
Allowed
means you can make international calls
(i.e., calls beginning with the internationalprefix
preprogrammed in your phone).
can’t make international calls withthephone.
Menu 5 3 3, Incoming Calls
Allowed
means you can receive all calls.
you can receive no calls.
Menu 5 4, Hide Memory
This function lets you hide phonenumbers in your
personal directory. The names stored in thehidden
memory locations are shown on the display, but the
numbers are shown as asterisks (∗).
To hide only one location, enter the locationnumber at
both the
To hide a series of locations, such as locations10-15,
enter the first location, for example 10,at
the last location, for example 15, at
To hide numbers:
Hide From:
and
HideTo:
Blocked
means you
Blocked
means
prompts (shown below).
Hide From:
HideTo:
.
Õ
Left F (
Õ
key in security code
at
Security code
left
F (
OK)
at
▼ to
at
HideTo:
OK
Yes
OK)
Hide From:
F (
Õ
F (
Õ
first location to be
hidden then left
(
Õ
location to be hidden
then left
Menu
: then
)
then left
enter
F
enter last
OK)
and
) 54
Menu 6, Network Services
Menu 6 1, Dual mode Select
You can set the phone to work in AMPS (
TDMA (
Digital
override your setting, however. When the phone isin
dual mode (
selects the right mode. The phone automaticallyreturns
to dualmode (
and back on.
) networks. The network can always
Ana.& Dig.
), the cellular network automatically
Ana.& Dig.
) when you switch the phone off
Analog
) and/or
39
Page 44

Menu 6 2,VoicePrivacy
You may set this to
the voice channel only in networkswith digital service. If
you have this feature on and voiceprivacy becomes
inactive for any reason the phonedisplays
INACTIVE
and beeps. Check for availability ofthis
function from your networkoperator.
Note: Menu items
your phone’s menuonly if you are using the first
telephone number of your phone (see Menu8, NAM
Selection), you have subscribed to theservicefrom
your network operator, and you have activated the
menu items with Menu 6 7.
Menu 6 3, Call
Forwarding
OnorOff
. VoicePrivacyOnencrypts
6 3,6 4,6 5,
and
Õ
Left F (
Õ
▼to forwarding
6 6
appear on
VOICE PRIVACY
Menu
) 63
option
Õ
This appears on the menu
only if activated with
Menu 6 7
This forwards your calls to thenumber that is on
display when you select
3 1) forwards all incoming calls.
2) forwards calls only when youare on the phone.
ForwardIfNot Answered
don’t answer.
forwards calls if you areoutofthe serving cellular
network.
currently-active forwarding options.
Menu 6 4, Call Waiting
This appears on the menu
only if activated with
Menu 6 7
If you activate call waiting,youwill receive a tone during
a call to let you know you have an incoming call.The
phone may also display the incoming caller’s
identification. To answer the incoming call, press
Forward If Outof Reach
CancelAllForwarding
Activate.ForwardAllCalls
(Menu 6 3 3) forwards calls if you
left F (OK)
Õ
▼ to
Activate
or
Cancel
Õ
left F (OK)
Menu
Activate
(Menu 6
(Menu 6 3
or
ForwardIf Busy
(Menu 6 3 4)
(Menu 6 3 5) cancels all
Õ
Left F (
Õ
▼to
Cancel
Õ
left F (OK)
U.
) 64
40
Page 45

Menu 6 5, Selective Call
Acceptance
This appears on the menu only
if activated with Menu 6 7
With this, you can program the network to screen
incoming calls. The caller’s phone number is compared
to the list you select and the callis theneither rejected
or allowed.
incoming caller’s number matches one on the allowed
numbers list.
incoming caller’s number matches one on the blocked
numbers list.
Activate
restriction off.
remove numbers from the list.
If you select
list,
Confirm your selection or setting withleft
Contact your network operator to havethis feature
activated.
Menu 6 6, Send Own
Number
AllowedNumbersList
Blocked NumbersList
turns the restriction on.
Edit
allows you to add numbers to or
Edit
RemoveNo.
, you can then choose to
from the list, or
Õ
Left F (
Õ
▼to
Numbers List
Menu
Allowed
or
Blocked
Numbers List
Õ
▼ to
Activate,
Deactivate,
Õ
allows calls when the
rejects calls when the
Deactivate
RemoveAll
Õ
Õ
number) or
or
left F (OK)
turns the
Add No.
(clear the list).
F (
Left F (
▼to
Yes
Menu
(to show
No
Edit
to the
OK
(to not
) 65
).
) 66
show number)
Õ
This appears on the menu only
if activated with Menu 6 7
left F (OK)
Õ
key in the number
you want to call at
Number:
prompt
Õ
press U to call
This specifies whether or not to display(i.e., Send) your
phone number to the person you arecalling.This
feature functions only insystems equipped with Calling
Number Identification. Contactyour network operator
to see if this is available.
41
Page 46

If you do not make a selection, the phoneuses the
default network setting, which isalwaysactive when
you switch on your phone. Checkwithyour network
operator to find out the network default.
Menu 6 7, Network Feature Setting
Call Forwarding, CallWaiting, Selective Call
Acceptance, and Send Own Number areservices
available through your networkoperator or dealer.
When you subscribe to any of these services, your
operator or dealer gives you a separate code that you
use to activate and deactivate each service.
Menu 6 7 lets you store all the codes youuse in your
phone. Once you store the code inyourphone, the
service appears as a menu item. You can then use the
menu to activate and deactivate
WAITING,SELECTIVE CALLACCEPTANCE,
NUMBER
.
To remove an item from the menu, gothrough the
steps shown in “To Store Codes”, butsimply press left
F (
OK
) after the
a code).
To store codes:
Feature code:
CALL FORWARD, CALL
and
SEND OWN
prompt (without entering
Õ
Left F (
Õ
at
the code you want to
store in your phone
(e.g. *74) then left
F (
Õ
▼ to the service that
the code applies to,
then left
Õ
▼ to suboption (as
applicable) then left
F (
Õ
▼ to
Cancel
Õ
left F (OK)
Menu
Feature Code:
OK
)
F (
OK
)
Activate
OK
or
) 67
enter
)
42
Page 47

Menu 7, System Select
In each cellular service area there are usually two
cellular operators operating public systems oftype “A”
or “B”. One of the public systems (A or B) isyourhome
system (depending on your operator) butyourphone
can work with both types of systems. With Menu 7,you
can select the type of system the phoneshoulduse.
If you have registeredwithseveral operators, use Menu
8,
NAM Select
currently-selected NAM determines which system is
currently your “home” system.
BothA&B
to use a home-type system (such as “B” ifthehome
system is B). If this is not available,it then tries to use a
non-home type system (such as “A” if the homesystem
is B).
HometypeAorHometype B
only a home-type system.
Non-HomeAorNon-Home B
only a non-home-type system.
HomeArea
Note: To use this option, your home system operator
must have a roaming agreement with the host
company whose system you try to use. Contact your
home system operator for the roaming agreements
they have with other operators.
Depending on the selection either theAor Bindicator
(or both) will appear. Neither indicator appears ifHome
Area is selected.
, to select the current home system. The
means that when roaming, the phonefirst tries
means the phone tries to use
means the phone tries to use
means the phone cannot roam at all.
43
Page 48

Roaming Indicators
When the phone begins roaming,itbeeps, displays
ROAMING
, and lights the roaming indicator( ). For a
description of the two states of the roamingindicator,
see “The Display and Connectors” chapter. Some
cellular systems can recognize aroamingphone
automatically. In other systems, you must contact the
cellular operator before the system canrecognize the
phone. You will need to give your phone number, your
phone’s ESN (electronic serial number), andhow you
plan to pay for your calls. There isusually an additional
charge for roaming calls.
Note: The ESN for your cellular phone isprinted under
the battery pack on the back of the phone.
Menu 8, NAM Selection
Õ
Left F (
Õ
▼ to phone number
Menu
) 8
to use
Õ
left F (
The cellular operator programs your phonewith
software called a Number AssignmentModule(NAM)
when you register for service. You can register your
phone with up to 3 cellular systems, eachgiving your
phone a different NAM,whichcontains unique data for
you such as your phone number, home service area,
and A-key.
Only one NAM is in effectatatime.When you select a
phone number, you are also selecting whichsystem
you are using as your home system. The first phone
number displayed with this menuis the phone number
in use.
Note: You need at least one active number to make
calls. You cannot change from one NAM to another
during a call.
Select
)
44
Page 49

Menu 9, Number Editor
This function lets you edit the existing digits of a phone
number. You can press
U to dial the edited number.
The number you want
to edit must be on the
display
Õ
Left F (
Õ
C removes the digit
left of cursor
Õ
▼ or ▲ moves the
cursor right or left
Menu
) 9
Menu 10, Alert Options
With
Ring &Vibra
incoming calls. With
tone. With
With
Vibrate
phone only flashes its lights and
The vibrator function can be activated,but it functions
only if an optional vibratingbattery is used (BBT-1XV).
Contact your dealer for more information.
For different ringing volume levels and tone patterns,
see Menu 3 1 and Menu 3 2.
When the phone starts to alert, you canpress
mute the ringing tone. The phone continuesto alert
silently by flashing the lights andthe text
display.
When
Beep once,VibrateorSilent
phone displays
received or voice mail indicationbeeps become shorter
with one of the above options selected.
When
Silent
(Menu 3 6) does not work.
If
Vibrate
the phone automatically goes into
incoming calls. If the phone is set to
placed in a Handsfree stand, the phone rings only.
When the phone is connected to a HFdesktopcharger,
HF car kit, or headset, the indication modecanbe set
separately for each of these accessories.
the phone rings and vibrates for
Ring
Beep Once
the phone only vibrates. With
the phone sounds a ringing
the phone sounds a short beep.
CALL
Silent
.
, the
E to
CALL
on the
SILENT
has been chosen, Automatic Answer
is selected and no vibrating batteryisattached,
has been chosen, the
. Call related tones likemessage
Silent
mode for
Vibrate
and then
45
Page 50

Menu 11, Activate Keyguard
Keyguard remains on untilyou deactivate by pressing
left
F (
Menu
and there is no call in progress, no key tones are heard
and no key presses are be accepted, exceptfor calls to
911 (or other official preprogrammed emergency
number) and
When placing an emergency call, theemergency
number is displayed only afteryouhave keyed in all its
digits. After the emergency call, Keyguard automatically
becomes active again. Keyguard cannotbeactivated
when the phone is connected to a car kit orin the
handsfree desktop charger.
) then ∗. When the functionis activated
U and E.
Press left F (
then 11
Menu
)
46
Page 51

11. Data and Fax Calls
The phone can send or receive data whenit is
connected to a compatible data terminal (suchas a fax
machine or PC) through a data adapter. See the
documentation for the data adapter andterminal.
Only analog data can be sent and received.
The phone recognizes the type ofthe connected
terminal automatically. For instance, if a fax machineis
connected to the phone, the phone makes a faxcall.
Note: Pressing and holding 9 to initiatean emergency
call does not work when the phone isconnectedto a
modem.
To start an outgoing data or fax call
Check that the data terminalisproperly installed.
Ê
A data or fax transmission is always startedfrom
the data terminal.
Start the transmission from the data terminalin the
Ë
normal way. For example, to send a telefax, start
the transmission from the fax machines keypad.
The phone calls the number you dialedfrom the
terminal’s keypad.
After the transmission, end the call fromthedata
Ì
terminal, or press
To receive a data call
Check that the data terminalisproperly installed.
Ê
Press U to answer the call. OR, if you knowthat
Ë
the incoming call is a data call,youcan answer the
call from the data terminal.
After the transmission, end the call fromthedata
Ì
terminal. OR, press
E.
E.
47
Page 52

To receive a fax call
Check that the data terminalisproperly installed.
Ê
Press U to answer the call. OR, if you knowthis
Ë
is an incoming fax, you can answer thecallfrom
the fax machine’s keypad.
After the transmission, end the call fromthefax
Ì
machine’s keypad. OR, press
E.
48
Page 53

12. Accessories
In addition to the battery andchargers described in
this manual, an extensive accessory range is
available. You can select the accessories that meet
your specific communication needs. For availability,
please check with your local dealer.
Use only batteries,anten nas,chargers, and accessories
approved by the phone manufacturer. Theuse of any
other types will invalidateanyapproval or warranty
applying to the telephone, and may bedangerous.
IMPORTANT! See “The Battery” chapter of this guide
for important battery information.
A new battery’s full
performance is achieved only
after two or three complete
charge and discharge cycles!
Approximatebattery operation times
Battery TalkTime,
Slim BBH-1S
550 mAhNiMH
BBT-1XVVibrating
550mAh NiMH
Ultra Extended
BBH-2H
1100 mAhNiCd
Ultra Extended
BBH-1H
1500 mAhNiMH
Digital/Analog
70 min./ 45 min. 26-30 hours
70 min./ 45 min. 26-30 hours
150 min./ 90 min. 52-60 hours
210 min./120 min. 71-83 hours
StandbyTime,
Digital/Analog
14-19 hours
14-19 hours
28-38 hours
40-52 hours
49
Page 54

Note: Battery operation times vary according to signal
conditions, network parameters set bytheoperator,
and how you use the batteries. Usingthephone near
the network’s basestation consumes less power.
Keeping the antenna fully extendedwhenever possible
maintains the connection to the networkwith less
power.
Approximatecharging times
Battery ACH-3U ACH-4U
Slim BBH-1S 4.5 hours 1 hour
BBT-1XV Vibrating 4.5 hours 1 hour
Ultra Extended
BBH-2H
Ultra Extended
BBH-1H
Note: It is recommended that you allowyourbattery to
fully discharge before you recharge it. Batteries last
longer and perform better if allowed to dischargefully at
least once a week.
9 hours 2 hours
14 hours 2 hours,30 min.
StandardTravel Charger (ACH-3U)
This charger can be used with all
battery options. Note that you
cannot make calls during charging
when the battery is fully
discharged.
Plug the charger into a wall outlet
and connect the lead to the base
of the phone or to a light desk stand.
Fast TravelCharger (ACH-4U)
This lightweight AC charger can be
used with all battery options. Calls
can be made during charging, even
with a fully discharged battery.
To use the Fast Travel Charger
(ACH-4U), plug it into a standard
120V AC wall outlet, and connect
the lead from the charger to the
base of the phone.
50
Page 55

The charger can also be used together with the
optional Compact Desktop Charging Stand(CHH-2)
and Light Desk Stand (CHH-2L).
Fast Cigarette Lighter Charger (LCH-2)
You can charge the phone
battery from your vehicle
battery by using the Fast
Cigarette Lighter Charger
(LCH-2). You can also use the
charger with stands CHH-2
and CHH-2L (described
below). Calls are possible
during charging.
A green light indicates the
charger is ready for charging (when not charging)or
finished charging (if it has beencharging).A red light
indicates charging. The battery chargingtimesare the
same as those for the Fast Travel Charger (ACH-4U).
The input voltage range is from 10 to30VDC,negative
grounding. Avoid prolonged charging with the Fast
Cigarette Lighter Charger (LCH-2)when the car engine
is not running; this may cause the batteryof your car to
drain. Note also that in some cars the cigarette lighter
plug is not provided withelectricity if the ignition is not
switched on.
Fuse Replacement
The Fast Cigarette Lighter Chargercontains a
protective fuse. The fuse is locatedinthe charger tip.
If the charger does not work, the fuse may beblown,
in which case replace it witha 3 amp. 125 volt fuse.
Never use a fuse with a higher rating.
Compact Desktop Charging Stand (CHH-2)
The Compact Desktop
Charging Stand (CHH-2)
allows you to place both the
phone and a spare battery for
charging at the same time in
the stand. It is compatible with
all battery options.
51
Page 56

The charger starts to charge the spare batteryassoon
as it has finished charging the phonebattery.
Connect either the Fast Travel Charger (ACH-4U) or the
Fast Cigarette Lighter Charger (LCH-2)to the stand,
and then plug the Fast Travel Charger or Fast Cigarette
Lighter Charger into a wall outletor vehicle respectively.
Place the phone and/or the sparebatteryin the stand.
To discharge the spare battery, press the bluebutton
on the stand. When the battery istotallydischarged,
recharging starts automatically. (If you wish to stop
discharging, press the buttonagaintostart the
charging right away.) Only the spare battery canbe
discharged.
The blinking red light indicates discharging, the
continuous red light indicates recharging and the green
light indicates trickle charging.Thephone is ready for
use when the green light appears(checkthe charge on
the phone display).
Light Desk Stand (CHH-2L)
The Light Desk Stand (CHH-2L)
offers support for the phone
during charging. Used together
with the Standard Travel Charger
(ACH-3U), Fast Travel Charger
(ACH-4U,) or the Fast Cigarette
Lighter Charger (LCH-2), this
drop-in stand is an economical
choice when you need your
phone close at hand, always readyforcalls.
Charging is indicated by the scrollingbattery bars on
the right side of the phone’s display.Charging is
finished when the scrolling stops.
52
Page 57

13. Care and Maintenance
Your phone is a product of superior design and
craftsmanship and should be treatedwith care. The
suggestions below will help youto fulfill the warranty
obligations and to enjoy this product for many years.
Keep the phone and all its parts and accessoriesoutof
small childrens’ reach.
Keep the phone dry. Precipitation, humidityand liquids
contain minerals that will corrodeelectronic circuits.
Do not use or store the phone in dusty, dirty areas. Its
moving parts can be damaged.
Do not store the phone in hot areas.High temperatures
can shorten the life of electronic devices, damage
batteries, and warp or melt certain plastics.
Do not store the phone in cold areas.When the phone
warms up (to its normal temperature),moisturecan
form inside the phone, which maydamageelectronic
circuit boards.
Do not attempt to open the phone. Non-expert
handling of the phone may damage it.
Do not drop, knock or shake the phone.Rough
handling can break internal circuit boards.
Do not use harsh chemicals, cleaning solvents,or
strong detergents to clean the phone. Wipe itwitha
soft cloth slightly dampened inamildsoap-and-water
solution.
If the phone or any of its accessories arenotworking
properly, take them to your nearest qualifiedservice
facility. The personnel there will assistyou,and if
necessary, arrange for service.
53
Page 58

14. Technical Data
Cellular System TDMA andAMPS
Weight 7.9 oz (224g) with 550mAh
Capacity 169 cc
Frequency Range 824.010 - 848.970 MHz (TX)
Transmitter Output Power 0.4mW to 600mW nominal
Battery Voltage 6 Vnominal
Charging Current 800mA typical
Operating Temperature -20
Number ofChannels 832
Number ofNAMs 3
Memory Locations 100
Memory Capacity Alpha: 16 digits per location
USA
NOKIA MOBILEPHONES – 6200 CourtneyCampbell
Causeway, Suite 900, P.O. Box 30730,Tampa,FL 33630.
Tel: 1-800-666-5553
CANADA
NOKIA PRODUCTS LTD. – 575 WestneyRd. South,
Ajax, OntarioL1S 4N7. Tel: (905) 427-6654
NiMH battery
869.010 - 893.970 MHz (RX)
° C to + 40°C
(-4° F to+ 104° F)
Numeric: 16digits per location
+ 30 digitsin 8 locations.
NOKIA and the Arrows logoare registered trademarksof Nokia
Corporation.
The information containedin this UserGuide was writtenfor dual-mode
phone NHC-4NE/HE.
The right to make changes andimprovements to any ofthe products
described in this guide withoutprior noticeis reserved.
Issue No. 1. © 1996 Nokia Mobile Phones.All rights reserved.
These commodities areauthorized by the U.S. Government forexport only
to Canada, Mexico,or the UnitedStates. They may not be resold, diverted,
transferred,or otherwise disposed of in any other country, either intheir
original form or after being incorporated throughan intermediate process
into other end-items,without thewritten approval of theU.S. Department
of State.
54
Page 59

NOKIA One-Year Limited Warranty
Nokia Mobile Phones, Inc. (“NMPI”) warrants thatthis cellular
phone (“Product")is free from defects in material and
workmanship, according to thefollowing terms andconditions:
1. The limited warranty for the Product extends for ONE (1)
year beginningon the date ofpurchase of the Product.
2. The limited warranty extendsonly to the originalconsumer
purchaser (“Consumer”) of the Product and is not
assignable ortransferable to any subsequent
purchaser/enduser.
3. The limited warranty extendsonly to Consumers who
purchase the Product inthe United States.
4. Duringthe limited warrantyperiod, NMPI willrepair, or
replace, at NMPI’s option, any defective parts, or any
parts thatwill not properly operate for their intended use
with newor factory rebuilt replacement items. No charge
will be made to the Consumer for any suchparts . NMPI
will alsopay for the labor charges incurredby NMPI in
repairing or replacing thedefective parts. The external
housing andcosmetic parts shall be free of defects atthe
time of shipment and, therefore, shall notbe covered
under theselimited warranty terms.
5. Upon request from NMPI, theConsumer must provide
information to reasonably provethe date of purchase.
6. The Consumer shall bear the cost of shipping the Product
to theCustomer Service Departmentof NMPI. NMPIshall
bear thecost of shippingthe Product backto the
Consumer afterthe completion of service under this
limited warranty.
7. The Consumer shall have no coverage or benefits under
this limitedwarranty if any ofthe following conditions are
applicable:
a) The Producthas been subjectto abnormal use, abnormal
conditions, improper storage, exposure to moisture or
dampness, unauthorized modifications, unauthorized
connections, unauthorized repair, misuse, neglect, abuse,
accident, alteration, improperinstallation, or other acts
which are notthe fault of NMPI, including damage caused
by shippingand blown fuses.
b) The CustomerService Department atNMPI was not notified
by Consumerof the allegeddefect or malfunctionof the
Product during the applicablelimited warranty period.
55
Page 60

c) The Productserial number plate orthe accessory date
code hasbeen removed, defaced,or altered.
d) The defector damage was caused by the defective
function ofthe cellular system, orby inadequate signal
reception by the external antenna.
8. If aproblem developsduring the limitedwarranty period,
the Consumershould take thefollowing step-by-step
procedure:
a) The Consumer shallreturn the Product to theplace of
purchase for repair orreplacement processing.
b) If “a”is not convenientthe Consumer may contact the
Customer ServiceDepartment at NMPI,at the phone
number listedon the bottomof this page forfurther
instructions.
c) The Consumer shallship the Product prepaidand insured.
Expenses related to removingthe Productfrom an
installation are not covered under this limited warranty.
d) The Consumerwill be billedfor any partsor labor charges
not coveredby this limitedwarranty. TheConsumer shall
be responsible for expenses related to reinstallation of the
Product.
e) If the Product is returnedto the CustomerService
Department atNMPI during thelimited warranty period,
but the problem with theProduct cannotbe fixed under
the terms andconditions of thislimited warranty, the
Consumer willbe notified andgiven an estimateof the
charges the Consumer must pay tohave the Product
repaired,with all shipping charges billed to theConsumer.
If the estimate is refused, theProduct willbe returned
freight collect. If the Product is returnedto the Customer
Service Departmentat NMPI afterthe expiration of the
warranty period,NMPI’s normal service policies shall
apply and theConsumer will be invoiced for all shipping
charges.
9. The Product consists ofnewly assembled equipmentthat
may contain usedcomponents which have been
reprocessedto allow machinecompliance with Product
performance and reliability specifications.
56
Page 61

10. ANY IMPLIED WARRANTY OF MERCHANTABILITY, OR
FITNESS FORA PARTICULAR PURPOSE OF USE,
SHALL BE LIMITED TO THE DURATION OF THE
FOREGOING WRITTEN WARRANTY, OTHERWISE, THE
FOREGOING WARRANTY IS THE PURCHASER’S SOLE
AND EXCLUSIVE REMEDYAND IN LIEU OFALL OTHER
WARRANTIES, EXPRESS OR IMPLIED. NMPI SHALL
NOT BE LIABLE FOR INCIDENTAL OR
CONSEQUENTIAL DAMAGES ORA LOSS OF
ANTICIPATED BENEFITS OR PROFITS, RESULTING
FROM THE PURCHASE OR USE OFTHE PRODUCT OR
ARISING FROM THEBREACH OF THE WARRANTY
EVEN IF NMPI KNEW OF THELIKELIHOOD OF SUCH
DAMAGES.
11. Some states donot allow limitation of how long an implied
warranty lasts,so the above limitation may not apply to
you (the Consumer). Some states donot allow the
exclusion ofincidental or consequential damages, so the
above limitation orexclusions may not apply to you (the
Consumer). This limited warranty gives youspecific legal
rights andyou may also have other rights which varyfrom
state to state.
12. NMPI neitherassumes nor authorizes any authorized
service centeror any personor entity toassume for it any
other obligation or liabilitybeyond that which is expressly
provided for in this limitedwarranty.
13. Questions concerningthis limited warrantymay be directed
to theCustomer Service Departmentat Nokia, 6200
Courtney CampbellCauseway,Suite 900, Tampa, FL
33630. Telephone (813) 288-3800or 1-800-666-5553,
Facsimile: (813)287-6612.
14. The limitedwarranty period for Nokia ProductCorp.
supplied attachments and accessoriesare specifically
defined withintheir own warranty cards and packaging.
57
Page 62

14. Technical Data
Cellular System TDMA andAMPS
Weight 7.9 oz (224g) with 550mAh
Capacity 169 cc
Frequency Range 824.010 - 848.970 MHz (TX)
Transmitter Output Power 0.4mW to 600mW nominal
Battery Voltage 6 Vnominal
Charging Current 800mA typical
Operating Temperature -20
Number ofChannels 832
Number ofNAMs 3
Memory Locations 100
Memory Capacity Alpha: 16 digits per location
LATINAMERICA
NOKIA MOBILEPHONES – 2300 Valley View Lane, Suite 100
Irving, TX75062 USA. Tel: (214) 257-9800
USA
NOKIA MOBILEPHONES – 6200 CourtneyCampbell
Causeway, Suite 900, P.O. Box 30730,Tampa,FL 33630.
Tel: 1-800-666-5553
NiMH battery
869.010 - 893.970 MHz (RX)
° C to + 40°C
(-4° F to+ 104° F)
Numeric: 16digits per location
+ 30 digitsin 8 locations.
NOKIA and the Arrows logoare registered trademarksof Nokia
Corporation.
The information containedin this UserGuide was writtenfor dual-mode
phone NHC-4NE/HE.
The right to make changes andimprovements to any ofthe products
described in this guide withoutprior noticeis reserved.
Issue No. 1. © 1996 Nokia Mobile Phones.All rights reserved.
These commodities areauthorized by the U.S. Government forexport only
to Canada, Mexico,or the UnitedStates. They may not be resold, diverted,
transferred,or otherwise disposed of in any other country, either intheir
original form or after being incorporated throughan intermediate process
into other end-items,without thewritten approval of theU.S. Department
of State.
 Loading...