


Maytag MFR30PNCTS, MFS230PTVS, MFS230PTRS, MFS230PAVS, MFS230PARS Installation Instructions
...FULL CONTROL
COMMERCIAL WASHER PROGRAMMING GUIDE (North America Only)
Table of Contents................................................................................................................... |
2 |
1 2 3
4 5 6
7 8 9
0
W10214576D
www.maytagcommerciallaundry.com

TABLE OF CONTENTS
WASHER SAFETY.............................................................. |
3 |
CONTROL PANEL.............................................................. |
4 |
Control Panel Overview................................................... |
4 |
Keypad............................................................................ |
4 |
How to Enter Program Mode.......................................... |
5 |
Main Menu...................................................................... |
6 |
GENERAL CONTROL DESCRIPTION............................... |
7 |
Control Features............................................................. |
7 |
Menu Functions.............................................................. |
7 |
Machine Types................................................................ |
8 |
Create a Wash Program................................................. |
8 |
Program Functions......................................................... |
9 |
WASHER STARTUP......................................................... |
11 |
Configuration Menu...................................................... |
11 |
Advanced Menu............................................................ |
15 |
Initialization Menu......................................................... |
18 |
Wash Program Creation and Adjustment...................... |
20 |
CYCLE PROGRAMMING................................................ |
21 |
Program Menu.............................................................. |
21 |
Program Functions....................................................... |
21 |
Program Step Function................................................. |
22 |
Program the Wash Cycle.............................................. |
23 |
Program the Drain Step................................................ |
33 |
OPERATION..................................................................... |
36 |
Start a Laundry Load..................................................... |
36 |
Cycle Options................................................................. |
36 |
Program End and Unloading........................................ |
37 |
Messages During the Wash Cycle................................ |
37 |
Special Function Keypad.............................................. |
38 |
PROGRAMMED CYCLES................................................ |
39 |
Legend.......................................................................... |
39 |
WASH PROGRAMS......................................................... |
40 |
TROUBLESHOOTING...................................................... |
47 |
Display Messages......................................................... |
47 |
Fault Code Overview..................................................... |
49 |
Service Menu................................................................ |
52 |
Problem Check List....................................................... |
57 |
Error Message Explanation........................................... |
58 |
SERVICE INFORMATION................................................ |
83 |
Replacing the Electronic Board and Keypad............... |
84 |
Installing New Software................................................ |
84 |
Washer Specifications.................................................. |
85 |
APPENDIX........................................................................ |
86 |
Table A-1: Conversion Between |
|
Celsius and Fahrenheit................................................. |
86 |
Table A-2: Conversion Between |
|
Kilograms and Pounds.................................................. |
86 |
Table A-3: Machine Conversion................................... |
86 |
Table A-4: Maximum, Minimum, and |
|
Normal Water Setting Values........................................ |
87 |
Table A-5: Programmable Water Level Units |
|
Related to the Amount of Water in the Tub.................. |
88 |
Table A-6: Washer Wash and Spin Speeds................. |
91 |
2

WASHER SAFETY |
3
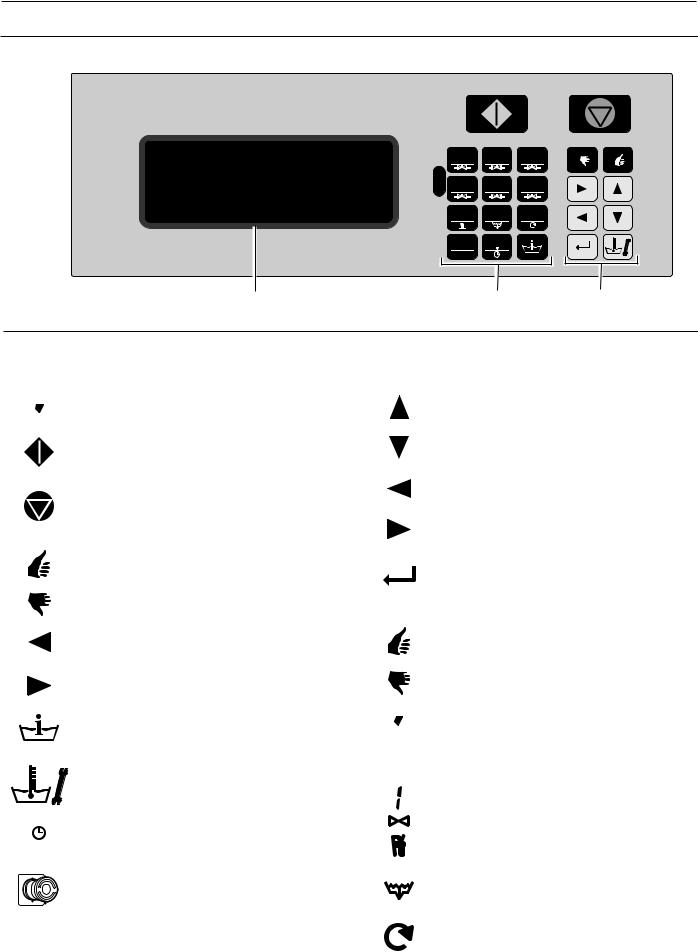
CONTROL PANEL
Control Panel Overview
1 |
2 |
3 |
4 |
5 |
6 |
7 |
8 |
9 |
0 |
|
|
|
|
LCD Display |
|
|
|
|
|
|
Operation |
Program |
|
||||
|
|
|
|
|
|
|
|
Keypads |
Keypads |
|
|||||
|
|
|
|
|
|
|
|
|
|
|
|
|
|
||
|
|
|
|
|
|
|
|
|
|
|
|
|
|
|
|
|
|
KEYPAD |
|
|
|
|
|
|
|
|
|
||||
|
|
|
|
|
|
|
|
|
|
|
|
|
|
||
|
Operation Keypads |
Program Keypads |
|
|
|||||||||||
|
|
|
|
|
|
|
|
|
|
|
|
|
|
|
|
|
n |
1 2 3 4 5 6 7 8 9 0 |
|
|
|
|
|
|
|
|
|
n |
ARROW UP |
|
|
|
|
- Program number selection keypads |
|
|
|
|
|
|
- Selects the previous menu item |
|
|||||
|
n |
START |
|
|
|
|
|
n |
ARROW DOWN |
|
|
||||
|
|
- Starts a program |
|
|
|
|
|
|
- Selects the next menu item |
|
|||||
|
|
- Advances the program step by step |
|
|
|
|
|
|
|
|
|
||||
|
|
|
|
|
|
|
|
|
|
|
|
n |
LEFT ARROW |
|
|
|
n |
STOP |
|
|
|
|
|
|
- Selects the previous element of a menu item |
|
|||||
|
|
- Interrupts a program |
|
|
|
|
|
|
|
|
|
||||
|
|
- Ends a program |
|
|
|
|
|
n |
RIGHT ARROW |
|
|
||||
|
|
YES |
|
|
|
|
|
|
- Selects the next element of a menu item |
|
|||||
|
n |
|
|
|
|
|
|
|
|
|
|||||
|
|
- Select displayed option |
|
|
|
|
|
n |
ENTER |
|
|
||||
|
|
|
|
|
|
|
|
|
|
|
|
|
- Selects a new menu |
|
|
|
n |
NO |
|
|
|
|
|
|
- Confirms a new value or list element and |
|
|||||
|
|
- Do not select displayed option |
|
|
|
|
|
|
continues to the next menu item |
|
|||||
|
n |
ARROW LEFT |
|
|
|
|
|
n |
YES |
|
|
||||
|
|
- Decreases the sequence time |
|
|
|
|
|
|
- Select displayed option |
|
|||||
|
n |
ARROW RIGHT |
|
|
|
|
|
n |
NO |
|
|
||||
|
|
- Increases the sequence time |
|
|
|
|
|
|
- Do not select displayed option |
|
|||||
|
n |
INFO |
|
|
|
|
|
n |
1 2 3 4 5 6 7 8 9 0 |
|
|||||
|
|
- Shows all available wash programs, program |
|
|
|
|
|
|
- Numeric values |
|
|
||||
|
|
steps and functions |
|
|
|
|
|
|
- Decimal point |
|
|
||||
|
n |
SERVICE/STATUS |
|
|
|
|
|
SPECIAL FUNCTION KEYPADS |
|
||||||
|
|
- Shows the status and total number |
|
|
|
|
|
|
|||||||
|
|
|
|
|
|
|
|
INLET 1 2 3 ( 4 5 |
6 ) |
|
|||||
|
|
of washer cycles |
|
|
|
|
|
n |
|
||||||
|
|
|
|
|
|
|
|
|
|
|
|
|
- Opens the inlet valve |
|
|
|
|
|
|
|
|
|
|
|
|
|
|
|
|
||
|
n |
DELAY TIME |
|
|
|
|
|
|
|
|
|
|
|||
|
|
- Activates the time delay function |
|
|
|
|
|
n |
HEAT |
|
|
||||
|
EMERGENCY STOP SWITCH |
|
|
|
|
|
|
- Activate the heat (if equipped) |
|
||||||
|
|
|
|
|
|
|
|
||||||||
|
|
|
|
|
|
|
|
||||||||
|
|
|
|
|
|
|
DRAIN |
|
|
||||||
|
This emergency stop switch is used on non-coin |
|
|
|
|
|
n |
|
|
||||||
|
washer-extractors. Located on the control panel |
|
|
|
|
|
|
- opens the drain valve |
|
||||||
|
just left of the LCD Display |
|
|
|
|
|
|
|
|
|
|||||
|
|
|
|
|
|
|
|
|
|
|
|
n |
SPEED ADJUST |
|
|
|
|
|
|
|
|
|
|
|
|
|
|
|
- Adjusts the spin speed in a cycle |
|
|
4
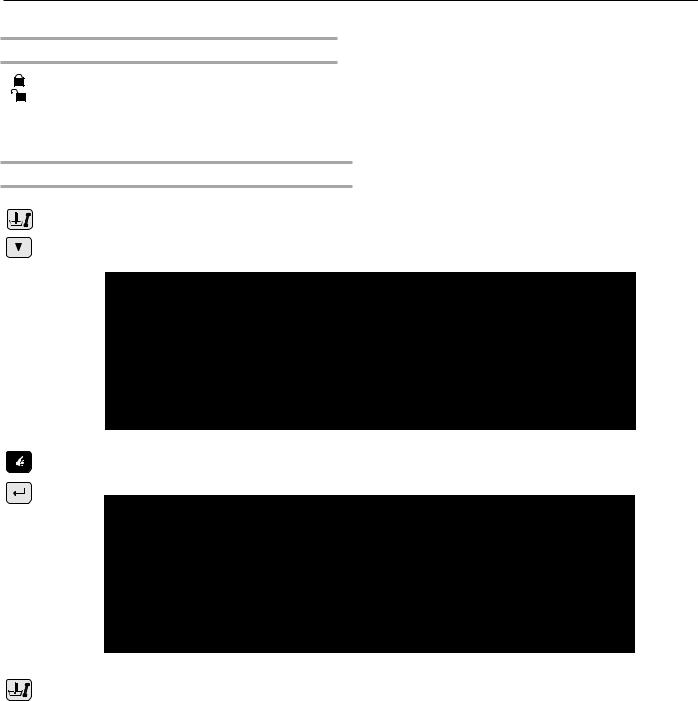
How To Enter Program Mode
To Enter With Keyswitch
KEYSWITCH
The key switch may be mounted on the front panel, the rear panel, or in the control area of the washer. With the key switch you can select “Run Mode” or “Program Mode”
– RUN MODE: For normal washer wash operation.
– PROGRAM MODE: For changing the wash programs and washer settings.
To Enter With Program Keypads
1. Press Service/Status.
2.Press Arrow Down several times until you see the screen with the menu selection “To Program Mode No/Yes.”
Status Menu
To Program Mode |
No/Yes |
3. Select “Yes” by pressing ENTER. You will see the Main Menu Screen. If a password was enabled, first you have to enter the correct password.
To Program Mode
Password |
.... |
To leave the To Program Mode:
When the “Main Menu” screen is shown:
Press Service/Status. You will return to “Run Mode” and “SELECT CYCLE” is displayed.
5
<![endif]>6
MAIN MENU
1. |
|
Initialization Menu |
8 |
Program Menu |
|
Service Menu |
|
Configuration Menu |
|
2.
Initialization Menu
Language English |
tu |
||||||||||||
|
|
|
|
|
|
|
|
|
|
|
|
|
|
Service Interval: |
3000 |
|
|
|
|
|
|
|
|||||
Buzzer time: 5 sec |
|
|
|
|
|
|
|
||||||
Allow Advance: |
|
|
YES |
|
|||||||||
Automatic Cool |
|
|
|
|
|
|
|
|
|
||||
Down: YES |
|
||||||||||||
Wait for Temperature: |
|
YES |
|
|
|||||||||
Manual Override: YES |
|
|
|
||||||||||
|
|
|
|
YES |
|
||||||||
Temperature balance: |
|
||||||||||||
Motor On Time: 12 sec |
|
|
|
||||||||||
Motor Off Time: |
3 |
sec |
|
||||||||||
|
|
|
|
|
|||||||||
Smart Motion: YES |
|
||||||||||||
|
|
|
|
|
|
|
|
|
|
|
|
|
|
Hot Water Heater temp. 60 °C Temp Overshoot Protection: -00% Max, Heating Time: 60 Min
Max, WaterFill Time: 10 Min |
|
Overfill Detection: 10 Units |
|
External Wait Control: NO |
|
Main Water Pressure: High |
tu |
Initialization Menu |
Exit |
8
1. |
|
1. |
|
Initialization Menu |
8 |
Initialization Menu |
8 |
Program Menu |
|
Program Menu |
|
Service Menu |
|
Service Menu |
|
Configuration Menu |
|
Configuration Menu |
|
2. |
|
2. |
|
|
|
|
|
|
|
|
||
|
Program Menu |
|
Service Menu |
|||||||||
|
See Corresponding flowchart |
|
Software Y Y Y Version: X.XX |
|||||||||
|
How to Create and Adjust |
|
Diagnostic Program |
|||||||||
|
a Wash Program |
|
Start Cycle: NO |
|||||||||
|
|
|
|
Faults |
|
|
|
|
|
|
|
|
|
8 |
|
View Fault Messages |
|||||||||
|
|
|
|
View Fault Messages: NO |
||||||||
|
|
|
|
View Fault Statistics |
|
|
|
|||||
|
|
|
|
Toolbox |
|
|
|
|
|
|
|
|
|
|
|
|
|
|
|
|
|
|
|
||
|
|
|
|
View Input States |
||||||||
|
|
|
|
Invert Power: Off |
||||||||
|
|
|
|
Pulley Ratio: |
XX |
|
|
|
||||
|
|
|
|
Reset Service Counts: NO |
||||||||
|
|
|
|
|
|
|
||||||
|
|
|
|
(RTC Time: XX: YY: ZZ) |
||||||||
|
|
|
|
(RTC Date: AA: BB: CC) |
||||||||
|
|
|
|
(Adjust Clock) |
|
|
|
|
|
|
|
|
|
|
|
|
Service Menu |
Exit |
|||||||
8
1. |
|
|
Initialization Menu |
8 |
|
Program Menu |
||
|
||
Service Menu |
|
|
Configuration Menu |
|
2.  Configuration Menu
Password 3 2 1 |
|
|
|
|
|
|
|
|
|||||||||||||||||||||
Machine |
|
|
|
|
|
|
|
|
|
|
|
|
|
|
|
|
|
|
|
|
|
|
|
|
|
|
|
|
|
Type R6 |
|
|
|
|
|
|
|
tu |
|||||||||||||||||||||
Reset Defaults |
? |
|
|
|
|
|
|
|
|
|
|
|
|
|
|
|
|
|
|
|
|
|
|
|
|||||
Brightness Display: 12 |
|
|
|
|
|
|
|
|
|||||||||||||||||||||
Inverter Menu |
|
|
|
|
|
|
|
|
|||||||||||||||||||||
Supply Volt: 3x380-415V+N tu |
|||||||||||||||||||||||||||||
Load Param |
|
|
|
|
|
|
|
|
|||||||||||||||||||||
Steam Connect: NO |
|
|
|
|
|
|
|
|
|||||||||||||||||||||
Total N of Inlets: |
2 |
|
|
|
|
|
|
|
|
|
|
|
|
|
|
|
|
|
|
tu |
|||||||||
Drain Valve 2: NO |
|
|
|
|
|
|
|
|
|||||||||||||||||||||
(Water Recycle |
|
|
|
|
|
|
|
|
|
|
|
|
|
|
|
|
|
|
|
|
|
|
|||||||
Inlets: 0) |
|
|
|
|
|
|
|
tu |
|||||||||||||||||||||
Supply Sign A: Box |
|
|
|
|
|
|
|
|
|
|
|
|
tu |
||||||||||||||||
Supply Sign B: |
Box |
|
|
|
|
|
|
|
|
|
|
|
|
|
|
|
tu |
||||||||||||
Supply Sign C: |
Box |
|
|
|
|
|
|
|
|
|
|
|
|
|
|
tu |
|||||||||||||
Supply Sign D: |
Box |
|
|
|
|
|
|
|
|
|
|
|
|
|
|
tu |
|||||||||||||
Supply Sign E: |
Box |
|
|
NO |
|
|
|
|
|
|
|
|
tu |
||||||||||||||||
Liquid Soap Supply: |
|
|
|
|
|
|
|
|
|
||||||||||||||||||||
Min. Level Start Supply: |
0 |
|
|
|
|
|
|
|
|||||||||||||||||||||
Temperature: Celsius |
|
|
|
|
|
|
|
tu |
|||||||||||||||||||||
Full Heating: |
67 |
|
|
|
|
|
|
|
|
|
|
|
|
|
|
|
|||||||||||||
Wet Cleaning: |
NO |
|
|
|
|
|
|
|
|
||||||||||||||||||||
Erase All Wash |
|
|
|
Program |
|
|
|
|
|
|
|
|
|||||||||||||||||
Load Standard Programs |
|
|
|
|
|
|
|
|
|||||||||||||||||||||
Language: English |
|
|
|
|
|
|
|
tu |
|||||||||||||||||||||
|
|
|
|
|
15? NO |
|
|||||||||||||||||||||||
Load Program 1 - |
|
||||||||||||||||||||||||||||
Load Program 16 - 52? |
|
|
|
|
|
|
|||||||||||||||||||||||
|
NO |
|
|||||||||||||||||||||||||||
Communication Type: RS485 |
|
|
|
tu |
|||||||||||||||||||||||||
|
|
|
|
|
|
|
|
||||||||||||||||||||||
Communication Address: 1 |
|
||||||||||||||||||||||||||||
Advanced Menu: NO |
|
|
|
|
|
|
|
|
|||||||||||||||||||||
Exit |
|
||||||||||||||||||||||||||||
|
|
|
|
||||||||||||||||||||||||||
Configuration Menu |
|
||||||||||||||||||||||||||||
8
1. |
|
Initialization Menu |
8 |
Program Menu |
|
Service Menu |
|
Configuration Menu |
|
Advanced Menu |
|
2.  Advanced Menu
Data Acquisition Mem Hygienic Cycle
Strict Temp. Control: NO Temp. Calib. Offset: 0
Program Mode Lock
Password Edit Password
New Password
Old Password
No Password Program Lock
Password
Programs
Program 1 Unlocked tu Edit Password
New Password
Old Password
No Password
Traceability:
Enable Traceability: NO Traceability Report: Store DAQ tu
Weighing
Weighing System: NO Main Units: kg
Help Units: %
Load Cell Calibration
Expected Free Weight: XXXX
Water Level: Units
Automatic Level Adjust: NO
(Automatic Soap Adjust.: NO)
Advance Menu Exit
8
Keyswitch: Program |
|
p |
Selecting the Menu item: Press UP or DOWN. |
|
|
|
|
|
|
q |
Selecting list: Press LEFT or RIGHT. |
|
|
|
|
|
|
|
||
|
|
|
tu |
|
|
|
Attention !!! |
|
|
|
|
1. Select the Initialization, Program, Service or Configuration Menu. |
|
Depending the Machine Type, |
|
8 |
|
|
||
|
Selecting a new program Sub-menu and go to the next item: ENTER. |
|
|
|||
some items will not be displayed. |
|
|
2. Change the Settings at the Menu items. |
|||
|
|
|
|
|||
|
|
|
8 |
Confirming a menu item and go to the next menu item: ENTER. |
|
|
|
|
|
|
|
||
|
|
|
-- |
Insert a value or Select another List element. |
|
|
|
|
|
|
|
|
|

GENERAL CONTROL DESCRIPTION
Control Features
The control offers:
n99 programmable cycles
n15 pre-programmed cycles and 37 dedicated programs
nSignal voltage control for external pumps or liquid supply dispensers
nRedistribution of garments, if needed, to reduce vibration during extraction
nAutomatic temperature control during the water fill process
nWash options and configuration setting
nLanguage (English, French, or Spanish)
Information displayed during operation:
nProgram selected
nThe active wash step
nThe remaining program time
nWash cycle progression bar
nThe name of the sequence
nIndication of wait for heat (if selected)
nSymbol for water filling
nSymbol for heating
nThe water level and temperature can be viewed
nDiagnostic messages
Operation Menu:
nManually shorten, extend, or stop a cycle
nPause a cycle
nSpecial function keypads allow direct operation of selected components (water valves, etc.)
nProgram overview
nService information
THE HARDWARE AND SOFTWARE OF THE FULL CONTROL WASHER CONTROLLER:
nEasy operation using a comprehensive keypad
nThe hardware contains 1 electronic board
nThe MCG FC washer controller with Graphic LCD display
nWasher control software is stored as Flash memory that is easily replaced
nWasher programs are stored as EEPROM memory (non-volatile memory)
Menu Functions
The PROGRAM Menu allows you to:
nCreate and name wash programs
nEdit existing wash programs
nModify wash programs
nCopy wash programs
nDelete wash programs
nInspect wash programs with the VIEW function
The CONFIGURATION Menu allows you to:
nSelect the Machine Type
nLoad the default factory settings into the CONFIGURATION and INITIALIZATION Menu
nSelect the display brightness
nSelect the power supply voltage of the washer
nLoad the Frequency Inverter Parameters
nErase all the programmed wash programs (reset Wash program in EEPROM memory)
nLoad the standard wash programs
nSelect the number of washer water supply inlets
nSelect a second drain valve for water recycling
nSelect Soap Box or liquid supply
nExternal liquid pump setup (if connected)
nSelect the temperature display (Celsius or Fahrenheit)
nSelect full heating
nLow water pressure setting
nSelect wet cleaning option
nSelect the minimum water level for chemical supply to start
The INITIALIZATION Menu allows you to:
nSelect display language
nProgram the Service due cycle count
nSet buzzer time interval
nSelect/deselect the Advance function
nSelect/deselect the Wait for temperature function
nSelect/deselect allow manual override of a step or function
nSelect/deselect the Temperature balance function
nSelect/deselect the default speed and reset time of wash cycle action
nSelect/deselect the Automatic Cool Down function
nSelect/deselect the Show Economic function
nProgram the hot water supply temperature
nProgram the Temperature Overshoot Protection temperature
nProgram the Maximum Heating Time
nProgram the Maximum Fill time
nProgramming the Maximum Level Overfill value
The SERVICE Menu allows you to:
nInspect the error messages log register and statistics
nActivate the power of the Frequency Inverter
nDetermine the functionality of the electric input signals
nReset the Cycle counter
The DIAGNOSTIC Menu runs a diagnostic cycle to detect problems with the washer
The ADVANCED Menu is designated for special optional applications and is available on Model MFS55 and larger models.
7

Machine Types
This programming guide uses Machine Types for references to the tables and text. Refer to the table below for Machine Types for your washer.
Machine Types Used for Commercial Washers
Rigid Mount Washers |
Soft Mount Washers |
||
|
|
|
|
Model |
Machine Type |
Model |
Machine Type |
|
|
|
|
MFR30PNCTS |
R 13 |
MFS25PNFTS |
F 10 |
|
|
|
|
MFR40PNCTS |
R 18 |
MFS35PNFTS |
F 16 |
|
|
|
|
MFR60PNCTS |
R 27 |
MFS55PNAVS |
F 23/3 |
|
|
|
|
MFR80PNCTS |
R 35 |
MFS50PNFVS |
F 22 |
|
|
|
|
- |
- |
MFS80PNFVS |
F 33 |
|
|
|
|
- |
- |
MFS100PFVS |
F 40 |
|
|
|
|
- |
- |
MFS125PFVS |
F 55 |
|
|
|
|
Machine Type Selection for Commercial Washers
|
Dry load |
“Machine Type” |
||
|
capacity |
|
selection |
|
|
6 kg / 15 lbs |
=> |
R6 |
|
|
|
|
|
|
|
7 kg / 18 lbs |
=> |
R7 |
|
|
|
|
|
|
Rigid |
10 kg / 25 lbs |
=> |
R10 |
|
|
|
|
||
mounted |
13 kg / 30 lbs |
=> |
R13 |
|
industrial |
|
|
|
|
18 kg / 40 lbs |
=> |
R18 |
||
washer |
||||
extractors |
|
|
|
|
22 kg / 50 lbs |
=> |
R22 |
||
|
||||
|
|
|
|
|
|
27 kg / 60 lbs |
=> |
R27 |
|
|
|
|
|
|
|
35 kg / 80 lbs |
=> |
R35 |
|
|
|
|
|
|
|
6 kg / 15 lbs |
=> |
F6 |
|
|
|
|
|
|
|
7 kg / 18 lbs |
=> |
F7 |
|
|
|
|
|
|
|
10 kg / 25 lbs |
=> |
F10 |
|
|
|
|
|
|
|
13 kg / 30 lbs |
=> |
F13 |
|
|
|
|
|
|
|
16 kg / 35 lbs |
=> |
F16 |
|
|
|
|
|
|
Soft Mount |
22 kg / 50 lbs |
=> |
F23/3* |
|
industrial |
|
|
|
|
22 kg / 50 lbs |
=> |
F23/4** |
||
washer |
||||
|
|
|
||
extractors |
33 kg / 80 lbs |
=> |
F33 |
|
|
|
|
|
|
|
40 kg / 100 lbs |
=> |
F40 |
|
|
|
|
|
|
|
55 kg / 125 lbs |
=> |
F55 |
|
|
|
|
|
|
|
80 kg / 180 lbs |
=> |
F800 |
|
|
|
|
|
|
|
100 kg / 225 lbs |
=> |
F1000 |
|
|
|
|
|
|
|
120 kg / 275 lbs |
=> |
F1200 |
|
|
|
|
|
|
*Washers with plastic soap dispenser
**Washers with stainless steel soap dispenser
|
Dry load |
“Machine Type” |
||
|
capacity |
|
selection |
|
|
16 kg / 35 lbs |
=> |
MB16 |
|
|
|
|
|
|
|
26 kg / 60 lbs |
=> |
MB26 |
|
|
|
|
|
|
|
33 kg / 80 lbs |
=> |
MB33 |
|
|
|
|
|
|
Soft Mount |
44 kg / 110 lbs |
=> |
MB44 |
|
|
|
|
||
hygienic |
66 kg / 150 lbs |
=> |
MB66 |
|
barrier |
|
|
|
|
70 kg / 160 lbs |
=> |
MB70 |
||
washer |
||||
extractors |
|
|
|
|
90 kg / 200 lbs |
=> |
MB90 |
||
|
||||
|
|
|
|
|
|
110 kg / 245 lbs |
=> |
MB110 |
|
|
|
|
|
|
|
140 kg / 310 lbs |
=> |
MB140 |
|
|
|
|
|
|
|
180 kg / 400 lbs |
=> |
MB180 |
|
|
|
|
|
|
NOTE: Other Machine Types appear in the software, but do not correspond to current Maytag brands.
Create a Wash Program
n The Full Control washer controller is designated for: Washers with a top dispensers.
Washers with front/side dispensers.
|
|
|
E |
|
|
D |
|
|
C |
|
|
B |
|
|
|
A |
|
|
|
nWash programs are built step-by-step.
nEach step consists of a Wash Sequence and a Drain/Extraction sequence.
n99 wash programs with 99 steps is programmable.
Programming the Wash Sequence:
n First choose the type of Wash Sequence.
|
Washer with |
|
Washer with |
Top Soap Dispenser |
Front/Side Soap Dispenser |
||
n |
Prewash |
n |
Wash |
n |
Wash |
n |
Cool Down |
n |
Cool Down |
n |
Rinse |
n |
Rinse |
n |
Soak |
n |
Final Rinse |
n |
Spray |
n |
Flush |
n |
No Wash |
nSoak
nSpray
nNo Wash
Then program all the related functions of the sequence. The available functions are:
nTemperature
nWater Level
nWater Inlet Valves
nWash Speed
nReversing Interval times
nSupplies
nSequence Time (length of step)
nDrain Valve 1–2
nPause Signal
Each step has default settings. Many new programs will not require changes from the suggested values.
8

Programming the Drain sequence:
After programming the Wash Sequence, program the Drain/Extraction sequence.
nDrain, or
nExtraction, or
nNo Drain, or
nStatic Drain, or
nReversing Drain.
Then program all related functions of the Drain/Extraction sequence. The available functions are:
nSequence Time (length of step)
nSpeed
nDrain valve 1–2
It is also possible to skip a sequence between two other sequences by programming No Wash or No Drain.
Example: The No Drain sequence should be programmed between a Wash and a Cool Down Sequence.
NOTE: See Programming for more information on sequences.
Tumble Sequence:
nThe wash cycle always ends with a Tumble Sequence.
nThe Tumble sequence takes 30 seconds, then the program is finished and the door can be opened.
nThe Tumble sequence cannot be skipped.
Program Functions
Limits:
nTo ensure the correct operation of the washer, values must be within certain limits.
nProgramming functions into a washer that does not have the associated function will cause error codes during operation.
nIf a programmed value is outside the programmed limits, the default program value will override the programmed value.
Programming the Water Temperature:
–Minimum value: 34°F (1°C)
–Maximum value: 113°F (45°C) for PREWASH and SOAK, and 196°F (92°C) for the WASH Sequence.
–For RINSE, FINAL RINSE, FLUSH, and SPRAY, no temperature can be programmed.
Programming the Water Inlet Valves:
nDepending on the programmed temperature the water inlet valves are suggested.
nWhile the tub is filling with water, the computer controls the water temperature by switching on and off the hot and cold water inlet valves.
nFor washers with a Top Soap Dispenser, you must consider that by programming the water inlet valves, you are also selecting the Soap Box at which the soap must be added.
nIf you want to program a Wash Sequence with:
– Cold water: Only cold inlet valves must be programmed.
– Warm or hot water: Cold and hot inlet valves must be programmed.
Top Soap Dispenser washers: The cold water inlet valves
Inlet Valve 2 Corresponds with Soap Box A (Prewash). Inlet Valve 5 Corresponds with Soap Box B (Wash). Inlet Valve 1 Corresponds with Soap Box C (Final Rinse).
Inlet Valve 6 Is a direct inlet valve and speeds up the water fill process.
The hot water inlet valves
Inlet Valve 4 Corresponds with Soap Box B (Wash).
Inlet Valve 3 Is a direct inlet valve and speeds up the water fill process.
See the schematic diagram supplied with the washer for additional information on inlet valves.
How to Select Inlet Valves:
EXAMPLE: |
|
|
n For a Prewash: |
Programmable temperature: |
34–113°F |
|
|
(1–45°C) |
|
Inlet Valve 2 (cold) |
Soap Box A |
|
+ Inlet Valve 3 (hot) |
|
|
and/or 6 (cold) |
Direct Inlets |
n For a Wash: |
Programmable temperature: |
34–198°F |
|
Inlet Valve 4 (hot) |
(1–92°C) |
|
|
|
|
and/or 5 (cold) |
Soap Box B |
|
+ Inlet Valve 3 (hot) |
|
|
and/or 6 (cold) |
Direct Inlets |
n For a Rinse: |
Inlet Valves 2 + 5 + 6 (cold) |
No Soap |
n For a Final Rinse: Inlet Valve 1 (cold hard) |
|
|
|
(or cold soft) |
Soap Box C |
|
+ Inlet Valve 6 (cold soft) |
only if No |
NOTES:
nWater inlets 3 or 6 must be used for washers with laundry product supply pumps because the liquid is added at the direct water inlet channel.
nDepending on the washer, cold water can be used with water Inlet Valve 1.
nIf the water recycling feature is used, the water recycling supply must be connected to Inlet Valve 2 or 5.
9
Front/Side Soap Dispenser washers:
The cold water inlet valves
Inlet Valve 1 |
Cold Hard Water or Recycled Water |
Inlet Valve 2 |
Cold Soft Water |
The hot water inlet valves
Inlet Valve 3 Warm Soft Water
NOTE: To add soap to a Front/Side Soap Dispenser washer, the supplies must be programmed.
Programming the Water Level:
Water level Limits
nSee “Water Setting Values for Different Washers” because these values are different for each Machine Type.
nThe minimum value is above the heating elements and the temperature sensor
nThe maximum value is below the overflow outlet
Normal Low Level, Normal High Level
nThe Normal Low Level is recommended for the PREWASH, WASH, and SOAK sequences.
nThe Normal High Level is recommended for the RINSE and FINAL RINSE Sequences.
nAt the FLUSH sequence, you can’t program a water level because the water will escape through the overflow opening.
nAt the Cool Down sequence, the Full Control washer controller makes use of a low water level and is draining the water automatically.
nAt the Spray sequence, the Drain valve stays open.
Economic Water Level
nIf you prefer a wash cycle with an economic water level: You can select “Show ECONOMIC” in the Initialization Menu to use the standard setting.
nECONOMIC function. At the start of each wash cycle, the question ECONOMIC? will be displayed. If you select
ECONOMIC, the program will function with 20% units less water.
–or you may make dedicated programs with a water level 20% units below the normal water level.
Wet Cleaning selection Configuration Menu
nIt is possible to program a level below default minimum programmable level. (See table on page 87).
nThe heating will not be functional for a water level below the standard minimum programmable water level.
NOTES:
nNormal high water level is recommended for woolens and delicate linens.
nThe economic function should only be used for small, lightly soiled wash loads.
Programming the Wash Speed:
nStandard reversing Wash Speed is between 40 and 50 RPM (See table on page 91).
nFor some special applications the drum should only turn very slowly.
Speed Limits:
nThe minimum programmable Wash Speed is 10 RPM.
nThe maximum programmable Wash Speed is 40 - 60 RPM, depending on washer size.
Programming Extraction Speed:
nSee Table A-5 for maximum and minimum spin speeds. The limits differ depending on the maximum allowed g-force at high spin for each Machine Type.
nAn Intermediate spin between two sequences should be about 1/2 the maximum spin.
Programming Supplies:
nUp to 4 supplies can be programmed at the same time in a sequence.
nFor Front/Side Soap Dispenser washers, supplies A, B, C, D, and E have to be programmed to inject the soap by compartment.
nIf liquid soap pumps were installed on the washer, these pumps will be activated by programming a time value for the corresponding supply signal 1, 2, 3, 4, 5, 6, 7, or 8.
nThe maximum programmable time is 99 seconds per sequence.
nIf the time is 0 seconds then the supply will NOT be activated during the wash process.
NOTE: If more than 4 supplies are needed in the same step, run the step twice with half the water volume in each step. Use the NO DRAIN sequence between the steps so the water does not drain out.
Programming the Motor On and Off Times for Reversing
nThe default Reversing Motor On and Off Times at Wash Speed is 12 seconds on and 3 seconds off.
nFor Delicates and Woolens, it is recommended to program a Gentle Wash action with a On time of 3 seconds and an Off Time of 12 seconds.
Programming the Sequence Time
nThe sequence time starts running after the programmed water level is reached.
nIf the Wait for Temperature feature is selected, the sequence time begins only after the programmed temperature is reached.
NOTE: The Wait for Temperature feature must be Off unless there is an auxiliary heat source on the washer.
nFor a Cool Down Sequence, the programmed time corresponds with the time for decreasing the water temperature.
TIP: A cool down of 3 minutes must be programmed. To avoid garment shrinkage, it is recommended to program the time so that the temperature will decrease with about 5°F (3°C)
for each minute.
Buzzer
nThe Buzzer should be programmed when a running wash cycle needs to be interrupted.
nThe Buzzer will be activated to alert the operator.
nIn most cases, the operator interrupts a program to fill the Soap Box an additional time.
nThe program interruption will always occur at the end of a step.
10
WASHER STARTUP
Perform washer startup after the washer is installed. See the Installation Instructions for your washer. Startup consists of three steps:
nSelect the washer specific settings in the Configuration Menu.
nSelect the operator specific settings in the Initialization Menu.
nAdjust default programs or create new programs at the Program Menu.
Initial configuration and initialization settings were done at the factory.
IMPORTANT:
nRead this manual thoroughly before making changes to the Configuration or Initialization Menus.
nWrite down current settings before changing any setting.
nThe default washer setups are used for a wide variety of models and applications. Some program modifications may be necessary to achieve optimum performance for your application.
Configuration Menu
The Configuration Menu allows you to choose individual washer specific settings. The Configuration Menu can only be accessed when the washer is in standby mode.
IMPORTANT: Only a qualified technician should perform configuration setup. Incorrect configuration setting could cause serious washer damage.
1.Make sure power is ON and no program is running.
2.Turn the key switch to PROGRAM MODE or enter through the Program Mode setup with the keypad sequence outlined on page 6. The Main Menu will be displayed.
3.Press 5 or 6 to select the Configuration Menu.
|
|
|
|
|
Main Menu |
|
|
|
|
||
Initialization Menu … |
|
|
|
Program Menu … |
Configuration Menu … |
||
Service Menu … |
Advanced Menu … |
||
4. Press ENTER. The password screen will appear.
Configuration Menu |
|
Password |
_ _ _ |
5.Enter the password “3-2-1”. Press ENTER. 
6.Press 5 or 6 to select the menu items individually.
11

Configuration Menu Options and Defaults
Menu Item |
Description |
Default |
Range |
|
|
|
|
Machine Type |
Select the Machine Type. The Machine Type is on |
R6 |
List |
|
the Name Plate at the rear of the washer. |
|
|
Are You Sure ? |
Confirm that you want to change the Machine Type. |
No |
No/Yes |
|
(F23/3 = Top Soap Dispenser) |
|
|
|
(F23/4 & F22/5 = Front/Side Soap Dispenser) |
|
|
|
NOTES: |
|
|
|
Changing the Machine Type does not change wash |
|
|
|
programs stored in EEPROM memory. Erase all |
|
|
|
program memory and the standard wash programs |
|
|
|
again after changing the Machine Type because |
|
|
|
wash programs settings differ for each washer. |
|
|
|
To ensure proper operation, make certain the |
|
|
|
Machine Type is correct. See table on page 86. |
|
|
|
|
|
|
Reset Defaults ? |
Resets Initialization and Configuration Menu settings |
No |
No/Yes |
|
to the default factory settings. |
|
|
|
Only used at SETUP of a new washer controller. |
|
|
Are You Sure ? |
Confirm that you want to Reset Defaults. |
No |
No/Yes |
|
|
|
|
Brightness Display |
Change the display brightness for best viewing. |
12 |
1–20 |
|
|
|
|
Inverter Menu… |
Loads the Inverter Menu. |
|
|
|
NOTES: |
|
|
|
The washer can only perform properly if the Inverter |
|
|
|
Parameters are correct. Make certain the Inverter |
|
|
|
Type and supply voltage are correct. |
|
|
|
Not for washers R6, R7, R10. |
|
|
Supply Voltage XXXXXXX |
Select the correct supply voltage as indicated by |
|
Select from |
(Inverter Type) |
the washer nameplate. |
|
available choices |
|
NOTE: Loading parameters is only required after |
|
in menu* |
|
|
|
|
|
Inverter replacement or if there are problems with |
|
|
|
the drive system. |
|
|
Load Param… |
n Confirm that you want to load the Inverter |
No |
No/Yes |
Are You Sure ? |
Parameters. |
|
|
|
If yes: |
|
|
|
– Door must be closed. |
|
|
|
– Check if the SETUP is correct. |
|
|
|
• Parameter List Version |
|
|
|
• Machine Type, Software Version |
|
|
|
– Check status screen while parameters are |
|
|
|
loaded. |
|
|
|
• Sending Param.: 0–100% |
|
|
|
• Inverter Software Version: YYYY |
|
|
|
• Verify Parameters: 0–100% |
|
|
|
• Inverter Type: XXXX |
|
|
|
|
|
|
Steam Connect |
Not valid for washers MFS18 to MFS35, MFR18 to |
No |
No/Yes |
|
MFR80 (except MFR60) |
|
|
|
Kit for steam heat is only available on the |
|
|
|
MFS models 55 and larger. |
|
|
* Choices vary by model.
12
Configuration Menu Options and Defaults (continued)
Menu Item |
Description |
Default |
Range |
|
|
|
|
Total Number of Inlets |
Washers have 2 or 3 water inlets: |
3 |
2/3 |
|
2 main: |
|
|
|
– hot water |
|
|
|
– cold water |
|
|
|
3 main: |
|
|
|
– soft warm water |
|
|
|
– soft cold water |
|
|
|
– hard or recycled cold water |
|
|
|
NOTE: This input changes program choices. |
|
|
|
|
|
|
Drain Valve 2 |
Second drain destination could include recycled |
No |
No/Yes |
|
water. Not all washers have a second drain valve. |
|
|
|
NOTES: |
|
|
|
If drain 2 is a normally closed drain valve, |
|
|
|
then select “yes.” |
|
|
|
Select “No” for single drain destination. |
|
|
|
|
|
|
Water Recycle Inlets |
Front/Side Soap Dispenser washers only: If water |
0 |
0–3 |
|
recycling is employed, select the Inlet Valve number |
|
|
|
that recycled water will flow into the washer form. |
|
|
|
NOTE: All washers require additional equipment to |
|
|
|
recycle water. Call customer service. |
|
|
|
|
|
|
Supply Signals A through E |
Front/Side Soap Dispenser washers only: Select |
Box |
Box/Liquid |
|
“box” for dispenser box. |
|
|
|
|
|
|
Liquid Soap Supply |
Select “Yes” if external liquid laundry supply pumps |
No |
No/Yes |
|
will be used. |
|
|
|
|
|
|
Minimum Level Start Supply |
Enter the water level at which the liquid supply |
0 units |
0 – Minimum |
|
pump(s) begin pumping. Refer to “Minimum, |
(top) |
program level |
|
Normal, and Maximum Water Setting Values.” |
10 units |
|
|
NOTE: The default water level for front dispenser |
|
|
|
(front) |
|
|
|
washers is 10 units. |
|
|
|
|
|
|
|
|
|
|
Temperature |
Select the units temperature will be displayed in. |
Celsius |
Celsius / |
|
|
|
Fahrenheit |
|
|
|
|
Full Heating |
This function controls the percent of wash time |
67% |
0–100% |
|
supplementary heat is used during the wash |
|
|
|
sequence to reduce energy consumption. |
|
|
|
100%: Target temperature is maintained |
|
|
|
throughout the wash sequence. |
|
|
|
0%: Supplemental heat turns off after the |
|
|
|
target temperature is reached. |
|
|
|
67%: Target temperature is maintained 2/3 of |
|
|
|
the way through the wash sequence. |
|
|
|
|
|
|
Wet Cleaning |
Select Wet Cleaning to program water levels |
No |
No/Yes |
|
below the Minimum Water level. Refer to “Minimum, |
|
|
|
Normal, and Maximum Water Setting Values.” |
|
|
|
|
|
|
13
Configuration Menu Options and Defaults (continued)
Menu Item |
Description |
Default |
Limits |
|
|
|
|
|
|
Erase All Wash Prog ? |
This function erases all existing wash programs stored |
No |
No/Yes |
|
|
in memory. It should be performed when installing a |
|
|
|
|
new washer controller to make certain no old programs |
|
|
|
Are You Sure ? |
are stored in the memory. |
No |
No/Yes |
|
|
||||
|
|
|
|
|
Load Standard Programs ? |
Allows you to load 15 factory-set programs |
No |
No/Yes |
|
|
and 37 additional default programs. It also allows you |
|
|
|
|
to select the language for the user program. |
|
|
|
Language |
Select display language* |
English |
List |
|
|
||||
Load Program 1 - 15 ? |
Loads factory set cycles |
No |
No/Yes |
|
|
||||
Load Program 16-52 ? |
Loads additional default programs |
No |
No/Yes |
|
NOTE: Always re-load standard programs in memory |
||||
|
|
|
||
|
after selecting a different Machine Type. |
|
|
|
|
|
|
|
|
Communication Type |
The washer controller supports RS485 and |
RS485 |
RS485/IRDA |
|
|
Infrared (IRDA) ports; it only supports one type of |
|
|
|
|
communication at a time. |
|
|
|
|
The RS485 port allows hard-wire connection to a |
|
|
|
|
network or computer. |
|
|
|
|
The IRDA window is next to the “4” on the touch pad |
|
|
|
|
and allows communication with a infrared device. |
|
|
|
|
NOTE: Some handheld computers emit a weak signal. |
|
|
|
|
It will be necessary to hold the device next to the IRDA |
|
|
|
|
window. See Trace-Tech Manual (Part Number |
|
|
|
|
W10243988) for more information. |
|
|
|
|
|
|
|
|
Communication Addr. |
Assigns a unique address for communication with a |
255 |
1–255 |
|
|
network or computer through a RS485 cable. |
|
|
|
|
NOTE: No two washers or other devices can have the |
|
|
|
|
same communication address in a network. |
|
|
|
|
|
|
|
|
Advanced Menu |
Displays the Advanced Menu on the Main Menu. |
No |
No/Yes |
|
|
|
|
|
|
Exit |
Return to Main Menu. |
|
|
|
|
|
|
|
* Call Customer Service for language availability.
14

Advanced Menu
The Advanced Menu contains special, optional, and infrequently used applications. Only factory trained personnel should modify items in this menu.
1.Make sure power is ON and no program is running.
2.Enter the PROGRAM MODE. The Main Menu will be displayed. To get access to the Advance Menu, select “YES” for “Advanced Menu” listed in the Configuration Menu.
3.Press 5 or 6 to select the Advanced Menu.
|
|
|
|
|
Main Menu |
|
|
|
|
||
Initialization Menu … |
|
|
|
Program Menu … |
Configuration Menu … |
||
Service Menu … |
Advanced Menu … |
||
4. Press ENTER.
Advanced Menu
1 DAQ Memory …
2Hygienic Cycle …
3Program Mode Lock …
4Program Lock …
5Traceability …
Advanced Menu
6 Weighing …
7 Exit
5.The Advanced Menu contains 7 items on two screens. Press 5 or 6 to select the desired menu item.
DAQ Memory Menu
The Data Acquisition (DAQ) memory stores information about the use profile and functionality of the washer. This information is usually applied in conjunction with Trace-Tech software.
nThe DAQ memory collects information whenever the washer is on. It does not collect information when the washer is off.
nThe DAQ Storage Memory can be reset at the Configuration Menu by the Reset Defaults function. All data stored in the DAQ Memory will be lost.
DAQ Memory Menu Variables
Menu Item |
Description |
Limits |
|
|
|
|
|
All Memory |
Turns on all memory |
On/Off |
|
Segments |
segments. |
||
|
|||
|
|
|
|
Statistics |
Stores statistical information |
On/Off |
|
Segment |
about washer utilization. |
||
|
|||
|
|
|
|
Traceability |
Contains Traceability |
On/Off |
|
Segment |
information from the washer. |
||
|
|||
|
|
|
|
Trace-Tech |
Stores setup information from |
On/Off |
|
Settings |
the Trace-Tech PC software |
||
|
|||
|
|
|
|
Log |
Contains the event log for |
On/Off |
|
Segment |
the washer. |
||
|
|||
|
|
|
|
Exit |
Return to Advanced Menu. |
|
|
|
|
|
Hygienic Cycle Menu
The Hygienic Cycle Menu contains the Strict Temperature Control and Temperature Calibration Offset functions. Both programs act on temperature control and require accessory heat to function properly.
nStrict Temperature Control may be turned on or off. When it is turned on, the target wash temperature is the minimum temperature during the wash cycle. When this function is off, accessory heat turns off when the water reaches target temperature (see illustration below).
Water
Temperature
2 : Strict Temperature
Control
Target
1 : Normal Temperature
Control
Time
Strict Temperature Control
nTemperature Control Offset allows calibration with an external measurement device. The offset control is adjustable between 23° and 41°F (-5° and +5° C) (see illustration below).
NOTE: Calibration is only necessary to assure a minimum temperature is attained during a hygienic cycle. It is not required for normal washer use.
Water
Temperature
|
|
|
|
|
|
|
|
|
|
|
|
|
|
|
|
|
|
|
+ 5 |
|
|
Target |
|
|
|
|
|
|
|
|
|
|
|
|
|
|
|
|
|
|
|
|
|
|
|
|
|
|
|
|
|
|
|
|
|
|
|
|
|
- 5 |
|
|
|||
|
|
|
|
|
|
|
|
|
|
|
|
|
|
|
Offset |
|
|
|
|
|
|
|
|
|
|
adjustment |
|
|
|
|
|
|
|
|
|
|
|
|
|
|
Time |
|
|
|
|
|
|
|
|
|
|
|
||
|
|
|
|
|
|
|
|
|
||
|
|
|
|
|||||||
|
|
Temperature Calibration Offset |
|
|||||||
Temperature Calibration Offset Variables |
|
|||||||||
|
|
|
|
|
||||||
Menu Item |
Default |
Information |
|
Limits |
||||||
Strict |
|
No |
The Strict Temperature |
|
No/Yes |
|||||
Temperature |
|
|
||||||||
|
|
Control of the wash |
|
|
||||||
Control |
|
|
|
|
||||||
|
|
computer ensures laundry is |
|
|
||||||
|
|
|
|
|
||||||
|
|
|
washed at the programmed |
|
|
|||||
|
|
|
target temperature. |
|
|
|||||
|
|
|
|
|
|
|
|
|
|
|
Temperature |
0 |
By changing the |
|
23/32/41°F |
||||||
Calibration |
|
|
|
(-5/0/5°C) |
||||||
|
|
Temperature Calibration |
|
|||||||
Offset |
|
|
Offset setting, |
|
|
|||||
|
|
|
the water temperature sensor |
|
|
|||||
|
|
|
setting is equalized with the |
|
|
|||||
|
|
|
external reference |
|
|
|||||
|
|
|
temperature sensor. |
|
|
|||||
|
|
|
|
|
|
|||||
Exit |
|
|
Return to Advanced Menu. |
|
|
|||||
|
|
|
|
|
|
|
|
|
|
|
15

Program Mode Lock Menu
The access to the Program Mode can be locked by a password.
It means that without password you can’t have access to the
Main Menu Screen.
Menu Item |
Description |
Default |
Limits |
|
|
|
|
Password . . . |
Enter a 4 digit value for the Password and press |
None |
0000–99999 |
|
ENTER. |
|
|
|
NOTE: The password will not be requested if it has |
|
|
|
not been set. |
|
|
|
|
|
|
Edit Password … |
|
|
|
New Password …. |
Insert a 4 digit numeric value to create a new |
|
|
|
password. |
|
|
No Password … |
Select the menu item “No password” if you want to |
|
|
|
get rid of the password. |
|
|
Old Password … |
To change the Password enter old password, create |
|
|
|
a new password. |
|
|
|
|
|
|
Exit |
Return to Advanced Menu |
|
|
|
|
|
|
Program Lock Menu
Each wash program can be locked individually.
When the program is locked, it means no settings can be changed anymore.
It avoids that programs once created get changed by somebody else.
To get access to this menu a password is needed if it has been set.
Menu Item |
|
Description |
Default |
Limits |
|
|
|
|
|
Programs … |
|
Each program can be locked - unlocked individually. |
Unlocked |
|
1 HOT WASH |
Unlocked |
When the program is locked, it means Program |
|
|
settings can no longer be changed. |
|
|
||
2 WARM WASH |
Locked |
This helps avoid created programs being changed |
|
|
… |
|
|
|
|
|
by another. |
|
|
|
99 Program 99 |
Unlocked |
|
|
|
|
|
|
||
EXIT |
|
|
|
|
|
|
|
|
|
16

Traceability Menu
The Traceability Menu allows information collection regarding cycle parameters. This information can be used to verify that any wash cycle meets given requirements. For further information on the collection and management of this information see the Traceability Management Manual W10243988.
Traceability Menu Options and Defaults
Menu Item |
Description |
Default |
Limits |
|
|
|
|
Enable Traceability |
First you have to select Traceability to obtain the |
No |
No/Yes |
|
other menu items. |
|
|
|
|
|
|
Traceability Report |
A report can be created for each wash cycle. |
Store DAQ |
Store DAQ |
|
A printer or PC can be connected to the washer by |
|
Store PC |
|
|
Print Last |
|
|
Serial RS485 communication bus. |
|
|
|
|
Print All |
|
|
• “Store DAQ”: stores all wash process data in the |
|
|
|
|
|
|
|
DAQ memory. When the PC is connected to the |
|
|
|
washer, the data is sent and stored on the PC. |
|
|
|
• “Store PC”: sends continuously all wash cycle data |
|
|
|
to the PC, where it is stored. |
|
|
|
• “Print Last” sends the report directly to a printer. |
|
|
|
The command is given by “Start Print Last Report.” |
|
|
|
• “Print All” sends the report in real time to a printer. |
|
|
Stored Cycles … |
If Store DAQ is selected, the display shows the |
XX% |
|
|
number of wash cycles stored in DAQ memory. |
|
|
Start Print Last Report |
If Print Last is selected, the menu item “Start Printing |
No |
No/Yes |
|
the Last Stored Report” is displayed. |
|
|
|
|
|
|
Disability Traceability Errors |
Err 81 and Err 82 can be switched off if they are |
No |
No/Yes |
|
interfering with the wash cycle. |
|
|
|
|
|
|
Exit |
Return to Advanced Menu. |
|
|
|
|
|
|
17

Initialization Menu
Initialization Menu allows you to choose standard default program settings for your application.
1.Make sure power is ON and no program is running.
2.Enter PROGRAM MODE. The Main Menu will be displayed.
3.Press 5 or 6 to select the Initialization Menu.
Main Menu |
|
Initialization Menu … |
|
Program Menu … |
Configuration Menu … |
Service Menu … |
Advanced Menu … |
4. Press ENTER.
Initialization Menu Selections and Defaults
Menu Item |
Description |
Default |
Range |
|
|
|
|
Language |
Language selection for Program Mode: English, |
English |
List |
|
Spanish, or French |
|
|
|
|
|
|
Service Interval |
Number of cycles at which maintenance is required. |
3000 |
1–9999 |
|
3000: Top Soap Dispenser washers |
9999 |
|
|
9999: Front/Side Soap Dispenser washers |
|
|
|
|
|
|
Buzzer Time |
The time the Buzzer beeps at end of wash |
5 sec |
0–99 |
|
cycle while “Unload” is displayed. |
|
|
|
|
|
|
Allow Advance |
The Advance function allows the user to skip a |
Yes |
No/Yes |
|
sequence or change sequence duration. |
|
|
|
|
|
|
Automatic Cool Down |
Automatic cool down selection*. |
Yes |
No/Yes |
|
|
|
|
Wait for Temp |
Wash Process time is put on hold until the |
Yes |
No/Yes |
|
programmed temperature is reached. |
|
|
|
|
|
|
Manual Override |
Activates the Special Function keys on the touch |
Yes |
No/Yes |
|
pad. The operator can directly operate the water inlet, |
|
|
|
drain, heating, and spin speed functions. |
|
|
|
NOTE: It is not possible to manually direct the washer |
|
|
|
to perform an unsafe sequence of functions. |
|
|
|
Example: If there is no water in the drum, the |
|
|
|
HEATING special function keypad can’t be activated. |
|
|
|
|
|
|
*Automatic Cool Down
■■ To avoid mechanical temperature shock and to extend the life time of your washer, after a hot wash, cold water is injected bit by bit. As a result at the end of the hot wash, the temperature will be lowered to about 65°C (150°F).
■■ The automatic cool down function will only be functional if a hot wash with a temperature above 65°C (150°F) has been programmed and if a cold water inlet valve is programmed in the next step. When a Cool down sequence has been programmed, the automatic cool down will not function.
■■ The automatic cool down differs from a normal cool down sequence. The purpose of a normal cool down sequence is to avoid the shrinking of the garments. (Takes more time).
18
Initialization Menu Selections and Defaults (continued)
Menu Item |
Description |
Default |
Range |
|
|
|
|
Temperature Balance |
Temperature balance, controls water temperature |
Yes |
No/Yes |
|
by regulating the cold and hot water valves. (Some |
|
|
|
wash temperatures may require additional heat.) |
|
|
|
|
|
|
Motor On Time |
Normal wash action, drum turns for 12 seconds. |
12 sec |
1–99 sec |
|
Recommended 3 sec for Gentle wash action. |
|
|
|
(= suggested values for the Program Menu) |
|
|
|
|
|
|
Motor Off Time |
Drum is stopped for 3 seconds for normal action. |
3 sec |
1–99 sec |
|
12 sec recommended for Gentle wash action. |
|
|
Smart Motion |
This option decreases the drum RPM during water |
Yes |
No/Yes |
|
filling; therefore, the laundry absorbs water more |
|
|
|
quickly and washing efficiency increases. |
|
|
|
|
|
|
Hot Water Heater Temp. |
The water heater temperature should be the same |
140°F |
122–176°F |
|
as the temperature of the hot water supply. |
(60°C) |
(50–80°C) |
|
|
|
|
Temp. Overshoot Prot. |
This is the % below the target temperature heat is |
00 % |
0–30 % |
|
switched off to avoid overshoot. Heating will begin |
|
|
|
after 30 seconds if the target temperature is not |
|
|
|
reached. |
|
|
|
|
|
|
Max. Heating Time |
Generates an error message if the target water |
60 min |
10–90 min |
|
temperature is not reached within the Maximum |
|
|
|
Heating time (Err 14). |
|
|
|
If 99 is entered, no error message will display. |
|
99 |
|
The washer will continue heating until the target |
|
|
|
water temperature is reached. |
|
|
|
|
|
|
Max. Water Fill Time |
Generates an error message if the target water level |
10 min |
5–99 min |
|
is not reached within the Max. Water Fill Time (Err 11). |
|
|
|
If 99 is entered, no error message will display. The |
|
|
|
washer will continue filling until the target water level |
|
|
|
is reached. |
|
|
Overfill Detection |
An error message is generated if the water level |
10 units |
10–25 units |
|
exceeds the programmed water level by more than |
|
|
|
the programmed number of units (Err 12). If the |
|
|
|
washer uses steam heating, the steam installation |
|
|
|
should have adequate power to quickly heat the |
|
|
|
water. Slow heating will raise the water level and |
|
|
|
also cause increased energy and laundry product |
|
|
|
consumption. Reduce the programmed water |
|
|
|
temperature to the minimum level necessary to |
|
|
|
achieve satisfactory results. |
|
|
|
|
|
|
External Wait Control |
Liquid soap supply system: |
No |
No/Yes |
|
Selection for a washer connected to a central liquid |
|
|
|
soap supply system. |
|
|
|
The central pump system is able to Pause the washer, |
|
|
|
before continuing the wash process, until the central |
|
|
|
pump system is free to pump the liquid soap supply |
|
|
|
into the washer. |
|
|
|
Heating, (for installations with limited power supply): |
|
|
|
You can disable the heating system of the washer |
|
|
|
with an external signal. |
|
|
|
The heating will switch on again, and the wash |
|
|
|
process will continue, as soon as the external signal |
|
|
|
is switched off. |
|
|
Main Water Pressure |
Front/Side Soap Dispenser washers only: The laundry |
High |
Low/High |
|
product containers may not fall during the water |
|
|
|
intake sequence if the water pressure is too low. Set |
|
|
|
to “Low” if the water pressure is weak or if the water |
|
|
|
supply pressure decreases notably during delivery. |
|
|
|
|
|
|
Exit |
Return to Main Menu |
|
|
|
|
|
|
19

<![endif]>20
Wash Program Creation and Adjustment
|
|
|
|
|
2. |
|
|
|
|
|
|
|
3. |
|
|
|
|
|
|
1. |
|
|
|
|
Program Menu |
|
|
|
|
|
|
Edit Step |
|
|
|
||
|
|
|
|
|
Select Program No _ |
|
|
|
|
|
Menu |
|
|
|
|
|||
|
Initialization Menu |
|
|
|
|
|
|
|
|
|
|
|
|
|||||
|
|
|
|
|
|
|
|
|
Select Step No _ |
|
|
|
||||||
|
|
|
|
Name XXXX |
|
|
|
|
|
|
|
|
|
|||||
|
Program Menu |
|
8 |
|
|
|
|
|
|
|
|
|
|
|
||||
|
|
|
|
|
|
Select Step No: |
|
Add Step... |
|
|
|
|||||||
|
|
|
|
|
View... |
|
|
|
|
|
|
|||||||
|
Service Menu |
|
|
|
|
|
Edit... |
|
|
View Step . . |
|
|
Edit Step... |
|
|
|
||
|
|
|
|
|
|
|
|
|
|
|
Insert Step... |
|
|
|
||||
|
Diagnostic Menu |
|
|
|
|
|
New... |
|
|
Exit |
|
|
|
|
|
|
||
|
|
|
|
|
|
|
|
|
|
|
View Step... |
|
|
|
||||
|
Configuration Menu |
|
Copy From |
Copy... |
|
|
|
|
|
|
|
|
||||||
|
|
|
|
|
|
|
|
Delete Step... |
|
|
|
|||||||
|
|
Program |
Delete... |
|
|
|
|
|
|
|
|
|
||||||
|
|
|
|
|
|
|
|
|
|
|
|
|
||||||
|
|
|
|
|
|
|
|
|
|
Step Menu |
Exit |
|
|
|
||||
|
|
|
|
|
|
Program Menu |
Exit |
|
|
|
|
|
|
|
|
|||
|
|
|
|
|
|
|
|
|
|
|
|
|
|
|
|
|||
|
|
|
|
|
|
|
|
Program Wash Part Step |
|
|
|
|
|
|
||||
4. |
|
4. |
|
4. |
|
|
4. |
|
4. |
|
4. |
|
4. |
|
4. |
|
4. |
|
|
Pre Wash |
tu |
Wash |
tu |
Cool Down |
tu |
Rinse |
tu |
Final Rinse |
tu |
Soak |
tu |
Flush |
tu |
Spray |
tu |
No Wash |
|
Temp _ oC |
|
Temp _ oC |
|
Temp _ oC |
|
Inlet _ |
|
Inlet _ |
|
Temp _ oC |
|
RPM |
|
RPM _ |
|
|
||
Inlet _ |
|
Inlet _ |
|
RPM _ |
|
Level _ |
|
Level _ |
|
Inlet _ |
|
On Time _ Sec |
Drain Valve 1 |
tu |
|
|||
Level _ |
|
Level _ |
|
Drain Valve 1 tu |
RPM _ |
|
RPM _ |
|
Level _ |
|
Off Time _ Sec |
Supply A _” |
|
|
||||
RPM _ |
|
RPM _ |
|
On Time _ Sec |
|
Detergents Menu... |
|
Detergents Menu... |
|
RPM _ |
|
Time _ Min |
|
Spray 1 |
|
|
||
Detergents Menu... |
|
Detergents Menu... |
Off Time _ Sec |
|
On Time _ Sec |
|
On Time _ Sec |
|
Detergents Menu... |
|
Signal No |
|
Spray 2 |
|
|
|||
On Time _ Sec |
|
On Time _ Sec |
|
Time _ Min |
|
Off Time _ Sec |
|
Off Time _ Sec |
|
On Time _ Sec |
|
|
|
Time _ Min |
|
|
||
Off Time _ Sec |
|
Off Time _ Sec |
|
Signal No |
|
Time _ Min |
|
Time _ Min |
|
Off Time _ Sec |
|
|
|
Signal No |
|
|
||
Time _ Min |
|
Time _ Min |
|
|
|
Signal No |
|
Signal No |
|
Time _ Hour |
|
|
|
|
|
|
||
Signal No |
|
Signal No |
|
|
|
|
|
|
|
|
Signal No |
|
|
|
|
|
|
|
|
|
|
|
|
|
|
|
|
|
<![if ! IE]> <![endif]>u |
|
|
|
|
|
|
|
|
|
|
|
|
|
|
|
|
Program Drain Step |
|
|
|
|
|
|
||||
|
|
|
5. |
|
5. |
|
|
5. |
|
|
5. |
|
5. |
|
|
|
|
|
|
|
|
|
Drain |
tu |
|
Spin |
tu |
|
No Drain |
tu |
Static Drain |
tu |
Drain |
|
|
|
|
|
|
|
Drain Valve 1 |
tu |
Drain Valve 1 |
tu |
Step |
Exit |
|
Drain Valve 1 |
tu |
Drain Valve 1 |
tu |
|
|
|||
|
|
|
Time _ Min |
|
RPM _ |
|
|
|
|
Time _ Min |
|
RPM |
|
|
|
|||
|
|
|
Step |
|
Exit |
Time _ Min |
|
|
|
|
Step |
Exit |
On Time _ Sec |
|
|
|
||
|
|
|
|
|
|
Step |
Exit |
|
|
|
|
|
Off Time _ Sec |
|
|
|
||
= Only for washers with Top Soap Dispenser |
|
|
|
|
|
|
|
|
|
|
Time _ Min |
|
|
|
||||
|
|
|
|
|
|
|
|
|
|
Step |
Exit |
|
|
|||||
|
|
|
|
|
|
|
|
|
|
|
|
|
|
|
|
|||
1. |
Select the Program Menu. |
|
|
|
|
Keyswitch: Program |
|
|
Legend: |
|
|
|
|
|||||
2. |
Enter the desired Program Number. |
NOTE: Depending on the washer configuration and |
p |
Select the Menu item: Press UP or DOWN. |
|
For a new program enter the program name. |
|||
|
q |
|
||
|
Select Program View, Edit, Insert, New, Copy or Delete. |
initialization, some menu items will not be displayed. |
tu |
Select list: Press LEFT or RIGHT. |
3. |
Select the appropriate Step Function: Add, Edit, Insert, View, or Delete. |
|
||
|
8 |
Select a new program Sub-menu and go to the next item: ENTER. |
||
|
Enter the desired Step Number. |
|
||
4. |
Select the appropriate Wash Step Function. |
|
|
or |
5. |
Enter the appropriate Step Function settings. |
|
-- |
Confirm a menu item and go to the next menu item: ENTER. |
Select the appropriate Drain Function. |
|
Insert a value or Select another List element. |
||
|
Enter the appropriate Step Function settings. |
|
|
|
|
Exit the Step Menu. |
|
|
|
|
|
|
|
CYCLE PROGRAMMING
Specific functions have been implemented in the Full Control washer controller to allow for a detailed programming.
Functions for the Complete Program:
nProgram Number: Select the wash program.
nName: Insert or modify the name for the program.
nView: Inspect the program settings without making changes.
nEdit: Make changes to a program.
nNew: Create a new program.
nCopy: Make a copy of an existing program.
nDelete: Erase a program.
nExit: Leave the Program Menu.
Functions for the Program Steps:
nStep Number: Select the program step.
nAdd: Add a program step at the end of the program.
nEdit: Adjust a program step.
nInsert: Add a program step between two other steps.
nView: Inspect the step settings without making changes.
nDelete: Delete a step.
nExit: Leave the program step menu.
Follow the flowchart on the proceeding page step-by-step.
Program Menu
Initialization allows you to choose standard default program settings for your application.
1.Make sure power is ON and no program is running.
2.Enter PROGRAM MODE. The Main Menu will be displayed.
3.Press 5 or 6 to select the Program Menu.
Main Menu |
|
Initialization Menu … |
|
Program Menu … |
Configuration Menu … |
Service Menu … |
Advanced Menu … |
4. Press ENTER.
Program Functions
Program Menu |
|
|
Select Program N°: |
1 |
|
Name: HOT WASH |
|
|
View … |
New … |
Delete … |
Edit … |
Copy … |
Exit |
Menu Item |
Description |
|
|
|
|
Select Program N: |
Select program 1 to 99. |
|
|
|
|
Name: _ _ _ _ _ _ _ _ _ |
The Program Name describes the |
|
|
wash cycle. Press ENTER when the |
|
|
cycle name is complete. Select the |
|
|
Character with the 5 and 6 arrows. |
|
|
Select the character position with |
|
|
the 3 and 4 arrows. |
|
|
|
|
View |
Allows you to see the Program |
|
|
Settings without changing them. |
|
|
|
|
Edit |
Allows you to change a program |
|
|
by selecting new sequences from a |
|
|
menu or by changing values in an |
|
|
existing step. You can also add, |
|
|
insert or delete sequences from |
|
|
an existing program. |
|
|
|
|
New |
To create a new program, you |
|
|
have to make use of the add step |
|
|
function. By adding steps the |
|
|
program will grow step by step. |
|
|
A confirmation is asked first to |
|
|
delete the old program. |
|
|
|
|
Copy |
HINT: To create a new program, |
|
|
with minor changes from an existing |
|
|
program, it is easier to copy an |
|
|
existing program than to make |
|
|
changes. |
|
|
Insert the desired program number |
|
Copy From |
from which you want to copy the |
|
program. |
||
Program N°: XXX |
||
The standard programs can be |
||
|
||
|
selected at the program numbers |
|
|
101–115. |
|
|
Program number 101 corresponds |
|
|
with program 1. |
|
|
Program number 102 corresponds |
|
|
with program 2. |
|
|
Program number 115 corresponds |
|
|
with program 15. |
|
|
A confirmation is asked first to |
|
|
delete the old program. |
|
|
|
|
Delete a Program |
To get rid of an existing program, |
|
|
use the delete program function. |
|
|
The complete program will be |
|
|
erased at once. |
|
|
A confirmation is asked first to |
|
|
delete the old program. |
|
|
|
|
Exit |
Return to Main Menu |


 : Program Lock Symbol
In the Advanced Menu, it is possible to lock/unlock each wash program individually. The wash program cannot be changed when the Program Lock Symbol is displayed. Only the View function will be operational, all others will be disabled until unlocked.
21

|
|
|
|
Program Step Function |
|
|
|
||
|
|
|
|
|
|
|
|
|
|
|
|
|
|
|
Edit Step Menu |
|
|
|
|
|
|
|
|
Program |
1: Hot Wash |
|
|
|
|
|
|
Select Step N°: |
1 |
|
|
|
|
||
|
|
Add step … |
Insert Step … |
Delete Step … |
|
||||
|
|
Edit Step … |
View Step … |
Exit |
|
||||
|
|
|
|
|
|
|
|
|
|
Menu Item |
|
|
Description |
|
|
|
|
|
|
|
|
|
|
|
|
|
|||
Select Step N°: 1 |
|
|
Insert the desired step number. |
|
|
|
|||
|
|
|
|
Step 1 to 99 can be selected. |
|
|
|
||
|
|
|
|
If the number is not accepted, this means that the step is not available. |
|||||
|
|
|
|
No Step number must be entered for “Add Step” function. |
|||||
|
|
|
|
||||||
Add Step |
|
|
To create new programs, a new extra step should be added at the end of the program. |
||||||
|
|
|
|
||||||
Edit Step |
|
|
To change values and list elements from an existing step. |
||||||
|
|
|
|
|
|
|
|||
Insert Step |
|
|
A new step is inserted between two existing steps. |
|
|
|
|||
|
|
|
|
If the number is not accepted, this means there is no step with a step number that is equal to a |
|||||
|
|
|
|
selected step number minus one. A new step can only be inserted between two available steps. |
|||||
|
|
|
|
||||||
View Step |
|
|
Before making changes in a wash program, it is recommended to have a look at the actual |
||||||
|
|
|
|
settings in the view function. No changes can be made in the View Step function. |
|||||
|
|
|
|
||||||
Delete Step |
|
|
An existing Step in the program disappears when it is deleted. A confirmation is asked |
||||||
|
|
|
|
before deleting the Old Step. |
|
|
|
||
|
|
|
|
|
|
|
|||
Exit |
|
|
Return to Program Menu |
|
|
|
|||
|
|
|
|
|
|
|
|
|
|
22
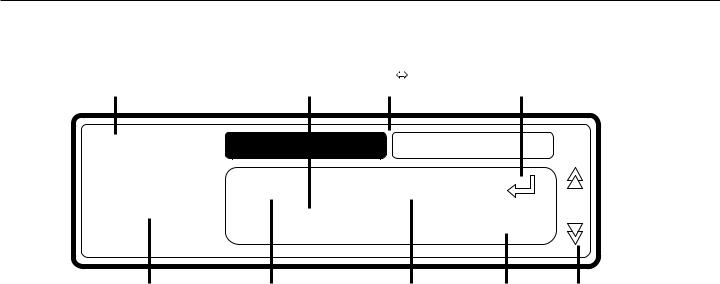
Program the Wash Cycle
Program |
|
Original |
|
STEP |
|
Info |
Number |
|
Value |
|
Wash Spin part |
|
Action |
|
|
|
|
|
|
|
Prog 1 |
Wash |
Spin |
|
|
STEP 2 |
Time: |
8.0 Min |
5 |
|
8.0 |
[4.0-20.0] |
|||
|
|
Step |
|
Menu |
|
Value |
|
Limits |
|
Position |
Number |
|
Item |
|
Menu Item |
|
Menu Item |
|
Menu Item |
|
|
|
|
|
|
|
|
|
This section provides a detailed explanation about programming the Wash Sequences.
nEach program step contains a Wash segment and a Drain/Spin segment.
nFirst, the Wash segment must be selected; each item can be programmed.
nNext the Drain/Spin segment must be selected, each item can be programmed.
n Without making changes you can see item by item, by pressing ARROW DOWN or UP. n If you want to make changes:
–Insert a new value.
–Enable or disable a setting by pressing YES or NO.
–Select a list element by pressing LEFT ARROW or RIGHT ARROW.
NOTE: You must press ENTER to confirm each selection.
nDefault values were pre-programmed into each step to make programming easier. See WASH PROGRAMS for a general explanation of creating wash programs.
nSee each list element by using the LEFT ARROW or RIGHT ARROW symbols at the right side of the display.
nThe arrow down symbol on the display points to the last Menu Item: EXIT.
23

Selecting the wash cycle
Prog XX |
Pre-Wash |
Extract |
|
Step YY |
Type: |
Pre-Wash |
z |
|
|
For Washers with Top Soap Dispenser:
If Add Step, Edit Step, or Insert Step, are selected, choose the Wash Sequence now.
The number of available sequences depends on the Machine Type and whether it is equipped with top or Front/Side Soap Dispensers.
Prewash Wash Cool Down Rinse Final Rinse Soak Flush Spray No Wash
For Washers with Front/Side Soap Dispenser:
Wash Cool Down Rinse Soak Flush Spray No Wash
For a new step, as a default, the first displayed function is the Wash Sequence.
nPress LEFT ARROW or RIGHT ARROW to choose the desired sequence.
nPress ENTER to confirm.
nUse ARROW DOWN if you accept the pre-programmed default value.
24

The Prewash Sequence
Prewash Wash Cool Down Rinse Final Rinse Soak Flush Spray No Wash
Only for washers with Top Soap Dispensers.
Menu Item |
Description |
Default |
Limits |
|
|
|
|
Temperature |
The water temperature. |
104°F |
33.8–113°F |
|
|
(40°C) |
(1–45°C) |
|
|
|
|
Inlet |
The suggested Inlet Valves are related to the temperature and |
2–3 |
1–6 |
|
the Soap Box to be used. |
|
|
|
If you insert other Inlet Valves than suggested, problems |
|
|
|
can occur at the water fill process. |
|
|
|
|
|
|
Level |
The suggested water level depends on the Machine Type. |
Normal |
See Table A-4 |
|
|
Low |
|
|
|
|
|
RPM |
The suggested RPM depends on the Machine Type. |
– |
See Table A-6 |
|
|
|
|
Detergents Menu... |
Time selection for external liquid soap supplies. You can |
0 sec |
0–99 sec |
|
program up to 4 supplies at the same time, attempting |
|
|
Supply 1, ..., 8 |
to program more than 4 supplies will generate an error |
|
|
|
message. Only 4 non-zero supplies per step are accepted. |
|
|
|
(Liquid soap supplies must be switched on at the Configuration |
|
|
|
Menu.) |
|
|
|
|
|
|
On Time |
The wash action, motor On Time. |
12 sec |
1–99 sec |
|
Gentle wash action: 3 seconds |
|
|
|
(The suggested default values can be adjusted in the |
|
|
|
Initialization Menu) |
|
|
|
|
|
|
Off Time |
The wash action, motor Off Time. |
3 sec |
1–99 sec |
|
Gentle wash action: 12 seconds |
|
|
|
(The suggested default values can be adjusted in the |
|
|
|
Initialization Menu) |
|
|
|
|
|
|
Time |
The Prewash Sequence Time. |
4 min |
0–99.5 min |
|
(for 0 minutes the Prewash sequence will be skipped |
|
|
|
(programmable in steps of 0.5 minutes) |
|
|
|
|
|
|
Signal |
When a signal is programmed, a pause will be introduced at |
No |
No/Yes |
|
the end of the Wash Step. This allows the operator to add |
|
|
|
soap for the next step. A buzzer signal warns the operator |
|
|
|
that the cycle has been interrupted. |
|
|
|
|
|
|
25
The Wash Sequence |
|
|
|
|
|
|
|
|
|
|
|
|
|
|
|
|
|
|
Prewash |
|
Wash |
|
Cool Down |
|
Rinse |
|
Final Rinse |
|
Soak |
|
Flush |
|
Spray |
|
No Wash |
||
|
|
|
|
|
|
|
|
|||||||||||
|
|
|
|
|
|
|
|
|
|
|
|
|
|
|
|
|
|
|
|
|
|
|
|
|
|
|
|
|
|
|
|
|
|
|
|
|
|
Menu Item |
|
|
Description |
|
Default |
|
Limits |
|||||||||||
|
|
|
|
|
|
|
|
|
|
|
|
|
|
|
|
|
|
|
Temperature |
|
|
The water temperature. |
|
140°F |
|
33.8–197.6°F |
|||||||||||
|
|
|
|
|
|
|
|
|
|
|
|
|
(60°C) |
|
(1–92°C) |
|||
|
|
|
|
|
|
|
|
|
|
|
|
|
|
|
|
|
|
|
Inlet (Top Soap |
|
|
The suggested Inlet Valves are related to the temperature |
3, 4, 5 |
|
|
1–6 |
|||||||||||
Dispenser) |
|
|
and the Soap Box to be used. |
|
|
|
|
|
|
|
||||||||
(Front/Side Soap |
|
|
NOTE: If you insert other Inlet Valves than the suggested |
2, 3 |
|
|
1–3 |
|||||||||||
Dispenser) |
|
|
|
|
|
|
|
|
|
|||||||||
|
|
ones, problems can occur at the water fill process. |
|
|
|
|
|
|
|
|||||||||
|
|
|
|
|
|
|
|
|
|
|||||||||
|
|
|
|
|
|
|
|
|
|
|
|
|
|
|
|
|
|
|
Level |
|
|
The suggested water level depends on the Machine Type. |
|
Normal |
|
See Table A-4 |
|||||||||||
|
|
|
|
|
|
|
|
|
|
|
|
|
Low |
|
|
|
|
|
|
|
|
|
|
|
|
|
|
|
|
|
|
|
|
|
|
|
|
RPM |
|
|
The suggested RPM depends on the Machine Type. |
|
– |
|
See Table A-6 |
|||||||||||
|
|
|
|
|
|
|
|
|
|
|
|
|
|
|
|
|
|
|
Detergents Menu. . . |
|
|
Time selection for Soap Boxes (hopper) and external liquid |
|
|
|
|
0–9 sec |
||||||||||
|
|
|
soap supplies. You can program up to 4 supplies at the |
|
|
|
|
|
|
|
||||||||
Box A, B, C, D, E |
|
|
same time, attempting to program more then 4 supplies |
|
0 sec |
|
|
|
|
|||||||||
Supply 1, ..., 8 |
|
|
will generate an error message. |
|
0 sec |
|
|
|
|
|||||||||
|
|
Reset the time of the supplies back to 0. Only 4 non-zero |
|
|
|
|
|
|||||||||||
|
|
|
|
|
|
|
|
|
|
|||||||||
|
|
|
times values can be programmed. |
|
|
|
|
|
|
|
||||||||
|
|
|
- Liquid soap supplies must be switched on in the |
|
|
|
|
|
|
|
||||||||
|
|
|
Configuration Menu. |
|
|
|
|
|
|
|
||||||||
|
|
|
- Box A, B, C, D, and E are only available on Front/Side Soap |
|
|
|
|
|
|
|
||||||||
|
|
|
Dispenser washers. |
|
|
|
|
|
|
|
||||||||
|
|
|
|
|
|
|
|
|
|
|
|
|
|
|
|
|
|
|
On Time |
|
|
The wash action, motor On Time. |
|
12 sec |
|
1–99 sec |
|||||||||||
|
|
|
Gentle wash action: 3 seconds |
|
|
|
|
|
|
|
||||||||
|
|
|
(The suggested default values can be adjusted in the |
|
|
|
|
|
|
|
||||||||
|
|
|
Initialization Menu) |
|
|
|
|
|
|
|
||||||||
|
|
|
|
|
|
|
|
|
|
|
|
|
|
|
|
|
|
|
Off Time |
|
|
The wash action, motor Off Time. |
|
3 sec |
|
1–99 sec |
|||||||||||
|
|
|
Gentle wash action: 12 seconds |
|
|
|
|
|
|
|
||||||||
|
|
|
(The suggested default values can be adjusted in the |
|
|
|
|
|
|
|
||||||||
|
|
|
Initialization Menu) |
|
|
|
|
|
|
|
||||||||
Time |
|
|
The Wash Sequence Time. |
|
7 min |
|
0–99.5 min |
|||||||||||
|
|
|
(for 0 minutes the Wash Sequence will be skipped) |
|
|
|
|
|
|
|
||||||||
|
|
|
(programmable in steps of 0.5 minutes) |
|
|
|
|
|
|
|
||||||||
|
|
|
|
|
|
|
|
|
|
|
|
|
|
|
|
|
|
|
Signal |
|
|
When a signal is programmed, a pause will be introduced |
|
No |
|
No/Yes |
|||||||||||
|
|
|
at the end of the Wash Step. This allows the operator to add |
|
|
|
|
|
|
|
||||||||
|
|
|
soap for the next step. A buzzer signal warns the operator |
|
|
|
|
|
|
|
||||||||
|
|
|
that the cycle has been interrupted. |
|
|
|
|
|
|
|
||||||||
|
|
|
|
|
|
|
|
|
|
|
|
|
|
|
|
|
|
|
26

The Cool Down Sequence
Prewash Wash Cool Down Rinse Final Rinse Soak Flush Spray No Wash
nAfter a hot wash you can program a Cool Down Sequence to avoid temperature shock and shrinking of the garments.
nThe drain step after the hot wash must be put on NO DRAIN.
nNo inlets are programmable:
–For Top Soap Dispenser washers: inlet 6 is the standard inlet.
–For Front/Side Soap Dispenser washers: inlet 2 is the standard inlet.
nThe water level cannot be programmed as the process of adding and draining water does not allow this.
IMPORTANT: Do not program a drain sequence before a cool down sequence.
Menu Item |
Description |
Default |
Limits |
|
|
|
|
Temperature |
The water temperature |
140°F |
33.8–140°F |
|
|
(60°C) |
(1–60°C) |
|
|
|
|
RPM |
The suggested RPM depends on the Machine Type. |
– |
|
|
|
|
|
Drain Valve |
Only available on washers with both a normal Open and |
1 |
1–2 |
|
normal Closed Drain valve. |
|
|
|
|
|
|
On Time |
The wash action, motor On Time. |
12 sec |
1–99 sec |
|
Gentle wash action: 3 sec. |
|
|
|
(The suggested default values can be adjusted in the |
|
|
|
Initialization Menu) |
|
|
|
|
|
|
Off Time |
The wash action, motor Off Time. |
3 sec |
1–99 sec |
|
Gentle wash action: 12 sec. |
|
|
|
(The suggested default values can be adjusted in the |
|
|
|
Initialization Menu) |
|
|
|
|
|
|
Time |
The programmed time = time needed to decrease the |
7 min |
0–99.5 sec |
|
water temperature. |
|
|
|
Once the programmed temperature has been reached, |
|
|
|
the next Sequence will be started. |
|
|
|
(for 0 minutes the Cool Down sequence will be skipped) |
|
|
|
(programmable in steps of 0.5 minutes) |
|
|
|
IMPORTANT: If a short time is programmed, the water |
|
|
|
temperature will decrease fast. |
|
|
|
Recommendation: Program 1 minute for each 37.4°F (3°C) |
|
|
|
temperature drop. |
|
|
|
Example: For a hot wash of 194°F (90°C) and a Cool Down |
|
|
|
Sequence of 140°F (60°C) a time of about 86°F (30°C)/37.4°F |
|
|
|
(3°C) = 10 minutes should be programmed for the Cool Down |
|
|
|
Sequence. |
|
|
|
|
|
|
Signal |
When a signal is programmed, a pause will be introduced at |
No |
No/Yes |
|
the end of the Wash Step. This allows the operator to add |
|
|
|
soap for the next step. A buzzer signal warns the operator |
|
|
|
that the cycle has been interrupted. |
|
|
|
|
|
|
27

The Rinse Sequence
Prewash Wash Cool Down Rinse Final Rinse Soak Flush Spray No Wash
n No temperature can be programmed because a Rinse is only possible with cold water.
Menu Item |
Description |
Default |
Limits |
|
|
|
|
|
|
Inlet (Top Soap |
3 Inlets can be programmed. |
2, 5, 6 |
1, 2, 5, 6 |
|
Dispenser) |
The suggested Inlet Valves are related to the |
|
|
|
|
temperature and the Soap Box to be used. |
|
|
|
(Front/Side Soap |
IMPORTANT: If you insert other Inlet Valves than the |
2 |
1, 2 |
|
Dispenser) |
suggested ones, problems can occur at the water fill |
|||
|
|
|||
|
process. |
|
|
|
|
|
|
|
|
Level |
The suggested water level depends on the Machine Type. |
Normal |
See Table A-4 |
|
|
|
High |
|
|
|
|
|
|
|
RPM |
The suggested RPM depends on the Machine Type. |
– |
See Table A-6 |
|
|
|
|
|
|
Detergents Menu… |
Time selection for Soap Boxes (hopper) and external liquid |
|
0–99 sec |
|
|
soap supplies. |
|
|
|
Box A, B, C, D, E |
You can program up to 4 supplies at the same time. If you |
0 sec |
|
|
|
|
|
||
Supply 1, …, 8 |
have programmed more then 4 supplies an error message |
0 sec |
|
|
will be generated. |
|
|||
|
Reset the time of the supplies back to 0. Only 4 non-zero |
|
|
|
|
times values can be programmed. |
|
|
|
|
– Liquid soap supplies must be switched on in the |
|
|
|
|
Configuration Menu. |
|
|
|
|
– Box A, B, C, D, and E are only available on Front/Side |
|
|
|
|
Soap Dispenser washers. |
|
|
|
|
|
|
|
|
On Time |
The wash action, motor On Time. |
12 sec |
1–99 sec |
|
|
Gentle wash action: 3 sec. |
|
|
|
|
(The suggested default values can be adjusted in the |
|
|
|
|
Initialization Menu) |
|
|
|
|
|
|
|
|
Off Time |
The wash action, motor Off Time. |
3 sec |
0–99 sec |
|
|
Gentle wash action: 12 sec. |
|
|
|
|
(The suggested default values can be adjusted in the |
|
|
|
|
Initialization Menu) |
|
|
|
|
|
|
|
|
Time |
The Rinse Sequence Time. |
2 min |
0–99.5 min |
|
|
(for 0 minutes the Rinse sequence will be skipped) |
|
|
|
|
(programmable in steps of 0.5 minutes) |
|
|
|
|
|
|
|
|
Signal |
When a signal is programmed, a pause will be introduced at |
No |
No/Yes |
|
|
the end of the Wash Step. This allows the operator to add |
|
|
|
|
soap for the next step. A buzzer signal warns the operator |
|
|
|
|
that the cycle has been interrupted. |
|
|
|
|
|
|
|
28
 Loading...